Buffalo Chicken Dip is the perfect party appetizer!

Introduction to Buffalo Chicken Dip Recipe

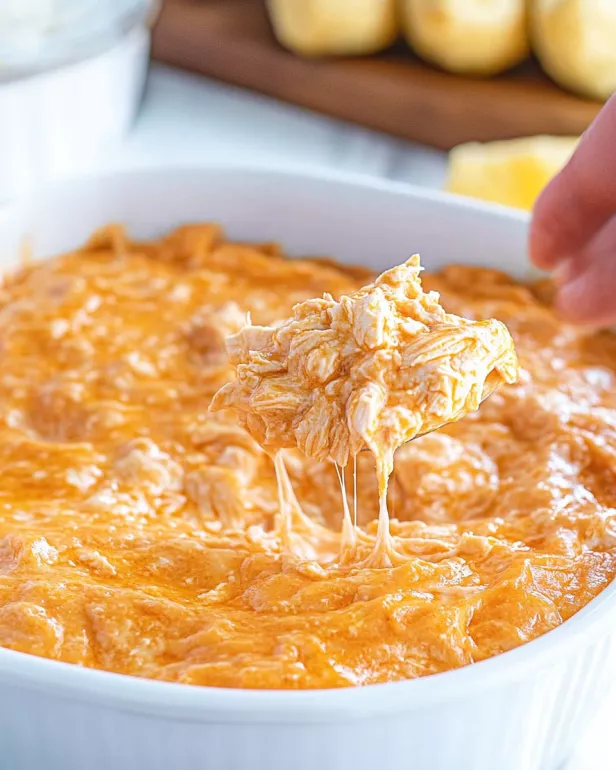
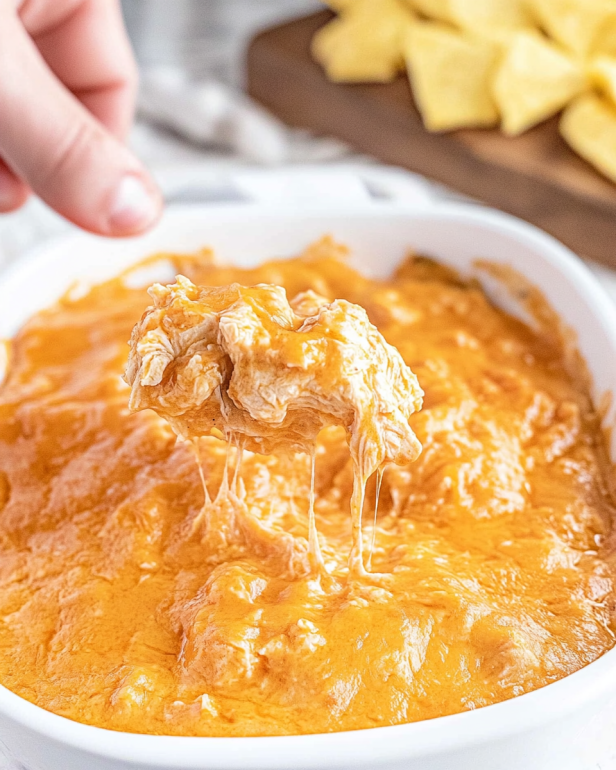
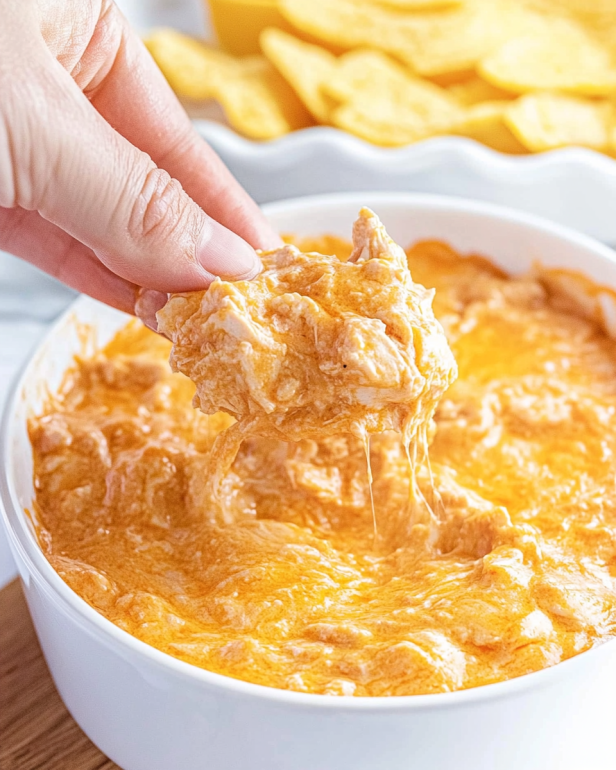
Buffalo Chicken Dip Recipe is a crowd-pleaser that brings a burst of flavor to any occasion. This creamy, cheesy dip combines the savory taste of shredded chicken with the zesty kick of buffalo wing sauce. Whether you’re hosting a game day party, a family get-together, or just a cozy night in, this dip is sure to impress your guests.

What makes this dip so special? It’s not just the delicious flavors; it’s also incredibly easy to make! With just a few simple ingredients, you can whip up a dish that everyone will love. Plus, it’s versatile! You can serve it with a variety of dippers, from crunchy tortilla chips to fresh veggie sticks. The best part? It can be prepared in advance, making it a perfect choice for busy hosts.

In this article, we will guide you through the ingredients, preparation steps, and even some fun variations of the Buffalo Chicken Dip. So, roll up your sleeves and get ready to create a dip that will have everyone coming back for more!

Ingredients for Buffalo Chicken Dip Recipe

Buffalo Chicken Dip Recipe, you’ll need a handful of simple ingredients. Each one plays a vital role in delivering that rich, creamy, and spicy flavor that everyone loves. Here’s what you’ll need:

  • 2 cups shredded cooked chicken: This is the star of the dip! You can use leftover chicken or rotisserie chicken for convenience.
  • 1 (8-ounce) package cream cheese, softened: Cream cheese adds a smooth texture and richness to the dip.
  • 1/2 cup ranch dressing: This brings a tangy flavor that balances the heat of the buffalo sauce.
  • 1/2 cup buffalo wing sauce: The key ingredient that gives the dip its signature kick. Adjust the amount based on your spice preference!
  • 1 cup shredded cheddar cheese: Cheddar adds a delicious cheesy flavor and helps bind the dip together.
  • 1/2 cup crumbled blue cheese (optional): For those who love blue cheese, this adds an extra layer of flavor.
  • 1/4 cup chopped green onions: These are used for garnish, adding a fresh touch to the final dish.

Gather these ingredients, and you’ll be well on your way to making a dip that will have everyone raving. Remember, the quality of your ingredients can make a big difference, so choose fresh and flavorful options whenever possible!

Step-by-Step Preparation of Buffalo Chicken Dip Recipe

Buffalo Chicken Dip Recipe. Follow these simple steps, and you’ll have a delicious dip in no time!

Step 1: Gather Your Ingredients

Before you start cooking, make sure you have everything you need. Gather your shredded chicken, cream cheese, ranch dressing, buffalo wing sauce, cheddar cheese, blue cheese (if using), and green onions. Having everything in one place will make the process smoother and more enjoyable.

Step 2: Prepare the Chicken

If you haven’t done so already, shred your cooked chicken. You can use leftover chicken or a rotisserie chicken for convenience. Shredding the chicken into small pieces helps it mix well with the other ingredients. This step is crucial for achieving that perfect creamy texture in your dip.

Step 3: Mix the Ingredients

In a large mixing bowl, combine the shredded chicken, softened cream cheese, ranch dressing, and buffalo wing sauce. Use a spatula or a wooden spoon to mix everything together until it’s well combined. The mixture should be creamy and smooth. Next, fold in the shredded cheddar cheese and blue cheese, if you’re using it. This adds a delightful cheesy flavor that everyone will love!

Step 4: Bake the Buffalo Chicken Dip

Now it’s time to transfer your mixture to a baking dish. Spread it evenly across the dish to ensure even cooking. Place the dish in your preheated oven at 350°F (175°C) and bake for 20-25 minutes. You’ll know it’s ready when the dip is hot and bubbly. The aroma will fill your kitchen, making it hard to wait!

Step 5: Serve and Enjoy

Once your dip is baked to perfection, remove it from the oven and let it cool slightly. This will help prevent any burns when you dig in. Before serving, garnish your dip with chopped green onions for a fresh touch. Now, grab your favorite dippers—tortilla chips, celery sticks, or carrot sticks—and enjoy your delicious Buffalo Chicken Dip!

Variations of Buffalo Chicken Dip Recipe

Buffalo Chicken Dip Recipe is a hit on its own, there are many fun variations you can try. These twists can cater to different tastes and dietary preferences, ensuring everyone at your gathering finds something they love. Let’s explore a couple of exciting options!

Spicy Buffalo Chicken Dip Recipe

If you’re a fan of heat, this spicy version is for you! To amp up the flavor, simply add extra buffalo wing sauce to the original recipe. You can also mix in diced jalapeños or even a splash of hot sauce. This will give your dip an extra kick that spice lovers will appreciate. Just be sure to taste as you go, so you can adjust the heat to your liking!

Vegetarian Buffalo Chicken Dip Recipe

For those who prefer a meat-free option, a vegetarian Buffalo Chicken Dip is a fantastic choice. Instead of chicken, use shredded jackfruit or chickpeas for a hearty texture. You can also add finely chopped celery and carrots for crunch. The rest of the ingredients remain the same, ensuring you still get that creamy, spicy goodness. This variation is perfect for vegetarians and meat-eaters alike!

These variations not only keep things interesting but also allow you to cater to different dietary needs. Feel free to get creative and make the dip your own!

Cooking Note for Buffalo Chicken Dip Recipe

Buffalo Chicken Dip Recipe, there are a few cooking notes to keep in mind. These tips will help ensure your dip turns out perfectly every time. First, always preheat your oven. This step is crucial for even cooking. If you skip this, your dip may not heat through properly.

Next, consider the texture of your dip. If you prefer a creamier dip, make sure your cream cheese is softened well. You can leave it out at room temperature for about 30 minutes before mixing. This will make it easier to blend with the other ingredients.

Also, keep an eye on the baking time. Ovens can vary, so check your dip a few minutes before the suggested time. You want it to be hot and bubbly, but not overcooked. If you notice the edges starting to brown too much, you can cover the dish with aluminum foil to prevent burning.

Lastly, feel free to experiment with the ingredients. If you want to add more flavor, consider mixing in some garlic powder or onion powder. These spices can enhance the overall taste of your dip. Enjoy the process and make it your own!

Serving Suggestions for Buffalo Chicken Dip Recipe

Buffalo Chicken Dip Recipe is ready, it’s time to think about how to serve it. This dip is incredibly versatile and pairs well with a variety of dippers. Here are some popular options:

  • Tortilla Chips: Crunchy and salty, tortilla chips are a classic choice. They hold up well against the creamy dip.
  • Vegetable Sticks: Fresh celery sticks, carrot sticks, or cucumber slices add a healthy crunch. They also balance the richness of the dip.
  • Crackers: Choose your favorite crackers for a delightful pairing. They add a nice texture and flavor contrast.
  • Mini Bread Bowls: For a fun twist, serve the dip in mini bread bowls. This adds a unique touch to your presentation.
  • Sandwiches or Wraps: Use the dip as a filling for sandwiches or wraps. It makes for a delicious lunch option!

Don’t forget to provide plenty of napkins! This dip can get a little messy, but that’s part of the fun. Your guests will love digging in and enjoying the flavors together.

Tips for Perfecting Your Buffalo Chicken Dip Recipe

Buffalo Chicken Dip Recipe even better, here are some handy tips. First, always taste your dip before serving. This allows you to adjust the flavors to your liking. If you want more heat, add a bit more buffalo sauce. If it’s too spicy, a little extra cream cheese can help balance it out.

Another tip is to let the dip cool slightly before serving. This helps the flavors meld together and makes it easier to scoop. If you’re making the dip ahead of time, you can prepare it and store it in the fridge. Just remember to bake it right before serving for the best taste.

Lastly, consider garnishing your dip with additional toppings. Chopped cilantro, diced tomatoes, or even a drizzle of ranch dressing can add a nice touch. These little details can elevate your dip and impress your guests!

Cooking Note for Buffalo Chicken Dip Recipe

Buffalo Chicken Dip Recipe, there are a few cooking notes to keep in mind. These tips will help ensure your dip turns out perfectly every time. First, always preheat your oven. This step is crucial for even cooking. If you skip this, your dip may not heat through properly.

Next, consider the texture of your dip. If you prefer a creamier dip, make sure your cream cheese is softened well. You can leave it out at room temperature for about 30 minutes before mixing. This will make it easier to blend with the other ingredients.

Also, keep an eye on the baking time. Ovens can vary, so check your dip a few minutes before the suggested time. You want it to be hot and bubbly, but not overcooked. If you notice the edges starting to brown too much, you can cover the dish with aluminum foil to prevent burning.

Lastly, feel free to experiment with the ingredients. If you want to add more flavor, consider mixing in some garlic powder or onion powder. These spices can enhance the overall taste of your dip. Enjoy the process and make it your own!

Serving Suggestions for Buffalo Chicken Dip Recipe

Buffalo Chicken Dip Recipe is ready, it’s time to think about how to serve it. This dip is incredibly versatile and pairs well with a variety of dippers. Here are some popular options:

  • Tortilla Chips: Crunchy and salty, tortilla chips are a classic choice. They hold up well against the creamy dip.
  • Vegetable Sticks: Fresh celery sticks, carrot sticks, or cucumber slices add a healthy crunch. They also balance the richness of the dip.
  • Crackers: Choose your favorite crackers for a delightful pairing. They add a nice texture and flavor contrast.
  • Mini Bread Bowls: For a fun twist, serve the dip in mini bread bowls. This adds a unique touch to your presentation.
  • Sandwiches or Wraps: Use the dip as a filling for sandwiches or wraps. It makes for a delicious lunch option!

Don’t forget to provide plenty of napkins! This dip can get a little messy, but that’s part of the fun. Your guests will love digging in and enjoying the flavors together.

For an extra touch, consider setting up a dipping station. Arrange your dippers on a large platter, and place the Buffalo Chicken Dip in the center. This not only looks appealing but also encourages guests to mingle and enjoy the food. You can even label each dipper for a fun twist!

Lastly, if you want to elevate your serving game, think about adding some garnishes. A sprinkle of chopped parsley or a drizzle of ranch dressing can make your dip look even more appetizing. With these serving suggestions, your Buffalo Chicken Dip will be the star of the show!

Tips for Perfecting Your Buffalo Chicken Dip Recipe

Buffalo Chicken Dip Recipe even better, here are some handy tips. First, always taste your dip before serving. This allows you to adjust the flavors to your liking. If you want more heat, add a bit more buffalo sauce. If it’s too spicy, a little extra cream cheese can help balance it out.

Another tip is to let the dip cool slightly before serving. This helps the flavors meld together and makes it easier to scoop. If you’re making the dip ahead of time, you can prepare it and store it in the fridge. Just remember to bake it right before serving for the best taste.

Consider garnishing your dip with additional toppings. Chopped cilantro, diced tomatoes, or even a drizzle of ranch dressing can add a nice touch. These little details can elevate your dip and impress your guests!

Also, think about the serving temperature. While the dip is best served warm, it can still be enjoyed at room temperature. If you have leftovers, you can reheat them in the oven or microwave. Just be careful not to overheat, as this can change the texture.

Lastly, don’t hesitate to experiment with different cheeses. Mixing in mozzarella or pepper jack can add a unique twist to your dip. Each cheese brings its own flavor, making your Buffalo Chicken Dip even more delightful!

With these tips, you’ll be well on your way to creating the ultimate Buffalo Chicken Dip. Your friends and family will be asking for your secret recipe in no time!

Breakdown of Time for Buffalo Chicken Dip Recipe

Buffalo Chicken Dip Recipe can help you plan better, especially when hosting a gathering. Here’s a simple breakdown of the time involved in preparing this delicious dip.

Prep Time

The prep time for your Buffalo Chicken Dip is quite short. You’ll need about 10-15 minutes to gather your ingredients and mix them together. If you’re using leftover chicken, shredding it will take a few extra minutes. Overall, you can expect to spend around 15 minutes on preparation.

Cooking Time

Once your dip is mixed and ready to go, it’s time to bake! The cooking time is approximately 20-25 minutes in a preheated oven at 350°F (175°C). Keep an eye on it as it bakes, ensuring it becomes hot and bubbly without overcooking.

Total Time

In total, you’re looking at about 35-40 minutes from start to finish. This includes both prep and cooking time. With such a quick turnaround, you can easily whip up this tasty dip even on a busy day!

Now that you know the time involved, you can confidently plan to serve your Buffalo Chicken Dip at your next event. It’s a quick and satisfying dish that will surely impress your guests!

Nutritional Information for Buffalo Chicken Dip Recipe

Buffalo Chicken Dip Recipe is essential, especially if you’re mindful of your diet. This dip is not only delicious but also provides a good balance of nutrients. Here’s a closer look at the nutritional information per serving:

Calories

Each serving of Buffalo Chicken Dip contains approximately 220 calories. This makes it a satisfying option for a snack or appetizer without being overly heavy. The calorie count can vary slightly based on the specific ingredients you use, especially if you opt for low-fat versions of cream cheese or ranch dressing.

Protein

Protein lovers will appreciate that this dip packs about 15 grams of protein per serving. The shredded chicken and cheese contribute significantly to this protein content, making it a great choice for those looking to boost their protein intake. This can help keep you feeling full and satisfied, especially during gatherings.

Sodium

One thing to keep in mind is the sodium content. Each serving contains around 500 mg of sodium. This is primarily due to the ranch dressing and buffalo wing sauce. If you’re watching your sodium intake, consider using low-sodium versions of these ingredients. This small adjustment can help you enjoy your dip while keeping your health goals in check.

Buffalo Chicken Dip Recipe offers a tasty and nutritious option for your next gathering. With its balance of calories, protein, and flavor, it’s sure to be a hit with your guests!

FAQs about Buffalo Chicken Dip Recipe

What can I serve with Buffalo Chicken Dip?

Buffalo Chicken Dip, the options are endless! You can pair it with crunchy tortilla chips for a classic combination. Fresh vegetable sticks like celery, carrots, and cucumber slices also make great dippers. They add a nice crunch and balance the dip’s creaminess. If you want something different, try serving it with crackers or mini bread bowls. You can even use the dip as a filling for sandwiches or wraps. The key is to choose dippers that can hold up to the creamy texture of the dip!

Can I make Buffalo Chicken Dip ahead of time?

Buffalo Chicken Dip ahead of time is a great way to save time on the day of your event. You can prepare the dip, mix all the ingredients, and store it in the refrigerator for up to 24 hours before baking. Just remember to cover it tightly with plastic wrap or aluminum foil. When you’re ready to serve, simply bake it in the oven until it’s hot and bubbly. This way, you can enjoy the dip without the last-minute rush!

How do I store leftover Buffalo Chicken Dip?

Buffalo Chicken Dip, storing them is easy! Allow the dip to cool completely, then transfer it to an airtight container. You can keep it in the refrigerator for up to 3-4 days. When you’re ready to enjoy it again, simply reheat it in the oven or microwave. If reheating in the oven, cover it with foil to prevent it from drying out. This way, you can savor the delicious flavors of your dip even after the party!

Can I use rotisserie chicken for Buffalo Chicken Dip?

Buffalo Chicken Dip! It saves you time and adds great flavor. Simply shred the rotisserie chicken and mix it with the other ingredients as directed in the recipe. This not only makes the preparation quicker but also ensures that your dip is packed with delicious, tender chicken. It’s a win-win for busy cooks!

Conclusion on Buffalo Chicken Dip Recipe

Buffalo Chicken Dip Recipe is a delightful addition to any gathering. Its creamy texture, combined with the spicy kick of buffalo sauce, makes it a favorite among guests. Whether you’re hosting a game day party, a family reunion, or just a casual get-together, this dip is sure to impress.

Not only is it easy to prepare, but it also offers plenty of room for creativity. With variations like the spicy version or a vegetarian alternative, you can cater to different tastes and dietary needs. Plus, the serving options are endless, allowing you to customize the experience for your guests.

Remember to follow the tips and cooking notes provided to ensure your dip turns out perfectly every time. From the right baking temperature to the best garnishes, these small details can elevate your dish. And don’t forget to enjoy the process! Cooking should be fun and rewarding.

Buffalo Chicken Dip is not just a recipe; it’s a way to bring people together and create lasting memories. Happy cooking!

Classic Butter Chicken Recipe: A Flavorful Delight!

Introduction to Classic Butter Chicken Recipe

What is Butter Chicken?

Butter chicken, also known as murgh makhani, is a beloved dish from Indian cuisine. It features tender pieces of chicken cooked in a rich, creamy tomato sauce. The sauce is infused with a blend of aromatic spices, making it both flavorful and comforting. This dish is often enjoyed with rice or naan, allowing you to savor every drop of the delicious sauce. Butter chicken is not just a meal; it’s an experience that brings warmth and joy to the table.

The Origins of Classic Butter Chicken Recipe

The origins of butter chicken date back to the 1950s in Delhi, India. It was created by the chefs at the Moti Mahal restaurant. They wanted to use leftover chicken from the tandoor, a traditional clay oven. By simmering the chicken in a buttery tomato sauce, they transformed it into a delightful dish. Over the years, butter chicken has gained popularity worldwide, becoming a staple in Indian restaurants everywhere. Its creamy texture and rich flavors have made it a favorite among many, regardless of their culinary background.

Ingredients for Classic Butter Chicken Recipe

To create the perfect classic butter chicken, you’ll need a selection of fresh ingredients. Each component plays a vital role in building the rich flavors that make this dish so special. Here’s what you’ll need:

  • 2 pounds boneless, skinless chicken thighs, cut into bite-sized pieces
  • 1 cup plain yogurt
  • 2 tablespoons lemon juice
  • 2 teaspoons ground cumin
  • 2 teaspoons ground coriander
  • 1 teaspoon ground turmeric
  • 1 teaspoon garam masala
  • 1 teaspoon paprika
  • 1 teaspoon salt
  • 1/2 teaspoon black pepper
  • 4 tablespoons unsalted butter
  • 1 medium onion, finely chopped
  • 4 cloves garlic, minced
  • 1 tablespoon fresh ginger, minced
  • 1 can (15 ounces) tomato sauce
  • 1 cup heavy cream
  • 1/4 cup chopped fresh cilantro (for garnish)

These ingredients come together to create a dish that is not only delicious but also satisfying. The combination of spices, yogurt, and cream gives the butter chicken its signature taste. Make sure to use fresh ingredients for the best results. Now that you have everything ready, let’s move on to the preparation steps!

Step-by-Step Preparation of Classic Butter Chicken Recipe

Step 1: Marinating the Chicken

Marinating the chicken is a crucial step in making classic butter chicken. Start by taking a large bowl and combining the yogurt, lemon juice, ground cumin, ground coriander, ground turmeric, garam masala, paprika, salt, and black pepper. This mixture is what gives the chicken its rich flavor. Once everything is well mixed, add the bite-sized chicken pieces. Make sure each piece is coated thoroughly with the marinade. Cover the bowl with plastic wrap and place it in the refrigerator. Let it marinate for at least one hour, but overnight is best for maximum flavor.

Step 2: Cooking the Chicken

After marinating, it’s time to cook the chicken. Heat a large skillet or saucepan over medium heat and add the unsalted butter. Once the butter has melted, add the finely chopped onion. Sauté the onion for about 5-7 minutes until it becomes soft and golden brown. This step adds a sweet flavor to the dish. Next, stir in the minced garlic and ginger, cooking for an additional 1-2 minutes until fragrant. Now, add the marinated chicken along with the marinade to the skillet. Cook the chicken for about 5-7 minutes, stirring occasionally, until it is browned on all sides.

Step 3: Preparing the Sauce

Once the chicken is browned, it’s time to prepare the sauce. Pour in the can of tomato sauce and bring the mixture to a gentle simmer. This is where the magic happens! Reduce the heat to low, cover the skillet, and let it cook for 15-20 minutes. Stir occasionally to prevent sticking. The chicken will absorb the flavors of the spices and tomato sauce, making it tender and juicy.

Step 4: Combining Chicken and Sauce

After the chicken has simmered, it’s time to combine it with the creamy goodness. Stir in the heavy cream, which will give the dish its signature richness. Let the mixture simmer for another 5 minutes. This step allows the flavors to meld together beautifully. If you feel it needs more seasoning, adjust with a pinch of salt. The sauce should be creamy and vibrant, coating the chicken perfectly.

Step 5: Final Touches

Now that your classic butter chicken is ready, it’s time for the final touches. Remove the skillet from heat and garnish the dish with chopped fresh cilantro. This adds a pop of color and freshness. Serve the butter chicken hot over a bed of fluffy rice or with warm naan bread. Enjoy every bite of this delightful dish!

Variations of Classic Butter Chicken Recipe

Vegetarian Version of Classic Butter Chicken Recipe

If you’re looking for a vegetarian alternative to the classic butter chicken recipe, you’re in luck! This version uses paneer, a type of Indian cheese, instead of chicken. Paneer absorbs flavors beautifully, making it a perfect substitute. To prepare, follow the same marinating process using yogurt and spices. Instead of chicken, cut the paneer into cubes and marinate them for at least an hour.

When cooking, melt the butter in a skillet and sauté onions, garlic, and ginger just like in the original recipe. Then, add the marinated paneer cubes and cook until they are golden brown. Pour in the tomato sauce and let it simmer. Finally, stir in the heavy cream and let it cook for a few more minutes. Garnish with cilantro, and you have a delicious vegetarian butter chicken that everyone will love!

Spicy Twist on Classic Butter Chicken Recipe

For those who enjoy a bit of heat, adding a spicy twist to the classic butter chicken recipe is a great idea! To make it spicier, simply incorporate 1-2 teaspoons of cayenne pepper or red chili flakes into the marinade. This will give the chicken a fiery kick that pairs wonderfully with the creamy sauce.

As you cook the chicken, you can also add chopped green chilies along with the onions for an extra layer of spice. After adding the tomato sauce, let it simmer as usual. The heat from the spices will balance beautifully with the richness of the cream. Serve this spicy version with rice or naan, and enjoy the delightful combination of flavors!

Cooking Note for Classic Butter Chicken Recipe

When preparing the classic butter chicken recipe, there are a few important cooking notes to keep in mind. These tips will help you achieve the best results and ensure that your dish is both delicious and satisfying.

First, marinating the chicken is essential. The longer you marinate, the more flavorful the chicken will be. If you have the time, aim for an overnight marination. This allows the spices to penetrate deeply, making the chicken tender and juicy.

Next, when cooking the chicken, avoid overcrowding the skillet. If the pan is too full, the chicken will steam instead of brown. This can lead to a less appealing texture. If necessary, cook the chicken in batches to ensure even cooking.

Also, keep an eye on the heat. Cooking on medium heat is ideal for browning the chicken and sautéing the onions. If the heat is too high, the spices may burn, resulting in a bitter taste. Adjust the heat as needed to maintain a gentle simmer when adding the tomato sauce and cream.

Lastly, taste as you go! Adjust the seasoning to your preference. Everyone’s palate is different, so feel free to add more salt, spices, or even a touch of sugar if the sauce is too acidic. This will help balance the flavors and create a dish that you and your guests will love.

By following these cooking notes, you’ll be well on your way to creating a classic butter chicken that is rich, creamy, and bursting with flavor. Happy cooking!

Serving Suggestions for Classic Butter Chicken Recipe

Serving classic butter chicken is just as important as preparing it. The right accompaniments can elevate the dish and create a delightful dining experience. Here are some fantastic serving suggestions to consider:

  • Steamed Basmati Rice: The fluffy texture of basmati rice pairs perfectly with the creamy sauce. It absorbs the flavors beautifully, making each bite a treat.
  • Warm Naan Bread: Naan is a traditional Indian flatbread that is perfect for scooping up the butter chicken. You can choose plain naan or garlic naan for an extra flavor boost.
  • Raita: A cooling yogurt-based side dish, raita can help balance the spices in the butter chicken. Mix yogurt with diced cucumber, mint, and a pinch of salt for a refreshing accompaniment.
  • Vegetable Sides: Serve some sautéed or roasted vegetables on the side. Options like green beans, bell peppers, or a simple salad can add color and nutrition to your meal.
  • Pickles: Indian pickles, known as achaar, can add a tangy kick to your meal. They are often made from mango or lime and can enhance the overall flavor profile.

When serving classic butter chicken, presentation matters too! Use a large serving dish to showcase the vibrant colors of the dish. Garnish with fresh cilantro for a pop of green. This not only looks appealing but also adds a fresh flavor.

Finally, don’t forget to offer some chilled beverages. A glass of mango lassi or a refreshing mint lemonade can complement the spices and make your meal even more enjoyable. With these serving suggestions, your classic butter chicken will surely impress your family and friends!

Tips for Perfecting Classic Butter Chicken Recipe

Creating the perfect classic butter chicken recipe is all about attention to detail. Here are some helpful tips to ensure your dish turns out delicious every time:

  • Use Quality Ingredients: Fresh, high-quality ingredients make a big difference. Opt for organic chicken and fresh spices whenever possible. This enhances the overall flavor of your dish.
  • Marinate Longer: While an hour is sufficient, marinating the chicken overnight is ideal. This allows the spices to penetrate deeply, resulting in more flavorful and tender chicken.
  • Control the Heat: Cooking on medium heat is key. Too high of a heat can burn the spices, while too low can lead to undercooked chicken. Adjust as needed to maintain a gentle simmer.
  • Don’t Rush the Browning: Take your time when browning the chicken. This step adds depth of flavor. If necessary, cook in batches to avoid overcrowding the pan.
  • Adjust the Cream: If you prefer a lighter dish, substitute half of the heavy cream with coconut milk. This adds a unique flavor while reducing calories.
  • Season to Taste: Always taste your dish as you cook. Adjust the seasoning with salt, spices, or even a touch of sugar to balance acidity. This ensures the flavors are just right.
  • Garnish Generously: Don’t skip the cilantro garnish! It adds a fresh touch and enhances the visual appeal of your dish. A sprinkle of crushed nuts can also add texture.
  • Pair Wisely: Consider your side dishes carefully. Steamed basmati rice or warm naan are classic choices that complement the rich sauce beautifully.

By following these tips, you’ll be well on your way to mastering the classic butter chicken recipe. Each step contributes to a dish that is not only flavorful but also a joy to share with family and friends. Happy cooking!

Breakdown of Time for Classic Butter Chicken Recipe

Prep Time

Preparing the classic butter chicken recipe involves a few essential steps. The marination process is crucial for flavor. You’ll need about 15 minutes to mix the marinade and coat the chicken. However, remember that marinating the chicken should ideally take at least 1 hour, or even overnight for the best results. So, while the active prep time is short, plan ahead to allow for marination.

Cooking Time

Once the chicken is marinated, the cooking process is straightforward. It will take approximately 30 minutes to cook the chicken and prepare the sauce. This includes:

  • Sautéing the onions: 5-7 minutes
  • Cooking the chicken: 5-7 minutes
  • Simmering with tomato sauce: 15-20 minutes
  • Adding cream and final simmer: 5 minutes

In total, the cooking time is around 30 minutes, making it a quick and satisfying meal option.

Total Time

When you combine the prep time and cooking time, the total time for the classic butter chicken recipe is approximately 1 hour and 30 minutes. This includes the marination time of at least 1 hour. If you choose to marinate overnight, you can easily prepare this dish in about 30 minutes the next day. This makes it a great option for a weeknight dinner or a special occasion!

Nutritional Information for Classic Butter Chicken Recipe

Calories

When enjoying a serving of classic butter chicken, you can expect to consume around 450 calories. This makes it a hearty meal option, perfect for satisfying your hunger. The rich ingredients, including cream and butter, contribute to the calorie count, but they also provide a delightful flavor that many love. Balancing this dish with lighter sides can help manage your overall calorie intake.

Protein

Classic butter chicken is a great source of protein, offering approximately 30 grams per serving. The chicken thighs used in the recipe are not only tender but also packed with protein, which is essential for muscle repair and overall health. Including protein in your meals can help keep you feeling full longer, making this dish a fulfilling choice for lunch or dinner.

Sodium

In terms of sodium, classic butter chicken contains about 800 milligrams per serving. This amount can vary based on the specific ingredients used, especially if you add salt or use canned tomato sauce with added sodium. If you’re watching your sodium intake, consider using low-sodium tomato sauce and adjusting the salt in the recipe. This way, you can enjoy the flavors without compromising your dietary needs.

FAQs about Classic Butter Chicken Recipe

What can I serve with Classic Butter Chicken Recipe?

When it comes to serving classic butter chicken, there are plenty of delicious options to consider. The most popular accompaniments include:

  • Basmati Rice: Fluffy basmati rice is a classic pairing. It soaks up the rich sauce beautifully, making each bite delightful.
  • Naan Bread: Warm naan, whether plain or garlic-flavored, is perfect for scooping up the creamy chicken. It adds a wonderful texture to the meal.
  • Raita: A cooling yogurt-based side, raita can balance the spices in the butter chicken. Mix yogurt with diced cucumber and mint for a refreshing touch.
  • Vegetable Sides: Consider serving sautéed or roasted vegetables. Options like green beans or a simple salad can add color and nutrition.
  • Indian Pickles: Known as achaar, these tangy pickles can enhance the overall flavor profile of your meal.

These sides not only complement the butter chicken but also create a well-rounded dining experience.

Can I make Classic Butter Chicken Recipe ahead of time?

Absolutely! Classic butter chicken can be made ahead of time, making it a great option for meal prep or entertaining. After cooking, let the dish cool completely before storing it in an airtight container. It can be refrigerated for up to 3 days. When you’re ready to serve, simply reheat it on the stove over low heat, stirring occasionally until warmed through. This allows the flavors to meld even more, making it taste just as delicious, if not better!

Is Classic Butter Chicken Recipe spicy?

The classic butter chicken recipe is generally mild, making it suitable for a wide range of palates. However, you can easily adjust the spice level to your liking. If you prefer a spicier dish, consider adding cayenne pepper or red chili flakes to the marinade. You can also include chopped green chilies during cooking for an extra kick. This way, you can customize the heat level to suit your taste!

How can I store leftovers of Classic Butter Chicken Recipe?

Storing leftovers of classic butter chicken is simple! Allow the dish to cool completely, then transfer it to an airtight container. It can be stored in the refrigerator for up to 3 days. If you want to keep it longer, consider freezing it. Place the cooled butter chicken in a freezer-safe container, and it can last for up to 3 months. When you’re ready to enjoy it again, thaw it in the refrigerator overnight and reheat on the stove or in the microwave. This makes for a quick and satisfying meal later on!

Conclusion on Classic Butter Chicken Recipe

In conclusion, the classic butter chicken recipe is a delightful dish that brings warmth and flavor to any table. With its tender chicken pieces enveloped in a rich, creamy sauce, it’s no wonder this dish has become a favorite worldwide. The combination of spices, yogurt, and cream creates a symphony of flavors that is both comforting and satisfying.

Whether you’re preparing it for a family dinner or a special occasion, this recipe is sure to impress. The step-by-step preparation makes it accessible for cooks of all skill levels. Plus, the variations allow you to customize the dish to suit your preferences, whether you choose to go vegetarian or add a spicy twist.

Remember, the key to a perfect butter chicken lies in the marination and cooking process. Take your time, use quality ingredients, and don’t hesitate to adjust the flavors to your liking. With these tips in mind, you’ll create a dish that not only tastes amazing but also brings joy to those who share it with you.

So, gather your ingredients, roll up your sleeves, and dive into the wonderful world of classic butter chicken. Enjoy the process, savor the flavors, and most importantly, share this delightful meal with your loved ones. Happy cooking!

Ground Beef Orzo Skillet Recipe is a family favorite!

Introduction to Ground Beef Orzo Skillet Recipe

Are you looking for a quick and delicious meal that the whole family will love? Look no further! The Ground Beef Orzo Skillet Recipe is a fantastic choice. This one-pan dish combines savory ground beef with tender orzo pasta, making it both hearty and satisfying. Plus, it’s easy to prepare, which means you can spend less time in the kitchen and more time enjoying your meal.

This recipe is perfect for busy weeknights or when you want to impress guests without spending hours cooking. With just a handful of ingredients, you can create a flavorful dish that’s packed with protein and nutrients. The combination of ground beef, orzo, and fresh vegetables creates a delightful harmony of flavors that will have everyone asking for seconds.

Not only is this dish tasty, but it’s also versatile. You can easily customize it to suit your family’s preferences. Whether you want to add extra veggies or switch up the protein, the Ground Beef Orzo Skillet Recipe can adapt to your needs. So, let’s dive into the ingredients and get started on this delightful culinary adventure!

Ingredients for Ground Beef Orzo Skillet Recipe

To create the delicious Ground Beef Orzo Skillet, you’ll need a few simple ingredients. Each component plays a vital role in building flavor and texture. Here’s what you’ll need:

  • 1 pound ground beef: This is the star of the dish, providing rich flavor and protein.
  • 1 cup orzo pasta: A small, rice-shaped pasta that cooks quickly and absorbs flavors beautifully.
  • 1 medium onion, diced: Adds sweetness and depth to the dish.
  • 2 cloves garlic, minced: Brings a wonderful aroma and enhances the overall taste.
  • 1 can (14.5 ounces) diced tomatoes, undrained: Adds moisture and a burst of acidity.
  • 1 cup beef broth: Provides a savory base for the dish.
  • 1 teaspoon Italian seasoning: A blend of herbs that adds a classic Italian flavor.
  • Salt and pepper to taste: Essential for seasoning and enhancing flavors.
  • 1 tablespoon olive oil: Used for sautéing the vegetables and beef.
  • 1 cup shredded mozzarella cheese: Melts beautifully on top, adding creaminess.
  • Fresh parsley, chopped (for garnish): Adds a pop of color and freshness to the dish.

These ingredients come together to create a comforting and satisfying meal. Feel free to adjust the quantities based on your family’s preferences or dietary needs. Now that you have everything ready, let’s move on to the step-by-step preparation of this delightful Ground Beef Orzo Skillet!

Step-by-Step Preparation of Ground Beef Orzo Skillet Recipe

Now that you have all your ingredients ready, it’s time to dive into the cooking process! This Ground Beef Orzo Skillet Recipe is straightforward and fun to make. Follow these steps to create a delicious meal that your family will love.

Step 1: Preparing the Ingredients

Before you start cooking, it’s essential to prepare your ingredients. Begin by dicing the onion and mincing the garlic. Having everything ready will make the cooking process smoother. Measure out the orzo, diced tomatoes, and beef broth. This way, you won’t have to scramble for ingredients while cooking. It’s all about being organized!

Step 2: Cooking the Ground Beef

Next, heat the olive oil in a large skillet over medium heat. Once the oil is hot, add the diced onion. Sauté it for about 3-4 minutes until it becomes soft and translucent. Then, stir in the minced garlic and cook for an additional minute. The aroma will be delightful!

Now, it’s time to add the ground beef. Break it apart with a spoon as it cooks. You want it to brown evenly, which should take about 5-7 minutes. If there’s excess fat, drain it off to keep the dish from becoming greasy.

Step 3: Adding Vegetables and Seasonings

Once the beef is browned, it’s time to add flavor! Stir in the undrained diced tomatoes, beef broth, Italian seasoning, salt, and pepper. The tomatoes will add moisture, while the seasoning will enhance the overall taste. Mix everything well to combine the flavors.

Step 4: Incorporating the Orzo

Now, add the orzo pasta to the skillet. Stir it into the mixture, ensuring it’s evenly distributed. This small pasta will soak up all the delicious flavors as it cooks. Bring the mixture to a boil, and then reduce the heat to low.

Step 5: Simmering the Dish

Cover the skillet and let it simmer for about 10-12 minutes. During this time, the orzo will cook and absorb most of the liquid. Be sure to stir occasionally to prevent sticking. You want the orzo to be tender and the dish to be creamy.

Step 6: Final Touches and Serving

Once the orzo is cooked, remove the skillet from heat. Sprinkle the shredded mozzarella cheese on top. Cover the skillet for a few minutes to allow the cheese to melt. This will create a gooey, cheesy topping that everyone will love!

Finally, garnish with chopped fresh parsley before serving. This adds a lovely touch of color and freshness. Your Ground Beef Orzo Skillet is now ready to be enjoyed!

Variations of Ground Beef Orzo Skillet Recipe

The Ground Beef Orzo Skillet Recipe is not only delicious but also incredibly versatile. You can easily modify it to suit your taste preferences or dietary needs. Here are some exciting variations to consider:

Alternative Proteins

If you want to switch things up, consider using alternative proteins. Ground turkey or chicken can be great substitutes for ground beef. They offer a lighter flavor and are lower in fat. For a more robust taste, try using ground lamb. It adds a unique twist to the dish. You can also use plant-based ground meat for a vegetarian option. This way, you can enjoy the same hearty texture without the meat!

Vegetarian Options

For those who prefer a meat-free meal, the Ground Beef Orzo Skillet can easily be transformed into a vegetarian delight. Instead of ground beef, use a mix of sautéed mushrooms, bell peppers, and zucchini. These vegetables add depth and flavor to the dish. You can also include beans, like black beans or chickpeas, for added protein. Don’t forget to adjust the seasoning to enhance the flavors of your veggies!

Flavor Enhancements

To elevate the taste of your Ground Beef Orzo Skillet, consider adding extra herbs and spices. Fresh basil or oregano can bring a burst of freshness. A pinch of red pepper flakes can add a delightful kick. You might also experiment with different cheeses. Try using cheddar or feta for a different flavor profile. Adding a splash of balsamic vinegar or a squeeze of lemon juice can brighten the dish, making it even more delicious!

With these variations, you can create a Ground Beef Orzo Skillet that suits your taste and dietary preferences. Feel free to get creative and make it your own!

Cooking Note for Ground Beef Orzo Skillet Recipe

When preparing the Ground Beef Orzo Skillet Recipe, there are a few cooking notes to keep in mind. These tips will help ensure that your dish turns out perfectly every time.

First, always use a large skillet. This allows enough space for the ingredients to cook evenly without overcrowding. A non-stick skillet is ideal, as it prevents sticking and makes cleanup easier.

Next, be mindful of the heat. Cooking over medium heat is essential for browning the beef and softening the onions without burning them. If the heat is too high, the ingredients may cook unevenly, leading to a less flavorful dish.

Additionally, stirring occasionally is crucial during the simmering phase. This helps the orzo cook evenly and prevents it from clumping together. If you notice that the mixture is getting too thick, feel free to add a splash more beef broth or water to maintain the desired consistency.

Lastly, let the dish rest for a few minutes after cooking. This allows the flavors to meld together, enhancing the overall taste. Plus, it gives the cheese a moment to set, making it easier to serve.

By following these cooking notes, you’ll create a delicious Ground Beef Orzo Skillet that your family will love. Happy cooking!

Serving Suggestions for Ground Beef Orzo Skillet Recipe

Once your Ground Beef Orzo Skillet is ready, it’s time to think about how to serve it! This dish is not only delicious but also visually appealing, making it perfect for family dinners or gatherings. Here are some serving suggestions to enhance your meal experience:

  • Pair with a Fresh Salad: A crisp green salad complements the hearty flavors of the skillet. Consider a simple mixed greens salad with a light vinaigrette. The freshness of the salad balances the richness of the dish.
  • Serve with Garlic Bread: Nothing beats the combination of cheesy orzo and warm garlic bread. The bread is perfect for scooping up the delicious mixture, making every bite enjoyable.
  • Top with Extra Cheese: If you’re a cheese lover, feel free to sprinkle additional shredded cheese on top before serving. This adds an extra layer of creaminess and flavor.
  • Garnish with Fresh Herbs: Besides parsley, consider using fresh basil or chives as a garnish. This adds a pop of color and enhances the dish’s aroma.
  • Include a Side of Roasted Vegetables: Roasted vegetables, such as carrots, zucchini, or bell peppers, make a nutritious side. Their natural sweetness pairs well with the savory orzo skillet.
  • Offer a Variety of Hot Sauces: For those who enjoy a bit of heat, provide a selection of hot sauces on the side. This allows guests to customize their meal to their spice preference.

These serving suggestions will elevate your Ground Beef Orzo Skillet experience. Whether it’s a casual family dinner or a special occasion, these ideas will impress your guests and make the meal even more enjoyable!

Tips for Perfecting Your Ground Beef Orzo Skillet Recipe

To make your Ground Beef Orzo Skillet truly shine, consider these helpful tips. They will ensure that your dish is not only delicious but also visually appealing and satisfying. Let’s explore some ways to perfect this recipe!

  • Use Quality Ingredients: Start with fresh, high-quality ground beef. Grass-fed beef often has a richer flavor. Fresh vegetables will also enhance the taste and texture of your dish.
  • Don’t Skip the Seasoning: Season your beef well while cooking. A little salt and pepper can go a long way in bringing out the flavors. Taste as you go to find the perfect balance.
  • Cook the Orzo Al Dente: When adding the orzo, aim for it to be al dente. This means it should be firm to the bite. It will continue to cook slightly after you remove it from the heat, so keep that in mind!
  • Experiment with Cheese: While mozzarella is a classic choice, feel free to mix it up! Try adding parmesan for a nutty flavor or gouda for a smoky twist. Mixing different cheeses can create a delightful topping.
  • Incorporate Fresh Herbs: Fresh herbs can elevate your dish. Add basil or oregano during cooking for a burst of flavor. Garnishing with fresh herbs before serving adds a lovely touch.
  • Adjust Liquid as Needed: If you find the mixture too thick while simmering, don’t hesitate to add a bit more beef broth or water. This will help achieve the desired creamy consistency.
  • Let It Rest: After cooking, let the skillet sit for a few minutes before serving. This resting time allows the flavors to meld together, making each bite even more delicious.
  • Serve Hot: This dish is best enjoyed hot and fresh. If you have leftovers, reheat gently on the stove with a splash of broth to keep it moist.

By following these tips, you’ll create a Ground Beef Orzo Skillet that’s not only tasty but also a hit with family and friends. Enjoy the cooking process and the delightful meal that follows!

Breakdown of Time for Ground Beef Orzo Skillet Recipe

Understanding the time needed for each step of the Ground Beef Orzo Skillet Recipe can help you plan your cooking efficiently. Here’s a breakdown of the time required for preparation and cooking:

Prep Time

The prep time for this delicious dish is quite short. You’ll need about 10-15 minutes to gather and prepare your ingredients. This includes dicing the onion, mincing the garlic, and measuring out the orzo and other components. Being organized will make this step quick and easy!

Cooking Time

Once you start cooking, the total cooking time is approximately 20-25 minutes. This includes:

  • 3-4 minutes for sautéing the onion
  • 5-7 minutes for browning the ground beef
  • 10-12 minutes for simmering the orzo and other ingredients

During this time, you’ll create a flavorful and hearty meal that’s sure to please!

Total Time

In total, you can expect the Ground Beef Orzo Skillet Recipe to take about 30-40 minutes from start to finish. This makes it a perfect option for busy weeknights when you want a satisfying meal without spending hours in the kitchen. With this quick and easy recipe, you’ll have a delicious dinner ready in no time!

Nutritional Information for Ground Beef Orzo Skillet Recipe

Understanding the nutritional content of your meals is essential for maintaining a balanced diet. The Ground Beef Orzo Skillet Recipe not only offers great taste but also provides a good amount of nutrients. Here’s a breakdown of the nutritional information per serving:

Calories

450 calories. This makes it a hearty meal that can keep you satisfied without going overboard on calories. The combination of protein from the beef and carbohydrates from the orzo provides a balanced energy source for your day.

Protein

30 grams of protein per serving, thanks to the ground beef and cheese. Including protein in your meals can help you feel fuller for longer, making it a great choice for lunch or dinner.

Sodium

600 milligrams. While sodium is necessary for bodily functions, it’s important to monitor your intake. If you’re watching your sodium levels, consider using low-sodium beef broth and rinsing the canned tomatoes to reduce the overall sodium content.

Overall, the Ground Beef Orzo Skillet Recipe is a nutritious option that provides a good balance of calories, protein, and essential nutrients. Enjoy this delicious meal while being mindful of your dietary needs!

FAQs about Ground Beef Orzo Skillet Recipe

Can I use a different type of pasta instead of orzo?

Absolutely! While orzo is a fantastic choice for this recipe, you can substitute it with other small pasta shapes. Options like ditalini, small shells, or even elbow macaroni work well. Just keep in mind that cooking times may vary slightly, so check the package instructions for the best results. The key is to choose a pasta that can absorb the flavors of the dish while still providing a satisfying texture.

How can I make the Ground Beef Orzo Skillet Recipe healthier?

There are several ways to make this Ground Beef Orzo Skillet Recipe healthier. First, consider using lean ground beef or substituting it with ground turkey or chicken. These options are lower in fat and calories. You can also add more vegetables, such as spinach, bell peppers, or zucchini, to increase the nutritional value. Additionally, using whole grain orzo can boost fiber content. Lastly, reduce the amount of cheese or opt for a lower-fat cheese to cut down on calories while still enjoying that cheesy goodness!

What can I serve with Ground Beef Orzo Skillet?

This dish is hearty enough to stand alone, but it pairs wonderfully with various sides. A fresh green salad with a light vinaigrette complements the flavors beautifully. Garlic bread is another excellent choice, perfect for scooping up the cheesy orzo. You might also consider serving it with roasted vegetables or a side of steamed broccoli for added nutrition. These sides enhance the meal and provide a well-rounded dining experience.

Can I make this recipe ahead of time?

Yes, you can prepare the Ground Beef Orzo Skillet ahead of time! To do this, cook the dish as directed, then let it cool completely before storing it in an airtight container in the refrigerator. It can be kept for up to 3 days. When you’re ready to enjoy it, simply reheat it on the stove over low heat, adding a splash of beef broth or water to keep it moist. This makes it a convenient option for meal prep or busy weeknights!

Conclusion on Ground Beef Orzo Skillet Recipe

In conclusion, the Ground Beef Orzo Skillet Recipe is a delightful and versatile dish that brings comfort and satisfaction to the dinner table. With its simple ingredients and straightforward preparation, it’s perfect for busy weeknights or when you want to impress guests with minimal effort. The combination of savory ground beef, tender orzo, and melted cheese creates a hearty meal that everyone will love.

This recipe not only offers a delicious taste but also allows for creativity. You can easily customize it by adding your favorite vegetables or trying different proteins. Whether you choose to stick with the classic version or experiment with variations, the Ground Beef Orzo Skillet is sure to become a family favorite.

Moreover, the nutritional benefits of this dish make it a smart choice for those looking to maintain a balanced diet. With a good amount of protein and essential nutrients, it provides the energy needed for a busy day. Plus, the ease of preparation means you can enjoy a homemade meal without spending hours in the kitchen.

So, gather your ingredients, follow the steps, and get ready to enjoy a delicious Ground Beef Orzo Skillet. Your family will appreciate the effort, and you’ll love how simple it is to create a satisfying meal. Happy cooking!

Bunny Butt Pancakes make breakfast fun and delightful!

Introduction to Bunny Butt Pancakes Recipe

Are you looking for a fun and delightful breakfast idea? Look no further! The Bunny Butt Pancakes Recipe is not just a meal; it’s an experience. These adorable pancakes are perfect for kids and adults alike. They bring joy to the breakfast table and make any morning feel special. Whether it’s a holiday, a birthday, or just a regular day, these pancakes will surely put a smile on everyone’s face.

What Makes Bunny Butt Pancakes Special?

What sets Bunny Butt Pancakes apart is their playful presentation. Shaped like cute bunny bottoms, they are a feast for the eyes as well as the stomach. The fluffy texture of the pancakes combined with the sweetness of chocolate chips and the softness of mini marshmallows creates a delightful treat. Plus, they are easy to make! With simple ingredients and a few fun decorations, you can create a breakfast masterpiece that your family will love.

Perfect for Any Occasion

Bunny Butt Pancakes are versatile and can be enjoyed on various occasions. They are perfect for Easter brunch, spring celebrations, or even a whimsical weekend breakfast. Kids will love helping to decorate their pancakes, making it a fun family activity. You can also customize them for different themes or holidays, adding seasonal fruits or colors to match the occasion. No matter when you serve them, these pancakes are sure to be a hit!

Ingredients for Bunny Butt Pancakes Recipe

To create your delightful Bunny Butt Pancakes, you’ll need a few simple ingredients. Each component plays a vital role in making these pancakes fluffy and delicious. Here’s what you’ll need:

  • 1 ½ cups all-purpose flour: This is the base of your pancakes, giving them structure.
  • 2 tablespoons granulated sugar: A touch of sweetness to enhance the flavor.
  • 1 tablespoon baking powder: This helps the pancakes rise and become fluffy.
  • ½ teaspoon salt: A pinch of salt balances the sweetness.
  • 1 ¾ cups milk: Adds moisture and helps create a smooth batter.
  • 1 large egg: Binds the ingredients together and adds richness.
  • 3 tablespoons unsalted butter, melted: Provides flavor and moisture.
  • 1 teaspoon vanilla extract: Adds a lovely aroma and taste.
  • Chocolate chips: For the bunny eyes, adding a fun touch.
  • Mini marshmallows: Perfect for creating the fluffy bunny tail.
  • Fresh fruit (optional): Use for decoration and extra flavor.

Gather these ingredients before you start cooking. Having everything ready will make the process smoother and more enjoyable. Plus, it’s a great way to involve kids in the kitchen! They can help measure and mix, making breakfast a fun family activity.

Step-by-Step Preparation of Bunny Butt Pancakes Recipe

Step 1: Gather Your Ingredients

Before you start cooking, it’s essential to gather all your ingredients. This makes the process smoother and more enjoyable. You’ll need flour, sugar, baking powder, salt, milk, egg, melted butter, vanilla extract, chocolate chips, mini marshmallows, and optional fresh fruit. Having everything ready will help you stay organized and make cooking a breeze!

Step 2: Prepare the Pancake Batter

Now, let’s make the pancake batter! In a large mixing bowl, whisk together the all-purpose flour, granulated sugar, baking powder, and salt. Make sure they are well combined. In another bowl, mix the milk, egg, melted butter, and vanilla extract until smooth. Then, pour the wet ingredients into the dry ingredients. Stir gently until just combined. Remember, it’s okay if there are a few lumps. Overmixing can make the pancakes tough, and we want them fluffy!

Step 3: Shape the Bunny Butts

Shaping the bunny butts is where the fun begins! Preheat your non-stick skillet or griddle over medium heat. Lightly grease it with cooking spray or a small amount of butter. Once it’s hot, pour about ¼ cup of batter onto the skillet for each pancake. You can make them round or slightly oval to resemble bunny bottoms. The key is to keep them thick and fluffy!

Step 4: Cook the Pancakes

Cooking the pancakes is simple! Watch for bubbles to form on the surface, which usually takes about 2-3 minutes. Once you see those bubbles, it’s time to flip! Cook for another 1-2 minutes until they are golden brown. Remove the pancakes from the skillet and keep them warm while you repeat with the remaining batter. You’ll want a nice stack of fluffy pancakes for the next step!

Step 5: Assemble the Bunny Butt Pancakes

Now comes the best part—assembling your Bunny Butt Pancakes! Stack two pancakes for each serving, placing one on top of the other. Use chocolate chips to create cute little eyes and a mini marshmallow for the fluffy tail. If you like, add fresh fruit around the pancakes for decoration. This not only makes your plate look beautiful but also adds a burst of flavor!

Variations of Bunny Butt Pancakes Recipe

While the classic Bunny Butt Pancakes are delightful, there are many ways to switch things up! You can experiment with different flavors and toppings to create your unique version. Let’s explore some fun variations that will keep breakfast exciting!

Different Flavors to Try

Why stick to just one flavor when you can have many? Here are some tasty ideas to enhance your Bunny Butt Pancakes:

  • Cinnamon Swirl: Add a teaspoon of cinnamon to the batter for a warm, spicy flavor. You can also create a cinnamon swirl by mixing cinnamon and sugar together and drizzling it into the batter as it cooks.
  • Chocolate Chip Delight: For chocolate lovers, mix in a handful of chocolate chips directly into the batter. This will make every bite a sweet surprise!
  • Banana Pancakes: Mash one ripe banana and mix it into the batter. This adds natural sweetness and a lovely banana flavor.
  • Berry Bliss: Fold in fresh or frozen berries like blueberries or strawberries into the batter. They add a burst of color and flavor!
  • Nutty Banana: Combine mashed bananas with chopped nuts, like walnuts or pecans, for a crunchy texture.

Feel free to mix and match these flavors to create your perfect Bunny Butt Pancakes. The possibilities are endless!

Alternative Toppings for Bunny Butt Pancakes

Toppings can make or break your pancake experience. Here are some fun and delicious alternatives to try:

  • Yogurt: Instead of syrup, top your pancakes with a dollop of yogurt. Greek yogurt adds creaminess and a tangy flavor.
  • Maple Syrup: A classic choice! Drizzle warm maple syrup over your pancakes for a sweet finish.
  • Peanut Butter: Spread a layer of peanut butter on top for a protein-packed option. It pairs wonderfully with banana slices!
  • Whipped Cream: Add a fluffy layer of whipped cream for a decadent treat. You can even sprinkle some chocolate shavings on top!
  • Fruit Compote: Cook down your favorite fruits with a bit of sugar to create a warm fruit compote. This adds a delicious homemade touch.

These alternative toppings will elevate your Bunny Butt Pancakes and make breakfast even more enjoyable. Get creative and have fun with your pancake creations!

Cooking Note for Bunny Butt Pancakes Recipe

Cooking Bunny Butt Pancakes is a delightful experience, but there are a few tips to keep in mind to ensure they turn out perfectly every time. Here are some essential cooking notes to help you achieve fluffy, delicious pancakes that everyone will love.

First, make sure your skillet or griddle is preheated properly. A medium heat is ideal for cooking pancakes. If the heat is too high, the outside may burn while the inside remains raw. Conversely, if the heat is too low, the pancakes may turn out flat and dense. A good test is to sprinkle a few drops of water on the skillet; if they sizzle and evaporate quickly, it’s ready!

Next, don’t forget to grease your cooking surface lightly. Using cooking spray or a small amount of butter will prevent the pancakes from sticking. However, be careful not to over-grease, as this can lead to greasy pancakes.

When pouring the batter onto the skillet, use a measuring cup or ladle for consistency. This ensures that each pancake is the same size, making for a beautiful stack. Remember to leave some space between each pancake, as they will spread slightly while cooking.

Lastly, patience is key! Allow the pancakes to cook until you see bubbles forming on the surface. This is a sign that they are ready to flip. If you flip them too soon, they may not cook through properly. Once flipped, keep an eye on them to avoid overcooking. The goal is to achieve a lovely golden-brown color.

By following these cooking notes, you’ll create Bunny Butt Pancakes that are not only adorable but also perfectly fluffy and delicious. Enjoy the process and have fun in the kitchen!

Serving Suggestions for Bunny Butt Pancakes Recipe

Creative Plating Ideas

Presentation is key when it comes to serving Bunny Butt Pancakes. A well-plated dish can make the meal even more enjoyable. Here are some creative plating ideas to make your pancakes stand out:

  • Layered Stack: Create a tall stack of pancakes, alternating with layers of fresh fruit or yogurt. This adds height and visual appeal.
  • Animal Theme: Use additional fruits like banana slices for ears or strawberries for a nose. This enhances the bunny theme and makes the dish more playful.
  • Colorful Surroundings: Arrange colorful fruits around the pancakes. Berries, kiwi, and orange slices can create a vibrant plate that’s pleasing to the eye.
  • Whipped Cream Clouds: Add dollops of whipped cream around the pancakes to resemble fluffy clouds. This adds a whimsical touch to your breakfast.
  • Chocolate Drizzle: Drizzle melted chocolate or chocolate syrup over the pancakes for an extra sweet touch. It not only looks great but tastes delicious too!

These creative plating ideas will make your Bunny Butt Pancakes not just a meal, but a delightful experience for everyone at the table. Remember, the more fun and colorful your plate, the more excited everyone will be to dig in!

Pairing Drinks with Bunny Butt Pancakes

To complement your Bunny Butt Pancakes, consider serving them with delicious drinks. The right beverage can enhance the flavors of your breakfast. Here are some great drink pairings:

  • Freshly Squeezed Orange Juice: The bright, citrusy flavor of orange juice pairs perfectly with the sweetness of pancakes. It’s refreshing and energizing!
  • Milk or Chocolate Milk: A classic choice! Milk adds creaminess, while chocolate milk brings a fun twist that kids will love.
  • Fruit Smoothie: Blend your favorite fruits with yogurt or milk for a nutritious and tasty drink. This adds a healthy touch to your breakfast.
  • Herbal Tea: For a lighter option, serve a warm cup of herbal tea. Chamomile or mint tea can be soothing and delightful.
  • Coffee: For adults, a cup of coffee can be the perfect pairing. The rich flavor of coffee balances the sweetness of the pancakes.

These drink pairings will elevate your Bunny Butt Pancakes experience, making breakfast even more enjoyable. Choose your favorites and get ready to savor a delightful morning!

Tips for Perfect Bunny Butt Pancakes Recipe

Common Mistakes to Avoid

Making Bunny Butt Pancakes can be a fun and rewarding experience, but there are a few common mistakes to watch out for. Avoiding these pitfalls will help you create the fluffiest and most delicious pancakes possible.

  • Overmixing the Batter: One of the biggest mistakes is overmixing the batter. It’s important to stir just until the ingredients are combined. A few lumps are perfectly fine! Overmixing can lead to tough pancakes.
  • Incorrect Heat Settings: Cooking pancakes at the wrong temperature can ruin them. If the heat is too high, the pancakes may burn on the outside while remaining raw inside. If it’s too low, they can turn out flat. Aim for medium heat for the best results.
  • Not Preheating the Skillet: Skipping the preheating step can lead to uneven cooking. Always preheat your skillet or griddle before pouring in the batter. This ensures a nice golden-brown color.
  • Using Cold Ingredients: Cold ingredients can affect the texture of your pancakes. Make sure your milk and eggs are at room temperature before mixing. This helps create a smoother batter.
  • Skipping the Greasing Step: Forgetting to grease your skillet can lead to sticking pancakes. Use a small amount of butter or cooking spray to ensure easy flipping and removal.

By keeping these common mistakes in mind, you’ll be well on your way to making perfect Bunny Butt Pancakes every time!

How to Store Leftover Pancakes

If you happen to have leftover Bunny Butt Pancakes, don’t worry! Storing them properly will keep them fresh for later enjoyment. Here’s how to do it:

  • Cooling: Allow the pancakes to cool completely on a wire rack. This prevents moisture from building up, which can make them soggy.
  • Storing in the Fridge: Place the cooled pancakes in an airtight container or wrap them in plastic wrap. They can be stored in the refrigerator for up to 3 days.
  • Freezing for Later: For longer storage, you can freeze the pancakes. Place parchment paper between each pancake to prevent them from sticking together. Then, put them in a freezer-safe bag or container. They can last up to 2 months in the freezer.
  • Reheating: To reheat, simply pop them in the toaster, microwave, or oven. If using the microwave, heat them in short intervals to avoid drying them out.

With these storage tips, you can enjoy your Bunny Butt Pancakes even after the initial breakfast rush. They make for a quick and tasty snack or meal any time of the day!

Breakdown of Time for Bunny Butt Pancakes Recipe

Prep Time

Getting everything ready for your Bunny Butt Pancakes is quick and easy! The prep time usually takes about 10-15 minutes. This includes gathering your ingredients, measuring them out, and mixing the batter. If you have little helpers, it might take a bit longer, but that just adds to the fun!

Cooking Time

Once your batter is ready, cooking the pancakes is a breeze. The cooking time for each batch of pancakes is around 10-15 minutes. You can cook multiple pancakes at once, depending on the size of your skillet or griddle. Just remember to keep an eye on them to ensure they turn golden brown!

Total Time

In total, you can expect to spend about 20-30 minutes from start to finish. This includes both prep and cooking time. It’s a quick breakfast option that’s perfect for busy mornings or special occasions. Plus, the joy of creating these adorable Bunny Butt Pancakes makes every minute worth it!

Nutritional Information for Bunny Butt Pancakes Recipe

Calories and Macronutrients

Understanding the nutritional content of your Bunny Butt Pancakes can help you make informed choices. Each serving of these delightful pancakes contains approximately 320 calories. Here’s a breakdown of the macronutrients:

  • Net Carbs: 45g
  • Protein: 8g
  • Fat: 10g

This nutritional profile makes Bunny Butt Pancakes a satisfying breakfast option. They provide a good balance of carbohydrates for energy, protein for muscle repair, and fat for flavor and satiety. Enjoying these pancakes as part of a balanced breakfast can help fuel your day!

Health Considerations

While Bunny Butt Pancakes are a fun treat, it’s essential to consider their health aspects. Here are a few points to keep in mind:

  • Moderation is Key: Enjoy these pancakes as an occasional treat rather than a daily breakfast. Balance them with healthier options like fruits or yogurt to enhance their nutritional value.
  • Whole Grain Options: For a healthier twist, consider using whole wheat flour instead of all-purpose flour. This adds fiber and nutrients, making your pancakes more filling.
  • Lower Sugar Alternatives: You can reduce the sugar content by using natural sweeteners like honey or maple syrup. This can help lower the overall calorie count.
  • Allergy Considerations: If you have dietary restrictions, you can easily modify the recipe. Substitute almond milk for dairy milk or use egg replacements for a vegan option.

By being mindful of these health considerations, you can enjoy Bunny Butt Pancakes while still maintaining a balanced diet. They can be a delightful addition to your breakfast rotation when prepared thoughtfully!

FAQs about Bunny Butt Pancakes Recipe

Can I make Bunny Butt Pancakes ahead of time?

Absolutely! You can prepare Bunny Butt Pancakes ahead of time. To do this, simply cook the pancakes as directed and let them cool completely. Once cooled, store them in an airtight container in the refrigerator for up to three days. When you’re ready to enjoy them, just reheat in the microwave or toaster. This makes for a quick and easy breakfast option on busy mornings!

What can I use instead of eggs in Bunny Butt Pancakes?

If you need an egg substitute for Bunny Butt Pancakes, there are several options! You can use ¼ cup of unsweetened applesauce or mashed banana for each egg. Another great option is to mix 1 tablespoon of ground flaxseed with 2.5 tablespoons of water. Let it sit for a few minutes until it thickens. These substitutes will help bind the ingredients together while keeping your pancakes delicious!

How do I make Bunny Butt Pancakes gluten-free?

Making Bunny Butt Pancakes gluten-free is easy! Simply replace the all-purpose flour with a gluten-free flour blend. Many blends are available that work well in pancake recipes. Just ensure that the blend you choose is suitable for baking. You may also want to add a teaspoon of xanthan gum to help with the texture. Enjoy your gluten-free Bunny Butt Pancakes without missing out on the fun!

Can I freeze Bunny Butt Pancakes?

Yes, you can freeze Bunny Butt Pancakes! To freeze, allow the pancakes to cool completely. Then, place parchment paper between each pancake to prevent them from sticking together. Store them in a freezer-safe bag or container. They can last up to two months in the freezer. When you’re ready to eat, simply reheat them in the toaster or microwave for a quick and tasty breakfast!

Conclusion on Bunny Butt Pancakes Recipe

In conclusion, Bunny Butt Pancakes are not just a delightful breakfast option; they are a fun and creative way to start your day. With their adorable presentation and fluffy texture, these pancakes bring joy to the breakfast table. Whether you’re celebrating a special occasion or simply enjoying a weekend morning, Bunny Butt Pancakes are sure to impress everyone in your family.

By following the simple recipe and tips provided, you can create a delicious stack of Bunny Butt Pancakes that will have everyone smiling. Remember, the key to perfect pancakes lies in the preparation and cooking techniques. Don’t be afraid to experiment with different flavors and toppings to make them your own!

So, gather your ingredients, invite your family into the kitchen, and enjoy the process of making these charming pancakes together. The laughter and creativity shared during this cooking adventure will make the meal even more special. Happy cooking, and may your mornings be filled with the joy of Bunny Butt Pancakes!

Loaded Salmon Rice Bowl Recipe: A Quick Delight!

Introduction to the Loaded Salmon Rice Bowl Recipe

Loaded Salmon Rice Bowl Recipe is here to satisfy your cravings. This dish combines tender salmon, fresh vegetables, and fluffy rice, creating a delightful harmony of flavors and textures. Whether you’re cooking for yourself or hosting a dinner party, this recipe is sure to impress.

What Makes the Loaded Salmon Rice Bowl Recipe Special?

What sets this recipe apart is its versatility and health benefits. First, the salmon is rich in omega-3 fatty acids, which are great for heart health. Plus, it’s packed with protein, making it a filling option for any meal. The addition of fresh ingredients like cherry tomatoes, avocado, and baby spinach not only enhances the flavor but also boosts the nutritional value.

Moreover, this recipe allows for creativity. You can easily swap out ingredients based on your preferences or what you have on hand. Want to add a spicy kick? Drizzle some sriracha on top! Prefer a different protein? Grilled chicken or tofu works wonderfully too. The possibilities are endless!

In just a few simple steps, you can create a vibrant and satisfying meal that’s perfect for lunch or dinner. So, let’s dive into the ingredients and get cooking!

Ingredients for the Loaded Salmon Rice Bowl Recipe

Loaded Salmon Rice Bowl Recipe, you’ll need a variety of fresh and flavorful ingredients. Here’s what you’ll need:

  • 2 cups cooked white or brown rice
  • 1 pound salmon fillet
  • 2 tablespoons olive oil
  • 1 teaspoon garlic powder
  • 1 teaspoon paprika
  • Salt and pepper to taste
  • 1 cup cherry tomatoes, halved
  • 1 avocado, sliced
  • 1 cup baby spinach
  • 1/4 cup crumbled feta cheese
  • 2 tablespoons fresh lemon juice
  • 1 tablespoon chopped fresh dill (optional)

These ingredients come together to create a delicious and colorful meal. The salmon provides a rich source of protein, while the vegetables add crunch and freshness. The feta cheese gives a creamy texture, and the lemon juice brightens the dish. Feel free to adjust the quantities based on your preferences or the number of servings you need!

Now that you have your ingredients ready, let’s move on to the step-by-step preparation of this delightful rice bowl.

Step-by-Step Preparation of the Loaded Salmon Rice Bowl Recipe

Loaded Salmon Rice Bowl Recipe. Each step is designed to ensure that your meal is not only delicious but also easy to make.

Step 1: Preparing the Salmon

First, preheat your oven to 400°F. This temperature is perfect for cooking salmon, allowing it to become flaky and tender. While the oven heats up, line a baking sheet with parchment paper. This will prevent the salmon from sticking and make cleanup a breeze.

Next, place the salmon fillet on the prepared baking sheet. Drizzle it with olive oil, ensuring it’s well-coated. Then, sprinkle garlic powder, paprika, salt, and pepper over the salmon. These seasonings will enhance the flavor, making your dish even more enjoyable. Once seasoned, it’s time to bake!

Put the salmon in the oven and bake for 12-15 minutes. You’ll know it’s done when it flakes easily with a fork. This step is crucial, as perfectly cooked salmon is the star of your rice bowl!

Step 2: Cooking the Rice

While the salmon is baking, you can prepare the rice. If you haven’t cooked it yet, follow the package instructions for either white or brown rice. Both options work well, so choose based on your preference.

Once the rice is cooked, fluff it with a fork to separate the grains. This will give your rice a light and airy texture, making it a perfect base for your bowl. If you’re using leftover rice, simply reheat it in the microwave or on the stove until warm.

Step 3: Assembling the Bowl

Now comes the fun part—assembling your loaded salmon rice bowl! In a large bowl, combine the cooked rice, halved cherry tomatoes, baby spinach, and fresh lemon juice. Toss everything gently to mix. The lemon juice adds a refreshing zing that brightens the flavors.

Once your rice mixture is ready, it’s time to add the star ingredient: the salmon! Remove the salmon from the oven and let it cool for a few minutes. Then, flake the salmon into large pieces and add it to the rice mixture. This step ensures that every bite is packed with flavor.

Step 4: Adding Toppings

Finally, it’s time to add the finishing touches to your loaded salmon rice bowl. Divide the rice and salmon mixture among four bowls. Top each bowl with sliced avocado, crumbled feta cheese, and chopped fresh dill if you’re using it. These toppings not only add flavor but also make your dish visually appealing.

Loaded Salmon Rice Bowl Recipe is ready to be served. Enjoy it immediately for a delightful meal that’s both healthy and satisfying.

Variations of the Loaded Salmon Rice Bowl Recipe

Loaded Salmon Rice Bowl Recipe is not only delicious but also incredibly versatile. You can easily customize it to suit your taste or dietary needs. Here are some exciting variations to consider:

Alternative Proteins

If you’re not a fan of salmon or want to try something different, there are plenty of alternative proteins you can use. Grilled chicken is a popular choice, offering a lean source of protein. Simply season and cook it the same way as the salmon. For a vegetarian option, consider using tofu. Marinate it in your favorite sauce, then grill or bake until golden. Another great option is shrimp, which cooks quickly and adds a delightful seafood flavor. No matter what protein you choose, you’ll still enjoy a hearty and satisfying meal!

Different Rice Options

While white and brown rice are classic choices, you can switch things up with other grains. Quinoa is a fantastic alternative, packed with protein and fiber. It has a nutty flavor that complements the salmon beautifully. Another option is cauliflower rice, which is low in carbs and adds a unique texture. For a more exotic twist, try using jasmine or basmati rice. These fragrant rice varieties will elevate your dish and make it even more enjoyable. Feel free to experiment with different grains to find your favorite combination!

Creative Toppings

Loaded Salmon Rice Bowl Recipe shine. While avocado and feta cheese are delicious, you can get creative with other toppings. Consider adding sliced radishes for a crunchy bite or pickled onions for a tangy kick. You could also sprinkle some sesame seeds or chopped nuts for added texture. Fresh herbs like cilantro or parsley can brighten the dish even more. Don’t hesitate to mix and match toppings based on what you love or have on hand. The possibilities are endless!

Cooking Note for the Loaded Salmon Rice Bowl Recipe

Loaded Salmon Rice Bowl Recipe, there are a few cooking notes to keep in mind to ensure your dish turns out perfectly every time. These tips will help you achieve the best flavor and texture, making your meal even more enjoyable.

First, always choose fresh salmon for the best taste. Fresh salmon has a vibrant color and a pleasant smell. If you can, buy it from a trusted fishmonger or grocery store. If you opt for frozen salmon, make sure to thaw it completely before cooking. This will help it cook evenly and maintain its moisture.

Next, pay attention to the cooking time. Salmon can easily overcook, leading to a dry texture. Keep an eye on it while it bakes. The fish is done when it flakes easily with a fork and has a slightly opaque appearance. If you have a meat thermometer, aim for an internal temperature of 145°F for perfectly cooked salmon.

Additionally, feel free to adjust the seasonings to your liking. If you enjoy a bolder flavor, consider adding more garlic powder or paprika. You can also experiment with other spices like cumin or chili powder for a unique twist. Remember, cooking is all about personal preference, so don’t hesitate to make it your own!

Loaded Salmon Rice Bowl Recipe!

Serving Suggestions for the Loaded Salmon Rice Bowl Recipe

Loaded Salmon Rice Bowl Recipe, presentation is key! A beautifully arranged bowl not only looks appetizing but also enhances the dining experience. Here are some serving suggestions to elevate your meal:

  • Use Colorful Bowls: Choose vibrant bowls that contrast with the colors of your ingredients. This will make your dish pop and look more inviting.
  • Garnish with Fresh Herbs: A sprinkle of fresh herbs like dill, parsley, or cilantro can add a burst of color and flavor. It’s a simple touch that makes a big difference!
  • Serve with Lemon Wedges: Adding lemon wedges on the side allows guests to squeeze fresh juice over their bowls. This extra zing can brighten the flavors even more.
  • Pair with a Side Salad: A light side salad with mixed greens, cucumbers, and a simple vinaigrette complements the rice bowl perfectly. It adds crunch and freshness to the meal.
  • Offer a Variety of Sauces: Consider serving your rice bowl with a selection of sauces, such as sriracha, tahini, or a yogurt-based sauce. This allows everyone to customize their bowl to their taste.
  • Include a Drink: Pair your meal with a refreshing drink. Iced tea, sparkling water, or a light white wine can enhance the overall dining experience.

Loaded Salmon Rice Bowl Recipe more appealing but also create a delightful atmosphere for you and your guests. Enjoy every bite and the company you share it with!

Tips for Perfecting the Loaded Salmon Rice Bowl Recipe

Loaded Salmon Rice Bowl Recipe, a few tips can help you elevate your dish to the next level. These simple yet effective suggestions will ensure that every bowl is bursting with flavor and texture.

First, always season your ingredients well. The salmon benefits greatly from a good amount of seasoning. Don’t be shy with the salt and pepper! A well-seasoned dish is key to enhancing the natural flavors of the ingredients.

Next, consider marinating the salmon before cooking. A quick marinade of olive oil, lemon juice, and your favorite herbs can add depth to the flavor. Just 30 minutes in the marinade can make a big difference!

When it comes to the rice, try adding a bit of flavor while cooking. You can use vegetable or chicken broth instead of water for cooking the rice. This small change will infuse the rice with extra taste, making it a more delicious base for your bowl.

Don’t forget about the texture! Mixing in some crunchy elements can make your dish more exciting. Consider adding toasted nuts or seeds, like sunflower seeds or slivered almonds, for a delightful crunch.

For the vegetables, feel free to experiment with different types. Roasted bell peppers, cucumbers, or even shredded carrots can add color and flavor. The more variety you include, the more interesting your bowl will be!

Lastly, serve your rice bowl immediately after assembling. This ensures that the ingredients remain fresh and vibrant. If you let it sit too long, the textures may change, and the dish may lose its appeal.

Loaded Salmon Rice Bowl Recipe that’s not only delicious but also visually stunning. Enjoy the process and have fun experimenting with flavors!

Breakdown of Time for the Loaded Salmon Rice Bowl Recipe

Loaded Salmon Rice Bowl Recipe can help you plan your cooking efficiently. Here’s a quick breakdown of the time required for preparation and cooking:

Prep Time

The prep time for this recipe is approximately 10-15 minutes. During this time, you will gather all your ingredients, wash and chop the vegetables, and season the salmon. Having everything ready before you start cooking makes the process smoother and more enjoyable.

Cooking Time

Loaded Salmon Rice Bowl Recipe is about 15-20 minutes. This includes baking the salmon for 12-15 minutes and cooking the rice, which can vary depending on whether you are using white or brown rice. Brown rice typically takes longer to cook, so plan accordingly if you choose that option.

Total Time

Loaded Salmon Rice Bowl Recipe into your schedule!

Nutritional Information for the Loaded Salmon Rice Bowl Recipe

Loaded Salmon Rice Bowl Recipe not only tastes great but also provides a variety of nutrients. Here’s a breakdown of the key nutritional information per serving:

Calories

Loaded Salmon Rice Bowl Recipe contains approximately 450 calories. This makes it a satisfying meal that can fit well into your daily caloric intake. The combination of salmon, rice, and fresh vegetables ensures that you’re getting a hearty meal without excessive calories.

Protein

Protein is vital for muscle repair and overall health. This recipe packs in about 30 grams of protein per serving, primarily from the salmon. This high protein content helps keep you feeling full and energized throughout the day. It’s an excellent choice for those looking to increase their protein intake while enjoying a delicious meal.

Sodium

When it comes to sodium, each serving contains around 600 milligrams. This amount is reasonable for a meal, especially considering the use of seasonings and feta cheese. However, if you’re watching your sodium intake, you can easily adjust the salt used in the recipe. Opting for low-sodium feta or skipping added salt can help lower the sodium content without sacrificing flavor.

Loaded Salmon Rice Bowl Recipe is a nutritious option that provides a good balance of calories, protein, and sodium. It’s a meal that not only satisfies your taste buds but also supports your health goals. Enjoy this delicious bowl knowing you’re making a smart choice for your body!

FAQs about the Loaded Salmon Rice Bowl Recipe

Can I use frozen salmon for the Loaded Salmon Rice Bowl Recipe?

Loaded Salmon Rice Bowl Recipe. Just make sure to thaw it completely before cooking. You can do this by placing it in the refrigerator overnight or using the defrost setting on your microwave. Thawing ensures that the salmon cooks evenly and retains its moisture, giving you a delicious result.

What can I substitute for rice in the Loaded Salmon Rice Bowl Recipe?

Loaded Salmon Rice Bowl Recipe, there are several great options. Quinoa is a popular choice, as it’s high in protein and has a nutty flavor. Cauliflower rice is another excellent low-carb alternative, providing a unique texture. You could also try farro or barley for a hearty grain option. Each of these substitutes will add a different twist to your dish while keeping it nutritious!

How can I make the Loaded Salmon Rice Bowl Recipe spicier?

Loaded Salmon Rice Bowl Recipe, consider drizzling sriracha or your favorite hot sauce over the top before serving. You can also mix in some red pepper flakes or cayenne pepper with the seasonings for the salmon. If you enjoy spicy flavors, adding jalapeños or diced chili peppers to the rice mixture can give it an extra kick. Adjust the spice level to your liking for a bowl that’s bursting with flavor!

Is the Loaded Salmon Rice Bowl Recipe healthy?

Loaded Salmon Rice Bowl Recipe is a healthy meal option. It features salmon, which is rich in omega-3 fatty acids and protein, along with fresh vegetables that provide essential vitamins and minerals. The use of whole grains like brown rice or quinoa adds fiber, promoting digestive health. Overall, this dish is balanced and nutritious, making it a great choice for anyone looking to eat healthily while enjoying a delicious meal.

Conclusion on the Loaded Salmon Rice Bowl Recipe

Loaded Salmon Rice Bowl Recipe is a fantastic choice for anyone seeking a quick, nutritious, and flavorful meal. With its combination of tender salmon, vibrant vegetables, and fluffy rice, this dish is not only satisfying but also visually appealing. The versatility of the recipe allows you to customize it to your liking, making it suitable for various dietary preferences and occasions.

Whether you’re preparing a weeknight dinner or impressing guests at a gathering, this rice bowl is sure to be a hit. The health benefits of salmon, along with the fresh ingredients, make it a smart choice for those looking to maintain a balanced diet. Plus, the ease of preparation means you can enjoy a delicious meal without spending hours in the kitchen.

As you explore the different variations and toppings, don’t hesitate to get creative. Experimenting with flavors and textures can lead to delightful new combinations that you and your family will love. Remember, cooking is all about enjoying the process and sharing good food with loved ones.

Loaded Salmon Rice Bowl Recipe. Happy cooking!

Creamy Green Bean Casserole Recipe is a must-try!

Introduction to Creamy Green Bean Casserole Recipe

The History of Green Bean Casserole

The creamy green bean casserole has a rich history that dates back to the 1950s. It was created by a home economist named Dorcas Reilly. She developed this dish for the Campbell Soup Company, aiming to provide a simple yet delicious recipe using their cream of mushroom soup. The casserole quickly became a staple at holiday dinners, especially during Thanksgiving. Over the years, it has evolved, with many families adding their unique twists. Today, it remains a beloved comfort food, often associated with family gatherings and festive occasions.

Why You Should Try This Creamy Green Bean Casserole Recipe

This creamy green bean casserole recipe is not just easy to make; it’s also packed with flavor. The combination of fresh green beans, creamy mushroom soup, and crispy fried onions creates a delightful texture and taste. Plus, it’s a versatile dish that can be customized to suit your preferences. Whether you’re looking for a side dish for a holiday feast or a comforting meal on a weeknight, this casserole fits the bill. It’s a great way to incorporate vegetables into your diet while satisfying your taste buds. So, gather your ingredients and get ready to enjoy a classic dish that’s sure to please everyone at the table!

Ingredients for Creamy Green Bean Casserole Recipe

To create a delicious creamy green bean casserole, you’ll need a few simple ingredients. Each component plays a vital role in achieving that perfect blend of flavors and textures. Here’s what you’ll need:

  • 1 pound fresh green beans: Trimmed and cut into 2-inch pieces for the best texture.
  • 1 can (10.5 ounces) cream of mushroom soup: This is the base of your creamy sauce, adding richness and flavor.
  • 1 cup milk: Helps to thin out the soup and create a creamy consistency.
  • 1 teaspoon soy sauce: Adds a savory depth to the dish.
  • 1 teaspoon garlic powder: For a hint of garlic flavor that complements the green beans.
  • 1/2 teaspoon black pepper: A touch of spice to enhance the overall taste.
  • 1 cup French fried onions: These crispy onions are essential for that crunchy topping.

These ingredients come together to create a comforting dish that’s perfect for any occasion. Feel free to adjust the quantities based on your preferences or dietary needs. For instance, if you love cheese, consider adding shredded cheddar for an extra layer of flavor. Now that you have your ingredients ready, let’s move on to the preparation steps!

Step-by-Step Preparation of Creamy Green Bean Casserole Recipe

Step 1: Prepping the Green Beans

First things first, let’s get those green beans ready! Start by washing them thoroughly under cold water. This step ensures that any dirt or residue is removed. Next, trim the ends of the beans and cut them into 2-inch pieces. This size is perfect for even cooking and easy serving. Once you’ve prepped the green beans, it’s time to blanch them. Bring a large pot of water to a boil. Carefully add the green beans and let them cook for about 5 minutes. You want them to be bright green and tender-crisp. After that, drain the beans and set them aside. This quick blanching helps to lock in their vibrant color and flavor.

Step 2: Making the Creamy Sauce

Now, let’s whip up that creamy sauce! In a mixing bowl, combine the cream of mushroom soup, milk, soy sauce, garlic powder, and black pepper. Use a whisk or a spoon to stir everything together until it’s well blended. This mixture will be the heart of your casserole, providing that rich and creamy texture. The soy sauce adds a savory touch, while the garlic powder gives it a nice flavor boost. Make sure there are no lumps in the mixture; it should be smooth and creamy. Once it’s ready, you can move on to the next step!

Step 3: Combining Ingredients

With your green beans prepped and the creamy sauce made, it’s time to combine everything. In a large bowl, add the blanched green beans to the creamy sauce. Gently stir until all the beans are evenly coated. This step is crucial because you want every bite to be deliciously creamy. Once the beans are well mixed with the sauce, transfer the entire mixture into a 1.5-quart baking dish. Spread it out evenly to ensure even cooking. This will help the casserole bake perfectly, giving you that delightful texture you’re looking for.

Step 4: Baking the Casserole

Now comes the exciting part—baking! Preheat your oven to 350°F. Place the baking dish in the oven and let it bake for about 25 minutes. This allows the flavors to meld together beautifully. After 25 minutes, carefully remove the casserole from the oven. It’s time to add the finishing touch! Sprinkle the French fried onions on top. These crispy onions will add a wonderful crunch to your dish. Return the casserole to the oven and bake for an additional 10 minutes, or until the onions are golden brown. Once done, let it cool for a few minutes before serving. Your creamy green bean casserole is now ready to be enjoyed!

Variations of Creamy Green Bean Casserole Recipe

Vegetarian Options

If you’re looking for a vegetarian twist on the classic creamy green bean casserole, you’re in luck! This dish is naturally vegetarian-friendly, thanks to its base of green beans and cream of mushroom soup. To enhance the flavors, consider adding sautéed mushrooms or bell peppers. These additions not only boost the taste but also add more texture. You can also substitute the cream of mushroom soup with a homemade version using vegetable broth and a mix of your favorite vegetables. This way, you can control the ingredients and make it even healthier!

Gluten-Free Alternatives

For those who need a gluten-free option, it’s easy to adapt this creamy green bean casserole recipe. Start by using gluten-free cream of mushroom soup, which is available in many grocery stores. You can also make your own by thickening vegetable broth with cornstarch or gluten-free flour. Additionally, check the label on the French fried onions, as some brands may contain gluten. If you can’t find gluten-free fried onions, consider topping your casserole with crushed gluten-free crackers or even crispy rice cereal for that satisfying crunch!

Adding Protein to Your Casserole

Want to make your creamy green bean casserole heartier? Adding protein is a great way to do it! You can mix in cooked diced chicken or turkey for a delicious twist. This not only enhances the flavor but also makes it a complete meal. If you prefer a vegetarian protein source, consider adding cooked lentils or chickpeas. These options will provide a satisfying texture and boost the nutritional value of your dish. No matter which protein you choose, it will surely elevate your casserole to the next level!

Cooking Note for Creamy Green Bean Casserole Recipe

When preparing your creamy green bean casserole, there are a few important cooking notes to keep in mind. These tips will help ensure that your dish turns out perfectly every time.

First, always use fresh green beans for the best flavor and texture. If fresh beans are not available, frozen green beans can be a good alternative. Just make sure to thaw and drain them before using. Canned green beans can also work, but they may not provide the same crispness.

Next, be mindful of the baking time. Ovens can vary in temperature, so keep an eye on your casserole as it bakes. You want the green beans to be tender but not mushy. If you notice that the onions are browning too quickly, you can cover the dish loosely with aluminum foil to prevent burning.

Additionally, if you prefer a creamier casserole, feel free to add more milk or even a splash of heavy cream to the sauce mixture. This will enhance the richness and make every bite even more delightful.

Lastly, let the casserole cool for a few minutes before serving. This allows the flavors to settle and makes it easier to scoop out portions. Enjoy your creamy green bean casserole as a comforting side dish or a hearty main course!

Serving Suggestions for Creamy Green Bean Casserole Recipe

Pairing with Main Dishes

When it comes to serving your creamy green bean casserole, the right main dish can elevate your meal. This casserole pairs wonderfully with a variety of proteins. For a classic combination, serve it alongside roasted turkey or chicken. The savory flavors of the casserole complement the juicy meat perfectly.

If you’re in the mood for something different, consider pairing it with grilled salmon. The richness of the fish balances nicely with the creamy texture of the casserole. For a vegetarian option, a hearty stuffed bell pepper or a savory vegetable lasagna can make a delightful match. These pairings not only enhance the meal but also create a colorful and appetizing plate.

Don’t forget about the sides! A fresh garden salad or some crusty bread can round out your meal beautifully. The crispness of the salad adds a refreshing contrast to the creamy casserole, while the bread is perfect for soaking up any leftover sauce. With these pairings, your creamy green bean casserole will shine as a star on the dinner table!

Ideal Occasions for Serving

This creamy green bean casserole is a versatile dish that fits perfectly into many occasions. It’s a staple at holiday gatherings, especially Thanksgiving and Christmas. Its comforting flavors and creamy texture make it a favorite among family and friends.

However, you don’t have to wait for a holiday to enjoy it! This casserole is also great for potlucks, picnics, or casual family dinners. It’s easy to prepare in advance, making it a convenient choice for busy weeknights. Just pop it in the oven when you’re ready to eat, and you’ll have a delicious side dish in no time.

Additionally, if you’re hosting a brunch, consider serving this casserole as a unique side. It pairs well with breakfast items like quiche or scrambled eggs. No matter the occasion, your creamy green bean casserole is sure to impress and satisfy everyone at the table!

Tips for Perfecting Your Creamy Green Bean Casserole Recipe

To make your creamy green bean casserole truly shine, consider these helpful tips. They will ensure that your dish is not only delicious but also visually appealing and satisfying.

First, always choose fresh green beans when possible. Fresh beans have a crisp texture and vibrant color that frozen or canned beans may lack. If you must use frozen beans, make sure to thaw and drain them thoroughly to avoid excess moisture in your casserole.

Next, don’t skip the blanching step! Blanching the green beans before mixing them with the sauce helps to maintain their bright color and crispness. It also ensures that they cook evenly in the oven, resulting in a perfect texture.

For an extra layer of flavor, consider adding herbs or spices to your creamy sauce. A pinch of thyme or a dash of paprika can elevate the taste and make your casserole stand out. Experiment with different seasonings to find your favorite combination!

When it comes to the French fried onions, feel free to get creative. You can mix in some crushed garlic or even sprinkle a bit of cheese on top before baking. This will add a delightful crunch and enhance the overall flavor of your casserole.

Lastly, let your casserole rest for a few minutes after baking. This allows the flavors to meld together and makes it easier to serve. Plus, it gives you a moment to enjoy the delicious aroma wafting through your kitchen!

By following these tips, you’ll create a creamy green bean casserole that’s not only comforting but also a hit at any gathering. Enjoy the process and the delightful results!

Breakdown of Time for Creamy Green Bean Casserole Recipe

Prep Time

Getting everything ready for your creamy green bean casserole is a breeze! The prep time for this recipe is approximately 15 minutes. This includes washing and trimming the green beans, making the creamy sauce, and combining all the ingredients. With a little organization, you can have everything prepped and ready to go in no time!

Cooking Time

Once your casserole is assembled, it’s time to bake! The cooking time is about 35 minutes. First, you’ll bake the casserole for 25 minutes to allow the flavors to meld. Then, you’ll add the crispy French fried onions and bake for an additional 10 minutes. This step ensures that the onions become golden brown and crunchy, adding that perfect finishing touch to your dish.

Total Time

In total, you can expect to spend around 50 minutes from start to finish. This includes both prep and cooking time. With such a quick turnaround, this creamy green bean casserole is an excellent choice for busy weeknights or special occasions. You’ll have a delicious and comforting dish ready to serve in less than an hour!

Nutritional Information for Creamy Green Bean Casserole Recipe

Calories

When it comes to enjoying your creamy green bean casserole, knowing the calorie content can help you make informed choices. Each serving of this delightful dish contains approximately 180 calories. This makes it a relatively light option, especially when compared to other creamy casseroles. The balance of ingredients ensures that you can indulge without feeling guilty. Plus, with the addition of fresh green beans, you’re also getting a serving of vegetables!

Protein Content

Protein is an essential nutrient, and this creamy green bean casserole provides a modest amount. Each serving contains about 4 grams of protein. While this may not seem like a lot, it can be boosted by adding protein-rich ingredients like cooked chicken or turkey. If you’re looking for a vegetarian option, consider mixing in lentils or chickpeas. These additions will not only enhance the protein content but also make your casserole more filling and nutritious.

Sodium Levels

Sodium is another important factor to consider, especially for those watching their salt intake. Each serving of the creamy green bean casserole contains around 500 milligrams of sodium. This level is typical for many casseroles, primarily due to the cream of mushroom soup and soy sauce. If you’re concerned about sodium, you can opt for low-sodium versions of these ingredients. This simple swap can help reduce the overall sodium content while still keeping the dish flavorful.

FAQs about Creamy Green Bean Casserole Recipe

Can I make Creamy Green Bean Casserole ahead of time?

Absolutely! Making your creamy green bean casserole ahead of time is a great idea. You can prepare the entire dish, cover it, and store it in the refrigerator for up to 24 hours before baking. When you’re ready to serve, simply pop it in the oven. You may need to add a few extra minutes to the baking time since it will be cold from the fridge. This makes it a convenient option for busy days or holiday gatherings!

What can I substitute for cream of mushroom soup in the recipe?

If you don’t have cream of mushroom soup on hand or prefer a different flavor, there are several substitutes you can use. One option is to make a homemade version using sautéed mushrooms, heavy cream, and a bit of flour to thicken it. Alternatively, you can use cream of chicken soup or even a creamy vegetable soup for a different twist. Just ensure that the substitute maintains a similar creamy consistency for the best results!

How do I store leftovers of Creamy Green Bean Casserole?

Storing leftovers is easy! Allow the casserole to cool completely before transferring it to an airtight container. You can keep it in the refrigerator for up to 3-4 days. If you want to store it for a longer period, consider freezing it. Just make sure to use a freezer-safe container. When you’re ready to enjoy it again, thaw it in the fridge overnight and reheat in the oven until warmed through. This way, you can savor the deliciousness of your creamy green bean casserole even after the initial meal!

Can I use fresh green beans instead of canned?

Yes, you can definitely use fresh green beans instead of canned! In fact, fresh green beans will give your casserole a better texture and flavor. Just remember to blanch them first, as mentioned in the preparation steps. This quick cooking process helps to maintain their vibrant color and crispness. Fresh green beans will elevate your dish and make it even more enjoyable!

Conclusion on Creamy Green Bean Casserole Recipe

In conclusion, the creamy green bean casserole recipe is a delightful dish that brings comfort and joy to any table. Its rich history and versatility make it a favorite among families and friends alike. Whether you’re preparing it for a holiday feast or a casual weeknight dinner, this casserole is sure to impress.

With simple ingredients and easy preparation steps, you can create a dish that is both delicious and satisfying. The combination of fresh green beans, creamy mushroom soup, and crispy fried onions creates a perfect harmony of flavors and textures. Plus, the variations allow you to customize it to suit your dietary needs and preferences.

As you gather around the table to enjoy this classic dish, remember that it’s not just about the food. It’s about the memories you create with loved ones. So, don’t hesitate to share this creamy green bean casserole recipe with family and friends. They’ll appreciate the effort and love you put into making it.

Now that you have all the tips and tricks, it’s time to roll up your sleeves and get cooking! Enjoy every bite of your creamy green bean casserole, and may it become a cherished part of your family traditions for years to come.

Savory Dutch Oven Corned Beef is a must-try dish!

Introduction to Savory Corned Beef in a Dutch Oven

savory corned beef in a Dutch oven. This classic recipe not only warms the soul but also brings families together around the dinner table. The combination of tender corned beef, vibrant vegetables, and aromatic spices creates a delightful experience for your taste buds. Plus, cooking in a Dutch oven ensures that every ingredient melds beautifully, resulting in a dish that is both comforting and satisfying.

What Makes Savory Corned Beef in a Dutch Oven Special?

One of the standout features of preparing corned beef in a Dutch oven is the even heat distribution. This cooking method allows the meat to become incredibly tender while absorbing all the flavors from the spices and vegetables. The heavy lid traps moisture, creating a steamy environment that enhances the dish’s overall taste. Additionally, the Dutch oven is versatile; you can use it on the stovetop or in the oven, making it perfect for any cooking style.

savory corned beef in a Dutch oven is sure to impress. So, roll up your sleeves and get ready to savor every bite of this delicious dish!

Ingredients for Savory Corned Beef in a Dutch Oven

savory corned beef in a Dutch oven, you’ll need a selection of fresh ingredients that work together to enhance the dish’s flavor. Here’s what you’ll need:

  • 3 to 4 pounds corned beef brisket: This is the star of the dish, providing rich flavor and tenderness.
  • 1 tablespoon black peppercorns: These add a warm, spicy kick to the meat.
  • 1 tablespoon mustard seeds: Mustard seeds bring a tangy flavor that complements the beef.
  • 1 tablespoon coriander seeds: These seeds add a citrusy note, balancing the dish.
  • 1 teaspoon allspice berries: Allspice offers a hint of sweetness and warmth.
  • 1 bay leaf: This herb infuses the broth with a subtle depth of flavor.
  • 4 cloves garlic, minced: Garlic enhances the overall taste with its aromatic qualities.
  • 1 large onion, quartered: Onions add sweetness and richness to the dish.
  • 4 large carrots, cut into 2-inch pieces: Carrots provide a natural sweetness and vibrant color.
  • 4 medium potatoes, quartered: Potatoes make the meal hearty and filling.
  • 1 small head of cabbage, cut into wedges: Cabbage adds a crunchy texture and absorbs the flavors.
  • 4 cups beef broth: This forms the base of the cooking liquid, enhancing the beef’s flavor.
  • 2 cups water: Water helps to create the right consistency for the broth.
  • 1 tablespoon apple cider vinegar: This adds a touch of acidity, brightening the dish.

savory corned beef in a Dutch oven. Each component plays a vital role in creating a meal that is not only satisfying but also bursting with flavor. Now that you have everything ready, let’s move on to the preparation steps!

Step-by-Step Preparation of Savory Corned Beef in a Dutch Oven

savory corned beef in a Dutch oven. Each step is designed to ensure that your dish turns out perfectly tender and flavorful. Let’s get started!

Step 1: Preparing the Ingredients

First, you need to prepare your ingredients. Rinse the corned beef brisket under cold water. This helps remove excess salt, making the meat more palatable. After rinsing, pat it dry with paper towels. Next, chop your vegetables. Cut the carrots into 2-inch pieces, quarter the potatoes, and cut the cabbage into wedges. Mince the garlic and quarter the onion. Having everything prepped will make the cooking process smoother and more enjoyable.

Step 2: Searing the Corned Beef

savory corned beef in a Dutch oven.

Step 3: Adding Vegetables and Spices

After searing, it’s time to add the vegetables and spices. Sprinkle the spice mixture you prepared earlier all over the brisket. Then, add the minced garlic, quartered onion, carrots, potatoes, and cabbage around the brisket in the Dutch oven. This colorful medley not only looks appealing but also infuses the meat with wonderful flavors as it cooks.

Step 4: Cooking in the Dutch Oven

Now, pour the beef broth and water over the brisket and vegetables. Add the apple cider vinegar for a touch of acidity. Cover the Dutch oven with its lid and place it in your preheated oven at 300°F (150°C). Let it cook for 3 to 4 hours. The low and slow cooking method will make the meat incredibly tender and flavorful. You’ll know it’s done when the brisket easily pulls apart with a fork.

Step 5: Resting and Slicing the Corned Beef

Once your corned beef is cooked to perfection, carefully remove the Dutch oven from the oven. Let the brisket rest for about 10 minutes. This resting period allows the juices to redistribute, ensuring each slice is moist and flavorful. After resting, slice the corned beef against the grain. This technique helps keep the meat tender and easy to chew. Serve it with the vegetables and a spoonful of the delicious cooking liquid for an unforgettable meal!

Variations of Savory Corned Beef in a Dutch Oven

savory corned beef in a Dutch oven is delicious on its own, there are many ways to switch things up. Exploring different cuts of meat and experimenting with various vegetables and seasonings can lead to exciting new flavors. Let’s take a look at some variations that can elevate your dish!

Different Cuts of Meat to Use

Although corned beef brisket is the traditional choice, you can try other cuts for a unique twist. Here are a few options:

  • Chuck Roast: This cut is marbled with fat, making it juicy and flavorful. It can be a great alternative if you prefer a richer taste.
  • Round Roast: A leaner option, round roast can still be tender when cooked slowly. It’s perfect for those looking for a healthier choice.
  • Pork Shoulder: For a different flavor profile, consider using pork shoulder. It becomes incredibly tender and pairs well with the same spices.

Each of these cuts brings its own unique flavor and texture to the dish. Feel free to experiment and find your favorite!

Alternative Vegetables and Seasonings

savory corned beef in a Dutch oven. Here are some ideas:

  • Brussels Sprouts: These mini cabbages can replace the traditional cabbage. They add a nutty flavor and a delightful crunch.
  • Green Beans: Fresh green beans can be a colorful addition. They cook quickly and add a nice texture to the dish.
  • Parsnips: For a sweeter taste, try adding parsnips. They complement the carrots beautifully and enhance the overall flavor.
  • Herbs: Consider adding fresh herbs like thyme or rosemary for an aromatic touch. They can elevate the dish and add depth to the flavors.

savory corned beef in a Dutch oven that suits your taste. Enjoy the process of experimenting and discovering new favorites!

Cooking Note for Savory Corned Beef in a Dutch Oven

savory corned beef in a Dutch oven is a delightful experience, but there are a few important notes to keep in mind to ensure your dish turns out perfectly. Understanding the nuances of cooking with a Dutch oven can make all the difference in flavor and texture.

First, always preheat your oven before placing the Dutch oven inside. This step is crucial as it allows the meat to cook evenly from the start. A consistent temperature helps break down the tough fibers in the brisket, resulting in tender meat.

Next, consider the size of your Dutch oven. It should be large enough to hold the brisket and all the vegetables without overcrowding. If the pot is too small, the ingredients may not cook evenly. A well-fitted Dutch oven allows for proper heat circulation, ensuring that every bite is flavorful.

Another key point is to avoid lifting the lid too often during cooking. Each time you open the lid, heat escapes, which can prolong cooking time. Trust the process! The lid traps steam, creating a moist environment that helps the meat become tender.

Lastly, don’t rush the resting period after cooking. Allowing the brisket to rest for about 10 minutes is essential. This step helps the juices redistribute throughout the meat, making each slice juicy and flavorful. Patience pays off in the end!

savory corned beef in a Dutch oven. Enjoy the process and the delicious results!

Serving Suggestions for Savory Corned Beef in a Dutch Oven

savory corned beef in a Dutch oven is ready, it’s time to think about how to serve it. The right sides and presentation can elevate your meal, making it even more enjoyable. Here are some fantastic serving suggestions to complement your delicious dish!

Pairing with Sides

When it comes to sides, you want to choose options that balance the rich flavors of the corned beef. Here are some classic pairings:

  • Colcannon: This traditional Irish dish made with mashed potatoes and cabbage is a perfect match. It adds creaminess and complements the corned beef beautifully.
  • Roasted Vegetables: A mix of seasonal vegetables, such as carrots, Brussels sprouts, and parsnips, roasted until caramelized can add a sweet and savory touch.
  • Irish Soda Bread: Serve slices of this hearty bread on the side. It’s great for soaking up the flavorful cooking liquid.
  • Pickles: A side of tangy pickles or pickled vegetables can provide a refreshing contrast to the rich meat.

These sides not only enhance the meal but also add variety to your plate. Feel free to mix and match based on your preferences and what you have on hand!

Creative Serving Ideas

To make your meal even more special, consider some creative serving ideas:

  • Build Your Own Sandwich: Slice the corned beef thinly and serve it on rye bread with mustard, sauerkraut, and Swiss cheese. This makes for a delicious sandwich that’s perfect for lunch or a casual dinner.
  • Corned Beef Hash: Use leftover corned beef to create a hearty hash. Sauté diced potatoes, onions, and the leftover meat in a skillet until crispy. Top with a fried egg for a satisfying breakfast or brunch option.
  • Soup: Transform leftovers into a comforting soup. Add the corned beef to a pot with broth, diced vegetables, and seasonings. Simmer until everything is heated through for a quick and tasty meal.
  • Garnish with Fresh Herbs: Before serving, sprinkle fresh parsley or chives over the dish. This adds a pop of color and freshness that brightens the flavors.

savory corned beef in a Dutch oven into a memorable dining experience. Enjoy experimenting with different presentations and flavors!

Tips for Perfecting Savory Corned Beef in a Dutch Oven

savory corned beef in a Dutch oven, consider these helpful tips. They can make a significant difference in flavor and texture, ensuring your dish is a hit every time.

First, always choose high-quality corned beef. Look for briskets that are well-marbled with fat. This fat will melt during cooking, keeping the meat juicy and flavorful. If possible, buy from a trusted butcher or a reputable brand.

Next, don’t skip the seasoning step. The spice mixture is essential for enhancing the flavor of the corned beef. Make sure to rub it generously over the meat. This allows the spices to penetrate deeply, resulting in a more flavorful dish.

Another tip is to layer your vegetables properly. Place heartier vegetables, like potatoes and carrots, at the bottom of the Dutch oven. They take longer to cook and will benefit from the heat rising from the brisket. Softer vegetables, like cabbage, should go on top, as they need less cooking time.

Additionally, consider adding a splash of beer or red wine to the cooking liquid. This can add depth and richness to the flavor profile. Just be sure to adjust the amount of broth or water accordingly to maintain the right consistency.

Lastly, let the corned beef rest after cooking. This step is crucial for juicy slices. If you slice it too soon, the juices will run out, leaving you with dry meat. Patience is key here!

savory corned beef in a Dutch oven. Enjoy the process and the delicious results!

Breakdown of Time for Savory Corned Beef in a Dutch Oven

savory corned beef in a Dutch oven can help you plan your meal better. Here’s a breakdown of the time you’ll need for preparation and cooking.

Prep Time

The prep time for this delicious dish is relatively short. You can expect to spend about 20 to 30 minutes getting everything ready. This includes rinsing the corned beef, chopping the vegetables, and mixing the spices. Having everything prepped in advance will make the cooking process smoother and more enjoyable.

Cooking Time

Once you have everything prepared, the cooking time is where the magic happens. You’ll need to cook the corned beef in the Dutch oven for about 3 to 4 hours at 300°F (150°C). This low and slow method allows the meat to become tender and flavorful. The exact time may vary depending on the size of your brisket, so keep an eye on it. You’ll know it’s done when it easily pulls apart with a fork.

Total Time

In total, you should plan for about 4 to 5 hours from start to finish. This includes both the prep and cooking times. While it may seem like a long time, most of it is hands-off cooking. You can use this time to relax or prepare your sides. The result will be a hearty and satisfying meal that’s well worth the wait!

Breakdown of Time for Savory Corned Beef in a Dutch Oven

savory corned beef in a Dutch oven can help you plan your meal better. Here’s a breakdown of the time you’ll need for preparation and cooking.

Prep Time

The prep time for this delicious dish is relatively short. You can expect to spend about 20 to 30 minutes getting everything ready. This includes rinsing the corned beef, chopping the vegetables, and mixing the spices. Having everything prepped in advance will make the cooking process smoother and more enjoyable. It’s a great way to ensure that you have all your ingredients at hand, making the cooking experience more efficient.

Cooking Time

Once you have everything prepared, the cooking time is where the magic happens. You’ll need to cook the corned beef in the Dutch oven for about 3 to 4 hours at 300°F (150°C). This low and slow method allows the meat to become tender and flavorful. The exact time may vary depending on the size of your brisket, so keep an eye on it. You’ll know it’s done when it easily pulls apart with a fork. This slow cooking process not only enhances the flavors but also ensures that the vegetables become perfectly tender.

Total Time

In total, you should plan for about 4 to 5 hours from start to finish. This includes both the prep and cooking times. While it may seem like a long time, most of it is hands-off cooking. You can use this time to relax or prepare your sides. The result will be a hearty and satisfying meal that’s well worth the wait! Plus, the aroma wafting through your home will surely build anticipation for this delightful dish.

Nutritional Information for Savory Corned Beef in a Dutch Oven

savory corned beef in a Dutch oven, this dish not only satisfies your taste buds but also provides a good amount of nutrients. Here’s a breakdown of the nutritional information per serving:

Calories

savory corned beef in a Dutch oven contains approximately 350 calories. This makes it a hearty meal that can keep you full and satisfied. The combination of protein, vegetables, and healthy fats contributes to the overall caloric content, making it a well-rounded dish.

Protein

Protein is a vital nutrient for building and repairing tissues in the body. In this recipe, you can expect about 30 grams of protein per serving. The corned beef brisket is the primary source of protein, providing essential amino acids that support muscle health and overall well-being. This makes it an excellent choice for those looking to increase their protein intake.

Sodium

While corned beef is known for its salty flavor, it’s important to be mindful of sodium intake. Each serving contains around 800 milligrams of sodium. This is primarily due to the curing process of the brisket. If you are watching your sodium levels, consider rinsing the brisket thoroughly before cooking and using low-sodium beef broth. This can help reduce the overall sodium content while still delivering a delicious meal.

savory corned beef in a Dutch oven while being aware of its health benefits. It’s a delightful dish that can fit into a balanced diet when enjoyed in moderation!

FAQs about Savory Corned Beef in a Dutch Oven

How long does it take to cook corned beef in a Dutch oven?

Cooking corned beef in a Dutch oven typically takes about 3 to 4 hours at 300°F (150°C). This low and slow method allows the meat to become tender and flavorful. The exact time may vary based on the size of your brisket. You’ll know it’s ready when it easily pulls apart with a fork. Patience is key to achieving that melt-in-your-mouth texture!

Can I use a different type of meat for this recipe?

Absolutely! While corned beef brisket is the traditional choice, you can experiment with other cuts of meat. Options like chuck roast, round roast, or even pork shoulder can work well. Each cut brings its own unique flavor and texture to the dish. Just remember to adjust the cooking time as needed, depending on the cut you choose.

What are the best sides to serve with corned beef?

When it comes to sides, you have plenty of delicious options! Classic pairings include colcannon, roasted vegetables, and Irish soda bread. You can also serve tangy pickles for a refreshing contrast. These sides complement the rich flavors of the corned beef and add variety to your meal. Feel free to mix and match based on your preferences!

How do I store leftovers of Savory Corned Beef in a Dutch Oven?

Storing leftovers is easy! Allow the corned beef to cool completely before transferring it to an airtight container. You can keep it in the refrigerator for up to 3 to 4 days. If you want to store it for a longer period, consider freezing it. Wrap the corned beef tightly in plastic wrap and then place it in a freezer-safe bag. It can last for up to 2 to 3 months in the freezer. When you’re ready to enjoy it again, simply thaw it in the refrigerator overnight and reheat it gently on the stovetop or in the oven.

Conclusion on Savory Corned Beef in a Dutch Oven

savory corned beef in a Dutch oven is more than just a meal; it’s an experience that brings warmth and comfort to your dining table. The combination of tender meat, flavorful spices, and hearty vegetables creates a dish that is both satisfying and nourishing. Whether you’re preparing it for a special occasion or a cozy family dinner, this recipe is sure to impress.

As you’ve learned, the process of making corned beef in a Dutch oven is straightforward and rewarding. From the careful selection of ingredients to the slow cooking method, each step contributes to the rich flavors that define this classic dish. Plus, the versatility of the recipe allows you to customize it to your taste, whether by trying different cuts of meat or experimenting with various vegetables and seasonings.

savory corned beef in a Dutch oven can fit well into a balanced diet.

So, gather your ingredients, roll up your sleeves, and embark on this culinary adventure. You’ll not only create a delicious meal but also memories that will last a lifetime. Enjoy every bite of your savory corned beef, and don’t forget to share it with loved ones. Happy cooking!

Twisted Green Bean Casserole is a must-try recipe!

Introduction to Twisted Green Bean Casserole

Welcome to a delightful twist on a classic dish! The Twisted Green Bean Casserole is not just your average holiday side. It brings a fresh and exciting flavor profile that will impress your family and friends. This recipe combines the traditional elements of green bean casserole with some unique ingredients, making it a standout at any gathering.

Imagine tender green beans, sautéed mushrooms, and crispy fried onions all mingling together in a creamy, cheesy sauce. This dish is perfect for Thanksgiving, Christmas, or any family dinner. Plus, it’s easy to prepare, allowing you to spend more time with your loved ones and less time in the kitchen.

What sets this casserole apart is its versatility. You can easily customize it to suit your taste. Whether you want to add a bit of protein or swap out ingredients for healthier options, the possibilities are endless. This recipe is not only delicious but also encourages creativity in the kitchen.

So, roll up your sleeves and get ready to make a Twisted Green Bean Casserole that will have everyone asking for seconds. Let’s dive into the ingredients you’ll need to create this mouthwatering dish!

Ingredients for Twisted Green Bean Casserole

To create your very own Twisted Green Bean Casserole, you’ll need a selection of fresh and flavorful ingredients. Here’s what you’ll need:

  • 2 pounds fresh green beans, trimmed and cut into 2-inch pieces
  • 1 cup sliced mushrooms
  • 1 medium onion, diced
  • 2 cloves garlic, minced
  • 1 cup sour cream
  • 1 cup shredded cheddar cheese
  • 1 cup crispy fried onions (plus extra for topping)
  • 1 teaspoon salt
  • 1/2 teaspoon black pepper
  • 1/2 teaspoon garlic powder
  • 1/2 teaspoon onion powder
  • 1 tablespoon olive oil

These ingredients come together to create a rich and creamy casserole that’s bursting with flavor. The fresh green beans provide a crisp texture, while the sautéed mushrooms and onions add depth. The combination of sour cream and cheddar cheese gives it a creamy, cheesy goodness that everyone will love.

Feel free to get creative! You can swap out some ingredients or add your favorites. For instance, if you prefer a lighter version, consider using Greek yogurt instead of sour cream. Or, if you want to add a savory kick, toss in some cooked bacon or diced ham. The choice is yours!

Now that you have your ingredients ready, let’s move on to the next step: preparing the Twisted Green Bean Casserole!

Step-by-Step Preparation of Twisted Green Bean Casserole

Step 1: Prepping the Green Beans

First things first, let’s get those green beans ready! Start by trimming the ends of the beans. This helps remove any tough parts. Then, cut them into 2-inch pieces. This size is perfect for even cooking and easy serving. Next, bring a large pot of salted water to a boil. Once boiling, add the green beans and blanch them for about 5 minutes. This quick cooking method keeps them bright green and crisp.

After 5 minutes, it’s time to cool them down. Immediately transfer the beans to an ice bath. This stops the cooking process and helps maintain their vibrant color. Once they’re cool, drain the beans again and set them aside. You’re now ready for the next step!

Step 2: Making the Sauce for Twisted Green Bean Casserole

Now, let’s create a delicious sauce that will bring everything together. In a large skillet, heat 1 tablespoon of olive oil over medium heat. Once the oil is hot, add the diced onion and sliced mushrooms. Sauté them for about 5-7 minutes until they become soft and fragrant. The aroma will fill your kitchen!

Next, stir in the minced garlic and cook for an additional minute. Garlic adds a wonderful flavor that complements the other ingredients. Once everything is nicely sautéed, remove the skillet from the heat. This mixture will be the base of your creamy sauce.

Step 3: Combining Ingredients

In a large mixing bowl, it’s time to combine all the ingredients. Start by adding the blanched green beans to the bowl. Then, pour in the sautéed onion and mushroom mixture. Next, add 1 cup of sour cream, 1 cup of shredded cheddar cheese, and 1 cup of crispy fried onions. Don’t forget to sprinkle in the salt, black pepper, garlic powder, and onion powder.

Now, mix everything together until well combined. You want every green bean to be coated in that creamy goodness. This step is crucial for ensuring that every bite is packed with flavor. Once mixed, you’re ready to transfer the mixture to the baking dish!

Step 4: Baking the Casserole

Preheat your oven to 350°F (175°C) if you haven’t done so already. Grease a 9×13-inch baking dish to prevent sticking. Carefully transfer the green bean mixture into the dish, spreading it out evenly. For an extra crunch, top it with additional crispy fried onions.

Now, it’s time to bake! Place the casserole in the preheated oven and bake for 25-30 minutes. You’ll know it’s ready when the casserole is bubbly and the top is golden brown. Once done, remove it from the oven and let it sit for about 5 minutes before serving. This allows the flavors to settle and makes it easier to serve.

And there you have it! Your Twisted Green Bean Casserole is now ready to be enjoyed. It’s a dish that’s sure to impress at any gathering!

Variation of Twisted Green Bean Casserole

Alternative Ingredients to Consider

One of the best things about the Twisted Green Bean Casserole is its flexibility. You can easily swap out ingredients to suit your taste or dietary needs. Here are some alternative ingredients to consider:

  • Vegetables: Instead of just green beans, try adding broccoli, cauliflower, or even carrots for a colorful mix. These veggies add different textures and flavors.
  • Cheese: If cheddar isn’t your favorite, feel free to use mozzarella, gouda, or even a spicy pepper jack for a kick!
  • Protein: For a heartier dish, consider adding cooked chicken, turkey, or even tofu. This addition makes it a complete meal.
  • Herbs and Spices: Fresh herbs like thyme or rosemary can elevate the flavor. A pinch of cayenne pepper can add a nice heat.
  • Crunchy Toppings: Instead of crispy fried onions, try crushed crackers, breadcrumbs, or even nuts for a different crunch.

These alternatives not only enhance the flavor but also allow you to customize the casserole to your liking. So, don’t hesitate to experiment!

Different Cooking Methods for Twisted Green Bean Casserole

While baking is the traditional method for preparing the Twisted Green Bean Casserole, there are other cooking methods you can try. Here are a few options:

  • Slow Cooker: For a hands-off approach, use a slow cooker. Combine all the ingredients in the slow cooker and cook on low for 4-6 hours. This method allows the flavors to meld beautifully.
  • Instant Pot: If you’re short on time, the Instant Pot is a great option. Use the sauté function for the onions and mushrooms, then add the remaining ingredients. Cook on high pressure for about 5 minutes, followed by a quick release.
  • Stovetop: For a quicker version, you can prepare the casserole on the stovetop. Sauté the ingredients as usual, then serve directly from the pan. This method is perfect for a last-minute side dish.

Each cooking method offers a unique twist on the classic casserole, making it easy to enjoy this dish any time of year!

Cooking Note for Twisted Green Bean Casserole

When preparing your Twisted Green Bean Casserole, there are a few important cooking notes to keep in mind. These tips will help ensure that your dish turns out perfectly every time.

First, always use fresh green beans for the best flavor and texture. Frozen green beans can work in a pinch, but they may not provide the same crispness. If you do opt for frozen, be sure to thaw and drain them thoroughly before using.

Next, don’t skip the blanching step! Blanching the green beans not only helps maintain their vibrant color but also ensures they are tender yet still crisp. This step is crucial for achieving that perfect bite in your casserole.

When sautéing the onions and mushrooms, keep an eye on the heat. Cooking them over medium heat allows them to soften without burning. If they start to brown too quickly, reduce the heat to avoid a bitter taste.

For the best flavor, let the casserole sit for a few minutes after baking. This resting time allows the flavors to meld together, making each bite even more delicious. Plus, it makes serving easier!

Lastly, feel free to adjust the seasoning to your taste. Everyone has different preferences, so don’t hesitate to add more salt, pepper, or spices as you see fit. Taste as you go to create a dish that’s just right for you and your guests.

By following these cooking notes, you’ll be well on your way to creating a Twisted Green Bean Casserole that’s not only tasty but also a hit at any gathering!

Serving Suggestions for Twisted Green Bean Casserole

Now that your Twisted Green Bean Casserole is baked to perfection, it’s time to think about how to serve it! This dish is not only delicious but also versatile, making it a great addition to various meals. Here are some serving suggestions to elevate your dining experience:

  • Pair with Proteins: The casserole complements a variety of main dishes. Serve it alongside roasted chicken, turkey, or even grilled steak. The creamy texture of the casserole balances well with the savory flavors of meat.
  • Include a Salad: A fresh salad can brighten up your meal. Consider a simple green salad with a light vinaigrette or a hearty spinach salad with nuts and cranberries. This adds a refreshing contrast to the richness of the casserole.
  • Serve with Bread: Crusty bread or dinner rolls are perfect for soaking up the creamy sauce. You can also offer garlic bread for an extra flavor boost. It’s a great way to round out the meal.
  • Make it a Buffet: If you’re hosting a gathering, consider serving the casserole as part of a buffet. Include other sides like mashed potatoes, stuffing, and cranberry sauce. This allows guests to create their own plates and enjoy a variety of flavors.
  • Garnish for Presentation: For an appealing presentation, garnish the casserole with fresh herbs like parsley or thyme before serving. This adds a pop of color and a hint of freshness that enhances the dish visually.

These serving suggestions will help you create a well-rounded meal that everyone will enjoy. The Twisted Green Bean Casserole is sure to be a crowd-pleaser, making it a fantastic choice for any occasion!

Tips for Perfecting Your Twisted Green Bean Casserole

Creating the perfect Twisted Green Bean Casserole is all about attention to detail. Here are some helpful tips to ensure your dish turns out delicious every time:

  • Choose Fresh Ingredients: Always opt for fresh green beans, as they provide the best flavor and texture. Look for beans that are bright green and firm. Fresh mushrooms and onions also enhance the overall taste of the casserole.
  • Don’t Overcook the Green Beans: Blanching is key! Make sure to only blanch the green beans for 5 minutes. This keeps them crisp and vibrant. Overcooking can lead to mushy beans, which can ruin the texture of your casserole.
  • Mix Thoroughly: When combining the ingredients, ensure everything is well mixed. This ensures that every bite is packed with flavor. Use a spatula to gently fold the ingredients together, being careful not to break the green beans.
  • Adjust Seasoning: Taste your mixture before baking. Everyone has different preferences, so feel free to add more salt, pepper, or spices to suit your taste. A little extra seasoning can make a big difference!
  • Use Quality Cheese: The type of cheese you use can greatly affect the flavor. Opt for a good quality cheddar cheese for a rich, creamy taste. If you want a stronger flavor, consider using aged cheddar.
  • Let it Rest: After baking, allow the casserole to sit for about 5 minutes before serving. This resting time helps the flavors meld together and makes it easier to serve. Plus, it allows the casserole to set up a bit.
  • Experiment with Toppings: While crispy fried onions are traditional, don’t hesitate to try different toppings. Crushed crackers, breadcrumbs, or even a sprinkle of parmesan cheese can add a unique twist to your casserole.
  • Make it Ahead: If you’re short on time, consider preparing the casserole a day in advance. Assemble it, cover it, and store it in the fridge. When you’re ready to bake, just pop it in the oven. This saves time and allows the flavors to develop even more.

By following these tips, you’ll be well on your way to mastering the Twisted Green Bean Casserole. Each step contributes to a dish that’s not only tasty but also a hit at any gathering!

Breakdown of Time for Twisted Green Bean Casserole

Prep Time

Preparing your Twisted Green Bean Casserole is a breeze! The prep time typically takes about 20-25 minutes. This includes washing and trimming the green beans, chopping the onions and mushrooms, and mincing the garlic. Additionally, you’ll need time to blanch the green beans and sauté the vegetables. With a little organization, you can have everything ready to go in no time!

Cooking Time

Once your ingredients are prepped, the cooking time is straightforward. Baking the casserole in the oven takes about 25-30 minutes. During this time, the casserole will bubble and the top will turn a beautiful golden brown. This is when all the flavors meld together, creating that delicious creamy texture we all love.

Total Time

In total, you can expect to spend around 50-55 minutes from start to finish. This includes both the prep and cooking times. It’s a quick and easy dish to whip up, making it perfect for busy weeknights or festive gatherings. Plus, the time spent is well worth it when you see everyone enjoying your Twisted Green Bean Casserole!

Nutritional Information for Twisted Green Bean Casserole

Calories

210 calories. This makes it a satisfying side dish that won’t weigh you down. The combination of fresh green beans, creamy sauce, and cheese provides a hearty yet balanced option for your meal.

Protein

6 grams of protein. The protein comes from the cheese and the green beans, making it a nutritious choice. If you decide to add cooked chicken or bacon, you can easily boost the protein content even further, turning this side dish into a more filling main course.

Sodium

400 milligrams of sodium. This amount can vary based on the specific ingredients you use, especially if you opt for pre-packaged items like crispy fried onions. To reduce sodium, consider using low-sodium versions of ingredients or adjusting the amount of added salt. This way, you can enjoy your casserole while keeping your health goals in mind.

Overall, the Twisted Green Bean Casserole is a flavorful and nutritious addition to any meal. With its balanced calories, protein, and sodium content, it’s a dish that can fit into a variety of dietary plans. Enjoy it as a comforting side or make it the star of your dinner table!

FAQs about Twisted Green Bean Casserole

Can I make Twisted Green Bean Casserole ahead of time?

Absolutely! Making your Twisted Green Bean Casserole ahead of time is a great way to save time on busy days. You can prepare the casserole up to a day in advance. Simply assemble all the ingredients in the baking dish, cover it tightly with plastic wrap or aluminum foil, and store it in the refrigerator. When you’re ready to bake, just remove the cover and pop it in the oven. You may need to add a few extra minutes to the baking time since it will be cold from the fridge.

What can I substitute for green beans in Twisted Green Bean Casserole?

If you’re looking to switch things up, there are several delicious substitutes for green beans. You can use broccoli, cauliflower, or even asparagus for a different flavor and texture. These vegetables will still work well with the creamy sauce and other ingredients. Just remember to adjust the cooking time as needed, especially if you choose a vegetable that cooks faster or slower than green beans.

How do I store leftovers of Twisted Green Bean Casserole?

Storing leftovers is easy! Allow the Twisted Green Bean Casserole to cool completely before transferring it to an airtight container. You can keep it in the refrigerator for up to 3-4 days. When you’re ready to enjoy it again, simply reheat it in the oven at 350°F (175°C) until warmed through. You can also microwave individual portions for a quick meal. Just be sure to cover it to prevent it from drying out!

Can I freeze Twisted Green Bean Casserole?

Yes, you can freeze your Twisted Green Bean Casserole! To do this, prepare the casserole as directed but do not bake it. Instead, cover it tightly with plastic wrap and then with aluminum foil to prevent freezer burn. It can be stored in the freezer for up to 2-3 months. When you’re ready to bake it, thaw it in the refrigerator overnight and then bake as usual. This makes it a convenient option for meal prep or holiday gatherings!

Conclusion on Twisted Green Bean Casserole

In conclusion, the Twisted Green Bean Casserole is a delightful and versatile dish that brings a fresh twist to a beloved classic. With its creamy texture, savory flavors, and crispy topping, it’s sure to be a hit at any gathering. Whether you’re serving it for a holiday feast or a casual family dinner, this casserole is bound to impress.

Not only is it easy to prepare, but it also allows for creativity in the kitchen. You can customize the ingredients to suit your taste or dietary needs, making it a dish that everyone can enjoy. From adding proteins like chicken or bacon to experimenting with different vegetables and cheeses, the possibilities are endless.

Moreover, the Twisted Green Bean Casserole is not just about taste; it also offers nutritional benefits. With a good balance of calories, protein, and essential nutrients, it can fit into a variety of meal plans. Plus, it’s a great way to incorporate more vegetables into your diet.

So, the next time you’re looking for a side dish that’s both comforting and exciting, remember the Twisted Green Bean Casserole. It’s a recipe that’s sure to become a favorite in your home, bringing smiles and satisfaction to your table. Enjoy the process of making it, and even more, enjoy sharing it with your loved ones!

Banana Oat Muffins Recipe for a Healthy Snack Today!

Introduction to Banana Oat Muffins Recipe

Welcome to the delightful world of Banana Oat Muffins! These muffins are not just a treat for your taste buds; they are also a healthy option for breakfast or a snack. Packed with wholesome ingredients, they offer a perfect balance of flavor and nutrition. Whether you’re rushing out the door or enjoying a leisurely morning, these muffins fit right into your routine.

Why Choose Banana Oat Muffins?

Banana Oat Muffins are a fantastic choice for several reasons. First, they are incredibly easy to make. With just a few simple ingredients, you can whip up a batch in no time. Plus, they are a great way to use up those overripe bananas sitting on your counter. Instead of tossing them out, transform them into delicious muffins!

Moreover, these muffins are nutritious. The rolled oats provide fiber, which is essential for digestion. Bananas add natural sweetness and potassium, making them a heart-healthy option. If you choose to add nuts or seeds, you’ll boost the protein content, making these muffins even more satisfying.

Another reason to love Banana Oat Muffins is their versatility. You can customize them to suit your taste. Want a chocolatey treat? Toss in some chocolate chips! Prefer a nutty flavor? Add walnuts or almonds. The possibilities are endless, allowing you to create a muffin that’s uniquely yours.

Lastly, these muffins are perfect for meal prep. You can bake a batch and store them for later. They freeze well, so you can enjoy a homemade treat anytime you want. Just grab one from the freezer, thaw it, and you’re good to go!

In summary, Banana Oat Muffins are a delicious, nutritious, and versatile option for anyone looking to enjoy a healthy snack or breakfast. Let’s dive into the ingredients and get started on this delightful recipe!

Ingredients for Banana Oat Muffins Recipe

To create the perfect Banana Oat Muffins, you’ll need a handful of simple ingredients. Each component plays a vital role in ensuring your muffins are moist, flavorful, and nutritious. Here’s what you’ll need:

  • 1 ½ cups rolled oats: These are the star ingredient, providing fiber and a hearty texture.
  • 1 cup mashed ripe bananas: About 2-3 bananas will do. They add natural sweetness and moisture.
  • ½ cup almond milk: You can use any milk of your choice, such as cow’s milk or oat milk.
  • ¼ cup honey or maple syrup: This will sweeten your muffins naturally. Choose based on your preference.
  • ¼ cup coconut oil, melted: This adds richness and helps keep the muffins moist.
  • 1 teaspoon vanilla extract: A splash of vanilla enhances the overall flavor.
  • 1 teaspoon baking powder: This helps the muffins rise and become fluffy.
  • ½ teaspoon baking soda: Works with the baking powder for a perfect rise.
  • ½ teaspoon salt: A pinch of salt balances the sweetness.
  • ½ teaspoon ground cinnamon: This adds a warm, comforting flavor.
  • ½ cup chopped walnuts or chocolate chips (optional): Add these for extra texture and flavor.

Gather these ingredients, and you’re ready to start baking! Each item contributes to the deliciousness of your Banana Oat Muffins. Now, let’s move on to the step-by-step preparation to bring these muffins to life!

Step-by-Step Preparation of Banana Oat Muffins Recipe

Now that you have all your ingredients ready, it’s time to dive into the fun part: baking! Follow these simple steps to create your delicious Banana Oat Muffins. Each step is easy to follow, ensuring that you’ll have a batch of tasty muffins in no time.

Step 1: Preheat the Oven

First things first, preheat your oven to 350°F (175°C). This step is crucial as it ensures your muffins bake evenly. A hot oven helps them rise beautifully, giving you that perfect fluffy texture. While the oven heats up, you can prepare the muffin tin.

Step 2: Prepare the Muffin Tin

Next, grab your muffin tin. You can either line it with paper liners or lightly grease it with cooking spray or coconut oil. This will prevent the muffins from sticking and make cleanup a breeze. Make sure each cup is ready to hold your delicious batter!

Step 3: Mix the Dry Ingredients

In a large mixing bowl, combine the rolled oats, baking powder, baking soda, salt, and ground cinnamon. Stir these dry ingredients together until they are well mixed. This step is important because it ensures that the leavening agents are evenly distributed, helping your muffins rise properly.

Step 4: Combine the Wet Ingredients

In another bowl, mix the mashed bananas, almond milk, honey (or maple syrup), melted coconut oil, and vanilla extract. Use a fork or whisk to blend everything until smooth. This mixture will add moisture and sweetness to your muffins, making them irresistible!

Step 5: Combine Wet and Dry Ingredients

Now, pour the wet ingredients into the bowl with the dry ingredients. Gently stir until just combined. Be careful not to overmix; a few lumps are perfectly fine. If you’re adding walnuts or chocolate chips, fold them in at this stage for an extra burst of flavor.

Step 6: Fill the Muffin Tin

Using a spoon or a scoop, divide the batter evenly among the muffin cups. Fill each cup about ¾ full to allow room for rising. This will help you achieve that lovely dome shape on top of your muffins. Make sure they are all filled evenly for consistent baking!

Step 7: Bake the Muffins

Finally, place the muffin tin in the preheated oven. Bake for 18-20 minutes, or until a toothpick inserted into the center comes out clean. Keep an eye on them as they bake; the aroma will fill your kitchen, making it hard to wait! Once done, let them cool in the pan for about 5 minutes before transferring them to a wire rack to cool completely.

And there you have it! Your Banana Oat Muffins are ready to be enjoyed. They are perfect for breakfast, snacks, or even dessert. Let’s explore some fun variations next!

Variations of Banana Oat Muffins Recipe

While the classic Banana Oat Muffins are delicious on their own, there are many fun variations you can try! These tweaks can enhance the flavor and texture, making your muffins even more exciting. Let’s explore some tasty options!

Adding Nuts and Seeds

Nuts and seeds are a fantastic way to add crunch and nutrition to your Banana Oat Muffins. Consider mixing in ½ cup of chopped walnuts, almonds, or pecans. Not only do they provide a delightful texture, but they also boost the protein content. If you prefer seeds, try adding chia seeds or flaxseeds. These tiny powerhouses are rich in omega-3 fatty acids and fiber, making your muffins even healthier!

Incorporating Chocolate Chips

If you have a sweet tooth, chocolate chips are a must! Adding ½ cup of dark or semi-sweet chocolate chips can turn your muffins into a delightful treat. The chocolate melts slightly during baking, creating gooey pockets of goodness. This variation is perfect for kids and adults alike. You can even mix in some peanut butter chips for a fun twist!

Gluten-Free Options

For those following a gluten-free diet, you can easily adapt this recipe. Simply replace the rolled oats with certified gluten-free oats. Additionally, ensure that your baking powder and any other ingredients are gluten-free. This way, everyone can enjoy these tasty muffins without worry. They will still be just as delicious and satisfying!

These variations allow you to customize your Banana Oat Muffins to suit your taste and dietary needs. Feel free to experiment and find your favorite combination. Now, let’s move on to some important cooking notes to ensure your muffins turn out perfectly!

Cooking Note for Banana Oat Muffins Recipe

When it comes to baking Banana Oat Muffins, a few cooking notes can help you achieve the best results. These tips will ensure your muffins are moist, fluffy, and bursting with flavor. Let’s take a closer look at some essential points to keep in mind while preparing your muffins.

First, always use ripe bananas. The riper the bananas, the sweeter and more flavorful your muffins will be. Look for bananas with brown spots on the peel; this indicates they are perfect for baking. If you have frozen bananas, they work great too! Just thaw them and mash them before adding to the mixture.

Next, be mindful of your mixing technique. When combining the wet and dry ingredients, mix until just combined. Overmixing can lead to dense muffins. A few lumps are okay! This gentle approach helps keep the muffins light and airy.

Another important note is to check your oven temperature. Ovens can vary, so it’s a good idea to use an oven thermometer to ensure accuracy. If your oven runs hot, your muffins may bake faster than expected. Keep an eye on them during the last few minutes of baking to avoid overcooking.

Lastly, allow your muffins to cool properly. After baking, let them sit in the pan for about 5 minutes. This helps them set and makes it easier to remove them without breaking. Then, transfer them to a wire rack to cool completely. This step is crucial for maintaining their texture and flavor.

By following these cooking notes, you’ll be well on your way to baking the perfect Banana Oat Muffins. Now that you have the tips, let’s explore some serving suggestions to enjoy these delightful treats!

Serving Suggestions for Banana Oat Muffins Recipe

Now that your Banana Oat Muffins are baked to perfection, it’s time to think about how to serve them! These muffins are versatile and can be enjoyed in various ways. Here are some delightful serving suggestions to enhance your muffin experience:

  • With a Spread: Enjoy your muffins warm with a spread of almond butter, peanut butter, or cream cheese. This adds a creamy texture and extra flavor, making your snack even more satisfying.
  • As a Breakfast Pairing: Serve your muffins alongside a bowl of fresh fruit or yogurt. This combination provides a balanced breakfast, giving you energy to start your day right.
  • With a Hot Beverage: Pair your muffins with a cup of coffee, tea, or hot chocolate. The warmth of the drink complements the muffins perfectly, creating a cozy snack time.
  • As a Dessert: Drizzle a little honey or maple syrup over your muffins for a sweet treat after dinner. You can also serve them with a scoop of vanilla ice cream for a delightful dessert.
  • On-the-Go Snack: These muffins are perfect for busy days! Grab one as you head out the door for a quick and nutritious snack. They are easy to pack and travel well.

Feel free to mix and match these serving ideas to find your favorite way to enjoy Banana Oat Muffins. They are delicious on their own, but these suggestions can elevate your muffin experience even further. Now that you know how to serve them, let’s move on to some tips for perfecting your Banana Oat Muffins!

Tips for Perfect Banana Oat Muffins Recipe

To ensure your Banana Oat Muffins turn out perfectly every time, here are some handy tips to keep in mind. These suggestions will help you achieve the ideal texture, flavor, and overall muffin experience. Let’s dive into these helpful hints!

  • Use Ripe Bananas: The key to sweet and flavorful muffins is using ripe bananas. Look for bananas with brown spots, as they are sweeter and easier to mash. If you have overripe bananas, they are perfect for this recipe!
  • Don’t Overmix: When combining the wet and dry ingredients, mix until just combined. Overmixing can lead to dense muffins. A few lumps are okay; they will bake out during cooking!
  • Check Your Oven: Ovens can vary in temperature. Use an oven thermometer to ensure your oven is at the right temperature. This will help your muffins bake evenly and rise properly.
  • Cool Before Storing: Allow your muffins to cool completely before storing them. This prevents moisture buildup, which can make them soggy. Store them in an airtight container to keep them fresh.
  • Experiment with Add-Ins: Feel free to get creative! Add-ins like nuts, seeds, or dried fruit can enhance the flavor and texture of your muffins. Just be sure not to overload the batter, as this can affect baking.
  • Use a Muffin Scoop: For even-sized muffins, use a muffin scoop to portion the batter. This ensures that all muffins bake at the same rate and have a uniform appearance.
  • Test for Doneness: To check if your muffins are done, insert a toothpick into the center. If it comes out clean or with a few crumbs, they are ready. If it’s wet, give them a few more minutes.

By following these tips, you’ll be well on your way to baking the perfect Banana Oat Muffins. Each batch will be delicious, fluffy, and satisfying. Now that you have the tips, let’s break down the time needed for this delightful recipe!

Breakdown of Time for Banana Oat Muffins Recipe

Understanding the time required for each step of the Banana Oat Muffins recipe can help you plan your baking session better. Here’s a simple breakdown of the time you’ll need for preparation and cooking. This way, you can enjoy your muffins without any rush!

Prep Time

The prep time for Banana Oat Muffins is quite short. You’ll need about 10-15 minutes to gather your ingredients and mix everything together. This includes mashing the bananas, measuring out the oats, and combining the wet and dry ingredients. It’s a quick process, making it easy to fit into your busy schedule!

Cooking Time

Once your batter is ready, the cooking time is approximately 18-20 minutes. During this time, the muffins will rise and bake to perfection. Keep an eye on them as they bake, and use a toothpick to check for doneness. If it comes out clean, your muffins are ready to be enjoyed!

Total Time

In total, you can expect to spend about 30-35 minutes from start to finish. This includes both prep and cooking time. With such a quick turnaround, you can easily whip up a batch of Banana Oat Muffins for breakfast or a snack. Plus, the delightful aroma filling your kitchen will make the wait worthwhile!

Now that you know the time breakdown, you can plan your baking session accordingly. Let’s move on to the nutritional information for these delicious muffins!

Nutritional Information for Banana Oat Muffins Recipe

Understanding the nutritional content of your Banana Oat Muffins is essential for making informed choices about your diet. These muffins are not only delicious but also packed with nutrients that can support your health. Let’s break down the key nutritional components of this recipe.

Calories

Each Banana Oat Muffin contains approximately 150 calories. This makes them a great option for a light breakfast or snack. The calorie count is reasonable, especially considering the wholesome ingredients used. You can enjoy these muffins without feeling guilty, knowing they provide energy without excessive calories.

Protein

In terms of protein, each muffin offers about 3 grams. While this may not seem like a lot, it contributes to your daily protein intake. Pairing these muffins with a source of protein, like yogurt or nut butter, can create a more balanced meal. This combination will keep you feeling full and satisfied for longer.

Sodium

Each muffin contains roughly 150 milligrams of sodium. This is a moderate amount, making it suitable for most diets. Keeping sodium levels in check is important for heart health, and these muffins fit well within a balanced diet. If you’re watching your sodium intake, you can adjust the salt in the recipe to suit your needs.

Overall, Banana Oat Muffins are a nutritious choice that can fit into a healthy lifestyle. They provide a good balance of calories, protein, and sodium, making them a smart option for breakfast or a snack. Now that you know the nutritional information, let’s address some frequently asked questions about this delightful recipe!

FAQs about Banana Oat Muffins Recipe

Can I use frozen bananas for the Banana Oat Muffins Recipe?

Absolutely! Frozen bananas work wonderfully in this recipe. Just thaw them first, then mash them up. They will add the same sweetness and moisture as fresh bananas. In fact, using frozen bananas can enhance the flavor, as they tend to become sweeter when frozen. So, don’t hesitate to use those overripe bananas you’ve stored in the freezer!

How can I make Banana Oat Muffins Recipe healthier?

There are several ways to boost the health factor of your Banana Oat Muffins. First, consider reducing the amount of honey or maple syrup. You can cut it down by a tablespoon or two without sacrificing sweetness. Additionally, you can substitute half of the coconut oil with unsweetened applesauce. This will lower the fat content while keeping the muffins moist. Lastly, adding seeds like chia or flaxseeds can increase the fiber and omega-3 fatty acids, making your muffins even more nutritious!

What can I substitute for oats in the Banana Oat Muffins Recipe?

If you need to substitute oats, you can use ground oats or oat flour. This will maintain the flavor and texture of the muffins. If you’re looking for a gluten-free option, you can also try using almond flour or coconut flour. However, keep in mind that these flours absorb more moisture, so you may need to adjust the liquid ingredients accordingly. Experimenting with different flours can lead to unique and tasty results!

How long do Banana Oat Muffins last?

Banana Oat Muffins can last for about 3-5 days when stored in an airtight container at room temperature. If you want to keep them fresh for a longer time, consider freezing them. They can be stored in the freezer for up to 3 months. Just make sure to wrap them tightly in plastic wrap or place them in a freezer-safe bag. When you’re ready to enjoy, simply thaw them at room temperature or pop them in the microwave for a quick warm-up!

Conclusion on Banana Oat Muffins Recipe

In conclusion, the Banana Oat Muffins Recipe is a delightful way to enjoy a healthy and tasty treat. These muffins are not only easy to make but also packed with nutritious ingredients that benefit your overall well-being. With their natural sweetness from ripe bananas and the wholesome goodness of rolled oats, they make for a perfect breakfast or snack option.

Throughout this article, we’ve explored the simple steps to create these muffins, along with various ways to customize them to suit your taste. Whether you prefer adding nuts, chocolate chips, or keeping them gluten-free, the possibilities are endless. Plus, with the tips and variations provided, you can ensure that each batch turns out perfectly every time.

Moreover, the nutritional information highlights how these muffins can fit into a balanced diet. With moderate calories, a decent amount of protein, and low sodium, they are a smart choice for anyone looking to maintain a healthy lifestyle. Whether you’re enjoying them fresh out of the oven or storing them for later, Banana Oat Muffins are sure to satisfy your cravings.

So, gather your ingredients, preheat your oven, and get ready to bake a batch of these delicious muffins. They are not just a treat for your taste buds but also a wonderful way to nourish your body. Enjoy the process, share them with friends and family, and savor every bite of your homemade Banana Oat Muffins!

Taco Casserole Recipe: A Quick and Delicious Meal!

Introduction to Taco Casserole Recipe

What is Taco Casserole?

Taco casserole is a delightful dish that combines the flavors of traditional tacos into a hearty, baked meal. It features layers of seasoned ground beef, beans, corn, and cheese, all baked together to create a warm and comforting dish. This casserole is not only easy to prepare but also offers a fun twist on taco night. With its vibrant colors and rich flavors, taco casserole is sure to please everyone at the dinner table.

Why You Should Try This Taco Casserole Recipe

There are many reasons to try this taco casserole recipe. First, it’s incredibly simple to make, making it perfect for busy weeknights. You can have a delicious meal ready in under an hour! Second, it’s versatile. You can easily customize it to suit your taste preferences or dietary needs. Whether you prefer a vegetarian option or want to spice things up, this recipe can adapt to your desires.

Moreover, taco casserole is a crowd-pleaser. It serves well for family dinners, potlucks, or gatherings with friends. Everyone loves the combination of flavors, and it’s a great way to introduce kids to new ingredients. Plus, it’s a one-dish meal, which means less cleanup for you!

In summary, taco casserole is not just a meal; it’s an experience. With its delicious layers and easy preparation, it’s a recipe you’ll want to make again and again. So, let’s dive into the ingredients and get started on this tasty journey!

Ingredients for Taco Casserole Recipe

To create a mouthwatering taco casserole, you’ll need a variety of fresh and flavorful ingredients. Here’s what you’ll need:

  • 1 pound ground beef: This is the main protein source, providing a rich flavor.
  • 1 medium onion, diced: Adds sweetness and depth to the dish.
  • 1 bell pepper, diced: Choose your favorite color for a pop of color and crunch.
  • 2 cloves garlic, minced: Garlic enhances the overall flavor profile.
  • 1 packet taco seasoning (about 1 ounce): This is key for that classic taco taste.
  • 1 can (15 ounces) diced tomatoes, drained: Provides moisture and a tangy flavor.
  • 1 can (15 ounces) black beans, drained and rinsed: Adds protein and fiber.
  • 1 cup corn (frozen or canned): Sweet corn complements the savory ingredients.
  • 1 cup shredded cheddar cheese: Melts beautifully and adds creaminess.
  • 1 cup sour cream: Adds a cool, creamy layer to balance the spices.
  • 1 cup salsa: Choose mild or spicy, depending on your preference.
  • 1 tablespoon olive oil: For sautéing the vegetables.
  • Salt and pepper to taste: Essential for seasoning.
  • Fresh cilantro, chopped (for garnish): Adds a fresh touch when serving.

These ingredients come together to create a delicious taco casserole that is sure to impress. Feel free to mix and match based on your preferences. Now that you have everything you need, let’s move on to the step-by-step preparation!

Step-by-Step Preparation of Taco Casserole Recipe

Step 1: Preheat the Oven

Before you start cooking, it’s important to preheat your oven. Set it to 350°F (175°C). This ensures that your taco casserole bakes evenly and comes out perfectly golden and bubbly. While the oven heats up, you can prepare the other ingredients, making the process smooth and efficient.

Step 2: Prepare the Meat

In a large skillet, heat 1 tablespoon of olive oil over medium heat. Once the oil is hot, add the diced onion and bell pepper. Sauté them for about 5 minutes until they become soft and fragrant. Next, stir in 2 cloves of minced garlic and cook for an additional minute. This step builds a flavorful base for your casserole.

Now, it’s time to add the star of the dish: the ground beef. Break it apart with a spatula as it cooks. You want it to brown nicely, which should take about 6-8 minutes. Once browned, drain any excess fat to keep your casserole from becoming greasy.

Step 3: Mix the Ingredients

With the meat ready, it’s time to mix in the remaining ingredients. Sprinkle the taco seasoning over the beef mixture, followed by the drained diced tomatoes, black beans, and corn. Stir everything together and let it cook for another 5 minutes. This allows the flavors to meld beautifully. Don’t forget to season with salt and pepper to taste!

Step 4: Layer the Casserole

Now comes the fun part—layering! Grab a 9×13-inch baking dish and spread half of the beef mixture evenly across the bottom. Next, add half of the salsa and half of the sour cream on top. Sprinkle with half of the shredded cheddar cheese. Repeat this process with the remaining ingredients, creating a delicious layered effect.

Step 5: Bake the Taco Casserole

Once your casserole is layered, it’s time to bake! Place the dish in the preheated oven and let it bake for 25-30 minutes. You’ll know it’s ready when the cheese is bubbly and golden. After baking, remove it from the oven and let it cool for about 5 minutes. This cooling time helps the layers set, making it easier to serve.

Now, your taco casserole is ready to be garnished with fresh cilantro and served. Enjoy the delightful flavors and the smiles it brings to your table!

Variations of Taco Casserole Recipe

Vegetarian Taco Casserole

If you’re looking for a meatless option, a vegetarian taco casserole is a fantastic choice! Simply replace the ground beef with a mix of hearty vegetables and legumes. You can use ingredients like lentils, chickpeas, or even quinoa for added protein. Additionally, consider adding more veggies like zucchini, mushrooms, or spinach to enhance the flavor and nutrition. The rest of the ingredients, such as black beans, corn, and cheese, can remain the same. This version is not only delicious but also packed with nutrients!

Gluten-Free Taco Casserole

For those who need to avoid gluten, making a gluten-free taco casserole is easy! Ensure that your taco seasoning is gluten-free, as some brands may contain gluten. You can also use corn tortillas instead of traditional flour tortillas for layering. Just cut them into strips and layer them in between the beef mixture and cheese. This will give your casserole a delightful texture while keeping it gluten-free. Enjoy the same great flavors without any worries!

Spicy Taco Casserole

If you love a bit of heat, a spicy taco casserole will surely satisfy your taste buds! To kick up the spice level, add diced jalapeños or serrano peppers to the beef mixture. You can also opt for spicy salsa instead of mild. For an extra layer of flavor, consider adding a sprinkle of cayenne pepper or chili powder. This version is perfect for those who enjoy a fiery twist on the classic taco casserole!

Cooking Note for Taco Casserole Recipe

When preparing your taco casserole, there are a few important cooking notes to keep in mind. These tips will help ensure that your dish turns out perfectly every time.

First, always use a large skillet for cooking the meat and vegetables. This allows for even cooking and prevents overcrowding, which can lead to steaming instead of browning. Browning the meat is crucial for developing rich flavors.

Next, be mindful of the taco seasoning. Different brands can vary in saltiness and spice levels. It’s a good idea to taste the mixture as you cook and adjust the seasoning accordingly. If you prefer a milder flavor, you can always start with less seasoning and add more as needed.

Additionally, if you’re using frozen corn, there’s no need to thaw it before adding it to the mixture. Just toss it in straight from the freezer. It will cook perfectly in the oven and add a nice sweetness to the casserole.

Lastly, let your taco casserole cool for a few minutes after baking. This cooling period helps the layers set, making it easier to cut and serve. If you dive in too quickly, the layers may fall apart, and you won’t get that beautiful presentation.

By following these cooking notes, you’ll create a taco casserole that is not only delicious but also visually appealing. Enjoy the process and the delightful meal that awaits!

Serving Suggestions for Taco Casserole Recipe

Toppings to Enhance Your Taco Casserole

Once your taco casserole is baked to perfection, it’s time to think about toppings! Adding a variety of toppings can elevate the dish and make it even more enjoyable. Here are some delicious options:

  • Chopped Green Onions: These add a fresh crunch and a mild onion flavor.
  • Sliced Jalapeños: For those who love heat, fresh jalapeños can add a spicy kick.
  • Avocado or Guacamole: Creamy avocado or guacamole provides a rich texture that balances the spices.
  • Fresh Salsa: A dollop of fresh salsa on top can enhance the flavor and add a burst of freshness.
  • Shredded Lettuce: This adds a nice crunch and a refreshing element to the dish.
  • Chopped Cilantro: A sprinkle of fresh cilantro brightens up the flavors and adds a pop of color.
  • Crushed Tortilla Chips: For added crunch, sprinkle some crushed tortilla chips on top just before serving.

Feel free to mix and match these toppings based on your preferences. They not only enhance the flavor but also make your taco casserole visually appealing!

Side Dishes That Pair Well

To complete your meal, consider serving your taco casserole with some delicious side dishes. Here are a few ideas that pair perfectly:

  • Mexican Rice: Fluffy rice seasoned with spices complements the flavors of the casserole.
  • Refried Beans: Creamy refried beans add a hearty element and are a classic side for any Mexican meal.
  • Guacamole and Chips: A side of guacamole with tortilla chips makes for a tasty appetizer.
  • Simple Green Salad: A light salad with mixed greens, tomatoes, and a lime vinaigrette balances the richness of the casserole.
  • Grilled Corn on the Cob: Sweet corn on the cob brushed with butter is a delightful addition to your meal.

These side dishes not only complement the taco casserole but also create a well-rounded dining experience. Enjoy your meal with family and friends, and savor the delicious flavors!

Tips for Perfecting Your Taco Casserole Recipe

Creating the perfect taco casserole is all about attention to detail and a few helpful tips. With these suggestions, you can elevate your dish and impress your family and friends!

First, always use fresh ingredients. Fresh vegetables and high-quality meat can significantly enhance the flavor of your casserole. If possible, choose organic produce and grass-fed beef for a healthier option.

Next, don’t skip the seasoning! Taco seasoning is essential for that authentic flavor. However, feel free to customize it. You can add extra spices like cumin, paprika, or chili powder to suit your taste. A pinch of cayenne can also add a nice kick!

When layering your casserole, make sure to spread the ingredients evenly. This ensures that every bite is packed with flavor. Use a spatula to smooth out each layer, making it visually appealing as well.

Another tip is to let your casserole rest after baking. Allowing it to cool for about 5-10 minutes helps the layers set, making it easier to cut and serve. This way, you’ll have neat slices instead of a messy serving!

Lastly, don’t be afraid to experiment! Taco casserole is versatile, so feel free to try different ingredients. You can add olives, bell peppers, or even different types of cheese. The possibilities are endless, and you might just discover a new favorite combination!

By following these tips, you’ll create a taco casserole that’s not only delicious but also visually stunning. Enjoy the process and the delightful meal that awaits!

Breakdown of Time for Taco Casserole Recipe

Prep Time

Preparing your taco casserole is quick and easy! The prep time for this recipe is about 15-20 minutes. During this time, you’ll gather all your ingredients, chop the vegetables, and cook the ground beef. Having everything ready before you start cooking makes the process smoother and more enjoyable. Plus, it helps you stay organized in the kitchen!

Cooking Time

The cooking time for your taco casserole is approximately 25-30 minutes. This includes the time it takes to bake the casserole in the oven until the cheese is bubbly and golden. While it bakes, you can clean up your kitchen or prepare any side dishes you want to serve alongside. It’s a great way to maximize your time and keep everything running efficiently!

Total Time

In total, you can expect to spend about 40-50 minutes from start to finish. This includes both prep and cooking time. With such a quick turnaround, taco casserole is perfect for busy weeknights or last-minute gatherings. You’ll have a delicious, hearty meal ready in no time, allowing you to enjoy more moments with your family and friends!

Nutritional Information for Taco Casserole Recipe

Calories

When it comes to enjoying a delicious taco casserole, knowing the calorie content can help you make informed choices. Each serving of this taco casserole recipe contains approximately 350 calories. This makes it a satisfying meal without being overly heavy. It’s a great option for those looking to enjoy a hearty dish while keeping an eye on their calorie intake.

Protein

Protein is an essential nutrient, and this taco casserole delivers! Each serving provides about 25 grams of protein. The ground beef and black beans contribute significantly to this protein content, making it a filling meal. Protein is important for muscle repair and growth, so this casserole can be a great post-workout meal or a nutritious dinner option for the whole family.

Sodium

Sodium levels are also an important consideration in any recipe. Each serving of this taco casserole contains around 800 milligrams of sodium. While this is a reasonable amount for a flavorful dish, it’s wise to be mindful if you are watching your sodium intake. You can reduce the sodium by using low-sodium taco seasoning and canned ingredients. This way, you can enjoy the delicious flavors without compromising your health goals.

FAQs About Taco Casserole Recipe

Can I make Taco Casserole ahead of time?

Absolutely! Making taco casserole ahead of time is a great idea. You can prepare the entire dish, layer it in the baking dish, and cover it tightly with plastic wrap or aluminum foil. Store it in the refrigerator for up to 24 hours before baking. When you’re ready to cook, simply remove it from the fridge and bake as directed. If you prefer, you can also freeze it for longer storage. Just remember to thaw it in the fridge overnight before baking for the best results!

What can I substitute for ground beef in Taco Casserole?

If you’re looking for alternatives to ground beef, there are plenty of options! You can use ground turkey or chicken for a leaner option. For a vegetarian version, consider using lentils, black beans, or a plant-based meat substitute. These alternatives will still provide a hearty texture and delicious flavor. Feel free to experiment with different proteins to find your favorite combination!

How do I store leftovers of Taco Casserole?

Storing leftovers is easy! Allow the taco casserole to cool completely before transferring it to an airtight container. You can keep it in the refrigerator for up to 3-4 days. When you’re ready to enjoy it again, simply reheat individual portions in the microwave or warm it in the oven until heated through. This makes for a quick and tasty meal on busy days!

Can I freeze Taco Casserole?

Yes, you can freeze taco casserole! To do this, prepare the casserole as directed but do not bake it. Instead, cover it tightly with plastic wrap and then with aluminum foil to prevent freezer burn. It can be stored in the freezer for up to 3 months. When you’re ready to enjoy it, thaw it in the refrigerator overnight and then bake as usual. This way, you can have a delicious meal ready whenever you need it!

Conclusion on Taco Casserole Recipe

In conclusion, the taco casserole recipe is a delightful and versatile dish that brings the flavors of traditional tacos into a comforting, baked meal. With its layers of seasoned ground beef, beans, corn, and cheese, this casserole is not only easy to prepare but also a crowd-pleaser for family dinners and gatherings. The best part is that it can be customized to suit various dietary preferences, whether you choose to make it vegetarian, gluten-free, or spicy.

As you explore this recipe, remember that the joy of cooking comes from experimenting and making it your own. Feel free to add your favorite toppings or side dishes to enhance the experience. The combination of flavors and textures will surely impress your family and friends, making taco casserole a go-to recipe in your kitchen.

So, gather your ingredients, follow the steps, and enjoy the deliciousness of taco casserole. It’s a meal that not only satisfies hunger but also creates lasting memories around the dinner table. Happy cooking!