**Shrimp Avocado Salad for Summer: A Refreshing Delight**

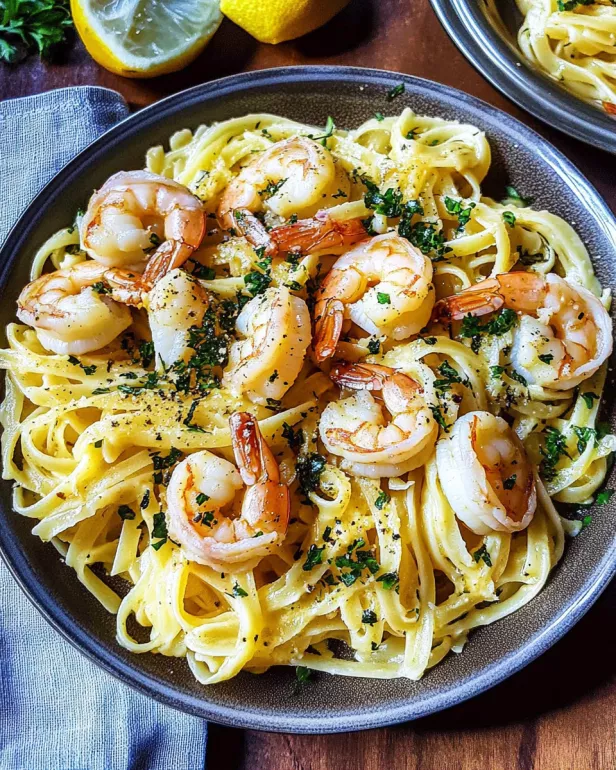
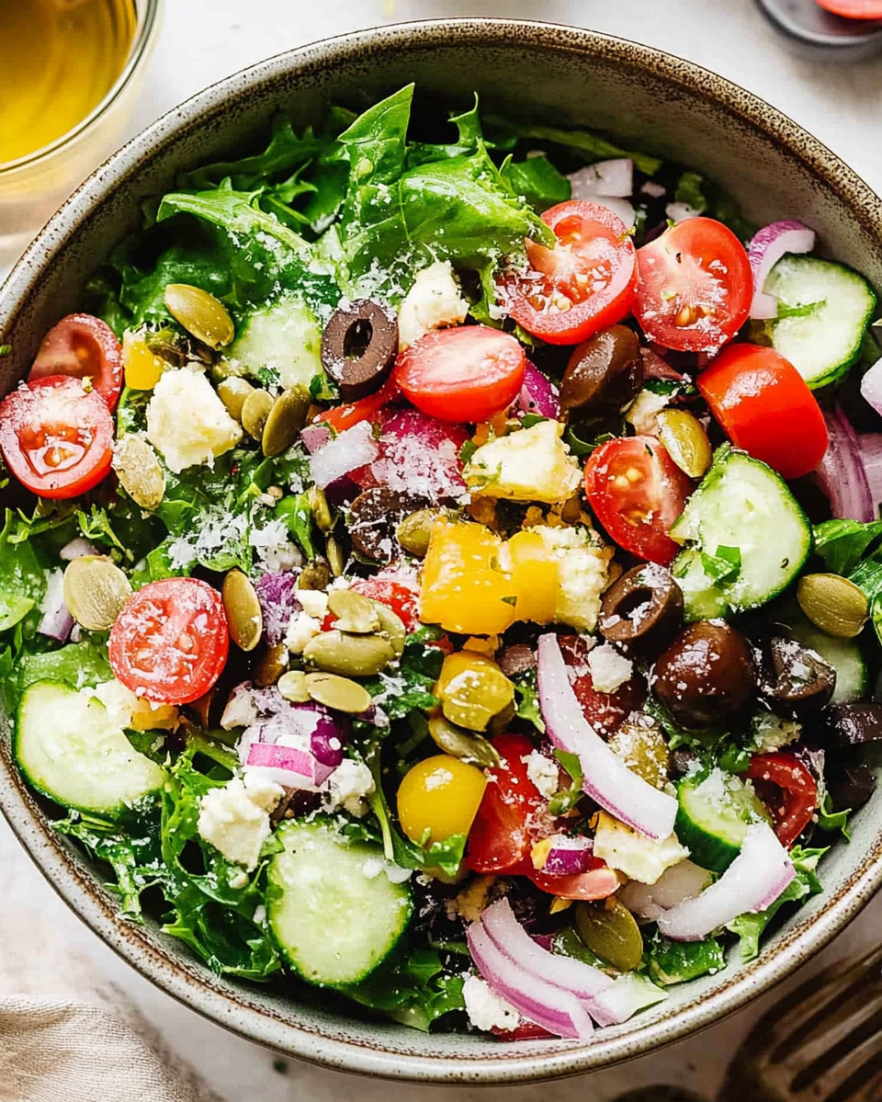
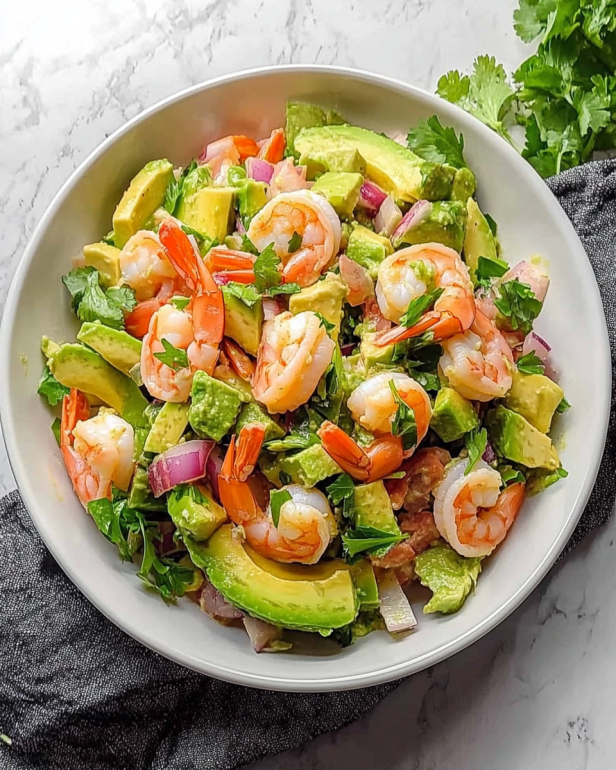
Introduction to Shrimp Avocado Salad for Summer

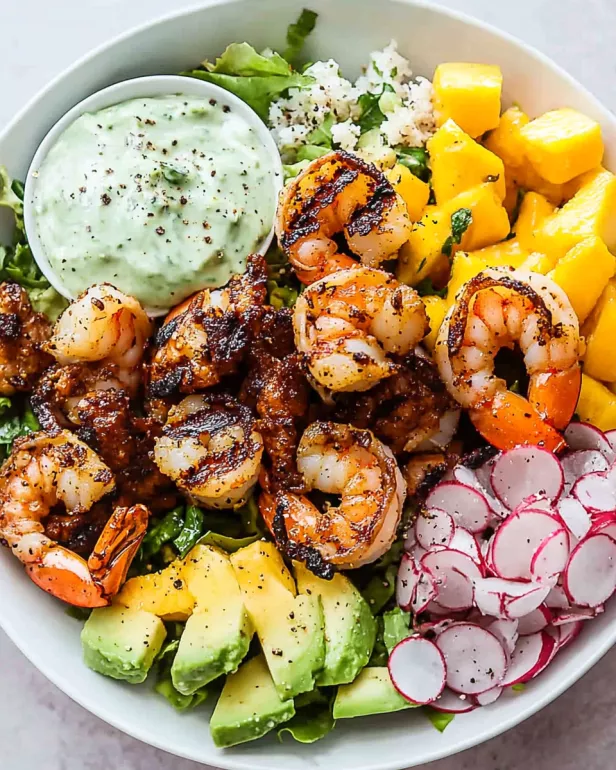
Shrimp Avocado Salad for Summer. This delightful salad combines the fresh flavors of shrimp, creamy avocado, and vibrant vegetables, making it a fantastic choice for any summer gathering or a simple weeknight dinner.

Why Shrimp Avocado Salad for Summer is a Perfect Choice

There are many reasons why this salad is a must-try. First, it’s packed with nutrients. Shrimp is a great source of protein, while avocados provide healthy fats and fiber. Together, they create a balanced meal that keeps you feeling full and satisfied.

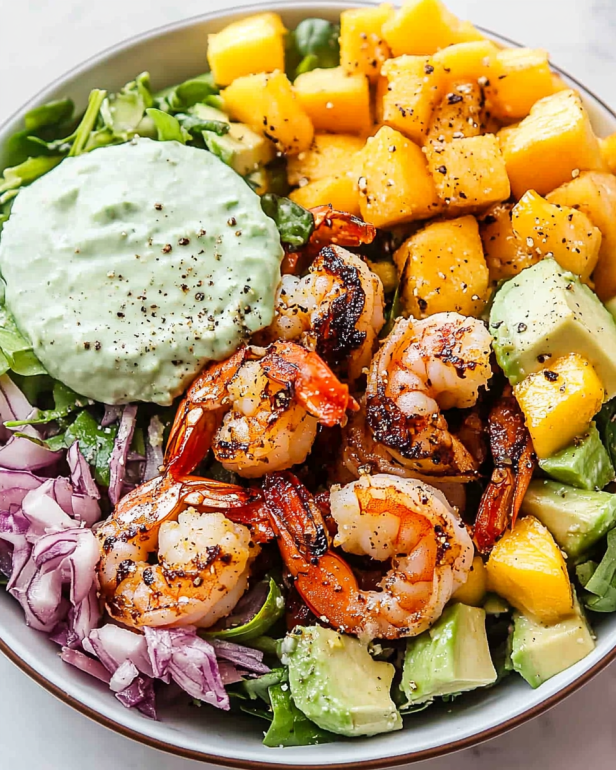
Shrimp Avocado Salad for Summer is incredibly versatile. You can easily customize it to suit your taste. Whether you prefer a zesty lime dressing or a creamy alternative, this salad can adapt to your preferences. Plus, it’s quick to prepare, making it ideal for busy summer days.

Another reason to love this salad is its vibrant colors. The mix of greens, reds, and yellows not only looks appealing but also makes it a feast for the eyes. Serving this salad at a barbecue or picnic will surely impress your guests.

Shrimp Avocado Salad for Summer is refreshing and light, perfect for hot days. It’s a dish that can be enjoyed on its own or as a side. With all these benefits, it’s no wonder this salad is a favorite during the summer season!

Ingredients for Shrimp Avocado Salad for Summer

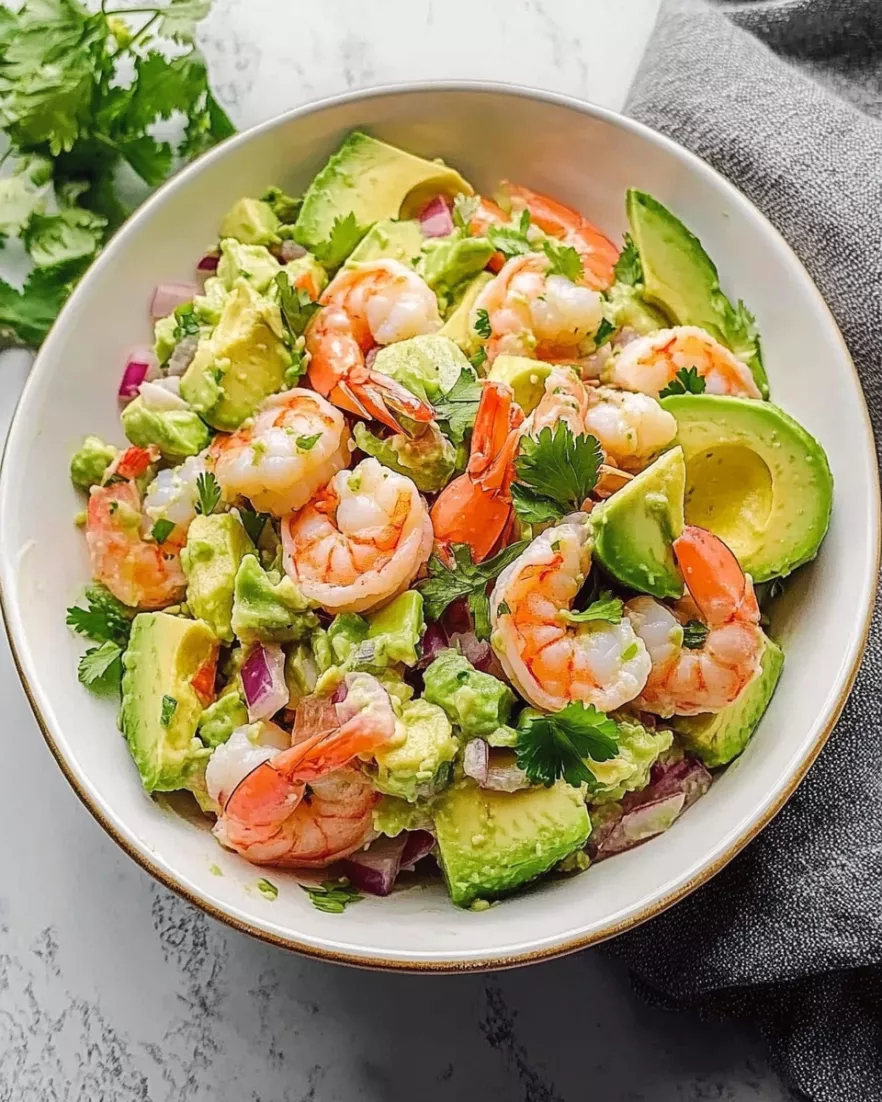
Shrimp Avocado Salad for Summer, you’ll need a variety of fresh ingredients. Each component adds its unique flavor and texture, making the salad both tasty and nutritious. Here’s what you’ll need:

  • 1 pound large shrimp, peeled and deveined
  • 2 tablespoons olive oil
  • 1 teaspoon garlic powder
  • 1 teaspoon paprika
  • Salt and pepper to taste
  • 8 cups mixed salad greens (such as arugula, spinach, and romaine)
  • 1 avocado, diced
  • 1 cup cherry tomatoes, halved
  • 1/2 cucumber, sliced
  • 1/4 red onion, thinly sliced
  • 1/4 cup fresh cilantro, chopped
  • Juice of 1 lime
  • 1/4 cup feta cheese, crumbled (optional)

These ingredients come together to create a vibrant and satisfying dish. The shrimp provides a protein boost, while the avocado adds creaminess. The mixed greens and vegetables contribute crunch and freshness, making every bite enjoyable. Don’t forget the lime juice, which adds a zesty kick that brightens the entire salad!

Shrimp Avocado Salad for Summer is not only easy to make but also allows for creativity in the kitchen!

Preparation of Shrimp Avocado Salad for Summer

Shrimp Avocado Salad for Summer. The steps are simple and quick, making this dish perfect for any occasion. Let’s dive into the preparation process!

Step 1: Preparing the Shrimp

First, you need to prepare the shrimp. Start by rinsing the shrimp under cold water. This helps to remove any residual grit. Next, in a large bowl, toss the shrimp with olive oil, garlic powder, paprika, salt, and pepper. Make sure each shrimp is well coated with the seasoning. This step is crucial as it enhances the flavor of the shrimp, making it delicious!

Step 2: Preparing the Avocado

Shrimp Avocado Salad for Summer, balancing the other ingredients perfectly.

Step 3: Mixing the Ingredients

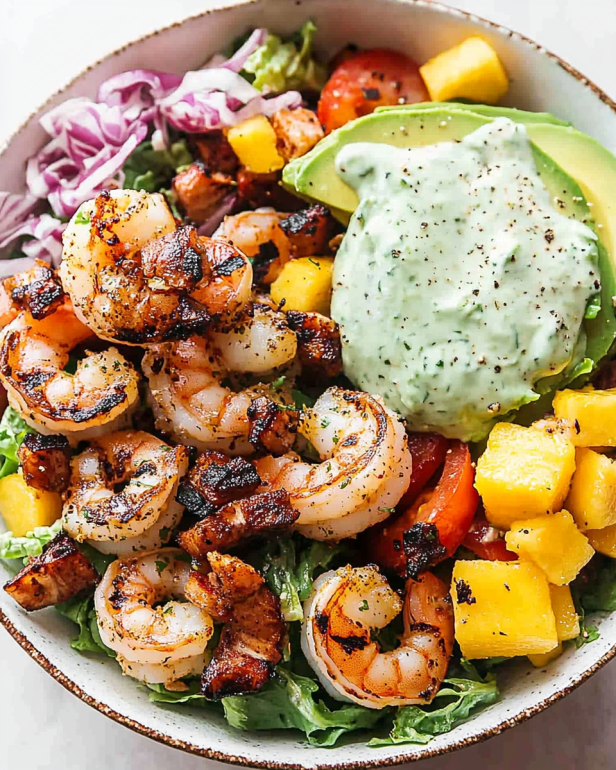
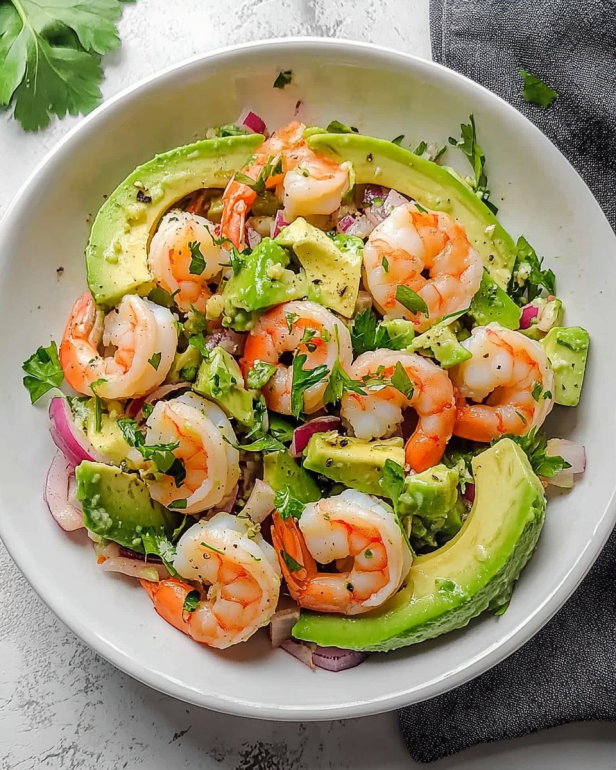
Once the shrimp is seasoned and the avocado is ready, it’s time to mix everything together. In a large salad bowl, combine the mixed salad greens, diced avocado, cherry tomatoes, cucumber, red onion, and cilantro. Gently toss these ingredients to ensure they are evenly distributed. This colorful mix not only looks great but also provides a variety of flavors and textures in every bite!

Step 4: Adding the Dressing

Shrimp Avocado Salad for Summer is now ready to serve!

Variation of Shrimp Avocado Salad for Summer

Shrimp Avocado Salad for Summer is a fantastic base that allows for plenty of creativity. You can easily switch up the ingredients to suit your taste or to use what you have on hand. Here are some alternative ingredients and dressing options to consider.

Alternative Ingredients to Consider

Shrimp Avocado Salad for Summer, feel free to experiment with different ingredients. Here are some ideas:

  • Protein Alternatives: If you want to switch things up, try grilled chicken or tofu instead of shrimp. Both options provide a great source of protein.
  • Vegetable Additions: For added crunch, consider including sliced bell peppers, radishes, or even shredded carrots. These will enhance the texture and flavor of your salad.
  • Fruits: Adding fruits like mango or pineapple can bring a sweet twist to your salad. Their natural sweetness pairs well with the savory shrimp and creamy avocado.
  • Nuts and Seeds: Toss in some toasted almonds or sunflower seeds for an extra crunch. They also add healthy fats and protein.

Shrimp Avocado Salad for Summer unique and tailored to your preferences. Don’t hesitate to mix and match!

Different Dressings for Shrimp Avocado Salad for Summer

The dressing can make a big difference in the overall flavor of your salad. While lime juice is refreshing, there are other delicious options to try:

  • Balsamic Vinaigrette: A tangy balsamic vinaigrette can add a rich flavor that complements the shrimp and avocado beautifully.
  • Honey Mustard Dressing: For a sweet and tangy twist, drizzle some honey mustard dressing over your salad. It pairs well with the fresh ingredients.
  • Ranch Dressing: If you prefer a creamy dressing, ranch is a classic choice. It adds a rich flavor that many people love.
  • Avocado Dressing: Blend avocado with yogurt, lime juice, and herbs for a creamy dressing that enhances the avocado flavor in the salad.

Shrimp Avocado Salad for Summer and keep things exciting. Feel free to try different combinations until you find your favorite!

Cooking Note for Shrimp Avocado Salad for Summer

Shrimp Avocado Salad for Summer, there are a few cooking notes to keep in mind. These tips will help ensure that your salad turns out perfectly every time. Let’s explore some important points to consider.

First, always choose fresh shrimp. Fresh shrimp not only tastes better but also has a firmer texture. If you can, buy shrimp that is wild-caught. This choice is often more sustainable and flavorful than farmed shrimp.

Next, be careful not to overcook the shrimp. Cooking shrimp for too long can make them tough and rubbery. Aim for a cooking time of just 2-3 minutes on each side. The shrimp should turn pink and opaque when done. If you’re unsure, use a meat thermometer; shrimp should reach an internal temperature of 120°F.

Additionally, consider the timing of your salad preparation. To keep the avocado from browning, prepare it just before serving. If you need to cut it in advance, sprinkle some lime juice on it. This will help maintain its vibrant green color.

Shrimp Avocado Salad for Summer ahead of time, store the components separately. Keep the shrimp, salad greens, and dressing in separate containers. This way, everything stays fresh and crisp until you’re ready to serve.

Shrimp Avocado Salad for Summer that everyone will love. Enjoy the process and the delightful flavors of this refreshing dish!

Serving Suggestions for Shrimp Avocado Salad for Summer

Shrimp Avocado Salad for Summer, it’s time to think about how to serve it. This salad is not only delicious but also versatile, making it a great addition to various meals. Here are some serving suggestions to enhance your dining experience.

Best Pairings with Shrimp Avocado Salad for Summer

To make your meal even more enjoyable, consider pairing your salad with complementary dishes. Here are some ideas:

  • Grilled Corn on the Cob: The sweetness of grilled corn pairs wonderfully with the savory shrimp and creamy avocado. It adds a delightful crunch and a burst of flavor.
  • Garlic Bread: A side of warm garlic bread can be a perfect match. The buttery, garlicky taste complements the freshness of the salad.
  • Quinoa or Rice: Serve your salad alongside a scoop of quinoa or rice. This adds a hearty element to your meal, making it more filling.
  • Chilled White Wine: A glass of chilled white wine, like Sauvignon Blanc or Pinot Grigio, can elevate your dining experience. The crispness of the wine pairs beautifully with the flavors of the salad.
  • Fruit Salad: For dessert, a light fruit salad can be a refreshing end to your meal. The sweetness of seasonal fruits balances the savory notes of the salad.

Shrimp Avocado Salad for Summer but also create a well-rounded meal. Whether you’re hosting a summer barbecue or enjoying a quiet dinner at home, these suggestions will surely impress your guests and satisfy your taste buds!

Tips for Making the Best Shrimp Avocado Salad for Summer

Shrimp Avocado Salad for Summer is all about attention to detail. With a few simple tips, you can elevate your salad to a whole new level. Here are some helpful suggestions to ensure your dish is both delicious and visually appealing.

  • Use Fresh Ingredients: Always opt for the freshest shrimp and vegetables. Fresh ingredients not only taste better but also enhance the overall quality of your salad. Visit your local farmer’s market for the best produce!
  • Season the Shrimp Well: Don’t skimp on seasoning the shrimp. The olive oil, garlic powder, and paprika create a flavorful base. Feel free to experiment with spices like cayenne pepper for a kick!
  • Perfectly Ripe Avocado: Choose avocados that are ripe but not overripe. A perfectly ripe avocado will be creamy and easy to dice. If it’s too soft, it may turn mushy in the salad.
  • Chill Before Serving: For a refreshing experience, chill your salad in the refrigerator for about 30 minutes before serving. This allows the flavors to meld together and makes the salad even more refreshing.
  • Garnish for Presentation: A sprinkle of fresh cilantro or a few slices of lime on top can make your salad look stunning. Presentation matters, especially when serving guests!
  • Adjust to Taste: Don’t hesitate to adjust the ingredients based on your preferences. If you love more crunch, add extra cucumbers or nuts. If you prefer a creamier texture, increase the amount of avocado.
  • Serve Immediately: For the best taste and texture, serve your Shrimp Avocado Salad for Summer right after mixing. This ensures the greens stay crisp and the avocado remains fresh.

Shrimp Avocado Salad for Summer that is not only delicious but also a feast for the eyes. Enjoy the process of making this delightful dish, and don’t forget to share it with family and friends!

Breakdown of Time for Shrimp Avocado Salad for Summer

Shrimp Avocado Salad for Summer, it’s helpful to know how much time you’ll need for each step. This way, you can plan your cooking efficiently and enjoy the process. Here’s a breakdown of the time required for each part of the recipe.

Prep Time

Shrimp Avocado Salad for Summer is approximately 15 minutes. This includes gathering all your ingredients, rinsing the shrimp, and chopping the vegetables. If you’re quick with a knife, you might even finish a bit sooner! Just remember to take your time with the avocado to ensure it’s diced perfectly.

Cooking Time

Cooking the shrimp takes about 6 to 8 minutes. You’ll want to cook them for 2-3 minutes on each side until they turn pink and opaque. This quick cooking time ensures that the shrimp remain tender and juicy. Keep an eye on them to avoid overcooking!

Total Time

Shrimp Avocado Salad for Summer. This makes it a perfect option for a quick lunch or a light dinner. With such a short time commitment, you can enjoy a delicious and healthy meal without spending hours in the kitchen!

Nutritional Information for Shrimp Avocado Salad for Summer

Shrimp Avocado Salad for Summer not only tastes great but also offers a variety of nutrients. Here’s a closer look at the nutritional information per serving of this delightful salad.

Calories

Shrimp Avocado Salad for Summer contains approximately 320 calories. This makes it a light yet satisfying option for lunch or dinner. The combination of shrimp, avocado, and fresh vegetables provides a nutritious meal without excessive calories.

Protein

One of the standout features of this salad is its protein content. Each serving provides about 25 grams of protein. Shrimp is an excellent source of lean protein, which is essential for muscle repair and overall health. Including this salad in your diet can help you meet your daily protein needs while enjoying a delicious meal.

Sodium

Shrimp Avocado Salad for Summer is relatively low, making it a heart-healthy choice. Each serving contains around 400 milligrams of sodium, depending on how much salt you add during preparation. Keeping sodium levels in check is important for maintaining healthy blood pressure and overall wellness.

Shrimp Avocado Salad for Summer is not only a tasty dish but also a nutritious one. With its balanced calories, high protein content, and low sodium levels, it’s a great addition to any summer meal plan. Enjoy this salad knowing you’re nourishing your body with every bite!

FAQs about Shrimp Avocado Salad for Summer

Can I make Shrimp Avocado Salad for Summer ahead of time?

Shrimp Avocado Salad for Summer ahead of time. However, it’s best to keep the avocado and dressing separate until you’re ready to serve. This helps prevent the avocado from browning and keeps the salad fresh. You can cook the shrimp and chop the vegetables a few hours in advance. Just store them in airtight containers in the refrigerator. When you’re ready to enjoy your salad, simply combine everything and add the dressing!

What can I substitute for shrimp in Shrimp Avocado Salad for Summer?

Shrimp Avocado Salad for Summer, there are several options. Grilled chicken is a popular choice, providing a similar protein boost. For a vegetarian option, consider using tofu or chickpeas. Both options are nutritious and can absorb flavors well. Additionally, you could use grilled fish like salmon or even canned tuna for a quick and easy substitute. Feel free to get creative and choose what suits your taste!

Is Shrimp Avocado Salad for Summer healthy?

Shrimp Avocado Salad for Summer is a healthy choice. It’s packed with lean protein from the shrimp, healthy fats from the avocado, and plenty of vitamins and minerals from the fresh vegetables. The salad is low in calories and sodium, making it a heart-healthy option. Plus, the fiber from the vegetables and avocado helps keep you feeling full. Enjoying this salad can be a delicious way to nourish your body!

How long does Shrimp Avocado Salad for Summer last in the fridge?

Shrimp Avocado Salad for Summer is best enjoyed fresh. However, if you have leftovers, they can be stored in the refrigerator for up to 1 day. Keep in mind that the avocado may brown and the salad may lose some of its crispness. To extend freshness, store the shrimp and vegetables separately from the avocado and dressing. This way, you can enjoy the salad again while maintaining its quality!

Conclusion on Shrimp Avocado Salad for Summer

Shrimp Avocado Salad for Summer is a delightful dish that perfectly captures the essence of the season. With its vibrant colors, fresh ingredients, and delicious flavors, this salad is not only a feast for the eyes but also a nourishing meal for the body. Whether you’re hosting a summer barbecue, enjoying a picnic, or simply looking for a quick and healthy dinner option, this salad fits the bill.

By combining protein-rich shrimp with creamy avocado and a variety of crunchy vegetables, you create a balanced meal that is both satisfying and refreshing. The versatility of this salad allows you to customize it to your liking, making it easy to adapt to different tastes and dietary preferences. Plus, with simple preparation steps and a short cooking time, you can whip it up in no time!

Shrimp Avocado Salad for Summer a regular part of your meal rotation. Not only will it keep you feeling energized, but it will also impress your family and friends with its deliciousness. So, gather your ingredients, follow the steps, and savor every bite of this delightful summer salad!

Shrimp Avocado Salad for Summer!

Cheesy Hamburger Potato Casserole Recipe is a must-try!

Introduction to Cheesy Hamburger Potato Casserole Recipe

Welcome to the delightful world of casseroles! Today, we’re diving into a comforting dish that brings warmth and joy to any table: the Cheesy Hamburger Potato Casserole. This recipe is not just a meal; it’s a hug in a dish. With layers of savory ground beef, creamy cheese, and hearty potatoes, it’s a perfect choice for family dinners or gatherings with friends.

What Makes This Recipe Special?

What sets the Cheesy Hamburger Potato Casserole apart is its incredible blend of flavors and textures. The combination of ground beef, creamy mushroom soup, and two types of cheese creates a rich and satisfying dish. Plus, the use of hash browns adds a unique twist, making it a fun and easy option for busy weeknights. This casserole is not only delicious but also versatile. You can easily customize it to suit your taste preferences or dietary needs.

Another reason this recipe shines is its simplicity. With just a few ingredients and straightforward steps, you can whip up a hearty meal in no time. It’s perfect for those who may not have a lot of cooking experience but still want to impress their family or guests. The Cheesy Hamburger Potato Casserole is sure to become a favorite in your household!

A Brief History of Casseroles

Casseroles have a rich history that dates back centuries. The term “casserole” comes from the French word for “saucepan,” which reflects its origins as a dish cooked in a single pot. Traditionally, casseroles were a way to use up leftovers, combining various ingredients into one hearty meal. This method of cooking became popular in the United States during the 1950s, as families sought convenient and economical meal solutions.

Over the years, casseroles have evolved into a beloved comfort food. They are often associated with family gatherings, potlucks, and holiday celebrations. The Cheesy Hamburger Potato Casserole is a modern take on this classic dish, showcasing how versatile and timeless casseroles can be. Whether you’re serving it at a casual dinner or a festive occasion, this recipe is sure to bring smiles and satisfaction to your table.

Ingredients for Cheesy Hamburger Potato Casserole Recipe

To create the delicious Cheesy Hamburger Potato Casserole, you’ll need a few simple ingredients. Each component plays a vital role in building the rich flavors and textures that make this dish so special. Here’s what you’ll need:

  • 2 pounds ground beef: This is the star of the dish, providing protein and a savory base.
  • 1 medium onion, chopped: Onions add sweetness and depth to the flavor.
  • 3 cloves garlic, minced: Garlic brings a wonderful aroma and enhances the overall taste.
  • 4 cups frozen hash browns (thawed): These provide a hearty texture and make the casserole filling.
  • 2 cups shredded cheddar cheese: Cheddar adds a rich, cheesy flavor that melts beautifully.
  • 1 can (10.5 ounces) cream of mushroom soup: This creamy soup binds the ingredients together and adds moisture.
  • 1 cup milk: Milk helps to create a creamy consistency in the casserole.
  • 1 teaspoon salt: Salt enhances the flavors of all the ingredients.
  • 1/2 teaspoon black pepper: Black pepper adds a subtle kick.
  • 1 teaspoon paprika: Paprika gives a hint of smokiness and color.
  • 1 teaspoon dried parsley: Parsley adds a touch of freshness and color.
  • 1 cup sour cream: Sour cream adds creaminess and a slight tang.
  • 1 cup shredded mozzarella cheese: Mozzarella provides a gooey, stretchy texture on top.

With these ingredients, you’re well on your way to creating a comforting and satisfying meal. Feel free to adjust the quantities or swap out ingredients based on your preferences. For instance, you can use ground turkey for a leaner option or add your favorite vegetables for extra nutrition. The possibilities are endless!

Step-by-Step Preparation of Cheesy Hamburger Potato Casserole Recipe

Now that you have all your ingredients ready, it’s time to dive into the preparation of your Cheesy Hamburger Potato Casserole. This step-by-step guide will help you create a delicious meal that your family will love. Let’s get started!

Step 1: Prepping the Ingredients

First things first, gather all your ingredients on the counter. This makes the cooking process smoother. Start by chopping the onion and mincing the garlic. You want these to be small enough to blend well into the beef mixture. Next, make sure your frozen hash browns are fully thawed. This helps them cook evenly in the casserole. If you’re using any additional ingredients, like vegetables or spices, prepare those as well. Having everything ready will make the cooking process much easier!

Step 2: Cooking the Ground Beef

In a large skillet, heat it over medium heat. Add the ground beef, chopped onion, and minced garlic. Cook until the beef is browned and the onions are soft. This usually takes about 7-10 minutes. Make sure to stir occasionally to prevent sticking. Once cooked, drain any excess fat from the skillet. This step is important to keep your casserole from becoming greasy. Now, your beef mixture is ready to be layered into the casserole!

Step 3: Layering the Casserole

Grab a greased 9×13-inch baking dish. Start by spreading half of the hash brown mixture evenly on the bottom. Then, layer half of the cooked ground beef mixture on top. Sprinkle half of the shredded cheddar cheese over the beef. Repeat these layers with the remaining hash brown mixture, ground beef, and finish with the rest of the cheddar cheese. Finally, add the mozzarella cheese on top for that gooey finish. This layering technique ensures that every bite is packed with flavor!

Step 4: Baking the Casserole

Now it’s time to bake! Cover the baking dish with aluminum foil and place it in the preheated oven at 350°F. Bake for 30 minutes. After that, carefully remove the foil and bake for an additional 15-20 minutes. You want the cheese to be bubbly and golden brown. Once done, take it out of the oven and let it cool for about 10 minutes before serving. This cooling time helps the casserole set, making it easier to cut and serve.

And there you have it! Your Cheesy Hamburger Potato Casserole is ready to be enjoyed. This dish is not only comforting but also a crowd-pleaser. Let’s move on to some variations you can try to make this recipe even more exciting!

Variation of Cheesy Hamburger Potato Casserole Recipe

While the classic Cheesy Hamburger Potato Casserole is a hit on its own, there are many ways to switch things up! Whether you want to try different ingredients or cater to specific dietary needs, these variations will keep your meals exciting and delicious.

Alternative Ingredients

One of the best things about casseroles is their versatility. You can easily swap out ingredients to suit your taste. Here are some alternative ingredients you might consider:

  • Ground Turkey or Chicken: For a leaner option, substitute ground beef with ground turkey or chicken. This change reduces the fat content while still providing a hearty base.
  • Fresh Vegetables: Add diced bell peppers, mushrooms, or spinach to the beef mixture for extra nutrition and flavor. These veggies not only enhance the taste but also add vibrant colors to your casserole.
  • Different Cheeses: Experiment with different types of cheese! Try pepper jack for a spicy kick or gouda for a smoky flavor. Mixing cheeses can create a unique taste experience.
  • Seasoning Variations: Feel free to play with spices! Adding Italian seasoning, taco seasoning, or even a dash of cayenne pepper can give your casserole a whole new personality.

These alternative ingredients can help you create a dish that’s tailored to your preferences. Don’t hesitate to get creative!

Vegetarian Version of the Casserole

If you’re looking for a vegetarian option, you can easily transform this casserole into a meatless delight. Here’s how:

  • Replace Ground Beef: Use a plant-based meat substitute, such as lentils, black beans, or crumbled tofu. These options provide protein and a satisfying texture.
  • Increase Vegetables: Load up on your favorite vegetables! Consider adding zucchini, corn, or broccoli. These will add flavor and nutrition to your dish.
  • Use Vegetable Broth: Instead of milk, you can use vegetable broth to keep the casserole moist and flavorful.
  • Cheese Options: Ensure that the cheese you use is vegetarian-friendly. Many brands offer delicious vegetarian cheese options that melt beautifully.

This vegetarian version of the Cheesy Hamburger Potato Casserole is just as comforting and satisfying as the original. It’s a great way to enjoy a hearty meal while keeping it meat-free!

Cooking Note for Cheesy Hamburger Potato Casserole Recipe

When preparing the Cheesy Hamburger Potato Casserole, there are a few important cooking notes to keep in mind. These tips will help ensure that your casserole turns out perfectly every time, making it a delightful dish for you and your loved ones.

First, always make sure to thaw your frozen hash browns completely before using them. This step is crucial as it allows for even cooking and prevents excess moisture from making your casserole soggy. If you forget to thaw them, you can microwave the hash browns for a few minutes to speed up the process.

Next, when cooking the ground beef, be sure to drain any excess fat. This helps keep your casserole from becoming greasy and ensures a better texture. If you prefer a leaner option, using ground turkey or chicken is a great alternative.

Additionally, feel free to adjust the seasoning to your taste. If you love a bit of spice, consider adding more paprika or even some chili powder. On the other hand, if you prefer a milder flavor, you can reduce the amount of black pepper or omit it altogether.

Lastly, remember that every oven is different. Keep an eye on your casserole as it bakes. If the cheese is bubbling and golden brown before the suggested baking time is up, it’s perfectly fine to take it out early. Allowing it to cool for about 10 minutes before serving will help the layers set, making it easier to cut and serve.

By following these cooking notes, you’ll create a Cheesy Hamburger Potato Casserole that’s not only delicious but also visually appealing. Enjoy the process and the wonderful aroma that fills your kitchen!

Serving Suggestions for Cheesy Hamburger Potato Casserole Recipe

Once your Cheesy Hamburger Potato Casserole is ready, it’s time to think about how to serve it! This dish is hearty and filling on its own, but pairing it with the right sides and beverages can elevate your meal even further. Here are some great serving suggestions to consider.

Ideal Side Dishes

To complement the rich flavors of the casserole, consider serving it with lighter side dishes. Here are a few ideas:

  • Green Salad: A fresh green salad with mixed greens, cherry tomatoes, and a light vinaigrette adds a refreshing contrast to the creamy casserole.
  • Steamed Vegetables: Steamed broccoli, green beans, or carrots provide a nutritious and colorful addition to your meal.
  • Garlic Bread: For those who love bread, garlic bread is a fantastic choice. It’s perfect for soaking up any extra cheese or sauce from the casserole.
  • Coleslaw: A tangy coleslaw can add a crunchy texture and a bit of zest, balancing the richness of the casserole.

These side dishes not only enhance the meal but also add variety to your dining experience. Feel free to mix and match based on your family’s preferences!

Perfect Pairings with Beverages

Choosing the right beverages can make your meal even more enjoyable. Here are some beverage pairings that go well with the Cheesy Hamburger Potato Casserole:

  • Iced Tea: A refreshing glass of iced tea, sweetened or unsweetened, is a classic choice that complements the flavors of the casserole.
  • Lemonade: For a fruity twist, serve lemonade. Its tartness pairs nicely with the richness of the dish.
  • Beer: If you enjoy beer, a light lager or pale ale can be a great match. The carbonation helps cleanse the palate between bites.
  • Red Wine: A medium-bodied red wine, like a Merlot or Cabernet Sauvignon, can enhance the savory flavors of the casserole.

These beverage options will not only quench your thirst but also enhance the overall dining experience. Enjoy your Cheesy Hamburger Potato Casserole with these delightful sides and drinks for a meal that’s sure to impress!

Tips for Perfecting Your Cheesy Hamburger Potato Casserole Recipe

To ensure your Cheesy Hamburger Potato Casserole turns out perfectly every time, it’s essential to keep a few tips in mind. These insights will help you avoid common pitfalls and make the most of your cooking experience. Let’s dive into some common mistakes to avoid and storage tips for leftovers!

Common Mistakes to Avoid

Even the best cooks can make mistakes! Here are some common errors to watch out for:

  • Not Thawing Hash Browns: Using frozen hash browns without thawing can lead to uneven cooking. Always thaw them completely to ensure a consistent texture.
  • Overcooking the Beef: Cooking the ground beef for too long can make it dry. Aim for a nice brown color without overcooking it.
  • Skipping the Drain Step: Forgetting to drain excess fat from the beef can make your casserole greasy. Always drain it well for a better texture.
  • Not Layering Properly: Layering is key! Make sure to distribute the ingredients evenly for balanced flavors in every bite.
  • Ignoring Baking Time: Every oven is different. Keep an eye on your casserole to avoid burning the cheese. If it looks done early, trust your instincts!

By avoiding these common mistakes, you’ll be on your way to creating a delicious casserole that everyone will love!

Storage Tips for Leftovers

If you have leftovers (which is often the case with this hearty dish), proper storage is essential to maintain freshness. Here are some tips:

  • Cool Before Storing: Allow the casserole to cool completely before storing it. This helps prevent condensation, which can make it soggy.
  • Use Airtight Containers: Store leftovers in airtight containers to keep them fresh. Glass containers work well, but plastic ones are also fine.
  • Refrigerate Promptly: Place the casserole in the refrigerator within two hours of cooking. It can last for about 3-4 days in the fridge.
  • Freezing for Later: If you want to keep it longer, consider freezing portions. Wrap them tightly in plastic wrap and then in aluminum foil. This can extend the shelf life to about 2-3 months.
  • Reheating Tips: When reheating, cover the casserole with foil to prevent it from drying out. Heat it in the oven at 350°F until warmed through, or use the microwave for quicker results.

By following these storage tips, you can enjoy your Cheesy Hamburger Potato Casserole even after the first serving. It’s a great way to savor the flavors of this comforting dish for days to come!

Breakdown of Time for Cheesy Hamburger Potato Casserole Recipe

Understanding the time needed for each step of the Cheesy Hamburger Potato Casserole recipe can help you plan your cooking efficiently. Here’s a breakdown of the time you’ll need for preparation and cooking.

Prep Time

The prep time for this delicious casserole is approximately 20-25 minutes. This includes gathering your ingredients, chopping the onion, mincing the garlic, and thawing the hash browns. Taking your time during this step ensures that everything is ready for a smooth cooking process. Remember, having all your ingredients prepped and organized will make the cooking experience much more enjoyable!

Cooking Time

Once you’ve prepped your ingredients, the cooking time is about 45-50 minutes. This includes:

  • Cooking the Ground Beef: About 10 minutes to brown the beef and soften the onions and garlic.
  • Baking the Casserole: 30 minutes covered with foil, followed by an additional 15-20 minutes uncovered to achieve that golden, bubbly cheese on top.

Keep in mind that the baking time may vary slightly depending on your oven, so it’s always a good idea to check for that perfect golden brown finish!

Total Time

In total, you can expect to spend around 1 hour and 10-15 minutes from start to finish. This includes both prep and cooking time. With this timeline, you can easily plan your meal around other activities or even prepare a simple side dish while the casserole bakes. The Cheesy Hamburger Potato Casserole is not only a delicious choice but also a time-efficient one!

Nutritional Information for Cheesy Hamburger Potato Casserole Recipe

Understanding the nutritional content of your meals is essential for maintaining a balanced diet. The Cheesy Hamburger Potato Casserole is not only delicious but also provides a good amount of nutrients. Here’s a breakdown of the key nutritional information per serving:

Calories

Each serving of the Cheesy Hamburger Potato Casserole contains approximately 450 calories. This makes it a hearty meal that can satisfy your hunger without going overboard. The combination of ground beef, cheese, and potatoes contributes to the calorie count, providing energy for your day.

Protein

Protein is an essential nutrient for building and repairing tissues. This casserole packs a punch with about 30 grams of protein per serving. The ground beef and cheese are excellent sources of protein, making this dish a great option for those looking to increase their protein intake. It’s perfect for active individuals or anyone needing a filling meal!

Sodium

While the Cheesy Hamburger Potato Casserole is tasty, it’s important to be mindful of sodium intake. Each serving contains around 800 milligrams of sodium. This amount is relatively high, primarily due to the cream of mushroom soup and cheese. If you’re watching your sodium levels, consider using low-sodium soup or cheese alternatives to help reduce the overall sodium content.

By being aware of the nutritional information, you can enjoy your Cheesy Hamburger Potato Casserole while making informed choices about your diet. It’s a comforting dish that can fit into a balanced meal plan when enjoyed in moderation!

FAQs about Cheesy Hamburger Potato Casserole Recipe

Can I use frozen potatoes for this recipe?

Absolutely! You can use frozen hash browns for the Cheesy Hamburger Potato Casserole. Just make sure to thaw them completely before using. Thawing helps ensure even cooking and prevents excess moisture from making your casserole soggy. If you forget to thaw them, a quick microwave session can do the trick!

How can I make this casserole spicier?

If you’re looking to add some heat to your Cheesy Hamburger Potato Casserole, there are several ways to do so! You can mix in diced jalapeños or add a dash of hot sauce to the ground beef mixture. Another option is to sprinkle some crushed red pepper flakes or cayenne pepper into the casserole. Adjust the spice level to your liking, and enjoy the extra kick!

Can I prepare Cheesy Hamburger Potato Casserole in advance?

Yes, you can prepare the Cheesy Hamburger Potato Casserole in advance! Simply assemble the casserole up to the baking step, cover it tightly with plastic wrap or aluminum foil, and refrigerate it for up to 24 hours. When you’re ready to bake, remove the cover and bake it as directed. You may need to add a few extra minutes to the baking time if it’s coming straight from the fridge.

What are some good toppings for this casserole?

Toppings can elevate your Cheesy Hamburger Potato Casserole to the next level! Consider adding some chopped green onions or fresh parsley for a pop of color and freshness. You can also sprinkle some extra shredded cheese on top during the last few minutes of baking for a gooey finish. For a crunchy texture, crushed tortilla chips or fried onions make excellent toppings. Get creative and customize it to your taste!

Conclusion on Cheesy Hamburger Potato Casserole Recipe

In conclusion, the Cheesy Hamburger Potato Casserole is a delightful dish that combines comfort and flavor in every bite. This recipe is not only easy to prepare but also offers endless possibilities for customization. Whether you stick to the classic version or explore various alternatives, this casserole is sure to please everyone at your table.

As you gather your loved ones around for a hearty meal, the warmth and satisfaction of this casserole will create lasting memories. It’s perfect for family dinners, potlucks, or even a cozy night in. The combination of ground beef, creamy cheeses, and tender potatoes makes it a filling option that everyone will enjoy.

Remember, cooking is all about creativity and personal touch. Feel free to experiment with different ingredients, spices, and toppings to make this dish your own. With the tips and variations provided, you can easily adapt the Cheesy Hamburger Potato Casserole to suit your taste and dietary needs.

So, roll up your sleeves, gather your ingredients, and get ready to enjoy a comforting meal that’s sure to become a staple in your home. Happy cooking!

Shrimp Scampi Pasta Recipe Without Wine is easy to make.

Introduction to Shrimp Scampi Pasta Recipe Without Wine

What Makes This Recipe Unique?

Shrimp Scampi Pasta Recipe Without Wine stands out for its simplicity and rich taste. By omitting wine, we make this dish accessible to everyone, including those who prefer not to cook with alcohol. The combination of garlic, butter, and fresh lemon creates a vibrant sauce that perfectly complements the shrimp and pasta. Plus, it’s quick to prepare, making it an ideal choice for busy weeknights or special occasions.

Why Choose a Wine-Free Version?

Choosing a wine-free version of shrimp scampi opens the door to a wider audience. Many people avoid wine for various reasons, including dietary restrictions, personal preferences, or health concerns. This recipe allows everyone to enjoy the classic flavors without compromising on taste. Additionally, the use of lemon juice and zest adds a refreshing brightness that mimics the acidity of wine, ensuring that the dish remains flavorful and satisfying. So, whether you’re cooking for family or friends, this wine-free shrimp scampi pasta is sure to impress!

Ingredients for Shrimp Scampi Pasta Recipe Without Wine

Essential Ingredients

Shrimp Scampi Pasta Recipe Without Wine, you’ll need a few key ingredients. These essentials come together to form a delightful dish that’s both satisfying and flavorful. Here’s what you’ll need:

  • 8 ounces linguine or spaghetti: This will be the base of your dish, providing a perfect canvas for the shrimp and sauce.
  • 1 pound large shrimp: Peeled and deveined, these shrimp are the star of the show, bringing a sweet and tender texture.
  • 4 tablespoons unsalted butter: This adds richness and depth to the sauce.
  • 3 tablespoons olive oil: A healthy fat that enhances flavor and helps cook the shrimp.
  • 4 cloves garlic: Minced garlic infuses the dish with a wonderful aroma and taste.
  • 1 teaspoon red pepper flakes: Adjust this to your spice preference for a little kick.
  • 1 lemon: Juiced and zested, lemon brightens the dish and adds a refreshing tang.
  • 1/4 cup fresh parsley: Chopped parsley adds a pop of color and freshness.
  • Salt and pepper: Essential for seasoning and enhancing the flavors.
  • Grated Parmesan cheese (optional): For those who enjoy a cheesy finish, this is a great addition.

Optional Ingredients for Extra Flavor

Shrimp Scampi Pasta Recipe Without Wine, consider adding some optional ingredients. These can enhance the dish and cater to your taste preferences:

  • 1/4 cup heavy cream: For a creamier sauce, stir this in after adding the lemon juice.
  • Cherry tomatoes: Halved, they add a burst of sweetness and color.
  • Spinach or arugula: Toss in some greens for added nutrition and flavor.
  • Capers: These can provide a briny kick that complements the shrimp beautifully.

Feel free to mix and match these ingredients to create your perfect version of shrimp scampi pasta!

Step-by-Step Preparation of Shrimp Scampi Pasta Recipe Without Wine

Step 1: Preparing the Shrimp

Before you start cooking, it’s important to prepare the shrimp properly. First, ensure that your shrimp are peeled and deveined. This means removing the shell and the dark vein that runs along the back. Rinse the shrimp under cold water and pat them dry with a paper towel. This step is crucial as it helps the shrimp cook evenly and prevents excess moisture from affecting the sauce. Once prepared, set the shrimp aside while you get the pasta ready.

Step 2: Cooking the Pasta

Next, bring a large pot of salted water to a boil. Add the linguine or spaghetti and cook according to the package instructions until al dente. This usually takes about 8 to 10 minutes. Remember to stir occasionally to prevent the pasta from sticking together. Once cooked, reserve 1/2 cup of the pasta water, then drain the rest and set the pasta aside. This reserved water will help adjust the sauce later, ensuring it clings perfectly to the pasta.

Step 3: Sautéing the Garlic and Shrimp

Now, it’s time to create that delicious sauce! In a large skillet, melt the butter and olive oil over medium heat. Once melted, add the minced garlic and red pepper flakes. Sauté for about 1 minute until the garlic is fragrant but not browned. Then, add the prepared shrimp to the skillet. Season them with salt and pepper. Cook the shrimp for 2-3 minutes on each side until they turn pink and opaque. This quick cooking ensures they remain tender and juicy.

Step 4: Combining Ingredients

After the shrimp are cooked, it’s time to bring everything together. Squeeze the lemon juice over the shrimp and add the lemon zest for that extra zing. Next, add the drained pasta to the skillet. Toss everything together gently, ensuring the pasta is well coated with the buttery sauce. If the sauce seems too thick, gradually add the reserved pasta water, a little at a time, until you reach your desired consistency. This step is key to achieving a luscious sauce that clings to the pasta.

Step 5: Final Touches and Serving

Shrimp Scampi Pasta Recipe Without Wine with family and friends!

Variations of Shrimp Scampi Pasta Recipe Without Wine

Adding Vegetables for a Healthier Twist

Shrimp Scampi Pasta Recipe Without Wine not only boosts the nutritional value but also adds vibrant colors and textures. Here are some great options:

  • Zucchini: Spiralized or sliced, zucchini adds a fresh crunch. Sauté it with the garlic for a few minutes before adding the shrimp.
  • Bell Peppers: Diced bell peppers bring sweetness and a pop of color. Add them to the skillet when you sauté the garlic.
  • Asparagus: Cut into bite-sized pieces, asparagus can be added during the last few minutes of cooking the shrimp for a tender yet crisp finish.
  • Broccoli: Steamed or blanched broccoli florets can be tossed in with the pasta for added fiber and nutrients.

These vegetables not only enhance the dish’s flavor but also make it more filling and satisfying. Feel free to mix and match based on your preferences!

Alternative Proteins to Use

Shrimp Scampi Pasta Recipe Without Wine. Here are some tasty alternatives:

  • Chicken: Diced chicken breast can be sautéed in the same way as shrimp. Cook it until golden brown and fully cooked before adding the garlic.
  • Scallops: These tender seafood gems can replace shrimp. Sear them for about 2-3 minutes on each side until they are opaque.
  • Tofu: For a vegetarian option, use firm tofu. Cube it and sauté until golden before adding the garlic and other ingredients.
  • Salmon: Flaked cooked salmon can be added at the end for a rich flavor. Just be careful not to overcook it!

These alternatives allow you to customize your dish while still enjoying the delicious flavors of shrimp scampi. Experiment with different proteins to find your favorite combination!

Cooking Note for Shrimp Scampi Pasta Recipe Without Wine

Tips for Perfectly Cooked Shrimp

Shrimp Scampi Pasta Recipe Without Wine. Here are some helpful tips to ensure your shrimp turn out just right:

  • Choose Fresh Shrimp: Always opt for fresh or properly thawed shrimp. Fresh shrimp have a sweet flavor and firm texture.
  • Don’t Overcook: Shrimp cook quickly. Aim for 2-3 minutes on each side. They should turn pink and opaque. Overcooking can make them rubbery.
  • Pat Dry: Before cooking, pat the shrimp dry with a paper towel. This helps them sear nicely and prevents excess moisture in the pan.
  • Use High Heat: Cooking shrimp over medium to high heat allows for a quick sear, locking in flavor and moisture.
  • Season Well: Don’t forget to season your shrimp with salt and pepper before cooking. This enhances their natural flavor.

By following these tips, you’ll achieve perfectly cooked shrimp that elevate your pasta dish!

Adjusting Cooking Times for Different Pasta Types

Shrimp Scampi Pasta Recipe Without Wine:

  • Spaghetti: Typically takes about 8-10 minutes to cook until al dente. Keep an eye on it to avoid overcooking.
  • Linguine: Similar to spaghetti, linguine usually cooks in 9-11 minutes. Stir occasionally to prevent sticking.
  • Fettuccine: This wider pasta may take a bit longer, around 10-12 minutes. Check for doneness before draining.
  • Penne: Penne pasta generally cooks in 11-13 minutes. It’s great for holding onto the sauce!
  • Gluten-Free Pasta: Cooking times can vary widely. Always check the package instructions for the best results.

Adjusting your cooking times based on the pasta type ensures that everything is perfectly cooked and ready to enjoy together!

Serving Suggestions for Shrimp Scampi Pasta Recipe Without Wine

Ideal Side Dishes

Shrimp Scampi Pasta Recipe Without Wine, pairing it with the right side dishes can enhance the overall dining experience. Here are some ideal options:

  • Garlic Bread: A classic choice, garlic bread complements the buttery sauce of the pasta. It’s perfect for soaking up any leftover sauce!
  • Caesar Salad: Crisp romaine lettuce, crunchy croutons, and creamy dressing make a refreshing side. The flavors balance well with the richness of the shrimp scampi.
  • Steamed Vegetables: Lightly steamed broccoli, green beans, or asparagus add color and nutrition. They provide a nice contrast to the pasta.
  • Caprese Salad: Fresh tomatoes, mozzarella, and basil drizzled with balsamic glaze offer a light and flavorful side that pairs beautifully with shrimp.

These side dishes not only complement the main dish but also add variety to your meal, making it more enjoyable for everyone!

Recommended Pairings

Shrimp Scampi Pasta Recipe Without Wine. Here are some recommended pairings:

  • Lemonade: A refreshing glass of lemonade enhances the citrus notes in the dish. It’s a great non-alcoholic option for all ages.
  • Iced Tea: Unsweetened iced tea with a slice of lemon is a perfect match. It’s light and won’t overpower the flavors of the pasta.
  • Sparkling Water: For a bubbly touch, serve sparkling water with a twist of lime or lemon. It cleanses the palate between bites.
  • Light Beer: If you prefer an alcoholic option, a light lager or pilsner can complement the dish without overwhelming it.

These pairings will enhance the flavors of your shrimp scampi pasta, making your meal even more delightful!

Tips for Making the Best Shrimp Scampi Pasta Recipe Without Wine

Common Mistakes to Avoid

Shrimp Scampi Pasta Recipe Without Wine, avoiding common pitfalls can make a big difference in the final dish. Here are some mistakes to watch out for:

  • Overcooking the Shrimp: Shrimp cook quickly. If you leave them in the pan too long, they can become rubbery. Aim for just 2-3 minutes on each side.
  • Not Salting the Pasta Water: Salting the water is essential. It enhances the pasta’s flavor and ensures it tastes great on its own.
  • Skipping the Reserved Pasta Water: This water is starchy and helps create a silky sauce. Don’t forget to add it gradually to achieve the right consistency.
  • Using Low-Quality Ingredients: Fresh shrimp, good olive oil, and real butter make a noticeable difference. Invest in quality ingredients for the best flavor.
  • Not Tasting as You Go: Always taste your dish while cooking. Adjust the seasoning to your liking, ensuring a balanced flavor.

By avoiding these mistakes, you’ll be on your way to creating a delicious shrimp scampi pasta that everyone will love!

Enhancing Flavor Without Wine

Shrimp Scampi Pasta Recipe Without Wine in several ways. Here are some tips to elevate your dish:

  • Use Fresh Herbs: Fresh herbs like basil or thyme can add depth. Toss them in just before serving for a burst of flavor.
  • Incorporate Citrus Zest: Besides lemon, try adding lime or orange zest for a unique twist. This adds brightness and complexity to the dish.
  • Experiment with Spices: Consider adding a pinch of smoked paprika or cayenne pepper for a different flavor profile. These spices can add warmth and depth.
  • Include Broth: Instead of just using pasta water, add a splash of chicken or vegetable broth for extra flavor. This can enhance the overall taste of the sauce.
  • Finish with Olive Oil: Drizzling a bit of high-quality olive oil over the finished dish can add richness and a lovely finish.

These enhancements will ensure your shrimp scampi pasta is bursting with flavor, making it a memorable meal!

Breakdown of Time for Shrimp Scampi Pasta Recipe Without Wine

Prep Time

Shrimp Scampi Pasta Recipe Without Wine is quick and easy. The prep time typically takes about 15 minutes. During this time, you’ll gather all your ingredients, peel and devein the shrimp, and chop the garlic and parsley. Having everything ready before you start cooking makes the process smoother and more enjoyable.

Cooking Time

The cooking time for this delicious dish is around 15 minutes. This includes boiling the pasta and sautéing the shrimp with garlic and spices. The quick cooking ensures that the shrimp remain tender and juicy while the pasta is perfectly al dente. Timing is key, so keep an eye on both the pasta and shrimp to avoid overcooking.

Total Time

Shrimp Scampi Pasta Recipe Without Wine. This makes it a fantastic option for a weeknight dinner or a last-minute gathering. With just half an hour, you can serve a delightful meal that’s sure to impress your family and friends!

Nutritional Information for Shrimp Scampi Pasta Recipe Without Wine

Calories and Macronutrients

Shrimp Scampi Pasta Recipe Without Wine can help you make informed choices about your meals. Each serving of this delightful dish contains approximately 450 calories. Here’s a breakdown of the macronutrients:

  • Net Carbs: 45g – This includes the carbohydrates from the pasta and any added vegetables.
  • Protein: 28g – The shrimp provide a significant protein boost, making this dish satisfying and filling.
  • Fat: 20g – The combination of butter and olive oil contributes to the healthy fat content, enhancing flavor and richness.

This balance of macronutrients makes shrimp scampi pasta a well-rounded meal option, perfect for those looking to enjoy a delicious dish without compromising on nutrition.

Health Benefits of Key Ingredients

Shrimp Scampi Pasta Recipe Without Wine offers unique health benefits, making this dish not only tasty but also nutritious. Here’s a closer look at some of the key ingredients:

  • Shrimp: Low in calories and high in protein, shrimp are also a great source of selenium, which supports immune function and thyroid health.
  • Garlic: Known for its numerous health benefits, garlic can help lower blood pressure and improve cholesterol levels. It also has anti-inflammatory properties.
  • Lemon: Rich in vitamin C, lemon boosts the immune system and aids in digestion. Its antioxidants help fight free radicals in the body.
  • Parsley: This fresh herb is packed with vitamins A, C, and K. It also contains antioxidants and can help support healthy digestion.
  • Olive Oil: A heart-healthy fat, olive oil is known for its anti-inflammatory properties and can help reduce the risk of chronic diseases.

By incorporating these ingredients, your shrimp scampi pasta not only satisfies your taste buds but also contributes to your overall health. Enjoy this delicious meal knowing it’s good for you too!

FAQs About Shrimp Scampi Pasta Recipe Without Wine

Can I use frozen shrimp for this recipe?

Shrimp Scampi Pasta Recipe Without Wine. Just make sure to thaw them properly before cooking. To do this, place the frozen shrimp in a bowl of cold water for about 15-20 minutes. Once thawed, pat them dry with a paper towel to remove excess moisture. This will help them cook evenly and prevent the sauce from becoming watery. Using frozen shrimp is a convenient option that still delivers great flavor!

What can I substitute for wine in shrimp scampi?

Shrimp Scampi Pasta Recipe Without Wine, lemon juice is an excellent choice. It adds acidity and brightness, mimicking the effect of wine. You can also use chicken or vegetable broth for added depth of flavor. Another option is to mix a little white grape juice with vinegar to achieve a similar taste profile. These alternatives will keep your dish flavorful and enjoyable without the use of alcohol.

How can I make this dish gluten-free?

Shrimp Scampi Pasta Recipe Without Wine gluten-free is simple! Just substitute regular pasta with gluten-free pasta made from rice, quinoa, or lentils. Many brands offer gluten-free options that cook similarly to traditional pasta. Be sure to check the cooking times, as they may vary. Additionally, always check the labels of your other ingredients, like broth and seasonings, to ensure they are gluten-free. This way, everyone can enjoy this delicious dish!

Can I prepare this recipe in advance?

Shrimp Scampi Pasta Recipe Without Wine fresh, you can prepare some components in advance. You can cook the pasta and shrimp separately, then store them in airtight containers in the refrigerator. When you’re ready to serve, simply reheat the shrimp and toss it with the pasta and sauce. However, keep in mind that the shrimp may lose some of their texture when reheated. For the best results, try to enjoy this dish right after cooking!

Conclusion on Shrimp Scampi Pasta Recipe Without Wine

Recap of Key Points

Shrimp Scampi Pasta Recipe Without Wine is a delightful dish that combines simplicity with rich flavors. By using fresh ingredients like shrimp, garlic, and lemon, you create a meal that is both satisfying and nutritious. The recipe is easy to follow, making it perfect for busy weeknights or special occasions. Remember to adjust the spice levels and add optional ingredients to suit your taste. With tips for cooking shrimp perfectly and suggestions for side dishes, you can elevate your dining experience. This dish is not only delicious but also offers health benefits from its key ingredients.

Encouragement to Try the Recipe

Shrimp Scampi Pasta Recipe Without Wine. Whether you’re cooking for yourself, family, or friends, this dish is sure to impress. Don’t hesitate to experiment with different vegetables or proteins to make it your own. Enjoy the process, and savor every bite of this flavorful pasta dish. Happy cooking!

Sweet Potato Ground Turkey Casserole is a family favorite.

Introduction to Sweet Potato Ground Turkey Casserole

Sweet Potato Ground Turkey Casserole. This hearty dish combines the natural sweetness of sweet potatoes with the savory flavor of ground turkey, creating a perfect balance that is both satisfying and healthy.

Not only is this casserole easy to prepare, but it also packs a punch when it comes to nutrition. Sweet potatoes are rich in vitamins and minerals, while ground turkey provides a lean source of protein. Together, they make a fantastic meal that can be enjoyed any day of the week.

Whether you’re hosting a family dinner or simply looking for a quick weeknight meal, this casserole is sure to impress. With its vibrant colors and mouthwatering aroma, it’s a feast for the eyes as well as the taste buds. Plus, it’s versatile! You can easily customize it with your favorite vegetables or spices to suit your taste.

Sweet Potato Ground Turkey Casserole. By the end, you’ll be ready to whip up this delightful dish in your own kitchen. So, let’s get started on this culinary adventure!

Ingredients for Sweet Potato Ground Turkey Casserole

Sweet Potato Ground Turkey Casserole, you’ll need a selection of fresh and wholesome ingredients. Each component plays a vital role in delivering flavor and nutrition. Here’s what you’ll need:

  • 2 medium sweet potatoes, peeled and diced (about 2 cups)
  • 1 pound ground turkey
  • 1 small onion, diced
  • 2 cloves garlic, minced
  • 1 teaspoon ground cumin
  • 1 teaspoon smoked paprika
  • 1/2 teaspoon salt
  • 1/4 teaspoon black pepper
  • 1 cup corn kernels (fresh, frozen, or canned)
  • 1 cup black beans, drained and rinsed
  • 1 cup shredded cheddar cheese
  • 1/4 cup fresh cilantro, chopped (optional)
  • 1 tablespoon olive oil

These ingredients come together to create a delightful blend of flavors. The sweet potatoes add a natural sweetness, while the ground turkey provides a lean protein source. The spices, like cumin and smoked paprika, enhance the dish with warmth and depth. Corn and black beans contribute texture and additional nutrients, making this casserole a well-rounded meal.

Feel free to adjust the ingredients based on your preferences. For instance, you can swap out the ground turkey for ground chicken or lean beef. You can also add more vegetables, like bell peppers or zucchini, to boost the nutritional value. The possibilities are endless!

Step-by-Step Preparation of Sweet Potato Ground Turkey Casserole

Sweet Potato Ground Turkey Casserole. Follow these simple steps to create a delicious meal that everyone will enjoy!

Step 1: Prepping the Sweet Potatoes

First, you need to prepare the sweet potatoes. Start by peeling them carefully. Then, dice the sweet potatoes into small, even cubes. This ensures they cook evenly. Next, bring a large pot of water to a boil. Once boiling, add the diced sweet potatoes. Cook them for about 10-12 minutes, or until they are tender. You can check their tenderness by poking them with a fork. Once done, drain the sweet potatoes and set them aside.

Step 2: Cooking the Ground Turkey

While the sweet potatoes are cooking, you can start on the ground turkey. Heat a large skillet over medium heat and add the olive oil. Once the oil is hot, add the diced onion. Sauté the onion for about 3-4 minutes until it becomes soft and translucent. Then, add the minced garlic and cook for an additional minute. This will give your dish a wonderful aroma!

Next, add the ground turkey to the skillet. Use a spoon to break it apart as it cooks. Stir it occasionally until it is browned and fully cooked, which should take about 5-7 minutes. Make sure to drain any excess fat from the skillet to keep your casserole light and healthy.

Step 3: Combining Ingredients

Now it’s time to bring everything together! In the skillet with the cooked turkey, add the drained sweet potatoes, corn, black beans, cumin, smoked paprika, salt, and black pepper. Mix everything well to ensure the flavors combine beautifully. This step is crucial as it allows the spices to coat all the ingredients evenly, enhancing the overall taste of your casserole.

Step 4: Assembling the Casserole

Once your mixture is well combined, it’s time to assemble the casserole. Take a greased 9×13-inch baking dish and transfer the turkey and sweet potato mixture into it. Spread it out evenly across the dish. This helps ensure that every bite is packed with flavor. Finally, sprinkle the shredded cheddar cheese generously on top. The cheese will melt and create a delicious, gooey layer when baked.

Step 5: Baking the Casserole

Preheat your oven to 375°F if you haven’t done so already. Once the oven is ready, place the assembled casserole inside. Bake it for about 25-30 minutes. You’ll know it’s done when the cheese is melted and bubbly, creating a golden crust on top. Once baked, remove the casserole from the oven and let it cool for a few minutes. This cooling time allows the flavors to settle, making it even tastier!

Sweet Potato Ground Turkey Casserole is ready to be served! Enjoy the delightful combination of flavors and textures in this wholesome dish.

Variations of Sweet Potato Ground Turkey Casserole

Sweet Potato Ground Turkey Casserole is a versatile dish that can be easily customized to suit your taste preferences. By adding different vegetables or spices, you can create a unique version of this delicious casserole. Here are some ideas to inspire your culinary creativity!

Adding Different Vegetables

One of the best ways to enhance your casserole is by incorporating a variety of vegetables. Not only do they add flavor, but they also boost the nutritional value. Here are some great options:

  • Bell Peppers: Diced bell peppers add a sweet crunch. You can use any color, such as red, yellow, or green.
  • Zucchini: Chopped zucchini blends well with the other ingredients and adds moisture.
  • Spinach: Fresh or frozen spinach can be stirred in for a pop of color and added nutrients.
  • Mushrooms: Sautéed mushrooms bring an earthy flavor that complements the turkey.
  • Carrots: Diced carrots add a touch of sweetness and a nice texture.

Feel free to mix and match these vegetables based on what you have on hand. The more colorful your casserole, the more appealing it will be!

Spicing It Up with Seasonings

Sweet Potato Ground Turkey Casserole with different seasonings. Here are some ideas to elevate the taste:

  • Chili Powder: Add a teaspoon or two for a warm, spicy kick.
  • Italian Herbs: A blend of oregano, basil, and thyme can give your casserole a Mediterranean twist.
  • Cayenne Pepper: For those who enjoy heat, a pinch of cayenne can add a fiery touch.
  • Fresh Herbs: Chopped parsley or basil can brighten the dish and add freshness.
  • Lemon Zest: A sprinkle of lemon zest before serving can enhance the flavors and add brightness.

Experimenting with different vegetables and spices allows you to create a casserole that suits your family’s tastes. The possibilities are endless, making this dish a fun and exciting meal option!

Cooking Note for Sweet Potato Ground Turkey Casserole

Sweet Potato Ground Turkey Casserole, there are a few important cooking notes to keep in mind. These tips will help ensure that your casserole turns out perfectly every time, making it a delightful addition to your meal rotation.

First, always choose fresh ingredients. Fresh sweet potatoes, vegetables, and herbs will enhance the flavor and texture of your casserole. If you can, opt for organic produce to maximize the nutritional benefits.

Next, be mindful of the cooking times. Overcooking the sweet potatoes can lead to a mushy texture. Aim for tender but not falling apart. Similarly, when cooking the ground turkey, ensure it is fully cooked but not dry. The meat should be browned and no longer pink, which usually takes about 5-7 minutes.

Another tip is to let the casserole cool for a few minutes after baking. This cooling period allows the layers to set, making it easier to serve. If you cut into the casserole too soon, it may fall apart, losing its beautiful presentation.

Lastly, feel free to adjust the baking time based on your oven. Every oven is different, and some may cook faster than others. Keep an eye on the cheese; once it’s melted and bubbly, your casserole is ready to come out!

Sweet Potato Ground Turkey Casserole that your family will love. Enjoy the process and the wonderful aromas that fill your kitchen!

Serving Suggestions for Sweet Potato Ground Turkey Casserole

Sweet Potato Ground Turkey Casserole is baked to perfection, it’s time to think about how to serve it. This dish is not only delicious but also versatile, making it a great centerpiece for any meal. Here are some serving suggestions to enhance your dining experience:

  • Fresh Salad: Pair your casserole with a light, fresh salad. A simple green salad with mixed greens, cherry tomatoes, and a vinaigrette dressing complements the richness of the casserole beautifully.
  • Steamed Vegetables: Serve with a side of steamed vegetables like broccoli or green beans. This adds color and extra nutrients to your meal.
  • Avocado Slices: Creamy avocado slices on the side can add a delightful texture and flavor contrast. They also provide healthy fats!
  • Yogurt or Sour Cream: A dollop of plain yogurt or sour cream on top of each serving can add creaminess and a tangy flavor that balances the sweetness of the potatoes.
  • Hot Sauce: For those who enjoy a bit of heat, offering hot sauce on the side allows everyone to customize their dish to their liking.

Additionally, consider serving the casserole in individual portions. This not only makes for an attractive presentation but also allows guests to enjoy their own serving without needing to scoop from a larger dish.

Lastly, don’t forget to garnish! A sprinkle of fresh cilantro or parsley on top before serving adds a pop of color and freshness. This simple touch can elevate the dish and make it even more appealing.

Sweet Potato Ground Turkey Casserole will be a hit at any table. Enjoy the delightful flavors and the smiles it brings to your family and friends!

Tips for Perfecting Your Sweet Potato Ground Turkey Casserole

Sweet Potato Ground Turkey Casserole is all about attention to detail and a few helpful tips. With these suggestions, you can elevate your casserole to new heights, ensuring it’s a hit every time you serve it!

First, consider the texture of your sweet potatoes. For a creamier casserole, you can mash half of the sweet potatoes before mixing them with the other ingredients. This will create a smooth base that contrasts nicely with the chunky turkey and beans.

Next, don’t skip the seasoning! The spices you choose can make a big difference in flavor. Taste your mixture before baking and adjust the seasonings as needed. If you prefer a bolder flavor, feel free to add more cumin or smoked paprika.

Another tip is to layer your ingredients. Instead of mixing everything together, try layering the sweet potatoes, turkey mixture, and cheese. This method can create a more visually appealing dish and allows the flavors to meld beautifully as they bake.

For added crunch, consider topping your casserole with breadcrumbs or crushed tortilla chips before baking. This will give your dish a delightful texture contrast and a golden finish.

Lastly, let your casserole rest for about 10 minutes after baking. This resting time allows the flavors to settle and makes it easier to cut into neat portions. Plus, it helps prevent burns from the hot cheese!

Sweet Potato Ground Turkey Casserole. Enjoy the process and the delicious results!

Breakdown of Time for Sweet Potato Ground Turkey Casserole

Sweet Potato Ground Turkey Casserole can help you plan your cooking efficiently. Here’s a detailed breakdown of the time you’ll need for preparation and cooking:

Prep Time

The prep time for this casserole is approximately 20-25 minutes. This includes:

  • Peeling and dicing the sweet potatoes (about 10 minutes).
  • Dicing the onion and mincing the garlic (around 5 minutes).
  • Gathering and measuring all other ingredients (5-10 minutes).

Taking your time during prep ensures that everything is ready for a smooth cooking process.

Cooking Time

Sweet Potato Ground Turkey Casserole is about 30-35 minutes. This includes:

  • Boiling the sweet potatoes until tender (10-12 minutes).
  • Cooking the ground turkey and sautéing the onions and garlic (about 8-10 minutes).
  • Baking the assembled casserole in the oven (25-30 minutes).

Each step is crucial for achieving the perfect texture and flavor in your casserole.

Total Time

In total, you can expect to spend around 50-60 minutes from start to finish. This includes both prep and cooking times. Here’s a quick summary:

  • Prep Time: 20-25 minutes
  • Cooking Time: 30-35 minutes
  • Total Time: 50-60 minutes

Sweet Potato Ground Turkey Casserole into your busy schedule. Enjoy the process and the delicious meal that awaits!

Nutritional Information for Sweet Potato Ground Turkey Casserole

Sweet Potato Ground Turkey Casserole is not only delicious but also packed with nutrients. Here’s a breakdown of the key nutritional information per serving:

Calories

Sweet Potato Ground Turkey Casserole contains approximately 320 calories. This makes it a satisfying option for lunch or dinner without overwhelming your daily caloric intake. The combination of sweet potatoes and ground turkey provides a hearty meal that keeps you feeling full and energized.

Protein

Protein is vital for muscle repair and overall health. This casserole offers about 24 grams of protein per serving, thanks to the lean ground turkey. Protein helps you feel satiated and supports your body’s functions, making this dish a great choice for active individuals and families.

Sodium

When it comes to sodium, each serving contains around 400 milligrams. While this is a reasonable amount for a flavorful dish, it’s always good to be mindful of your sodium intake, especially if you are watching your salt consumption. You can reduce sodium by using low-sodium versions of canned beans and corn or by adjusting the amount of added salt in the recipe.

Sweet Potato Ground Turkey Casserole is a nutritious meal option that provides a good balance of calories, protein, and essential nutrients. It’s a fantastic way to enjoy a wholesome dish that supports your health and satisfies your taste buds!

FAQs about Sweet Potato Ground Turkey Casserole

Can I use other types of meat in the casserole?

Sweet Potato Ground Turkey Casserole is quite versatile. You can easily substitute ground turkey with other types of meat. Ground chicken is a great alternative if you want a similar flavor profile. If you prefer beef, lean ground beef works well too. Just remember to adjust the cooking time slightly, as different meats may require varying cooking durations. Feel free to experiment and find the meat that your family enjoys the most!

How can I make this casserole vegetarian?

Sweet Potato Ground Turkey Casserole is simple and delicious! Instead of ground turkey, you can use plant-based meat alternatives, such as lentils, chickpeas, or crumbled tofu. These options provide protein and texture. Additionally, you can add more vegetables like mushrooms, zucchini, or bell peppers to enhance the flavor. Just ensure to season well to keep the dish flavorful and satisfying!

Can I prepare Sweet Potato Ground Turkey Casserole ahead of time?

Sweet Potato Ground Turkey Casserole ahead of time! This makes it a convenient option for busy days. You can assemble the casserole and store it in the refrigerator for up to 24 hours before baking. Just cover it tightly with plastic wrap or aluminum foil. When you’re ready to bake, remove it from the fridge and let it sit at room temperature for about 30 minutes before placing it in the oven. This helps ensure even cooking. You can also freeze the assembled casserole for up to three months. Just remember to thaw it in the fridge overnight before baking!

What are some good side dishes to serve with this casserole?

Sweet Potato Ground Turkey Casserole can enhance your meal experience. Here are some great options:

  • Green Salad: A fresh green salad with mixed greens, cucumbers, and a light vinaigrette complements the richness of the casserole.
  • Roasted Vegetables: Roasted seasonal vegetables, like Brussels sprouts or carrots, add a delicious crunch and flavor.
  • Quinoa or Rice: A side of quinoa or brown rice can provide additional fiber and nutrients, making your meal more filling.
  • Garlic Bread: Warm garlic bread is a tasty addition that pairs well with the casserole’s flavors.
  • Fruit Salad: A refreshing fruit salad can balance the savory flavors of the casserole and add a sweet touch.

These side dishes not only complement the casserole but also create a well-rounded meal that everyone will enjoy!

Conclusion on Sweet Potato Ground Turkey Casserole

Sweet Potato Ground Turkey Casserole is a delightful dish that brings together wholesome ingredients and rich flavors. It’s not just a meal; it’s a celebration of nutrition and taste that can easily become a family favorite. With its vibrant colors and satisfying textures, this casserole is perfect for any occasion, whether it’s a cozy weeknight dinner or a gathering with friends.

By following the simple steps outlined in this article, you can create a delicious casserole that is both easy to prepare and packed with nutrients. The versatility of this dish allows you to customize it to your liking, whether by adding different vegetables or experimenting with spices. This means you can enjoy a new twist on the casserole every time you make it!

Moreover, the nutritional benefits of sweet potatoes and ground turkey make this casserole a smart choice for those looking to maintain a balanced diet. With a good amount of protein, fiber, and essential vitamins, it’s a meal that nourishes both the body and the soul.

Sweet Potato Ground Turkey Casserole. Your family will thank you for it, and you’ll love the ease and satisfaction of preparing such a wholesome dish. Happy cooking!

Stuffed Pepper Casserole Recipe is a must-try dish!

Introduction to Stuffed Pepper Casserole Recipe

What is Stuffed Pepper Casserole?

The Stuffed Pepper Casserole is a delightful twist on the classic stuffed peppers. Instead of hollowing out individual peppers, this recipe combines all the flavors into a hearty casserole. It features layers of cooked rice, ground meat, and colorful bell peppers, all baked together with a rich tomato sauce. This dish is not only comforting but also packed with nutrients, making it a perfect meal for families or gatherings. The combination of ingredients creates a delicious medley that is sure to please everyone at the table.

Why You Should Try This Recipe

There are many reasons to try the Stuffed Pepper Casserole Recipe. First, it’s incredibly easy to prepare. With just a few simple steps, you can have a warm, satisfying meal ready in no time. Second, this casserole is versatile. You can customize it to suit your taste preferences or dietary needs. Whether you prefer beef, turkey, or a vegetarian option, this recipe has you covered. Plus, it’s a great way to sneak in some veggies, making it a nutritious choice for both kids and adults.

Moreover, the Stuffed Pepper Casserole is perfect for meal prep. You can make a large batch and enjoy leftovers throughout the week. It reheats well, maintaining its delicious flavors. So, if you’re looking for a comforting, easy-to-make dish that the whole family will love, this casserole is a must-try!

Ingredients for Stuffed Pepper Casserole Recipe

To create a delicious Stuffed Pepper Casserole, you’ll need a variety of fresh and pantry ingredients. Here’s a complete list to help you gather everything you need:

  • 2 cups cooked rice
  • 1 pound ground beef or turkey
  • 1 medium onion, diced
  • 1 bell pepper, diced (any color)
  • 2 cloves garlic, minced
  • 1 can (15 ounces) diced tomatoes, undrained
  • 1 can (8 ounces) tomato sauce
  • 1 teaspoon Italian seasoning
  • 1 teaspoon salt
  • ½ teaspoon black pepper
  • 1 cup shredded cheddar cheese
  • 1 cup corn (fresh, frozen, or canned)
  • 2 tablespoons olive oil

These ingredients come together to create a flavorful and satisfying dish. The combination of rice, meat, and vegetables ensures that each bite is packed with taste. Plus, the addition of cheese on top adds a delightful creaminess that everyone will love. Make sure to have everything ready before you start cooking, as this will make the preparation process smoother and more enjoyable!

Step-by-Step Preparation of Stuffed Pepper Casserole Recipe

Step 1: Prepping the Ingredients

Before diving into cooking, it’s essential to prep your ingredients. Start by cooking your rice according to the package instructions. While the rice is cooking, you can chop your vegetables. Dice the onion and bell pepper into small pieces. Mince the garlic cloves finely. This step is crucial as it ensures that all ingredients are ready to go when you start cooking. Having everything prepped will make the cooking process smoother and more enjoyable.

Step 2: Cooking the Base

Now, let’s get cooking! In a large skillet, heat the olive oil over medium heat. Once the oil is hot, add the diced onion and bell pepper. Sauté them for about 5 minutes until they become soft and fragrant. Next, stir in the minced garlic and cook for an additional minute. This will enhance the flavors of your base. After that, add the ground beef or turkey to the skillet. Break it apart with a spoon and cook until it’s browned and no longer pink, which should take about 6-8 minutes. Don’t forget to drain any excess fat to keep your casserole light and healthy!

Step 3: Assembling the Casserole

Once your base is ready, it’s time to assemble the casserole. In the same skillet, stir in the cooked rice, diced tomatoes (with their juice), tomato sauce, Italian seasoning, salt, black pepper, and corn. Mix everything well to combine. Let it heat through for about 5 minutes. This allows all the flavors to meld together beautifully. After that, transfer the mixture into a greased 9×13-inch baking dish. Spread it evenly, ensuring every corner is filled. Finally, sprinkle the shredded cheddar cheese generously over the top. This will create a delicious, gooey layer once baked!

Step 4: Baking the Casserole

Now that your casserole is assembled, it’s time to bake! Preheat your oven to 350°F (175°C) if you haven’t done so already. Place the baking dish in the oven and bake for 20-25 minutes. You’ll know it’s ready when the cheese is melted and bubbly, creating a golden crust on top. Once done, remove it from the oven and let it cool for about 5 minutes before serving. This cooling time helps the casserole set, making it easier to serve. Enjoy your delicious Stuffed Pepper Casserole with family and friends!

Variations of Stuffed Pepper Casserole Recipe

Vegetarian Options

If you’re looking for a meatless meal, the Stuffed Pepper Casserole can easily be transformed into a vegetarian delight. Instead of using ground beef or turkey, consider substituting it with black beans, lentils, or even quinoa. These ingredients not only provide protein but also add a unique texture to the dish. You can also include extra vegetables like zucchini, mushrooms, or spinach to enhance the flavor and nutrition. This way, you can enjoy a hearty meal that’s both satisfying and healthy!

Different Protein Choices

For those who prefer different types of meat, this casserole is quite flexible. You can use ground chicken or pork as alternatives to beef or turkey. Each protein brings its own flavor, allowing you to customize the dish to your liking. Additionally, if you want to add a bit of spice, try using chorizo or Italian sausage. These options will give your casserole a delicious kick, making it even more enjoyable for those who love bold flavors.

Alternative Grains and Carbs

While the recipe calls for rice, you can switch it up with other grains or carbs. Quinoa is a fantastic option, as it’s packed with protein and has a nutty flavor. Cauliflower rice is another great choice for a low-carb version. If you prefer a heartier base, consider using orzo or even small pasta shapes. These alternatives can change the texture and taste of the casserole, making it a fun dish to experiment with. No matter what you choose, the Stuffed Pepper Casserole will remain a comforting and delicious meal!

Cooking Note for Stuffed Pepper Casserole Recipe

When preparing the Stuffed Pepper Casserole, there are a few cooking notes to keep in mind to ensure the best results. First, always use fresh ingredients whenever possible. Fresh vegetables not only enhance the flavor but also add vibrant colors to your dish. If you’re using frozen corn, there’s no need to thaw it before adding it to the mixture; it will cook perfectly in the oven.

Another important tip is to adjust the seasoning to your taste. The recipe includes Italian seasoning, salt, and black pepper, but feel free to add more spices if you like. A pinch of paprika or a dash of hot sauce can elevate the flavor profile. Additionally, if you prefer a creamier texture, consider mixing in a dollop of sour cream or cream cheese before baking.

Lastly, keep an eye on the baking time. Ovens can vary, so check your casserole a few minutes before the suggested time. You want the cheese to be melted and bubbly, but not overcooked. If you notice the cheese browning too quickly, you can cover the dish with aluminum foil to prevent burning. Following these cooking notes will help you create a delicious and satisfying Stuffed Pepper Casserole that everyone will love!

Serving Suggestions for Stuffed Pepper Casserole Recipe

Pairing with Sides

When it comes to serving your Stuffed Pepper Casserole, the right sides can elevate the meal even further. A fresh garden salad is a perfect complement. The crisp greens and colorful veggies add a refreshing contrast to the warm, hearty casserole. You can dress the salad with a light vinaigrette to keep it simple and healthy.

Another great side option is garlic bread. The buttery, toasted bread pairs wonderfully with the rich flavors of the casserole. You can even sprinkle some herbs on top for added flavor. If you’re looking for something lighter, steamed vegetables like broccoli or green beans work well too. They add a nice crunch and are packed with nutrients.

For a fun twist, consider serving the casserole with tortilla chips. This adds a crunchy texture and makes for a delightful dipping experience. You can even top the casserole with some avocado or guacamole for a creamy finish. No matter what sides you choose, they will enhance the overall dining experience and make your meal even more enjoyable!

Ideal Occasions for Serving

The Stuffed Pepper Casserole is a versatile dish that fits perfectly into various occasions. It’s an excellent choice for family dinners, especially on busy weeknights. The ease of preparation means you can spend more time with your loved ones and less time in the kitchen.

This casserole is also a fantastic option for potlucks or gatherings. Its generous servings make it easy to share, and it’s sure to be a hit among guests. You can prepare it ahead of time and simply reheat it before serving, making it a stress-free option for entertaining.

Additionally, the Stuffed Pepper Casserole is great for casual get-togethers, like game nights or movie marathons. It’s a comforting dish that everyone will love, and it pairs well with snacks and drinks. Whether you’re hosting a big event or enjoying a cozy night in, this casserole is a delightful choice that brings people together.

Tips for Perfecting Your Stuffed Pepper Casserole Recipe

Ingredient Substitutions

When making the Stuffed Pepper Casserole, you might want to switch things up a bit. Ingredient substitutions can help you tailor the dish to your taste or dietary needs. For instance, if you’re out of ground meat, you can use shredded rotisserie chicken or even tofu for a vegetarian option. Both will add a unique flavor and texture to the casserole.

If you prefer a different type of cheese, feel free to experiment! Mozzarella or pepper jack cheese can provide a delightful twist. They melt beautifully and add a different taste profile. Additionally, if you don’t have Italian seasoning on hand, a mix of dried oregano, basil, and thyme can work just as well.

For those looking to reduce carbs, consider using cauliflower rice instead of regular rice. It’s a great low-carb alternative that still provides a satisfying base. You can also add more vegetables, like diced zucchini or mushrooms, to increase the nutritional value without adding many calories. These substitutions can make your Stuffed Pepper Casserole even more delicious and personalized!

Storage and Reheating Tips

Storing your Stuffed Pepper Casserole properly is key to enjoying it later. After it cools, cover the casserole tightly with plastic wrap or aluminum foil. You can keep it in the refrigerator for up to 3-4 days. If you want to store it for a longer period, consider freezing it. Just make sure to use a freezer-safe container. It can last up to 3 months in the freezer.

When you’re ready to enjoy the leftovers, reheating is simple. If it’s frozen, let it thaw in the refrigerator overnight. To reheat, place the casserole in the oven at 350°F (175°C) for about 20-30 minutes, or until heated through. You can also microwave individual portions for a quick meal. Just cover the dish with a microwave-safe lid to keep it moist.

For the best results, add a sprinkle of cheese on top before reheating. This will give you that delicious, gooey texture that everyone loves. With these storage and reheating tips, you can enjoy your Stuffed Pepper Casserole multiple times without losing any flavor!

Breakdown of Time for Stuffed Pepper Casserole Recipe

Prep Time

Preparing the Stuffed Pepper Casserole is quick and straightforward. The prep time typically takes about 15-20 minutes. This includes cooking the rice and chopping the vegetables. Having everything ready before you start cooking will make the process smoother. So, take your time to dice the onion, bell pepper, and mince the garlic. This step is essential for a delicious outcome!

Cooking Time

The cooking time for the casserole is around 30-35 minutes. This includes the time spent cooking the meat and vegetables in the skillet, as well as the baking time in the oven. You’ll want to ensure the meat is fully cooked and the cheese is melted and bubbly. Keep an eye on it during baking to achieve that perfect golden crust!

Total Time

In total, you can expect to spend about 50-55 minutes from start to finish. This includes both prep and cooking times. With such a manageable time commitment, the Stuffed Pepper Casserole is an excellent option for busy weeknights or when you want to impress guests without spending hours in the kitchen. Enjoy the process and the delicious results!

Nutritional Information for Stuffed Pepper Casserole Recipe

Calories

When it comes to enjoying a hearty meal, knowing the calorie content can help you make informed choices. Each serving of the Stuffed Pepper Casserole contains approximately 320 calories. This makes it a satisfying option without being overly heavy. The combination of ingredients provides a balanced meal that can fit into various dietary plans. Whether you’re counting calories or just looking for a nutritious dish, this casserole is a great choice!

Protein

Protein is an essential nutrient that helps build and repair tissues in our bodies. Each serving of the Stuffed Pepper Casserole offers about 20 grams of protein. This comes primarily from the ground beef or turkey, along with the cheese and rice. Including protein in your meals can help keep you feeling full and satisfied longer. So, this casserole not only tastes great but also supports your nutritional needs!

Sodium

Monitoring sodium intake is important for maintaining heart health. Each serving of the Stuffed Pepper Casserole contains around 600 milligrams of sodium. This amount is reasonable for a flavorful dish, but if you’re watching your sodium levels, consider using low-sodium canned tomatoes and sauces. You can also adjust the salt added during cooking. By making these small changes, you can enjoy this delicious casserole while keeping your sodium intake in check!

FAQs about Stuffed Pepper Casserole Recipe

Can I make Stuffed Pepper Casserole ahead of time?

Absolutely! Making the Stuffed Pepper Casserole ahead of time is a great idea. You can prepare the entire dish, cover it tightly, and store it in the refrigerator for up to 24 hours before baking. This allows the flavors to meld together beautifully. When you’re ready to bake, simply preheat your oven and follow the baking instructions. If you prefer, you can also freeze the casserole before baking. Just make sure to use a freezer-safe dish. It can be stored for up to 3 months. When you’re ready to enjoy it, thaw it in the refrigerator overnight and bake as directed. This makes meal planning a breeze!

What can I substitute for rice in Stuffed Pepper Casserole?

If you’re looking to switch things up, there are several great substitutes for rice in the Stuffed Pepper Casserole. Quinoa is a fantastic option, as it’s high in protein and has a nutty flavor. Cauliflower rice is another popular choice for those wanting a low-carb alternative. It’s light and absorbs flavors well. You can also use orzo pasta or even small pasta shapes for a different texture. Each of these alternatives will give your casserole a unique twist while still keeping it delicious and satisfying!

How do I store leftovers of Stuffed Pepper Casserole?

Storing leftovers of your Stuffed Pepper Casserole is simple! Once the casserole has cooled, cover it tightly with plastic wrap or aluminum foil. You can keep it in the refrigerator for up to 3-4 days. If you want to store it for a longer period, consider freezing it. Just transfer the casserole to a freezer-safe container, and it can last up to 3 months. When you’re ready to enjoy the leftovers, thaw them in the refrigerator overnight. Reheat in the oven at 350°F (175°C) for about 20-30 minutes, or microwave individual portions for a quick meal. This way, you can savor the delicious flavors of your casserole even after the first serving!

Conclusion on Stuffed Pepper Casserole Recipe

The Stuffed Pepper Casserole is more than just a meal; it’s a comforting dish that brings warmth and joy to any table. With its rich flavors and hearty ingredients, this casserole is perfect for family dinners, potlucks, or even a cozy night in. The ease of preparation makes it a go-to recipe for busy weeknights, while its versatility allows you to customize it to suit your taste preferences.

Whether you choose to stick with the classic version or explore the various substitutions and variations, you’re sure to create a dish that everyone will love. From the savory ground meat to the vibrant bell peppers and gooey cheese, each bite is a delightful experience. Plus, with the nutritional benefits it offers, you can feel good about serving it to your loved ones.

So, gather your ingredients, follow the simple steps, and enjoy the deliciousness of the Stuffed Pepper Casserole. It’s a recipe that not only satisfies hunger but also creates lasting memories around the dinner table. Happy cooking!

Grilled Shrimp Salad with Avocado and Mango delights!

Introduction to Grilled Shrimp Salad with Avocado and Mango Recipe

Grilled Shrimp Salad with Avocado and Mango Recipe is a delightful dish that combines vibrant flavors and healthy ingredients. This salad is perfect for warm days or any time you crave something light yet satisfying. With juicy shrimp, creamy avocado, and sweet mango, every bite is a burst of flavor.

Why This Recipe is a Must-Try

First and foremost, this recipe is incredibly easy to prepare. In just a few simple steps, you can create a restaurant-quality dish right in your kitchen. The combination of grilled shrimp and fresh produce makes it not only delicious but also packed with nutrients. Shrimp is a great source of protein, while avocado and mango provide healthy fats and vitamins.

Moreover, this salad is versatile. You can customize it to suit your taste. Whether you want to add a spicy kick or substitute proteins, the options are endless. Plus, it’s visually appealing, making it a great choice for gatherings or family dinners. Impress your guests with this colorful and tasty salad!

Grilled Shrimp Salad with Avocado and Mango Recipe is a must-try for anyone who enjoys fresh, flavorful meals. It’s quick, healthy, and absolutely delicious. So, let’s dive into the ingredients and get started on this culinary adventure!

Ingredients for Grilled Shrimp Salad with Avocado and Mango Recipe

Grilled Shrimp Salad with Avocado and Mango Recipe, you will need a selection of fresh ingredients. Each component plays a vital role in delivering flavor and nutrition. Here’s what you’ll need:

  • 1 pound large shrimp, peeled and deveined
  • 1 tablespoon olive oil
  • 1 teaspoon garlic powder
  • 1 teaspoon paprika
  • Salt and pepper to taste
  • 4 cups mixed salad greens (such as romaine, spinach, and arugula)
  • 1 ripe avocado, diced
  • 1 ripe mango, diced
  • 1/2 red onion, thinly sliced
  • 1/4 cup fresh cilantro, chopped
  • Juice of 1 lime
  • 1/4 cup crumbled feta cheese (optional)

These ingredients come together to create a salad that is not only tasty but also visually appealing. The shrimp adds a protein punch, while the avocado and mango provide healthy fats and natural sweetness. The mixed greens offer a crisp texture, and the red onion adds a bit of zing. Finally, the lime juice and cilantro bring everything together with a refreshing finish.

Feel free to adjust the quantities based on your preferences or the number of servings you need. Now that you have your ingredients ready, let’s move on to the preparation steps!

Step-by-Step Preparation of Grilled Shrimp Salad with Avocado and Mango Recipe

Grilled Shrimp Salad with Avocado and Mango Recipe. This step-by-step guide will help you create a delicious salad that is sure to impress. Let’s get started!

Step 1: Preparing the Shrimp

First, you need to prepare the shrimp. If you haven’t done so already, peel and devein the shrimp. This step is crucial as it removes the shell and any unwanted parts. Rinse the shrimp under cold water and pat them dry with a paper towel. This will help the seasoning stick better.

Step 2: Marinating the Shrimp

Next, it’s time to marinate the shrimp. In a mixing bowl, combine the shrimp with olive oil, garlic powder, paprika, salt, and pepper. Toss everything together until the shrimp are well coated. This marinating process adds flavor and makes the shrimp even more delicious. Let the shrimp sit for about 10-15 minutes to absorb the flavors.

Step 3: Grilling the Shrimp

Once the shrimp are marinated, preheat your grill to medium-high heat. If you prefer, you can thread the shrimp onto skewers for easier grilling. This also helps prevent them from falling through the grill grates. Grill the shrimp for about 2-3 minutes on each side. You’ll know they’re done when they turn pink and opaque. Remove them from the grill and set aside.

Step 4: Preparing the Salad Base

While the shrimp are grilling, you can prepare the salad base. In a large salad bowl, combine the mixed salad greens, diced avocado, diced mango, and thinly sliced red onion. The combination of these ingredients creates a colorful and nutritious base for your salad. Don’t forget to chop the fresh cilantro and add it to the mix for an extra burst of flavor!

Step 5: Assembling the Salad

Grilled Shrimp Salad with Avocado and Mango Recipe!

Variations of Grilled Shrimp Salad with Avocado and Mango Recipe

Grilled Shrimp Salad with Avocado and Mango Recipe is already a fantastic dish, but you can easily switch things up to keep it exciting. Here are some variations that you can try to make this salad even more delightful!

Adding Different Proteins

If shrimp isn’t your favorite, don’t worry! You can substitute it with other proteins. Grilled chicken is a popular choice. Simply season and grill the chicken breasts just like the shrimp. For a vegetarian option, try grilled tofu. Tofu absorbs flavors well, making it a great alternative. You can also use canned chickpeas for a quick protein boost. Just rinse and toss them in with the salad ingredients. Each protein option brings its unique taste and texture, making your salad versatile and satisfying.

Incorporating Seasonal Vegetables

Grilled Shrimp Salad with Avocado and Mango Recipe is by adding seasonal vegetables. Fresh corn, for example, adds a sweet crunch. You can grill the corn on the cob and then cut the kernels off. Bell peppers, cucumbers, or even cherry tomatoes can also brighten up your salad. These vegetables not only add flavor but also increase the nutritional value. Feel free to experiment with whatever is in season to keep your salad fresh and exciting!

Grilled Shrimp Salad with Avocado and Mango Recipe. Enjoy the process of experimenting and discovering new flavors!

Cooking Note for Grilled Shrimp Salad with Avocado and Mango Recipe

Grilled Shrimp Salad with Avocado and Mango Recipe, there are a few cooking notes to keep in mind. These tips will help ensure that your salad turns out perfectly every time.

First, always choose fresh shrimp. Fresh shrimp not only tastes better but also has a firmer texture. If you opt for frozen shrimp, make sure to thaw them completely before cooking. You can do this by placing them in the refrigerator overnight or running them under cold water for a quick thaw.

Next, marinating the shrimp is essential. Allowing the shrimp to sit in the marinade for at least 10-15 minutes enhances the flavor. However, avoid marinating for too long, as the acid in the lime juice can start to “cook” the shrimp, making them tough.

When grilling, ensure your grill is preheated to medium-high heat. This helps achieve a nice sear on the shrimp, locking in the juices. If you’re using wooden skewers, soak them in water for about 30 minutes before grilling. This prevents them from burning on the grill.

Lastly, be mindful of the cooking time. Shrimp cook quickly, usually in just 2-3 minutes per side. Overcooking can lead to rubbery shrimp, so keep a close eye on them. Once they turn pink and opaque, they are ready to be removed from the grill.

Grilled Shrimp Salad with Avocado and Mango Recipe that everyone will love. Happy cooking!

Serving Suggestions for Grilled Shrimp Salad with Avocado and Mango Recipe

Grilled Shrimp Salad with Avocado and Mango Recipe, it’s time to think about how to serve it. This salad is not only a meal on its own but also pairs wonderfully with various accompaniments. Here are some ideal pairings to enhance your dining experience!

Ideal Pairings and Accompaniments

To elevate your meal, consider serving the salad with a few tasty sides. Here are some great options:

  • Crispy Bread or Garlic Toast: A slice of crusty bread or garlic toast complements the salad perfectly. The crunchiness adds texture and makes for a satisfying bite.
  • Chilled White Wine: A glass of chilled white wine, like Sauvignon Blanc or Pinot Grigio, pairs beautifully with the fresh flavors of the salad. The acidity in the wine enhances the taste of the shrimp and mango.
  • Fruit-Infused Water: Keep it refreshing with a pitcher of fruit-infused water. Add slices of lime, lemon, or even berries for a delightful drink that matches the salad’s vibrant flavors.
  • Quinoa or Rice: For a heartier meal, serve the salad alongside a scoop of quinoa or brown rice. These grains add fiber and make the meal more filling.
  • Grilled Vegetables: Grilled vegetables, such as zucchini, bell peppers, or asparagus, can be a great addition. They add color and flavor, making your plate even more appealing.

Grilled Shrimp Salad with Avocado and Mango Recipe with these delightful accompaniments!

Tips for Perfecting Your Grilled Shrimp Salad with Avocado and Mango Recipe

Grilled Shrimp Salad with Avocado and Mango Recipe truly shine, consider these helpful tips. They will ensure that every bite is bursting with flavor and freshness. Let’s explore some simple yet effective ways to elevate your salad!

First, always use fresh ingredients. Fresh shrimp, ripe avocados, and juicy mangoes will make a significant difference in taste. When shopping, look for shrimp that smell clean and have a firm texture. For avocados, choose ones that yield slightly to gentle pressure, indicating ripeness. As for mangoes, they should be fragrant and slightly soft to the touch.

Next, don’t skip the marinating step. Allowing the shrimp to soak in the marinade for at least 10-15 minutes enhances the flavor. If you have time, consider marinating for up to 30 minutes. Just be cautious not to over-marinate, as the lime juice can start to cook the shrimp.

When grilling, ensure your grill is hot enough. A preheated grill helps achieve those beautiful grill marks and locks in the shrimp’s juices. If you’re using skewers, remember to soak wooden ones in water for about 30 minutes before grilling. This prevents them from burning and keeps your shrimp intact.

For added flavor, consider garnishing your salad with extra herbs. Fresh basil or mint can provide a delightful twist. You can also add a sprinkle of chili flakes for a spicy kick. If you enjoy crunch, toss in some toasted nuts or seeds, like almonds or sunflower seeds, for texture.

Lastly, serve the salad immediately after assembling. This keeps the greens crisp and the shrimp warm. If you need to prepare it in advance, keep the dressing separate until you’re ready to serve. This way, your salad will remain fresh and delicious.

Grilled Shrimp Salad with Avocado and Mango Recipe that will impress everyone at your table. Enjoy the process and happy cooking!

Breakdown of Time for Grilled Shrimp Salad with Avocado and Mango Recipe

Grilled Shrimp Salad with Avocado and Mango Recipe can help you plan your meal better. Here’s a simple breakdown of the time required for preparation and cooking.

Prep Time

The prep time for this delicious salad is approximately 20 minutes. This includes gathering your ingredients, peeling and deveining the shrimp, and chopping the vegetables and fruits. Taking your time during this step ensures that everything is fresh and ready to go. If you’re using frozen shrimp, remember to allow extra time for thawing.

Cooking Time

Once you’ve prepped your ingredients, the cooking time is quite short. Grilling the shrimp takes about 6-8 minutes total, as you’ll grill them for 2-3 minutes on each side. This quick cooking time is one of the reasons why this salad is perfect for busy weeknights or last-minute gatherings.

Total Time

Grilled Shrimp Salad with Avocado and Mango Recipe is not only delicious but also a time-saver!

Nutritional Information for Grilled Shrimp Salad with Avocado and Mango Recipe

Grilled Shrimp Salad with Avocado and Mango Recipe is not only delicious but also packed with nutrients. Here’s a breakdown of the key nutritional information per serving:

Calories

Each serving of this delightful salad contains approximately 320 calories. This makes it a great option for those looking to enjoy a satisfying meal without consuming too many calories. The combination of shrimp, avocado, and mango provides a healthy balance of energy and nutrients.

Protein

One of the standout features of this salad is its protein content. With about 25 grams of protein per serving, the grilled shrimp serves as an excellent source of lean protein. Protein is vital for muscle repair and growth, making this salad a perfect post-workout meal or a nutritious lunch option.

Sodium

The sodium content in this salad is relatively low, making it a heart-healthy choice. Each serving contains around 400 milligrams of sodium, depending on the amount of salt used during preparation. Keeping sodium levels in check is important for maintaining healthy blood pressure and overall heart health.

Grilled Shrimp Salad with Avocado and Mango Recipe is not only a feast for the taste buds but also a nutritious option for those looking to eat healthily. With its balanced calories, high protein content, and low sodium levels, this salad is a fantastic addition to your meal rotation. Enjoy the flavors while nourishing your body!

FAQs about Grilled Shrimp Salad with Avocado and Mango Recipe

Can I use frozen shrimp for this recipe?

Grilled Shrimp Salad with Avocado and Mango Recipe. Just make sure to thaw them completely before cooking. You can do this by placing them in the refrigerator overnight or running them under cold water for a quick thaw. Once thawed, follow the same marinating and grilling steps as you would with fresh shrimp. This way, you can still enjoy a delicious salad even if fresh shrimp isn’t available!

What can I substitute for mango in this salad?

Grilled Shrimp Salad with Avocado and Mango Recipe while keeping it fresh and delicious!

How can I make this salad spicier?

Grilled Shrimp Salad with Avocado and Mango Recipe, there are a few easy ways to do so. First, you can add a pinch of cayenne pepper to the shrimp marinade. This will give the shrimp a nice kick. Additionally, consider tossing in some sliced jalapeños or serrano peppers into the salad. For an extra spicy dressing, mix in a dash of hot sauce or sriracha with the lime juice. These additions will surely satisfy your spicy cravings!

Is this salad suitable for meal prep?

Grilled Shrimp Salad with Avocado and Mango Recipe is great for meal prep. However, to keep the ingredients fresh, it’s best to store the components separately. Keep the grilled shrimp, salad greens, and diced avocado and mango in separate containers. When you’re ready to eat, simply combine them and add the lime juice. This way, your salad will stay crisp and delicious throughout the week. It’s a perfect option for quick lunches or dinners!

Conclusion on Grilled Shrimp Salad with Avocado and Mango Recipe

Grilled Shrimp Salad with Avocado and Mango Recipe is a delightful dish that brings together fresh ingredients and vibrant flavors. This salad is not only easy to prepare but also offers a nutritious meal option that can be enjoyed any time of the year. With its combination of protein-rich shrimp, creamy avocado, and sweet mango, every bite is a celebration of taste and health.

Whether you’re hosting a summer gathering or simply looking for a quick weeknight dinner, this salad is sure to impress. Its versatility allows you to customize it to your liking, making it a perfect fit for various dietary preferences. Plus, the colorful presentation makes it a feast for the eyes as well as the palate.

As you explore the different variations and serving suggestions, you’ll find that this recipe can easily become a staple in your meal rotation. Remember to use fresh ingredients and follow the cooking tips for the best results. With just a little effort, you can create a dish that is not only delicious but also packed with nutrients.

Grilled Shrimp Salad with Avocado and Mango Recipe today. Enjoy the burst of flavors and the satisfaction of a healthy meal that you can feel good about serving to your family and friends. Happy cooking!

Cranberry Pecan Chicken Salad is a must-try recipe!

Introduction to Cranberry Pecan Chicken Salad Recipe

Cranberry Pecan Chicken Salad Recipe. This dish is not just a meal; it’s a celebration of flavors and textures. Imagine tender chicken mingling with crunchy pecans and sweet cranberries, all wrapped in a creamy dressing. It’s a perfect blend that makes every bite a joy!

What Makes This Salad Special?

What sets this salad apart? First, it’s the combination of ingredients. The juicy chicken provides a hearty base, while the dried cranberries add a burst of sweetness. Pecans bring a satisfying crunch, making each mouthful exciting. Plus, the creamy dressing ties everything together, creating a harmonious flavor profile.

Another reason this salad shines is its versatility. You can serve it in various ways—on a bed of fresh greens, in a sandwich, or even with crunchy crackers. This adaptability makes it a fantastic choice for lunch, dinner, or a picnic. Whether you’re hosting a gathering or enjoying a quiet meal at home, this salad fits the occasion perfectly.

Health Benefits of Cranberry Pecan Chicken Salad

Not only is this salad delicious, but it also offers several health benefits. Chicken is a great source of protein, which helps build and repair tissues. The pecans are rich in healthy fats, providing energy and supporting heart health. Meanwhile, cranberries are packed with antioxidants, which can help boost your immune system.

Additionally, the inclusion of celery adds fiber, promoting good digestion. With a balance of protein, healthy fats, and vitamins, this salad is a nutritious option for anyone looking to eat well. So, you can enjoy every bite, knowing you’re nourishing your body!

Ingredients for Cranberry Pecan Chicken Salad Recipe

Cranberry Pecan Chicken Salad Recipe, you’ll need a few simple yet flavorful ingredients. Each component plays a vital role in building the salad’s unique taste and texture. Here’s what you’ll need:

  • 2 cups cooked chicken, shredded or diced
  • 1 cup celery, diced
  • 1/2 cup dried cranberries
  • 1/2 cup pecans, chopped
  • 1/2 cup mayonnaise
  • 1 tablespoon Dijon mustard
  • 1 tablespoon lemon juice
  • 1/2 teaspoon salt
  • 1/4 teaspoon black pepper
  • 1/4 teaspoon garlic powder

These ingredients come together to create a salad that is not only tasty but also satisfying. The cooked chicken serves as a protein-rich base, while the celery adds a refreshing crunch. Dried cranberries introduce a hint of sweetness, and the pecans provide a delightful nutty flavor. The creamy dressing, made with mayonnaise, Dijon mustard, and lemon juice, ties everything together beautifully.

Feel free to adjust the quantities based on your preferences. For instance, if you love a bit more crunch, add extra pecans. If you prefer a sweeter taste, toss in more cranberries. The beauty of this recipe lies in its flexibility, allowing you to customize it to your liking!

Step-by-Step Preparation of Cranberry Pecan Chicken Salad Recipe

Cranberry Pecan Chicken Salad Recipe. This step-by-step guide will help you create a delicious salad that’s sure to impress. Let’s get started!

Step 1: Preparing the Chicken

First, you need to prepare the chicken. If you haven’t cooked it yet, you can boil, bake, or grill it. Make sure the chicken is fully cooked and tender. Once it’s ready, let it cool for a few minutes. Then, shred or dice the chicken into bite-sized pieces. This will make it easier to mix with the other ingredients. If you have leftover chicken from a previous meal, that works perfectly too!

Step 2: Mixing the Salad Ingredients

Next, grab a large mixing bowl. In this bowl, combine the shredded chicken, diced celery, dried cranberries, and chopped pecans. The celery adds a nice crunch, while the cranberries provide sweetness. The pecans will give your salad a delightful nutty flavor. Use a spatula or spoon to gently mix everything together. Be careful not to mash the ingredients; you want to keep that lovely texture!

Step 3: Combining the Dressing

Now, it’s time to make the dressing. In a separate small bowl, mix together the mayonnaise, Dijon mustard, lemon juice, salt, black pepper, and garlic powder. Stir well until all the ingredients are fully combined. This creamy dressing will enhance the flavors of your salad. If you prefer a tangier taste, feel free to add a bit more lemon juice. Taste the dressing and adjust the seasoning if needed!

Step 4: Assembling the Salad

Finally, pour the dressing over the chicken mixture. Gently stir until everything is evenly coated with the dressing. This step is crucial, as it ensures that every bite is packed with flavor. Once mixed, cover the bowl with plastic wrap and refrigerate for at least 30 minutes. This chilling time allows the flavors to meld beautifully. When you’re ready to serve, you can enjoy your salad on a bed of greens, in a sandwich, or with your favorite crackers!

Variations of Cranberry Pecan Chicken Salad Recipe

Cranberry Pecan Chicken Salad Recipe is wonderfully versatile. You can easily switch up ingredients or dressings to suit your taste. Let’s explore some alternative ingredients and different dressing options that can elevate your salad experience!

Alternative Ingredients

While the classic recipe is delicious, you might want to try some variations. Here are a few alternative ingredients to consider:

  • Fruits: Add diced apples or grapes for a sweet crunch. These fruits complement the cranberries beautifully.
  • Vegetables: Incorporate diced bell peppers or shredded carrots for extra color and nutrition. They add a nice crunch too!
  • Herbs: Fresh herbs like parsley or dill can enhance the flavor. Just a sprinkle can make a big difference.
  • Cheese: Crumbled feta or shredded cheddar can add a creamy texture and rich flavor.
  • Protein: For a twist, try using turkey or even tofu for a vegetarian option. Both can work well in this salad.

Feel free to mix and match these ingredients based on what you have on hand or what you enjoy most. The beauty of this salad is its flexibility!

Different Dressing Options

The dressing is key to bringing all the flavors together. If you want to try something different, consider these dressing options:

  • Greek Yogurt Dressing: Substitute half of the mayonnaise with Greek yogurt for a lighter, tangy flavor.
  • Honey Mustard Dressing: Mix honey with Dijon mustard for a sweet and tangy twist. This pairs well with the cranberries.
  • Vinaigrette: A simple vinaigrette made with olive oil, vinegar, and herbs can give your salad a fresh taste.
  • Avocado Dressing: Blend ripe avocado with lime juice and a bit of water for a creamy, healthy dressing.

Cranberry Pecan Chicken Salad Recipe exciting and new. Each variation offers a unique taste experience, so don’t hesitate to get creative!

Cooking Note for Cranberry Pecan Chicken Salad Recipe

Cranberry Pecan Chicken Salad Recipe, there are a few cooking notes to keep in mind. These tips will help ensure that your salad turns out perfectly every time. Let’s dive into some essential points to consider!

First, always use cooked chicken. You can boil, bake, or grill it, depending on your preference. If you’re short on time, rotisserie chicken from the store is a great option. It’s already cooked and adds a wonderful flavor to your salad.

Next, make sure to let the chicken cool before shredding or dicing it. This step is important because hot chicken can make the salad warm, which isn’t ideal. Cooling the chicken also helps maintain the crispness of the other ingredients.

When mixing the salad, be gentle. You want to combine the ingredients without mashing them. This way, you’ll keep the delightful textures intact. A spatula works well for this task, as it allows you to fold the ingredients together carefully.

Don’t skip the chilling time! Refrigerating the salad for at least 30 minutes allows the flavors to meld beautifully. This step enhances the overall taste, making each bite more enjoyable. If you can, let it chill for a few hours or even overnight for the best results.

Lastly, taste as you go! Adjust the seasoning to your liking. If you prefer a bit more tang, add extra lemon juice. If you like it sweeter, toss in more cranberries. Personalizing the flavors will make your salad truly your own.

Cranberry Pecan Chicken Salad Recipe that everyone will love. Enjoy the process and have fun experimenting with flavors!

Serving Suggestions for Cranberry Pecan Chicken Salad Recipe

Cranberry Pecan Chicken Salad Recipe, it’s time to think about how to serve it. This salad is not only delicious but also visually appealing. Here are some great serving suggestions to enhance your dining experience!

Best Pairings

This salad pairs wonderfully with a variety of sides and accompaniments. Here are some ideas to consider:

  • Fresh Greens: Serve the salad on a bed of mixed greens or spinach. This adds a fresh crunch and makes for a colorful presentation.
  • Whole Grain Bread: Use whole grain or sourdough bread to make a hearty sandwich. The nutty flavor of the bread complements the salad perfectly.
  • Crackers: Pair the salad with your favorite crackers for a delightful crunch. This is a great option for a light snack or appetizer.
  • Fruit Salad: A side of fruit salad can add a refreshing touch. The sweetness of fruits like berries or melon balances the savory flavors of the chicken salad.
  • Soup: A warm bowl of soup, like tomato or butternut squash, can make for a comforting meal alongside the salad.

These pairings not only enhance the meal but also provide a variety of textures and flavors that everyone will enjoy!

Presentation Tips

Cranberry Pecan Chicken Salad Recipe. Here are some tips to make your dish look as good as it tastes:

  • Colorful Bowls: Use vibrant bowls or plates to serve the salad. Bright colors can make the dish more inviting.
  • Garnish: Add a sprinkle of fresh herbs, like parsley or cilantro, on top for a pop of color and added flavor.
  • Layering: If serving on greens, layer the salad on top for a beautiful display. This creates height and makes the dish visually appealing.
  • Individual Servings: Consider serving the salad in individual cups or jars. This adds a fun twist and makes it easy for guests to enjoy.
  • Chilled Serving: For a refreshing touch, serve the salad in chilled bowls. This keeps the salad cool and enhances the overall experience.

Cranberry Pecan Chicken Salad Recipe will not only taste amazing but also look stunning on the table. Enjoy sharing this delightful dish with family and friends!

Tips for Perfecting Your Cranberry Pecan Chicken Salad Recipe

Cranberry Pecan Chicken Salad Recipe is always a hit, consider these helpful tips. From storage to meal prep, these suggestions will help you enjoy this delicious salad anytime!

Storage Tips

Proper storage is essential for keeping your salad fresh and tasty. Here are some tips to follow:

  • Refrigeration: Store your chicken salad in an airtight container. This helps maintain its freshness and prevents any odors from other foods in the fridge.
  • Duration: The salad can last in the fridge for up to 3 days. However, for the best taste and texture, try to consume it within 1-2 days.
  • Separation: If you plan to make the salad ahead of time, consider storing the dressing separately. This keeps the salad crisp and prevents sogginess.
  • Freezing: While it’s not recommended to freeze the salad, you can freeze the cooked chicken. Just make sure to thaw it before mixing it with the other ingredients.

Cranberry Pecan Chicken Salad Recipe at its best!

Meal Prep Ideas

Meal prepping can save you time and make healthy eating easier. Here are some meal prep ideas for your salad:

  • Batch Cooking: Prepare a large batch of the chicken salad at once. Divide it into individual portions for quick lunches or snacks throughout the week.
  • Ingredient Prep: Chop and store the celery, cranberries, and pecans in separate containers. This way, you can quickly mix them with the chicken and dressing when you’re ready to eat.
  • Customizable Portions: Create customizable salad jars. Layer the ingredients in jars, starting with the dressing at the bottom, followed by chicken, veggies, and nuts. Just shake and enjoy when you’re ready!
  • Snack Packs: Pack small portions of the salad with whole grain crackers or veggie sticks for a healthy snack on the go.

Cranberry Pecan Chicken Salad Recipe effortlessly throughout the week. With a little planning, you can have a delicious and nutritious meal ready whenever you need it!

Breakdown of Time for Cranberry Pecan Chicken Salad Recipe

Cranberry Pecan Chicken Salad Recipe can help you plan your meal better. Here’s a simple breakdown of the time involved in preparing this delicious dish.

Prep Time

The prep time for this salad is quite short. You’ll need about 15-20 minutes to gather your ingredients, cook the chicken (if not using pre-cooked), and chop the vegetables and nuts. This makes it a quick option for lunch or dinner!

Cooking Time

If you’re cooking the chicken from scratch, it may take an additional 20-30 minutes, depending on your cooking method. Boiling or baking chicken breasts is usually the quickest way. However, if you use leftover or rotisserie chicken, you can skip this step entirely!

Total Time

Cranberry Pecan Chicken Salad Recipe. This includes the time for cooking the chicken and mixing all the ingredients. Plus, don’t forget to allow at least 30 minutes for chilling in the fridge. This chilling time is essential for the flavors to meld together beautifully.

With this time breakdown, you can easily fit this delightful salad into your busy schedule. Whether you’re making it for a family meal or a gathering with friends, it’s a quick and satisfying option!

Nutritional Information for Cranberry Pecan Chicken Salad Recipe

Cranberry Pecan Chicken Salad Recipe is essential for making informed choices about your meals. This salad is not only delicious but also packed with nutrients that can support a healthy lifestyle. Let’s break down the key nutritional components!

Calories

Each serving of this delightful salad contains approximately 320 calories. This makes it a satisfying option for lunch or dinner without overwhelming your daily caloric intake. The balance of protein, fats, and carbohydrates in this salad helps keep you full and energized throughout the day.

Protein

Cranberry Pecan Chicken Salad Recipe is its protein content. Each serving provides about 25 grams of protein. This is primarily from the chicken, which is an excellent source of lean protein. Protein is vital for muscle repair and growth, making this salad a great choice for active individuals or anyone looking to maintain a healthy diet.

Sodium

In terms of sodium, this salad contains around 500 milligrams per serving. While sodium is necessary for bodily functions, it’s important to monitor your intake. If you’re watching your sodium levels, consider using low-sodium mayonnaise or adjusting the seasoning to suit your dietary needs. This way, you can enjoy the flavors without compromising your health goals.

Cranberry Pecan Chicken Salad Recipe offers a balanced mix of calories, protein, and sodium, making it a nutritious choice for any meal. Enjoy this salad knowing you’re treating your body well while savoring every bite!

FAQs about Cranberry Pecan Chicken Salad Recipe

Can I use canned chicken for this recipe?

Cranberry Pecan Chicken Salad Recipe. It’s a convenient option that saves time. Just make sure to drain the chicken well before using it. This will help prevent the salad from becoming too watery. Canned chicken is already cooked, so you can skip the cooking step and go straight to mixing the ingredients!

How long does the salad last in the fridge?

The salad can last in the fridge for up to 3 days when stored properly in an airtight container. However, for the best taste and texture, it’s recommended to consume it within 1-2 days. This ensures that the ingredients remain fresh and crunchy. If you notice any changes in smell or texture, it’s best to discard it.

Can I make this salad ahead of time?

Cranberry Pecan Chicken Salad Recipe is perfect for meal prep. You can make it a day in advance and store it in the fridge. Just remember to keep the dressing separate if you want to maintain the crispness of the ingredients. Mixing it right before serving will enhance the flavors and keep everything fresh!

What can I substitute for pecans?

If you’re looking for a substitute for pecans, there are several options you can try. Walnuts are a great alternative, offering a similar crunch and flavor. Almonds can also work well, providing a different nutty taste. If you prefer a nut-free option, consider using sunflower seeds or pumpkin seeds. These alternatives will still add a delightful crunch to your salad!

Conclusion on Cranberry Pecan Chicken Salad Recipe

Cranberry Pecan Chicken Salad Recipe is a delightful dish that combines flavor, nutrition, and versatility. With its mix of tender chicken, crunchy pecans, and sweet cranberries, this salad is sure to please everyone at your table. Whether you enjoy it as a light lunch, a hearty dinner, or a picnic treat, it fits perfectly into any meal plan.

Not only is this salad easy to prepare, but it also allows for endless customization. You can experiment with different ingredients and dressings to create a version that suits your taste. Plus, the health benefits of the ingredients make it a smart choice for those looking to maintain a balanced diet.

Remember to follow the tips for preparation, storage, and serving to ensure your salad is always fresh and delicious. With a little planning, you can enjoy this tasty dish throughout the week, making it a convenient option for busy days.

Cranberry Pecan Chicken Salad Recipe. You’ll be glad you did! Enjoy every bite, knowing you’re nourishing your body while indulging in a delightful meal.

Southern Chicken Salad is a must-try classic dish.

Introduction to Southern Chicken Salad

Southern chicken salad is a delightful dish that brings comfort and flavor to any table. This classic recipe is not just a meal; it’s a tradition in many Southern households. With its creamy texture and a mix of crunchy vegetables, it’s a perfect blend of taste and nutrition. Whether you’re enjoying it on a hot summer day or serving it at a family gathering, Southern chicken salad is sure to please everyone.

What Makes Southern Chicken Salad Unique?

What sets Southern chicken salad apart from other chicken salads? It’s all about the ingredients and the love that goes into making it. First, the use of both mayonnaise and Greek yogurt creates a rich, creamy dressing that’s both satisfying and lighter than traditional recipes. The addition of sweet pickle relish adds a hint of sweetness, balancing the savory flavors beautifully.

Moreover, the choice of vegetables, like crunchy celery and zesty red onion, gives the salad a refreshing crunch. Optional ingredients like grapes or nuts introduce a delightful twist, making each bite exciting. This versatility allows everyone to customize their salad to their liking, whether they prefer a classic version or something with a bit more flair.

In the South, chicken salad is often served in various ways. You can enjoy it on a bed of crisp lettuce, in a sandwich, or even with crackers for a quick snack. This adaptability makes it a go-to dish for picnics, potlucks, and casual dinners alike. So, let’s dive into the ingredients and preparation of this beloved Southern staple!

Ingredients for Southern Chicken Salad

To create a delicious Southern chicken salad, you’ll need a variety of fresh ingredients. Each component plays a vital role in achieving that perfect balance of flavors and textures. Here’s what you’ll need:

  • 2 cups cooked chicken: Shredded or diced, this is the star of the dish. You can use rotisserie chicken for convenience.
  • 1/2 cup mayonnaise: This adds creaminess and richness to the salad.
  • 1/4 cup plain Greek yogurt: A healthier alternative that also contributes to the creamy texture.
  • 1 tablespoon Dijon mustard: This gives a subtle tang that enhances the overall flavor.
  • 1 tablespoon apple cider vinegar: A splash of acidity that brightens the dish.
  • 1/2 teaspoon garlic powder: For a hint of savory depth.
  • 1/2 teaspoon onion powder: Adds a mild onion flavor without the crunch.
  • 1/2 teaspoon salt: Essential for bringing out all the flavors.
  • 1/4 teaspoon black pepper: A touch of spice to round out the taste.
  • 1/2 cup celery: Finely chopped for a refreshing crunch.
  • 1/4 cup red onion: Finely chopped for a bit of zing.
  • 1/4 cup sweet pickle relish: This adds a delightful sweetness that contrasts beautifully with the savory elements.
  • 1/4 cup grapes (optional): Halved for a burst of sweetness.
  • 1/4 cup chopped pecans or walnuts (optional): For added crunch and nuttiness.

These ingredients come together to create a Southern chicken salad that’s not only tasty but also satisfying. Feel free to adjust the quantities based on your preferences or dietary needs. Now that you have your ingredients ready, let’s move on to the preparation steps!

Preparation of Southern Chicken Salad

Now that you have gathered all your ingredients, it’s time to prepare your Southern chicken salad. The process is simple and straightforward, making it easy for anyone to whip up this delicious dish. Let’s break it down into five easy steps.

Step 1: Cooking the Chicken

First, you need to cook the chicken. If you’re using raw chicken, you can boil, bake, or grill it until fully cooked. Boiling is a quick method; just place the chicken in a pot of water and let it simmer for about 15-20 minutes. Once cooked, allow it to cool before shredding or dicing it into bite-sized pieces. If you’re short on time, using rotisserie chicken is a great shortcut!

Step 2: Preparing the Vegetables

Next, it’s time to prepare the vegetables. Start by washing the celery and red onion thoroughly. Then, finely chop the celery into small pieces. For the red onion, aim for a similar size to ensure even distribution in the salad. If you’re adding grapes or nuts, halve the grapes and chop the nuts as well. This step adds a fresh crunch to your Southern chicken salad.

Step 3: Mixing the Dressing

Now, let’s mix the dressing. In a large mixing bowl, combine the mayonnaise, Greek yogurt, Dijon mustard, apple cider vinegar, garlic powder, onion powder, salt, and black pepper. Use a whisk or a spoon to mix everything until it’s smooth and creamy. This dressing is what makes your Southern chicken salad rich and flavorful!

Step 4: Combining Ingredients

Once your dressing is ready, it’s time to combine all the ingredients. Add the cooked chicken, chopped celery, red onion, sweet pickle relish, and any optional ingredients like grapes or nuts to the bowl. Gently stir everything together until all the ingredients are well coated with the dressing. Be careful not to overmix, as you want to keep the chicken pieces intact.

Step 5: Chilling the Salad

Finally, cover the bowl with plastic wrap and refrigerate the salad. Allow it to chill for at least one hour, but for the best flavor, aim for 2-3 hours. This chilling time lets the flavors meld together beautifully, making each bite even more delicious. Once chilled, your Southern chicken salad is ready to serve!

Variation of Southern Chicken Salad

Southern chicken salad is a versatile dish that can be easily customized to suit your taste. Whether you want to switch up the ingredients or try a new serving style, there are plenty of options to explore. Let’s take a look at some alternative ingredients and different serving styles that can elevate your Southern chicken salad experience.

Alternative Ingredients for Southern Chicken Salad

While the classic recipe is delicious, you can experiment with various ingredients to create your own twist. Here are some ideas:

  • Greek Yogurt Only: For a lighter version, use all Greek yogurt instead of mayonnaise. This will give you a tangy flavor while cutting down on calories.
  • Fruits: Add diced apples or dried cranberries for a sweet twist. These fruits not only enhance the flavor but also add a pop of color.
  • Herbs: Fresh herbs like dill or parsley can brighten the salad. Just chop them finely and mix them in for an aromatic touch.
  • Spices: Experiment with spices like paprika or cayenne pepper for a little kick. This can add a whole new dimension to your Southern chicken salad.
  • Different Nuts: Instead of pecans or walnuts, try slivered almonds or sunflower seeds for a different crunch.

Feel free to mix and match these ingredients based on what you have on hand or what you enjoy most. The beauty of Southern chicken salad lies in its adaptability!

Different Serving Styles for Southern Chicken Salad

How you serve your Southern chicken salad can make a big difference in the dining experience. Here are some creative serving styles to consider:

  • On a Bed of Greens: Serve the salad on a bed of fresh lettuce or mixed greens. This adds a refreshing crunch and makes for a beautiful presentation.
  • In a Sandwich: Use your favorite bread or a croissant to make a delicious chicken salad sandwich. This is perfect for lunch or a picnic.
  • With Crackers: For a quick snack, serve the chicken salad with your choice of crackers. This is a great option for gatherings or parties.
  • Stuffed in Avocado: Halve an avocado and fill it with the chicken salad. This not only looks appealing but also adds healthy fats to your meal.
  • In Lettuce Wraps: For a low-carb option, use large lettuce leaves to wrap the chicken salad. This is a fun and healthy way to enjoy the dish.

These serving styles can make your Southern chicken salad even more enjoyable. Whether you’re hosting a gathering or just having a casual meal, these variations will surely impress your guests!

Cooking Note for Southern Chicken Salad

When preparing Southern chicken salad, there are a few important cooking notes to keep in mind. These tips will help ensure that your dish turns out perfectly every time. Let’s explore some key points to consider during the cooking process.

First, the quality of the chicken is crucial. Using fresh, high-quality chicken will enhance the flavor of your salad. If you opt for rotisserie chicken, choose one that is moist and well-seasoned. This will add depth to your salad without requiring extra seasoning.

Next, consider the cooking method for your chicken. Boiling is a quick and easy option, but grilling or baking can add a smoky flavor that elevates the dish. If you grill the chicken, marinating it beforehand can infuse even more flavor. A simple marinade of olive oil, lemon juice, and your favorite herbs works wonders!

Additionally, be mindful of the texture of your ingredients. When chopping vegetables, aim for uniform sizes. This ensures that every bite of your Southern chicken salad has a balanced mix of flavors and textures. For instance, finely chopped celery and red onion will blend well with the creamy dressing, while larger pieces of chicken will provide satisfying bites.

Lastly, don’t rush the chilling process. Allowing your salad to chill for a few hours is essential for the flavors to meld together. This resting time not only enhances the taste but also improves the overall texture of the salad. So, be patient and let your Southern chicken salad sit in the fridge before serving!

By following these cooking notes, you’ll create a Southern chicken salad that’s not only delicious but also a hit at any gathering. Enjoy the process and savor the delightful flavors that come together in this classic dish!

Serving Suggestions for Southern Chicken Salad

Once your Southern chicken salad is ready, it’s time to think about how to serve it. The way you present this dish can enhance the overall experience. Here are some delightful accompaniments and serving ideas that will complement your Southern chicken salad perfectly.

Best Accompaniments for Southern Chicken Salad

Pairing your Southern chicken salad with the right sides can elevate your meal. Here are some tasty options:

  • Fresh Fruit: Serve slices of watermelon, cantaloupe, or a fruit salad on the side. The sweetness of the fruit balances the savory flavors of the chicken salad.
  • Potato Chips: A crunchy side like classic potato chips or kettle-cooked chips adds a satisfying crunch. They’re perfect for scooping up the salad!
  • Pickles: A side of dill pickles or bread-and-butter pickles can add a tangy contrast to the creamy salad. This is a classic Southern pairing!
  • Coleslaw: A light, tangy coleslaw can complement the richness of the chicken salad. The crunchiness of the slaw adds another layer of texture.
  • Biscuits or Cornbread: Soft, buttery biscuits or sweet cornbread are perfect for soaking up any leftover dressing. They make for a comforting addition to your meal.

These accompaniments not only enhance the flavors of your Southern chicken salad but also create a well-rounded meal. Whether you’re hosting a picnic, a family gathering, or just enjoying a quiet dinner at home, these serving suggestions will surely impress your guests and make your meal memorable!

Tips for Perfecting Southern Chicken Salad

Creating the perfect Southern chicken salad is an art that can be mastered with a few helpful tips. Whether you’re a seasoned cook or a beginner, avoiding common mistakes and knowing how to store your salad properly can make a big difference. Let’s explore some essential tips to ensure your Southern chicken salad is always a hit!

Common Mistakes to Avoid

Even the best cooks can make mistakes. Here are some common pitfalls to watch out for when making Southern chicken salad:

  • Overcooking the Chicken: Cooking chicken for too long can make it dry and tough. Aim for juicy, tender chicken by checking for doneness early.
  • Skipping the Chill Time: Not allowing the salad to chill can result in a bland flavor. Chilling helps the ingredients meld together, enhancing the taste.
  • Using Low-Quality Ingredients: The quality of your chicken and vegetables matters. Fresh, high-quality ingredients will elevate your salad.
  • Not Tasting as You Go: Always taste your salad before serving. Adjust the seasoning to your liking for the best flavor.
  • Overmixing the Ingredients: Mixing too vigorously can break down the chicken and make the salad mushy. Gently fold the ingredients together for the best texture.

By avoiding these common mistakes, you’ll be on your way to making a delicious Southern chicken salad that everyone will love!

Storage Tips for Southern Chicken Salad

Proper storage is key to keeping your Southern chicken salad fresh and tasty. Here are some tips to help you store it effectively:

  • Refrigerate Promptly: After preparing your salad, cover it and place it in the refrigerator within two hours. This helps prevent bacterial growth.
  • Use an Airtight Container: Store your chicken salad in an airtight container to keep it fresh and prevent odors from other foods in the fridge.
  • Consume Within 3-5 Days: For the best quality, eat your Southern chicken salad within 3-5 days. If it looks or smells off, it’s best to discard it.
  • Freeze for Longer Storage: If you have leftovers, consider freezing the salad. However, note that the texture may change once thawed. It’s best to freeze only the chicken and dressing separately.

By following these storage tips, you can enjoy your Southern chicken salad for days to come, ensuring it remains delicious and safe to eat!

Breakdown of Time for Southern Chicken Salad

Understanding the time needed to prepare Southern chicken salad can help you plan your meal better. Whether you’re making it for a family dinner or a gathering, knowing the prep and cooking times is essential. Here’s a quick breakdown of the time involved in making this delicious dish.

Prep Time

The prep time for Southern chicken salad is quite manageable. You’ll spend about 15-20 minutes gathering your ingredients and chopping the vegetables. If you’re using leftover or rotisserie chicken, this time can be even shorter. Just remember to have everything ready before you start mixing!

Cooking Time

If you’re cooking raw chicken, the cooking time will vary based on your method. Boiling chicken typically takes around 15-20 minutes. Baking or grilling may take a bit longer, about 25-30 minutes, depending on the thickness of the chicken. Once cooked, allow the chicken to cool for a few minutes before shredding or dicing it.

Total Time

In total, you can expect to spend about 30-50 minutes on preparation and cooking, depending on your chicken method. However, don’t forget to factor in the chilling time! For the best flavor, it’s recommended to chill the salad for at least 1 hour, but 2-3 hours is ideal. So, while the active time is relatively short, planning ahead for chilling will ensure your Southern chicken salad is at its best when served.

Nutritional Information for Southern Chicken Salad

Understanding the nutritional content of your Southern chicken salad is essential for making informed choices. This dish is not only delicious but also packed with nutrients that can fit into a balanced diet. Let’s break down the key nutritional components of this classic recipe.

Calories in Southern Chicken Salad

Each serving of Southern chicken salad contains approximately 290 calories. This makes it a satisfying option for lunch or dinner without being overly heavy. The calorie count can vary based on the specific ingredients you use, especially if you opt for lighter alternatives like Greek yogurt instead of mayonnaise. Keeping track of your portion sizes can help you enjoy this dish while managing your calorie intake.

Protein Content in Southern Chicken Salad

One of the standout features of Southern chicken salad is its protein content. Each serving provides about 25 grams of protein, thanks to the chicken. Protein is essential for building and repairing tissues, making it a vital part of your diet. This high protein content can help keep you feeling full and satisfied, making it a great choice for those looking to maintain or build muscle.

Sodium Levels in Southern Chicken Salad

When it comes to sodium, Southern chicken salad contains around 500 milligrams per serving. This level is moderate, but it’s important to be mindful of your overall sodium intake, especially if you’re watching your salt consumption. You can reduce the sodium levels by using low-sodium mayonnaise or Greek yogurt and by being cautious with added salt. Always taste your salad before serving to ensure it meets your flavor preferences without excessive sodium.

By understanding the nutritional information of Southern chicken salad, you can enjoy this delightful dish while keeping your health goals in mind. Whether you’re looking for a protein-packed meal or a tasty side dish, this salad fits the bill!

FAQs about Southern Chicken Salad

Can I use leftover chicken for Southern Chicken Salad?

Absolutely! Using leftover chicken is a fantastic way to make Southern chicken salad. It saves time and reduces food waste. Just ensure the chicken is properly cooked and stored in the fridge. Shred or dice the leftover chicken before mixing it with the other ingredients. This method not only adds convenience but also enhances the flavor, as the chicken has had time to marinate in its juices.

What can I substitute for mayonnaise in Southern Chicken Salad?

If you’re looking for a healthier option or have dietary restrictions, there are several substitutes for mayonnaise in Southern chicken salad. Plain Greek yogurt is a popular choice, as it provides creaminess and a tangy flavor. You can also use avocado for a rich, buttery texture. For a lighter version, try using a combination of sour cream and mustard. Each alternative will give your salad a unique twist while keeping it delicious!

How long does Southern Chicken Salad last in the fridge?

Southern chicken salad can last in the fridge for about 3 to 5 days when stored properly. Make sure to keep it in an airtight container to maintain freshness. If you notice any changes in smell or appearance, it’s best to discard it. Always remember to refrigerate the salad promptly after serving to ensure it stays safe to eat.

Can I make Southern Chicken Salad ahead of time?

Yes, making Southern chicken salad ahead of time is a great idea! In fact, preparing it a few hours or even a day in advance allows the flavors to meld beautifully. Just be sure to store it in the refrigerator until you’re ready to serve. This makes it an excellent option for meal prep, picnics, or gatherings, as it can save you time and effort on the day of your event.

Conclusion on Southern Chicken Salad

In conclusion, Southern chicken salad is more than just a dish; it’s a celebration of flavors and traditions. This delightful recipe combines tender chicken with a creamy dressing and crunchy vegetables, creating a satisfying meal that can be enjoyed in various ways. Whether you serve it on a bed of greens, in a sandwich, or with crackers, it’s sure to be a hit at any gathering.

Moreover, the versatility of Southern chicken salad allows you to customize it to your taste. You can experiment with different ingredients, from fruits to nuts, making each version unique. This adaptability not only caters to different preferences but also encourages creativity in the kitchen.

As you prepare your Southern chicken salad, remember the importance of quality ingredients and proper preparation. Following the tips and variations provided will help you create a dish that’s not only delicious but also visually appealing. Plus, with its impressive nutritional profile, you can feel good about serving it to family and friends.

So, whether you’re enjoying a quiet meal at home or hosting a lively picnic, Southern chicken salad is a fantastic choice. It embodies the warmth and hospitality of Southern cooking, making it a beloved staple in many households. Give this recipe a try, and savor the delightful flavors that come together in every bite!

Garden Fresh Olive Garden Salad Recipe is a must-try!

Introduction to the Garden Fresh Olive Garden Salad Recipe

Garden Fresh Olive Garden Salad Recipe. This salad is not just a side dish; it’s a vibrant celebration of fresh ingredients that brings a taste of Italy right to your table. Whether you’re hosting a dinner party or simply enjoying a meal at home, this salad is sure to impress. With its colorful mix of greens, crunchy toppings, and zesty dressing, it’s a dish that everyone will love.

What Makes the Garden Fresh Olive Garden Salad Special?

What sets the Garden Fresh Olive Garden Salad apart? First, it’s all about the freshness. The combination of romaine, iceberg, and spinach creates a crisp base that is both nutritious and satisfying. The addition of cherry tomatoes adds a burst of sweetness, while the red onion provides a sharp contrast that enhances the overall flavor. Black olives and pepperoncini peppers introduce a delightful tang, making each bite exciting.

Moreover, the salad is topped with crunchy croutons and a sprinkle of Parmesan cheese, which adds texture and richness. The Olive Garden Italian dressing ties everything together, offering a perfect balance of herbs and spices. This salad is not only delicious but also versatile. You can easily customize it to suit your taste or dietary needs.

In essence, the Garden Fresh Olive Garden Salad is a perfect blend of flavors and textures. It’s a dish that embodies freshness and simplicity, making it a must-try for anyone who loves salads. So, let’s dive into the ingredients and preparation steps to create this delightful dish!

Ingredients for the Garden Fresh Olive Garden Salad Recipe

Garden Fresh Olive Garden Salad Recipe is simple and requires just a handful of fresh ingredients. Each component plays a vital role in delivering that delightful taste and texture. Here’s what you’ll need:

  • 4 cups mixed salad greens (romaine, iceberg, and spinach)
  • 1 cup cherry tomatoes, halved
  • 1/2 cup red onion, thinly sliced
  • 1/2 cup black olives, sliced
  • 1/2 cup pepperoncini peppers, sliced
  • 1/2 cup croutons
  • 1/4 cup grated Parmesan cheese
  • 1/2 cup Olive Garden Italian dressing

These ingredients come together to create a salad that is not only visually appealing but also packed with flavor. The mixed greens provide a crunchy base, while the cherry tomatoes add a pop of color and sweetness. The red onion gives a sharp bite, and the black olives and pepperoncini peppers contribute a tangy zest that elevates the dish.

Don’t forget the croutons! They add a satisfying crunch, and the grated Parmesan cheese brings a creamy richness that complements the other ingredients beautifully. Finally, the Olive Garden Italian dressing ties everything together, ensuring each bite is bursting with flavor.

Now that you have your ingredients ready, let’s move on to the preparation steps to create this delicious salad!

Step-by-Step Preparation of the Garden Fresh Olive Garden Salad Recipe

Garden Fresh Olive Garden Salad Recipe. Follow these simple steps to create a fresh and delicious salad that everyone will enjoy. Let’s get started!

Step 1: Preparing the Vegetables

First, wash all your vegetables thoroughly. This step is crucial for ensuring your salad is clean and safe to eat. Start with the mixed salad greens. Rinse them under cold water and spin them dry in a salad spinner. If you don’t have one, gently pat them dry with a clean kitchen towel.

Next, take the cherry tomatoes and slice them in half. This will help release their juicy sweetness into the salad. For the red onion, use a sharp knife to slice it thinly. Remember, the thinner the slices, the milder the flavor will be. Finally, prepare the black olives and pepperoncini peppers by slicing them as well. Set all the prepared vegetables aside in a bowl.

Step 2: Mixing the Salad Ingredients

In a large salad bowl, combine the mixed salad greens, halved cherry tomatoes, sliced red onion, black olives, and pepperoncini peppers. Gently toss the ingredients together using salad tongs or your hands. This ensures that all the flavors mix well without bruising the greens. The vibrant colors of the vegetables will make your salad look inviting and fresh!

Step 3: Making the Dressing

If you’re using the Olive Garden Italian dressing, you can skip this step. However, if you prefer a homemade vinaigrette, it’s easy to whip up! In a small bowl, mix together 1/4 cup of olive oil, 2 tablespoons of red wine vinegar, 1 teaspoon of Dijon mustard, and a pinch of salt and pepper. Whisk the ingredients until they are well combined. This dressing will add a fresh and zesty flavor to your salad.

Step 4: Combining Everything Together

Now it’s time to bring everything together! Drizzle the Olive Garden Italian dressing (or your homemade vinaigrette) over the mixed salad ingredients. Toss the salad gently to ensure that all the vegetables are evenly coated with the dressing. This step is essential for enhancing the flavors of the salad.

Finally, top your salad with croutons and a generous sprinkle of grated Parmesan cheese. This adds a delightful crunch and a creamy finish to your dish. Serve the salad immediately for the freshest taste, or chill it in the refrigerator for up to 30 minutes if you prefer a cooler option.

And there you have it! Your Garden Fresh Olive Garden Salad is ready to be enjoyed. Let’s explore some variations to make this salad even more exciting!

Variations of the Garden Fresh Olive Garden Salad Recipe

Garden Fresh Olive Garden Salad Recipe is wonderfully versatile. You can easily customize it to suit your taste or dietary preferences. Here are some exciting variations to consider!

Adding Protein to Your Salad

If you want to make your salad more filling, consider adding protein. Grilled chicken or shrimp are excellent choices. Simply grill the chicken or shrimp until cooked through, then slice or toss them on top of your salad. This addition not only boosts the protein content but also enhances the flavor.

For a different twist, you can also add canned tuna or chickpeas. These options are great for a quick protein boost. Just drain and rinse the chickpeas before adding them to your salad. They provide a nice texture and are packed with nutrients!

Vegetarian and Vegan Options

For those following a vegetarian or vegan diet, there are plenty of options to enjoy this salad. You can replace the Parmesan cheese with a vegan cheese alternative or simply omit it altogether. Nutritional yeast is another fantastic option that adds a cheesy flavor without dairy.

Additionally, consider adding more vegetables to enhance the salad’s nutritional value. Avocado slices, bell peppers, or even roasted vegetables can add depth and flavor. These ingredients not only make the salad more colorful but also provide healthy fats and vitamins.

By making these simple adjustments, you can create a Garden Fresh Olive Garden Salad that fits your dietary needs while still being delicious and satisfying. Now, let’s move on to some cooking notes to ensure your salad turns out perfectly!

Cooking Note for the Garden Fresh Olive Garden Salad Recipe

Garden Fresh Olive Garden Salad Recipe, a few cooking notes can help you achieve the best results. These tips will ensure that your salad is not only delicious but also visually appealing and fresh.

First, always use the freshest ingredients possible. Fresh vegetables not only taste better but also provide more nutrients. When selecting your salad greens, look for vibrant colors and crisp textures. Avoid any wilted or discolored leaves, as they can affect the overall quality of your salad.

Next, consider the timing of your preparation. If you plan to serve the salad later, it’s best to keep the dressing separate until just before serving. This prevents the greens from wilting and keeps the salad crisp. You can store the prepared vegetables in the refrigerator for a few hours, but remember to add the dressing only when you’re ready to enjoy your meal.

Additionally, if you’re using store-bought croutons, check the ingredients for any added preservatives or artificial flavors. Homemade croutons are a great alternative and can be made easily by toasting bread cubes in olive oil and seasoning them with herbs. This way, you can control the flavor and texture, making your salad even more delightful.

Lastly, don’t be afraid to experiment with flavors! Adding herbs like basil or parsley can elevate your salad. A squeeze of lemon juice can also brighten the flavors and add a refreshing zing. Remember, cooking is all about creativity, so feel free to adjust the ingredients to suit your taste.

With these cooking notes in mind, you’re well on your way to creating a fantastic Garden Fresh Olive Garden Salad that will impress your family and friends. Now, let’s explore some serving suggestions to make your salad even more enjoyable!

Serving Suggestions for the Garden Fresh Olive Garden Salad Recipe

Garden Fresh Olive Garden Salad Recipe is just as important as preparing it. The way you present your salad can enhance the dining experience and make it even more enjoyable. Here are some delightful serving suggestions to consider:

First, consider using a large, colorful serving bowl. A vibrant bowl can make the salad look more appealing and inviting. You can also layer the ingredients in the bowl for a beautiful presentation. Start with the mixed greens at the bottom, then add the cherry tomatoes, red onion, olives, and pepperoncini peppers on top. This way, guests can see the colorful layers before they dig in!

Next, serve the salad alongside a variety of main dishes. It pairs wonderfully with grilled meats, pasta dishes, or even as a refreshing side for pizza. The crispness of the salad complements the richness of these dishes, creating a balanced meal. If you’re hosting a gathering, consider offering a buffet-style setup where guests can help themselves to the salad and choose their favorite main courses.

For a more casual dining experience, serve the salad in individual bowls. This makes it easy for everyone to enjoy their portion without the need for serving utensils. You can also add a small side of extra dressing for those who like their salad a bit saucier. This way, everyone can customize their salad to their liking!

Don’t forget about garnishing! A sprinkle of fresh herbs, like basil or parsley, can add a pop of color and flavor. You can also add a few extra croutons on top for added crunch. If you’re feeling adventurous, consider drizzling a balsamic glaze over the salad for a touch of sweetness that contrasts beautifully with the savory ingredients.

Lastly, if you have leftovers, store them in an airtight container in the refrigerator. However, keep the dressing separate to maintain the freshness of the greens. This way, you can enjoy the salad again the next day without sacrificing taste or texture.

With these serving suggestions, your Garden Fresh Olive Garden Salad will not only taste amazing but also look stunning on the table. Now, let’s move on to some tips for perfecting this delightful salad!

Tips for Perfecting the Garden Fresh Olive Garden Salad Recipe

Garden Fresh Olive Garden Salad Recipe, consider these helpful tips. They will ensure that your salad is not only delicious but also visually appealing and satisfying. Let’s dive into some expert advice!

First, always wash your greens thoroughly. This step is crucial for removing any dirt or pesticides. After washing, dry the greens well. Excess moisture can make your salad soggy. A salad spinner is perfect for this, but if you don’t have one, gently pat them dry with a clean towel.

Next, think about the order of your ingredients. When mixing your salad, add the heavier ingredients, like olives and croutons, last. This prevents them from crushing the delicate greens. Toss gently to keep everything intact and looking fresh.

For added flavor, consider marinating your onions. Soaking sliced red onions in cold water for about 10 minutes can mellow their sharpness. This makes them more palatable and enhances the overall taste of your salad.

Another tip is to use fresh herbs. Adding chopped basil, parsley, or even dill can brighten the flavors of your salad. Fresh herbs not only add taste but also a pop of color, making your dish more appealing.

When it comes to dressing, less is often more. Start with a small amount of dressing and add more as needed. This way, you can control the flavor and avoid overwhelming the fresh ingredients. Remember, you can always add more, but it’s hard to take it away!

Lastly, serve your salad immediately after dressing it. This ensures that the greens remain crisp and fresh. If you need to prepare it ahead of time, keep the dressing separate until just before serving. This simple step will keep your salad looking and tasting its best.

By following these tips, you’ll create a Garden Fresh Olive Garden Salad that is not only delicious but also a feast for the eyes. Now, let’s break down the time needed to prepare this delightful dish!

Breakdown of Time for the Garden Fresh Olive Garden Salad Recipe

Prep Time

Garden Fresh Olive Garden Salad Recipe is quick and easy. The prep time typically takes about 15 minutes. This includes washing and slicing all the vegetables, as well as gathering your ingredients. If you’re adding protein, like grilled chicken or shrimp, you may need to factor in additional time for cooking. However, the salad itself comes together in no time!

Cooking Time

For this salad, there is no actual cooking involved, making it a perfect choice for a quick meal or side dish. If you choose to grill chicken or shrimp, that may take an additional 10 to 15 minutes, depending on your cooking method. But for the most part, you can enjoy this salad without any cooking at all!

Total Time

Garden Fresh Olive Garden Salad Recipe. This includes the time for prepping the vegetables and any additional cooking if you decide to add protein. It’s a fantastic option for busy days when you want something fresh and healthy without spending hours in the kitchen.

Nutritional Information for the Garden Fresh Olive Garden Salad Recipe

Garden Fresh Olive Garden Salad Recipe is not only delicious but also offers a variety of nutrients. Here’s a breakdown of the key nutritional information per serving:

Calories

Each serving of the Garden Fresh Olive Garden Salad contains approximately 150 calories. This makes it a light and healthy option for lunch or dinner. The low-calorie count allows you to enjoy this salad without feeling guilty, especially if you’re watching your calorie intake.

Protein

This salad provides about 3 grams of protein per serving. While this may seem modest, it can be easily boosted by adding grilled chicken, shrimp, or chickpeas. These additions not only enhance the protein content but also make the salad more filling and satisfying.

Sodium

The sodium content in the Garden Fresh Olive Garden Salad is around 400 milligrams per serving. This amount can vary based on the type of dressing used and any additional ingredients you may add. If you’re concerned about sodium intake, consider using a low-sodium dressing or making your own to control the salt content.

Overall, the Garden Fresh Olive Garden Salad is a nutritious choice that can fit into various dietary plans. It’s packed with vitamins and minerals from the fresh vegetables, making it a great addition to your meals. Now that you know the nutritional benefits, let’s address some frequently asked questions about this delightful salad!

FAQs about the Garden Fresh Olive Garden Salad Recipe

Can I make the Garden Fresh Olive Garden Salad ahead of time?

Garden Fresh Olive Garden Salad Recipe ahead of time, but with a few considerations. To keep the salad fresh, wash and chop all the vegetables and store them in an airtight container in the refrigerator. This way, they will stay crisp and vibrant. However, it’s best to wait to add the dressing until just before serving. This prevents the greens from wilting and ensures that your salad remains crunchy and delicious.

If you want to make it even easier, you can prepare the dressing in advance as well. Just store it in a separate container in the fridge. When you’re ready to serve, simply combine the vegetables and dressing, toss, and enjoy!

What can I substitute for the dressing in the Garden Fresh Olive Garden Salad Recipe?

If you’re looking for alternatives to the Olive Garden Italian dressing, there are plenty of options! You can make a simple homemade vinaigrette using ingredients you likely have on hand. A mix of olive oil, vinegar (like red wine or balsamic), mustard, and a pinch of salt and pepper works wonderfully. This homemade dressing can add a fresh and zesty flavor to your salad.

Additionally, you can try other store-bought dressings, such as balsamic vinaigrette, ranch, or a lemon herb dressing. Each of these options will give your salad a unique twist while still complementing the fresh ingredients beautifully. Feel free to experiment and find the dressing that you love the most!

How long does the Garden Fresh Olive Garden Salad last in the fridge?

Garden Fresh Olive Garden Salad can last in the fridge for about 1 to 2 days if stored properly. However, it’s important to keep the dressing separate from the salad until you’re ready to eat. This will help maintain the freshness of the greens and prevent them from becoming soggy.

When storing leftovers, place the salad in an airtight container. If you notice any wilted greens or soggy ingredients, it’s best to remove them before serving. Enjoy your salad within a couple of days for the best taste and texture!

Conclusion on the Garden Fresh Olive Garden Salad Recipe

Garden Fresh Olive Garden Salad Recipe is a delightful addition to any meal. Its vibrant colors, fresh ingredients, and zesty dressing make it a favorite among salad lovers. Whether you’re enjoying it as a light lunch or serving it alongside a hearty dinner, this salad is sure to impress.

Not only is it easy to prepare, but it also offers endless possibilities for customization. You can add proteins, switch up the dressing, or incorporate seasonal vegetables to keep things exciting. This versatility makes it a go-to recipe for any occasion, from casual family dinners to festive gatherings.

Moreover, the nutritional benefits of this salad cannot be overlooked. Packed with vitamins and minerals, it supports a healthy lifestyle while satisfying your taste buds. With just a few simple ingredients, you can create a dish that is both delicious and nourishing.

So, why not give the Garden Fresh Olive Garden Salad a try? Gather your ingredients, follow the steps, and enjoy the fresh flavors that this salad brings to your table. Your family and friends will surely appreciate the effort, and you’ll love how easy it is to make. Happy cooking!

Italian Chopped Salad Recipe: A Fresh Delight to Enjoy!

Introduction to Italian Chopped Salad Recipe

The Italian Chopped Salad is a delightful dish that brings together fresh ingredients and vibrant flavors. This salad is not just a side; it can be a meal on its own! With its colorful mix of vegetables, olives, and cheese, it’s a feast for the eyes and the palate. Whether you’re hosting a gathering or just looking for a healthy lunch, this salad is sure to impress.

What Makes the Italian Chopped Salad Unique?

What sets the Italian Chopped Salad apart is its combination of textures and flavors. The crisp romaine lettuce provides a refreshing base, while the juicy cherry tomatoes and crunchy cucumbers add a satisfying bite. The addition of Kalamata olives introduces a briny flavor that perfectly complements the creamy mozzarella. Each ingredient is chopped into bite-sized pieces, making it easy to enjoy every mouthful. Plus, the homemade dressing ties everything together, enhancing the natural flavors of the vegetables.

The Health Benefits of an Italian Chopped Salad

Eating an Italian Chopped Salad is not only delicious but also nutritious. This salad is packed with vitamins and minerals from the fresh vegetables. Romaine lettuce is rich in vitamins A and K, which are essential for eye health and bone strength. Tomatoes are a great source of antioxidants, particularly lycopene, which may help reduce the risk of chronic diseases. Cucumbers are hydrating and low in calories, making them a perfect addition for those watching their weight. Furthermore, the healthy fats from olive oil and cheese provide energy and support heart health. Overall, this salad is a wonderful way to incorporate more vegetables into your diet while enjoying a tasty meal.

Ingredients for Italian Chopped Salad Recipe

To create a delicious Italian Chopped Salad, you’ll need a variety of fresh ingredients. Each component adds its unique flavor and texture, making the salad a delightful experience. Here’s what you’ll need:

  • 2 cups romaine lettuce, chopped
  • 1 cup cherry tomatoes, halved
  • 1 cup cucumber, diced
  • 1/2 cup red bell pepper, diced
  • 1/2 cup red onion, finely chopped
  • 1/2 cup Kalamata olives, pitted and sliced
  • 1/2 cup mozzarella balls, halved
  • 1/4 cup fresh parsley, chopped
  • 1/4 cup grated Parmesan cheese
  • 1/4 cup olive oil
  • 2 tablespoons red wine vinegar
  • 1 teaspoon dried oregano
  • Salt and pepper to taste

These ingredients come together to create a vibrant and flavorful salad. The romaine lettuce serves as a crisp base, while the cherry tomatoes and cucumbers add freshness. The red bell pepper and onion provide a sweet and tangy crunch, and the Kalamata olives bring a savory depth. Finally, the mozzarella and Parmesan cheese add creaminess and richness, making this salad truly satisfying.

Feel free to adjust the quantities based on your preferences or the number of servings you need. The beauty of the Italian Chopped Salad is its versatility, allowing you to mix and match ingredients to suit your taste!

Step-by-Step Preparation of Italian Chopped Salad Recipe

Now that you have all your ingredients ready, it’s time to prepare your Italian Chopped Salad! Following these simple steps will ensure that your salad is fresh, flavorful, and visually appealing. Let’s dive into the preparation process!

Step 1: Preparing the Vegetables

Start by washing all your vegetables thoroughly. This step is crucial to remove any dirt or pesticides. First, rinse the romaine lettuce under cold water. Shake off the excess water and pat it dry with a clean kitchen towel or paper towels. Next, wash the cherry tomatoes and cucumbers. For the bell pepper and red onion, simply rinse them under running water. Once cleaned, you’re ready to chop!

Step 2: Chopping the Ingredients

Chop the romaine lettuce into bite-sized pieces. Aim for uniformity to ensure even distribution in the salad. Then, halve the cherry tomatoes and dice the cucumber into small cubes. For the red bell pepper, remove the seeds and chop it into small pieces. Finely chop the red onion, as its strong flavor can be overwhelming if the pieces are too large. Lastly, slice the Kalamata olives and mozzarella balls in half. Place all the chopped ingredients into a large mixing bowl.

Step 3: Making the Dressing

In a separate small bowl, whisk together the olive oil, red wine vinegar, dried oregano, salt, and pepper. This dressing is simple yet packed with flavor. Whisk until the ingredients are well combined and emulsified. Taste the dressing and adjust the seasoning if needed. You can add a pinch more salt or a splash of vinegar for extra zing!

Step 4: Combining Everything Together

Now it’s time to bring everything together! Pour the dressing over the chopped vegetables in the large bowl. Gently toss the salad to ensure that every ingredient is coated with the dressing. This step is important for flavor. Finally, sprinkle the grated Parmesan cheese on top and give it a final toss. Your Italian Chopped Salad is now ready to serve!

For the best flavor, consider chilling the salad in the refrigerator for about 30 minutes before serving. This allows the flavors to meld beautifully. Enjoy your fresh and vibrant Italian Chopped Salad!

Variations of Italian Chopped Salad Recipe

The Italian Chopped Salad is incredibly versatile. You can easily customize it to suit your taste or dietary needs. Here are some exciting variations to consider, ensuring that every bite remains delightful and satisfying.

Adding Proteins to Your Italian Chopped Salad

If you want to make your Italian Chopped Salad more filling, adding protein is a great option. Grilled chicken is a popular choice, as it adds a savory flavor and pairs well with the salad’s ingredients. Simply grill or sauté chicken breast, slice it, and toss it into the salad.

For a vegetarian option, consider adding chickpeas. They are not only protein-rich but also add a nice texture. Just rinse and drain a can of chickpeas, then mix them in with the other ingredients.

Another delicious option is to include shrimp. Cooked shrimp can add a touch of elegance to your salad. Toss them in with the dressing for a refreshing seafood twist. No matter which protein you choose, it will enhance the salad’s nutritional value and make it a complete meal.

Vegetarian and Vegan Options for Italian Chopped Salad Recipe

For those following a vegetarian or vegan diet, the Italian Chopped Salad can easily be adapted. If you want to keep it vegetarian, simply omit the Parmesan cheese or use a vegetarian-friendly cheese alternative. You can also add more vegetables, like artichoke hearts or roasted red peppers, to enhance the flavor.

For a vegan version, replace the mozzarella with a plant-based cheese or skip it altogether. You can also add avocado for creaminess. Avocado not only adds healthy fats but also gives a rich texture that complements the other ingredients beautifully.

Another great addition for vegans is nuts or seeds, such as sunflower seeds or walnuts. They provide a satisfying crunch and boost the salad’s nutritional profile. With these variations, your Italian Chopped Salad can cater to any dietary preference while remaining delicious and fresh!

Cooking Note for Italian Chopped Salad Recipe

When preparing your Italian Chopped Salad, there are a few cooking notes to keep in mind to ensure the best results. First, freshness is key. Always use the freshest ingredients available. This not only enhances the flavor but also improves the overall texture of the salad. Fresh vegetables will provide that satisfying crunch and vibrant colors that make the salad visually appealing.

Another important tip is to chop your ingredients uniformly. This ensures that every bite is balanced and enjoyable. If some pieces are larger than others, it can lead to an uneven distribution of flavors. Aim for bite-sized pieces that are easy to eat.

Additionally, consider the timing of your salad preparation. If you plan to serve the salad later, it’s best to keep the dressing separate until just before serving. This prevents the vegetables from wilting and losing their crispness. You can prepare the chopped ingredients ahead of time and store them in the refrigerator. Just remember to toss them with the dressing right before serving for maximum freshness.

Lastly, don’t hesitate to experiment with the dressing. While the classic olive oil and vinegar combination is delicious, you can add your personal touch. A squeeze of lemon juice or a dash of mustard can elevate the flavor profile. Feel free to adjust the seasoning to suit your taste. Cooking is all about creativity, so have fun with it!

By keeping these cooking notes in mind, you’ll create a delightful Italian Chopped Salad that is not only tasty but also visually stunning. Enjoy the process and the delicious results!

Serving Suggestions for Italian Chopped Salad Recipe

Serving your Italian Chopped Salad can be just as fun as making it! This salad is versatile and can be enjoyed in various ways. Here are some delightful serving suggestions to enhance your dining experience.

First, consider serving the salad as a refreshing side dish. It pairs wonderfully with grilled meats, such as chicken or steak. The crispness of the salad complements the savory flavors of the grilled dishes, making for a balanced meal. You can also serve it alongside pasta dishes, where the salad adds a fresh contrast to the rich flavors of the sauce.

If you want to make the salad the star of the meal, serve it as a main dish. Add your choice of protein, like grilled chicken, shrimp, or chickpeas, to create a satisfying and nutritious meal. This way, the Italian Chopped Salad becomes a complete dish that is both filling and flavorful.

For a casual gathering or picnic, consider serving the salad in individual cups or jars. This not only makes for easy serving but also adds a fun touch to your presentation. Guests can grab their own portion, making it a convenient option for outdoor events.

Another great idea is to serve the salad with crusty bread or garlic bread on the side. The bread can be used to scoop up the salad, adding a delightful crunch to each bite. This combination is perfect for a light lunch or dinner.

Lastly, don’t forget about garnishing! A sprinkle of extra Parmesan cheese or a few fresh herbs on top can elevate the presentation. You can also add a drizzle of balsamic glaze for a touch of sweetness and visual appeal.

With these serving suggestions, your Italian Chopped Salad will not only taste amazing but also look beautiful on the table. Enjoy sharing this vibrant dish with family and friends!

Tips for Perfecting Your Italian Chopped Salad Recipe

Creating the perfect Italian Chopped Salad is all about attention to detail and a few helpful tips. With these suggestions, you can elevate your salad to new heights, ensuring it’s not only delicious but also visually appealing. Here are some tips to keep in mind:

First, always use fresh ingredients. Fresh vegetables not only taste better but also provide a vibrant color that makes your salad pop. When shopping, look for crisp romaine lettuce, bright cherry tomatoes, and firm cucumbers. The fresher the ingredients, the more flavorful your salad will be!

Next, consider the size of your vegetable pieces. Aim for uniformity in chopping. This ensures that every bite is balanced and enjoyable. If some pieces are larger than others, it can lead to an uneven distribution of flavors. Bite-sized pieces are ideal for a salad, making it easy to enjoy.

Don’t forget about the dressing! A well-balanced dressing can make or break your salad. Taste it before adding it to the salad. If it feels too tangy, add a bit more olive oil. If it’s too bland, a pinch of salt or a splash of vinegar can enhance the flavor. Adjusting the dressing to your taste is key!

Another great tip is to let your salad sit for a few minutes after tossing it with the dressing. This allows the flavors to meld together beautifully. If you have time, chilling the salad for about 30 minutes in the refrigerator can enhance the taste even more.

Lastly, don’t hesitate to experiment! The Italian Chopped Salad is versatile, so feel free to add your favorite ingredients. Whether it’s a sprinkle of nuts for crunch or a handful of herbs for freshness, personalizing your salad can make it uniquely yours. Enjoy the process of creating and tasting!

By following these tips, you’ll be well on your way to mastering the Italian Chopped Salad. Each bite will be a delightful experience, bursting with flavor and freshness. Happy salad making!

Breakdown of Time for Italian Chopped Salad Recipe

Understanding the time needed to prepare your Italian Chopped Salad can help you plan your meal better. This salad is quick to make, making it a perfect choice for busy days or last-minute gatherings. Here’s a breakdown of the time involved in creating this delicious dish.

Prep Time

The prep time for the Italian Chopped Salad is approximately 15 to 20 minutes. This includes washing and chopping all the fresh vegetables. If you have a sharp knife and a cutting board ready, you can speed up the process. Remember, the key is to chop everything into bite-sized pieces for easy eating!

Cooking Time

Interestingly, there is no actual cooking time involved in this salad. The only time you might spend is if you choose to grill chicken or shrimp as an added protein. If you opt for grilled chicken, allow about 10 to 15 minutes for cooking, depending on the thickness of the meat. However, if you stick to the salad as is, you can skip this step entirely!

Total Time

In total, you can expect to spend around 15 to 20 minutes preparing the Italian Chopped Salad, plus any additional time if you decide to cook proteins. If you let the salad chill in the refrigerator for about 30 minutes before serving, that’s an extra step to consider. Overall, this salad is quick and easy, making it a fantastic option for any meal!

Nutritional Information for Italian Chopped Salad Recipe

Understanding the nutritional content of your Italian Chopped Salad is essential for making informed dietary choices. This salad is not only delicious but also packed with nutrients that can benefit your health. Let’s break down the key nutritional components of this vibrant dish.

Calories in Italian Chopped Salad Recipe

Each serving of the Italian Chopped Salad contains approximately 250 calories. This makes it a great option for those looking to enjoy a satisfying meal without consuming too many calories. The combination of fresh vegetables, healthy fats from olive oil, and protein from cheese contributes to a balanced calorie count. You can enjoy this salad as a light lunch or a side dish without feeling guilty!

Protein Content in Italian Chopped Salad Recipe

In terms of protein, the Italian Chopped Salad offers about 10 grams per serving. The protein comes primarily from the mozzarella cheese and the addition of any proteins you might choose to include, such as grilled chicken or chickpeas. Protein is essential for muscle repair and growth, making this salad a nutritious choice for those looking to maintain a healthy diet.

Sodium Levels in Italian Chopped Salad Recipe

The sodium content in the Italian Chopped Salad is relatively moderate, making it a heart-healthy option. On average, each serving contains around 400-500 mg of sodium, depending on the amount of olives and cheese used. If you are watching your sodium intake, consider using low-sodium olives or cheese alternatives. This way, you can enjoy the flavors without compromising your health goals.

Overall, the Italian Chopped Salad is a nutritious and balanced meal option. With its low calorie count, decent protein content, and moderate sodium levels, it’s a fantastic choice for anyone looking to eat healthily while enjoying a delicious dish!

FAQs about Italian Chopped Salad Recipe

Can I make Italian Chopped Salad ahead of time?

Yes, you can prepare the Italian Chopped Salad ahead of time! However, it’s best to keep the dressing separate until you’re ready to serve. This helps maintain the crispness of the vegetables. You can chop all the ingredients and store them in an airtight container in the refrigerator. When you’re ready to enjoy the salad, simply add the dressing, toss, and serve. This way, you’ll have a fresh and delicious salad ready to go!

What can I substitute for ingredients in Italian Chopped Salad Recipe?

There are plenty of substitutions you can make in the Italian Chopped Salad Recipe! If you don’t have romaine lettuce, feel free to use spinach or mixed greens. For the cheese, feta or goat cheese can be great alternatives to mozzarella. If you’re not a fan of Kalamata olives, green olives or even capers can add a nice briny flavor. You can also swap out the vegetables based on your preferences. Bell peppers can be replaced with carrots or radishes, and you can add other favorites like avocado or artichokes. The possibilities are endless!

How long does Italian Chopped Salad last in the fridge?

The Italian Chopped Salad can last in the fridge for about 2 to 3 days if stored properly. To keep it fresh, make sure to store it in an airtight container. However, if you’ve already added the dressing, it’s best to consume it within a day to prevent the vegetables from wilting. If you plan to keep it longer, store the dressing separately and mix it in just before serving. This will help maintain the salad’s freshness and crunch!

Is Italian Chopped Salad Recipe gluten-free?

Yes, the Italian Chopped Salad Recipe is naturally gluten-free! All the ingredients used, such as fresh vegetables, olives, and cheese, do not contain gluten. However, if you’re using any packaged ingredients, like certain dressings or cheeses, it’s always a good idea to check the labels for gluten content. As long as you stick to fresh, whole ingredients, you can enjoy this salad without any gluten concerns!

Conclusion on Italian Chopped Salad Recipe

The Italian Chopped Salad is a delightful and nutritious dish that brings together a medley of fresh ingredients. With its vibrant colors and bold flavors, this salad is not just a side but a versatile meal option that can be enjoyed any time of the day. Whether you’re looking for a light lunch, a refreshing side for dinner, or a dish to impress your guests, the Italian Chopped Salad fits the bill perfectly.

By following the simple steps outlined in this recipe, you can create a salad that is both satisfying and healthy. The combination of crisp vegetables, savory olives, and creamy cheese makes each bite a burst of flavor. Plus, with the option to customize the salad by adding proteins or experimenting with different dressings, you can make it your own.

As you prepare your Italian Chopped Salad, remember the importance of using fresh ingredients. This not only enhances the taste but also ensures that you’re getting the maximum nutritional benefits. With its low calorie count and decent protein content, this salad is a guilt-free choice that supports a healthy lifestyle.

So, gather your ingredients, follow the steps, and enjoy the process of making this delicious Italian Chopped Salad. Whether you serve it at a family gathering or enjoy it as a quick meal, it’s sure to be a hit. Happy salad making!