Mango Cucumber Salad with Blueberries and Avocado Recipe delights!

Introduction to Mango Cucumber Salad with Blueberries and Avocado Recipe

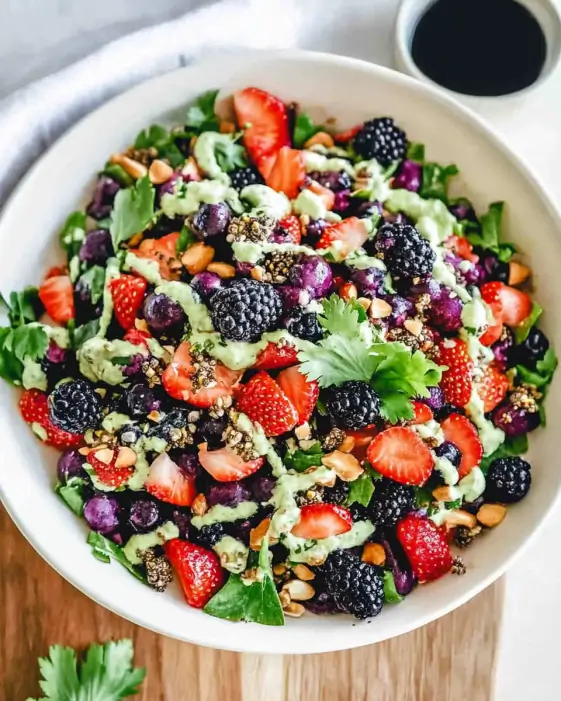
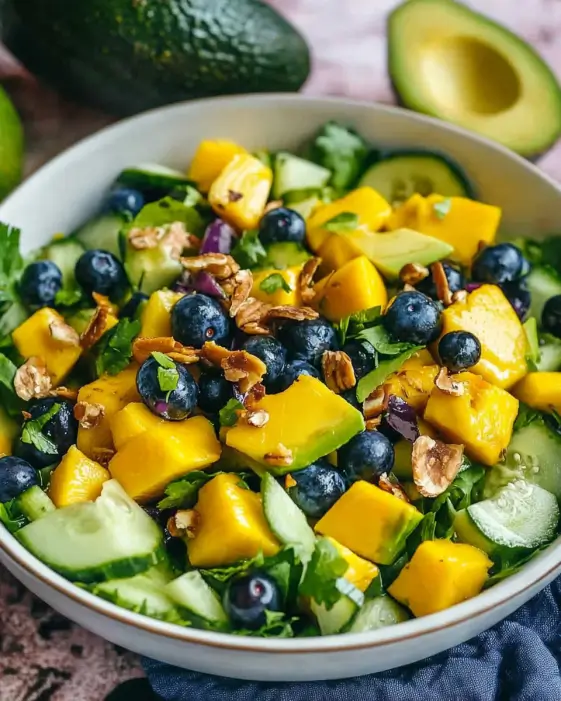
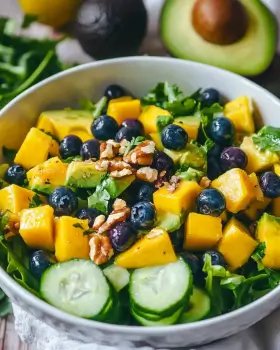
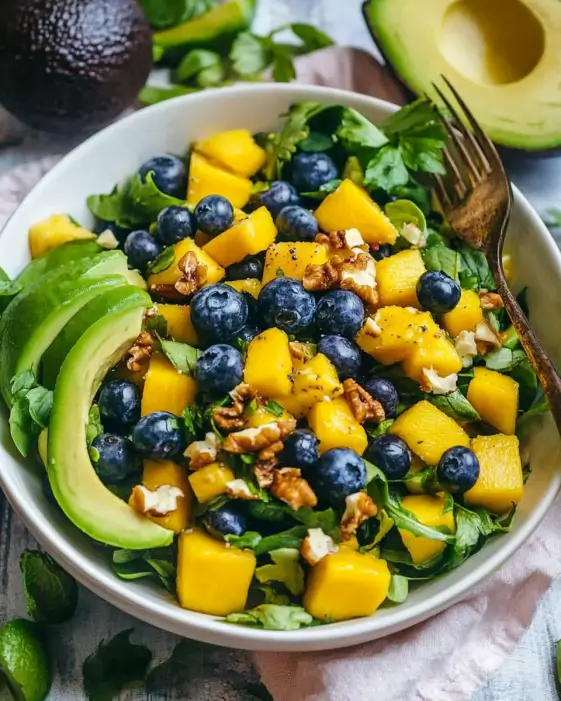
Mango Cucumber Salad with Blueberries and Avocado Recipe is a delightful combination of sweet and savory ingredients. This salad is not only vibrant and colorful but also packed with nutrients. It’s perfect for summer picnics, barbecues, or even as a light lunch. The mix of juicy mangos, crunchy cucumbers, and creamy avocado creates a delightful texture that will please your taste buds.

Why This Salad is a Must-Try

This salad is a must-try for several reasons. First, it’s incredibly easy to make. With just a few fresh ingredients, you can whip up a delicious dish in no time. Second, the flavors are simply amazing! The sweetness of the mangos pairs perfectly with the tartness of the blueberries. Plus, the creamy avocado adds a rich texture that makes every bite satisfying.

Moreover, this salad is versatile. You can enjoy it as a side dish or add protein to make it a complete meal. It’s also a great way to incorporate more fruits and vegetables into your diet. With its bright colors and refreshing taste, this salad is sure to impress your family and friends. So, let’s dive into the ingredients and get started on this delightful recipe!

Ingredients for Mango Cucumber Salad with Blueberries and Avocado Recipe

Mango Cucumber Salad with Blueberries and Avocado Recipe, you’ll need a handful of fresh ingredients. Each component adds its unique flavor and texture, making this salad a delightful treat. Here’s what you’ll need:

  • 2 ripe mangos, diced
  • 1 large cucumber, diced
  • 1 cup fresh blueberries
  • 1 ripe avocado, diced
  • 1/4 cup red onion, finely chopped
  • 1/4 cup fresh cilantro, chopped
  • 2 tablespoons lime juice
  • 1 tablespoon olive oil
  • Salt and pepper to taste

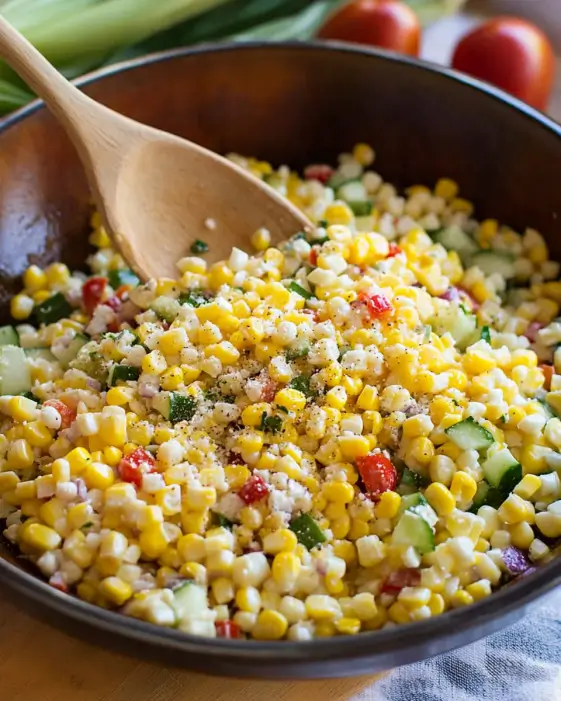
These ingredients come together to create a salad that is not only tasty but also visually appealing. The vibrant colors of the mangos, blueberries, and cucumbers make this dish a feast for the eyes. Plus, the combination of flavors will leave you wanting more!

When selecting your ingredients, opt for ripe mangos and avocados for the best taste. Fresh blueberries add a burst of sweetness, while the cucumber provides a refreshing crunch. The red onion and cilantro bring in a hint of sharpness and earthiness, balancing the sweetness perfectly. With these ingredients on hand, you’re ready to start preparing your salad!

Step-by-Step Preparation of Mango Cucumber Salad with Blueberries and Avocado Recipe

Mango Cucumber Salad with Blueberries and Avocado Recipe. This step-by-step guide will help you create a delicious salad that’s sure to impress. Let’s get started!

Step 1: Preparing the Ingredients

First things first, you need to prepare your ingredients. Start by washing all your fruits and vegetables thoroughly. This ensures that they are clean and safe to eat. Next, peel the mangos and avocado. Use a sharp knife to carefully dice them into bite-sized pieces. For the cucumber, cut off the ends and slice it in half lengthwise. Then, dice it into small cubes. Don’t forget to finely chop the red onion and cilantro. Having everything prepped will make the next steps much easier!

Step 2: Combining the Fruits and Vegetables

Once your ingredients are ready, grab a large mixing bowl. In this bowl, combine the diced mangos, cucumber, blueberries, avocado, red onion, and cilantro. Gently mix them together with a spatula or wooden spoon. Be careful not to mash the avocado; you want to keep those lovely chunks intact. This combination of fruits and vegetables creates a colorful and vibrant salad that looks as good as it tastes!

Step 3: Making the Dressing

Now it’s time to make the dressing. In a small bowl, whisk together the lime juice, olive oil, salt, and pepper. This dressing adds a zesty flavor that ties all the ingredients together. If you prefer a little more tang, feel free to add extra lime juice. Whisk until the mixture is well combined and smooth. This simple dressing is key to enhancing the flavors of your salad!

Step 4: Tossing the Salad Together

With your dressing ready, it’s time to bring everything together. Pour the dressing over the salad mixture in the large bowl. Gently toss the salad to ensure that all the ingredients are coated with the dressing. Remember to be gentle, as you don’t want to break apart the avocado. After tossing, let the salad sit for about 10 minutes. This resting time allows the flavors to meld beautifully, making each bite even more delicious!

Mango Cucumber Salad with Blueberries and Avocado Recipe is now ready to be served. Whether you enjoy it chilled or at room temperature, this salad is sure to be a hit!

Variations of Mango Cucumber Salad with Blueberries and Avocado Recipe

Mango Cucumber Salad with Blueberries and Avocado Recipe is delicious on its own, but you can easily customize it to suit your taste. Here are some fun variations to consider, making this salad even more exciting!

Adding Protein Options

If you want to turn this salad into a more filling meal, consider adding some protein. Grilled chicken or shrimp can be excellent choices. Simply cook the protein of your choice and slice it into bite-sized pieces. Toss it in with the salad for a satisfying dish. For a vegetarian option, try adding chickpeas or black beans. They not only boost the protein content but also add a nice texture. You can also sprinkle some feta cheese or goat cheese on top for a creamy touch. These additions will make your salad heartier while still keeping it fresh and vibrant!

Alternative Dressings to Try

While the lime and olive oil dressing is delightful, you can experiment with different dressings to change the flavor profile. For a creamy twist, consider using a yogurt-based dressing. Simply mix plain yogurt with lime juice, a bit of honey, and salt. This will add a rich creaminess that pairs well with the fruits. Another option is a balsamic vinaigrette. The sweetness of balsamic vinegar complements the fruits beautifully. Just whisk together balsamic vinegar, olive oil, and a touch of honey for a tangy dressing. Feel free to get creative and find the dressing that you love the most!

Mango Cucumber Salad with Blueberries and Avocado Recipe but also allow you to enjoy it in new and exciting ways. Whether you’re looking for a light snack or a hearty meal, these options have got you covered!

Cooking Note for Mango Cucumber Salad with Blueberries and Avocado Recipe

Mango Cucumber Salad with Blueberries and Avocado Recipe, there are a few cooking notes to keep in mind. These tips will help you achieve the best flavor and texture for your salad.

First, always choose ripe fruits and vegetables. Ripe mangos and avocados will provide the best taste and creaminess. To check if a mango is ripe, gently squeeze it. If it gives slightly, it’s ready to eat. For avocados, look for a dark green color and a slight softness when pressed. This ensures that your salad will be bursting with flavor.

Next, consider the size of your diced ingredients. Aim for uniform pieces to ensure even distribution of flavors. This way, every bite will have a balanced mix of sweetness and crunch. If you prefer larger chunks, feel free to adjust the size to your liking. Just remember that smaller pieces may blend flavors better.

Additionally, if you’re making this salad ahead of time, it’s best to add the avocado just before serving. This prevents the avocado from browning and keeps it looking fresh. You can also store the salad in an airtight container in the refrigerator for up to a day. However, the longer it sits, the softer the ingredients will become.

Lastly, don’t hesitate to adjust the seasoning to your taste. If you love a zesty kick, add more lime juice or even a pinch of chili powder for some heat. The beauty of this salad lies in its versatility, so feel free to make it your own!

Mango Cucumber Salad with Blueberries and Avocado Recipe that everyone will enjoy. Happy cooking!

Serving Suggestions for Mango Cucumber Salad with Blueberries and Avocado Recipe

Mango Cucumber Salad with Blueberries and Avocado Recipe, it’s time to think about how to serve it. This salad is not only delicious but also visually stunning, making it a perfect centerpiece for any meal. Here are some serving suggestions to elevate your dining experience:

  • As a Side Dish: This salad pairs wonderfully with grilled meats, such as chicken or fish. Serve it alongside your favorite protein for a refreshing contrast. The sweetness of the mango and blueberries complements savory dishes beautifully.
  • On a Bed of Greens: For a more substantial meal, serve the salad on a bed of mixed greens or spinach. This adds extra nutrients and makes the dish even more filling. You can also add some sliced avocado on top for an extra creamy touch.
  • In a Wrap: Use the salad as a filling for a wrap. Spread some hummus or cream cheese on a tortilla, add the salad, and roll it up. This makes for a quick and healthy lunch option that’s easy to take on the go.
  • As a Snack: Enjoy the salad as a light snack. It’s perfect for those hot summer days when you want something refreshing. Serve it in small cups for a fun and easy-to-eat treat.
  • Garnished with Nuts: For added crunch, sprinkle some chopped nuts on top just before serving. Almonds or walnuts work great and add a delightful texture to the salad.

Mango Cucumber Salad with Blueberries and Avocado Recipe in various ways. Whether you’re hosting a gathering or simply enjoying a meal at home, this salad is sure to impress!

Tips for Perfecting Your Mango Cucumber Salad with Blueberries and Avocado Recipe

Mango Cucumber Salad with Blueberries and Avocado Recipe truly shine, consider these helpful tips. They will ensure that your salad is not only delicious but also visually appealing and satisfying. Let’s explore some ways to perfect this delightful dish!

First, always use fresh ingredients. Fresh fruits and vegetables enhance the flavor and texture of your salad. When selecting mangos, look for ones that are slightly soft to the touch. This indicates ripeness and sweetness. For cucumbers, choose firm ones with smooth skin. Fresh blueberries should be plump and vibrant in color. These small details can make a big difference in taste!

Next, pay attention to the size of your diced ingredients. Aim for uniform pieces to ensure even distribution of flavors. This way, every bite will have a balanced mix of sweetness and crunch. If you prefer larger chunks, feel free to adjust the size to your liking. Just remember that smaller pieces may blend flavors better.

Another tip is to let the salad sit for a few minutes after tossing. This resting time allows the flavors to meld beautifully, making each bite even more delicious. If you have time, letting it chill in the refrigerator for about 30 minutes can enhance the taste even further. The cool temperature makes the salad refreshing, especially on warm days.

Don’t forget to taste and adjust the seasoning! After tossing the salad, take a moment to sample it. If you feel it needs more zing, add a splash of lime juice or a pinch of salt. Personalizing the flavor to your liking will make the salad even more enjoyable.

Lastly, consider presentation. A beautifully arranged salad is always more appetizing. Use a large serving bowl or individual cups for a fun touch. Garnish with extra cilantro or a sprinkle of nuts for added texture and color. A visually appealing dish can elevate the dining experience and impress your guests!

Mango Cucumber Salad with Blueberries and Avocado Recipe that everyone will love. Enjoy the process and have fun experimenting with flavors!

Breakdown of Time for Mango Cucumber Salad with Blueberries and Avocado Recipe

Mango Cucumber Salad with Blueberries and Avocado Recipe can help you plan your meal better. Here’s a simple breakdown of the time involved in making this refreshing salad.

Prep Time

The prep time for this salad is quite short. You’ll need about 15 minutes to wash, peel, and dice all the ingredients. This includes chopping the mangos, cucumber, avocado, red onion, and cilantro. If you have everything ready, you can whip it up even faster!

Cooking Time

Interestingly, there’s no actual cooking time involved in this recipe. The only time you’ll spend is about 10 minutes letting the salad sit after tossing it together. This resting period allows the flavors to meld beautifully, enhancing the overall taste.

Total Time

Mango Cucumber Salad with Blueberries and Avocado Recipe. This makes it a quick and easy dish to prepare, perfect for busy days or last-minute gatherings. With minimal time investment, you can enjoy a delicious and healthy salad that’s sure to impress!

Nutritional Information for Mango Cucumber Salad with Blueberries and Avocado Recipe

Mango Cucumber Salad with Blueberries and Avocado Recipe is not only delicious but also packed with nutrients. Here’s a breakdown of the key nutritional information per serving:

Calories

Each serving of this refreshing salad contains approximately 180 calories. This makes it a great option for those looking to enjoy a light meal or snack without consuming too many calories. The combination of fruits and vegetables provides a satisfying dish that won’t weigh you down.

Protein

In terms of protein, this salad offers about 3 grams per serving. While it may not be a high-protein dish on its own, you can easily boost the protein content by adding grilled chicken, shrimp, or beans. This makes it a versatile option that can cater to different dietary needs.

Sodium

The sodium content in this salad is quite low, making it a heart-healthy choice. With minimal added salt, you can enjoy the natural flavors of the ingredients without worrying about excess sodium intake. This is especially beneficial for those monitoring their salt consumption.

Mango Cucumber Salad with Blueberries and Avocado Recipe is a nutritious and flavorful option that fits well into a healthy diet. With its low calorie count, moderate protein, and low sodium levels, it’s a fantastic choice for anyone looking to eat well while enjoying delicious food!

FAQs about Mango Cucumber Salad with Blueberries and Avocado Recipe

Can I make Mango Cucumber Salad with Blueberries and Avocado Recipe ahead of time?

Mango Cucumber Salad with Blueberries and Avocado Recipe ahead of time! However, it’s best to add the avocado just before serving. This helps prevent the avocado from browning and keeps the salad looking fresh. You can chop all the other ingredients and store them in an airtight container in the refrigerator. When you’re ready to serve, simply mix everything together and add the avocado and dressing. This way, you’ll enjoy a vibrant and delicious salad without any hassle!

What can I substitute for avocado in this salad?

Mango Cucumber Salad with Blueberries and Avocado Recipe, there are a few options. You can use diced mango for extra sweetness or even a creamy dressing like yogurt to mimic the texture. Another great alternative is to use silken tofu, which adds creaminess without the flavor of avocado. If you prefer a crunchier texture, consider adding diced bell peppers or even some nuts. These substitutions will still keep your salad delicious and enjoyable!

Is Mango Cucumber Salad with Blueberries and Avocado Recipe suitable for meal prep?

Mango Cucumber Salad with Blueberries and Avocado Recipe is perfect for meal prep. You can prepare the salad in advance and store it in individual containers for easy grab-and-go meals. Just remember to keep the avocado and dressing separate until you’re ready to eat. This will help maintain the freshness and prevent browning. With this salad on hand, you’ll have a healthy and tasty option ready for lunch or dinner throughout the week!

Conclusion on Mango Cucumber Salad with Blueberries and Avocado Recipe

Mango Cucumber Salad with Blueberries and Avocado Recipe is a delightful dish that brings together a medley of flavors and textures. This salad is not only easy to prepare but also offers a refreshing taste that is perfect for any occasion. Whether you’re hosting a summer barbecue, enjoying a picnic, or simply looking for a light meal, this salad is sure to impress.

With its vibrant colors and nutritious ingredients, this salad stands out as a healthy choice. The combination of sweet mangos, crunchy cucumbers, and creamy avocado creates a satisfying experience for your taste buds. Plus, the addition of blueberries adds a burst of flavor and antioxidants, making it a wholesome option for everyone.

As you explore the various tips and variations, you’ll find that this recipe is versatile and adaptable. Feel free to experiment with different proteins, dressings, and toppings to make it your own. The possibilities are endless, allowing you to enjoy this salad in new and exciting ways.

Mango Cucumber Salad with Blueberries and Avocado Recipe a try. You’ll be amazed at how quickly it comes together and how delicious it tastes. Enjoy the fresh flavors and the compliments from your family and friends as they savor every bite!

Blueberry Peach Feta Salad Recipe is a must-try dish!

Introduction to Blueberry Peach Feta Salad Recipe

Blueberry Peach Feta Salad Recipe is just what you need! This delightful salad combines sweet, juicy peaches and plump blueberries with creamy feta cheese. It’s a perfect blend of flavors and textures that will make your taste buds dance.

Why You Should Try This Salad

First and foremost, this salad is incredibly easy to make. With just a few simple ingredients, you can whip up a dish that looks and tastes gourmet. Plus, it’s a fantastic way to enjoy seasonal fruits. Blueberries and peaches are not only delicious but also packed with nutrients. They provide vitamins, antioxidants, and fiber, making this salad a healthy choice.

Moreover, the combination of sweet and savory flavors is simply irresistible. The sweetness of the peaches and blueberries pairs beautifully with the salty feta cheese. This contrast creates a delightful experience in every bite. Whether you’re serving it at a summer barbecue or enjoying it as a light lunch, this salad is sure to impress.

Blueberry Peach Feta Salad Recipe is versatile. You can easily customize it to suit your taste. Add nuts for crunch, or toss in some greens for extra nutrition. The possibilities are endless! So, why not give it a try? You’ll be amazed at how quickly it becomes a favorite in your household.

Ingredients for Blueberry Peach Feta Salad Recipe

Blueberry Peach Feta Salad Recipe, you’ll need a handful of fresh ingredients. Each component plays a vital role in bringing out the flavors and textures of this delightful dish. Here’s what you’ll need:

  • 2 ripe peaches: Choose peaches that are firm yet slightly soft to the touch for the best flavor.
  • 1 cup fresh blueberries: Look for plump, juicy blueberries that are deep blue in color.
  • 1 cup feta cheese: Crumbled feta adds a creamy and salty element to the salad.
  • 4 cups mixed greens: A blend of spinach, arugula, or spring mix works well for a fresh base.
  • 1/4 cup walnuts or pecans (optional): Nuts add a nice crunch and extra nutrition.
  • 1/4 cup balsamic vinaigrette: This dressing ties all the flavors together beautifully.
  • Salt and pepper to taste: A pinch of salt and a dash of pepper enhance the overall flavor.

These ingredients come together to create a vibrant and tasty salad. The sweetness of the peaches and blueberries, combined with the creaminess of the feta, makes for a delightful dish. Feel free to adjust the quantities based on your preferences or the number of servings you need. Now that you have your ingredients ready, let’s move on to the preparation steps!

Step-by-Step Preparation of Blueberry Peach Feta Salad Recipe

Blueberry Peach Feta Salad Recipe. Follow these simple steps to create a delicious and colorful salad that everyone will love!

Step 1: Gather Your Ingredients

Before you start, make sure you have everything you need. Gather your peaches, blueberries, feta cheese, mixed greens, nuts, balsamic vinaigrette, salt, and pepper. Having all your ingredients in one place makes the process smoother and more enjoyable. Plus, it helps you avoid any last-minute trips to the store!

Step 2: Prepare the Fruits

Next, it’s time to prepare the fruits. Start by washing the blueberries under cool running water. Gently pat them dry with a clean towel. For the peaches, rinse them as well. Then, slice each peach in half and remove the pit. Cut the peach halves into thin wedges or bite-sized pieces. This will make it easy to mix them into the salad and enjoy every bite!

Step 3: Crumble the Feta Cheese

Now, let’s get to the feta cheese! Take your cup of feta and crumble it into small pieces. You can use your fingers or a fork for this. The crumbled feta will add a creamy texture and a salty flavor that perfectly complements the sweetness of the fruits. Make sure to set it aside for later.

Step 4: Mix the Dressing

In a small bowl, combine the balsamic vinaigrette with a pinch of salt and a dash of pepper. Whisk it together until it’s well mixed. This dressing will bring all the flavors together, enhancing the taste of your salad. If you like a little extra zing, feel free to add a splash of lemon juice or a teaspoon of honey!

Step 5: Combine All Ingredients

Blueberry Peach Feta Salad Recipe is now ready to serve!

Enjoy this vibrant salad as a side dish or a light meal. It’s not only delicious but also visually appealing, making it a great addition to any table. Now that you know how to prepare it, let’s explore some variations you can try!

Variation of Blueberry Peach Feta Salad Recipe

Blueberry Peach Feta Salad Recipe is delightful as is, there are many ways to switch things up! You can easily customize this salad to suit your taste or to use what you have on hand. Let’s explore some alternative fruits and different cheese options that can elevate your salad experience.

Alternative Fruits to Use

If you want to mix things up, consider using different fruits. Here are some tasty alternatives:

  • Strawberries: Their sweet and slightly tart flavor pairs wonderfully with feta.
  • Mango: This tropical fruit adds a juicy sweetness that complements the salad beautifully.
  • Raspberries: Their vibrant color and tangy taste can enhance the overall flavor profile.
  • Kiwi: For a unique twist, add sliced kiwi for a refreshing zing.
  • Apples: Crisp apple slices can add a nice crunch and a hint of sweetness.

Blueberry Peach Feta Salad Recipe a new experience every time!

Different Cheese Options

Feta cheese is a star in this salad, but you can experiment with other cheeses too. Here are some delicious options:

  • Goat Cheese: Creamy and tangy, goat cheese adds a rich flavor that pairs well with fruits.
  • Blue Cheese: For those who love bold flavors, blue cheese can add a sharp and savory kick.
  • Ricotta: This soft cheese offers a mild taste and creamy texture, making it a great alternative.
  • Parmesan: Shaved or grated Parmesan can add a nutty flavor that complements the sweetness of the fruits.

Blueberry Peach Feta Salad Recipe is all about creativity, so don’t hesitate to explore these variations!

Cooking Note for Blueberry Peach Feta Salad Recipe

Blueberry Peach Feta Salad Recipe, there are a few cooking notes to keep in mind. These tips will help you achieve the best flavor and texture, ensuring your salad is a hit every time!

First, always choose fresh, ripe fruits. The quality of your peaches and blueberries can make a big difference in taste. Look for peaches that are fragrant and slightly soft to the touch. For blueberries, opt for those that are plump and deep blue. Fresh ingredients will enhance the overall flavor of your salad.

Next, consider the timing of your salad preparation. It’s best to assemble the salad just before serving. This way, the greens stay crisp, and the fruits remain fresh. If you need to prepare it ahead of time, keep the dressing separate until you’re ready to serve. This will prevent the greens from wilting and ensure a vibrant presentation.

Additionally, if you’re making this salad for a gathering, consider serving it in a large bowl. This allows guests to help themselves and enjoy the colorful layers of fruits and greens. You can also provide extra toppings, like nuts or seeds, on the side for those who want to customize their salad.

Blueberry Peach Feta Salad Recipe is versatile, and you can adjust the ingredients based on your preferences. Whether you want to add more fruits, try different cheeses, or even include a protein like grilled chicken, the possibilities are endless. Enjoy the process and have fun creating your perfect salad!

Serving Suggestions for Blueberry Peach Feta Salad Recipe

Blueberry Peach Feta Salad Recipe, it’s time to think about how to serve it! This salad is not only a treat for the taste buds but also a feast for the eyes. Here are some ideal pairings and serving suggestions to elevate your dining experience.

Ideal Pairings with the Salad

This vibrant salad pairs wonderfully with a variety of dishes. Here are some great options to consider:

  • Grilled Chicken: The juicy, savory flavor of grilled chicken complements the sweetness of the salad perfectly. You can slice the chicken and place it on top for a complete meal.
  • Fish Tacos: The light and zesty flavors of fish tacos make a great match. The salad adds a refreshing crunch that balances the richness of the tacos.
  • Quinoa Bowl: Serve the salad alongside a quinoa bowl for a nutritious and filling meal. The protein from quinoa pairs well with the fruits and feta.
  • Sandwiches: A simple turkey or veggie sandwich can be enhanced with this salad on the side. The flavors will complement each other beautifully.
  • Cheese Platter: Create a cheese platter with various cheeses, crackers, and fruits. The Blueberry Peach Feta Salad Recipe can be a standout item on the board.

These pairings not only enhance the meal but also make it more enjoyable. Whether you’re hosting a gathering or enjoying a quiet dinner at home, these suggestions will help you create a delightful dining experience.

Blueberry Peach Feta Salad Recipe!

Tips for Making the Perfect Blueberry Peach Feta Salad Recipe

Choosing the Best Peaches and Blueberries

Blueberry Peach Feta Salad Recipe, selecting the right fruits is essential. Start with peaches. Look for ones that are firm but yield slightly to gentle pressure. This indicates ripeness. A fragrant aroma is also a good sign of a sweet peach. Avoid peaches with bruises or blemishes, as they may not taste as fresh.

When it comes to blueberries, opt for those that are plump and deep blue in color. They should have a slight bloom, which is a natural protective coating. This bloom indicates freshness. Avoid any that are shriveled or have a greenish tint, as they may not be ripe. If possible, buy organic blueberries to ensure they are free from pesticides.

Blueberry Peach Feta Salad Recipe truly shine!

Storing Leftovers

Blueberry Peach Feta Salad Recipe, storing them properly is key to maintaining freshness. First, if you’ve already mixed the salad, it’s best to eat it within a day. The greens can wilt, and the fruits may lose their texture.

To store leftovers, place the salad in an airtight container. If you have not added the dressing yet, keep it separate. This will help keep the greens crisp. When you’re ready to enjoy the leftovers, simply drizzle the dressing on top and give it a gentle toss.

Blueberry Peach Feta Salad Recipe even after the initial serving!

Breakdown of Time for Blueberry Peach Feta Salad Recipe

Blueberry Peach Feta Salad Recipe can help you plan your meal better. Here’s a simple breakdown of the time involved in making this delicious salad.

Prep Time

15 minutes to gather your ingredients, wash the fruits, and prepare everything. This includes slicing the peaches and crumbling the feta cheese. It’s a quick and easy process that anyone can manage!

Cooking Time

Blueberry Peach Feta Salad Recipe is all about fresh ingredients and assembly. So, the cooking time is 0 minutes. You simply mix everything together, making it a perfect dish for those busy days when you want something healthy without the hassle.

Total Time

15 minutes. This makes it an ideal choice for a quick lunch or a last-minute side dish for dinner. With such a short time commitment, you can enjoy a delicious and nutritious meal without spending hours in the kitchen!

Nutritional Information for Blueberry Peach Feta Salad Recipe

Blueberry Peach Feta Salad Recipe can help you make informed choices about your meals. This salad is not only delicious but also packed with nutrients. Here’s a breakdown of the key nutritional components:

Calories

Blueberry Peach Feta Salad Recipe contains approximately 250 calories. This makes it a light yet satisfying option for lunch or dinner. The combination of fruits, greens, and feta cheese provides a balanced meal without excessive calories.

Protein

8 grams per serving. The feta cheese contributes a good amount of protein, while the nuts (if added) can boost this number even further. Protein is essential for muscle repair and overall health, making this salad a great choice for a nutritious meal.

Sodium

Blueberry Peach Feta Salad Recipe contains around 400 milligrams per serving. Most of this sodium comes from the feta cheese and the balsamic vinaigrette. If you’re watching your sodium intake, consider using a low-sodium feta or dressing to keep the flavor while reducing the salt content.

Blueberry Peach Feta Salad Recipe can be a delicious way to incorporate more fruits and vegetables into your diet!

FAQs about Blueberry Peach Feta Salad Recipe

Can I make this salad ahead of time?

Blueberry Peach Feta Salad Recipe ahead of time, but with a few considerations. It’s best to wash and cut the fruits and mix the greens in advance. However, to keep the salad fresh, store the dressing separately. This way, the greens won’t wilt, and the fruits will stay crisp. When you’re ready to serve, simply combine everything and drizzle the dressing on top. This method ensures your salad remains vibrant and delicious!

What can I substitute for feta cheese?

Blueberry Peach Feta Salad Recipe, there are several options. Goat cheese is a popular choice, offering a creamy and tangy flavor. You could also use ricotta for a milder taste or blue cheese for a bolder kick. If you prefer a dairy-free option, try crumbled tofu or a nut-based cheese. Each substitute will bring its unique flavor, so feel free to experiment!

Is this salad suitable for meal prep?

Blueberry Peach Feta Salad Recipe is great for meal prep. Just remember to keep the dressing separate until you’re ready to eat. You can prepare the fruits and greens in advance and store them in airtight containers in the fridge. This way, you can enjoy a quick and healthy meal throughout the week. Just add the dressing when you’re ready to serve, and you’ll have a fresh salad in no time!

How long will leftovers last in the fridge?

Blueberry Peach Feta Salad Recipe can last in the fridge for about two days. However, it’s best to consume them within the first day for optimal freshness. If you’ve already mixed the salad, the greens may start to wilt after a day. To keep your salad tasting great, store any leftovers in an airtight container. If you notice any signs of spoilage, such as an off smell or slimy texture, it’s best to discard it. Enjoy your salad while it’s still fresh!

Conclusion on Blueberry Peach Feta Salad Recipe

Blueberry Peach Feta Salad Recipe is a delightful dish that brings together the best of summer flavors. With its vibrant colors and refreshing taste, this salad is not only a feast for the eyes but also a healthy choice for any meal. The combination of sweet peaches, juicy blueberries, and creamy feta cheese creates a perfect balance that is sure to please everyone at the table.

Blueberry Peach Feta Salad Recipe is a wonderful way to celebrate seasonal produce while providing your body with essential nutrients.

So, why not give this recipe a try? Gather your ingredients, follow the simple steps, and enjoy the burst of flavors that this salad has to offer. It’s a delicious way to embrace healthy eating without sacrificing taste. We hope you enjoy making and sharing this delightful salad with family and friends!

Superfood Berry Salad Recipe for a Healthy Meal

Introduction to the Superfood Berry Salad Recipe

Welcome to the delightful world of salads! Today, we’re diving into a vibrant and nutritious dish: the Superfood Berry Salad. This salad is not just a feast for the eyes; it’s packed with essential nutrients that can boost your health. With a mix of fresh greens and colorful berries, this salad is a perfect addition to any meal or a light snack on its own.

But what exactly makes a salad a “superfood” salad? Let’s explore this concept further.

What Makes a Salad a Superfood Salad?

A superfood salad is more than just a mix of greens and toppings. It includes ingredients that are rich in vitamins, minerals, and antioxidants. These components work together to provide numerous health benefits. For instance, berries are known for their high antioxidant content, which helps fight free radicals in the body. Greens like spinach and kale are loaded with vitamins A, C, and K, promoting overall health.

Moreover, adding nuts like walnuts not only enhances the flavor but also provides healthy fats and protein. Feta cheese, while optional, can add a creamy texture and a boost of calcium. The dressing, often a simple vinaigrette, ties all the flavors together while keeping the salad light and refreshing.

In essence, a superfood salad is a delicious way to nourish your body. It’s a blend of flavors, textures, and colors that can elevate your meal while supporting your health goals. So, let’s get started on creating this vibrant Superfood Berry Salad!

Ingredients for the Superfood Berry Salad Recipe

To create the delicious Superfood Berry Salad, you’ll need a variety of fresh ingredients. Each component plays a vital role in enhancing the flavor and nutritional value of the salad. Here’s what you’ll need:

  • 2 cups mixed greens: You can use spinach, arugula, or kale. These greens are packed with vitamins and minerals.
  • 1 cup strawberries: Make sure to hull and slice them. Strawberries are rich in vitamin C and antioxidants.
  • 1 cup blueberries: These tiny berries are known for their high antioxidant levels and are great for heart health.
  • 1 cup raspberries: Raspberries add a tart flavor and are high in fiber, which is excellent for digestion.
  • 1/2 cup walnuts: Chopped walnuts provide healthy fats and a satisfying crunch.
  • 1/4 cup feta cheese: This is optional, but it adds a creamy texture and a boost of calcium.
  • 1/4 cup balsamic vinaigrette: This dressing ties all the flavors together. You can also use a honey mustard dressing for a sweeter taste.
  • Salt and pepper: These are essential for seasoning your salad to perfection.

Gathering these ingredients will set you on the right path to making a refreshing and nutritious Superfood Berry Salad. Each bite will be a burst of flavor and health benefits!

Step-by-Step Preparation of the Superfood Berry Salad Recipe

Now that you have all your ingredients ready, it’s time to prepare your Superfood Berry Salad! This step-by-step guide will help you create a delicious and nutritious salad that’s sure to impress. Let’s get started!

Step 1: Preparing the Base

First, take your mixed greens and wash them thoroughly. It’s important to remove any dirt or grit. After washing, gently pat them dry with a clean kitchen towel or use a salad spinner. Once dry, place the greens in a large bowl. This will be the base of your salad, providing a fresh and crunchy texture.

Step 2: Adding the Berries

Next, it’s time to add the berries! Start with the strawberries. Make sure they are hulled and sliced into bite-sized pieces. Then, toss in the blueberries and raspberries. These berries not only add vibrant colors but also pack a punch of flavor and nutrients. Gently mix the berries with the greens, being careful not to crush them.

Step 3: Incorporating Additional Superfoods

Now, let’s enhance the salad with some additional superfoods. Sprinkle the chopped walnuts over the salad. They add a delightful crunch and healthy fats. If you’re using feta cheese, crumble it on top as well. This creamy cheese complements the tartness of the berries beautifully. Mix everything together gently to ensure an even distribution of flavors.

Step 4: Making the Dressing

For the dressing, you can either use store-bought balsamic vinaigrette or make your own. If you choose to make it, combine 1/4 cup of balsamic vinegar with 1/2 cup of olive oil in a small bowl. Add a pinch of salt and pepper to taste. Whisk the mixture until it’s well combined. This dressing will add a tangy flavor that ties all the ingredients together.

Step 5: Assembling the Salad

Finally, it’s time to assemble your Superfood Berry Salad! Drizzle the dressing over the salad mixture. Toss everything gently to coat the greens and berries evenly. Taste the salad and adjust the seasoning with more salt and pepper if needed. You can serve it immediately or chill it in the refrigerator for 15-30 minutes for a refreshing taste. Enjoy your vibrant and nutritious salad!

Variation of the Superfood Berry Salad Recipe

One of the best things about the Superfood Berry Salad is its versatility. You can easily adapt it to suit different seasons or dietary preferences. Let’s explore some exciting variations that can keep your salad fresh and interesting!

Seasonal Variations

As the seasons change, so do the fruits and vegetables available. This gives you a chance to mix things up! In the spring, consider adding fresh peas or asparagus for a crisp texture. Summer is perfect for including peaches or nectarines, which add a sweet juiciness. In the fall, try incorporating sliced apples or pears, which pair wonderfully with walnuts. Winter can bring in citrus fruits like oranges or grapefruits, adding a refreshing zing to your salad.

By using seasonal ingredients, you not only enhance the flavor but also support local farmers and enjoy the freshest produce available. Plus, it keeps your Superfood Berry Salad exciting all year round!

Ingredient Swaps for Dietary Preferences

Whether you have dietary restrictions or simply want to try something new, there are plenty of ingredient swaps you can make. For those who are vegan, you can skip the feta cheese or replace it with a plant-based cheese alternative. If you’re looking for a nut-free option, sunflower seeds or pumpkin seeds can provide a similar crunch without the allergens.

If you prefer a different dressing, feel free to experiment! A lemon vinaigrette or a creamy avocado dressing can add a unique twist. For added protein, grilled chicken, chickpeas, or even quinoa can be excellent additions. These swaps allow you to customize your Superfood Berry Salad to fit your taste and dietary needs.

With these variations, you can enjoy a new take on the Superfood Berry Salad every time you make it. So, don’t hesitate to get creative and make it your own!

Cooking Note for the Superfood Berry Salad Recipe

When preparing the Superfood Berry Salad, there are a few cooking notes to keep in mind to ensure the best flavor and texture. First, always choose the freshest ingredients. Fresh greens and ripe berries will make a significant difference in taste. Look for vibrant colors and firm textures when selecting your produce.

Additionally, washing your greens and berries is crucial. Rinse them under cold water to remove any dirt or pesticides. After washing, make sure to dry them thoroughly. Excess moisture can make your salad soggy, which is not what you want!

When it comes to chopping, aim for uniform sizes. This helps with even distribution of flavors and makes for a more visually appealing salad. For example, slice your strawberries into similar sizes as your blueberries and raspberries. This way, every bite will have a balanced mix of ingredients.

Lastly, consider the timing of your salad assembly. If you plan to serve the salad later, it’s best to keep the dressing separate until just before serving. This will help maintain the crispness of the greens and prevent them from wilting. If you do choose to chill the salad, remember to toss it gently after taking it out of the fridge to redistribute the dressing and flavors.

By following these cooking notes, you’ll create a Superfood Berry Salad that is not only delicious but also visually stunning. Enjoy the process and the delightful flavors that come together in this healthy dish!

Serving Suggestions for the Superfood Berry Salad Recipe

Now that you’ve prepared your Superfood Berry Salad, it’s time to think about how to serve it! This salad is not only delicious but also versatile, making it a great addition to various meals. Here are some serving suggestions to enhance your dining experience:

  • As a Side Dish: The Superfood Berry Salad pairs wonderfully with grilled meats or fish. Serve it alongside chicken, salmon, or steak for a balanced meal. The freshness of the salad complements the richness of the protein beautifully.
  • As a Main Course: For a light lunch or dinner, enjoy the salad as a main dish. Add grilled chicken or chickpeas for extra protein. This makes it filling and satisfying while still being healthy.
  • At a Picnic or Potluck: This salad is perfect for gatherings! It’s easy to transport and can be made ahead of time. Just remember to keep the dressing separate until you’re ready to serve. This way, the greens stay crisp and fresh.
  • With a Slice of Bread: Serve the salad with a warm, crusty bread or a slice of whole-grain toast. This adds a nice texture and makes for a more complete meal.
  • As a Breakfast Option: For a unique twist, enjoy the Superfood Berry Salad for breakfast! Top it with Greek yogurt and a drizzle of honey for a nutritious start to your day.

These serving suggestions will help you enjoy your Superfood Berry Salad in various ways. Whether you’re having a casual meal at home or hosting a gathering, this salad is sure to impress your guests and satisfy your taste buds!

Tips for Perfecting Your Superfood Berry Salad Recipe

Creating the perfect Superfood Berry Salad is all about attention to detail and a few simple tips. With these suggestions, you can elevate your salad to new heights, ensuring it’s not only delicious but also visually appealing. Here are some tips to help you perfect your salad:

  • Choose Fresh Ingredients: Always opt for the freshest greens and berries. Look for vibrant colors and firm textures. Fresh ingredients will enhance the flavor and nutritional value of your salad.
  • Balance Flavors: Aim for a balance of sweet, tart, and savory flavors. The sweetness of the berries should complement the slight bitterness of the greens. Adjust the dressing to achieve the perfect harmony.
  • Texture Matters: Incorporate a variety of textures for a more enjoyable eating experience. The crunch of walnuts, the creaminess of feta, and the juiciness of berries create a delightful contrast.
  • Dress Just Before Serving: To keep your salad crisp, add the dressing just before serving. This prevents the greens from wilting and ensures a fresh taste.
  • Experiment with Herbs: Fresh herbs like mint or basil can add an exciting twist to your salad. They bring a burst of flavor and freshness that complements the other ingredients.
  • Chill for Extra Refreshment: If you have time, chill your salad in the refrigerator for 15-30 minutes before serving. This enhances the flavors and makes for a refreshing dish, especially on warm days.
  • Presentation Counts: Take a moment to arrange your salad beautifully. Layer the ingredients in a way that showcases the colors and textures. A well-presented salad is more inviting and appetizing.
  • Customize to Your Taste: Don’t hesitate to adjust the recipe to suit your preferences. Whether it’s adding more berries or trying a different dressing, make it your own!

By following these tips, you’ll create a Superfood Berry Salad that not only tastes amazing but also looks stunning. Enjoy the process of making this healthy dish, and don’t forget to share it with family and friends!

Breakdown of Time for the Superfood Berry Salad Recipe

Understanding the time it takes to prepare your Superfood Berry Salad can help you plan your meals better. Whether you’re making it for a quick lunch or a special gathering, knowing the time breakdown is essential. Here’s how the timing works out:

Prep Time

The prep time for the Superfood Berry Salad is quite short. You’ll need about 15 minutes to gather and prepare all your ingredients. This includes washing the greens and berries, chopping the walnuts, and crumbling the feta cheese if you choose to use it. With everything ready, you’ll be set to assemble your salad in no time!

Cooking Time

Interestingly, there’s no actual cooking time involved in this salad. The beauty of the Superfood Berry Salad lies in its simplicity and freshness. All you need to do is mix the ingredients together. If you decide to grill chicken or prepare a different protein to add, that may take an additional 10-15 minutes. However, the salad itself is ready to go without any cooking!

Total Time

In total, you can expect to spend about 15-30 minutes on the Superfood Berry Salad. This includes the prep time and any additional time you might want to chill the salad in the refrigerator. If you’re in a hurry, you can skip the chilling step and serve it right away. Either way, you’ll have a delicious and nutritious salad ready to enjoy!

With this time breakdown, you can easily fit the Superfood Berry Salad into your busy schedule. It’s a quick, healthy option that doesn’t compromise on flavor or nutrition!

Nutritional Information for the Superfood Berry Salad Recipe

Understanding the nutritional content of your meals is essential for maintaining a balanced diet. The Superfood Berry Salad is not only delicious but also packed with nutrients that can support your health. Let’s break down the key nutritional components of this vibrant salad.

Calories

Each serving of the Superfood Berry Salad contains approximately 180 calories. This makes it a light yet satisfying option for lunch or dinner. The combination of fresh greens and berries provides a low-calorie meal that is rich in flavor and nutrients. If you add protein, like grilled chicken or chickpeas, the calorie count will increase slightly, but it will also enhance the salad’s nutritional value.

Protein

In terms of protein, this salad offers about 5 grams per serving. The protein comes mainly from the walnuts and optional feta cheese. If you’re looking to boost the protein content, consider adding grilled chicken, chickpeas, or even quinoa. These additions will not only increase the protein but also make the salad more filling and satisfying.

Sodium

The sodium content in the Superfood Berry Salad is relatively low, making it a heart-healthy choice. On average, each serving contains around 200 mg of sodium, depending on the dressing used. If you’re watching your sodium intake, opt for a low-sodium balsamic vinaigrette or make your own dressing to control the salt content. This way, you can enjoy the salad without worrying about excess sodium.

Overall, the Superfood Berry Salad is a nutritious option that provides a good balance of calories, protein, and low sodium. It’s a great way to incorporate more fruits and vegetables into your diet while enjoying a delicious meal. So, go ahead and indulge in this healthy salad, knowing it’s good for you!

FAQs about the Superfood Berry Salad Recipe

Can I use frozen berries in the Superfood Berry Salad Recipe?

Yes, you can use frozen berries in your Superfood Berry Salad! However, keep in mind that frozen berries may release some juice as they thaw. This can slightly change the texture of your salad. To minimize this, you can thaw the berries in the refrigerator before adding them to the salad. This way, they will maintain their shape and flavor better. Just make sure to drain any excess liquid before mixing them in!

How long can I store the Superfood Berry Salad?

The Superfood Berry Salad is best enjoyed fresh, but you can store it in the refrigerator for up to 2 days. To keep the salad crisp, it’s important to store the dressing separately. When you’re ready to eat, simply drizzle the dressing over the salad and toss it gently. If you notice the greens starting to wilt, it’s a sign that it’s time to enjoy your salad. For optimal freshness, try to consume it within the first day!

What are the health benefits of the ingredients in the Superfood Berry Salad Recipe?

The ingredients in the Superfood Berry Salad offer a variety of health benefits. Here’s a quick overview:

  • Mixed Greens: Rich in vitamins A, C, and K, these greens support eye health, boost immunity, and promote healthy bones.
  • Strawberries: High in vitamin C and antioxidants, strawberries help improve heart health and reduce inflammation.
  • Blueberries: Known for their high antioxidant content, blueberries support brain health and may improve memory.
  • Raspberries: Packed with fiber, raspberries aid digestion and help maintain a healthy weight.
  • Walnuts: A great source of healthy fats, walnuts support heart health and provide essential omega-3 fatty acids.
  • Feta Cheese: While optional, feta adds calcium and protein, which are important for bone health.
  • Balsamic Vinaigrette: This dressing can provide antioxidants and may help regulate blood sugar levels.

By enjoying this salad, you’re not just treating your taste buds; you’re also nourishing your body with a variety of essential nutrients!

Conclusion on the Superfood Berry Salad Recipe

In conclusion, the Superfood Berry Salad is a delightful and nutritious dish that brings together a variety of flavors and textures. With its vibrant colors and fresh ingredients, this salad is not only visually appealing but also packed with health benefits. From the antioxidant-rich berries to the crunchy walnuts, each component contributes to a well-rounded meal that supports your overall well-being.

Whether you’re looking for a light lunch, a side dish for dinner, or a refreshing option for a picnic, this salad fits the bill perfectly. Its versatility allows you to customize it according to your taste preferences and dietary needs. You can easily swap ingredients, add proteins, or experiment with different dressings to keep things exciting.

Moreover, the Superfood Berry Salad is quick and easy to prepare, making it an ideal choice for busy days. With just a few simple steps, you can create a delicious meal that nourishes your body and satisfies your taste buds. Remember to use fresh ingredients and follow the tips provided to enhance the flavor and presentation of your salad.

So, why not give the Superfood Berry Salad a try? Enjoy the burst of flavors and the health benefits it offers. Share it with family and friends, and make it a staple in your meal rotation. Here’s to delicious, healthy eating!

Sweet Crunchy Corn Salad is a must-try dish!

Introduction to Sweet Crunchy Corn Salad

Sweet Crunchy Corn Salad is a delightful dish that brings together fresh ingredients and vibrant flavors. This salad is not just a side; it can be a star on your dining table. With its colorful mix of vegetables and a zesty dressing, it’s perfect for any occasion. Whether you’re hosting a summer barbecue or looking for a light lunch, this salad fits the bill.

What Makes Sweet Crunchy Corn Salad Special?

What sets Sweet Crunchy Corn Salad apart is its combination of textures and tastes. The sweet corn kernels provide a burst of sweetness, while the crunchy vegetables add a satisfying bite. The cherry tomatoes bring juiciness, and the red onion offers a mild sharpness that balances the flavors beautifully. Moreover, the dressing, made with lime juice and honey, adds a refreshing zing that ties everything together.

This salad is also incredibly versatile. You can easily customize it to suit your taste preferences. Want a little heat? Toss in some jalapeños. Looking for a different herb? Swap cilantro for parsley or basil. The possibilities are endless! Plus, it’s a great way to incorporate more vegetables into your diet, making it a healthy choice for everyone.

In addition to its delicious taste, Sweet Crunchy Corn Salad is quick and easy to prepare. With just a few simple steps, you can whip up a dish that impresses your family and friends. So, let’s dive into the ingredients and preparation methods that make this salad a must-try!

Ingredients for Sweet Crunchy Corn Salad

To create the perfect Sweet Crunchy Corn Salad, you’ll need a variety of fresh ingredients that come together to create a delightful dish. Here’s a list of what you’ll need:

  • 2 cups fresh corn kernels (about 4 ears of corn) or 1 can (15 oz) of sweet corn, drained
  • 1 cup cherry tomatoes, halved
  • 1/2 cup red bell pepper, diced
  • 1/2 cup cucumber, diced
  • 1/4 cup red onion, finely chopped
  • 1/4 cup fresh cilantro, chopped
  • 1/4 cup lime juice (about 2 limes)
  • 2 tablespoons olive oil
  • 1 teaspoon honey
  • Salt and pepper to taste

These ingredients not only provide a burst of flavor but also a rainbow of colors that make the salad visually appealing. Fresh corn is the star of the show, bringing sweetness and crunch. Cherry tomatoes add juiciness, while red bell pepper and cucumber contribute a refreshing crunch. The red onion gives a slight bite, and cilantro adds a fresh herbaceous note.

The dressing is simple yet flavorful, combining lime juice, olive oil, and honey. This mixture enhances the natural flavors of the vegetables and ties the salad together beautifully. Feel free to adjust the ingredients based on your preferences or what you have on hand. For instance, if you prefer a different herb, parsley or basil can be great substitutes for cilantro.

Now that you have all the ingredients ready, let’s move on to the step-by-step preparation of this delicious Sweet Crunchy Corn Salad!

Step-by-Step Preparation of Sweet Crunchy Corn Salad

Now that you have gathered all the ingredients, it’s time to prepare your Sweet Crunchy Corn Salad. Follow these simple steps to create a delicious and refreshing dish that everyone will love!

Step 1: Preparing the Corn

First, you need to prepare the corn. If you’re using fresh corn, bring a pot of water to a boil. Once the water is bubbling, add the corn and cook for about 3-5 minutes. This will make the corn tender yet still crunchy. After cooking, drain the corn and let it cool. If you’re using canned corn, simply drain and rinse it under cold water. This step ensures that your corn is clean and ready to mix into the salad.

Step 2: Chopping the Vegetables

Next, it’s time to chop the vegetables. Take your cherry tomatoes and cut them in half. This will help release their juices and add flavor to the salad. Then, dice the red bell pepper and cucumber into small pieces. Finally, finely chop the red onion. Each vegetable adds its unique taste and texture, making the salad vibrant and delicious. Don’t forget to chop the fresh cilantro as well, as it will add a lovely herbaceous note to the dish.

Step 3: Mixing the Dressing

Now, let’s make the dressing! In a small bowl, combine the lime juice, olive oil, honey, salt, and pepper. Whisk these ingredients together until they are well blended. The lime juice adds a zesty kick, while the honey brings a touch of sweetness. This dressing will enhance the flavors of the vegetables and tie the salad together beautifully.

Step 4: Combining Ingredients

Once your corn is cool and your vegetables are chopped, it’s time to combine everything. In a large mixing bowl, add the corn, cherry tomatoes, red bell pepper, cucumber, red onion, and cilantro. Pour the dressing over the top and toss gently. Make sure all the ingredients are evenly coated with the dressing. This step is crucial as it ensures that every bite is packed with flavor!

Step 5: Chilling the Salad

Finally, to let the flavors meld together, chill the salad in the refrigerator for at least 30 minutes. This step is important as it allows the dressing to soak into the vegetables, enhancing the overall taste. After chilling, your Sweet Crunchy Corn Salad is ready to serve! You can enjoy it cold or at room temperature, making it a versatile dish for any occasion.

Variations of Sweet Crunchy Corn Salad

Sweet Crunchy Corn Salad is a fantastic base for creativity in the kitchen. You can easily modify it to suit your taste or the season. Here are some exciting variations to consider!

Adding Protein to Sweet Crunchy Corn Salad

If you want to make your Sweet Crunchy Corn Salad more filling, adding protein is a great option. You can mix in black beans for a hearty touch. They not only add protein but also a lovely texture. Another delicious choice is grilled chicken. Simply dice the chicken and fold it into the salad for a satisfying meal. If you’re looking for a vegetarian option, consider adding chickpeas. They are packed with protein and will keep you full longer. For a seafood twist, try adding shrimp or crab meat. These additions will elevate your salad and make it a complete dish!

Seasonal Variations of Sweet Crunchy Corn Salad

Sweet Crunchy Corn Salad can change with the seasons, making it a year-round favorite. In the summer, you can add diced avocado for a creamy texture. It pairs wonderfully with the fresh ingredients. In the fall, consider adding roasted butternut squash or sweet potatoes. These ingredients bring warmth and a hint of sweetness to the salad. During winter, you might want to include pomegranate seeds for a pop of color and a burst of flavor. In spring, fresh peas or asparagus can add a delightful crunch. These seasonal variations keep the salad exciting and allow you to enjoy different flavors throughout the year!

With these variations, your Sweet Crunchy Corn Salad can be tailored to fit any occasion or season. Feel free to experiment and find your favorite combinations!

Cooking Note for Sweet Crunchy Corn Salad

When preparing your Sweet Crunchy Corn Salad, there are a few cooking notes to keep in mind to ensure the best results. First, the freshness of your ingredients plays a crucial role in the overall flavor of the salad. Always opt for fresh corn when possible, as it provides a sweeter taste and a delightful crunch. If you choose canned corn, make sure to select a brand that uses minimal additives for the best flavor.

Another important tip is to adjust the dressing to your taste. If you prefer a tangier flavor, feel free to add more lime juice. On the other hand, if you like it sweeter, a little extra honey can enhance the taste. Remember, the key to a great salad is balancing the flavors, so don’t hesitate to experiment!

Additionally, consider the texture of your vegetables. Cutting them into uniform sizes will help ensure that every bite is consistent. This not only makes the salad visually appealing but also enhances the eating experience. For instance, if you chop the cucumber too large, it may overpower the other ingredients.

Lastly, don’t skip the chilling step! Allowing the salad to rest in the refrigerator for at least 30 minutes helps the flavors meld together beautifully. This resting period is essential for achieving a well-balanced taste. So, take your time and let your Sweet Crunchy Corn Salad shine!

Serving Suggestions for Sweet Crunchy Corn Salad

Sweet Crunchy Corn Salad is not only delicious on its own, but it also pairs wonderfully with a variety of dishes. Whether you’re planning a picnic, a family dinner, or a casual get-together, this salad can complement your meal perfectly. Here are some great serving suggestions to enhance your dining experience!

Best Pairings with Sweet Crunchy Corn Salad

When it comes to pairing, Sweet Crunchy Corn Salad shines alongside grilled meats. The fresh flavors of the salad balance the smoky taste of grilled chicken, steak, or fish. For a summer barbecue, serve it next to juicy burgers or hot dogs. The crunchiness of the salad provides a refreshing contrast to the richness of grilled foods.

If you’re looking for a lighter option, consider serving the salad with baked or roasted fish. The zesty dressing complements the delicate flavors of the fish beautifully. Additionally, Sweet Crunchy Corn Salad can be a great side for tacos or burritos. The vibrant ingredients add a fresh touch to your Mexican feast.

For vegetarian meals, this salad pairs well with quinoa or rice dishes. The combination of grains and the salad creates a satisfying and nutritious meal. You can also enjoy it alongside a hearty soup, like tomato or black bean soup. The salad adds a refreshing crunch that balances the warmth of the soup.

Lastly, don’t forget about serving Sweet Crunchy Corn Salad at brunch! It can be a delightful addition to your spread, especially when paired with eggs or avocado toast. The bright colors and flavors will surely impress your guests.

With these serving suggestions, you can elevate your Sweet Crunchy Corn Salad to new heights. It’s a versatile dish that can adapt to any meal, making it a must-have in your recipe collection!

Tips for Making the Perfect Sweet Crunchy Corn Salad

Creating the perfect Sweet Crunchy Corn Salad is all about attention to detail and a few handy tips. With these suggestions, you can elevate your salad to a whole new level of deliciousness!

First, always use the freshest ingredients possible. Fresh corn, ripe tomatoes, and crisp vegetables will make a noticeable difference in flavor and texture. If you can, buy corn on the cob and cook it just before making the salad. This ensures maximum sweetness and crunch.

Next, consider the size of your vegetable pieces. Aim for uniformity in size when chopping. This not only makes the salad look appealing but also ensures that every bite is balanced. For instance, if your cucumber pieces are much larger than the corn kernels, it can disrupt the overall texture.

Don’t forget to taste as you go! After mixing the dressing, drizzle a little over the salad and give it a taste. You might find that it needs a pinch more salt or a splash more lime juice. Adjusting the flavors to your liking is key to a delicious salad.

Another great tip is to let the salad sit for a while before serving. Chilling it in the refrigerator for at least 30 minutes allows the flavors to meld beautifully. This resting time enhances the overall taste, making each bite more flavorful.

If you want to add a little extra crunch, consider tossing in some nuts or seeds. Toasted sunflower seeds or chopped walnuts can add a delightful crunch and a nutty flavor that complements the sweetness of the corn.

Lastly, don’t be afraid to experiment! Sweet Crunchy Corn Salad is versatile, so feel free to try different ingredients or dressings. You might discover a new favorite combination that makes your salad even more special.

By following these tips, you’ll be well on your way to making a Sweet Crunchy Corn Salad that’s not only delicious but also visually stunning. Enjoy the process and have fun in the kitchen!

Breakdown of Time for Sweet Crunchy Corn Salad

When preparing your Sweet Crunchy Corn Salad, it’s helpful to know how much time you’ll need for each step. This way, you can plan accordingly and enjoy the process of making this delicious dish. Here’s a breakdown of the time required for each part of the recipe.

Prep Time

The prep time for Sweet Crunchy Corn Salad is approximately 15-20 minutes. This includes gathering all your ingredients, washing the vegetables, and chopping them into bite-sized pieces. If you’re using fresh corn, you’ll also need to account for the time it takes to husk and clean the corn. However, if you opt for canned corn, this step will be quicker, allowing you to focus on chopping the other ingredients.

Cooking Time

The cooking time is minimal, especially if you’re using canned corn. If you choose to use fresh corn, you’ll need about 3-5 minutes to boil it until tender. After cooking, allow the corn to cool for a few minutes before mixing it into the salad. This step is essential to maintain the crunchiness of the corn.

Total Time

In total, you can expect to spend around 30-40 minutes preparing your Sweet Crunchy Corn Salad. This includes the prep time, cooking time, and the chilling time of at least 30 minutes in the refrigerator. Chilling is crucial as it allows the flavors to meld together beautifully, enhancing the overall taste of the salad. So, while the active preparation is quick, the chilling time is what makes this salad truly delicious!

Nutritional Information for Sweet Crunchy Corn Salad

Understanding the nutritional content of your Sweet Crunchy Corn Salad is essential for making informed dietary choices. This salad is not only delicious but also packed with nutrients that can benefit your health. Let’s break down the key nutritional components of this vibrant dish!

Calories in Sweet Crunchy Corn Salad

Each serving of Sweet Crunchy Corn Salad contains approximately 120 calories. This makes it a light and healthy option for those looking to maintain or lose weight. The low-calorie count allows you to enjoy this salad without guilt, whether as a side dish or a main meal. Plus, the fresh ingredients provide a satisfying crunch and flavor that will keep you coming back for more!

Protein Content in Sweet Crunchy Corn Salad

In terms of protein, Sweet Crunchy Corn Salad offers about 3 grams per serving. While this may seem modest, it can be enhanced by adding protein-rich ingredients like black beans, grilled chicken, or chickpeas. These additions not only boost the protein content but also make the salad more filling and nutritious. So, if you’re looking to increase your protein intake, feel free to customize your salad with your favorite protein sources!

Sodium Levels in Sweet Crunchy Corn Salad

The sodium levels in Sweet Crunchy Corn Salad are relatively low, making it a heart-healthy choice. The exact sodium content can vary based on the ingredients you use, especially if you add salt to taste. On average, you can expect around 150-200 mg of sodium per serving. To keep the sodium levels in check, consider using low-sodium canned corn or skipping the added salt altogether. This way, you can enjoy a flavorful salad without worrying about excess sodium intake.

Overall, Sweet Crunchy Corn Salad is a nutritious option that fits well into a balanced diet. With its low calorie count, moderate protein content, and low sodium levels, it’s a great choice for anyone looking to eat healthily while enjoying delicious flavors!

FAQs about Sweet Crunchy Corn Salad

Can I use frozen corn for Sweet Crunchy Corn Salad?

Absolutely! Frozen corn is a convenient option for making Sweet Crunchy Corn Salad. It’s often picked and frozen at peak freshness, so it retains its sweet flavor and crunch. To use frozen corn, simply thaw it before adding it to your salad. You can do this by placing it in a bowl of cold water for a few minutes or by microwaving it for a short time. Just make sure to drain any excess water before mixing it with the other ingredients. This way, you’ll still enjoy a delicious and refreshing salad!

How long can I store Sweet Crunchy Corn Salad?

Sweet Crunchy Corn Salad can be stored in the refrigerator for up to 3 days. To keep it fresh, make sure to place it in an airtight container. However, the salad is best enjoyed within the first day or two, as the vegetables may start to lose their crunch over time. If you notice any excess liquid from the dressing, you can drain it before serving. If you plan to make it ahead of time, consider adding delicate ingredients like tomatoes and cucumbers just before serving to maintain their freshness.

What are some good toppings for Sweet Crunchy Corn Salad?

There are plenty of delicious toppings you can add to enhance your Sweet Crunchy Corn Salad! For a bit of crunch, consider sprinkling some toasted nuts or seeds, like sunflower seeds or chopped walnuts. If you want to add a creamy element, crumbled feta cheese or avocado slices work wonderfully. For a spicy kick, diced jalapeños or a sprinkle of chili powder can elevate the flavor. Fresh herbs like basil or parsley can also add a burst of freshness. Feel free to get creative and mix and match toppings to find your perfect combination!

Conclusion on Sweet Crunchy Corn Salad

In conclusion, Sweet Crunchy Corn Salad is a delightful dish that combines fresh ingredients, vibrant flavors, and a satisfying crunch. This salad is not only easy to prepare but also incredibly versatile, allowing you to customize it to suit your taste preferences and seasonal ingredients. Whether you enjoy it as a side dish or a main meal, it’s sure to impress your family and friends.

The combination of sweet corn, juicy tomatoes, and crisp vegetables creates a colorful and nutritious salad that can brighten up any table. Plus, with the option to add proteins or seasonal variations, you can make it your own. The zesty dressing ties everything together, enhancing the natural flavors of the ingredients.

As you explore the world of Sweet Crunchy Corn Salad, remember to have fun and experiment with different ingredients. Whether you’re hosting a summer barbecue, preparing a light lunch, or simply looking for a healthy snack, this salad is a fantastic choice. With its low calorie count and high nutritional value, it fits perfectly into a balanced diet.

So, gather your ingredients, follow the simple steps, and enjoy the deliciousness of Sweet Crunchy Corn Salad. It’s a dish that celebrates the joy of fresh produce and brings a burst of flavor to your meals. Happy cooking!

Summer Berry and Peach Cheesecake is a must-try dessert!

Introduction to Summer Berry Peach Cheesecake

Summer Berry Peach Cheesecake? This dessert combines the creamy richness of cheesecake with the vibrant flavors of summer fruits. Each bite offers a burst of sweetness from the peaches and berries, making it a refreshing treat for warm days.

Cheesecake is a beloved dessert, but adding seasonal fruits elevates it to a whole new level. The combination of juicy peaches and mixed berries not only enhances the flavor but also adds a beautiful color to the dish. This cheesecake is not just a dessert; it’s a celebration of summer’s bounty!

What Makes Summer Berry Peach Cheesecake Special?

Summer Berry Peach Cheesecake apart is its unique blend of flavors and textures. The creamy cheesecake filling pairs perfectly with the tartness of the berries and the sweetness of the peaches. The graham cracker crust adds a delightful crunch, creating a satisfying contrast to the smooth filling.

Moreover, this cheesecake is versatile. You can easily customize it with your favorite fruits or even make it gluten-free. It’s a crowd-pleaser, ideal for summer gatherings, picnics, or simply enjoying at home. The best part? It’s easy to prepare, allowing you to spend more time enjoying the sunshine and less time in the kitchen.

In the following sections, we will guide you through the ingredients and step-by-step preparation of this delicious cheesecake. Get ready to impress your family and friends with a dessert that captures the essence of summer!

Ingredients for Summer Berry Peach Cheesecake

Summer Berry Peach Cheesecake, you’ll need a few key ingredients. Each component plays a vital role in achieving the perfect balance of flavors and textures. Here’s what you’ll need:

  • 1 ½ cups graham cracker crumbs: This forms the base of your cheesecake, providing a crunchy texture.
  • ½ cup unsalted butter, melted: This helps bind the crumbs together for a sturdy crust.
  • 2 cups cream cheese, softened: The star of the show, cream cheese gives the cheesecake its rich and creamy texture.
  • 1 cup granulated sugar: This sweetens the filling, balancing the tartness of the fruits.
  • 1 teaspoon vanilla extract: Adds a lovely aroma and enhances the overall flavor.
  • 2 large eggs: These help set the cheesecake, giving it structure.
  • 1 cup sour cream: This adds creaminess and a slight tang to the filling.
  • 2 cups fresh peaches, diced: Sweet and juicy, peaches bring a delightful flavor to the cheesecake.
  • 1 cup mixed berries: A combination of strawberries, blueberries, and raspberries adds color and a burst of flavor.
  • 2 tablespoons cornstarch: This helps thicken the fruit mixture, preventing it from becoming too watery.
  • 1 tablespoon lemon juice: A splash of lemon juice brightens the flavors and complements the fruits.

Summer Berry Peach Cheesecake. Each ingredient contributes to the overall taste, making it a delightful dessert for any occasion. Now that you have everything you need, let’s move on to the step-by-step preparation!

Step-by-Step Preparation of Summer Berry Peach Cheesecake

Summer Berry Peach Cheesecake, it’s time to dive into the preparation. This cheesecake is simple to make, and following these steps will ensure a delicious result. Let’s break it down step by step!

Step 1: Preparing the Crust

1 ½ cups of graham cracker crumbs with the ½ cup of melted unsalted butter. Mix them together until the crumbs are fully coated with butter. This mixture should feel like wet sand.

Next, press the crumb mixture firmly into the bottom of a greased 9-inch springform pan. Make sure it’s even and compact. This will create a sturdy base for your cheesecake. Once done, set the crust aside while you prepare the filling.

Step 2: Making the Cheesecake Filling

2 cups of softened cream cheese using an electric mixer. Mix until it’s smooth and creamy. Gradually add in 1 cup of granulated sugar and 1 teaspoon of vanilla extract. Continue mixing until everything is well combined.

2 large eggs one at a time. Make sure to mix well after each addition. This helps to incorporate air into the batter, making it light and fluffy. Finally, mix in 1 cup of sour cream until the batter is completely smooth.

Step 3: Adding the Summer Berries and Peaches

2 cups of diced fresh peaches and 1 cup of mixed berries with 2 tablespoons of cornstarch and 1 tablespoon of lemon juice. This step is crucial as it prevents the fruit from making the cheesecake too watery.

Gently fold the fruit mixture into the cheesecake batter. Be careful not to overmix, as you want to keep the fruit pieces intact. This will add bursts of flavor throughout the cheesecake.

Step 4: Baking the Summer Berry Peach Cheesecake

Pour the cheesecake mixture over the prepared crust in the springform pan. Use a spatula to smooth the top. Now, it’s time to bake! Place the cheesecake in the preheated oven at 325°F (163°C) and bake for 50-60 minutes. The center should be set but still slightly jiggly.

Step 5: Cooling and Setting the Cheesecake

Once baked, turn off the oven and leave the cheesecake inside for an additional hour. This gradual cooling helps prevent cracks on the surface. After an hour, remove the cheesecake from the oven and let it cool to room temperature.

Summer Berry Peach Cheesecake that’s ready to impress!

Variation of Summer Berry Peach Cheesecake

Summer Berry Peach Cheesecake is already a delightful treat, you can easily switch things up to suit your taste or dietary needs. Here are some fun variations to consider!

Alternative Fruit Combinations

One of the best things about this cheesecake is its versatility. You can experiment with different fruits to create your own unique flavor profile. Here are some tasty alternatives:

  • Cherries: Swap out the peaches for fresh cherries. Their sweet and tart flavor pairs wonderfully with the creamy cheesecake.
  • Mango: Diced mango adds a tropical twist. Its sweetness complements the tangy cream cheese beautifully.
  • Pineapple: For a refreshing change, use crushed pineapple. Just be sure to drain it well to avoid excess moisture.
  • Blackberries: These can replace or be added to the mixed berries for a deeper flavor and a pop of color.

Summer Berry Peach Cheesecake a new and exciting taste!

Gluten-Free and Vegan Options

If you or your guests have dietary restrictions, you can still enjoy this cheesecake with a few simple adjustments. Here’s how to make it gluten-free and vegan:

  • Gluten-Free: Substitute the graham cracker crumbs with gluten-free cookie crumbs or almond flour. Ensure that all other ingredients are gluten-free as well.
  • Vegan: For a vegan version, replace the cream cheese with a plant-based cream cheese alternative. Use flax eggs or applesauce instead of regular eggs, and opt for a dairy-free sour cream. You can also use coconut cream for added richness.

Summer Berry Peach Cheesecake, no matter their dietary preferences. So, get creative and make this dessert your own!

Cooking Note for Summer Berry Peach Cheesecake

Summer Berry Peach Cheesecake, there are a few important cooking notes to keep in mind. These tips will help ensure that your cheesecake turns out perfectly every time.

First, always use room temperature ingredients. This includes the cream cheese, eggs, and sour cream. Room temperature ingredients blend more easily, resulting in a smoother batter. If you forget to take them out in advance, you can place the cream cheese in a microwave for about 10-15 seconds to soften it slightly.

Next, be careful not to overmix the batter. Overmixing can incorporate too much air, which may cause the cheesecake to crack during baking. Mix just until the ingredients are combined and smooth.

Additionally, consider using a water bath for baking. This method helps maintain a consistent temperature and moisture level in the oven, reducing the risk of cracks. To do this, wrap the outside of your springform pan with aluminum foil to prevent water from seeping in. Place the pan in a larger baking dish filled with hot water before putting it in the oven.

Lastly, patience is key when cooling your cheesecake. Allowing it to cool gradually in the oven and then refrigerating it for several hours will enhance the flavors and improve the texture. Rushing this process can lead to a less-than-perfect cheesecake.

Summer Berry Peach Cheesecake that will impress everyone at your next gathering!

Serving Suggestions for Summer Berry Peach Cheesecake

Summer Berry Peach Cheesecake is chilled and ready to serve, it’s time to think about how to present it. A beautiful presentation can elevate your dessert and make it even more enjoyable. Here are some ideal pairings and garnishes to consider!

Ideal Pairings and Garnishes

To enhance the flavors of your cheesecake, consider these delicious pairings:

  • Fresh Mint Leaves: A sprig of mint adds a pop of color and a refreshing taste. Place a few leaves on top of each slice for a lovely presentation.
  • Whipped Cream: A dollop of freshly whipped cream on top of each slice adds a light and airy texture. You can sweeten it with a bit of sugar and vanilla for extra flavor.
  • Fruit Sauce: Drizzle a homemade berry sauce over the cheesecake. Simply blend some berries with a little sugar and lemon juice, then strain to remove seeds. This adds a vibrant color and extra fruitiness.
  • Chocolate Shavings: For chocolate lovers, sprinkle some dark chocolate shavings on top. The rich chocolate flavor pairs beautifully with the fruity cheesecake.
  • Ice Cream: Serve slices of cheesecake with a scoop of vanilla or peach ice cream. The creaminess of the ice cream complements the cheesecake perfectly.

Summer Berry Peach Cheesecake. Feel free to mix and match these suggestions based on your preferences and the occasion. Your guests will surely be impressed by the delightful presentation and taste!

Tips for Perfecting Your Summer Berry Peach Cheesecake

Summer Berry Peach Cheesecake is all about attention to detail. With a few helpful tips, you can elevate your cheesecake to a whole new level. Here are some expert suggestions to ensure your dessert turns out beautifully every time!

Use Quality Ingredients

Start with high-quality ingredients. Fresh, ripe peaches and berries will enhance the flavor of your cheesecake. Opt for full-fat cream cheese for a rich and creamy texture. The better the ingredients, the better the final product!

Don’t Skip the Cooling Steps

Cooling your cheesecake gradually is crucial. After baking, let it cool in the oven with the door slightly ajar. This helps prevent cracks. Once at room temperature, refrigerate it for at least four hours. Overnight is even better, as it allows the flavors to meld.

Check for Doneness

Keep an eye on your cheesecake while it bakes. The edges should be set, but the center should still have a slight jiggle. This indicates that it will firm up as it cools. Overbaking can lead to a dry cheesecake, so trust your instincts!

Experiment with Flavors

Feel free to get creative with flavors! Add a hint of almond extract or a splash of orange zest to the batter for a unique twist. You can also mix in different fruits or even a swirl of fruit puree for added flair.

Presentation Matters

When it comes to serving, presentation is key. Use a sharp knife to slice the cheesecake cleanly. Wipe the knife between cuts for neat slices. Garnish with fresh fruit, mint, or a drizzle of sauce to make it visually appealing.

Practice Patience

Summer Berry Peach Cheesecake will be worth the wait!

Summer Berry Peach Cheesecake will not only taste amazing but also look stunning, impressing everyone who gets a slice!

Breakdown of Time for Summer Berry Peach Cheesecake

Summer Berry Peach Cheesecake, it’s essential to know how much time you’ll need. This will help you organize your day and ensure everything goes smoothly. Here’s a breakdown of the time required for each step of the process.

Prep Time

Summer Berry Peach Cheesecake is approximately 30 minutes. This includes gathering all your ingredients, preparing the crust, and mixing the cheesecake filling. Make sure to have everything ready before you start to make the process easier!

Cooking Time

Once you’ve prepped, the cooking time is about 50-60 minutes. During this time, the cheesecake will bake in the oven. After baking, it’s crucial to let it cool in the oven for an additional hour. This gradual cooling helps prevent cracks and ensures a smooth texture.

Total Time

Summer Berry Peach Cheesecake even more delicious!

By understanding the time breakdown, you can better manage your schedule and enjoy the process of creating this delightful dessert. Happy baking!

Nutritional Information for Summer Berry Peach Cheesecake

Summer Berry Peach Cheesecake can help you enjoy it mindfully. Here’s a breakdown of the key nutritional components per serving. This information is based on a serving size of one slice, assuming the cheesecake serves 10 people.

Calories

Summer Berry Peach Cheesecake contains approximately 320 calories. This makes it a satisfying dessert that can fit into a balanced diet. The calories come from the rich ingredients like cream cheese and butter, combined with the natural sweetness of the fruits.

Protein

6 grams. The cream cheese and eggs contribute to this protein content, making it a more filling dessert option. Protein is essential for muscle repair and growth, so this cheesecake can be a delightful treat after a meal or workout.

Sodium

250 milligrams of sodium. This amount is relatively moderate, especially considering the rich flavors and creamy texture of the cheesecake. If you’re watching your sodium intake, be mindful of the other components of your meal when enjoying this dessert.

Summer Berry Peach Cheesecake offers a delicious balance of flavors while providing some nutritional benefits. Enjoying it in moderation can be part of a healthy lifestyle, especially when paired with fresh fruits and a balanced diet!

FAQs about Summer Berry Peach Cheesecake

Can I use frozen berries for Summer Berry Peach Cheesecake?

Summer Berry Peach Cheesecake. However, keep in mind that frozen berries may release more moisture when thawed. To prevent a watery cheesecake, make sure to drain any excess liquid before adding them to the batter. You can also toss the frozen berries with a bit of cornstarch to help absorb some of the moisture.

How do I store leftover Summer Berry Peach Cheesecake?

Summer Berry Peach Cheesecake, cover it tightly with plastic wrap or aluminum foil. You can also place it in an airtight container. Refrigerate the cheesecake for up to 5 days. If you want to keep it longer, consider freezing it. Wrap individual slices in plastic wrap and then place them in a freezer-safe container. This way, you can enjoy a slice whenever you crave it!

Can I make Summer Berry Peach Cheesecake ahead of time?

Summer Berry Peach Cheesecake a day in advance is a great idea. This allows the flavors to meld and the cheesecake to set properly. After baking and cooling, refrigerate it overnight. Just remember to add any toppings or garnishes right before serving to keep them fresh and vibrant.

What can I substitute for cream cheese in Summer Berry Peach Cheesecake?

Summer Berry Peach Cheesecake, there are several options. For a dairy-free version, you can use a plant-based cream cheese alternative. Silken tofu blended until smooth is another great option, providing a similar texture. For a lighter option, consider using Greek yogurt, but keep in mind that it may alter the flavor slightly. Each substitute will give your cheesecake a unique twist!

Conclusion on Summer Berry Peach Cheesecake

Summer Berry Peach Cheesecake is a delightful dessert that perfectly captures the essence of summer. With its creamy texture, vibrant flavors, and beautiful presentation, it’s sure to impress anyone who takes a bite. Whether you’re hosting a summer gathering, celebrating a special occasion, or simply treating yourself, this cheesecake is a fantastic choice.

By following the simple steps outlined in this article, you can create a stunning cheesecake that showcases the best of seasonal fruits. Remember, the key to a successful cheesecake lies in using quality ingredients, allowing for proper cooling, and being patient during the chilling process. With these tips in mind, you’ll be well on your way to mastering this delicious dessert.

Summer Berry Peach Cheesecake your own. The versatility of this recipe means you can adapt it to suit your taste preferences or dietary needs, ensuring that everyone can enjoy a slice.

Summer Berry Peach Cheesecake is more than just a dessert; it’s a celebration of summer’s bounty and a sweet way to create lasting memories with family and friends. Happy baking!

Creamy Mango Delight Recipe is a must-try dessert!

Introduction to Creamy Mango Delight Recipe

Creamy Mango Delight Recipe is a perfect blend of tropical flavors and creamy textures. This dessert is sure to impress your family and friends, making it a must-try for any occasion.

What Makes the Creamy Mango Delight Recipe Special?

What sets this recipe apart? First, it features ripe mangoes, which are naturally sweet and packed with vitamins. The combination of mangoes with heavy whipping cream creates a rich and velvety mousse that melts in your mouth. Plus, the addition of sweetened condensed milk adds a touch of sweetness that balances the tartness of lime juice.

Another highlight is its simplicity. With just a few ingredients and minimal preparation time, you can whip up this delightful dessert in no time. Whether you’re hosting a summer barbecue or simply craving something sweet, this recipe fits the bill perfectly.

Creamy Mango Delight Recipe is versatile. You can easily customize it to suit your taste. Want a tropical twist? Add coconut cream! Looking for a healthier option? Substitute Greek yogurt for a lighter version. The possibilities are endless!

So, let’s get started on this delicious journey. Your taste buds will thank you!

Ingredients for Creamy Mango Delight Recipe

Creamy Mango Delight Recipe, you’ll need a few simple ingredients. Each one plays a vital role in achieving that perfect balance of flavor and texture. Here’s what you’ll need:

  • 2 ripe mangoes, peeled and diced
  • 1 cup heavy whipping cream
  • 1/2 cup sweetened condensed milk
  • 1 teaspoon vanilla extract
  • 1 tablespoon lime juice
  • 1/4 teaspoon salt

These ingredients are not only easy to find but also work together to create a creamy, luscious dessert. The ripe mangoes provide natural sweetness and a vibrant color, while the heavy whipping cream adds a rich, smooth texture. Sweetened condensed milk enhances the sweetness, making every bite a treat.

Don’t forget the lime juice! It adds a refreshing zing that balances the sweetness perfectly. The salt, though minimal, enhances all the flavors, making this dessert even more delicious.

Now that you have your ingredients ready, let’s move on to the next step of preparing this delightful dessert!

Step-by-Step Preparation of Creamy Mango Delight Recipe

Creamy Mango Delight Recipe. Follow these simple steps to create a dessert that will leave everyone wanting more!

Step 1: Preparing the Mangoes

First things first, let’s get those mangoes ready! Start by peeling the ripe mangoes. Use a sharp knife to carefully remove the skin. Once peeled, cut the mangoes into small, even-sized pieces. This will help them blend smoothly later on. Make sure to remove the pit, as it’s not edible. Diced mangoes should be bright yellow and fragrant, indicating they are ripe and ready to use.

Step 2: Blending the Ingredients

Next, it’s time to blend! In a blender, combine the diced mangoes, sweetened condensed milk, vanilla extract, lime juice, and salt. Blend these ingredients until the mixture is smooth and creamy. You want a silky texture that will mix well with the whipped cream. If you prefer a chunkier texture, feel free to blend less. Once blended, set this mango mixture aside for the next step.

Step 3: Chilling the Mixture

Now, let’s whip up some cream! In a large mixing bowl, use an electric mixer to whip the heavy cream. Beat it until soft peaks form. This means the cream should hold its shape but still be soft and fluffy. Be careful not to over-whip, as it can turn into butter! Once your cream is ready, gently fold the mango mixture into the whipped cream. Use a spatula and fold carefully to keep the air in the whipped cream. This will ensure your dessert stays light and airy.

Step 4: Serving the Creamy Mango Delight

Creamy Mango Delight Recipe! Spoon the mousse into individual serving cups or bowls. You can use pretty glassware to make it look extra special. Once served, refrigerate the cups for at least 2 hours. This chilling time allows the flavors to meld and the dessert to set properly. When you’re ready to enjoy, you can garnish with fresh mint leaves or additional diced mango for a pop of color and flavor. Your guests will be amazed!

Variations of Creamy Mango Delight Recipe

Creamy Mango Delight Recipe is already a fantastic treat, but why stop there? You can easily customize this dessert to suit your taste or dietary needs. Here are a couple of delightful variations to consider:

Tropical Twist: Adding Coconut

Creamy Mango Delight Recipe to the next level, consider adding coconut! This tropical twist enhances the flavor and adds a delightful texture. To do this, simply mix in a tablespoon of coconut cream into the mango mixture before blending. This addition will give your dessert a rich, creamy consistency and a hint of coconut flavor that pairs beautifully with the mango. You can also sprinkle some toasted coconut flakes on top for an extra crunch and visual appeal. Your guests will love this tropical upgrade!

Healthy Option: Using Greek Yogurt

For those looking for a healthier alternative, substituting Greek yogurt for heavy whipping cream is a great option. Greek yogurt is packed with protein and has a tangy flavor that complements the sweetness of the mangoes. To make this variation, replace the cup of heavy whipping cream with 1 cup of plain Greek yogurt. Blend it with the mango mixture just like before. This version will still be creamy but with fewer calories and fat. Plus, it’s a fantastic way to sneak in some extra nutrients!

Creamy Mango Delight Recipe exciting but also allow you to cater to different preferences. Whether you choose the tropical coconut twist or the healthier Greek yogurt option, you’re sure to impress everyone with your creativity!

Cooking Note for Creamy Mango Delight Recipe

Creamy Mango Delight Recipe, there are a few important cooking notes to keep in mind. These tips will help ensure that your dessert turns out perfectly every time.

First, always choose ripe mangoes. The sweetness and flavor of your dessert depend heavily on the quality of the mangoes. Look for mangoes that are slightly soft to the touch and have a sweet aroma. If they are too firm, they may not blend well and could result in a less flavorful mousse.

Next, when whipping the cream, make sure your mixing bowl and beaters are cold. This helps the cream whip up faster and achieve the desired soft peaks. You can chill them in the refrigerator for about 15 minutes before starting. Additionally, avoid over-whipping the cream. If you whip it too long, it can turn grainy and eventually become butter. Stop whipping as soon as you see soft peaks forming.

Another tip is to fold the mango mixture into the whipped cream gently. Use a spatula and a folding motion to combine the two mixtures. This technique helps maintain the light and airy texture of the whipped cream, which is essential for a mousse-like dessert.

Creamy Mango Delight Recipe to chill in the refrigerator for at least 2 hours. This time helps the flavors meld together and allows the dessert to set properly. The result will be a creamy, luscious treat that everyone will love.

By following these cooking notes, you’ll create a delightful dessert that showcases the vibrant flavors of mangoes. Enjoy the process and the delicious outcome!

Serving Suggestions for Creamy Mango Delight Recipe

Creamy Mango Delight Recipe, it’s time to think about how to serve it! This dessert is not only delicious but also visually appealing, making it a great addition to any meal. Here are some serving suggestions to enhance your experience.

Perfect Pairings with Desserts

Creamy Mango Delight Recipe pairs wonderfully with a variety of other desserts. For a delightful dessert platter, consider serving it alongside:

  • Chocolate Mousse: The rich, dark chocolate flavor contrasts beautifully with the light mango mousse.
  • Fruit Tart: A fresh fruit tart adds a crunchy texture and complements the creamy mango delight.
  • Cheesecake: The tangy flavor of cheesecake balances the sweetness of the mango dessert.
  • Cookies: Serve with buttery shortbread or coconut macaroons for a delightful crunch.

These pairings not only enhance the overall dessert experience but also provide a variety of flavors and textures that your guests will love. Mixing and matching can create a fun dessert buffet that everyone can enjoy!

Ideal Occasions for Serving

Creamy Mango Delight Recipe is perfect for many occasions. Here are some ideal times to serve this delightful dessert:

  • Summer Gatherings: Its refreshing mango flavor makes it a hit at summer barbecues and picnics.
  • Birthday Parties: Celebrate with a sweet treat that’s sure to impress guests of all ages.
  • Holiday Celebrations: Brighten up your holiday table with this vibrant dessert.
  • Casual Family Dinners: Treat your family to a special dessert after a cozy meal.

Creamy Mango Delight Recipe is sure to be a crowd-pleaser. Its tropical flavors and creamy texture will leave everyone smiling!

Tips for Perfecting Your Creamy Mango Delight Recipe

Creamy Mango Delight Recipe is all about attention to detail. Here are some helpful tips to ensure your dessert turns out delicious every time:

  • Choose the Right Mangoes: Always opt for ripe mangoes. They should be slightly soft to the touch and emit a sweet aroma. This ensures your dessert is bursting with flavor.
  • Chill Your Equipment: For the best results, chill your mixing bowl and beaters before whipping the cream. Cold equipment helps the cream whip up faster and achieve the desired texture.
  • Don’t Over-Whip the Cream: Keep an eye on the cream while whipping. Stop as soon as you see soft peaks forming. Over-whipping can lead to a grainy texture, which is not ideal for a mousse.
  • Fold Gently: When combining the mango mixture with the whipped cream, use a gentle folding motion. This helps maintain the light and airy texture of the cream, which is key for a mousse-like dessert.
  • Let It Chill: Patience is essential! Allow the Creamy Mango Delight Recipe to chill in the refrigerator for at least 2 hours. This helps the flavors meld and the dessert to set properly.
  • Experiment with Flavors: Don’t hesitate to get creative! Try adding different flavors like coconut or even a hint of ginger for a unique twist. Each variation can bring a new dimension to your dessert.
  • Garnish for Presentation: A simple garnish can elevate your dessert. Consider adding fresh mint leaves, a sprinkle of toasted coconut, or extra diced mango on top for a beautiful finish.

Creamy Mango Delight Recipe. Each step is crucial in creating a dessert that is not only tasty but also visually appealing. Enjoy the process and the delightful results!

Breakdown of Time for Creamy Mango Delight Recipe

Creamy Mango Delight Recipe is essential for planning your dessert preparation. Here’s a simple breakdown to help you manage your time effectively:

Prep Time

The prep time for this delightful dessert is quite short. You’ll need about 15 minutes to gather your ingredients and prepare the mangoes. This includes peeling, dicing, and blending the mangoes with the other ingredients. It’s a quick and easy process that allows you to enjoy the fun of making this treat without spending too much time in the kitchen!

Cooking Time

Creamy Mango Delight Recipe. Instead, the main focus is on blending and whipping. The only time you’ll need to consider is the whipping of the cream, which takes about 5 minutes. So, in total, the active cooking time is around 5 minutes.

Total Time

Creamy Mango Delight Recipe is approximately 20 minutes. However, don’t forget to factor in the chilling time! You’ll need to refrigerate the dessert for at least 2 hours to allow it to set properly. So, while the active time is short, plan for a total of about 2 hours and 20 minutes from start to finish before serving.

This breakdown helps you see just how easy it is to create this delicious dessert. With minimal active time and a little patience for chilling, you’ll have a delightful treat ready to impress your guests!

Nutritional Information for Creamy Mango Delight Recipe

Creamy Mango Delight Recipe is important for those who are mindful of their diet. This dessert is not only delicious but also provides a good balance of nutrients. Here’s a breakdown of the key nutritional information per serving:

Calories

Creamy Mango Delight Recipe contains approximately 250 calories. This makes it a satisfying treat without being overly indulgent. The calories come from the natural sugars in the mangoes, the cream, and the sweetened condensed milk, providing a rich flavor that is worth every bite.

Protein

In terms of protein, this dessert offers about 3 grams per serving. While it’s not a high-protein dish, the protein content comes mainly from the heavy whipping cream and the sweetened condensed milk. This small amount can contribute to your daily protein intake, especially when enjoyed as part of a balanced diet.

Sodium

Creamy Mango Delight Recipe is relatively low, with approximately 50 milligrams per serving. This makes it a heart-healthy option for dessert lovers. The small amount of salt used in the recipe enhances the flavors without adding excessive sodium, making it suitable for those watching their salt intake.

Creamy Mango Delight Recipe is a delightful dessert that can fit into a variety of dietary plans. With its balanced nutritional profile, you can enjoy this treat guilt-free!

FAQs about Creamy Mango Delight Recipe

Can I use frozen mangoes for the Creamy Mango Delight Recipe?

Creamy Mango Delight Recipe. Just make sure to thaw them before blending. Frozen mangoes can be a great alternative, especially when fresh mangoes are out of season. They are often picked at peak ripeness and flash-frozen, preserving their sweetness and flavor. Just remember to drain any excess liquid after thawing to keep your dessert from becoming too watery.

How long can I store the Creamy Mango Delight?

Creamy Mango Delight Recipe can be stored in the refrigerator for up to 3 days. Make sure to cover it with plastic wrap or transfer it to an airtight container to keep it fresh. However, for the best taste and texture, it’s recommended to enjoy it within the first couple of days. After that, the whipped cream may start to lose its fluffiness, but the flavor will still be delightful!

Is the Creamy Mango Delight Recipe suitable for vegans?

Creamy Mango Delight Recipe is not suitable for vegans due to the use of heavy whipping cream and sweetened condensed milk. However, you can easily make a vegan version! Substitute the heavy cream with coconut cream or a plant-based whipping cream. For the sweetened condensed milk, you can use a vegan alternative made from coconut milk or almond milk. With these substitutions, you can enjoy a delicious vegan mango delight that everyone will love!

Conclusion on Creamy Mango Delight Recipe

Creamy Mango Delight Recipe is a fantastic dessert that brings the taste of tropical paradise right to your table. With its simple ingredients and easy preparation, it’s perfect for both novice cooks and seasoned chefs. The combination of ripe mangoes, creamy textures, and a hint of lime creates a delightful experience for your taste buds.

This dessert not only satisfies your sweet cravings but also offers versatility. Whether you choose to add coconut for a tropical twist or opt for Greek yogurt for a healthier version, the possibilities are endless. Each variation allows you to tailor the recipe to your preferences, making it a go-to treat for any occasion.

Creamy Mango Delight Recipe is ideal for summer gatherings, birthday parties, or simply as a sweet ending to a family dinner. Its vibrant colors and refreshing flavors make it a showstopper that will impress your guests and leave them asking for seconds.

So, gather your ingredients, follow the steps, and enjoy the delightful process of creating this creamy dessert. With a little patience and creativity, you’ll have a delicious treat that everyone will love. Happy cooking!

Strawberry Dole Whip is a refreshing summer treat!

Introduction to the Strawberry Dole Whip Recipe

What is Dole Whip?

Dole Whip is a delightful frozen treat that has captured the hearts of many. Originating from the Dole Food Company, this soft-serve dessert is known for its creamy texture and fruity flavor. Traditionally made with pineapple, Dole Whip has evolved over the years to include various flavors, including our star of the show: strawberry. This refreshing dessert is not only delicious but also a fun way to cool down on a hot day. With its vibrant color and sweet taste, it’s a perfect treat for both kids and adults alike.

Why Choose the Strawberry Dole Whip Recipe?

Choosing the Strawberry Dole Whip recipe means opting for a healthier dessert option that doesn’t skimp on flavor. This recipe is simple, quick, and requires just a handful of ingredients. Plus, it’s made with frozen strawberries, which are packed with vitamins and antioxidants. By using coconut milk, you also add a creamy texture without dairy, making it suitable for those with dietary restrictions. Whether you’re hosting a summer party or just craving something sweet, this Strawberry Dole Whip is sure to impress. It’s a delightful way to enjoy the taste of summer all year round!

Ingredients for the Strawberry Dole Whip Recipe

To create the perfect Strawberry Dole Whip, you’ll need a few simple ingredients. Each one plays a vital role in achieving that creamy, fruity goodness. Here’s what you’ll need:

  • 2 cups frozen strawberries: These provide the main flavor and natural sweetness.
  • 1 cup coconut milk: You can use either canned or carton coconut milk for a rich, creamy texture.
  • 1 tablespoon honey or agave syrup: This adds sweetness, but feel free to adjust based on your taste.
  • 1 teaspoon vanilla extract: This enhances the overall flavor, giving it a warm, inviting taste.
  • 1 tablespoon lime juice: A splash of lime juice brightens the flavors and adds a refreshing zing.

These ingredients come together to create a deliciously smooth and refreshing treat. The combination of strawberries and coconut milk not only tastes great but also offers a nutritious option for dessert lovers. So, gather these ingredients and get ready to whip up something special!

Step-by-Step Preparation of the Strawberry Dole Whip Recipe

Step 1: Gather Your Ingredients

Before you start making your Strawberry Dole Whip, it’s important to gather all your ingredients. This makes the process smooth and enjoyable. You’ll need:

  • 2 cups frozen strawberries
  • 1 cup coconut milk (canned or carton)
  • 1 tablespoon honey or agave syrup
  • 1 teaspoon vanilla extract
  • 1 tablespoon lime juice

Having everything ready will help you focus on blending and creating your delicious treat. Plus, it’s always fun to see all the colorful ingredients laid out!

Step 2: Blend the Ingredients

Now comes the fun part! In a blender, combine the frozen strawberries, coconut milk, honey or agave syrup, vanilla extract, and lime juice. Blend on high speed until the mixture is smooth and creamy. Don’t forget to scrape down the sides of the blender as needed. This ensures that all the ingredients mix well together.

After blending, take a moment to taste the mixture. If you want it sweeter, feel free to add a little more honey or agave syrup. Blend again for a few seconds to mix in the extra sweetness. This step is key to making your Strawberry Dole Whip just right!

Step 3: Freeze the Mixture

If you prefer a firmer texture, pour the blended mixture into a bowl or a piping bag and place it in the freezer for about 30 minutes. This will help it set up nicely, making it easier to scoop or pipe. If you’re in a hurry, you can skip this step and serve it right away, but a little time in the freezer can enhance the experience.

Step 4: Serve and Enjoy

Once your Strawberry Dole Whip is ready, it’s time to serve! You can scoop it into bowls or cones, depending on your preference. For a fun presentation, consider using a piping bag to create swirls in your serving dish. Enjoy your refreshing treat immediately, and don’t forget to share with friends and family!

This Strawberry Dole Whip is not only delicious but also a great way to cool down on a warm day. So, grab a spoon and dig in!

Variations of the Strawberry Dole Whip Recipe

Tropical Fruit Variations

If you’re looking to mix things up, consider trying some tropical fruit variations! The beauty of the Strawberry Dole Whip recipe is its versatility. You can easily swap out some of the strawberries for other fruits to create exciting new flavors. For instance, substituting half of the strawberries with frozen pineapple gives you a delightful Pineapple-Strawberry Dole Whip. This combination brings a taste of the tropics right to your kitchen!

Another fun option is to add mango. Simply replace a portion of the strawberries with frozen mango chunks. This will give your Dole Whip a sweet and creamy texture that’s hard to resist. You can also experiment with adding a splash of coconut extract for an extra tropical twist. The possibilities are endless, so feel free to get creative!

Dairy-Free Options

For those who are dairy-free or lactose intolerant, the Strawberry Dole Whip recipe is already a great choice! Using coconut milk makes it a creamy and delicious option without any dairy. However, if you want to explore even more dairy-free alternatives, consider using almond milk or oat milk. Both options will still provide a smooth texture while keeping the recipe light and refreshing.

Additionally, you can enhance the creaminess by adding a banana to the mix. Just blend in a ripe banana with the other ingredients. This not only adds a natural sweetness but also gives your Dole Whip a rich, creamy consistency. Enjoy these dairy-free variations while savoring the delightful flavors of your Strawberry Dole Whip!

Cooking Note for the Strawberry Dole Whip Recipe

When preparing your Strawberry Dole Whip, there are a few important cooking notes to keep in mind. These tips will help you achieve the best results and ensure your dessert is a hit!

First, always use high-quality frozen strawberries. Fresh strawberries can work, but frozen ones provide a creamier texture and are easier to blend. If you’re using fresh strawberries, make sure to freeze them for a few hours before starting the recipe. This will help you achieve that signature soft-serve consistency.

Next, consider the type of coconut milk you use. Canned coconut milk is thicker and creamier, which can enhance the texture of your Dole Whip. On the other hand, carton coconut milk is lighter and may result in a less creamy dessert. Choose based on your preference for richness.

Also, remember that the sweetness of strawberries can vary. Some may be sweeter than others, so it’s wise to taste the mixture before serving. Adjust the sweetness with honey or agave syrup as needed. This way, you can customize your Dole Whip to your liking!

Lastly, if you want to make a larger batch, simply double the ingredients. Just ensure your blender can handle the increased volume. Enjoy experimenting with this delightful recipe, and don’t hesitate to make it your own!

Serving Suggestions for the Strawberry Dole Whip Recipe

Perfect Pairings

When it comes to enjoying your Strawberry Dole Whip, the right pairings can elevate your experience. Here are some delightful options to consider:

  • Fresh Fruit: Serve your Dole Whip with a side of fresh fruit. Slices of kiwi, mango, or additional strawberries complement the flavors beautifully.
  • Granola: For a crunchy texture, sprinkle some granola on top. This adds a nice contrast to the creamy Dole Whip and makes it more filling.
  • Chocolate Drizzle: A drizzle of chocolate syrup can add a rich sweetness. It’s a fun way to indulge your sweet tooth!
  • Mint Leaves: Garnish with fresh mint leaves for a pop of color and a refreshing taste. This simple addition can make your dessert look fancy!

These pairings not only enhance the flavor but also make your Strawberry Dole Whip visually appealing. So, don’t hesitate to mix and match to find your favorite combinations!

Creative Serving Ideas

Serving your Strawberry Dole Whip can be just as fun as making it! Here are some creative ideas to impress your guests:

  • Ice Cream Cones: Instead of bowls, serve your Dole Whip in waffle cones. This makes for a fun, portable treat that’s perfect for parties or picnics.
  • Layered Parfaits: Create a layered parfait by alternating layers of Dole Whip with granola and fresh fruit in a clear glass. This not only looks beautiful but also adds different textures.
  • Frozen Pops: Pour the mixture into popsicle molds and freeze. You’ll have delicious Strawberry Dole Whip pops that are perfect for hot days!
  • Milkshake Style: Blend the Dole Whip with a splash of coconut milk for a milkshake version. Serve it in a tall glass with a straw for a refreshing drink.

These creative serving ideas will make your Strawberry Dole Whip a standout dessert. Whether you’re hosting a gathering or enjoying a quiet evening at home, these suggestions will surely impress!

Tips for Making the Perfect Strawberry Dole Whip Recipe

Choosing the Right Strawberries

When it comes to making the perfect Strawberry Dole Whip, the choice of strawberries is crucial. Freshness and quality can significantly impact the flavor and texture of your dessert. Here are some tips to help you select the best strawberries:

  • Look for Bright Color: Choose strawberries that are bright red and vibrant. This indicates ripeness and sweetness, which will enhance your Dole Whip.
  • Avoid Overripe Berries: While ripe strawberries are great, avoid those that are overly soft or mushy. They may not blend well and can affect the overall texture.
  • Check for Freshness: Make sure there are no signs of mold or bruising. Fresh strawberries will have a pleasant aroma and firm texture.
  • Consider Frozen Options: If fresh strawberries are out of season, frozen strawberries are a fantastic alternative. They are picked at peak ripeness and flash-frozen, preserving their flavor and nutrients.

By selecting the right strawberries, you’ll ensure that your Strawberry Dole Whip is bursting with flavor and has a delightful sweetness that everyone will love!

Achieving the Ideal Consistency

The consistency of your Strawberry Dole Whip is key to its enjoyment. You want it to be creamy and smooth, resembling soft-serve ice cream. Here are some tips to help you achieve that perfect texture:

  • Blend Thoroughly: Make sure to blend the ingredients on high speed until completely smooth. Scrape down the sides of the blender to ensure everything is well mixed.
  • Adjust Coconut Milk: If your mixture is too thick, add a little more coconut milk. This will help create a creamier texture. Conversely, if it’s too thin, blend in a few more frozen strawberries.
  • Freeze for Firmness: If you prefer a firmer Dole Whip, freeze the mixture for about 30 minutes before serving. This will help it set up nicely without becoming too hard.
  • Serve Immediately: For the best texture, serve your Dole Whip right after blending or after a short freeze. If left too long in the freezer, it may become too hard to scoop.

By following these tips, you’ll create a Strawberry Dole Whip that is not only delicious but also has the perfect creamy consistency. Enjoy your delightful treat!

Breakdown of Time for the Strawberry Dole Whip Recipe

Prep Time

The prep time for the Strawberry Dole Whip recipe is quite minimal. You’ll spend about 10 minutes gathering your ingredients and preparing them for blending. This includes measuring out the frozen strawberries, coconut milk, honey or agave syrup, vanilla extract, and lime juice. Having everything ready will make the blending process smooth and enjoyable!

Cooking Time

Interestingly, there’s no actual cooking involved in this recipe! The only time you’ll need to consider is the blending time, which takes about 5 minutes. After blending, if you choose to freeze the mixture for a firmer texture, that will add an additional 30 minutes. However, you can skip this step if you prefer to enjoy your Dole Whip right away.

Total Time

In total, you can expect to spend around 45 minutes from start to finish if you include the freezing time. If you decide to serve it immediately after blending, the total time will be just about 15 minutes. This makes the Strawberry Dole Whip a quick and easy dessert option, perfect for any occasion!

Nutritional Information for the Strawberry Dole Whip Recipe

Calories

When it comes to enjoying a sweet treat, knowing the calorie content can help you make informed choices. Each serving of the Strawberry Dole Whip contains approximately 150 calories. This makes it a relatively light dessert option, especially when compared to traditional ice creams. The use of frozen strawberries and coconut milk contributes to a satisfying yet low-calorie treat that you can enjoy without guilt.

Protein

Protein is an essential nutrient that helps with muscle repair and growth. In each serving of the Strawberry Dole Whip, you’ll find about 2 grams of protein. While this may not seem like a lot, it’s a nice addition to a dessert that is primarily fruit-based. If you’re looking to boost the protein content, consider adding a scoop of protein powder or serving it with a side of Greek yogurt.

Sodium

Sodium is another important factor to consider in your diet. The Strawberry Dole Whip is quite low in sodium, with each serving containing only a small amount. This makes it a heart-healthy choice for those watching their sodium intake. The natural ingredients used in this recipe help keep the sodium levels down, allowing you to indulge in a delicious dessert without worrying about excess salt.

FAQs about the Strawberry Dole Whip Recipe

Can I make the Strawberry Dole Whip Recipe ahead of time?

Absolutely! You can prepare the Strawberry Dole Whip ahead of time. After blending, simply store it in an airtight container in the freezer. This way, you can enjoy it whenever you like. However, keep in mind that the texture may change slightly after freezing. To restore its creamy consistency, let it sit at room temperature for a few minutes before serving. This will make it easier to scoop and enjoy!

Is the Strawberry Dole Whip Recipe suitable for vegans?

Yes, the Strawberry Dole Whip recipe is perfect for vegans! It contains no animal products, as it uses coconut milk instead of dairy. The sweetener options, honey or agave syrup, can be adjusted to suit vegan preferences. Simply use agave syrup, which is plant-based, to keep your Dole Whip entirely vegan-friendly. Enjoy this delicious treat without any worries!

How can I store leftover Strawberry Dole Whip?

If you have any leftover Strawberry Dole Whip, store it in an airtight container in the freezer. It’s best to consume it within a week for optimal flavor and texture. When you’re ready to enjoy it again, let it thaw for a few minutes at room temperature. This will help soften it up, making it easier to scoop. If it becomes too hard, you can also blend it again briefly to restore its creamy consistency. Enjoy your delightful treat even after the first serving!

Conclusion on the Strawberry Dole Whip Recipe

In conclusion, the Strawberry Dole Whip is a delightful and refreshing dessert that brings joy to any occasion. With its simple ingredients and easy preparation, it’s a treat that anyone can whip up in no time. Whether you’re cooling off on a hot summer day or looking for a sweet indulgence, this recipe is sure to satisfy your cravings.

Not only is the Strawberry Dole Whip delicious, but it also offers a healthier alternative to traditional ice creams. Packed with vitamins from the strawberries and the creamy goodness of coconut milk, it’s a dessert you can feel good about enjoying. Plus, the versatility of this recipe allows you to experiment with different fruits and flavors, making it a fun and creative culinary adventure.

So, gather your ingredients, follow the steps, and treat yourself to this delightful Strawberry Dole Whip. Whether you serve it at a party, enjoy it as a family treat, or savor it alone, it’s bound to bring a smile to your face. Don’t forget to share your creations with friends and family, and let them in on the joy of this delicious dessert!

Best Hibiscus Strawberry Lemonade Tea is refreshing!

Introduction to Best Hibiscus Strawberry Lemonade Tea

Welcome to the refreshing world of the Best Hibiscus Strawberry Lemonade Tea! This delightful drink combines the tartness of hibiscus with the sweetness of strawberries and the zesty kick of lemon. It’s perfect for hot summer days or any time you crave a cool, revitalizing beverage. Not only is it delicious, but it also offers a burst of vibrant color that can brighten up any gathering.

What Makes Best Hibiscus Strawberry Lemonade Tea Special?

What sets the Best Hibiscus Strawberry Lemonade Tea apart is its unique blend of flavors and health benefits. Hibiscus flowers are known for their rich, tangy taste and deep red hue. They are packed with antioxidants, which can help support your immune system. Strawberries add a natural sweetness and a dose of vitamin C, while fresh lemon juice brings a refreshing tartness that balances the drink perfectly.

This tea is not just a treat for your taste buds; it’s also a feast for your eyes. The vibrant colors of the hibiscus and strawberries create a visually appealing drink that’s sure to impress your guests. Plus, it’s easy to make and can be customized to suit your preferences. Whether you prefer it sweeter or with a hint of fizz, this recipe allows for plenty of creativity.

In addition, the Best Hibiscus Strawberry Lemonade Tea is a fantastic way to stay hydrated. With its refreshing taste and natural ingredients, it’s a healthier alternative to sugary sodas or store-bought drinks. So, gather your ingredients and get ready to enjoy a glass of this delightful refresher!

Ingredients for Best Hibiscus Strawberry Lemonade Tea

To create the Best Hibiscus Strawberry Lemonade Tea, you’ll need a few simple yet vibrant ingredients. Each component plays a crucial role in delivering that refreshing taste and beautiful color. Here’s what you’ll need:

  • 4 cups water: This is the base for your hibiscus tea.
  • 1 cup dried hibiscus flowers: These flowers provide the signature tart flavor and rich color.
  • 1 cup fresh strawberries: Make sure to hull and slice them for easy mixing. They add sweetness and a fruity aroma.
  • 1/2 cup fresh lemon juice: About 4-5 lemons should do the trick. This adds a zesty kick to the drink.
  • 1/2 cup honey or agave syrup: Adjust this to your taste preference. It sweetens the tea naturally.
  • 2 cups cold water: This helps to cool down the tea and balance the flavors.
  • Ice cubes: Essential for serving your tea chilled.
  • Lemon slices and fresh mint: These are optional garnishes that enhance the presentation and flavor.

Gathering these ingredients is the first step toward making a delicious pitcher of the Best Hibiscus Strawberry Lemonade Tea. Each ingredient contributes to the overall taste and health benefits of this delightful drink. So, let’s get started on the next steps to prepare this refreshing beverage!

Step-by-Step Preparation of Best Hibiscus Strawberry Lemonade Tea

Now that you have all your ingredients ready, it’s time to dive into the step-by-step preparation of the Best Hibiscus Strawberry Lemonade Tea. This process is simple and fun, making it a great activity for family and friends. Let’s get started!

Step 1: Preparing the Hibiscus Tea Base

First, you’ll need to create the hibiscus tea base. Begin by bringing 4 cups of water to a rolling boil in a medium saucepan. Once the water is boiling, remove it from the heat. Carefully add the dried hibiscus flowers to the hot water. This is where the magic happens! Let the flowers steep for about 15-20 minutes. The longer you steep, the richer the flavor will be. After steeping, strain the tea into a large pitcher, discarding the flowers. You should now have a beautiful, deep red hibiscus tea ready for the next steps.

Step 2: Infusing the Strawberries

While the hibiscus tea is still warm, it’s time to infuse the strawberries. Take your fresh strawberries, which should be hulled and sliced, and add them directly to the pitcher with the warm tea. The warmth will help release the strawberries’ natural juices, enhancing the flavor of your drink. Stir gently to combine. This step not only adds sweetness but also a lovely fruity aroma that will make your kitchen smell delightful!

Step 3: Mixing in the Lemonade

Next, it’s time to add the zesty kick! Pour in 1/2 cup of fresh lemon juice into the pitcher. This will balance the sweetness of the strawberries and honey or agave syrup. Speaking of sweeteners, now is the perfect time to add 1/2 cup of honey or agave syrup. Stir the mixture well until the sweetener is fully dissolved. The combination of hibiscus, strawberries, and lemon juice creates a refreshing and vibrant flavor profile that’s hard to resist!

Step 4: Combining All Ingredients

Finally, to complete your Best Hibiscus Strawberry Lemonade Tea, add 2 cups of cold water to the pitcher. This will help cool down the tea and dilute it to your desired strength. Mix everything together gently. Now, it’s time to chill! Place the pitcher in the refrigerator for at least 1 hour. This allows the flavors to meld beautifully. When you’re ready to serve, pour the tea over ice cubes in glasses. For an extra touch, garnish with lemon slices and fresh mint leaves. Enjoy your refreshing drink!

Variation of Best Hibiscus Strawberry Lemonade Tea

While the Best Hibiscus Strawberry Lemonade Tea is delightful as is, there are many ways to customize it to suit your taste. Whether you want to switch up the sweetness or add more fruity flavors, these variations will keep your drink exciting and refreshing. Let’s explore some fun options!

Alternative Sweeteners for Best Hibiscus Strawberry Lemonade Tea

If you’re looking for different ways to sweeten your Best Hibiscus Strawberry Lemonade Tea, you have plenty of options! Here are a few alternatives:

  • Maple Syrup: This natural sweetener adds a unique flavor and is a great option for those who prefer a vegan choice.
  • Coconut Sugar: With a lower glycemic index, coconut sugar is a healthier alternative that adds a hint of caramel flavor.
  • Stevia: If you want to cut down on calories, stevia is a zero-calorie sweetener that can be used in small amounts.
  • Agave Nectar: Similar to honey, agave nectar is sweeter than sugar, so you may need less of it.

Feel free to experiment with these sweeteners to find the perfect balance for your taste buds. Just remember to adjust the quantity based on how sweet you like your tea!

Adding Other Fruits to Best Hibiscus Strawberry Lemonade Tea

Another fun way to enhance the Best Hibiscus Strawberry Lemonade Tea is by adding other fruits. This not only boosts the flavor but also adds more nutrients. Here are some delicious options:

  • Blueberries: These tiny berries pack a punch of antioxidants and add a lovely color to your drink.
  • Raspberries: Their tartness complements the sweetness of strawberries beautifully.
  • Peaches: Fresh peach slices can add a juicy sweetness that pairs well with hibiscus.
  • Oranges: A splash of orange juice or slices can give your tea a citrusy twist.

Mix and match these fruits to create your own signature version of the Best Hibiscus Strawberry Lemonade Tea. The possibilities are endless, and each variation will bring a new taste experience!

Cooking Note for Best Hibiscus Strawberry Lemonade Tea

When preparing the Best Hibiscus Strawberry Lemonade Tea, there are a few cooking notes to keep in mind to ensure your drink turns out perfectly every time. These tips will help you achieve the best flavor and presentation, making your tea a standout refreshment for any occasion.

First, always use high-quality dried hibiscus flowers. The fresher the flowers, the more vibrant the color and flavor of your tea will be. Look for organic options if possible, as they are free from pesticides and additives. This choice not only enhances the taste but also ensures you’re enjoying a healthier beverage.

Next, pay attention to the steeping time. Steeping the hibiscus flowers for too long can result in a bitter taste. Aim for the recommended 15-20 minutes. If you prefer a milder flavor, you can steep for a shorter time. Remember, you can always adjust the sweetness later, but it’s harder to fix bitterness.

Additionally, when adding sweeteners, consider the temperature of your tea. Warm tea helps dissolve honey or agave syrup more effectively. If you find that your sweetener isn’t dissolving well, give it a little more time to mix in while the tea is still warm.

Lastly, don’t forget to chill your tea before serving. This step is crucial for a refreshing experience. Allowing the flavors to meld in the refrigerator for at least an hour will enhance the overall taste. If you’re in a hurry, you can also chill individual glasses by adding ice cubes, but the flavor will be best when the tea has had time to cool down properly.

By following these cooking notes, you’ll ensure that your Best Hibiscus Strawberry Lemonade Tea is not only delicious but also visually appealing. Enjoy the process and the delightful results!

Serving Suggestions for Best Hibiscus Strawberry Lemonade Tea

Once you’ve prepared the Best Hibiscus Strawberry Lemonade Tea, it’s time to serve it up in style! Presentation can elevate your drink from simple to spectacular. Here are some serving suggestions to make your tea even more enjoyable and visually appealing.

Garnishing Ideas for Best Hibiscus Strawberry Lemonade Tea

Garnishes not only enhance the look of your drink but also add extra flavor. Here are some delightful garnishing ideas:

  • Lemon Slices: Thinly sliced lemons can be placed on the rim of the glass or floated on top of the tea. They add a pop of color and a hint of citrus aroma.
  • Fresh Mint Leaves: A sprig of mint adds a refreshing touch. It also complements the hibiscus and strawberry flavors beautifully.
  • Strawberry Halves: Place a few halved strawberries on the rim or inside the glass for a fruity decoration that matches the drink.
  • Edible Flowers: For a fancy touch, consider adding edible flowers like pansies or nasturtiums. They bring a beautiful visual element and are safe to consume.
  • Colorful Straws: Use vibrant, reusable straws to add a fun element to your drink. They can also make sipping more enjoyable!

When serving the Best Hibiscus Strawberry Lemonade Tea, consider using clear glasses. This way, the stunning red color of the tea and the vibrant garnishes can shine through. You can also serve it in a large pitcher for a communal feel, allowing guests to help themselves. Just remember to keep the pitcher chilled!

These garnishing ideas will not only make your Best Hibiscus Strawberry Lemonade Tea look appealing but also enhance the overall drinking experience. So, get creative and enjoy serving this refreshing drink at your next gathering!

Tips for Making the Best Hibiscus Strawberry Lemonade Tea

Creating the Best Hibiscus Strawberry Lemonade Tea is a delightful experience, but a few tips can help you elevate your drink to perfection. Whether you’re a seasoned tea maker or a beginner, these suggestions will ensure your tea is refreshing and flavorful every time.

First, always start with fresh ingredients. Fresh strawberries and lemons will enhance the taste significantly. Look for ripe strawberries that are bright red and fragrant. For lemons, choose ones that feel heavy for their size, as they tend to be juicier.

Next, consider the water quality. Using filtered or spring water can make a noticeable difference in the flavor of your tea. Tap water may contain minerals or chlorine that can alter the taste, so opt for cleaner options when possible.

When it comes to steeping the hibiscus flowers, remember that patience is key. Steeping for the right amount of time—15 to 20 minutes—will yield the best flavor. If you’re unsure, start with a shorter steeping time and taste it. You can always steep longer if needed.

Adjusting sweetness is another important tip. Everyone has different preferences, so start with less sweetener and add more as needed. This way, you can find the perfect balance that suits your taste buds.

For a more intense flavor, try adding a pinch of salt. It may sound unusual, but a tiny bit of salt can enhance the sweetness and overall flavor profile of your tea.

Lastly, don’t forget to experiment! The Best Hibiscus Strawberry Lemonade Tea is versatile. Feel free to try different fruits, herbs, or sweeteners. Each variation can lead to a new favorite recipe. Enjoy the process and have fun creating your perfect refresher!

Breakdown of Time for Best Hibiscus Strawberry Lemonade Tea

Understanding the time needed to prepare the Best Hibiscus Strawberry Lemonade Tea can help you plan better. Whether you’re making it for a special occasion or just a refreshing drink at home, knowing the time breakdown is essential. Here’s how the timing works:

Prep Time for Best Hibiscus Strawberry Lemonade Tea

The prep time for the Best Hibiscus Strawberry Lemonade Tea is quite short. You’ll need about 15 minutes to gather and prepare your ingredients. This includes:

  • Hulling and slicing the strawberries.
  • Juicing the lemons.
  • Measuring out the dried hibiscus flowers and sweeteners.

In total, you can expect to spend around 15 minutes on prep work. This makes it easy to whip up this delightful drink, even on a busy day!

Cooking Time for Best Hibiscus Strawberry Lemonade Tea

The cooking time is primarily focused on steeping the hibiscus flowers. Once you bring the water to a boil, you’ll let the flowers steep for 15-20 minutes. This is the key step to developing the rich flavor of your tea. After steeping, you’ll need a few more minutes to mix in the other ingredients. Overall, the cooking time is about 20-25 minutes.

Total Time for Best Hibiscus Strawberry Lemonade Tea

When you combine the prep time and cooking time, the total time to make the Best Hibiscus Strawberry Lemonade Tea is approximately 35-40 minutes. However, keep in mind that you’ll want to chill the tea for at least 1 hour before serving. So, while the active preparation takes less than an hour, plan for a total of about 1 hour and 40 minutes if you include chilling time. This makes it perfect for preparing ahead of a gathering or a sunny afternoon!

Nutritional Information for Best Hibiscus Strawberry Lemonade Tea

Understanding the nutritional information of the Best Hibiscus Strawberry Lemonade Tea can help you make informed choices about your beverage. This refreshing drink not only tastes great but also offers some health benefits. Let’s break down the key nutritional components of this delightful refresher.

Calories in Best Hibiscus Strawberry Lemonade Tea

Each serving of the Best Hibiscus Strawberry Lemonade Tea contains approximately 80 calories. This makes it a low-calorie option compared to many sugary drinks. The calories primarily come from the natural sugars found in strawberries and the sweetener you choose. If you’re looking for a refreshing drink that won’t derail your diet, this tea is a fantastic choice!

Protein Content in Best Hibiscus Strawberry Lemonade Tea

When it comes to protein, the Best Hibiscus Strawberry Lemonade Tea is not a significant source. Each serving contains 0 grams of protein. While this drink is not meant to provide protein, it does offer a burst of flavor and hydration. If you’re looking to boost your protein intake, consider pairing this tea with a protein-rich snack, like nuts or yogurt, for a balanced treat.

Sodium Levels in Best Hibiscus Strawberry Lemonade Tea

The sodium content in the Best Hibiscus Strawberry Lemonade Tea is quite low, making it a heart-healthy option. Each serving contains less than 5 mg of sodium. This is excellent news for those watching their sodium intake. Staying hydrated with this refreshing tea can be a great way to enjoy a flavorful drink without the added salt.

Overall, the Best Hibiscus Strawberry Lemonade Tea is a nutritious and delicious choice. With its low calorie count, minimal sodium, and refreshing flavors, it’s perfect for any occasion. Enjoy this delightful drink while knowing you’re making a healthy choice!

FAQs about Best Hibiscus Strawberry Lemonade Tea

Can I make Best Hibiscus Strawberry Lemonade Tea ahead of time?

Absolutely! Making the Best Hibiscus Strawberry Lemonade Tea ahead of time is a great idea. In fact, preparing it a few hours in advance allows the flavors to meld beautifully. You can store it in the refrigerator for up to 3 days. Just remember to keep it covered to maintain freshness. When you’re ready to serve, pour it over ice and garnish as desired. This makes it perfect for parties or gatherings!

What are the health benefits of Best Hibiscus Strawberry Lemonade Tea?

The Best Hibiscus Strawberry Lemonade Tea is not only delicious but also packed with health benefits. Hibiscus flowers are rich in antioxidants, which can help support your immune system and lower blood pressure. Strawberries provide vitamin C, which is great for skin health and boosting immunity. Additionally, the lemon juice adds a dose of vitamin C and aids in digestion. Overall, this refreshing drink is a tasty way to hydrate while enjoying some health perks!

Can I use dried hibiscus flowers for Best Hibiscus Strawberry Lemonade Tea?

Yes, using dried hibiscus flowers is essential for making the Best Hibiscus Strawberry Lemonade Tea. They provide the signature tart flavor and vibrant color that make this drink special. Just ensure that the dried flowers are of high quality, preferably organic, to get the best taste and health benefits. You can find them at health food stores or online. Avoid using hibiscus tea bags, as they may contain additives that can alter the flavor.

How long can I store Best Hibiscus Strawberry Lemonade Tea?

You can store the Best Hibiscus Strawberry Lemonade Tea in the refrigerator for up to 3 days. Make sure to keep it in a sealed container to prevent any absorption of odors from other foods. If you notice any changes in color or smell, it’s best to discard it. For the freshest taste, enjoy it within the first couple of days. This way, you can savor the delightful flavors of hibiscus, strawberries, and lemon at their best!

Conclusion on Best Hibiscus Strawberry Lemonade Tea

In conclusion, the Best Hibiscus Strawberry Lemonade Tea is a delightful and refreshing beverage that brings together the vibrant flavors of hibiscus, strawberries, and lemon. This drink is not only visually appealing but also packed with health benefits, making it a perfect choice for any occasion. Whether you’re hosting a summer gathering, enjoying a picnic, or simply looking for a tasty way to stay hydrated, this tea is sure to impress.

With its easy preparation and customizable options, you can make this drink your own. Experiment with different fruits, sweeteners, and garnishes to create a version that suits your taste. The versatility of the Best Hibiscus Strawberry Lemonade Tea allows you to enjoy it in various ways, whether you prefer it still or sparkling, sweet or tart.

Moreover, the nutritional benefits of this tea make it a guilt-free indulgence. With low calories and minimal sodium, it’s a healthier alternative to sugary drinks. So, why not treat yourself and your loved ones to this refreshing drink? Gather your ingredients, follow the simple steps, and enjoy a glass of the Best Hibiscus Strawberry Lemonade Tea today!

As you sip on this delightful refresher, you’ll not only quench your thirst but also savor the wonderful flavors and health benefits it offers. Cheers to a delicious and healthy drink that’s perfect for any time of the year!

Blue Raspberry Lemonade is a refreshing summer drink.

Introduction to Blue Raspberry Lemonade

What is Blue Raspberry Lemonade?

Blue Raspberry Lemonade is a delightful twist on the classic lemonade. It combines the tartness of fresh lemons with the sweet, fruity flavor of blue raspberry syrup. This vibrant drink is not only refreshing but also visually appealing, making it a favorite for summer gatherings and parties. The bright blue color adds a fun element, especially for kids and those young at heart. With just a few simple ingredients, you can whip up this delicious beverage in no time!

The Popularity of Blue Raspberry Lemonade

Over the years, Blue Raspberry Lemonade has gained immense popularity. Its unique flavor profile and eye-catching color make it a standout choice at events. Many people enjoy it at fairs, festivals, and even backyard barbecues. The drink’s playful hue often sparks curiosity, inviting people to try it. Additionally, its versatility allows for various adaptations, such as sparkling versions or fruity additions. Whether served at a birthday party or a casual picnic, Blue Raspberry Lemonade is sure to impress guests of all ages!

Ingredients for Blue Raspberry Lemonade

To create the perfect Blue Raspberry Lemonade, you’ll need a few simple ingredients. Each component plays a vital role in achieving that delightful balance of sweet and tart flavors. Here’s what you’ll need:

  • 2 cups fresh lemon juice: This is about 10-12 lemons. Fresh juice gives the best flavor.
  • 1 cup blue raspberry syrup: This sweet syrup adds the signature blue color and fruity taste.
  • 4 cups cold water: Cold water helps to dilute the mixture and makes it refreshing.
  • 1 cup granulated sugar: Adjust this to your taste. You can add more or less depending on how sweet you like your lemonade.
  • Ice cubes: Essential for serving, ice keeps your drink chilled and refreshing.
  • Fresh lemon slices and blueberries: These are for garnish, adding a lovely touch to your presentation.

Gathering these ingredients is the first step to making your delicious Blue Raspberry Lemonade. Each item contributes to the overall taste and appearance, ensuring your drink is as delightful to look at as it is to sip!

Step-by-Step Preparation of Blue Raspberry Lemonade

Step 1: Gather Your Ingredients

Before you start making your Blue Raspberry Lemonade, it’s important to gather all your ingredients. This will make the process smoother and more enjoyable. Make sure you have:

  • 2 cups of fresh lemon juice
  • 1 cup of blue raspberry syrup
  • 4 cups of cold water
  • 1 cup of granulated sugar
  • Ice cubes
  • Fresh lemon slices and blueberries for garnish

Having everything ready will help you create this refreshing drink without any interruptions!

Step 2: Prepare the Blue Raspberry Syrup

If you’re using store-bought blue raspberry syrup, you can skip this step. However, if you want to make your own, it’s quite simple! Just combine equal parts of water and sugar in a saucepan. Heat it gently until the sugar dissolves. Then, add blue raspberry flavoring or puree. Stir well and let it cool. This homemade syrup will add a personal touch to your lemonade!

Step 3: Mix the Lemonade Base

Now, it’s time to create the lemonade base. In a large pitcher, pour in the fresh lemon juice. Next, add the blue raspberry syrup you prepared earlier. Stir the mixture well to combine the flavors. This step is crucial as it ensures that the sweet and tart elements blend perfectly!

Step 4: Combine the Syrup and Lemonade

After mixing the lemonade base, it’s time to sweeten it up! Add the granulated sugar to the pitcher. Stir until the sugar is fully dissolved. Then, pour in the cold water. Mix everything together until well combined. Taste your lemonade and adjust the sweetness if needed. You can add more sugar or syrup to suit your preference!

Step 5: Serve Over Ice

Once your Blue Raspberry Lemonade is ready, it’s time to serve! Fill glasses with ice cubes and pour the lemonade over the ice. For a beautiful presentation, garnish each glass with fresh lemon slices and a few blueberries. This not only looks great but also adds extra flavor!

Now, you’re all set to enjoy your refreshing Blue Raspberry Lemonade. Cheers to a delicious drink that’s perfect for any occasion!

Variations of Blue Raspberry Lemonade

Sparkling Blue Raspberry Lemonade

If you’re looking to add some fizz to your Blue Raspberry Lemonade, try making a sparkling version! This bubbly twist is perfect for parties or special occasions. To create it, simply substitute half of the cold water with club soda or sparkling water. This will give your drink a refreshing effervescence that enhances the overall experience. The bubbles not only make it fun to drink but also elevate the vibrant blue color, making it even more appealing. Serve it in tall glasses with ice, and watch your guests enjoy the delightful sparkle!

Blue Raspberry Lemonade with Fresh Fruits

For a fruity twist, consider adding fresh fruits to your Blue Raspberry Lemonade. You can mix in slices of strawberries, raspberries, or even chunks of watermelon. These fruits not only add flavor but also create a beautiful, colorful drink. To prepare, simply add the fresh fruits to the pitcher after mixing the lemonade base. Let it sit for a few minutes to allow the flavors to meld. This variation is not only delicious but also adds a healthy touch to your beverage. Plus, it makes for a stunning presentation when served!

Cooking Note for Blue Raspberry Lemonade

When preparing Blue Raspberry Lemonade, there are a few important cooking notes to keep in mind. These tips will help you achieve the best flavor and presentation for your refreshing drink.

First, always use fresh lemon juice. While bottled lemon juice is convenient, it often lacks the bright, zesty flavor that fresh lemons provide. Squeezing your lemons right before use ensures that your lemonade is bursting with freshness. If you have a juicer, it can make the process quicker and easier!

Next, consider the quality of your blue raspberry syrup. If you’re using store-bought syrup, check the ingredients. Opt for a brand that uses natural flavors and fewer artificial additives. If you decide to make your own syrup, remember that the balance of sweetness is key. Taste as you go to find the perfect mix of sweet and tart.

Additionally, chilling your lemonade is essential. After mixing, let it sit in the refrigerator for at least 30 minutes. This allows the flavors to meld together beautifully. A well-chilled drink is always more refreshing, especially on a hot day!

Lastly, presentation matters! When serving, use clear glasses to showcase the vibrant blue color of your lemonade. The garnishes of fresh lemon slices and blueberries not only enhance the look but also add a pop of color. This attention to detail will impress your guests and make your Blue Raspberry Lemonade even more enjoyable.

By following these cooking notes, you’ll create a delicious and visually stunning Blue Raspberry Lemonade that everyone will love!

Serving Suggestions for Blue Raspberry Lemonade

Garnishing Ideas

Garnishing your Blue Raspberry Lemonade can elevate its presentation and flavor. Here are some fun ideas to make your drink even more appealing:

  • Fresh Herbs: Add a sprig of mint or basil for a refreshing aroma and taste. These herbs complement the fruity flavors beautifully.
  • Fruit Skewers: Create colorful skewers with blueberries, raspberries, and lemon wedges. Place them on the rim of the glass for a fun touch.
  • Edible Flowers: For a fancy twist, consider adding edible flowers like pansies or violets. They add a pop of color and a touch of elegance.
  • Colored Sugar Rim: Dip the rim of your glasses in lemon juice, then in blue sugar for a sweet and colorful edge. This adds a fun surprise with every sip!

These garnishing ideas not only enhance the look of your Blue Raspberry Lemonade but also add extra flavors and textures. Get creative and have fun with your presentations!

Pairing with Snacks and Meals

Blue Raspberry Lemonade is a versatile drink that pairs well with various snacks and meals. Here are some delicious pairing suggestions:

  • Light Appetizers: Serve your lemonade with fresh vegetable platters, cheese boards, or bruschetta. The refreshing drink complements the light flavors perfectly.
  • Grilled Foods: Enjoy your Blue Raspberry Lemonade alongside grilled chicken, burgers, or hot dogs. The sweet and tart notes balance the savory flavors of grilled dishes.
  • Salads: Pair it with a fresh garden salad or a fruit salad. The lemonade enhances the freshness of the greens and fruits.
  • Desserts: This drink goes wonderfully with desserts like lemon bars, fruit tarts, or even cupcakes. The sweetness of the lemonade complements the sweetness of the treats.

By pairing your Blue Raspberry Lemonade with these snacks and meals, you create a delightful dining experience. Whether it’s a casual gathering or a special occasion, these suggestions will surely impress your guests!

Tips for Making the Perfect Blue Raspberry Lemonade

Creating the perfect Blue Raspberry Lemonade is all about attention to detail and a few helpful tips. Here are some suggestions to ensure your drink is as delicious as it is beautiful:

  • Use Fresh Ingredients: Always opt for fresh lemons when making your lemonade. Fresh lemon juice provides a bright, zesty flavor that bottled juice simply can’t match. The freshness of your ingredients will shine through in the final drink.
  • Balance Sweetness: Taste your lemonade as you mix. Everyone has different preferences for sweetness. Start with the recommended sugar amount, but feel free to adjust it to your liking. You can always add more sugar or syrup if needed!
  • Chill Before Serving: After mixing your Blue Raspberry Lemonade, let it chill in the refrigerator for at least 30 minutes. This allows the flavors to meld and ensures a refreshing drink when served over ice.
  • Experiment with Flavors: Don’t hesitate to get creative! Try adding other fruits or herbs to your lemonade. Fresh mint, strawberries, or even a splash of lime juice can enhance the flavor profile and make your drink unique.
  • Presentation Matters: Serve your Blue Raspberry Lemonade in clear glasses to showcase its vibrant color. Use garnishes like lemon slices, blueberries, or mint leaves to make it visually appealing. A beautiful presentation can elevate the drinking experience!
  • Make It Ahead: If you’re hosting a gathering, consider making your Blue Raspberry Lemonade ahead of time. This allows you to enjoy the party without worrying about mixing drinks on the spot. Just remember to keep it chilled!
  • Stay Hydrated: While Blue Raspberry Lemonade is a fun treat, remember to drink water too! It’s important to stay hydrated, especially on hot days or during outdoor events.

By following these tips, you’ll create a delightful Blue Raspberry Lemonade that will impress your family and friends. Enjoy the process and have fun experimenting with flavors!

Breakdown of Time for Blue Raspberry Lemonade

Prep Time

The prep time for making Blue Raspberry Lemonade is quite short. You’ll need about 15-20 minutes to gather your ingredients, squeeze the lemons, and mix everything together. This quick preparation makes it easy to whip up a refreshing drink in no time!

Cooking Time

There’s no actual cooking involved in this recipe, but you will need to allow some time for the flavors to meld. After mixing your lemonade, it’s best to refrigerate it for at least 30 minutes. This chilling time ensures that your drink is refreshingly cold and the flavors are well combined.

Total Time

In total, you can expect to spend about 45-50 minutes from start to finish. This includes the prep time and the chilling time. With such a short total time, you can easily make Blue Raspberry Lemonade for any occasion, whether it’s a casual get-together or a festive celebration!

Nutritional Information for Blue Raspberry Lemonade

Calories in Blue Raspberry Lemonade

When enjoying a refreshing glass of Blue Raspberry Lemonade, it’s good to know its calorie content. Each serving contains approximately 120 calories. This makes it a relatively light beverage choice, especially when compared to many sugary sodas or other sweet drinks. If you’re watching your calorie intake, you can adjust the amount of sugar or syrup to make it even lighter. Remember, moderation is key!

Protein Content

Blue Raspberry Lemonade is not a significant source of protein. Each serving contains 0 grams of protein. This drink is primarily made up of carbohydrates from the sugar and lemon juice. If you’re looking for a protein boost, consider pairing your lemonade with a protein-rich snack, like nuts or yogurt, to create a balanced treat!

Sodium Levels

In terms of sodium, Blue Raspberry Lemonade is quite low. Each serving typically contains less than 5 milligrams of sodium. This makes it a great option for those who are mindful of their sodium intake. Staying hydrated with a low-sodium drink like this can be refreshing, especially during hot summer days or after physical activities!

FAQs about Blue Raspberry Lemonade

Can I use fresh raspberries instead of syrup for Blue Raspberry Lemonade?

Yes, you can use fresh raspberries to create a more natural version of Blue Raspberry Lemonade! To do this, blend fresh raspberries with a bit of sugar and water to make a puree. Strain the mixture to remove the seeds, then mix it with your fresh lemon juice and cold water. This will give you a delicious, fruity drink without the need for syrup. Just keep in mind that the color may not be as vibrant as the syrup version, but the flavor will be just as delightful!

How can I make Blue Raspberry Lemonade less sweet?

If you prefer a less sweet Blue Raspberry Lemonade, there are a few easy ways to adjust the sweetness. Start by reducing the amount of granulated sugar you add. You can also use less blue raspberry syrup. Taste the mixture as you go, and add more lemon juice if you want to enhance the tartness. Another option is to use a sugar substitute or a natural sweetener like honey or agave syrup, which can provide sweetness without the extra calories.

Is Blue Raspberry Lemonade suitable for kids?

Absolutely! Blue Raspberry Lemonade is a fun and colorful drink that kids will love. The sweet and tangy flavors make it a perfect treat for parties, picnics, or hot summer days. Just be mindful of the sugar content, especially if you’re serving it to younger children. You can always adjust the sweetness to suit their taste. Plus, the vibrant blue color is sure to catch their attention!

Can I make Blue Raspberry Lemonade ahead of time?

Yes, you can make Blue Raspberry Lemonade ahead of time! In fact, preparing it in advance allows the flavors to meld together beautifully. Just mix all the ingredients and store the lemonade in the refrigerator. It’s best to serve it within 2-3 days for optimal freshness. If you’re making it for a party, consider preparing it the night before. Just remember to give it a good stir before serving, and add ice and garnishes right before you pour it into glasses!

Conclusion on Blue Raspberry Lemonade

In conclusion, Blue Raspberry Lemonade is a delightful and refreshing drink that brings a burst of flavor and color to any occasion. Its unique combination of tart lemon juice and sweet blue raspberry syrup creates a perfect balance that appeals to both kids and adults alike. Whether you’re hosting a summer barbecue, celebrating a birthday, or simply enjoying a sunny day, this vibrant beverage is sure to impress your guests.

With its easy preparation and versatile variations, Blue Raspberry Lemonade can be customized to suit your taste. From adding fresh fruits to creating a sparkling version, the possibilities are endless. Plus, with the tips and serving suggestions provided, you can elevate your drink to a whole new level of enjoyment.

So, gather your ingredients, follow the simple steps, and whip up a batch of this delightful drink. Don’t forget to share it with family and friends, as the joy of Blue Raspberry Lemonade is best enjoyed together. Cheers to refreshing moments and delicious sips!

Pineapple Pink Lemonade Soda is a refreshing delight!

Introduction to Pineapple Pink Lemonade Soda Recipe

Pineapple Pink Lemonade Soda Recipe is a delightful beverage that is perfect for any occasion. Whether you’re hosting a summer barbecue, enjoying a picnic, or simply relaxing at home, this drink will surely impress your guests and quench your thirst.

What Makes Pineapple Pink Lemonade Soda Unique?

What sets this drink apart is its vibrant color and unique flavor profile. The combination of fresh pineapple juice and freshly squeezed lemon juice creates a deliciously sweet and tart taste. The addition of sparkling water and club soda gives it a fizzy twist, making it a fun and bubbly drink. Plus, the beautiful pink hue makes it visually appealing, perfect for parties or special gatherings.

Another fantastic aspect of this recipe is its versatility. You can easily customize it to suit your taste preferences. Want to make it less sweet? Simply adjust the sugar. Looking for a tropical twist? Add coconut water! The possibilities are endless, making this drink a favorite among many.

In the following sections, we will guide you through the ingredients, preparation steps, and tips to make the best Pineapple Pink Lemonade Soda. Get ready to enjoy a refreshing drink that will brighten your day!

Ingredients for Pineapple Pink Lemonade Soda Recipe

Pineapple Pink Lemonade Soda Recipe, you’ll need a few simple ingredients. Each component plays a vital role in achieving that perfect balance of sweetness and tartness. Here’s what you’ll need:

  • 2 cups fresh pineapple juice
  • 1 cup freshly squeezed lemon juice (about 4-6 lemons)
  • 1 cup granulated sugar
  • 4 cups sparkling water (chilled)
  • 1 cup club soda (chilled)
  • Ice cubes
  • Fresh pineapple slices for garnish
  • Lemon wedges for garnish
  • Mint leaves for garnish (optional)

These ingredients come together to create a refreshing drink that is not only delicious but also visually stunning. The fresh pineapple juice provides a tropical sweetness, while the lemon juice adds a zesty kick. The sparkling water and club soda give it that bubbly texture, making it a fun drink for everyone.

Feel free to experiment with the ingredients! You can adjust the sugar to your liking or add other fruits for a unique twist. The key is to use fresh ingredients for the best flavor. Now that you have your ingredients ready, let’s move on to the preparation steps!

Step-by-Step Preparation of Pineapple Pink Lemonade Soda Recipe

Pineapple Pink Lemonade Soda Recipe. Follow these simple steps to create a refreshing drink that everyone will love!

Step 1: Gather Your Ingredients

Before you start, make sure you have everything you need. Gather your fresh pineapple juice, lemon juice, sugar, sparkling water, club soda, and garnishes. Having everything in one place will make the process smoother and more enjoyable. Plus, it’s always nice to see all those vibrant colors together!

Step 2: Prepare the Lemonade Base

In a large pitcher, combine the freshly squeezed lemon juice and granulated sugar. Stir well until the sugar is completely dissolved. This step is crucial because it ensures that your lemonade base is sweet and tangy. The fresh lemon juice will give your drink that zesty flavor, while the sugar balances it out perfectly.

Step 3: Mix in the Pineapple Juice

Once your lemonade base is ready, it’s time to add the star of the show: the fresh pineapple juice! Pour the pineapple juice into the pitcher and stir gently. This combination of juices creates a deliciously sweet and tart flavor that is simply irresistible. The vibrant yellow color will brighten up your pitcher, making it even more inviting.

Step 4: Combine with Soda

Pineapple Pink Lemonade Soda Recipe so special!

Step 5: Serve and Enjoy

Finally, it’s time to serve your delicious creation! Fill glasses with ice cubes and pour the pineapple pink lemonade soda over the ice. For a beautiful presentation, garnish each glass with fresh pineapple slices, lemon wedges, and mint leaves if desired. Serve immediately and enjoy the refreshing taste of summer in every sip!

With these easy steps, you’ll have a delightful drink that’s perfect for any occasion. Whether it’s a sunny day or a cozy evening, this Pineapple Pink Lemonade Soda will surely brighten your mood!

Variations of Pineapple Pink Lemonade Soda Recipe

Pineapple Pink Lemonade Soda Recipe is not only delicious on its own, but it also offers a fantastic base for creative variations. You can easily customize this drink to suit your taste or the occasion. Here are a couple of fun ideas to elevate your beverage experience!

Adding Fresh Fruits

One of the simplest ways to enhance your Pineapple Pink Lemonade Soda is by adding fresh fruits. You can include slices of strawberries, raspberries, or even blueberries. These fruits not only add a pop of color but also infuse the drink with additional flavors. Simply toss in a handful of your favorite berries into the pitcher before serving. The fruits will float beautifully, making your drink look even more appealing.

Another great option is to add citrus slices. Think oranges or limes! These fruits will complement the lemon and pineapple, creating a refreshing medley of flavors. Just remember to adjust the sugar if you add more fruits, as they can add their own natural sweetness.

Alcoholic Twist: Pineapple Pink Lemonade Cocktail

If you’re looking to turn your Pineapple Pink Lemonade Soda into a fun cocktail, it’s super easy! You can add a splash of your favorite spirit, like vodka or rum, to create a delightful adult beverage. For a tropical vibe, coconut rum works wonderfully with the pineapple flavor.

To make a Pineapple Pink Lemonade Cocktail, simply follow the original recipe and, before serving, stir in about 1 to 2 ounces of alcohol per glass. This addition will give your drink a little kick, perfect for summer parties or gatherings. Just be sure to enjoy responsibly!

These variations allow you to personalize your Pineapple Pink Lemonade Soda, making it a versatile drink for any occasion. Whether you prefer it fruity or with a splash of spirits, you can create a refreshing beverage that everyone will love!

Cooking Note for Pineapple Pink Lemonade Soda Recipe

Pineapple Pink Lemonade Soda Recipe, there are a few important cooking notes to keep in mind. These tips will help you achieve the best flavor and presentation for your refreshing drink.

First, always use fresh ingredients. Fresh pineapple juice and freshly squeezed lemon juice will provide the best taste. Store-bought juices often contain preservatives and added sugars that can alter the flavor. If you have a juicer, use it to extract juice from ripe pineapples and lemons for a vibrant and natural taste.

Next, chill your sparkling water and club soda before mixing. This step is crucial because it ensures that your drink remains refreshing and bubbly. Warm soda can lose its fizz quickly, making your drink less enjoyable. So, pop those bottles in the fridge ahead of time!

Additionally, consider the sweetness level. The recipe calls for one cup of granulated sugar, but you can adjust this based on your preference. If you prefer a less sweet drink, start with half the amount of sugar and taste as you go. You can always add more if needed.

Lastly, presentation matters! Use clear glasses to showcase the beautiful pink hue of your Pineapple Pink Lemonade Soda. Garnishing with fresh fruits and mint leaves not only enhances the visual appeal but also adds a delightful aroma. A well-presented drink can elevate any gathering, making it feel special.

By keeping these cooking notes in mind, you’ll create a Pineapple Pink Lemonade Soda that is not only delicious but also visually stunning. Enjoy the process and have fun experimenting with flavors!

Serving Suggestions for Pineapple Pink Lemonade Soda Recipe

Pineapple Pink Lemonade Soda Recipe, it’s time to think about how to serve it. This refreshing drink pairs beautifully with a variety of foods and occasions. Here are some perfect pairings to enhance your experience!

Perfect Pairings for Your Drink

Pineapple Pink Lemonade Soda complements light and flavorful dishes. Here are some tasty options:

  • Grilled Chicken or Fish: The zesty flavors of grilled chicken or fish work wonderfully with the sweet and tangy notes of your drink. The citrusy elements in both dishes will harmonize beautifully.
  • Fresh Salads: A crisp salad with mixed greens, fruits, and a light vinaigrette is a perfect match. The refreshing taste of the salad will enhance the overall experience of sipping your lemonade soda.
  • Fruit Platters: Serve a colorful fruit platter alongside your drink. Include tropical fruits like mango, kiwi, and berries. This will not only look appealing but also complement the flavors of your Pineapple Pink Lemonade Soda.
  • Light Appetizers: Think about serving light appetizers such as shrimp cocktails, bruschetta, or cheese platters. These bites will pair nicely with the fizzy drink, making for a delightful snack.
  • Summer Desserts: For dessert, consider light options like sorbet, fruit tarts, or coconut macaroons. These sweet treats will enhance the tropical vibe of your drink.

Whether you’re hosting a summer gathering or enjoying a quiet evening, these pairings will elevate your Pineapple Pink Lemonade Soda experience. Remember, the key is to keep the flavors light and refreshing, just like your drink!

Tips for Making the Best Pineapple Pink Lemonade Soda Recipe

Pineapple Pink Lemonade Soda Recipe is all about attention to detail. Here are some helpful tips to ensure your drink turns out delicious every time. With these suggestions, you’ll impress your friends and family with your refreshing creation!

First, always opt for fresh ingredients. Fresh pineapple and lemons will give your drink a vibrant flavor that bottled juices simply can’t match. If possible, choose ripe pineapples for the sweetest juice. The same goes for lemons; the juicier, the better!

Next, consider the temperature of your ingredients. Chilling your sparkling water and club soda beforehand is essential. This keeps your drink refreshing and bubbly. Warm soda can lose its fizz quickly, which can affect the overall enjoyment of your Pineapple Pink Lemonade Soda.

When it comes to sweetness, remember that you can always adjust the sugar. Start with less sugar if you prefer a lighter taste. You can always add more later. This way, you can cater to different preferences, especially if you’re serving guests.

For an extra burst of flavor, try adding herbs like basil or mint. These herbs can enhance the drink’s aroma and add a unique twist. Simply muddle a few leaves in the bottom of your glass before pouring in the soda for a refreshing herbal note.

Lastly, don’t forget about presentation! Use clear glasses to showcase the beautiful pink color of your drink. Garnishing with fresh fruit slices and mint leaves not only looks appealing but also adds a delightful aroma. A well-presented drink can elevate any occasion!

By following these tips, you’ll create a Pineapple Pink Lemonade Soda that is not only delicious but also visually stunning. Enjoy the process and have fun experimenting with flavors!

Breakdown of Time for Pineapple Pink Lemonade Soda Recipe

Pineapple Pink Lemonade Soda Recipe, it’s helpful to know how much time you’ll need. This way, you can plan accordingly and ensure everything is ready for your guests. Here’s a simple breakdown of the time involved in making this refreshing drink!

Prep Time

The prep time for this delightful drink is quite short. You’ll need about 15 minutes to gather your ingredients, juice the lemons, and mix everything together. This includes:

  • Juicing the lemons (about 5 minutes)
  • Measuring out the pineapple juice and sugar (5 minutes)
  • Mixing the ingredients in a pitcher (5 minutes)

Overall, you can expect to spend around 15 minutes on preparation.

Cooking Time

There’s no actual cooking involved in this recipe, as it’s all about mixing fresh ingredients. However, if you consider the time needed to chill your sparkling water and club soda, you might want to set aside an additional 30 minutes. This will ensure your drink is perfectly refreshing when served. So, while there’s no cooking time, chilling the sodas is essential!

Total Time

In total, you can expect to spend about 45 minutes from start to finish. This includes:

  • 15 minutes for prep
  • 30 minutes for chilling the sodas

Pineapple Pink Lemonade Soda ready to serve. It’s a quick and easy drink that’s perfect for any occasion!

Nutritional Information for Pineapple Pink Lemonade Soda Recipe

Pineapple Pink Lemonade Soda Recipe is essential, especially if you’re mindful of your diet. This refreshing drink not only tastes great but also provides some nutritional benefits. Here’s a breakdown of the key nutritional information per serving:

Calories

Each serving of the Pineapple Pink Lemonade Soda contains approximately 120 calories. This calorie count comes primarily from the natural sugars found in the fresh pineapple juice and the granulated sugar added to the recipe. While it’s a sweet treat, it’s still a relatively low-calorie option compared to many other beverages.

Protein

In terms of protein, this drink contains 0 grams per serving. The Pineapple Pink Lemonade Soda is not a source of protein, as it mainly consists of fruit juices and carbonated water. If you’re looking to boost your protein intake, consider pairing this drink with a protein-rich snack or meal.

Sodium

The sodium content in this refreshing drink is minimal, making it a great choice for those watching their sodium intake. Typically, the sodium level is around 5 mg per serving, depending on the brand of sparkling water and club soda used. This low sodium level helps keep the drink light and refreshing, perfect for hot summer days.

Pineapple Pink Lemonade Soda Recipe is a delightful beverage that can be enjoyed without guilt. With its vibrant flavors and refreshing qualities, it’s a perfect addition to any gathering or a simple treat for yourself. Enjoy this drink while being mindful of your nutritional choices!

FAQs about Pineapple Pink Lemonade Soda Recipe

Can I make Pineapple Pink Lemonade Soda ahead of time?

Pineapple Pink Lemonade Soda Recipe ahead of time! However, it’s best to mix the juices and sugar in advance and chill them in the refrigerator. Just remember to add the sparkling water and club soda right before serving. This way, your drink will stay fizzy and refreshing. If you mix everything too early, the carbonation will go flat, and you’ll miss out on that delightful fizz!

What can I substitute for pineapple juice in the recipe?

If you don’t have fresh pineapple juice, there are a few alternatives you can use. You can substitute it with canned pineapple juice, but make sure it’s 100% juice without added sugars. Another option is to use mango juice for a different tropical flavor. Just keep in mind that the taste will change slightly, but it can still be delicious!

Is Pineapple Pink Lemonade Soda suitable for kids?

Pineapple Pink Lemonade Soda Recipe is a fun and fruity drink that kids will love. It’s made with fresh juices and is free from artificial ingredients, making it a healthier choice compared to many sodas. Just be mindful of the sugar content, and feel free to adjust it to suit your child’s taste. They can enjoy this refreshing drink at parties, picnics, or even as a special treat at home!

How can I make Pineapple Pink Lemonade Soda less sweet?

Pineapple Pink Lemonade Soda Recipe. Start by reducing the amount of granulated sugar. You can use half a cup instead of a full cup and taste as you go. Additionally, consider using a sugar alternative like stevia or erythritol for a lower-calorie option. Another tip is to add more lemon juice, which will enhance the tartness and balance out the sweetness. This way, you can enjoy a refreshing drink that suits your taste!

Conclusion on Pineapple Pink Lemonade Soda Recipe

Pineapple Pink Lemonade Soda Recipe is a delightful and refreshing drink that brings together the best of tropical flavors. With its vibrant color and fizzy texture, it’s perfect for any occasion, whether it’s a summer barbecue, a picnic in the park, or simply a relaxing day at home. The combination of fresh pineapple juice and zesty lemon juice creates a unique flavor that is both sweet and tangy, making it a favorite among many.

Moreover, this recipe is incredibly versatile. You can easily customize it to suit your taste preferences by adding fresh fruits or even turning it into a cocktail for adult gatherings. The tips and variations provided ensure that you can make this drink your own, whether you prefer it sweet, tart, or with a hint of tropical flair.

As you prepare your Pineapple Pink Lemonade Soda, remember to use fresh ingredients for the best flavor. The joy of making this drink lies not only in its taste but also in the experience of creating something special for yourself and your loved ones. So, gather your ingredients, follow the simple steps, and enjoy the refreshing taste of summer in every sip!

We hope this recipe inspires you to whip up your own batch of Pineapple Pink Lemonade Soda. Cheers to delicious drinks and wonderful memories!