Cinnamon Roll Cake Recipe is a must-try dessert!

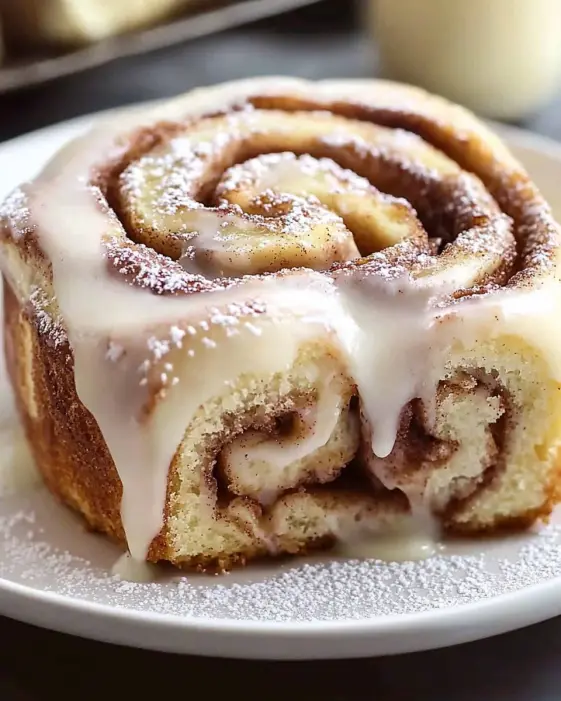
Introduction to the Cinnamon Roll Cake Recipe

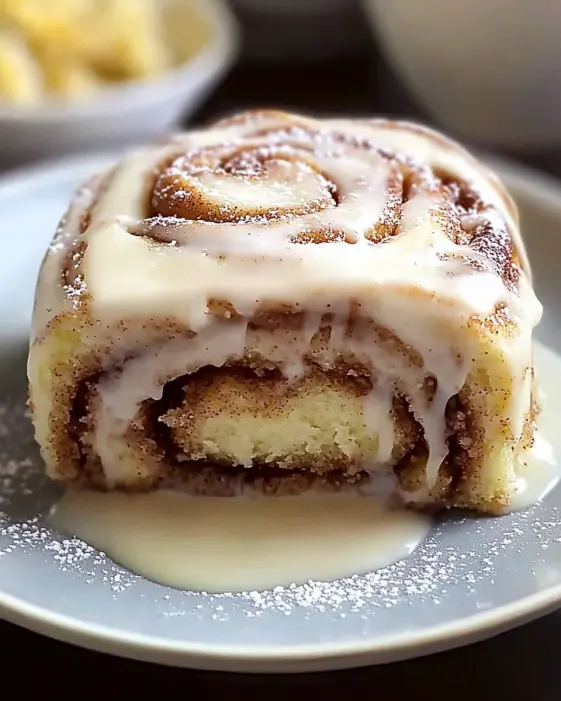
Welcome to the delightful world of the Cinnamon Roll Cake Recipe! This cake is a perfect blend of soft, fluffy cake and the warm, comforting flavors of cinnamon. Imagine biting into a slice of cake that tastes just like a cinnamon roll, but without the fuss of rolling and shaping dough. It’s a treat that brings joy to any occasion, whether it’s a cozy family gathering or a festive celebration.

What Makes Cinnamon Roll Cake Special?

What sets this cake apart is its unique combination of textures and flavors. The cake itself is moist and tender, while the cinnamon filling adds a sweet, spicy swirl that makes each bite a delightful surprise. The icing on top not only enhances the flavor but also adds a beautiful finish to the cake. Plus, it’s incredibly easy to make! You don’t need any special skills or equipment, just a few simple ingredients and a little bit of love.

This Cinnamon Roll Cake Recipe is also versatile. You can customize it to suit your taste. Want a nutty crunch? Toss in some chopped walnuts or pecans. Looking for a different flavor? Experiment with various extracts in the icing. The possibilities are endless! This cake is not just a dessert; it’s a canvas for your creativity.

So, whether you’re a seasoned baker or a beginner, this recipe is sure to impress. Let’s dive into the ingredients and get started on creating this scrumptious Cinnamon Roll Cake!

Ingredients for the Cinnamon Roll Cake Recipe

To create the perfect Cinnamon Roll Cake, you’ll need a selection of simple yet essential ingredients. Each component plays a vital role in achieving that delightful flavor and texture. Here’s what you’ll need:

  • 2 cups all-purpose flour
  • 1 cup granulated sugar
  • 1 tablespoon baking powder
  • 1/2 teaspoon salt
  • 1/2 cup unsalted butter, melted
  • 1 cup milk
  • 2 large eggs
  • 1 teaspoon vanilla extract

For the cinnamon filling, gather the following:

  • 1/2 cup brown sugar, packed
  • 1 tablespoon ground cinnamon
  • 1/4 cup unsalted butter, softened

And for the icing, you will need:

  • 1 cup powdered sugar
  • 2 tablespoons milk
  • 1/2 teaspoon vanilla extract

These ingredients come together to create a cake that is not only delicious but also visually appealing. The combination of sweet and spicy flavors, along with the creamy icing, makes this cake a true delight. Now that you have your ingredients ready, let’s move on to the step-by-step preparation!

Step-by-Step Preparation of the Cinnamon Roll Cake Recipe

Now that you have all your ingredients ready, it’s time to dive into the fun part: preparing your Cinnamon Roll Cake! Follow these simple steps to create a cake that will impress everyone. Let’s get started!

Step 1: Preparing the Batter

First, preheat your oven to 350°F (175°C). This ensures that your cake bakes evenly. While the oven warms up, grab a large mixing bowl. Combine the all-purpose flour, granulated sugar, baking powder, and salt. Whisk these dry ingredients together until they are well mixed. This step is crucial as it helps distribute the baking powder evenly throughout the flour.

Next, in a separate bowl, whisk together the melted butter, milk, eggs, and vanilla extract. Make sure everything is combined well. Now, slowly pour this wet mixture into the dry ingredients. Stir gently until just combined. Remember, it’s okay if there are a few lumps. Overmixing can lead to a dense cake, and we want it to be light and fluffy!

Step 2: Making the Cinnamon Filling

Now, let’s create that delicious cinnamon filling! In a small bowl, mix the packed brown sugar and ground cinnamon together. Add the softened butter to the mixture and stir until it becomes smooth and creamy. This filling is what gives the cake its signature swirl and sweet flavor. Make sure it’s well combined, as this will enhance the taste of your cake.

Step 3: Assembling the Cake

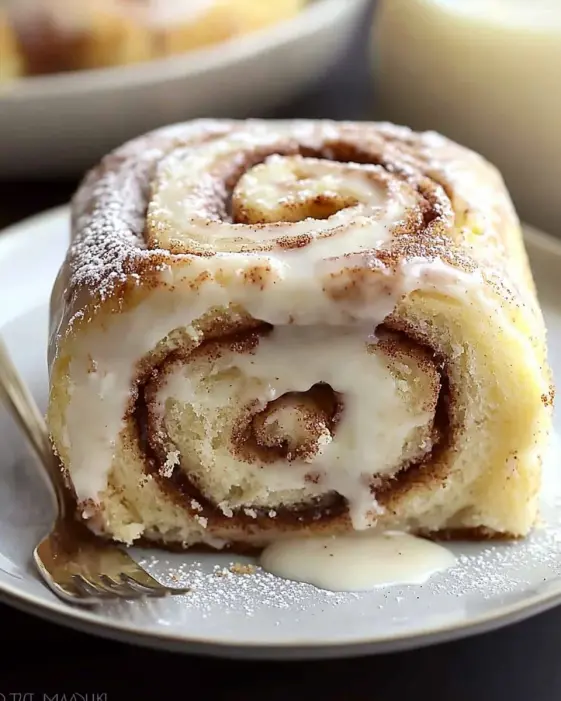
It’s time to assemble your cake! Start by greasing a 9×13-inch baking dish. Pour half of the prepared batter into the dish, spreading it evenly. Then, sprinkle half of the cinnamon filling over the batter. This will create a lovely layer of flavor. Carefully pour the remaining batter on top, ensuring it covers the filling. Finally, sprinkle the rest of the cinnamon filling over the top.

To create that beautiful marbled effect, take a knife and gently swirl the filling into the batter. Be careful not to mix it too much; you want to see those lovely swirls when it bakes!

Step 4: Baking the Cinnamon Roll Cake

Now, place your assembled cake in the preheated oven. Bake for 25-30 minutes. To check if it’s done, insert a toothpick into the center. If it comes out clean, your cake is ready! If not, give it a few more minutes. Once baked, remove it from the oven and let it cool in the pan for about 10 minutes.

Step 5: Preparing the Glaze

While your cake is cooling, let’s prepare the icing. In a medium bowl, whisk together the powdered sugar, milk, and vanilla extract. Keep mixing until the icing is smooth and creamy. This glaze will add a sweet finish to your cake. Once the cake has cooled slightly, drizzle the icing over the top, allowing it to flow down the sides. It’s the perfect finishing touch!

And there you have it! Your Cinnamon Roll Cake is now ready to be enjoyed. The delightful aroma and beautiful presentation will surely make it a hit at any gathering.

Variation of the Cinnamon Roll Cake Recipe

One of the best things about the Cinnamon Roll Cake Recipe is its versatility. You can easily switch up the ingredients to create different flavors and textures. Let’s explore some alternative ingredients that can elevate your cake experience!

Alternative Ingredients for Different Flavors

Want to add a twist to your Cinnamon Roll Cake? Here are some fun ideas:

  • Chocolate Chip Delight: Fold in 1 cup of chocolate chips into the batter for a rich, chocolatey flavor.
  • Fruit Infusion: Add 1 cup of fresh berries, like blueberries or raspberries, to the batter for a fruity burst.
  • Nutty Goodness: Mix in 1/2 cup of chopped walnuts or pecans for a delightful crunch.
  • Maple Twist: Substitute maple extract for vanilla in the batter and icing for a warm, maple flavor.

These variations not only enhance the taste but also make your cake unique. Feel free to experiment and find your favorite combination!

Gluten-Free and Vegan Options

If you have dietary restrictions, don’t worry! You can still enjoy this delicious cake. Here’s how to make gluten-free and vegan versions:

  • Gluten-Free: Replace all-purpose flour with a gluten-free flour blend. Make sure it contains xanthan gum for the best texture.
  • Vegan: Use plant-based milk, such as almond or soy milk, instead of regular milk. Replace eggs with flax eggs (1 tablespoon of ground flaxseed mixed with 2.5 tablespoons of water for each egg).
  • Butter Substitute: Use coconut oil or vegan butter in place of unsalted butter for a dairy-free option.

These alternatives allow everyone to enjoy the delightful flavors of the Cinnamon Roll Cake, regardless of their dietary needs. So, go ahead and try these variations to make your cake even more special!

Cooking Note for the Cinnamon Roll Cake Recipe

When it comes to baking, a few key tips can make all the difference in achieving the perfect Cinnamon Roll Cake. Here are some important cooking notes to keep in mind:

  • Ingredient Temperature: Ensure that your ingredients are at room temperature. This includes eggs, milk, and butter. Room temperature ingredients mix more easily, resulting in a smoother batter.
  • Measuring Flour: When measuring flour, avoid packing it into the cup. Instead, spoon the flour into the measuring cup and level it off with a knife. This prevents using too much flour, which can lead to a dense cake.
  • Swirling Technique: When swirling the cinnamon filling into the batter, use a gentle hand. A few light swirls will create beautiful marbling without overmixing the batter.
  • Oven Calibration: Every oven is different. If you find that your cakes often bake unevenly, consider using an oven thermometer to check the accuracy of your oven’s temperature.
  • Cooling Time: Allow the cake to cool in the pan for about 10 minutes before transferring it to a wire rack. This helps prevent it from breaking apart and ensures a better texture.
  • Storage Tips: If you have leftovers, store the cake in an airtight container at room temperature for up to three days. For longer storage, consider refrigerating it or freezing individual slices.

By following these cooking notes, you’ll set yourself up for success in creating a delicious Cinnamon Roll Cake. Happy baking!

Serving Suggestions for the Cinnamon Roll Cake Recipe

Now that your Cinnamon Roll Cake is baked and beautifully iced, it’s time to think about how to serve it! This cake is not only delicious on its own but also pairs wonderfully with various accompaniments. Here are some delightful serving suggestions to enhance your cake experience:

Best Pairings with Cinnamon Roll Cake

  • Coffee: A warm cup of coffee is a classic pairing. The rich flavors of coffee complement the sweet and spicy notes of the cake perfectly. Whether you prefer a bold espresso or a creamy latte, coffee is a great choice.
  • Tea: If you’re a tea lover, consider serving your cake with a nice cup of herbal or chai tea. The aromatic spices in chai tea will enhance the cinnamon flavor of the cake.
  • Fresh Fruit: Serve slices of fresh fruit, like strawberries or bananas, alongside the cake. The natural sweetness and freshness of the fruit balance the richness of the cake.
  • Ice Cream: For a decadent treat, add a scoop of vanilla or cinnamon ice cream on the side. The cold ice cream melts slightly on the warm cake, creating a delightful contrast.
  • Whipped Cream: A dollop of whipped cream can add a light and airy touch to each slice. You can even sprinkle a bit of cinnamon on top for an extra flavor boost.
  • Maple Syrup: Drizzling a little maple syrup over the cake can enhance its sweetness and add a lovely flavor. This is especially delightful if you’ve used maple extract in your icing!

These serving suggestions will elevate your Cinnamon Roll Cake experience, making it even more enjoyable for you and your guests. Whether it’s for breakfast, dessert, or a special occasion, this cake is sure to impress!

Tips for Perfecting Your Cinnamon Roll Cake Recipe

Creating the perfect Cinnamon Roll Cake is all about attention to detail and a few helpful tips. With these suggestions, you can ensure that your cake turns out moist, flavorful, and visually stunning every time. Let’s explore some essential tips to elevate your baking game!

  • Use Fresh Ingredients: Always check the freshness of your baking ingredients. Expired baking powder can lead to a flat cake. Fresh eggs and dairy also contribute to a better texture and flavor.
  • Don’t Overmix: When combining the wet and dry ingredients, mix just until combined. Overmixing can make the cake tough. A few lumps are perfectly fine!
  • Swirl with Care: When swirling the cinnamon filling, use a gentle hand. Too much mixing can blend the filling into the batter, losing that beautiful marbled effect.
  • Check for Doneness: Every oven is different, so keep an eye on your cake as it bakes. Use a toothpick to check for doneness. If it comes out clean, your cake is ready!
  • Cool Properly: Allow the cake to cool in the pan for about 10 minutes before transferring it to a wire rack. This helps maintain its shape and prevents it from becoming soggy.
  • Experiment with Flavors: Don’t hesitate to try different extracts or spices in your batter and icing. Almond extract or nutmeg can add a unique twist to your cake.
  • Store Correctly: To keep your cake fresh, store it in an airtight container. If you plan to keep it for more than a few days, consider freezing individual slices for later enjoyment.
  • Garnish for Presentation: A sprinkle of cinnamon or a few chopped nuts on top of the icing can enhance the visual appeal of your cake. It makes for a lovely presentation!

By following these tips, you’ll be well on your way to mastering the art of baking a delicious Cinnamon Roll Cake. Each tip helps ensure that your cake is not only tasty but also a feast for the eyes. Happy baking!

Breakdown of Time for the Cinnamon Roll Cake Recipe

Understanding the time needed for each step in the Cinnamon Roll Cake Recipe can help you plan your baking session better. Here’s a detailed breakdown of the time required for preparation, cooking, and the total time to enjoy this delightful cake!

Prep Time

The prep time for the Cinnamon Roll Cake is approximately 20-25 minutes. This includes gathering your ingredients, measuring them out, and mixing the batter and cinnamon filling. Taking your time during this stage ensures that everything is well-prepared for the baking process. Remember, a little patience goes a long way in baking!

Cooking Time

Once your cake is assembled, it will need to bake for about 25-30 minutes. Keep an eye on it as it bakes, and use a toothpick to check for doneness. If it comes out clean, your cake is ready to be taken out of the oven. This cooking time is crucial for achieving that perfect fluffy texture!

Total Time

In total, you can expect to spend around 50-55 minutes from start to finish. This includes both the prep and cooking times. After baking, allow the cake to cool for about 10 minutes before icing it. This cooling period is essential for the icing to set beautifully on the warm cake.

With this time breakdown, you can easily fit the Cinnamon Roll Cake into your schedule. Whether it’s for a special occasion or just a sweet treat for yourself, this cake is worth every minute spent in the kitchen!

Nutritional Information for the Cinnamon Roll Cake Recipe

Understanding the nutritional content of your Cinnamon Roll Cake is important, especially if you’re mindful of your diet. This cake is not only delicious but also provides a satisfying treat. Here’s a breakdown of the key nutritional information per serving:

Calories

250 calories. This makes it a great option for a sweet treat without going overboard on calories. Enjoying a slice with your morning coffee or as an afternoon snack can be a delightful way to indulge without guilt.

Protein

3 grams. While this isn’t a high-protein dessert, it does contribute to your daily intake. Pairing the cake with a protein-rich beverage, like a glass of milk or a protein shake, can help balance your meal.

Sodium

200 milligrams. This is relatively moderate, making it a suitable option for most diets. However, if you’re watching your sodium intake, consider enjoying this cake in moderation.

Overall, the Cinnamon Roll Cake is a delightful treat that can fit into a balanced diet. With its comforting flavors and satisfying texture, it’s a dessert that can be enjoyed on special occasions or as a sweet indulgence any day of the week. Just remember to savor each bite!

FAQs about the Cinnamon Roll Cake Recipe

Can I make the Cinnamon Roll Cake ahead of time?

Absolutely! You can prepare the Cinnamon Roll Cake ahead of time. In fact, it often tastes even better the next day as the flavors meld together. To do this, bake the cake and let it cool completely. Once cooled, cover it tightly with plastic wrap or aluminum foil. Store it at room temperature for up to two days. If you want to keep it longer, consider refrigerating it. Just remember to add the icing right before serving for the best presentation!

How do I store leftover Cinnamon Roll Cake?

Storing leftover Cinnamon Roll Cake is simple! Place any uneaten slices in an airtight container. This helps keep the cake moist and fresh. You can store it at room temperature for up to three days. If you live in a warmer climate, it’s best to refrigerate the cake to prevent spoilage. Just make sure to let it come to room temperature before serving for the best taste!

Can I freeze the Cinnamon Roll Cake?

Yes, you can freeze the Cinnamon Roll Cake! To freeze, first, let the cake cool completely. Then, wrap it tightly in plastic wrap and aluminum foil to prevent freezer burn. You can freeze it for up to three months. When you’re ready to enjoy it, simply thaw it in the refrigerator overnight. For best results, add the icing after thawing to keep it fresh and delicious!

What can I substitute for buttermilk in the recipe?

If you don’t have buttermilk on hand, don’t worry! You can easily make a substitute. For every cup of buttermilk needed, mix 1 tablespoon of white vinegar or lemon juice with enough milk to make 1 cup. Let it sit for about 5 minutes until it thickens slightly. This homemade buttermilk works perfectly in the Cinnamon Roll Cake Recipe, giving it that lovely tangy flavor!

Conclusion on the Cinnamon Roll Cake Recipe

In conclusion, the Cinnamon Roll Cake Recipe is a delightful treat that combines the best of both worlds: the soft, fluffy texture of cake and the warm, comforting flavors of cinnamon rolls. This cake is not only easy to make but also offers endless possibilities for customization. Whether you choose to add nuts, fruits, or even chocolate, each variation brings a unique twist to this classic dessert.

As you’ve seen, the preparation is straightforward, making it accessible for bakers of all skill levels. With just a few simple steps, you can create a cake that is sure to impress family and friends. The delightful aroma that fills your kitchen while it bakes is just the icing on the cake—literally!

Moreover, the nutritional information shows that this cake can fit into a balanced diet, allowing you to indulge without guilt. Whether you serve it for breakfast, dessert, or a special occasion, the Cinnamon Roll Cake is bound to be a hit.

So, gather your ingredients, roll up your sleeves, and get ready to bake this scrumptious Cinnamon Roll Cake. Enjoy every bite, and don’t forget to share your creations with loved ones. Happy baking!

Air Fryer Breakfast Burrito make every meal delightful.

Introduction to the Air Fryer Breakfast Burrito Recipe

Air Fryer Breakfast Burrito Recipe is just what you need! This recipe combines the convenience of an air fryer with the hearty goodness of a breakfast burrito. It’s perfect for busy mornings or lazy weekends. With just a few simple ingredients, you can whip up a satisfying meal that will keep you energized throughout the day.

Why Choose an Air Fryer for Breakfast Burritos?

Using an air fryer for your breakfast burritos offers several benefits. First, it cooks food quickly and evenly, giving you a crispy exterior without the need for excessive oil. This means you can enjoy a healthier version of your favorite breakfast treat. Plus, air fryers are easy to use and clean, making them a great addition to any kitchen.

Another reason to choose an air fryer is the versatility it provides. You can customize your burrito with various fillings, from eggs and cheese to veggies and meats. The air fryer locks in flavors while ensuring that every bite is delicious. So, whether you’re in a rush or want to savor a leisurely breakfast, the air fryer makes it simple and enjoyable.

In the following sections, we will guide you through the ingredients, preparation steps, and tips for making the perfect air fryer breakfast burrito. Get ready to impress your family and friends with this delightful dish!

Ingredients for the Air Fryer Breakfast Burrito Recipe

Air Fryer Breakfast Burrito Recipe, you’ll need a few key ingredients. These items are easy to find and can be adjusted based on your personal preferences. Here’s what you’ll need:

  • Tortillas: 4 large flour or whole wheat tortillas work best for wrapping your burrito.
  • Eggs: 4 large eggs, beaten. They provide a fluffy and protein-packed filling.
  • Cheese: 1 cup shredded cheese, such as cheddar or Monterey Jack, for that melty goodness.
  • Vegetables: 1 cup diced bell peppers and onions. Feel free to add spinach or tomatoes for extra flavor.
  • Meat (optional): 1 cup cooked and crumbled sausage or bacon, if you prefer a meatier burrito.
  • Seasonings: Salt, pepper, and a pinch of paprika or cumin for added taste.
  • Sour cream or salsa: For serving, these add a delicious finishing touch.

Air Fryer Breakfast Burrito Recipe is its flexibility!

Now that you have your ingredients ready, let’s move on to the next step: preparing the filling for your burrito.

Step-by-Step Preparation of the Air Fryer Breakfast Burrito Recipe

Step 1: Preparing the Filling

First things first, let’s get that filling ready! Start by heating a non-stick skillet over medium heat. Add a splash of oil if you like, then toss in the diced bell peppers and onions. Sauté them for about 3-4 minutes until they’re soft and fragrant. Next, pour in the beaten eggs. Stir gently until the eggs are fully cooked, which should take about 2-3 minutes. Don’t forget to season with salt, pepper, and your choice of paprika or cumin for that extra kick!

If you’re adding meat, now’s the time to mix in the cooked sausage or bacon. Stir everything together until well combined. Once your filling is ready, remove it from the heat and let it cool slightly. This will make it easier to handle when you start assembling your burrito.

Step 2: Assembling the Burrito

Now that your filling is prepped, it’s time to assemble the burrito! Take one tortilla and lay it flat on a clean surface. Spoon a generous amount of the filling onto the center of the tortilla. Be careful not to overfill, as this can make rolling tricky. Sprinkle a handful of shredded cheese on top of the filling for that melty goodness.

To roll the burrito, fold in the sides of the tortilla first, then roll it up from the bottom. Make sure to tuck in the filling as you go to keep everything secure. Repeat this process for the remaining tortillas and filling. You should have four deliciously stuffed burritos ready to go!

Step 3: Air Frying the Burrito

It’s time to cook those burritos! Preheat your air fryer to 375°F (190°C). Lightly spray the air fryer basket with cooking spray to prevent sticking. Place the burritos seam-side down in the basket, making sure they’re not overcrowded. You may need to cook them in batches, depending on the size of your air fryer.

Air fry the burritos for about 8-10 minutes, flipping them halfway through. This will ensure they get crispy on all sides. Keep an eye on them to avoid overcooking. Once they’re golden brown and crispy, they’re ready to be taken out!

Step 4: Serving the Burrito

Finally, it’s time to enjoy your delicious air fryer breakfast burritos! Carefully remove them from the air fryer and let them cool for a minute. Serve them warm with a dollop of sour cream or a side of salsa for dipping. You can also garnish with fresh herbs like cilantro or green onions for an extra pop of flavor.

Air Fryer Breakfast Burrito Recipe any time you like!

Variations of the Air Fryer Breakfast Burrito Recipe

Vegetarian Options

Air Fryer Breakfast Burrito Recipe can easily be adapted to suit your vegetarian needs. Start by loading up on colorful vegetables! You can use ingredients like zucchini, mushrooms, or even sweet potatoes. These veggies add great flavor and texture.

For protein, consider adding black beans or chickpeas. They’re not only nutritious but also filling. You can also mix in some avocado for creaminess. Don’t forget to sprinkle in your favorite spices, like cumin or chili powder, to enhance the taste. This vegetarian version is just as satisfying and delicious!

Meat Lover’s Twist

Air Fryer Breakfast Burrito Recipe is perfect. Start with the classic filling of eggs and cheese, then add your choice of meats. You can use crumbled sausage, crispy bacon, or even diced ham. Each option brings its own unique flavor to the burrito.

To elevate the taste, consider adding a blend of cheeses, like pepper jack for a little heat. You can also throw in some cooked potatoes for extra substance. This version is sure to satisfy any meat lover’s appetite!

Spicy Additions

Air Fryer Breakfast Burrito Recipe with some fiery ingredients. Start by adding jalapeños or diced green chilies to your filling. These will give your burrito a nice kick! You can also use spicy salsa or hot sauce when serving.

For an extra layer of flavor, consider mixing in some chipotle seasoning or cayenne pepper. This will not only add heat but also a smoky flavor that pairs wonderfully with the other ingredients. With these spicy additions, your breakfast burrito will be a flavor explosion!

Air Fryer Breakfast Burrito Recipe can be tailored to suit everyone’s palate. Enjoy experimenting with different ingredients and flavors!

Cooking Note for the Air Fryer Breakfast Burrito Recipe

Air Fryer Breakfast Burrito Recipe, there are a few important cooking notes to keep in mind. These tips will help ensure that your burritos turn out perfectly every time.

First, always preheat your air fryer. This step is crucial as it helps achieve that crispy texture we all love. Preheating allows the burritos to cook evenly and prevents them from becoming soggy. A quick 3-5 minute preheat at 375°F (190°C) will do the trick!

Next, consider the size of your burritos. If they are too large, they may not cook through properly. Aim for a size that fits comfortably in your air fryer basket. If you find that your burritos are too big, you can always cut them in half before air frying. This will help them cook more evenly and allow for a quicker cooking time.

Additionally, don’t overcrowd the air fryer basket. Give each burrito enough space to allow hot air to circulate around them. This ensures that they cook evenly and get that desired crispiness. If you have multiple burritos, it’s better to cook them in batches.

Lastly, keep an eye on the cooking time. Air fryers can vary in temperature and cooking efficiency. Check your burritos a minute or two before the suggested cooking time. This way, you can avoid overcooking and ensure they are golden brown and delicious.

Air Fryer Breakfast Burrito Recipe. Enjoy the process and the delightful results!

Serving Suggestions for the Air Fryer Breakfast Burrito Recipe

Air Fryer Breakfast Burrito Recipe, it’s time to think about how to serve it! Presentation can elevate your meal, making it even more enjoyable. Here are some tasty serving suggestions to enhance your breakfast experience:

  • Sour Cream and Salsa: A classic pairing! Serve your burritos with a dollop of sour cream and a side of salsa. This adds a creamy and tangy flavor that complements the burrito perfectly.
  • Fresh Herbs: Garnish your burritos with fresh herbs like cilantro or parsley. This not only adds a pop of color but also a burst of freshness that brightens the dish.
  • Avocado Slices: Creamy avocado slices or guacamole can take your burrito to the next level. The richness of avocado balances the flavors beautifully.
  • Hot Sauce: For those who love a kick, offer a variety of hot sauces on the side. This allows everyone to customize their burrito to their spice preference.
  • Fruit Salad: Pair your burrito with a refreshing fruit salad. The sweetness of fruits like berries, melons, or citrus can provide a nice contrast to the savory burrito.
  • Breakfast Potatoes: Serve your burrito alongside crispy breakfast potatoes or hash browns. This hearty addition makes for a filling meal that’s perfect for brunch.

Air Fryer Breakfast Burrito Recipe but also make your meal more visually appealing. Feel free to mix and match based on your preferences and what you have on hand. Enjoy your delicious creation with family and friends, and watch them rave about your cooking skills!

Tips for Perfecting Your Air Fryer Breakfast Burrito Recipe

Air Fryer Breakfast Burrito Recipe, a few handy tips can go a long way. These suggestions will help you achieve the perfect balance of flavors and textures, ensuring your burritos are a hit every time.

First, always use fresh ingredients. Fresh vegetables and eggs will enhance the flavor of your burrito. If possible, choose organic produce for a healthier option. Fresh ingredients not only taste better but also provide more nutrients.

Next, don’t skip the seasoning! A pinch of salt and pepper is essential, but you can also experiment with herbs and spices. Try adding garlic powder, onion powder, or even a dash of chili powder for an extra kick. Seasoning your filling well will elevate the overall taste of your burrito.

Another tip is to let your filling cool slightly before assembling. This prevents the tortillas from becoming soggy. If the filling is too hot, it can also make rolling the burrito difficult. Allowing it to cool for a few minutes will make the process easier and more enjoyable.

When it comes to tortillas, choose the right type. Flour tortillas are soft and pliable, making them great for burritos. However, whole wheat tortillas add a nutty flavor and extra fiber. Experiment with different types to find your favorite!

Additionally, consider adding a layer of cheese inside the burrito. This not only adds flavor but also helps hold the filling together. A gooey cheese layer can make each bite even more satisfying.

Lastly, don’t forget to check your air fryer’s manual for specific cooking times and temperatures. Each air fryer can vary slightly, so adjusting the time based on your model will help you achieve the best results. If you find that your burritos are not cooking evenly, try flipping them more frequently during the cooking process.

Air Fryer Breakfast Burrito Recipe. Enjoy the delicious results and share your creations with family and friends!

Breakdown of Time for the Air Fryer Breakfast Burrito Recipe

Prep Time

Air Fryer Breakfast Burrito Recipe is quick and easy! The prep time usually takes about 15-20 minutes. This includes gathering your ingredients, chopping vegetables, and beating the eggs. If you’re adding meat, you might need a few extra minutes to cook it beforehand. Overall, you can have everything prepped and ready to go in no time!

Cooking Time

Once your burritos are assembled, the cooking time is quite short. Air frying them typically takes around 8-10 minutes. Make sure to flip them halfway through to ensure they cook evenly. Keep an eye on them as they cook, so they reach that perfect golden brown color. This quick cooking time makes the air fryer a fantastic option for busy mornings!

Total Time

Air Fryer Breakfast Burrito Recipe. This includes both prep and cooking time. With such a quick turnaround, you can enjoy a delicious breakfast without spending hours in the kitchen. It’s perfect for those hectic mornings when you need something tasty and filling!

Nutritional Information for the Air Fryer Breakfast Burrito Recipe

Calories

Air Fryer Breakfast Burrito Recipe, knowing the calorie content can help you make informed choices. On average, one burrito contains about 300-400 calories, depending on the ingredients you use. If you opt for whole wheat tortillas and load up on veggies, you can keep the calorie count on the lower side. Remember, the key is to balance your ingredients to fit your dietary needs while still enjoying a hearty meal!

Protein

Protein is an essential part of any breakfast, and your air fryer burrito delivers! Each burrito typically contains around 15-20 grams of protein. This comes from the eggs, cheese, and any added meats like sausage or bacon. If you’re looking to boost the protein content, consider adding more eggs or including beans in your filling. This will not only enhance the protein level but also keep you feeling full longer!

Sodium

Air Fryer Breakfast Burrito Recipe while keeping your sodium levels in check!

FAQs about the Air Fryer Breakfast Burrito Recipe

Can I make the Air Fryer Breakfast Burrito Recipe ahead of time?

Air Fryer Breakfast Burrito Recipe ahead of time. Simply cook the filling, let it cool, and store it in an airtight container in the fridge. When you’re ready to enjoy your burritos, just assemble and air fry them. This makes for a quick breakfast option on busy mornings!

What can I substitute for tortillas in the Air Fryer Breakfast Burrito Recipe?

Air Fryer Breakfast Burrito Recipe a unique twist!

How do I store leftovers from the Air Fryer Breakfast Burrito Recipe?

Storing leftovers is easy! Place any uneaten burritos in an airtight container and refrigerate them. They can last for up to 3 days in the fridge. When you’re ready to eat, simply reheat them in the air fryer for a few minutes until warmed through. This way, you can enjoy your delicious burritos again!

Can I freeze the Air Fryer Breakfast Burrito Recipe?

Air Fryer Breakfast Burrito Recipe! After assembling the burritos, wrap each one tightly in plastic wrap or aluminum foil. Place them in a freezer-safe bag or container. They can be stored in the freezer for up to 2 months. When you’re ready to eat, thaw them in the fridge overnight and then air fry until heated through. It’s a great way to have a quick breakfast ready at any time!

Conclusion on the Air Fryer Breakfast Burrito Recipe

Air Fryer Breakfast Burrito Recipe is a fantastic way to start your day with a delicious and satisfying meal. With its crispy exterior and flavorful filling, this recipe is sure to become a favorite in your household. The air fryer not only makes cooking easier but also healthier, allowing you to enjoy your breakfast burrito without the guilt of excess oil.

Whether you prefer a classic version, a vegetarian option, or a spicy twist, the versatility of this recipe means you can customize it to suit your taste. Plus, with the ability to prepare the filling ahead of time or even freeze the burritos, you can enjoy a quick and nutritious breakfast whenever you need it.

Air Fryer Breakfast Burrito Recipe!

Happy cooking, and enjoy every bite of your homemade breakfast burritos!

Apple Cranberry Walnut Salad Recipe for Autumn Delight

Introduction to Apple Cranberry Walnut Salad Recipe

Welcome to the delightful world of the Apple Cranberry Walnut Salad Recipe! This salad is not just a dish; it’s a celebration of autumn flavors. With its vibrant colors and fresh ingredients, it brings a burst of joy to any table. Whether you’re hosting a family gathering or simply enjoying a quiet dinner, this salad is sure to impress.

The Perfect Blend of Flavors and Textures

Imagine biting into a crisp apple, followed by the sweet tang of dried cranberries. The crunch of walnuts adds a satisfying texture, while the creamy goat cheese (if you choose to include it) brings a rich depth to the dish. Each ingredient plays a role, creating a harmonious blend that dances on your taste buds.

The combination of sweet and savory flavors makes this salad versatile. It pairs beautifully with roasted meats or can stand alone as a light lunch. Plus, it’s packed with nutrients, making it a healthy choice for any meal. So, let’s dive into the ingredients and preparation of this delightful Apple Cranberry Walnut Salad!

Ingredients for Apple Cranberry Walnut Salad Recipe

To create the perfect Apple Cranberry Walnut Salad, you’ll need a selection of fresh and flavorful ingredients. Each component adds its unique taste and texture, making the salad a delightful experience. Here’s what you’ll need:

  • 4 cups of baby kale and mixed greens
  • 1 crisp apple, diced (Fuji or Gala work best)
  • 1/2 cup of sweetened dried cranberries
  • 1/2 cup of toasted walnuts, roughly chopped
  • 1/4 cup of goat cheese, crumbled (optional)
  • 1/4 cup of thinly sliced shallots
  • 1/4 cup of apple cider vinaigrette

These ingredients come together to create a salad that is not only visually appealing but also packed with nutrients. The baby kale and mixed greens provide a fresh base, while the diced apple adds a sweet crunch. Sweetened dried cranberries bring a burst of flavor, and toasted walnuts contribute a satisfying crunch. If you choose to add goat cheese, it will enhance the creaminess of the salad. Shallots add a mild onion flavor, and the apple cider vinaigrette ties everything together with a tangy finish.

Feel free to adjust the quantities based on your preferences or the number of servings you need. Now that you have your ingredients ready, let’s move on to the step-by-step preparation of this delicious Apple Cranberry Walnut Salad!

Step-by-Step Preparation of Apple Cranberry Walnut Salad Recipe

Now that you have gathered all your ingredients, it’s time to bring this Apple Cranberry Walnut Salad to life! Follow these simple steps to create a delicious and visually appealing dish that everyone will love.

Step 1: Preparing the Ingredients

Start by washing your greens thoroughly. Rinse the baby kale and mixed greens under cold water. This step is crucial to remove any dirt or grit. After washing, gently pat them dry with a clean kitchen towel or use a salad spinner to remove excess water.

Next, take your crisp apple. Dice it into bite-sized pieces, ensuring you remove the core. If you prefer, you can leave the skin on for added nutrients and color. Then, measure out your sweetened dried cranberries and toasted walnuts. If your walnuts aren’t toasted, you can quickly toast them in a dry skillet over medium heat for about 5 minutes, stirring frequently to avoid burning.

Step 2: Mixing the Salad Components

In a large mixing bowl, combine the prepared baby kale and mixed greens. Add the diced apple, sweetened dried cranberries, and toasted walnuts. If you’re using goat cheese, crumble it over the top. The cheese adds a creamy texture that complements the other ingredients beautifully.

Next, add the thinly sliced shallots. They provide a mild onion flavor that enhances the overall taste of the salad. Gently toss the ingredients together using tongs or two large forks. This ensures that everything is evenly distributed and ready for the dressing.

Step 3: Making the Dressing

For this salad, we’ll use a simple apple cider vinaigrette. If you have store-bought vinaigrette, feel free to use that. However, making your own is easy and adds a personal touch. In a small bowl, whisk together 1/4 cup of apple cider vinegar, 1/2 cup of olive oil, a teaspoon of honey, and a pinch of salt and pepper. Adjust the seasoning to your taste.

Once your dressing is ready, drizzle it over the salad mixture. The vinaigrette will enhance the flavors and bring everything together.

Step 4: Combining Everything Together

Now it’s time to combine everything! Pour the dressing over the salad mixture and toss gently again. Make sure all the ingredients are well coated with the dressing. This step is essential for ensuring that every bite is flavorful.

For the best flavor experience, let the salad sit for about 10 minutes before serving. This allows the flavors to meld together beautifully. If you have time, refrigerate it for a short while to enhance the taste even more.

And there you have it! Your Apple Cranberry Walnut Salad is ready to be enjoyed. It’s a perfect dish for any occasion, bringing a taste of autumn to your table.

Variation of Apple Cranberry Walnut Salad Recipe

While the classic Apple Cranberry Walnut Salad is delicious on its own, there are many ways to switch things up! By incorporating alternative ingredients or seasonal variations, you can create a unique salad that suits your taste and the occasion. Let’s explore some exciting options!

Alternative Ingredients to Consider

Sometimes, you might want to experiment with different flavors or textures. Here are a few alternative ingredients you can try:

  • Different Nuts: Instead of walnuts, consider using sliced almonds or pecans. Each nut brings its own flavor and crunch.
  • Cheese Options: If goat cheese isn’t your favorite, try feta or blue cheese for a different taste profile.
  • Fruits: Swap out apples for pears or add slices of fresh oranges for a citrusy twist.
  • Greens: Mix in arugula or spinach for a different base. These greens can add a peppery flavor or a softer texture.
  • Dried Fruits: Instead of cranberries, use dried cherries or apricots for a sweet surprise.

These alternatives can help you customize your salad to match your preferences or what you have on hand. Feel free to mix and match until you find your perfect combination!

Seasonal Variations for Different Occasions

Seasonal ingredients can elevate your Apple Cranberry Walnut Salad, making it perfect for any occasion. Here are some ideas:

  • Winter: Add roasted butternut squash or sweet potatoes for warmth and heartiness. These ingredients pair wonderfully with the salad’s flavors.
  • Spring: Incorporate fresh herbs like mint or basil. They add a refreshing touch that brightens the dish.
  • Summer: Toss in some grilled chicken or shrimp for a protein-packed meal. You can also add fresh berries for a burst of sweetness.
  • Fall: Include roasted Brussels sprouts or pumpkin seeds to enhance the autumn theme. These ingredients complement the apple and cranberry beautifully.

By adjusting the ingredients based on the season, you can keep your Apple Cranberry Walnut Salad exciting and fresh all year round. Enjoy experimenting with these variations!

Cooking Note for Apple Cranberry Walnut Salad Recipe

When preparing the Apple Cranberry Walnut Salad, a few cooking notes can enhance your experience and ensure the best results. Here are some helpful tips to keep in mind:

  • Fresh Ingredients: Always opt for the freshest ingredients available. Fresh greens, crisp apples, and high-quality nuts will significantly improve the flavor and texture of your salad.
  • Toasting Nuts: Toasting walnuts or any nuts you choose to use can elevate their flavor. Simply place them in a dry skillet over medium heat for a few minutes, stirring frequently until they are golden and fragrant. This step adds a delightful crunch and depth to your salad.
  • Chill Your Greens: For an extra refreshing salad, consider chilling your greens before mixing. Cold greens can enhance the overall crispness of the salad, making each bite more enjoyable.
  • Adjusting Sweetness: If you prefer a sweeter salad, feel free to add a touch more honey to your dressing or include additional dried cranberries. On the other hand, if you like a tangier flavor, increase the apple cider vinegar slightly.
  • Serving Fresh: This salad is best served fresh. If you plan to make it ahead of time, consider keeping the dressing separate until just before serving. This will prevent the greens from wilting and ensure a crisp texture.

By following these cooking notes, you can create a delicious Apple Cranberry Walnut Salad that is not only visually appealing but also bursting with flavor. Enjoy the process and feel free to make it your own!

Serving Suggestions for Apple Cranberry Walnut Salad Recipe

Now that you’ve prepared your delicious Apple Cranberry Walnut Salad, it’s time to think about how to serve it! This salad is versatile and can complement a variety of main dishes. Plus, there are creative ways to present it that will impress your guests. Let’s explore some ideal pairings and serving ideas!

Ideal Pairings with Main Dishes

The Apple Cranberry Walnut Salad is a fantastic side dish that pairs well with many main courses. Here are some delicious options:

  • Roasted Chicken: The savory flavors of roasted chicken complement the sweetness of the salad perfectly. The crispy skin and juicy meat create a delightful contrast.
  • Grilled Salmon: The rich taste of grilled salmon pairs beautifully with the fresh ingredients in the salad. The combination of flavors is both healthy and satisfying.
  • Pork Tenderloin: A herb-crusted pork tenderloin works wonderfully with the salad. The sweetness of the apples and cranberries balances the savory pork.
  • Vegetarian Quiche: For a lighter option, serve the salad alongside a slice of vegetarian quiche. The creamy filling and flaky crust make a delightful match.
  • Stuffed Bell Peppers: If you’re looking for a hearty vegetarian dish, stuffed bell peppers filled with grains and vegetables pair nicely with the salad.

These pairings not only enhance the meal but also create a colorful and appetizing presentation on your table. Feel free to mix and match based on your preferences!

Creative Ways to Serve the Salad

Presentation can elevate your Apple Cranberry Walnut Salad from simple to stunning. Here are some creative serving ideas:

  • Individual Bowls: Serve the salad in individual bowls for a personal touch. This makes it easy for guests to enjoy their own portion.
  • Layered in a Jar: For a fun twist, layer the salad ingredients in a mason jar. Start with the dressing at the bottom, followed by shallots, nuts, cheese, and greens. This makes for a beautiful presentation and is perfect for picnics!
  • On a Platter: Arrange the salad on a large platter for a family-style serving. This encourages sharing and creates a warm, inviting atmosphere.
  • With Edible Flowers: Add a few edible flowers on top for a pop of color. This not only looks beautiful but also adds a unique touch to your salad.
  • As a Wrap: For a fun twist, use the salad as a filling for wraps. Use large lettuce leaves or whole-grain tortillas to create a fresh and portable meal.

These creative serving suggestions will make your Apple Cranberry Walnut Salad a standout dish at any gathering. Enjoy the compliments as your guests savor every bite!

Tips for Perfecting Your Apple Cranberry Walnut Salad Recipe

To make your Apple Cranberry Walnut Salad truly shine, consider these helpful tips. They will guide you in selecting the best ingredients and ensuring your salad remains fresh and delicious. Let’s dive into some essential advice!

Choosing the Right Apples

The type of apple you choose can significantly impact the flavor and texture of your salad. Here are some tips for selecting the best apples:

  • Sweetness: Opt for sweet varieties like Fuji or Gala. Their natural sweetness pairs beautifully with the tartness of cranberries.
  • Crispness: Look for firm apples that have a nice crunch. Crisp apples add a refreshing bite to your salad.
  • Color: Choose apples with vibrant colors. Brightly colored apples not only look appealing but also indicate freshness.
  • Seasonality: Try to buy apples that are in season. Seasonal apples are often fresher and more flavorful.

By selecting the right apples, you can enhance the overall taste of your Apple Cranberry Walnut Salad. Remember, the apple is a star ingredient, so choose wisely!

Storing Leftovers Properly

If you have any leftover salad, proper storage is key to maintaining its freshness. Here are some tips for storing your Apple Cranberry Walnut Salad:

  • Keep the Dressing Separate: If possible, store the dressing in a separate container. This prevents the greens from wilting and keeps them crisp.
  • Use an Airtight Container: Place the salad in an airtight container to keep it fresh. This helps to prevent moisture from getting in.
  • Refrigerate Promptly: Store the salad in the refrigerator as soon as you’re done eating. This helps to maintain its freshness and flavor.
  • Consume Within a Few Days: For the best taste, try to eat the leftover salad within 2-3 days. The longer it sits, the more the ingredients may lose their texture and flavor.

By following these storage tips, you can enjoy your Apple Cranberry Walnut Salad even after the initial serving. It’s a great way to savor the delicious flavors for a few more days!

Breakdown of Time for Apple Cranberry Walnut Salad Recipe

Understanding the time needed to prepare your Apple Cranberry Walnut Salad can help you plan your meal better. Here’s a simple breakdown of the time required for each step of the process.

Prep Time

The prep time for this salad is quite minimal. You’ll need about 15 minutes to wash, chop, and prepare all your ingredients. This includes:

  • Washing the greens and drying them
  • Dicing the apple
  • Measuring out the cranberries and walnuts
  • Slicing the shallots

With everything ready, you’ll be set to mix your salad in no time!

Cooking Time

While there’s no actual cooking involved in this salad, you may want to toast your walnuts for added flavor. This step takes about 5 minutes. Simply place the walnuts in a dry skillet over medium heat, stirring frequently until they are golden and fragrant. If you skip this step, your total time will remain the same.

Total Time

In total, you can expect to spend around 20 minutes preparing your Apple Cranberry Walnut Salad. This includes both the prep time and the optional toasting of the walnuts. It’s a quick and easy dish that’s perfect for busy weeknights or last-minute gatherings!

Nutritional Information for Apple Cranberry Walnut Salad Recipe

Understanding the nutritional content of your Apple Cranberry Walnut Salad is essential for making informed dietary choices. This salad is not only delicious but also packed with nutrients that can contribute to a balanced diet. Let’s break down the key nutritional components of this delightful dish.

Calories

Each serving of the Apple Cranberry Walnut Salad contains approximately 230 calories. This makes it a light yet satisfying option for lunch or as a side dish during dinner. The combination of fresh greens, fruits, and nuts provides a wholesome meal without excessive calories.

Protein

In terms of protein, this salad offers about 5 grams per serving. While it may not be a high-protein dish, the addition of nuts and optional goat cheese can enhance the protein content. If you’re looking for a protein boost, consider adding grilled chicken, shrimp, or roasted chickpeas to your salad.

Sodium

The sodium content in this salad is relatively low, making it a heart-healthy choice. Each serving contains around 150 milligrams of sodium, depending on the dressing used. To keep the sodium levels in check, opt for low-sodium versions of dressings or make your own at home.

Overall, the Apple Cranberry Walnut Salad is a nutritious option that can fit well into various dietary plans. It’s a great way to enjoy fresh produce while keeping your meals balanced and healthy!

FAQs about Apple Cranberry Walnut Salad Recipe

Can I make the salad ahead of time?

Yes, you can prepare the Apple Cranberry Walnut Salad ahead of time! However, it’s best to keep the dressing separate until you’re ready to serve. This prevents the greens from wilting and keeps them crisp. You can chop the ingredients and store them in an airtight container in the refrigerator. Just remember to add the dressing right before serving for the freshest taste!

What type of apples are best for this salad?

For the best flavor and texture, choose sweet and crisp apples like Fuji or Gala. These varieties add a delightful crunch and a natural sweetness that pairs well with the tangy cranberries. You can also experiment with Honeycrisp or Granny Smith apples for a different taste. Just make sure they are fresh and firm for the best results!

How can I make this salad vegan?

Making the Apple Cranberry Walnut Salad vegan is easy! Simply omit the goat cheese or replace it with a plant-based cheese alternative. You can also enhance the salad with additional protein by adding roasted chickpeas or sunflower seeds. The apple cider vinaigrette is typically vegan, but double-check the ingredients if you’re using a store-bought version.

Can I add other nuts or seeds to the salad?

Absolutely! Feel free to get creative with your nuts and seeds. Almonds, pecans, or even pumpkin seeds can add a delightful crunch and flavor to your salad. Each type of nut or seed brings its unique taste, so mix and match based on your preferences. Just remember to toast them for an extra burst of flavor!

Conclusion on Apple Cranberry Walnut Salad Recipe

In conclusion, the Apple Cranberry Walnut Salad is a delightful dish that captures the essence of autumn in every bite. With its vibrant colors and a perfect blend of flavors, this salad is not only visually appealing but also packed with nutrients. Whether you’re serving it at a family gathering, a holiday feast, or enjoying it as a light lunch, it’s sure to impress everyone at the table.

This recipe is versatile, allowing you to customize it with various ingredients based on your preferences or seasonal availability. From swapping nuts to adding different fruits, the possibilities are endless. Plus, the simple preparation makes it an ideal choice for busy weeknights or last-minute gatherings.

Remember, the key to a great salad lies in using fresh ingredients and allowing the flavors to meld together. By following the tips and variations provided, you can create a unique version of the Apple Cranberry Walnut Salad that suits your taste perfectly.

So, gather your ingredients, follow the steps, and enjoy the delightful experience of making and sharing this wonderful salad. It’s a dish that not only nourishes the body but also warms the heart. Happy cooking!

Crispy Honey Chicken is a must-try for dinner!

Introduction to Crispy Honey Chicken Recipe

What Makes Crispy Honey Chicken Special?

Crispy Honey Chicken is a delightful dish that combines the best of both worlds: crunchiness and sweetness. The chicken is coated in a crispy panko breadcrumb layer, which gives it a satisfying crunch with every bite. The sweet honey sauce adds a rich flavor that perfectly complements the savory chicken. This dish is not only delicious but also easy to prepare, making it a favorite for family dinners and gatherings. The balance of textures and flavors makes it a standout recipe that everyone will love.

A Brief History of Honey Chicken Dishes

Honey chicken dishes have a rich history, often found in various cuisines around the world. The use of honey as a sweetener dates back thousands of years. In Asian cuisine, honey chicken is particularly popular, often featuring in Chinese takeout menus. The dish typically combines tender chicken with a sweet and savory sauce, showcasing the versatility of honey. Over time, many variations have emerged, with each culture adding its unique twist. Today, the Crispy Honey Chicken Recipe stands out for its crunchy texture and delightful flavor, making it a beloved choice for many home cooks.

Ingredients for Crispy Honey Chicken Recipe

Essential Ingredients

To create the perfect Crispy Honey Chicken, you’ll need a few essential ingredients. These items are key to achieving that delightful crunch and sweet flavor. Here’s what you’ll need:

  • 2 pounds boneless, skinless chicken thighs: Diced into small chunks for easy cooking and maximum flavor absorption.
  • 1 cup all-purpose flour: This helps create a base coating that sticks to the chicken.
  • 1 teaspoon garlic powder: Adds a savory depth to the dish.
  • 1 teaspoon onion powder: Enhances the overall flavor profile.
  • 1 teaspoon salt: Essential for seasoning the chicken.
  • 1/2 teaspoon black pepper: Provides a subtle kick.
  • 2 large eggs: Whisked to create a binding layer for the breadcrumbs.
  • 1 cup panko breadcrumbs: These give the chicken its signature crunch.
  • 1/2 cup honey: The star ingredient that brings sweetness to the dish.
  • 1/4 cup soy sauce: Adds a savory, umami flavor.
  • 1 tablespoon rice vinegar: Balances the sweetness with a hint of acidity.
  • 1 tablespoon vegetable oil: Used for frying the chicken.
  • 1 teaspoon sesame oil: Adds a nutty flavor that enhances the dish.
  • 1 tablespoon sliced green onions: For garnish, adding a fresh touch.

Optional Ingredients for Extra Flavor

If you want to elevate your Crispy Honey Chicken even further, consider these optional ingredients:

  • Crushed cornflakes: Mixing these with panko can add an extra crunch.
  • Sriracha or red pepper flakes: For those who enjoy a spicy kick, adding these to the honey sauce can create a delightful contrast.
  • Sesame seeds: Sprinkling these on top can enhance the visual appeal and add a nutty flavor.
  • Vegetables: Adding bell peppers or broccoli can make the dish more colorful and nutritious.

With these ingredients, you’re well on your way to making a delicious Crispy Honey Chicken that will impress your family and friends!

Step-by-Step Preparation of Crispy Honey Chicken Recipe

Step 1: Marinating the Chicken

To start, marinating the chicken is a great way to infuse flavor. Although this recipe doesn’t require a long marination time, you can enhance the taste by letting the chicken sit in a mixture of soy sauce and a bit of honey for about 15-30 minutes. This step helps the chicken absorb the flavors, making it even more delicious. If you have time, feel free to marinate it longer in the refrigerator. Just remember to cover it well!

Step 2: Preparing the Coating

Next, it’s time to prepare the coating. In a large bowl, mix the all-purpose flour, garlic powder, onion powder, salt, and black pepper. This mixture will create a flavorful base for the chicken. In another bowl, whisk the eggs until they are fluffy. Finally, pour the panko breadcrumbs into a third bowl. This three-step coating process is essential for achieving that crispy texture. Make sure to have everything ready before you start coating the chicken!

Step 3: Frying the Chicken

Now, let’s fry the chicken! Heat the vegetable oil and sesame oil in a large skillet over medium heat. Once the oil is shimmering, it’s time to add the chicken. Take each piece, dredge it in the flour mixture, dip it in the eggs, and roll it in the panko breadcrumbs. This ensures an even coating. Fry the chicken in batches for about 5-7 minutes on each side. You want them to turn a beautiful golden brown and become crispy. After frying, transfer the chicken to a plate lined with paper towels to absorb any excess oil.

Step 4: Making the Honey Sauce

While the chicken is frying, you can prepare the honey sauce. In a small saucepan, combine the honey, soy sauce, and rice vinegar. Warm the mixture over low heat, stirring occasionally. This will help the sauce thicken slightly and blend the flavors together. Keep an eye on it to ensure it doesn’t boil. Once it’s ready, remove it from the heat and set it aside.

Step 5: Combining Chicken and Sauce

Finally, it’s time to bring everything together! Once the chicken is crispy and the sauce is ready, you can either drizzle the sauce over the chicken or serve it on the side for dipping. If you choose to drizzle, make sure each piece is well-coated. Finish off with a sprinkle of sliced green onions for a fresh touch. Your Crispy Honey Chicken is now ready to be enjoyed!

Variations of Crispy Honey Chicken Recipe

Spicy Crispy Honey Chicken

If you love a bit of heat, then Spicy Crispy Honey Chicken is the perfect variation for you! To add a spicy kick, simply mix sriracha or red pepper flakes into the honey sauce. Start by preparing the honey sauce as usual, but before you warm it, stir in about one to two tablespoons of sriracha, depending on your heat preference. This will create a sweet and spicy flavor that pairs beautifully with the crispy chicken. You can also sprinkle some crushed red pepper flakes over the chicken just before serving for an extra burst of flavor. This variation is sure to satisfy those who enjoy a little spice in their meals!

Crispy Honey Chicken with Vegetables

For a more nutritious twist, consider adding vegetables to your Crispy Honey Chicken. This variation not only enhances the dish’s color but also boosts its nutritional value. You can sauté bell peppers, broccoli, or snap peas in the same skillet after frying the chicken. Just toss them in the hot oil for a few minutes until they are tender yet crisp. Once the vegetables are cooked, you can either mix them with the chicken and sauce or serve them on the side. This way, you get a delightful combination of crispy chicken and fresh veggies, making it a well-rounded meal that everyone will enjoy!

Cooking Note for Crispy Honey Chicken Recipe

Tips for Achieving the Perfect Crispiness

Getting that perfect crispy texture for your Crispy Honey Chicken is essential. Here are some helpful tips to ensure your chicken turns out just right:

  • Use Panko Breadcrumbs: Panko breadcrumbs are lighter and airier than regular breadcrumbs. This helps create a crunchier coating. Make sure to use them for the best results!
  • Don’t Overcrowd the Pan: When frying, avoid adding too many chicken pieces at once. Overcrowding can lower the oil temperature, leading to soggy chicken. Fry in batches to maintain that crispy texture.
  • Maintain Oil Temperature: Keep an eye on the oil temperature. If it’s too low, the chicken will absorb more oil and become greasy. If it’s too high, the coating may burn before the chicken cooks through. Aim for a medium heat.
  • Let the Chicken Rest: After frying, let the chicken rest on a plate lined with paper towels. This helps absorb excess oil and keeps the coating crispy.
  • Serve Immediately: Crispy chicken is best enjoyed fresh. Serve it right after cooking to maintain that delightful crunch. If you need to hold it for a bit, keep it in a warm oven (around 200°F) to keep it warm without steaming.

By following these tips, you’ll be well on your way to making Crispy Honey Chicken that’s not only delicious but also perfectly crispy. Enjoy the delightful crunch with every bite!

Serving Suggestions for Crispy Honey Chicken Recipe

Best Side Dishes to Pair

When it comes to serving your Crispy Honey Chicken, choosing the right side dishes can elevate the meal. Here are some fantastic options that complement the sweet and savory flavors of the chicken:

  • Steamed Rice: A classic choice, steamed white or brown rice absorbs the delicious honey sauce, making every bite satisfying.
  • Vegetable Stir-Fry: A colorful mix of bell peppers, broccoli, and snap peas adds nutrition and crunch. The freshness of the veggies balances the sweetness of the chicken.
  • Coleslaw: A tangy coleslaw provides a refreshing contrast to the crispy chicken. The crunch of the cabbage pairs well with the dish’s texture.
  • Garlic Noodles: These flavorful noodles are a great side that can soak up the honey sauce, adding a delightful twist to your meal.
  • Mashed Potatoes: Creamy mashed potatoes can be a comforting side that complements the crispy chicken perfectly.

These side dishes not only enhance the meal but also create a well-rounded dining experience that everyone will enjoy!

Presentation Ideas for Serving

Presentation plays a key role in making your Crispy Honey Chicken look as good as it tastes. Here are some creative ideas to serve your dish:

  • Platter Style: Arrange the crispy chicken bites on a large platter. Drizzle the honey sauce over the top and garnish with sliced green onions and sesame seeds for a beautiful finish.
  • Individual Plates: Serve each portion on individual plates with a small bowl of honey sauce on the side for dipping. This adds a personal touch to each serving.
  • Garnish with Fresh Herbs: Adding fresh herbs like cilantro or parsley can brighten up the dish and add a pop of color.
  • Use Colorful Bowls: Serve the side dishes in colorful bowls to create a vibrant table setting. This makes the meal visually appealing and inviting.
  • Layered Presentation: For a more sophisticated look, layer the chicken bites with vegetables and rice in a clear glass dish. This showcases the different textures and colors beautifully.

With these serving suggestions and presentation ideas, your Crispy Honey Chicken will not only taste amazing but also look stunning on the table. Enjoy your meal with family and friends!

Tips for Perfecting Your Crispy Honey Chicken Recipe

Common Mistakes to Avoid

Making Crispy Honey Chicken can be a fun and rewarding experience. However, there are some common mistakes that can affect the final result. Here are a few pitfalls to watch out for:

  • Skipping the Coating Steps: Each step in the coating process is important. Dredging in flour, dipping in eggs, and rolling in panko ensures a crispy texture. Skipping any step can lead to a soggy coating.
  • Using Regular Breadcrumbs: Regular breadcrumbs do not provide the same crunch as panko. Always opt for panko breadcrumbs for that perfect crispy finish.
  • Not Heating the Oil Properly: If the oil isn’t hot enough, the chicken will absorb too much oil and become greasy. Use a thermometer to check the oil temperature, aiming for around 350°F.
  • Overcrowding the Pan: Frying too many pieces at once can lower the oil temperature. This results in uneven cooking and less crispiness. Fry in small batches for the best results.
  • Not Letting the Chicken Rest: After frying, allow the chicken to rest on paper towels. This helps absorb excess oil and keeps the coating crispy. Don’t skip this step!

By avoiding these common mistakes, you’ll be well on your way to creating the perfect Crispy Honey Chicken that everyone will love!

Storage Tips for Leftovers

If you happen to have leftovers, storing them properly is key to maintaining their deliciousness. Here are some helpful tips:

  • Cool Before Storing: Allow the chicken to cool completely before storing. This prevents condensation, which can make the coating soggy.
  • Use an Airtight Container: Place the chicken in an airtight container to keep it fresh. This helps prevent moisture from getting in.
  • Refrigerate: Store the chicken in the refrigerator if you plan to eat it within a few days. It’s best consumed within 3 days for optimal taste.
  • Freezing for Longer Storage: If you want to keep the chicken longer, consider freezing it. Place the chicken in a freezer-safe bag, removing as much air as possible. It can last up to 2 months in the freezer.
  • Reheat Properly: When reheating, use an oven or air fryer to restore the crispiness. Avoid using a microwave, as it can make the chicken soggy.

By following these storage tips, you can enjoy your Crispy Honey Chicken even after the first serving!

Breakdown of Time for Crispy Honey Chicken Recipe

Prep Time

Preparing your Crispy Honey Chicken is a breeze! The prep time for this recipe is approximately 20 minutes. This includes gathering all your ingredients, marinating the chicken, and setting up your coating stations. Having everything ready will make the cooking process smooth and enjoyable. Remember, a little organization goes a long way in the kitchen!

Cooking Time

The cooking time for Crispy Honey Chicken is about 15-20 minutes. This includes frying the chicken until it reaches that perfect golden brown color and crispiness. Depending on your skillet size, you may need to fry the chicken in batches. Each batch takes around 5-7 minutes to cook thoroughly. Keep an eye on the chicken to ensure it doesn’t overcook!

Total Time

In total, you can expect to spend about 35-40 minutes from start to finish. This includes both prep and cooking time. With such a quick turnaround, you can have a delicious meal ready in no time. Whether it’s a weeknight dinner or a special occasion, Crispy Honey Chicken is a fantastic choice that won’t keep you in the kitchen for long!

Nutritional Information for Crispy Honey Chicken Recipe

Calories and Macronutrients

Understanding the nutritional content of your meals is important, especially when preparing delicious dishes like Crispy Honey Chicken. Each serving of this delightful recipe contains approximately 450 calories. Here’s a breakdown of the macronutrients:

  • Protein: 25g – Chicken is a great source of lean protein, which is essential for muscle growth and repair.
  • Fat: 20g – The fats come from the oils used in frying and the chicken itself, providing flavor and energy.
  • Net Carbohydrates: 30g – The carbohydrates mainly come from the flour and panko breadcrumbs, contributing to the dish’s texture.

This balance of macronutrients makes Crispy Honey Chicken a satisfying meal that can fit into a variety of dietary plans. It’s a great option for those looking to enjoy a tasty dish without compromising on nutrition.

Sodium and Other Nutritional Facts

In addition to calories and macronutrients, it’s important to consider sodium and other nutritional facts. Each serving of Crispy Honey Chicken contains about 800mg of sodium. This is primarily due to the soy sauce used in the recipe. Here are some additional nutritional details:

  • Sodium: 800mg – While this adds flavor, it’s wise to monitor sodium intake, especially for those with dietary restrictions.
  • Cholesterol: Approximately 120mg – This comes from the chicken and eggs, which are sources of dietary cholesterol.
  • Fiber: 1g – The fiber content is low, as this dish is primarily protein and carbohydrates. Pairing it with vegetables can help increase fiber intake.

By being aware of these nutritional facts, you can enjoy your Crispy Honey Chicken while making informed choices about your diet. Remember, balance is key, and pairing this dish with healthy sides can enhance its nutritional value!

FAQs about Crispy Honey Chicken Recipe

Can I use a different type of meat for this recipe?

Absolutely! While this recipe calls for chicken thighs, you can easily substitute other meats. Chicken breasts work well too, but they may require a shorter cooking time. If you prefer pork, try using pork tenderloin, diced into small pieces. For a vegetarian option, consider using tofu or tempeh. Just remember to adjust the cooking time based on the meat you choose to ensure it’s cooked through and safe to eat.

How can I make this recipe healthier?

There are several ways to make your Crispy Honey Chicken healthier without sacrificing flavor. First, you can use skinless chicken breasts instead of thighs to reduce fat content. Additionally, consider using whole wheat flour and whole grain panko breadcrumbs for added fiber. You can also reduce the amount of honey in the sauce or substitute it with a natural sweetener like maple syrup or agave nectar. Finally, serving the chicken with a side of steamed vegetables can boost the nutritional value of your meal.

What can I substitute for honey in this recipe?

If you need a substitute for honey, there are several options available. Maple syrup is a great alternative that provides a similar sweetness. Agave nectar is another option that works well in sauces. For a lower-calorie choice, consider using a sugar-free honey substitute or a blend of stevia and water. Just keep in mind that the flavor may vary slightly, so adjust the quantity to taste.

Can I bake the chicken instead of frying it?

Yes, you can definitely bake the chicken for a healthier cooking method! To do this, preheat your oven to 400°F (200°C). After coating the chicken, place the pieces on a baking sheet lined with parchment paper. Lightly spray the chicken with cooking oil to help it crisp up. Bake for about 20-25 minutes, flipping halfway through, until the chicken is golden brown and cooked through. Baking will give you a deliciously crispy texture without the extra oil from frying!

Conclusion on Crispy Honey Chicken Recipe

Recap of Key Points

In summary, the Crispy Honey Chicken recipe is a delightful combination of flavors and textures that everyone can enjoy. With its crunchy panko coating and sweet honey sauce, this dish is perfect for family dinners or gatherings. We explored the essential ingredients needed to create this dish, including boneless chicken thighs, panko breadcrumbs, and honey. The step-by-step preparation guide ensures that even novice cooks can achieve delicious results. Additionally, we discussed variations to suit different tastes, such as adding spice or incorporating vegetables. Remember to follow the tips for achieving the perfect crispiness and avoid common mistakes to make your cooking experience enjoyable.

Encouragement to Try the Recipe

Now that you have all the information you need, it’s time to roll up your sleeves and try making Crispy Honey Chicken! This recipe is not only easy to follow but also allows for creativity in the kitchen. Whether you stick to the classic version or experiment with your own twists, you’re sure to impress your family and friends. So gather your ingredients, follow the steps, and enjoy the delightful crunch and sweetness of this amazing dish. Happy cooking!

General Tso’s Chicken Recipe is a must-try dish!

Introduction to General Tso’s Chicken Recipe

What is General Tso’s Chicken?

General Tso’s Chicken is a popular dish in Chinese-American cuisine. It features crispy chicken pieces coated in a sweet and spicy sauce. The dish is known for its bold flavors and delightful crunch. Typically, the chicken is fried until golden brown, then tossed in a sauce made from soy sauce, sugar, and spices. This combination creates a mouthwatering experience that many people love. It’s often served with steamed rice and vegetables, making it a complete meal.

The History Behind General Tso’s Chicken

The origins of General Tso’s Chicken are quite fascinating. Despite its name, the dish is not from China but was created in the United States. It is named after General Tso Tsung-t’ang, a famous Chinese military leader from the Qing dynasty. However, the dish itself was popularized in the 1970s by Chinese chefs in America. They adapted traditional Chinese flavors to suit American tastes, resulting in the sweet and spicy dish we enjoy today. Over the years, General Tso’s Chicken has become a staple in Chinese restaurants across the country, loved by many for its unique taste and satisfying crunch.

Ingredients for General Tso’s Chicken Recipe

To create a delicious General Tso’s Chicken, you’ll need a variety of ingredients that come together to form the perfect balance of flavors. Here’s what you’ll need:

  • 2 pounds boneless, skinless chicken thighs, chopped into small pieces
  • 1 cup all-purpose flour
  • 1 teaspoon sea salt
  • 1 teaspoon ground black pepper
  • 2 large eggs, whisked
  • 1 cup cornstarch
  • 1/2 cup canola oil (for frying)
  • 1 tablespoon minced garlic
  • 1 tablespoon minced fresh ginger
  • 1/2 cup dark soy sauce
  • 1/4 cup apple cider vinegar
  • 1/4 cup brown sugar
  • 1 tablespoon sweet chili sauce
  • 1 teaspoon toasted sesame oil
  • 1/2 teaspoon crushed red pepper (adjust to preference)
  • 2 green onions, chopped (for garnish)
  • Toasted sesame seeds (for garnish)

These ingredients are essential for achieving that crispy texture and sweet-spicy flavor that makes General Tso’s Chicken so beloved. The chicken thighs provide a juicy base, while the combination of soy sauce, vinegar, and sugar creates a rich sauce that perfectly coats the crispy chicken. Don’t forget the garnishes! Green onions and sesame seeds add a lovely touch to your dish, making it not only tasty but visually appealing as well.

Step-by-Step Preparation of General Tso’s Chicken Recipe

Step 1: Marinating the Chicken

To start, marinate the chicken for extra flavor. In a bowl, combine the chopped chicken thighs with a splash of soy sauce and a pinch of salt. Let it sit for about 15-20 minutes. This step helps the chicken absorb the flavors, making it even tastier. While the chicken marinates, you can prepare the other ingredients.

Step 2: Preparing the Sauce

Next, it’s time to prepare the sauce. In a small bowl, mix together the dark soy sauce, apple cider vinegar, brown sugar, sweet chili sauce, toasted sesame oil, and crushed red pepper. Stir well until the sugar dissolves. This sauce will give your General Tso’s Chicken its signature sweet and spicy flavor. Set it aside for later use.

Step 3: Coating the Chicken

Now, let’s coat the chicken. In one bowl, combine the all-purpose flour, sea salt, and ground black pepper. In another bowl, whisk the eggs until frothy. Finally, place the cornstarch in a third bowl. Take each piece of marinated chicken, coat it in the flour mixture, dip it in the eggs, and then roll it in the cornstarch. This three-step coating process ensures a crispy texture when frying.

Step 4: Frying the Chicken

Heat the canola oil in a large frying pan or wok over medium-high heat. Once the oil is shimmering, carefully add the coated chicken in small batches. Fry each piece for about 4-5 minutes, or until golden brown and crispy. Be sure not to overcrowd the pan, as this can lower the oil temperature and affect the crispiness. Once cooked, transfer the chicken to a plate lined with paper towels to absorb any excess oil.

Step 5: Combining Chicken and Sauce

In the same pan, reduce the oil, leaving about a tablespoon. Add the minced garlic and ginger, stirring for about 30 seconds until aromatic. Then, pour in the prepared sauce and let it come to a gentle simmer. Return the crispy chicken to the pan, tossing it in the sauce to ensure each piece is well-coated. Allow it to cook for an additional 2-3 minutes, letting the sauce thicken slightly and envelop the chicken.

Step 6: Garnishing and Serving

Finally, it’s time to serve your delicious General Tso’s Chicken! Transfer the chicken to a serving dish and garnish with chopped green onions and a sprinkle of toasted sesame seeds. This adds a pop of color and a delightful crunch. Serve it hot with steamed rice and your favorite vegetables for a complete meal. Enjoy!

Variations of General Tso’s Chicken Recipe

Healthier Alternatives

If you’re looking to enjoy General Tso’s Chicken with a healthier twist, there are several alternatives you can try. One option is to bake the chicken instead of frying it. Simply coat the chicken pieces as usual, then place them on a baking sheet lined with parchment paper. Bake at 400°F (200°C) for about 20-25 minutes, or until golden and crispy. This method reduces the amount of oil used, making it a lighter dish.

Another way to make this dish healthier is by using skinless chicken breasts instead of thighs. Chicken breasts are leaner and lower in fat, which can help cut down on calories. Additionally, you can substitute the brown sugar with a natural sweetener like honey or maple syrup. This change not only lowers the glycemic index but also adds a unique flavor to the sauce.

Lastly, consider adding more vegetables to your dish. Bell peppers, broccoli, and snap peas can be tossed in with the chicken during the final cooking stage. This not only boosts the nutritional value but also adds vibrant colors and textures to your meal.

Vegetarian and Vegan Options

For those who prefer a vegetarian or vegan version of General Tso’s Chicken, there are plenty of delicious substitutes. One popular option is to use tofu. Firm or extra-firm tofu can be cut into bite-sized pieces and marinated just like chicken. Coat the tofu in the same flour, egg, and cornstarch mixture before frying or baking it. This will give you that satisfying crunch while keeping it plant-based.

Another alternative is to use seitan, a protein-rich meat substitute made from wheat gluten. Seitan has a chewy texture that mimics chicken, making it a great choice for this recipe. Simply follow the same steps for marinating and coating as you would with chicken.

For a lighter option, you can also use cauliflower. Cut the cauliflower into florets, coat them in the same mixture, and bake or fry until crispy. The sauce will add a delightful flavor to the cauliflower, making it a tasty and healthy alternative.

These variations allow everyone to enjoy the delicious flavors of General Tso’s Chicken, regardless of dietary preferences. Whether you choose to go healthier or vegetarian, the essence of this beloved dish remains intact.

Cooking Note for General Tso’s Chicken Recipe

When preparing General Tso’s Chicken, there are a few important cooking notes to keep in mind. These tips will help you achieve the best results and ensure your dish turns out perfectly every time.

First, always use fresh ingredients. Fresh chicken, garlic, and ginger will enhance the flavors of your dish. If possible, choose organic chicken for a healthier option. Fresh ingredients not only taste better but also contribute to the overall quality of your meal.

Next, pay attention to the oil temperature when frying. If the oil is too hot, the chicken will burn on the outside while remaining raw inside. Conversely, if the oil is not hot enough, the chicken will absorb too much oil and become greasy. A good rule of thumb is to test the oil by dropping a small piece of chicken in. If it sizzles immediately, the oil is ready.

Additionally, consider using a thermometer to monitor the oil temperature. Ideally, it should be around 350°F (175°C) for frying. This ensures that your chicken cooks evenly and achieves that desired crispy texture.

Another tip is to avoid overcrowding the pan. Fry the chicken in small batches to maintain the oil temperature. Overcrowding can lead to steaming rather than frying, which affects the crispiness of the chicken.

Lastly, let the fried chicken rest on paper towels after cooking. This step helps absorb excess oil, keeping your dish light and crispy. Following these cooking notes will elevate your General Tso’s Chicken, making it a delightful meal for you and your guests.

Serving Suggestions for General Tso’s Chicken Recipe

When it comes to serving General Tso’s Chicken, the right accompaniments can elevate your meal to new heights. Here are some delightful serving suggestions that pair perfectly with this sweet and spicy dish.

First and foremost, steamed white rice is a classic choice. The fluffy rice acts as a perfect base, soaking up the delicious sauce from the chicken. You can also opt for jasmine or basmati rice for a fragrant twist. If you’re looking for a healthier option, consider serving it with brown rice or quinoa. These grains add a nutty flavor and extra nutrients to your meal.

Another great side dish is stir-fried vegetables. Broccoli, bell peppers, and snap peas not only add color but also provide a crunchy texture that complements the crispy chicken. Simply sauté the vegetables in a bit of oil with garlic and ginger for a quick and tasty side.

If you want to add a refreshing element to your meal, a simple cucumber salad can do the trick. Toss sliced cucumbers with rice vinegar, sesame oil, and a sprinkle of sesame seeds. This light salad balances the richness of the chicken and adds a crisp bite.

For those who enjoy a bit of heat, serve your General Tso’s Chicken with a side of spicy chili sauce or sriracha. This extra kick can enhance the flavors and satisfy those who love spicy food.

Lastly, don’t forget about garnishes! Chopped green onions and toasted sesame seeds not only add visual appeal but also enhance the overall flavor. A sprinkle of fresh cilantro can also bring a burst of freshness to the dish.

With these serving suggestions, your General Tso’s Chicken will be a hit at any dinner table. Enjoy the delightful combination of flavors and textures that make this dish a favorite among many!

Tips for Perfecting Your General Tso’s Chicken Recipe

Perfecting your General Tso’s Chicken can take some practice, but with a few helpful tips, you can elevate your dish to restaurant-quality. Here are some essential tips to ensure your chicken turns out crispy, flavorful, and absolutely delicious.

First, always marinate your chicken. This step is crucial for infusing flavor. A simple marinade of soy sauce, garlic, and ginger can make a big difference. Let the chicken sit for at least 15-20 minutes. If you have more time, marinating for a few hours or overnight will enhance the taste even further.

Next, focus on the coating process. Make sure to coat each piece of chicken thoroughly. The three-step coating of flour, egg, and cornstarch is key to achieving that crispy texture. Ensure that the chicken is well-coated in each step, shaking off any excess before frying.

When frying, maintain the right oil temperature. As mentioned earlier, the ideal frying temperature is around 350°F (175°C). Use a thermometer to check the oil temperature. If you don’t have one, drop a small piece of chicken into the oil. If it sizzles immediately, you’re good to go!

Fry the chicken in small batches. This prevents overcrowding, which can lower the oil temperature and lead to soggy chicken. Frying in batches allows each piece to cook evenly and become perfectly crispy.

After frying, let the chicken rest on paper towels. This step helps absorb any excess oil, keeping your dish light and crispy. Avoid covering the chicken right after frying, as this can create steam and make it soggy.

Finally, don’t skip the garnishes! Chopped green onions and toasted sesame seeds not only add flavor but also enhance the visual appeal of your dish. A sprinkle of fresh herbs like cilantro can also brighten up the flavors.

By following these tips, you’ll be well on your way to mastering the art of General Tso’s Chicken. Enjoy the process and savor the delicious results!

Breakdown of Time for General Tso’s Chicken Recipe

Prep Time

Preparing General Tso’s Chicken is a delightful process that requires some time. The prep time typically takes about 30 minutes. This includes marinating the chicken, preparing the sauce, and coating the chicken pieces. If you choose to let the chicken marinate longer, you can enhance the flavor even more. Just remember to plan ahead!

Cooking Time

The cooking time for General Tso’s Chicken is approximately 20-25 minutes. This includes frying the chicken until it’s golden and crispy, as well as combining it with the sauce. Frying in small batches ensures that each piece cooks evenly and achieves that perfect crunch. The sauce will also need a few minutes to thicken and coat the chicken beautifully.

Total Time

In total, you can expect to spend around 50-55 minutes from start to finish when making General Tso’s Chicken. This includes both prep and cooking time. With a little organization, you can have a delicious meal ready to serve in under an hour. It’s a great option for a weeknight dinner or a special occasion!

Nutritional Information for General Tso’s Chicken Recipe

Calories

When enjoying General Tso’s Chicken, it’s important to be aware of its calorie content. A typical serving of this dish, which is about one cup, contains approximately 400-500 calories. This number can vary based on the cooking method and portion size. If you choose to bake the chicken instead of frying, you can significantly reduce the calorie count, making it a lighter option without sacrificing flavor.

Protein

General Tso’s Chicken is a great source of protein, thanks to the chicken thighs used in the recipe. A single serving provides around 30-35 grams of protein. This makes it an excellent choice for those looking to increase their protein intake. Protein is essential for muscle repair and growth, making this dish a satisfying option for active individuals.

Sodium

While General Tso’s Chicken is delicious, it can be high in sodium due to the soy sauce and other seasonings. A serving typically contains about 800-1000 milligrams of sodium. If you’re watching your sodium intake, consider using low-sodium soy sauce or reducing the amount of sauce used in the recipe. This way, you can still enjoy the flavors without exceeding your daily sodium limit.

FAQs about General Tso’s Chicken Recipe

What is the origin of General Tso’s Chicken?

The origin of General Tso’s Chicken is quite intriguing. Although it carries the name of a famous Chinese general, the dish itself was created in the United States. It was popularized in the 1970s by Chinese chefs who adapted traditional recipes to suit American tastes. The dish combines crispy chicken with a sweet and spicy sauce, making it a favorite in Chinese-American cuisine. Today, it is enjoyed by many and has become a staple in Chinese restaurants across the country.

Can I make General Tso’s Chicken in advance?

Yes, you can prepare General Tso’s Chicken in advance! To do this, you can marinate the chicken and coat it with the flour mixture ahead of time. Store the coated chicken in the refrigerator until you’re ready to fry it. However, it’s best to fry the chicken just before serving to maintain its crispy texture. If you have leftover chicken, you can store it in an airtight container in the fridge for up to three days. Reheat it in the oven to restore some crispiness before serving.

What can I serve with General Tso’s Chicken?

General Tso’s Chicken pairs wonderfully with a variety of side dishes. Steamed white rice is a classic choice, as it absorbs the delicious sauce. You can also serve it with fried rice or quinoa for a different twist. Stir-fried vegetables, such as broccoli, bell peppers, and snap peas, add color and nutrition to your meal. For a refreshing touch, consider a cucumber salad or a simple green salad. These sides complement the flavors of the chicken and create a well-rounded meal.

Is General Tso’s Chicken spicy?

General Tso’s Chicken has a mild to moderate level of spiciness, depending on how much crushed red pepper you add to the sauce. The dish is known for its sweet and spicy flavor profile, but it is not overwhelmingly hot. If you prefer a spicier version, feel free to increase the amount of crushed red pepper or serve it with a side of chili sauce. This way, you can adjust the heat level to suit your taste!

Conclusion on General Tso’s Chicken Recipe

In conclusion, General Tso’s Chicken is a delightful dish that brings together crispy chicken and a sweet, spicy sauce. Its unique flavor profile and satisfying crunch make it a favorite among many. Whether you’re enjoying it at a restaurant or making it at home, this dish is sure to impress.

By following the steps outlined in this recipe, you can create a delicious meal that captures the essence of this beloved Chinese-American classic. Remember to experiment with variations, whether you choose healthier alternatives or vegetarian options. The beauty of General Tso’s Chicken lies in its versatility, allowing you to tailor it to your preferences.

As you prepare this dish, keep in mind the cooking tips shared earlier. They will help you achieve the perfect balance of flavors and textures. With a little practice, you’ll be able to master the art of making General Tso’s Chicken, impressing family and friends alike.

So, gather your ingredients, roll up your sleeves, and get ready to enjoy a plate of homemade General Tso’s Chicken. It’s a dish that not only satisfies your taste buds but also brings a sense of joy to your dining experience. Happy cooking!

Carrot Cake with Cream Cheese Frosting Recipe delights everyone!

Introduction to Carrot Cake with Cream Cheese Frosting Recipe

Carrot Cake with Cream Cheese Frosting Recipe. This cake is not just a treat for the taste buds; it’s also a feast for the eyes. With its vibrant orange color and creamy frosting, it’s perfect for any celebration or simply to enjoy at home.

Carrot cake has a rich history, dating back to medieval times when carrots were used as a sweetener in desserts. Over the years, this humble vegetable has transformed into a beloved cake, often paired with the lusciousness of cream cheese frosting. The combination of spices, sweetness, and the moist texture of the cake makes it a standout dessert.

In this recipe, we’ll guide you through each step, ensuring that you create a cake that’s not only delicious but also easy to make. Whether you’re a seasoned baker or a beginner, you’ll find joy in crafting this delightful dessert. Plus, the addition of crushed pineapple and nuts adds a unique twist that elevates the flavor profile.

Carrot Cake with Cream Cheese Frosting Recipe is sure to impress your family and friends. Let’s get started on this sweet adventure!

Ingredients for Carrot Cake with Cream Cheese Frosting Recipe

Carrot Cake with Cream Cheese Frosting Recipe. Having everything ready will make your baking experience smooth and enjoyable. Here’s what you’ll need:

  • 3 cups finely shredded carrots (approximately 6 medium carrots)
  • 1 cup white sugar
  • 1 cup dark brown sugar, packed
  • 1 cup canola oil
  • 4 large eggs
  • 2 teaspoons pure vanilla extract
  • 2 cups all-purpose flour
  • 2 teaspoons baking powder
  • 1 teaspoon baking soda
  • 1 teaspoon ground cinnamon
  • 1/2 teaspoon ground nutmeg
  • 1/2 teaspoon sea salt
  • 1 cup drained crushed pineapple
  • 1 cup chopped walnuts or pecans (optional)

For the creamy frosting, you will need:

  • 8 ounces softened cream cheese
  • 1/2 cup softened unsalted butter
  • 4 cups confectioners’ sugar
  • 1 teaspoon pure vanilla extract
  • 1-2 tablespoons milk (for desired consistency)

These ingredients come together to create a moist and flavorful cake, topped with a rich and creamy frosting. The combination of carrots, pineapple, and nuts adds texture and depth to the cake, making it a delightful treat for any occasion. Now that we have our ingredients ready, let’s move on to the preparation steps!

Step-by-Step Preparation of Carrot Cake with Cream Cheese Frosting Recipe

Carrot Cake with Cream Cheese Frosting Recipe. Follow these simple steps to create a delicious cake that will surely impress everyone!

Step 1: Preheat the Oven

First things first, preheat your oven to 350°F (175°C). This step is crucial as it ensures that your cake bakes evenly. While the oven heats up, you can prepare your cake pans. Grease two 9-inch round cake pans with butter or cooking spray, then dust them lightly with flour. This will help the cakes come out easily once they are baked.

Step 2: Prepare the Cake Batter

In a large mixing bowl, combine the finely shredded carrots, white sugar, dark brown sugar, canola oil, eggs, and pure vanilla extract. Use a whisk or an electric mixer to blend these ingredients until the mixture is smooth and well combined. This step is important because it helps to incorporate air into the batter, making your cake light and fluffy.

Next, in a separate bowl, sift together the all-purpose flour, baking powder, baking soda, ground cinnamon, ground nutmeg, and sea salt. Sifting helps to break up any lumps and ensures that the dry ingredients are evenly mixed. Gradually add the dry mixture to the wet ingredients, stirring gently until just combined. Be careful not to overmix, as this can make the cake dense.

Finally, fold in the drained crushed pineapple and the optional chopped walnuts or pecans. These ingredients add moisture and a delightful crunch to your cake.

Step 3: Bake the Carrot Cake

Now it’s time to pour the batter into the prepared cake pans. Divide the batter evenly between the two pans. Place them in the preheated oven and bake for 25-30 minutes. To check if the cakes are done, insert a toothpick into the center of each cake. If it comes out clean, your cakes are ready!

Once baked, remove the pans from the oven and let them cool for about 10 minutes. After that, carefully transfer the cakes to wire racks to cool completely. This cooling step is essential before frosting, as it prevents the frosting from melting.

Step 4: Make the Cream Cheese Frosting

While the cakes are cooling, let’s whip up the creamy frosting! In a mixing bowl, beat the softened cream cheese and unsalted butter together until the mixture is fluffy and smooth. This usually takes about 2-3 minutes. Gradually add the confectioners’ sugar, mixing until fully incorporated. Stir in the pure vanilla extract for that extra flavor.

If your frosting is too thick, don’t worry! You can adjust the consistency by adding milk, one tablespoon at a time, until you reach your desired smoothness. The frosting should be spreadable but not too runny.

Step 5: Frost the Cake

Once the cakes have cooled completely, it’s time to assemble and frost! Place one layer of the cake on a serving platter. Spread a generous layer of the creamy frosting on top. Then, carefully place the second layer on top of the first. Use the remaining frosting to cover the top and sides of the cake, creating a beautiful finish.

Carrot Cake with Cream Cheese Frosting Recipe is ready to be enjoyed. This cake is perfect for birthdays, holidays, or just a sweet treat at home. Let’s move on to some variations you can try!

Variation of Carrot Cake with Cream Cheese Frosting Recipe

Carrot Cake with Cream Cheese Frosting Recipe is a beloved favorite, there are many ways to switch things up! Whether you’re looking for a healthier option or want to explore new flavors, these variations will keep your baking exciting. Let’s dive into some alternative ingredients and flavor variations you can try!

Alternative Ingredients for a Healthier Version

If you’re aiming for a healthier twist on the traditional recipe, consider these substitutions:

  • Whole Wheat Flour: Swap out all-purpose flour for whole wheat flour. This adds fiber and nutrients, making your cake a bit healthier.
  • Natural Sweeteners: Instead of white and brown sugar, use natural sweeteners like honey or maple syrup. They provide sweetness with added benefits.
  • Applesauce: Replace some or all of the canola oil with unsweetened applesauce. This reduces fat while keeping the cake moist.
  • Greek Yogurt: For the frosting, consider using Greek yogurt instead of cream cheese. It’s lower in fat and adds a nice tangy flavor.

These alternatives not only make the cake healthier but also maintain its delicious taste. You can enjoy a guilt-free slice without sacrificing flavor!

Flavor Variations to Try

Carrot Cake with Cream Cheese Frosting Recipe? Here are some fun flavor variations:

  • Spiced Carrot Cake: Add a pinch of ground ginger or allspice to the batter for an extra kick of flavor.
  • Coconut Carrot Cake: Mix in shredded coconut for a tropical touch. You can also top the cake with toasted coconut flakes for added texture.
  • Chocolate Carrot Cake: For chocolate lovers, add cocoa powder to the batter. This creates a rich, chocolatey version of the classic cake.
  • Orange Zest: Incorporate some fresh orange zest into the batter for a refreshing citrus flavor that pairs beautifully with the carrots.

These variations allow you to customize your cake to suit your taste preferences. Whether you want a healthier option or a new flavor experience, there’s a variation for everyone!

Cooking Note for Carrot Cake with Cream Cheese Frosting Recipe

Carrot Cake with Cream Cheese Frosting Recipe. Here are some important cooking notes to keep in mind as you embark on your baking journey:

First, ensure that your ingredients are at room temperature. This includes eggs, cream cheese, and butter. Room temperature ingredients blend more easily, resulting in a smoother batter and frosting. It’s a simple step that can enhance the overall texture of your cake.

Next, be mindful of the freshness of your ingredients. Fresh spices, especially cinnamon and nutmeg, can significantly elevate the flavor of your cake. If your spices have been sitting in the pantry for a while, consider replacing them for a more vibrant taste.

When shredding your carrots, aim for a fine consistency. This helps the carrots blend seamlessly into the batter, ensuring that every bite is moist and flavorful. A box grater or food processor works well for this task.

Additionally, avoid overmixing your batter. Once you combine the wet and dry ingredients, mix just until everything is incorporated. Overmixing can lead to a dense cake, which is not what we want for a light and fluffy carrot cake.

Lastly, keep an eye on your cakes while they bake. Ovens can vary in temperature, so start checking for doneness a few minutes before the recommended baking time. Remember, a toothpick inserted into the center should come out clean or with a few moist crumbs, but not wet batter.

Carrot Cake with Cream Cheese Frosting Recipe that will impress everyone at your gathering. Happy baking!

Serving Suggestions for Carrot Cake with Cream Cheese Frosting Recipe

Carrot Cake with Cream Cheese Frosting Recipe, it’s time to think about how to serve it! Presentation can elevate your cake from ordinary to extraordinary. Here are some delightful serving suggestions to make your cake shine:

  • Garnish with Fresh Fruits: Add a pop of color by garnishing your cake with fresh fruits. Slices of oranges, strawberries, or even a handful of blueberries can enhance the visual appeal and add a refreshing taste.
  • Serve with Whipped Cream: For an extra indulgent treat, serve slices of your cake with a dollop of whipped cream. The lightness of the whipped cream complements the richness of the frosting beautifully.
  • Pair with Ice Cream: Consider serving your carrot cake with a scoop of vanilla or cream cheese ice cream. The cold ice cream contrasts nicely with the warm cake, creating a delightful dessert experience.
  • Use Cake Stands: Elevate your cake on a decorative cake stand. This not only makes it look more appealing but also makes it easier for guests to serve themselves.
  • Slice and Serve with Coffee or Tea: Carrot cake pairs wonderfully with a warm cup of coffee or tea. Offer a selection of beverages for your guests to enjoy alongside their cake slices.

Carrot Cake with Cream Cheese Frosting Recipe but also create a delightful experience for your guests. Whether it’s a birthday party, a holiday gathering, or just a cozy family dinner, your cake is sure to be a hit!

Tips for Perfecting Your Carrot Cake with Cream Cheese Frosting Recipe

Carrot Cake with Cream Cheese Frosting Recipe is an art that can be mastered with a few helpful tips. Whether you’re a novice baker or a seasoned pro, these suggestions will ensure your cake turns out moist, flavorful, and visually appealing. Let’s explore some essential tips to elevate your baking game!

First, always measure your ingredients accurately. Use measuring cups and spoons for dry ingredients and a liquid measuring cup for wet ingredients. This precision is key to achieving the right texture and flavor in your cake.

Next, consider using fresh, high-quality ingredients. Fresh carrots, spices, and dairy products can significantly enhance the taste of your cake. For instance, freshly grated nutmeg has a more vibrant flavor than pre-ground nutmeg.

When mixing your batter, remember to fold in the carrots and any additional ingredients gently. This helps maintain the airiness of the batter, resulting in a light and fluffy cake. Overmixing can lead to a dense texture, which we want to avoid.

Another important tip is to let your cakes cool completely before frosting. If the cakes are even slightly warm, the frosting may melt and slide off. Patience is key here, as a well-frosted cake is a sight to behold!

For the frosting, ensure your cream cheese and butter are at room temperature. This allows for a smoother blend, creating a creamy and spreadable frosting. If your frosting is too thick, add milk gradually until you reach the desired consistency.

Lastly, don’t be afraid to get creative with your decorations! Consider adding a sprinkle of chopped nuts on top or a drizzle of caramel sauce for an extra touch. These small details can make your cake not only taste great but also look stunning.

Carrot Cake with Cream Cheese Frosting Recipe. Your friends and family will be impressed with your baking skills, and you’ll enjoy every delicious bite!

Breakdown of Time for Carrot Cake with Cream Cheese Frosting Recipe

Carrot Cake with Cream Cheese Frosting Recipe can help you plan your baking session effectively. Here’s a detailed breakdown of the time you’ll need for preparation, cooking, and cooling.

Prep Time

The prep time for this delightful cake is approximately 30 minutes. This includes gathering your ingredients, shredding the carrots, and mixing the batter. Taking your time during this stage ensures that everything is well-prepared, leading to a smoother baking process.

Cooking Time

Once your batter is ready, the cooking time is about 25-30 minutes. During this time, the cakes will rise and develop that beautiful golden color. Keep an eye on them, and remember to check for doneness with a toothpick. If it comes out clean, your cakes are ready to be taken out of the oven!

Total Time

In total, you can expect to spend around 1 hour and 15 minutes from start to finish. This includes prep time, cooking time, and a brief cooling period before frosting. However, remember that the cakes need to cool completely before you frost them, which can take an additional 30-60 minutes. So, plan accordingly if you want to serve your cake right after baking!

Carrot Cake with Cream Cheese Frosting Recipe. Happy baking!

Nutritional Information for Carrot Cake with Cream Cheese Frosting Recipe

Carrot Cake with Cream Cheese Frosting Recipe can help you enjoy this delicious dessert while keeping track of your dietary needs. Below, we’ll break down the key nutritional components of a typical serving of this delightful cake.

Calories

One slice of carrot cake (approximately 1/12 of the cake) contains around 350-400 calories. This number can vary based on the specific ingredients used, especially if you opt for healthier substitutions. The calories primarily come from sugars, fats, and carbohydrates, making it a rich treat that’s best enjoyed in moderation.

Protein

Carrot Cake with Cream Cheese Frosting Recipe provides about 3-5 grams of protein. The protein content comes mainly from the eggs and cream cheese used in the recipe. While it’s not a high-protein dessert, it does contribute to your daily intake when enjoyed as part of a balanced diet.

Sodium

In terms of sodium, a slice of carrot cake typically contains around 200-250 milligrams. This amount can vary depending on the salt used in the batter and the cream cheese frosting. If you’re watching your sodium intake, consider reducing the amount of sea salt in the recipe or using low-sodium cream cheese.

Carrot Cake with Cream Cheese Frosting Recipe. Whether you’re celebrating a special occasion or simply treating yourself, this cake is sure to bring joy to your taste buds!

FAQs about Carrot Cake with Cream Cheese Frosting Recipe

Can I make Carrot Cake with Cream Cheese Frosting Recipe ahead of time?

Carrot Cake with Cream Cheese Frosting Recipe ahead of time. In fact, the flavors often improve after a day. To do this, bake the cake layers and let them cool completely. Then, wrap each layer tightly in plastic wrap and store them in the refrigerator for up to 2 days. When you’re ready to serve, simply frost the cake and enjoy!

How do I store leftover Carrot Cake with Cream Cheese Frosting Recipe?

Carrot Cake with Cream Cheese Frosting Recipe in an airtight container. You can keep it in the refrigerator for up to 5 days. If you want to keep it longer, consider freezing the cake. Wrap it tightly in plastic wrap and then in aluminum foil. It can last in the freezer for up to 3 months. Just thaw it in the fridge overnight before serving.

Can I substitute ingredients in the Carrot Cake with Cream Cheese Frosting Recipe?

Carrot Cake with Cream Cheese Frosting Recipe. For example, you can use whole wheat flour instead of all-purpose flour for added nutrition. You can also replace the sugars with natural sweeteners like honey or maple syrup. Just keep in mind that these changes may slightly alter the texture and flavor of the cake.

What can I use instead of cream cheese in the frosting?

If you’re looking for an alternative to cream cheese in the frosting, there are several options. You can use mascarpone cheese for a rich and creamy texture. Greek yogurt is another great choice, offering a tangy flavor with fewer calories. For a dairy-free option, try using coconut cream or a vegan cream cheese substitute. Each alternative will give your frosting a unique taste, so feel free to experiment!

Conclusion on Carrot Cake with Cream Cheese Frosting Recipe

Carrot Cake with Cream Cheese Frosting Recipe is a delightful dessert that brings joy to any occasion. Its moist texture, combined with the rich and creamy frosting, creates a perfect balance of flavors. Whether you’re celebrating a birthday, hosting a holiday gathering, or simply treating yourself, this cake is sure to impress.

Throughout this article, we’ve explored the ingredients, preparation steps, and variations that make this cake so special. From the classic recipe to healthier alternatives and exciting flavor twists, there’s something for everyone. The tips and serving suggestions provided will help you create a stunning presentation that will wow your guests.

Carrot Cake with Cream Cheese Frosting Recipe awaits, ready to bring smiles and satisfaction to your table!

Happy baking, and may your kitchen be filled with the delightful aroma of freshly baked carrot cake!

Blackberry Velvet Gothic Cake is a must-try dessert!

Introduction to Blackberry Velvet Gothic Cake

Blackberry Velvet Gothic Cake. This cake is not just a treat for your taste buds; it’s a feast for the eyes as well. With its deep, dark chocolate flavor and vibrant blackberry accents, it’s perfect for any occasion, from birthdays to elegant dinner parties.

Blackberry Velvet Gothic Cake combines the classic richness of chocolate with the tart sweetness of fresh blackberries. This unique blend creates a cake that is both indulgent and refreshing. Imagine slicing into a moist, velvety cake, revealing layers of luscious whipped cream and juicy blackberries. It’s a dessert that promises to impress your guests and leave them wanting more!

Not only is this cake visually stunning, but it’s also surprisingly easy to make. With simple ingredients and straightforward steps, you can create a masterpiece in your own kitchen. Whether you’re an experienced baker or just starting out, this recipe will guide you through each step with ease.

Blackberry Velvet Gothic Cake is waiting to be made, and it’s sure to become a favorite in your dessert repertoire!

Ingredients for Blackberry Velvet Gothic Cake

Blackberry Velvet Gothic Cake, you’ll need a selection of simple yet essential ingredients. Each component plays a vital role in achieving that rich flavor and moist texture. Here’s what you’ll need:

  • 2 cups all-purpose flour
  • 1 ½ cups granulated sugar
  • ½ cup unsweetened cocoa powder
  • 1 teaspoon baking soda
  • 1 teaspoon baking powder
  • ½ teaspoon salt
  • 1 cup buttermilk, at room temperature
  • ½ cup vegetable oil
  • 2 large eggs, at room temperature
  • 1 teaspoon vanilla extract
  • 1 cup fresh blackberries, plus extra for decoration
  • 1 cup heavy cream
  • 2 tablespoons powdered sugar
  • 1 teaspoon vanilla extract

These ingredients come together to create a cake that is not only visually appealing but also bursting with flavor. The combination of cocoa powder and blackberries gives the cake its signature gothic look and taste. Plus, the whipped cream adds a light and airy touch, balancing the richness of the chocolate.

For those looking to enhance the flavor even further, consider adding a tablespoon of espresso powder to the dry ingredients. This little twist will deepen the chocolate flavor, making it even more irresistible. You can also swap out blackberries for other berries like raspberries or strawberries for a delightful variation.

Now that you have your ingredients ready, let’s move on to the preparation steps to bring this stunning cake to life!

Preparation of Blackberry Velvet Gothic Cake

Blackberry Velvet Gothic Cake. Follow these steps carefully to ensure your cake turns out perfectly moist and delicious!

Step 1: Preheat the Oven and Prepare the Pans

First things first, preheat your oven to 350°F (175°C). This step is crucial for even baking. While the oven heats up, take two 9-inch round cake pans and grease them with butter or cooking spray. Then, dust them lightly with flour to prevent sticking. This will help your cake layers come out smoothly.

Step 2: Mix the Dry Ingredients

In a large mixing bowl, combine the all-purpose flour, granulated sugar, unsweetened cocoa powder, baking soda, baking powder, and salt. Use a whisk to mix these dry ingredients thoroughly. This ensures that the leavening agents are evenly distributed, which is key for a fluffy cake.

Step 3: Cream the Butter and Sugar

In a separate bowl, mix the buttermilk, vegetable oil, eggs, and vanilla extract. Whisk these ingredients together until they are well combined. This mixture will add moisture and richness to your cake.

Step 4: Add the Eggs and Vanilla

Now, it’s time to add the wet mixture to the dry ingredients. Pour the wet ingredients into the bowl with the dry ingredients. Stir gently until just combined. Be careful not to overmix, as this can make the cake dense.

Step 5: Incorporate the Dry Ingredients and Buttermilk

Next, fold in the fresh blackberries. This step is important because you want to keep the blackberries intact for bursts of flavor in every bite. Gently mix them into the batter, ensuring they are evenly distributed without breaking apart.

Step 6: Add Blackberry Puree

If you want to enhance the blackberry flavor, consider making a quick blackberry puree. Simply blend a handful of blackberries until smooth, then fold this puree into the batter. This will give your cake a beautiful marbled effect and an extra kick of berry goodness!

Step 7: Bake the Cake

Now, evenly divide the batter between the two prepared cake pans. Place them in the preheated oven and bake for 25-30 minutes. To check if they are done, insert a toothpick into the center of the cakes. If it comes out clean, they are ready!

Step 8: Cool the Cake Layers

Once baked, remove the cakes from the oven and let them cool in the pans for about 10 minutes. After that, carefully transfer them to a wire rack to cool completely. This step is essential to prevent the cake from becoming soggy.

Blackberry Velvet Gothic Cake. Next, we’ll explore some delightful variations to make this cake even more special!

Variation of Blackberry Velvet Gothic Cake

Blackberry Velvet Gothic Cake is a versatile dessert that can be easily adapted to suit your taste preferences. While the original recipe is delicious on its own, experimenting with different flavors and ingredients can elevate your cake to new heights. Here are some delightful variations to consider:

  • Berry Medley: Instead of just using blackberries, mix in a variety of berries. Raspberries, blueberries, and strawberries can create a colorful and flavorful cake. Each berry adds its unique taste, making every bite a surprise!
  • Chocolate Ganache: For a richer experience, top your cake with a luscious chocolate ganache. Simply heat heavy cream and pour it over chopped dark chocolate. Stir until smooth, then let it cool slightly before pouring it over the frosted cake. This adds a decadent layer of chocolate that pairs beautifully with the blackberries.
  • Nutty Crunch: Add a layer of crushed nuts, like walnuts or pecans, between the cake layers. This will introduce a delightful crunch and a nutty flavor that complements the softness of the cake.
  • Spiced Variation: Incorporate warm spices like cinnamon or nutmeg into the batter. Just a teaspoon can add a cozy warmth to the cake, making it perfect for fall gatherings.
  • Vegan Option: For a vegan twist, substitute eggs with flaxseed meal mixed with water and use plant-based milk instead of buttermilk. Replace the heavy cream with coconut cream for a dairy-free whipped topping.

Blackberry Velvet Gothic Cake for different occasions. Whether you’re celebrating a birthday or hosting a dinner party, these twists will surely impress your guests!

Now that you have some exciting ideas for variations, let’s move on to some important cooking notes to ensure your cake turns out perfectly every time.

Cooking Note for Blackberry Velvet Gothic Cake

Blackberry Velvet Gothic Cake, a few key cooking notes can make all the difference. These tips will help you achieve the best results, ensuring your cake is moist, flavorful, and visually stunning.

First, always use room temperature ingredients. This includes eggs, buttermilk, and any other dairy products. Room temperature ingredients blend more easily, creating a smoother batter. This can lead to a lighter and fluffier cake.

Next, be mindful of your mixing technique. When combining the wet and dry ingredients, mix until just combined. Overmixing can develop gluten in the flour, resulting in a dense cake. You want your cake to be light and airy, so gentle folding is key.

Additionally, consider the quality of your cocoa powder. Using high-quality unsweetened cocoa powder can significantly enhance the chocolate flavor of your cake. Look for brands that are known for their rich taste and deep color.

Another important note is to check your oven temperature. Ovens can vary, so it’s a good idea to use an oven thermometer to ensure accuracy. Baking at the correct temperature is crucial for even cooking and achieving the right texture.

Lastly, don’t rush the cooling process. Allowing the cake layers to cool completely before frosting is essential. If the layers are warm, the whipped cream can melt, leading to a messy presentation. Patience is key to a beautifully finished cake!

Blackberry Velvet Gothic Cake. Now, let’s explore some serving suggestions to make your cake even more delightful!

Serving Suggestions for Blackberry Velvet Gothic Cake

Blackberry Velvet Gothic Cake is beautifully baked and frosted, it’s time to think about how to serve it. Presentation can elevate your dessert from delicious to extraordinary. Here are some delightful serving suggestions to impress your guests:

  • Garnish with Fresh Berries: Top your cake with a generous handful of fresh blackberries. This not only adds a pop of color but also enhances the berry flavor. You can also scatter some mint leaves around for a fresh touch.
  • Drizzle with Sauce: Consider drizzling a homemade berry sauce over each slice. To make this, simply blend some blackberries with a bit of sugar and lemon juice. This adds a tangy sweetness that complements the rich chocolate.
  • Serve with Ice Cream: Pair your cake with a scoop of vanilla or blackberry ice cream. The cold creaminess contrasts beautifully with the warm, moist cake, creating a delightful experience.
  • Layered Dessert Cups: For a fun twist, create individual dessert cups. Crumble pieces of the cake and layer them with whipped cream and fresh blackberries in clear cups. This makes for a stunning presentation and is perfect for parties.
  • Accompany with Coffee: Serve slices of your cake alongside a cup of freshly brewed coffee or tea. The rich flavors of the cake pair wonderfully with a warm beverage, making it a perfect afternoon treat.

Blackberry Velvet Gothic Cake but also create a memorable dessert experience for your guests. Whether it’s a special occasion or a casual gathering, these ideas will surely impress everyone at the table!

Tips for Perfecting Blackberry Velvet Gothic Cake

Blackberry Velvet Gothic Cake turns out perfectly every time, consider these helpful tips. Each suggestion is designed to enhance your baking experience and improve the final result.

  • Measure Ingredients Accurately: Use a kitchen scale for precise measurements. This is especially important for flour and sugar, as even a small difference can affect the cake’s texture.
  • Use Fresh Blackberries: Always opt for fresh blackberries for the best flavor. Check for ripeness and avoid any that are mushy or moldy. Fresh berries will provide a burst of flavor in every bite.
  • Don’t Skip the Cooling Time: Allow your cake layers to cool completely before frosting. This prevents the whipped cream from melting and ensures a clean, beautiful finish.
  • Experiment with Flavors: Feel free to add your favorite flavors to the batter. A splash of almond extract or a hint of orange zest can add a unique twist to the cake.
  • Practice Patience: Baking is a science, and sometimes it requires patience. Don’t rush through the steps. Take your time to mix, fold, and bake for the best results.

Blackberry Velvet Gothic Cake. Each cake you bake will be a delicious testament to your baking skills!

Breakdown of Time for Blackberry Velvet Gothic Cake

Blackberry Velvet Gothic Cake can help you plan your baking session effectively. Here’s a simple breakdown of the time you’ll need:

Prep Time

Getting everything ready is the first step. This includes measuring ingredients, greasing pans, and mixing the batter. Expect to spend about 20-30 minutes on prep time. This is your chance to gather all your ingredients and tools, ensuring a smooth baking process.

Cooking Time

Once your cake is in the oven, it will need about 25-30 minutes to bake. Keep an eye on it during the last few minutes. You want to make sure it’s perfectly baked without overdoing it. Remember, every oven is a bit different, so checking with a toothpick is key!

Total Time

In total, you should plan for about 1 hour to 1 hour and 15 minutes from start to finish. This includes prep, baking, and cooling time. If you’re making the whipped cream and decorating the cake, add an extra 15-20 minutes. This way, you can enjoy the process without feeling rushed!

Blackberry Velvet Gothic Cake into your schedule. Whether it’s for a special occasion or just a sweet treat for yourself, knowing how long each step takes will help you enjoy the baking experience even more!

Nutritional Information for Blackberry Velvet Gothic Cake

Blackberry Velvet Gothic Cake can help you enjoy this delicious dessert while keeping track of your dietary needs. Here’s a breakdown of the key nutritional components:

Calories

Blackberry Velvet Gothic Cake contains approximately 320 calories. This makes it a delightful treat that can fit into a balanced diet. Enjoying a slice as an occasional indulgence is a great way to satisfy your sweet tooth without overdoing it.

Protein

This cake provides about 4 grams of protein per slice. While it’s not a high-protein dessert, the inclusion of eggs and dairy contributes to its protein content. Pairing your cake with a source of protein, like a dollop of Greek yogurt, can enhance the nutritional value of your dessert.

Sodium

Blackberry Velvet Gothic Cake is around 200 milligrams. This is relatively low, making it a suitable option for those watching their sodium intake. However, it’s always good to enjoy sweets in moderation, especially if you have specific dietary restrictions.

Blackberry Velvet Gothic Cake guilt-free. Remember, balance is key, and this cake can be a delightful part of your dessert repertoire!

FAQs about Blackberry Velvet Gothic Cake

What is the origin of the Blackberry Velvet Gothic Cake?

Blackberry Velvet Gothic Cake is a modern twist on classic velvet cakes, which have roots in the Southern United States. Traditionally, velvet cakes are known for their soft, smooth texture and rich flavor. The addition of blackberries gives this cake a unique gothic flair, combining the deep chocolate tones with the vibrant berry notes. This cake is perfect for those who appreciate both the elegance of a velvet cake and the boldness of blackberries.

Can I substitute blackberries with other fruits in the recipe?

Blackberry Velvet Gothic Cake, you can easily swap them for other fruits. Raspberries, strawberries, or blueberries work wonderfully as alternatives. Each fruit will bring its own flavor profile, allowing you to customize the cake to your liking. Just remember to adjust the sweetness if you choose a fruit that is more tart.

How can I store leftover Blackberry Velvet Gothic Cake?

Blackberry Velvet Gothic Cake fresh, store it in an airtight container in the refrigerator. This will help maintain its moisture and flavor. The cake can last for about 3-4 days in the fridge. If you want to keep it longer, consider freezing individual slices. Wrap them tightly in plastic wrap and place them in a freezer-safe container. When you’re ready to enjoy, simply thaw at room temperature or warm in the microwave for a few seconds.

What are some common mistakes to avoid when making Blackberry Velvet Gothic Cake?

Blackberry Velvet Gothic Cake, there are a few common pitfalls to watch out for. First, avoid overmixing the batter, as this can lead to a dense cake. Second, ensure your ingredients are at room temperature for better mixing. Third, don’t skip the cooling time; frosting a warm cake can lead to a melted mess. Lastly, always check your oven temperature with a thermometer to ensure even baking. By keeping these tips in mind, you’ll create a stunning cake every time!

Conclusion on Blackberry Velvet Gothic Cake

Blackberry Velvet Gothic Cake is a delightful dessert that combines rich chocolate with the tartness of fresh blackberries. This cake not only pleases the palate but also captivates the eyes with its stunning presentation. Whether you’re celebrating a special occasion or simply indulging in a sweet treat, this cake is sure to impress.

Throughout this article, we’ve explored the ingredients, preparation steps, and variations that make this cake unique. From the careful mixing of ingredients to the art of frosting, each step contributes to the overall success of the cake. Remember, baking is as much about the process as it is about the final product. Enjoying the journey of creating this cake can be just as rewarding as savoring the delicious results.

Blackberry Velvet Gothic Cake is versatile, allowing you to make it your own. Whether you choose to add a chocolate ganache, mix in different berries, or even create a vegan version, the possibilities are endless.

Blackberry Velvet Gothic Cake awaits, ready to bring joy and sweetness to your table. Happy baking!

White Chocolate Raspberry Dream Cake Recipe is divine!

Introduction to White Chocolate Raspberry Dream Cake Recipe

White Chocolate Raspberry Dream Cake Recipe is not just a dessert; it’s an experience that brings joy to any occasion. Whether you’re celebrating a birthday, hosting a tea party, or simply indulging in a sweet craving, this cake is sure to impress.

The Allure of White Chocolate and Raspberry

Why do white chocolate and raspberry make such a perfect pair? Well, the answer lies in their contrasting flavors. White chocolate is rich and creamy, while raspberries offer a bright, tangy burst. Together, they create a harmonious balance that tantalizes the taste buds. Each bite of this cake is a delightful journey, where the sweetness of the white chocolate meets the refreshing zing of the raspberries.

Moreover, the visual appeal of this cake is simply stunning. The soft, pale color of the white chocolate frosting beautifully contrasts with the vibrant red of the raspberries. It’s a feast for the eyes as much as it is for the palate. This cake is not just about taste; it’s about creating memories and sharing joy with loved ones.

White Chocolate Raspberry Dream Cake Recipe, you’ll find that it’s easy to make, even for beginner bakers. With simple ingredients and straightforward steps, you’ll be on your way to creating a masterpiece that will leave everyone asking for seconds. So, let’s get started on this delicious adventure!

Ingredients for White Chocolate Raspberry Dream Cake Recipe

White Chocolate Raspberry Dream Cake Recipe. Having everything ready will make your baking experience smooth and enjoyable. Here’s what you’ll need:

  • 2 cups all-purpose flour
  • 1 ½ cups granulated sugar
  • ½ cup unsalted butter, softened
  • 1 cup milk
  • 3 large eggs
  • 1 tablespoon baking powder
  • 1 teaspoon vanilla extract
  • ½ teaspoon salt
  • 1 cup white chocolate chips
  • 1 cup fresh raspberries

For the frosting, you will need:

  • 1 cup unsalted butter, softened
  • 4 cups powdered sugar
  • 4 ounces cream cheese, softened
  • 1 teaspoon vanilla extract
  • 2 tablespoons heavy cream

These ingredients come together to create a cake that is not only delicious but also visually stunning. The combination of white chocolate and raspberries will surely make your cake a showstopper at any gathering. Make sure to use fresh ingredients for the best flavor. Now that we have our ingredients ready, let’s move on to the next step of preparing this delightful cake!

Step-by-Step Preparation of White Chocolate Raspberry Dream Cake Recipe

White Chocolate Raspberry Dream Cake Recipe. Each step is designed to guide you through the process, ensuring a delicious outcome.

Step 1: Preparing the Cake Batter

First, let’s make the cake batter. In a large mixing bowl, cream together the softened butter and granulated sugar. Use an electric mixer on medium speed until the mixture is light and fluffy. This usually takes about 3-5 minutes. Next, add the eggs one at a time, mixing well after each addition. Don’t forget to stir in the vanilla extract for that extra flavor!

In a separate bowl, whisk together the all-purpose flour, baking powder, and salt. This step is important as it helps to evenly distribute the baking powder and salt throughout the flour. Gradually add the dry ingredients to the butter mixture, alternating with the milk. Start and end with the flour mixture. Mix until just combined; be careful not to overmix. Finally, gently fold in the white chocolate chips and fresh raspberries. This will ensure they are evenly distributed without breaking the delicate berries.

Step 2: Baking the Cake Layers

Now that your batter is ready, it’s time to bake! Preheat your oven to 350°F (175°C) if you haven’t already. Grease and flour two 9-inch round cake pans to prevent sticking. Divide the batter evenly between the prepared pans. Smooth the tops with a spatula for an even bake.

Bake the cakes in the preheated oven for 25-30 minutes. To check if they are done, insert a toothpick into the center of each cake. If it comes out clean or with a few crumbs, they are ready! Once baked, allow the cakes to cool in the pans for about 10 minutes. Then, carefully transfer them to wire racks to cool completely.

Step 3: Making the Raspberry Filling

While the cakes are cooling, let’s prepare the raspberry filling. This step is optional, but it adds a lovely burst of flavor. In a small saucepan, combine a handful of fresh raspberries with a tablespoon of sugar. Cook over medium heat until the raspberries break down and the mixture thickens slightly, about 5-7 minutes. Remove from heat and let it cool. This filling can be spread between the cake layers for an extra fruity surprise!

Step 4: Preparing the White Chocolate Frosting

Next, we’ll make the creamy white chocolate frosting. In a mixing bowl, beat the softened butter and cream cheese together until smooth and fluffy. Gradually add the powdered sugar, mixing well after each addition. This will help to avoid a sugar cloud in your kitchen!

Once combined, stir in the vanilla extract and heavy cream. Mix until the frosting reaches a spreadable consistency. If it’s too thick, add a little more cream. If it’s too thin, add a bit more powdered sugar. Taste the frosting and adjust the sweetness if needed. It should be rich and creamy, perfect for our cake!

Step 5: Assembling the Cake

Now comes the fun part—assembling your cake! Once the cake layers are completely cool, place one layer on a serving plate. If you made the raspberry filling, spread a layer of it on top of the first cake layer. Then, spread a generous amount of frosting over the raspberry filling.

Carefully place the second cake layer on top. Use the remaining frosting to cover the top and sides of the cake. For a beautiful finish, you can decorate with additional fresh raspberries and white chocolate shavings. This will not only enhance the look but also add extra flavor!

White Chocolate Raspberry Dream Cake Recipe is ready to be enjoyed. Slice it up and share it with friends and family. They will surely be impressed by your baking skills!

Variations of White Chocolate Raspberry Dream Cake Recipe

White Chocolate Raspberry Dream Cake Recipe is a delightful treat on its own, there are many ways to customize it. Whether you want to experiment with different flavors or accommodate dietary needs, these variations will inspire your baking creativity!

Alternative Flavors and Add-ins

If you’re looking to switch things up, consider these alternative flavors and add-ins:

  • Chocolate Cake Base: Replace the vanilla cake base with a rich chocolate cake. This will create a delicious contrast with the white chocolate and raspberries.
  • Fruit Variations: Try using strawberries, blueberries, or blackberries instead of raspberries. Each fruit brings its unique flavor and color to the cake.
  • Citrus Zest: Add a teaspoon of lemon or orange zest to the batter for a refreshing citrus twist. This will brighten the flavors and add a lovely aroma.
  • Nuts: Incorporate chopped nuts like almonds or pecans into the batter for added texture and flavor. Just be sure to chop them finely to avoid overpowering the cake.
  • Flavored Frosting: Experiment with different frosting flavors. You can add cocoa powder for a chocolate frosting or a splash of almond extract for a nutty flavor.

Gluten-Free Options

If you or your guests are gluten-sensitive, you can easily adapt this recipe to be gluten-free. Here’s how:

  • Gluten-Free Flour: Substitute all-purpose flour with a gluten-free flour blend. Make sure it’s a 1:1 ratio blend for the best results.
  • Check Ingredients: Ensure that all other ingredients, like baking powder and chocolate chips, are gluten-free. Many brands offer gluten-free options.
  • Moisture Adjustment: Gluten-free flours can absorb more moisture. You may need to add an extra tablespoon of milk to the batter to achieve the right consistency.

White Chocolate Raspberry Dream Cake Recipe accessible to everyone. So, feel free to get creative and make this cake your own!

Cooking Note for White Chocolate Raspberry Dream Cake Recipe

White Chocolate Raspberry Dream Cake Recipe. Here are some essential cooking notes to keep in mind:

  • Room Temperature Ingredients: Ensure that your butter, eggs, and cream cheese are at room temperature. This helps them blend more easily, resulting in a smoother batter and frosting.
  • Measuring Flour: When measuring flour, use the spoon-and-level method. Spoon the flour into your measuring cup and level it off with a knife. This prevents packing, which can lead to a dense cake.
  • Don’t Overmix: When combining the wet and dry ingredients, mix until just combined. Overmixing can lead to a tough cake, so be gentle when folding in the raspberries and chocolate chips.
  • Cooling Time: Allow the cakes to cool completely before frosting. If the cakes are warm, the frosting may melt and slide off, ruining the beautiful layers.
  • Frosting Consistency: If your frosting is too thick, add a little more heavy cream. If it’s too thin, add more powdered sugar. The right consistency is key for easy spreading and a beautiful finish.
  • Storage: Store any leftover cake in an airtight container at room temperature for up to three days. For longer storage, refrigerate it, but be sure to bring it back to room temperature before serving for the best flavor.

White Chocolate Raspberry Dream Cake. Happy baking!

Serving Suggestions for White Chocolate Raspberry Dream Cake Recipe

White Chocolate Raspberry Dream Cake is beautifully assembled, it’s time to think about how to serve it! Presentation can elevate your cake from delicious to extraordinary. Here are some delightful serving suggestions to impress your guests:

  • Garnish with Fresh Fruits: Top your cake with additional fresh raspberries and mint leaves. This not only adds a pop of color but also enhances the fruity flavor.
  • Serve with Whipped Cream: A dollop of freshly whipped cream on the side can complement the sweetness of the cake. You can even add a hint of vanilla or a sprinkle of powdered sugar for extra flair.
  • Pair with Ice Cream: Serve slices of cake with a scoop of vanilla or raspberry ice cream. The cold ice cream contrasts beautifully with the warm cake, creating a delightful experience.
  • Drizzle with Chocolate Sauce: For chocolate lovers, a drizzle of warm chocolate sauce over the cake can add an indulgent touch. It pairs wonderfully with the white chocolate and raspberries.
  • Use Cake Stands: Present your cake on a decorative cake stand. This elevates the cake and makes it the centerpiece of your dessert table.
  • Slice and Serve: When slicing the cake, use a sharp knife dipped in hot water. This helps create clean cuts, making each slice look neat and appealing.

White Chocolate Raspberry Dream Cake but also create a memorable experience for your guests. Whether it’s a special occasion or a casual gathering, this cake is sure to be a hit!

Tips for Perfecting Your White Chocolate Raspberry Dream Cake Recipe

White Chocolate Raspberry Dream Cake is all about attention to detail and a few helpful tips. Whether you’re a seasoned baker or just starting out, these tips will ensure your cake turns out delicious and beautiful every time.

  • Choose Quality Ingredients: The flavor of your cake starts with the ingredients. Use high-quality white chocolate and fresh raspberries for the best taste. This will elevate your cake and make it truly special.
  • Measure Accurately: Baking is a science, so precise measurements are crucial. Use a kitchen scale for the most accurate results, especially for flour and sugar. This will help you achieve the right texture.
  • Room Temperature Ingredients: As mentioned earlier, make sure your butter, eggs, and cream cheese are at room temperature. This helps them blend smoothly, resulting in a lighter cake and creamier frosting.
  • Don’t Rush the Cooling Process: Allow your cake layers to cool completely before frosting. If they are even slightly warm, the frosting can melt and slide off, ruining your hard work.
  • Use a Cake Leveler: For a professional look, use a cake leveler to trim the tops of your cake layers. This ensures they are flat and stack evenly, making for a more polished presentation.
  • Chill the Frosting: If your frosting is too soft to spread, chill it in the refrigerator for about 15 minutes. This will firm it up, making it easier to work with and giving you a smoother finish.
  • Experiment with Flavors: Don’t hesitate to try different flavor combinations. Adding a hint of almond extract or lemon zest can give your cake a unique twist that your guests will love.
  • Practice Patience: Take your time when assembling and decorating the cake. A little patience goes a long way in achieving a stunning final product that you can be proud of.
  • Store Properly: To keep your cake fresh, store it in an airtight container. If you have leftovers, refrigerate them, but allow the cake to come to room temperature before serving for the best flavor.

White Chocolate Raspberry Dream Cake Recipe. Each step you take will bring you closer to creating a cake that not only looks amazing but tastes incredible too. Happy baking!

Breakdown of Time for White Chocolate Raspberry Dream Cake Recipe

White Chocolate Raspberry Dream Cake Recipe can help you plan your baking session effectively. Here’s a detailed breakdown of the time you’ll need to create this delightful cake.

Prep Time

The prep time for this cake is approximately 30 minutes. This includes gathering your ingredients, measuring them out, and preparing the cake batter. Make sure to set aside enough time to ensure everything is ready before you start mixing. Having all your ingredients at room temperature will also speed up the process!

Cooking Time

The cooking time for the cake layers is about 25-30 minutes. During this time, the cakes will bake in the oven until they are golden brown and a toothpick inserted in the center comes out clean. Keep an eye on them as they bake, as oven temperatures can vary.

Total Time

In total, you can expect to spend around 1 hour and 15 minutes to 1 hour and 30 minutes on the entire process. This includes prep time, cooking time, and the cooling time for the cakes before frosting. Remember, patience is key! Allowing the cakes to cool completely will ensure that your frosting stays intact and looks beautiful.

White Chocolate Raspberry Dream Cake and savor the delicious results!

Nutritional Information for White Chocolate Raspberry Dream Cake Recipe

White Chocolate Raspberry Dream Cake Recipe can help you enjoy it in moderation. Here’s a breakdown of the key nutritional information per serving, so you can indulge without worry.

Calories

Each slice of this delightful cake contains approximately 450 calories. This makes it a rich treat, perfect for special occasions or when you want to satisfy your sweet tooth. Remember, moderation is key, especially if you’re watching your calorie intake!

Protein

In terms of protein, each serving provides about 5 grams. While this isn’t a high-protein dessert, it does contribute to your daily intake. Pairing the cake with a protein-rich side, like a dollop of Greek yogurt, can enhance the nutritional value of your dessert.

Sodium

The sodium content in each slice is around 200 milligrams. This is relatively moderate, making it a suitable option for most diets. However, if you’re watching your sodium intake, be mindful of the other meals you consume throughout the day.

White Chocolate Raspberry Dream Cake while being aware of its impact on your diet. It’s all about balance, so savor each bite and share the joy with friends and family!

FAQs about White Chocolate Raspberry Dream Cake Recipe

Can I use frozen raspberries in the recipe?

White Chocolate Raspberry Dream Cake Recipe. Just make sure to thaw and drain them before adding to the batter. This helps prevent excess moisture, which can affect the cake’s texture. Frozen raspberries can be just as delicious as fresh ones, especially when they are in season!

How can I store leftover cake?

To store leftover cake, place it in an airtight container at room temperature for up to three days. If you want to keep it fresh for a longer time, refrigerate it. Just remember to bring it back to room temperature before serving. This will help maintain the cake’s flavor and texture, making each slice just as delightful as the first!

What can I substitute for white chocolate?

If you need a substitute for white chocolate, you can use a white chocolate-flavored baking bar or chips. Alternatively, you can create a similar flavor by using a combination of vanilla extract and a bit of cream. This will give you a sweet, creamy taste that complements the raspberries well. However, keep in mind that the texture may differ slightly from using real white chocolate.

Can I make this cake ahead of time?

White Chocolate Raspberry Dream Cake ahead of time. Bake the cake layers and let them cool completely. Then, wrap them tightly in plastic wrap and store them in the refrigerator for up to three days. You can also freeze the layers for up to a month. Just remember to frost the cake closer to serving time for the best presentation and taste!

Conclusion on White Chocolate Raspberry Dream Cake Recipe

White Chocolate Raspberry Dream Cake Recipe is a delightful treat that combines rich flavors and beautiful presentation. This cake is perfect for any occasion, whether it’s a birthday celebration, a holiday gathering, or simply a sweet indulgence for yourself. The creamy white chocolate pairs beautifully with the tartness of fresh raspberries, creating a harmonious balance that is sure to please everyone.

As you’ve seen throughout this article, making this cake is not only straightforward but also a fun experience. With simple steps and easily accessible ingredients, even novice bakers can create a stunning dessert that looks and tastes like it came from a professional bakery. Remember to take your time, follow the tips provided, and don’t hesitate to get creative with variations and serving suggestions.

White Chocolate Raspberry Dream Cake with those you love!

Baked Bacon Cheeseburger Mac and Cheese Recipe delights all!

Introduction to Baked Bacon Cheeseburger Mac and Cheese Recipe

Baked Bacon Cheeseburger Mac and Cheese Recipe is a delightful fusion of classic comfort food and hearty flavors. This recipe is not just a meal; it’s an experience that brings joy to the dinner table. With creamy cheese, crispy bacon, and savory ground beef, every bite is a celebration of taste.

What Makes This Recipe Special?

What sets this recipe apart is its unique blend of flavors and textures. The crispy bacon adds a smoky crunch, while the ground beef provides a satisfying heartiness. The creamy cheese sauce envelops the macaroni, creating a rich and comforting dish. Plus, the panko breadcrumb topping gives it a delightful crunch that contrasts beautifully with the creamy pasta. This dish is perfect for family gatherings, potlucks, or a cozy night in.

The Comfort of Mac and Cheese with a Twist

Baked Bacon Cheeseburger Mac and Cheese Recipe is sure to please everyone. It’s comfort food that warms the soul and satisfies the appetite.

Ingredients for Baked Bacon Cheeseburger Mac and Cheese Recipe

Baked Bacon Cheeseburger Mac and Cheese Recipe, you’ll need a selection of simple yet flavorful ingredients. Each component plays a vital role in delivering that delicious taste you crave. Here’s what you’ll need:

  • 8 ounces elbow macaroni
  • 4 slices bacon, chopped
  • 1 pound ground beef
  • 1 small onion, finely chopped
  • 2 cloves garlic, minced
  • 1 teaspoon salt
  • 1/2 teaspoon black pepper
  • 1 teaspoon smoked paprika
  • 2 cups shredded sharp cheddar cheese
  • 1 cup shredded mozzarella cheese
  • 2 cups whole milk
  • 1/4 cup all-purpose flour
  • 1 tablespoon Dijon mustard
  • 1/2 cup panko breadcrumbs
  • 1 tablespoon olive oil

These ingredients come together to create a rich and creamy dish that’s bursting with flavor. The combination of cheeses adds depth, while the bacon and beef provide a satisfying heartiness. Don’t forget the spices! They elevate the dish, making it truly special. Gather these ingredients, and you’re on your way to making a delightful meal that everyone will love.

Step-by-Step Preparation of Baked Bacon Cheeseburger Mac and Cheese Recipe

Baked Bacon Cheeseburger Mac and Cheese Recipe to life! Follow these simple steps to create a dish that’s sure to impress.

Step 1: Cooking the Pasta

Start by boiling a large pot of salted water. Once it’s bubbling, add the 8 ounces of elbow macaroni. Cook the pasta until it’s just tender, usually about 7-8 minutes. Remember, you want it slightly undercooked since it will bake later. After cooking, drain the pasta and set it aside. This step is crucial as it forms the base of your delicious dish.

Step 2: Preparing the Bacon

Next, grab a large skillet and heat it over medium heat. Add the 4 slices of chopped bacon to the skillet. Fry the bacon until it’s crispy, which should take about 5-6 minutes. Once done, remove the bacon and let it drain on paper towels. Don’t forget to leave about a tablespoon of the rendered fat in the skillet. This will add flavor to the ground beef!

Step 3: Sautéing the Ground Beef

In the same skillet with the reserved bacon fat, add 1 pound of ground beef, 1 small finely chopped onion, and 2 cloves of minced garlic. Season this mixture with 1 teaspoon of salt, 1/2 teaspoon of black pepper, and 1 teaspoon of smoked paprika. Sauté everything together for about 5-7 minutes, or until the beef is browned and the onion is translucent. This step builds a savory foundation for your pasta bake.

Step 4: Making the Cheese Sauce

Baked Bacon Cheeseburger Mac and Cheese Recipe truly special!

Step 5: Combining Ingredients

In a large mixing bowl, combine the cooked macaroni, the sautéed beef and onion mixture, and the creamy cheese sauce. Stir everything together until well incorporated. Make sure every piece of macaroni is coated in that delicious cheese sauce. This is where the magic happens, and your dish starts to take shape!

Step 6: Baking the Dish

Preheat your oven to 350°F. Grease a 9×13 inch baking dish and pour the macaroni mixture into it. In a small bowl, mix 1/2 cup of panko breadcrumbs with 1 tablespoon of olive oil and the reserved crispy bacon. Sprinkle this mixture evenly over the top of the macaroni. Bake in the preheated oven for 25-30 minutes, or until the top is golden brown and the edges are bubbling. Once it’s done, let it cool for a few minutes before serving. Enjoy your delicious creation!

Variations of Baked Bacon Cheeseburger Mac and Cheese Recipe

Baked Bacon Cheeseburger Mac and Cheese Recipe is a hit on its own, there are plenty of ways to customize it. Whether you’re looking for a vegetarian option or want to experiment with different cheeses, these variations will keep your taste buds excited!

Vegetarian Options

If you want to enjoy this dish without meat, you can easily make it vegetarian. Start by replacing the ground beef with sautéed mushrooms. Mushrooms add a rich, umami flavor that complements the cheese beautifully. You can also mix in a variety of colorful vegetables like bell peppers, spinach, or zucchini. These veggies not only enhance the flavor but also add a nutritious boost. For an extra kick, consider adding diced jalapeños or a sprinkle of red pepper flakes. This way, you can enjoy a hearty meal that’s both satisfying and meat-free!

Different Cheese Combinations

Baked Bacon Cheeseburger Mac and Cheese Recipe lies in its versatility. While sharp cheddar and mozzarella are fantastic, you can mix and match different cheeses to create your perfect blend. Try using gouda for a smoky flavor or pepper jack for a spicy twist. Cream cheese can also be added for extra creaminess. Experimenting with cheese combinations allows you to tailor the dish to your liking. Just remember to keep the total amount of cheese around three cups for the best texture!

Baked Bacon Cheeseburger Mac and Cheese Recipe! Enjoy the process and savor the delicious results.

Cooking Note for Baked Bacon Cheeseburger Mac and Cheese Recipe

Baked Bacon Cheeseburger Mac and Cheese Recipe, there are a few important cooking notes to keep in mind. These tips will help ensure that your dish turns out perfectly every time, making it a favorite for family dinners or gatherings.

First, always remember to cook the pasta al dente. This means it should be firm to the bite. Since the pasta will continue to cook while baking, undercooking it slightly prevents it from becoming mushy. This step is crucial for achieving the right texture in your final dish.

Next, when frying the bacon, keep an eye on it to avoid burning. Crispy bacon adds a wonderful crunch, but burnt bacon can ruin the flavor. If you prefer, you can also bake the bacon in the oven for a more hands-off approach. Just lay the bacon strips on a baking sheet and cook at 400°F for about 15-20 minutes, or until crispy.

Additionally, when making the cheese sauce, be sure to whisk continuously. This helps prevent lumps and ensures a smooth, creamy texture. If the sauce seems too thick, you can add a splash of milk to reach your desired consistency.

Baked Bacon Cheeseburger Mac and Cheese Recipe.

By following these cooking notes, you’ll create a delicious and satisfying meal that everyone will love. Happy cooking!

Serving Suggestions for Baked Bacon Cheeseburger Mac and Cheese Recipe

Baked Bacon Cheeseburger Mac and Cheese Recipe is ready, it’s time to think about how to serve it. This dish is hearty and filling on its own, but pairing it with the right sides and beverages can elevate your meal even further. Here are some delightful serving suggestions to consider.

Pairing with Sides

To complement the rich flavors of your mac and cheese, consider serving it with lighter sides. A fresh garden salad is a great choice. Toss together mixed greens, cherry tomatoes, cucumbers, and a light vinaigrette. This adds a refreshing crunch that balances the creaminess of the pasta.

Another excellent side is steamed or roasted vegetables. Broccoli, green beans, or asparagus work well. They not only add color to your plate but also provide essential nutrients. For a bit of zest, you can drizzle some lemon juice over the veggies before serving.

If you’re in the mood for something heartier, garlic bread or dinner rolls can be a fantastic addition. The crispy, buttery bread pairs wonderfully with the cheesy pasta, making for a comforting meal. Just remember to keep the portions in check, as the mac and cheese is quite filling!

Ideal Beverage Choices

When it comes to beverages, you have several options that can enhance your dining experience. For a classic pairing, consider serving a chilled glass of iced tea or lemonade. These refreshing drinks can cut through the richness of the cheese and bacon, providing a nice contrast.

If you prefer something a bit stronger, a light beer or a crisp white wine can also be great choices. A lager or pilsner complements the savory flavors, while a Sauvignon Blanc or Chardonnay adds a touch of elegance to your meal.

For a non-alcoholic option, sparkling water with a slice of lemon or lime can be a delightful choice. It’s refreshing and helps cleanse the palate between bites of the rich mac and cheese.

Baked Bacon Cheeseburger Mac and Cheese Recipe will be a hit at any gathering. Enjoy the delicious flavors and the company of your loved ones!

Tips for Perfecting Baked Bacon Cheeseburger Mac and Cheese Recipe

Baked Bacon Cheeseburger Mac and Cheese Recipe turns out perfectly every time, here are some helpful tips. These suggestions cover storage and reheating, so you can enjoy this delicious dish even after the first serving!

Storage Tips

Baked Bacon Cheeseburger Mac and Cheese Recipe, you might have some leftovers. To store them properly, let the dish cool completely at room temperature. Once cooled, transfer it to an airtight container. This helps keep the flavors fresh and prevents the pasta from drying out.

For best results, store the mac and cheese in the refrigerator. It can last for about 3-4 days. If you want to keep it longer, consider freezing it. To freeze, portion the mac and cheese into freezer-safe containers. Make sure to label them with the date. Frozen mac and cheese can last for up to 2-3 months. Just remember to thaw it in the refrigerator overnight before reheating!

Reheating Instructions

When it’s time to enjoy your leftovers, reheating is simple. If you’re reheating a single serving, the microwave is a quick option. Place the desired amount in a microwave-safe bowl and cover it with a damp paper towel. Heat on medium power for about 1-2 minutes, stirring halfway through. This helps heat it evenly.

If you have a larger portion, the oven is a great choice. Preheat your oven to 350°F. Transfer the mac and cheese to a baking dish and cover it with aluminum foil. Bake for about 20-25 minutes, or until heated through. For a crispy top, remove the foil for the last 5 minutes of baking.

Baked Bacon Cheeseburger Mac and Cheese Recipe multiple times without losing any of its deliciousness. Happy eating!

Breakdown of Time for Baked Bacon Cheeseburger Mac and Cheese Recipe

Baked Bacon Cheeseburger Mac and Cheese Recipe can help you plan your cooking efficiently. Here’s a quick breakdown of the prep and cooking times involved in creating this delicious dish.

Prep Time

The prep time for this recipe is approximately 15-20 minutes. During this time, you will gather all your ingredients, chop the bacon, onion, and garlic, and measure out the necessary items. Having everything ready before you start cooking makes the process smoother and more enjoyable.

Cooking Time

Once you begin cooking, the total cooking time is about 40-45 minutes. This includes:

  • Cooking the elbow macaroni (7-8 minutes)
  • Frying the bacon (5-6 minutes)
  • Sautéing the ground beef and vegetables (5-7 minutes)
  • Making the cheese sauce (10-12 minutes)
  • Baking the dish (25-30 minutes)

Each step is essential for building the flavors and textures that make this dish so special.

Total Time

Baked Bacon Cheeseburger Mac and Cheese Recipe into your meal planning. It’s a fantastic option for a weeknight dinner or a weekend gathering with friends and family!

Nutritional Information for Baked Bacon Cheeseburger Mac and Cheese Recipe

Baked Bacon Cheeseburger Mac and Cheese Recipe is not only delicious but also provides a good amount of nutrients. Here’s a breakdown of the key nutritional information per serving, so you can enjoy this dish while being mindful of your dietary needs.

Calories

Each serving of this hearty dish contains approximately 550 calories. This calorie count includes the rich flavors from the cheese, bacon, and ground beef, making it a filling option for lunch or dinner. While it’s a bit higher in calories, it’s important to remember that this meal is packed with protein and flavor, making it a satisfying choice.

Protein

Baked Bacon Cheeseburger Mac and Cheese Recipe is its protein content. Each serving provides around 30 grams of protein. This protein comes from the ground beef, cheese, and even the pasta. Protein is essential for muscle repair and growth, making this dish a great option for those looking to fuel their bodies after a workout or a long day.

Sodium

When it comes to sodium, each serving contains about 800 milligrams. This amount is primarily due to the bacon, cheese, and added salt. While sodium is necessary for bodily functions, it’s important to monitor your intake. If you’re watching your sodium levels, consider using low-sodium bacon or cheese alternatives to help reduce the overall sodium content without sacrificing flavor.

Baked Bacon Cheeseburger Mac and Cheese Recipe while being aware of its impact on your diet. It’s a delicious meal that can fit into a balanced lifestyle when enjoyed in moderation. Happy cooking and eating!

FAQs about Baked Bacon Cheeseburger Mac and Cheese Recipe

Can I make this recipe ahead of time?

Baked Bacon Cheeseburger Mac and Cheese Recipe is perfect for making ahead of time. You can prepare the entire dish, including the baking step, and then cover it tightly with plastic wrap or aluminum foil. Store it in the refrigerator for up to 24 hours before baking. When you’re ready to enjoy it, simply preheat your oven and bake as directed. If it’s coming straight from the fridge, you may need to add a few extra minutes to the baking time to ensure it’s heated through.

What can I substitute for bacon?

Baked Bacon Cheeseburger Mac and Cheese Recipe a delicious flavor without the bacon.

Is it possible to freeze Baked Bacon Cheeseburger Mac and Cheese?

Baked Bacon Cheeseburger Mac and Cheese Recipe! To do this, let the dish cool completely after baking. Then, portion it into freezer-safe containers or wrap it tightly in plastic wrap and aluminum foil. It can be frozen for up to 2-3 months. When you’re ready to enjoy it, thaw it in the refrigerator overnight. Reheat it in the oven or microwave until it’s heated through. Freezing is a great way to have a delicious meal ready for busy days!

Conclusion on Baked Bacon Cheeseburger Mac and Cheese Recipe

Baked Bacon Cheeseburger Mac and Cheese Recipe is a delightful dish that brings together the comforting flavors of mac and cheese with the savory goodness of a cheeseburger. This recipe is not only easy to prepare but also offers endless possibilities for customization. Whether you choose to stick with the classic ingredients or explore variations like vegetarian options or different cheese combinations, this dish is sure to satisfy your cravings.

As you gather around the table with family and friends, this hearty meal will create lasting memories. The creamy texture, combined with the crispy bacon and tender beef, makes every bite a joy. Plus, with the added crunch from the panko topping, it’s a dish that appeals to both kids and adults alike.

Baked Bacon Cheeseburger Mac and Cheese Recipe a try? It’s perfect for weeknight dinners, special occasions, or even meal prep for busy days ahead. With its rich flavors and comforting nature, it’s bound to become a favorite in your household. Enjoy the process of cooking, and most importantly, enjoy the delicious results!

Spring Vegetable Pasta is a delightful seasonal dish.

Introduction to Spring Vegetable Pasta Recipe

Spring Vegetable Pasta Recipe. This dish not only showcases the best of spring produce but also offers a quick and easy meal option for busy weeknights.

Imagine twirling your fork around a plate of perfectly cooked pasta, surrounded by a medley of garden-fresh vegetables. The combination of asparagus, grape tomatoes, and yellow squash creates a symphony of flavors that dance on your palate. Plus, the addition of baby kale adds a nutritious boost, making this dish both delicious and wholesome.

Whether you’re a seasoned chef or a beginner in the kitchen, this recipe is designed to be simple and approachable. With just a handful of ingredients, you can whip up a delightful meal that will impress your family and friends. So, roll up your sleeves and get ready to dive into the world of spring cooking!

In the following sections, we will guide you through the ingredients, preparation steps, and tips to make your Spring Vegetable Pasta truly shine. Let’s embrace the season and enjoy the bounty of fresh vegetables together!

Ingredients for Spring Vegetable Pasta Recipe

Spring Vegetable Pasta Recipe, you’ll need a selection of fresh ingredients that highlight the vibrant flavors of the season. Here’s what you’ll need:

  • 8 ounces of your favorite pasta (farfalle or spaghetti are great choices)
  • 1 tablespoon extra virgin olive oil
  • 2 cloves garlic, finely chopped
  • 1 cup chopped asparagus
  • 1 cup halved grape tomatoes
  • 1 cup diced yellow squash
  • 1 cup baby kale
  • 1 teaspoon sea salt
  • 1/2 teaspoon freshly ground black pepper
  • 1/2 teaspoon chili flakes (optional)
  • 1/4 cup shredded Pecorino Romano cheese
  • Fresh parsley leaves for garnish

These ingredients come together to create a colorful and nutritious dish. The pasta serves as a hearty base, while the vegetables add a burst of freshness. The garlic and olive oil provide a fragrant backdrop, enhancing the overall flavor. Don’t forget the Pecorino Romano cheese, which adds a creamy richness that ties everything together.

Feel free to adjust the quantities based on your preferences or what you have on hand. The beauty of this recipe lies in its flexibility, allowing you to experiment with different vegetables and flavors. Now that you have your ingredients ready, let’s move on to the preparation steps!

Preparation of Spring Vegetable Pasta Recipe

Spring Vegetable Pasta Recipe, it’s time to dive into the preparation process. This recipe is straightforward and allows you to enjoy the vibrant flavors of spring vegetables. Let’s break it down into easy steps!

Step 1: Preparing the Vegetables

Start by washing all your vegetables thoroughly. Freshness is key! Chop the asparagus into bite-sized pieces, halve the grape tomatoes, and dice the yellow squash. Finally, rinse the baby kale and set it aside. Having everything prepped will make the cooking process smooth and enjoyable.

Step 2: Cooking the Pasta

Next, bring a large pot of salted water to a boil. Add your favorite pasta, whether it’s farfalle or spaghetti. Cook according to the package instructions until it reaches an al dente texture. This usually takes about 8-10 minutes. Once done, drain the pasta, but remember to save about half a cup of the cooking water. This starchy water will help create a lovely sauce later!

Step 3: Sautéing the Vegetables

In a spacious skillet, warm the extra virgin olive oil over medium heat. Add the finely chopped garlic and sauté for about a minute until it becomes fragrant. Then, toss in the chopped asparagus and sauté for 3-4 minutes. This will allow the asparagus to soften slightly while retaining its crunch.

After that, add the halved grape tomatoes and diced yellow squash. Cook for another 3-4 minutes, stirring occasionally. You want the vegetables to be vibrant and tender, but still have a bit of bite to them. Finally, stir in the baby kale, sea salt, black pepper, and chili flakes if you like a little heat. Cook for an additional 2 minutes until the kale wilts down.

Step 4: Combining Ingredients

Now it’s time to bring everything together! Add the drained pasta to the skillet with the sautéed vegetables. Gradually pour in the reserved pasta water, mixing until you achieve your desired sauce consistency. This step is crucial as it helps the flavors meld beautifully.

Step 5: Final Touches

Spring Vegetable Pasta is now ready to be served!

Garnish with fresh parsley leaves for a pop of color and added flavor. Enjoy your delightful dish warm, and savor the taste of spring!

Variation of Spring Vegetable Pasta Recipe

Spring Vegetable Pasta Recipe is its versatility. You can easily customize it to suit your taste or to use what you have on hand. Let’s explore some exciting variations that can elevate your dish even further!

Seasonal Vegetable Swaps

Spring brings a bounty of fresh vegetables, and you can swap out the ones in the original recipe for others that you enjoy. Here are some great options:

  • Peas: Sweet peas add a pop of color and a burst of sweetness.
  • Bell Peppers: Diced bell peppers can add crunch and a hint of sweetness.
  • Spinach: If you prefer, you can replace baby kale with fresh spinach for a milder flavor.
  • Carrots: Thinly sliced or julienned carrots can add a lovely crunch and sweetness.
  • Broccoli: Chopped broccoli florets can be a great addition for extra nutrition and texture.

Feel free to mix and match these vegetables based on what’s in season or what you have in your fridge. The goal is to create a colorful and nutritious dish that celebrates the flavors of spring!

Protein Additions

Spring Vegetable Pasta more filling, consider adding a protein source. Here are some tasty options:

  • Grilled Chicken: Sliced grilled chicken breast can add a hearty element to your dish.
  • Shrimp: Sautéed shrimp can bring a delightful seafood twist to your pasta.
  • Chickpeas: For a vegetarian option, add canned chickpeas for a protein boost.
  • Tofu: Cubed and sautéed tofu can be a great plant-based protein addition.
  • Bacon or Pancetta: For a savory touch, crispy bacon or pancetta can enhance the flavor profile.

Adding protein not only makes the dish more satisfying but also enhances its nutritional value. Choose what you love, and enjoy the delicious combinations!

Cooking Note for Spring Vegetable Pasta Recipe

Spring Vegetable Pasta Recipe, there are a few cooking notes to keep in mind to ensure your dish turns out perfectly every time. These tips will help you enhance the flavors and textures of your meal, making it a delightful experience for you and your guests.

First, always use fresh, seasonal vegetables. Fresh produce not only tastes better but also retains more nutrients. Visit your local farmer’s market or grocery store to find the best options available. The vibrant colors and flavors of fresh vegetables will elevate your pasta dish.

Next, pay attention to the cooking times of your vegetables. Each type of vegetable has its own ideal cooking time. For instance, asparagus takes a bit longer to soften than grape tomatoes. To achieve the best texture, add the vegetables to the skillet in the order of their cooking times. This way, everything will be perfectly cooked and maintain a delightful crunch.

Another important note is to reserve that pasta water! The starchy water is a secret ingredient that helps bind the sauce to the pasta. It adds creaminess and helps achieve the desired consistency. Start with a small amount and gradually add more until you reach your preferred sauce thickness.

Spring Vegetable Pasta to the next level. These finishing touches make your meal look appealing and taste even better.

Spring Vegetable Pasta that everyone will love. Happy cooking!

Serving Suggestions for Spring Vegetable Pasta Recipe

Spring Vegetable Pasta is ready, it’s time to think about how to serve it. Presentation can elevate your dish and make it even more enjoyable. Here are some delightful serving suggestions to consider:

  • Plate it Up: Serve the pasta in shallow bowls or on large plates. This allows the vibrant colors of the vegetables to shine through. A sprinkle of fresh parsley on top adds a beautiful touch.
  • Pair with a Salad: A light side salad complements the pasta perfectly. Consider a simple mixed greens salad with a lemon vinaigrette. The freshness of the salad balances the richness of the pasta.
  • Accompany with Bread: Serve your pasta with a slice of crusty bread or garlic bread. This is perfect for soaking up any leftover sauce. It adds a comforting element to the meal.
  • Wine Pairing: If you enjoy wine, consider pairing your dish with a crisp white wine, like Sauvignon Blanc or Pinot Grigio. These wines enhance the fresh flavors of the vegetables.
  • Top with Extra Cheese: For cheese lovers, don’t hesitate to add more Pecorino Romano or even a sprinkle of Parmesan on top. This extra layer of flavor can make your dish even more indulgent.

Spring Vegetable Pasta is versatile and can be enjoyed in many ways. Whether it’s a casual family dinner or a special gathering with friends, these serving suggestions will help you create a memorable dining experience.

Enjoy your meal and the delightful flavors of spring!

Tips for Perfecting Your Spring Vegetable Pasta Recipe

Spring Vegetable Pasta Recipe, consider these helpful tips. They will ensure that your dish is not only delicious but also visually appealing and satisfying. Let’s dive into some expert advice!

First, always taste as you cook. This simple step allows you to adjust the seasoning to your liking. You might find that a pinch more salt or a dash of pepper can make a big difference in flavor. Remember, every ingredient contributes to the overall taste, so don’t hesitate to tweak it!

Next, consider the timing of your ingredients. For the best texture, add the vegetables in stages based on their cooking times. Start with the ones that take longer, like asparagus, and finish with quicker-cooking ones, like baby kale. This way, everything will be perfectly cooked and retain its vibrant color.

Spring Vegetable Pasta even more delightful. Don’t skimp on this ingredient!

Additionally, don’t forget about the pasta! Make sure to cook it al dente. This means it should be firm to the bite. Overcooked pasta can become mushy and lose its appeal. Remember to reserve that pasta water, as it’s a secret weapon for creating a luscious sauce.

Lastly, get creative with your garnishes. Fresh herbs like basil or chives can add a burst of flavor and color. A squeeze of lemon juice can brighten the dish, while a sprinkle of red pepper flakes can add a kick. These finishing touches can transform your pasta into a gourmet experience.

Spring Vegetable Pasta that’s not only tasty but also a feast for the eyes. Enjoy the process and savor the delightful flavors of spring!

Breakdown of Time for Spring Vegetable Pasta Recipe

Spring Vegetable Pasta Recipe can help you plan your cooking efficiently. Here’s a simple breakdown of the time required for preparation and cooking.

Prep Time

Preparing your ingredients is an essential first step. For this recipe, you’ll need about 15 minutes for prep time. This includes washing, chopping, and measuring all your vegetables and pasta. Having everything ready will make the cooking process smooth and enjoyable.

Cooking Time

Spring Vegetable Pasta is approximately 20 minutes. This includes boiling the pasta and sautéing the vegetables. Here’s how the time breaks down:

  • Boiling the pasta: 8-10 minutes
  • Sautéing the garlic and vegetables: 10-12 minutes

By keeping an eye on the cooking times, you’ll ensure that your vegetables remain vibrant and your pasta is perfectly cooked.

Total Time

Spring Vegetable Pasta that celebrates the flavors of the season!

Nutritional Information for Spring Vegetable Pasta Recipe

Spring Vegetable Pasta Recipe can help you make informed choices about your meals. This dish is not only delicious but also packed with essential nutrients. Here’s a breakdown of the key nutritional components:

Calories

Spring Vegetable Pasta contains approximately 350-400 calories. This makes it a satisfying yet light meal option. The calories come from the pasta, vegetables, and the added cheese, providing a balanced mix of carbohydrates, fats, and proteins.

Protein

Each serving offers about 12-15 grams of protein. The protein primarily comes from the pasta and the Pecorino Romano cheese. If you choose to add protein sources like grilled chicken, shrimp, or chickpeas, the protein content will increase significantly, making it even more filling and nutritious.

Sodium

Spring Vegetable Pasta while keeping it heart-healthy.

Spring Vegetable Pasta Recipe is a nutritious choice that provides a good balance of calories, protein, and essential nutrients. It’s a great way to enjoy the flavors of spring while nourishing your body!

FAQs about Spring Vegetable Pasta Recipe

What vegetables are best for spring vegetable pasta?

Spring Vegetable Pasta, the best vegetables are those that are fresh and in season. Asparagus, grape tomatoes, and yellow squash are excellent choices. You can also consider adding peas, bell peppers, or spinach for variety. The key is to choose vibrant, colorful vegetables that will enhance the dish’s flavor and nutrition. Feel free to mix and match based on your preferences and what you find at your local market!

Can I make the spring vegetable pasta recipe ahead of time?

Spring Vegetable Pasta ahead of time! To do this, cook the pasta and sauté the vegetables as directed. Once everything is combined, let it cool before storing it in an airtight container in the refrigerator. It can be kept for up to three days. When you’re ready to enjoy it, simply reheat in a skillet over medium heat, adding a splash of reserved pasta water to bring it back to life. This makes it a great option for meal prep!

Is the spring vegetable pasta recipe suitable for meal prep?

Spring Vegetable Pasta is perfect for meal prep. You can make a large batch and portion it out for lunches or dinners throughout the week. Just remember to store the pasta and vegetables separately if you want to keep the pasta from getting too soft. This way, you can enjoy a fresh and tasty meal any day of the week!

How can I make the spring vegetable pasta recipe vegan?

Spring Vegetable Pasta vegan is easy! Simply omit the Pecorino Romano cheese or replace it with a plant-based cheese alternative. You can also add nutritional yeast for a cheesy flavor without dairy. Additionally, ensure that the pasta you choose is egg-free. With these simple swaps, you can enjoy a delicious vegan version of this delightful dish!

Conclusion on Spring Vegetable Pasta Recipe

Spring Vegetable Pasta Recipe is a delightful way to celebrate the vibrant flavors of the season. With its fresh ingredients and simple preparation, this dish is perfect for anyone looking to enjoy a light yet satisfying meal. The combination of colorful vegetables, aromatic garlic, and creamy Pecorino Romano cheese creates a symphony of flavors that is sure to please your palate.

Not only is this recipe easy to make, but it also offers endless possibilities for customization. Whether you choose to swap in seasonal vegetables or add a protein source, you can tailor the dish to suit your taste and dietary needs. Plus, with the option to prepare it ahead of time, it’s a fantastic choice for busy weeknights or meal prep.

Spring Vegetable Pasta, take a moment to appreciate the beauty of fresh produce and the joy of cooking. This dish is not just a meal; it’s an experience that brings the essence of spring to your table. So gather your ingredients, invite your loved ones, and enjoy the delightful flavors of this seasonal pasta dish!

Happy cooking, and may your kitchen be filled with the fresh aromas of spring!