Potsticker Soup: A Comforting and Flavorful Bowl of Warmth

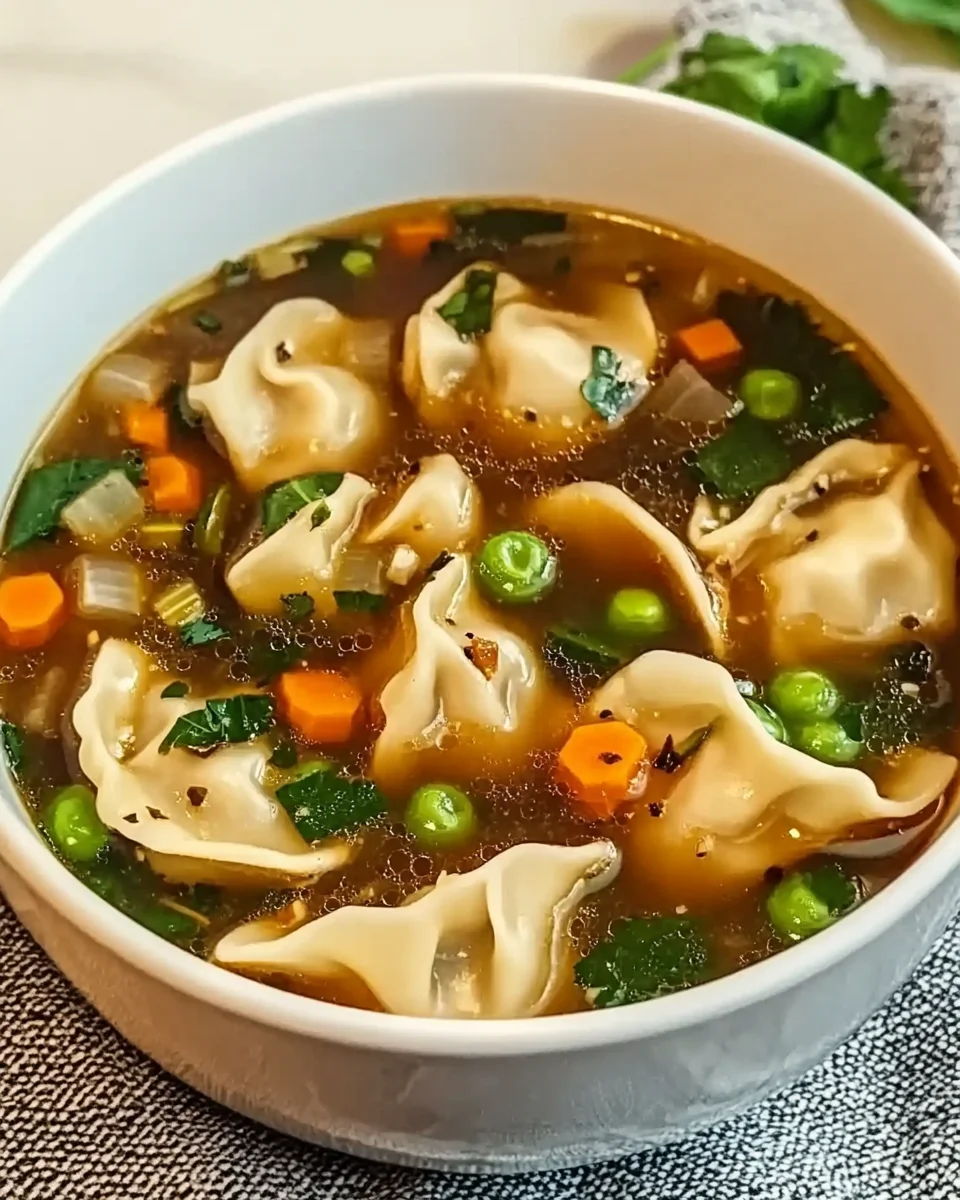
Few dishes strike the perfect balance between simplicity and deep, satisfying flavor quite like Potsticker Soup. This dish takes the beloved dumplings—typically pan-fried or steamed—and transforms them into a hearty, broth-based soup that is both quick to prepare and incredibly comforting.

Whether you’re looking for a fast weeknight meal, a warming dish for chilly evenings, or an Asian-inspired twist on classic dumpling soup, this recipe delivers everything you need. It’s customizable, budget-friendly, and packed with bold flavors that make every spoonful feel like a hug in a bowl.

In this guide, we’ll explore why Potsticker Soup deserves a spot in your regular meal rotation, different ways to customize it, and answer some common questions to help you make the best version possible.

Why This Recipe Works: The Beauty of Simplicity

1. A One-Pot Wonder

With minimal prep and just one pot on the stove, this soup comes together in under 30 minutes. It’s the perfect solution for busy nights when you want a homemade meal without spending hours in the kitchen.

2. A Rich, Customizable Broth

The base of this soup is a savory, umami-packed broth that can be adjusted to your taste. Whether you prefer it mild and soothing or bold and spicy, this recipe allows you to tweak the seasonings with just a few ingredients.

3. The Star of the Dish: Potstickers

Instead of serving potstickers as a side dish, this soup turns them into the main attraction. The dumplings absorb the broth’s flavor while keeping their delicious filling intact, creating a perfect bite every time.

4. Adaptable for Any Diet

  • Make it vegetarian by swapping out the broth and using vegetable-filled potstickers.
  • Boost the protein with chicken, tofu, or extra potstickers.
  • Go low-carb by using fewer dumplings and more vegetables.
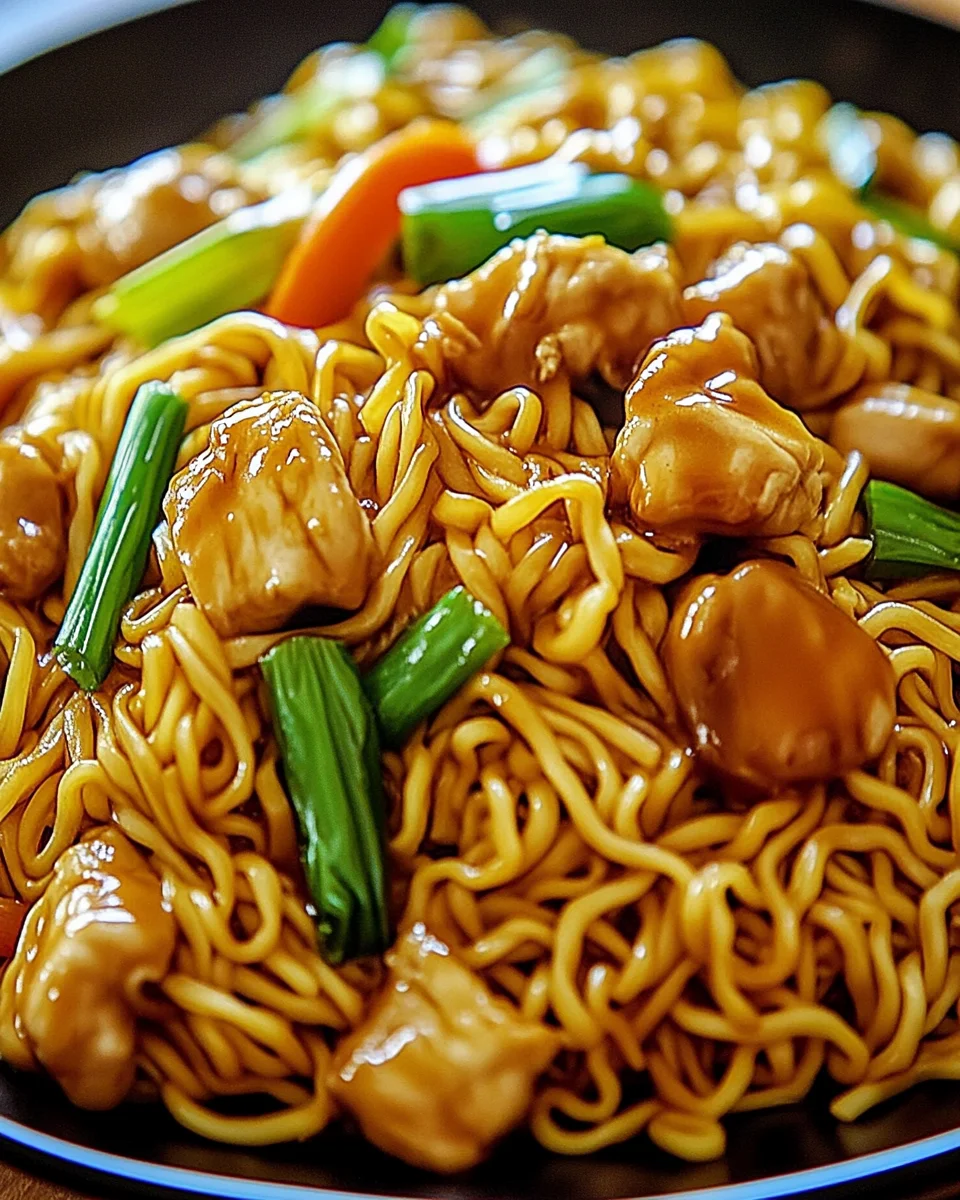
  • Add noodles for an even heartier meal.

Ingredients: The Perfect Fusion of Dumplings and Broth

For the Soup Base:
  • 4 cups chicken broth (or vegetable broth for a vegetarian option)
  • 1 tablespoon soy sauce
  • 1 tablespoon sesame oil
  • 2 teaspoons grated ginger
  • 2 cloves garlic, minced
  • 1 tablespoon rice vinegar (optional, for tang)
  • Salt and pepper to taste
For the Dumplings and Add-ins:
  • 12–15 frozen potstickers (store-bought or homemade)
  • ½ cup sliced mushrooms (optional)
  • ½ cup spinach or bok choy (optional)
  • 2–3 green onions, chopped (for garnish)
  • 1 teaspoon chili oil or red pepper flakes (optional, for heat)

Directions: Bringing This Flavorful Bowl to Life

1. Create the Aromatic Base
Heat sesame oil in a large pot over medium heat. Add garlic and ginger, sautéing for about 1 minute until fragrant.

2. Simmer the Broth
Pour in the chicken (or vegetable) broth, soy sauce, and rice vinegar. Let the soup simmer for 5–10 minutes to allow the flavors to meld together.

3. Cook the Potstickers and Vegetables
Gently add frozen potstickers to the simmering broth, cooking for 5–7 minutes until heated through. If using mushrooms or greens, stir them in during the last few minutes of cooking.

4. Season and Finish
Taste the broth and adjust seasoning with salt, pepper, and chili oil if desired. Remove from heat.

5. Serve and Enjoy
Ladle soup into bowls, ensuring each portion has a generous mix of broth, potstickers, and vegetables. Garnish with chopped green onions and a drizzle of sesame oil.

Nutritional Breakdown: A Light Yet Satisfying Meal

  • Calories: 250 kcal per serving
  • Protein: 12g
  • Fat: 10g
  • Carbohydrates: 28g
  • Fiber: 3g

How to Customize Your Potsticker Soup

One of the greatest things about this dish is how easily it can be tailored to fit your preferences. Whether you want to enhance the umami, add more greens, or spice things up, here are some ideas to inspire your perfect bowl:

1. Experiment with Different Broths

The foundation of any good soup is the broth, and this recipe allows for creativity:

  • Traditional Asian-style – Use chicken or vegetable broth with soy sauce, ginger, and garlic.
  • Richer umami flavors – Add tamari, fish sauce, or miso paste for depth.
  • Spicy twist – Infuse the broth with chili flakes, sriracha, or gochujang for heat.
  • Light and refreshing – Use a clear broth with a hint of citrus (like a splash of lime juice).

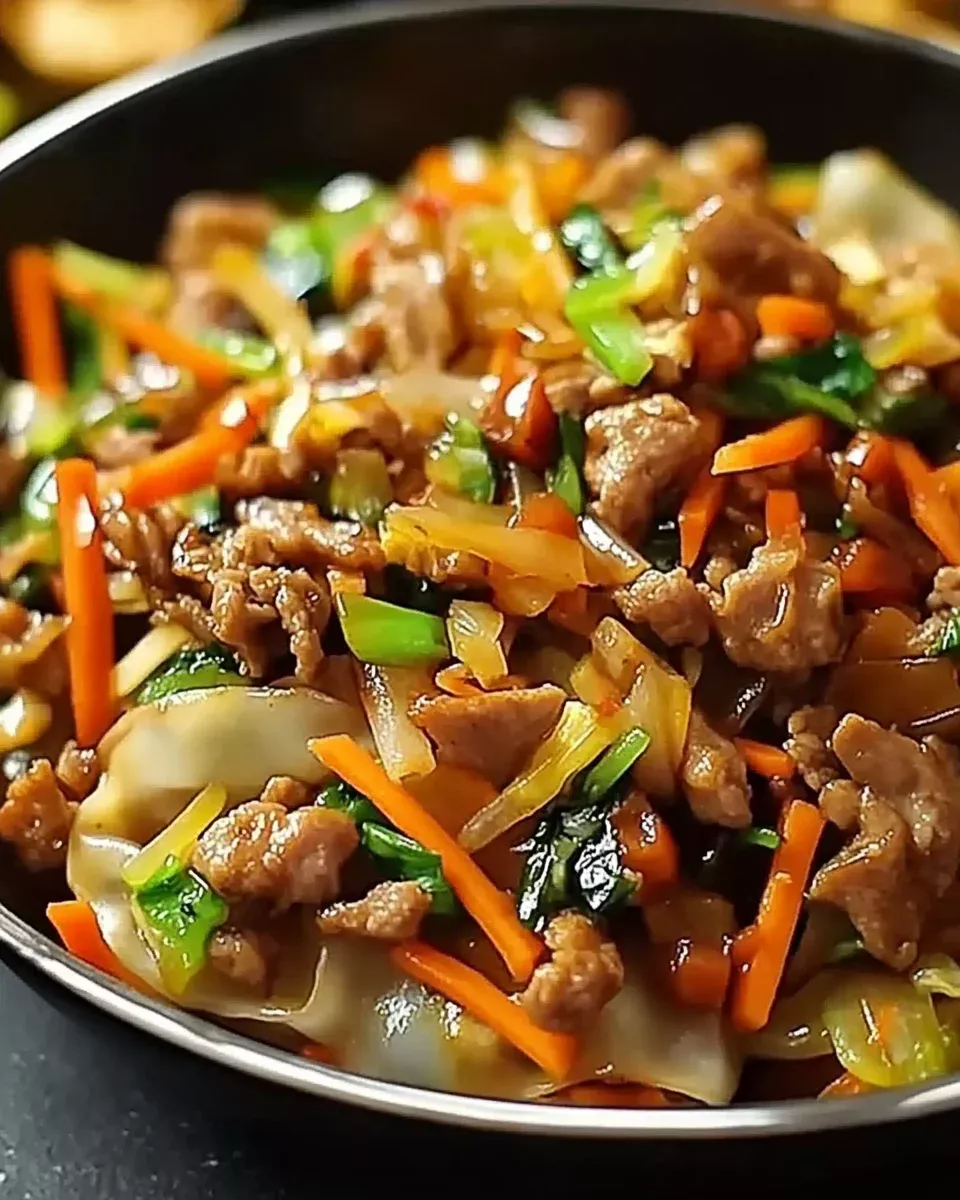
2. Get Creative with Vegetables

While mushrooms, bok choy, and spinach are common additions, you can mix things up by adding:

  • Napa cabbage for a mild crunch
  • Carrots for sweetness
  • Bell peppers for extra color and texture
  • Zucchini or snap peas for a fresh, crisp bite

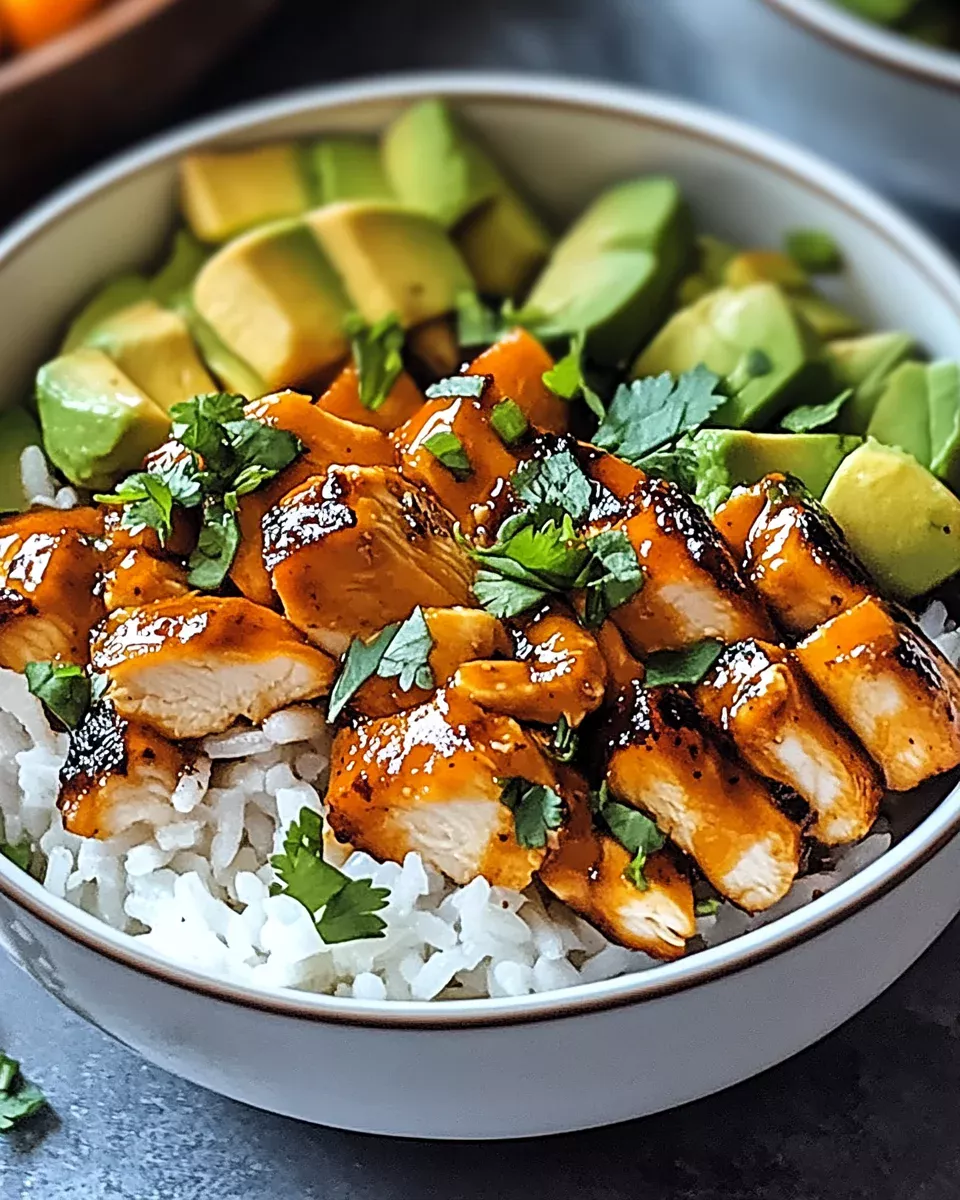
3. Adjust the Protein Content

While potstickers themselves are typically filled with pork, chicken, or vegetables, you can add extra protein to make the soup more filling:

  • Shredded rotisserie chicken
  • Tofu for a vegetarian-friendly option
  • Shrimp for a seafood-inspired twist
  • Ground turkey or beef for a heartier meal

4. Make It a Noodle Soup

If you’re craving something even more substantial, adding noodles is a fantastic way to turn this into a complete one-bowl meal. Some great options include:

  • Ramen noodles – Soft and chewy, perfect for absorbing the broth.
  • Udon noodles – Thick and hearty, ideal for a more filling dish.
  • Glass noodles – A lighter, gluten-free alternative.

5. Spice Levels: Mild or Fiery?

Adjusting the spice level allows you to cater to different preferences:

  • For a mild version, stick to a simple broth with soy sauce and sesame oil.
  • For extra warmth, add a splash of chili oil, sriracha, or Thai bird’s eye chilies.
  • If you love bold spice, try incorporating kimchi, gochujang, or Sichuan peppercorns.

Frequently Asked Questions (FAQs)

1. Can I Use Fresh Potstickers Instead of Frozen?

Absolutely! Fresh dumplings cook faster than frozen ones, so reduce the cooking time to about 3-4 minutes instead of 5-7 minutes.

2. How Do I Prevent Potstickers from Falling Apart in the Soup?

To keep the dumplings intact:

  • Do not over-stir once they’re in the broth.
  • Add them gently and avoid boiling too aggressively.
  • Cook them according to package instructions to prevent overcooking.

3. Can I Freeze Leftovers?

The broth can be frozen, but it’s best to freeze it without the potstickers. Dumplings can become mushy when reheated from frozen. If you need to store leftovers, separate the broth and dumplings before freezing.

4. What’s the Best Way to Reheat the Soup?

To keep the dumplings from getting too soft, reheat the broth separately until hot, then add the dumplings in for just a minute or two until warmed through.

5. Can I Make This Dish Gluten-Free?

Yes! Just follow these swaps:

  • Use gluten-free potstickers (found in many grocery stores or specialty markets).
  • Replace soy sauce with tamari or coconut aminos.
  • Check that your broth is labeled gluten-free.

6. How Can I Make the Broth Extra Flavorful?

For a deeper, richer broth, try adding:

  • A splash of fish sauce or tamari for umami.
  • A dash of rice vinegar for balance.
  • Dried mushrooms for earthy richness.
  • A drizzle of sesame oil for a nutty finish.

7. What Can I Serve with Potsticker Soup?

While this dish is satisfying on its own, it pairs well with:

  • Steamed dumplings or spring rolls for extra variety.
  • A side of kimchi for a tangy, spicy contrast.
  • A simple cucumber salad to balance the richness of the broth.

Final Thoughts: A Must-Try Soup for Any Occasion

Potsticker Soup is a dish that proves you don’t need complex ingredients or hours of cooking to create something deeply flavorful and satisfying. It’s a quick, customizable meal that can be adjusted to suit any taste, whether you want something light and refreshing or bold and spicy.

With its simple preparation, comforting broth, and the irresistible chewiness of dumplings, this recipe is perfect for:
Busy weeknights when you need something fast and filling.
Cold evenings when only a steaming bowl of soup will do.
A creative way to enjoy dumplings beyond pan-frying.

So the next time you’re craving warm, savory comfort in a bowl, skip the takeout and make your own Potsticker Soup—you won’t regret it!

Creamy Pepperoncini Chicken Skillet: A Perfect Balance of Tang and Comfort

When it comes to effortless yet impressive home-cooked meals, Creamy Pepperoncini Chicken Skillet checks all the right boxes. This dish brings together the tenderness of perfectly seared chicken, the tangy punch of pepperoncini peppers, and the silky richness of a creamy sauce, all in a single skillet. Whether you’re cooking for a family dinner or preparing something special for guests, this recipe delivers big on flavor without demanding hours in the kitchen.

In this comprehensive guide, we’ll explore why this dish has become a favorite among home cooks, how to customize it to suit your taste, and answer some common questions to ensure you get the perfect creamy, zesty skillet meal every time.

Why This Recipe Works: The Magic of Creamy and Tangy

The beauty of this dish lies in its contrast of flavors and textures. The mild heat and briny sharpness of pepperoncini peppers cut through the richness of the creamy sauce, creating a well-balanced dish that is indulgent but not overwhelming. Here are a few key reasons why this dish stands out:

1. The One-Pan Convenience

Nobody likes washing a sink full of dishes after cooking. This one-pan recipe minimizes cleanup while maximizing flavor. By cooking everything in a single skillet, you build deep, complex flavors as each ingredient layers onto the next.

2. A Sauce That Elevates Every Bite

The sauce in this dish is where the magic happens. Made from chicken broth, heavy cream, and the natural brininess of pepperoncini peppers, it coats every bite with a luxurious texture that’s not too heavy. The acidity from the peppers cuts through the richness, making this dish both hearty and refreshing.

3. Quick and Easy Yet Restaurant-Quality

Despite its sophisticated taste, this recipe is incredibly easy to make. With minimal prep and about 30 minutes of cooking time, you can serve up a meal that looks and tastes like something from a high-end restaurant.

4. Perfect for Any Occasion

Whether you’re looking for a quick weeknight dinner, a low-effort meal for entertaining, or something different from your usual chicken recipes, this dish fits the bill. It pairs well with pasta, rice, roasted vegetables, or even crusty bread, making it adaptable to whatever you have on hand.

Creamy Pepperoncini Chicken Skillet: A Tangy and Comforting Delight

Ingredients: The Perfect Harmony of Creamy and Tangy

For the Chicken:
  • 4 boneless, skinless chicken breasts
  • 1 tablespoon olive oil
  • Salt and pepper to taste
For the Sauce:
  • 1 onion, thinly sliced
  • 4 cloves garlic, minced
  • 1 cup sliced pepperoncini peppers
  • 1 cup chicken broth
  • 1 cup heavy cream
  • Chopped fresh parsley for garnish

Directions: Bringing the Flavors to Life

1. Sear the Chicken
Heat olive oil in a large skillet over medium-high heat. Season the chicken with salt and pepper, then sear until golden brown on both sides (about 5 minutes per side). Remove and set aside.

2. Sauté the Aromatics
In the same skillet, cook the sliced onions and minced garlic until soft and fragrant (about 3 minutes).

3. Add the Tangy Kick
Stir in the sliced pepperoncini peppers and cook for an additional 2 minutes, allowing their flavor to infuse.

4. Build the Creamy Sauce
Pour in the chicken broth, scraping up any browned bits from the pan. Stir in the heavy cream and bring to a gentle simmer.

5. Simmer to Perfection
Return the chicken to the skillet and let it cook in the sauce for 10 minutes, allowing the flavors to meld and the sauce to thicken.

6. Garnish and Serve
Sprinkle with fresh parsley and serve over rice, mashed potatoes, or pasta for a complete meal.

Nutritional Breakdown: A Satisfying Yet Balanced Dish

  • Calories: 320 kcal
  • Protein: 25g
  • Fat: 20g
  • Carbohydrates: 8g
  • Fiber: 2g

How to Customize This Dish

One of the best things about Creamy Pepperoncini Chicken Skillet is its versatility. Whether you have dietary preferences or want to switch up flavors, here are some great ways to adapt the dish:

1. Adjusting the Heat Level

  • For a milder dish, rinse the pepperoncini peppers before adding them to remove some of their briny intensity.
  • For extra spice, add crushed red pepper flakes or a splash of hot sauce.
  • For a smokier depth, swap out pepperoncini for roasted red peppers or fire-roasted poblanos.

2. Making It Dairy-Free

If you love creamy sauces but need a dairy-free alternative, try replacing the heavy cream with coconut milk or cashew cream. These options still provide richness while offering a slightly different flavor profile.

3. Using Different Proteins

While chicken breasts are the most common choice, this dish can be made with:

  • Chicken thighs for a juicier, more flavorful bite.
  • Shrimp for a seafood variation.
  • Tofu or tempeh for a vegetarian-friendly version.

4. Adding Extra Vegetables

To make this dish even more nutrient-packed, consider adding:

  • Spinach or kale for a boost of greens.
  • Mushrooms for an earthy umami element.
  • Cherry tomatoes for bursts of sweetness that balance out the tangy peppers.

5. Pairing It with the Right Side Dish

This dish pairs beautifully with a variety of sides. Here are some of the best options:

  • Over pasta or rice – The sauce clings to grains, making every bite extra flavorful.
  • With roasted potatoes – Crispy potatoes soak up the sauce while adding texture.
  • With garlic bread – A crunchy, buttery slice of bread is perfect for dipping into the sauce.

Frequently Asked Questions (FAQs)

1. What Are Pepperoncini Peppers, and Where Can I Find Them?

Pepperoncini peppers are mild, tangy, and slightly sweet chili peppers often pickled in vinegar. They can be found in the condiment aisle of most grocery stores, usually near pickles and olives.

2. Can I Make This Dish in Advance?

Yes! The dish actually tastes better the next day as the flavors have more time to meld together. Store leftovers in an airtight container in the refrigerator for up to 3 days.

3. How Do I Reheat Leftovers Without Making the Sauce Separate?

Reheat gently over low heat on the stove, stirring occasionally. If the sauce thickens too much, add a splash of chicken broth or water to loosen it up. Avoid microwaving on high, as it can cause the cream to separate.

4. Can I Freeze This Dish?

While it’s possible to freeze the chicken, cream-based sauces don’t always freeze well. The sauce may separate and lose its creamy texture upon thawing. If you plan to freeze it, consider making the dish without the cream, then adding fresh cream when reheating.

5. Can I Use Bone-In Chicken?

Absolutely! Bone-in, skin-on chicken thighs or drumsticks work well in this recipe. Just adjust the cooking time to ensure the chicken is fully cooked through.

6. Is This Dish Gluten-Free?

Yes! As long as you use a gluten-free chicken broth, the entire dish is naturally gluten-free. Serve it with a gluten-free side like mashed potatoes or roasted vegetables.

7. How Can I Make the Sauce Extra Thick and Creamy?

For a richer, thicker sauce:

  • Add grated Parmesan cheese to the sauce for extra depth.
  • Simmer the sauce for a few extra minutes to allow it to reduce and thicken naturally.
  • Mix in a cornstarch slurry (1 teaspoon cornstarch + 1 tablespoon water) for an extra silky texture.

Final Thoughts: A Must-Try Recipe for Flavor Lovers

Creamy Pepperoncini Chicken Skillet is more than just a meal—it’s an experience of rich, tangy, and creamy flavors that work in perfect harmony. Whether you’re looking for something quick and easy or a crowd-pleasing dish that feels special, this recipe is guaranteed to satisfy.

The balance of acidity, creaminess, and spice makes it stand out from ordinary chicken dishes, while its one-pan preparation keeps it simple and convenient. Plus, with so many ways to customize it, you can make this dish your own and enjoy it differently every time.

So next time you’re craving comfort food with a bold twist, give this Creamy Pepperoncini Chicken Skillet a try—you won’t regret it!

The Ultimate Guide to Popcorn Chicken: A Crispy, Flavorful Snack

Popcorn chicken is one of those irresistible bite-sized delights that never fail to please. Whether you’re snacking while watching a movie, serving up a crowd-pleasing appetizer, or indulging in a homemade fast-food-style meal, popcorn chicken delivers the perfect crunch with a juicy, flavorful center.

Originating from the Southern United States and popularized by fast-food chains like KFC, popcorn chicken has become a global favorite. The crispy, seasoned coating combined with tender, marinated chicken makes it a dish that is both easy to prepare and endlessly customizable.

This guide will take you through everything you need to know about making perfect popcorn chicken, from key techniques to FAQs, customization ideas, and pro tips.

What Makes This Popcorn Chicken Stand Out?

Many fast-food versions of popcorn chicken often fall short in one key area—crispiness. While the seasoning may be good, the texture can sometimes be greasy and soggy. Homemade popcorn chicken, when done right, stays crispy, crunchy, and full of flavor.

Here’s what makes this version better than anything you can get from a takeout box:

1. Marinating for Maximum Juiciness

The secret to juicy, flavorful popcorn chicken is in the marinade. Using buttermilk (or a substitute) tenderizes the meat while also infusing it with seasoning. This prevents the chicken from drying out during frying, ensuring every bite is soft on the inside with a crispy shell.

2. The Perfect Breading Technique

A combination of flour and cornflour (cornstarch) is the key to an ultra-crispy coating. The addition of buttermilk to the flour before dredging creates tiny clumps of flour, which fry up into extra crispy, craggy bits—giving you that restaurant-quality crunch.

3. Fast and Easy Cooking

Unlike large fried chicken pieces that require deep frying and longer cook times, popcorn chicken takes just two minutes to cook per batch. The small size of each piece means they cook quickly and evenly, making this an ideal recipe for weeknight dinners, game-day snacks, or party appetizers.

Ingredients: The Perfect Blend of Crunch and Flavor

For the Chicken and Marinade:
  • 500g (1 lb) chicken breast, skinless and boneless (or chicken tenderloin/thighs)
  • ¾ cup buttermilk (see substitutes below)
  • 1 ½ teaspoons cooking salt (kosher salt preferred)
  • 1 large egg
For the Crispy Coating:
  • 1 ½ cups all-purpose flour
  • ½ cup cornflour (cornstarch)
  • 1 teaspoon kosher salt
  • ½ teaspoon celery salt
  • 1 teaspoon black pepper
  • 1 teaspoon paprika (regular, not smoked or hot)
  • 1 teaspoon dried thyme, crushed
  • 1 teaspoon dried oregano, crushed
  • ¾ teaspoon onion powder
  • 2 teaspoons garlic powder
  • ½ teaspoon mustard powder
  • ½ teaspoon ginger powder
  • ¼ teaspoon cayenne pepper (optional, for heat)
For Frying:
  • 2 ½ – 3 ½ cups canola, vegetable, or peanut oil (enough for shallow frying)
For Dipping (Optional):
  • Honey mustard sauce, ketchup, BBQ sauce, sweet and sour sauce, or any favorite dip

Directions: Turning Ingredients into Crispy Perfection

1. Marinate the Chicken
Cut the chicken into ½-inch cubes. In a bowl, whisk together buttermilk, salt, and egg. Add the chicken and marinate for at least 1 hour (up to 24 hours for more flavor).

2. Prepare the Breading
In a large bowl, mix flour, cornflour, and all seasoning ingredients. For extra crunch, drizzle 3 tablespoons of the buttermilk marinade into the flour mixture and rub it in with your fingers to create small flour clumps.

3. Coat the Chicken
Using one hand, lift the chicken from the marinade, letting excess drip off, and scatter it over the flour mixture. Toss with your other hand to coat evenly, pressing the flour into the chicken for maximum crispiness. Shake off excess flour and set aside on a tray.

4. Heat the Oil
In a large, heavy-based saucepan or skillet, heat 2.5 cm (1 inch) of oil to 180°C (350°F). Test the oil by dropping a bit of the breading in—if it sizzles immediately, it’s ready.

5. Fry the Chicken
Working in batches, carefully lower the chicken into the oil. Fry for about 2 minutes, stirring occasionally to ensure even cooking. The pieces should be golden brown and crispy. Remove with a slotted spoon and drain on a paper towel-lined tray.

6. Serve and Enjoy
Serve the hot popcorn chicken in a bowl or paper cups with your favorite dipping sauces.

Nutritional Breakdown: A Tasty and Satisfying Treat

  • Calories: 280 kcal per 100g
  • Carbohydrates: 9.4g
  • Protein: 21.8g
  • Fat: 17.3g
  • Saturated Fat: 3.7g
  • Sodium: 589mg
  • Sugar: 1.5g

Customizing Your Popcorn Chicken

Popcorn chicken is highly versatile, and with a few tweaks, you can make it your own. Here are some creative ways to customize the flavor, texture, and serving options:

1. Experiment with Different Seasonings

The seasoning blend in this recipe mimics the famous “KFC 11 herbs and spices,” but you can easily switch things up:

  • Spicy Kick – Add more cayenne pepper or a dash of hot sauce to the marinade.
  • Garlic Lover’s Version – Increase the garlic powder and add minced garlic to the marinade.
  • Smoky Flavor – Use smoked paprika instead of regular paprika.
  • Asian-Inspired – Add five-spice powder and a touch of soy sauce for a different flavor profile.

2. Alternative Cooking Methods

While frying is the traditional way to achieve the best crunch, you can also try these methods:

  • Air Fryer Method – Lightly spray the breaded chicken with oil and cook at 200°C (400°F) for 10-12 minutes, shaking the basket halfway through.
  • Oven-Baked Version – Place the chicken on a greased baking sheet, spray with oil, and bake at 220°C (425°F) for 15-18 minutes, flipping halfway.

3. Serving Ideas

Popcorn chicken is more than just a snack. Here are some fun and delicious ways to serve it:

  • Movie Night Snack – Serve in paper cups with dipping sauces for a fun popcorn-style treat.
  • Loaded Popcorn Chicken Bowls – Top a bowl of mashed potatoes with popcorn chicken, cheese, and gravy for a comforting meal.
  • Asian Fusion – Toss the chicken in sweet chili sauce and serve with jasmine rice and stir-fried vegetables.
  • Chicken and Waffles – Pair with mini waffles and drizzle with maple syrup for a sweet and savory twist.

Frequently Asked Questions

1. Can I Make Popcorn Chicken Ahead of Time?

Yes! You can prepare the chicken in advance by marinating it and coating it in flour. Store the breaded chicken in an airtight container in the fridge for up to 24 hours before frying.

If you need to make it even further ahead, you can freeze the uncooked, breaded chicken pieces for up to 3 months. Fry them straight from frozen, adding an extra minute to the cooking time.

2. What’s the Best Oil for Frying?

For the best flavor and crispiness, use neutral oils with a high smoke point such as:

  • Canola oil
  • Vegetable oil
  • Peanut oil

Avoid olive oil, as it has a lower smoke point and can burn at high frying temperatures.

3. How Do I Keep Popcorn Chicken Crispy?

If you’re making a large batch, you can keep the cooked popcorn chicken warm and crispy by placing it in a low oven (90°C/200°F) on a wire rack. This prevents the pieces from becoming soggy.

4. Can I Use Chicken Thighs Instead of Breast?

Yes! Chicken thighs will add extra juiciness and are slightly more forgiving if overcooked. The texture will be slightly different, but the flavor will be just as delicious.

5. How Can I Make a Healthier Version?

For a lighter version, consider:

  • Baking instead of frying – This method reduces the oil content while still keeping the chicken crispy.
  • Using whole wheat flour – Adds fiber and a nuttier taste.
  • Air frying – Requires less oil but still achieves a crispy texture.

6. What’s the Best Way to Reheat Leftovers?

To keep the chicken crispy, avoid microwaving, as it makes the breading soggy. Instead, use:

  • Oven – Bake at 200°C (400°F) for 5-7 minutes.
  • Air Fryer – Heat at 180°C (350°F) for 3-5 minutes.

7. Can I Use This Recipe for a Gluten-Free Version?

Absolutely! Simply replace the all-purpose flour with a gluten-free flour blend and make sure your cornflour (cornstarch) is labeled gluten-free.

8. What Are the Best Dipping Sauces for Popcorn Chicken?

The right dipping sauce can take your popcorn chicken to the next level. Here are some favorites:

  • Honey Mustard Sauce – A tangy-sweet classic.
  • BBQ Sauce – Smoky and slightly sweet, perfect for dipping.
  • Ranch Dressing – Cool and creamy, a great contrast to crispy chicken.
  • Buffalo Sauce – For those who love a spicy kick.
  • Sweet Chili Sauce – Adds a delicious sweet and spicy flavor.

Final Thoughts: A Recipe Worth Trying

Popcorn chicken is more than just a snack—it’s a versatile, fun, and flavorful dish that can be adapted in countless ways. Whether you enjoy it as a crispy appetizer, a meal centerpiece, or a party favorite, this recipe delivers everything you love about fried chicken in a bite-sized package.

Making it at home means you control the ingredients, seasonings, and cooking methods, ensuring a fresher, crispier, and healthier version than store-bought or fast food alternatives.

So next time you’re craving something crispy, golden, and downright addictive, skip the takeout and make your own homemade popcorn chicken. It’s guaranteed to be a hit with both kids and adults alike.

The Ultimate Guide to Salmon Rice Bowls: A Delicious and Nutritious Meal

Salmon rice bowls have taken the culinary world by storm, offering a perfect combination of protein, healthy fats, and vibrant flavors. This dish, inspired by Japanese and Hawaiian cuisine, is not only delicious but also incredibly versatile. Whether you are looking for a quick weekday meal, a post-workout dinner, or a meal-prep-friendly option, salmon rice bowls fit the bill.

In this comprehensive guide, we will dive deep into why salmon rice bowls are a must-try, how you can customize them to suit your taste, and answer some frequently asked questions to help you master this recipe.

Why Salmon Rice Bowls Are a Game-Changer

A Perfect Balance of Flavor and Nutrition

Salmon rice bowls strike a beautiful balance between taste and health. The salmon provides a rich umami flavor, enhanced by a sweet and savory marinade, while the rice acts as a comforting, neutral base. Fresh vegetables like cucumbers, avocado, and edamame add texture and brightness, while spicy mayo ties everything together with a creamy kick.

From a nutritional standpoint, this dish is a powerhouse. Salmon is packed with omega-3 fatty acids, essential for brain and heart health. The combination of lean protein, complex carbohydrates, and healthy fats keeps you full and energized for hours.

Quick and Easy to Prepare

Despite its gourmet appeal, this dish is surprisingly simple to make. With just a few fresh ingredients and minimal cooking time, you can have a restaurant-quality meal ready in under 30 minutes. The salmon marinates while you prep the toppings, making it an efficient and practical meal for busy schedules.

Customizable to Suit Any Diet

One of the best things about salmon rice bowls is their flexibility. Whether you are gluten-free, dairy-free, or following a low-carb diet, you can easily modify this dish to fit your dietary preferences. Swap out the jasmine rice for quinoa or cauliflower rice, replace soy sauce with coconut aminos, or add different vegetables for variety.

Ingredients: The Building Blocks of Flavor

For the Salmon:
  • 1 ½ lbs center-cut salmon filet, skin removed
  • ¼ cup soy sauce (or tamari for gluten-free)
  • 2 tablespoons honey
  • 1 tablespoon sriracha or chili garlic paste
  • 2 garlic cloves, grated
  • 2 teaspoons grated ginger
For the Spicy Mayo:
  • ⅓ cup kewpie mayonnaise (or regular mayonnaise)
  • 1 tablespoon sriracha
  • 1 teaspoon grated ginger
  • 1 teaspoon toasted sesame oil
  • 1 tablespoon soy sauce
For the Bowl Assembly:
  • 4 cups steamed jasmine rice (or rice of choice)
  • 2 Persian cucumbers, sliced into half-moons
  • 1 avocado, sliced
  • 1 cup steamed edamame
  • Sesame seeds, for garnish
  • Nori sheets, for serving

Directions: Crafting the Perfect Bowl

1. Marinate the Salmon
In a bowl, whisk together soy sauce, honey, sriracha, garlic, and ginger. Pat the salmon dry, cut it into 1½-inch cubes, and coat it with the marinade. Let it marinate for at least 20–30 minutes, or up to 8 hours for deeper flavor.

2. Prepare the Spicy Mayo
Mix all ingredients for the spicy mayo in a small bowl. Refrigerate until ready to use.

3. Cook the Salmon
Preheat the oven to 400°F (200°C). Line a baking sheet with parchment paper. Spread the marinated salmon cubes on the sheet and bake for 8–10 minutes. Broil for an additional 1–2 minutes for a light char.

4. Assemble the Bowls
Divide the steamed rice among four bowls. Top with salmon cubes, cucumbers, avocado slices, and edamame. Sprinkle with sesame seeds, drizzle with spicy mayo, and serve with nori sheets for an extra umami kick.

Nutritional Breakdown: A Balanced Bite

  • Calories: 634 kcal per serving
  • Protein: High-quality lean protein from salmon
  • Fats: Heart-healthy omega-3s and monounsaturated fats from salmon and avocado
  • Carbohydrates: Energy-packed jasmine rice with fiber-rich veggies
  • Vitamins & Minerals: Loaded with vitamin D, B12, and antioxidants

Ways to Customize Your Salmon Rice Bowl

1. Experiment with Different Proteins

While salmon is the star of this dish, you can easily swap it out for other proteins:

  • Grilled Chicken – A leaner option that pairs well with the same marinade.
  • Tofu or Tempeh – A great plant-based alternative for vegetarians and vegans.
  • Shrimp – Quick to cook and adds a seafood twist to the bowl.
  • Seared Tuna – Offers a sashimi-style touch with a delicate texture.

2. Change Up the Base

Rice is a staple ingredient, but there are plenty of alternatives:

  • Brown Rice – A fiber-rich option with a nuttier flavor.
  • Sushi Rice – Adds a sticky texture, perfect for a more traditional feel.
  • Quinoa – A high-protein, gluten-free alternative.
  • Cauliflower Rice – A low-carb, keto-friendly option.

3. Play Around with Toppings

The toppings add texture, flavor, and nutritional benefits. Here are some ideas:

  • Crunchy Additions – Shredded carrots, radish slices, shredded cabbage, crispy shallots.
  • Fruity Twists – Diced mango, pineapple, or pomegranate for a touch of sweetness.
  • Extra Protein – Soft-boiled eggs, roasted chickpeas, or even crumbled feta cheese.
  • More Greens – Kale, spinach, or microgreens for added freshness.

4. Experiment with Different Sauces

Spicy mayo is a fan favorite, but here are some other sauce ideas:

  • Teriyaki Glaze – A sweet and savory sauce that pairs beautifully with salmon.
  • Miso Dressing – Adds depth with umami-rich flavors.
  • Sesame-Ginger Vinaigrette – A light and refreshing alternative.
  • Coconut Lime Sauce – Perfect for a tropical variation.

Frequently Asked Questions

1. Can I Make This Recipe Ahead of Time?

Yes! This recipe is excellent for meal prep. The key is to store the components separately to maintain freshness. Keep the cooked salmon and rice in airtight containers in the fridge and store the vegetables and sauce separately. When ready to eat, reheat the salmon and rice, then assemble the bowl with fresh toppings.

2. How Long Can I Store Leftovers?

Cooked salmon can be stored in an airtight container in the refrigerator for up to 3 days. If you want to extend its shelf life, you can freeze the salmon for up to 2 months. However, fresh toppings like avocado and cucumbers are best added right before serving.

3. Can I Use Canned Salmon Instead of Fresh?

Absolutely! While fresh salmon offers the best texture and flavor, canned salmon is a convenient and budget-friendly option. If using canned salmon, skip the marinating step and mix it with a bit of soy sauce, sesame oil, and sriracha for added flavor.

4. What’s the Best Type of Salmon to Use?

For the best results, use a center-cut filet of wild-caught salmon. It has a firmer texture and a richer flavor than farmed salmon. If wild-caught salmon is unavailable, sustainably farmed Atlantic salmon is a good alternative.

5. Can I Make This Dish Gluten-Free?

Yes! Simply swap out the soy sauce for tamari or coconut aminos, and make sure your other condiments (like sriracha) are gluten-free. Pair it with a gluten-free grain like quinoa or cauliflower rice.

6. What Are Some Low-Carb Alternatives to Rice?

For those following a low-carb or keto diet, cauliflower rice, zucchini noodles, or shredded cabbage make excellent substitutes. These alternatives keep the dish light while still allowing you to enjoy all the delicious flavors.

7. What’s the Best Way to Cook the Salmon?

Baking the salmon at 400°F (200°C) for 8–10 minutes, followed by a quick broil for 1–2 minutes, ensures a tender texture with a slightly caramelized top. Alternatively, you can pan-sear the salmon over medium-high heat for 3–4 minutes per side or even air-fry it at 375°F (190°C) for 8–10 minutes.

8. Can I Serve This Dish Cold?

Yes! This dish works beautifully as a cold meal, especially if using sushi rice. Simply chill all the ingredients before assembling for a refreshing poke bowl-style experience.

Conclusion: A Dish Worth Adding to Your Meal Rotation

Salmon rice bowls are the perfect combination of flavor, nutrition, and convenience. Whether you prefer a classic preparation or enjoy experimenting with different ingredients, this dish can be tailored to your taste and dietary needs.

With a simple yet flavorful marinade, fresh toppings, and a rich, creamy sauce, every bite is a delightful balance of textures and tastes. It’s a meal that’s not only satisfying but also nourishing, making it a great option for anyone looking to incorporate more healthy and delicious dishes into their routine.

Next time you’re craving a wholesome, restaurant-quality meal at home, try making a salmon rice bowl. Once you do, it’s sure to become a staple in your kitchen.

Chicken Chow Mein with the Ultimate Chow Mein Sauce: A Takeout Classic Made at Home

Chicken Chow Mein is a beloved dish in Chinese cuisine that has become a staple in restaurants and home kitchens around the world. With its combination of tender stir-fried noodles, crisp vegetables, and juicy chicken, all tossed in a rich, umami-packed sauce, this dish is both comforting and satisfying.

The secret to an exceptional Chicken Chow Mein lies in the perfectly balanced sauce—a harmonious blend of savory soy sauce, deep oyster sauce, nutty sesame oil, and a touch of sweetness. Whether you’re looking for a quick weeknight meal or an impressive dish to serve guests, this homemade version surpasses takeout in both flavor and freshness.

This article explores why Chicken Chow Mein is so popular, how you can customize it to your liking, expert cooking tips, and answers to common questions to ensure that your stir-fry turns out perfect every time.

Why You’ll Love This Chicken Chow Mein Recipe

1. A Perfect Balance of Flavors

What makes this Chow Mein stand out is the bold and well-balanced sauce. The savory depth of soy sauce, the rich umami of oyster sauce, the nutty aroma of sesame oil, and a hint of sweetness all come together to coat the noodles in a way that’s irresistibly delicious.

2. Quick and Easy—Ready in 30 Minutes

Unlike many takeout dishes that require long preparation times, this homemade Chicken Chow Mein can be made in under 30 minutes. With a little prep work and a hot skillet, you’ll have a restaurant-quality meal on the table in no time.

3. A One-Pan Wonder

Chicken Chow Mein is a true one-pan meal, meaning minimal cleanup. The entire dish—from cooking the chicken to sautéing the vegetables and tossing in the noodles—can be done in one wok or skillet, making it efficient and convenient.

4. Highly Customizable

One of the best things about Chow Mein is its versatility. You can easily swap out the protein, adjust the vegetables, or modify the sauce to suit your taste. Whether you love extra heat, prefer a vegetarian version, or want a different protein, this dish is endlessly adaptable.

5. Better Than Takeout

Homemade Chicken Chow Mein tastes fresher, contains less oil, and is free from preservatives compared to what you’d get at a restaurant. Plus, you have full control over ingredients, sodium levels, and spice preferences, ensuring that the meal is healthier and just as flavorful.

Essential Ingredients for a Flavor-Packed Dish

For the Chow Mein Sauce:

  • Soy sauce (salty, umami-rich base)
  • Oyster sauce (adds deep, savory richness)
  • Hoisin sauce (a hint of sweetness and complexity)
  • Sesame oil (nutty aroma and flavor)
  • Cornstarch (for a perfectly thickened sauce)
  • Sugar (optional, balances flavors)
  • Chicken broth or water (for consistency)

For the Chicken Chow Mein:

  • Chow mein noodles (or thin egg noodles)
  • Vegetable oil (for stir-frying)
  • Chicken breast or thighs (sliced thin for tenderness)
  • Garlic and onion (aromatic depth)
  • Carrots, cabbage, and bean sprouts (classic crunch and texture)
  • Green onions (for garnish and freshness)

Step-by-Step Directions for the Perfect Stir Fry

1. Create the Signature Sauce

  • In a small bowl, whisk together all sauce ingredients. Set aside.

2. Cook the Noodles

  • Prepare noodles according to package instructions. Drain and set aside.

3. Sear the Chicken to Perfection

  • Heat oil in a large skillet or wok over medium-high heat.
  • Add sliced chicken and stir-fry until golden brown and fully cooked. Remove from the skillet.

4. Sauté the Vegetables for Maximum Flavor

  • In the same skillet, heat more oil if needed.
  • Add garlic, onion, carrots, cabbage, and bean sprouts. Stir-fry until just tender but still crisp.

5. Bring It All Together

  • Return the cooked chicken to the skillet.
  • Add noodles and pour in the chow mein sauce.
  • Toss everything together until well coated and heated through.

6. Garnish and Serve

  • Sprinkle sliced green onions on top.
  • Serve hot and enjoy this takeout-worthy meal at home.

Nutritional Highlights

  • Calories: Around 400 per serving
  • Protein: High, thanks to lean chicken
  • Carbohydrates: Moderate from noodles and veggies
  • Healthy Fats: From sesame oil and chicken

How to Customize Your Chicken Chow Mein

Choosing the Right Protein

While chicken is the classic choice, you can easily switch up the protein based on your preferences:

  • Beef: Thinly sliced flank steak or sirloin works well.
  • Shrimp: Adds a seafood twist with a delicate sweetness.
  • Pork: Thin pork strips or ground pork can replace the chicken.
  • Tofu: A great plant-based option that absorbs the sauce beautifully.

Vegetable Add-Ins

Although carrots, cabbage, and bean sprouts are common in Chicken Chow Mein, you can get creative by adding:

  • Bell peppers for sweetness and crunch.
  • Snap peas or snow peas for extra texture.
  • Mushrooms for an earthy, umami boost.
  • Zucchini or bok choy for a fresh, mild bite.

Noodle Substitutes

  • Traditional chow mein noodles provide the best texture, but you can use:
    • Lo mein noodles (slightly softer but still delicious).
    • Spaghetti or egg noodles (a great pantry-friendly substitute).
    • Rice noodles (for a gluten-free alternative).

Spice It Up

If you love a bit of heat, try adding:

  • Chili paste or sriracha for bold spiciness.
  • Crushed red pepper flakes for a little kick.
  • Szechuan peppercorns for a numbing heat.

Gluten-Free Adjustments

  • Replace soy sauce with tamari or coconut aminos.
  • Use gluten-free noodles instead of chow mein noodles.
  • Ensure that oyster sauce is gluten-free, or substitute with a mix of hoisin sauce and fish sauce.

Pro Tips for the Best Chicken Chow Mein

1. Use High Heat for Authentic Flavor

To get that signature stir-fry texture, use medium-high to high heat. This helps caramelize the chicken, lock in flavors, and keep the vegetables crisp rather than soggy.

2. Cook in Batches

Avoid overcrowding the pan, as too many ingredients will steam rather than stir-fry. Cook the chicken first, set it aside, and then stir-fry the vegetables separately before combining everything.

3. Don’t Overcook the Noodles

If using dried chow mein noodles, be sure to undercook them slightly before adding them to the pan. They will continue to cook when tossed with the sauce. Overcooked noodles will become mushy rather than springy.

4. Let the Sauce Thicken Properly

Cornstarch helps thicken the sauce, allowing it to coat the noodles evenly. Be sure to whisk the sauce ingredients well before adding them to prevent clumping.

5. Garnish for Extra Flavor

For the perfect finishing touch, garnish your Chicken Chow Mein with:

  • Sliced green onions for freshness.
  • Toasted sesame seeds for crunch.
  • A drizzle of sesame oil for extra nuttiness.

Frequently Asked Questions (FAQs)

1. Can I Make Chicken Chow Mein Ahead of Time?

Yes! Chicken Chow Mein stores well, making it a great option for meal prep. Store in an airtight container in the refrigerator for up to 3 days.

2. What’s the Best Way to Reheat Chicken Chow Mein?

  • Stovetop: Heat in a pan over medium heat with a splash of water or broth, stirring frequently.
  • Microwave: Heat in 30-second intervals, stirring in between to prevent drying out.

3. Can I Freeze Chicken Chow Mein?

Yes, but for the best texture, freeze the chicken and vegetables separately from the noodles. When ready to eat, thaw everything, cook fresh noodles, and toss them together with the sauce.

4. What’s the Difference Between Chow Mein and Lo Mein?

  • Chow Mein: Noodles are stir-fried, giving them a slightly crispy texture.
  • Lo Mein: Noodles are softer and tossed in sauce rather than stir-fried.

5. Can I Make This Dish Healthier?

Absolutely! To make Chicken Chow Mein lighter, you can:

  • Use whole wheat or zucchini noodles instead of traditional chow mein noodles.
  • Reduce oil and sugar in the sauce.
  • Increase vegetables for added fiber and nutrients.

Conclusion: The Ultimate Takeout Fakeout

Making Chicken Chow Mein at home is not only easier and healthier than ordering takeout, but it also allows you to customize the flavors, textures, and ingredients to your liking.

With its savory sauce, crisp vegetables, tender chicken, and springy noodles, this dish is guaranteed to become a staple in your kitchen. The best part? It’s a one-pan meal that comes together in just 30 minutes, making it perfect for busy weeknights or a fun, homemade alternative to takeout.

Try this Chicken Chow Mein recipe today and experience the bold, delicious flavors of an authentic Chinese stir-fry—right from your own kitchen.

Egg Roll Stir Fry: A Quick and Healthy Twist on a Classic Favorite

Egg rolls are a beloved staple in Asian cuisine, known for their crispy wrappers and savory, flavor-packed fillings. However, traditional egg rolls require deep-frying, making them higher in calories and more time-consuming to prepare. Enter Egg Roll Stir Fry—a deconstructed, low-carb version of the classic egg roll that delivers all the bold flavors and textures you love, without the added effort or extra carbs.

This dish combines ground meat, cabbage, carrots, garlic, ginger, and a rich umami-packed sauce into a one-pan meal that is perfect for busy weeknights, meal prepping, or a quick and healthy lunch. Whether you follow a low-carb, keto, gluten-free, or high-protein diet, this recipe is easy to customize and adapt to suit your preferences.

In this guide, we’ll explore why Egg Roll Stir Fry is a must-try dish, how you can tweak it to fit your taste, and answer the most common questions about preparing, storing, and serving this flavorful meal.

Why Egg Roll Stir Fry is a Game-Changer

1. All the Flavor, None of the Fuss

Traditional egg rolls require filling, rolling, and deep-frying, which can be time-consuming and messy. With Egg Roll Stir Fry, you skip the wrappers and frying process while still enjoying all the savory, slightly crunchy, and aromatic goodness in a fraction of the time.

2. A One-Pan Wonder

This dish is a dream for home cooks looking for a quick and easy meal. Everything is cooked in one skillet or wok, making cleanup a breeze. In just 25 minutes, you can have a nutritious and satisfying meal on the table with minimal effort.

3. Packed with Nutrients

Egg Roll Stir Fry is loaded with fiber-rich vegetables, lean protein, and heart-healthy fats. Cabbage and carrots provide a crunchy texture, while garlic and ginger infuse the dish with aromatic depth. This meal is not only delicious but also low in carbs and high in essential vitamins and minerals.

4. Perfect for Meal Prep

If you love prepping meals in advance, this recipe is a lifesaver. It stores well in the refrigerator, making it an excellent option for make-ahead lunches and dinners. The flavors deepen over time, so leftovers taste just as delicious—if not better—the next day.

5. Highly Versatile

Whether you want to switch up the protein, add more veggies, or make it vegetarian, this recipe is highly adaptable. From spicy to mild, meaty to plant-based, and carb-heavy to keto-friendly, you can tweak this dish in countless ways.

Ingredients for a Flavorful Stir Fry

Main Ingredients:

  • 1 pound ground meat (chicken, turkey, or pork)
  • 2 tablespoons vegetable oil
  • 1 medium onion, chopped
  • 3 garlic cloves, minced
  • 1 teaspoon grated ginger
  • 1 medium head of green cabbage, thinly sliced
  • 2 medium carrots, shredded

For the Sauce:

  • ¼ cup soy sauce
  • 1 tablespoon sesame oil
  • 1 teaspoon rice vinegar
  • ¼ teaspoon crushed red pepper flakes (optional)

For Garnish:

  • 2 green onions, sliced
  • Sesame seeds (optional)

Simple Steps to Stir-Fry Perfection

1. Sizzle and Brown the Meat

  • Heat vegetable oil in a large skillet or wok over medium-high heat.
  • Add ground meat, breaking it up with a spoon, and cook until browned.
  • Drain any excess fat if needed.

2. Add Aromatics for Depth

  • Stir in the chopped onion, garlic, and grated ginger.
  • Cook for 2-3 minutes until fragrant and the onion softens.

3. Toss in the Veggies

  • Add the sliced cabbage and shredded carrots to the skillet.
  • Stir frequently and cook for 5-7 minutes until the vegetables are tender but still crisp.

4. Infuse with Bold Flavors

  • In a small bowl, whisk together soy sauce, sesame oil, rice vinegar, and red pepper flakes.
  • Pour over the stir fry and mix well.

5. Let the Flavors Meld

  • Cook for an additional 2 minutes, allowing the ingredients to absorb the sauce.

6. Garnish and Serve

  • Remove from heat and top with sliced green onions and sesame seeds.
  • Serve hot as is or pair with steamed rice or cauliflower rice for a low-carb option.

Nutritional Breakdown

  • Calories: 280 kcal per serving
  • Protein: High in lean protein from ground meat
  • Carbohydrates: Moderate, mostly from vegetables
  • Fat: Balanced from sesame oil and meat

Creative Ways to Customize Egg Roll Stir Fry

One of the best things about this recipe is its versatility. Here are some fun variations to suit different tastes and dietary needs:

Protein Choices

While the traditional recipe calls for ground pork, chicken, or turkey, you can switch things up with different proteins:

  • Beef: Ground beef gives this dish a heartier, bolder flavor.
  • Shrimp: Adds a delicate sweetness and a seafood twist.
  • Tofu or Tempeh: For a plant-based alternative, use crumbled tofu or cubed tempeh.
  • Eggs: Scrambled eggs work well for a vegetarian-friendly option with extra protein.

Extra Veggie Additions

To add more color, flavor, and nutrition, consider tossing in:

  • Bell peppers – Sweet and crunchy
  • Mushrooms – Earthy and umami-packed
  • Snap peas – Adds a crisp texture
  • Zucchini – Light and slightly sweet
  • Bean sprouts – Classic in many stir-fry dishes

Spicing It Up

If you love a bit of heat, there are several ways to turn up the spice level:

  • Add extra red pepper flakes or sriracha for a fiery kick.
  • Mix in chili garlic sauce for a bolder, more authentic Asian heat.
  • Use spicy ground sausage instead of traditional ground meat.

Gluten-Free and Keto Modifications

  • Replace soy sauce with tamari or coconut aminos for a gluten-free version.
  • Serve over cauliflower rice instead of regular rice to keep it low-carb.
  • Use avocado oil instead of sesame oil for a lighter fat option.

Frequently Asked Questions (FAQs)

1. Can I Make Egg Roll Stir Fry in Advance?

Yes! This dish is perfect for meal prep. You can cook a large batch and store it in the fridge for up to 3 days. The flavors meld together beautifully over time, making leftovers just as delicious as the freshly cooked dish.

2. How Do I Reheat Leftovers?

  • Stovetop: Heat in a skillet over medium heat with a splash of water or broth to keep it moist.
  • Microwave: Heat in 30-second intervals, stirring in between, until warmed through.

3. Can I Freeze Egg Roll Stir Fry?

Yes! Cool the stir fry completely and store it in a freezer-safe container for up to 3 months. When ready to eat, thaw overnight in the refrigerator and reheat on the stovetop for the best texture.

4. What’s the Best Meat for This Recipe?

Ground pork, chicken, or turkey work best, but you can also use beef, shrimp, or a plant-based alternative like tofu or tempeh.

5. Is This Dish Low-Carb and Keto-Friendly?

Yes! Egg Roll Stir Fry is naturally low in carbs, especially if you skip the rice. Serve it over cauliflower rice or enjoy it on its own for a delicious keto meal.

6. How Can I Reduce the Sodium?

Use low-sodium soy sauce or replace half the soy sauce with water to reduce salt intake. Coconut aminos is another great alternative for a lower-sodium, slightly sweeter flavor.

7. What Can I Serve With Egg Roll Stir Fry?

While this dish is delicious on its own, you can pair it with:

  • Steamed white or brown rice
  • Cauliflower rice for a low-carb option
  • Egg noodles for a heartier meal
  • A simple cucumber salad for a refreshing side

8. Can I Use a Pre-Made Coleslaw Mix Instead of Chopping Cabbage?

Absolutely! A bag of pre-shredded coleslaw mix makes this dish even easier and faster to prepare.

Conclusion: A Dish That Checks All the Boxes

Egg Roll Stir Fry is the ultimate combination of convenience, flavor, and nutrition. Whether you’re looking for a quick weeknight meal, a meal prep-friendly dish, or a low-carb alternative to traditional egg rolls, this recipe delivers on all fronts.

With bold flavors, crispy-tender vegetables, and a rich umami sauce, this dish captures everything you love about egg rolls—without the wrapper. Plus, its one-pan simplicity makes it a go-to for anyone who wants a delicious, no-fuss meal.

Try this Egg Roll Stir Fry for yourself, experiment with different ingredients, and make it your own. It’s a dish that’s bound to become a household favorite—one that you’ll come back to time and time again.

Garlic Butter Pork Chops with Cheesy Potato Bake: The Ultimate Comfort Meal

When it comes to cozy, home-cooked meals, few dishes deliver the same level of satisfaction as Garlic Butter Pork Chops with Cheesy Potato Bake. This dish is a combination of juicy, golden-seared pork chops drizzled with rich, aromatic garlic butter, served atop a bed of creamy, cheesy potatoes baked to perfection. It’s the kind of meal that brings families together at the dinner table, filling the kitchen with mouthwatering aromas and creating a comforting experience that lingers long after the last bite.

This recipe is perfect for busy weeknights, yet impressive enough to serve when entertaining guests. It’s simple to prepare, requiring only a few key ingredients, but the result is a restaurant-quality dish that feels indulgent and special. The golden crust on the pork chops, the gooey melted cheese, and the fragrant garlic butter sauce make this meal irresistible for anyone who loves rich, comforting flavors.

Whether you’re cooking for your family, meal prepping for the week, or making a hearty dish for a dinner party, this recipe delivers every time. In this guide, we’ll explore why this dish works so well, how you can customize it to fit your taste, and answer the most frequently asked questions to ensure your success in the kitchen.

Why This Recipe Works

A One-Pan Marvel

One of the best things about this dish is its simplicity. Instead of making separate side dishes, the pork chops and cheesy potatoes cook together in one pan. The pork chops release their flavorful juices as they bake, infusing the potatoes with even more depth and richness. This means fewer dishes to clean and more time to enjoy your meal.

The Perfect Combination of Textures

This dish excels in the contrast of textures. The pork chops develop a beautifully golden crust from the searing process, while the potatoes become tender and creamy in the oven. The cheese melts into a bubbly, rich topping, creating layers of flavor in every bite.

A Garlic Butter Sauce That Elevates Everything

Garlic butter makes everything better, and this recipe is no exception. The buttery, aromatic garlic sauce adds a luxurious depth to the pork chops and seeps into the potatoes, creating an irresistible richness. The addition of fresh thyme brings a subtle herbaceous note that balances out the creaminess of the dish.

Customizable for Any Occasion

While the classic combination of sharp cheddar, garlic butter, and juicy pork chops is already incredible, this recipe is easy to customize based on your preferences. Want to add a smoky twist? Use smoked cheddar or Gruyère cheese. Prefer a bit of heat? Add a pinch of cayenne or red pepper flakes to the garlic butter. You can also swap in your favorite protein or mix in additional vegetables for a dish that’s tailored to your liking.

Gather Your Ingredients

For the Pork Chops:

  • 4 bone-in pork chops (about 1 inch thick)
  • 3 tbsp olive oil
  • 4 tbsp butter, divided
  • 4 cloves garlic, minced
  • 2 sprigs fresh thyme
  • Salt and pepper, to taste
  • Fresh parsley, chopped (optional, for garnish)

For the Cheesy Potato Bake:

  • 4-5 medium potatoes, thinly sliced
  • 1 medium onion, thinly sliced
  • 2 cups shredded cheddar cheese
  • 1 cup milk
  • ½ cup sour cream
  • 2 tbsp butter
  • 1 tsp garlic powder

Directions to Deliciousness

1. Prepare for Perfection

  • Preheat your oven to 375°F (190°C).
  • Lightly grease a 9×13-inch baking dish with butter or non-stick spray.

2. Create the Creamy Potato Layers

  • Melt 2 tbsp butter in a skillet over medium heat.
  • Add sliced onions and cook until caramelized (5-7 minutes). Stir in garlic powder, salt, and pepper.
  • Layer half the sliced potatoes in the baking dish, followed by half the onions and 1 cup of shredded cheddar.
  • Repeat with the remaining potatoes, onions, and cheese.

3. Make the Velvety Sauce

  • In a saucepan, heat milk and sour cream over medium heat until warm.
  • Pour this mixture over the potato layers. Cover the dish with foil and bake for 30 minutes.

4. Sear the Pork Chops for Maximum Flavor

  • Season pork chops with salt and pepper.
  • Heat olive oil in a skillet over medium-high heat.
  • Sear each pork chop for 3-4 minutes per side until golden brown. Set aside.

5. Infuse with Garlic Butter Goodness

  • In the same skillet, melt the remaining butter and add garlic and thyme.
  • Cook until fragrant, about 1-2 minutes.
  • Return pork chops to the skillet, spooning the garlic butter over the meat.

6. Bring It All Together

  • Remove foil from the potatoes in the oven.
  • Place seared pork chops on top of the potatoes.
  • Pour the garlic butter sauce over the dish.
  • Bake uncovered for an additional 30 minutes, until pork reaches 145°F (63°C) and potatoes are tender.

7. Serve and Enjoy

  • Let the dish rest for 5-10 minutes before serving.
  • Garnish with chopped parsley if desired.
  • Serve warm and enjoy a meal packed with rich, indulgent flavors.

Nutritional Breakdown

  • Calories: 650 kcal per serving
  • Protein: High in protein from pork chops
  • Carbohydrates: Moderate from potatoes
  • Fat: Rich from cheese, butter, and sour cream

How to Make This Dish Your Own

Choosing the Right Pork Chops

The key to juicy, tender pork chops is selecting the right cut. Bone-in pork chops tend to have more flavor and retain moisture better than boneless cuts, making them the ideal choice for this dish. If using boneless pork chops, be sure to reduce the cooking time slightly to prevent them from drying out.

Alternative Cheese Options

While sharp cheddar cheese provides a bold and tangy flavor, you can experiment with different cheeses to achieve unique variations:

  • Gruyère – Adds a nutty, slightly sweet flavor that melts beautifully.
  • Monterey Jack – A milder cheese that still delivers a creamy texture.
  • Smoked Cheddar – Infuses the dish with a rich, smoky essence.
  • Parmesan – For a sharper, saltier kick, try mixing in some grated Parmesan with your cheddar.

Adding More Vegetables

If you’d like to increase the nutritional value of the dish while adding texture and color, consider incorporating vegetables into the potato bake. Some great additions include:

  • Sliced mushrooms – Adds an earthy depth of flavor.
  • Spinach or kale – Wilts down and blends seamlessly with the cheese sauce.
  • Roasted bell peppers – Provides sweetness and a pop of color.
  • Zucchini or squash – Adds freshness and a slight crunch.

Spicing It Up

For those who love a bit of heat, consider enhancing the dish with:

  • A pinch of cayenne pepper in the garlic butter.
  • Red pepper flakes for a little extra spice.
  • Smoked paprika for a subtle warmth and smoky kick.

Frequently Asked Questions (FAQs)

Can I Prepare This Dish in Advance?

Yes! You can assemble the cheesy potato bake up to a day in advance. Cover and refrigerate it, then bake as directed when ready to serve. For the pork chops, you can season and sear them ahead of time, but they should be finished in the oven just before serving to keep them tender and juicy.

What’s the Best Way to Reheat Leftovers?

The best method for reheating is to cover the dish with foil and bake at 350°F (175°C) for 15-20 minutes, or until warmed through. This prevents the pork chops from drying out. You can also reheat individual portions in the microwave, but be sure to add a splash of milk or broth to keep the potatoes creamy.

Can I Use a Different Meat?

Absolutely! While pork chops are the star of this dish, you can substitute with:

  • Chicken thighs or chicken breasts – Just adjust the cooking time to ensure they reach an internal temperature of 165°F (74°C).
  • Beef steaks – Ribeye or sirloin work well, though they may need a shorter bake time.
  • Salmon fillets – If you prefer seafood, the garlic butter sauce pairs wonderfully with salmon.

Can I Freeze This Dish?

Yes, but with some modifications. The potato bake freezes well, but it’s best to freeze it before baking. Assemble the layers, cover tightly with plastic wrap and foil, then freeze for up to 2 months. When ready to serve, thaw overnight in the refrigerator and bake as instructed.

For the pork chops, it’s best to freeze them separately after searing. When ready to eat, let them thaw in the refrigerator, then bake with the potatoes as directed.

How Do I Keep the Pork Chops from Drying Out?

  • Do not overcook them – Use a meat thermometer to ensure they reach 145°F (63°C) but not higher.
  • Let them rest – After cooking, let the pork chops rest for 5-10 minutes to allow the juices to redistribute.
  • Use bone-in chops – These retain moisture better than boneless cuts.

Conclusion: A Dish That Brings People Together

Garlic Butter Pork Chops with Cheesy Potato Bake is the perfect combination of rich, indulgent flavors and home-cooked comfort. The savory garlic butter, the melted cheese, and the tender, juicy pork chops create a meal that’s both elegant and satisfying.

This recipe is easy to customize, making it a go-to for both weeknight dinners and special occasions. Whether you’re serving it to family, guests, or simply indulging in a comforting homemade meal, this dish is guaranteed to be a crowd-pleaser.

Try it for yourself, experiment with flavors, and enjoy every rich, buttery, cheesy bite. It’s the kind of recipe that will quickly become a household favorite.

The Ultimate Guide to Honey Chipotle Chicken Rice Bowls

Honey Chipotle Chicken Rice Bowls are the perfect combination of sweet, smoky, and savory flavors, making them a favorite among home cooks and food enthusiasts. Whether you’re looking for a quick weeknight dinner, a meal prep solution, or a dish that will impress your family and friends, these bowls deliver bold flavors with minimal effort.

In this guide, we’ll explore what makes this dish so special, how you can customize it to fit your tastes, and provide tips to make your cooking process even smoother. Plus, we’ll answer some of the most common questions about this recipe to help you achieve the perfect meal every time.

Why This Recipe Stands Out

A Perfect Balance of Sweet and Spicy

The magic of this recipe lies in its honey-chipotle marinade. Honey adds a natural sweetness that balances the smoky heat of chipotle peppers in adobo sauce. This contrast creates an addictive glaze on the chicken that keeps you coming back for more.

Simple Ingredients, Big Flavor

Despite its restaurant-quality taste, this dish is made with simple pantry staples. With just a few fresh ingredients and some bold seasonings, you can create a dish that feels gourmet without requiring a long list of specialty items.

A Versatile Meal for Any Occasion

This dish works well for many occasions, from casual weeknight dinners to meal prep for busy weeks. It can be served in multiple ways—over rice, in a wrap, or even as a salad—making it a flexible option for various dietary preferences.

Nutrient-Packed and Satisfying

Not only is this meal delicious, but it’s also packed with protein, fiber, and essential nutrients. The lean chicken provides a solid source of protein, while fresh vegetables add vitamins and antioxidants. The rice serves as a hearty base, keeping you full and energized throughout the day.

Gather Your Ingredients

For the Honey Chipotle Chicken:

  • 4 boneless, skinless chicken breasts
  • ¼ cup honey
  • 2 tbsp chipotle pepper in adobo sauce, minced
  • 2 tbsp olive oil
  • 2 tbsp lime juice
  • 1 tsp garlic powder
  • 1 tsp onion powder
  • ½ tsp cumin
  • ½ tsp smoked paprika
  • Salt and pepper, to taste

For the Rice:

  • 1 cup long-grain white rice
  • 2 cups water or chicken broth
  • 1 tbsp olive oil
  • Salt, to taste

For the Toppings:

  • 1 cup corn kernels (fresh or frozen)
  • 1 red bell pepper, diced
  • ½ cup red onion, diced
  • ½ cup fresh cilantro, chopped
  • 1 avocado, sliced
  • Lime wedges, for serving

Step-by-Step Directions

1. Marinate & Cook the Chicken

  1. In a bowl, whisk together honey, chipotle peppers, olive oil, lime juice, garlic powder, onion powder, cumin, paprika, salt, and pepper.
  2. Place the chicken in a resealable bag or shallow dish and pour the marinade over it. Refrigerate for at least 30 minutes (or overnight for deeper flavor).
  3. Preheat a grill or grill pan to medium-high heat. Cook the chicken for 6-7 minutes per side until fully cooked (internal temp: 165°F).
  4. Let the chicken rest for 5 minutes, then slice into strips.

2. Cook the Perfect Rice

  1. In a medium saucepan, combine rice, water (or broth), olive oil, and salt.
  2. Bring to a boil, then reduce heat to low, cover, and simmer for 18-20 minutes until the liquid is absorbed.
  3. Remove from heat and fluff with a fork.

3. Prepare the Toppings

  1. In a skillet over medium heat, sauté the corn and red bell pepper until tender (about 5 minutes).
  2. Chop red onion and cilantro, then slice the avocado.

4. Assemble the Bowls

  1. Start with a base of rice in each bowl.
  2. Top with grilled chicken, sautéed corn and peppers, red onion, avocado slices, and cilantro.
  3. Serve with lime wedges for an extra zesty kick.

Fuel Your Body: Nutritional Breakdown

  • Calories: 500-600 per serving
  • Protein: 38g
  • Carbohydrates: 55g
  • Fat: 12g

Customizing Your Honey Chipotle Chicken Rice Bowls

One of the best things about this recipe is how easy it is to tailor it to your liking. Here are a few ways to make it your own:

Swap the Protein

While chicken is the star of this dish, you can switch it up with different proteins:

  • Shrimp: For a seafood twist, marinate and sauté shrimp for a lighter but equally flavorful option.
  • Beef or Pork: Thinly sliced steak or pork tenderloin works great with the same marinade.
  • Tofu or Tempeh: For a vegetarian version, press and marinate tofu or tempeh before grilling or pan-searing.

Adjust the Spice Level

The chipotle peppers bring a moderate heat, but you can tweak the spice level based on your preference:

  • For extra heat: Add more chipotle peppers or a dash of hot sauce.
  • For a milder flavor: Reduce the chipotle or use a mild chili powder instead.

Change Up the Base

While rice is a classic base for this dish, there are plenty of alternatives:

  • Brown rice: A whole-grain option with more fiber.
  • Quinoa: A protein-rich, gluten-free alternative.
  • Cauliflower rice: A low-carb option for those watching their carb intake.

Experiment with Toppings

Toppings can take this bowl to the next level. Try adding:

  • Shredded cheese for extra richness
  • Pickled onions for tanginess
  • Sliced jalapeños for heat
  • Greek yogurt or sour cream for creaminess
  • Fresh salsa for added brightness

Tips for Making the Best Honey Chipotle Chicken

Even though this recipe is straightforward, these tips can help you get the best results:

Let the Chicken Marinate

Marinating the chicken for at least 30 minutes (or overnight) allows the flavors to fully develop. The longer it sits, the deeper the flavors will penetrate.

Use a Grill for the Best Flavor

Grilling the chicken adds a delicious smoky char that enhances the chipotle marinade. If you don’t have a grill, a cast-iron skillet or grill pan will work just as well.

Rest the Chicken Before Slicing

After cooking, let the chicken rest for a few minutes before slicing. This keeps the juices from escaping, ensuring each bite is moist and tender.

Fluff the Rice for a Perfect Texture

Once the rice is cooked, fluff it with a fork instead of stirring with a spoon. This prevents it from becoming mushy.

Assemble with Fresh Ingredients

Adding fresh toppings like avocado, lime, and cilantro right before serving enhances the dish’s texture and brightness.

Frequently Asked Questions

Can I Make This Dish Ahead of Time?

Yes! This dish is great for meal prep. Store the cooked chicken, rice, and toppings separately in airtight containers in the fridge for up to 4 days. Assemble your bowls when ready to eat for the freshest taste.

What’s the Best Way to Reheat Leftovers?

Reheat the chicken and rice in a skillet over medium heat with a splash of water to keep them moist. The microwave also works, but be sure to cover the dish to prevent it from drying out.

Can I Bake the Chicken Instead of Grilling It?

Absolutely. Bake at 375°F (190°C) for 20-25 minutes or until the internal temperature reaches 165°F (74°C). For extra flavor, broil for the last 2-3 minutes to get a slightly charred finish.

Can I Use a Store-Bought Marinade Instead?

Yes, but making your own marinade allows you to control the flavors and ingredients. If using store-bought, look for a honey-chipotle or smoky BBQ marinade with minimal additives.

What Are Some Good Side Dishes?

While this dish is a meal on its own, you can serve it with sides like:

  • Black beans or pinto beans
  • A fresh green salad
  • Roasted sweet potatoes
  • Grilled vegetables

Is This Recipe Gluten-Free?

Yes, as long as you use gluten-free chipotle peppers and seasonings. If you’re unsure, always check ingredient labels.

Can I Freeze This Dish?

Yes! Freeze the grilled chicken in an airtight container for up to 2 months. When ready to eat, thaw in the fridge overnight and reheat as needed.

Conclusion: A Dish That’s as Versatile as It Is Delicious

Honey Chipotle Chicken Rice Bowls are a fantastic meal option for anyone looking for a dish that’s easy, flavorful, and satisfying. The combination of sweet honey, smoky chipotle, and fresh toppings creates a balanced meal that never gets boring.

With endless ways to customize this recipe, you can make it suit your tastes and dietary needs. Whether you’re preparing it for a weeknight dinner, meal prepping for the week, or making a crowd-pleasing dish for guests, these rice bowls are sure to impress.

So fire up your grill, gather your ingredients, and enjoy the delicious blend of flavors in every bite!