White Chicken Chili: A Creamy, Hearty Twist on a Classic

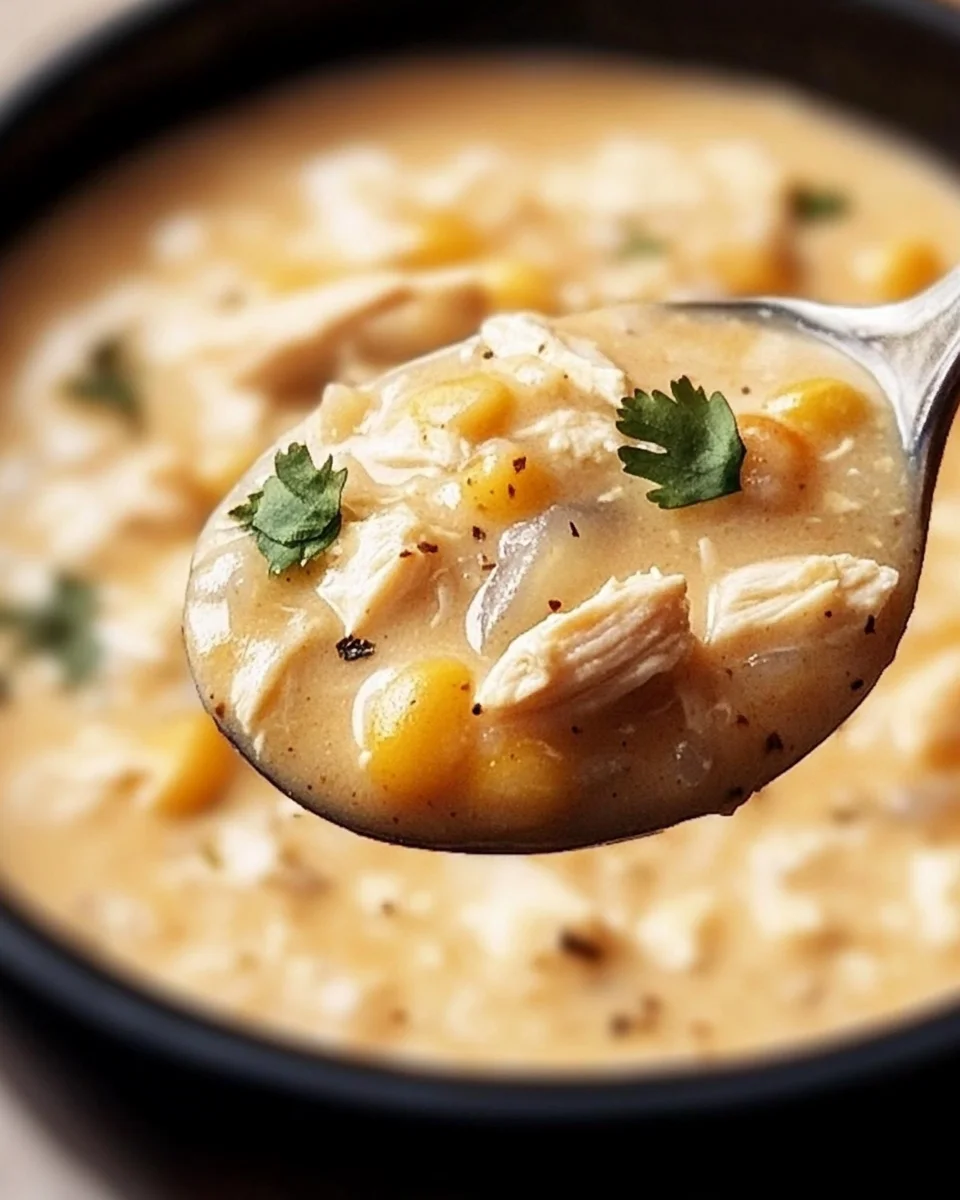
White Chicken Chili is a comforting, creamy alternative to traditional red chili, featuring tender shredded chicken, white beans, green chilies, and a rich, velvety broth. It’s perfect for cozy nights, meal prepping, or feeding a crowd, offering the perfect balance of warmth, flavor, and texture. Unlike classic chili that uses tomatoes and beef, this version brings a lighter yet equally satisfying experience with its creamy consistency and well-balanced spice.

If you’re looking for a quick, easy-to-make meal that’s both hearty and packed with flavor, this White Chicken Chili recipe is a must-try. In this article, we’ll dive into the history of white chili, expert tips for making it perfect, creative variations, and frequently asked questions to help you master this dish.

The Origins of White Chicken Chili

Chili is an iconic dish that has deep roots in Mexican and Southwestern cuisine, but White Chicken Chili is a relatively modern twist on the classic. Traditional chili, or chili con carne, features beef, tomatoes, and a smoky, rich sauce. In contrast, White Chicken Chili swaps beef for shredded chicken and replaces the tomato-based broth with a creamy, spiced base.

The exact origins of White Chicken Chili are unclear, but it is believed to have gained popularity in the Southwestern United States. This version embraces Tex-Mex flavors while providing a lighter, creamier alternative to traditional chili. Over time, it has become a staple in home kitchens across the country, loved for its rich texture, bold flavors, and easy preparation.

Why You’ll Love This White Chicken Chili Recipe

1. Creamy Yet Light

Unlike traditional chili, which can sometimes feel heavy, White Chicken Chili has a smooth, creamy consistency without being overly rich. The combination of cream cheese and heavy cream gives it a luxurious texture that still feels light enough for everyday meals.

2. Packed with Protein and Fiber

With lean shredded chicken and white beans, this dish is high in protein and fiber, making it a filling and nutritious meal. The white beans not only add texture but also help create a naturally thickened broth when blended slightly.

3. Perfect for Meal Prep

This chili stores well and reheats beautifully, making it an ideal choice for meal prepping. You can make a batch at the beginning of the week and enjoy leftovers for several days. It also freezes well, so you can always have a hearty meal ready to go.

4. Customizable to Your Taste

One of the best things about this dish is that it’s highly customizable. Whether you prefer a spicier version, a dairy-free alternative, or a vegetarian twist, White Chicken Chili can easily be adjusted to fit your preferences.

5. Quick and Easy to Make

This one-pot recipe comes together in under an hour, making it a great option for busy weeknights. You can also make it in a slow cooker or Instant Pot for added convenience.

Ingredients – A Harmony of Flavor and Creaminess

The Hearty Base

  • Cooked shredded chicken
  • White beans (for texture and heartiness)
  • Green chilies (adds mild spice and smokiness)
  • Chicken broth

The Creamy Factor

  • Cream cheese (for a rich, velvety texture)
  • Heavy cream (adds smoothness and depth)

The Seasonings & Aromatics

  • Onion, diced
  • Garlic, minced
  • Ground cumin
  • Chili powder
  • Smoked paprika
  • Salt and pepper to taste

Optional Additions

  • Frozen corn (adds subtle sweetness)

Directions – Crafting the Perfect Bowl of White Chicken Chili

1. Building the Flavor Base

  • Sauté onions and garlic until softened and fragrant.

2. Developing Depth

  • Add green chilies, spices, and chicken broth, allowing them to simmer and blend.

3. Bringing it All Together

  • Stir in shredded chicken, white beans, and corn, simmering to let flavors develop.

4. Achieving the Signature Creaminess

  • Mix in softened cream cheese until fully melted, then stir in heavy cream for extra richness.

5. The Finishing Touch

  • Serve hot, garnished with shredded cheese, fresh cilantro, and a squeeze of lime juice.

Nutritional Breakdown – A Balanced Comfort Dish

  • Calories: 320 per serving
  • Protein: 25g
  • Total Fat: 15g
  • Carbohydrates: 23g
  • Fiber: 6g
  • Sodium: 740mg

Expert Tips for the Best White Chicken Chili

Achieving the perfect balance of creaminess, spice, and texture requires a few key techniques. Here are some expert tips to help you make the best White Chicken Chili every time.

1. Use Rotisserie Chicken for Convenience

Save time by using store-bought rotisserie chicken instead of cooking and shredding chicken from scratch. This shortcut makes preparation even faster while still delivering great flavor.

2. Blend Some of the Beans for a Thicker Consistency

If you prefer a thicker chili, blend a portion of the white beans before adding them to the pot. This trick helps create a naturally creamy base without needing extra thickeners.

3. Adjust the Spice Level to Your Liking

  • For a spicier kick, add diced jalapeños, extra green chilies, or cayenne pepper.
  • If you prefer a milder version, use mild green chilies and reduce the chili powder.

4. Let the Flavors Meld

While this chili is delicious right after cooking, it tastes even better after sitting for a while. Letting it rest for 30 minutes to an hour allows the flavors to fully develop.

5. Don’t Skip the Garnishes

Toppings can elevate the dish, adding texture and extra flavor. Consider garnishing your bowl with:

  • Shredded cheese (Monterey Jack or Pepper Jack)
  • Chopped cilantro for freshness
  • Crushed tortilla chips for crunch
  • A squeeze of fresh lime juice to enhance the flavors

Creative Variations of White Chicken Chili

White Chicken Chili is incredibly versatile. Here are a few creative twists to try:

1. Dairy-Free White Chicken Chili

  • Swap cream cheese and heavy cream for coconut milk or cashew cream.
  • Use extra blended beans for a naturally creamy texture.

2. Spicy Southwest White Chicken Chili

  • Add chipotle peppers in adobo sauce for a smoky heat.
  • Stir in fire-roasted corn for extra depth of flavor.

3. Vegetarian White Chili

  • Replace chicken with diced sweet potatoes or cauliflower.
  • Use vegetable broth instead of chicken broth.

4. Extra Protein Boost

  • Add cooked ground turkey or chicken sausage for additional protein.
  • Stir in quinoa or an extra can of beans for a heartier texture.

5. Green Chile Hatch Chili Version

  • Use fire-roasted Hatch green chilies for an authentic Southwestern twist.
  • Add roasted tomatillos for a tangy depth of flavor.

Frequently Asked Questions (FAQs)

1. Can I Make This Recipe in a Slow Cooker?

Yes! To make White Chicken Chili in a slow cooker:

  • Add all ingredients (except cream cheese and heavy cream) to the slow cooker.
  • Cook on low for 6-8 hours or high for 3-4 hours.
  • Stir in the cream cheese and heavy cream at the end, just before serving.

2. How Can I Make This Chili Spicier?

For a spicier version, try adding:

  • Diced jalapeños or serrano peppers
  • Extra chili powder or cayenne pepper
  • Hot sauce or crushed red pepper flakes

3. Can I Use Canned Chicken?

Yes, canned chicken is an option for a quick meal, but freshly cooked or rotisserie chicken provides the best texture and flavor.

4. How Do I Store and Reheat Leftovers?

  • Refrigeration: Store in an airtight container for up to 4 days.
  • Freezing: Freeze in individual portions for up to 3 months.
  • Reheating: Warm in a saucepan over medium heat, adding a splash of broth if it thickens too much.

5. What Are the Best Side Dishes to Serve With White Chicken Chili?

  • Cornbread or tortilla chips for dipping
  • A fresh side salad for contrast
  • Avocado slices or guacamole for creaminess
  • Garlic bread or crusty rolls

Final Thoughts: A Bowl of Comfort for Any Occasion

White Chicken Chili is a must-have recipe for every home cook, offering the perfect blend of warmth, richness, and spice. Whether you’re making it for a weeknight meal, meal prepping for the week, or serving a crowd, it’s a dish that never fails to impress.

With endless ways to customize it—from adjusting the spice level to experimenting with different ingredients—this chili is as versatile as it is delicious. Plus, the ease of preparation makes it a go-to comfort meal for busy days.

So grab your bowl, add your favorite toppings, and enjoy every creamy, flavorful bite of this hearty, soul-warming chili!

Crispy Dry Rub Chicken Wings: The Perfect Balance of Flavor and Crunch

Chicken wings have been a beloved snack for decades, enjoyed at sports bars, family gatherings, and weekend cookouts. While saucy wings often steal the spotlight, dry rub chicken wings offer a unique, bold flavor and an irresistible crispy texture. Unlike traditional buffalo wings that rely on thick sauces, dry rub wings use a blend of seasonings, spices, and a light coating of flour to achieve a crispy, well-seasoned crust.

This recipe combines smoky, sweet, and savory elements to create the perfect balance of flavors. Whether you’re hosting a game day party, craving a quick snack, or looking for a healthier alternative to deep-fried wings, this recipe is an absolute must-try.

In this guide, we’ll explore the history of dry rub wings, what makes them so special, pro tips for achieving maximum crispiness, creative variations, and frequently asked questions to help you perfect this dish.

The Origins of Dry Rub Chicken Wings

While chicken wings are most commonly associated with buffalo sauce, dry rub wings trace their roots to Southern barbecue culture. Barbecue masters in the American South perfected the technique of using spice blends (or “rubs”) to season meats before grilling or smoking them. This method enhances the meat’s natural flavors while creating a flavorful crust on the outside.

The same concept applies to dry rub chicken wings—instead of coating them in sauce after cooking, the wings are tossed in a carefully curated spice blend before baking or air frying. This technique allows the seasonings to infuse into the meat while forming a crispy outer layer, making every bite flavorful and satisfying.

Over the years, dry rub wings have gained immense popularity, becoming a staple at restaurants, tailgates, and home kitchens alike. The versatility of dry rub seasonings means that you can experiment with different flavors, from sweet and smoky to spicy and bold.

Why These Crispy Dry Rub Wings Stand Out

1. Maximum Flavor Without the Mess

One of the biggest advantages of dry rub wings is that they deliver big, bold flavors without the sticky mess of traditional sauced wings. The seasonings stick directly to the wings, ensuring every bite is packed with smoky, garlicky, slightly sweet goodness.

2. Healthier Than Traditional Fried Wings

Instead of deep frying, this recipe uses baking or air frying, allowing the wings to become crispy with significantly less oil. Air frying, in particular, reduces the overall fat content while still achieving that sought-after crunch.

3. Customizable to Your Taste

With a simple blend of spices, this recipe is highly adaptable. Whether you want to add more heat, swap ingredients, or try different seasonings, this dry rub can be adjusted to suit your flavor preferences.

4. Perfect for Any Occasion

These wings are versatile enough for every event—whether you’re looking for a quick weeknight meal, a party appetizer, or the ultimate game day snack. Serve them as-is, or pair them with dips, salads, and sides to create a complete meal.

Ingredients – The Perfect Blend of Smoky, Sweet, and Savory

For the Chicken Wings

  • 2 pounds chicken wings (drummettes or split wings)
  • 1/3 to 1/2 cup all-purpose flour (for coating)

For the Signature Dry Rub

  • 2 teaspoons brown sugar or brown sweetener
  • 1 teaspoon smoked paprika
  • 1 teaspoon chili powder
  • 1/2 teaspoon garlic powder
  • 1/2 teaspoon onion powder
  • Salt and pepper to taste

For Cooking

  • Cooking oil spray (olive oil recommended)

Directions – Achieving That Irresistible Crunch

Oven Method

  1. Preheat the oven to 375°F (190°C). Pat the chicken wings dry with paper towels.
  2. In a large bowl, combine flour, brown sugar, smoked paprika, chili powder, garlic powder, onion powder, salt, and pepper. Toss the wings in this mixture until fully coated.
  3. Line a baking sheet with parchment paper. Arrange the wings in a single layer and lightly spritz with cooking oil.
  4. Bake for 20 minutes, flip the wings, spritz with oil again, and continue baking for another 10 minutes until crispy.
  5. Ensure the internal temperature reaches 165°F (74°C) before serving.

Air Fryer Method

  1. Preheat the air fryer to 400°F (204°C).
  2. Coat the wings with the dry rub mixture as described above.
  3. Place the wings in the air fryer basket, spritz with oil, and cook for 15 minutes.
  4. Flip the wings, spritz again with oil, and cook for an additional 5 minutes until crispy.

Nutritional Breakdown – Guilt-Free Indulgence

  • Calories: 492 kcal per serving
  • Protein: 41g
  • Total Fat: 25g
  • Carbohydrates: 15g
  • Fiber: 2g

Expert Tips for the Best Dry Rub Chicken Wings

1. Pat the Wings Dry for Extra Crispiness

Moisture is the enemy of crispiness. Before seasoning, thoroughly pat the wings dry with paper towels. Removing excess moisture allows the dry rub to adhere properly and helps the wings crisp up beautifully during cooking.

2. Don’t Skip the Oil Spray

Even though these wings aren’t deep-fried, a light spritz of cooking oil helps the seasonings bind to the meat and promotes even browning. If using an air fryer, this step is especially important to mimic the crunchiness of fried wings.

3. Use a Wire Rack for Even Cooking

If baking, place the wings on a wire rack over a baking sheet instead of directly on parchment paper. This allows air to circulate around the wings, ensuring they cook evenly and become crispy on all sides.

4. Flip the Wings for Uniform Crispiness

Whether baking or air frying, flip the wings halfway through the cooking process to ensure even crisping. This simple step makes a huge difference in texture.

5. Adjust the Heat to Your Preference

This dry rub recipe has a mild to moderate level of heat, but you can easily turn up the spice by adding more chili powder, cayenne pepper, or crushed red pepper flakes. If you prefer a milder flavor, simply reduce the spice levels or omit them altogether.

Creative Variations to Try

While this recipe offers a perfectly balanced smoky, slightly sweet, and savory dry rub, there are countless ways to customize it:

1. Spicy Cajun Dry Rub Wings

  • Add 1 teaspoon of cayenne pepper for extra heat
  • Include ½ teaspoon of dried thyme and oregano for that signature Cajun flavor

2. Garlic Parmesan Wings

  • After baking, toss the wings in melted butter, grated parmesan, and extra garlic powder
  • Garnish with fresh parsley for added freshness

3. Sweet & Smoky BBQ Wings

  • Replace the brown sugar with maple sugar or honey powder
  • Add ½ teaspoon of smoked mesquite seasoning for a deep barbecue flavor

4. Lemon Pepper Dry Rub Wings

  • Swap out the smoked paprika and chili powder for 1 teaspoon lemon zest and 1 teaspoon cracked black pepper
  • Finish with a squeeze of fresh lemon juice after baking

5. Asian-Inspired Five Spice Wings

  • Add ½ teaspoon Chinese five-spice powder for a unique, aromatic twist
  • Sprinkle with sesame seeds and chopped green onions before serving

Frequently Asked Questions (FAQs)

1. Can I Make These Wings Ahead of Time?

Yes! Prep the wings with the dry rub and store them in the refrigerator for up to 24 hours before cooking. This allows the flavors to develop even more.

2. Can I Use Frozen Wings?

You can, but it’s important to thaw them completely and pat them dry before seasoning. Excess moisture will prevent them from crisping up properly.

3. Can I Cook These in the Air Fryer Instead of the Oven?

Absolutely! The air fryer method is quicker and results in an ultra-crispy texture. Cook at 400°F (204°C) for 15-20 minutes, flipping halfway through.

4. What Dips Go Well with Dry Rub Wings?

While these wings don’t require sauce, they pair well with:

  • Ranch dressing (classic cooling contrast)
  • Blue cheese dip (bold and tangy)
  • Honey mustard (sweet and savory balance)
  • Garlic aioli (rich and creamy)

5. How Do I Store and Reheat Leftovers?

Store any leftovers in an airtight container in the refrigerator for up to 3 days. To reheat:

  • Air Fryer: 375°F (190°C) for 5 minutes
  • Oven: 375°F (190°C) for 10 minutes
  • Avoid microwaving, as it will make the wings soggy.

Final Thoughts: Why These Dry Rub Wings Are a Must-Try

Crispy, flavorful, and effortlessly easy to make, these dry rub chicken wings offer the perfect alternative to traditional sauced wings. By combining a bold blend of smoky, garlicky, and slightly sweet seasonings, this recipe delivers restaurant-quality results at home.

What makes them truly special is their versatility—whether baked or air-fried, mild or spicy, they can be customized to fit any preference. With the right techniques and seasoning tweaks, you’ll have a go-to wing recipe for every occasion.

So, the next time you’re craving crispy, flavorful wings, skip the takeout and try these homemade dry rub chicken wings—they’re sure to become a new favorite in your kitchen!

Traditional Chinese Egg Rolls: A Crispy, Savory Delight

Egg rolls are a staple in Chinese cuisine, known for their crispy golden shell and flavorful, savory filling. Whether served as an appetizer, side dish, or snack, these deep-fried delights are a favorite at family gatherings, restaurants, and festive celebrations. While many enjoy egg rolls at their favorite Chinese restaurant, making them at home allows you to customize the flavors, control the ingredients, and achieve that perfect crispy texture.

In this comprehensive guide, we’ll explore the history of Chinese egg rolls, why they are so beloved, tips for achieving the best texture and flavor, creative variations, and answers to common questions. By the end, you’ll have all the knowledge you need to master the art of egg roll making.

The Origins of Egg Rolls: A Chinese-American Classic

Despite their name, egg rolls are not a traditional dish from China. Instead, they are believed to have originated in Chinese-American cuisine in the early 20th century. While their exact origins are debated, they were likely inspired by spring rolls, a thinner, delicate version of the dish that has been enjoyed in China for centuries.

The main difference between egg rolls and spring rolls is the wrapper. Spring rolls have a thinner, rice-paper wrapper that turns crispy and flaky when fried, while egg rolls use a thicker wheat-based wrapper that creates a more substantial, bubbly, and crunchy exterior. The filling in egg rolls is also typically heartier, often including a mixture of pork, cabbage, carrots, and seasonings.

Despite their Americanized origins, egg rolls remain deeply connected to Chinese culinary traditions, embracing bold flavors, fresh ingredients, and the mastery of frying techniques.

Why You’ll Love Making Egg Rolls at Home

1. Unmatched Crispiness

Homemade egg rolls give you complete control over frying temperature, wrapper choice, and filling moisture, ensuring they turn out crispy, golden, and never greasy.

2. Fresh, Quality Ingredients

When you make egg rolls from scratch, you can choose high-quality meats, fresh vegetables, and the perfect balance of seasonings, unlike some store-bought or restaurant versions that may contain preservatives.

3. Customizable to Your Taste

Whether you prefer a classic pork filling, a vegetarian option, or even a spicy twist, homemade egg rolls can be easily adjusted to match your personal flavor preferences.

4. Fun and Engaging Cooking Process

Rolling egg rolls is an enjoyable activity that can be shared with family and friends. Once you learn the technique, assembling them becomes second nature.

5. Perfect for Any Occasion

Egg rolls are versatile and crowd-pleasing, making them an excellent addition to potlucks, parties, holiday celebrations, or casual family dinners.

Mastering the Art of the Perfect Egg Roll

Achieving the perfect egg roll requires attention to detail in three key areas: the filling, the wrapper, and the frying process.

1. The Secret to a Flavorful Filling

The key to a well-balanced egg roll filling is a combination of tender meat, fresh vegetables, and bold seasonings. Ground pork is the most common protein used, but you can also try chicken, shrimp, tofu, or mushrooms.

For the best results, the filling should be cooked ahead of time to remove excess moisture, ensuring the egg rolls fry up crispy rather than soggy. A mix of soy sauce, oyster sauce, sesame oil, and white pepper adds depth and richness to the filling.

2. Handling the Wrappers Like a Pro

Egg roll wrappers are delicate yet sturdy, and handling them properly ensures a smooth, tightly sealed roll. To prevent tearing, keep the wrappers covered with a damp towel while assembling.

When rolling, make sure to tuck the sides in tightly and seal the edges with cornstarch slurry or beaten egg to prevent them from opening during frying.

3. The Perfect Frying Technique

Achieving the ideal crispy texture depends on the frying method. Here are some expert frying tips:

  • Use an oil with a high smoke point, such as peanut, vegetable, or canola oil.
  • Heat the oil to 350°F (175°C) for the best balance of crispiness and even cooking.
  • Fry in small batches to avoid overcrowding, which can lower the oil temperature and result in greasy egg rolls.
  • Drain excess oil on a wire rack or paper towels to keep them crisp.

Creative Variations to Try

While traditional pork and cabbage egg rolls are delicious, there are endless variations to experiment with. Here are a few ideas:

1. Vegetarian Delight

Swap the pork for a hearty mix of mushrooms, tofu, shredded zucchini, and bell peppers. This plant-based option is just as flavorful and satisfying.

2. Spicy Szechuan Egg Rolls

For a fiery kick, add chopped chili peppers, Szechuan peppercorns, and extra garlic to the filling. Serve with a spicy chili oil dipping sauce for even more heat.

3. Seafood-Inspired Egg Rolls

Replace pork with shrimp, crab meat, or a mix of seafood for a light and flavorful twist.

4. Thai-Style Peanut Egg Rolls

Incorporate peanut sauce, shredded coconut, and Thai basil for a fusion-inspired variation with a nutty, aromatic profile.

5. Sweet & Savory Egg Rolls

For a unique appetizer, add finely diced apples, hoisin sauce, and a touch of honey to create a balance of sweet and savory flavors.

Frequently Asked Questions (FAQs)

1. How do I prevent my egg rolls from getting soggy?

The key to crispy egg rolls is removing excess moisture from the filling before rolling. Cook the filling thoroughly, allow it to cool slightly, and drain any liquid before assembling.

2. Can I bake egg rolls instead of frying them?

Yes! Brush them lightly with oil and bake at 400°F (200°C) for 18-20 minutes, flipping halfway through. While they won’t be as crispy as deep-fried versions, baking is a healthier alternative.

3. Can I freeze homemade egg rolls?

Absolutely! Assemble the egg rolls and freeze them uncooked on a baking sheet. Once frozen solid, transfer them to a sealed container or freezer bag. Fry straight from frozen, adding an extra minute or two to the cooking time.

4. What dipping sauces pair best with egg rolls?

Traditional egg rolls pair well with:

  • Sweet and Sour Sauce – A tangy, fruity contrast to the savory filling.
  • Soy Sauce with Chili Oil – For those who love a spicy kick.
  • Hoisin Sauce – A thick, slightly sweet, umami-packed option.
  • Garlic Ginger Soy Dipping Sauce – A fresh and fragrant homemade sauce.

5. Can I air-fry egg rolls?

Yes! Brush the rolls lightly with oil and air-fry at 375°F (190°C) for 10-12 minutes, flipping halfway through. Air frying creates a crisp texture with less oil.

Final Thoughts: Elevate Your Home Cooking with Chinese Egg Rolls

Making homemade Chinese egg rolls is an art that combines texture, flavor, and technique. Whether you stick to the classic recipe or experiment with new fillings, these crispy, golden delights are always a crowd-pleaser.

By mastering the right frying temperature, sealing technique, and ingredient balance, you’ll be able to create restaurant-quality egg rolls at home. The best part? The possibilities are endless, allowing you to customize each batch to match your cravings and creativity.

So grab your wrappers, heat up that oil, and start rolling—your perfect batch of homemade egg rolls is just a few steps away!

Chinese Chicken & Cabbage Stir-Fry: A Flavorful, Quick, and Healthy Meal

Chinese cuisine is known for its bold flavors, colorful presentation, and balance of textures. One dish that embodies these qualities is Chinese Chicken & Cabbage Stir-Fry—a quick, nutritious, and delicious meal that can be prepared in under 35 minutes. Whether you are a busy professional looking for a fast dinner or someone who enjoys experimenting with Asian-inspired flavors, this stir-fry is an excellent addition to your recipe collection.

This dish combines tender chicken, crisp cabbage, and a rich umami-packed sauce made with oyster sauce, soy sauce, and chicken stock. The combination of vibrant vegetables and a perfectly balanced sauce ensures that every bite is bursting with flavor.

In this article, we’ll explore the origins of stir-frying, the benefits of this dish, variations you can try, pro tips for mastering the technique, and frequently asked questions to help you perfect your cooking experience.

The Art of Stir-Frying: A Time-Honored Chinese Cooking Technique

Stir-frying is one of the most famous cooking methods in Chinese cuisine. It originated over 2,000 years ago during the Han Dynasty and has since become a fundamental cooking technique worldwide. The method involves cooking ingredients over high heat in a wok with minimal oil, allowing them to retain their natural flavors, nutrients, and textures.

The key to a successful stir-fry lies in preparation, timing, and heat control. Having all your ingredients prepped and ready before cooking ensures that everything cooks evenly without overcooking or burning. A hot wok helps to create the signature smoky aroma known as “wok hei”, or “breath of the wok,” which enhances the flavor of the dish.

Why You’ll Love This Chinese Chicken & Cabbage Stir-Fry

1. Quick and Easy for Busy Days

This dish is perfect for those nights when you need a meal on the table in under 35 minutes. With simple slicing, chopping, and quick stir-frying, you’ll have a restaurant-quality dish ready in no time.

2. Packed with Nutrients

Cabbage is a powerhouse of nutrients, rich in vitamins C and K, fiber, and antioxidants. Combined with lean chicken breast, which provides high-quality protein, this stir-fry is a nutrient-dense meal that supports overall health.

3. Versatile and Customizable

One of the best aspects of this dish is its versatility. You can modify the spice level, swap ingredients based on dietary preferences, or add other vegetables to suit your taste. Whether you like it mild or extra spicy, this recipe can be adjusted to your liking.

4. Budget-Friendly and Simple Ingredients

All the ingredients used in this recipe are affordable and easy to find in any grocery store. Cabbage is an inexpensive vegetable that lasts a long time in the refrigerator, making it a great staple for meal planning.

5. A Delicious Way to Eat More Vegetables

Even picky eaters will enjoy this dish. The sauce infuses the cabbage with a savory umami taste, transforming it from a simple vegetable into a flavorful centerpiece of the meal.

Ingredients – A Flavorful Fusion

Proteins & Fats
  • 2 chicken breasts, thinly sliced
  • 1 tablespoon butter
Vibrant Vegetables
  • 1 medium onion, sliced
  • 2 cloves garlic, minced
  • 1/2 head green cabbage, shredded
  • 1/2 jalapeño pepper, finely diced
  • 1 orange bell pepper, diced
Savory Sauces & Seasonings
  • 1/2 cup chicken stock
  • 2 tablespoons oyster sauce
  • 1 tablespoon soy sauce
  • Pinch of salt and pepper, to taste

Cooking Directions – Mastering the Wok

Step 1: Prep Like a Pro

Thinly slice the chicken breasts against the grain. Slice the onion and orange pepper, mince the garlic, finely dice the jalapeño, and shred the cabbage.

Step 2: Sear the Chicken

In a large skillet or wok, melt butter over medium-high heat. Add the sliced chicken, season with salt and pepper, and stir-fry until golden brown and fully cooked (about 5-7 minutes). Remove and set aside.

Step 3: Build the Base Flavors

In the same pan, sauté the onion until softened (about 3 minutes). Add the garlic and jalapeño, cooking for an additional minute. Stir in the cabbage and orange bell pepper.

Step 4: Sauce it Up

Pour in the chicken stock, oyster sauce, and soy sauce. Stir well to evenly coat the vegetables. Cook for 5-7 minutes, allowing the cabbage to become tender-crisp.

Step 5: Final Touches

Return the cooked chicken to the pan, mixing it with the vegetables and sauce. Cook for 2-3 more minutes until heated through. Adjust seasoning if necessary.

Nutritional Breakdown – A Healthy Delight

  • Calories: 250 per serving
  • Total Fat: 8g
  • Total Carbohydrates: 18g
  • Protein: 25g

Creative Variations to Try

While the traditional Chinese Chicken & Cabbage Stir-Fry is incredibly flavorful on its own, you can experiment with variations to suit your personal taste and dietary needs. Here are some exciting ways to switch things up:

1. Spicy Sichuan-Style Stir-Fry

If you love heat, add a spoonful of Sichuan peppercorns or red chili flakes to the dish. This will give your stir-fry a numbing, tingling sensation known as “málà,” a signature of Sichuan cuisine.

2. Low-Carb & Keto-Friendly Version

For those following a low-carb diet, replace oyster sauce with coconut aminos and serve the stir-fry in lettuce wraps or alongside cauliflower rice.

3. Vegetarian Twist

Swap out the chicken for tofu, tempeh, or mushrooms for a plant-based version. The rich sauce will ensure the dish remains flavorful and satisfying.

4. Peanut-Ginger Stir-Fry

Enhance the dish by adding grated ginger and a drizzle of peanut butter to the sauce. This gives the stir-fry a nutty, aromatic flavor that pairs well with the cabbage and chicken.

5. Extra Crunch with Water Chestnuts & Cashews

For added texture, toss in sliced water chestnuts or roasted cashews just before serving. These ingredients provide a delightful crunch that contrasts with the tender chicken and cabbage.

Expert Tips for the Perfect Stir-Fry

Mastering the stir-fry technique takes a bit of practice, but these expert tips will help you achieve the best results:

1. Use a High-Quality Wok or Skillet

A wok is the ideal pan for stir-frying because of its high, sloped sides that allow for even heat distribution. If you don’t have a wok, a large skillet will also work.

2. Preheat the Wok Before Adding Ingredients

A hot wok is essential for getting the right sear on the chicken and ensuring the vegetables remain crisp. Heat your pan for a minute or two before adding oil and ingredients.

3. Slice Chicken Thinly for Even Cooking

Thinly slicing the chicken against the grain ensures tenderness and prevents it from becoming chewy. This also helps it cook faster, reducing the overall cooking time.

4. Do Not Overcrowd the Pan

Cooking in small batches prevents the ingredients from steaming and ensures that each piece develops a nice sear. If necessary, cook the chicken first, remove it, and then cook the vegetables separately.

5. Adjust Seasoning to Taste

Taste the stir-fry before serving and adjust the seasoning if needed. If you prefer a sweeter profile, add a splash of honey. For more umami depth, increase the oyster sauce or soy sauce.

Frequently Asked Questions (FAQs)

1. Can I make this dish ahead of time?

Yes! This dish actually tastes even better the next day as the flavors meld together. Store it in an airtight container in the refrigerator for up to 3 days. Reheat in a pan over medium heat for the best texture.

2. How can I make this dish less spicy?

Simply omit the jalapeño pepper or reduce the amount used. You can also substitute it with a milder pepper or bell pepper for a similar flavor without the heat.

3. What can I use instead of oyster sauce?

If you don’t have oyster sauce, you can substitute it with hoisin sauce or a mixture of soy sauce and a pinch of sugar.

4. Can I use pre-shredded cabbage?

Absolutely! A pre-shredded coleslaw mix works great and saves time on preparation.

5. What other vegetables can I add?

This dish pairs well with a variety of vegetables, including carrots, snap peas, mushrooms, and zucchini. Feel free to mix and match based on what you have available.

6. Can I freeze this dish?

While it is possible to freeze the stir-fry, cabbage tends to release water and become softer when thawed. For best results, consume fresh or refrigerate leftovers for a few days.

Final Thoughts: A Must-Try Stir-Fry for Every Home Cook

The Chinese Chicken & Cabbage Stir-Fry is a perfect balance of flavor, texture, and nutrition. It’s easy to make, adaptable to different diets, and brings the bold flavors of Chinese cuisine to your kitchen. Whether you stick to the classic recipe or try one of the variations, this dish is sure to become a favorite in your meal rotation.

By following the expert tips and understanding the art of stir-frying, you’ll be able to create a restaurant-quality dish right at home. So grab your wok, fire up the stove, and enjoy the magic of this delicious, wholesome stir-fry!

The Ultimate Crockpot Potato Broccoli Cheddar Soup: A Bowl of Comfort

When the temperatures drop, there’s nothing more comforting than a warm, creamy bowl of soup. One dish that stands out among all comfort foods is Potato Broccoli Cheddar Soup, and when made in a crockpot, it becomes even more effortless. This slow-cooked delight combines the richness of cheddar cheese, the heartiness of potatoes, and the fresh, earthy taste of broccoli, creating a meal that is both satisfying and nutritious.

Whether you’re meal prepping for the week, looking for an easy weeknight dinner, or craving something rich and filling, this slow cooker potato broccoli cheddar soup is the perfect dish. It’s easy to make, requires minimal effort, and delivers big on flavor.

Let’s dive deep into what makes this soup a must-have addition to your recipe collection.

Why This Soup is a Must-Try

This potato broccoli cheddar soup isn’t just delicious—it’s also incredibly practical. Here are a few reasons why it has become a staple in many households:

1. Hands-Off Cooking with a Slow Cooker

One of the best parts of this recipe is the set-it-and-forget-it approach. Once you add your ingredients to the crockpot, you can go about your day while your home fills with the irresistible aroma of creamy, cheesy soup.

2. Perfect for Meal Prep

This soup stores well in the refrigerator for several days, making it an excellent choice for meal prepping. Whether you’re planning lunches for the week or want an easy dinner option, you’ll appreciate having this soup on hand.

3. Made with Simple, Wholesome Ingredients

Unlike many store-bought versions, this homemade soup does not contain processed cheese or artificial ingredients. Everything is fresh, from the broccoli and potatoes to the shredded cheddar cheese, giving the soup a superior taste and texture.

4. Customizable to Your Preference

There are many ways to tweak this recipe to suit your tastes. You can adjust the thickness, experiment with different types of cheese, or add protein like bacon, ham, or shredded chicken for a more filling meal.

5. Crowd-Pleasing Comfort Food

Whether you’re serving it at a family dinner, potluck, or holiday gathering, this soup is sure to be a hit. It’s packed with flavor, warmth, and a creamy consistency that makes it irresistible.

Gather Your Ingredients: A Cozy Blend of Flavors

Main Ingredients:

  • 2 pounds Yukon Gold potatoes, peeled and cubed
  • 4 cups fresh broccoli florets
  • 1 large yellow onion, diced
  • 2 carrots, diced
  • 2 celery stalks, diced
  • 4 cloves garlic, minced
  • 6 cups chicken broth
  • 2 cups heavy cream
  • 3 cups sharp cheddar cheese, freshly grated
  • 2 teaspoons dried thyme
  • 1 teaspoon garlic powder
  • Kosher salt and fresh cracked pepper to taste

Optional Garnishes:

  • Extra shredded cheddar
  • Chopped chives or green onions
  • Croutons

Step-by-Step Directions: Let the Crockpot Work Its Magic

Step 1: Prep and Load the Crockpot

  1. Place the diced potatoes, onion, carrots, and celery into the crockpot.
  2. Add minced garlic, thyme, garlic powder, salt, and pepper.
  3. Pour in chicken broth, just enough to cover the vegetables.

Step 2: Slow Cook to Perfection

  1. Cover and cook on LOW for 6-7 hours or HIGH for 3-4 hours until the potatoes are fork-tender.
  2. Add the broccoli florets in the last hour of cooking to keep them bright and tender.

Step 3: The Creamy, Cheesy Finish

  1. In the final 30 minutes, stir in the heavy cream.
  2. Gradually add the shredded cheddar, stirring between additions to ensure a smooth melt.
  3. Taste and adjust the seasoning with extra salt and pepper if needed.

Step 4: Serve and Enjoy

  1. Ladle the soup into bowls and top with extra cheese, chives, or croutons for added texture and flavor.
  2. Serve warm and enjoy the rich, velvety goodness!

Nutritional Breakdown: Satisfyingly Hearty

  • Serving Size: 1/8 of the recipe
  • Calories: 425 kcal
  • Fat: 28g
  • Carbohydrates: 32g
  • Protein: 18g
  • Fiber: 4g
  • Sodium: 680mg

Tips to Elevate Your Soup

While this recipe is straightforward, a few expert tips can help take it to the next level:

1. Choose the Right Cheese

Opt for a sharp cheddar cheese for a deeper, more complex flavor. Always shred your own cheese instead of using pre-shredded varieties, as they contain anti-caking agents that can affect the soup’s texture.

2. Add Broccoli at the Right Time

To keep the broccoli vibrant and fresh-tasting, add it toward the end of the cooking time. This prevents it from becoming mushy while maintaining its nutritional value.

3. Adjust the Consistency to Your Liking

If you prefer a thicker soup, use an immersion blender to puree some of the potatoes before adding the cheese and cream. If you like it thinner, add more broth or cream until you reach your desired texture.

4. Don’t Overheat the Cheese

Adding cheese to a boiling liquid can cause it to separate and become grainy. To keep your soup creamy, stir in the cheese gradually over low heat, ensuring it melts smoothly.

5. Season as You Go

Potatoes tend to absorb a lot of salt, so be sure to taste and adjust the seasoning before serving. A pinch of smoked paprika, garlic powder, or even a dash of hot sauce can add a little extra flavor.

Common FAQs About Potato Broccoli Cheddar Soup

1. Can I Make This Soup Ahead of Time?

Yes! This soup actually tastes even better the next day as the flavors continue to develop. Store it in an airtight container in the refrigerator for up to four days.

2. Can I Freeze This Soup?

While freezing is possible, cream-based soups don’t always freeze well. The dairy may separate when reheated, resulting in a grainy texture. If you want to freeze it, try leaving out the heavy cream and cheese until after thawing, then adding them fresh when reheating.

3. How Do I Reheat Leftovers Without Curdling the Soup?

To maintain the creamy consistency, reheat the soup slowly over low to medium heat, stirring frequently. Avoid bringing it to a boil. If the soup has thickened in the fridge, add a splash of broth or cream to loosen it up.

4. What Type of Potatoes Work Best?

Yukon Gold potatoes are ideal for this soup because they have a naturally creamy texture and help thicken the broth. However, Russet potatoes can also be used if that’s what you have on hand.

5. Can I Use Frozen Broccoli Instead of Fresh?

Yes! Frozen broccoli works well and doesn’t require thawing. Just add it during the last hour of cooking so it doesn’t overcook.

6. What Are Some Protein Additions to Make It Heartier?

For a protein boost, try adding:

  • Crispy bacon bits for a smoky crunch
  • Diced ham for a salty contrast
  • Shredded rotisserie chicken for a comforting twist

7. How Can I Make It Lighter?

If you’re looking to reduce the calories, you can:

  • Swap heavy cream for half-and-half
  • Use low-fat cheddar cheese
  • Substitute vegetable broth for chicken broth for a vegetarian-friendly version

8. What Side Dishes Pair Well with This Soup?

This soup pairs perfectly with:

  • Crusty bread or garlic toast
  • A fresh green salad
  • Grilled cheese sandwiches
  • Crackers or oyster crackers

Conclusion: A Bowl Full of Warmth and Flavor

There’s something truly special about Potato Broccoli Cheddar Soup—it’s rich, creamy, and packed with comforting flavors that make every bite satisfying. Thanks to the slow cooker, it’s an effortless dish that requires minimal hands-on time, making it perfect for busy weeknights or meal prepping.

From its smooth, cheesy broth to the hearty chunks of potatoes and tender broccoli, every spoonful is a delightful balance of textures and flavors. Plus, with so many ways to customize it—whether by adding protein, adjusting the thickness, or tweaking the seasoning—you can easily make this dish your own.

If you’re looking for a comforting, homemade soup that brings warmth and joy to your table, this crockpot potato broccoli cheddar soup is a must-try. Serve it up with your favorite toppings, enjoy the rich flavors, and embrace the coziness of a perfectly crafted bowl of soup.

Garlic Butter Chicken Bites with Creamy Parmesan Pasta: A Comfort Food Masterpiece

Some dishes have a way of bringing instant comfort and satisfaction, and Garlic Butter Chicken Bites with Creamy Parmesan Pasta is one of them. This dish strikes the perfect balance between rich, garlicky flavors, tender chicken, and a luscious, cheesy sauce that coats every strand of pasta. Whether you need an easy weeknight dinner or a restaurant-quality meal to impress guests, this dish delivers bold flavors in just 35 minutes.

Why This Recipe Works

1. Quick and Easy, Yet Packed with Flavor

This dish proves that delicious meals don’t have to take hours to prepare. The chicken is cut into bite-sized pieces, which helps it cook faster and more evenly. At the same time, the pasta boils while the sauce is prepared, making the cooking process seamless and efficient.

2. One-Pan Simplicity

By cooking the chicken, sauce, and pasta all in the same pan, this recipe reduces cleanup time while allowing flavors to develop naturally. The garlic butter from the chicken infuses into the sauce, creating a rich, cohesive taste.

3. The Perfect Balance of Textures

  • Crisp, golden chicken coated in garlic butter
  • Silky, creamy Parmesan sauce that clings to every bite
  • Perfectly cooked pasta that brings the dish together

The contrast between the tender, juicy chicken and the smooth, cheesy pasta sauce makes each bite deeply satisfying.

4. A Crowd-Pleaser That’s Easy to Customize

This dish is one of those fail-proof recipes that everyone loves, and it can be easily adjusted to suit different dietary needs and flavor preferences. Whether you swap proteins, add veggies, or spice things up, the base of this recipe remains solid and delicious every time.

Gather Your Ingredients: The Flavor Foundation

For the Chicken:

  • 1 pound boneless, skinless chicken breasts or thighs, cut into bite-sized pieces
  • 3 tablespoons butter, divided
  • 3 cloves garlic, minced
  • 1 teaspoon paprika
  • 1/2 teaspoon salt
  • 1/4 teaspoon black pepper
  • 1/4 teaspoon chili flakes (optional)
  • 1 tablespoon fresh parsley, chopped (optional, for garnish)

For the Creamy Parmesan Pasta:

  • 8 ounces pasta (fettuccine, penne, or your choice)
  • 1 tablespoon olive oil
  • 2 cups heavy cream
  • 1 cup grated Parmesan cheese
  • 1 teaspoon garlic powder
  • 1/2 teaspoon salt
  • 1/4 teaspoon black pepper
  • 1/4 teaspoon nutmeg (optional)

Cooking Magic: Bringing It All Together

Step 1: Cook the Pasta

  1. Boil the pasta according to package instructions until al dente.
  2. Reserve 1/2 cup of pasta water before draining. Set the pasta aside.

Step 2: Prepare the Chicken

  1. Season the chicken with paprika, salt, pepper, and chili flakes (if using).
  2. Heat 1 tablespoon of butter in a large skillet over medium-high heat.
  3. Add the chicken and cook for 5-7 minutes, turning occasionally, until golden brown and fully cooked.
  4. Add another tablespoon of butter and the minced garlic, stirring to coat the chicken in the flavorful garlic butter.
  5. Remove the chicken from the skillet and set aside.

Step 3: Create the Creamy Parmesan Sauce

  1. In the same skillet, heat 1 tablespoon olive oil and the remaining 1 tablespoon of butter over medium heat.
  2. Add the heavy cream, garlic powder, salt, black pepper, and nutmeg (if using). Stir and bring to a gentle simmer.
  3. Slowly stir in the Parmesan cheese until it melts into a smooth and creamy sauce.
  4. Add the reserved pasta water a little at a time to adjust the consistency as needed.

Step 4: Combine Pasta and Sauce

  1. Toss the cooked pasta into the sauce, making sure it’s evenly coated.

Step 5: Assemble and Serve

  1. Plate the creamy Parmesan pasta and top with the garlic butter chicken bites.
  2. Garnish with fresh parsley, if desired.

Nutritional Snapshot: Savor Without Guilt

  • Serving Size: 4 servings
  • Calories per serving: ~560 kcal
  • Protein: High
  • Carbohydrates: Moderate
  • Fats: Rich (due to butter and heavy cream)
  • Calcium: High (thanks to Parmesan cheese)

The Secret to Perfect Garlic Butter Chicken Bites

The star of this dish is the garlic butter chicken—tender, juicy pieces seared until golden brown and coated in a rich, fragrant butter sauce. Here’s what makes it so special:

1. Choosing the Right Chicken

  • Boneless, skinless chicken breasts offer a leaner bite with a firmer texture.
  • Chicken thighs provide extra juiciness and tenderness, making them the preferred choice for those who love a richer flavor.

2. Seasoning for Depth

A simple blend of paprika, salt, black pepper, and optional chili flakes enhances the natural savoriness of the chicken while adding a hint of warmth and spice.

3. The Key to a Golden Crust

Searing the chicken in butter over medium-high heat creates a beautiful golden-brown exterior while keeping the inside moist and tender. Avoid overcrowding the pan—this ensures the chicken caramelizes rather than steams.

4. Infusing Flavor with Garlic Butter

After the chicken is cooked, adding minced garlic and more butter at the end allows the flavors to meld together, creating a fragrant coating that makes the bites absolutely irresistible.

The Ultimate Creamy Parmesan Sauce

The pasta in this dish is more than just a side—it’s coated in a rich, creamy Parmesan sauce that ties everything together. Unlike heavy Alfredo sauces, this version is silky and balanced, with just the right amount of cheesiness.

1. The Role of Heavy Cream

Heavy cream is essential for creating a thick, smooth sauce that clings to the pasta without feeling greasy or overly rich.

2. Why Parmesan is the Star

Freshly grated Parmesan cheese melts beautifully, adding both flavor and texture. Its sharp, salty notes complement the buttery chicken while bringing depth to the sauce.

3. The Magic of Pasta Water

Before draining the pasta, reserving some of the starchy cooking water helps loosen the sauce while allowing it to cling better to the pasta. This trick ensures that every bite is perfectly coated and flavorful.

4. A Touch of Warm Spice

A hint of nutmeg (optional) rounds out the flavors, adding a subtle warmth that enhances the sauce without overpowering the garlic and cheese.

How to Elevate This Dish Even Further

While this dish is already incredibly flavorful, there are a few ways to take it to the next level:

1. Add Vegetables for Extra Flavor and Nutrition

  • Spinach: Stir in fresh spinach at the end for a boost of color and nutrients.
  • Mushrooms: Sauté mushrooms with the chicken for a rich, earthy contrast.
  • Sun-Dried Tomatoes: Add a slightly tangy sweetness to balance the creaminess.

2. Swap the Protein for a New Twist

  • Shrimp: A seafood alternative that pairs beautifully with garlic and Parmesan.
  • Salmon: Flaky, pan-seared salmon makes for an elegant variation.
  • Tofu: A great option for vegetarians—pan-fried tofu absorbs the garlic butter beautifully.

3. Make it Lighter Without Losing Flavor

  • Use half-and-half instead of heavy cream for a lighter sauce.
  • Opt for whole wheat or chickpea pasta for added fiber and protein.
  • Reduce the butter slightly while keeping enough for richness.

Serving Suggestions

Best Side Dishes to Pair With

This dish is rich and creamy, so pairing it with lighter sides can create a more balanced meal. Consider serving it with:

  • A crisp Caesar salad for a refreshing contrast
  • Garlic bread to soak up the extra sauce
  • Roasted asparagus or broccoli for an added crunch
  • A glass of white wine, such as Chardonnay or Sauvignon Blanc, to complement the creamy sauce

Frequently Asked Questions (FAQs)

1. Can I make this dish ahead of time?

Yes! You can prep the chicken and sauce ahead of time, storing them separately. When ready to serve, boil fresh pasta and combine everything for a quick meal.

2. What’s the best pasta to use?

Fettuccine, penne, or linguine work best because they hold onto the sauce well. However, any pasta can be used.

3. Can I freeze leftovers?

It’s not recommended to freeze this dish since the cream sauce may separate when thawed. Instead, store leftovers in the fridge for up to 3 days.

4. What’s the best way to reheat this dish?

  • Stovetop: Heat in a skillet over low heat, adding a splash of milk or cream to refresh the sauce.
  • Avoid microwaving, as it can make the sauce grainy.

5. How can I make this dish spicier?

  • Add extra chili flakes while seasoning the chicken.
  • Stir in a dash of cayenne pepper for more heat.
  • Drizzle with spicy garlic oil before serving.

Final Thoughts: A Meal Worth Savoring

Garlic Butter Chicken Bites with Creamy Parmesan Pasta is the ultimate comfort food—rich, indulgent, and full of bold flavors that make it hard to resist. It’s the kind of meal that looks fancy but comes together effortlessly, making it perfect for both casual weeknights and special occasions.

With its golden, buttery chicken, silky Parmesan sauce, and perfectly cooked pasta, this dish is sure to become a go-to favorite in any kitchen. Try it once, and you’ll be coming back for more!

1-Hour Garlic Breadsticks: The Perfect Olive Garden Copycat Recipe

Few things compare to the warm, buttery goodness of freshly baked garlic breadsticks. Whether served alongside a comforting bowl of pasta, a hearty soup, or simply enjoyed on their own, these breadsticks are a staple in Italian-American dining. Inspired by the famous Olive Garden breadsticks, this homemade version delivers the same soft, fluffy texture, golden crust, and irresistible garlic-butter topping—all in just one hour.

This recipe is designed for both novice bakers and seasoned cooks looking for a quick and foolproof way to create restaurant-quality breadsticks at home. The best part? They require minimal ingredients, making them a fantastic addition to any meal without the need for an all-day baking commitment.

The Magic Behind Perfect Breadsticks

1. The Secret to Soft and Fluffy Breadsticks

The key to achieving the light, airy texture of these breadsticks lies in the dough preparation. Yeast activation, proper kneading, and a short but effective rise time all contribute to the bread’s final texture. Using instant yeast helps speed up the process, allowing you to enjoy fresh breadsticks without waiting hours for proofing.

Additionally, the dough’s hydration level (the balance between flour and liquid) ensures the perfect chewiness without becoming too dense. Kneading develops the gluten, which gives the breadsticks their signature elasticity, while resting allows the dough to relax and expand for that pillowy softness.

2. The Buttery Garlic Finish

While the dough provides the foundation, the buttery garlic topping is what makes these breadsticks truly irresistible. A simple combination of melted butter, garlic salt, and dried parsley adds layers of flavor, ensuring that each bite is packed with garlicky goodness. Brushing this mixture on the breadsticks right after baking allows it to seep into the warm bread, creating the perfect finish.

3. Achieving the Golden Brown Crust

A 400°F oven temperature is the sweet spot for baking breadsticks—hot enough to develop a golden crust while keeping the interior soft and fluffy. The even distribution of heat ensures that the breadsticks bake uniformly, preventing them from becoming too dry or undercooked.

Why You’ll Love This Recipe

1. Fast and Easy:

Unlike traditional bread recipes that require multiple proofing stages and hours of rising time, this recipe delivers perfectly soft breadsticks in just one hour. It’s an excellent choice for busy weeknights or last-minute dinner plans.

2. Budget-Friendly:

With just a handful of pantry staples, you can make a batch of 12 breadsticks for a fraction of the cost of store-bought or restaurant versions. Plus, homemade always tastes better!

3. Versatile and Customizable:

This base recipe can be easily modified to suit different flavors and preferences. Whether you want cheesy, herbed, or even spicy breadsticks, the possibilities are endless.

4. Pairs Well with Everything:

These breadsticks complement a wide range of dishes, from creamy pasta and rich soups to fresh salads and hearty main courses. They’re also delicious on their own with a side of marinara sauce for dipping.

Ingredients – The Secret to Soft, Buttery Perfection

For the Dough:

  • 1 ½ cups warm water
  • 2 teaspoons instant yeast
  • 2 tablespoons sugar
  • 4 – 4 ½ cups all-purpose flour
  • 1 tablespoon salt
  • 2 tablespoons melted butter

For the Topping:

  • 2 tablespoons melted butter
  • ½ teaspoon garlic salt
  • ½ teaspoon dried parsley

Directions – From Dough to Delicious in No Time

  1. Activate the Yeast: In a small bowl, stir together warm water, yeast, and sugar. If using active dry yeast, let the mixture sit for 5 minutes until foamy.
  2. Make the Dough: In a large bowl, mix 4 cups of flour with salt. Add the yeast mixture and melted butter. Stir until a dough forms.
  3. Knead to Perfection: Transfer the dough to a floured surface and knead for 5 minutes until smooth. If sticky, gradually add more flour.
  4. Shape the Breadsticks: Roll the dough into a large rectangle and divide into 12 equal pieces. Roll each piece into a breadstick shape and place on a prepared baking sheet.
  5. Let it Rise: Cover with a towel and allow the dough to rise for 30-45 minutes until puffy.
  6. Bake Until Golden: Preheat the oven to 400°F (200°C). Bake for 12-14 minutes or until lightly browned.
  7. Add the Buttery Finish: Mix melted butter with garlic salt and parsley. Brush over the warm breadsticks before serving.

Nutritional Breakdown – Indulgence in Every Bite (Per breadstick, approximate values)

  • Calories: ~150 kcal
  • Carbohydrates: ~24g
  • Protein: ~4g
  • Fats: ~4g
  • Fiber: ~1g

Ways to Customize Your Breadsticks

One of the best things about this recipe is how versatile it is. Here are some ideas to take these breadsticks to the next level:

1. Cheese Lovers’ Breadsticks

For an extra indulgent touch, sprinkle shredded mozzarella, Parmesan, or cheddar cheese over the breadsticks just before baking. The cheese will melt into a gooey, golden topping that pairs perfectly with the buttery garlic base.

2. Herb-Infused Breadsticks

Enhance the flavor with fresh or dried herbs. Try adding:

  • Italian seasoning for a classic touch
  • Rosemary and thyme for an earthy, aromatic twist
  • Basil and oregano for a Mediterranean feel

3. Spicy Kick Breadsticks

If you love a little heat, mix red pepper flakes or cayenne pepper into the garlic butter topping. This adds a subtle spice that enhances the breadsticks without overpowering their classic flavor.

4. Whole Wheat Variation

For a healthier alternative, substitute half of the all-purpose flour with whole wheat flour. This gives the breadsticks a nuttier flavor and a slightly denser texture while still maintaining softness.

5. Sweet Cinnamon Sugar Breadsticks

For a dessert twist, skip the garlic and brush the breadsticks with melted butter, then sprinkle with a mixture of cinnamon and sugar. Serve with a vanilla glaze or honey for dipping.

Serving Suggestions

1. Classic Italian Pairings

These breadsticks are the perfect side dish for Italian-inspired meals. Serve them with:

  • Creamy Fettuccine Alfredo
  • Spaghetti with Marinara or Bolognese Sauce
  • Lasagna or Stuffed Shells
  • Minestrone or Tomato Basil Soup

2. Dipping Sauces

Make your breadsticks even more enjoyable with these delicious dipping options:

  • Marinara sauce for a tangy, tomato-based dip
  • Garlic butter sauce for extra richness
  • Ranch dressing for a creamy contrast
  • Cheese sauce for a gooey, decadent touch

3. Light and Fresh Complements

For a well-balanced meal, pair the breadsticks with a crisp garden salad, Caesar salad, or roasted vegetables. Their rich, buttery flavor contrasts beautifully with fresh, bright ingredients.

Frequently Asked Questions (FAQs)

1. Can I make these breadsticks ahead of time?

Yes! You can prepare the dough and shape the breadsticks up to a day in advance. Cover them tightly and refrigerate until ready to bake. Let them come to room temperature before baking for best results.

2. How do I store leftover breadsticks?

Store any leftover breadsticks in an airtight container at room temperature for up to 2 days. For longer storage, keep them in the refrigerator for up to 5 days.

3. How do I reheat breadsticks to keep them soft?

To reheat, wrap the breadsticks in foil and warm them in a 350°F oven for 5-7 minutes. You can also microwave them for 15-20 seconds, though this may slightly change their texture.

4. Can I freeze these breadsticks?

Absolutely! Let the breadsticks cool completely, then wrap them tightly in plastic wrap or aluminum foil. Freeze for up to 3 months. To reheat, bake at 350°F for 10-12 minutes until warmed through.

5. Can I use active dry yeast instead of instant yeast?

Yes, but you’ll need to let the yeast activate in warm water with sugar for about 5-10 minutes before adding it to the dough. This will ensure proper rising.

6. What if I don’t have garlic salt?

You can make your own by combining 1/2 teaspoon of garlic powder with a pinch of salt. Alternatively, fresh minced garlic mixed with melted butter works just as well.

Final Thoughts: The Ultimate Homemade Breadstick Experience

There’s something truly special about making warm, fresh breadsticks from scratch. This 1-hour garlic breadstick recipe brings all the fluffy, buttery, garlicky goodness of restaurant-quality breadsticks into your own kitchen—without the wait.

With a simple yeast dough, quick rise time, and a rich garlic butter finish, these breadsticks are guaranteed to become a staple in your home. Whether you’re serving them alongside a family dinner, impressing guests, or simply indulging in a batch on their own, they deliver warmth, comfort, and incredible flavor in every bite.

Once you try these homemade breadsticks, you’ll never look at store-bought versions the same way again. Happy baking!

Creamy Smothered Chicken and Rice: A Comforting Classic

Some dishes are more than just meals; they evoke a sense of nostalgia, warmth, and home. Creamy Smothered Chicken and Rice is one such dish—a rich, comforting recipe that brings together tender chicken, fluffy rice, and a creamy, cheesy sauce for the ultimate indulgence. Whether you’re making it for a family dinner, a cozy night in, or meal prepping for the week ahead, this dish delivers satisfaction in every bite.

The History of Smothered Chicken and Rice

Smothered chicken has deep roots in Southern comfort cooking, where slow-cooked, well-seasoned poultry is enveloped in a rich, savory sauce. While traditional Southern smothered chicken is often paired with mashed potatoes or biscuits, this version takes inspiration from both Southern and homestyle cooking, pairing it with rice for a satisfying, balanced meal.

The concept of “smothering” food in a sauce or gravy comes from the French term étouffée, meaning “smothered” or “suffocated,” a technique commonly used in Cajun and Creole cuisine. Over time, different cultures adapted the technique, incorporating their own local ingredients and flavors. This creamy smothered chicken variation blends classic Southern cooking with a touch of indulgence, thanks to the velvety cheese sauce that makes the dish irresistible.

What Makes This Dish So Special?

1. A One-Pan Wonder

This dish simplifies home cooking without sacrificing flavor. Everything—from searing the chicken to creating the creamy sauce—is done in one pan, cutting down on dishes while maximizing taste.

2. Perfect Balance of Textures

The contrast between tender, juicy chicken, fluffy rice, and a smooth, velvety sauce makes each bite deeply satisfying. The cheese and butter create a richness, while the rice absorbs all the flavors, making it the perfect accompaniment.

3. Ultimate Comfort Food

There’s something undeniably cozy about creamy, smothered dishes. The blend of garlic, thyme, and cheddar cheese adds warmth, making this a meal that soothes the soul. Whether it’s a cold evening or you simply need a hearty, home-cooked meal, this dish delivers.

4. Customizable for Any Preference

One of the best aspects of this dish is how easily it can be customized to suit different tastes and dietary needs. Whether you want to add vegetables, swap the protein, or make it lighter, there are endless ways to make this dish your own.

How to Elevate This Dish Even Further

While the classic version is already packed with flavor, there are a few ways to make this dish even more impressive.

1. Add a Kick of Heat

If you enjoy a bit of spice, consider adding:

  • A pinch of cayenne pepper to the sauce for subtle heat
  • Smoked paprika to enhance the depth of flavor
  • Red pepper flakes for an extra spicy kick

2. Introduce More Vegetables

For a nutritious boost, mix in:

  • Sautéed mushrooms for an earthy contrast
  • Peas or diced carrots for added color and sweetness
  • Spinach or kale, stirred into the sauce for a hint of freshness

3. Experiment with Different Cheeses

While cheddar and Parmesan create a rich sauce, you can try:

  • Gruyère for a nutty, complex flavor
  • Mozzarella for extra creaminess
  • Pepper Jack for a spicy, melty twist

4. Swap the Protein

Not a fan of chicken breasts? No problem. Try:

  • Chicken thighs, which remain extra juicy and tender
  • Shrimp, added at the end for a seafood twist
  • Mushrooms or tofu, for a vegetarian-friendly version

Pro Tips for Achieving the Best Flavor

1. Sear the Chicken for Maximum Flavor

Browning the chicken before simmering it in the sauce adds depth and a beautiful golden crust, which enhances both texture and taste.

2. Whisk the Sauce for a Silky Texture

When making the creamy sauce, whisk constantly to avoid lumps. Adding the milk and broth slowly ensures a smooth, velvety consistency.

3. Don’t Overcook the Rice

To keep the rice light and fluffy, avoid overcooking it. The grains should be tender but not mushy, allowing them to absorb just the right amount of sauce.

4. Season as You Go

Building flavors gradually ensures a well-balanced dish. Season the chicken, rice, and sauce separately, tasting as you go to adjust the salt and spice levels.

How to Serve Creamy Smothered Chicken and Rice

Presentation matters, even with comfort food. Here are a few serving ideas to make this dish feel extra special:

1. Family-Style Feast

Serve the smothered chicken straight from the skillet, allowing everyone to help themselves. The bubbling cheese sauce, golden chicken, and fluffy rice create an inviting, homey centerpiece for the table.

2. Plated Elegance

For a more refined presentation:

  • Place a scoop of rice on a plate.
  • Arrange the chicken breast on top, then spoon over the creamy sauce.
  • Garnish with fresh parsley or a sprinkle of extra cheese for a pop of color and added flavor.

3. Pair It with the Perfect Side

Though this dish is satisfying on its own, here are a few side options that complement its flavors:

  • A crisp green salad with a tangy vinaigrette to cut through the richness
  • Steamed or roasted vegetables for added texture and nutrition
  • Warm dinner rolls to soak up every bit of the creamy sauce

Frequently Asked Questions (FAQs)

1. Can I make this dish ahead of time?

Yes! You can prepare the chicken and sauce ahead of time and store them separately. Reheat gently on the stovetop, adding a splash of milk or broth to loosen the sauce.

2. Can I use brown rice instead of white rice?

Absolutely! Brown rice takes longer to cook but adds extra fiber and a nutty flavor. You may need to adjust the broth quantity and cooking time.

3. How do I store leftovers?

Store leftovers in an airtight container in the refrigerator for up to 3 days. To reheat, warm gently on the stovetop, adding a bit of broth or milk to restore the creamy texture.

4. Can I freeze this dish?

Yes! Freeze individual portions in freezer-safe containers for up to 2 months. Thaw overnight in the fridge before reheating.

5. What’s the best way to make this dish lighter?

  • Use Greek yogurt instead of heavy cream for a tangy, protein-packed alternative.
  • Reduce the cheese or use a light cheese blend.
  • Swap butter for olive oil for a slightly healthier fat source.

6. Can I make this gluten-free?

Yes! Simply replace the all-purpose flour in the sauce with gluten-free flour or cornstarch.

7. What if I don’t have chicken broth?

You can use vegetable broth or a combination of water and bouillon cubes to replicate the flavor.

Final Thoughts: The Ultimate Comfort Dish

Creamy Smothered Chicken and Rice is a testament to the power of simple ingredients coming together to create something extraordinary. The rich, velvety sauce, the perfectly seasoned chicken, and the fluffy, flavorful rice make this dish a standout in any kitchen.

What makes this recipe truly special is its ability to bring people together. Whether served at a family dinner, a casual gathering, or as a meal-prep favorite, it delivers warmth, comfort, and satisfaction every time.

So the next time you’re in need of a hearty, homemade meal that feels like a warm hug, this dish is the perfect answer. One bite, and you’ll understand why it’s destined to become a household favorite.

Garlic Chilli Cacio e Pepe: A Bold Twist on an Italian Classic

Cacio e Pepe, a dish rooted in Roman tradition, has stood the test of time as one of Italy’s simplest yet most beloved recipes. With just a few ingredients—cheese, black pepper, pasta, and starchy water—this dish embodies the art of Italian cooking: minimalism, technique, and bold flavors. However, for those who crave an extra dimension of spice and depth, this Garlic Chilli Cacio e Pepe is an irresistible variation that elevates the classic to new heights.

By introducing garlic, red chillies, and a hint of Kashmiri chilli powder, this recipe transforms the traditional version into a fiery, flavor-packed dish with layers of heat, umami, and creaminess. It’s a perfect choice for spice enthusiasts who love Italian cuisine but want a little extra kick in their pasta.

The Legacy of Cacio e Pepe: Simplicity with Complexity

Cacio e Pepe translates to “cheese and pepper,” which may sound deceptively simple, but achieving the perfect creamy texture without adding cream or butter requires an understanding of emulsification. The dish dates back to Roman shepherds, who needed a meal that was both nourishing and travel-friendly. They carried dried pasta, aged cheese (pecorino romano), and black pepper, all of which were non-perishable and easy to cook over an open flame.

Despite its humble origins, Cacio e Pepe has become a signature dish of Rome, celebrated in fine dining establishments and home kitchens alike. What makes it so appealing is its balance—the sharpness of pecorino, the warmth of toasted black pepper, and the silky sauce formed by pasta water and cheese.

But why stop there? By adding garlic and chilli, we introduce more depth, complexity, and contrast to an already exceptional dish. The result is a vibrant, spicy, and deeply satisfying version of Cacio e Pepe that still honors its roots while embracing bold, modern flavors.

The Power of Ingredients: Why Quality Matters

Since Cacio e Pepe relies on a short list of ingredients, each component must be of the highest quality to achieve the best results.

1. Pasta: The Backbone of the Dish

Dried spaghetti or bucatini is essential for this recipe. Unlike fresh pasta, dried pasta releases more starch into the cooking water, which is critical for forming a creamy sauce. The starch acts as a natural emulsifier when combined with cheese, preventing the sauce from separating.

A high-quality bronze-cut pasta will absorb the sauce better, ensuring each strand is well-coated in that luscious, spicy cheese mixture.

2. Pecorino Romano: The Star of the Show

Pecorino Romano is non-negotiable in this dish. It differs from Parmesan in its sharper, saltier, and slightly tangy profile, which enhances the dish’s flavor.

For best results, always grate pecorino fresh rather than using pre-ground cheese. Pre-grated versions often contain anti-caking agents that hinder melting and emulsification, leading to a grainy texture rather than a smooth sauce.

3. Black Pepper: More Than Just a Spice

Black pepper is not merely a seasoning in this dish—it’s a defining flavor. Using whole black peppercorns, toasting them before grinding, and adding them freshly crushed to the pan brings out their earthy, floral, and slightly smoky notes.

Pre-ground pepper, in contrast, lacks depth and can lead to a less vibrant final dish.

4. Garlic and Chilli: The Bold Enhancements

Garlic introduces an irresistible aromatic depth, complementing the cheese and pepper beautifully. The bird’s eye chillies bring an intense heat, while Kashmiri chilli powder adds a milder warmth and a rich color to the sauce.

Together, these additions create a balance of spicy, savory, and creamy flavors without overpowering the dish’s core identity.

Ingredients – A Symphony of Spice and Creaminess

  • 250g dried spaghetti or bucatini (essential for the perfect starch-infused sauce)
  • 1 tsp whole black peppercorns (freshly ground for maximum flavor)
  • 1 shallot, diced (adds a subtle sweetness)
  • 4 cloves garlic, minced (for a rich, aromatic depth)
  • 2 red bird’s eye chillies, minced (packs a spicy punch)
  • 2 tsp Kashmiri chilli powder (enhances color and background heat)
  • 50g salted butter (for indulgent richness)
  • 70g pecorino romano, very finely grated (essential for authenticity)
  • Handful of parsley, roughly chopped (adds a fresh finish)

Directions – The Art of Perfecting Creamy Heat

  1. Prepare the Pasta: Boil the spaghetti or bucatini in salted water for one minute less than package instructions. Reserve the starchy pasta water.
  2. Toast the Peppercorns: In a dry pan over low heat, toast the black peppercorns until fragrant (about 1-2 minutes). Grind coarsely using a pestle and mortar.
  3. Build the Flavors: Melt the butter in a wide pan over low heat. Add the toasted black pepper and let it bloom in the butter.
  4. Sauté Aromatics: Add the diced shallots, followed by garlic and minced chillies. Sauté until the shallots turn translucent and the garlic turns lightly golden.
  5. Spice it Up: Reduce heat to low and stir in the Kashmiri chilli powder, allowing it to toast and infuse into the butter.
  6. Emulsify the Sauce: Turn off the heat and add a ladle of reserved pasta water. Add the pasta and grated pecorino, then vigorously toss and mix to emulsify into a creamy sauce.
  7. Adjust Consistency: If the sauce is too thick, add more pasta water. If too thin, incorporate extra grated pecorino.
  8. Finish and Serve: Stir in chopped parsley and serve immediately with extra pecorino on top.

Nutritional Breakdown – A Balanced Indulgence (per serving, approximate)

  • Calories: ~550 kcal
  • Protein: ~20g
  • Carbohydrates: ~70g
  • Fats: ~20g
  • Fiber: ~4g

The Science Behind the Perfect Sauce

The magic of Cacio e Pepe lies in its sauce, which is neither oil-based nor cream-based but instead relies on emulsification. The starchy pasta water, combined with finely grated pecorino, creates a smooth and velvety sauce.

However, achieving this consistency can be tricky. If the temperature is too high, the cheese can seize and clump instead of forming a creamy sauce. The key is to remove the pan from direct heat before adding the cheese, ensuring it melts gradually into the pasta water.

Additionally, the sauce must be vigorously mixed to fully emulsify. A gentle toss won’t do—it requires speed and motion to create that glossy, restaurant-quality finish.

Common Mistakes and How to Avoid Them

Even though this dish uses just a few ingredients, small mistakes can result in a disappointing texture. Here are some common errors and how to avoid them:

1. Using Pre-Ground Pepper

Toasting and grinding fresh whole peppercorns unlocks aromatic oils and complex flavors that pre-ground pepper lacks. Always toast and grind your own for the best results.

2. Adding Cheese Over High Heat

If the pecorino is added while the pan is too hot, it will separate and create a gritty, clumpy sauce. Remove the pan from heat before mixing in the cheese and stir vigorously to help it emulsify.

3. Skipping the Starchy Pasta Water

The starch from the pasta water is crucial for binding the cheese and creating a smooth sauce. Without it, the cheese will not coat the pasta properly. Always reserve pasta water before draining.

4. Overcooking the Pasta

Pasta should be one minute shy of al dente when it’s added to the sauce. It will finish cooking in the pan while absorbing all the flavors. Overcooked pasta will break apart when tossed in the sauce.

5. Not Using Enough Motion

To properly emulsify the sauce, the pasta must be tossed and stirred vigorously. Simply mixing with a spoon isn’t enough—you need movement to bind the cheese and starch into a creamy coating.

Frequently Asked Questions

1. Can I make this dish less spicy?

Absolutely. To reduce heat, you can deseed the chillies or use a milder variety, such as Fresno chillies. You can also reduce or omit the Kashmiri chilli powder while still keeping the garlic for added depth.

2. Can I use Parmesan instead of Pecorino Romano?

While Parmesan can be used, it lacks the sharp, salty bite of pecorino, which is essential for traditional Cacio e Pepe. If using Parmesan, expect a milder and slightly nuttier flavor.

3. What can I serve with this dish?

This pasta pairs beautifully with crisp white wines like Pinot Grigio or Sauvignon Blanc. A simple arugula salad with lemon dressing also complements its rich flavors.

4. How can I store leftovers?

Cacio e Pepe is best eaten fresh, as the sauce thickens when stored. However, if you have leftovers, refrigerate them in an airtight container. To reheat, add a splash of water and gently warm over low heat while stirring constantly.

5. Can I make this dish vegan?

Yes! Substitute pecorino romano with a high-quality vegan cheese that melts well and use plant-based butter. Keep in mind that the emulsification process may require more pasta water since dairy-free cheeses behave differently.

Conclusion: A Bold and Irresistible Upgrade to a Classic

Garlic Chilli Cacio e Pepe is a fiery, indulgent, and deeply satisfying variation of the beloved Roman dish. It takes everything we love about the original—creamy sauce, sharp cheese, and toasty black pepper—and enhances it with the bold flavors of garlic and chilli.

This dish is perfect for those who love spice and crave an extra dimension of depth in their pasta. Whether enjoyed as a comforting weeknight meal or an impressive dinner for guests, it’s sure to become a go-to recipe in any kitchen.

By respecting the techniques of traditional Cacio e Pepe while embracing new flavors, this version celebrates both history and innovation—proving that sometimes, a little heat makes everything better.

Pesto Chicken Salad: A Fresh, High-Protein Meal in Minutes

When it comes to quick, easy, and flavor-packed meals, Pesto Chicken Salad is a game-changer. This dish combines tender shredded chicken, creamy Greek yogurt, and vibrant pesto for a high-protein, no-mayo alternative to traditional chicken salad. It’s light yet satisfying, packed with fresh basil and garlic, and perfect for meal prep.

Whether served in a wrap, on toast, over greens, or even as a pasta salad, this simple three-ingredient recipe is a must-try for anyone who loves Mediterranean flavors and effortless meals.

Why Pesto Chicken Salad Is a Must-Try

1. Only Three Ingredients, Big Flavor

This recipe keeps things incredibly simple with just three core ingredients:

  • Rotisserie chicken for a convenient, protein-rich base.
  • Pesto for a fresh, herby kick.
  • Greek yogurt for creaminess without the heaviness of mayo.

2. A Healthier Alternative to Traditional Chicken Salad

Most chicken salad recipes rely on mayonnaise, which can be high in fat and calories. This version swaps in Greek yogurt, making it:

  • Lower in fat and calories while still rich and creamy.
  • High in protein to keep you full.
  • Packed with probiotics for better digestion.

3. Ready in Just Five Minutes

If you need a quick lunch or an easy meal-prep option, this no-cook recipe is ready in five minutes or less. Simply mix the ingredients, adjust the flavors, and serve it however you like.

4. Versatile and Customizable

This simple base recipe can be modified in countless ways:

  • Serve it in a wrap, on toast, or in a croissant for a hearty meal.
  • Use lettuce cups for a low-carb, keto-friendly option.
  • Mix it into cooked pasta for a refreshing cold pesto pasta salad.

5. Perfect for Meal Prep

Pesto Chicken Salad is a meal-prep dream—it stays fresh in the fridge for up to five days, making it ideal for packed lunches or quick dinners.

Fresh and Flavorful Ingredients

  • Rotisserie chicken for a tender, protein-rich base
  • Homemade or store-bought pesto packed with basil and garlic
  • Plain Greek yogurt for a creamy, tangy substitute for mayo
  • Optional add-ins like cherry tomatoes, sun-dried tomatoes, or red peppers for extra flavor

How to Make This Easy 3-Ingredient Pesto Chicken Salad

  1. Combine Ingredients – Mix shredded rotisserie chicken, pesto, and Greek yogurt in a large bowl.
  2. Customize Your Salad – Add cherry tomatoes, red pepper, or a squeeze of lemon juice for a fresh twist.
  3. Serve in Multiple Ways – Enjoy in a wrap, on toast, with lettuce cups, or stirred into pasta for a cold pesto pasta salad.
  4. Store for Later – Keep in an airtight container in the fridge for up to 5 days.

Nutritional Breakdown (Per Serving, Approximate)

  • Calories: 352 kcal
  • Protein: 39.2g
  • Carbohydrates: 5.4g
  • Fat: 19.3g

Frequently Asked Questions (FAQs)

1. What Makes This Recipe Different from Regular Chicken Salad?

Traditional chicken salad is made with mayonnaise, which can be heavy and high in fat. This version replaces mayo with Greek yogurt and adds pesto for an herby, Mediterranean-inspired twist.

2. Can I Use Store-Bought Pesto?

Yes! While homemade pesto offers the freshest flavor, store-bought pesto is a great shortcut. Just choose one with high-quality olive oil, fresh basil, and real Parmesan cheese for the best taste.

3. What’s the Best Type of Chicken to Use?

Any cooked chicken works, but these options are best:

  • Rotisserie chicken – Quick and flavorful with no extra cooking required.
  • Grilled chicken – Adds a smoky depth.
  • Poached chicken – Soft and tender, perfect for mixing.
  • Canned chicken – Works in a pinch, but fresh chicken has better texture.

4. How Long Does Pesto Chicken Salad Last in the Fridge?

When stored in an airtight container, this salad stays fresh for up to five days. If meal prepping, store the salad separately from bread or greens to keep everything crisp.

5. Can I Make This Recipe Dairy-Free?

Yes! To make a dairy-free version:

  • Use dairy-free Greek yogurt or mashed avocado instead of regular Greek yogurt.
  • Choose a dairy-free pesto, or make your own without Parmesan cheese.

6. What’s the Best Way to Serve Pesto Chicken Salad?

This dish is incredibly versatile—try it:

  • In a wrap – Add arugula and sun-dried tomatoes for a Mediterranean-inspired meal.
  • On toast or a croissant – For an indulgent brunch option.
  • Over mixed greens – Drizzle with balsamic glaze for a light, refreshing salad.
  • With crackers or cucumber slices – As a protein-packed snack.
  • Tossed with cooked pasta – For an easy pesto chicken pasta salad.

7. Can I Add Extra Ingredients for More Flavor?

Absolutely! Some delicious add-ins include:

  • Cherry tomatoes for a juicy pop of flavor.
  • Sun-dried tomatoes for a rich, tangy twist.
  • Chopped red bell pepper for sweetness and crunch.
  • Sliced almonds or walnuts for added texture.
  • A squeeze of lemon juice to brighten the dish.

8. Can I Make This Recipe Low-Carb or Keto-Friendly?

Yes! This recipe is naturally low in carbs, but to keep it keto-friendly:

  • Use full-fat Greek yogurt.
  • Skip the toast and serve it in lettuce wraps.
  • Add avocado for extra healthy fats.

9. How Can I Add More Protein?

To boost the protein content, try:

  • Using extra chicken to increase the protein-to-sauce ratio.
  • Mixing in a boiled egg, cottage cheese, or chickpeas for variety.
  • Serving it with a side of hard-boiled eggs or quinoa.

10. What Should I Serve With Pesto Chicken Salad?

For a complete meal, serve it with:

  • Roasted vegetables for a warm, balanced plate.
  • A side of whole-grain crackers for crunch.
  • Fresh fruit, like grapes or berries, for a sweet contrast.
  • A chilled glass of white wine or iced tea for a refreshing pairing.

Expert Tips for the Best Pesto Chicken Salad

  • Use fresh, high-quality pesto – It makes a huge difference in flavor.
  • Let the salad chill for 30 minutes before serving to let the flavors meld.
  • Add an extra drizzle of olive oil for richness.
  • Shred the chicken finely for the creamiest texture.
  • If the pesto is thick, thin it out with a little lemon juice or olive oil.

Conclusion: A Simple, Flavor-Packed Meal for Any Occasion

Pesto Chicken Salad is the ultimate combination of convenience, nutrition, and flavor. With just three main ingredients, this dish proves that healthy eating doesn’t have to be complicated.

Whether you’re making it for meal prep, a quick lunch, or a light dinner, this salad is guaranteed to satisfy. It’s packed with protein, full of fresh basil and garlic, and incredibly versatile—making it a recipe you’ll come back to again and again.

Try it today and enjoy a refreshing, Mediterranean-inspired meal that’s both effortless and delicious!