Lucky Charms Rice Krispie Treats: A Magical St. Patrick’s Day Snack

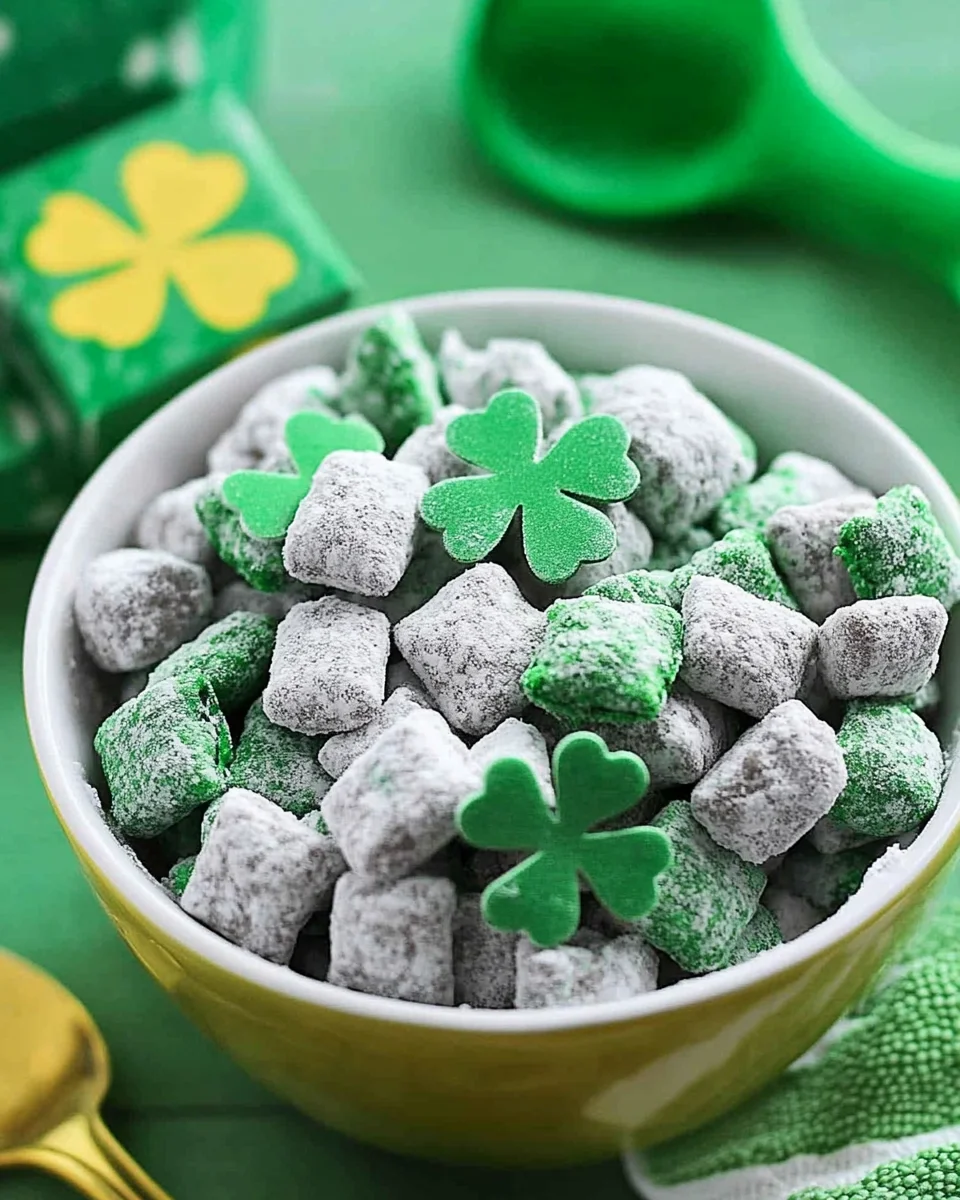
St. Patrick’s Day is all about fun, color, and a little bit of luck, and what better way to celebrate than with a batch of Lucky Charms Rice Krispie Treats? This festive twist on a classic marshmallow treat combines the gooey goodness of traditional Rice Krispie bars with the colorful magic of Lucky Charms cereal. The result? A soft, chewy, and delightfully crunchy dessert that’s as fun to make as it is to eat.

Perfect for kids’ parties, holiday celebrations, or just a fun afternoon in the kitchen, these treats bring a little bit of rainbow magic to your dessert table. Whether you’re making them for St. Patrick’s Day or just looking for a nostalgic treat, this recipe is guaranteed to bring smiles all around.

Why You’ll Love These Lucky Charms Rice Krispie Treats

  • No-Bake & Easy to Make – With only a few ingredients and no oven required, these treats come together in minutes.
  • A Fun Twist on a Classic – Swapping out traditional Rice Krispies for Lucky Charms adds extra crunch and sweetness with the colorful marshmallow pieces.
  • Perfect for Any Celebration – While they’re ideal for St. Patrick’s Day, you can make them for birthdays, school events, or any time you need a cheerful treat.
  • Kid-Friendly and Interactive – This recipe is simple enough for kids to help with, making it a great family-friendly activity.
  • Customizable and Creative – You can add sprinkles, drizzle with chocolate, or mix in other cereals for your own unique version.

Ingredients: A Festive Twist on a Classic Treat

  • Base Ingredients:
    • Lucky Charms cereal
    • White mini marshmallows
    • Butter
    • Vanilla extract
  • Color and Topping Options:
    • Green food coloring
    • Pastel mini marshmallows (optional)
    • Green sprinkles or St. Patrick’s Day-themed sprinkles (optional)

Directions: Creating a Lucky, Gooey Treat

  1. Melt the Marshmallows: In a large pot, melt butter over medium heat, then stir in marshmallows until completely melted and smooth.
  2. Add the Color: Mix in green food coloring until you reach your desired shade of green.
  3. Combine with Cereal: Remove from heat and fold in Lucky Charms cereal, ensuring an even coating.
  4. Shape the Treats: Press the mixture into a greased 9×12-inch baking dish, using wax paper or greased fingers to flatten.
  5. Decorate: Sprinkle the top with additional mini marshmallows and sprinkles for a festive touch.
  6. Set and Serve: Let the treats cool before cutting into squares and serving.

Nutritional Facts (Per Serving, Approximate):

  • Calories: 137
  • Carbohydrates: 19g
  • Protein: 2g
  • Fat: 7g
  • Saturated Fat: 4g
  • Cholesterol: 15mg
  • Sodium: 166mg
  • Fiber: 1g
  • Sugar: 9g

The Secret to the Best Marshmallow Treats

While Rice Krispie treats may seem simple, there are a few key tips to make sure they turn out soft, chewy, and perfectly gooey:

  1. Use Fresh Marshmallows – Older marshmallows don’t melt as smoothly and can lead to a hard, dry texture in your treats.
  2. Melt the Butter Slowly – Cooking the butter over medium heat prevents it from burning and keeps the mixture silky smooth.
  3. Don’t Over-Stir the Cereal – Over-mixing can break down the marshmallow charms in Lucky Charms, so stir gently to keep them intact.
  4. Press Gently in the PanPacking the mixture too tightly makes the bars dense and tough. Instead, lightly press them into the pan with greased fingers or wax paper.
  5. Let Them Set Before Cutting – Giving the treats time to cool helps them hold their shape when sliced.

Serving Ideas for the Ultimate Lucky Charms Treats

These Lucky Charms Rice Krispie Treats are perfect on their own, but you can make them even more festive and fun with these serving ideas:

  • Cut into Fun Shapes – Use shamrock-shaped cookie cutters for an extra St. Patrick’s Day touch.
  • Drizzle with White or Dark Chocolate – A chocolate drizzle adds a delicious contrast to the sweetness.
  • Layer with Ice Cream – Place a scoop of vanilla ice cream between two treats for a delicious Lucky Charms ice cream sandwich.
  • Serve with a Glass of Green Milk – Add a few drops of green food coloring to a glass of milk for an extra festive pairing.
  • Sprinkle with Edible Glitter – Make your treats sparkle by adding edible glitter or gold sprinkles.

Frequently Asked Questions

1. Can I Use Regular Rice Krispies Instead of Lucky Charms?

Yes! If you want a more classic marshmallow treat, you can use a mix of Lucky Charms and Rice Krispies or substitute entirely with Rice Krispies. However, using all Lucky Charms gives these treats their unique color and crunch.

2. How Do I Prevent the Treats from Getting Too Hard?

The key to keeping your bars soft and chewy is:

  • Not overheating the marshmallows – Melt them over low to medium heat, stirring constantly.
  • Not pressing the mixture too firmly into the pan—this helps keep them light and airy.
  • Storing them properly in an airtight container at room temperature.

3. How Long Do Lucky Charms Rice Krispie Treats Last?

These treats are best eaten within 2-3 days for maximum freshness. Store them in an airtight container at room temperature to prevent them from drying out.

4. Can I Make These Ahead of Time?

Yes! You can make them up to a day in advance, but they’re best when fresh and chewy. If making ahead, store them in a container with parchment paper between layers to prevent sticking.

5. Can I Make These Treats in the Microwave Instead of the Stovetop?

Yes! You can melt the butter and marshmallows in a microwave-safe bowl by heating in 30-second intervals, stirring each time, until fully melted. Then, mix in the cereal and follow the same steps as the stovetop method.

6. Can I Freeze These Treats?

Freezing is not recommended, as the marshmallow mixture can become too hard and chewy once frozen. However, if needed, wrap individual bars tightly in plastic wrap and freeze for up to a month. Let them sit at room temperature before eating.

7. What Other Variations Can I Try?

Want to mix things up? Here are some fun variations to try:

  • Chocolate Lucky Charms Treats – Stir in mini chocolate chips or drizzle with melted chocolate.
  • Peanut Butter Marshmallow Bars – Add ½ cup of peanut butter to the melted marshmallow mixture for a nutty twist.
  • Fruity Marshmallow Treats – Swap out Lucky Charms for Fruity Pebbles or Trix cereal for a different flavor.
  • S’mores Krispie Treats – Mix in crushed graham crackers and mini chocolate chips for a s’mores-inspired version.

Fun Ways to Get Kids Involved

This recipe is perfect for kids to help with! Here are a few fun ways to make it an interactive activity:

  • Let them stir the cereal into the marshmallow mixture (with supervision, since the mixture is warm).
  • Have them press the mixture into the pan using wax paper.
  • Let them decorate the top with sprinkles, extra marshmallows, or chocolate chips.
  • Teach them about measuring ingredients while you bake together.

Final Thoughts: A Fun and Festive Treat for All Ages

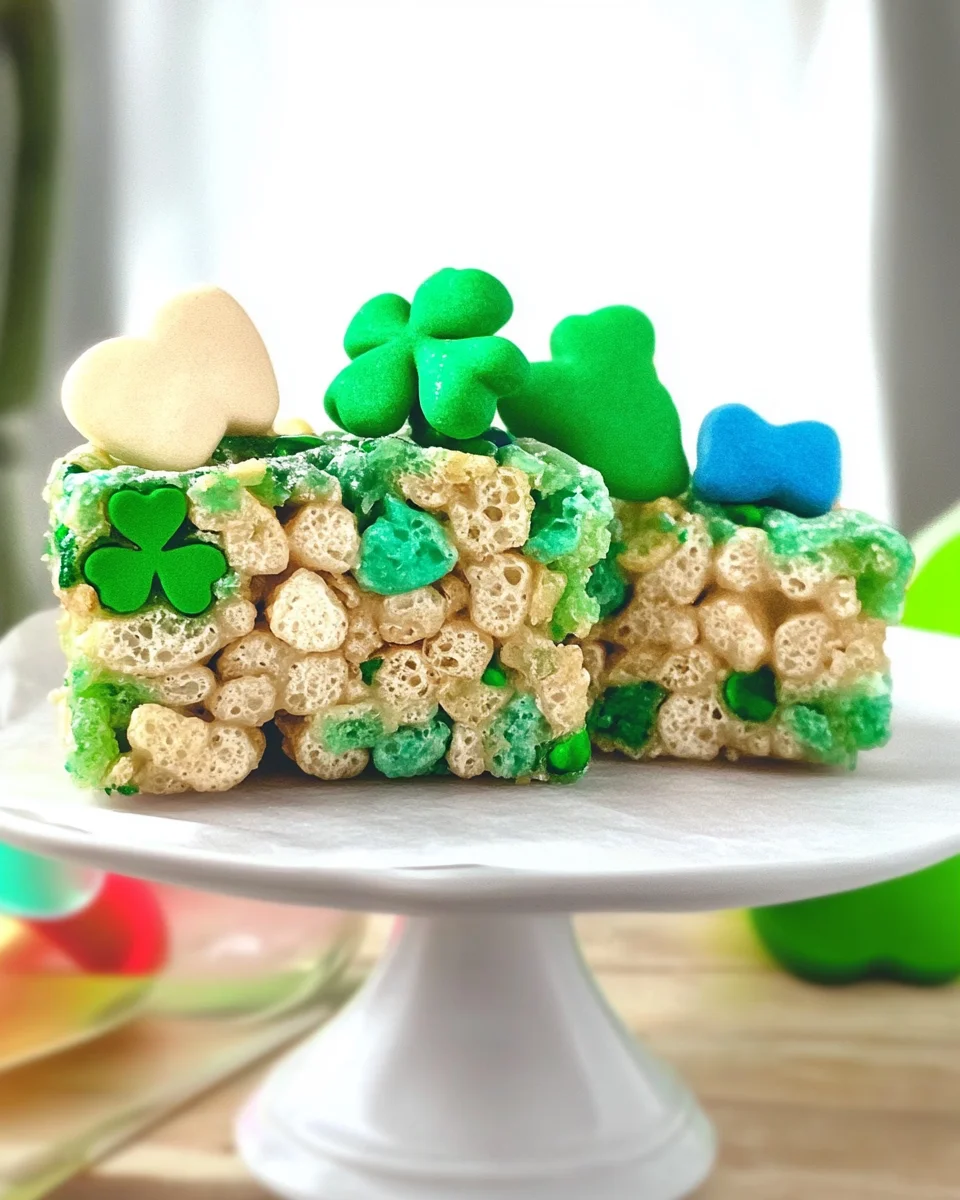
These Lucky Charms Rice Krispie Treats are a fun, colorful, and delicious twist on the classic marshmallow bar. Whether you’re celebrating St. Patrick’s Day, making a fun treat for kids, or just indulging in a nostalgic dessert, this recipe is guaranteed to bring a touch of magic to your kitchen.

With their crunchy cereal base, gooey marshmallow coating, and festive pastel colors, these treats brighten up any occasion. Plus, they’re easy to make, perfect for sharing, and endlessly customizable.

So, grab a box of Lucky Charms, whip up a batch, and enjoy a treat that’s as lucky as it is delicious!

Easter Sprinkle Cookies: A Soft, Chewy, and Festive Treat

Nothing says spring like bright, colorful, and fun Easter cookies. These Easter Sprinkle Cookies are the perfect addition to any holiday gathering, bringing together the soft and chewy texture of a classic cookie with the crunch of pastel sprinkles and bursts of chocolate from M&M’s and white chocolate chips.

Whether you’re baking these for an Easter party, making a treat for a spring picnic, or simply looking for a delicious and easy cookie recipe, these cookies deliver a perfect balance of sweetness, texture, and festive charm.

Why These Easter Cookies Are a Must-Try

There are plenty of cookie recipes out there, but this one stands out for several reasons:

  • Soft and Chewy Texture – These cookies have crispy edges and a tender, chewy center, making them utterly irresistible.
  • Festive and Fun – With pastel M&M’s, white chocolate chips, and colorful sprinkles, they are a visual delight perfect for springtime.
  • Quick and Easy to Make – No complicated techniques, chilling time, or special equipment required—just a simple, foolproof recipe.
  • Versatile for Any Occasion – While designed for Easter, these cookies can be customized for any celebration by switching up the colors of the M&M’s and sprinkles.
  • Kid-Friendly and Great for Baking Together – This is a fantastic family-friendly recipe where kids can help mix, roll, and decorate the cookies with sprinkles.

Ingredients: A Colorful Celebration in Every Bite

  • Base Dough:
    • All-purpose flour
    • Baking powder
    • Baking soda
    • Salt
    • Unsalted butter, softened
    • Granulated sugar
    • Brown sugar
    • Large egg
    • Pure vanilla extract
  • Fun and Festive Mix-Ins:
    • Easter or spring M&M’s
    • White chocolate chips or chunks
    • Pastel sprinkles

Directions: Creating the Perfect Soft and Chewy Cookies

  1. Prepare the Dough: Cream together butter and sugars, then mix in the egg and vanilla. Combine dry ingredients separately before gradually incorporating them into the wet mixture.
  2. Add the Fun Stuff: Gently fold in M&M’s and white chocolate chips for extra texture and flavor.
  3. Shape the Cookies: Roll the dough into balls, pressing the tops into pastel sprinkles for a decorative touch.
  4. Bake to Perfection: Arrange on a parchment-lined baking sheet and bake at 350°F for 8-11 minutes until the edges are set but the centers remain soft.
  5. Cool and Enjoy: Allow the cookies to cool on a wire rack before serving. Press extra M&M’s or chocolate chips on top while they’re still warm for a bakery-style look.

Nutritional Facts (Per Cookie, Approximate):

  • Calories: 200
  • Carbohydrates: 28g
  • Protein: 2g
  • Fat: 9g
  • Saturated Fat: 5g
  • Cholesterol: 24mg
  • Sodium: 73mg
  • Fiber: 1g
  • Sugar: 20g

The Secret to the Perfect Chewy Cookie

Achieving that soft, bakery-style texture in cookies comes down to a few key baking principles:

  1. Use a Combination of Sugars – The brown sugar adds moisture and chewiness, while granulated sugar helps with spreading and crisping the edges.
  2. Softened Butter, Not Melted – Butter that is too soft or melted will cause the cookies to spread too much, making them thinner and crispier instead of thick and chewy.
  3. Don’t Overbake – The cookies should look slightly underbaked when removed from the oven. They will continue to set as they cool, ensuring a perfectly soft center.
  4. Shape the Cookies Right After Baking – If the cookies spread unevenly, use a spoon or round cutter to gently shape them while they’re still warm for a uniform and bakery-style look.
  5. Chill the Dough for Thicker Cookies – If you prefer thicker cookies, chill the dough for 20-30 minutes before baking to prevent excessive spreading.

How to Serve and Enjoy These Cookies

These Easter Sprinkle Cookies are a versatile treat that can be served in a variety of fun ways:

  • On an Easter Dessert Platter – Pair them with other spring-themed treats like carrot cake cupcakes, lemon bars, and chocolate nests for a beautiful dessert spread.
  • With a Cup of Coffee or Tea – The perfect afternoon snack for those who enjoy a sweet treat with their favorite warm beverage.
  • As an Ice Cream Sandwich – Place a scoop of vanilla or strawberry ice cream between two cookies for a fun and festive ice cream sandwich.
  • Wrapped as a Gift – Pack them in a decorative box or bag for a homemade Easter gift for friends and family.
  • As a Fun Cookie Decorating Activity – Let kids dip them in melted chocolate or add extra sprinkles for a hands-on decorating experience.

Frequently Asked Questions

1. Can I Use Different Types of Chocolate?

Yes! While white chocolate chips work beautifully in this recipe, you can switch things up with different types of chocolate:

  • Milk Chocolate Chips – For a creamier, richer flavor.
  • Dark Chocolate Chips – Adds a slight bitterness that balances the sweetness.
  • Peanut Butter Chips – If you love the combination of peanut butter and chocolate, this is a great variation.

2. Do I Have to Use Pastel M&M’s?

No, you can use regular M&M’s or even different seasonal colors to make these cookies work for other holidays like Christmas, Halloween, or Valentine’s Day.

3. How Do I Keep the Cookies Soft for Days?

To ensure your cookies stay soft:

  • Store them in an airtight container at room temperature.
  • Place a slice of bread in the container—this helps maintain moisture and prevents cookies from drying out.
  • Avoid refrigerating the cookies, as the cold air can make them hard.

4. Can I Make the Dough Ahead of Time?

Yes! This cookie dough can be made in advance and stored:

  • Refrigerator: Keep the dough chilled for up to 3 days before baking.
  • Freezer: Freeze rolled cookie dough balls for up to 2 months. Bake straight from the freezer, adding 1-2 extra minutes to the baking time.

5. Can I Make These Cookies Without Eggs?

Yes! If you need an egg-free version, you can substitute the egg with:

  • ¼ cup unsweetened applesauce
  • ¼ cup mashed banana
  • 1 tablespoon flaxseed meal mixed with 3 tablespoons water (let sit for 5 minutes to thicken)

6. Can I Use a Different Type of Flour?

This recipe works best with all-purpose flour, but you can also try:

  • Gluten-Free Flour Blend – Use a 1:1 gluten-free baking blend for a gluten-free version.
  • Whole Wheat Flour – This will make the cookies slightly denser, but they’ll still be delicious.

7. How Do I Make the Cookies Extra Round and Pretty?

For perfectly round, bakery-style cookies, try this trick:

  • As soon as the cookies come out of the oven, place a round cookie cutter or glass over each cookie and gently swirl it in a circular motion.
  • This helps shape the cookies while they’re still warm for uniform, round edges.

Fun Variations to Try

Looking to add a unique twist to these Easter cookies? Here are a few fun ideas:

  • Lemon Easter Cookies – Add zest from one lemon to the dough for a citrusy twist.
  • Carrot Cake Cookies – Mix in grated carrot, cinnamon, and nutmeg for a carrot cake-inspired version.
  • Nutty Crunch – Add chopped almonds, pecans, or pistachios for a crunchy element.
  • Coconut Delight – Stir in shredded coconut for a tropical touch.
  • Drizzle with White or Dark Chocolate – After baking, drizzle the cookies with melted chocolate for an extra fancy finish.

Final Thoughts: A Must-Bake Easter Treat

These Easter Sprinkle Cookies are a delightful combination of fun, flavor, and festivity. They’re easy to make, bursting with color, and bring a touch of springtime joy to any occasion. Whether you’re baking them for an Easter party, gifting them to friends and family, or just indulging in a seasonal treat, they’re guaranteed to be a hit.

With their soft and chewy texture, creamy white chocolate chips, and crunchy pastel sprinkles, these cookies are the ultimate spring dessert. Plus, their versatility and ease of preparation make them a go-to recipe for any holiday or celebration.

So grab your pastel sprinkles, M&M’s, and butter, and start baking these irresistibly festive Easter cookies. They’ll quickly become a favorite in your household—year after year!

Best Strawberry Cake Ever: A Sweet and Fruity Delight

There’s something magical about a homemade strawberry cake—soft, moist, and bursting with fresh strawberry flavor. Whether it’s for a birthday, a summer picnic, or just because you’re craving something sweet, this cake is a perfect balance of fruity freshness and rich, creamy frosting.

Unlike many strawberry cakes that rely on artificial flavors, this recipe uses real strawberry puree in both the cake and frosting, giving it an authentic taste. The addition of strawberry gelatin enhances the color and flavor, while the luscious cream cheese frosting adds the perfect amount of tangy sweetness.

If you’ve been searching for the ultimate strawberry cake, this one is easy to make, incredibly delicious, and guaranteed to impress.

Why This Strawberry Cake Stands Out

This cake is not your average strawberry cake. Here’s what makes it special:

  • Intense Strawberry Flavor – With real strawberry puree and strawberry gelatin, every bite is packed with natural sweetness.
  • Moist and Tender Texture – Thanks to oil and eggs, the cake stays soft and fluffy.
  • Perfectly Balanced Frosting – The cream cheese frosting brings a light tanginess that complements the sweetness of the cake.
  • Easy to Make – Using a cake mix as the base makes this recipe quick and foolproof, while the fresh ingredients elevate the flavor.
  • Vibrant Color and Presentation – The cake’s beautiful pink hue makes it a stunning dessert for any occasion.

Ingredients: A Burst of Strawberry Flavor

  • For the Cake:
    • White cake mix
    • Strawberry-flavored instant gelatin
    • Frozen strawberries in syrup, pureed
    • Eggs
    • Vegetable oil
    • Water
  • For the Frosting:
    • Confectioners’ sugar
    • Cream cheese, softened
    • Butter, softened
    • Frozen strawberries in syrup, pureed
    • Strawberry extract

Directions: Baking a Cake That Tastes Like Summer

  1. Prepare the Oven: Preheat to 350°F and grease two 9-inch round cake pans.
  2. Make the Batter: Mix cake mix, gelatin, strawberries, eggs, oil, and water until smooth.
  3. Bake to Perfection: Pour into pans and bake for 20 minutes or until a toothpick comes out clean.
  4. Create the Frosting: Beat butter and cream cheese, then mix in strawberry puree, extract, and confectioners’ sugar until smooth.
  5. Frost and Assemble: Spread frosting between layers and over the cake. Garnish with fresh strawberries if desired.
  6. Serve and Enjoy: Slice and indulge in this moist, fruity masterpiece.

Nutritional Facts (Per Serving, Approximate):

  • Calories: ~400
  • Carbohydrates: ~55g
  • Protein: ~4g
  • Fat: ~18g
  • Sugar: ~45g

The Secret to a Perfect Strawberry Cake

Achieving the best homemade strawberry cake comes down to a few key techniques:

  1. Use Real Strawberries – Fresh or frozen strawberries pureed into the batter and frosting create a natural, fruity flavor.
  2. Enhance the Flavor with Strawberry Gelatin – This adds depth to the strawberry taste while giving the cake a lovely pink color.
  3. Keep It Moist – Using vegetable oil instead of butter ensures a super soft and moist texture.
  4. Balance the Sweetness – The cream cheese frosting provides a slight tang that prevents the cake from being overly sweet.
  5. Chill Before Serving – Allowing the cake to sit in the refrigerator for a bit intensifies the strawberry flavor and helps the frosting set.

Best Ways to Serve This Strawberry Cake

This cake is versatile and pairs well with a variety of flavors and toppings. Here are some of the best ways to serve it:

  • With Fresh Strawberries – Garnish the cake with sliced or whole strawberries for a fresh, juicy bite.
  • Paired with Ice Cream – Serve alongside a scoop of vanilla or strawberry ice cream for extra indulgence.
  • Drizzled with Chocolate – A light chocolate drizzle pairs beautifully with the strawberry flavors.
  • Layered with Whipped Cream – For a lighter twist, substitute part of the frosting with whipped cream.
  • With a Dusting of Powdered Sugar – A simple sprinkle adds an elegant touch.

Frequently Asked Questions

1. What makes this strawberry cake so moist?

This cake stays incredibly moist due to vegetable oil, eggs, and the moisture from the strawberry puree. Unlike butter, which can create a denser texture, oil keeps the cake light and soft for days.

2. Can I use fresh strawberries instead of frozen?

Yes! While the recipe calls for frozen strawberries in syrup, you can use fresh strawberries instead. Simply puree them with a little sugar to create a similar consistency.

3. Can I use homemade cake mix instead of a boxed mix?

Absolutely! If you prefer to make the cake from scratch, substitute the boxed mix with a homemade mix using flour, baking powder, sugar, and salt. However, the boxed mix provides convenience and consistent results.

4. How do I prevent my cake from becoming too dense?

To ensure a light and fluffy texture:

  • Avoid overmixing the batter, as this can lead to a dense cake.
  • Use room temperature eggs for better incorporation.
  • Measure flour correctly (spoon and level it instead of scooping directly).

5. Can I make this cake ahead of time?

Yes! This cake actually tastes even better the next day because the flavors have time to meld. You can:

  • Store the baked cake layers in the fridge for up to 2 days before frosting.
  • Fully assemble and refrigerate the cake for up to 3 days.
  • Freeze the unfrosted cake layers for up to 3 months. Just thaw overnight before frosting.

6. Can I make cupcakes with this recipe?

Yes! Simply divide the batter into cupcake liners and bake at 350°F for about 15-18 minutes or until a toothpick inserted in the center comes out clean.

7. What’s the best way to store leftovers?

  • Refrigerator: Store the cake in an airtight container for up to 4 days.
  • Freezer: Wrap slices in plastic wrap and freeze for up to 2 months. Thaw at room temperature before eating.

8. Can I substitute the cream cheese frosting with another type?

Yes! If you’re looking for alternatives, try:

  • Buttercream frosting – For a classic, sweeter finish.
  • Whipped cream frosting – Lighter and less sweet.
  • Strawberry glaze – For a fresh, fruity twist.

Fun Variations to Try

Want to put your own spin on this cake? Here are some creative variations:

  • Lemon-Strawberry Cake – Add lemon zest and a splash of lemon juice to the batter for a citrusy contrast.
  • Chocolate-Strawberry Cake – Add a layer of chocolate ganache between cake layers.
  • Almond Strawberry Cake – Substitute the vanilla extract with almond extract for a nutty twist.
  • Berry Medley Cake – Mix in blueberries, raspberries, or blackberries for a mixed berry flavor.

Final Thoughts: A Cake That’s Worth Every Bite

This Best Strawberry Cake Ever is a celebration of fresh, fruity flavors with a rich and creamy twist. The moist, tender crumb combined with the luscious strawberry cream cheese frosting makes it an irresistible dessert for any occasion.

Whether you’re making it for a birthday, a family gathering, or just because you love strawberries, this cake will never disappoint. It’s easy to make, beautiful to serve, and absolutely delicious.

So go ahead—bake a slice of summer, share it with loved ones, and enjoy every bite of this sweet, nostalgic treat!

Condensed Milk Pecan Pie: A Rich and Creamy Twist on a Classic

Pecan pie is one of the most beloved desserts, especially during the holiday season. Traditionally made with corn syrup, sugar, eggs, and pecans, this sweet and nutty pie has been a staple at Thanksgiving tables for generations. However, this Condensed Milk Pecan Pie takes things up a notch by swapping out the usual corn syrup for sweetened condensed milk, resulting in a creamier, richer filling with a silky-smooth texture.

If you’re looking for a way to refresh your pecan pie recipe, this version is a must-try. It keeps the familiar caramelized nutty flavors while adding a luscious, custard-like consistency that melts in your mouth. Whether served warm with a scoop of ice cream or enjoyed cold straight from the fridge, this pie is pure comfort in every bite.

Why This Recipe Stands Out

This Condensed Milk Pecan Pie has a few key differences that make it unique:

  • Ultra-Creamy Filling – The condensed milk replaces corn syrup, giving the filling a smoother, richer texture.
  • Deep, Caramelized Flavor – Brown sugar enhances the toasty, caramel-like undertones of the pie.
  • Perfectly Balanced Sweetness – While pecan pie is known for being ultra-sweet, the condensed milk helps to soften the intensity, making it more balanced.
  • No Corn Syrup Needed – Ideal for those who prefer to avoid corn syrup in their baking.
  • Customizable with Different Nuts – While pecans are the classic choice, this pie works beautifully with walnuts, almonds, or even a mixed nut blend.

Ingredients: The Perfect Blend of Creamy and Crunchy

  • Rich and Creamy Filling:
    • Light brown sugar
    • All-purpose flour
    • Sweetened condensed milk
    • Large eggs
    • Vanilla extract
  • Nutty Topping:
    • Pecan halves or pieces
  • Flaky Crust:
    • Pie crust pastry

Directions: Baking the Ultimate Pecan Pie

  1. Prepare the Crust: Fit a pie crust into a 9-inch pan and refrigerate until ready to fill.
  2. Toast the Pecans: Optional but recommended—lightly toast pecans in a dry skillet for enhanced flavor.
  3. Mix the Filling: Combine brown sugar and flour first, then mix in eggs, condensed milk, and vanilla.
  4. Add the Pecans: Stir in the pecans, ensuring they are evenly coated.
  5. Assemble and Bake: Pour the filling into the pie crust, bake at 350°F for 25 minutes, cover the edges with foil, and bake for another 10 minutes.
  6. Cool and Serve: Let the pie cool completely before refrigerating or serving.

Nutritional Facts (Per Slice, Approximate):

  • Calories: 372
  • Carbohydrates: 40g
  • Protein: 8g
  • Fat: 21g
  • Saturated Fat: 5g
  • Cholesterol: 62mg
  • Sodium: 136mg
  • Fiber: 2g
  • Sugar: 30g

The Science Behind Condensed Milk in Pecan Pie

Using sweetened condensed milk instead of corn syrup has several benefits:

  1. Improved Texture – Condensed milk contains both milk solids and sugar, which results in a filling that is more custard-like and smooth compared to the sometimes overly sticky texture of traditional pecan pie.
  2. Better Flavor Depth – The milk solids caramelize during baking, enhancing the natural sweetness and adding complexity to the filling.
  3. Easier Mixing – Since condensed milk is already sweetened and thick, it blends effortlessly into the other ingredients without needing additional sugar syrups.

How to Serve Condensed Milk Pecan Pie

There are plenty of ways to enjoy this rich, nutty dessert, whether you want to keep things classic or add a fun twist:

  • Warm with Vanilla Ice Cream – The contrast of cold ice cream and warm pie is absolutely divine.
  • Chilled for a Creamy Bite – Allow the pie to cool completely and refrigerate for a firmer, cheesecake-like texture.
  • Drizzled with Caramel or Chocolate Sauce – A little extra sweetness and decadence never hurts.
  • Topped with Whipped Cream – The light, airy texture balances the pie’s richness perfectly.
  • Paired with Coffee or Bourbon – A strong cup of coffee or a sip of bourbon complements the sweet, buttery flavors beautifully.

Frequently Asked Questions

1. How is this different from traditional pecan pie?

Traditional pecan pie uses corn syrup as the primary sweetener and thickening agent. This recipe replaces the corn syrup with sweetened condensed milk, creating a smoother, creamier filling with a slightly less sticky consistency. The condensed milk also adds a slight caramelized depth that enhances the overall flavor.

2. Do I need to toast the pecans before baking?

Toasting pecans before adding them to the pie intensifies their flavor and adds a subtle crunch. While it’s an optional step, it’s highly recommended for the best results. To toast pecans, simply place them in a dry skillet over medium heat for about 5 minutes, stirring frequently until they become fragrant.

3. Can I use a store-bought pie crust?

Absolutely! While a homemade pie crust provides the best flakiness and flavor, a pre-made crust will work just as well, especially if you’re short on time. Just make sure to use a deep-dish pie crust to accommodate the filling.

4. How do I prevent the crust from burning?

Pecan pies bake for a longer time compared to other pies, so the crust edges can brown too quickly. To prevent burning:

  • Use a pie shield or wrap the edges with aluminum foil after the first 25 minutes of baking.
  • Bake the pie on a preheated baking sheet, which helps the bottom cook evenly.

5. Can I make this pie ahead of time?

Yes! Pecan pie actually tastes better the next day because the flavors have time to meld. To make ahead:

  • Refrigerate for up to 4 days – Let the pie cool completely, then cover it loosely with foil or plastic wrap.
  • Freeze for up to 3 months – Wrap the pie tightly in plastic wrap, followed by aluminum foil. Thaw overnight in the refrigerator before serving.

6. How do I reheat pecan pie?

If you prefer warm pecan pie, here’s how to reheat it:

  • Whole pie: Place in a 300°F oven for 10-15 minutes.
  • Single slice: Heat in the microwave for 10-15 seconds or in a toaster oven at 300°F for a few minutes.

7. Can I add chocolate or other mix-ins?

Yes! Here are some delicious variations to try:

  • Chocolate Pecan Pie – Add ½ cup of chocolate chips to the filling before baking.
  • Bourbon Pecan Pie – Mix in 1-2 tablespoons of bourbon for a richer, deeper flavor.
  • Maple Pecan Pie – Swap out some of the brown sugar for pure maple syrup for a slightly different sweetness.
  • Coconut Pecan Pie – Stir in ½ cup of shredded coconut for a tropical twist.

How to Store and Freeze Pecan Pie

  • Refrigerator: Store loosely covered for up to 4 days.
  • Freezer: Wrap tightly and freeze for up to 3 months.
  • Thawing: Let frozen pie thaw overnight in the fridge before serving.

Final Thoughts: A Must-Try Twist on a Classic Pie

This Condensed Milk Pecan Pie takes the best parts of a traditional pecan pie and elevates them with a rich, creamy texture and deep caramelized flavors. By swapping out corn syrup for sweetened condensed milk, this version has a silky consistency that’s less sticky yet still indulgently sweet.

Whether you’re making it for Thanksgiving, a holiday gathering, or just because you’re craving a classic dessert, this pie is sure to impress. The perfect balance of crunchy pecans and creamy filling makes each bite irresistible, and with so many customization options, you can easily make it your own.

So, grab your ingredients, preheat the oven, and treat yourself to a homemade pecan pie that’s rich, creamy, and absolutely unforgettable!

The 3-Ingredient Cookie: A Simple and Delicious Treat

In a world filled with elaborate desserts, sometimes the simplest recipes create the most delightful results. The 3-Ingredient Cookie is a prime example of how basic pantry staples can come together to form a buttery, crumbly, and irresistibly sweet treat. Whether you’re short on time, new to baking, or simply craving something quick and easy, these cookies are a perfect solution.

With just butter, sugar, and flour, these cookies have a light, crisp texture with a rich, buttery flavor that pairs beautifully with coffee, tea, or a scoop of ice cream. They’re elegant enough for holiday gatherings yet simple enough to whip up on a weekday afternoon.

Why You’ll Love This Recipe

  • Minimal Ingredients, Maximum Flavor – No need for eggs, leavening agents, or fancy mix-ins. The simplicity of butter, sugar, and flour creates a cookie that melts in your mouth.
  • Easy and Foolproof – Whether you’re an experienced baker or a beginner, these cookies are nearly impossible to mess up.
  • Perfect for Any Occasion – Serve them with afternoon tea, pack them in a lunchbox, or add them to a holiday cookie platter.
  • Endless Variations – While the base recipe is simple, you can customize it with different flavors and toppings.

Ingredients: The Magic Trio of Baking

  • Base Ingredients:
    • Butter, softened
    • Superfine sugar
    • All-purpose flour
  • Coating (Optional):
    • Raw sugar or large-granulated sugar for a crunchy finish

Directions: A Foolproof Path to Perfect Cookies

  1. Cream the Butter & Sugar: Beat the softened butter with sugar until light and fluffy.
  2. Form the Dough: Sift in the flour and mix until fully incorporated.
  3. Shape & Chill: Roll the dough into a log, coat with sugar, wrap in cling film, and refrigerate for one hour.
  4. Slice & Bake: Cut the dough into squares, place them on a parchment-lined baking sheet, and bake at 325°F for 20 minutes.
  5. Cool & Store: Let cookies cool before storing them in an airtight container.

Nutritional Facts (Per Cookie, Approximate):

  • Calories: ~120
  • Carbohydrates: ~14g
  • Protein: ~1g
  • Fat: ~7g
  • Sugar: ~6g

What Makes These Cookies Special?

Many cookies require multiple steps, chilling time, and precise measurements to get the perfect texture. These 3-ingredient cookies rely on the right balance of butter, sugar, and flour to create a classic shortbread-like texture with a crisp exterior and tender crumb.

The high butter content gives them a rich flavor and delicate melt-in-your-mouth feel, while superfine sugar ensures the cookies remain light and slightly crisp rather than dense. The result? A cookie that is both elegant and effortless.

How to Serve These Cookies

These cookies are incredibly versatile and pair well with a variety of flavors and beverages. Here are some of the best ways to enjoy them:

  • With a Cup of Tea or Coffee – Their light sweetness complements a strong espresso or herbal tea.
  • As a Dessert Base – Use them as a base for layered desserts, crumbled over yogurt, or served with fruit and whipped cream.
  • Paired with Ice Cream – Their crisp texture contrasts beautifully with soft, creamy ice cream.
  • With a Dusting of Powdered Sugar – A light sprinkle before serving enhances their delicate sweetness.
  • As a Holiday Treat – These cookies make a wonderful addition to holiday cookie platters and gift boxes.

Frequently Asked Questions

1. Why didn’t my cookies turn out crunchy?

If your cookies are too soft, there are a few possible reasons:

  • Butter wasn’t properly creamed with sugar. Beating the butter and sugar until light and fluffy helps incorporate air, leading to a crispier cookie.
  • The sugar was too coarse. Using superfine sugar ensures it blends smoothly with the butter.
  • They weren’t baked long enough. A longer, slower bake time at a lower temperature helps develop a crunchy texture.

2. Why are my cookies too hard?

Hard cookies can result from:

  • Too much flour. Always measure flour accurately using a kitchen scale or the spoon-and-level method.
  • Overmixing the dough. Overworking the dough develops gluten, making cookies tough instead of tender.
  • Overbaking. These cookies should be lightly golden, not dark brown. Remove them from the oven as soon as the edges start to turn golden.

3. Can I use bread flour instead of all-purpose flour?

Yes, but the cookies will be slightly different in texture. Bread flour has more protein, which can make them a bit denser and darker in color. For best results, stick with all-purpose flour or a blend of all-purpose and cake flour.

4. How do I make superfine sugar at home?

If you don’t have superfine sugar, you can make it by:

  1. Placing granulated sugar in a food processor or blender.
  2. Pulsing for 1-2 minutes until the sugar is finely ground but not powdered.
  3. Letting the sugar settle before opening the lid to avoid a sugar dust cloud.

5. Can I freeze the dough?

Yes! This dough freezes exceptionally well.

  • To freeze before baking: Shape the dough into a log, wrap it tightly in plastic wrap, and freeze for up to 6 months. Slice and bake from frozen, adding a couple of extra minutes to the baking time.
  • To freeze baked cookies: Store in an airtight container and freeze for up to 3 months. Let them thaw at room temperature before serving.

6. How can I customize these cookies?

While these cookies are delicious as-is, here are some fun ways to change them up:

  • Add Vanilla or Almond Extract – A teaspoon of vanilla or almond extract enhances the flavor.
  • Dip in Chocolate – After baking, dip half the cookie in melted dark or white chocolate.
  • Sprinkle with Cinnamon Sugar – Roll the dough in cinnamon sugar before baking for a warm, spiced flavor.
  • Add Citrus Zest – Lemon, orange, or lime zest adds a fresh, tangy note.
  • Mix in Nuts – Finely chopped almonds, pecans, or hazelnuts add a crunchy texture.

7. How do I store these cookies?

To keep them fresh:

  • At room temperature: Store in an airtight container for up to a week.
  • In the refrigerator: If you prefer a firmer texture, store in the fridge for up to 2 weeks.
  • In the freezer: Freeze for up to 3 months, separating layers with parchment paper.

The Beauty of Simple Baking

Baking doesn’t have to be complicated to be delicious and satisfying. These 3-Ingredient Cookies prove that with just a few pantry staples, you can create something truly delightful.

They’re perfect for busy days, beginner bakers, or those who just love a classic, buttery cookie without the fuss of extra ingredients. Whether enjoyed on their own, paired with coffee, or dressed up for the holidays, these cookies are a timeless treat that never fails to impress.

So, the next time you need a quick and delicious homemade dessert, skip the store-bought cookies and give these simple yet irresistible 3-ingredient cookies a try. You’ll be amazed at how just three ingredients can create something so wonderful!

Homemade School Cafeteria Pizza: A Nostalgic Slice of Childhood

For many, school cafeteria pizza was the highlight of lunchtime—thick, doughy crust, a layer of rich tomato sauce, and gooey, melted cheese. Whether you loved it or traded it for a snack, there’s no denying that cafeteria pizza holds a special place in our memories. Now, you can recreate that nostalgic experience at home, bringing back the flavors of childhood with a fresher, homemade twist.

This recipe is perfect for family dinners, a fun cooking activity with kids, or simply indulging in a comforting meal that takes you back to simpler times. Unlike fast-food pizza, this version features a thick, airy crust and a unique batter-like dough, reminiscent of the classic cafeteria slices served on those beige lunch trays.

Why This Homemade Cafeteria Pizza is a Must-Try

There’s a reason why this old-school pizza is still loved today. This recipe perfectly captures the taste and texture of the school cafeteria classic but with better ingredients and more flexibility. Here’s why you should try making it:

  • Authentic Texture and Flavor – The soft, thick crust and slightly crispy edges give it that classic cafeteria-style feel.
  • Easier to Make Than Traditional Pizza Dough – The batter-like dough is simpler to mix and spread, making it a beginner-friendly recipe.
  • Customizable – You can keep it classic with just cheese or load it up with your favorite toppings like pepperoni, sausage, or vegetables.
  • Fun for Families – Let kids help spread the sauce, sprinkle cheese, and choose toppings to make it a hands-on cooking experience.
  • A Perfect Make-Ahead Meal – The crust can be prepared in advance and baked later for an easy weeknight dinner.

Ingredients: The Perfect Throwback Flavors

  • Classic Crust:
    • Shortening
    • Cornmeal
    • Yeast
    • Warm water
    • All-purpose flour
    • Instant non-fat dry milk powder
    • Sugar
    • Salt
    • Oil
  • Toppings & Sauce:
    • Pizza sauce
    • Shredded mozzarella cheese
    • Favorite pizza toppings (pepperoni, veggies, etc.)

Directions: Bringing Back the School Lunchroom Classic

  1. Prepare the Pan: Preheat oven to 475°F, grease a baking sheet, and sprinkle with cornmeal.
  2. Make the Dough: Dissolve yeast in warm water, then mix with flour, dry milk powder, sugar, salt, and oil.
  3. Let It Rest: Spread dough into the pan and allow it to rise for 20 minutes.
  4. Pre-Bake the Crust: Bake for 10 minutes to give the base structure.
  5. Add Toppings: Spread pizza sauce, add cheese, and top with favorite ingredients.
  6. Bake to Perfection: Return to the oven and bake for 10-15 minutes until golden and bubbly.
  7. Slice & Serve: Let it cool slightly before serving for the ultimate nostalgic experience.

Nutritional Facts (Per Serving, Approximate):

  • Calories: ~280
  • Carbohydrates: ~34g
  • Protein: ~12g
  • Fat: ~10g
  • Sodium: ~450mg

What Makes School Cafeteria Pizza Different?

Unlike traditional hand-tossed or thin-crust pizzas, school cafeteria pizza is known for its thick, spongy crust and simple, satisfying flavors. The dough is more batter-like than traditional pizza dough, creating a soft, chewy base. The sauce is slightly sweet with a tangy tomato flavor, and the cheese melts into a perfect golden layer on top.

The secret to nailing the texture lies in:

  • Using instant dry milk powder in the dough, which helps create a soft, tender crust.
  • A pre-baked crust, which gives it structure before adding sauce and toppings.
  • A higher baking temperature, ensuring a crisp yet fluffy bite.

How to Serve and Enjoy Your Homemade Cafeteria Pizza

This pizza is best served fresh out of the oven, but there are plenty of ways to enjoy it beyond a simple slice:

  • Classic Lunchroom Style – Serve with a side of corn, apple slices, or a carton of chocolate milk for the ultimate nostalgic meal.
  • Game Night Favorite – Cut it into squares for easy snacking while watching sports or playing board games.
  • Pizza Night Done Right – Pair it with a crisp green salad, garlic bread, or mozzarella sticks for a complete meal.
  • Kid-Friendly Meal – Let kids customize their own section of the pizza with different toppings.
  • Party-Ready – Slice into small squares for a perfect party appetizer that everyone will love.

Frequently Asked Questions

1. What makes cafeteria pizza dough different from regular pizza dough?

Unlike traditional pizza dough, cafeteria pizza dough resembles a batter more than a stiff dough. It’s mixed and spread rather than kneaded and rolled, resulting in a softer, airier crust. The addition of dry milk powder and a higher moisture content helps create this unique texture.

2. Can I use a different type of flour?

Yes! While all-purpose flour is commonly used, you can experiment with:

  • Bread flour – For a chewier crust with more structure.
  • Whole wheat flour – Adds a nutty flavor and extra fiber, though the crust may be slightly denser.
  • Gluten-free flour blends – Works well for a gluten-free version, but make sure it includes xanthan gum or a binding agent for proper texture.

3. What are the best toppings for this pizza?

Classic cafeteria pizza is simple and delicious, but you can customize it to suit your taste. Here are some great topping ideas:

  • Classic Cheese – Just mozzarella for a true school-style pizza.
  • Pepperoni – A layer of crispy, slightly curled pepperoni slices.
  • Sausage & Peppers – Cooked crumbled sausage with diced bell peppers.
  • Hawaiian – Ham and pineapple for a sweet and savory twist.
  • Veggie Lovers – Mushrooms, onions, spinach, or olives.

4. Can I make this pizza ahead of time?

Yes! You can prepare the dough and pre-bake the crust ahead of time, then store it in the refrigerator for up to 24 hours before adding toppings and finishing the bake.

Alternatively, you can fully bake the pizza and refrigerate leftovers for up to 3 days. Simply reheat slices in an oven or air fryer to maintain crispiness.

5. Can I freeze cafeteria pizza?

Absolutely! To freeze:

  • Before baking: Prepare the crust, pre-bake it, then freeze. When ready to eat, add sauce and toppings, then bake from frozen.
  • After baking: Slice the pizza, wrap individual pieces in plastic wrap, and store in an airtight container for up to 2 months. Reheat in a 375°F oven for 10-12 minutes.

6. What if I don’t have dry milk powder?

Dry milk powder helps enhance the texture, but if you don’t have it, you can substitute it with:

  • Regular milk – Replace some of the water in the dough with warm milk.
  • Greek yogurt – Adds a slight tang and richness to the dough.
  • Omit it altogether – The crust may be slightly less soft but will still be delicious.

7. How do I prevent the crust from getting soggy?

To ensure a crispy bottom and sturdy texture, follow these tips:

  • Pre-bake the crust before adding toppings.
  • Use a light layer of sauce—too much can make the crust soft.
  • Bake on a preheated pizza stone or baking steel for an extra crisp bottom.
  • Let the pizza rest for a few minutes before slicing to allow moisture to redistribute.

Final Thoughts: The Perfect Way to Relive School Lunch Memories

Homemade School Cafeteria Pizza is more than just a meal—it’s a trip down memory lane. The fluffy, doughy crust, the simple yet satisfying sauce, and the melted cheese all come together to recreate that classic lunchroom experience.

What makes this recipe even better is that it’s easy to make, fun to customize, and great for feeding a crowd. Whether you’re making it for kids who’ve never tasted old-school cafeteria pizza or for yourself to relive childhood nostalgia, this homemade version is guaranteed to bring back warm memories.

So, fire up the oven, grab your ingredients, and enjoy a homemade slice of the past—with better flavors and a personal touch!

Cheesy Pepperoni Rolls: The Ultimate Crowd-Pleasing Snack

When it comes to quick, satisfying, and utterly delicious snacks, Cheesy Pepperoni Rolls are at the top of the list. They’re the perfect combination of crispy golden dough, gooey melted cheese, and spicy, savory pepperoni, making them a hit for any occasion. Whether you’re planning a game night, party appetizer, or just a cozy evening snack, these rolls deliver flavor in every bite.

What makes them even better? They’re incredibly easy to prepare with just a handful of ingredients, yet they taste like something straight from a pizzeria. Serve them with your favorite dipping sauces, and you’ve got a snack that will disappear before you know it!

Why These Cheesy Pepperoni Rolls Are So Irresistible

These handheld bites of perfection have been a fan favorite for years, and for good reason:

  • Crispy on the Outside, Soft and Cheesy on the Inside – The contrast between the flaky crust and the gooey, melty cheese is what makes these rolls unforgettable.
  • Savory & Flavorful – The combination of spiced pepperoni, creamy mozzarella, and a hint of Parmesan creates a bold, well-balanced taste.
  • Perfect for Any Occasion – Whether you’re serving them at a party, making a quick snack, or preparing for a road trip, these rolls are always a hit.
  • Customizable & Versatile – You can add your own twist with different cheeses, meats, and seasonings to suit your taste.
  • Great for Meal Prep – These rolls store well and reheat beautifully, making them a fantastic option for quick lunches or late-night cravings.

Ingredients: A Flavorful Blend of Simplicity

  • Dough & Base:
    • Frozen pizza dough
    • Olive oil
  • Cheese & Seasoning:
    • Mozzarella, grated
    • Parmesan cheese
    • Italian seasoning
    • Garlic salt (optional)
  • Savory Filling:
    • Pepperoni slices
    • 1/4 cup tomato sauce

Directions: The Path to Golden Perfection

  1. Prepare the Dough: Let the frozen dough thaw until slightly puffed.
  2. Roll & Brush: Roll into an 11×11-inch square and brush with olive oil.
  3. Layer the Fillings: Spread tomato sauce, arrange pepperoni, and sprinkle mozzarella and Parmesan.
  4. Season for Flavor: Add Italian seasoning and garlic salt for an extra kick.
  5. Roll & Seal: Roll the dough tightly and seal the edges.
  6. Bake to Perfection: Brush with melted butter and bake at 375°F for 15-25 minutes, until golden brown.
  7. Cool & Serve: Let cool before slicing into 1-inch pieces and enjoy with dipping sauces.

Nutritional Facts (Per Serving, Approximate):

  • Calories: ~220
  • Carbohydrates: ~22g
  • Protein: ~8g
  • Fat: ~12g
  • Sodium: ~480mg

The Story Behind Pepperoni Rolls

Pepperoni rolls have deep roots in American food culture, particularly in West Virginia, where they originated as a portable, hearty snack for coal miners in the early 20th century. Originally, they were made with simple bread dough and pepperoni, baked together so the oils from the pepperoni would infuse the bread. Over time, variations emerged, with cheese, sauce, and seasonings being added to enhance the flavor.

This modern version takes the classic pepperoni roll and elevates it with melted mozzarella, a crispy golden crust, and a hint of Italian seasoning, making it a must-try for anyone who loves pizza flavors in a convenient roll.

The Perfect Bite: A Balance of Texture and Flavor

Every bite of a Cheesy Pepperoni Roll offers a sensory experience that keeps you coming back for more. Here’s what makes them stand out:

  • The Dough: Light, airy, and crispy on the outside while staying soft and chewy on the inside.
  • The Cheese: Mozzarella melts into every layer, adding a creamy, stretchy texture. Parmesan provides a nutty depth of flavor.
  • The Pepperoni: Slightly spicy, smoky, and packed with umami richness.
  • The Seasoning: Italian seasoning and garlic salt bring out the best in every ingredient.

It’s a combination that mimics the best parts of a pizza—just in a neater, more snackable form!

How to Serve and Enjoy Cheesy Pepperoni Rolls

These versatile snacks can be enjoyed in multiple ways, depending on the occasion:

  • Party Appetizers: Slice them into bite-sized portions and serve with dipping sauces for an easy, crowd-pleasing appetizer.
  • Movie Night Snack: Skip the popcorn and serve these rolls with a side of marinara for dipping.
  • Lunchbox Favorite: Pack them for school or work; they hold up well and taste just as good at room temperature.
  • Game Day Treat: A must-have for sports-watching gatherings—pair them with wings and nachos for the ultimate spread.
  • Quick Dinner: Serve with a side salad for a balanced meal when you’re short on time.

Dipping Sauces That Elevate the Flavor

Cheesy Pepperoni Rolls are fantastic on their own, but pairing them with a great dip takes them to another level:

  • Marinara Sauce – A classic choice that enhances the pizza-like flavors.
  • Garlic Butter Dip – Rich and indulgent, perfect for an extra burst of flavor.
  • Ranch Dressing – A creamy, tangy contrast to the cheesy, meaty filling.
  • Spicy Sriracha Mayo – For those who love a little heat with their snacks.
  • Pesto Sauce – A fresh, herby addition that pairs surprisingly well.

Frequently Asked Questions

1. Can I Use a Different Type of Dough?

Absolutely! While frozen pizza dough is a convenient option, you can substitute it with:

  • Homemade pizza dough for a more personalized touch.
  • Crescent roll dough for a lighter, flakier texture.
  • Bread dough for a heartier, more traditional version.
  • Puff pastry if you want an extra crispy, buttery crust.

2. What Other Fillings Can I Use?

The beauty of this recipe is that it’s highly customizable! Try these variations:

  • Cheese Lovers’ Version – Use a mix of mozzarella, cheddar, and provolone.
  • Spicy Kick – Add crushed red pepper flakes or jalapeños for extra heat.
  • Vegetarian Option – Swap out the pepperoni for sautéed mushrooms, spinach, or roasted red peppers.
  • Meat Lover’s Style – Mix in cooked sausage, crumbled bacon, or even ham for an extra protein boost.

3. How Can I Prevent the Rolls from Getting Soggy?

To keep your pepperoni rolls crispy and perfectly baked, follow these tips:

  • Pat dry the pepperoni with a paper towel before layering it onto the dough.
  • Don’t overload with cheese or sauce—too much moisture can lead to soggy rolls.
  • Bake until golden brown to ensure the crust crisps up properly.
  • Cool before storing—letting the rolls cool before sealing them in a container helps prevent trapped steam from making them soggy.

4. Can I Make These Ahead of Time?

Yes! These rolls store and reheat beautifully:

  • Refrigeration: Store in an airtight container for up to 3 days. Reheat in the oven at 350°F for about 10 minutes to maintain crispiness.
  • Freezing: Wrap individual rolls in plastic wrap and store in a freezer-safe bag for up to 2 months. Thaw in the fridge before reheating.
  • Meal Prep: Make a big batch and bake fresh when needed—just assemble the rolls, freeze before baking, and cook directly from frozen at 375°F for an extra 5-7 minutes.

5. Can I Air Fry These Instead of Baking?

Yes! If you want a faster, crispier version, air frying is a fantastic alternative. Preheat your air fryer to 375°F and cook for 8-12 minutes, flipping halfway through. This method gives you an extra golden crust without needing as much oil.

Final Thoughts: The Perfect Snack for Any Occasion

Cheesy Pepperoni Rolls are everything you want in a snack—crispy, cheesy, flavorful, and incredibly easy to make. They combine the best elements of pizza and finger food, making them a fantastic choice for everything from casual snacking to party appetizers.

With their endless customization options, you can tailor them to your tastes by experimenting with different cheeses, meats, and seasonings. Plus, their make-ahead and freezer-friendly nature means you can always have a batch ready for when cravings strike.

So, whether you’re hosting a gathering, looking for a quick dinner idea, or just in the mood for something warm, cheesy, and satisfying, give these Cheesy Pepperoni Rolls a try. They’re guaranteed to become a new favorite in your recipe collection!

Italian Stromboli: A Golden, Cheesy Roll of Italian Flavor

Italian Stromboli is the perfect fusion of crispy, golden-brown crust, layers of rich deli meats, and melted cheese, all rolled together into a mouthwatering baked masterpiece. Originating as an Italian-American twist on traditional pizza, Stromboli has become a go-to dish for family dinners, casual gatherings, and game-day snacks. With its warm, flaky exterior and savory, cheesy interior, this dish is a guaranteed crowd-pleaser.

This recipe takes classic Italian flavors and packs them into an easy-to-make, handheld meal. While traditionally served with marinara sauce for dipping, Stromboli is just as delicious on its own. Whether you enjoy it as a main course, an appetizer, or a hearty snack, this dish brings the essence of authentic Italian cuisine right to your table.

What Makes Italian Stromboli So Special?

There’s a reason why Stromboli has remained a favorite comfort food for generations. Here’s why it’s so irresistible:

  • Crispy on the Outside, Cheesy on the Inside – The contrast of textures is what makes Stromboli stand out. The golden-brown, flaky crust gives way to warm, melted cheese and layers of perfectly seasoned meats.
  • Packed with Flavor – Each bite is filled with the richness of Genoa salami, the smoky spice of pepperoni, and the creamy melt of provolone or mozzarella.
  • Versatile and Customizable – You can fill Stromboli with your favorite meats, cheeses, and even vegetables, making it a perfect dish to suit different tastes.
  • Great for Any Occasion – Whether you’re serving it as a weeknight dinner, an appetizer for a party, or a weekend treat, Stromboli is always a hit.
  • Simple but Impressive – It may look like a gourmet dish, but Stromboli is incredibly easy to prepare with just a few steps.

Ingredients: A Symphony of Savory Flavors

  • Dough & Base:
    • 1 tube of Pillsbury pizza crust
  • Meat & Cheese Filling:
    • 8 slices deli ham
    • 10 slices Genoa salami
    • 12 slices sandwich pepperoni
    • 8 slices provolone or mozzarella cheese (or shredded cheese)
  • Garlic Butter Topping:
    • 2 tablespoons butter
    • 2 minced garlic cloves
    • 2 teaspoons chopped parsley
    • 3 tablespoons Parmesan cheese

Directions: Rolling Up the Perfect Stromboli

  1. Prepare the Oven & Garlic Butter: Preheat the oven according to the pizza crust package. Melt butter and mix with garlic, parsley, and Parmesan; set aside.
  2. Roll Out the Dough: Line a baking sheet with parchment paper and stretch the pizza dough to fit.
  3. Layer the Fillings: Start with ham, followed by salami, pepperoni, and cheese.
  4. Roll & Seal: Roll the Stromboli lengthwise, sealing the seam and edges to prevent leakage.
  5. Score & Top: Lightly score the top to release steam. Brush with garlic butter mixture.
  6. Bake to Perfection: Bake as directed on the pizza dough package until golden brown.
  7. Slice & Serve: Let it cool slightly before slicing. Enjoy with marinara or red sauce for dipping.

Nutritional Facts (Per Serving, Approximate):

  • Calories: 400
  • Total Fat: 25g
  • Carbohydrates: 30g
  • Protein: 20g

Despite its Italian flavors, Stromboli is actually an Italian-American creation. The dish is said to have originated in the 1950s in Philadelphia, where Italian immigrants combined traditional pizza ingredients into a rolled and baked form. It quickly gained popularity as an easier-to-eat alternative to pizza, with its neatly sealed shape making it perfect for slicing and serving.

The name “Stromboli” is believed to have been inspired by the Italian volcanic island of Stromboli, symbolizing the way the melted cheese and filling “erupt” when sliced. Whether that’s the true origin or just a fun culinary legend, one thing is certain—Stromboli has become a staple in Italian-American cuisine.

The Perfect Balance of Texture and Taste

What makes Stromboli so addictive is the perfect balance of textures and flavors:

  • The Dough: Light and flaky on the outside, soft and chewy on the inside.
  • The Meat: A blend of savory deli cuts, including ham, salami, and pepperoni, which provide layers of richness and spice.
  • The Cheese: Provolone or mozzarella melts into the dough, giving each bite a creamy, gooey pull.
  • The Seasoning: A buttery garlic-parmesan topping enhances the crust, adding an extra depth of flavor.

This harmonious combination of ingredients makes Stromboli not just a meal but a culinary experience.

How to Serve Stromboli

Stromboli is a dish that can be enjoyed in multiple ways, making it perfect for any occasion. Here are some of the best serving ideas:

  • With Marinara Sauce – A side of warm, homemade marinara or pizza sauce brings out the flavors even more.
  • As a Party Appetizer – Slice Stromboli into bite-sized portions for easy-to-eat finger food at gatherings.
  • As a Main Dish – Pair it with a fresh green salad, roasted vegetables, or soup for a complete meal.
  • For Lunch or Meal Prep – Stromboli holds up well when reheated, making it a great option for packed lunches.
  • With Extra Cheese on Top – Sprinkle some Parmesan or extra mozzarella on the crust before baking for an even cheesier finish.

Frequently Asked Questions

1. What is the difference between Stromboli and Calzone?

While both dishes feature pizza dough stuffed with cheese and fillings, Stromboli and Calzone are quite different:

  • Stromboli is rolled like a log, then baked and sliced into portions.
  • Calzone is folded into a half-moon shape, completely sealing the filling inside like a pocket.
  • Stromboli often includes deli meats, whereas Calzones are usually filled with ricotta cheese and vegetables.

2. Can I use homemade pizza dough instead of store-bought?

Absolutely! While store-bought dough is a convenient option, making your own pizza dough allows for more control over texture and flavor. A simple yeast-based dough will work perfectly.

3. Can I add vegetables to my Stromboli?

Yes! Some great vegetable options include:

  • Sautéed bell peppers and onions for a sweet and savory contrast.
  • Spinach or arugula for a fresh, slightly bitter note.
  • Sun-dried tomatoes for an added burst of umami flavor.
    Just make sure to cook or drain watery vegetables to prevent the dough from getting soggy.

4. What are some alternative fillings for Stromboli?

While the classic version includes ham, salami, and pepperoni, you can experiment with these variations:

  • Chicken Pesto Stromboli – Shredded chicken, pesto, and mozzarella.
  • Veggie Stromboli – Roasted zucchini, mushrooms, and feta.
  • BBQ Chicken Stromboli – BBQ sauce, grilled chicken, and cheddar.
  • Buffalo Chicken Stromboli – Spicy buffalo sauce, chicken, and blue cheese crumbles.
  • Breakfast Stromboli – Scrambled eggs, bacon, and cheddar cheese.

5. How do I prevent my Stromboli from becoming soggy?

To avoid excess moisture:

  • Pat meats dry with a paper towel before layering.
  • Use shredded cheese instead of fresh mozzarella, which can be watery.
  • Make small ventilation cuts on top to release steam while baking.
  • Avoid overfilling—too many ingredients can make the dough difficult to seal.

6. Can I make Stromboli ahead of time?

Yes! Stromboli is great for meal prep. You can:

  • Assemble it ahead and refrigerate it for a few hours before baking.
  • Bake it fully, then store leftovers in the fridge for up to 3–4 days.
  • Freeze unbaked Stromboli for later; just thaw overnight before baking.

7. How do I reheat leftover Stromboli?

For best results:

  • Oven: Bake at 350°F for 10–15 minutes to maintain crispiness.
  • Air Fryer: Heat at 350°F for 5–7 minutes for a quick, crispy reheat.
  • Microwave: Use in short bursts, but note that the crust may become softer.

Final Thoughts: The Ultimate Homemade Italian Comfort Food

Stromboli is the perfect dish to bring people together, whether for a casual family meal, a game night, or a special gathering. Its golden, flaky crust and rich, cheesy filling make every bite irresistible.

With endless variations and easy preparation, Stromboli is a recipe worth mastering. Whether you follow the classic method or put your own creative spin on it, this dish is sure to become a staple in your home.

So, next time you’re craving something warm, cheesy, and packed with Italian flavor, skip the pizza delivery and roll up a homemade Stromboli instead—you won’t regret it!

Cottage Cheese Egg Salad: A Protein-Packed Twist on a Classic

Egg salad is a timeless favorite, loved for its creamy texture, rich flavor, and versatility. Traditionally made with mayonnaise, the dish can sometimes be heavy on fat and calories. Cottage Cheese Egg Salad offers a lighter, protein-rich alternative that maintains all the creamy goodness while boosting nutritional value. This version swaps out most of the mayonnaise for cottage cheese, which adds a tangy flavor and a velvety consistency without overwhelming the dish.

Perfect for breakfast, lunch, or a quick protein-packed snack, this egg salad is satisfying, easy to prepare, and endlessly customizable. Whether spread on toast, wrapped in a tortilla, or served over greens, this dish is sure to become a new favorite.

Why You’ll Love This Cottage Cheese Egg Salad

This healthier take on classic egg salad is a game-changer. Here’s why it deserves a spot in your meal rotation:

  • High in Protein, Lower in Calories – Cottage cheese provides an excellent source of protein while reducing the overall fat content compared to traditional egg salad.
  • Creamy and Flavorful – The combination of eggs, cottage cheese, and a touch of mustard creates a smooth, tangy, and savory experience.
  • Quick and Easy to Make – With just a handful of ingredients and minimal prep time, this dish comes together in minutes.
  • Versatile and Customizable – Add herbs, spices, or crunchy veggies to make it uniquely yours.
  • Great for Meal Prep – This salad stores well in the fridge, making it an excellent make-ahead meal or snack.

Ingredients: A Healthy Blend of Flavor

  • Protein Base:
    • Cottage cheese (full-fat or reduced-fat)
    • Hard-boiled eggs
  • Flavor Enhancers:
    • Scallions (or chives as an alternative)
    • Mayonnaise (optional for depth of flavor)
    • Dijon-style mustard
    • Red pepper flakes (or substitute with paprika or cayenne)
    • Salt and black pepper to taste

Directions: Simple Steps to a Perfect Egg Salad

  1. Prepare the Eggs: Hard-boil the eggs, cool them in ice water, then peel.
  2. Chop and Separate: Remove the yolks from most of the eggs, keeping a few whole. Finely chop the egg whites.
  3. Make the Dressing: Mash the yolks with cottage cheese, mayonnaise, and mustard until creamy.
  4. Combine and Mix: In a bowl, mix chopped egg whites, remaining cottage cheese, scallions, and seasonings with the creamy dressing.
  5. Chill and Serve: Refrigerate for at least 30 minutes for best flavor, then serve on toast, in a wrap, or as a side dish.

Nutritional Facts (Per Serving, Approximate):

  • Calories: 181
  • Carbohydrates: 3g
  • Protein: 13g
  • Fat: 13g
  • Saturated Fat: 3g
  • Cholesterol: 254mg
  • Sodium: 467mg
  • Fiber: 0.4g
  • Vitamin A: 550 IU
  • Calcium: 75mg
  • Iron: 1mg

A Healthier Approach to Egg Salad

One of the biggest reasons to make cottage cheese egg salad is its nutritional benefits. Compared to traditional egg salad, which is often loaded with mayonnaise, this version offers a more balanced macronutrient profile.

How It Compares to Traditional Egg Salad:

  • Lower in Fat – Replacing most of the mayo with cottage cheese significantly reduces unhealthy fats.
  • Higher in Protein – Cottage cheese is naturally protein-rich, making this salad even more satisfying.
  • Rich in Vitamins and Minerals – Eggs and cottage cheese both provide essential nutrients, including vitamin B12, vitamin D, calcium, and iron.

What to Expect in Terms of Taste and Texture

This cottage cheese egg salad is creamy, tangy, and satisfying, with a light and refreshing feel. The cottage cheese provides a mild tartness, while mustard and scallions enhance the flavor with a little bite. The result is a balanced combination of savory richness and a slight zing.

Unlike traditional egg salad, which can sometimes be dense and heavy, this version has a lighter, airier texture. The soft curds of cottage cheese add a unique dimension, creating an almost whipped consistency when blended with the eggs.

Serving Suggestions: How to Enjoy This Egg Salad

This dish is incredibly versatile and can be enjoyed in many ways:

  • On Toast – Spread it over sourdough, rye, or whole grain bread for a delicious open-faced sandwich.
  • In a Sandwich – Layer it between slices of bread with lettuce and tomato for a satisfying meal.
  • In a Wrap – Roll it up in a whole wheat tortilla with avocado and spinach for a nutritious wrap.
  • Over a Salad – Scoop it onto a bed of mixed greens for a protein-packed salad bowl.
  • With Crackers or Veggies – Use it as a dip for sliced cucumbers, bell peppers, or whole-grain crackers.
  • Stuffed in an Avocado – Fill an avocado half with egg salad for a creamy, nutrient-dense snack.

Frequently Asked Questions

1. Can I Make This Recipe Without Mayonnaise?

Yes! If you prefer to skip the mayo completely, you can increase the cottage cheese or substitute it with Greek yogurt for a similar creamy texture with added tang.

2. How Long Does This Egg Salad Last in the Fridge?

Stored in an airtight container, cottage cheese egg salad will stay fresh for up to 2 days in the refrigerator. However, since cottage cheese can release some liquid over time, give it a quick stir before serving.

3. Can I Use Low-Fat Cottage Cheese?

Absolutely! Low-fat cottage cheese works well, though it may be slightly less creamy than full-fat versions. If it feels too runny, you can strain the excess liquid before mixing it with the eggs.

4. Is This Recipe Suitable for a Low-Carb or Keto Diet?

Yes! This recipe is naturally low in carbohydrates, making it an excellent option for keto and low-carb diets. Just be mindful of what you serve it with—stick to lettuce wraps, avocado, or low-carb crackers instead of bread.

5. Can I Add Other Ingredients for More Flavor?

Of course! This egg salad is highly customizable. Here are a few great add-ins:

  • Crunchy Ingredients – Celery, bell peppers, or chopped pickles add texture.
  • Fresh Herbs – Dill, parsley, or chives enhance the freshness.
  • Spices – A pinch of paprika, cayenne, or black pepper can add depth.
  • Additional Protein – Diced ham, smoked salmon, or cooked turkey for extra protein.

6. What If My Cottage Cheese is Too Watery?

Some brands of cottage cheese can be quite runny. To fix this issue, you can:

  • Strain it through a fine mesh sieve to remove excess liquid.
  • Mash it with a fork to create a thicker, smoother consistency.

7. Can I Freeze This Egg Salad?

No, freezing is not recommended. The texture of eggs and cottage cheese changes when frozen, leading to a watery, grainy consistency once thawed. It’s best enjoyed fresh.

The Benefits of Using Cottage Cheese

Cottage cheese is a nutritional powerhouse, and adding it to egg salad is a great way to boost health benefits while keeping the dish creamy and delicious. Here’s why it’s a great choice:

  • Rich in Protein – Cottage cheese contains casein protein, which is slow-digesting and helps keep you full longer.
  • Great Source of Calcium – Supports bone health and muscle function.
  • Low in Calories – Compared to mayonnaise, it significantly reduces the calorie count per serving.
  • Packed with Probiotics – Some cottage cheese brands contain live cultures that promote gut health.

Simple Variations to Try

Looking to switch things up? Here are a few delicious variations:

  • Spicy Egg Salad – Add a dash of hot sauce, cayenne pepper, or chopped jalapeños for heat.
  • Avocado Egg Salad – Mash in half an avocado for an ultra-creamy and healthy twist.
  • Mediterranean Egg Salad – Stir in chopped olives, feta cheese, and sundried tomatoes.
  • Smoked Salmon Egg Salad – Add flaked smoked salmon for an upscale flavor.
  • Curried Egg Salad – Mix in a teaspoon of curry powder for a warm, spiced twist.

Final Thoughts: A Must-Try Egg Salad for Any Occasion

Cottage Cheese Egg Salad is a healthier, protein-rich alternative to traditional egg salad without sacrificing taste or texture. Its creamy consistency, balanced flavors, and versatility make it a go-to recipe for breakfast, lunch, or meal prep.

Whether you’re looking for a quick snack, a nutritious meal, or a post-workout protein boost, this egg salad fits the bill. The best part? It’s completely adaptable—add your favorite herbs, spices, or mix-ins to make it your own.

So, next time you’re craving something creamy, satisfying, and packed with nutrients, skip the traditional mayonnaise-heavy egg salad and give this cottage cheese version a try. Your taste buds—and your health—will thank you!

Leprechaun’s Lucky Puppy Chow: A Festive and Irresistible St. Patrick’s Day Treat

St. Patrick’s Day is a time for celebration, fun, and of course, delicious treats. Whether you’re hosting a party, packing festive snacks for kids, or simply indulging in something sweet, Leprechaun’s Lucky Puppy Chow is the perfect addition to your holiday spread. This green and gold-infused version of the classic Muddy Buddies is a fun, crunchy, and chocolatey snack that everyone will love.

What makes this puppy chow stand out? A St. Patrick’s Day twist—green candy melts, festive sprinkles, and the addition of Lucky Charms marshmallows or green M&M’s turn this simple treat into something truly magical. Sweet, salty, and dangerously addictive, it’s a snack that disappears fast at any gathering.

Why This Lucky Puppy Chow is a Must-Try

If you’ve never made puppy chow before, this is the perfect time to start. Here’s why this festive and crunchy treat is a St. Patrick’s Day essential:

1. Quick and Easy to Make

  • This no-bake recipe comes together in just minutes.
  • All you need is a microwave and a mixing bowl—no fancy equipment required.

2. Perfect Balance of Sweet and Crunchy

  • The crispy cereal stays light and crunchy while being coated in rich chocolate and peanut butter.
  • Powdered sugar balances the sweetness and gives it a melt-in-your-mouth texture.

3. A Fun, Kid-Friendly Treat

  • This snack is great for kids—both making it and eating it!
  • The bright green color and fun mix-ins make it feel like a treat straight from a leprechaun’s pot of gold.

4. Versatile for Any Occasion

  • While it’s perfect for St. Patrick’s Day, you can switch up the colors and mix-ins to match any holiday or event.
  • It’s easy to package in little gift bags for party favors or classroom treats.

Magical Ingredients for a Festive Snack:

  • Chex Rice Cereal
  • Green candy melts
  • Peanut butter
  • Vegetable or canola oil
  • Powdered sugar
  • St. Patrick’s Day toppings (Green M&M’s, Shamrock Sprinkles, Lucky Charms Shamrock Marshmallows)

Easy Steps to a Festive & Crunchy Treat:

  1. Melt & Mix: Melt green candy melts, peanut butter, and oil in the microwave, stirring until smooth.
  2. Coat the Cereal: Pour the melted mixture over Chex cereal and stir until fully coated.
  3. Shake & Set: Place the coated cereal in a gallon-sized zip-top bag, add powdered sugar, and shake until fully covered.
  4. Cool & Decorate: Spread the mixture onto wax paper to set, then mix in M&M’s, shamrock sprinkles, and Lucky Charms marshmallows.
  5. Serve & Enjoy: Store in an airtight container and enjoy this crunchy, chocolatey, peanut butter-infused snack all St. Patrick’s Day long!

Nutritional Breakdown (Per Serving Estimate):

  • Calories: ~222
  • Carbohydrates: ~41g
  • Protein: ~2g
  • Fat: ~6g
  • Sugar: ~25g
  • Sodium: ~85mg

Creative Ways to Serve Leprechaun’s Lucky Puppy Chow

While this treat is delicious on its own, there are plenty of ways to elevate it even further:

1. As a Party Snack Mix

  • Serve it in a large bowl at a party with extra pretzels, popcorn, or nuts mixed in for variety.

2. Packaged as Edible Gifts

  • Fill clear treat bags or mason jars, tie them with green ribbon, and hand them out as party favors.

3. Topped Over Ice Cream

  • Sprinkle it over vanilla or mint chocolate chip ice cream for an extra layer of crunch.

4. Mixed Into a Dessert Board

  • Combine it with green cupcakes, shamrock cookies, and gold-wrapped chocolates for a St. Patrick’s Day dessert table.

5. Layered in a Parfait

  • Use puppy chow as a crunchy layer in a dessert parfait with pudding, whipped cream, and fruit.

Fun Variations to Try

The beauty of puppy chow is its versatility. If you love experimenting, try some of these fun variations:

1. Mint Chocolate Puppy Chow

  • Add a few drops of peppermint extract to the melted coating for a cool, minty twist.
  • Use mint M&M’s or Andes mint pieces for a fresh and festive flavor.

2. Golden Caramel Puppy Chow

  • Drizzle caramel sauce over the mix before adding powdered sugar for a richer, buttery taste.
  • Sprinkle in gold sugar sprinkles to mimic leprechaun gold.

3. Nut-Free Puppy Chow

  • Replace peanut butter with sunflower butter or cookie butter for an allergy-friendly version.

4. Dark Chocolate & Sea Salt Puppy Chow

  • Use dark chocolate instead of candy melts and finish with a sprinkle of sea salt for a more sophisticated flavor.

5. Rainbow Candy Puppy Chow

  • Mix in rainbow-colored candy for a magical pot-of-gold effect.

Frequently Asked Questions (FAQs)

1. Why is it called Puppy Chow?

Despite its name, puppy chow is not for dogs! The name comes from the cereal’s resemblance to dog food, but it is a completely human-friendly treat. Some regions call it Muddy Buddies, but the recipe remains the same.

2. How long does Puppy Chow stay fresh?

  • Store it in an airtight container at room temperature for up to a week.
  • If you want it to last longer, store it in the refrigerator for up to two weeks.

3. Can I make this recipe ahead of time?

Yes! In fact, making it a day ahead allows the flavors to settle and enhances the crunch. Just store it in a sealed container to keep it fresh.

4. Can I freeze Puppy Chow?

Yes! Freeze it in an airtight bag or container for up to 3 months. When ready to eat, let it thaw at room temperature for about 15 minutes.

5. What type of cereal works best?

Rice Chex or Corn Chex are the best options because they are light, crispy, and hold the coating well. Avoid cereals that are too dense or flavored.

6. Can I make it without powdered sugar?

If you prefer a less sweet version, try coating the cereal in crushed graham crackers or coconut flakes instead of powdered sugar.

7. Can I use white chocolate instead of candy melts?

Yes! White chocolate chips or almond bark work well as substitutes, but they take a bit longer to melt than candy melts.

Final Thoughts: A Lucky Snack for Every Occasion

Leprechaun’s Lucky Puppy Chow is more than just a treat—it’s a fun, festive way to bring a little extra magic to your St. Patrick’s Day celebrations. With its sweet crunch, colorful appearance, and easy preparation, it’s a recipe you’ll want to make again and again.

The best part? It’s completely customizable. Whether you go with the classic green and gold theme, add a minty twist, or experiment with caramel and dark chocolate, there’s no wrong way to enjoy this delicious snack.

So grab your mixing bowl, a few simple ingredients, and a bit of St. Patrick’s Day spirit, and whip up a batch of this lucky and delicious treat. Who knows? Maybe it’ll even bring you a bit of good fortune!