Leprechaun Poop: A Hilarious and Delicious St. Patrick’s Day Treat

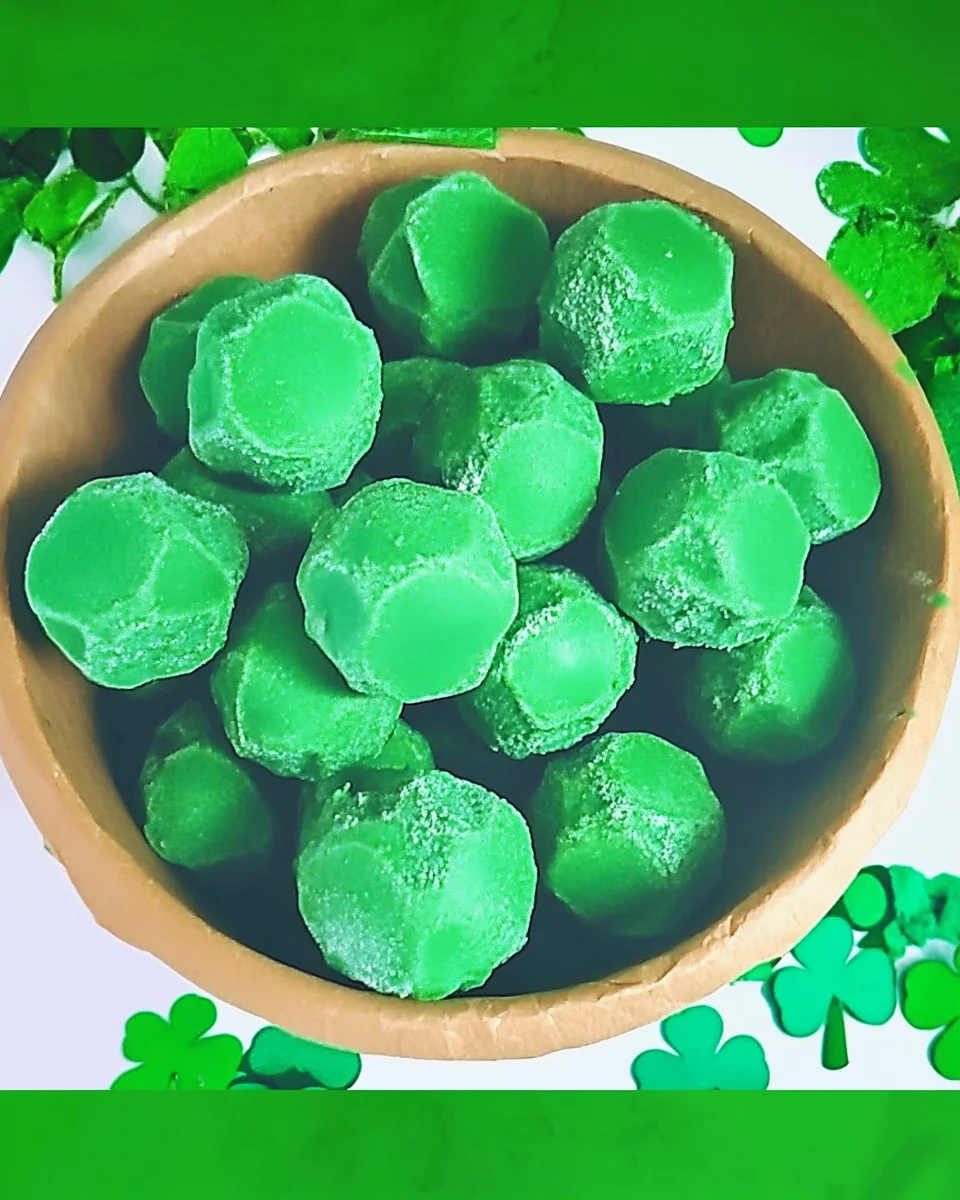
St. Patrick’s Day is all about fun, magic, and mischievous little leprechauns. While traditional Irish dishes like corned beef and soda bread take center stage, festive themed desserts add an extra element of excitement to the holiday. Enter Leprechaun Poop, a whimsical, no-bake treat that’s as delicious as it is amusing.

These bite-sized Oreo cookie truffles, coated in vibrant green chocolate, make for the perfect St. Patrick’s Day party snack, gag gift, or fun kitchen activity with kids. Whether you’re making them as a treat for a school event, a party favor, or just a silly dessert to surprise your family, these little treats will spark laughter and delight.

Why Everyone Loves This St. Patrick’s Day Treat

1. A No-Bake Dessert That’s Quick and Easy

Not everyone has time to bake elaborate holiday desserts. Luckily, Leprechaun Poop requires zero baking and just a few simple ingredients. With crushed Oreos, creamy frosting, and melted chocolate, you can whip up a batch in no time.

2. A Fun and Silly Treat for Kids

Let’s be honest—kids love anything with a goofy name. Calling these “Leprechaun Poop Bites” will instantly make them laugh, and helping to crush Oreos, roll the dough, and dip the treats in chocolate makes this a fantastic hands-on activity for little chefs.

3. A Perfect Party Favor or Gag Gift

Looking for a unique St. Patrick’s Day party favor? Package these treats in clear bags with a fun tag that reads “Leprechaun Poop”, and hand them out to party guests, coworkers, or classmates for a memorable and lighthearted holiday surprise.

4. Customizable for Any Occasion

Though this version is perfect for St. Patrick’s Day, the basic recipe can be adapted for other holidays:

  • Use red and white chocolate for a Christmas “Grinch Poop”.
  • Try pastel colors for an “Easter Bunny Poop” treat.
  • Go pink or blue for a baby shower “Unicorn Poop”.

5. A Sweet and Crunchy Texture Everyone Loves

Each bite features a rich, chocolatey center, a smooth and creamy texture, and a crisp outer shell, making these treats highly addictive. They’re not too sweet, making them a crowd-pleaser for both kids and adults.

A Magical Mix of Ingredients

  • Oreo cookies (crushed into small pieces)
  • Vanilla icing
  • Green chocolate melts

How to Make These Mischievous Bites

Step One: Mix the Base

  • Crush Oreo cookies into fine crumbs and mix them with vanilla icing until the mixture holds together.

Step Two: Shape and Chill

  • Roll the mixture into small bite-sized balls and place them on a lined baking sheet.
  • Refrigerate or freeze for at least an hour to firm up.

Step Three: Coat in Green Chocolate

  • Melt green candy melts according to package directions.
  • Dip each Oreo ball into the melted chocolate, ensuring a smooth coating.
  • Tap off excess chocolate and place back on the baking sheet.

Step Four: Let Set and Enjoy!

  • Allow the coated bites to harden completely before serving.
  • Store in an airtight container for up to 3 days or freeze for up to 3 months.

Nutritional Gold at the End of the Rainbow (Per Serving, Estimated)

  • Calories: 44 kcal
  • Carbohydrates: 7g
  • Fat: 2g
  • Saturated Fat: 1g
  • Sodium: 31mg
  • Sugar: 5g

Creative Ways to Serve and Present Leprechaun Poop

1. Individual Gift Bags with Fun Labels

Package the treats in small cellophane bags, tie them with a green ribbon, and attach a playful tag that reads:
“Straight from the Leprechaun’s Pot o’ Gold!”

2. Serve in Mini Cauldrons or Gold Pots

For a themed presentation, place the treats in mini black cauldrons or gold pots to make it look like leprechauns left a special surprise behind.

3. Use as a Topping for Ice Cream or Cupcakes

Crumble these green-coated truffles over vanilla ice cream, cupcakes, or brownies for an extra festive touch.

4. St. Patrick’s Day Dessert Charcuterie Board

Arrange the Leprechaun Poop alongside gold-wrapped chocolates, rainbow-colored candy, and mint-flavored treats for a fun and colorful St. Patrick’s Day dessert board.

FAQs: Everything You Need to Know About Making Leprechaun Poop

1. Can I Make These Treats in Advance?

Yes! You can prepare the cookie dough balls a day ahead and keep them in the refrigerator. If you need to store them for longer, freeze them before dipping them in chocolate.

2. How Long Do They Last?

These treats stay fresh in an airtight container for up to three days at room temperature. For longer storage, keep them in the refrigerator for up to a week or freeze for up to three months.

3. Can I Use White Chocolate Instead of Green Candy Melts?

Yes! If you don’t have green candy melts, you can melt white chocolate and add a few drops of green food coloring. Just be sure to stir well so the color blends evenly.

4. How Do I Keep the Oreo Balls from Falling Apart When Dipping?

  • Make sure to chill the cookie balls for at least an hour before dipping them in melted chocolate.
  • Use a fork to roll the balls in chocolate, then tap the fork on the side of the bowl to remove excess coating.

5. What’s the Best Way to Crush Oreos?

If you don’t have a food processor, you can place Oreos in a resealable plastic bag and crush them using a rolling pin or kitchen mallet.

6. Can I Make These with Different Flavors of Oreos?

Absolutely! Try using:

  • Mint Oreos for an extra St. Patrick’s Day twist.
  • Golden Oreos for a vanilla-flavored version.
  • Peanut Butter Oreos for a nutty flavor combination.

7. What If My Chocolate Starts Hardening While Dipping?

If the melted chocolate starts thickening:

  • Reheat it in the microwave for 10-15 seconds, stirring in between.
  • Stir in a teaspoon of coconut oil or vegetable shortening to keep it smooth.

8. Can I Add Sprinkles or Decorations?

Definitely! While the green chocolate coating looks great on its own, you can sprinkle the treats with:

  • Edible gold dust for a magical touch.
  • Green or rainbow sprinkles to enhance the festive look.
  • Crushed Oreos for added texture.

Fun Variations of Leprechaun Poop

1. Mint Chocolate Leprechaun Poop

  • Add a few drops of peppermint extract to the cookie dough for a refreshing mint flavor.

2. Peanut Butter Leprechaun Poop

  • Mix a tablespoon of peanut butter into the crushed Oreos for a chocolate-peanut butter twist.

3. Gold-Dusted Leprechaun Poop

  • Lightly brush the coated truffles with edible gold dust for a “pot of gold” effect.

4. Coconut Leprechaun Poop

  • Roll the Oreo balls in shredded coconut before dipping them in chocolate.

5. St. Patrick’s Day Cake Pop Version

  • Insert lollipop sticks into the cookie balls before dipping them in green chocolate to make Leprechaun Poop Cake Pops.

Final Thoughts: A Treat That’s As Fun as It Is Delicious

Leprechaun Poop is more than just a dessert—it’s a playful, laugh-inducing treat that brings a sense of mischief and fun to any St. Patrick’s Day celebration. Whether you’re making them for a party, a school event, or just for fun at home, these delightfully silly Oreo truffles will be a hit with kids and adults alike.

Their rich, chocolatey flavor, smooth texture, and vibrant green coating make them as delicious as they are entertaining. Plus, they’re easy to make, require no baking, and can be customized in countless ways.

So, if you’re looking to add a little leprechaun magic to your holiday, whip up a batch of these hilarious and tasty Leprechaun Poop treats—because St. Patrick’s Day should be just as much about fun and laughter as it is about good food!

Easter Sugar Cookies: A Festive and Delicious Springtime Treat

Easter is the perfect time for colorful, fun, and festive baking, and nothing captures the spirit of the holiday better than Easter Sugar Cookies. These soft, buttery cookies are not only delicious but also an adorable addition to your holiday dessert table. Whether shaped like bunnies, eggs, or carrots, these cookies bring a festive charm to any Easter gathering.

Beyond their eye-catching appearance, these cookies hold their shape beautifully after baking, making them perfect for decorating. Their slightly crisp edges and soft, melt-in-your-mouth centers make them a crowd-pleaser for both kids and adults. Plus, the easy-to-make frosting and colorful sanding sugar create a playful, vibrant look without the need for intricate decorating skills.

If you’re looking for a fun Easter baking project or a delightful treat to share with friends and family, these sugar cookies are the perfect choice.

Why You’ll Love These Easter Sugar Cookies

1. A Fun and Festive Holiday Treat

Easter baking should be as joyful as the holiday itself, and these cookies capture that spirit perfectly. Their pastel colors, playful shapes, and simple yet elegant decorations make them a beautiful addition to any Easter celebration.

2. Perfect for All Ages

Baking and decorating these cookies is a great activity for kids and adults alike. Kids will love cutting out the shapes, dipping cookies in colorful sanding sugar, and adding fun details, while adults will appreciate their deliciously nostalgic flavor.

3. No Spreading—Perfectly Shaped Cookies Every Time

One of the biggest challenges with sugar cookies is that they often spread and lose their shape during baking. This recipe ensures that your cookies hold their form perfectly, giving you crisp edges and defined shapes every time.

4. Customizable for Any Occasion

While these cookies are designed for Easter, you can easily adapt them for any holiday or event by changing the cookie cutter shapes and decorating colors. Think hearts for Valentine’s Day, pumpkins for Halloween, or snowflakes for Christmas!

5. Simple Yet Stunning Decoration

Unlike traditional decorated sugar cookies that require intricate royal icing work, these cookies achieve a beautiful and festive look with minimal effort. The combination of smooth frosting and sparkling sanding sugar makes them both easy to decorate and visually impressive.

Baking Up Some Easter Magic: Ingredients You’ll Need

For the Sugar Cookies:

  • Unsalted butter (for a rich, buttery flavor)
  • Granulated sugar (for the perfect sweetness)
  • Egg and vanilla extract (to bind and add depth of flavor)
  • All-purpose flour, baking powder, and salt (for structure and texture)

For the Frosting and Decoration:

  • Powdered sugar (to create a smooth frosting)
  • Whole milk and light corn syrup (for the perfect consistency)
  • Vanilla extract (for flavor)
  • Sanding sugars (in pastel colors for that festive Easter look)
  • Brown or black food coloring (for piping cute bunny faces)

Step-by-Step Guide to Easter Cookie Perfection

Step One: Prepare the Cookie Dough

  • Cream together butter and sugar until fluffy, then add the egg and vanilla.
  • In a separate bowl, whisk together the flour, baking powder, and salt before gradually adding it to the wet ingredients.
  • Mix until a smooth dough forms.

Step Two: Chill and Roll the Dough

  • Divide the dough into two discs, wrap in plastic, and chill for at least 3 hours.
  • Once firm, roll out the dough on a floured surface to just under ¼ inch thickness.

Step Three: Cut and Bake the Cookies

  • Use bunny, carrot, or egg-shaped cookie cutters to cut out the cookies.
  • Transfer to a parchment-lined baking sheet, leaving space between each.
  • Bake at 350°F for 10-12 minutes, until the edges turn slightly golden.

Step Four: Make the Frosting

  • Whisk together powdered sugar, milk, corn syrup, and vanilla until smooth.
  • The consistency should be thick enough to pipe but fluid enough to spread.

Step Five: Decorate the Cookies

  • Pipe a thin border of frosting near the edge of each cookie.
  • Fill in the center with more frosting, then use a toothpick to smooth it out.
  • Immediately dip the cookie in colored sanding sugar, then tap off the excess.
  • Use brown or black icing to pipe tiny eyes and noses for the bunny cookies.

Step Six: Let the Frosting Set

  • Allow the cookies to dry for a few hours until the frosting is fully set.
  • Enjoy these adorable and delicious Easter treats!

Nutritional Breakdown (Per Cookie, Estimated)

  • Calories: 259 kcal
  • Carbohydrates: 42g
  • Protein: 2g
  • Fat: 10g
  • Sugar: 29g
  • Calcium: 21mg
  • Iron: 1mg

Creative Ways to Serve and Display Easter Sugar Cookies

Presentation is just as important as taste, especially when it comes to holiday treats. Here are some creative ways to serve and display these cookies for maximum impact:

1. Easter Cookie Gift Boxes

Package these cookies in decorative Easter tins or gift boxes and tie them with a pastel ribbon. They make great gifts for teachers, friends, and neighbors.

2. DIY Easter Cookie Decorating Station

Set up a cookie decorating station at an Easter party where guests can frost and decorate their own cookies with different colors of sanding sugar and piping bags.

3. Edible Easter Centerpiece

Arrange the cookies on a large platter with other Easter treats like chocolate eggs, marshmallow chicks, and fresh fruit for a visually appealing dessert spread.

4. Serve with Easter-Themed Drinks

Pair these cookies with pastel-colored milkshakes, lemonade, or a light floral tea for a perfectly themed Easter snack.

FAQs: Everything You Need to Know About Making Easter Sugar Cookies

1. How Far in Advance Can I Make These Cookies?

These cookies can be made several days in advance and stored in an airtight container at room temperature for up to 10 days. You can also freeze them for up to three months for longer storage.

2. Can I Skip the Corn Syrup in the Frosting?

Yes, but keep in mind that corn syrup helps the frosting set and creates a smooth, glossy finish. If you omit it, your icing may not dry as firmly, making the cookies slightly harder to stack.

3. Why is My Icing Too Runny or Too Thick?

If your icing is too runny, add more powdered sugar to thicken it. If it’s too thick, add a small amount of milk until it reaches the desired consistency. This frosting is very forgiving, so adjustments are easy.

4. How Can I Prevent My Cookies from Becoming Too Hard?

The key to keeping sugar cookies soft and tender is to:

  • Avoid overbaking—they should only be lightly golden around the edges.
  • Use room-temperature butter to ensure even mixing.
  • Roll the dough evenly to about ¼ inch thickness—thinner cookies will be crispier.

5. Can I Use Different Cookie Shapes?

Absolutely! While bunny-shaped cookies are adorable for Easter, you can also make carrots, eggs, flowers, or even butterflies for a spring-themed batch.

6. Can I Use This Recipe for Christmas or Other Holidays?

Yes! This is a great all-purpose sugar cookie recipe that can be used for any holiday. Simply change the colors and cookie cutters to match the occasion.

7. What’s the Best Way to Store Leftover Frosting?

If you have extra frosting, store it in an airtight container in the refrigerator for up to a week. Stir it well before using, and add a tiny bit of milk if it needs to be thinned out.

8. Can I Use Natural Food Coloring for the Sanding Sugar?

Yes! If you prefer to avoid artificial dyes, you can make your own natural food coloring using fruit and vegetable powders, such as:

  • Beet powder for pink
  • Spirulina for blue or green
  • Turmeric for yellow

Fun Variations of Easter Sugar Cookies

Want to switch things up? Here are a few delicious variations to try:

1. Lemon Easter Sugar Cookies

Add lemon zest and a teaspoon of lemon juice to the dough for a bright and citrusy flavor.

2. Chocolate-Dipped Easter Cookies

After frosting and decorating, dip half of each cookie in melted white or dark chocolate for an extra layer of indulgence.

3. Almond-Flavored Easter Cookies

Swap out vanilla extract for almond extract to create a rich, nutty flavor that pairs beautifully with the buttery dough.

4. Marbled Easter Cookies

Instead of using sanding sugar, divide your frosting into different colors and swirl them together for a beautiful marbled effect.

5. Speckled Egg Cookies

Frost cookies in pastel colors, then flick tiny drops of cocoa powder mixed with water onto the surface for a realistic speckled egg effect.

Final Thoughts: The Perfect Easter Cookie Recipe

Easter is a time for joy, celebration, and delicious treats, and these Easter Sugar Cookies fit the occasion perfectly. Their buttery, soft texture, vibrant colors, and playful designs make them an irresistible addition to any springtime celebration.

Whether you’re baking them for a party, a fun family activity, or simply to satisfy a sweet craving, these cookies are guaranteed to bring smiles. Their simple yet elegant decoration makes them easy enough for beginners while still offering endless creative possibilities.

So, gather your ingredients, dust off your favorite cookie cutters, and get ready to bake a batch of delicious, festive, and absolutely adorable Easter Sugar Cookies!

Easter Cake Roll: A Beautifully Swirled Springtime Dessert

When it comes to Easter desserts, nothing captures the festive spirit quite like a pastel-colored cake roll. Light, airy, and bursting with bright spring colors, this Easter Cake Roll is as fun to make as it is to eat. With a soft lemon sponge and a creamy, tangy cream cheese frosting, it’s a dessert that will impress both kids and adults at your holiday gathering.

The beauty of a cake roll lies in its simple elegance—a delicate sponge cake that is carefully rolled, filled with luscious frosting, and then sliced into stunning spirals. This particular version features pastel swirls that make it perfect for Easter, baby showers, or any spring celebration. If you’re looking for a dessert that is as much a centerpiece as it is a treat, this is the one.

Why This Easter Cake Roll is a Must-Try

1. A Show-Stopping Easter Dessert

While Easter desserts often include carrot cake, sugar cookies, or chocolate eggs, this vibrant cake roll stands out on any dessert table. The soft pastel colors combined with a light lemon flavor make it a refreshing and visually stunning choice.

2. Light and Airy Texture

Unlike heavier cakes, this sponge cake is light and delicate, making it the perfect way to end a big Easter meal without feeling overly full. The whipped egg whites give it a soft, fluffy texture, while the lemon juice adds just a touch of brightness.

3. Creamy, Tangy Filling

The cream cheese frosting adds richness and creaminess, balancing the lightness of the sponge. It’s not overly sweet, making it the perfect complement to the delicate lemon cake.

4. Fun and Customizable

One of the best things about this Easter Cake Roll is that it’s completely customizable. You can:

  • Swap the lemon flavor for vanilla, almond, or even coconut.
  • Use different food coloring combinations to match any occasion.
  • Add fruit preserves, chocolate ganache, or even shredded coconut to the filling for extra flavor.

5. Perfect for Beginners and Experienced Bakers

Cake rolls may look intimidating, but they’re actually much easier than they seem. With the right technique—such as rolling the cake while it’s warm to prevent cracking—you can create a flawless, bakery-style dessert with minimal effort.

A Rainbow of Ingredients

For the Cake:

  • Egg whites (room temperature)
  • Freshly squeezed lemon juice
  • Kosher salt
  • Sugar
  • Cake flour
  • Pastel gel food coloring

For the Cream Cheese Frosting:

  • Cream cheese (softened)
  • Unsalted butter (softened)
  • Powdered sugar
  • Pure vanilla extract
  • Powdered sugar (for dusting)

Baking the Perfect Easter Cake Roll

Step One: Prepare and Whisk the Egg Whites

  • Preheat the oven to 350°F and line a baking sheet with parchment paper.
  • Using a stand mixer, beat egg whites, lemon juice, and salt until foamy.
  • Gradually add sugar and continue whisking until soft peaks form.

Step Two: Incorporate the Flour

  • Gently fold in the cake flour until smooth, taking care not to deflate the batter.

Step Three: Create the Colorful Swirl

  • Divide the batter into four bowls and add a few drops of pastel food coloring to each.
  • Adjust the color intensity to your liking, ensuring soft, vibrant shades.
  • Spoon dollops of each color onto the parchment-lined pan, alternating hues.
  • Use a flat spatula to gently spread and blend the colors for a marbled effect.

Step Four: Bake and Roll

  • Bake for 12 minutes, or until the cake springs back when touched.
  • Let it cool for five minutes, then invert onto a new sheet of parchment paper.
  • Carefully remove the top layer of parchment and roll the warm cake into a spiral.
  • Chill in the refrigerator for a few hours to set the shape.

Step Five: Make the Cream Cheese Frosting

  • Beat together the cream cheese, butter, powdered sugar, and vanilla until smooth.

Step Six: Fill, Roll, and Serve

  • Once chilled, carefully unroll the cake and evenly spread the frosting across the top.
  • Gently re-roll the cake, making sure not to squeeze out the filling.
  • Lightly dust with powdered sugar before serving for an elegant touch.

Nutritional Breakdown (Per Serving, Estimated)

  • Calories: ~280 kcal
  • Carbohydrates: 32g
  • Protein: 4g
  • Fat: 14g
  • Saturated Fat: 8g
  • Sugar: 24g
  • Fiber: 1g
  • Calcium: 40mg
  • Iron: 0.5mg

Serving Ideas for the Easter Cake Roll

This cake roll is stunning on its own, but if you want to elevate your presentation, consider these creative ways to serve it:

1. Garnish with Fresh Fruit

Top your cake slices with fresh berries, kiwi, or citrus slices for added color and freshness.

2. Drizzle with White Chocolate

For an extra touch of sweetness, drizzle melted white chocolate or lemon glaze over the cake before serving.

3. Pair with a Springtime Drink

Serve alongside a light herbal tea, fresh lemonade, or a floral-infused mocktail for a perfectly paired Easter treat.

4. Dust with Edible Gold or Coconut Flakes

Add a sprinkle of edible gold dust, shredded coconut, or pastel sprinkles for a whimsical finishing touch.

5. Serve with Ice Cream

Pair each slice with a scoop of vanilla, lemon, or coconut ice cream for a decadent dessert combination.

FAQs: Everything You Need to Know About Making a Cake Roll

1. How Do I Prevent My Cake Roll from Cracking?

Cracking happens when the cake cools too much before rolling. To prevent this:

  • Roll the cake while it’s still warm using parchment paper or a clean kitchen towel.
  • Let it cool in its rolled shape, then carefully unroll it before adding the filling.

2. Why Is My Cake Too Dense or Gummy?

If your cake feels too dense, it may be due to:

  • Overmixing the batter, which can deflate the egg whites.
  • Not whipping the egg whites enough—they should reach soft peaks before folding them in.

3. Can I Make This Cake Ahead of Time?

Yes! The Easter Cake Roll can be made a day in advance. Store it in the refrigerator, wrapped in plastic wrap, to keep it fresh. Dust with powdered sugar just before serving to maintain its perfect look.

4. Can I Freeze a Cake Roll?

Absolutely! Wrap the filled and rolled cake tightly in plastic wrap, then place it in a freezer-safe bag. Freeze for up to one month. When ready to serve, let it thaw in the refrigerator overnight.

5. Can I Use Different Frostings?

Yes! While cream cheese frosting is a classic choice, you can also use:

  • Whipped cream with fruit
  • Chocolate ganache
  • Buttercream frosting
  • Mascarpone and honey mixture

6. What If I Don’t Have Cake Flour?

If you don’t have cake flour, you can make your own by substituting all-purpose flour with a mix of all-purpose flour and cornstarch (for every cup of flour, remove 2 tablespoons and replace with 2 tablespoons of cornstarch).

7. Can I Use Natural Food Coloring?

Yes! If you want to avoid artificial food coloring, try using:

  • Matcha powder for green
  • Beet powder for pink
  • Turmeric for yellow
  • Blue spirulina for blue

Variations of the Easter Cake Roll

1. Chocolate Easter Cake Roll

For a richer version, replace the lemon sponge with chocolate cake and fill it with chocolate cream or Nutella frosting.

2. Strawberry Shortcake Roll

Swap out the cream cheese frosting for fresh whipped cream and sliced strawberries for a light and fruity alternative.

3. Coconut Cream Roll

Add coconut extract to the cake batter and coat the finished cake roll with toasted coconut flakes for a tropical twist.

4. Raspberry Lemon Roll

Spread a thin layer of raspberry jam over the sponge before adding the frosting for a tangy, sweet contrast.

5. Carrot Cake Roll

Turn this into a fun Easter carrot cake version by using spiced carrot cake and filling it with classic cream cheese frosting.

Final Thoughts: A Dessert That’s as Beautiful as It Is Delicious

The Easter Cake Roll is more than just a dessert—it’s a celebration of spring, full of color, flavor, and fun. Its light, airy sponge and creamy filling make it the perfect choice for Easter brunch, holiday gatherings, or any time you want to enjoy a delightful, show-stopping treat.

With its playful pastel swirls and irresistible flavor, this cake roll is sure to impress your guests and bring a touch of magic to your holiday table. Whether you’re a seasoned baker or a beginner, this recipe is a fun and rewarding way to celebrate Easter.

So, gather your ingredients, preheat the oven, and get ready to roll—because no Easter celebration is complete without a little sweetness!

Skirt Steak Rice Bowls with Chimichurri: A Bold and Flavorful Meal

If you’re looking for a meal that’s both hearty and refreshing, Skirt Steak Rice Bowls with Chimichurri are the perfect choice. This dish brings together juicy, pan-seared steak, fluffy rice, and a vibrant chimichurri sauce, creating a bold and satisfying meal that’s surprisingly simple to make.

With minimal prep time and a quick cooking process, this recipe is ideal for weeknight dinners, meal prep, or even special occasions. The fresh chimichurri sauce—made with herbs, garlic, vinegar, and a touch of spice—adds a bright, zesty contrast to the rich steak, making every bite full of flavor.

In this guide, we’ll explore what makes this dish so special, ways to customize it, pairing ideas, and answers to common questions to help you make the perfect steak rice bowl at home.

Why You’ll Love This Recipe

1. The Perfect Combination of Flavors

Skirt steak has a deep, beefy richness, and when paired with a tangy, herbaceous chimichurri sauce, the contrast is irresistible. The warm, fluffy rice serves as the perfect base, soaking up all the delicious juices.

2. Fast and Easy to Make

  • Cooks in under 30 minutes—perfect for busy weeknights.
  • Minimal prep required—simply season the steak, make the sauce, and cook.
  • One-pan cooking—all you need is a skillet to achieve that perfect steak sear.

3. Versatile and Customizable

You can adjust this bowl to suit your taste preferences. Whether you like extra spice, a different sauce, or a grain-free option, there are endless ways to make it your own.

4. Meal-Prep Friendly

Steak rice bowls store well in the fridge, making them an excellent choice for meal prepping. Simply reheat and enjoy a flavorful meal in minutes.

Ingredients:

For the Steak:
  • Skirt steak (or substitute with flank steak, ribeye, or NY strip)
  • Kosher salt
  • Black pepper
  • Neutral oil (grapeseed, avocado, or canola)
For the Chimichurri Sauce:
  • Red wine vinegar
  • Kosher salt
  • Garlic (minced)
  • Shallot (chopped)
  • Fresno chile (or jalapeño)
  • Fresh cilantro (chopped)
  • Fresh parsley (chopped)
  • Extra virgin olive oil
For the Rice Bowls:
  • White rice (or substitute with brown rice, quinoa, or mixed greens)
  • Pickled red onions
  • Lime wedges
  • Fresh cilantro
  • Optional toppings: sautéed zucchini, roasted corn, avocado, black beans

Directions:

1. Prepare the Chimichurri Sauce:

  • Mix vinegar, salt, garlic, shallot, and Fresno chile.
  • Stir in chopped cilantro, parsley, and olive oil. Set aside.

2. Season and Cook the Steak:

  • Pat steak dry and season generously with salt and pepper.
  • Let sit at room temperature for 15 minutes before cooking.
  • Heat oil in a cast-iron skillet over high heat.
  • Sear steak for 2-3 minutes per side until medium-rare (125°F-130°F).
  • Let the steak rest for 5-10 minutes, then slice against the grain.

3. Assemble the Rice Bowls:

  • Divide cooked rice into bowls.
  • Add sliced steak on top.
  • Drizzle with chimichurri sauce.
  • Garnish with pickled onions, fresh cilantro, and lime wedges.

Nutritional Information (Per Serving):

  • Calories: 345 kcal
  • Carbohydrates: 15g
  • Protein: 34g
  • Fat: 16g
  • Saturated Fat: 5g
  • Sodium: 683mg
  • Iron: 3mg

Ways to Customize Your Steak Rice Bowl

1. Choosing the Right Cut of Steak

Skirt steak is ideal for this dish because it’s thin, quick to cook, and incredibly flavorful. However, you can substitute with:

  • Flank steak – Slightly leaner but still tender when cooked properly.
  • Ribeye – More marbling for a rich, juicy texture.
  • Hanger steak – Known for its deep, beefy flavor.
  • NY strip steak – A classic, well-balanced option.

2. Alternative Bases

Rice is a classic base, but you can switch it up with:

  • Brown rice – For extra fiber and a nuttier taste.
  • Quinoa – A protein-packed alternative.
  • Cauliflower rice – For a low-carb version.
  • Grilled veggies or greens – If you’re going grain-free.

3. Sauce Variations

Chimichurri is the star of this dish, but you can try:

  • Cilantro lime crema – A creamy, tangy sauce for a different twist.
  • Spicy mayo – For a richer, slightly spicy kick.
  • Basil vinaigrette – A fresh, herbaceous option.
  • Ginger scallion sauce – If you prefer an Asian-inspired flavor.

4. Extra Toppings for More Texture and Flavor

  • Avocado slices – Adds creaminess to balance the bold flavors.
  • Pickled red onions – Provides a tangy, slightly sweet crunch.
  • Grilled corn – A smoky, sweet addition.
  • Black beans – For extra protein and fiber.
  • Cherry tomatoes – A fresh burst of acidity.
  • Toasted sesame seeds – For a slight crunch and nutty flavor.

Best Sides and Pairings

1. Fresh and Light Side Dishes

  • Cucumber and Tomato Salad – A refreshing contrast to the steak’s richness.
  • Grilled Vegetables – Adds depth and smoky flavor.
  • Roasted Sweet Potatoes – A naturally sweet side that complements the tangy chimichurri.

2. Drinks to Complement the Meal

  • Red Wine – A Malbec or Cabernet Sauvignon pairs beautifully with steak.
  • Classic Lemonade – A bright, citrusy drink that cuts through the richness.
  • Iced Green Tea – Light and refreshing with a subtle earthy flavor.

3. Dessert Pairings

  • Chocolate Mousse – A rich, creamy dessert to finish the meal.
  • Grilled Pineapple with Honey – A light, tropical touch.
  • Flan or Crème Brûlée – A silky, caramelized treat that pairs well with steak.

Frequently Asked Questions (FAQs)

1. What is Chimichurri, and What Does It Taste Like?

Chimichurri is a classic Argentinian sauce made with fresh herbs (cilantro and parsley), garlic, red wine vinegar, olive oil, and chili pepper. It has a tangy, garlicky, and slightly spicy flavor, which pairs beautifully with grilled meats.

2. How Do I Cook the Steak Perfectly?

For a juicy and flavorful steak:

  • Season generously with salt and pepper.
  • Use high heat and a cast-iron skillet for a great sear.
  • Cook for 2-3 minutes per side for medium-rare (125°F-130°F).
  • Let the steak rest for at least 5-10 minutes before slicing against the grain.

3. Can I Make This Dish Ahead of Time?

Yes! To prep in advance:

  • Make the chimichurri sauce a day ahead (it gets better with time!).
  • Cook and slice the steak and store separately in an airtight container.
  • Reheat the steak gently in a skillet or microwave before assembling the bowls.

4. What’s the Best Way to Store Leftovers?

  • Refrigerate: Store components separately in airtight containers for up to 3 days.
  • Freeze: The steak can be frozen for up to 3 months, but chimichurri is best made fresh.
  • Reheat: Warm the steak in a pan over low heat or in the microwave with a splash of water to prevent drying out.

5. Can I Use Store-Bought Chimichurri?

Yes! While homemade chimichurri is more flavorful and fresh, store-bought versions can work in a pinch. Just look for one with high-quality ingredients and no unnecessary additives.

6. Can I Grill the Steak Instead of Pan-Searing It?

Absolutely! Grilling the steak adds a nice smoky flavor. Just:

  • Preheat your grill to medium-high heat.
  • Cook for 3-4 minutes per side for medium-rare.
  • Let it rest before slicing.

Conclusion: A Steak Bowl Worth Making Again and Again

These Skirt Steak Rice Bowls with Chimichurri are a perfect blend of bold flavors, juicy steak, and fresh ingredients. Whether you’re making them for a casual weeknight dinner or meal prepping for the week, this recipe is simple, satisfying, and packed with flavor.

With endless ways to customize it, you can enjoy different variations every time, keeping the dish exciting and tailored to your taste. Plus, the quick cooking time makes it ideal for busy schedules, while the chimichurri sauce takes it to the next level with its fresh, zesty kick.

So next time you’re craving a protein-packed, restaurant-quality meal at home, give these Skirt Steak Rice Bowls a try—you won’t be disappointed!

Harissa Honey Chicken Bowls: A Sweet and Spicy Meal Prep Favorite

If you’re looking for a meal that is bold, flavorful, and easy to prepare, then Harissa Honey Chicken Bowls need to be on your menu. This dish combines the smoky heat of harissa, the sweetness of honey, and the freshness of crisp vegetables and creamy toppings, all served over fragrant turmeric-infused rice. Whether you’re making it for a quick weeknight dinner or prepping meals for the week, this recipe delivers a restaurant-quality experience in every bite.

With layers of texture and flavor, these bowls are inspired by Mediterranean and North African cuisine, offering a delicious balance of spicy, tangy, and creamy elements. The best part? They are highly customizable, allowing you to swap ingredients based on your dietary preferences and what you have in your kitchen.

This guide will walk you through why this dish is so irresistible, how to customize it, and answer common questions about preparation and storage.

What Makes This Recipe Stand Out?

1. A Perfect Balance of Sweet and Spicy

The combination of harissa paste and honey is what makes this dish truly special. Harissa, a North African chili paste, brings a deep, smoky heat, while honey adds a natural sweetness that balances the spice. When used as a marinade and dressing, this duo infuses the chicken with bold flavors, creating a juicy, caramelized finish.

2. Vibrant and Nutrient-Rich Ingredients

Each component of this bowl offers unique flavors and health benefits:

  • Harissa Chicken: Lean protein packed with bold spices.
  • Turmeric Rice: A fragrant, golden-hued base with anti-inflammatory properties.
  • Fresh Vegetables: Crisp cucumbers, roasted corn, and pickled red onions add texture and color.
  • Creamy Elements: Hummus, tzatziki, and avocado bring a rich, cooling contrast to the spicy chicken.
  • Feta Cheese: A tangy finish that ties everything together.

3. Perfect for Meal Prep

If you love preparing meals in advance, these bowls are an excellent option. Each component can be stored separately, allowing you to assemble fresh bowls throughout the week. Plus, they hold up well in the fridge, ensuring a delicious and satisfying meal every time.

4. Customizable to Fit Any Diet

This recipe is already gluten-free, but it can easily be adjusted to fit other dietary needs:

  • Dairy-Free: Omit the feta and tzatziki or use plant-based alternatives.
  • Low-Carb: Swap the rice for cauliflower rice or a bed of greens.
  • Vegetarian: Replace the chicken with roasted chickpeas or grilled tofu.

Ingredients:

For the Marinade and Dressing:
  • Harissa paste
  • Honey
  • Lime juice
  • Olive oil
  • Salt
  • Chicken tenders
For the Rice:
  • Basmati rice
  • Turmeric
  • Lemon juice
  • Salt
For the Bowls:
  • Corn on the cob
  • Persian cucumbers
  • Avocados
  • Pickled red onions
  • Crumbled feta
  • Mixed salad greens
  • Hummus
  • Tzatziki

Directions:

1. Marinate the Chicken:

  • Whisk together harissa paste, honey, lime juice, olive oil, and salt.
  • Reserve half for dressing and marinate the chicken tenders in the remaining mixture for at least 30 minutes.

2. Cook the Chicken and Corn:

  • Preheat the oven to 375°F (190°C).
  • Place the marinated chicken on a sheet pan.
  • Bake chicken and corn together for 25 minutes.
  • Broil the corn for extra char if desired.

3. Prepare the Rice:

  • Cook basmati rice with turmeric, lemon juice, and salt until fluffy.

4. Assemble the Bowls:

  • Start with a base of turmeric rice and mixed greens.
  • Add sliced cucumbers, shredded chicken, and roasted corn.
  • Top with pickled onions, avocado, hummus, tzatziki, and crumbled feta.
  • Drizzle with the reserved harissa honey dressing.

Nutritional Information (Per Serving):

  • Calories: 1195 kcal
  • Carbohydrates: 98g
  • Protein: 75g
  • Fat: 57g
  • Sodium: 1567mg
  • Fiber: 10g
  • Sugar: 18g

How to Customize Your Harissa Honey Chicken Bowl

One of the best things about this dish is how easily it can be adapted. Here are a few ways to make it your own:

1. Swap the Protein

While this recipe calls for chicken tenders, you can use:

  • Chicken thighs for a juicier texture.
  • Grilled shrimp for a lighter seafood variation.
  • Lamb or beef for a heartier option.
  • Crispy chickpeas or tofu for a plant-based alternative.

2. Try Different Grains or Greens

Turmeric basmati rice is fragrant and fluffy, but you can substitute:

  • Brown rice for extra fiber.
  • Quinoa for added protein.
  • Couscous or bulgur for a Mediterranean twist.
  • A bed of greens for a grain-free version.

3. Adjust the Heat Level

Harissa paste can vary in spice level, so if you prefer milder heat, use:

  • Less harissa and more honey to soften the spice.
  • Greek yogurt mixed into the dressing for a creamy balance.
  • Roasted red pepper paste instead of harissa for a milder kick.

If you love spice, try:

  • Adding a dash of cayenne or chili flakes to the marinade.
  • Serving with extra harissa on the side.
  • Mixing Sriracha into the hummus for an extra kick.

4. Experiment with Toppings

Toppings bring extra layers of texture and flavor. Consider:

  • Roasted almonds or pine nuts for crunch.
  • Chopped fresh herbs like parsley or mint for brightness.
  • A drizzle of tahini for nutty richness.

Best Side Dishes and Pairings

These bowls are hearty enough to stand alone, but they pair well with additional sides and beverages:

1. Fresh and Light Sides

  • Mediterranean Chickpea Salad: A zesty mix of chickpeas, tomatoes, cucumbers, and lemon dressing.
  • Tabbouleh: A refreshing parsley and bulgur salad with lemon and olive oil.
  • Grilled Pita Bread: Perfect for scooping up extra hummus and tzatziki.

2. Beverage Pairings

  • Mint Lemonade: A refreshing drink that balances the spice.
  • Iced Hibiscus Tea: Slightly tart with floral notes that complement the flavors.
  • Dry White Wine: A crisp Sauvignon Blanc or Pinot Grigio works well with the dish’s bold flavors.

3. Desserts for a Sweet Finish

  • Baklava: A flaky, honey-sweetened pastry with nuts.
  • Mango Yogurt Parfait: Light and creamy with a tropical twist.
  • Date and Almond Energy Bites: A nutritious way to end the meal.

Frequently Asked Questions (FAQs)

1. What is Harissa Made From?

Harissa is a North African chili paste made from a blend of roasted red peppers, chili peppers, garlic, olive oil, and spices like cumin and coriander. It has a deep, smoky heat with a slightly sweet undertone.

2. Is This Dish Spicy?

The spice level depends on the harissa paste used. Some brands are milder, while others pack a serious punch. You can adjust the spice by reducing the harissa and increasing the honey.

3. How Long Does This Meal Last in the Fridge?

The components of this bowl can be stored separately for up to 5 days. If meal prepping, store the dressing, greens, and avocado separately to keep everything fresh.

4. Can I Freeze the Chicken?

Yes! The marinated and cooked chicken can be stored in an airtight container in the freezer for up to 3 months. Simply reheat in a skillet or microwave before serving.

5. Can I Make This Dish Vegan?

Absolutely! Replace the chicken with crispy roasted chickpeas, tofu, or tempeh. Use dairy-free tzatziki and hummus, and you’ll have a delicious vegan-friendly meal.

6. What If I Can’t Find Harissa Paste?

If harissa isn’t available, try substituting with:

  • Red pepper flakes mixed with olive oil and garlic.
  • Sriracha with a touch of cumin.
  • A blend of paprika, cayenne, and roasted red peppers.

Conclusion: A Must-Try Bowl for Bold Flavors and Easy Meal Prep

The Harissa Honey Chicken Bowl is a perfect combination of spice, sweetness, and fresh ingredients, making it an ideal meal for lunch, dinner, or meal prep. It’s not just delicious—it’s nutrient-rich, protein-packed, and highly customizable.

Whether you love fiery flavors, crave Mediterranean cuisine, or simply want a satisfying meal that keeps well, this recipe is worth adding to your rotation. With simple swaps and endless topping possibilities, you can tailor it to your taste and dietary needs.

So the next time you’re in the mood for something bold, fresh, and full of flavor, give this Harissa Honey Chicken Bowl a try—you won’t be disappointed!

Thai Peanut Sweet Potato Buddha Bowl: A Flavor-Packed, Nutrient-Rich Delight

If you’re looking for a wholesome, vibrant, and flavor-packed meal, the Thai Peanut Sweet Potato Buddha Bowl is a must-try. Packed with colorful vegetables, hearty quinoa, creamy chickpeas, and a rich Thai peanut sauce, this dish is the perfect balance of sweet, savory, and spicy.

Buddha bowls have gained popularity as nutrient-dense, plant-based meals that provide a variety of textures and flavors in one bowl. This version takes it up a notch by incorporating roasted sweet potatoes, crunchy fresh veggies, and a creamy peanut sauce infused with Thai-inspired ingredients like lime, garlic, and ginger.

Whether you’re looking for a meatless Monday dinner, a healthy meal prep option, or a refreshing lunch, this dish delivers on taste, texture, and nutrition. In this guide, we’ll dive into what makes this bowl so special, how to customize it to fit your preferences, and answer some of the most common questions about this delicious meal.

Why You’ll Love This Buddha Bowl

1. A Perfect Balance of Flavors

One of the standout features of this dish is how beautifully the flavors come together. The natural sweetness of roasted sweet potatoes, the nutty richness of the peanut sauce, the freshness of the vegetables, and the tangy kick of lime juice create a harmonious combination that excites your taste buds.

2. Packed with Nutrients

This bowl isn’t just delicious—it’s a nutritional powerhouse. Each ingredient brings its own set of benefits:

  • Sweet potatoes provide fiber, vitamins A and C, and antioxidants.
  • Quinoa is a complete protein, offering all nine essential amino acids.
  • Chickpeas add plant-based protein and fiber, keeping you full longer.
  • Peanut sauce contributes healthy fats and protein, making this meal satisfying and well-rounded.

3. Versatile and Customizable

Buddha bowls are incredibly flexible, allowing you to swap ingredients based on what you have in your kitchen or your dietary preferences. Whether you want to add extra protein, different grains, or spice variations, this recipe can easily be adjusted to fit your lifestyle.

4. Meal Prep-Friendly

This dish is great for meal prep since the components can be made in advance and stored separately. Simply assemble your bowl when you’re ready to eat, and you’ll have a fresh, delicious meal in minutes.

Ingredients:

For the Bowl:
  • Sweet potatoes (cubed)
  • Quinoa (uncooked)
  • Chickpeas (drained and rinsed)
  • Mixed greens (spinach, kale, or your favorite blend)
  • Red bell pepper (sliced)
  • Shredded purple cabbage
  • Cucumber (sliced)
  • Chopped cilantro
  • Chopped peanuts
For the Thai Peanut Sauce:
  • Creamy peanut butter
  • Soy sauce (or tamari for gluten-free)
  • Lime juice
  • Maple syrup or honey
  • Garlic (minced)
  • Fresh ginger (grated)
  • Water (to thin as needed)
  • Red chili flakes (optional, for heat)
Optional Toppings:
  • Sliced avocado
  • Lime wedges
  • Sesame seeds
  • Sriracha sauce

Directions:

1. Roast the Sweet Potatoes:

  • Preheat oven to 400°F (200°C).
  • Toss sweet potatoes with olive oil, salt, and pepper.
  • Roast for 25-30 minutes, flipping halfway.

2. Cook the Quinoa:

  • Prepare quinoa according to package instructions (1 cup quinoa to 2 cups water).
  • Simmer for 15-20 minutes until fluffy.

3. Prepare the Thai Peanut Sauce:

  • Whisk together peanut butter, soy sauce, lime juice, maple syrup, garlic, and ginger.
  • Add water to adjust consistency.
  • Stir in red chili flakes for extra heat.

4. Warm the Chickpeas:

  • Heat chickpeas in a pan with salt and spices like cumin or smoked paprika.

5. Assemble the Bowl:

  • Start with a bed of mixed greens.
  • Arrange roasted sweet potatoes, quinoa, and chickpeas on top.
  • Add bell peppers, shredded cabbage, and cucumber slices.
  • Drizzle with Thai peanut sauce and garnish with cilantro and peanuts.

6. Customize & Serve:

  • Add optional toppings like avocado, lime wedges, sesame seeds, or Sriracha.
  • Serve immediately and enjoy!

Nutritional Information (Per Serving):

  • Calories: ~465 kcal
  • Carbohydrates: ~60g
  • Protein: ~15g
  • Fat: ~18g
  • Fiber: ~10g
  • Sodium: ~600mg

How to Customize Your Thai Peanut Sweet Potato Buddha Bowl

One of the best things about Buddha bowls is their versatility. Here are some ways you can make this dish your own:

1. Swap the Base Ingredients

While this recipe features quinoa and sweet potatoes, you can experiment with different grains or starches:

  • Brown Rice: Adds a nutty flavor and more fiber.
  • Cauliflower Rice: A low-carb option with a light texture.
  • Farro or Barley: Chewy and hearty, offering a different texture.
  • Roasted Butternut Squash: A great alternative to sweet potatoes with similar sweetness.

2. Add More Protein

If you want to boost the protein content, try adding:

  • Grilled tofu or tempeh for extra plant-based protein.
  • Grilled chicken or shrimp for a non-vegetarian option.
  • Hard-boiled eggs for a protein-rich addition.

3. Adjust the Spice Level

The peanut sauce already has ginger and chili flakes, but if you love extra spice, consider:

  • Adding Sriracha for a bolder heat.
  • Sprinkling in red pepper flakes or Thai chili paste.
  • Mixing in a bit of curry powder or turmeric for warmth.

4. Try Different Toppings

Toppings add extra crunch, freshness, and flavor. Some great additions include:

  • Sliced avocado for creaminess.
  • Roasted cashews or almonds for crunch.
  • Pickled red onions for a tangy bite.
  • Sesame seeds or crushed peanuts for texture.

Best Ways to Serve and Pair This Dish

This Buddha bowl is a complete meal on its own, but if you want to enhance your dining experience, here are some great pairings:

1. Refreshing Drinks

  • Thai Iced Tea: A slightly sweet, creamy beverage that complements the spicy peanut sauce.
  • Coconut Water: A refreshing option that balances the bold flavors.
  • Green Tea with Lemon: A light, cleansing drink to round out the meal.

2. Side Dishes

  • Fresh Spring Rolls: Light and fresh, these pair well with the peanut sauce.
  • Miso Soup: A warm, umami-rich soup that contrasts nicely with the cold elements of the bowl.
  • Steamed Edamame: A simple protein-packed side dish.

3. Light Desserts

  • Mango Sticky Rice: A classic Thai dessert that complements the meal’s flavors.
  • Coconut Chia Pudding: A creamy, lightly sweet treat.
  • Fresh Pineapple or Papaya: Refreshing and tropical.

Frequently Asked Questions (FAQs)

1. Can I Make This Bowl Ahead of Time?

Yes! This is a great meal-prep option. Store the roasted sweet potatoes, quinoa, chickpeas, and peanut sauce separately in the refrigerator. When ready to eat, assemble the bowl and drizzle with the sauce.

2. How Long Does the Peanut Sauce Last?

The peanut sauce can be stored in an airtight container in the refrigerator for up to a week. If it thickens too much, add a little water or lime juice to loosen it before serving.

3. Can I Make This Recipe Gluten-Free?

Yes! Just use tamari instead of soy sauce in the peanut sauce, and make sure any additional toppings are gluten-free.

4. What Can I Use Instead of Peanut Butter?

If you have a peanut allergy or want a different flavor, try:

  • Almond butter for a richer taste.
  • Cashew butter for a milder, creamier alternative.
  • Sunflower seed butter for a nut-free option.

5. How Can I Make It Low-Carb?

For a lower-carb version, swap out:

  • Quinoa for cauliflower rice.
  • Sweet potatoes for roasted zucchini or bell peppers.

6. Can I Serve This Warm or Cold?

This bowl is delicious both warm and cold. If you prefer a warm meal, heat up the quinoa, chickpeas, and sweet potatoes before assembling. If you like a refreshing meal, keep everything chilled.

Conclusion: A Nutrient-Rich Bowl Bursting with Flavor

The Thai Peanut Sweet Potato Buddha Bowl is a perfect blend of flavors, textures, and nutrition. With its creamy peanut sauce, hearty roasted sweet potatoes, fresh veggies, and protein-packed quinoa and chickpeas, it offers a balanced and satisfying meal that can be easily customized to fit your dietary needs.

Whether you’re making this for a quick weeknight dinner, a meal-prep lunch, or a nourishing post-workout meal, this Buddha bowl delivers big on taste and health benefits.

So grab your favorite bowl, pile in the vibrant ingredients, drizzle on that savory peanut sauce, and enjoy a meal that’s as beautiful as it is delicious.

High-Protein Air Fryer Bagels: A Simple, Healthy Breakfast Upgrade

Bagels are a breakfast staple, but traditional bagels can be carb-heavy and lacking in protein. If you’re looking for a nutrient-packed alternative that doesn’t sacrifice taste, these protein bagels made in the air fryer are the perfect solution. They are light, fluffy, and packed with over 10 grams of protein per serving, making them a great choice for anyone wanting a high-protein breakfast or snack.

Unlike traditional bagels that require yeast and a long proofing process, this quick and easy recipe uses just three main ingredients: cottage cheese, flour, and baking powder. The cottage cheese adds moisture and protein, while the baking powder helps them rise without needing yeast. The result? A soft, slightly chewy bagel with a crisp golden crust, ready in under 30 minutes.

If you’ve never made bagels before, don’t worry—this recipe is beginner-friendly. No kneading machines or long waiting times are required. Plus, the air fryer method makes them even easier and faster to prepare than baking in the oven.

Why You’ll Love These Protein Bagels

1. High in Protein, Low in Effort

Each bagel contains around 10 grams of protein, thanks to the cottage cheese. This makes them a great post-workout snack, breakfast option, or meal-prep staple for those looking to boost their protein intake.

2. No Yeast or Proofing Needed

Traditional bagels require yeast, kneading, and long proofing times. These protein bagels come together in minutes without any waiting time, making them perfect for busy mornings.

3. Air Fryer Convenience

Using an air fryer speeds up the cooking process, giving the bagels a crispy, golden exterior without the need for boiling or baking. If you don’t have an air fryer, they can also be baked in the oven with excellent results.

4. Gluten-Free and Dairy-Free Options

With a simple swap of gluten-free flour, these bagels can be made entirely gluten-free. Although this recipe relies on cottage cheese for protein, there are dairy-free alternatives available for those who need them.

5. Customizable with Endless Topping Options

Bagels are a blank canvas—you can keep them simple or load them up with your favorite flavors. Whether you love everything seasoning, sesame seeds, or shredded cheese, these bagels can be tailored to your taste.

Ingredients:

For the Bagel Dough:
  • All-purpose flour (or gluten-free alternative)
  • Baking powder
  • Salt (optional)
  • Cottage cheese (2% or 4%)
For Topping and Finishing:
  • Egg wash (whisked egg with a splash of water)
  • Toppings (everything seasoning, sesame seeds, poppy seeds, shredded asiago cheese)

Directions:

1. Prepare the Dough:

  • Mix the flour, baking powder, and salt in a bowl.
  • Add cottage cheese and stir until a rough dough forms.

2. Knead and Shape:

  • Transfer the dough to a floured surface and knead for 1-2 minutes until smooth.
  • Divide into four equal portions, roll into logs, and shape into bagels.

3. Add the Finishing Touches:

  • Brush each bagel with the egg wash to enhance color and help toppings stick.
  • Sprinkle with everything seasoning, sesame seeds, or cheese, if desired.

4. Cook to Perfection:

For the Air Fryer:

  • Preheat to 300°F and cook for 15-17 minutes until golden brown.

For the Oven:

  • Bake at 375°F for 20-25 minutes on a parchment-lined baking sheet.

5. Cool and Serve:

  • Let the bagels rest for at least 15 minutes before slicing and enjoying.

Nutritional Information (Per Bagel):

  • Calories: ~170 kcal
  • Protein: ~10g
  • Carbohydrates: ~28g
  • Fat: ~2g
  • Fiber: ~1g
  • Sodium: ~250mg

How to Customize Your Protein Bagels

One of the best things about these bagels is how easy they are to modify based on your preferences. Here are some customization ideas to make them even more delicious:

1. Change Up the Flour

  • Whole Wheat Flour: For extra fiber and a more hearty texture.
  • Gluten-Free Flour: Use Cup4Cup or another gluten-free blend for a wheat-free option.
  • Almond Flour: A low-carb alternative that works best when mixed with another flour for stability.

2. Boost the Protein Even More

  • Add an Egg White: This increases protein content while helping the dough bind better.
  • Mix in Protein Powder: A neutral or vanilla-flavored protein powder can give an extra boost.

3. Experiment with Toppings

  • Everything Bagel Seasoning: A classic blend of sesame seeds, garlic, onion, and poppy seeds.
  • Sesame or Poppy Seeds: Adds a subtle crunch and nutty flavor.
  • Cheese Topping: Sprinkle shredded asiago, parmesan, or cheddar before air frying.
  • Cinnamon Sugar: For a sweeter take, brush with egg wash and sprinkle with cinnamon and sugar.

4. Get Creative with Fillings

Want to take these bagels to the next level? Try stuffing them with cream cheese, shredded cheese, or even peanut butter before shaping them for an unexpected twist.

Best Ways to Enjoy Protein Bagels

These bagels are great on their own, but you can also use them as a base for creative meals and snacks. Here are a few ideas:

1. High-Protein Breakfast Sandwich

Slice a bagel in half, toast it, and add:

  • Scrambled eggs
  • Turkey bacon or smoked salmon
  • Avocado slices
  • A sprinkle of everything seasoning

2. Open-Faced Bagel Pizzas

Top a sliced bagel with:

  • Tomato sauce
  • Mozzarella cheese
  • Pepperoni or veggies
  • Air fry at 350°F until the cheese is bubbly.

3. Sweet Bagel Treat

Spread with:

  • Almond butter or peanut butter
  • Banana slices and a drizzle of honey
  • A sprinkle of chia seeds for added nutrition

4. Bagel Chips for Snacking

Slice the bagels into thin rounds, brush with olive oil, and air fry at 350°F until crispy. These make excellent homemade bagel chips for dipping into hummus or guacamole.

Frequently Asked Questions (FAQs)

1. Can I Make These Bagels Without an Air Fryer?

Yes! Simply bake them in the oven at 375°F for 20-25 minutes until golden brown. The air fryer just makes the process faster and gives a crispier crust.

2. How Do I Store Leftover Bagels?

  • Refrigerator: Store in an airtight container for up to 5 days.
  • Freezer: Freeze in a sealed bag for up to 3 months. To reheat, toast in the air fryer or oven until warm.

3. Are These Bagels Low-Carb?

Not as written, but you can make them lower in carbs by using a combination of almond flour and coconut flour instead of all-purpose flour.

4. Can I Use Greek Yogurt Instead of Cottage Cheese?

Yes! Greek yogurt works well, but cottage cheese provides more protein and a fluffier texture. If using Greek yogurt, make sure it’s thick and full-fat for the best results.

5. What’s the Best Way to Reheat Them?

  • Air Fryer: 330°F for 3-5 minutes.
  • Toaster: Toast until warm and crispy.
  • Microwave: 30 seconds, but this may make them softer.

6. How Can I Make These Bagels Even Crispier?

  • Brush with egg wash before cooking.
  • Use a little extra baking powder for more rise.
  • Cook a few extra minutes in the air fryer at a slightly higher temperature.

Conclusion: A Bagel That Works for You

These high-protein air fryer bagels prove that you don’t have to choose between health and flavor. Whether you’re looking for a quick breakfast, an easy snack, or a satisfying post-workout meal, this simple recipe delivers big on nutrition and taste.

With only a few ingredients, minimal prep, and a short cook time, they are perfect for meal prepping or making fresh in the morning. Plus, with customizable toppings and fillings, you can make them exactly how you like.

So, whether you’re aiming to increase your protein intake, find a healthier alternative to store-bought bagels, or just try something new, these air fryer protein bagels are a must-try addition to your kitchen routine.

Give them a try, and enjoy a delicious, protein-packed bagel that keeps you full and energized all day!

Grilled Steak Elote Tacos: A Flavorful Twist Awaits!

Grilled Steak Elote Tacos

Introduction to Grilled Steak Elote Tacos

When smoky grilled steak meets the irresistible charm of Mexican street corn, something magical happens. These Grilled Steak Elote Tacos are not your average taco night fare—they’re a bold celebration of flavor, texture, and vibrant ingredients. Juicy, perfectly seasoned steak pairs beautifully with sweet corn, creamy cheese, zesty lime, and a touch of chili, all wrapped in a warm tortilla. It’s the kind of dish that brings the fiesta to your table and makes every bite unforgettable. Ready to savor a new favorite? Let’s dive in!

Why You’ll Love This Grilled Steak Elote Tacos

These Grilled Steak Elote Tacos are a game-changer for busy nights! They come together in just 35 minutes, making them perfect for those evenings when time is tight. The combination of tender steak and vibrant corn brings a burst of flavor that will impress even the pickiest eaters. Plus, they’re customizable, so everyone can add their favorite toppings. You’ll love how easy it is to create a restaurant-quality meal at home!

Ingredients for Grilled Steak Elote Tacos

Gathering the right ingredients is key to making these Grilled Steak Elote Tacos a hit! Here’s what you’ll need:

  • Corn kernels: Fresh or frozen, they add sweetness and texture. If using frozen, make sure to thaw and drain them well.
  • Olive oil: This helps to coat the corn and enhances the grilling process, giving it a lovely char.
  • Chili powder: A must for that smoky, spicy kick that elevates the corn mixture.
  • Garlic powder: It adds depth and flavor, making every bite irresistible.
  • Lime juice: Freshly squeezed is best! It brightens the flavors and balances the richness of the steak.
  • Salt and pepper: Essential for seasoning, they bring out the natural flavors of the ingredients.
  • Flank steak: This cut is perfect for grilling, as it’s tender and flavorful. You can also use skirt steak if you prefer.
  • Taco seasoning: A blend of spices that adds a burst of flavor to the steak. You can make your own or use a store-bought mix.
  • Corn tortillas: These are the perfect vessel for your tacos. Warm them up for the best texture!
  • Queso fresco: This crumbly cheese adds a creamy, salty touch that complements the other flavors beautifully.
  • Fresh cilantro: A sprinkle of this herb adds freshness and a pop of color to your tacos.
  • Avocado: Sliced avocado brings creaminess and richness, making each bite even more satisfying.
  • Lime wedges: Serve these on the side for an extra squeeze of zesty goodness!

For those who like a little heat, consider adding diced jalapeños to the corn mixture. If you want to switch things up, grilled chicken or shrimp can be great alternatives to flank steak. You can find the exact quantities for each ingredient at the bottom of the article, ready for printing!

How to Make Grilled Steak Elote Tacos

Now that you have all your ingredients ready, let’s dive into the fun part—making these Grilled Steak Elote Tacos! Follow these simple steps, and you’ll have a delicious meal on the table in no time.

Step 1: Preheat the Grill

Preheating your grill is crucial for achieving that perfect sear on the steak. Set your grill to medium-high heat and let it warm up for about 10-15 minutes. This ensures that the meat cooks evenly and locks in those juicy flavors. If you hear a satisfying sizzle when the steak hits the grill, you know you’re on the right track!

Step 2: Prepare the Corn Mixture

While the grill is heating, it’s time to prepare the corn mixture. In a bowl, combine the corn kernels, olive oil, chili powder, garlic powder, lime juice, salt, and pepper. Toss everything together until the corn is well-coated. This mixture is where the magic happens! The spices will infuse the corn with flavor, creating a delightful contrast to the savory steak.

Step 3: Season and Grill the Steak

Next, it’s time to season the flank steak. Generously sprinkle taco seasoning on both sides of the meat. This adds a burst of flavor that complements the corn beautifully. Place the steak on the grill and cook for about 4-5 minutes per side for medium-rare. Use a meat thermometer if you have one; aim for an internal temperature of 130°F. Once done, let it rest for 5 minutes before slicing. This step is key to keeping the juices inside!

Step 4: Grill the Corn

While the steak is resting, it’s time to grill the corn mixture. Use a grill basket or a piece of aluminum foil to prevent the corn from falling through the grates. Grill for about 5-7 minutes, stirring occasionally. You want the corn to get slightly charred, which adds a smoky flavor that’s simply irresistible. The aroma will have your family gathering around the grill in no time!

Step 5: Warm the Tortillas

Don’t forget about the tortillas! Warm them on the grill for about 30 seconds on each side. This step enhances their flavor and makes them pliable for folding. You can also wrap them in foil and place them on the grill to keep them warm while you finish cooking. Trust me, warm tortillas make all the difference!

Step 6: Assemble the Tacos

Now comes the fun part—assembling your tacos! Start with a warm tortilla, then layer on a few slices of grilled steak. Top it off with the grilled corn mixture, crumbled queso fresco, and sliced avocado. Don’t forget a sprinkle of fresh cilantro for that burst of color and flavor. Each layer adds a unique taste, creating a taco experience that’s out of this world!

Step 7: Serve with Lime

Finally, serve your tacos with lime wedges on the side. A squeeze of fresh lime juice elevates the flavors and adds a zesty kick. It’s the finishing touch that brings everything together. Your Grilled Steak Elote Tacos are now ready to be devoured!

Tips for Success

  • Always let the steak rest after grilling to keep it juicy.
  • Use fresh corn when possible for the best flavor and texture.
  • Don’t skip the lime juice; it brightens the entire dish!
  • Experiment with toppings like pickled onions or hot sauce for extra flair.
  • Make extra corn mixture; it’s great as a side dish or salad topping!

Equipment Needed

  • Grill: A gas or charcoal grill works perfectly. If you don’t have one, a grill pan on the stovetop will do.
  • Grill basket: Ideal for grilling the corn mixture. If you don’t have one, use aluminum foil to create a pouch.
  • Meat thermometer: Helps ensure your steak is cooked to perfection. A simple knife can also check doneness.

Variations

  • Vegetarian Option: Swap the flank steak for grilled portobello mushrooms or marinated tofu for a hearty, meat-free alternative.
  • Spicy Kick: Add diced jalapeños or a splash of hot sauce to the corn mixture for an extra layer of heat.
  • Different Proteins: Try using grilled chicken, shrimp, or even fish for a delightful twist on the classic taco.
  • Flavorful Sauces: Drizzle with chipotle mayo or avocado crema for a creamy, zesty finish.
  • Gluten-Free Option: Ensure your corn tortillas are certified gluten-free, and enjoy a safe, delicious meal!

Serving Suggestions

  • Side Dishes: Pair your tacos with a refreshing Mexican street corn salad or a zesty cucumber salad for a light touch.
  • Drinks: Serve with a chilled margarita or a fruity agua fresca to complement the flavors.
  • Presentation: Arrange tacos on a colorful platter, garnished with lime wedges and fresh cilantro for a vibrant look.

FAQs about Grilled Steak Elote Tacos

Can I make Grilled Steak Elote Tacos ahead of time?

Absolutely! You can prepare the corn mixture and grill the steak in advance. Just store them separately in the fridge. When you’re ready to serve, warm everything up and assemble your tacos. It’s a great way to save time on busy nights!

What can I substitute for flank steak?

If flank steak isn’t your thing, don’t worry! You can easily swap it for grilled chicken, shrimp, or even fish. Each option brings its own unique flavor to the Grilled Steak Elote Tacos, so feel free to get creative!

How do I store leftovers?

Leftovers can be stored in an airtight container in the fridge for up to three days. Just keep the components separate to maintain freshness. Reheat the steak and corn mixture before assembling your tacos again!

Can I make these tacos spicy?

Definitely! If you love a little heat, add diced jalapeños to the corn mixture or drizzle some hot sauce over the assembled tacos. It’s an easy way to kick up the flavor and make your Grilled Steak Elote Tacos even more exciting!

Are Grilled Steak Elote Tacos gluten-free?

Yes, they can be gluten-free! Just ensure that your corn tortillas are certified gluten-free. This way, everyone can enjoy these delicious tacos without worry!

Final Thoughts

Making Grilled Steak Elote Tacos is more than just cooking; it’s about creating joyful moments around the table. The vibrant flavors and textures come together to form a dish that feels special, yet is easy enough for any busy weeknight. I love how this recipe brings my family together, sparking laughter and conversation with every bite. Whether you’re hosting friends or enjoying a cozy dinner at home, these tacos are sure to impress. So grab your ingredients, fire up the grill, and let the deliciousness unfold. Trust me, you’ll be savoring every moment!

“`

Print
clock clock iconcutlery cutlery iconflag flag iconfolder folder iconinstagram instagram iconpinterest pinterest iconfacebook facebook iconprint print iconsquares squares iconheart heart iconheart solid heart solid icon
Grilled Steak Elote Tacos

Grilled Steak Elote Tacos: A Flavorful Twist Awaits!


5 Stars 4 Stars 3 Stars 2 Stars 1 Star

No reviews

  • Author: Isabella
  • Total Time: 35 minutes
  • Yield: 4 servings 1x

Description

Grilled Steak Elote Tacos are a delicious fusion of grilled steak and Mexican street corn, served in warm corn tortillas.


Ingredients

Scale
  • 2 cups corn kernels (fresh or frozen)
  • 1 tablespoon olive oil
  • 1 teaspoon chili powder
  • 1 teaspoon garlic powder
  • 1 teaspoon lime juice
  • Salt and pepper to taste
  • 1 pound flank steak
  • 1 tablespoon taco seasoning
  • 8 small corn tortillas
  • 1 cup crumbled queso fresco
  • 1/4 cup chopped fresh cilantro
  • 1 avocado, sliced
  • Lime wedges for serving

Instructions

  1. Preheat your grill to medium-high heat. If using frozen corn, thaw it and drain any excess water.
  2. In a bowl, combine the corn kernels, olive oil, chili powder, garlic powder, lime juice, salt, and pepper. Toss to coat evenly.
  3. Season the flank steak with taco seasoning on both sides. Place the steak on the grill and cook for about 4-5 minutes per side for medium-rare, or until desired doneness. Remove from the grill and let it rest for 5 minutes before slicing.
  4. While the steak is resting, grill the corn mixture in a grill basket or on a piece of aluminum foil for about 5-7 minutes, stirring occasionally, until slightly charred.
  5. Warm the corn tortillas on the grill for about 30 seconds on each side.
  6. To assemble the tacos, place a few slices of grilled steak on each tortilla, top with the grilled corn mixture, crumbled queso fresco, avocado slices, and chopped cilantro.
  7. Serve with lime wedges on the side for squeezing over the tacos.

Notes

  • For a spicier kick, add diced jalapeños to the corn mixture.
  • Substitute the flank steak with grilled chicken or shrimp for a different protein option.
  • Prep Time: 15 minutes
  • Cook Time: 20 minutes
  • Category: Main Dish
  • Method: Grilling
  • Cuisine: Mexican

Nutrition

  • Serving Size: 1 taco
  • Calories: 450
  • Sugar: 3g
  • Sodium: 600mg
  • Fat: 25g
  • Saturated Fat: 8g
  • Unsaturated Fat: 15g
  • Trans Fat: 0g
  • Carbohydrates: 30g
  • Fiber: 5g
  • Protein: 30g
  • Cholesterol: 80mg

Spam Musubi Bake: A Delicious Twist on Tradition!

Spam Musubi Bake

Introduction to Spam Musubi Bake

Experience a fresh take on a beloved classic with this Spam Musubi Bake. Combining the iconic flavors of salty, savory Spam with the comforting ease of a casserole, this dish transforms a traditional Hawaiian favorite into a simple, crowd-pleasing meal. Perfect for busy weeknights or casual gatherings, it’s a flavorful fusion that brings warmth and nostalgia to every bite—no sushi rolling required!

Why You’ll Love This Spam Musubi Bake

This Spam Musubi Bake is a lifesaver for busy days! It’s quick to prepare, taking just 45 minutes from start to finish. The flavors are simply irresistible, with the savory Spam perfectly complementing the seasoned sushi rice. Plus, it’s a one-dish wonder, making cleanup a breeze. Whether you’re feeding a family or hosting friends, this dish is sure to bring smiles and satisfied appetites to the table!

Ingredients for Spam Musubi Bake

Gathering the right ingredients is key to making a delicious Spam Musubi Bake. Here’s what you’ll need:

  • Sushi Rice: This sticky rice is the foundation of the dish, providing that classic sushi texture.
  • Water: Essential for cooking the rice to fluffy perfection.
  • Rice Vinegar: Adds a tangy flavor that balances the richness of the Spam.
  • Sugar: Just a touch to enhance the rice’s flavor and give it a hint of sweetness.
  • Salt: A must for seasoning the rice and bringing all the flavors together.
  • Spam: The star of the show! Its savory, umami flavor is what makes this dish so special.
  • Soy Sauce: Adds depth and a savory kick to the Spam as it cooks.
  • Mirin (optional): This sweet rice wine can enhance the flavor of the Spam, but feel free to skip it if you prefer.
  • Vegetable Oil: Used for frying the Spam to achieve that crispy, golden-brown exterior.
  • Nori: Seaweed strips that add a touch of authenticity and flavor to the dish.
  • Green Onions: Fresh and vibrant, they add a pop of color and a mild onion flavor.
  • Sesame Seeds (optional): A lovely garnish that adds a nutty crunch, but not necessary if you’re short on time.

For exact measurements, check the bottom of the article where you can find everything listed for easy printing!

How to Make Spam Musubi Bake

Step 1: Prepare the Sushi Rice

Start by rinsing the sushi rice under cold water until the water runs clear. This step is crucial for removing excess starch, which helps achieve that perfect sticky texture. Next, combine the rinsed rice and water in a medium saucepan. Bring it to a boil, then reduce the heat to low, cover, and let it simmer for 18-20 minutes. Once the rice is tender and the water is absorbed, remove it from heat. Let it sit, covered, for about 10 minutes. This resting time allows the rice to finish cooking and become fluffy.

Step 2: Cook the Spam

While the rice is resting, it’s time to cook the Spam. Heat vegetable oil in a skillet over medium heat. Add the sliced Spam and cook until it’s golden brown and crispy, about 3-4 minutes per side. This step is where the magic happens! As the Spam cooks, drizzle soy sauce and mirin over it during the last minute. This adds a delicious caramelized flavor that elevates the dish. Once done, remove the Spam from the skillet and set it aside to cool slightly.

Step 3: Assemble the Dish

Now comes the fun part—assembling your Spam Musubi Bake! Grease a 9×13-inch baking dish to prevent sticking. Spread half of the seasoned sushi rice evenly across the bottom of the dish. Next, layer the crispy Spam on top, making sure to cover the rice completely. Finally, add the remaining sushi rice, pressing down gently to pack it in. This layering creates a beautiful, cohesive dish that will hold together when baked. Don’t worry if it looks a bit messy; it’ll all come together in the oven!

Step 4: Bake and Serve

Preheat your oven to 375°F (190°C) if you haven’t already. Place the assembled dish in the oven and bake for 20-25 minutes. This step allows all the flavors to meld together beautifully. Once it’s heated through, remove it from the oven and let it cool for about 5 minutes. This cooling time makes it easier to cut into squares or rectangles. Serve warm, garnished with chopped green onions and sesame seeds for that extra touch. Enjoy every bite of this delightful dish!

Tips for Success

  • Rinse the sushi rice thoroughly to achieve the perfect sticky texture.
  • Let the cooked rice rest for 10 minutes for fluffiness.
  • Don’t skip the soy sauce; it adds essential flavor to the Spam.
  • Feel free to customize with your favorite toppings or spices.
  • Use a sharp knife to cut the baked dish for clean edges.

Equipment Needed

  • Medium Saucepan: For cooking the sushi rice. A pot with a lid works too.
  • Skillet: To fry the Spam. A non-stick pan is ideal for easy cleanup.
  • Baking Dish: A 9×13-inch dish is perfect. Any similar-sized dish will do.
  • Sharp Knife: For cutting the baked dish into squares.

Variations

  • Teriyaki Chicken: Swap out the Spam for teriyaki chicken for a different flavor profile that’s equally delicious.
  • Tofu Option: For a vegetarian twist, use marinated tofu instead of Spam, giving it a savory kick.
  • Spicy Version: Add sriracha or crushed red pepper flakes to the Spam while cooking for a spicy kick.
  • Vegetable Medley: Incorporate sautéed vegetables like bell peppers and carrots for added nutrition and color.
  • Quinoa Base: For a healthier alternative, use quinoa instead of sushi rice for a protein-packed dish.

Serving Suggestions

  • Pair with a fresh cucumber salad for a refreshing crunch.
  • Serve alongside pickled ginger for a zesty contrast.
  • Complement with a light soy sauce or teriyaki glaze drizzle.
  • Enjoy with a chilled glass of iced green tea.
  • Garnish with extra green onions for a pop of color.

FAQs about Spam Musubi Bake

Can I make Spam Musubi Bake ahead of time?

Absolutely! You can prepare the dish a day in advance. Just assemble it, cover it tightly, and store it in the refrigerator. When you’re ready to serve, simply bake it as directed. This makes it a fantastic option for meal prep!

What can I substitute for Spam?

If Spam isn’t your thing, no worries! You can use teriyaki chicken or marinated tofu for a delicious alternative. Both options will still give you that savory flavor profile that makes this dish so enjoyable.

Is Spam Musubi Bake gluten-free?

Yes, this recipe is gluten-free! Just ensure that the soy sauce you use is labeled gluten-free. There are many great options available that maintain the same delicious flavor.

How do I store leftovers?

Store any leftovers in an airtight container in the refrigerator for up to three days. Reheat in the oven or microwave before serving. It’s just as tasty the next day!

Can I add vegetables to the Spam Musubi Bake?

Definitely! Adding sautéed vegetables like bell peppers, carrots, or even spinach can enhance the dish’s flavor and nutrition. Just layer them in with the Spam for a colorful twist!

Final Thoughts

Creating this Spam Musubi Bake has been a delightful journey for me, and I hope it brings you as much joy as it has brought to my family. The combination of flavors and textures is simply irresistible, making it a dish that sparks smiles and happy memories around the dinner table. Whether you’re sharing it with loved ones or enjoying it as a quick weeknight meal, this recipe is sure to become a cherished favorite. So roll up your sleeves, embrace the culinary adventure, and savor every delicious bite of this unique twist on a classic dish!

“`

Print
clock clock iconcutlery cutlery iconflag flag iconfolder folder iconinstagram instagram iconpinterest pinterest iconfacebook facebook iconprint print iconsquares squares iconheart heart iconheart solid heart solid icon
Spam Musubi Bake

Spam Musubi Bake: A Delicious Twist on Tradition!


5 Stars 4 Stars 3 Stars 2 Stars 1 Star

No reviews

  • Author: Isabella
  • Total Time: 45 minutes
  • Yield: 6 servings 1x
  • Diet: Gluten Free

Description

A delicious twist on the traditional Spam musubi, baked to perfection.


Ingredients

Scale
  • 2 cups sushi rice
  • 2 1/2 cups water
  • 1/4 cup rice vinegar
  • 2 tablespoons sugar
  • 1 teaspoon salt
  • 8 ounces Spam, sliced into 1/4-inch pieces
  • 1 tablespoon soy sauce
  • 1 tablespoon mirin (optional)
  • 1 tablespoon vegetable oil
  • 4 sheets nori, cut into strips
  • 1/4 cup green onions, chopped
  • Sesame seeds for garnish (optional)

Instructions

  1. Preheat your oven to 375°F (190°C). Rinse the sushi rice under cold water until the water runs clear. Combine the rinsed rice and water in a medium saucepan and bring to a boil. Once boiling, reduce the heat to low, cover, and simmer for 18-20 minutes until the rice is tender and the water is absorbed. Remove from heat and let it sit, covered, for 10 minutes.
  2. In a small bowl, mix together the rice vinegar, sugar, and salt until dissolved. Gently fold this mixture into the cooked rice, ensuring it’s evenly coated. Allow the rice to cool slightly.
  3. While the rice cools, heat the vegetable oil in a skillet over medium heat. Add the sliced Spam and cook until browned and crispy on both sides, about 3-4 minutes per side. Drizzle the soy sauce and mirin over the Spam during the last minute of cooking, allowing it to caramelize slightly.
  4. In a greased 9×13-inch baking dish, spread half of the sushi rice evenly across the bottom. Layer the cooked Spam on top, followed by the remaining sushi rice, pressing down gently to pack it.
  5. Bake in the preheated oven for 20-25 minutes until heated through. Remove from the oven and let it cool for about 5 minutes.
  6. Cut into squares or rectangles and serve warm, garnished with chopped green onions and sesame seeds if desired.

Notes

  • For a spicy kick, add a drizzle of sriracha or a sprinkle of crushed red pepper flakes to the Spam while cooking.
  • Substitute the Spam with teriyaki chicken or tofu for a different flavor profile.
  • Prep Time: 15 minutes
  • Cook Time: 30 minutes
  • Category: Main Dish
  • Method: Baking
  • Cuisine: Hawaiian

Nutrition

  • Serving Size: 1 square
  • Calories: 290
  • Sugar: 2g
  • Fat: 12g
  • Carbohydrates: 35g
  • Protein: 10g

Spicy Caribbean Mahi Mahi: A Flavorful Delight Await!

Spicy Caribbean Mahi Mahi

Introduction to Spicy Caribbean Mahi Mahi

Dive into the vibrant flavors of the Caribbean with this Spicy Mahi Mahi recipe that brings together bold spices and fresh ingredients for an unforgettable meal. Perfectly cooked and bursting with zesty heat, this dish transforms everyday fish into a tropical feast that excites the palate. Whether you’re looking to spice up your weeknight dinner or impress guests with something exotic, this recipe delivers a delicious punch of flavor with every bite. Get ready to savor the taste of island-inspired goodness right at your table!

Why You’ll Love This Spicy Caribbean Mahi Mahi

This Spicy Caribbean Mahi Mahi is not just a meal; it’s a celebration of flavor and ease. In just 20 minutes, you can serve up a dish that’s bursting with zesty spices and fresh ingredients. It’s perfect for busy evenings when you need something quick yet impressive. Plus, the health benefits of mahi mahi make it a guilt-free choice that your family will love. Who says weeknight dinners can’t be exciting?

Ingredients for Spicy Caribbean Mahi Mahi

Gathering the right ingredients is key to making this Spicy Caribbean Mahi Mahi shine. Here’s what you’ll need:

  • Mahi Mahi Fillets: The star of the dish! This firm, white fish has a mild flavor that pairs beautifully with spices.
  • Olive Oil: A healthy fat that helps the spices stick and adds richness to the fish.
  • Garlic Powder: For that aromatic kick, garlic powder enhances the overall flavor without the hassle of chopping fresh garlic.
  • Onion Powder: This adds a subtle sweetness and depth, complementing the garlic perfectly.
  • Smoked Paprika: It brings a smoky, slightly sweet flavor that transports you straight to the Caribbean.
  • Cayenne Pepper: Adjust this to your spice preference! It adds a delightful heat that makes the dish exciting.
  • Dried Thyme: A classic herb that adds an earthy note, enhancing the overall flavor profile.
  • Salt: Essential for bringing out the natural flavors of the fish and spices.
  • Black Pepper: A dash of this adds a bit of warmth and complexity to the dish.
  • Lime: Fresh lime juice brightens the flavors and adds a zesty finish that’s simply irresistible.
  • Fresh Cilantro: For garnish, this herb adds a pop of color and a fresh, vibrant taste.

For those looking to mix things up, consider adding a mango salsa on the side. Just combine diced mango, red onion, cilantro, and lime juice for a tropical twist! If you prefer baking, you can easily adapt this recipe by placing the seasoned fillets on a lined baking sheet and baking at 400°F for 15-20 minutes.

Exact measurements for each ingredient can be found at the bottom of the article, ready for you to print and take to the kitchen!

How to Make Spicy Caribbean Mahi Mahi

Now that you have all your ingredients ready, let’s dive into making this Spicy Caribbean Mahi Mahi. Follow these simple steps, and you’ll have a delicious meal in no time!

Step 1: Preheat the Grill

First things first, preheat your grill or grill pan over medium-high heat. This step is crucial for even cooking and helps develop those beautiful grill marks. A hot grill ensures that the fish sears nicely, locking in moisture and flavor. Trust me, you want that perfect char!

Step 2: Prepare the Spice Mixture

In a small bowl, mix together the garlic powder, onion powder, smoked paprika, cayenne pepper, dried thyme, salt, and black pepper. This spice blend is the heart of your Spicy Caribbean Mahi Mahi. Each spice plays a role in enhancing the flavor, creating a delightful balance of heat and aroma. Feel free to adjust the cayenne pepper based on your spice tolerance!

Step 3: Season the Mahi Mahi

Next, pat the mahi mahi fillets dry with paper towels. This step is essential for better seasoning adherence. Then, brush both sides of the fillets with olive oil. The oil not only helps the spices stick but also adds a rich flavor that complements the fish beautifully.

Step 4: Apply the Spice Mixture

Now it’s time to sprinkle the spice mixture evenly over both sides of the fillets. Press gently to help the spices adhere. Don’t be shy! You want a good coating to ensure every bite is packed with flavor. The vibrant colors of the spices will make your mahi mahi look as good as it tastes!

Step 5: Grill the Mahi Mahi

Place the seasoned mahi mahi on the grill and cook for about 4-5 minutes on each side. You’ll know it’s done when the fish flakes easily with a fork and is opaque in the center. Keep an eye on it; overcooking can lead to dryness. The goal is a perfectly grilled fillet that’s juicy and flavorful!

Step 6: Rest and Garnish

Once off the grill, let the mahi mahi rest for a couple of minutes. This resting period allows the juices to redistribute, ensuring a moist bite. Finally, garnish with fresh cilantro before serving. This adds a pop of color and a fresh taste that elevates the dish. Your Spicy Caribbean Mahi Mahi is now ready to impress!

Tips for Success

  • Always preheat your grill for even cooking and better flavor.
  • Pat the fish dry to help the spices stick better.
  • Adjust the cayenne pepper to suit your family’s spice tolerance.
  • Let the fish rest after grilling for juicier bites.
  • Experiment with different herbs for a unique twist on flavor.

Equipment Needed

  • Grill or Grill Pan: Essential for that smoky flavor. A stovetop grill pan works just as well!
  • Mixing Bowl: For combining your spices. Any bowl will do!
  • Brush: To apply olive oil. A silicone brush is great for even coverage.
  • Spatula: For flipping the fish without breaking it.
  • Meat Thermometer: Optional, but helpful for checking doneness.

Variations

  • Spicy Mango Salsa: Top your mahi mahi with a refreshing mango salsa made from diced mango, red onion, cilantro, and lime juice for a tropical twist.
  • Herb-Crusted Mahi Mahi: Swap out the spices for fresh herbs like parsley, dill, or basil for a lighter flavor profile.
  • Oven-Baked Version: If grilling isn’t an option, bake the seasoned fillets at 400°F for 15-20 minutes for a delicious alternative.
  • Gluten-Free Option: This recipe is naturally gluten-free, making it a great choice for those with dietary restrictions.
  • Vegetarian Alternative: Substitute mahi mahi with grilled eggplant or zucchini for a plant-based version that still packs a punch!

Serving Suggestions

  • Rice and Beans: Serve with coconut rice or black beans for a hearty side that complements the fish.
  • Grilled Vegetables: Pair with seasonal grilled veggies for a colorful and nutritious addition.
  • Refreshing Drinks: Enjoy with a chilled mojito or a tropical fruit smoothie.
  • Presentation: Serve on a vibrant platter, garnished with lime wedges and cilantro for a stunning display.

FAQs about Spicy Caribbean Mahi Mahi

Can I use frozen mahi mahi for this recipe?

Absolutely! Just make sure to thaw the mahi mahi completely before seasoning and grilling. Frozen fish can be just as delicious when cooked properly.

What can I serve with Spicy Caribbean Mahi Mahi?

This dish pairs wonderfully with coconut rice, grilled vegetables, or a fresh salad. You can also add a tropical mango salsa for an extra burst of flavor!

How do I know when the mahi mahi is done cooking?

The fish is ready when it flakes easily with a fork and is opaque in the center. If you have a meat thermometer, aim for an internal temperature of 145°F for perfectly cooked mahi mahi.

Can I make this recipe in the oven instead of grilling?

Yes! Simply place the seasoned fillets on a lined baking sheet and bake at 400°F for 15-20 minutes. It’s a great alternative if you don’t have access to a grill.

Is this recipe suitable for meal prep?

Definitely! You can grill a batch of mahi mahi and store it in the fridge for up to three days. Just reheat gently before serving to keep it moist and flavorful.

Final Thoughts

Cooking this Spicy Caribbean Mahi Mahi is more than just preparing a meal; it’s about creating a joyful experience for you and your family. The vibrant flavors and aromas will transport you to a sunny beach, even if you’re just in your kitchen. I love how this dish brings everyone together, sparking conversations and smiles around the table. Plus, it’s quick enough to fit into our busy lives, making it a go-to recipe for any occasion. So, grab your ingredients and let the magic of the Caribbean fill your home with warmth and flavor!

“`

Print
clock clock iconcutlery cutlery iconflag flag iconfolder folder iconinstagram instagram iconpinterest pinterest iconfacebook facebook iconprint print iconsquares squares iconheart heart iconheart solid heart solid icon
Spicy Caribbean Mahi Mahi

Spicy Caribbean Mahi Mahi: A Flavorful Delight Await!


5 Stars 4 Stars 3 Stars 2 Stars 1 Star

No reviews

  • Author: Isabella
  • Total Time: 20 minutes
  • Yield: 4 servings 1x
  • Diet: Low Calorie

Description

A flavorful and spicy grilled mahi mahi recipe that brings the taste of the Caribbean to your table.


Ingredients

Scale
  • 1 pound mahi mahi fillets
  • 2 tablespoons olive oil
  • 1 teaspoon garlic powder
  • 1 teaspoon onion powder
  • 1 teaspoon smoked paprika
  • 1 teaspoon cayenne pepper (adjust for spice preference)
  • 1 teaspoon dried thyme
  • 1 teaspoon salt
  • 1/2 teaspoon black pepper
  • 1 lime, juiced
  • Fresh cilantro, for garnish

Instructions

  1. Preheat your grill or a grill pan over medium-high heat.
  2. In a small bowl, mix together the garlic powder, onion powder, smoked paprika, cayenne pepper, thyme, salt, and black pepper.
  3. Pat the mahi mahi fillets dry with paper towels and brush both sides with olive oil.
  4. Sprinkle the spice mixture evenly over both sides of the fillets, pressing gently to adhere.
  5. Squeeze the lime juice over the seasoned fillets.
  6. Place the mahi mahi on the grill and cook for about 4-5 minutes on each side, or until the fish flakes easily with a fork and is opaque in the center.
  7. Remove from the grill and let rest for a couple of minutes.
  8. Garnish with fresh cilantro before serving.

Notes

  • For a tropical twist, serve the mahi mahi with a mango salsa made from diced mango, red onion, cilantro, and lime juice.
  • If you prefer baking, place the seasoned fillets on a lined baking sheet and bake at 400°F for 15-20 minutes, or until cooked through.
  • Prep Time: 10 minutes
  • Cook Time: 10 minutes
  • Category: Main Course
  • Method: Grilling
  • Cuisine: Caribbean

Nutrition

  • Serving Size: 1 fillet
  • Calories: 220
  • Sugar: 0g
  • Sodium: 500mg
  • Fat: 14g
  • Saturated Fat: 2g
  • Unsaturated Fat: 12g
  • Trans Fat: 0g
  • Carbohydrates: 0g
  • Fiber: 0g
  • Protein: 23g
  • Cholesterol: 70mg