Stuffed Chicken Breast Recipe: A Delicious Dinner Idea

Introduction to Stuffed Chicken Breast Recipe

Are you looking for a delicious and satisfying meal that’s easy to prepare? Look no further than the stuffed chicken breast recipe! This dish combines tender chicken with a creamy, flavorful filling that will impress your family and friends. Not only is it tasty, but it’s also packed with protein, making it a great choice for a healthy dinner.

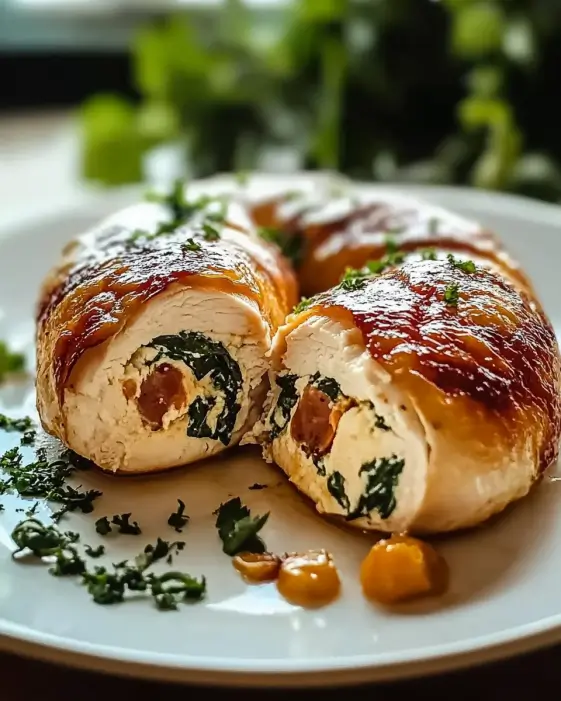
Stuffed chicken breasts are versatile and can be customized to suit your taste. Whether you prefer classic flavors or want to experiment with new ingredients, this recipe has you covered. The combination of cream cheese and spinach creates a rich and creamy filling that pairs perfectly with the juicy chicken. Plus, it’s a fantastic way to sneak in some greens!

In this article, we’ll guide you through the ingredients, preparation steps, and even some variations to try. You’ll learn how to make this delightful dish from start to finish. So, roll up your sleeves and get ready to create a meal that’s not only delicious but also visually appealing. Your stuffed chicken breast will be the star of the dinner table!

Ingredients for Stuffed Chicken Breast Recipe

To create a mouthwatering stuffed chicken breast, you’ll need a few simple ingredients. Each component plays a vital role in delivering flavor and texture. Here’s what you’ll need:

  • 2 large boneless, skinless chicken breasts (about 1 pound total) – Choose fresh chicken for the best taste.
  • 4 ounces cream cheese, softened – This adds a creamy texture to the filling.
  • 1 cup fresh spinach, chopped – Spinach brings a nutritious boost and vibrant color.
  • 1/2 cup shredded mozzarella cheese – Mozzarella adds a delightful stretch and flavor.
  • 1 teaspoon garlic powder – Garlic powder enhances the overall taste.
  • 1 teaspoon onion powder – This adds a subtle sweetness and depth.
  • 1/2 teaspoon salt – Salt is essential for bringing out the flavors.
  • 1/4 teaspoon black pepper – A pinch of pepper adds a mild kick.
  • 1 tablespoon olive oil – Olive oil helps in searing the chicken to perfection.
  • 1/2 teaspoon paprika (optional) – Paprika gives a pop of color and a hint of smokiness.

These ingredients come together to create a delicious stuffed chicken breast recipe that’s sure to please. Feel free to adjust the quantities based on your preferences or dietary needs. Now that you have everything ready, let’s move on to the preparation steps!

Step-by-Step Preparation of Stuffed Chicken Breast Recipe

Now that you have gathered all the ingredients, it’s time to dive into the preparation of your stuffed chicken breast recipe. This step-by-step guide will help you create a delicious meal that’s sure to impress. Let’s get started!

Step 1: Preparing the Chicken

First, you need to prepare the chicken breasts. Start by rinsing them under cold water. Pat them dry with paper towels. This step is important as it helps the chicken sear better. Next, carefully slice a pocket into each chicken breast. Make sure not to cut all the way through; you want to create a nice space for the stuffing. This pocket will hold all the delicious filling you’re about to make!

Step 2: Making the Stuffing

In a medium bowl, combine the softened cream cheese, chopped spinach, and shredded mozzarella cheese. Add the garlic powder, onion powder, salt, and black pepper. Mix everything together until it’s well combined. The mixture should be creamy and easy to spread. If you want to add a little extra flavor, consider mixing in some sun-dried tomatoes or artichoke hearts. This will give your stuffed chicken breast recipe a unique twist!

Step 3: Stuffing the Chicken Breasts

Now it’s time to stuff the chicken breasts! Take a spoonful of the cream cheese mixture and carefully fill each pocket. Don’t overstuff, as the filling needs room to expand while cooking. If necessary, use toothpicks to secure the opening of the chicken breasts. This will help keep the stuffing inside while they cook. Make sure to remove the toothpicks before serving!

Step 4: Cooking the Stuffed Chicken Breasts

Heat the olive oil in an oven-safe skillet over medium-high heat. Once the oil is hot, add the stuffed chicken breasts to the skillet. Sear them for about 3-4 minutes on each side until they are golden brown. This step adds a nice crust and enhances the flavor. If you’re using paprika, sprinkle it over the chicken at this point for added color and taste. After searing, transfer the skillet to your preheated oven. Bake for 20-25 minutes, or until the chicken is cooked through. The internal temperature should reach 165°F. Once done, let the chicken rest for 5 minutes before slicing. This allows the juices to redistribute, making your chicken even juicier!

Variation of Stuffed Chicken Breast Recipe

One of the best things about the stuffed chicken breast recipe is its versatility. You can easily switch up the stuffing ingredients or cooking methods to create a dish that suits your taste. Let’s explore some exciting variations that will keep your meals fresh and delicious!

Different Stuffing Options

While the classic spinach and cream cheese filling is delightful, there are many other stuffing options to consider. Here are a few ideas to inspire your culinary creativity:

  • Sun-Dried Tomatoes and Feta: Combine sun-dried tomatoes with crumbled feta cheese for a Mediterranean twist. This combination adds a tangy flavor that pairs beautifully with chicken.
  • Mushroom and Swiss Cheese: Sauté chopped mushrooms and mix them with Swiss cheese for a rich, earthy filling. This option is perfect for mushroom lovers!
  • Broccoli and Cheddar: Steam some broccoli and mix it with shredded cheddar cheese. This filling is not only tasty but also adds a pop of color to your dish.
  • Artichoke and Parmesan: Blend chopped artichokes with grated Parmesan cheese for a creamy and savory stuffing. This option is sure to impress your guests!
  • Spicy Jalapeño and Cream Cheese: For those who enjoy a kick, add diced jalapeños to the cream cheese mixture. This spicy filling will awaken your taste buds!

Feel free to mix and match these ingredients based on what you have on hand. The possibilities are endless, and you can create a unique stuffed chicken breast recipe every time!

Cooking Methods for Stuffed Chicken Breast Recipe

In addition to varying the stuffing, you can also experiment with different cooking methods. Here are a few techniques to consider:

  • Grilling: For a smoky flavor, try grilling the stuffed chicken breasts. Preheat your grill and cook the chicken over medium heat for about 6-8 minutes on each side. Make sure to check the internal temperature!
  • Slow Cooking: If you prefer a hands-off approach, use a slow cooker. Place the stuffed chicken breasts in the slow cooker with a bit of broth. Cook on low for 4-6 hours for tender, juicy chicken.
  • Air Frying: For a healthier option, use an air fryer. Preheat the air fryer to 375°F and cook the stuffed chicken for about 15-20 minutes, flipping halfway through. This method gives you a crispy exterior without excess oil.
  • Poaching: For a lighter dish, poach the stuffed chicken breasts in simmering broth. This method keeps the chicken moist and flavorful.

By trying out these different stuffing options and cooking methods, you can create a stuffed chicken breast recipe that’s uniquely yours. Enjoy the process of experimenting and discovering new flavors!

Cooking Note for Stuffed Chicken Breast Recipe

When preparing your stuffed chicken breast recipe, there are a few important cooking notes to keep in mind. These tips will help ensure that your dish turns out perfectly every time. Let’s dive into some key points to consider!

First, always use a meat thermometer to check the internal temperature of the chicken. This is crucial for food safety. The chicken should reach an internal temperature of 165°F (75°C) to be fully cooked. If you don’t have a meat thermometer, you can cut into the thickest part of the chicken. The juices should run clear, and the meat should no longer be pink.

Next, consider the thickness of your chicken breasts. If they are particularly thick, you may need to adjust the cooking time. Thicker breasts will require a longer baking time to ensure they cook through. Conversely, if your chicken breasts are thinner, reduce the cooking time to prevent them from drying out.

Additionally, letting the stuffed chicken rest after cooking is essential. Allowing it to rest for about 5 minutes before slicing helps the juices redistribute throughout the meat. This results in a juicier and more flavorful chicken breast.

Lastly, don’t be afraid to experiment with seasonings! While the recipe provides a solid base, feel free to add your favorite herbs and spices. Fresh herbs like basil or thyme can elevate the flavor profile of your stuffed chicken breast recipe.

By keeping these cooking notes in mind, you’ll be well on your way to creating a delicious and satisfying meal that everyone will love. Happy cooking!

Serving Suggestions for Stuffed Chicken Breast Recipe

Once your stuffed chicken breast recipe is ready, it’s time to think about how to serve it. Presentation can elevate your meal, making it even more enjoyable. Here are some delightful serving suggestions that will complement your dish perfectly!

  • With a Side Salad: A fresh garden salad is a great way to balance the richness of the stuffed chicken. Use mixed greens, cherry tomatoes, cucumbers, and a light vinaigrette for a refreshing contrast.
  • Over Rice or Quinoa: Serve the stuffed chicken on a bed of fluffy rice or quinoa. This adds a hearty element to your meal and helps soak up any delicious juices from the chicken.
  • With Roasted Vegetables: Pair your chicken with a medley of roasted vegetables. Carrots, bell peppers, and zucchini drizzled with olive oil and herbs make a colorful and nutritious side.
  • With Mashed Potatoes: Creamy mashed potatoes are a classic comfort food that pairs wonderfully with stuffed chicken. The smooth texture complements the chicken’s filling beautifully.
  • With a Creamy Sauce: Drizzle a light cream sauce or a homemade gravy over the chicken for added flavor. A garlic or herb-infused sauce can enhance the overall taste.

For a more festive presentation, consider garnishing your stuffed chicken breast with fresh herbs like parsley or basil. This not only adds a pop of color but also enhances the aroma of the dish.

Don’t forget about the beverages! A crisp white wine or a refreshing sparkling water can be the perfect accompaniment to your meal. With these serving suggestions, your stuffed chicken breast recipe will be a hit at any dinner table!

Tips for Perfect Stuffed Chicken Breast Recipe

Creating the perfect stuffed chicken breast recipe is all about attention to detail. With a few helpful tips, you can elevate your dish to restaurant-quality. Here are some essential tips to ensure your stuffed chicken turns out delicious every time!

  • Choose the Right Chicken: Opt for large, boneless, skinless chicken breasts. They provide enough space for stuffing and cook evenly. If possible, select organic or free-range chicken for better flavor.
  • Soften the Cream Cheese: Make sure your cream cheese is at room temperature before mixing. This makes it easier to blend with other ingredients, resulting in a smooth filling.
  • Season Generously: Don’t skimp on seasoning! The chicken itself needs flavor, so be sure to season both the stuffing and the outside of the chicken. A little extra salt and pepper can go a long way.
  • Use Fresh Ingredients: Whenever possible, use fresh spinach and herbs. Fresh ingredients enhance the flavor and nutritional value of your stuffed chicken breast recipe.
  • Don’t Overstuff: While it’s tempting to pack in as much filling as possible, overstuffing can lead to a mess. Leave some space for the filling to expand during cooking.
  • Let It Rest: After cooking, allow the chicken to rest for a few minutes. This helps the juices redistribute, making the chicken more tender and juicy.
  • Experiment with Flavors: Feel free to get creative! Try adding different herbs, spices, or even a splash of lemon juice to the stuffing for a zesty kick. The more you experiment, the more you’ll discover your favorite combinations.
  • Check for Doneness: Always use a meat thermometer to ensure your chicken is fully cooked. This guarantees safety and prevents overcooking, which can dry out the meat.

By following these tips, you’ll be well on your way to mastering the art of making a perfect stuffed chicken breast recipe. Enjoy the process and savor the delicious results!

Breakdown of Time for Stuffed Chicken Breast Recipe

Understanding the time required for each step of your stuffed chicken breast recipe is essential for planning your meal. Here’s a simple breakdown of the time you’ll need for preparation and cooking. This will help you manage your kitchen time effectively and ensure everything is ready when you want to serve.

Prep Time

The prep time for this stuffed chicken breast recipe is approximately 15-20 minutes. During this time, you will gather your ingredients, prepare the chicken breasts, and make the stuffing. It’s a good idea to have everything ready before you start cooking. This way, you can move smoothly from one step to the next without any interruptions.

Cooking Time

Once you’ve prepped your ingredients, the cooking time will take about 25-30 minutes. This includes searing the chicken in the skillet for about 6-8 minutes and then baking it in the oven for 20-25 minutes. The searing process adds flavor and helps lock in moisture, while baking ensures the chicken is cooked through and tender.

Total Time

In total, you can expect to spend around 40-50 minutes from start to finish. This includes both prep and cooking time. With this timeline, you can easily plan your meal and have everything ready to enjoy a delicious stuffed chicken breast recipe in no time!

Nutritional Information for Stuffed Chicken Breast Recipe

Understanding the nutritional content of your meals is essential for maintaining a balanced diet. The stuffed chicken breast recipe not only offers great taste but also provides valuable nutrients. Here’s a breakdown of the key nutritional information for this delicious dish.

Calories

400 calories. This makes it a satisfying option for dinner without being overly heavy. The combination of chicken, cream cheese, and spinach contributes to the overall calorie count while providing essential nutrients.

Protein

45 grams of protein. Protein is vital for muscle repair and growth, making this dish an excellent choice for those looking to increase their protein intake. The chicken breast is a lean source of protein, while the cream cheese and mozzarella add a creamy texture without excessive calories.

Sodium

600 milligrams per serving. While sodium is necessary for bodily functions, it’s important to monitor your intake. If you’re watching your sodium levels, consider using low-sodium versions of the seasonings or cheeses. This way, you can enjoy the flavors without compromising your dietary needs.

Overall, the stuffed chicken breast recipe is a nutritious option that balances calories, protein, and sodium. It’s a great way to enjoy a delicious meal while also fueling your body with essential nutrients. Whether you’re cooking for yourself or for family and friends, this dish is sure to be a hit!

FAQs about Stuffed Chicken Breast Recipe

Can I use frozen chicken breasts for this recipe?

Yes, you can use frozen chicken breasts for your stuffed chicken breast recipe! However, it’s important to thaw them completely before starting. You can do this by placing them in the refrigerator overnight or using the defrost setting on your microwave. Once thawed, follow the same preparation steps as you would with fresh chicken. Just remember that cooking times may vary slightly, so always check the internal temperature to ensure it reaches 165°F (75°C).

What are some popular stuffing ingredients for stuffed chicken breast?

There are countless stuffing ingredients you can use to create a delicious stuffed chicken breast recipe. Some popular options include:

  • Spinach and Cream Cheese: A classic combination that’s creamy and nutritious.
  • Sun-Dried Tomatoes and Feta: Adds a tangy Mediterranean flavor.
  • Mushrooms and Swiss Cheese: Earthy and rich, perfect for mushroom lovers.
  • Broccoli and Cheddar: A colorful and cheesy option.
  • Artichokes and Parmesan: Creamy and savory, great for special occasions.

Feel free to mix and match these ingredients based on your preferences. The key is to choose flavors that complement each other!

How do I know when the stuffed chicken breast is fully cooked?

To ensure your stuffed chicken breast is fully cooked, use a meat thermometer. Insert it into the thickest part of the chicken. The internal temperature should reach 165°F (75°C). If you don’t have a thermometer, you can cut into the chicken. The juices should run clear, and the meat should no longer be pink. Always prioritize food safety to enjoy your meal worry-free!

Can I make stuffed chicken breast ahead of time?

Absolutely! You can prepare stuffed chicken breasts ahead of time. After stuffing the chicken, cover it tightly and store it in the refrigerator for up to 24 hours before cooking. This allows the flavors to meld together beautifully. When you’re ready to cook, simply follow the cooking instructions. If you’re cooking from cold, you may need to add a few extra minutes to the baking time. Enjoy the convenience of meal prep while still serving a delicious dish!

Conclusion on Stuffed Chicken Breast Recipe

In conclusion, the stuffed chicken breast recipe is a fantastic way to enjoy a delicious and nutritious meal. With its creamy filling and tender chicken, this dish is sure to become a favorite in your household. Not only is it easy to prepare, but it also offers endless possibilities for customization. Whether you stick to the classic spinach and cream cheese filling or explore new flavors, you can create a dish that suits your taste perfectly.

As you’ve learned throughout this article, the key to a successful stuffed chicken breast lies in the preparation and cooking methods. By following the steps outlined, you can ensure that your chicken is juicy and flavorful. Remember to experiment with different stuffing options and cooking techniques to keep your meals exciting. The versatility of this recipe allows you to adapt it to any occasion, whether it’s a casual family dinner or a special gathering with friends.

Moreover, the nutritional benefits of this dish make it a smart choice for those looking to maintain a balanced diet. With high protein content and the option to include various vegetables, you can enjoy a satisfying meal that fuels your body. So, gather your ingredients, roll up your sleeves, and get ready to impress your loved ones with your culinary skills!

We hope this stuffed chicken breast recipe inspires you to get creative in the kitchen. Happy cooking, and enjoy every delicious bite!

Dan Dan Noodles are a delicious and easy recipe.

Introduction to Dan Dan Noodles Recipe

What are Dan Dan Noodles?

Dan Dan Noodles are a delightful dish that hails from China. They are known for their unique combination of flavors and textures. This dish features wheat noodles topped with a spicy, savory sauce made from ground meat, sesame paste, and various seasonings. The noodles are often garnished with fresh herbs and crushed peanuts, adding a crunchy element to each bite. The balance of heat, umami, and freshness makes Dan Dan Noodles a favorite among many food lovers.

The Origin of Dan Dan Noodles

Dan Dan Noodles have a rich history that dates back to the Sichuan province of China. Traditionally, street vendors would carry their ingredients in a pole, hence the name “Dan Dan,” which means “carrying pole” in Chinese. The dish was originally served as a quick meal for laborers, making it both convenient and delicious. Over time, it has evolved into a beloved dish enjoyed in homes and restaurants worldwide. Today, Dan Dan Noodles are celebrated for their bold flavors and comforting qualities, making them a staple in Chinese cuisine.

Ingredients for Dan Dan Noodles Recipe

To create a delicious plate of Dan Dan Noodles, you’ll need a variety of fresh and flavorful ingredients. Each component plays a vital role in achieving the perfect balance of taste and texture. Here’s what you’ll need:

  • 8 ounces of dried Chinese wheat noodles: These noodles are the base of the dish, providing a chewy texture.
  • 1 tablespoon vegetable oil: This oil is used for cooking the meat and adds a subtle flavor.
  • 1 pound ground pork (or ground chicken): The meat adds richness and protein to the dish. You can also use ground turkey for a leaner option.
  • 2 cloves garlic, minced: Garlic brings a wonderful aroma and depth of flavor.
  • 1 tablespoon fresh ginger, minced: Ginger adds a zesty kick and complements the other flavors.
  • 2 tablespoons soy sauce: This sauce provides saltiness and umami, enhancing the overall taste.
  • 2 tablespoons sesame paste (or tahini): This ingredient gives the dish its creamy texture and nutty flavor.
  • 1 tablespoon chili oil: Adjust this to your spice preference for a kick of heat.
  • 1 tablespoon rice vinegar: This adds a tangy note that balances the richness of the sauce.
  • 1 teaspoon sugar: A touch of sweetness helps to round out the flavors.
  • 1/4 cup chicken broth (or water): This helps to create a saucy consistency.
  • 1/4 cup chopped green onions: These add freshness and a pop of color.
  • 1/4 cup chopped cilantro: Cilantro brings a bright, herbal note to the dish.
  • 1 tablespoon crushed peanuts (optional, for garnish): These add a delightful crunch and nutty flavor.

Gathering these ingredients will set you on the right path to making a fantastic Dan Dan Noodles Recipe. Each element contributes to the dish’s overall appeal, making it a satisfying meal for any occasion.

Step-by-Step Preparation of Dan Dan Noodles Recipe

Step 1: Preparing the Noodles

To start your Dan Dan Noodles Recipe, you need to prepare the noodles. Begin by boiling a large pot of water. Once the water is bubbling, add the 8 ounces of dried Chinese wheat noodles. Cook them according to the package instructions until they are al dente. This usually takes about 4 to 6 minutes. After cooking, drain the noodles in a colander. To prevent them from sticking together, toss them with a tablespoon of vegetable oil. Set the noodles aside while you prepare the sauce and meat.

Step 2: Making the Sauce

Next, it’s time to create the flavorful sauce that will coat your noodles. In a medium bowl, combine the soy sauce, sesame paste, chili oil, rice vinegar, sugar, and chicken broth. Mix these ingredients well until they form a smooth sauce. This mixture will add a rich, savory flavor to your dish. Adjust the chili oil based on your spice preference. If you like it hot, feel free to add more!

Step 3: Cooking the Meat

Now, let’s move on to the meat. In a large skillet or wok, heat 1 tablespoon of vegetable oil over medium-high heat. Once the oil is hot, add 1 pound of ground pork (or ground chicken). Cook the meat for about 5 to 7 minutes, breaking it apart with a spatula. You want it to be browned and cooked through. After the meat is browned, add the minced garlic and ginger. Cook for an additional 1 to 2 minutes until they become fragrant. This step adds a wonderful aroma to your dish!

Step 4: Combining Ingredients

With the meat cooked and the sauce ready, it’s time to bring everything together. Pour the sauce mixture into the skillet with the cooked meat. Stir well to combine all the flavors. Allow the sauce to simmer for about 2 to 3 minutes. This will help it thicken slightly, making it perfect for coating the noodles. Once the sauce is ready, add the prepared noodles to the skillet. Toss everything together until the noodles are evenly coated with the sauce.

Step 5: Garnishing the Dish

Finally, it’s time to serve your delicious Dan Dan Noodles! Remove the skillet from heat and stir in the chopped green onions and cilantro. These fresh herbs will add a burst of flavor and color to your dish. To make it even more appealing, you can garnish with crushed peanuts if desired. Serve the noodles hot, and enjoy the delightful combination of flavors!

Variations of Dan Dan Noodles Recipe

Dan Dan Noodles are versatile and can be adapted to suit different tastes and dietary preferences. Here are a couple of popular variations that you can try:

Vegetarian Dan Dan Noodles Recipe

If you prefer a meat-free option, you can easily make Vegetarian Dan Dan Noodles. Simply replace the ground pork with crumbled tofu or tempeh. Both options provide a great source of protein and absorb the flavors of the sauce beautifully. You can also add extra vegetables like bell peppers, carrots, or mushrooms to enhance the dish’s nutrition and texture. Just sauté the vegetables along with the garlic and ginger for a delicious twist!

Spicy Dan Dan Noodles Recipe

For those who love a fiery kick, Spicy Dan Dan Noodles are the way to go! To amp up the heat, increase the amount of chili oil in the sauce. You can also add some crushed red pepper flakes or fresh sliced chili peppers for an extra punch. If you want to balance the spice, consider adding a dollop of creamy peanut butter to the sauce. This will create a rich, spicy, and nutty flavor that will leave your taste buds dancing!

These variations allow you to customize your Dan Dan Noodles to your liking. Whether you choose the vegetarian or spicy version, you’ll still enjoy the delightful flavors that make this dish so beloved.

Cooking Note for Dan Dan Noodles Recipe

When preparing Dan Dan Noodles, it’s essential to keep a few cooking notes in mind. First, always taste your sauce before adding it to the noodles. This way, you can adjust the flavors to your liking. If you find the sauce too salty, add a splash of water or chicken broth to balance it out. On the other hand, if you want more flavor, consider adding a bit more soy sauce or sesame paste.

Additionally, the type of noodles you use can affect the final dish. While Chinese wheat noodles are traditional, you can experiment with other types, such as rice noodles or even whole wheat noodles for a healthier option. Just remember to adjust the cooking time according to the type of noodle you choose.

Lastly, don’t hesitate to get creative with your toppings! Fresh herbs, crushed peanuts, or even a squeeze of lime can elevate your Dan Dan Noodles to the next level. Enjoy the cooking process and make it your own!

Serving Suggestions for Dan Dan Noodles Recipe

Serving Dan Dan Noodles can be as fun as making them! This dish is perfect for family dinners or casual gatherings with friends. Here are some serving suggestions to enhance your dining experience:

  • Serve with a side of pickled vegetables: The tangy crunch of pickled veggies complements the rich flavors of the noodles.
  • Pair with a light soup: A simple broth or miso soup can balance the meal and add warmth.
  • Offer extra toppings: Set out bowls of crushed peanuts, chili oil, and fresh herbs for guests to customize their bowls.
  • Enjoy with a refreshing drink: Iced tea or a light beer can be great choices to wash down the spicy noodles.

These serving suggestions will not only make your meal more enjoyable but also create a delightful dining atmosphere. Dan Dan Noodles are sure to impress your guests and leave them wanting more!

Tips for Perfecting Your Dan Dan Noodles Recipe

To ensure your Dan Dan Noodles turn out perfectly every time, consider these helpful tips:

  • Use fresh ingredients: Fresh garlic, ginger, and herbs will enhance the flavors significantly.
  • Don’t overcook the noodles: Aim for al dente to maintain a nice texture that holds up to the sauce.
  • Adjust the spice level: Start with a small amount of chili oil and gradually add more to suit your taste.
  • Mix well: Make sure to toss the noodles thoroughly with the sauce to ensure every bite is flavorful.
  • Experiment with textures: Adding crunchy toppings like crushed peanuts or fried shallots can add an exciting contrast to the dish.

By following these tips, you’ll be well on your way to mastering the art of making Dan Dan Noodles. Enjoy the process and the delicious results!

Cooking Note for Dan Dan Noodles Recipe

When preparing Dan Dan Noodles, it’s essential to keep a few cooking notes in mind. First, always taste your sauce before adding it to the noodles. This way, you can adjust the flavors to your liking. If you find the sauce too salty, add a splash of water or chicken broth to balance it out. On the other hand, if you want more flavor, consider adding a bit more soy sauce or sesame paste.

Additionally, the type of noodles you use can affect the final dish. While Chinese wheat noodles are traditional, you can experiment with other types, such as rice noodles or even whole wheat noodles for a healthier option. Just remember to adjust the cooking time according to the type of noodle you choose.

Lastly, don’t hesitate to get creative with your toppings! Fresh herbs, crushed peanuts, or even a squeeze of lime can elevate your Dan Dan Noodles to the next level. Enjoy the cooking process and make it your own!

Serving Suggestions for Dan Dan Noodles Recipe

Serving Dan Dan Noodles can be as fun as making them! This dish is perfect for family dinners or casual gatherings with friends. Here are some serving suggestions to enhance your dining experience:

  • Serve with a side of pickled vegetables: The tangy crunch of pickled veggies complements the rich flavors of the noodles. You can use pickled cucumbers or radishes for a refreshing contrast.
  • Pair with a light soup: A simple broth or miso soup can balance the meal and add warmth. This combination is especially comforting on chilly days.
  • Offer extra toppings: Set out bowls of crushed peanuts, chili oil, and fresh herbs for guests to customize their bowls. This interactive element makes the meal more enjoyable.
  • Enjoy with a refreshing drink: Iced tea or a light beer can be great choices to wash down the spicy noodles. A cold beverage can help cool off the heat from the chili oil.
  • Garnish with lime wedges: A squeeze of fresh lime juice can brighten the flavors and add a zesty kick to your dish.

These serving suggestions will not only make your meal more enjoyable but also create a delightful dining atmosphere. Dan Dan Noodles are sure to impress your guests and leave them wanting more!

Tips for Perfecting Your Dan Dan Noodles Recipe

To ensure your Dan Dan Noodles turn out perfectly every time, consider these helpful tips:

  • Use fresh ingredients: Fresh garlic, ginger, and herbs will enhance the flavors significantly. Freshness makes a big difference in taste.
  • Don’t overcook the noodles: Aim for al dente to maintain a nice texture that holds up to the sauce. Overcooked noodles can become mushy.
  • Adjust the spice level: Start with a small amount of chili oil and gradually add more to suit your taste. This way, you can control the heat.
  • Mix well: Make sure to toss the noodles thoroughly with the sauce to ensure every bite is flavorful. A good mix helps distribute the sauce evenly.
  • Experiment with textures: Adding crunchy toppings like crushed peanuts or fried shallots can add an exciting contrast to the dish. Textures can elevate the overall experience.
  • Let the sauce simmer: Allowing the sauce to simmer for a few extra minutes can deepen the flavors. This step is crucial for a rich taste.
  • Garnish generously: Don’t skimp on the green onions and cilantro. They add freshness and brightness to the dish.
  • Pair with sides: Consider serving your Dan Dan Noodles with a light salad or steamed vegetables. This can balance the meal and add nutrition.

By following these tips, you’ll be well on your way to mastering the art of making Dan Dan Noodles. Enjoy the process and the delicious results!

Breakdown of Time for Dan Dan Noodles Recipe

Prep Time

Preparing Dan Dan Noodles is quick and easy! You’ll need about 15 minutes for prep. This includes gathering your ingredients, chopping the garlic, ginger, green onions, and cilantro, and measuring out the sauces. Having everything ready will make the cooking process smoother and more enjoyable.

Cooking Time

The cooking time for Dan Dan Noodles is approximately 20 minutes. This includes boiling the noodles, cooking the meat, and simmering the sauce. The quick cooking time makes this dish perfect for busy weeknights when you want a delicious meal without spending hours in the kitchen.

Total Time

In total, you can expect to spend about 35 minutes from start to finish. This includes both prep and cooking time. With such a short time commitment, you can enjoy a flavorful and satisfying meal that’s sure to please everyone at the table!

Nutritional Information for Dan Dan Noodles Recipe

Calories

Each serving of Dan Dan Noodles contains approximately 450 calories. This makes it a hearty meal that can satisfy your hunger without being overly heavy. The balance of carbohydrates, protein, and fats in this dish contributes to its overall caloric content. If you’re watching your calorie intake, consider adjusting portion sizes or adding more vegetables to your plate.

Protein

Dan Dan Noodles are a great source of protein, providing about 25 grams per serving. The ground pork or chicken used in the recipe contributes significantly to this protein content. If you opt for the vegetarian version with tofu or tempeh, you’ll still enjoy a good amount of protein, making this dish a nutritious choice for any meal.

Sodium

The sodium content in Dan Dan Noodles is around 800 milligrams per serving. This is primarily due to the soy sauce and chicken broth used in the recipe. If you’re concerned about sodium intake, you can use low-sodium soy sauce and broth to help reduce the overall sodium level. Additionally, balancing the dish with fresh vegetables can enhance flavor without adding extra salt.

FAQs about Dan Dan Noodles Recipe

What is the best type of noodle for Dan Dan Noodles?

The best type of noodle for Dan Dan Noodles is dried Chinese wheat noodles. These noodles have a chewy texture that pairs perfectly with the rich sauce. However, if you can’t find them, you can also use other types of noodles like egg noodles or even rice noodles. Just be sure to adjust the cooking time according to the type of noodle you choose. The key is to select a noodle that can hold up to the sauce and provide a satisfying bite.

Can I make Dan Dan Noodles ahead of time?

Yes, you can make Dan Dan Noodles ahead of time! To do this, prepare the noodles and sauce separately. Store the cooked noodles in an airtight container in the refrigerator. The sauce can also be stored in a separate container. When you’re ready to eat, simply reheat the sauce in a skillet and toss it with the noodles. This makes it a great option for meal prep or quick weeknight dinners. Just keep in mind that the noodles may absorb some sauce, so you might want to add a splash of water or broth when reheating to keep them saucy.

How can I adjust the spiciness of Dan Dan Noodles?

Adjusting the spiciness of Dan Dan Noodles is easy! Start with a small amount of chili oil in the sauce, and taste it before adding more. If you prefer a milder dish, you can use less chili oil or even omit it altogether. On the other hand, if you love heat, feel free to add more chili oil, crushed red pepper flakes, or fresh chili peppers. Remember, you can always add more spice, but it’s hard to take it away once it’s in!

What are some common toppings for Dan Dan Noodles?

Common toppings for Dan Dan Noodles include chopped green onions, fresh cilantro, and crushed peanuts. These toppings add freshness, crunch, and flavor to the dish. You can also consider adding sesame seeds, sliced cucumbers, or even a drizzle of extra chili oil for those who enjoy more heat. Feel free to get creative with your toppings to make your Dan Dan Noodles even more delicious!

Conclusion on Dan Dan Noodles Recipe

In conclusion, Dan Dan Noodles are a delightful and versatile dish that brings the vibrant flavors of Chinese cuisine right to your table. With their rich, savory sauce and chewy noodles, they offer a satisfying meal that can be enjoyed by everyone. Whether you choose the traditional meat version or opt for a vegetarian twist, the possibilities are endless.

Making Dan Dan Noodles at home is not only easy but also allows you to customize the dish to your taste. You can adjust the spice level, add extra vegetables, or experiment with different toppings to create a unique experience every time. Plus, with a total preparation and cooking time of just 35 minutes, you can whip up this delicious meal even on busy weeknights.

As you gather your ingredients and follow the steps outlined in this recipe, remember to enjoy the process. Cooking is an art, and Dan Dan Noodles provide a wonderful canvas for your culinary creativity. So, gather your loved ones, serve up a steaming bowl of these flavorful noodles, and savor the delightful combination of tastes and textures. Happy cooking!

Creamy Tuscan Ravioli Recipe is a must-try dish!

Introduction to Creamy Tuscan Ravioli Recipe

Creamy Tuscan Ravioli Recipe! This dish is not just a meal; it’s an experience that brings the flavors of Italy right to your kitchen. Imagine tender cheese ravioli enveloped in a rich, creamy sauce, bursting with fresh ingredients. It’s a perfect blend of comfort and elegance, making it ideal for both weeknight dinners and special occasions.

What Makes Creamy Tuscan Ravioli Special?

So, what sets this dish apart? First, the combination of flavors is simply irresistible. The creamy sauce, made with heavy cream and Parmesan cheese, creates a luscious coating for the ravioli. Then, the addition of garlic, cherry tomatoes, and baby spinach adds a burst of freshness and color. Each bite is a delightful mix of creamy, savory, and slightly tangy notes.

Moreover, this recipe is incredibly versatile. You can easily customize it to suit your taste. Whether you prefer it vegetarian or want to add protein like chicken or shrimp, the options are endless. Plus, it’s quick to prepare, making it a go-to choice for busy weeknights.

In the following sections, we will guide you through the ingredients, preparation steps, and tips to make your Creamy Tuscan Ravioli shine. Get ready to impress your family and friends with this delicious dish!

Ingredients for Creamy Tuscan Ravioli Recipe

Creamy Tuscan Ravioli Recipe, you’ll need a selection of fresh and flavorful ingredients. Each component plays a vital role in bringing this dish to life. Here’s what you’ll need:

  • 12 ounces refrigerated cheese ravioli: This is the star of the dish. Choose your favorite cheese-filled ravioli for the best flavor.
  • 2 tablespoons olive oil: Olive oil adds richness and helps sauté the garlic to perfection.
  • 3 cloves garlic, minced: Garlic brings a wonderful aroma and depth of flavor to the sauce.
  • 1 cup cherry tomatoes, halved: These sweet tomatoes add a burst of freshness and color.
  • 1 cup baby spinach: Spinach not only enhances the dish’s nutrition but also adds a lovely green hue.
  • 1 cup heavy cream: This is the key ingredient for a rich and creamy sauce.
  • 1/2 cup grated Parmesan cheese: Parmesan adds a salty, nutty flavor that complements the cream.
  • 1 teaspoon Italian seasoning: A blend of herbs that enhances the overall taste of the dish.
  • Salt and pepper to taste: Essential for seasoning and balancing flavors.
  • Fresh basil leaves for garnish (optional): A touch of basil adds a fragrant finish to your dish.

Gathering these ingredients will set you on the right path to creating a delicious meal. Each item contributes to the overall flavor and texture, making your Creamy Tuscan Ravioli a dish to remember. Now that you have everything ready, let’s move on to the preparation steps!

Step-by-Step Preparation of Creamy Tuscan Ravioli Recipe

Creamy Tuscan Ravioli Recipe. This process is straightforward and enjoyable, allowing you to create a delicious meal in no time. Let’s get started!

Step 1: Preparing the Ravioli Dough

If you’re using store-bought ravioli, you can skip this step. However, if you want to make your own, here’s a simple way to prepare the dough:

  • Ingredients for Dough: 2 cups all-purpose flour, 3 large eggs, and a pinch of salt.
  • On a clean surface, make a mound with the flour. Create a well in the center and add the eggs and salt.
  • Using a fork, beat the eggs gently, then gradually incorporate the flour from the edges.
  • Knead the dough for about 5-10 minutes until smooth. Wrap it in plastic wrap and let it rest for 30 minutes.
  • Roll out the dough thinly and cut it into squares. Fill each square with your favorite cheese filling, then fold and seal the edges.

Once your ravioli is ready, you can move on to the next step!

Step 2: Making the Creamy Tuscan Sauce

Creating the sauce is where the magic happens. Follow these simple steps:

  • In a large skillet, heat 2 tablespoons of olive oil over medium heat.
  • Add 3 cloves of minced garlic and sauté for about 1 minute until fragrant.
  • Next, toss in 1 cup of halved cherry tomatoes. Cook for 3-4 minutes until they soften and release their juices.
  • Stir in 1 cup of baby spinach and cook until it wilts, which should take about 2 minutes.
  • Pour in 1 cup of heavy cream and bring it to a gentle simmer. Stir in 1/2 cup of grated Parmesan cheese and 1 teaspoon of Italian seasoning. Mix until the cheese melts and the sauce becomes creamy.

Step 3: Cooking the Ravioli

Now it’s time to cook the ravioli. Here’s how:

  • Bring a large pot of salted water to a boil.
  • Add the ravioli and cook according to the package instructions or until they float to the surface, which usually takes about 3-5 minutes.
  • Once cooked, drain the ravioli gently and set them aside. Be careful not to break them!

Step 4: Combining Ravioli with Sauce

Finally, it’s time to bring everything together:

  • In the skillet with the creamy sauce, add the cooked ravioli.
  • Gently toss the ravioli in the sauce, ensuring they are well coated.
  • Season with salt and pepper to taste, adjusting as needed.

Creamy Tuscan Ravioli is now ready to be served! Enjoy the delightful flavors and creamy texture that make this dish a favorite.

Variation of Creamy Tuscan Ravioli Recipe

Creamy Tuscan Ravioli Recipe is its versatility. You can easily adapt it to suit different dietary preferences and tastes. Whether you’re looking for vegetarian options or want to add some protein, there are plenty of ways to make this dish your own. Let’s explore some delicious variations!

Vegetarian Options for Creamy Tuscan Ravioli

Creamy Tuscan Ravioli without sacrificing flavor. Here are some ideas:

  • Use a variety of vegetables: Consider adding mushrooms, zucchini, or bell peppers to the sauce. These veggies will add texture and flavor.
  • Incorporate herbs: Fresh herbs like thyme, oregano, or parsley can elevate the dish. They add a burst of freshness that complements the creamy sauce.
  • Try different cheeses: Experiment with ricotta or goat cheese in your ravioli filling. These cheeses can provide a unique taste and creaminess.
  • Make it a hearty dish: Add cooked lentils or chickpeas to the sauce for extra protein and fiber. This will make your meal more filling and nutritious.

Creamy Tuscan Ravioli remains satisfying and delicious, even without meat!

Protein Additions to Creamy Tuscan Ravioli

If you’re looking to boost the protein content of your dish, there are several tasty additions you can make. Here are some popular choices:

  • Grilled chicken: Sliced grilled chicken breast can be added to the sauce for a hearty and satisfying meal. It pairs wonderfully with the creamy sauce.
  • Shrimp: Sautéed shrimp can add a touch of elegance to your ravioli. Simply cook them in the skillet before adding the sauce.
  • Italian sausage: Crumbled and cooked Italian sausage can bring a savory flavor to the dish. It’s a great way to add a bit of spice!
  • Tofu: For a vegetarian protein option, consider adding cubed, sautéed tofu. It absorbs the flavors of the sauce beautifully.

Creamy Tuscan Ravioli more filling and nutritious. Feel free to mix and match based on your preferences!

Cooking Note for Creamy Tuscan Ravioli Recipe

Creamy Tuscan Ravioli Recipe, there are a few important cooking notes to keep in mind. These tips will help ensure that your dish turns out perfectly every time, enhancing both flavor and presentation.

First, always use fresh ingredients. Fresh garlic, ripe cherry tomatoes, and vibrant spinach will elevate the taste of your sauce. Fresh ingredients not only add flavor but also provide a beautiful color contrast in your dish.

Next, be mindful of the cooking time for the ravioli. Overcooking can lead to mushy pasta, which is not ideal. Keep an eye on them as they cook. Once they float to the surface, they are usually done. A quick taste test can also help you determine if they are cooked to your liking.

When making the creamy sauce, remember to stir continuously after adding the heavy cream. This will prevent the cream from scorching on the bottom of the skillet. A gentle simmer is key to achieving that rich, creamy texture without burning.

Additionally, if you find the sauce too thick, you can thin it out with a splash of pasta water. This starchy water not only adjusts the consistency but also helps the sauce cling better to the ravioli.

Lastly, don’t forget to taste and adjust the seasoning. A pinch of salt or a dash of pepper can make a world of difference. Always season to your preference, ensuring that every bite is bursting with flavor.

Creamy Tuscan Ravioli that is not only delicious but also visually appealing. Enjoy the process and savor the delightful results!

Serving Suggestions for Creamy Tuscan Ravioli Recipe

Creamy Tuscan Ravioli is ready, it’s time to think about how to serve it. The right accompaniments can elevate your meal, making it even more enjoyable. Here are some delightful serving suggestions to enhance your dining experience.

Pairing Wines with Creamy Tuscan Ravioli

Creamy Tuscan Ravioli beautifully. Here are some excellent wine pairings:

  • Chardonnay: A creamy Chardonnay works well with the rich sauce. Its buttery notes enhance the dish’s flavors.
  • Sauvignon Blanc: This wine’s crisp acidity balances the creaminess of the sauce, providing a refreshing contrast.
  • Pinot Grigio: A light and fruity Pinot Grigio can add a nice touch without overpowering the dish.
  • Chianti: If you prefer red wine, a Chianti offers a fruity and earthy flavor that pairs nicely with the ravioli.

When serving wine, remember to chill white wines and serve red wines at room temperature. This will enhance the overall dining experience.

Side Dishes to Complement Creamy Tuscan Ravioli

Creamy Tuscan Ravioli:

  • Garlic Bread: A classic choice! Warm, buttery garlic bread is perfect for soaking up any leftover sauce.
  • Caesar Salad: A fresh Caesar salad adds a crunchy texture and a tangy flavor that complements the creamy ravioli.
  • Roasted Vegetables: Seasonal roasted vegetables, like zucchini and bell peppers, provide a colorful and nutritious side.
  • Caprese Salad: Fresh mozzarella, tomatoes, and basil drizzled with balsamic glaze create a refreshing contrast to the rich ravioli.

Creamy Tuscan Ravioli with these delightful pairings for a truly memorable meal!

Tips for Perfecting Your Creamy Tuscan Ravioli Recipe

Creamy Tuscan Ravioli Recipe truly shine, consider these helpful tips. They will guide you in achieving the best flavor and texture, ensuring that every bite is a delight.

First, always taste as you go. This is crucial for adjusting flavors. A pinch of salt or a dash of pepper can elevate your dish significantly. Don’t hesitate to tweak the seasoning until it’s just right for your palate.

Next, pay attention to the cooking time for the ravioli. Overcooking can lead to a mushy texture. As soon as they float to the surface, they are usually done. A quick taste test will help you determine if they are cooked to your liking.

When making the creamy sauce, use low heat to prevent the cream from scorching. Stir continuously after adding the cream to ensure a smooth, velvety texture. If the sauce thickens too much, add a splash of pasta water to loosen it up.

For added depth of flavor, consider sautéing the garlic until it’s golden brown. This will enhance its sweetness and aroma, making your sauce even more delicious. Additionally, using freshly grated Parmesan cheese instead of pre-packaged can make a noticeable difference in taste.

Don’t forget about presentation! A sprinkle of fresh basil or a drizzle of olive oil can make your dish visually appealing. A well-presented plate not only looks inviting but also enhances the dining experience.

Lastly, experiment with different herbs and spices. While Italian seasoning is a great base, adding fresh herbs like basil or parsley can brighten the dish. A pinch of red pepper flakes can also add a nice kick if you enjoy a bit of heat.

Creamy Tuscan Ravioli that is not only delicious but also a feast for the eyes. Enjoy the process and the wonderful flavors that come together in this delightful dish!

Breakdown of Time for Creamy Tuscan Ravioli Recipe

Creamy Tuscan Ravioli Recipe can help you plan your meal better. Here’s a simple breakdown of the time required for each step, ensuring you can enjoy this delicious dish without any rush.

Prep Time

The prep time for this recipe is quite manageable. You’ll need about 15-20 minutes to gather and prepare your ingredients. This includes:

  • Chopping garlic and halving cherry tomatoes.
  • Measuring out the heavy cream and Parmesan cheese.
  • Washing and drying the baby spinach.

Having everything ready will make the cooking process smoother and more enjoyable!

Cooking Time

Once you start cooking, the total cooking time is approximately 15-20 minutes. Here’s how it breaks down:

  • Cooking the ravioli: 3-5 minutes, depending on the package instructions.
  • Making the sauce: 10-15 minutes, which includes sautéing garlic, tomatoes, and spinach, followed by simmering the cream and cheese.

This quick cooking time makes it easy to whip up a delicious meal even on busy nights!

Total Time

In total, you can expect to spend about 30-40 minutes from start to finish. This includes both prep and cooking time. It’s a perfect option for a weeknight dinner or a last-minute gathering with friends.

Creamy Tuscan Ravioli and impress your family or guests with a delightful meal that’s ready in no time!

Nutritional Information for Creamy Tuscan Ravioli Recipe

Creamy Tuscan Ravioli Recipe is essential for making informed choices about your meals. This dish is not only delicious but also provides a good balance of nutrients. Here’s a breakdown of the key nutritional information per serving:

Calories

Creamy Tuscan Ravioli contains approximately 450 calories. This calorie count includes the ravioli, creamy sauce, and added vegetables. It’s a satisfying meal that can fit well into a balanced diet, especially when paired with lighter side dishes.

Protein Content

In terms of protein, this dish offers about 15 grams per serving. The protein primarily comes from the cheese ravioli and the Parmesan cheese in the sauce. If you choose to add protein options like chicken, shrimp, or tofu, the protein content will increase, making it even more filling and nutritious.

Sodium Levels

The sodium content in each serving is around 600 milligrams. This amount can vary based on the specific ingredients you use, especially if you opt for pre-packaged ravioli or add extra seasoning. To manage sodium levels, consider using low-sodium broth or cheese alternatives, and always taste before adding more salt.

Creamy Tuscan Ravioli while being aware of its health benefits. It’s a delightful dish that can be part of a balanced diet when enjoyed in moderation!

FAQs about Creamy Tuscan Ravioli Recipe

Can I use store-bought ravioli for this recipe?

Creamy Tuscan Ravioli Recipe without the hassle of making the dough from scratch. Just choose your favorite cheese-filled ravioli, and follow the cooking instructions on the package. This way, you can focus on preparing the delicious creamy sauce and enjoy a delightful meal in no time!

How can I make the sauce lighter?

Creamy Tuscan Ravioli will still be delicious and satisfying!

What herbs work best in Creamy Tuscan Ravioli?

Creamy Tuscan Ravioli Recipe. Some of the best herbs to use include:

  • Basil: Fresh basil adds a sweet and aromatic touch that complements the creamy sauce.
  • Oregano: This herb brings a warm, earthy flavor that pairs well with Italian dishes.
  • Thyme: Thyme adds a subtle depth and works beautifully with the garlic and cream.
  • Parsley: Fresh parsley can brighten the dish and add a pop of color.

Feel free to mix and match these herbs based on your preference. Fresh herbs will always provide the best flavor, but dried herbs can work in a pinch!

Can I freeze Creamy Tuscan Ravioli?

Creamy Tuscan Ravioli! To do this, it’s best to freeze the ravioli and sauce separately. Allow the sauce to cool completely before transferring it to an airtight container. For the ravioli, place them in a single layer on a baking sheet and freeze until solid. Then, transfer them to a freezer bag. When you’re ready to enjoy your meal, simply reheat the sauce on the stove and cook the frozen ravioli in boiling water until they float. This way, you can enjoy a delicious homemade meal anytime!

Conclusion on Creamy Tuscan Ravioli Recipe

Creamy Tuscan Ravioli Recipe is a delightful dish that combines rich flavors and fresh ingredients, making it a favorite for many. Whether you’re preparing it for a family dinner or a special occasion, this recipe is sure to impress. The creamy sauce, paired with tender ravioli and vibrant vegetables, creates a meal that is both satisfying and visually appealing.

As you’ve seen, this recipe is incredibly versatile. You can easily customize it to fit your dietary preferences, whether you choose to keep it vegetarian or add protein. The options are endless, allowing you to make this dish your own. Plus, with the quick preparation and cooking time, you can enjoy a gourmet meal without spending hours in the kitchen.

Creamy Tuscan Ravioli to new heights. Don’t hesitate to experiment with different flavors and ingredients to find your perfect combination.

Creamy Tuscan Ravioli. Enjoy the process, share it with loved ones, and savor every bite of this Italian-inspired dish. Buon Appetito!

Korean Ground Beef Bowl Recipe is a must-try dish!

Introduction to the Korean Ground Beef Bowl Recipe

The Korean Ground Beef Bowl is a delightful dish that brings the vibrant flavors of Korean cuisine right to your kitchen. This recipe is not only easy to prepare but also packed with nutrients, making it a perfect choice for busy weeknights. With its savory beef, fresh vegetables, and aromatic sauce, this bowl is sure to please everyone at the dinner table.

What Makes the Korean Ground Beef Bowl Unique?

What sets the Korean Ground Beef Bowl apart is its harmonious blend of flavors and textures. The ground beef is seasoned with a mix of soy sauce, ginger, and garlic, creating a rich umami taste. The addition of brown sugar adds a hint of sweetness, balancing the savory elements beautifully. Moreover, the dish is topped with vibrant vegetables like broccoli and carrots, which not only enhance the flavor but also add a pop of color.

Another unique aspect is the versatility of this recipe. You can easily customize it to suit your taste preferences. Whether you prefer it spicy or mild, the Korean Ground Beef Bowl can be adjusted to fit your palate. Plus, it’s a great way to incorporate healthy ingredients into your meals, making it a favorite for families looking to eat well without sacrificing flavor.

In summary, the Korean Ground Beef Bowl is a delicious, nutritious, and adaptable dish that brings a taste of Korea to your home. It’s perfect for anyone looking to explore new flavors while enjoying a comforting meal. So, let’s dive into the ingredients and preparation steps to create this delightful dish!

Ingredients for the Korean Ground Beef Bowl Recipe

To create a delicious Korean Ground Beef Bowl, you’ll need a few key ingredients that come together to form a flavorful and satisfying meal. Here’s what you’ll need:

  • 1 pound ground beef: This is the star of the dish, providing a rich and hearty base.
  • 1 tablespoon vegetable oil: Used for cooking the beef, it helps achieve a nice sear.
  • 3 cloves garlic, minced: Garlic adds a wonderful aroma and depth of flavor.
  • 1 tablespoon fresh ginger, minced: Ginger brings a zesty kick that complements the beef.
  • 1/4 cup soy sauce: This salty ingredient is essential for that umami taste.
  • 2 tablespoons brown sugar: The sweetness of brown sugar balances the savory flavors.
  • 1 tablespoon sesame oil: This oil adds a nutty flavor that enhances the dish.
  • 1 teaspoon red pepper flakes: Adjust this to your spice preference for a kick.
  • 1 cup cooked white rice: The perfect base for your bowl, soaking up all the flavors.
  • 1 cup broccoli florets (steamed): Broccoli adds color and nutrition to the dish.
  • 1/2 cup shredded carrots: Carrots provide a sweet crunch that contrasts nicely with the beef.
  • 2 green onions, sliced: These add freshness and a mild onion flavor.
  • 1 tablespoon sesame seeds (for garnish): A sprinkle of sesame seeds adds a lovely finishing touch.

With these ingredients on hand, you’re ready to whip up a delightful Korean Ground Beef Bowl that’s sure to impress your family and friends. Let’s move on to the preparation steps to bring this dish to life!

Step-by-Step Preparation of the Korean Ground Beef Bowl Recipe

Now that you have all your ingredients ready, it’s time to dive into the step-by-step preparation of the Korean Ground Beef Bowl. This process is straightforward and will have your kitchen smelling amazing in no time. Let’s get started!

Step 1: Preparing the Ingredients

Before you start cooking, it’s essential to prepare all your ingredients. Begin by mincing the garlic and ginger. This will ensure they release their flavors quickly when cooked. Next, wash and chop the broccoli into bite-sized florets. If you haven’t done so already, cook your white rice according to the package instructions. Having everything ready will make the cooking process smooth and enjoyable.

Step 2: Cooking the Ground Beef

In a large skillet, heat the vegetable oil over medium heat. Once the oil is hot, add the ground beef. Cook it for about 5-7 minutes, breaking it apart with a spatula as it browns. Make sure to drain any excess fat if necessary. This step is crucial as it creates a flavorful base for your dish.

Step 3: Making the Sauce

After the beef is browned, it’s time to add the minced garlic and ginger to the skillet. Cook them for an additional 1-2 minutes until they become fragrant. Then, stir in the soy sauce, brown sugar, sesame oil, and red pepper flakes. Allow the mixture to cook for another 2-3 minutes. This will help the sauce thicken slightly and coat the beef evenly, enhancing the overall flavor.

Step 4: Combining Ingredients

Once the sauce is ready, it’s time to combine everything. In a large bowl, place a scoop of the cooked white rice. Top it with the Korean ground beef mixture. Then, add the steamed broccoli and shredded carrots on top. This layering not only looks appealing but also ensures that every bite is packed with flavor.

Step 5: Serving the Dish

To finish off your Korean Ground Beef Bowl, garnish it with sliced green onions and a sprinkle of sesame seeds. This adds a nice crunch and a pop of color to your dish. Serve it warm and enjoy the delightful flavors of your homemade meal!

Variations of the Korean Ground Beef Bowl Recipe

The Korean Ground Beef Bowl is a versatile dish that can be easily adapted to suit different dietary preferences and spice levels. Whether you’re looking for a vegetarian option or want to kick up the heat, there are plenty of variations to explore. Let’s take a closer look at some exciting alternatives!

Vegetarian Alternatives

textured vegetable protein (TVP) or mushrooms. Both options provide a hearty texture that mimics ground beef well. Simply sauté the TVP or chopped mushrooms in the same way you would the beef, adding the same seasonings for flavor.

tofu. Firm tofu can be crumbled and cooked in the skillet, absorbing all the savory flavors of the sauce. For an extra protein boost, consider adding edamame or chickpeas to the mix. These ingredients not only enhance the nutritional value but also add a delightful crunch to your bowl.

Don’t forget to keep the vibrant vegetables like broccoli and carrots, as they add color and nutrition to your vegetarian Korean Ground Beef Bowl. With these alternatives, you can enjoy a satisfying meal that’s both delicious and plant-based!

Spicy Additions

red pepper flakes in the sauce. Start with the recommended teaspoon and gradually add more until you reach your desired spice level.

gochujang, a Korean chili paste that brings both heat and depth of flavor. Just a tablespoon mixed into the sauce can elevate the dish significantly. You can also top your bowl with sliced jalapeños or chili oil for an added burst of spice.

kimchi. This fermented Korean dish is not only spicy but also packed with probiotics, making it a healthy addition. With these spicy variations, you can customize your Korean Ground Beef Bowl to suit your taste buds perfectly!

Cooking Note for the Korean Ground Beef Bowl Recipe

When preparing the Korean Ground Beef Bowl, there are a few cooking notes to keep in mind to ensure your dish turns out perfectly every time. First, using fresh ingredients is key. Fresh garlic and ginger will provide the best flavor, enhancing the overall taste of your bowl. If you can, opt for high-quality ground beef, as it will make a noticeable difference in texture and flavor.

Another important tip is to avoid overcrowding the skillet when cooking the ground beef. If your skillet is too full, the beef may steam instead of brown, resulting in a less flavorful dish. If you have a large amount of beef, consider cooking it in batches. This will help achieve that nice, browned texture that is so desirable.

Additionally, be mindful of the cooking time for the sauce. Allowing it to simmer for a few minutes helps the flavors meld together beautifully. However, be careful not to overcook it, as this can lead to a sauce that is too thick or burnt. Stirring occasionally will help prevent sticking and ensure even cooking.

Lastly, feel free to adjust the seasoning to your liking. Taste the sauce before serving and tweak it if necessary. A little extra soy sauce or brown sugar can make a big difference. With these cooking notes in mind, you’ll be well on your way to creating a delicious Korean Ground Beef Bowl that everyone will love!

Serving Suggestions for the Korean Ground Beef Bowl Recipe

Serving your Korean Ground Beef Bowl is just as important as preparing it. The way you present this dish can enhance the dining experience and make it even more enjoyable. Here are some delightful serving suggestions to elevate your meal:

  • Pair with Kimchi: Kimchi is a traditional Korean side dish made from fermented vegetables. Its spicy and tangy flavor complements the savory beef bowl perfectly. A small serving on the side adds a burst of flavor and a probiotic boost.
  • Include a Fried Egg: Topping your bowl with a fried egg can add richness and extra protein. The runny yolk mixes beautifully with the beef and rice, creating a creamy texture that enhances the overall dish.
  • Serve with Pickled Vegetables: Adding pickled vegetables, such as radishes or cucumbers, can provide a refreshing crunch. The acidity from the pickles balances the richness of the beef, making each bite more exciting.
  • Offer Extra Sauces: Consider serving additional sauces on the side, like extra soy sauce or a spicy gochujang sauce. This allows guests to customize their bowls according to their taste preferences.
  • Accompany with a Simple Salad: A light salad with mixed greens, sesame dressing, and sliced cucumbers can be a great way to add freshness to the meal. It complements the hearty bowl while providing a nutritious side.

These serving suggestions not only enhance the flavor of your Korean Ground Beef Bowl but also create a more vibrant and enjoyable dining experience. Feel free to mix and match these ideas to find the perfect combination that suits your taste!

Tips for Perfecting Your Korean Ground Beef Bowl Recipe

Creating the perfect Korean Ground Beef Bowl is all about attention to detail and a few helpful tips. With these suggestions, you can elevate your dish and impress your family and friends. Let’s explore some essential tips to ensure your bowl is a hit every time!

  • Use Quality Ingredients: Start with fresh, high-quality ingredients. Fresh garlic and ginger will enhance the flavor significantly. Opt for grass-fed ground beef if possible, as it tends to be leaner and more flavorful.
  • Don’t Rush the Browning: When cooking the ground beef, allow it to brown properly. This step adds depth to the flavor. Avoid stirring too often; let it sit for a minute or two before breaking it apart.
  • Adjust the Sauce to Taste: Before serving, taste the sauce and adjust the seasoning as needed. If you prefer a sweeter flavor, add a bit more brown sugar. For a saltier kick, a splash more soy sauce can do wonders.
  • Experiment with Vegetables: Feel free to add or substitute vegetables based on your preferences. Bell peppers, snap peas, or even zucchini can add variety and nutrition to your bowl.
  • Let the Rice Rest: After cooking the rice, let it sit covered for a few minutes. This helps the grains firm up and makes it easier to scoop into your bowl without becoming mushy.
  • Garnish Generously: Don’t skimp on the garnishes! Sliced green onions and sesame seeds not only add flavor but also make your dish visually appealing. A sprinkle of fresh herbs like cilantro can also brighten the dish.
  • Serve Immediately: For the best experience, serve your Korean Ground Beef Bowl right after preparing it. This ensures that the flavors are fresh and the ingredients are at their best.

By following these tips, you’ll be well on your way to mastering the Korean Ground Beef Bowl. Each bowl will be bursting with flavor and sure to satisfy everyone at the table. Enjoy the cooking process and the delicious results!

Breakdown of Time for the Korean Ground Beef Bowl Recipe

Understanding the time required for each step of the Korean Ground Beef Bowl recipe can help you plan your cooking efficiently. Here’s a breakdown of the time you’ll need for preparation and cooking:

Prep Time

15 minutes. This includes gathering all your ingredients, mincing the garlic and ginger, chopping the broccoli, and cooking the rice. Having everything ready before you start cooking will make the process smoother and more enjoyable.

Cooking Time

15-20 minutes. This includes browning the ground beef, cooking the garlic and ginger, and allowing the sauce to thicken. The quick cooking time makes this recipe perfect for busy weeknights when you want a delicious meal without spending hours in the kitchen.

Total Time

30-35 minutes from start to finish. This includes both prep and cooking time. With such a short time commitment, you can enjoy a flavorful and nutritious Korean Ground Beef Bowl without the hassle!

Nutritional Information for the Korean Ground Beef Bowl Recipe

Understanding the nutritional content of your meals is essential for maintaining a balanced diet. The Korean Ground Beef Bowl is not only delicious but also provides a good mix of nutrients. Here’s a breakdown of the key nutritional information per serving:

Calories

400 calories. This makes it a satisfying meal that can fit well into a balanced diet. The combination of protein, carbohydrates, and healthy fats ensures that you feel full and energized after enjoying this dish.

Protein

25 grams of protein per serving. The ground beef is the primary source of protein, making this bowl a great option for those looking to increase their protein intake. Pairing it with rice and vegetables also helps create a well-rounded meal.

Sodium

800 milligrams of sodium. This is primarily due to the soy sauce used in the recipe. If you’re watching your sodium levels, consider using low-sodium soy sauce or adjusting the amount to suit your dietary needs.

In summary, the Korean Ground Beef Bowl is a nutritious option that provides a good balance of calories, protein, and flavor. By being aware of the nutritional information, you can enjoy this delightful dish while keeping your health goals in mind!

FAQs about the Korean Ground Beef Bowl Recipe

Can I use a different type of meat for the Korean Ground Beef Bowl Recipe?

Absolutely! The Korean Ground Beef Bowl Recipe is quite versatile. You can substitute ground beef with ground turkey, chicken, or even pork. Each option will bring its unique flavor and texture to the dish. If you prefer a leaner option, ground turkey or chicken is a great choice. Just remember to adjust the cooking time slightly, as different meats may cook at different rates.

How can I make the Korean Ground Beef Bowl Recipe spicier?

If you love heat, there are several ways to spice up your Korean Ground Beef Bowl. Start by increasing the amount of red pepper flakes in the sauce. You can also add a tablespoon of gochujang, a Korean chili paste that adds both heat and depth. For an extra kick, consider topping your bowl with sliced jalapeños or a drizzle of chili oil. These additions will surely satisfy your spicy cravings!

What can I serve with the Korean Ground Beef Bowl Recipe?

There are many delicious sides that pair well with the Korean Ground Beef Bowl. Kimchi is a classic choice, offering a spicy and tangy contrast to the savory beef. You can also serve it with pickled vegetables for a refreshing crunch. A simple salad with mixed greens and sesame dressing can add a light touch. Additionally, a fried egg on top of the bowl can enhance the flavor and provide extra protein. Feel free to mix and match these sides to create a well-rounded meal!

Can I prepare the Korean Ground Beef Bowl Recipe in advance?

Yes, you can prepare parts of the Korean Ground Beef Bowl in advance! The ground beef mixture can be cooked ahead of time and stored in the refrigerator for up to three days. Just reheat it when you’re ready to serve. You can also cook the rice in advance and store it in an airtight container. However, it’s best to prepare the fresh vegetables just before serving to maintain their crispness and flavor. This way, you can enjoy a quick and easy meal any day of the week!

Conclusion on the Korean Ground Beef Bowl Recipe

The Korean Ground Beef Bowl is a delightful dish that combines rich flavors, vibrant colors, and nutritious ingredients. It’s a fantastic option for anyone looking to enjoy a quick yet satisfying meal. With its easy preparation and versatility, this recipe can easily become a staple in your weekly dinner rotation.

Whether you choose to stick to the classic version or explore the various adaptations, the Korean Ground Beef Bowl offers something for everyone. From vegetarian alternatives to spicy variations, you can customize it to suit your taste preferences. Plus, the nutritional benefits make it a guilt-free indulgence that the whole family can enjoy.

As you prepare this dish, remember to focus on using fresh ingredients and adjusting the flavors to your liking. With a little practice, you’ll master the art of creating the perfect Korean Ground Beef Bowl. So gather your ingredients, follow the steps, and savor the deliciousness of this Korean-inspired meal!

In conclusion, the Korean Ground Beef Bowl is not just a meal; it’s an experience. It brings the warmth of home-cooked comfort food while allowing you to explore the exciting flavors of Korean cuisine. Enjoy every bite, and happy cooking!

Sweet & Spicy Korean BBQ Meatloaf is a must-try!

Introduction to Sweet and Spicy Korean BBQ Meatloaf

Sweet and Spicy Korean BBQ Meatloaf is not just a meal; it’s an experience that tantalizes your taste buds and warms your heart.

This unique recipe takes traditional meatloaf and infuses it with a sweet and spicy glaze made from gochujang, a popular Korean chili paste. The result is a savory dish that is both satisfying and exciting. Imagine biting into a juicy slice of meatloaf, where the sweetness of brown sugar meets the heat of chili paste, creating a perfect balance of flavors.

Not only is this meatloaf delicious, but it is also easy to prepare. With simple ingredients and straightforward steps, you can whip up this dish in no time. Whether you’re cooking for your family or hosting friends, this meatloaf is sure to impress. Plus, it serves six, making it perfect for gatherings or meal prep for the week ahead.

Sweet and Spicy Korean BBQ Meatloaf a hit. So, roll up your sleeves and get ready to create a dish that will have everyone asking for seconds!

Ingredients for Sweet and Spicy Korean BBQ Meatloaf

Sweet and Spicy Korean BBQ Meatloaf, you’ll need a few key ingredients that come together to form a deliciously unique dish. Here’s what you’ll need:

  • 1 pound ground beef: This is the base of your meatloaf, providing rich flavor and texture.
  • 1/2 cup breadcrumbs: Breadcrumbs help bind the meatloaf and keep it moist.
  • 1/4 cup grated onion: Adds moisture and a subtle sweetness to the meatloaf.
  • 1/4 cup milk: This ingredient keeps the meatloaf tender and juicy.
  • 1 large egg: Acts as a binder, helping to hold everything together.
  • 1/4 cup soy sauce: Provides a savory depth of flavor that complements the meat.
  • 1/4 cup brown sugar: Adds sweetness that balances the spiciness of the dish.
  • 2 tablespoons gochujang: This Korean chili paste gives the meatloaf its signature heat and flavor.
  • 1 tablespoon minced garlic: Enhances the overall taste with its aromatic qualities.
  • 1 teaspoon ground ginger: Adds a warm, spicy note that pairs well with the other flavors.
  • 1/2 teaspoon black pepper: Provides a mild kick to the meatloaf.
  • 1/4 teaspoon salt: Enhances all the flavors in the dish.
  • 1/4 cup chopped green onions: For garnish, adding a fresh touch to your finished meatloaf.

Sweet and Spicy Korean BBQ Meatloaf.

Preparation of Sweet and Spicy Korean BBQ Meatloaf

Sweet and Spicy Korean BBQ Meatloaf. Follow these simple steps to create a dish that is sure to impress!

Step 1: Preheat the Oven

First things first, preheat your oven to 350°F (175°C). This step is crucial as it ensures that your meatloaf cooks evenly. While the oven heats up, you can focus on preparing the meat mixture.

Step 2: Prepare the Meat Mixture

In a large mixing bowl, combine the ground beef, breadcrumbs, grated onion, milk, and egg. Use your hands or a spoon to mix everything together until well combined. Make sure not to overmix, as this can make the meatloaf tough. You want a nice, cohesive mixture that holds together well.

Step 3: Shape the Meatloaf

Once your meat mixture is ready, transfer it to the prepared loaf pan. Shape it into a loaf, making sure it’s even on all sides. This helps it cook uniformly. If you don’t have a loaf pan, you can also shape it freeform on a baking sheet lined with parchment paper.

Step 4: Make the Sweet and Spicy Glaze

In a separate bowl, whisk together the soy sauce, brown sugar, gochujang, minced garlic, ground ginger, black pepper, and salt. This glaze is what gives your meatloaf its signature sweet and spicy flavor. Pour this mixture over the shaped meatloaf, ensuring it’s evenly coated. This step adds a delicious layer of flavor that will caramelize as it bakes.

Step 5: Bake the Meatloaf

Now, it’s time to bake! Place the loaf pan in the preheated oven and bake for 45-55 minutes. You’ll know it’s done when the internal temperature reaches 160°F (70°C). This ensures that your meatloaf is safe to eat and perfectly cooked.

Step 6: Let it Rest Before Serving

After baking, remove the meatloaf from the oven and let it rest for about 10 minutes. This resting period allows the juices to redistribute, making your meatloaf even more flavorful and moist. Once rested, slice it up and garnish with chopped green onions for a fresh touch.

Sweet and Spicy Korean BBQ Meatloaf is ready to be served. Enjoy the delightful blend of flavors that this dish brings to your table!

Variation of Sweet and Spicy Korean BBQ Meatloaf

Sweet and Spicy Korean BBQ Meatloaf recipe is already a crowd-pleaser, there are plenty of ways to switch things up! Whether you want to cater to dietary preferences or simply try something new, these variations will keep your meals exciting.

Alternative Ingredients

One of the best things about meatloaf is its versatility. You can easily swap out ingredients to suit your taste or dietary needs. Here are some alternative ingredients you might consider:

  • Ground Turkey or Chicken: For a leaner option, substitute ground beef with ground turkey or chicken. This change will reduce the fat content while still providing a delicious flavor.
  • Quinoa or Oats: Instead of breadcrumbs, try using cooked quinoa or oats. These options add a unique texture and are great for gluten-free diets.
  • Vegetables: Add finely chopped vegetables like bell peppers, carrots, or zucchini to the meat mixture. This not only boosts nutrition but also adds moisture and flavor.
  • Different Sauces: Experiment with different sauces like teriyaki or hoisin sauce for a different flavor profile. Each sauce brings its own unique taste to the meatloaf.

Sweet and Spicy Korean BBQ Meatloaf that fits your preferences while still being delicious!

Different Cooking Methods

In addition to changing ingredients, you can also explore different cooking methods to prepare your meatloaf. Here are a few ideas:

  • Slow Cooker: For a hands-off approach, cook your meatloaf in a slow cooker. Simply shape the meatloaf and place it in the slow cooker. Cook on low for 6-8 hours or on high for 3-4 hours. This method keeps the meatloaf moist and tender.
  • Grilling: If you’re feeling adventurous, try grilling your meatloaf! Shape it into patties or a loaf and grill over medium heat. This adds a smoky flavor that pairs wonderfully with the sweet and spicy glaze.
  • Air Fryer: For a quicker option, use an air fryer. Shape the meatloaf and place it in the air fryer basket. Cook at 350°F (175°C) for about 25-30 minutes. The air fryer gives a nice crispy exterior while keeping the inside juicy.

Sweet and Spicy Korean BBQ Meatloaf, making it even more enjoyable!

Cooking Note for Sweet and Spicy Korean BBQ Meatloaf

Sweet and Spicy Korean BBQ Meatloaf, there are a few important cooking notes to keep in mind. These tips will help ensure that your meatloaf turns out perfectly every time, enhancing both flavor and texture.

First, always use a meat thermometer to check the internal temperature. This is crucial for food safety. The meatloaf should reach an internal temperature of 160°F (70°C) to ensure it is fully cooked. If you don’t have a thermometer, you can cut into the center to check that it is no longer pink.

Next, consider the type of ground meat you use. While ground beef is traditional, using ground turkey or chicken can yield a lighter dish. Just remember that leaner meats may require a bit more moisture, so you might want to add a splash more milk or an extra egg to keep it juicy.

Additionally, let your meatloaf rest after baking. This step is often overlooked but is essential. Resting allows the juices to redistribute throughout the meatloaf, making each slice moist and flavorful. If you slice it too soon, you may end up with a dry meatloaf.

Lastly, don’t hesitate to customize the glaze. The sweet and spicy sauce is what makes this dish stand out. Feel free to adjust the amount of gochujang based on your heat preference. If you like it spicier, add a bit more; if you prefer it milder, reduce the amount. You can also mix in some honey or maple syrup for extra sweetness.

Sweet and Spicy Korean BBQ Meatloaf that will impress everyone at your table!

Serving Suggestions for Sweet and Spicy Korean BBQ Meatloaf

Sweet and Spicy Korean BBQ Meatloaf is ready, it’s time to think about how to serve it! This dish is not only delicious on its own, but it also pairs wonderfully with a variety of sides and accompaniments. Here are some serving suggestions to elevate your meal:

  • Steamed Rice: A classic choice, serving your meatloaf with fluffy steamed rice helps soak up the sweet and spicy glaze. You can use white rice, brown rice, or even jasmine rice for a fragrant touch.
  • Kimchi: For an authentic Korean experience, serve your meatloaf with a side of kimchi. This fermented vegetable dish adds a tangy crunch that complements the flavors of the meatloaf beautifully.
  • Roasted Vegetables: Pair your meatloaf with a medley of roasted vegetables. Carrots, broccoli, and bell peppers tossed in olive oil and seasoning make for a colorful and nutritious side.
  • Mashed Potatoes: Creamy mashed potatoes are a comforting side that balances the spiciness of the meatloaf. You can even add a hint of garlic or sour cream for extra flavor.
  • Salad: A fresh salad with mixed greens, cucumbers, and a light vinaigrette can provide a refreshing contrast to the rich meatloaf. Consider adding sliced avocado for creaminess.
  • Pickled Vegetables: Serve pickled radishes or cucumbers on the side. Their tangy flavor cuts through the richness of the meatloaf, adding a delightful crunch.

When it comes to presentation, slice the meatloaf into thick pieces and arrange them on a platter. Drizzle some of the remaining glaze over the top for an appealing look. Garnish with chopped green onions for a pop of color and freshness.

Sweet and Spicy Korean BBQ Meatloaf but also create a well-rounded meal that everyone will enjoy. So gather your loved ones, set the table, and get ready to dig into a delicious feast!

Tips for Perfecting Sweet and Spicy Korean BBQ Meatloaf

Sweet and Spicy Korean BBQ Meatloaf is all about attention to detail. With a few helpful tips, you can elevate your dish to new heights. Here are some tried-and-true suggestions to ensure your meatloaf turns out delicious every time:

  • Choose Quality Meat: Start with high-quality ground beef. Look for meat that has a good fat content, around 80/20. This balance keeps the meatloaf juicy and flavorful.
  • Don’t Overmix: When combining the ingredients, mix just until everything is incorporated. Overmixing can lead to a dense and tough meatloaf. Aim for a light touch!
  • Use Fresh Ingredients: Fresh garlic, ginger, and green onions will enhance the flavor of your meatloaf. Fresh ingredients pack more punch than dried ones.
  • Experiment with Spices: Feel free to add your favorite spices to the meat mixture. A dash of smoked paprika or a sprinkle of sesame seeds can add an extra layer of flavor.
  • Adjust the Sweetness: If you prefer a sweeter glaze, add more brown sugar or honey to the sauce. Taste as you go to find the perfect balance for your palate.
  • Let it Rest: After baking, allow the meatloaf to rest for at least 10 minutes. This step is crucial for keeping it moist and flavorful. Slicing too soon can cause it to fall apart.
  • Save the Drippings: Don’t discard the drippings from the loaf pan! Use them to make a delicious gravy or drizzle over the meatloaf for added flavor.
  • Garnish Creatively: When serving, get creative with your garnishes. Chopped cilantro or sesame seeds can add a beautiful touch and enhance the dish’s presentation.

Sweet and Spicy Korean BBQ Meatloaf that will impress your family and friends. Enjoy the process and have fun experimenting with flavors!

Breakdown of Time for Sweet and Spicy Korean BBQ Meatloaf

Sweet and Spicy Korean BBQ Meatloaf can help you plan your cooking efficiently. Here’s a simple breakdown of the time involved:

Prep Time

Getting everything ready is the first step. This includes gathering your ingredients, chopping vegetables, and mixing the meat. Expect to spend about 15-20 minutes on prep. This time can vary based on your cooking experience and how quickly you work.

Cooking Time

Once your meatloaf is shaped and in the oven, it will need to bake for 45-55 minutes. During this time, you can clean up your kitchen or prepare your side dishes. Just make sure to check the internal temperature to ensure it reaches 160°F (70°C).

Total Time

In total, you should plan for about 1 hour and 15 minutes to 1 hour and 30 minutes from start to finish. This includes prep and cooking time. After baking, don’t forget to let your meatloaf rest for 10 minutes before slicing. This resting period is essential for juicy slices!

Sweet and Spicy Korean BBQ Meatloaf is ready to serve when you want it. Enjoy the process and the delicious results!

Breakdown of Time for Sweet and Spicy Korean BBQ Meatloaf

Sweet and Spicy Korean BBQ Meatloaf can help you plan your cooking efficiently. Here’s a simple breakdown of the time involved:

Prep Time

Getting everything ready is the first step. This includes gathering your ingredients, chopping vegetables, and mixing the meat. Expect to spend about 15-20 minutes on prep. This time can vary based on your cooking experience and how quickly you work. If you have everything organized, you can cut down on this time!

Cooking Time

Once your meatloaf is shaped and in the oven, it will need to bake for 45-55 minutes. During this time, you can clean up your kitchen or prepare your side dishes. Just make sure to check the internal temperature to ensure it reaches 160°F (70°C). This step is crucial for food safety and ensures your meatloaf is perfectly cooked.

Total Time

In total, you should plan for about 1 hour and 15 minutes to 1 hour and 30 minutes from start to finish. This includes prep and cooking time. After baking, don’t forget to let your meatloaf rest for 10 minutes before slicing. This resting period is essential for juicy slices!

Sweet and Spicy Korean BBQ Meatloaf is ready to serve when you want it. Enjoy the process and the delicious results!

Nutritional Information for Sweet and Spicy Korean BBQ Meatloaf

Sweet and Spicy Korean BBQ Meatloaf can help you make informed choices about your meals. This dish is not only delicious but also provides a good balance of nutrients. Here’s a breakdown of the key nutritional information per serving:

Calories

Sweet and Spicy Korean BBQ Meatloaf contains approximately 290 calories. This makes it a satisfying option for dinner without being overly heavy. The combination of ingredients ensures that you get a hearty meal that keeps you full and energized.

Protein

Protein is essential for building and repairing tissues, and this meatloaf delivers! Each serving provides about 24 grams of protein. The ground beef is a great source of high-quality protein, making this dish a fantastic choice for those looking to increase their protein intake.

Sodium

When it comes to sodium, each serving contains around 600 milligrams. While this is a reasonable amount for a flavorful dish, it’s important to be mindful of your overall sodium intake, especially if you are watching your salt consumption. You can reduce the sodium content by using low-sodium soy sauce or adjusting the amount of added salt in the recipe.

Sweet and Spicy Korean BBQ Meatloaf while also being aware of its health benefits. This dish is not only a treat for your taste buds but also a nutritious option for your dinner table!

FAQs about Sweet and Spicy Korean BBQ Meatloaf

Can I use ground turkey instead of beef for Sweet and Spicy Korean BBQ Meatloaf?

Sweet and Spicy Korean BBQ Meatloaf juicy and flavorful. The cooking time may also vary slightly, so be sure to check the internal temperature to ensure it reaches 160°F (70°C).

How can I make Sweet and Spicy Korean BBQ Meatloaf gluten-free?

Sweet and Spicy Korean BBQ Meatloaf gluten-free is simple! You can substitute regular breadcrumbs with gluten-free breadcrumbs or even use oats. Additionally, opt for gluten-free soy sauce, which is widely available. This way, you can enjoy the same delicious flavors without worrying about gluten.

What sides pair well with Sweet and Spicy Korean BBQ Meatloaf?

Sweet and Spicy Korean BBQ Meatloaf. Some great options include:

  • Steamed rice or fried rice to soak up the glaze.
  • Kimchi for a tangy, spicy kick.
  • Roasted vegetables for a colorful and nutritious addition.
  • Creamy mashed potatoes to balance the flavors.
  • A fresh salad for a light and refreshing contrast.

Feel free to mix and match these sides to create a well-rounded meal!

Can I freeze Sweet and Spicy Korean BBQ Meatloaf?

Sweet and Spicy Korean BBQ Meatloaf! To do this, let the meatloaf cool completely after baking. Then, wrap it tightly in plastic wrap or aluminum foil and place it in an airtight container or freezer bag. It can be stored in the freezer for up to 3 months. When you’re ready to enjoy it, simply thaw it in the refrigerator overnight and reheat in the oven until warmed through. This makes for a convenient meal option on busy days!

Conclusion on Sweet and Spicy Korean BBQ Meatloaf

Sweet and Spicy Korean BBQ Meatloaf is a delightful twist on a classic dish that brings together the best of both worlds. With its unique blend of flavors, this meatloaf is sure to become a favorite in your household. The combination of savory ground beef, sweet brown sugar, and spicy gochujang creates a mouthwatering experience that is both comforting and exciting.

Not only is this recipe easy to prepare, but it also offers plenty of room for creativity. Whether you choose to stick to the traditional ingredients or experiment with alternatives, the possibilities are endless. You can customize the dish to suit your taste preferences or dietary needs, making it a versatile option for any occasion.

As you gather around the table to enjoy this delicious meatloaf, you’ll find that it not only satisfies hunger but also brings people together. The warm, inviting aroma that fills your kitchen will have everyone eagerly anticipating their first bite. Plus, with its impressive nutritional profile, you can feel good about serving this dish to your loved ones.

Sweet and Spicy Korean BBQ Meatloaf a try? Whether it’s a weeknight dinner or a special gathering, this dish is sure to impress. With its delightful flavors and easy preparation, you’ll be making it again and again. Enjoy the process, savor the flavors, and most importantly, share the joy of good food with those you care about!

One-Pan Coconut Curry Salmon Recipe is a must-try!

Introduction to One-Pan Coconut Curry Salmon Recipe

One-Pan Coconut Curry Salmon Recipe is here to save the day. This dish combines the rich taste of salmon with the creamy goodness of coconut milk and aromatic spices. It’s not just a meal; it’s an experience that brings the warmth of the tropics right to your kitchen.

What Makes One-Pan Coconut Curry Salmon Recipe Special?

What sets this recipe apart is its simplicity and versatility. First, it’s a one-pan wonder, meaning less cleanup for you! You can prepare everything in a single skillet, making it perfect for busy weeknights. Second, the combination of flavors is simply irresistible. The curry powder adds a warm, spicy kick, while the coconut milk provides a creamy base that balances the dish beautifully.

Moreover, this recipe is not only tasty but also nutritious. Salmon is a fantastic source of protein and omega-3 fatty acids, which are great for heart health. The addition of fresh spinach and cherry tomatoes boosts the vitamin content, making this meal both satisfying and healthy.

One-Pan Coconut Curry Salmon Recipe is sure to impress. It’s easy to make, packed with flavor, and looks stunning on the plate. So, let’s dive into the ingredients and get cooking!

Ingredients for One-Pan Coconut Curry Salmon Recipe

One-Pan Coconut Curry Salmon Recipe, you’ll need a few simple ingredients. Each component plays a vital role in building the rich flavors and textures of this dish. Here’s what you’ll need:

  • 2 (6-ounce) salmon fillets: Fresh salmon is the star of this recipe, providing a delicious and healthy protein source.
  • 1 tablespoon olive oil: This helps to sear the salmon and adds a touch of healthy fat.
  • 1 teaspoon salt: Essential for enhancing the flavors of the dish.
  • 1/2 teaspoon black pepper: Adds a mild heat and depth to the seasoning.
  • 1 tablespoon curry powder: The key ingredient that gives this dish its signature flavor.
  • 1 can (13.5 ounces) coconut milk: Provides a creamy base that balances the spices beautifully.
  • 1 cup cherry tomatoes, halved: These add a burst of sweetness and color to the dish.
  • 1 cup spinach, fresh: A nutritious addition that wilts perfectly into the curry.
  • 1 tablespoon lime juice: Adds a zesty brightness that elevates the flavors.
  • 1/4 cup fresh cilantro, chopped: For garnish, this herb adds freshness and a pop of color.

With these ingredients on hand, you’re ready to create a meal that’s not only delicious but also visually appealing. The combination of salmon, coconut milk, and spices will transport your taste buds to a tropical paradise. Now, let’s move on to the step-by-step preparation of this fantastic dish!

Step-by-Step Preparation of One-Pan Coconut Curry Salmon Recipe

One-Pan Coconut Curry Salmon Recipe is straightforward and fun to make. Follow these steps to create a delicious meal that will impress everyone at the table!

Step 1: Preparing the Ingredients

Before you start cooking, it’s essential to prepare your ingredients. This makes the cooking process smoother and more enjoyable. First, gather all your ingredients on the counter. Then, measure out the olive oil, salt, pepper, and curry powder. Next, halve the cherry tomatoes and chop the fresh cilantro. Finally, rinse the spinach under cold water to remove any dirt. With everything prepped, you’re ready to start cooking!

Step 2: Cooking the Base for One-Pan Coconut Curry Salmon Recipe

Begin by preheating your oven to 400°F (200°C). While the oven heats up, take a large oven-safe skillet and place it on the stove over medium heat. Add the tablespoon of olive oil and let it warm up. Once the oil is hot, it’s time to season the salmon fillets. Sprinkle salt, black pepper, and curry powder on both sides of the fillets. This seasoning will enhance the flavor of the salmon and create a delicious crust.

Step 3: Adding the Salmon

Carefully place the seasoned salmon fillets in the skillet, skin-side down. Sear the salmon for about 3-4 minutes. You want the skin to become crispy and golden brown. After that, gently flip the fillets over. Now, pour the coconut milk into the skillet around the salmon. This creamy base will soak up all the flavors from the spices and the salmon.

Step 4: Finishing Touches for One-Pan Coconut Curry Salmon Recipe

One-Pan Coconut Curry Salmon Recipe is now ready to enjoy!

Variation of One-Pan Coconut Curry Salmon Recipe

One-Pan Coconut Curry Salmon Recipe is a delightful dish on its own, there are many ways to switch things up! Whether you want to try different proteins or explore vegetarian options, this recipe is versatile enough to accommodate your preferences. Let’s take a look at some tasty variations!

Alternative Proteins to Use

If you’re not a fan of salmon or simply want to try something new, there are several alternative proteins you can use. Here are a few suggestions:

  • Chicken Breast: Boneless, skinless chicken breasts work well in this recipe. Just cut them into smaller pieces and follow the same cooking steps.
  • Shrimp: Fresh or frozen shrimp can be a great substitute. Add them to the skillet after the coconut milk, as they cook quickly.
  • Tofu: For a plant-based option, firm tofu is an excellent choice. Press and cube the tofu, then sauté it until golden before adding the coconut milk.
  • White Fish: Fish like cod or tilapia can also be used. They have a mild flavor that pairs well with the curry sauce.

These alternatives will still give you that delicious curry flavor while allowing you to enjoy different textures and tastes. Feel free to experiment with your favorite proteins!

Vegetarian Options for One-Pan Coconut Curry Salmon Recipe

One-Pan Coconut Curry Salmon Recipe, you’re in luck! This dish can easily be transformed into a hearty vegetarian meal. Here are some ideas:

  • Chickpeas: Canned or cooked chickpeas can add protein and a nice texture. Simply toss them in with the coconut milk and vegetables.
  • Mixed Vegetables: Use a variety of your favorite vegetables, such as bell peppers, zucchini, or carrots. They will absorb the curry flavors beautifully.
  • Cauliflower: Cauliflower florets can be a great addition. They soak up the coconut milk and spices, making for a satisfying dish.
  • Eggplant: Diced eggplant can add a rich flavor and meaty texture. Sauté it until tender before adding the coconut milk.

These vegetarian options will ensure that everyone at the table can enjoy a delicious meal. The creamy coconut milk and spices will still shine through, making it a delightful experience for all!

Cooking Note for One-Pan Coconut Curry Salmon Recipe

One-Pan Coconut Curry Salmon Recipe, there are a few important cooking notes to keep in mind. These tips will help you achieve the best results and ensure that your dish turns out perfectly every time.

First, always choose fresh salmon fillets for the best flavor and texture. Fresh salmon has a vibrant color and a firm texture, which makes it ideal for searing. If you can, buy wild-caught salmon, as it tends to have a richer taste compared to farmed varieties.

Next, be mindful of the cooking time. Salmon can easily overcook, leading to a dry texture. To avoid this, keep an eye on the fillets while they bake. The salmon is done when it flakes easily with a fork and has an internal temperature of 145°F (63°C). Using a meat thermometer can help you check this accurately.

Additionally, feel free to adjust the spice levels to suit your taste. If you prefer a milder flavor, reduce the amount of curry powder. On the other hand, if you enjoy a bit of heat, consider adding more spices or even a dash of hot sauce to the coconut milk.

One-Pan Coconut Curry Salmon Recipe hot, and enjoy the delightful combination of flavors!

Serving Suggestions for One-Pan Coconut Curry Salmon Recipe

One-Pan Coconut Curry Salmon Recipe is ready, it’s time to think about how to serve it! Presentation can elevate your meal, making it even more enjoyable. Here are some delightful serving suggestions to complement this flavorful dish:

  • Serve with Rice: A classic pairing is to serve the salmon over a bed of fluffy white rice or brown rice. The rice will soak up the delicious coconut curry sauce, making every bite a treat.
  • Quinoa Delight: For a healthier option, consider serving the salmon with quinoa. This protein-packed grain adds a nutty flavor and pairs beautifully with the curry.
  • Fresh Salad: A light salad with mixed greens, cucumber, and a tangy vinaigrette can balance the richness of the curry. The freshness of the salad will enhance the overall meal.
  • Warm Naan Bread: If you want to add a touch of Indian cuisine, serve the dish with warm naan bread. It’s perfect for scooping up the curry and adds a delightful texture.
  • Steamed Vegetables: For an extra boost of nutrition, serve steamed vegetables like broccoli or green beans on the side. They add color and crunch to your plate.

One-Pan Coconut Curry Salmon Recipe look restaurant-worthy!

Whether you’re hosting a dinner party or enjoying a cozy meal at home, these serving suggestions will help you create a memorable dining experience. Enjoy your delicious creation!

Tips for Perfecting One-Pan Coconut Curry Salmon Recipe

One-Pan Coconut Curry Salmon Recipe truly shine, consider these helpful tips. They will guide you in achieving the best flavor and texture, ensuring that every bite is a delight!

  • Use Fresh Ingredients: Fresh salmon, vegetables, and herbs make a big difference in flavor. Always opt for the freshest ingredients you can find. This will enhance the overall taste of your dish.
  • Marinate the Salmon: For an extra flavor boost, consider marinating the salmon in lime juice and curry powder for about 30 minutes before cooking. This allows the flavors to penetrate the fish, making it even more delicious.
  • Adjust Spice Levels: Everyone has different spice preferences. If you like it mild, reduce the curry powder. For those who enjoy heat, add more spices or a pinch of cayenne pepper to the coconut milk.
  • Don’t Overcrowd the Pan: When adding vegetables, make sure not to overcrowd the skillet. This ensures even cooking and allows the salmon to sear properly. If needed, cook in batches.
  • Check for Doneness: Salmon is perfectly cooked when it flakes easily with a fork and has an internal temperature of 145°F (63°C). Use a meat thermometer for accuracy to avoid overcooking.
  • Let It Rest: After baking, let the dish rest for a few minutes before serving. This helps the flavors meld together and makes for a more enjoyable meal.
  • Experiment with Garnishes: While cilantro is a great garnish, feel free to experiment! Chopped green onions, toasted coconut flakes, or even a sprinkle of sesame seeds can add a unique touch.
  • Pair with Sides: Consider serving your dish with sides that complement the curry. Rice, quinoa, or a fresh salad can balance the richness of the coconut milk and enhance the meal.

One-Pan Coconut Curry Salmon Recipe to new heights. Enjoy the process and savor the delicious results!

Breakdown of Time for One-Pan Coconut Curry Salmon Recipe

One-Pan Coconut Curry Salmon Recipe can help you plan your cooking efficiently. Here’s a quick breakdown of the time involved in preparing and cooking this delightful dish.

Prep Time

The prep time for this recipe is quite short, making it perfect for busy weeknights. You’ll need about 10-15 minutes to gather and prepare your ingredients. This includes measuring out spices, chopping vegetables, and seasoning the salmon. With everything ready, you’ll be set to start cooking!

Cooking Time

Once you begin cooking, the actual cooking time is approximately 15-20 minutes. This includes searing the salmon for about 3-4 minutes on each side and then baking it in the oven for 10-12 minutes. The combination of stovetop and oven cooking ensures that the salmon is perfectly cooked and infused with flavor.

Total Time

One-Pan Coconut Curry Salmon Recipe to take around 25-35 minutes from start to finish. This quick turnaround makes it an excellent choice for a delicious meal without spending hours in the kitchen. With just a little bit of time, you can enjoy a flavorful dish that’s sure to impress!

Nutritional Information for One-Pan Coconut Curry Salmon Recipe

One-Pan Coconut Curry Salmon Recipe not only delights your taste buds but also provides valuable nutrients. Here’s a breakdown of the nutritional information per serving:

Calories

One-Pan Coconut Curry Salmon Recipe contains approximately 450 calories. This makes it a satisfying meal that can fit well into a healthy eating plan. The combination of salmon, coconut milk, and vegetables contributes to a well-rounded dish that keeps you energized throughout the day.

Protein

Protein is a vital nutrient for building and repairing tissues, and this recipe delivers! Each serving provides about 30 grams of protein. Salmon is an excellent source of high-quality protein, which is essential for muscle health and overall well-being. Including this dish in your diet can help you meet your daily protein needs.

Sodium

When it comes to sodium, each serving contains around 800 milligrams. While sodium is necessary for bodily functions, it’s important to monitor your intake. If you’re watching your sodium levels, consider using low-sodium coconut milk or reducing the amount of added salt in the recipe. This way, you can enjoy the flavors without exceeding your daily sodium limit.

One-Pan Coconut Curry Salmon Recipe is a nutritious option that provides a good balance of calories, protein, and essential nutrients. It’s a delicious way to nourish your body while enjoying a flavorful meal!

FAQs about One-Pan Coconut Curry Salmon Recipe

Can I use frozen salmon for the One-Pan Coconut Curry Salmon Recipe?

One-Pan Coconut Curry Salmon Recipe. However, it’s best to thaw the salmon first. You can do this by placing it in the refrigerator overnight or using the defrost setting on your microwave. Once thawed, follow the same cooking instructions. Just keep in mind that cooking time may vary slightly, so check for doneness to ensure it flakes easily with a fork.

What can I serve with One-Pan Coconut Curry Salmon Recipe?

One-Pan Coconut Curry Salmon Recipe. Consider pairing it with:

  • Fluffy Rice: White or brown rice is a classic choice that absorbs the curry sauce beautifully.
  • Quinoa: This protein-packed grain adds a nutty flavor and complements the dish well.
  • Fresh Salad: A light salad with mixed greens and a tangy dressing can balance the richness of the curry.
  • Naan Bread: Warm naan is perfect for scooping up the curry and adds a delightful texture.
  • Steamed Vegetables: Broccoli or green beans can add color and nutrition to your meal.

These sides will enhance your dining experience and make the meal even more satisfying!

How can I make One-Pan Coconut Curry Salmon Recipe spicier?

One-Pan Coconut Curry Salmon Recipe. Here are some ideas:

  • Add Red Pepper Flakes: Sprinkle in a teaspoon of red pepper flakes when seasoning the salmon for a nice kick.
  • Use Fresh Jalapeños: Diced jalapeños can be added to the coconut milk for a fresh, spicy flavor.
  • Incorporate Hot Sauce: A few dashes of your favorite hot sauce can elevate the heat level.
  • Increase Curry Powder: If you enjoy the flavor of curry, consider adding an extra half tablespoon of curry powder.

Feel free to adjust the spice levels to suit your taste preferences!

Can I prepare One-Pan Coconut Curry Salmon Recipe in advance?

One-Pan Coconut Curry Salmon Recipe in advance. You can season the salmon and chop the vegetables a few hours ahead of time. Just store them in the refrigerator until you’re ready to cook. However, it’s best to cook the salmon fresh for the best texture and flavor. If you have leftovers, they can be stored in an airtight container in the fridge for up to two days. Reheat gently in the microwave or on the stovetop before serving.

Conclusion on One-Pan Coconut Curry Salmon Recipe

One-Pan Coconut Curry Salmon Recipe is a delightful dish that combines simplicity with rich flavors. It’s perfect for busy weeknights or special occasions, offering a quick yet impressive meal that everyone will love. The creamy coconut milk, aromatic spices, and fresh ingredients come together to create a dish that is not only delicious but also nutritious.

By following the easy steps outlined in this article, you can whip up a fantastic meal in no time. Whether you choose to stick with salmon or explore alternative proteins and vegetarian options, the versatility of this recipe allows for endless creativity in the kitchen. Plus, with minimal cleanup required, you can spend more time enjoying your meal and less time washing dishes!

One-Pan Coconut Curry Salmon Recipe is not just a recipe; it’s an opportunity to bring joy and warmth to your dining table. So gather your ingredients, invite your loved ones, and savor the delightful experience of this tropical-inspired dish. Happy cooking!

Lemon Thumbprint Cookies are a must-try dessert!

Introduction to Lemon Thumbprint Cookies Recipe

Lemon Thumbprint Cookies are a delightful treat that combines the bright, zesty flavor of lemon with a soft, buttery cookie base. These cookies are not just a feast for the taste buds; they also bring a cheerful pop of color to any dessert table. Whether you’re hosting a gathering or simply indulging in a sweet snack, these cookies are sure to impress.

What Makes Lemon Thumbprint Cookies Special?

What sets Lemon Thumbprint Cookies apart is their unique combination of textures and flavors. The soft, crumbly cookie pairs perfectly with the tangy lemon curd filling. Each bite offers a burst of citrus that refreshes the palate. Additionally, the thumbprint design adds a charming touch, making them visually appealing. These cookies are not only delicious but also versatile, allowing for various fillings and flavor enhancements.

The History of Thumbprint Cookies

Thumbprint cookies have a rich history that dates back to Europe, particularly in Sweden and Poland. Traditionally, these cookies were made with a simple dough and filled with fruit preserves. The name “thumbprint” comes from the method of creating an indentation in the dough using one’s thumb. Over the years, bakers have experimented with different flavors and fillings, leading to the creation of variations like Lemon Thumbprint Cookies. Today, these cookies are beloved worldwide, cherished for their delightful taste and easy preparation.

Ingredients for Lemon Thumbprint Cookies Recipe

To create the perfect batch of Lemon Thumbprint Cookies, you’ll need a selection of simple yet essential ingredients. Each component plays a vital role in achieving that delightful balance of flavor and texture. Here’s what you’ll need:

  • 2 ½ cups all-purpose flour: This forms the base of your cookies, providing structure and a soft crumb.
  • 1 teaspoon baking powder: This leavening agent helps the cookies rise, giving them a light and airy texture.
  • ½ teaspoon salt: A pinch of salt enhances the sweetness and balances the flavors.
  • 1 cup unsalted butter, softened: Butter adds richness and moisture, making the cookies tender.
  • ¾ cup granulated sugar: This sweetens the dough and contributes to the cookie’s lovely golden color.
  • 1 large egg: The egg binds the ingredients together and adds moisture.
  • 1 teaspoon vanilla extract: This adds a warm, sweet flavor that complements the lemon.
  • 2 tablespoons lemon zest: Fresh lemon zest infuses the dough with a vibrant citrus aroma.
  • 2 tablespoons fresh lemon juice: This adds a tangy flavor that brightens the cookies.
  • ½ cup powdered sugar (for dusting): A light dusting of powdered sugar adds a sweet finish to the cookies.
  • ½ cup lemon curd (for filling): The star of the show! Lemon curd provides a creamy, tart filling that makes each cookie special.

Gathering these ingredients is the first step toward baking your delicious Lemon Thumbprint Cookies. Each item contributes to the overall flavor and texture, ensuring a delightful treat that everyone will love. Now that you have your ingredients ready, let’s move on to the preparation!

Step-by-Step Preparation of Lemon Thumbprint Cookies Recipe

Now that you have gathered all your ingredients, it’s time to dive into the fun part: preparing your Lemon Thumbprint Cookies! Follow these simple steps to create a batch of cookies that will delight your family and friends.

Step 1: Preparing the Dough

Start by preheating your oven to 350°F (175°C). This ensures that your cookies bake evenly. Next, take a medium bowl and whisk together the all-purpose flour, baking powder, and salt. This mixture is essential as it provides the structure for your cookies. Set this bowl aside for now.

In a large mixing bowl, cream together the softened unsalted butter and granulated sugar. Use an electric mixer for about 3-4 minutes until the mixture is light and fluffy. This step is crucial because it incorporates air into the dough, making your cookies tender. Once fluffy, beat in the large egg, vanilla extract, lemon zest, and fresh lemon juice. Mix until everything is well combined.

Finally, gradually add the dry ingredients to the wet mixture. Stir gently until just combined. Be careful not to overmix, as this can lead to tough cookies. Your dough should be soft and slightly sticky, perfect for shaping!

Step 2: Shaping the Cookies

Now comes the fun part—shaping your cookies! Scoop tablespoon-sized portions of dough and roll them into balls. Make sure to space them about 2 inches apart on the prepared baking sheets. This spacing allows the cookies to spread without sticking together while baking.

Once you have all your dough balls on the baking sheets, it’s time to create the signature thumbprint. Using your thumb or the back of a spoon, gently press down in the center of each ball to form an indentation. This is where the lemon curd will go later, so make sure the indentations are deep enough!

Step 3: Baking the Cookies

With your cookies shaped and ready, it’s time to bake! Place the baking sheets in the preheated oven and bake for 12-15 minutes. Keep an eye on them; you want the edges to turn lightly golden while the centers remain soft. Once baked, remove the cookies from the oven and let them cool on the baking sheets for about 5 minutes. This cooling time helps them set before transferring them to a wire rack.

Step 4: Filling the Thumbprints

After your cookies have cooled completely, it’s time to fill those delightful thumbprints! Take your lemon curd and carefully spoon it into each indentation. Don’t be shy—fill them generously for that burst of flavor in every bite. Finally, dust the cookies with powdered sugar for a sweet finishing touch. Your Lemon Thumbprint Cookies are now ready to be enjoyed!

Variations of Lemon Thumbprint Cookies Recipe

While the classic Lemon Thumbprint Cookies are a delightful treat on their own, there are many ways to switch things up! Here are some fun variations to consider, ensuring that every batch can be a little different and exciting.

Alternative Fillings for Lemon Thumbprint Cookies

One of the best parts about Lemon Thumbprint Cookies is the filling. While lemon curd is a fantastic choice, you can explore other delicious options. Here are some ideas:

  • Fruit Preserves: Use your favorite fruit preserves like raspberry, strawberry, or apricot. These add a sweet and fruity twist.
  • Chocolate Ganache: For chocolate lovers, a rich chocolate ganache can be a decadent filling. Simply melt chocolate with cream and let it cool before filling.
  • Nut Butters: Almond or peanut butter can add a nutty flavor. Just make sure to use a smooth variety for easy filling.
  • Cream Cheese Frosting: A dollop of cream cheese frosting can add a tangy sweetness that pairs beautifully with the lemon flavor.

Feel free to mix and match these fillings to create your own unique Lemon Thumbprint Cookies. Each variation brings a new taste experience, making them perfect for any occasion!

Gluten-Free Lemon Thumbprint Cookies Recipe

If you or someone you know is gluten-sensitive, you can still enjoy these delightful cookies! Here’s how to make a gluten-free version:

  • Flour Substitute: Replace all-purpose flour with a gluten-free flour blend. Make sure it contains xanthan gum for the best texture.
  • Check Ingredients: Ensure that all other ingredients, like baking powder and lemon curd, are gluten-free. Many brands offer gluten-free options.
  • Follow the Same Steps: You can follow the same preparation steps as the original recipe. Just be mindful of the baking time, as gluten-free cookies may bake a little faster.

These gluten-free Lemon Thumbprint Cookies will be just as delicious and enjoyable as the traditional version. Everyone can indulge in this sweet treat!

Cooking Note for Lemon Thumbprint Cookies Recipe

When baking Lemon Thumbprint Cookies, a few cooking notes can help ensure your cookies turn out perfectly every time. These tips will guide you through the process, making it easier and more enjoyable.

First, always use room temperature ingredients. This means letting your butter and egg sit out for about 30 minutes before you start. Room temperature butter creams better with sugar, leading to a fluffier cookie. Similarly, a room temperature egg mixes more easily into the dough.

Next, be mindful of your oven temperature. Ovens can vary, so it’s a good idea to use an oven thermometer. This ensures that your cookies bake evenly. If your oven runs hot, your cookies may brown too quickly. Conversely, if it runs cool, they may not bake properly.

When shaping your cookies, try to keep the dough balls uniform in size. This helps them bake evenly. Using a cookie scoop can make this task easier and more consistent. Additionally, if you find the dough too sticky to handle, you can chill it in the refrigerator for about 15-20 minutes. This will make it easier to roll into balls.

Lastly, don’t skip the cooling time after baking. Allowing the cookies to cool on the baking sheet for a few minutes helps them firm up. This way, they won’t break apart when you transfer them to a wire rack. Patience is key to achieving that perfect texture!

By following these cooking notes, you’ll be well on your way to creating delicious Lemon Thumbprint Cookies that are sure to impress. Happy baking!

Serving Suggestions for Lemon Thumbprint Cookies Recipe

When it comes to serving Lemon Thumbprint Cookies, the possibilities are endless! These cookies are not only delicious but also visually appealing, making them a perfect addition to various occasions. Here are some delightful serving suggestions to elevate your cookie experience:

  • Tea Time Treat: Pair your Lemon Thumbprint Cookies with a warm cup of tea. The zesty lemon flavor complements herbal or green teas beautifully. Consider serving them on a decorative platter for an elegant touch.
  • Picnic Delight: Pack these cookies for a picnic! Their sturdy texture makes them easy to transport. Include a small jar of extra lemon curd for dipping, adding a fun interactive element to your outdoor feast.
  • Party Platter: Create a dessert platter featuring Lemon Thumbprint Cookies alongside other treats. Mix in brownies, mini cupcakes, or fruit tarts for a colorful and varied dessert table that will impress your guests.
  • Gift Giving: These cookies make a wonderful homemade gift! Package them in a decorative box or jar, and tie with a ribbon. Include a note with serving suggestions or a recipe card for a personal touch.
  • Brunch Buffet: Serve Lemon Thumbprint Cookies at a brunch gathering. They pair well with fresh fruit, yogurt, and mimosas. Their bright flavor adds a cheerful note to any brunch spread.

With these serving suggestions, you can enjoy your Lemon Thumbprint Cookies in various delightful ways. Whether you’re hosting a gathering or simply treating yourself, these cookies are sure to bring joy to any occasion!

Tips for Perfect Lemon Thumbprint Cookies Recipe

Creating the perfect Lemon Thumbprint Cookies is all about attention to detail and a few helpful tips. With these suggestions, you can ensure that your cookies turn out delicious every time. Let’s dive into some essential tips that will elevate your baking game!

  • Use Fresh Ingredients: Always opt for fresh lemons for zest and juice. Fresh ingredients enhance the flavor and aroma of your cookies, making them taste even better.
  • Measure Accurately: Baking is a science, so precise measurements are crucial. Use a kitchen scale for the flour and sugar if possible. This ensures consistency in your cookie texture.
  • Chill the Dough: If your dough feels too soft or sticky, chill it in the refrigerator for about 30 minutes. This makes it easier to handle and helps the cookies maintain their shape while baking.
  • Don’t Overbake: Keep a close eye on your cookies as they bake. They should be lightly golden around the edges but still soft in the center. Overbaking can lead to dry cookies.
  • Experiment with Zest: For a more intense lemon flavor, consider adding an extra tablespoon of lemon zest to the dough. This will give your cookies a vibrant citrus punch.
  • Let Them Cool: Allow your cookies to cool completely before filling them with lemon curd. This prevents the curd from melting and ensures a perfect presentation.
  • Store Properly: To keep your cookies fresh, store them in an airtight container at room temperature. They can last for up to a week, but they’re best enjoyed within the first few days.

By following these tips, you’ll be well on your way to baking Lemon Thumbprint Cookies that are not only beautiful but also bursting with flavor. Happy baking!

Breakdown of Time for Lemon Thumbprint Cookies Recipe

Understanding the time required for each step in the Lemon Thumbprint Cookies recipe can help you plan your baking session effectively. Here’s a detailed breakdown of the time you’ll need to create these delightful cookies.

Prep Time

The prep time for Lemon Thumbprint Cookies is approximately 20-25 minutes. This includes gathering your ingredients, measuring them out, and preparing the dough. Make sure to set aside enough time to cream the butter and sugar properly, as this step is crucial for achieving a light and fluffy texture.

Cooking Time

Once your cookies are shaped and ready to bake, the cooking time is about 12-15 minutes. Keep an eye on them as they bake, looking for that lovely golden edge. Remember, the centers should remain soft, so don’t overbake!

Total Time

In total, you can expect to spend around 35-40 minutes from start to finish. This includes both prep and cooking time. If you factor in the cooling time before filling the cookies, you might want to allow an additional 10-15 minutes. Overall, you’ll have a delicious batch of Lemon Thumbprint Cookies ready in under an hour!

Nutritional Information for Lemon Thumbprint Cookies Recipe

Understanding the nutritional content of your Lemon Thumbprint Cookies can help you enjoy them mindfully. Here’s a breakdown of the key nutritional information per cookie, allowing you to indulge without worry.

Calories

Each Lemon Thumbprint Cookie contains approximately 120 calories. This makes them a delightful treat that can fit into a balanced diet. Enjoying one or two cookies can satisfy your sweet tooth without overindulging.

Protein

These cookies provide about 1 gram of protein each. While they are not a significant source of protein, they do offer a small amount that can contribute to your daily intake. Pairing them with a protein-rich snack, like yogurt or nuts, can create a more balanced treat.

Sodium

Each cookie contains roughly 50 milligrams of sodium. This is a relatively low amount, making Lemon Thumbprint Cookies a heart-friendly option. Keeping sodium levels in check is essential for maintaining overall health, and these cookies fit the bill!

By being aware of the nutritional information, you can enjoy your Lemon Thumbprint Cookies while keeping your dietary goals in mind. They are a delightful treat that brings joy without compromising your health!

FAQs about Lemon Thumbprint Cookies Recipe

Can I use other citrus fruits in the Lemon Thumbprint Cookies Recipe?

Absolutely! While this recipe highlights the bright flavor of lemon, you can easily substitute other citrus fruits. For instance, orange, lime, or grapefruit zest and juice can create a delightful twist. Each fruit brings its unique flavor profile, allowing you to customize your cookies. Just remember to adjust the amount of zest and juice according to your taste preference. Experimenting with different citrus fruits can lead to exciting new variations of your thumbprint cookies!

How do I store Lemon Thumbprint Cookies?

Storing your Lemon Thumbprint Cookies properly is key to keeping them fresh. Place the cookies in an airtight container at room temperature. This helps maintain their soft texture and flavor. They can last for up to a week when stored this way. If you live in a humid environment, consider placing a piece of parchment paper between layers of cookies to prevent them from sticking together. For longer storage, you can refrigerate them, but be sure to let them come to room temperature before serving for the best taste!

Can I freeze Lemon Thumbprint Cookies?

Yes, you can freeze Lemon Thumbprint Cookies! To do this, allow the cookies to cool completely after baking. Then, place them in a single layer on a baking sheet and freeze until solid. Once frozen, transfer the cookies to an airtight container or a freezer bag. They can be stored in the freezer for up to three months. When you’re ready to enjoy them, simply thaw at room temperature. If you prefer, you can also freeze the cookie dough before baking. Just scoop the dough into balls, freeze, and then bake directly from the freezer, adding a couple of extra minutes to the baking time.

Conclusion on Lemon Thumbprint Cookies Recipe

In conclusion, Lemon Thumbprint Cookies are a delightful treat that brings a burst of sunshine to any occasion. Their soft, buttery texture combined with the tangy lemon curd filling creates a perfect balance of flavors that is hard to resist. Whether you’re baking for a special event or simply indulging in a sweet snack, these cookies are sure to impress everyone who tries them.

With easy-to-follow steps and a few simple ingredients, you can create a batch of these cookies in no time. Plus, the versatility of the recipe allows you to experiment with different fillings and variations, making it a fun baking adventure. From fruit preserves to gluten-free options, there’s a version of Lemon Thumbprint Cookies for everyone to enjoy.

As you embark on your baking journey, remember the tips and tricks shared throughout this article. They will help you achieve the perfect cookie every time. So gather your ingredients, preheat your oven, and get ready to enjoy the delightful aroma of freshly baked Lemon Thumbprint Cookies wafting through your kitchen.

Happy baking, and may your Lemon Thumbprint Cookies bring joy and sweetness to your life and the lives of those around you!

Strawberry Lemon Blondies Recipe for a Sweet Treat!

Introduction to Strawberry Lemon Blondies Recipe

What are Blondies?

Blondies are a delightful dessert that resembles brownies but with a lighter, golden color. Unlike traditional brownies, which are rich and chocolatey, blondies are made with brown sugar, giving them a sweet, caramel-like flavor. They are often chewy and moist, making them a favorite among dessert lovers. The beauty of blondies lies in their versatility; you can add various ingredients like nuts, chocolate chips, or fruits to create your own unique twist. In this recipe, we’ll explore the refreshing combination of strawberries and lemon, which adds a burst of flavor to these delicious treats.

Why Choose Strawberry Lemon Blondies?

Strawberry Lemon Blondies are the perfect dessert for any occasion. They combine the sweetness of strawberries with the zesty brightness of lemon, creating a delightful balance of flavors. This recipe is not only easy to make but also a great way to use fresh strawberries, especially during the summer months when they are in season. The vibrant colors and refreshing taste make these blondies an excellent choice for picnics, parties, or simply as a sweet treat at home. Plus, they are sure to impress your family and friends with their unique flavor profile!

Ingredients for Strawberry Lemon Blondies Recipe

To create these scrumptious Strawberry Lemon Blondies, you’ll need a few simple ingredients. Each component plays a vital role in achieving the perfect texture and flavor. Here’s what you’ll need:

  • 1 cup unsalted butter, melted
  • 1 cup brown sugar, packed
  • 1/2 cup granulated sugar
  • 2 large eggs
  • 1 teaspoon vanilla extract
  • 1 tablespoon lemon zest
  • 1/4 cup fresh lemon juice
  • 2 cups all-purpose flour
  • 1 teaspoon baking powder
  • 1/2 teaspoon salt
  • 1 cup fresh strawberries, diced

These ingredients come together to create a moist and flavorful blondie that’s bursting with fruity goodness. The combination of butter and sugars provides a rich base, while the eggs add structure. The lemon zest and juice infuse a refreshing tang, perfectly complementing the sweetness of the strawberries. Make sure to use fresh strawberries for the best flavor and texture. Now that you have your ingredients ready, let’s move on to the step-by-step preparation of this delightful dessert!

Step-by-Step Preparation of Strawberry Lemon Blondies Recipe

Step 1: Preheat the Oven

First things first, preheat your oven to 350°F (175°C). This step is crucial as it ensures that your blondies bake evenly. A properly heated oven helps achieve that perfect golden color and chewy texture. While the oven warms up, you can prepare the rest of your ingredients.

Step 2: Prepare the Baking Dish

Next, grab a 9×9-inch baking pan and grease it well. You can use butter or cooking spray for this. Greasing the pan prevents the blondies from sticking, making it easier to remove them once they’re baked. If you prefer, you can also line the pan with parchment paper for added convenience.

Step 3: Mix the Dry Ingredients

In a separate bowl, whisk together the flour, baking powder, and salt. This step is important as it helps to evenly distribute the baking powder and salt throughout the flour. Mixing these dry ingredients first ensures that your blondies rise properly and have a consistent texture.

Step 4: Cream the Butter and Sugar

Now, in a large mixing bowl, combine the melted butter, brown sugar, and granulated sugar. Whisk them together until the mixture is smooth and creamy. This process, known as creaming, helps to incorporate air into the batter, giving your blondies a light and fluffy texture.

Step 5: Add Eggs and Lemon Zest

Once your butter and sugar mixture is ready, it’s time to add the eggs, vanilla extract, lemon zest, and lemon juice. Mix everything together until well combined. The eggs add moisture and structure, while the lemon zest and juice infuse a refreshing flavor that brightens up the blondies.

Step 6: Combine Wet and Dry Ingredients

Now, gradually add the dry ingredients to the wet mixture. Stir gently until just combined. Be careful not to overmix, as this can lead to dense blondies. You want to maintain a light and airy texture, so mix until you no longer see any dry flour.

Step 7: Fold in Strawberries

Next, gently fold in the diced strawberries. This step is where the magic happens! The strawberries will add bursts of flavor and moisture to your blondies. Make sure to distribute them evenly throughout the batter for a delightful fruity experience in every bite.

Step 8: Bake the Blondies

Pour the batter into your prepared baking pan and spread it evenly. Place the pan in the preheated oven and bake for 25-30 minutes. Keep an eye on them! You’ll know they’re done when a toothpick inserted in the center comes out clean or with a few moist crumbs.

Step 9: Cool and Cut

Once baked, remove the blondies from the oven and let them cool in the pan for at least 15 minutes. This cooling time allows them to set properly. After they’ve cooled, cut them into squares and enjoy your delicious Strawberry Lemon Blondies!

Variations of Strawberry Lemon Blondies Recipe

Adding Nuts for Crunch

If you love a bit of crunch in your desserts, consider adding nuts to your Strawberry Lemon Blondies. Chopped walnuts or pecans can enhance the texture and flavor. Simply fold in about 1/2 cup of your favorite nuts along with the strawberries. The nuts will add a delightful contrast to the soft blondies, making each bite even more enjoyable. Plus, they provide healthy fats and protein, making your treat a bit more nutritious!

Using Different Berries

While strawberries are a star in this recipe, you can easily switch things up by using different berries. Blueberries, raspberries, or blackberries can all work beautifully in this blondie recipe. Each berry brings its unique flavor and sweetness. For instance, blueberries will add a burst of juiciness, while raspberries will give a tart kick. Just make sure to adjust the amount of sugar slightly if you choose a tart berry. This way, you can enjoy a variety of flavors while keeping the base recipe intact!

Cooking Note for Strawberry Lemon Blondies Recipe

When making Strawberry Lemon Blondies, a few cooking notes can help ensure your dessert turns out perfectly every time. First, always use fresh ingredients. Fresh strawberries will provide the best flavor and texture. If you can, choose strawberries that are ripe and sweet for a more vibrant taste.

Another important tip is to measure your ingredients accurately. Baking is a science, and even small variations can affect the outcome. Use a kitchen scale for precise measurements, especially for flour. Too much flour can lead to dry blondies, while too little can make them too gooey.

Additionally, keep an eye on the baking time. Ovens can vary, so start checking your blondies a few minutes before the recommended time. If you notice the edges are golden brown and a toothpick comes out clean, it’s time to take them out. Overbaking can lead to a dry texture, which we want to avoid.

Lastly, let the blondies cool completely in the pan before cutting. This helps them set and makes it easier to achieve clean cuts. If you’re in a hurry, you can place the pan in the fridge for a short time to speed up the cooling process. Following these cooking notes will help you create delicious Strawberry Lemon Blondies that everyone will love!

Serving Suggestions for Strawberry Lemon Blondies Recipe

Pairing with Ice Cream

One of the best ways to enjoy your Strawberry Lemon Blondies is by pairing them with a scoop of ice cream. The creamy texture of ice cream complements the chewy blondies perfectly. Vanilla ice cream is a classic choice, as its subtle flavor allows the fruity notes of the blondies to shine. However, you can also try lemon sorbet for a refreshing twist or strawberry ice cream for an extra burst of flavor. Simply place a warm blondie on a plate, add a scoop of your favorite ice cream on top, and drizzle with a bit of lemon glaze or chocolate sauce for an indulgent treat. This combination is sure to impress your guests and elevate your dessert experience!

Serving with Fresh Fruit

For a lighter option, consider serving your Strawberry Lemon Blondies with fresh fruit. A side of mixed berries, such as blueberries, raspberries, and sliced strawberries, adds a refreshing touch. The natural sweetness of the fruit pairs beautifully with the blondies, enhancing their flavor. You can also create a simple fruit salad with a splash of lemon juice and a sprinkle of mint for added freshness. This not only makes for a colorful presentation but also adds a nutritious element to your dessert. Whether you choose ice cream or fresh fruit, these serving suggestions will make your Strawberry Lemon Blondies even more delightful!

Tips for Perfect Strawberry Lemon Blondies Recipe

Choosing the Right Strawberries

When it comes to making the best Strawberry Lemon Blondies, selecting the right strawberries is key. Fresh, ripe strawberries will enhance the flavor and texture of your blondies. Look for strawberries that are bright red, firm, and free from blemishes. The aroma should be sweet and fragrant, indicating ripeness. If possible, buy strawberries from local farmers’ markets, as they are often fresher and more flavorful than store-bought ones.

Before using, wash the strawberries gently under cool water and pat them dry with a paper towel. Remove the green tops and dice them into small pieces. This ensures that the strawberries distribute evenly throughout the batter, giving you that delightful burst of flavor in every bite. If you find strawberries that are slightly overripe, don’t worry! You can still use them, but be sure to adjust the sugar in your recipe to balance the sweetness.

Storing Leftovers

After enjoying your delicious Strawberry Lemon Blondies, you might have some leftovers. Storing them properly will keep them fresh and tasty for days. Allow the blondies to cool completely before storing. Once cooled, place them in an airtight container. This helps to maintain their moisture and prevents them from drying out.

You can store the blondies at room temperature for up to three days. If you want to keep them longer, consider refrigerating them. They can last up to a week in the fridge. For even longer storage, you can freeze the blondies. Wrap them tightly in plastic wrap and then place them in a freezer-safe bag. They can be frozen for up to three months. When you’re ready to enjoy them, simply thaw them at room temperature or warm them in the microwave for a few seconds. This way, you can savor the delightful taste of Strawberry Lemon Blondies anytime!

Breakdown of Time for Strawberry Lemon Blondies Recipe

Prep Time

The prep time for your Strawberry Lemon Blondies is quite manageable. You’ll need about 15-20 minutes to gather your ingredients and prepare the batter. This includes measuring out the ingredients, mixing the wet and dry components, and folding in the strawberries. With a little organization, you can have everything ready to go in no time!

Cooking Time

Once your batter is prepared, the cooking time is straightforward. Bake the blondies in your preheated oven for 25-30 minutes. Keep an eye on them as they bake, checking for that perfect golden color. The toothpick test is your best friend here; it should come out clean or with a few moist crumbs when they’re done.

Total Time

In total, you can expect to spend about 45-50 minutes from start to finish. This includes both the prep and cooking times. With such a quick turnaround, you can whip up these delightful Strawberry Lemon Blondies for any occasion, whether it’s a family gathering or a cozy night in. Enjoy the process and the delicious results!

Nutritional Information for Strawberry Lemon Blondies Recipe

Calories

When indulging in a delicious Strawberry Lemon Blondie, it’s good to know the calorie content. Each serving contains approximately 210 calories. This makes them a delightful treat without being overly indulgent. Enjoying these blondies in moderation allows you to satisfy your sweet tooth while keeping your calorie intake in check. They are perfect for a light dessert or a sweet snack during the day!

Protein

In terms of protein, each blondie offers about 2 grams. While this may not seem like a lot, it contributes to the overall nutritional profile of the dessert. The protein comes mainly from the eggs used in the recipe. While Strawberry Lemon Blondies are not a significant source of protein, they can still be enjoyed as part of a balanced diet. Pairing them with a protein-rich snack, like yogurt or a handful of nuts, can help boost your protein intake for the day.

Sodium

Each serving of Strawberry Lemon Blondies contains approximately 150 mg of sodium. This level is relatively low, making them a suitable option for those watching their sodium intake. The sodium primarily comes from the baking powder and salt used in the recipe. Keeping an eye on sodium levels is essential, especially for individuals with dietary restrictions. Enjoy these blondies guilt-free, knowing they fit well within a healthy eating plan!

FAQs about Strawberry Lemon Blondies Recipe

Can I use frozen strawberries in the recipe?

Yes, you can use frozen strawberries in your Strawberry Lemon Blondies! However, keep in mind that frozen strawberries may release more moisture than fresh ones. To prevent your blondies from becoming too soggy, it’s best to thaw the strawberries first and drain any excess liquid. After that, chop them into smaller pieces and fold them into the batter as you would with fresh strawberries. This way, you can still enjoy the fruity flavor even when fresh strawberries are out of season!

How do I know when the blondies are done baking?

Knowing when your blondies are done baking is crucial for achieving the perfect texture. Start checking them around the 25-minute mark. Insert a toothpick into the center of the blondies; if it comes out clean or with a few moist crumbs, they are ready! If the toothpick has wet batter on it, give them a few more minutes in the oven. Remember, blondies should be slightly soft in the center, as they will continue to cook a bit while cooling in the pan.

Can I substitute lemon juice for lemon zest?

While you can use lemon juice instead of lemon zest, it’s not a perfect substitute. Lemon zest adds a concentrated flavor and aroma that juice alone cannot provide. If you don’t have lemon zest, you can use a bit more lemon juice, but keep in mind that it may alter the texture slightly. For the best results, try to use both lemon zest and juice together. This combination will give your blondies a bright, zesty flavor that truly shines!

How should I store the blondies?

To keep your Strawberry Lemon Blondies fresh, allow them to cool completely before storing. Place them in an airtight container at room temperature for up to three days. If you want to keep them longer, you can refrigerate them for up to a week. For even longer storage, wrap the blondies tightly in plastic wrap and place them in a freezer-safe bag. They can be frozen for up to three months. When you’re ready to enjoy them, simply thaw at room temperature or warm them in the microwave for a few seconds!

Conclusion on Strawberry Lemon Blondies Recipe

In conclusion, the Strawberry Lemon Blondies Recipe is a delightful treat that combines the sweetness of strawberries with the zesty brightness of lemon. This dessert is not only easy to make but also offers a refreshing twist on traditional blondies. With simple ingredients and straightforward steps, you can whip up a batch in no time, making it perfect for any occasion.

Whether you’re hosting a summer picnic, celebrating a birthday, or simply craving something sweet, these blondies are sure to impress. Their vibrant colors and delicious flavors will have everyone coming back for seconds. Plus, with the option to customize them by adding nuts or different berries, you can make this recipe your own!

Remember to follow the cooking notes and tips provided to ensure your blondies turn out perfectly every time. From choosing the right strawberries to storing leftovers, these small details can make a big difference in your baking experience. So, gather your ingredients, preheat your oven, and get ready to enjoy a batch of scrumptious Strawberry Lemon Blondies!

Happy baking, and may your kitchen be filled with the sweet aroma of these delightful treats!

Garlic Chilli Noodles Recipe is quick and delicious!

Introduction to Garlic Chilli Noodles Recipe

Garlic Chilli Noodles are a delightful dish that brings together the bold flavors of garlic and the heat of chili. This recipe is not just a meal; it’s an experience that tantalizes your taste buds. Whether you’re a busy parent, a student, or someone who simply loves good food, this dish is perfect for you. It’s quick to prepare, packed with flavor, and can be customized to suit your preferences.

What Makes Garlic Chilli Noodles Special?

What sets Garlic Chilli Noodles apart from other noodle dishes? First, it’s the combination of fresh ingredients that create a symphony of flavors. The garlic adds a rich aroma, while the red pepper flakes provide a spicy kick. Together, they create a mouthwatering sauce that clings to the noodles perfectly.

Moreover, this dish is incredibly versatile. You can easily adjust the spice level to suit your taste. If you prefer a milder flavor, simply reduce the amount of red pepper flakes. On the other hand, if you love heat, feel free to add more! The addition of colorful mixed vegetables not only enhances the dish’s visual appeal but also boosts its nutritional value.

Another reason to love Garlic Chilli Noodles is their quick cooking time. In just about 30 minutes, you can whip up a delicious meal that serves four. This makes it an ideal choice for weeknight dinners or last-minute gatherings. Plus, it’s a great way to use up any leftover vegetables you have in your fridge.

In summary, Garlic Chilli Noodles are special because they are flavorful, customizable, quick to prepare, and a great way to enjoy a healthy meal. So, let’s dive into the ingredients and get started on this delicious journey!

Ingredients for Garlic Chilli Noodles Recipe

To create the perfect Garlic Chilli Noodles, you’ll need a selection of fresh and flavorful ingredients. Each component plays a vital role in building the dish’s unique taste. Here’s what you’ll need:

  • 8 ounces spaghetti or linguine: Choose your favorite type of noodle for a delightful base.
  • 3 tablespoons vegetable oil: This helps in sautéing the garlic and vegetables, adding richness.
  • 6 cloves garlic, minced: Fresh garlic is essential for that aromatic flavor.
  • 1-2 teaspoons red pepper flakes: Adjust this to control the heat level according to your preference.
  • 3 tablespoons soy sauce: This adds a savory depth to the dish.
  • 2 tablespoons oyster sauce: It enhances the umami flavor, making the noodles irresistible.
  • 1 tablespoon sesame oil: A drizzle of this oil gives a nutty aroma and flavor.
  • 1 cup mixed vegetables: Use a colorful mix like bell peppers, carrots, and snap peas for added nutrition and crunch.
  • 2 green onions, sliced: These add a fresh, mild onion flavor and a pop of color.
  • Salt and pepper to taste: Essential for seasoning and enhancing all the flavors.
  • Fresh cilantro for garnish (optional): This adds a refreshing touch to the final dish.

Gathering these ingredients will set you on the right path to making a delicious Garlic Chilli Noodles dish. Each item contributes to the overall flavor and texture, ensuring a satisfying meal. Now that you have everything ready, let’s move on to the step-by-step preparation!

Step-by-Step Preparation of Garlic Chilli Noodles Recipe

Now that you have all your ingredients ready, it’s time to dive into the cooking process. Follow these simple steps to create your delicious Garlic Chilli Noodles. Each step is designed to ensure that your dish turns out flavorful and satisfying.

Step 1: Preparing the Noodles

Start by cooking the spaghetti or linguine. Bring a large pot of salted water to a boil. Once boiling, add the noodles and cook according to the package instructions. This usually takes about 8-10 minutes. Stir occasionally to prevent sticking. When the noodles are al dente, drain them in a colander. Remember to reserve 1/2 cup of the pasta water for later. This starchy water will help bind the sauce to the noodles.

Step 2: Making the Garlic Chilli Sauce

While the noodles are cooking, you can prepare the sauce. In a large skillet or wok, heat 3 tablespoons of vegetable oil over medium heat. Once the oil is hot, add the minced garlic and red pepper flakes. Sauté for about 1 minute, stirring constantly. You want the garlic to become fragrant but not burnt. This step is crucial as it builds the base flavor for your Garlic Chilli Noodles.

Step 3: Combining Ingredients

Next, add the mixed vegetables to the skillet. Stir-fry them for about 3-4 minutes until they are tender yet still crisp. This keeps the vegetables vibrant and full of nutrients. After that, it’s time to add the cooked noodles. Pour in the soy sauce, oyster sauce, and sesame oil. Toss everything together gently. If the noodles seem dry, add the reserved pasta water a little at a time until they are well coated and heated through.

Step 4: Final Touches and Serving

Once everything is combined, season your dish with salt and pepper to taste. Remove the skillet from heat and stir in the sliced green onions. These will add a fresh crunch to your noodles. Now, it’s time to serve! Plate your Garlic Chilli Noodles hot, and if you like, garnish with fresh cilantro for an extra pop of flavor. Enjoy your meal!

Variations of Garlic Chilli Noodles Recipe

Garlic Chilli Noodles are not only delicious but also incredibly versatile. You can easily modify the recipe to suit your dietary preferences or to use up ingredients you have on hand. Here are some exciting variations to consider:

Vegetarian Options

If you’re looking for a vegetarian twist, you can enhance the dish with a variety of vegetables. Consider adding:

  • Broccoli: This adds a nice crunch and is packed with nutrients.
  • Zucchini: Sliced thinly, zucchini cooks quickly and absorbs flavors well.
  • Mushrooms: They provide a meaty texture and earthy flavor.
  • Spinach: Toss in fresh spinach at the end for a pop of color and added vitamins.

Feel free to mix and match these vegetables based on what you enjoy or have available. You can also add tofu for extra protein, making the dish even more filling.

Protein Additions

If you want to boost the protein content of your Garlic Chilli Noodles, there are several options to consider:

  • Chicken: Cooked, shredded chicken can be added during the stir-fry step for a hearty meal.
  • Shrimp: Quick-cooking shrimp can be tossed in with the garlic for a seafood twist.
  • Tofu: Firm tofu, cubed and sautéed until golden, is a great vegetarian protein source.
  • Beef: Thinly sliced beef can be marinated and added for a rich flavor.

These protein additions not only enhance the dish but also make it more satisfying. You can easily customize your Garlic Chilli Noodles to fit your taste and dietary needs!

Cooking Note for Garlic Chilli Noodles Recipe

When preparing Garlic Chilli Noodles, a few cooking notes can help you achieve the best results. These tips will ensure that your dish is not only delicious but also visually appealing and satisfying.

First, always use fresh ingredients. Fresh garlic and vegetables will enhance the flavor of your noodles significantly. If possible, choose seasonal vegetables for the best taste and nutrition. Fresh ingredients make a noticeable difference in the final dish.

Next, pay attention to the cooking time of your noodles. Overcooked noodles can become mushy and lose their delightful texture. Aim for al dente, which means the noodles should be firm to the bite. This texture will hold up better when mixed with the sauce and vegetables.

Another important note is to control the heat level. If you’re unsure about the spice, start with a smaller amount of red pepper flakes. You can always add more later if you want extra heat. This way, you can cater to everyone’s taste preferences, making the dish enjoyable for all.

Additionally, when stir-frying, keep the heat at medium to medium-high. This allows the garlic to become fragrant without burning. Burning garlic can create a bitter taste that may ruin your dish. Stir constantly to ensure even cooking and to prevent sticking.

Lastly, don’t forget to taste as you go! Adjust the seasoning with salt, pepper, or additional sauces to suit your palate. This step is crucial for creating a well-balanced dish that everyone will love.

By following these cooking notes, you’ll be well on your way to making a fantastic Garlic Chilli Noodles dish that’s bursting with flavor and texture. Happy cooking!

Serving Suggestions for Garlic Chilli Noodles Recipe

Once your Garlic Chilli Noodles are ready, it’s time to think about how to serve them. Presentation can elevate your dish and make it even more enjoyable. Here are some delightful serving suggestions to consider:

  • Garnish with Fresh Herbs: A sprinkle of fresh cilantro or basil can add a burst of color and flavor. These herbs complement the garlic and chili beautifully.
  • Pair with Protein: Serve your noodles alongside grilled chicken, shrimp, or tofu for a complete meal. This not only adds protein but also makes the dish more filling.
  • Accompany with a Side Salad: A light salad with a tangy dressing can balance the heat of the noodles. Consider a cucumber salad or a simple green salad with a vinaigrette.
  • Serve with Lime Wedges: A squeeze of fresh lime juice over the noodles can brighten the flavors. It adds a zesty kick that enhances the overall taste.
  • Offer Extra Chili Flakes: For those who love spice, place a small bowl of red pepper flakes on the table. This allows guests to customize their heat level.
  • Use Colorful Bowls: Serving your Garlic Chilli Noodles in vibrant bowls can make the dish more appealing. The colors of the noodles and vegetables will pop against a bright background.

These serving suggestions not only enhance the visual appeal of your Garlic Chilli Noodles but also allow for a more personalized dining experience. Whether it’s a casual family dinner or a gathering with friends, these tips will help you create a memorable meal that everyone will enjoy!

Tips for Perfect Garlic Chilli Noodles Recipe

Creating the perfect Garlic Chilli Noodles is all about attention to detail and a few handy tips. With these suggestions, you can elevate your dish and impress your family or guests. Here are some essential tips to keep in mind:

  • Use High-Quality Noodles: Opt for fresh or high-quality dried spaghetti or linguine. The texture of the noodles can greatly affect the overall dish. Fresh noodles will give a delightful chewiness, while good-quality dried noodles will hold the sauce well.
  • Don’t Skimp on Garlic: Garlic is the star of this dish. Use fresh garlic cloves and don’t be afraid to add a bit more if you love that garlicky flavor. The aroma and taste will enhance your noodles significantly.
  • Prep All Ingredients First: Before you start cooking, have all your ingredients prepped and ready to go. This includes chopping vegetables, measuring sauces, and mincing garlic. Stir-frying happens quickly, so being prepared will help you avoid overcooking.
  • Adjust Spice Levels: Remember, you can always add more red pepper flakes, but you can’t take them out once added. Start with a smaller amount and taste as you go. This way, you can find the perfect balance for your palate.
  • Don’t Overcrowd the Pan: When stir-frying, make sure not to overcrowd the skillet or wok. This can lead to steaming instead of frying, which affects the texture of your vegetables. If you have a lot of ingredients, consider cooking in batches.
  • Use Reserved Pasta Water Wisely: The reserved pasta water is starchy and helps bind the sauce to the noodles. Add it gradually until you reach your desired consistency. This will ensure your noodles are perfectly coated without being too saucy.
  • Finish with Fresh Ingredients: Adding fresh herbs like cilantro or green onions at the end of cooking adds a burst of freshness. This enhances the flavor and makes the dish visually appealing.
  • Serve Immediately: Garlic Chilli Noodles are best enjoyed fresh. Serve them right after cooking for the best texture and flavor. If they sit too long, they may become sticky.

By following these tips, you’ll be well on your way to making Garlic Chilli Noodles that are not only delicious but also visually stunning. Enjoy the process and happy cooking!

Breakdown of Time for Garlic Chilli Noodles Recipe

Understanding the time required for each step in the Garlic Chilli Noodles recipe can help you plan your cooking efficiently. Here’s a breakdown of the time you’ll need for preparation and cooking:

Prep Time

Prep time is crucial for a smooth cooking experience. For Garlic Chilli Noodles, you should expect to spend about 10-15 minutes gathering and preparing your ingredients. This includes:

  • Measuring out the noodles and sauces.
  • Minced garlic and slicing green onions.
  • Chopping mixed vegetables like bell peppers, carrots, and snap peas.

Having everything ready before you start cooking will make the process much easier and faster.

Cooking Time

The cooking time for Garlic Chilli Noodles is relatively quick. You’ll need approximately 15-20 minutes to cook the noodles and stir-fry the ingredients. Here’s how the time breaks down:

  • Cooking the noodles: 8-10 minutes.
  • Sautéing garlic and red pepper flakes: 1 minute.
  • Stir-frying mixed vegetables: 3-4 minutes.
  • Combining everything and heating through: 3-5 minutes.

This quick cooking time makes Garlic Chilli Noodles a fantastic option for busy weeknights!

Total Time

When you combine both prep and cooking times, the total time to make Garlic Chilli Noodles is about 25-35 minutes. This makes it a perfect dish for those who want a delicious meal without spending hours in the kitchen. You can enjoy a flavorful, homemade dish in no time!

Nutritional Information for Garlic Chilli Noodles Recipe

Understanding the nutritional content of your meals is essential for maintaining a balanced diet. Garlic Chilli Noodles not only offer a burst of flavor but also provide a decent nutritional profile. Here’s a breakdown of the key nutritional components per serving:

Calories

Each serving of Garlic Chilli Noodles contains approximately 350 calories. This makes it a satisfying meal option without being overly heavy. The calorie count can vary slightly based on the specific ingredients you use, especially if you add proteins or extra vegetables. Keeping track of your calorie intake can help you enjoy this dish as part of a healthy diet.

Protein

In terms of protein, Garlic Chilli Noodles provide about 10 grams per serving. This protein content comes primarily from the noodles and any added ingredients like vegetables or proteins. If you choose to include chicken, shrimp, or tofu, the protein content will increase significantly, making it a more filling meal. This is especially beneficial for those looking to maintain or build muscle.

Sodium

The sodium content in Garlic Chilli Noodles is around 800 milligrams per serving. This amount can vary based on the soy sauce and oyster sauce used. If you’re watching your sodium intake, consider using low-sodium soy sauce or adjusting the amount of sauce you add. Balancing sodium levels is important for overall health, especially for those with specific dietary restrictions.

In summary, Garlic Chilli Noodles are a flavorful dish that offers a good balance of calories, protein, and sodium. By being mindful of your ingredient choices, you can enjoy this delicious meal while keeping your nutritional goals in check.

FAQs about Garlic Chilli Noodles Recipe

Can I make Garlic Chilli Noodles ahead of time?

Yes, you can prepare Garlic Chilli Noodles ahead of time! To do this, cook the noodles and prepare the sauce as directed. However, it’s best to store the noodles and sauce separately. This way, the noodles won’t become soggy. When you’re ready to eat, simply reheat the noodles and sauce together in a skillet. Add a splash of reserved pasta water to help loosen the sauce if needed. This makes it a convenient option for meal prep or busy weeknights!

What can I substitute for noodles in this recipe?

If you’re looking for alternatives to traditional noodles, there are several options! You can use:

  • Zucchini Noodles: Also known as zoodles, they are a great low-carb option.
  • Rice Noodles: These are gluten-free and cook quickly, making them a fantastic substitute.
  • Whole Wheat Noodles: For a healthier twist, whole wheat noodles add more fiber.
  • Shirataki Noodles: These are low-calorie and made from konjac yam, perfect for a light meal.

Feel free to experiment with these substitutes based on your dietary needs and preferences!

How spicy are Garlic Chilli Noodles?

The spice level of Garlic Chilli Noodles can be easily adjusted to your liking. The recipe calls for 1-2 teaspoons of red pepper flakes, which gives a moderate heat. If you prefer a milder dish, start with just 1 teaspoon. On the other hand, if you love spice, feel free to add more! Remember, you can always add extra chili flakes when serving for those who enjoy a kick. This flexibility makes it a dish that everyone can enjoy!

Can I add vegetables to Garlic Chilli Noodles?

Absolutely! Adding vegetables to Garlic Chilli Noodles is not only encouraged but also enhances the dish’s flavor and nutrition. You can include a variety of vegetables such as:

  • Broccoli: Adds crunch and is rich in vitamins.
  • Bell Peppers: They bring sweetness and color.
  • Carrots: These add a nice texture and sweetness.
  • Snap Peas: They provide a fresh, crisp bite.

Feel free to mix and match based on what you have on hand or what’s in season. The more colorful your dish, the more appealing it will be!

Conclusion on Garlic Chilli Noodles Recipe

In conclusion, Garlic Chilli Noodles are a fantastic dish that combines simplicity with bold flavors. This recipe is not only quick to prepare but also allows for endless customization. Whether you prefer it spicy or mild, vegetarian or packed with protein, Garlic Chilli Noodles can cater to your taste and dietary needs.

As you’ve seen, the ingredients are straightforward, and the cooking process is easy to follow. With just a few steps, you can create a delicious meal that’s perfect for any occasion. From busy weeknights to casual gatherings, this dish is sure to impress your family and friends.

Moreover, the nutritional benefits of Garlic Chilli Noodles make it a smart choice for those looking to enjoy a balanced meal. With the right ingredients, you can keep the calories in check while still indulging in a flavorful experience. Remember to experiment with different vegetables and proteins to make the dish your own!

So, why not give this Garlic Chilli Noodles recipe a try? Gather your ingredients, follow the steps, and enjoy a delightful meal that’s bursting with flavor. Happy cooking, and may your kitchen be filled with the wonderful aroma of garlic and chili!

Homemade Ramen Recipe: A Delicious Culinary Adventure

Introduction to Homemade Ramen Recipe

The Origins of Ramen

Ramen is more than just a meal; it’s a cultural icon. This beloved dish originated in China but found its true home in Japan. The first ramen shops appeared in Japan in the early 20th century. Over the years, ramen has evolved into various regional styles, each with its unique flavors and ingredients. From the rich, creamy tonkotsu broth of Fukuoka to the soy sauce-based shoyu ramen of Tokyo, there’s a type of ramen for everyone. Today, ramen is enjoyed worldwide, making it a staple in many households.

Why Make Homemade Ramen?

Making homemade ramen is a rewarding experience. It allows you to control the ingredients, ensuring a healthier meal. Plus, you can customize it to suit your taste. Whether you prefer a vegetarian option or a spicy kick, the possibilities are endless. Homemade ramen is also a fun activity to share with family and friends. It’s a great way to bond over cooking and enjoy a delicious meal together. So, why not roll up your sleeves and dive into the world of homemade ramen? You’ll be glad you did!

Ingredients for Homemade Ramen Recipe

Essential Ingredients

To create a delicious homemade ramen, you need a few essential ingredients. These ingredients form the base of your dish, providing flavor and nutrition. Here’s what you’ll need:

  • Chicken Broth: 4 cups of chicken broth is the heart of your ramen. It adds depth and richness to the soup.
  • Water: 2 cups of water help balance the broth, making it lighter.
  • Instant Ramen Noodles: Use 2 packs of instant ramen noodles. Discard the seasoning packets, as you’ll create your own flavor.
  • Soy Sauce: 1 tablespoon of soy sauce adds a savory umami taste.
  • Miso Paste: 1 tablespoon of miso paste enhances the broth with a unique flavor.
  • Sesame Oil: 1 teaspoon of sesame oil gives a nutty aroma and taste.
  • Green Onions: 2 sliced green onions add freshness and color.
  • Soft-Boiled Eggs: 2 soft-boiled eggs provide creaminess and protein.
  • Cooked Chicken or Tofu: 1 cup of shredded cooked chicken or tofu for a vegetarian option adds protein.
  • Baby Spinach: 1 cup of baby spinach adds nutrients and a pop of color.
  • Carrot: 1 julienned carrot adds crunch and sweetness.

Optional Ingredients for Customization

One of the best parts of making homemade ramen is the ability to customize it. Here are some optional ingredients you can add to make your ramen unique:

  • Nori: 1 tablespoon of nori, cut into strips, adds a touch of ocean flavor.
  • Red Pepper Flakes: Sprinkle some red pepper flakes for a spicy kick.
  • Mushrooms: Add sliced mushrooms for an earthy flavor.
  • Corn: Sweet corn can bring a delightful sweetness to your bowl.
  • Bok Choy: This leafy green adds a nice crunch and is packed with nutrients.

Feel free to mix and match these ingredients based on your preferences. The beauty of homemade ramen lies in its versatility. So, gather your ingredients and get ready to create a bowl of comfort!

Step-by-Step Preparation of Homemade Ramen Recipe

Step 1: Preparing the Broth

To start your homemade ramen, you need to prepare the broth. In a large pot, combine 4 cups of chicken broth and 2 cups of water. Place the pot over medium heat and bring it to a gentle simmer. This process usually takes about 5 minutes. Once simmering, stir in 1 tablespoon of soy sauce, 1 tablespoon of miso paste, and 1 teaspoon of sesame oil. Mix well until the miso paste dissolves completely. This flavorful broth will be the foundation of your ramen, so take your time to ensure it’s well combined.

Step 2: Making the Noodles

Next, it’s time to cook the noodles. Add 2 packs of instant ramen noodles to the simmering broth. Remember to discard the seasoning packets that come with the noodles. Cook the noodles according to the package instructions, which usually takes about 3-4 minutes. Stir occasionally to prevent them from sticking together. The noodles should be tender but still have a slight bite to them, known as “al dente.” This texture will enhance your ramen experience.

Step 3: Preparing the Toppings

While the noodles are cooking, you can prepare your toppings. Start by soft-boiling 2 eggs. To do this, bring a small pot of water to a boil, gently add the eggs, and cook for about 6-7 minutes. Afterward, transfer them to an ice bath to stop the cooking process. Once cooled, peel the eggs and set them aside. Next, shred 1 cup of cooked chicken or tofu, depending on your preference. Finally, slice 2 green onions and julienne 1 carrot. You can also prepare any additional toppings you wish to add, like nori or red pepper flakes.

Step 4: Assembling the Ramen Bowl

Now comes the fun part—assembling your ramen bowl! Once the noodles are cooked, remove the pot from heat. Use a ladle to pour the broth and noodles into individual bowls. Top each bowl with the shredded chicken or tofu, a soft-boiled egg cut in half, sliced green onions, and julienned carrots. If you’re using nori, sprinkle some strips on top. For those who enjoy a bit of heat, add a pinch of red pepper flakes. Your homemade ramen is now ready to be enjoyed!

Variations of Homemade Ramen Recipe

Vegetarian Homemade Ramen Recipe

If you’re looking for a meat-free option, vegetarian homemade ramen is a fantastic choice. Start by using vegetable broth instead of chicken broth. This will provide a rich base for your soup. You can follow the same steps as the original recipe, but add more vegetables to enhance the flavor. Consider using mushrooms, bok choy, and bell peppers for a colorful and nutritious bowl. Tofu is a great protein source, so don’t forget to include it! You can also add a splash of soy sauce and a bit of miso paste for extra depth. This vegetarian version is just as satisfying and delicious!

Spicy Homemade Ramen Recipe

If you love a bit of heat, spicy homemade ramen is the way to go! To make it spicy, you can add chili paste or sriracha to the broth while it simmers. Start with a teaspoon and adjust according to your taste. You can also sprinkle red pepper flakes on top before serving for an extra kick. For added flavor, consider including sliced jalapeños or spicy kimchi as toppings. This spicy version will warm you up and tantalize your taste buds!

Tonkotsu Homemade Ramen Recipe

Tonkotsu ramen is known for its rich, creamy broth made from pork bones. To create a homemade version, you can use pork broth or a combination of chicken and pork broth for a deeper flavor. Simmer the broth for a longer time, ideally 6-8 hours, to extract all the flavors. While this takes more time, the result is a luxurious, velvety soup. You can still follow the original recipe for the noodles and toppings, but consider adding chashu (braised pork belly) for authenticity. This tonkotsu variation will impress anyone who tries it!

Cooking Note for Homemade Ramen Recipe

Tips for Achieving the Perfect Broth

Creating the perfect broth is key to a delicious homemade ramen. Here are some tips to help you achieve that rich, flavorful base:

  • Use Quality Broth: Start with high-quality chicken or vegetable broth. Homemade broth is ideal, but store-bought can work too. Look for low-sodium options to control the saltiness.
  • Simmer Slowly: Allow your broth to simmer gently. This helps the flavors meld together beautifully. A longer simmer time can enhance the taste, so don’t rush it!
  • Add Aromatics: For extra depth, consider adding garlic, ginger, or scallions to the broth while it simmers. These ingredients infuse the broth with wonderful flavors.
  • Season Gradually: When adding soy sauce and miso paste, do so gradually. Taste as you go to ensure the broth isn’t too salty. You can always add more, but it’s hard to fix an overly salty broth.
  • Strain for Clarity: If you prefer a clear broth, strain it before serving. This removes any solids and gives your ramen a clean, appealing look.

Common Mistakes to Avoid

Even the best cooks can make mistakes. Here are some common pitfalls to avoid when making homemade ramen:

  • Overcooking the Noodles: Instant ramen noodles cook quickly. Keep an eye on them to avoid mushiness. Aim for al dente texture for the best bite.
  • Skipping the Toppings: Toppings are what make ramen special! Don’t skip them. They add flavor, texture, and visual appeal to your dish.
  • Using the Seasoning Pack: Discard the seasoning packets that come with instant noodles. They can overpower your homemade broth and ruin the flavor.
  • Not Tasting as You Cook: Always taste your broth and adjust the seasoning as needed. This ensures a balanced flavor that suits your palate.
  • Rushing the Process: Take your time! Good ramen requires patience. Enjoy the cooking process and savor the results.

Serving Suggestions for Homemade Ramen Recipe

Ideal Pairings and Sides

When enjoying your homemade ramen, consider pairing it with delicious sides to enhance your meal. Here are some ideal options:

  • Gyoza: These tasty dumplings are a perfect match for ramen. They can be filled with pork, chicken, or vegetables, and are often served with a soy dipping sauce.
  • Edamame: Steamed edamame sprinkled with sea salt makes for a healthy and crunchy side. They are easy to prepare and add a nice touch to your meal.
  • Seaweed Salad: A refreshing seaweed salad can complement the flavors of your ramen. Its light and tangy taste balances the richness of the broth.
  • Pickled Vegetables: Adding pickled vegetables, like radishes or cucumbers, can provide a delightful crunch and acidity that cuts through the richness of the ramen.
  • Rice Balls: Onigiri, or rice balls, can be a fun side. They can be filled with various ingredients, such as tuna or pickled plum, and are easy to eat with your hands.

These sides not only enhance your ramen experience but also create a well-rounded meal. Feel free to mix and match based on your preferences!

Presentation Tips for Your Ramen Bowl

Presentation is key when serving homemade ramen. A beautifully arranged bowl can make your meal even more enjoyable. Here are some tips to elevate your ramen presentation:

  • Use a Deep Bowl: Choose a deep bowl to hold the broth and noodles. This allows for a generous serving and makes it easier to enjoy.
  • Layer Your Ingredients: When assembling your ramen, layer the ingredients thoughtfully. Place the noodles at the bottom, followed by the broth, and then add toppings on top for a visually appealing look.
  • Garnish with Fresh Herbs: Fresh herbs, like cilantro or basil, can add a pop of color and freshness. Sprinkle them on top just before serving.
  • Use Colorful Toppings: Incorporate a variety of colorful toppings, such as bright green spinach, orange carrots, and yellow corn. This not only looks great but also makes the dish more appetizing.
  • Serve with Chopsticks and a Spoon: Provide chopsticks for eating the noodles and a spoon for sipping the broth. This adds an authentic touch to your ramen experience.

With these serving suggestions and presentation tips, your homemade ramen will not only taste amazing but also look stunning on the table. Enjoy your culinary creation!

Tips for Perfecting Your Homemade Ramen Recipe

Ingredient Substitutions

Sometimes, you may not have all the ingredients on hand. No worries! Here are some easy substitutions to keep your homemade ramen delicious:

  • Broth: If you don’t have chicken broth, vegetable broth works great. You can also use beef broth for a richer flavor.
  • Noodles: If you can’t find instant ramen noodles, try using udon or soba noodles. They will give a different texture but still taste amazing.
  • Miso Paste: If miso paste is unavailable, tahini or peanut butter can add a creamy texture, though the flavor will differ.
  • Protein: For a protein boost, consider using canned chickpeas or lentils instead of chicken or tofu. They are nutritious and filling.
  • Vegetables: Feel free to swap out baby spinach for kale or Swiss chard. You can also use frozen vegetables if fresh ones aren’t available.

These substitutions can help you whip up a tasty bowl of ramen, even when you’re low on ingredients. Don’t hesitate to get creative!

Storage and Reheating Tips

Making a big batch of homemade ramen? Here’s how to store and reheat it properly:

  • Storage: Store the broth and noodles separately in airtight containers. This prevents the noodles from becoming mushy. The broth can last in the fridge for up to 4 days.
  • Freezing: You can freeze the broth for up to 3 months. Just make sure to leave some space in the container for expansion.
  • Reheating Broth: When ready to eat, reheat the broth on the stove over medium heat until it’s hot. Avoid boiling, as this can change the flavor.
  • Reheating Noodles: For the noodles, you can quickly boil them in water for a minute or two. Alternatively, microwave them with a splash of water to steam them.
  • Assembling: Once everything is heated, assemble your ramen bowl with fresh toppings for the best taste and texture.

By following these storage and reheating tips, you can enjoy your homemade ramen even days later. It’s a great way to save time and still have a delicious meal!

Breakdown of Time for Homemade Ramen Recipe

Prep Time

Preparing your homemade ramen is a breeze! The prep time usually takes about 15-20 minutes. This includes gathering your ingredients, chopping vegetables, and soft-boiling the eggs. If you’re new to cooking, don’t worry! Just take your time, and soon you’ll be a pro at it. Having everything ready before you start cooking makes the process smoother and more enjoyable.

Cooking Time

The cooking time for your ramen is relatively quick. Once you start simmering the broth, it takes about 10-15 minutes to cook everything. This includes bringing the broth to a simmer, cooking the noodles, and adding the vegetables. The key is to keep an eye on the noodles to ensure they don’t overcook. With a little practice, you’ll have a delicious bowl of ramen ready in no time!

Total Time

In total, you can expect to spend around 30-35 minutes from start to finish. This includes both prep and cooking time. It’s a perfect option for a weeknight dinner or a cozy weekend meal. Plus, the satisfaction of enjoying a homemade ramen bowl is worth every minute spent in the kitchen. So, gather your ingredients and get ready to create a delightful dish!

Nutritional Information for Homemade Ramen Recipe

Calories

When it comes to enjoying a delicious bowl of homemade ramen, understanding the calorie content is essential. Each serving of this homemade ramen recipe contains approximately 350 calories. This makes it a satisfying meal without being overly heavy. The balance of ingredients ensures you get a nutritious dish that can fit into various dietary plans. Whether you’re looking for a quick lunch or a comforting dinner, this ramen provides a hearty option.

Protein Content

Protein is a vital nutrient for our bodies, and this homemade ramen recipe delivers! Each serving contains about 20 grams of protein. This protein comes from the chicken or tofu, as well as the eggs. Including protein in your meals helps keep you full and supports muscle health. If you’re following a vegetarian diet, using tofu as your protein source is an excellent choice. It’s not only nutritious but also adds a lovely texture to your ramen.

Sodium Levels

Sodium is another important factor to consider when enjoying ramen. Each serving of this homemade ramen contains around 800 milligrams of sodium. While this is a reasonable amount for a flavorful dish, it’s essential to be mindful of your overall sodium intake throughout the day. To reduce sodium levels, you can opt for low-sodium broth and limit the amount of soy sauce you add. This way, you can enjoy your ramen while keeping your health in check.

FAQs about Homemade Ramen Recipe

Can I use store-bought noodles for homemade ramen?

Absolutely! You can use store-bought noodles for your homemade ramen. While instant ramen noodles are convenient, fresh or dried ramen noodles can elevate your dish. Fresh noodles often have a delightful texture and flavor. Just be sure to adjust the cooking time according to the package instructions. Whether you choose instant or fresh, your homemade ramen will still be delicious!

How long does homemade ramen last in the fridge?

Homemade ramen can last in the fridge for about 3 to 4 days. However, it’s best to store the broth and noodles separately. This prevents the noodles from becoming mushy. When you’re ready to enjoy your ramen again, simply reheat the broth and noodles separately, then assemble your bowl with fresh toppings. This way, you can savor the flavors just like the first time!

What are the best toppings for homemade ramen?

The best toppings for homemade ramen depend on your personal taste! Some popular options include:

  • Soft-Boiled Eggs: Creamy and rich, they add a wonderful texture.
  • Green Onions: Fresh and crunchy, they provide a burst of flavor.
  • Nori: Seaweed strips add a unique taste and visual appeal.
  • Cooked Chicken or Tofu: For protein, these are excellent choices.
  • Vegetables: Baby spinach, carrots, and mushrooms enhance nutrition and color.

Feel free to mix and match toppings to create your perfect bowl of ramen!

Can I freeze homemade ramen?

Yes, you can freeze homemade ramen! However, it’s best to freeze the broth separately from the noodles. The broth can be stored in an airtight container for up to 3 months. When you’re ready to enjoy it, thaw the broth in the fridge overnight. Reheat it on the stove, and cook fresh noodles to maintain their texture. This way, you can enjoy a comforting bowl of ramen even on busy days!

Conclusion on Homemade Ramen Recipe

Recap of Key Points

In conclusion, making your own homemade ramen is a delightful journey filled with flavor and creativity. We explored the origins of ramen, highlighting its rich history and cultural significance. The essential ingredients, such as chicken broth, instant ramen noodles, and fresh vegetables, form the foundation of a delicious bowl. We also discussed various preparation steps, from crafting the perfect broth to assembling your ramen bowl with tasty toppings. Remember, the beauty of homemade ramen lies in its versatility, allowing you to customize it to your liking.

Encouragement to Experiment with Your Ramen

Now that you have the basics down, don’t hesitate to experiment! Try different broths, noodles, and toppings to create your unique version of homemade ramen. Whether you prefer a vegetarian twist or a spicy kick, the possibilities are endless. Cooking is all about having fun and discovering new flavors. So, gather your ingredients, invite friends or family, and enjoy the process of making and sharing this comforting dish. Your homemade ramen adventure awaits!