Zebra Cookies are a must-try for cookie lovers!

Introduction to Zebra Cookies Recipe

What Are Zebra Cookies?

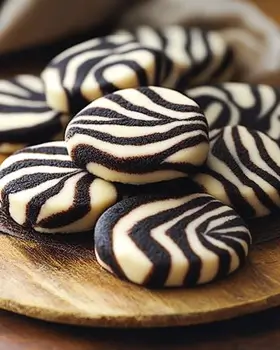
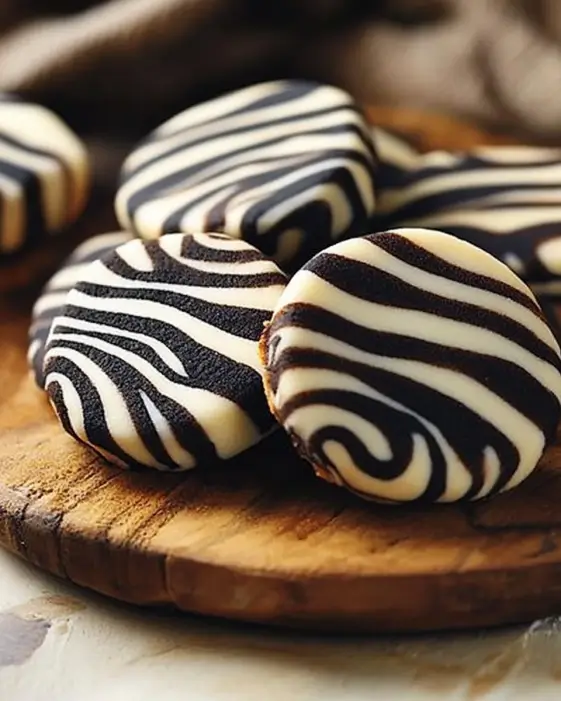
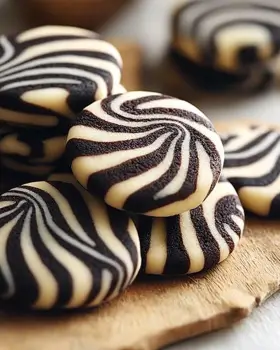
Zebra cookies are a delightful treat that combines two flavors into one beautiful design. They get their name from the striking black and white appearance, resembling a zebra’s stripes. These cookies are made with a rich chocolate dough and a vanilla-flavored dough, creating a stunning visual effect. When baked, they not only look amazing but also taste delicious, with a perfect balance of sweetness and chocolatey goodness. Each bite offers a delightful contrast, making them a favorite among cookie lovers of all ages.

Why You Should Try This Zebra Cookies Recipe

If you’re looking for a fun and unique cookie recipe, this zebra cookies recipe is a must-try! Not only are they visually appealing, but they are also easy to make. The ingredients are simple and commonly found in most kitchens. Plus, the process of creating the zebra effect is enjoyable and can be a great activity to do with family or friends.

These cookies are perfect for any occasion, whether it’s a birthday party, holiday gathering, or just a cozy afternoon treat. They also make a wonderful gift when packaged nicely. With the option to customize flavors and add-ins, you can make them your own. So, roll up your sleeves and get ready to impress your loved ones with these delightful zebra cookies!

Ingredients for Zebra Cookies Recipe

To create these delightful zebra cookies, you’ll need a few simple ingredients. Here’s what you’ll need:

  • 1 cup unsalted butter, softened
  • 1 cup granulated sugar
  • 1 cup brown sugar, packed
  • 2 large eggs
  • 1 teaspoon vanilla extract
  • 3 cups all-purpose flour
  • 1 teaspoon baking soda
  • 1/2 teaspoon salt
  • 1/2 cup unsweetened cocoa powder
  • 1 cup semi-sweet chocolate chips

These ingredients come together to create a rich and flavorful cookie. The combination of butter, sugars, and eggs forms a creamy base, while the flour and cocoa powder provide structure and that signature zebra look. The chocolate chips add a delightful burst of chocolate in every bite.

Before you start baking, make sure you have everything on hand. This will help the process go smoothly and ensure you don’t miss any key ingredients. Now that you have your ingredients ready, let’s move on to the preparation steps!

Step-by-Step Preparation of Zebra Cookies Recipe

Step 1: Preparing the Dough

To start, gather all your ingredients and tools. In a large mixing bowl, cream together the softened butter, granulated sugar, and brown sugar. Use an electric mixer on medium speed for about 2-3 minutes. This will make the mixture light and fluffy. Next, add the eggs one at a time, mixing well after each addition. Don’t forget to stir in the vanilla extract for that lovely flavor!

In a separate bowl, whisk together the all-purpose flour, baking soda, salt, and cocoa powder. This step is important as it ensures that the dry ingredients are evenly mixed. Gradually add this dry mixture to the wet ingredients. Mix until just combined. Be careful not to overmix, as this can make the cookies tough. Finally, fold in the semi-sweet chocolate chips, which will add a delicious chocolatey surprise in every bite!

Step 2: Creating the Zebra Effect

Now comes the fun part! Scoop tablespoon-sized portions of dough and roll them into balls. You should have two sets of dough balls: one set will remain plain, while the other will be rolled in cocoa powder. This will create the contrasting colors that give zebra cookies their name.

Place half of the plain dough balls on one baking sheet. For the remaining half, roll them in cocoa powder before placing them on the second baking sheet. This step is crucial for achieving that beautiful zebra look. To create the zebra effect, take one ball from each baking sheet and gently press them together. This will form a single cookie that showcases both colors. Repeat this process until all the dough is used up!

Step 3: Chilling the Dough

Chilling the dough is an optional step, but it can help improve the texture of your cookies. If you have time, cover the baking sheets with plastic wrap and place them in the refrigerator for about 30 minutes. This will firm up the dough, making it easier to handle and helping the cookies maintain their shape while baking. If you’re short on time, you can skip this step and proceed to baking!

Step 4: Baking the Zebra Cookies

Preheat your oven to 350°F (175°C) if you haven’t done so already. Once the dough is ready, place the baking sheets in the oven. Bake the cookies for 10-12 minutes, or until the edges are lightly golden. Keep an eye on them to avoid overbaking. After baking, let the cookies cool on the baking sheets for about 5 minutes. This allows them to set before transferring them to a wire rack to cool completely. Enjoy the delightful aroma filling your kitchen!

Variation of Zebra Cookies Recipe

Alternative Flavors and Add-ins

While the classic zebra cookies recipe is delicious on its own, you can easily customize it to suit your taste. Here are some fun ideas to add a twist to your zebra cookies:

  • Minty Fresh: Add a teaspoon of peppermint extract to the dough for a refreshing mint flavor. This pairs wonderfully with the chocolate and adds a festive touch!
  • Nutty Delight: Fold in chopped nuts, such as walnuts or pecans, for added crunch. Nuts can enhance the texture and flavor of your cookies.
  • Fruit Fusion: Incorporate dried fruits like cranberries or cherries. Their tartness will balance the sweetness of the cookies beautifully.
  • Spicy Kick: For a warm flavor, add a pinch of cinnamon or nutmeg to the dough. This will give your cookies a cozy, spiced aroma.
  • Chocolate Drizzle: Once the cookies are cooled, drizzle melted white chocolate over the top. This not only adds flavor but also makes them look extra special!

Feel free to mix and match these ideas to create your own unique zebra cookies. The possibilities are endless, and experimenting can lead to delightful surprises!

Gluten-Free Zebra Cookies Recipe

If you or someone you know has a gluten intolerance, you can still enjoy zebra cookies! Here’s how to make a gluten-free version:

  • Replace the all-purpose flour with a gluten-free flour blend. Make sure it’s a 1:1 substitute for best results.
  • Check that your baking soda and cocoa powder are gluten-free, as some brands may contain traces of gluten.
  • Follow the same preparation steps as the original recipe, ensuring to mix the gluten-free flour blend well with the other ingredients.

These gluten-free zebra cookies will still have that delightful taste and beautiful appearance. Everyone can enjoy them, regardless of dietary restrictions!

Cooking Note for Zebra Cookies Recipe

When making zebra cookies, there are a few important cooking notes to keep in mind. These tips will help ensure that your cookies turn out perfectly every time.

First, always use softened butter. This is crucial for achieving the right texture in your cookie dough. If your butter is too cold, it won’t cream well with the sugars, leading to dense cookies. To soften butter quickly, you can cut it into small pieces and let it sit at room temperature for about 15-20 minutes.

Next, be mindful of your mixing technique. When combining the dry ingredients with the wet ingredients, mix until just combined. Overmixing can lead to tough cookies, which is not what you want! A gentle fold is often best when adding chocolate chips or any other mix-ins.

Additionally, the size of your cookie dough balls matters. For uniform baking, try to keep all your dough balls the same size. This ensures that they bake evenly. Using a cookie scoop can help achieve consistent sizes.

Lastly, remember that every oven is different. Baking times may vary slightly based on your oven’s calibration. Keep an eye on your cookies as they bake, and take them out when the edges are lightly golden. They will continue to cook slightly after being removed from the oven, so don’t wait until they are fully set.

By following these cooking notes, you’ll be well on your way to baking delicious zebra cookies that are sure to impress!

Serving Suggestions for Zebra Cookies Recipe

Pairing with Beverages

When it comes to enjoying zebra cookies, the right beverage can elevate the experience. Here are some delightful pairings to consider:

  • Milk: A classic choice! The creamy texture of milk complements the rich chocolate and vanilla flavors of the cookies perfectly. Whether you prefer whole, almond, or oat milk, it’s a match made in cookie heaven.
  • Coffee: For adults, a warm cup of coffee can enhance the chocolatey goodness of zebra cookies. The bitterness of coffee balances the sweetness, making each bite even more enjoyable.
  • Tea: A soothing cup of tea, like chai or Earl Grey, can also be a great pairing. The spices in chai or the floral notes in Earl Grey can add a lovely contrast to the cookies.
  • Hot Chocolate: For a double chocolate treat, serve zebra cookies with a cup of hot chocolate. Top it with whipped cream for an indulgent experience!

These beverage pairings not only enhance the flavors of the zebra cookies but also create a cozy atmosphere for enjoying your treats.

Presentation Ideas

How you present your zebra cookies can make them even more appealing. Here are some creative ideas to showcase your delicious creations:

  • Cookie Platter: Arrange the cookies on a decorative platter. You can alternate between plain and cocoa-dusted cookies for a beautiful display. Add some fresh mint leaves or edible flowers for a pop of color.
  • Gift Packaging: If you’re giving zebra cookies as a gift, consider packaging them in a clear cellophane bag tied with a colorful ribbon. This adds a personal touch and makes them look extra special.
  • Cookie Jars: Fill a glass cookie jar with zebra cookies and place it on your kitchen counter. Not only does it look inviting, but it also keeps the cookies fresh!
  • Decorative Plates: Serve the cookies on themed plates, especially during holidays or special occasions. This adds a festive flair to your cookie presentation.

With these serving suggestions, you can enjoy zebra cookies in style, whether at a gathering or a quiet afternoon at home. Happy baking!

Tips for Perfecting Your Zebra Cookies Recipe

To ensure your zebra cookies turn out perfectly every time, consider these helpful tips. They will guide you through the baking process and help you achieve the best results.

Use Quality Ingredients

Start with high-quality ingredients. Fresh butter, eggs, and chocolate chips can make a big difference in flavor. Always check the expiration dates on your baking supplies to ensure freshness.

Measure Accurately

Accurate measurements are key to successful baking. Use measuring cups and spoons for dry ingredients and a liquid measuring cup for wet ingredients. Level off your flour and cocoa powder with a knife for precision.

Room Temperature Ingredients

For the best texture, make sure your butter and eggs are at room temperature. This helps them blend smoothly into the dough, resulting in a lighter cookie.

Don’t Overmix

When combining the wet and dry ingredients, mix until just combined. Overmixing can lead to tough cookies. A gentle fold is often best when adding chocolate chips or any other mix-ins.

Experiment with Baking Times

Every oven is different, so keep an eye on your cookies as they bake. Start checking them a minute or two before the recommended baking time. They should be lightly golden around the edges but still soft in the center.

Cool Properly

Let your cookies cool on the baking sheet for a few minutes before transferring them to a wire rack. This allows them to set and prevents them from breaking apart.

By following these tips, you’ll be well on your way to baking delicious zebra cookies that are sure to impress your family and friends!

Tips for Perfecting Your Zebra Cookies Recipe

To ensure your zebra cookies turn out perfectly every time, consider these helpful tips. They will guide you through the baking process and help you achieve the best results.

Use Quality Ingredients

Start with high-quality ingredients. Fresh butter, eggs, and chocolate chips can make a big difference in flavor. Always check the expiration dates on your baking supplies to ensure freshness. Using premium ingredients will enhance the overall taste of your zebra cookies.

Measure Accurately

Accurate measurements are key to successful baking. Use measuring cups and spoons for dry ingredients and a liquid measuring cup for wet ingredients. Level off your flour and cocoa powder with a knife for precision. This will help you achieve the right texture and consistency in your cookie dough.

Room Temperature Ingredients

For the best texture, make sure your butter and eggs are at room temperature. This helps them blend smoothly into the dough, resulting in a lighter cookie. If you’re short on time, you can soften butter quickly by cutting it into small pieces and letting it sit for about 15 minutes.

Don’t Overmix

When combining the wet and dry ingredients, mix until just combined. Overmixing can lead to tough cookies. A gentle fold is often best when adding chocolate chips or any other mix-ins. This will keep your cookies soft and chewy.

Experiment with Baking Times

Every oven is different, so keep an eye on your cookies as they bake. Start checking them a minute or two before the recommended baking time. They should be lightly golden around the edges but still soft in the center. Remember, cookies will continue to cook slightly after being removed from the oven.

Cool Properly

Let your cookies cool on the baking sheet for a few minutes before transferring them to a wire rack. This allows them to set and prevents them from breaking apart. Cooling them properly will also help maintain their texture and flavor.

By following these tips, you’ll be well on your way to baking delicious zebra cookies that are sure to impress your family and friends!

Breakdown of Time for Zebra Cookies Recipe

Prep Time

The prep time for zebra cookies is approximately 20-30 minutes. This includes gathering your ingredients, creaming the butter and sugars, mixing the dry ingredients, and forming the dough balls. If you choose to chill the dough, add an extra 30 minutes to this time. However, if you’re in a hurry, you can skip the chilling step and proceed directly to baking!

Cooking Time

The cooking time for zebra cookies is about 10-12 minutes. Keep a close eye on them as they bake. You want the edges to be lightly golden while the centers remain soft. Remember, cookies will continue to cook slightly after being removed from the oven, so it’s better to take them out a little early than to overbake.

Total Time

In total, you can expect to spend around 40-60 minutes making zebra cookies, including both prep and cooking time. If you decide to chill the dough, the total time will extend to about 1 hour and 30 minutes. Regardless of the time, the delicious results will be well worth the effort!

Nutritional Information for Zebra Cookies Recipe

Calories

Each zebra cookie contains approximately 150 calories. This makes them a delightful treat that can fit into a balanced diet. While they are sweet and satisfying, it’s always good to enjoy them in moderation. If you’re counting calories, consider how many cookies you plan to indulge in and adjust your meal plan accordingly.

Protein

In terms of protein, each cookie provides about 2 grams. While this isn’t a high protein snack, it does contribute to your daily intake. Pairing zebra cookies with a protein-rich beverage, like a glass of milk, can enhance the overall nutritional value of your snack. This way, you can enjoy the delicious flavors while still being mindful of your dietary needs.

Sodium

Each zebra cookie contains roughly 100 milligrams of sodium. This is a moderate amount, especially considering that most people consume more sodium than necessary in their diets. If you’re watching your sodium intake, be sure to balance your other meals throughout the day. Enjoying zebra cookies as an occasional treat can be part of a healthy lifestyle.

FAQs About Zebra Cookies Recipe

Can I make Zebra Cookies ahead of time?

Absolutely! You can prepare the zebra cookie dough ahead of time. After mixing the dough, simply cover it tightly with plastic wrap and refrigerate it for up to 3 days. When you’re ready to bake, scoop and shape the dough into balls, then follow the baking instructions. This makes it easy to enjoy fresh cookies whenever you want!

How do I store leftover Zebra Cookies?

To keep your zebra cookies fresh, store them in an airtight container at room temperature. They will stay delicious for about 5-7 days. If you want to keep them longer, consider placing a slice of bread in the container. This will help maintain moisture and keep the cookies soft. Just remember to replace the bread slice every few days!

Can I freeze Zebra Cookies?

Yes, you can freeze zebra cookies! To freeze them, allow the cookies to cool completely. Then, place them in a single layer on a baking sheet and freeze until solid. Once frozen, transfer the cookies to a freezer-safe bag or container. They can be stored in the freezer for up to 3 months. When you’re ready to enjoy them, simply thaw at room temperature or warm them in the oven for a few minutes.

What can I substitute for ingredients in the Zebra Cookies Recipe?

If you need to make substitutions, here are some options:

  • Butter: You can use margarine or coconut oil as a substitute for unsalted butter. Just ensure they are softened for the best results.
  • Granulated Sugar: You can replace granulated sugar with coconut sugar or a sugar substitute like Stevia, but this may alter the texture slightly.
  • Eggs: For a vegan option, use flax eggs (1 tablespoon of ground flaxseed mixed with 2.5 tablespoons of water per egg) or applesauce (1/4 cup per egg).
  • Flour: If you need a gluten-free option, use a gluten-free flour blend that is a 1:1 substitute for all-purpose flour.
  • Cocoa Powder: You can use Dutch-processed cocoa powder instead of unsweetened cocoa powder for a richer flavor.

These substitutions can help you tailor the zebra cookies to your dietary needs while still keeping them delicious!

Conclusion on Zebra Cookies Recipe

In conclusion, zebra cookies are not just a treat for the eyes but also a delight for the taste buds. Their unique black and white appearance, combined with the rich flavors of chocolate and vanilla, makes them a standout dessert for any occasion. Whether you’re baking for a special event or simply indulging in a cozy afternoon snack, this zebra cookies recipe is sure to impress.

With easy-to-follow steps and simple ingredients, you can create these beautiful cookies in no time. Plus, the versatility of the recipe allows you to experiment with different flavors and add-ins, making it a fun baking adventure. From minty twists to gluten-free options, there’s a zebra cookie variation for everyone!

Remember to keep the tips in mind for perfecting your cookies, and don’t hesitate to get creative with your presentations and pairings. Whether you enjoy them with a glass of milk, a cup of coffee, or as a gift for a loved one, zebra cookies are bound to bring smiles and satisfaction.

So, gather your ingredients, roll up your sleeves, and start baking these delightful zebra cookies today. Your friends and family will thank you for it, and you’ll enjoy every delicious bite!

Gooey Coffee Caramel Cake Recipe is a must-try dessert!

Introduction to Gooey Coffee Caramel Cake Recipe

Welcome to the delightful world of desserts! Today, we’re diving into a treat that’s sure to please any sweet tooth: the Gooey Coffee Caramel Cake. This cake is not just any ordinary dessert; it’s a perfect blend of rich coffee flavor, luscious caramel, and decadent chocolate. Imagine biting into a slice and experiencing the gooey goodness that melts in your mouth. It’s a cake that brings joy to every occasion, whether it’s a birthday party, a family gathering, or just a cozy evening at home.

What Makes the Gooey Coffee Caramel Cake Special?

So, what sets this cake apart from the rest? First, the combination of coffee and caramel creates a unique flavor profile that’s both comforting and indulgent. The brewed coffee enhances the chocolate, making it richer and more complex. Plus, the caramel sauce adds a sweet, sticky layer that makes each bite unforgettable.

Another special aspect is its texture. The cake is moist and gooey, thanks to the caramel and chocolate chips mixed into the batter. This cake is not just about taste; it’s about the experience of enjoying a slice that feels like a warm hug. It’s perfect for sharing with friends or savoring alone with a cup of coffee.

Whether you’re a baking novice or a seasoned pro, this Gooey Coffee Caramel Cake Recipe is easy to follow. With simple ingredients and straightforward steps, you’ll be able to whip up this delicious dessert in no time. So, let’s get started on this sweet adventure!

Ingredients for Gooey Coffee Caramel Cake Recipe

Before we dive into the baking process, let’s gather all the ingredients you’ll need for this scrumptious Gooey Coffee Caramel Cake. Having everything ready will make your baking experience smooth and enjoyable. Here’s what you’ll need:

  • 2 cups all-purpose flour
  • 1 ½ cups granulated sugar
  • ½ cup unsweetened cocoa powder
  • 1 tablespoon baking powder
  • 1 teaspoon baking soda
  • ½ teaspoon salt
  • 1 cup brewed coffee, cooled
  • ½ cup vegetable oil
  • 2 large eggs
  • 1 teaspoon vanilla extract
  • 1 cup caramel sauce (store-bought or homemade)
  • 1 cup chocolate chips

These ingredients come together to create a cake that’s not only delicious but also easy to make. The all-purpose flour provides the structure, while the cocoa powder adds a rich chocolate flavor. The brewed coffee enhances the overall taste, making it a delightful treat for coffee lovers.

Don’t forget the caramel sauce! It’s the star of the show, giving the cake its gooey texture and sweet flavor. You can use store-bought caramel sauce for convenience, or you can make your own for a personal touch. Either way, this cake is sure to impress!

Now that you have your ingredients ready, let’s move on to the next step: preparing the cake batter. Get excited, because you’re about to create something truly special!

Step-by-Step Preparation of Gooey Coffee Caramel Cake Recipe

Now that you have all your ingredients ready, it’s time to roll up your sleeves and start baking! This step-by-step guide will walk you through the process of making the Gooey Coffee Caramel Cake. Each step is simple and straightforward, ensuring that you’ll have a delicious cake in no time. Let’s get started!

Step 1: Preparing the Cake Batter

First things first, let’s prepare the cake batter. In a large mixing bowl, combine the dry ingredients. Start by whisking together the flour, granulated sugar, cocoa powder, baking powder, baking soda, and salt. Make sure everything is well mixed. This step is crucial as it ensures that your cake rises evenly and has a great texture.

Next, in another bowl, mix the wet ingredients. Pour in the cooled brewed coffee, vegetable oil, eggs, and vanilla extract. Whisk these together until the mixture is smooth and well combined. The coffee will add a rich flavor, while the oil keeps the cake moist.

Now, gradually add the wet mixture to the dry ingredients. Stir gently until just combined. Remember, it’s important not to overmix. Overmixing can lead to a dense cake, and we want it to be light and fluffy!

Step 2: Making the Coffee Caramel Sauce

While your cake batter is resting, let’s make the coffee caramel sauce. If you’re using store-bought caramel sauce, you can skip this step. However, if you want to make your own, here’s a quick method:

  • In a saucepan, combine 1 cup of granulated sugar and ¼ cup of water.
  • Heat over medium heat, stirring gently until the sugar dissolves.
  • Once dissolved, stop stirring and let it boil until it turns a golden brown color.
  • Remove from heat and carefully add ½ cup of heavy cream and 1 tablespoon of brewed coffee. Stir until smooth.

Let the sauce cool slightly before using it in the cake. This homemade sauce will add a wonderful depth of flavor to your cake!

Step 3: Baking the Cake

Now that your batter is ready and the caramel sauce is prepared, it’s time to bake! Preheat your oven to 350°F (175°C) if you haven’t done so already. Grease and flour a 9×13-inch baking pan to prevent sticking.

Pour the cake batter into the prepared pan, spreading it evenly. Bake in the preheated oven for 30-35 minutes. To check if it’s done, insert a toothpick into the center. If it comes out with a few moist crumbs, your cake is ready!

Step 4: Combining Cake and Sauce

Once the cake is baked, allow it to cool in the pan for about 10 minutes. Then, transfer it to a wire rack to cool completely. This cooling step is important as it helps the cake set properly.

After the cake has cooled, it’s time to add the gooey goodness! Drizzle the coffee caramel sauce over the top of the cake. You can use as much or as little as you like, depending on how sweet you want it. For an extra touch, sprinkle some chocolate chips on top for added flavor and texture.

And there you have it! Your Gooey Coffee Caramel Cake is now ready to be enjoyed. The combination of flavors and textures will surely impress anyone who takes a bite. Let’s move on to some variations you can try to make this cake even more exciting!

Variation of Gooey Coffee Caramel Cake Recipe

While the classic Gooey Coffee Caramel Cake is already a delightful treat, there are many ways to switch things up! By using alternative ingredients, you can create different flavors and textures that will keep your taste buds excited. Let’s explore some fun variations you can try!

Alternative Ingredients for Different Flavors

One of the best things about baking is the ability to experiment. Here are some alternative ingredients you can use to create unique flavors:

  • Nutty Flavor: Substitute half of the all-purpose flour with almond flour. This will give your cake a lovely nutty taste.
  • Spicy Kick: Add a teaspoon of cinnamon or a pinch of cayenne pepper to the dry ingredients. This will add warmth and depth to the flavor.
  • Fruit Infusion: Mix in 1 cup of chopped nuts or dried fruits like cherries or cranberries. They will add a chewy texture and a burst of flavor.
  • Chocolate Lovers: Use dark chocolate chips instead of regular chocolate chips for a richer chocolate experience.

These alternatives can transform your cake into something new and exciting. Feel free to mix and match to find your perfect combination!

Gluten-Free Options for Gooey Coffee Caramel Cake

If you or someone you know is gluten-sensitive, don’t worry! You can still enjoy this delicious cake. Here’s how to make a gluten-free version:

  • Gluten-Free Flour Blend: Replace the all-purpose flour with a gluten-free flour blend. Make sure it’s a 1:1 substitute for best results.
  • Check Ingredients: Ensure that your baking powder and baking soda are gluten-free. Most brands are, but it’s always good to double-check.
  • Extra Moisture: Gluten-free cakes can sometimes be drier. Consider adding an extra egg or a bit of applesauce to keep the cake moist.

With these simple adjustments, you can create a gluten-free Gooey Coffee Caramel Cake that everyone can enjoy. Baking is all about creativity, so don’t hesitate to try new things!

Cooking Note for Gooey Coffee Caramel Cake Recipe

When it comes to baking, a few tips can make a big difference in the outcome of your Gooey Coffee Caramel Cake. Here are some essential cooking notes to keep in mind:

  • Ingredient Temperature: Make sure your eggs and any dairy products are at room temperature. This helps them mix better into the batter, resulting in a smoother texture.
  • Measuring Flour: When measuring flour, use the spoon-and-level method. Spoon the flour into your measuring cup and level it off with a knife. This prevents packing, which can lead to a dense cake.
  • Cooling Time: Allow the cake to cool completely before adding the caramel sauce. This prevents the sauce from melting into the cake too much, keeping that gooey texture intact.
  • Storage: If you have leftovers, store the cake in an airtight container at room temperature for up to three days. You can also refrigerate it for a longer shelf life, but be sure to bring it back to room temperature before serving for the best flavor.
  • Serving Temperature: This cake is delicious served warm or at room temperature. If you prefer it warm, you can microwave individual slices for about 10-15 seconds.

By following these cooking notes, you’ll ensure that your Gooey Coffee Caramel Cake turns out perfectly every time. Happy baking!

Serving Suggestions for Gooey Coffee Caramel Cake Recipe

Now that your Gooey Coffee Caramel Cake is baked and drizzled with luscious caramel sauce, it’s time to think about how to serve it. The right presentation and pairing can elevate your dessert experience. Here are some delightful serving suggestions to make your cake even more enjoyable!

Pairing with Beverages

When it comes to beverages, the right choice can enhance the flavors of your cake. Here are some great options to consider:

  • Coffee: A classic pairing! Brew a fresh cup of coffee to complement the cake’s rich coffee flavor. You can serve it black or with cream and sugar, depending on your preference.
  • Tea: For a lighter option, consider serving the cake with a cup of herbal tea. Chamomile or chai tea can provide a lovely contrast to the sweetness of the cake.
  • Milk: A tall glass of cold milk is always a hit with chocolate desserts. The creaminess of the milk balances the rich flavors of the cake.
  • Ice Cream: For an indulgent treat, serve a scoop of vanilla or coffee-flavored ice cream alongside the cake. The cold ice cream melts into the warm cake, creating a delightful gooey experience.

These beverage pairings will not only enhance the flavors of your Gooey Coffee Caramel Cake but also create a delightful dessert experience for you and your guests.

Presentation Ideas for Serving

Presentation is key when serving your cake. Here are some creative ideas to make your dessert look as good as it tastes:

  • Plating: Cut the cake into neat squares and place each piece on a decorative plate. Drizzle extra caramel sauce over the top for a beautiful finish.
  • Garnish: Add a sprinkle of sea salt or a dusting of cocoa powder on top of the cake for an elegant touch. Fresh berries or mint leaves can also add a pop of color.
  • Layering: For a stunning presentation, layer slices of cake with whipped cream and fresh fruit in a glass. This creates a beautiful dessert parfait that’s perfect for special occasions.
  • Serving Style: Consider serving the cake on a cake stand to elevate its appearance. This adds a touch of sophistication to your dessert table.

With these serving suggestions, your Gooey Coffee Caramel Cake will not only taste amazing but also look irresistible. Enjoy sharing this delightful dessert with family and friends!

Tips for Perfecting Your Gooey Coffee Caramel Cake Recipe

To ensure your Gooey Coffee Caramel Cake turns out perfectly every time, consider these helpful tips. Each suggestion will guide you in achieving that ideal texture and flavor that makes this cake so special. Let’s dive into some expert advice!

  • Use Fresh Ingredients: Always check the freshness of your baking ingredients. Expired baking powder or old cocoa powder can affect the rise and flavor of your cake. Fresh ingredients lead to a better-tasting cake.
  • Don’t Overmix: When combining wet and dry ingredients, mix until just combined. Overmixing can lead to a dense cake. A few lumps are okay; they will bake out.
  • Check Oven Temperature: Ovens can vary in temperature. Use an oven thermometer to ensure your oven is at the correct temperature. This helps in baking the cake evenly.
  • Cool Properly: Allow the cake to cool in the pan for about 10 minutes before transferring it to a wire rack. This prevents it from breaking apart and helps maintain its shape.
  • Experiment with Toppings: While caramel sauce is a must, feel free to experiment with toppings. Chopped nuts, whipped cream, or even a sprinkle of powdered sugar can add a delightful twist.
  • Serve Warm: For the ultimate gooey experience, serve the cake warm. A quick 10-second zap in the microwave can bring back that fresh-baked warmth.
  • Store Properly: If you have leftovers, store them in an airtight container. This keeps the cake moist and delicious for days. You can also freeze slices for later enjoyment!

By following these tips, you’ll be well on your way to mastering the Gooey Coffee Caramel Cake Recipe. Each bite will be a delightful experience, filled with rich flavors and a gooey texture that everyone will love. Happy baking!

Breakdown of Time for Gooey Coffee Caramel Cake Recipe

Understanding the time needed for each step in the Gooey Coffee Caramel Cake Recipe can help you plan your baking session better. Here’s a detailed breakdown of the time you’ll need for preparation, cooking, and the total time involved in making this delicious cake.

Prep Time

The prep time for this cake is approximately 20-25 minutes. This includes gathering all your ingredients, measuring them out, and mixing the batter. It’s a good idea to have everything ready before you start baking. This way, you can enjoy the process without feeling rushed!

Cooking Time

Once your batter is ready, the cooking time is about 30-35 minutes. During this time, the cake will rise and bake to perfection in the oven. Keep an eye on it, and remember to check for doneness with a toothpick. You want it to come out with a few moist crumbs for that gooey texture!

Total Time

In total, you can expect to spend around 60-70 minutes from start to finish. This includes both prep and cooking time. After baking, allow the cake to cool for about 10 minutes in the pan before transferring it to a wire rack. This cooling period is essential for the cake to set properly and maintain its shape.

With this time breakdown, you can easily plan your baking session and enjoy the delightful process of making your Gooey Coffee Caramel Cake. Happy baking!

Nutritional Information for Gooey Coffee Caramel Cake Recipe

Understanding the nutritional content of your Gooey Coffee Caramel Cake is essential, especially if you’re mindful of your diet. This cake is not only delicious but also provides a satisfying treat. Here’s a breakdown of the key nutritional information per serving:

Calories

Each slice of this delightful cake contains approximately 320 calories. This makes it a rich dessert option, perfect for special occasions or when you want to indulge a little. The combination of ingredients, including sugar, flour, and chocolate, contributes to the calorie count, but it also ensures a satisfying flavor experience.

Protein

In terms of protein, each serving offers about 4 grams. While this isn’t a high-protein dessert, it does provide some protein from the eggs and chocolate. If you’re looking to boost the protein content, consider serving the cake with a dollop of whipped cream or a scoop of ice cream, which can add a bit more protein to your dessert.

Sodium

The sodium content in each slice is approximately 200 mg. This amount is relatively moderate, making it a reasonable choice for a sweet treat. However, if you’re watching your sodium intake, be mindful of any additional toppings or sauces you might add, as they can increase the overall sodium content.

Overall, the Gooey Coffee Caramel Cake is a delightful indulgence that can fit into a balanced diet when enjoyed in moderation. Remember, it’s all about balance and enjoying your favorite treats without guilt!

FAQs about Gooey Coffee Caramel Cake Recipe

Can I make Gooey Coffee Caramel Cake ahead of time?

Absolutely! Making the Gooey Coffee Caramel Cake ahead of time is a great idea. You can bake the cake a day in advance and store it at room temperature. Just make sure to cover it with plastic wrap or place it in an airtight container to keep it fresh. When you’re ready to serve, drizzle the caramel sauce on top. This way, the cake will still taste delicious and gooey, just like when it was freshly baked!

What can I substitute for coffee in the Gooey Coffee Caramel Cake Recipe?

If you prefer not to use coffee, there are several substitutes you can try. One option is to use brewed tea, such as chai or black tea, for a different flavor profile. You can also use milk or a milk alternative, like almond milk or oat milk, to keep the cake moist. For a chocolatey twist, consider using chocolate milk. Just remember that the coffee enhances the chocolate flavor, so choose a substitute that complements the other ingredients!

How do I store leftover Gooey Coffee Caramel Cake?

Storing leftover Gooey Coffee Caramel Cake is simple! Place the cake in an airtight container at room temperature for up to three days. If you want to keep it longer, you can refrigerate it for about a week. Just be sure to let it come to room temperature before serving for the best taste. If you have a lot of leftovers, you can also freeze individual slices. Wrap them tightly in plastic wrap and then place them in a freezer-safe bag. They can last for up to three months in the freezer. When you’re ready to enjoy, simply thaw at room temperature or warm them in the microwave for a few seconds!

Conclusion on Gooey Coffee Caramel Cake Recipe

In conclusion, the Gooey Coffee Caramel Cake is a delightful dessert that combines rich flavors and a moist texture, making it a perfect treat for any occasion. Whether you’re celebrating a special event or simply indulging in a sweet craving, this cake is sure to impress. With its easy-to-follow recipe, even novice bakers can create a masterpiece that looks and tastes amazing.

As you’ve seen, the versatility of this cake allows for various adaptations, whether you want to experiment with different flavors or cater to dietary needs. The addition of coffee enhances the chocolate, while the caramel sauce adds that irresistible gooeyness that everyone loves. Plus, with the tips and serving suggestions provided, you can elevate your dessert experience to new heights.

So, gather your ingredients, roll up your sleeves, and get ready to bake this scrumptious Gooey Coffee Caramel Cake. Your friends and family will be delighted, and you’ll enjoy every delicious bite. Happy baking, and may your kitchen be filled with the sweet aroma of this delightful cake!

Blackberry Velvet Gothic Cake is a must-try dessert!

Introduction to Blackberry Velvet Gothic Cake

Blackberry Velvet Gothic Cake. This cake is not just a feast for the eyes; it’s a symphony of flavors that will dance on your taste buds. Imagine a rich, velvety chocolate cake infused with the tartness of fresh blackberries. It’s a perfect blend of sweet and slightly tangy, making it an ideal dessert for any occasion.

The term “gothic” in this cake’s name hints at its dark, alluring appearance. The deep chocolate color, combined with the vibrant blackberries, creates a striking contrast that is sure to impress your guests. Whether you’re hosting a dinner party, celebrating a birthday, or simply indulging in a sweet treat, this cake is sure to be a showstopper.

Blackberry Velvet Gothic Cake look stunning, but it’s also surprisingly easy to make. With simple ingredients and straightforward steps, you can whip up this masterpiece in no time. Plus, the addition of whipped cream and fresh blackberries on top adds a touch of elegance, making it perfect for any celebration.

So, roll up your sleeves and get ready to create a dessert that’s as beautiful as it is delicious. Let’s explore the ingredients and preparation steps that will lead you to your very own Blackberry Velvet Gothic Cake!

Ingredients for Blackberry Velvet Gothic Cake

Blackberry Velvet Gothic Cake, you’ll need a selection of simple yet essential ingredients. Each component plays a vital role in achieving that rich flavor and delightful texture. Here’s what you’ll need:

  • 2 cups all-purpose flour
  • 1 ½ cups granulated sugar
  • ½ cup unsweetened cocoa powder
  • 1 teaspoon baking soda
  • 1 teaspoon baking powder
  • ½ teaspoon salt
  • 1 cup buttermilk, at room temperature
  • ½ cup vegetable oil
  • 2 large eggs, at room temperature
  • 2 teaspoons vanilla extract
  • 1 cup fresh blackberries, plus extra for garnish
  • 1 cup heavy cream
  • 2 tablespoons powdered sugar
  • 1 teaspoon vanilla extract (for the whipped cream)

These ingredients come together to create a cake that is not only visually stunning but also bursting with flavor. The combination of cocoa powder and blackberries gives the cake its unique gothic charm. The buttermilk adds moisture, while the whipped cream topping provides a light and airy finish.

For those looking to experiment, consider adding a tablespoon of espresso powder to the dry ingredients. This addition enhances the chocolate flavor, making it even richer. Alternatively, you can swap out the blackberries for raspberries or strawberries for a different berry twist.

Blackberry Velvet Gothic Cake. Let’s move on to the preparation steps to bring this delicious creation to life!

Preparation of Blackberry Velvet Gothic Cake

Blackberry Velvet Gothic Cake. Follow these steps carefully to ensure a delicious outcome. Each step is designed to build flavor and texture, leading to a cake that is both moist and rich.

Step 1: Preheat the Oven and Prepare the Pans

First things first, preheat your oven to 350°F (175°C). This ensures that your cake bakes evenly. While the oven heats up, take two 9-inch round cake pans and grease them with butter or cooking spray. Then, dust them with flour to prevent sticking. This step is crucial for a smooth cake release.

Step 2: Mix the Dry Ingredients

In a large mixing bowl, sift together the all-purpose flour, granulated sugar, cocoa powder, baking soda, baking powder, and salt. Sifting helps to aerate the flour and remove any lumps. This mixture forms the base of your cake, so make sure it’s well combined.

Step 3: Cream the Butter and Sugar

In a separate bowl, whisk together the buttermilk, vegetable oil, eggs, and vanilla extract until everything is well blended. This mixture adds moisture and richness to your cake. It’s important to use room temperature ingredients for the best results.

Step 4: Add the Eggs and Vanilla

Now, gradually add the wet ingredients to the dry ingredients. Mix gently until just combined. Be careful not to overmix, as this can lead to a dense cake. The batter should be smooth and slightly thick.

Step 5: Incorporate the Dry Ingredients and Buttermilk

Next, gently fold in the fresh blackberries. This step adds bursts of flavor and color to your cake. Use a spatula to carefully mix them in, ensuring they are evenly distributed without breaking them apart.

Step 6: Fold in the Blackberries

Once your batter is ready, divide it evenly between the two prepared cake pans. This ensures that both layers bake evenly. Smooth the tops with a spatula for a nice finish.

Step 7: Bake the Cake

Place the pans in the preheated oven and bake for 25-30 minutes. To check if the cakes are done, insert a toothpick into the center. If it comes out clean, your cakes are ready. If not, give them a few more minutes.

Step 8: Cool and Prepare for Frosting

After baking, allow the cakes to cool in the pans for about 10 minutes. Then, carefully transfer them to wire racks to cool completely. This step is important because frosting a warm cake can lead to melting and sliding. Once cooled, your cakes are ready for frosting!

Blackberry Velvet Gothic Cake. Next, we’ll explore some variations to make this cake even more exciting!

Variation of Blackberry Velvet Gothic Cake

Blackberry Velvet Gothic Cake is a versatile dessert that can be easily adapted to suit your taste preferences. While the original recipe is delicious on its own, experimenting with different flavors and ingredients can elevate your cake to new heights. Here are some exciting variations to consider:

  • Berry Medley: Instead of just blackberries, try using a mix of berries. Raspberries, blueberries, and strawberries can all add unique flavors and colors to your cake. This berry medley will create a vibrant and fruity experience.
  • Chocolate Ganache: For a richer topping, consider making a chocolate ganache. Simply heat heavy cream and pour it over chopped chocolate. Stir until smooth, then let it cool slightly before pouring it over the cake. This will add a luxurious chocolate layer that pairs beautifully with the blackberries.
  • Spiced Velvet Cake: Add a pinch of cinnamon or nutmeg to the dry ingredients for a warm, spiced flavor. This twist can give your cake a cozy feel, perfect for fall gatherings or holiday celebrations.
  • Nutty Crunch: Incorporate chopped nuts, such as walnuts or pecans, into the batter. This will add a delightful crunch and a nutty flavor that complements the chocolate and berries.
  • Vegan Option: For a vegan version, substitute eggs with flaxseed meal mixed with water and use plant-based milk instead of buttermilk. Replace vegetable oil with coconut oil for a tropical twist.

Blackberry Velvet Gothic Cake for any occasion. Whether you want to impress guests at a dinner party or simply enjoy a slice at home, these adaptations can make your cake truly unique. So, feel free to get creative and make this cake your own!

Cooking Note for Blackberry Velvet Gothic Cake

Blackberry Velvet Gothic Cake, a few cooking notes can help ensure your cake turns out perfectly every time. These tips will guide you through the process, making it easier and more enjoyable.

First, always use fresh ingredients. Fresh blackberries not only enhance the flavor but also add a beautiful pop of color. If you can, choose berries that are plump and firm. This will ensure they hold their shape during baking.

Next, pay attention to the temperature of your ingredients. Room temperature eggs and buttermilk mix more easily into the batter, resulting in a smoother texture. If you forget to take them out ahead of time, you can warm the eggs slightly in a bowl of warm water for about 10 minutes.

Blackberry Velvet Gothic Cake.

When baking, keep an eye on the cakes as they approach the end of the baking time. Ovens can vary, and you might find that your cakes bake a little faster or slower than the suggested time. Always use the toothpick test to check for doneness. If it comes out clean or with a few moist crumbs, your cake is ready!

Lastly, let the cakes cool completely before frosting. This step is crucial for achieving a beautiful finish. If the cakes are warm, the whipped cream can melt, making it difficult to create those lovely layers. Patience is key here!

Blackberry Velvet Gothic Cake. Enjoy the process, and don’t forget to have fun while creating this delicious dessert!

Serving Suggestions for Blackberry Velvet Gothic Cake

Blackberry Velvet Gothic Cake is beautifully baked and frosted, it’s time to think about how to serve it. Presentation can elevate your dessert experience, making it even more enjoyable for you and your guests. Here are some delightful serving suggestions to consider:

  • Elegant Slices: Cut the cake into even slices for a classic presentation. Use a sharp knife to ensure clean cuts. Serve each slice on a decorative plate, and consider adding a dollop of whipped cream on the side for an extra touch of indulgence.
  • Berry Garnish: Enhance the visual appeal by garnishing each slice with fresh blackberries. This not only adds color but also complements the flavors of the cake. You can also sprinkle a few mint leaves for a refreshing contrast.
  • Chocolate Drizzle: For a decadent twist, drizzle some melted chocolate over the top of the cake or each slice. This adds a rich flavor and makes the cake look even more tempting.
  • Ice Cream Pairing: Serve slices of the cake with a scoop of vanilla or chocolate ice cream. The creamy texture of the ice cream pairs wonderfully with the rich chocolate cake and tart blackberries, creating a delightful contrast.
  • Layered Dessert Cups: For a fun twist, consider creating individual dessert cups. Crumble pieces of the cake and layer them with whipped cream and fresh blackberries in clear cups. This makes for a beautiful presentation and is perfect for parties or gatherings.
  • Tea or Coffee Pairing: The Blackberry Velvet Gothic Cake pairs beautifully with a cup of tea or coffee. The rich flavors of the cake complement the warmth of your favorite beverage, making it a perfect afternoon treat.

Blackberry Velvet Gothic Cake but also allow you to impress your guests with your creativity. Whether you choose a simple slice or a more elaborate presentation, this cake is sure to be a hit!

Tips for Perfecting Your Blackberry Velvet Gothic Cake

Blackberry Velvet Gothic Cake is all about attention to detail and a few helpful tips. With these suggestions, you can elevate your baking skills and ensure that your cake turns out moist, flavorful, and visually stunning. Here are some essential tips to keep in mind:

  • Measure Accurately: Baking is a science, so precise measurements are crucial. Use a kitchen scale for the best accuracy, especially for flour and sugar. This will help you achieve the right texture and flavor.
  • Room Temperature Ingredients: Always use room temperature eggs and buttermilk. This helps the ingredients blend more smoothly, resulting in a lighter cake. If you forget to take them out in advance, warm the eggs in a bowl of warm water for about 10 minutes.
  • Don’t Overmix: When combining the wet and dry ingredients, mix just until combined. Overmixing can lead to a dense cake. A few lumps are okay; they will bake out during cooking.
  • Use Fresh Blackberries: Fresh blackberries not only taste better but also look more appealing. Choose berries that are plump and firm. If you use frozen blackberries, do not thaw them before adding to the batter, as this can make the cake soggy.
  • Check for Doneness: Ovens can vary, so start checking your cakes a few minutes before the suggested baking time. Insert a toothpick into the center; if it comes out clean or with a few moist crumbs, your cake is done.
  • Cool Completely: Allow the cakes to cool completely before frosting. This prevents the whipped cream from melting and ensures a beautiful finish. Patience is key here!
  • Experiment with Flavors: Don’t hesitate to add your twist! Consider adding a tablespoon of espresso powder to enhance the chocolate flavor or a pinch of cinnamon for warmth. These small changes can make a big difference.
  • Store Properly: If you have leftovers, store the cake in an airtight container in the refrigerator. This keeps it fresh and moist for a few days. You can also freeze slices for later enjoyment.

Blackberry Velvet Gothic Cake. Each step you take will bring you closer to creating a dessert that is not only delicious but also a feast for the eyes. Happy baking!

Breakdown of Time for Blackberry Velvet Gothic Cake

Blackberry Velvet Gothic Cake can help you plan your baking session effectively. Here’s a detailed breakdown of the time you’ll need for preparation, cooking, and the total time involved in creating this delightful dessert.

Prep Time

Blackberry Velvet Gothic Cake is approximately 20-30 minutes. This includes gathering your ingredients, measuring them accurately, and mixing the batter. Make sure to take your time during this stage to ensure everything is well-prepared. Remember, a well-prepared cake starts with a solid foundation!

Cooking Time

Once your batter is ready, the cooking time is about 25-30 minutes. During this time, the cakes will rise and develop that rich, velvety texture. Keep an eye on them as they bake, and use the toothpick test to check for doneness. If the toothpick comes out clean, your cakes are ready to cool!

Total Time

Blackberry Velvet Gothic Cake for a special occasion, be sure to factor in this cooling time!

Blackberry Velvet Gothic Cake turns out perfectly. Happy baking!

Nutritional Information for Blackberry Velvet Gothic Cake

Blackberry Velvet Gothic Cake can help you enjoy it mindfully. This cake is not only a treat for the taste buds but also provides some essential nutrients. Here’s a breakdown of the key nutritional information you can expect from a serving of this delightful dessert.

Calories

Blackberry Velvet Gothic Cake contains approximately 350 calories. This calorie count includes the rich chocolate cake, fresh blackberries, and whipped cream topping. While it’s a delicious indulgence, it’s important to enjoy it in moderation, especially if you’re watching your calorie intake.

Protein

In terms of protein, each serving offers about 5 grams. The protein comes primarily from the eggs and the heavy cream used in the recipe. While this isn’t a high-protein dessert, it does contribute to your daily protein needs when enjoyed as part of a balanced diet.

Sodium

Blackberry Velvet Gothic Cake is around 200 milligrams. This amount is relatively low, making it a suitable option for those who are mindful of their sodium intake. The salt used in the recipe helps enhance the flavors without adding excessive sodium.

Blackberry Velvet Gothic Cake can be a delightful addition to your dessert table. With its rich flavors and moderate nutritional content, it’s a treat that can be enjoyed on special occasions or as a sweet reward after a long day. Just remember to savor each bite!

FAQs about Blackberry Velvet Gothic Cake

What makes a cake “gothic”?

Blackberry Velvet Gothic Cake refers to its dark, rich appearance and intriguing flavors. The deep chocolate color, combined with the vibrant blackberries, creates a striking visual contrast. Additionally, the cake’s name evokes a sense of mystery and allure, often associated with gothic themes in literature and art. This cake is not just about looks; it also offers a unique blend of flavors that can be both bold and enchanting, making it a perfect fit for the gothic style.

Can I use frozen blackberries for the cake?

Blackberry Velvet Gothic Cake. However, it’s best to add them directly from the freezer without thawing. Thawing can make the berries mushy, which may affect the cake’s texture. Frozen blackberries can still provide great flavor and color, making them a convenient option if fresh berries are not available. Just be sure to gently fold them into the batter to avoid breaking them apart.

How do I store leftover Blackberry Velvet Gothic Cake?

Blackberry Velvet Gothic Cake, place it in an airtight container. This will help keep the cake fresh and moist. You can store it in the refrigerator for up to three days. If you want to keep it longer, consider freezing individual slices. Wrap each slice tightly in plastic wrap and then place them in a freezer-safe bag. This way, you can enjoy a piece of cake whenever you crave a sweet treat!

What can I substitute for buttermilk in the recipe?

Blackberry Velvet Gothic Cake. One common method is to mix 1 cup of milk with 1 tablespoon of white vinegar or lemon juice. Let it sit for about 5-10 minutes until it thickens slightly. Alternatively, you can use plain yogurt or sour cream, thinned with a little milk to achieve a similar consistency. These substitutes will help maintain the cake’s moisture and flavor.

Conclusion on Blackberry Velvet Gothic Cake

Blackberry Velvet Gothic Cake is a delightful dessert that combines rich chocolate flavors with the tartness of fresh blackberries. This cake not only looks stunning but also offers a unique taste experience that is sure to impress anyone who tries it. Whether you’re celebrating a special occasion or simply indulging in a sweet treat, this cake is a perfect choice.

Throughout this article, we’ve explored the ingredients, preparation steps, and various tips to help you create the perfect cake. From the careful mixing of ingredients to the thoughtful presentation, each step plays a crucial role in achieving a delicious outcome. Remember, baking is as much about the process as it is about the final product, so enjoy every moment in the kitchen!

Blackberry Velvet Gothic Cake to suit your taste and the preferences of your guests.

As you serve this cake, consider the presentation tips shared earlier. A beautifully garnished slice can elevate the dessert experience, making it even more enjoyable. Pair it with a cup of tea or coffee, and you have a delightful treat that’s perfect for any gathering.

Blackberry Velvet Gothic Cake. With a little patience and creativity, you’ll create a dessert that not only satisfies your sweet tooth but also leaves a lasting impression on everyone who tastes it. Happy baking!

Cranberry Pistachio Shortbread Cookies are delightful treats.

Introduction to Cranberry Pistachio Shortbread Cookies

Cranberry Pistachio Shortbread Cookies are a delightful treat that combines the rich, buttery flavor of traditional shortbread with the tartness of cranberries and the crunch of pistachios. These cookies are not just a feast for the taste buds; they also add a splash of color to any dessert table. Perfect for holiday gatherings, tea parties, or simply as a sweet snack, these cookies are sure to impress your family and friends.

Shortbread cookies have a long history, originating in Scotland. Their simple ingredients make them easy to prepare, while their rich flavor makes them a favorite among many. By adding cranberries and pistachios, we elevate this classic recipe to new heights. The sweet and tangy cranberries contrast beautifully with the nutty flavor of pistachios, creating a harmonious blend that is both satisfying and delicious.

Whether you are an experienced baker or a novice in the kitchen, making Cranberry Pistachio Shortbread Cookies is a straightforward process. With just a few simple steps, you can create a batch of cookies that will fill your home with a warm, inviting aroma. Plus, they make for a wonderful gift when packaged in a decorative box or tin.

So, roll up your sleeves and get ready to bake! In the following sections, we will guide you through the ingredients, preparation steps, and tips to ensure your Cranberry Pistachio Shortbread Cookies turn out perfectly every time. Let’s dive into the world of baking these delightful cookies!

Ingredients for Cranberry Pistachio Shortbread Cookies

To create the delicious Cranberry Pistachio Shortbread Cookies, you will need a few simple ingredients. Each component plays a vital role in achieving the perfect texture and flavor. Here’s what you’ll need:

  • 2 cups all-purpose flour: This is the base of your cookies, providing structure and a light texture.
  • 1 cup unsalted butter, softened: Butter adds richness and flavor. Make sure it’s softened for easy mixing.
  • 3/4 cup powdered sugar: This sweetener gives the cookies a delicate sweetness and a melt-in-your-mouth quality.
  • 1/2 teaspoon salt: A pinch of salt enhances the flavors and balances the sweetness.
  • 1 teaspoon vanilla extract: Vanilla adds a warm, aromatic flavor that complements the other ingredients.
  • 1/2 cup dried cranberries, chopped: These provide a tart contrast to the sweetness of the cookies.
  • 1/2 cup pistachios, shelled and chopped: Pistachios add a delightful crunch and nutty flavor.

With these ingredients on hand, you’re ready to embark on your baking adventure. Each item contributes to the overall taste and texture of the cookies, making them a delightful treat for any occasion. Gather your ingredients, and let’s move on to the preparation steps!

Preparation of Cranberry Pistachio Shortbread Cookies

Now that you have all your ingredients ready, it’s time to dive into the preparation of your Cranberry Pistachio Shortbread Cookies. This process is simple and enjoyable, allowing you to create delicious cookies that everyone will love. Let’s break it down step by step!

Step 1: Gather Your Ingredients

Before you start baking, make sure you have all your ingredients measured and ready to go. This will make the process smoother and more enjoyable. You’ll need:

  • 2 cups all-purpose flour
  • 1 cup unsalted butter, softened
  • 3/4 cup powdered sugar
  • 1/2 teaspoon salt
  • 1 teaspoon vanilla extract
  • 1/2 cup dried cranberries, chopped
  • 1/2 cup pistachios, shelled and chopped

Having everything in place will help you focus on mixing and baking!

Step 2: Prepare the Dough

In a large mixing bowl, start by creaming together the softened butter and powdered sugar. Use an electric mixer or a wooden spoon to mix until the mixture is light and fluffy. This should take about 2-3 minutes. The fluffiness is key to achieving that melt-in-your-mouth texture.

Next, add the vanilla extract and salt to the butter mixture. Mix until everything is well combined. This step adds flavor and balances the sweetness of the cookies.

Step 3: Incorporate Cranberries and Pistachios

Now, it’s time to add the flour. Gradually mix in the flour until just incorporated. Be careful not to overmix, as this can make the cookies tough. Once the flour is mixed in, gently fold in the chopped cranberries and pistachios. Make sure they are evenly distributed throughout the dough for a delightful burst of flavor in every bite!

Step 4: Shape the Cookies

After mixing, turn the dough out onto a lightly floured surface. Shape it into a log about 2 inches in diameter. This log will be sliced into individual cookies later. Make sure the log is as even as possible for uniform baking.

Step 5: Chill the Dough

Wrap the log in plastic wrap and refrigerate it for at least 30 minutes. Chilling the dough helps it firm up, making it easier to slice. This step is crucial for achieving the perfect cookie shape and texture.

Step 6: Bake the Cookies

Once the dough is chilled, preheat your oven to 350°F. Line a baking sheet with parchment paper. Slice the log into 1/4-inch thick rounds and place them on the prepared baking sheet, spacing them about 1 inch apart. Bake in the preheated oven for 12-15 minutes or until the edges are lightly golden. Keep an eye on them to avoid overbaking!

After baking, remove the cookies from the oven and let them cool on the baking sheet for 5 minutes. Then, transfer them to a wire rack to cool completely. Enjoy the delightful aroma filling your kitchen!

Variation of Cranberry Pistachio Shortbread Cookies

While the classic Cranberry Pistachio Shortbread Cookies are delicious on their own, there are many ways to customize this recipe. By making a few simple changes, you can create variations that suit your taste or the occasion. Let’s explore some alternative ingredients and flavor enhancements that can elevate your cookie experience!

Alternative Ingredients

If you want to switch things up, consider these alternative ingredients:

  • Almonds: Substitute pistachios with chopped almonds for a different nutty flavor. Almonds add a lovely crunch and pair well with cranberries.
  • Walnuts: Chopped walnuts can also be used. They have a rich flavor that complements the sweetness of the cookies.
  • Chocolate Chips: For a sweeter twist, add semi-sweet or white chocolate chips. They melt beautifully and add a creamy texture.
  • Orange Zest: Incorporate a teaspoon of orange zest for a citrusy kick. This brightens the flavor and adds a refreshing aroma.
  • Gluten-Free Flour: If you need a gluten-free option, use a gluten-free all-purpose flour blend. This allows everyone to enjoy these cookies!

These alternatives can help you create a unique version of the cookies that still maintains the essence of the original recipe.

Flavor Enhancements

In addition to alternative ingredients, you can enhance the flavor of your Cranberry Pistachio Shortbread Cookies with these ideas:

  • Spices: Add a pinch of cinnamon or nutmeg to the dough for a warm, cozy flavor. These spices are perfect for the holiday season!
  • Extracts: Experiment with different extracts like almond or maple. Just a few drops can change the flavor profile significantly.
  • Sea Salt: Sprinkle a little sea salt on top of the cookies before baking. This adds a delightful contrast to the sweetness.
  • Dried Fruits: Mix in other dried fruits like apricots or cherries for added texture and flavor. They can bring a new dimension to your cookies.

These flavor enhancements can make your Cranberry Pistachio Shortbread Cookies even more delightful. Feel free to mix and match these ideas to create your perfect cookie!

Cooking Note for Cranberry Pistachio Shortbread Cookies

When it comes to baking Cranberry Pistachio Shortbread Cookies, a few cooking notes can help ensure your cookies turn out perfectly every time. These tips will guide you through the process, making it easier and more enjoyable. Let’s take a look at some important points to keep in mind!

First, always use softened butter. This is crucial for achieving the right texture. If your butter is too cold, it won’t cream well with the sugar, leading to dense cookies. To soften butter quickly, cut it into small pieces and let it sit at room temperature for about 15-20 minutes.

Next, be mindful of your mixing technique. When combining the flour, mix until just incorporated. Overmixing can lead to tough cookies, which is not what we want! Gently folding in the cranberries and pistachios ensures they are evenly distributed without overworking the dough.

Chilling the dough is another essential step. This not only helps the cookies hold their shape but also enhances the flavors. If you’re short on time, you can chill the dough for a shorter period, but aim for at least 30 minutes for the best results.

When baking, keep an eye on the cookies as they approach the end of the baking time. Ovens can vary, and you want to catch them just as the edges turn lightly golden. This will give you that perfect balance of crisp edges and a soft center.

Lastly, allow the cookies to cool on the baking sheet for a few minutes before transferring them to a wire rack. This helps them set and prevents them from breaking apart. Once cooled, store them in an airtight container to maintain their freshness.

By following these cooking notes, you’ll be well on your way to creating delicious Cranberry Pistachio Shortbread Cookies that everyone will love. Happy baking!

Serving Suggestions for Cranberry Pistachio Shortbread Cookies

Once your Cranberry Pistachio Shortbread Cookies are baked and cooled, it’s time to think about how to serve them. These cookies are not only delicious but also visually appealing, making them perfect for various occasions. Here are some delightful serving suggestions to enhance your cookie experience!

  • Tea Time Treat: Serve the cookies alongside a pot of your favorite tea. The buttery flavor pairs wonderfully with herbal or black teas. Consider offering a selection of teas for a delightful afternoon tea experience.
  • Holiday Platters: Arrange the cookies on a festive platter for holiday gatherings. Add some fresh fruits, nuts, or chocolate-covered treats to create a beautiful dessert table that will impress your guests.
  • Gift Giving: Package the cookies in decorative boxes or tins. Tie them with a ribbon for a thoughtful homemade gift. They make a lovely present for friends, family, or coworkers during the holiday season.
  • Ice Cream Sandwiches: For a fun twist, use the cookies to create ice cream sandwiches. Simply place a scoop of your favorite ice cream between two cookies. This makes for a delightful dessert that’s sure to please!
  • With Coffee: Pair the cookies with a cup of coffee for a delightful morning or afternoon snack. The rich flavors of coffee complement the sweetness of the cookies perfectly.

These serving suggestions can elevate your Cranberry Pistachio Shortbread Cookies, making them a highlight of any gathering. Whether you’re enjoying them with a warm beverage or sharing them as gifts, these cookies are sure to bring joy to everyone who tastes them!

Tips for Perfect Cranberry Pistachio Shortbread Cookies

To ensure your Cranberry Pistachio Shortbread Cookies turn out perfectly every time, consider these helpful tips. Each suggestion will guide you through the baking process, making it easier and more enjoyable. Let’s explore some essential tips for achieving cookie perfection!

  • Measure Accurately: Use a kitchen scale for precise measurements, especially for flour. Too much flour can lead to dry cookies. If you don’t have a scale, spoon the flour into your measuring cup and level it off with a knife.
  • Room Temperature Ingredients: Make sure your butter is softened to room temperature. Cold butter won’t cream well with sugar, affecting the texture of your cookies. If you forget to take it out, you can cut it into small pieces to speed up the softening process.
  • Don’t Overmix: When adding flour, mix until just combined. Overmixing can develop gluten, resulting in tough cookies. Gently fold in the cranberries and pistachios to keep the dough tender.
  • Chill the Dough: Chilling the dough is crucial for shaping and baking. It helps the cookies maintain their shape and enhances the flavors. If you’re in a hurry, you can chill the dough for a shorter time, but aim for at least 30 minutes.
  • Use Parchment Paper: Line your baking sheet with parchment paper. This prevents sticking and ensures even baking. It also makes cleanup a breeze!
  • Watch the Baking Time: Keep an eye on your cookies as they bake. Ovens can vary, so check them a minute or two before the suggested baking time. You want the edges to be lightly golden, while the centers remain soft.
  • Cool Properly: Allow the cookies to cool on the baking sheet for a few minutes before transferring them to a wire rack. This helps them set and prevents breakage.
  • Store Correctly: To keep your cookies fresh, store them in an airtight container at room temperature. They can last up to a week, but they’re usually gone much sooner!

By following these tips, you’ll be well on your way to baking the perfect Cranberry Pistachio Shortbread Cookies. Enjoy the process and the delicious results!

Breakdown of Time for Cranberry Pistachio Shortbread Cookies

Understanding the time required for each step in making Cranberry Pistachio Shortbread Cookies can help you plan your baking session effectively. Here’s a detailed breakdown of the time you’ll need for preparation, cooking, and the total time involved in creating these delightful cookies.

Prep Time

The prep time for these cookies is approximately 15-20 minutes. This includes gathering your ingredients, creaming the butter and sugar, and mixing in the flour, cranberries, and pistachios. Make sure to measure everything accurately to ensure the best results!

Cooking Time

Once your dough is ready and chilled, the cooking time is about 12-15 minutes. Keep an eye on the cookies as they bake, checking for that perfect golden edge. Remember, every oven is different, so adjust the time as needed!

Total Time

In total, you should expect to spend around 1 hour to 1 hour and 15 minutes on making Cranberry Pistachio Shortbread Cookies. This includes the prep time, chilling the dough for at least 30 minutes, and the baking time. With this timeline, you can easily fit cookie-making into your day, whether it’s for a special occasion or just a sweet treat for yourself!

Nutritional Information for Cranberry Pistachio Shortbread Cookies

Understanding the nutritional content of your Cranberry Pistachio Shortbread Cookies can help you enjoy them mindfully. These cookies are not only delicious but also provide a balance of nutrients. Here’s a closer look at the nutritional information per serving:

Calories

Each Cranberry Pistachio Shortbread Cookie contains approximately 120 calories. This makes them a delightful treat that can fit into a balanced diet. Enjoying one or two cookies can satisfy your sweet tooth without overindulging.

Protein

These cookies provide about 2 grams of protein per serving. While they are not a significant source of protein, the inclusion of pistachios adds a bit of this essential nutrient. Protein is important for muscle repair and overall health, making these cookies a tasty way to enjoy a small boost.

Sodium

Each cookie contains roughly 50 milligrams of sodium. This is a moderate amount, especially considering that the salt in the recipe enhances the flavors without making the cookies overly salty. Keeping sodium levels in check is important for maintaining heart health, so these cookies can be enjoyed as part of a balanced diet.

In summary, Cranberry Pistachio Shortbread Cookies offer a delightful combination of flavors and textures while providing a reasonable nutritional profile. Enjoy them as a treat, and feel good about the ingredients that go into each bite!

FAQs about Cranberry Pistachio Shortbread Cookies

Can I use other nuts instead of pistachios?

Absolutely! If you prefer a different nut flavor, you can easily substitute pistachios with other nuts. Almonds and walnuts are great alternatives that will still provide a delightful crunch. Just make sure to chop them into small pieces for even distribution in the dough. This way, you can customize your Cranberry Pistachio Shortbread Cookies to suit your taste!

How do I store leftover cookies?

To keep your Cranberry Pistachio Shortbread Cookies fresh, store them in an airtight container. This will help maintain their texture and flavor. You can keep them at room temperature for up to a week. If you want to enjoy them later, consider placing a piece of parchment paper between layers of cookies to prevent sticking. This simple step will ensure your cookies stay delicious for days!

Can I freeze Cranberry Pistachio Shortbread Cookies?

Yes, you can freeze these cookies! To freeze them, allow the cookies to cool completely after baking. Then, place them in a single layer in an airtight container or a freezer bag. They can be stored in the freezer for up to three months. When you’re ready to enjoy them, simply thaw them at room temperature for a few hours. This way, you can have a tasty treat ready whenever you crave something sweet!

What can I serve with these cookies?

Cranberry Pistachio Shortbread Cookies pair wonderfully with a variety of beverages. Consider serving them with a warm cup of tea or coffee for a delightful afternoon snack. They also make a lovely addition to dessert platters at parties. For a fun twist, try using them to create ice cream sandwiches! The buttery flavor of the cookies complements the creaminess of ice cream perfectly. No matter how you serve them, these cookies are sure to be a hit!

Conclusion on Cranberry Pistachio Shortbread Cookies

In conclusion, Cranberry Pistachio Shortbread Cookies are a delightful treat that brings together the rich, buttery goodness of traditional shortbread with the vibrant flavors of cranberries and pistachios. These cookies are not only easy to make but also versatile, allowing for various adaptations to suit your taste preferences. Whether you enjoy them during the holidays, at tea time, or as a sweet snack, they are sure to impress anyone who takes a bite.

By following the simple steps outlined in this article, you can create a batch of cookies that will fill your home with a warm, inviting aroma. The combination of textures—from the crumbly shortbread to the chewy cranberries and crunchy pistachios—creates a delightful experience for your taste buds. Plus, with the tips and variations provided, you can customize your cookies to make them uniquely yours.

So, gather your ingredients, roll up your sleeves, and start baking! Whether you’re sharing them with friends and family or enjoying them all by yourself, these Cranberry Pistachio Shortbread Cookies are sure to bring joy and satisfaction. Happy baking!

Hashbrown Chaffle Recipe: A Quick and Tasty Delight

Introduction to Hashbrown Chaffle Recipe

What is a Hashbrown Chaffle?

A hashbrown chaffle is a delightful fusion of two beloved breakfast staples: hashbrowns and chaffles. This innovative dish combines the crispy texture of hashbrowns with the convenience of a chaffle, which is a waffle made primarily from cheese and eggs. The result is a golden, crunchy treat that is perfect for breakfast, brunch, or even a snack. With its savory flavor and satisfying crunch, the hashbrown chaffle is sure to become a favorite in your kitchen.

Why You Should Try This Hashbrown Chaffle Recipe

There are many reasons to give this hashbrown chaffle recipe a try. First, it’s incredibly easy to make, requiring just a few simple ingredients. You can whip it up in no time, making it a great option for busy mornings. Second, it’s versatile! You can customize it with your favorite toppings or mix-ins, like cheese, bacon, or veggies. Plus, it’s a low-carb option that fits well into various diets, including keto and gluten-free. Lastly, the crispy texture and rich flavor will leave you wanting more. So, why not treat yourself to this delicious dish? You won’t regret it!

Ingredients for Hashbrown Chaffle Recipe

To create the perfect hashbrown chaffle, you’ll need a handful of simple ingredients. Each one plays a vital role in achieving that crispy texture and delicious flavor. Here’s what you’ll need:

  • 2 cups frozen shredded hashbrowns, thawed: These are the star of the dish, providing the classic hashbrown taste and texture.
  • 1 large egg: This binds the ingredients together and adds moisture.
  • 1/2 cup shredded cheddar cheese: Cheese adds a rich flavor and helps create that crispy exterior.
  • 1/4 teaspoon garlic powder: This gives a subtle kick of flavor that enhances the overall taste.
  • 1/4 teaspoon onion powder: Similar to garlic powder, it adds depth to the flavor profile.
  • 1/4 teaspoon salt: A little salt is essential to bring out the flavors of the other ingredients.
  • 1/4 teaspoon black pepper: This adds a hint of spice and balances the dish.
  • Cooking spray or oil: Use this to grease the waffle maker, ensuring your chaffles come out easily and stay crispy.

Feel free to get creative! You can add cooked bacon bits, diced bell peppers, or even jalapeños for a spicy twist. The beauty of this hashbrown chaffle recipe is its versatility. So gather your ingredients and get ready to make a delicious meal!

Step-by-Step Preparation of Hashbrown Chaffle Recipe

Step 1: Preparing the Ingredients

Before you start cooking, it’s important to prepare all your ingredients. First, take the frozen shredded hashbrowns out of the freezer and let them thaw completely. This step is crucial because thawed hashbrowns will cook more evenly and become crispier. Next, gather your other ingredients: the egg, shredded cheddar cheese, garlic powder, onion powder, salt, and black pepper. Having everything ready will make the cooking process smooth and enjoyable.

Step 2: Mixing the Ingredients

Now that your ingredients are ready, it’s time to mix them together. In a large mixing bowl, combine the thawed hashbrowns, egg, and shredded cheddar cheese. Then, add the garlic powder, onion powder, salt, and black pepper. Use a fork or a spatula to mix everything until well combined. Make sure the egg is evenly distributed throughout the mixture. This will help bind the ingredients together and ensure every bite is flavorful.

Step 3: Preheating the Waffle Maker

While you’re mixing the ingredients, it’s a good idea to preheat your waffle maker. Follow the manufacturer’s instructions for the best results. Most waffle makers take just a few minutes to heat up. Once it’s ready, lightly grease the cooking surface with cooking spray or a little oil. This will prevent the chaffles from sticking and help them achieve that perfect crispy texture.

Step 4: Cooking the Hashbrown Chaffles

Now comes the fun part—cooking! Scoop about 1/2 cup of the hashbrown mixture and spread it evenly onto the preheated waffle maker. Close the lid and let it cook for about 5-7 minutes. Keep an eye on it; you want the chaffle to turn golden brown and crispy. Once it’s done, carefully remove it using a fork or tongs. Repeat this process with the remaining mixture until all your chaffles are cooked.

Step 5: Serving the Hashbrown Chaffles

Your hashbrown chaffles are now ready to be served! Enjoy them warm, and feel free to get creative with toppings. You can add sour cream, salsa, or even sliced avocado for a delicious twist. These chaffles make a great breakfast, brunch, or snack option. They’re not only tasty but also fun to make!

Variations of Hashbrown Chaffle Recipe

Adding Cheese to Your Hashbrown Chaffle Recipe

Cheese is a fantastic way to elevate your hashbrown chaffle recipe. While cheddar cheese is a classic choice, you can experiment with different types of cheese to create unique flavors. For instance, try using mozzarella for a gooey, stretchy texture. Alternatively, pepper jack cheese adds a delightful kick with its spicy notes. You can also mix cheeses, like combining cheddar and parmesan, for a rich and savory taste. Just remember to adjust the amount slightly if you’re adding more cheese to keep the right consistency. The result will be a cheesy, crispy chaffle that’s sure to impress!

Spicy Hashbrown Chaffle Recipe Variations

If you love a bit of heat, consider making spicy hashbrown chaffles! One easy way to add spice is by mixing in diced jalapeños or crushed red pepper flakes into your hashbrown mixture. This will give your chaffles a zesty kick that pairs perfectly with creamy toppings. Another option is to serve your chaffles with a spicy salsa or hot sauce on the side. For an extra layer of flavor, you can also add a dash of cayenne pepper to the mixture. These spicy variations will not only tantalize your taste buds but also make your breakfast or snack time more exciting!

Cooking Note for Hashbrown Chaffle Recipe

When making your hashbrown chaffles, there are a few important cooking notes to keep in mind. First, the type of waffle maker you use can affect the cooking time and texture of your chaffles. Some waffle makers heat more evenly than others, so it’s essential to monitor your chaffles closely as they cook. If you notice they are browning too quickly, you can adjust the temperature or reduce the cooking time slightly.

Additionally, the moisture content in your hashbrowns can vary. If your mixture seems too wet, consider squeezing out some excess moisture using a clean kitchen towel. This will help achieve that desired crispy texture. On the other hand, if the mixture feels too dry, you can add a little more egg or cheese to help bind it together.

Lastly, remember that every waffle maker is different. If you’re unsure about the cooking time, start with the lower end of the suggested time and check for doneness. You want your chaffles to be golden brown and crispy on the outside while remaining tender on the inside. With these tips in mind, you’ll be well on your way to making perfect hashbrown chaffles every time!

Serving Suggestions for Hashbrown Chaffle Recipe

Toppings to Enhance Your Hashbrown Chaffle Recipe

When it comes to serving your hashbrown chaffles, the possibilities are endless! Toppings can transform your dish from simple to spectacular. Here are some delicious ideas to enhance your hashbrown chaffle experience:

  • Sour Cream: A dollop of sour cream adds a creamy texture that balances the crispy chaffle.
  • Salsa: Fresh salsa brings a burst of flavor and a hint of spice, making it a perfect pairing.
  • Avocado: Sliced or mashed avocado adds healthy fats and a smooth, buttery taste.
  • Chopped Green Onions: Sprinkle some green onions on top for a fresh, crunchy bite.
  • Hot Sauce: If you love heat, a drizzle of your favorite hot sauce will kick things up a notch.
  • Cheese Sauce: Pouring warm cheese sauce over your chaffles creates a gooey, indulgent treat.

Feel free to mix and match these toppings to find your favorite combination. Each topping adds its unique flavor, making every bite exciting!

Pairing Ideas for Hashbrown Chaffles

Hashbrown chaffles are not just a standalone dish; they can be paired with various sides and beverages to create a complete meal. Here are some pairing ideas to consider:

  • Eggs: Serve your chaffles alongside scrambled or fried eggs for a hearty breakfast.
  • Bacon or Sausage: Crispy bacon or savory sausage links complement the chaffles perfectly.
  • Fresh Fruit: A side of fresh fruit, like berries or sliced oranges, adds a refreshing touch.
  • Salad: For a lighter option, pair your chaffles with a simple green salad drizzled with vinaigrette.
  • Juice or Coffee: Enjoy your meal with a glass of fresh juice or a warm cup of coffee to complete the experience.

These pairing ideas will not only enhance your hashbrown chaffle meal but also make it more satisfying. Enjoy experimenting with different combinations to find what you love best!

Tips for Perfecting Your Hashbrown Chaffle Recipe

Making the perfect hashbrown chaffle is all about attention to detail. Here are some helpful tips to ensure your chaffles turn out crispy and delicious every time:

  • Use Thawed Hashbrowns: Always thaw your frozen hashbrowns completely. This step is crucial for achieving that crispy texture. If they are still frozen, they may steam instead of crisping up.
  • Drain Excess Moisture: If your hashbrowns seem wet, consider squeezing out excess moisture using a clean kitchen towel. This will help your chaffles become crispier.
  • Don’t Overcrowd the Waffle Maker: When adding the mixture to the waffle maker, avoid overfilling. A heaping 1/2 cup is usually enough. This allows the chaffle to cook evenly and prevents overflow.
  • Adjust Cooking Time: Keep an eye on your chaffles as they cook. Depending on your waffle maker, cooking times may vary. Start with 5 minutes and check for that golden brown color.
  • Experiment with Seasonings: Feel free to get creative with your seasonings. Adding herbs like parsley or spices like paprika can enhance the flavor profile of your chaffles.
  • Let Them Cool Slightly: After cooking, let your chaffles cool for a minute before serving. This helps them firm up a bit more, making them easier to handle.
  • Store Properly: If you have leftovers, store them in an airtight container in the fridge. They can be reheated in the oven or toaster for a quick snack.

By following these tips, you’ll be well on your way to mastering the art of making hashbrown chaffles. Enjoy the process and have fun experimenting with different flavors and toppings!

Breakdown of Time for Hashbrown Chaffle Recipe

Prep Time

Preparing your hashbrown chaffle recipe is quick and easy. The prep time typically takes about 10 minutes. This includes thawing the hashbrowns, gathering your ingredients, and mixing everything together. If you have your ingredients ready, you can whip up the mixture in no time. Just remember to let the hashbrowns thaw completely for the best results!

Cooking Time

The cooking time for each batch of hashbrown chaffles is around 5-7 minutes. Depending on your waffle maker, you may need to adjust this time slightly. It’s important to keep an eye on your chaffles as they cook. You want them to be golden brown and crispy. If you’re making multiple batches, factor in a little extra time for each one. Overall, cooking should take about 20 minutes for all the chaffles.

Total Time

In total, you can expect to spend about 30 minutes from start to finish when making hashbrown chaffles. This includes both prep and cooking time. With such a quick turnaround, you can enjoy a delicious breakfast or snack without spending hours in the kitchen. Plus, the delightful aroma of cooking chaffles will make the wait even more worthwhile!

Nutritional Information for Hashbrown Chaffle Recipe

Calories in Hashbrown Chaffle Recipe

When it comes to enjoying a tasty meal, knowing the calorie content is essential. Each hashbrown chaffle contains approximately 150 calories. This makes it a satisfying option without being overly indulgent. If you’re watching your calorie intake, these chaffles can fit nicely into your meal plan. Plus, they provide a delicious way to start your day without the guilt!

Protein Content in Hashbrown Chaffle Recipe

Protein is an important nutrient that helps keep you full and satisfied. Each hashbrown chaffle offers about 7 grams of protein. This protein comes mainly from the egg and cheese in the recipe. Including protein in your meals can help maintain energy levels and support muscle health. So, not only are these chaffles tasty, but they also contribute to your daily protein needs!

Sodium Levels in Hashbrown Chaffle Recipe

Monitoring sodium intake is crucial for maintaining a healthy diet. Each hashbrown chaffle contains around 200 milligrams of sodium. This amount is relatively moderate, especially considering the flavor it adds to the dish. If you’re concerned about sodium levels, you can adjust the salt in the recipe or choose low-sodium cheese. This way, you can enjoy your chaffles while keeping your sodium intake in check!

FAQs about Hashbrown Chaffle Recipe

Can I make Hashbrown Chaffles in advance?

Yes, you can make hashbrown chaffles in advance! They are perfect for meal prep. Simply cook the chaffles as directed and let them cool completely. Once cooled, you can store them in an airtight container in the refrigerator for up to three days. When you’re ready to enjoy them, just reheat in the oven or toaster until crispy. This way, you can have a delicious breakfast or snack ready to go!

What can I use instead of potatoes in Hashbrown Chaffle Recipe?

If you’re looking for alternatives to potatoes, there are several options! You can use cauliflower rice or zucchini as a base for your chaffles. Both options provide a similar texture while being lower in carbs. Just make sure to squeeze out any excess moisture from the zucchini before mixing it in. This will help achieve that crispy chaffle texture you desire!

How do I store leftover Hashbrown Chaffles?

Storing leftover hashbrown chaffles is easy! Place them in an airtight container and keep them in the refrigerator. They will stay fresh for about three days. If you want to keep them longer, consider freezing them. Just make sure to separate each chaffle with parchment paper to prevent sticking. When you’re ready to eat, simply reheat them in the oven or toaster for a quick and tasty meal!

Can I freeze Hashbrown Chaffles?

Absolutely! Freezing hashbrown chaffles is a great way to have a quick meal on hand. After cooking and cooling the chaffles, place them in a single layer on a baking sheet and freeze until solid. Then, transfer them to a freezer-safe bag or container. They can be stored in the freezer for up to three months. When you’re ready to enjoy, just reheat them directly from the freezer in the oven or toaster until crispy!

Conclusion on Hashbrown Chaffle Recipe

In conclusion, the hashbrown chaffle recipe is a delightful and versatile dish that brings together the best of both worlds: crispy hashbrowns and the convenience of a chaffle. Whether you’re looking for a quick breakfast, a satisfying snack, or a fun brunch option, this recipe has you covered. With just a few simple ingredients and easy steps, you can create a delicious meal that is sure to impress family and friends.

Moreover, the ability to customize your hashbrown chaffles with various toppings and mix-ins makes this recipe even more appealing. From adding cheese and spices to incorporating veggies or meats, the possibilities are endless. This flexibility allows you to cater to different tastes and dietary preferences, making it a perfect choice for any occasion.

As you experiment with this hashbrown chaffle recipe, remember to keep the tips in mind for achieving that perfect crispy texture. With practice, you’ll master the art of making these delightful chaffles, ensuring they are a staple in your kitchen. So, gather your ingredients, fire up your waffle maker, and enjoy the deliciousness of hashbrown chaffles today!

Happy cooking!

Avocado Bacon and Egg Toasts make a perfect breakfast!

Introduction to Avocado Bacon Egg Toasts

Avocado Bacon Egg Toasts are a delightful and nutritious breakfast option that combines creamy avocado, crispy bacon, and perfectly cooked eggs. This dish is not only delicious but also packed with essential nutrients, making it a favorite among health-conscious eaters. The combination of flavors and textures creates a satisfying meal that can be enjoyed any time of the day.

Whether you’re looking for a quick breakfast or a leisurely brunch, these toasts are incredibly versatile. They can be customized to suit your taste preferences, allowing you to experiment with different ingredients and toppings. Plus, they are easy to prepare, making them perfect for busy mornings or lazy weekends.

In this article, we will guide you through the ingredients, preparation steps, and variations of Avocado Bacon Egg Toasts. You’ll learn how to create this mouthwatering dish that not only tastes great but also provides a healthy start to your day. So, grab your avocados and let’s get cooking!

Ingredients for Avocado Bacon Egg Toasts

To create the perfect Avocado Bacon Egg Toasts, you’ll need a few simple yet wholesome ingredients. Each component plays a vital role in delivering flavor and nutrition. Here’s what you’ll need:

  • 2 ripe avocados
  • 4 slices of whole grain bread
  • 4 large eggs
  • 4 slices of cooked bacon, crumbled
  • 1 tablespoon olive oil
  • Salt and pepper to taste
  • Red pepper flakes (optional, for a spicy kick)
  • Fresh lime juice (optional, for added zest)

These ingredients come together to create a deliciously satisfying meal. The ripe avocados provide healthy fats, while the eggs add protein. The crispy bacon brings a savory crunch, and the whole grain bread serves as a hearty base. Feel free to adjust the quantities based on your preferences or dietary needs.

Now that you have your ingredients ready, let’s move on to the preparation steps to whip up these tasty toasts!

Preparation of Avocado Bacon Egg Toasts

Now that you have gathered all your ingredients, it’s time to dive into the preparation of your Avocado Bacon Egg Toasts. This process is simple and quick, allowing you to enjoy a delicious meal in no time. Follow these steps to create your perfect toasts!

Step 1: Toast the Bread

Start by toasting the slices of whole grain bread. You can use a toaster or a skillet for this step. If using a skillet, heat it over medium heat and place the bread slices in the pan. Toast them until they are golden brown and crispy. This will create a sturdy base for your toppings and add a delightful crunch to each bite.

Step 2: Cook the Bacon

If you haven’t already cooked your bacon, now is the time! In a skillet, cook the bacon slices over medium heat until they are crispy. Once done, remove them from the skillet and place them on a paper towel to absorb excess grease. After they cool, crumble the bacon into small pieces. This will make it easy to sprinkle over your toasts.

Step 3: Prepare the Avocado

While the bread is toasting and the bacon is cooking, it’s time to prepare the avocados. Take your ripe avocados and cut them in half. Remove the pit and scoop the flesh into a bowl. Using a fork, mash the avocado until it reaches your desired consistency. For added flavor, squeeze in some fresh lime juice and season with salt and pepper. This creamy mixture will be the star of your toasts!

Step 4: Fry the Eggs

Next, heat a tablespoon of olive oil in a skillet over medium heat. Crack the eggs into the skillet, being careful not to break the yolks if you prefer sunny-side up. Cook the eggs to your liking—whether that’s sunny-side up, over-easy, or scrambled. Don’t forget to season them with a pinch of salt and pepper for extra flavor!

Step 5: Assemble the Avocado Bacon Egg Toasts

Now comes the fun part—assembling your toasts! Once the bread is toasted, spread a generous layer of the mashed avocado on each slice. Top each avocado toast with a cooked egg, followed by a sprinkle of crumbled bacon. If you like a little heat, add a pinch of red pepper flakes on top. Your Avocado Bacon Egg Toasts are now ready to be served!

Enjoy them immediately for the best taste and texture. These toasts are not only visually appealing but also packed with flavor and nutrition. Let’s move on to some variations you can try to keep things exciting!

Variation of Avocado Bacon Egg Toasts

While the classic Avocado Bacon Egg Toasts are delicious as they are, there are many ways to switch things up! By experimenting with alternative ingredients and different cooking methods, you can create unique versions of this tasty dish. Let’s explore some exciting variations that will keep your breakfast routine fresh and fun!

Alternative Ingredients

One of the best things about Avocado Bacon Egg Toasts is their versatility. You can easily swap out ingredients to suit your taste or dietary needs. Here are some alternative ingredients to consider:

  • Vegetarian Option: If you prefer a meat-free meal, simply omit the bacon. Instead, add sliced cherry tomatoes, radishes, or even sautéed spinach for a burst of flavor and color.
  • Cheese Lovers: Sprinkle some crumbled feta or shredded cheddar cheese on top of your avocado toast for an extra creamy texture and rich flavor.
  • Herbs and Greens: Fresh herbs like cilantro, basil, or chives can elevate your dish. Add a handful of arugula or spinach for added nutrition.
  • Spicy Kick: For those who love heat, consider adding sliced jalapeños or a drizzle of hot sauce to your toasts.

These alternative ingredients can transform your Avocado Bacon Egg Toasts into a whole new experience. Feel free to mix and match based on what you have on hand or what you’re craving!

Different Cooking Methods

In addition to changing ingredients, you can also try different cooking methods to prepare your Avocado Bacon Egg Toasts. Here are a few ideas:

  • Grilled Toast: Instead of toasting the bread in a toaster, try grilling it on a barbecue or grill pan. This adds a smoky flavor that pairs wonderfully with the creamy avocado.
  • Baked Eggs: For a fun twist, bake the eggs in a muffin tin. Simply crack an egg into each muffin cup and bake until set. This method is great for making multiple servings at once!
  • Poached Eggs: If you enjoy poached eggs, try this method for a delicate texture. Poach the eggs in simmering water and place them on top of your avocado toast for a gourmet touch.

By exploring these alternative ingredients and cooking methods, you can create a variety of Avocado Bacon Egg Toasts that suit your taste and mood. Now, let’s move on to some important cooking notes to ensure your toasts turn out perfectly every time!

Cooking Note for Avocado Bacon Egg Toasts

When preparing Avocado Bacon Egg Toasts, a few cooking notes can help you achieve the best results. These tips will ensure that your toasts are not only delicious but also visually appealing and satisfying. Let’s dive into some essential cooking notes to keep in mind!

First, choose ripe avocados. They should yield slightly when gently pressed. Overripe avocados can be brown and mushy, while underripe ones will be hard and difficult to mash. A perfectly ripe avocado will provide a creamy texture that complements the other ingredients beautifully.

Next, pay attention to the bread. Whole grain bread is a great choice for its nutritional benefits and hearty texture. However, if you opt for other types of bread, ensure they are fresh. Stale bread can lead to a less enjoyable eating experience. Toasting the bread until it’s golden brown adds a delightful crunch, enhancing the overall flavor.

When cooking the eggs, consider using a non-stick skillet. This will help prevent the eggs from sticking and make flipping or removing them easier. If you prefer sunny-side up eggs, cover the skillet with a lid for a minute or two. This helps cook the top of the egg without flipping, resulting in a perfectly runny yolk.

Lastly, don’t forget to season your ingredients. A pinch of salt and pepper can elevate the flavors of the avocado and eggs. If you’re using lime juice, it not only adds flavor but also helps prevent the avocado from browning too quickly.

By following these cooking notes, you’ll create Avocado Bacon Egg Toasts that are not only tasty but also visually appealing. Now that you’re equipped with these tips, let’s explore some serving suggestions to make your meal even more enjoyable!

Serving Suggestions for Avocado Bacon Egg Toasts

Once you’ve prepared your delicious Avocado Bacon Egg Toasts, it’s time to think about how to serve them. Presentation can elevate your meal, making it even more enjoyable. Here are some serving suggestions to enhance your dining experience:

  • Garnish with Fresh Herbs: A sprinkle of fresh herbs like cilantro, parsley, or chives can add a pop of color and flavor. These herbs not only look great but also complement the creamy avocado and savory bacon.
  • Pair with a Side Salad: Serve your toasts alongside a light salad. A simple mix of greens, cherry tomatoes, and a light vinaigrette can balance the richness of the toasts and add freshness to your meal.
  • Include Fresh Fruit: Fresh fruit, such as sliced strawberries, oranges, or a handful of berries, can provide a sweet contrast to the savory flavors of the toasts. This combination makes for a well-rounded breakfast or brunch.
  • Offer a Variety of Spreads: Consider serving your toasts with additional spreads like hummus, tzatziki, or a spicy aioli. These can add extra flavor and allow guests to customize their toasts to their liking.
  • Serve with a Beverage: Pair your Avocado Bacon Egg Toasts with a refreshing drink. A glass of freshly squeezed orange juice, a smoothie, or even a cup of coffee can complement the meal perfectly.

These serving suggestions can help you create a delightful dining experience. Whether it’s a casual breakfast or a special brunch with friends, your Avocado Bacon Egg Toasts will surely impress. Now that you have some ideas for serving, let’s move on to tips for perfecting your toasts!

Tips for Perfect Avocado Bacon Egg Toasts

Creating the perfect Avocado Bacon Egg Toasts is all about attention to detail. With a few simple tips, you can elevate your toasts from good to great! Here are some helpful suggestions to ensure your dish is not only delicious but also visually appealing.

  • Choose the Right Avocados: Always select ripe avocados for the best flavor and texture. They should feel slightly soft when gently pressed. If they are too hard, they won’t mash well, and if they are too soft, they may be overripe.
  • Season Generously: Don’t skimp on seasoning! A pinch of salt and pepper can enhance the flavors of the avocado and eggs. Consider adding a dash of garlic powder or smoked paprika for an extra flavor boost.
  • Perfectly Cooked Eggs: For the best results, cook your eggs to your preferred doneness. If you like runny yolks, sunny-side up is the way to go. For a firmer texture, try over-easy or scrambled eggs. Remember to use a non-stick skillet for easy cooking!
  • Toast to Perfection: Toast your bread until it’s golden brown and crispy. This adds a satisfying crunch and prevents the bread from becoming soggy when topped with avocado.
  • Experiment with Toppings: Don’t hesitate to get creative with your toppings! Fresh herbs, sliced radishes, or even a drizzle of balsamic glaze can add a unique twist to your toasts.
  • Serve Immediately: For the best taste and texture, serve your Avocado Bacon Egg Toasts right after assembling. This ensures that the bread remains crispy and the avocado stays fresh.

By following these tips, you’ll create Avocado Bacon Egg Toasts that are not only delicious but also visually stunning. Now that you’re equipped with these helpful hints, let’s break down the time needed to prepare this delightful dish!

Breakdown of Time for Avocado Bacon Egg Toasts

When preparing Avocado Bacon Egg Toasts, it’s essential to manage your time effectively. This dish is quick to make, making it perfect for busy mornings or leisurely brunches. Here’s a breakdown of the time you’ll need for each step:

Prep Time

Getting everything ready is the first step. This includes gathering your ingredients and preparing the avocados. Expect to spend about 10 minutes on prep. This time allows you to slice, mash, and season your avocados while also getting your bread ready for toasting.

Cooking Time

Cooking the bacon and eggs is the next step. This will take around 15 minutes. You can cook the bacon while the bread is toasting, which saves time. Frying the eggs will take about 5 minutes, depending on how you like them cooked. If you prefer scrambled eggs, this may take a little longer.

Total Time

In total, you can expect to spend about 25 minutes from start to finish. This includes both prep and cooking time. With this quick turnaround, you can enjoy a delicious and nutritious breakfast without spending too much time in the kitchen!

Now that you have a clear idea of the time involved, let’s take a look at the nutritional information for your Avocado Bacon Egg Toasts!

Nutritional Information for Avocado Bacon Egg Toasts

Understanding the nutritional value of your meals is essential for maintaining a balanced diet. Avocado Bacon Egg Toasts not only taste great but also provide a good mix of nutrients. Here’s a breakdown of the nutritional information per serving:

Calories

Each serving of Avocado Bacon Egg Toasts contains approximately 350 calories. This makes it a satisfying meal that can keep you energized throughout the day. The combination of healthy fats from the avocado, protein from the eggs, and fiber from the whole grain bread contributes to a well-rounded dish.

Protein

With about 14 grams of protein per serving, these toasts are a great way to start your day. Protein is essential for muscle repair and growth, making it an important part of your breakfast. The eggs and bacon provide a hearty protein boost, helping you feel full and satisfied.

Sodium

While enjoying your Avocado Bacon Egg Toasts, it’s good to be mindful of sodium intake. Each serving contains around 500 milligrams of sodium, primarily from the bacon and any added salt. If you’re watching your sodium levels, consider using low-sodium bacon or reducing the amount of salt you add during cooking.

By keeping track of the nutritional information, you can enjoy your Avocado Bacon Egg Toasts while making informed choices about your diet. Now that you know the nutritional benefits, let’s address some frequently asked questions about this delicious dish!

FAQs about Avocado Bacon Egg Toasts

Can I make Avocado Bacon Egg Toasts ahead of time?

While Avocado Bacon Egg Toasts are best enjoyed fresh, you can prepare some components ahead of time. For instance, you can cook the bacon and eggs in advance and store them in the refrigerator. However, it’s best to mash the avocados just before serving to prevent browning. If you want to save time in the morning, consider prepping the ingredients the night before. This way, you can quickly assemble your toasts when you’re ready to eat!

What type of bread is best for Avocado Bacon Egg Toasts?

The best bread for Avocado Bacon Egg Toasts is whole grain bread, as it adds fiber and nutrients. However, you can also use other types of bread based on your preference. Sourdough, rye, or even gluten-free options work well. Just make sure the bread is fresh and can hold up to the toppings without becoming soggy. Toasting the bread until golden brown will enhance its flavor and texture!

Can I use turkey bacon instead of regular bacon?

Absolutely! Turkey bacon is a great alternative to regular bacon if you’re looking for a leaner option. It has less fat and fewer calories, making it a healthier choice. Keep in mind that turkey bacon may have a different texture and flavor, but it can still add a delicious crunch to your Avocado Bacon Egg Toasts. Feel free to experiment and see which version you prefer!

How can I make Avocado Bacon Egg Toasts healthier?

There are several ways to make Avocado Bacon Egg Toasts healthier. First, consider using whole grain or sprouted bread for added fiber. You can also reduce the amount of bacon or use turkey bacon to cut down on fat. Adding more vegetables, like spinach or tomatoes, can boost the nutritional value. Lastly, be mindful of the amount of salt you use, and opt for fresh herbs and spices to enhance flavor without extra sodium. These small changes can make your toasts even more nutritious!

Conclusion on Avocado Bacon Egg Toasts

In conclusion, Avocado Bacon Egg Toasts are a delightful and nutritious meal that can be enjoyed at any time of the day. This dish combines the creamy texture of ripe avocados, the savory crunch of crispy bacon, and the satisfying goodness of perfectly cooked eggs. Not only are these toasts delicious, but they also provide a balanced mix of healthy fats, protein, and fiber, making them a great choice for breakfast, brunch, or even a light lunch.

With their versatility, you can easily customize your Avocado Bacon Egg Toasts to suit your taste preferences. Whether you choose to add fresh herbs, swap out the bacon for a vegetarian option, or experiment with different types of bread, the possibilities are endless. This adaptability allows you to keep your meals exciting and tailored to your dietary needs.

Moreover, the preparation process is straightforward and quick, making it perfect for busy mornings or leisurely weekends. By following the tips and variations provided, you can create a dish that not only looks appealing but also tastes fantastic. Remember to serve your toasts immediately for the best flavor and texture, and don’t hesitate to get creative with your toppings!

So, gather your ingredients, and get ready to enjoy a plate of Avocado Bacon Egg Toasts that will surely impress your family and friends. With their delicious taste and nutritional benefits, these toasts are bound to become a staple in your kitchen. Happy cooking!

Creamy Mushroom and Spinach Orzo Recipe is a must-try!

Introduction to Creamy Mushroom and Spinach Orzo Recipe

Welcome to the delightful world of creamy mushroom and spinach orzo! This dish is not just a meal; it’s a warm hug in a bowl. Perfect for busy weeknights or cozy weekends, this recipe combines the rich flavors of mushrooms and the freshness of spinach with the comforting texture of orzo pasta. It’s creamy, satisfying, and oh-so-easy to make!

What Makes This Recipe Special?

What sets this creamy mushroom and spinach orzo recipe apart is its simplicity and flavor. First, it’s a one-pot wonder, meaning less cleanup for you! The combination of sautéed mushrooms and fresh spinach creates a deliciously earthy taste that pairs perfectly with the creamy sauce. Plus, the addition of Parmesan cheese adds a savory depth that elevates the dish. Each bite is a delightful mix of textures and flavors, making it a favorite for both kids and adults alike.

Benefits of Cooking with Orzo

Orzo is a unique pasta that resembles rice, making it a versatile ingredient in many dishes. One of the main benefits of cooking with orzo is its quick cooking time. It cooks faster than traditional pasta, which is perfect for those busy evenings. Additionally, orzo absorbs flavors beautifully, allowing it to soak up the creamy sauce and seasonings in this recipe. It’s also a great source of carbohydrates, providing energy for your day. Whether you’re serving it as a main dish or a side, orzo is sure to please!

Ingredients for Creamy Mushroom and Spinach Orzo Recipe

Gathering the right ingredients is key to making a delicious creamy mushroom and spinach orzo. Here’s what you’ll need:

  • 2 tablespoons olive oil
  • 1 medium onion, diced
  • 3 cloves garlic, minced
  • 8 ounces mushrooms, sliced
  • 1 cup orzo pasta
  • 4 cups vegetable broth
  • 1 teaspoon dried thyme
  • 1 teaspoon salt
  • 1/2 teaspoon black pepper
  • 2 cups fresh spinach
  • 1/2 cup heavy cream
  • 1/2 cup grated Parmesan cheese
  • Fresh parsley, chopped (for garnish)

These ingredients come together to create a creamy, flavorful dish that is sure to impress. The olive oil adds richness, while the onion and garlic provide a fragrant base. Mushrooms bring an earthy flavor, and the spinach adds a pop of color and nutrition. The orzo pasta is the star, soaking up all the delicious flavors. Finally, the heavy cream and Parmesan cheese create that irresistible creaminess that makes this dish so comforting.

Feel free to customize the ingredients based on your preferences. For instance, you can use different types of mushrooms or add in your favorite herbs. The possibilities are endless!

Step-by-Step Preparation of Creamy Mushroom and Spinach Orzo Recipe

Now that you have all your ingredients ready, it’s time to dive into the cooking process! This creamy mushroom and spinach orzo recipe is straightforward and fun to make. Follow these steps to create a delicious meal that everyone will love.

Step 1: Preparing the Ingredients

Start by prepping your ingredients. Dice the onion into small pieces, and mince the garlic cloves finely. Slice the mushrooms into thin pieces. This will help them cook evenly. Rinse the fresh spinach under cold water and set it aside to drain. Having everything ready will make the cooking process smooth and enjoyable!

Step 2: Cooking the Orzo

In a large pot, heat the olive oil over medium heat. Once the oil is hot, add the diced onion. Sauté the onion for about 5 minutes until it becomes translucent. Next, stir in the minced garlic and sliced mushrooms. Cook for another 5-7 minutes, allowing the mushrooms to soften and release their juices. This step builds a flavorful base for your orzo.

Step 3: Sautéing the Mushrooms and Spinach

After the mushrooms are tender, it’s time to add the orzo pasta. Pour in the vegetable broth, dried thyme, salt, and black pepper. Bring the mixture to a boil, then reduce the heat to low. Cover the pot and let it simmer for about 10-12 minutes. Stir occasionally to prevent sticking. The orzo will absorb most of the liquid and become perfectly cooked.

Step 4: Combining Ingredients

Once the orzo is cooked, it’s time to add the fresh spinach. Stir it in gently, allowing the heat to wilt the spinach. This should take just a couple of minutes. Then, add the heavy cream and grated Parmesan cheese. Mix everything together until the cheese melts and the dish becomes creamy. The combination of flavors will be irresistible!

Step 5: Adding Cream and Seasoning

Finally, taste your creamy mushroom and spinach orzo. Adjust the seasoning if needed. You can add more salt or pepper according to your preference. Once everything is well combined and creamy, remove the pot from heat. Let it sit for a couple of minutes to thicken slightly before serving. Garnish with fresh parsley for a pop of color and flavor!

Variations of Creamy Mushroom and Spinach Orzo Recipe

This creamy mushroom and spinach orzo recipe is incredibly versatile. You can easily customize it to suit your taste or dietary needs. Here are some exciting variations to consider!

Adding Protein Options

If you want to boost the protein content of your dish, there are several delicious options. You can add cooked chicken, shrimp, or even chickpeas for a vegetarian twist. Simply stir in your choice of protein during the last few minutes of cooking. This not only enhances the nutritional value but also makes the dish more filling. For a heartier meal, grilled chicken pairs wonderfully with the creamy orzo.

Vegetarian Alternatives

For those following a vegetarian or vegan diet, there are easy substitutions to make this dish fit your needs. Instead of heavy cream, you can use coconut milk or cashew cream for a dairy-free version. Additionally, replace the Parmesan cheese with nutritional yeast or a vegan cheese alternative. These swaps will keep the creamy texture while ensuring everyone can enjoy this delightful meal!

Flavor Enhancements

To elevate the flavors of your creamy mushroom and spinach orzo, consider adding herbs and spices. Fresh basil, oregano, or even a pinch of red pepper flakes can add a delightful kick. You might also experiment with different types of mushrooms, such as shiitake or portobello, for a richer taste. A splash of lemon juice at the end can brighten the dish, making it even more refreshing. Don’t hesitate to get creative and make this recipe your own!

Cooking Note for Creamy Mushroom and Spinach Orzo Recipe

Cooking is an art, and this creamy mushroom and spinach orzo recipe is no exception! To ensure your dish turns out perfectly every time, here are some essential cooking notes to keep in mind.

First, always use a large pot. This allows enough space for the orzo to cook evenly and prevents any overflow. A pot with a lid is also crucial, as it helps trap steam and moisture, ensuring the orzo cooks thoroughly.

Next, pay attention to the heat. Start with medium heat when sautéing the onions and mushrooms. This helps to develop their flavors without burning them. Once you add the broth and orzo, bring it to a boil, then reduce the heat to low. A gentle simmer is key to achieving that creamy texture without overcooking the pasta.

Stirring occasionally is important, too. This prevents the orzo from sticking to the bottom of the pot and ensures even cooking. If you notice the mixture getting too thick, feel free to add a splash of vegetable broth or water to loosen it up.

Lastly, don’t rush the final steps. Allow the dish to sit for a couple of minutes after cooking. This resting time helps the flavors meld together and thickens the sauce slightly. Trust us; it’s worth the wait!

By following these cooking notes, you’ll create a creamy mushroom and spinach orzo that’s not only delicious but also a joy to prepare. Happy cooking!

Serving Suggestions for Creamy Mushroom and Spinach Orzo Recipe

Once your creamy mushroom and spinach orzo is ready, it’s time to think about how to serve it! This dish is not only delicious but also visually appealing. Here are some great serving suggestions to enhance your dining experience.

Pairing with Side Dishes

To create a well-rounded meal, consider pairing your creamy mushroom and spinach orzo with complementary side dishes. Here are a few ideas:

  • Garlic Bread: A warm slice of garlic bread is perfect for soaking up the creamy sauce. It adds a crunchy texture that contrasts beautifully with the soft orzo.
  • Mixed Green Salad: A fresh salad with mixed greens, cherry tomatoes, and a light vinaigrette can balance the richness of the orzo. The crispness of the salad provides a refreshing bite.
  • Roasted Vegetables: Roasted seasonal vegetables, such as zucchini, bell peppers, or asparagus, can add color and nutrition to your plate. Their natural sweetness pairs well with the savory flavors of the orzo.
  • Steamed Broccoli: Lightly steamed broccoli is another great option. It adds a pop of green and is packed with vitamins, making your meal even healthier.

These side dishes not only enhance the meal but also make it more visually appealing. Feel free to mix and match based on your preferences!

Presentation Tips

Presentation can elevate your creamy mushroom and spinach orzo from a simple dish to a restaurant-quality meal. Here are some tips to make your dish look as good as it tastes:

  • Use a Large Serving Bowl: Serve the orzo in a large, shallow bowl. This allows the creamy sauce to spread out, showcasing the vibrant colors of the spinach and mushrooms.
  • Garnish Generously: Don’t forget to sprinkle chopped fresh parsley on top before serving. This adds a burst of color and freshness that makes the dish pop.
  • Drizzle with Olive Oil: A light drizzle of high-quality olive oil over the top can add a glossy finish and enhance the flavor.
  • Serve with a Lemon Wedge: Placing a lemon wedge on the side not only looks appealing but also allows guests to add a splash of citrus for extra brightness.

By following these serving suggestions and presentation tips, your creamy mushroom and spinach orzo will be a feast for the eyes and the palate. Enjoy your meal!

Tips for Perfecting Your Creamy Mushroom and Spinach Orzo Recipe

To ensure your creamy mushroom and spinach orzo turns out perfectly every time, it’s essential to be aware of common pitfalls and how to store leftovers properly. Here are some helpful tips to guide you through the process!

Common Mistakes to Avoid

Even the best cooks can make mistakes! Here are a few common errors to watch out for:

  • Overcooking the Orzo: Orzo cooks quickly, so keep an eye on it. If you overcook it, the pasta can become mushy. Aim for al dente, where it still has a slight bite.
  • Not Stirring Enough: Stirring occasionally is crucial. This prevents the orzo from sticking to the pot and ensures even cooking. Don’t forget to give it a gentle stir every few minutes!
  • Skipping the Seasoning: Seasoning is key to bringing out the flavors. Don’t skip the salt and pepper, and feel free to adjust the spices to your taste. A little extra thyme or a pinch of red pepper flakes can make a big difference.
  • Adding Spinach Too Early: If you add the spinach too soon, it may become overcooked and lose its vibrant color. Wait until the orzo is nearly done before stirring in the spinach.
  • Rushing the Resting Time: Allowing the dish to sit for a few minutes after cooking helps the flavors meld together. Don’t rush this step; it’s worth the wait!

By avoiding these common mistakes, you’ll be on your way to creating a delicious creamy mushroom and spinach orzo that everyone will love!

Storage Tips

Leftovers can be just as delightful as the first serving! Here’s how to store your creamy mushroom and spinach orzo properly:

  • Cool Before Storing: Allow the orzo to cool to room temperature before transferring it to an airtight container. This helps prevent condensation, which can make the dish soggy.
  • Refrigerate: Store the orzo in the refrigerator for up to 3-4 days. Make sure the container is sealed tightly to keep it fresh.
  • Freezing: If you want to keep it longer, you can freeze the orzo. Place it in a freezer-safe container or bag, and it can last for up to 2 months. Just remember to label it with the date!
  • Reheating: When you’re ready to enjoy your leftovers, reheat them on the stove over low heat. Add a splash of vegetable broth or water to loosen the sauce, and stir until heated through. You can also microwave it, but be sure to cover it to prevent drying out.

By following these storage tips, you can enjoy your creamy mushroom and spinach orzo even after the initial meal. Happy cooking and savoring!

Breakdown of Time for Creamy Mushroom and Spinach Orzo Recipe

Understanding the time needed for each step in the creamy mushroom and spinach orzo recipe can help you plan your cooking better. Here’s a quick breakdown of the time involved in preparing this delicious dish.

Prep Time

The prep time for this creamy mushroom and spinach orzo recipe is approximately 10-15 minutes. During this time, you will gather all your ingredients, dice the onion, mince the garlic, and slice the mushrooms. Rinsing the spinach also falls under this time. Having everything ready will make the cooking process smoother and more enjoyable!

Cooking Time

The cooking time for this recipe is about 20-25 minutes. This includes sautéing the onions, garlic, and mushrooms, cooking the orzo in the broth, and finally adding the spinach and cream. The orzo cooks quickly, so you won’t be waiting long to enjoy your meal!

Total Time

In total, you can expect to spend around 30-40 minutes from start to finish. This makes the creamy mushroom and spinach orzo a fantastic option for a weeknight dinner or a cozy weekend meal. With minimal prep and cooking time, you’ll have a delicious, creamy dish ready to serve in no time!

Nutritional Information for Creamy Mushroom and Spinach Orzo Recipe

Understanding the nutritional content of your meals is essential for maintaining a balanced diet. This creamy mushroom and spinach orzo recipe not only delights your taste buds but also provides valuable nutrients. Here’s a breakdown of the nutritional information per serving:

Calories

Each serving of this creamy mushroom and spinach orzo contains approximately 380 calories. This makes it a satisfying meal option without being overly heavy. The combination of ingredients ensures that you get a good mix of energy and flavor, making it perfect for lunch or dinner.

Protein

In terms of protein, this dish offers about 12 grams per serving. The protein comes primarily from the orzo and the addition of Parmesan cheese. If you choose to add chicken or chickpeas, you can easily increase the protein content, making it an even more nutritious meal.

Sodium

The sodium content in this creamy mushroom and spinach orzo recipe is around 800 milligrams per serving. This amount can vary based on the vegetable broth used and any additional salt added during cooking. If you’re watching your sodium intake, consider using low-sodium broth and adjusting the salt to taste. This way, you can enjoy the dish while keeping your dietary needs in check.

Overall, this creamy mushroom and spinach orzo recipe is a delicious and nutritious option for any meal. With its balanced calories, protein, and sodium content, it’s a dish you can feel good about serving to your family and friends!

FAQs about Creamy Mushroom and Spinach Orzo Recipe

Can I make this recipe gluten-free?

Absolutely! To make this creamy mushroom and spinach orzo recipe gluten-free, simply substitute the orzo pasta with a gluten-free pasta alternative. There are many options available, such as rice pasta or quinoa pasta, which will work well in this dish. Just be sure to check the cooking times, as they may vary from traditional orzo. With these adjustments, you can enjoy a delicious gluten-free meal without sacrificing flavor!

How can I make it vegan?

Making this creamy mushroom and spinach orzo recipe vegan is easy! Start by replacing the heavy cream with coconut milk or a plant-based cream alternative. For the Parmesan cheese, you can use nutritional yeast or a vegan cheese substitute. These swaps will maintain the creamy texture and rich flavor while ensuring the dish is completely plant-based. Enjoy a delightful vegan meal that everyone will love!

What can I substitute for orzo?

If you don’t have orzo on hand, there are several great substitutes you can use. Small pasta shapes like ditalini, acini di pepe, or even couscous can work well in this recipe. Alternatively, you can use rice, quinoa, or even farro for a different texture. Just keep in mind that cooking times may vary, so adjust accordingly. No matter what you choose, the creamy mushroom and spinach sauce will still shine through!

How long do leftovers last?

Leftovers of this creamy mushroom and spinach orzo can be stored in the refrigerator for up to 3-4 days. Make sure to place them in an airtight container to keep them fresh. If you want to keep them longer, you can freeze the orzo for up to 2 months. When reheating, add a splash of vegetable broth or water to help loosen the sauce and restore its creamy texture. Enjoy your leftovers just as much as the first serving!

Conclusion on Creamy Mushroom and Spinach Orzo Recipe

In conclusion, the creamy mushroom and spinach orzo recipe is a delightful dish that brings comfort and flavor to your table. With its simple preparation and rich taste, it’s perfect for any occasion, whether it’s a busy weeknight or a cozy family gathering. The combination of earthy mushrooms, fresh spinach, and creamy sauce creates a satisfying meal that everyone will love.

This recipe not only showcases the versatility of orzo but also allows for endless customization. You can easily adapt it to fit your dietary needs or personal preferences, making it a go-to option for any cook. Whether you choose to add protein, experiment with different vegetables, or enhance the flavors with herbs and spices, the possibilities are truly endless.

As you prepare this dish, remember the tips and variations shared throughout the article. They will help you avoid common mistakes and elevate your cooking experience. Plus, with the nutritional information provided, you can enjoy this meal knowing it’s both delicious and nourishing.

So, gather your ingredients, follow the steps, and enjoy the process of creating this creamy mushroom and spinach orzo. It’s not just about the final dish; it’s about the joy of cooking and sharing a meal with loved ones. Bon appétit!

Citrus Breakfast Cakes Recipe brings joy to mornings!

Introduction to Citrus Breakfast Cakes Recipe

Welcome to the delightful world of Citrus Breakfast Cakes! If you’re looking for a bright and cheerful way to start your day, this recipe is just what you need. These cakes are not only easy to make but also bursting with fresh flavors from oranges and lemons. Imagine waking up to the sweet aroma of citrus wafting through your kitchen. It’s a perfect treat for breakfast or brunch, and they’re sure to impress your family and friends.

The Citrus Breakfast Cakes Recipe combines simple ingredients to create a light and fluffy texture. Each bite is a refreshing explosion of citrus goodness, making it a delightful addition to your morning routine. Whether you enjoy them warm with a drizzle of glaze or at room temperature, these cakes are versatile and delicious.

What makes this recipe even better is its adaptability. You can easily customize it to suit your taste. Want to add a little crunch? Toss in some poppy seeds or nuts! Prefer a different citrus flavor? Feel free to swap out the orange and lemon for lime or grapefruit. The possibilities are endless!

So, roll up your sleeves and get ready to bake. With just a few simple steps, you’ll have a batch of Citrus Breakfast Cakes that will brighten your day. Let’s dive into the ingredients and get started on this tasty adventure!

Ingredients for Citrus Breakfast Cakes Recipe

To create these delightful Citrus Breakfast Cakes, you’ll need a handful of simple ingredients. Each component plays a vital role in achieving that perfect balance of sweetness and citrusy zing. Here’s what you’ll need:

  • 2 cups all-purpose flour
  • 1 cup granulated sugar
  • 1 tablespoon baking powder
  • 1/2 teaspoon salt
  • 1/2 cup unsalted butter, softened
  • 1 cup whole milk
  • 2 large eggs
  • 1 tablespoon vanilla extract
  • Zest of 1 orange
  • Zest of 1 lemon
  • 1/4 cup fresh orange juice
  • 1/4 cup fresh lemon juice

For the glaze, you will need:

  • 1 cup powdered sugar
  • 2 tablespoons fresh orange juice
  • 1 tablespoon fresh lemon juice

These ingredients come together to create a moist and flavorful cake that’s perfect for any breakfast table. The combination of orange and lemon zest adds a refreshing twist, while the glaze gives it a sweet finish. Make sure to gather everything before you start baking, so you can enjoy the process without any interruptions!

Preparation of Citrus Breakfast Cakes Recipe

Step 1: Preheat the Oven

First things first, let’s get that oven ready! Preheat it to 350°F (175°C). This step is crucial because a properly heated oven ensures even baking. While the oven warms up, you can move on to the next steps.

Step 2: Prepare the Baking Pan

Next, it’s time to prepare your muffin tin. Grease and flour a 12-cup muffin tin or line it with paper liners. This will help the cakes release easily after baking. A well-prepared pan is key to achieving that perfect shape!

Step 3: Mix Dry Ingredients

In a large mixing bowl, whisk together the dry ingredients. Combine 2 cups of all-purpose flour, 1 cup of granulated sugar, 1 tablespoon of baking powder, and 1/2 teaspoon of salt. Mixing these ingredients well ensures that the baking powder is evenly distributed, which helps the cakes rise beautifully.

Step 4: Combine Wet Ingredients

Now, let’s move on to the wet ingredients. In another bowl, cream together 1/2 cup of softened unsalted butter until it’s light and fluffy. Then, add in 1 cup of whole milk, 2 large eggs, and 1 tablespoon of vanilla extract. Mix these ingredients until they are well combined. The butter should be fully incorporated, creating a smooth mixture.

Step 5: Blend Wet and Dry Mixtures

Gradually add the dry ingredients to the wet mixture. Stir gently until just combined. Be careful not to overmix! Overmixing can lead to dense cakes, and we want them to be light and fluffy.

Step 6: Add Citrus Zest and Juice

Now comes the fun part! Add the zest of 1 orange and 1 lemon, along with 1/4 cup of fresh orange juice and 1/4 cup of fresh lemon juice. These ingredients will infuse your cakes with that delightful citrus flavor. Gently fold them into the batter until everything is well mixed.

Step 7: Pour Batter into the Pan

Using a spoon or a scoop, pour the batter evenly into the prepared muffin tin. Fill each cup about two-thirds full. This allows room for the cakes to rise without overflowing. It’s okay if they look a little rustic; that’s part of their charm!

Step 8: Bake the Cakes

Place the muffin tin in the preheated oven and bake for 18-20 minutes. Keep an eye on them! You’ll know they’re done when a toothpick inserted into the center comes out clean. The cakes should be lightly golden on top, making them look irresistible.

Step 9: Cool and Serve

Once baked, allow the cakes to cool in the pan for about 5 minutes. Then, transfer them to a wire rack to cool completely. This step is important because it helps prevent sogginess. Serve them warm or at room temperature, and don’t forget to drizzle on that delicious glaze!

Variation of Citrus Breakfast Cakes Recipe

While the classic Citrus Breakfast Cakes are delightful as they are, there’s always room for creativity in the kitchen! Here are some fun variations to consider that can elevate your baking experience. Whether you want to switch up the flavors or add some texture, these ideas will keep your breakfast exciting.

Alternative Citrus Options

If you’re feeling adventurous, why not try different citrus fruits? Instead of using just orange and lemon, consider these alternatives:

  • Lime: Lime juice and zest can add a zesty kick to your cakes. The tartness pairs beautifully with the sweetness of the sugar.
  • Grapefruit: For a more unique flavor, use grapefruit zest and juice. It brings a slightly bitter note that balances the sweetness.
  • Tangerine: Tangerines are sweeter and less acidic than oranges. They can give your cakes a lovely, mellow flavor.

Feel free to mix and match these citrus fruits to create your own signature breakfast cakes. Each option brings its own special twist, making your morning treat even more delightful!

Adding Nuts or Seeds

For those who enjoy a bit of crunch, adding nuts or seeds can enhance the texture of your Citrus Breakfast Cakes. Here are some tasty options:

  • Poppy Seeds: Adding about 2 tablespoons of poppy seeds to the batter can give your cakes a lovely crunch and a hint of nuttiness.
  • Chopped Nuts: Walnuts or pecans can be folded into the batter for added richness. Just make sure to chop them finely so they blend well.
  • Sunflower Seeds: These seeds can add a delightful crunch and are a great nut-free option.

Incorporating these ingredients not only adds texture but also boosts the nutritional value of your cakes. So, don’t hesitate to experiment and find the perfect combination that suits your taste!

Cooking Note for Citrus Breakfast Cakes Recipe

When it comes to baking, a few key tips can make all the difference in achieving the perfect Citrus Breakfast Cakes. Here are some important cooking notes to keep in mind as you embark on this delicious journey:

First, always use fresh ingredients. Fresh citrus fruits will provide the best flavor and aroma. When zesting, make sure to only take the colorful outer layer of the peel. The white pith underneath can be bitter and may affect the taste of your cakes.

Next, room temperature ingredients are essential. Before you start mixing, let your butter, eggs, and milk sit out for about 30 minutes. This helps them blend together more smoothly, resulting in a lighter cake.

Additionally, be mindful of your mixing technique. When combining the wet and dry ingredients, mix just until combined. Overmixing can lead to tough cakes, which is not what we want! A few lumps are perfectly fine.

Another important note is to keep an eye on your baking time. Ovens can vary, so start checking your cakes a couple of minutes before the recommended time. You want them to be golden brown and a toothpick inserted in the center should come out clean.

Lastly, let your cakes cool properly. Cooling them in the pan for a few minutes before transferring to a wire rack helps maintain their shape and prevents sogginess. Patience is key here, as the cooling process enhances the texture and flavor.

By following these cooking notes, you’ll be well on your way to creating delightful Citrus Breakfast Cakes that are sure to impress. Happy baking!

Serving Suggestions for Citrus Breakfast Cakes Recipe

Now that you’ve baked your delicious Citrus Breakfast Cakes, it’s time to think about how to serve them! These cakes are versatile and can be enjoyed in various ways. Here are some delightful serving suggestions to elevate your breakfast experience:

  • With Fresh Fruit: Serve your cakes alongside a colorful assortment of fresh fruit. Slices of strawberries, blueberries, or kiwi can add a refreshing touch. The natural sweetness of the fruit complements the citrus flavors beautifully.
  • Yogurt Parfait: Create a yogurt parfait by layering your Citrus Breakfast Cakes with Greek yogurt and granola. This combination adds creaminess and crunch, making for a satisfying breakfast.
  • Accompanied by Tea or Coffee: Enjoy your cakes with a warm cup of tea or coffee. The citrus notes pair wonderfully with the rich flavors of your favorite morning beverage.
  • Drizzled with Honey: For an extra touch of sweetness, drizzle some honey over the top of your cakes. This adds a lovely glaze and enhances the overall flavor.
  • With a Side of Whipped Cream: A dollop of whipped cream can make your Citrus Breakfast Cakes feel extra special. It adds a light and airy texture that balances the cake’s density.
  • As a Dessert: These cakes aren’t just for breakfast! Serve them as a delightful dessert after dinner. Pair them with a scoop of vanilla ice cream for a refreshing treat.

Feel free to mix and match these serving ideas to create your perfect breakfast spread. The bright flavors of the Citrus Breakfast Cakes will shine through, no matter how you choose to enjoy them. So, gather your loved ones, set the table, and savor every bite of these delightful cakes!

Tips for Perfect Citrus Breakfast Cakes Recipe

Creating the perfect Citrus Breakfast Cakes is all about attention to detail and a few helpful tips. With these suggestions, you can ensure that your cakes turn out light, fluffy, and bursting with citrus flavor every time. Let’s dive into some essential tips that will elevate your baking game!

First, always measure your ingredients accurately. Use a kitchen scale for precision, especially for flour. Too much flour can lead to dense cakes, while too little can make them fall flat. If you’re using measuring cups, spoon the flour into the cup and level it off with a knife for the best results.

Next, don’t skip the zest! The zest of the orange and lemon is where much of the flavor lies. Use a microplane or zester to get the finest zest without the bitter pith. This will enhance the citrus aroma and taste in your cakes.

Another important tip is to mix your batter gently. When combining the wet and dry ingredients, stir just until you see no more flour. A few lumps are okay! Overmixing can develop gluten, leading to tough cakes instead of the desired light texture.

Consider using room temperature ingredients. This includes your butter, eggs, and milk. Room temperature ingredients blend more easily, creating a smoother batter and a better rise during baking. If you forget to take them out in advance, you can warm the eggs in a bowl of warm water for a few minutes.

For an extra burst of flavor, let your batter rest for about 10-15 minutes before baking. This allows the flour to hydrate fully and can improve the texture of your cakes. Just be sure not to let it sit too long, as you want to bake them while they’re fresh.

Lastly, keep an eye on your baking time. Ovens can vary, so start checking your cakes a couple of minutes before the recommended time. Look for a golden top and a toothpick that comes out clean. If they’re browning too quickly, you can cover them loosely with aluminum foil to prevent burning.

By following these tips, you’ll be well on your way to baking perfect Citrus Breakfast Cakes that are sure to impress everyone at your breakfast table. Happy baking!

Breakdown of Time for Citrus Breakfast Cakes Recipe

Prep Time

Getting everything ready for your Citrus Breakfast Cakes is a breeze! The prep time for this recipe is approximately 15-20 minutes. This includes gathering your ingredients, measuring them out, and mixing the batter. Make sure to have all your tools handy, like mixing bowls and measuring cups, to streamline the process. With a little organization, you’ll be ready to bake in no time!

Cooking Time

Once your batter is prepared and in the muffin tin, it’s time to bake! The cooking time for the Citrus Breakfast Cakes is about 18-20 minutes. Keep an eye on them as they bake, and check for doneness with a toothpick. When it comes out clean, your cakes are ready to be enjoyed. This short baking time makes it easy to whip up a delicious breakfast treat without spending hours in the kitchen!

Total Time

In total, you can expect to spend around 35-40 minutes from start to finish. This includes both the prep and cooking times. With such a quick turnaround, you can easily fit these delightful cakes into your morning routine. Whether you’re making them for a special occasion or just a regular day, the Citrus Breakfast Cakes are a fantastic choice that won’t take up too much of your time!

Nutritional Information for Citrus Breakfast Cakes Recipe

Understanding the nutritional content of your food is essential, especially when it comes to enjoying treats like Citrus Breakfast Cakes. These delightful cakes not only satisfy your sweet tooth but also provide some nutritional benefits. Here’s a breakdown of the key nutritional information for each serving of these tasty cakes:

Calories

Each Citrus Breakfast Cake contains approximately 210 calories. This makes them a relatively light option for breakfast or a snack. The balance of flavors and textures ensures that you feel satisfied without overindulging. Enjoying one or two cakes can be a delightful way to start your day without feeling guilty!

Protein

In terms of protein, each cake offers about 3 grams. While this isn’t a high protein snack, it does contribute to your daily intake. Pairing your cakes with a protein-rich side, like Greek yogurt or a handful of nuts, can help boost the overall protein content of your breakfast. This combination will keep you feeling full and energized throughout the morning.

Sodium

Each serving of Citrus Breakfast Cakes contains around 150 milligrams of sodium. This is a moderate amount, making it suitable for most diets. However, if you’re watching your sodium intake, consider using unsalted butter and keeping an eye on any additional toppings or accompaniments that may add extra salt.

Overall, these Citrus Breakfast Cakes are a delightful treat that can fit into a balanced diet. They provide a good mix of carbohydrates, a bit of protein, and essential vitamins from the citrus fruits. Enjoy them as part of a nutritious breakfast or a sweet afternoon snack!

FAQs about Citrus Breakfast Cakes Recipe

Can I use other fruits in the Citrus Breakfast Cakes Recipe?

Absolutely! While the Citrus Breakfast Cakes are delightful with oranges and lemons, you can experiment with other fruits. For instance, you can use lime juice and zest for a zesty twist. Grapefruit can also add a unique flavor. If you prefer sweeter options, tangerines or even berries can work well. Just remember to adjust the sugar levels if you use sweeter fruits. The key is to keep the balance of flavors, so feel free to get creative!

How can I make the Citrus Breakfast Cakes Recipe gluten-free?

Making the Citrus Breakfast Cakes gluten-free is simple! You can substitute the all-purpose flour with a gluten-free flour blend. Look for a blend that includes xanthan gum, as it helps mimic the texture of regular flour. Additionally, ensure that all other ingredients, like baking powder and sugar, are gluten-free. This way, you can enjoy the same delicious cakes without the gluten!

What is the best way to store leftover Citrus Breakfast Cakes?

To keep your Citrus Breakfast Cakes fresh, store them in an airtight container at room temperature. They can last for about 2-3 days. If you want to keep them longer, consider refrigerating them. Just make sure to let them cool completely before storing. When you’re ready to enjoy them again, you can warm them up in the microwave for a few seconds. This will bring back their delightful texture and flavor!

Can I freeze the Citrus Breakfast Cakes?

Yes, you can freeze the Citrus Breakfast Cakes! To do this, let them cool completely, then wrap each cake tightly in plastic wrap or aluminum foil. Place them in a freezer-safe bag or container. They can be frozen for up to 3 months. When you’re ready to enjoy them, simply thaw them in the refrigerator overnight or at room temperature for a few hours. You can also warm them in the oven for a few minutes to refresh their taste!

Conclusion on Citrus Breakfast Cakes Recipe

In conclusion, the Citrus Breakfast Cakes Recipe is a delightful way to brighten your mornings. With its simple ingredients and easy preparation, you can whip up a batch of these tasty treats in no time. The combination of fresh orange and lemon zest, along with the sweet glaze, creates a burst of flavor that is sure to please everyone at your breakfast table.

Not only are these cakes delicious, but they are also versatile. You can easily customize them with different citrus fruits or add nuts and seeds for extra texture. Whether you enjoy them warm with a drizzle of glaze or at room temperature, they are perfect for any occasion, from casual breakfasts to festive brunches.

Remember to follow the tips and variations provided to make your baking experience even more enjoyable. With a little creativity, you can make these cakes your own and impress your family and friends with your baking skills. So, gather your ingredients, preheat your oven, and get ready to enjoy the delightful flavors of Citrus Breakfast Cakes!

Happy baking, and may your mornings be filled with the refreshing taste of citrus goodness!

Creamy Beef and Shells is a family favorite meal.

Introduction to Creamy Beef and Shells Recipe

Creamy Beef and Shells Recipe. This dish combines tender ground beef, creamy cheese, and perfectly cooked shell pasta, creating a delightful harmony of flavors and textures. It’s not just a meal; it’s a warm hug on a plate!

What Makes the Creamy Beef and Shells Recipe Special?

What sets this recipe apart is its simplicity and versatility. First, it’s quick to prepare, making it perfect for busy weeknights. You can whip it up in under 30 minutes, which means more time to enjoy with your loved ones. Second, the creamy sauce is rich and satisfying, thanks to the combination of heavy cream and cheese. This creates a luscious texture that clings to the pasta and beef, making every bite a delight.

Creamy Beef and Shells Recipe is easily customizable. You can add your favorite vegetables or swap out the beef for a lighter protein. This flexibility allows you to cater to different tastes and dietary needs, ensuring everyone at the table is happy. Plus, it’s a great way to sneak in some extra nutrients without anyone noticing!

Creamy Beef and Shells Recipe is not just a meal; it’s an experience. With its creamy goodness and hearty ingredients, it’s sure to become a family favorite. So, let’s dive into the ingredients and get cooking!

Ingredients for Creamy Beef and Shells Recipe

Creamy Beef and Shells Recipe, you’ll need a few simple ingredients that come together to make a delicious meal. Here’s what you’ll need:

  • 1 pound ground beef
  • 8 ounces medium shell pasta
  • 1 tablespoon olive oil
  • 1 small onion, diced
  • 2 cloves garlic, minced
  • 1 teaspoon salt
  • 1/2 teaspoon black pepper
  • 1 teaspoon Italian seasoning
  • 1 can (14.5 ounces) diced tomatoes, undrained
  • 1 cup beef broth
  • 1 cup heavy cream
  • 1 cup shredded cheddar cheese
  • 1/4 cup grated Parmesan cheese
  • Fresh parsley, chopped (for garnish)

These ingredients are not only easy to find but also work together to create a creamy, savory dish that everyone will enjoy. The ground beef provides protein, while the shell pasta adds a fun texture. The combination of cheeses and cream creates a rich sauce that envelops the pasta and beef, making each bite irresistible.

Creamy Beef and Shells Recipe is all about making it your own!

Step-by-Step Preparation of Creamy Beef and Shells Recipe

Creamy Beef and Shells Recipe is straightforward and fun to make. Follow these steps to create a delicious meal that will impress your family and friends!

Step 1: Preparing the Ingredients

Before you start cooking, it’s essential to prepare your ingredients. Begin by dicing the onion and mincing the garlic. This will help them cook evenly and release their flavors. Next, measure out the spices, diced tomatoes, and broth. Having everything ready will make the cooking process smoother and more enjoyable. Remember, a little prep goes a long way!

Step 2: Cooking the Beef

In a large skillet, heat the olive oil over medium heat. Once the oil is hot, add the diced onion. Sauté it for about 3-4 minutes until it becomes soft and translucent. Then, stir in the minced garlic and cook for an additional minute. This step is crucial as it builds the flavor base for your dish.

Creamy Beef and Shells Recipe remains rich but not overly heavy.

Step 3: Boiling the Shell Pasta

While the beef is cooking, you can prepare the shell pasta. In a separate pot, bring water to a boil and add a pinch of salt. Once boiling, add the medium shell pasta. Cook it according to the package instructions until it’s al dente, usually around 8-10 minutes. Stir occasionally to prevent sticking. Once done, drain the pasta and set it aside. This will be the perfect vessel for your creamy sauce!

Step 4: Combining Ingredients for Creamy Sauce

After the beef is cooked and the pasta is ready, it’s time to combine everything. To the skillet with the beef, add the salt, black pepper, and Italian seasoning. Then, pour in the undrained diced tomatoes and beef broth. Stir everything together and bring it to a gentle simmer. This will allow the flavors to meld beautifully.

Once simmering, add the cooked shell pasta to the skillet. Stir well to ensure the pasta is coated with the beef mixture. Cover the skillet and let it cook for about 10-12 minutes. This step allows the pasta to absorb some of the flavors while becoming perfectly tender.

Step 5: Mixing Everything Together

Now comes the best part! Reduce the heat to low and stir in the heavy cream, shredded cheddar cheese, and grated Parmesan cheese. Mix everything until the cheese melts and the sauce becomes creamy. This should take about 2-3 minutes. The result will be a luscious, cheesy sauce that envelops the beef and pasta.

Creamy Beef and Shells Recipe is now ready to be enjoyed!

Variations of Creamy Beef and Shells Recipe

Creamy Beef and Shells Recipe is not only delicious but also highly adaptable. You can easily modify it to suit your taste or dietary preferences. Here are some exciting variations to consider:

Adding Vegetables to the Creamy Beef and Shells Recipe

Creamy Beef and Shells Recipe is by adding vegetables. Not only do they boost the nutritional value, but they also add color and flavor. Consider incorporating:

  • Spinach: Add fresh spinach during the last few minutes of cooking. It wilts quickly and adds a lovely green touch.
  • Bell Peppers: Dice some bell peppers and sauté them with the onion. They bring a sweet crunch to the dish.
  • Mushrooms: Sliced mushrooms can be added with the beef for an earthy flavor.
  • Zucchini: Grated or diced zucchini can be mixed in for extra moisture and nutrition.

These additions not only make the dish healthier but also create a more vibrant meal that everyone will enjoy!

Alternative Proteins in the Creamy Beef and Shells Recipe

If you’re looking for a lighter option, you can easily swap out the ground beef for other proteins. Here are some alternatives:

  • Ground Turkey: A leaner choice that still provides great flavor. It cooks similarly to beef.
  • Ground Chicken: Another light option that works well in this creamy dish.
  • Plant-Based Crumbles: For a vegetarian version, use plant-based meat substitutes. They mimic the texture of beef and absorb flavors beautifully.

Creamy Beef and Shells Recipe while catering to different dietary needs. Feel free to experiment and find your favorite combination!

Cooking Note for Creamy Beef and Shells Recipe

Creamy Beef and Shells Recipe, there are a few cooking notes to keep in mind. First, always taste your dish as you go. This allows you to adjust the seasoning to your liking. If you prefer a spicier kick, consider adding a pinch of red pepper flakes or a dash of hot sauce. On the other hand, if you want a milder flavor, you can reduce the amount of Italian seasoning.

Additionally, be mindful of the cooking times. Overcooking the pasta can lead to a mushy texture, which is not ideal for this dish. Always check the pasta a minute or two before the package instructions suggest. Remember, it will continue to cook slightly when mixed with the hot beef and sauce.

Creamy Beef and Shells Recipe turns out perfectly every time!

Serving Suggestions for Creamy Beef and Shells Recipe

Creamy Beef and Shells Recipe is ready, it’s time to serve! This dish is hearty enough to stand alone, but you can elevate the meal with some delightful sides. Here are a few serving suggestions:

  • Garlic Bread: A warm slice of garlic bread pairs perfectly with the creamy pasta. It’s great for soaking up any leftover sauce!
  • Side Salad: A fresh green salad with a light vinaigrette adds a refreshing contrast to the richness of the dish.
  • Steamed Vegetables: Broccoli or green beans can add a nutritious touch and balance the meal.
  • Wine Pairing: If you enjoy wine, a glass of red wine, like Merlot or Cabernet Sauvignon, complements the flavors beautifully.

Creamy Beef and Shells Recipe with these delightful additions!

Tips for Perfecting Your Creamy Beef and Shells Recipe

Creamy Beef and Shells Recipe turns out perfectly every time, consider these helpful tips:

  • Use Fresh Ingredients: Fresh garlic and onions will provide the best flavor. Whenever possible, opt for fresh herbs over dried ones.
  • Don’t Rush the Cheese: Allow the cheese to melt slowly over low heat. This creates a smoother, creamier sauce.
  • Experiment with Cheese: While cheddar and Parmesan are classic choices, feel free to try other cheeses like mozzarella or gouda for a unique twist.
  • Make it Ahead: This dish can be made ahead of time and reheated. Just add a splash of cream or broth when reheating to restore its creamy texture.

Creamy Beef and Shells Recipe. Happy cooking!

Cooking Note for Creamy Beef and Shells Recipe

Creamy Beef and Shells Recipe, there are a few cooking notes to keep in mind. First, always taste your dish as you go. This allows you to adjust the seasoning to your liking. If you prefer a spicier kick, consider adding a pinch of red pepper flakes or a dash of hot sauce. On the other hand, if you want a milder flavor, you can reduce the amount of Italian seasoning.

Additionally, be mindful of the cooking times. Overcooking the pasta can lead to a mushy texture, which is not ideal for this dish. Always check the pasta a minute or two before the package instructions suggest. Remember, it will continue to cook slightly when mixed with the hot beef and sauce.

Creamy Beef and Shells Recipe turns out perfectly every time!

Another important tip is to let the dish sit for a few minutes after cooking. This resting time allows the flavors to meld together and the sauce to thicken slightly. It also makes serving easier, as the pasta will hold its shape better. So, don’t rush to serve right away; give it a moment to settle!

Creamy Beef and Shells Recipe that everyone will love. Enjoy the process and happy cooking!

Serving Suggestions for Creamy Beef and Shells Recipe

Creamy Beef and Shells Recipe is ready, it’s time to serve! This dish is hearty enough to stand alone, but you can elevate the meal with some delightful sides. Here are a few serving suggestions:

  • Garlic Bread: A warm slice of garlic bread pairs perfectly with the creamy pasta. It’s great for soaking up any leftover sauce!
  • Side Salad: A fresh green salad with a light vinaigrette adds a refreshing contrast to the richness of the dish.
  • Steamed Vegetables: Broccoli or green beans can add a nutritious touch and balance the meal.
  • Wine Pairing: If you enjoy wine, a glass of red wine, like Merlot or Cabernet Sauvignon, complements the flavors beautifully.

Creamy Beef and Shells Recipe with these delightful additions!

Tips for Perfecting Your Creamy Beef and Shells Recipe

Creamy Beef and Shells Recipe turns out perfectly every time, consider these helpful tips:

  • Use Fresh Ingredients: Fresh garlic and onions will provide the best flavor. Whenever possible, opt for fresh herbs over dried ones. Fresh ingredients can elevate the taste of your dish significantly.
  • Don’t Rush the Cheese: Allow the cheese to melt slowly over low heat. This creates a smoother, creamier sauce. If you add cheese too quickly or at high heat, it may clump instead of melting beautifully.
  • Experiment with Cheese: While cheddar and Parmesan are classic choices, feel free to try other cheeses like mozzarella or gouda for a unique twist. Mixing different cheeses can add depth to the flavor.
  • Make it Ahead: This dish can be made ahead of time and reheated. Just add a splash of cream or broth when reheating to restore its creamy texture. This makes it a great option for meal prep!
  • Adjust the Seasoning: Taste your dish as you cook. If you like it spicier, add a pinch of red pepper flakes. For a milder flavor, reduce the Italian seasoning. Personalizing the seasoning can make the dish more enjoyable for your taste buds.
  • Thicken or Thin the Sauce: If you find the sauce too thick, you can easily thin it out. Just add a splash of beef broth or water to reach your desired consistency. Conversely, if the sauce is too thin, let it simmer a bit longer to thicken.
  • Let it Rest: After cooking, let the dish sit for a few minutes. This resting time allows the flavors to meld together and the sauce to thicken slightly. It also makes serving easier, as the pasta will hold its shape better.

Creamy Beef and Shells Recipe. Happy cooking!

Breakdown of Time for Creamy Beef and Shells Recipe

Creamy Beef and Shells Recipe can help you plan your cooking efficiently. Here’s a quick breakdown of the time required for preparation and cooking:

Prep Time

The prep time for this delicious dish is quite short. You’ll need about 10-15 minutes to gather and prepare your ingredients. This includes dicing the onion, mincing the garlic, and measuring out your spices and liquids. Having everything ready will make the cooking process smoother and more enjoyable!

Cooking Time

Once you start cooking, the total cooking time is approximately 20-25 minutes. This includes:

  • Cooking the beef and sautéing the onion and garlic (about 10 minutes).
  • Boiling the shell pasta (around 8-10 minutes).
  • Combining all ingredients and allowing them to simmer (about 10-12 minutes).

These steps come together quickly, making this recipe perfect for a busy weeknight dinner.

Total Time

Creamy Beef and Shells Recipe is an excellent choice for a satisfying meal that doesn’t take all evening to prepare. Enjoy the process and the delicious results!

Nutritional Information for Creamy Beef and Shells Recipe

Creamy Beef and Shells Recipe not only satisfies your taste buds but also provides a good amount of nutrients. Here’s a breakdown of the nutritional information per serving:

Calories

Creamy Beef and Shells Recipe contains approximately 550 calories. This makes it a hearty meal that can keep you full and satisfied. The combination of ground beef, pasta, and creamy sauce contributes to the calorie count, providing energy for your day.

Protein

Protein is vital for muscle repair and overall health. This recipe offers about 30 grams of protein per serving. The ground beef and cheese are excellent sources of protein, making this dish a great option for those looking to increase their protein intake. It’s perfect for active individuals or anyone needing a protein boost!

Sodium

Creamy Beef and Shells Recipe while keeping your sodium intake in check.

Creamy Beef and Shells Recipe is not only delicious but also provides a good balance of calories, protein, and sodium. By being mindful of the ingredients, you can enjoy this comforting dish while maintaining a healthy diet!

FAQs about Creamy Beef and Shells Recipe

Can I make the Creamy Beef and Shells Recipe ahead of time?

Creamy Beef and Shells Recipe can be made ahead of time, making it a great option for meal prep. Simply follow the recipe as directed, then let it cool completely before storing it in an airtight container. You can keep it in the refrigerator for up to 3 days. When you’re ready to enjoy it, just reheat on the stove over low heat. Add a splash of cream or broth to restore its creamy texture if needed.

What can I substitute for beef in the Creamy Beef and Shells Recipe?

Creamy Beef and Shells Recipe while catering to different dietary preferences.

How can I make the Creamy Beef and Shells Recipe healthier?

Creamy Beef and Shells Recipe healthier is easy! Here are a few tips:

  • Substitute ground beef with leaner options like ground turkey or chicken.
  • Use half-and-half or low-fat milk instead of heavy cream to reduce calories and fat.
  • Add more vegetables, such as spinach, bell peppers, or zucchini, to increase fiber and nutrients.
  • Opt for whole grain shell pasta for added fiber and nutrients.

These simple changes can help you enjoy a lighter version of this comforting dish without sacrificing flavor!

Can I freeze the Creamy Beef and Shells Recipe?

Creamy Beef and Shells Recipe! To do this, let the dish cool completely, then transfer it to a freezer-safe container. It can be stored in the freezer for up to 3 months. When you’re ready to eat, thaw it in the refrigerator overnight. Reheat on the stove over low heat, adding a little cream or broth to help restore its creamy consistency. Freezing is a great way to have a delicious meal ready to go for busy days!

Conclusion on Creamy Beef and Shells Recipe

Creamy Beef and Shells Recipe is a delightful dish that brings comfort and satisfaction to the dinner table. With its creamy texture, savory flavors, and hearty ingredients, it’s no wonder this recipe has become a family favorite. Whether you’re cooking for a busy weeknight or a special occasion, this dish is sure to impress.

Creamy Beef and Shells Recipe a go-to option for any meal plan.

As you gather around the table to enjoy this comforting dish, remember that cooking is not just about the food; it’s about creating memories with loved ones. So, take your time, savor each bite, and enjoy the warmth that comes from sharing a meal together.

Creamy Beef and Shells Recipe a try and make it your own. Happy cooking, and may your kitchen always be filled with delicious aromas and joyful moments!

Garlic Butter Steak Noodles are a must-try dish today!

Introduction to Garlic Butter Steak Noodles

Garlic Butter Steak Noodles are a delightful dish that combines the rich flavors of tender steak with the comforting texture of noodles. This recipe is not just a meal; it’s an experience that brings together the best of both worlds. Imagine savoring perfectly cooked pasta coated in a luscious garlic butter sauce, paired with juicy slices of flank steak. It’s a dish that’s sure to impress family and friends alike!

What Makes Garlic Butter Steak Noodles Special?

What sets Garlic Butter Steak Noodles apart is the harmony of flavors and textures. The garlic butter sauce is the star of the show, infusing the noodles with a savory richness that’s hard to resist. The flank steak, when cooked just right, adds a satisfying bite and a depth of flavor that elevates the entire dish. Plus, the quick cooking time makes it a perfect option for busy weeknights or special occasions.

Another reason this dish shines is its versatility. You can easily customize it to suit your taste. Whether you prefer a bit of heat from crushed red pepper flakes or a milder flavor, Garlic Butter Steak Noodles can be adjusted to your liking. Additionally, the recipe allows for alternative proteins, making it suitable for various dietary preferences.

In summary, Garlic Butter Steak Noodles are not just a meal; they are a celebration of flavors that come together in a delightful way. With simple ingredients and straightforward preparation, this dish is sure to become a favorite in your household!

Ingredients for Garlic Butter Steak Noodles

To create the mouthwatering Garlic Butter Steak Noodles, you’ll need a few simple yet flavorful ingredients. Each component plays a vital role in bringing this dish to life. Here’s what you’ll need:

  • 8 ounces of spaghetti or linguine: Choose your favorite pasta for a delightful base.
  • 1 pound of flank steak: Thinly sliced for quick cooking and maximum flavor.
  • 4 tablespoons of unsalted butter: This adds richness and a creamy texture to the sauce.
  • 4 cloves of garlic: Minced for that aromatic kick that complements the steak.
  • 1 tablespoon of soy sauce: This brings a savory depth to the dish.
  • 1 tablespoon of Worcestershire sauce: Adds a tangy flavor that enhances the overall taste.
  • 1 teaspoon of crushed red pepper flakes: Optional, but it gives a nice spicy touch.
  • Salt and pepper: To season the steak and noodles to perfection.
  • 2 green onions: Sliced for garnish, adding a fresh crunch.
  • Fresh parsley: Chopped for a pop of color and flavor.

These ingredients come together to create a dish that is not only delicious but also visually appealing. The combination of garlic, butter, and steak creates a rich sauce that clings to the noodles beautifully. Plus, the garnishes of green onions and parsley add a fresh touch that brightens the dish. Now that you have your ingredients ready, let’s move on to the preparation steps!

Step-by-Step Preparation of Garlic Butter Steak Noodles

Now that you have gathered all your ingredients, it’s time to dive into the cooking process. Each step is simple and straightforward, ensuring that you can whip up this delicious dish in no time. Let’s break it down step by step!

Step 1: Preparing the Steak

First, you need to prepare the flank steak. Start by slicing the steak thinly against the grain. This technique helps to keep the meat tender and easy to chew. Once sliced, season the steak generously with salt and pepper. This seasoning enhances the natural flavors of the meat. Next, heat a large skillet over medium-high heat and add 2 tablespoons of unsalted butter. When the butter is melted and bubbling, carefully add the seasoned steak to the skillet.

Cook the steak for about 2-3 minutes on each side. You want it to be nicely browned but still juicy. Once cooked to your liking, remove the steak from the skillet and let it rest on a plate. This resting period allows the juices to redistribute, making the steak even more flavorful.

Step 2: Cooking the Noodles

While the steak is resting, it’s time to cook the noodles. Bring a large pot of salted water to a boil. Add your choice of spaghetti or linguine and cook according to the package instructions until al dente. This usually takes around 8-10 minutes. Once cooked, drain the noodles in a colander, but be sure to reserve about ½ cup of the pasta water. This starchy water will help to create a silky sauce later on.

Step 3: Making the Garlic Butter Sauce

With the steak resting and the noodles cooked, it’s time to make the garlic butter sauce. In the same skillet you used for the steak, add the remaining 2 tablespoons of butter. Allow it to melt over medium heat. Once melted, add the minced garlic and sauté for about 1 minute. You want the garlic to become fragrant but be careful not to let it burn, as burnt garlic can taste bitter.

Next, stir in the soy sauce, Worcestershire sauce, and crushed red pepper flakes if you’re using them. This combination creates a rich and savory sauce that will coat the noodles beautifully. Let it simmer for a minute to meld the flavors together.

Step 4: Combining Ingredients

Now it’s time to bring everything together! Add the cooked noodles to the skillet with the garlic butter sauce. Toss the noodles gently to coat them evenly in the sauce. If the noodles seem a bit dry, gradually add some of the reserved pasta water until you reach your desired consistency. Finally, slice the rested steak against the grain and add it back to the skillet. Toss everything together for an additional 1-2 minutes to heat through.

Your Garlic Butter Steak Noodles are now ready to be served! The combination of tender steak and flavorful noodles is sure to delight your taste buds. Next, let’s explore some variations and serving suggestions to make this dish even more enjoyable!

Variation of Garlic Butter Steak Noodles

While the classic Garlic Butter Steak Noodles are undeniably delicious, there are many ways to switch things up! Whether you want to try different proteins or explore vegetarian options, these variations can cater to various tastes and dietary preferences. Let’s dive into some exciting alternatives!

Alternative Proteins to Use

If you’re looking to change the protein in your Garlic Butter Steak Noodles, you have several tasty options. Here are a few alternatives:

  • Chicken Breast: Thinly sliced chicken breast is a great substitute. It cooks quickly and absorbs the flavors of the garlic butter sauce beautifully.
  • Shrimp: For a seafood twist, use shrimp. They cook in just a few minutes and add a delightful sweetness to the dish.
  • Pork Tenderloin: Thinly sliced pork tenderloin can also work well. It has a mild flavor that pairs nicely with the garlic butter sauce.
  • Tofu: For a plant-based option, use firm tofu. Press it to remove excess moisture, then slice and sauté until golden brown.

Each of these proteins brings its unique flavor and texture, making your Garlic Butter Noodles a versatile dish that can please everyone at the table!

Vegetarian Options for Garlic Butter Steak Noodles

If you prefer a vegetarian version of Garlic Butter Steak Noodles, you can easily create a satisfying meal without meat. Here are some ideas:

  • Vegetable Medley: Use a mix of your favorite vegetables, such as bell peppers, broccoli, and snap peas. Sauté them in the garlic butter sauce for a colorful and nutritious dish.
  • Mushrooms: Sliced mushrooms add a hearty texture and umami flavor. They pair wonderfully with the garlic butter sauce.
  • Chickpeas: For added protein, toss in canned chickpeas. They are filling and absorb the flavors of the sauce well.
  • Eggplant: Diced eggplant can be sautéed until tender and adds a unique flavor to the dish.

These vegetarian options not only make the dish lighter but also allow you to enjoy the same rich flavors of Garlic Butter Steak Noodles. Feel free to mix and match ingredients to create your perfect bowl!

Cooking Note for Garlic Butter Steak Noodles

When preparing Garlic Butter Steak Noodles, a few cooking notes can help ensure your dish turns out perfectly every time. These tips will enhance the flavors and textures, making your meal even more enjoyable. Let’s explore some essential cooking notes!

First, always choose high-quality flank steak. The better the meat, the more flavorful your dish will be. Look for steak that has a nice marbling of fat, as this will keep it juicy during cooking. If flank steak isn’t available, consider using sirloin or ribeye as alternatives.

Next, remember to slice the steak against the grain. This technique is crucial for tenderness. If you slice with the grain, the meat can become chewy and tough. Take your time to identify the direction of the grain and cut perpendicular to it.

When cooking the noodles, be sure to salt the water generously. This step is vital as it enhances the flavor of the pasta itself. Additionally, cooking the noodles until they are al dente is key. This means they should be firm to the bite, as they will continue to cook slightly when tossed with the hot garlic butter sauce.

Another important note is to keep an eye on the garlic while sautéing. Garlic can burn quickly, leading to a bitter taste. Stir it frequently and remove it from the heat as soon as it becomes fragrant and golden.

Lastly, don’t hesitate to adjust the sauce to your liking. If you prefer a creamier texture, add more butter or a splash of cream. For a tangier flavor, a squeeze of fresh lemon juice can brighten the dish beautifully.

By following these cooking notes, you’ll create a delicious plate of Garlic Butter Steak Noodles that’s bursting with flavor and sure to impress anyone who tries it!

Serving Suggestions for Garlic Butter Steak Noodles

Once you’ve prepared your delicious Garlic Butter Steak Noodles, it’s time to think about how to serve them. The right side dishes and beverage pairings can elevate your meal, making it even more enjoyable. Here are some fantastic suggestions to complement your dish!

Ideal Side Dishes

When serving Garlic Butter Steak Noodles, consider adding a few side dishes that enhance the overall dining experience. Here are some great options:

  • Garlic Bread: A classic choice, garlic bread pairs perfectly with the rich flavors of the noodles. The crispy texture and buttery taste make it a delightful addition.
  • Steamed Vegetables: Lightly steamed broccoli, carrots, or green beans add a fresh and healthy touch. They provide a nice contrast to the hearty noodles.
  • Caesar Salad: A crisp Caesar salad with romaine lettuce, croutons, and a tangy dressing complements the richness of the steak and noodles beautifully.
  • Coleslaw: A refreshing coleslaw can add a crunchy texture and a bit of tanginess, balancing the flavors of the dish.

These side dishes not only enhance the meal but also add variety to your plate, making it visually appealing and satisfying.

Pairing with Beverages

Choosing the right beverage can elevate your dining experience even further. Here are some beverage pairings that go well with Garlic Butter Steak Noodles:

  • Red Wine: A glass of red wine, such as Cabernet Sauvignon or Merlot, complements the savory flavors of the steak beautifully.
  • White Wine: If you prefer white wine, a crisp Sauvignon Blanc can provide a refreshing contrast to the richness of the dish.
  • Beer: A light lager or a pale ale can be a great choice for beer lovers. The carbonation helps cleanse the palate between bites.
  • Sparkling Water: For a non-alcoholic option, sparkling water with a slice of lemon or lime adds a refreshing touch that pairs well with the meal.

By thoughtfully selecting side dishes and beverages, you can create a well-rounded meal that highlights the deliciousness of Garlic Butter Steak Noodles. Enjoy your culinary creation with family and friends!

Tips for Perfect Garlic Butter Steak Noodles

To ensure your Garlic Butter Steak Noodles turn out perfectly every time, there are a few essential tips to keep in mind. These tips will help you choose the right ingredients and master the cooking process. Let’s explore some helpful advice!

Choosing the Right Cut of Steak

When it comes to making Garlic Butter Steak Noodles, the cut of steak you choose can make a big difference in flavor and tenderness. Here are some tips for selecting the best steak:

  • Flank Steak: This is the traditional choice for this dish. It’s flavorful and cooks quickly. Just remember to slice it against the grain for maximum tenderness.
  • Sirloin: A sirloin steak is another excellent option. It’s lean and has a nice beefy flavor, making it a great alternative if flank steak isn’t available.
  • Ribeye: If you prefer a richer taste, ribeye is a fantastic choice. It has more marbling, which means it will be juicier and more flavorful.
  • Skirt Steak: Similar to flank steak, skirt steak is also a good option. It has a robust flavor and is best cooked quickly over high heat.

Whichever cut you choose, look for steaks that are bright red with a good amount of marbling. This marbling will help keep the meat juicy and tender during cooking.

Noodle Cooking Tips

Cooking the noodles correctly is just as important as preparing the steak. Here are some tips to ensure your noodles are perfect:

  • Use Plenty of Water: When boiling your noodles, use a large pot with plenty of water. This helps prevent the noodles from sticking together.
  • Salt the Water: Don’t forget to add salt to the boiling water. This step enhances the flavor of the noodles and makes them taste better.
  • Cook Al Dente: Follow the package instructions and cook the noodles until they are al dente. This means they should be firm to the bite, as they will continue to cook slightly when mixed with the sauce.
  • Reserve Pasta Water: Always save a cup of pasta water before draining. This starchy water can be added to the sauce to achieve the desired consistency.

By following these tips, you’ll create Garlic Butter Steak Noodles that are not only delicious but also perfectly cooked. Enjoy the process and savor the delightful flavors of this amazing dish!

Breakdown of Time for Garlic Butter Steak Noodles

Understanding the time needed to prepare Garlic Butter Steak Noodles can help you plan your cooking efficiently. This dish is quick to make, making it perfect for busy weeknights or last-minute gatherings. Here’s a breakdown of the time required for each step of the process.

Prep Time

The prep time for Garlic Butter Steak Noodles is approximately 15 minutes. During this time, you will gather all your ingredients, slice the flank steak, and mince the garlic. Additionally, you’ll need to measure out the sauces and prepare the green onions and parsley for garnish. Having everything ready before you start cooking will make the process smoother and more enjoyable.

Cooking Time

The cooking time for this dish is around 15-20 minutes. This includes cooking the noodles until al dente, sautéing the steak, and preparing the garlic butter sauce. Each step is quick, allowing you to have a delicious meal on the table in no time. The key is to keep an eye on the steak and garlic to ensure they don’t overcook.

Total Time

In total, you can expect to spend about 30-35 minutes from start to finish. This includes both prep and cooking time. With such a quick turnaround, Garlic Butter Steak Noodles are an excellent choice for a satisfying dinner that doesn’t require hours in the kitchen. You’ll be able to enjoy a flavorful meal without the hassle!

Nutritional Information for Garlic Butter Steak Noodles

Understanding the nutritional content of your meals is essential for maintaining a balanced diet. Garlic Butter Steak Noodles not only offer a delicious flavor but also provide a good mix of nutrients. Here’s a closer look at the nutritional information for this delightful dish.

Calories

Each serving of Garlic Butter Steak Noodles contains approximately 480 calories. This calorie count makes it a satisfying meal that can fit into a variety of dietary plans. The combination of steak and noodles provides energy, making it a great option for lunch or dinner.

Protein Content

One of the standout features of Garlic Butter Steak Noodles is its protein content. Each serving offers about 30 grams of protein. This high protein level is primarily due to the flank steak, which is an excellent source of lean protein. Protein is essential for muscle repair and growth, making this dish a great choice for active individuals.

Sodium Levels

When it comes to sodium, Garlic Butter Steak Noodles contain around 800 milligrams per serving. This sodium level comes from the soy sauce and Worcestershire sauce used in the recipe. While sodium is necessary for bodily functions, it’s important to monitor your intake. If you’re watching your sodium levels, consider using low-sodium soy sauce to reduce the overall sodium content without sacrificing flavor.

In summary, Garlic Butter Steak Noodles provide a balanced meal with a good mix of calories, protein, and sodium. By being mindful of the ingredients, you can enjoy this dish while keeping your nutritional goals in check!

FAQs about Garlic Butter Steak Noodles

Can I use different types of noodles for Garlic Butter Steak Noodles?

Absolutely! While spaghetti and linguine are popular choices, you can use various types of noodles for Garlic Butter Steak Noodles. Options like fettuccine, udon, or even rice noodles can work well. Just keep in mind that cooking times may vary, so always check the package instructions. The key is to choose a noodle that can hold onto the delicious garlic butter sauce!

How can I make Garlic Butter Steak Noodles spicier?

If you love a bit of heat, there are several ways to spice up your Garlic Butter Steak Noodles. First, you can increase the amount of crushed red pepper flakes in the recipe. If you want even more heat, consider adding a dash of hot sauce or a sprinkle of cayenne pepper. For a different flavor profile, try incorporating sliced jalapeños or fresh chili peppers. Adjust the spice level to your liking, and enjoy the fiery kick!

What is the best way to store leftovers of Garlic Butter Steak Noodles?

Storing leftovers of Garlic Butter Steak Noodles is easy! Allow the dish to cool completely before transferring it to an airtight container. You can store it in the refrigerator for up to 3 days. When you’re ready to enjoy it again, simply reheat in a skillet over medium heat. If the noodles seem dry, add a splash of water or broth to help revive the garlic butter sauce. Enjoy your delicious leftovers!

Conclusion on Garlic Butter Steak Noodles

In conclusion, Garlic Butter Steak Noodles are a fantastic dish that combines rich flavors and satisfying textures. This recipe is not only easy to prepare but also offers a delightful dining experience that can impress anyone at your table. With its simple ingredients and quick cooking time, it’s perfect for both busy weeknights and special occasions.

Whether you stick to the classic version or explore the various alternatives, such as different proteins or vegetarian options, Garlic Butter Steak Noodles can be tailored to suit your taste. The versatility of this dish allows you to experiment with flavors, making it a fun and creative cooking experience.

As you enjoy your Garlic Butter Steak Noodles, remember the importance of quality ingredients and proper cooking techniques. These factors will ensure that your dish is not only delicious but also visually appealing. With the right side dishes and beverage pairings, you can elevate your meal even further, creating a memorable dining experience.

So, gather your ingredients, follow the steps, and savor the delightful flavors of Garlic Butter Steak Noodles. This dish is sure to become a favorite in your household, bringing joy and satisfaction to every meal. Happy cooking!