Italian Crescent Casserole Recipe is a must-try dish!

Introduction to the Italian Crescent Casserole Recipe

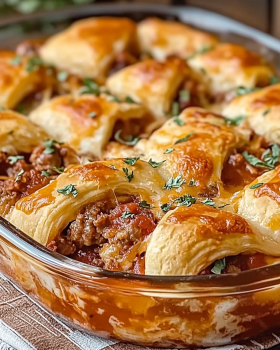
Italian Crescent Casserole Recipe is just what you need. This dish combines the comforting taste of crescent roll dough with savory Italian sausage, fresh vegetables, and rich marinara sauce. It’s a perfect choice for family gatherings, weeknight dinners, or even potlucks.

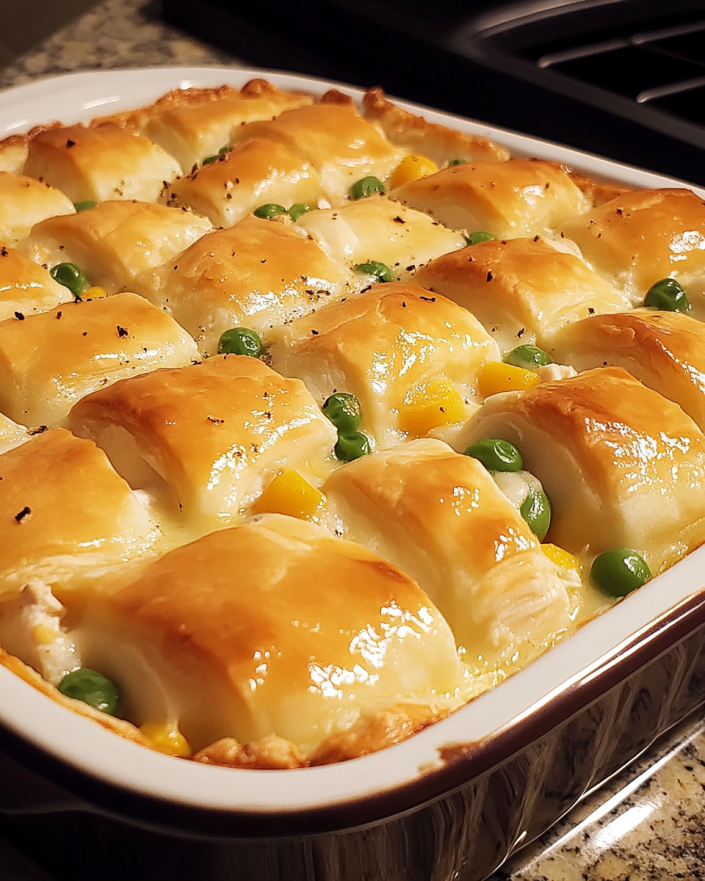
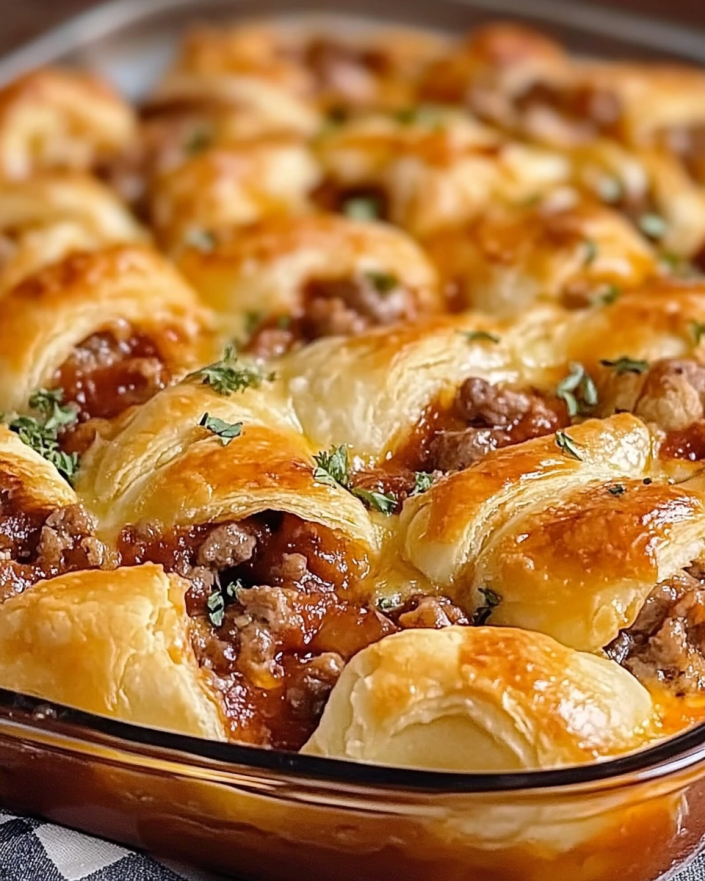
The beauty of this casserole lies in its simplicity. With just a few ingredients, you can create a hearty meal that everyone will love. Plus, it’s quick to prepare, making it ideal for busy evenings. The layers of flaky crescent dough, flavorful filling, and melted cheese create a delightful combination that is sure to please even the pickiest eaters.

Not only is this casserole tasty, but it also offers versatility. You can easily customize it to suit your dietary preferences or to use up ingredients you have on hand. Whether you prefer a meaty version or a vegetarian option, this recipe can adapt to your needs.

So, roll up your sleeves and get ready to whip up this scrumptious Italian Crescent Casserole. Your family and friends will be asking for seconds, and you might just find it becoming a regular feature on your dinner menu!

Ingredients for the Italian Crescent Casserole Recipe

Italian Crescent Casserole Recipe, you’ll need a selection of fresh and flavorful ingredients. Here’s what you’ll need:

  • 2 cans (8 oz each) refrigerated crescent roll dough
  • 1 lb ground Italian sausage
  • 1 cup diced bell pepper
  • 1 cup diced onion
  • 2 cups marinara sauce
  • 1 ½ cups shredded mozzarella cheese
  • ½ cup grated Parmesan cheese
  • 1 teaspoon Italian seasoning
  • ½ teaspoon garlic powder
  • Salt and pepper to taste
  • Fresh basil leaves for garnish (optional)

These ingredients come together to create a delightful dish that is both satisfying and easy to prepare. The crescent roll dough serves as a flaky base and topping, while the Italian sausage adds a rich, savory flavor. The bell pepper and onion provide a nice crunch and sweetness, balancing the dish perfectly.

Don’t forget the marinara sauce! It adds moisture and a burst of flavor that ties everything together. The combination of mozzarella and Parmesan cheese creates a gooey, cheesy layer that is simply irresistible. Feel free to adjust the seasonings to your taste, ensuring that every bite is just right for you and your family.

Now that you have your ingredients ready, let’s move on to the next step: preparing the casserole!

Step-by-Step Preparation of the Italian Crescent Casserole Recipe

Italian Crescent Casserole Recipe. Follow these simple steps to create a delicious meal that your family will love!

Step 1: Preheat the Oven

First things first, preheat your oven to 375°F (190°C). This step is crucial as it ensures that your casserole bakes evenly and comes out perfectly golden brown. While the oven heats up, you can move on to the next steps without wasting any time!

Step 2: Prepare the Crescent Dough

Next, take one can of the refrigerated crescent roll dough. Unroll it carefully and press it into the bottom of a greased 9×13-inch baking dish. Make sure to seal the seams well to create a solid base. This will hold all the delicious filling and keep it from leaking out during baking. Once you have a nice, even layer, set it aside while you prepare the filling.

Step 3: Cook the Filling

In a large skillet, heat over medium heat. Add the ground Italian sausage and cook until it’s browned, breaking it apart with a spoon. This should take about 5-7 minutes. If there’s excess fat, drain it off. Then, add the diced bell pepper and onion to the skillet. Sauté these vegetables until they are softened, which should take another 5 minutes. Finally, stir in the marinara sauce, Italian seasoning, garlic powder, salt, and pepper. Let this mixture simmer for 3-4 minutes until it’s heated through and fragrant.

Step 4: Assemble the Casserole

Now it’s time to assemble your casserole! Pour the sausage mixture evenly over the crescent roll layer in the baking dish. Then, sprinkle 1 cup of shredded mozzarella cheese and the grated Parmesan cheese over the sausage mixture. This cheesy layer adds a delightful richness to the dish. Finally, unroll the second can of crescent roll dough and place it over the cheese layer, sealing the seams just like you did with the bottom layer.

Step 5: Bake the Casserole

With everything assembled, it’s time to bake! Place the casserole in the preheated oven and bake for 25-30 minutes. Keep an eye on it, and look for a golden brown top. Once it’s done, remove it from the oven and let it cool for about 5 minutes before slicing. This cooling time helps the layers set, making it easier to serve. If you like, garnish with fresh basil leaves for a pop of color and flavor!

Italian Crescent Casserole Recipe. It’s simple, quick, and oh-so-delicious. Now, let’s explore some variations to make this dish even more exciting!

Variation of the Italian Crescent Casserole Recipe

Italian Crescent Casserole Recipe is not only delicious but also highly adaptable. You can easily modify it to suit different tastes and dietary needs. Here are some exciting variations to consider!

Vegetarian Options

If you’re looking for a meatless version, you can easily swap out the Italian sausage for plant-based alternatives. Consider using a plant-based sausage that mimics the flavor and texture of traditional sausage. Alternatively, sautéed mushrooms and spinach make a fantastic filling. They add a rich, earthy flavor that complements the marinara sauce beautifully.

Another great option is to include a variety of vegetables. Zucchini, diced tomatoes, or even artichoke hearts can enhance the dish’s flavor and nutrition. Just remember to sauté any fresh vegetables before adding them to the casserole. This step ensures they are tender and flavorful when baked.

Meat Variations

For those who love meat, there are plenty of options to explore! You can use ground turkey or chicken instead of Italian sausage for a lighter version. These meats still provide great flavor and pair well with the marinara sauce.

If you want to add a bit of spice, consider using spicy Italian sausage or adding red pepper flakes to the filling. This will give your casserole a nice kick! You can also mix in cooked pepperoni or diced ham for a different flavor profile. Each variation brings a unique twist to the classic recipe, making it fun to experiment.

Italian Crescent Casserole Recipe that suits your taste and dietary preferences. Whether you choose a vegetarian option or a meaty delight, this casserole is sure to impress!

Cooking Note for the Italian Crescent Casserole Recipe

Italian Crescent Casserole Recipe, there are a few important cooking notes to keep in mind. These tips will help ensure that your casserole turns out perfectly every time!

First, always check the expiration date on your crescent roll dough. Fresh dough will yield the best results, providing that flaky texture we all love. If the dough is past its date, it may not rise properly, affecting the overall outcome of your dish.

Next, when cooking the ground Italian sausage, make sure to break it into small pieces. This allows for even cooking and ensures that every bite is packed with flavor. If you prefer a leaner option, you can choose turkey or chicken sausage, but be aware that the flavor may differ slightly.

Additionally, feel free to adjust the seasoning to your liking. Taste the filling before assembling the casserole. If you want more flavor, add a pinch of salt or a dash of your favorite spices. Remember, the marinara sauce also contributes to the overall taste, so choose one that you enjoy!

Lastly, let the casserole cool for a few minutes after baking. This cooling period helps the layers set, making it easier to slice and serve. If you cut into it too soon, the filling may ooze out, making a mess on your plate.

Italian Crescent Casserole Recipe that your family will love. Happy cooking!

Serving Suggestions for the Italian Crescent Casserole Recipe

Italian Crescent Casserole Recipe is baked to perfection, it’s time to serve it up! This dish is not only delicious but also visually appealing, making it a great centerpiece for any meal. Here are some serving suggestions to enhance your dining experience:

  • Pair with a Fresh Salad: A crisp green salad is a perfect complement to the rich flavors of the casserole. Consider a simple mixed greens salad with a light vinaigrette. The freshness of the salad balances the hearty casserole beautifully.
  • Serve with Garlic Bread: For an extra touch of Italian flair, serve your casserole with warm garlic bread. The buttery, garlicky bread is perfect for soaking up any leftover marinara sauce on your plate.
  • Add a Side of Roasted Vegetables: Roasted vegetables, such as zucchini, bell peppers, or asparagus, can add color and nutrition to your meal. Their natural sweetness pairs well with the savory casserole.
  • Top with Fresh Herbs: Before serving, sprinkle some fresh basil or parsley on top of the casserole. This not only adds a pop of color but also enhances the flavor, making each bite even more delightful.
  • Offer a Variety of Cheeses: If you want to elevate the cheese factor, consider serving additional grated Parmesan or a side of ricotta cheese. Guests can add as much cheese as they like, making it a fun and customizable experience.

Italian Crescent Casserole Recipe is versatile enough to fit any occasion, whether it’s a casual family dinner or a festive gathering with friends. Enjoy your delicious creation!

Tips for Perfecting the Italian Crescent Casserole Recipe

Italian Crescent Casserole Recipe truly shine, consider these helpful tips. They will ensure that your dish is not only delicious but also visually appealing and satisfying for everyone at the table.

First, always use fresh ingredients. Fresh vegetables and high-quality marinara sauce can significantly enhance the flavor of your casserole. If possible, choose organic or locally sourced produce for the best taste.

Next, don’t rush the cooking process. When browning the sausage, allow it to cook thoroughly. This step adds depth to the flavor. Similarly, sauté the bell peppers and onions until they are soft and fragrant. This extra time will make a noticeable difference in the final dish.

Another tip is to layer your ingredients thoughtfully. Start with the crescent roll base, then add the sausage mixture, followed by the cheese. This layering technique helps to keep the flavors distinct while ensuring that every bite is packed with goodness.

Consider adding a splash of red wine to the sausage mixture while it simmers. This addition can elevate the flavor profile, giving your casserole a rich, complex taste. Just be sure to let it cook off for a few minutes to avoid an overpowering alcohol flavor.

For a crispy top, brush the second layer of crescent dough with a little olive oil or melted butter before baking. This will help achieve that golden-brown finish that everyone loves. You can also sprinkle some Italian seasoning or garlic powder on top for added flavor.

Lastly, let the casserole rest for a few minutes after baking. This resting time allows the layers to set, making it easier to slice and serve. It also helps the flavors meld together, resulting in a more cohesive dish.

Italian Crescent Casserole Recipe that will impress your family and friends. Enjoy the process and happy cooking!

Breakdown of Time for the Italian Crescent Casserole Recipe

Italian Crescent Casserole Recipe can help you plan your meal better. Here’s a simple breakdown of the time required for each step, so you can enjoy a delicious dinner without any stress!

Prep Time

The prep time for this casserole is approximately 15-20 minutes. During this time, you will gather all your ingredients, chop the vegetables, and prepare the crescent roll dough. This step is essential as it sets the stage for a smooth cooking process. Having everything ready will make the assembly quick and easy!

Cooking Time

Once you have everything prepped, the cooking time is about 25-30 minutes. This includes browning the sausage, sautéing the vegetables, and baking the casserole in the oven. The baking time is crucial for achieving that golden-brown top and ensuring the filling is heated through. Keep an eye on it as it bakes to get the perfect finish!

Total Time

Italian Crescent Casserole Recipe to take around 45-50 minutes from start to finish. This includes both prep and cooking time. With such a quick turnaround, you can have a hearty and satisfying meal ready in no time!

Now that you know the time breakdown, you can easily fit this delicious casserole into your busy schedule. It’s perfect for weeknight dinners or any occasion when you want to serve something special without spending hours in the kitchen!

Nutritional Information for the Italian Crescent Casserole Recipe

Italian Crescent Casserole Recipe is essential for those who are mindful of their diet. This dish is not only delicious but also provides a good balance of nutrients. Here’s a closer look at the nutritional information per serving:

Calories

Italian Crescent Casserole Recipe contains approximately 320 calories. This makes it a satisfying meal option without being overly heavy. The combination of ingredients, including the crescent roll dough, sausage, and cheese, contributes to the calorie count while providing energy for your day.

Protein

In terms of protein, this casserole packs a punch with about 18 grams per serving. The ground Italian sausage and cheese are excellent sources of protein, which is essential for muscle repair and overall health. Including protein in your meals can help keep you feeling full and satisfied longer.

Sodium

When it comes to sodium, each serving contains around 800 mg. While this is a reasonable amount for a hearty dish, it’s important to be mindful of your overall sodium intake, especially if you are watching your salt consumption. You can reduce the sodium content by using low-sodium marinara sauce or opting for a lower-sodium sausage.

Italian Crescent Casserole Recipe offers a balanced meal with a good mix of calories, protein, and flavor. It’s a great option for family dinners or gatherings, providing both satisfaction and nutrition. Enjoy this delightful dish while being aware of its nutritional benefits!

FAQs about the Italian Crescent Casserole Recipe

Can I make the Italian Crescent Casserole ahead of time?

Italian Crescent Casserole Recipe ahead of time. Simply follow the steps up to the baking point, then cover the assembled casserole with plastic wrap or aluminum foil. Store it in the refrigerator for up to 24 hours. When you’re ready to bake, remove the cover and let it sit at room temperature for about 15 minutes before placing it in the oven. This will help it bake evenly. Just remember, you may need to add a few extra minutes to the baking time if it’s cold from the fridge.

What can I substitute for crescent dough in the Italian Crescent Casserole Recipe?

If you don’t have crescent roll dough on hand, there are several alternatives you can use. Puff pastry is a great option, providing a flaky texture similar to crescent dough. You can also use biscuit dough, which will give a different but still delicious result. For a healthier option, consider using whole wheat pizza dough or even a cauliflower crust for a low-carb version. Just be sure to adjust the baking time as needed, depending on the dough you choose.

How do I store leftovers of the Italian Crescent Casserole?

Italian Crescent Casserole Recipe is easy! Allow the casserole to cool completely, then cover it tightly with plastic wrap or aluminum foil. You can also transfer it to an airtight container. Store it in the refrigerator for up to 3-4 days. When you’re ready to enjoy the leftovers, simply reheat them in the oven at 350°F (175°C) until warmed through, or microwave individual portions for a quick meal.

Can I freeze the Italian Crescent Casserole?

Italian Crescent Casserole Recipe for later enjoyment! To do this, prepare the casserole as directed but do not bake it. Instead, cover it tightly with plastic wrap and then with aluminum foil to prevent freezer burn. It can be stored in the freezer for up to 2-3 months. When you’re ready to bake it, thaw it in the refrigerator overnight and then bake as directed. This makes for a convenient meal option on busy days!

Conclusion on the Italian Crescent Casserole Recipe

Italian Crescent Casserole Recipe is a delightful dish that brings the warmth and flavors of Italy right to your kitchen. With its simple preparation and delicious ingredients, this casserole is perfect for any occasion, whether it’s a family dinner, a potluck, or a cozy night in. The combination of flaky crescent dough, savory sausage, and gooey cheese creates a comforting meal that everyone will love.

Moreover, the versatility of this recipe allows you to customize it to fit your dietary preferences. Whether you choose to make it vegetarian or explore different meat options, the possibilities are endless. This adaptability makes it a go-to recipe for busy weeknights or special gatherings.

As you prepare this casserole, remember to enjoy the process. Cooking is not just about the end result; it’s also about the joy of creating something delicious for yourself and your loved ones. So, gather your ingredients, follow the steps, and savor the delightful aroma that fills your kitchen.

Italian Crescent Casserole Recipe a try and make it a staple in your meal rotation. With its rich flavors and satisfying texture, it’s sure to become a favorite in your household. Happy cooking!

Loaded Potato Meatloaf Casserole is a must-try dish!

Introduction to Loaded Potato Meatloaf Casserole Recipe

Welcome to the delicious world of the Loaded Potato Meatloaf Casserole Recipe! This dish is not just a meal; it’s a comforting hug on a plate. Imagine a hearty meatloaf topped with creamy mashed potatoes, melted cheese, and crispy bacon. It’s a perfect blend of flavors and textures that will make your taste buds dance with joy. Whether you’re cooking for your family or hosting friends, this casserole is sure to impress.

What Makes This Recipe Special?

What sets the Loaded Potato Meatloaf Casserole apart is its unique combination of ingredients. The ground beef provides a savory base, while the mashed potatoes add creaminess. The addition of cheese and bacon elevates the dish, making it a true crowd-pleaser. Plus, it’s easy to prepare, making it a great option for busy weeknights. You can even customize it to suit your taste, whether you prefer a spicy kick or a vegetarian twist.

A Brief History of Meatloaf Casserole

Meatloaf has been a beloved dish in American households for generations. Its origins can be traced back to the 5th century, but it gained popularity in the United States during the Great Depression. Families needed affordable meals, and meatloaf fit the bill perfectly. Over the years, cooks have experimented with various ingredients, leading to the creation of meatloaf casseroles. This version, with its loaded toppings, is a modern take that brings comfort food to a whole new level.

Ingredients for Loaded Potato Meatloaf Casserole Recipe

To create the mouthwatering Loaded Potato Meatloaf Casserole, you’ll need a variety of ingredients that come together to form a delightful dish. Here’s a complete list of what you’ll need:

  • 2 pounds ground beef: This is the main protein source, providing a hearty base for the casserole.
  • 1 cup breadcrumbs: Breadcrumbs help bind the meatloaf together, ensuring it holds its shape.
  • 1 large egg: The egg acts as a binder, adding moisture and richness to the meat mixture.
  • 1 teaspoon garlic powder: Garlic powder adds a savory depth of flavor.
  • 1 teaspoon onion powder: This enhances the overall taste, giving it a comforting aroma.
  • 1 teaspoon salt: Salt is essential for bringing out the flavors in the dish.
  • 1/2 teaspoon black pepper: A touch of black pepper adds a mild kick.
  • 1/2 cup ketchup: Ketchup not only adds sweetness but also keeps the meatloaf moist.
  • 1/2 cup shredded cheddar cheese: Cheddar cheese brings a creamy texture and rich flavor.
  • 2 cups mashed potatoes (prepared): Creamy mashed potatoes form the delicious topping.
  • 1/2 cup sour cream: Sour cream adds tanginess and creaminess to the potato layer.
  • 1/4 cup green onions, chopped: Green onions provide a fresh crunch and vibrant color.
  • 1/2 cup bacon bits (cooked and crumbled): Bacon bits add a smoky flavor and crispy texture.
  • 1 cup shredded mozzarella cheese: Mozzarella cheese melts beautifully, creating a gooey topping.

With these ingredients, you’re all set to create a comforting and satisfying casserole that everyone will love. Feel free to adjust the quantities based on your preferences or dietary needs!

Step-by-Step Preparation of Loaded Potato Meatloaf Casserole Recipe

Now that you have all your ingredients ready, it’s time to dive into the preparation of the Loaded Potato Meatloaf Casserole Recipe. Follow these simple steps to create a dish that’s sure to be a hit!

Step 1: Prepping the Ingredients

Start by gathering all your ingredients on the counter. This makes the cooking process smoother. If you haven’t done so already, prepare your mashed potatoes. You can use store-bought or make them from scratch. If you’re making them from scratch, boil peeled potatoes until tender, then mash with butter and milk. Next, chop the green onions and cook the bacon until crispy. Set everything aside, and you’re ready to move on!

Step 2: Mixing the Meatloaf Base

In a large mixing bowl, combine the ground beef, breadcrumbs, egg, garlic powder, onion powder, salt, and black pepper. Use your hands or a spoon to mix everything together until well combined. Be careful not to overmix, as this can make the meatloaf tough. You want a nice, even mixture that holds together well.

Step 3: Assembling the Casserole

Now it’s time to assemble your casserole! Start by pressing the meat mixture into the bottom of a greased 9×13-inch baking dish. Make sure it’s an even layer. Next, spread the ketchup evenly over the meatloaf layer. This adds moisture and flavor. In a separate bowl, mix the prepared mashed potatoes with sour cream, green onions, and half of the cheddar cheese. Spread this creamy mixture over the ketchup layer. Finally, sprinkle the remaining cheddar cheese, bacon bits, and mozzarella cheese on top. This will create a deliciously cheesy crust!

Step 4: Baking the Casserole

Preheat your oven to 350°F. Once it’s ready, place the assembled casserole in the oven. Bake for 45-50 minutes. You’ll know it’s done when the meatloaf is cooked through and the cheese is bubbly and golden. The aroma will fill your kitchen, making it hard to wait!

Step 5: Letting It Rest

After baking, remove the casserole from the oven and let it cool for about 10 minutes. This resting time allows the flavors to meld and makes it easier to slice. Once it’s cooled slightly, you can cut it into squares and serve. Enjoy your delicious Loaded Potato Meatloaf Casserole!

Variations of Loaded Potato Meatloaf Casserole Recipe

The Loaded Potato Meatloaf Casserole Recipe is versatile and can be adapted to suit various dietary preferences and flavor profiles. Here are some exciting variations to consider, ensuring everyone can enjoy this delightful dish!

Vegetarian Options

If you’re looking for a vegetarian twist, you can easily substitute the ground beef with plant-based alternatives. Options like lentils, black beans, or crumbled tofu work wonderfully. For a heartier texture, consider using a meat substitute like Beyond Meat or Impossible Burger. Additionally, you can enhance the flavor by adding chopped vegetables such as bell peppers, mushrooms, or zucchini to the meatloaf base. This not only adds nutrition but also a burst of color!

Different Meat Choices

For those who prefer different meats, the Loaded Potato Meatloaf Casserole Recipe can be made with ground turkey, chicken, or pork. Each option brings its unique flavor to the dish. Ground turkey or chicken offers a lighter alternative, while ground pork adds a touch of sweetness. You can also mix different meats for a more complex flavor profile. Just remember to adjust the cooking time if you use leaner meats, as they may cook faster than beef.

Flavor Enhancements

To elevate the flavor of your casserole, consider adding spices and herbs. A teaspoon of smoked paprika or Italian seasoning can add depth. For a spicy kick, mix in diced jalapeños or crushed red pepper flakes into the meat mixture. You can also experiment with different types of cheese. Try pepper jack for a spicy twist or feta for a tangy flavor. Don’t forget to top it off with fresh herbs like parsley or cilantro before serving for a burst of freshness!

Cooking Note for Loaded Potato Meatloaf Casserole Recipe

When preparing the Loaded Potato Meatloaf Casserole, there are a few important cooking notes to keep in mind. These tips will help ensure your casserole turns out perfectly every time.

First, make sure to use a good quality ground beef. Look for meat that has a fat content of around 80/20. This balance provides enough fat to keep the meatloaf moist without being overly greasy. If you opt for leaner meat, consider adding a bit of olive oil to maintain moisture.

Next, don’t skip the resting time after baking. Allowing the casserole to rest for about 10 minutes helps the layers set. This makes it easier to slice and serve without falling apart. The flavors also have a chance to meld together during this time, enhancing the overall taste.

Additionally, if you want to make the casserole ahead of time, you can prepare it up to the baking step. Cover it tightly with plastic wrap and refrigerate for up to 24 hours. When you’re ready to bake, simply remove the wrap and add a few extra minutes to the cooking time to ensure it heats through completely.

Lastly, keep an eye on the cheese while baking. If it starts to brown too quickly, you can cover the casserole with aluminum foil to prevent burning. This will allow the meatloaf to cook through while keeping the cheese perfectly melted and gooey.

By following these cooking notes, you’ll create a Loaded Potato Meatloaf Casserole that’s not only delicious but also visually appealing. Enjoy the process and the delightful results!

Serving Suggestions for Loaded Potato Meatloaf Casserole Recipe

Once your Loaded Potato Meatloaf Casserole is ready, it’s time to think about how to serve it. This dish is hearty and filling on its own, but pairing it with the right sides and beverages can elevate your meal even further. Here are some ideal serving suggestions to complement your casserole.

Ideal Side Dishes

To create a well-rounded meal, consider serving your casserole with some delicious side dishes. Here are a few options:

  • Steamed Vegetables: Fresh steamed broccoli, green beans, or carrots add a pop of color and nutrition. They provide a nice contrast to the richness of the casserole.
  • Garden Salad: A light garden salad with mixed greens, cherry tomatoes, and a tangy vinaigrette can balance the heaviness of the casserole. It’s refreshing and adds a crunchy texture.
  • Garlic Bread: For those who love bread, garlic bread is a fantastic choice. The buttery, garlicky flavor pairs wonderfully with the casserole.
  • Coleslaw: A creamy coleslaw can add a crunchy and tangy element to your meal. It’s a great way to incorporate more veggies while adding a delightful crunch.

These side dishes not only enhance the meal but also provide a variety of flavors and textures that everyone will enjoy!

Pairing with Beverages

Choosing the right beverages can make your meal even more enjoyable. Here are some beverage options that pair well with the Loaded Potato Meatloaf Casserole:

  • Iced Tea: A refreshing glass of iced tea, sweetened or unsweetened, complements the flavors of the casserole perfectly.
  • Red Wine: If you enjoy wine, a light red wine like Pinot Noir can enhance the savory flavors of the meatloaf.
  • Sparkling Water: For a non-alcoholic option, sparkling water with a slice of lemon or lime adds a refreshing touch.
  • Apple Cider: In the fall, warm apple cider can be a cozy pairing that adds a hint of sweetness to the meal.

With these serving suggestions, your Loaded Potato Meatloaf Casserole will be a hit at the dinner table. Enjoy the delightful combination of flavors and the company of your loved ones!

Tips for Perfecting Loaded Potato Meatloaf Casserole Recipe

To ensure your Loaded Potato Meatloaf Casserole turns out perfectly every time, consider these helpful tips. They will guide you in avoiding common pitfalls and achieving a delicious result that everyone will love.

Common Mistakes to Avoid

First, avoid overmixing the meatloaf mixture. While it’s important to combine the ingredients well, overmixing can lead to a tough texture. Mix just until everything is incorporated.

Next, be cautious with the salt. Since ketchup and bacon already contain salt, you might want to reduce the amount you add to the meat mixture. Taste as you go to find the right balance.

Another mistake is not letting the casserole rest after baking. This step is crucial for allowing the layers to set, making it easier to slice and serve. Patience pays off!

Lastly, keep an eye on the baking time. Ovens can vary, so check for doneness a few minutes before the suggested time. The meatloaf should be cooked through, and the cheese should be bubbly and golden.

Storage Tips

If you have leftovers, store them in an airtight container in the refrigerator. The Loaded Potato Meatloaf Casserole can last for up to three days. To reheat, simply place it in the oven at 350°F until warmed through. You can also microwave individual portions for a quick meal.

For longer storage, consider freezing the casserole. Wrap it tightly in plastic wrap and then in aluminum foil. It can be frozen for up to three months. When you’re ready to enjoy it again, thaw it in the refrigerator overnight before reheating.

By following these tips, you’ll create a Loaded Potato Meatloaf Casserole that’s not only delicious but also easy to prepare and store. Enjoy the process and the delightful results!

Breakdown of Time for Loaded Potato Meatloaf Casserole Recipe

Understanding the time required for each step of the Loaded Potato Meatloaf Casserole Recipe can help you plan your cooking efficiently. Here’s a breakdown of the time you’ll need for preparation and cooking.

Prep Time

The prep time for this delicious casserole is approximately 20-30 minutes. This includes gathering your ingredients, chopping vegetables, and mixing the meatloaf base. If you’re making mashed potatoes from scratch, you might need an extra 10 minutes to boil and mash them. Having everything ready before you start cooking will make the process smoother and more enjoyable.

Cooking Time

Once your casserole is assembled, it will need to bake in the oven for about 45-50 minutes at 350°F. During this time, the meatloaf cooks through, and the cheese melts to create a bubbly, golden topping. Keep an eye on it towards the end of the cooking time to ensure it doesn’t over-brown.

Total Time

In total, you can expect to spend around 1 hour and 10 minutes to 1 hour and 20 minutes from start to finish. This includes both prep and cooking time. It’s a manageable timeframe for a hearty meal that serves six people, making it perfect for family dinners or gatherings with friends.

With this time breakdown, you can easily fit the Loaded Potato Meatloaf Casserole into your schedule. Enjoy the cooking process and the delightful meal that awaits!

Nutritional Information for Loaded Potato Meatloaf Casserole Recipe

Understanding the nutritional content of the Loaded Potato Meatloaf Casserole Recipe is essential for those who are mindful of their diet. This dish is not only delicious but also provides a good balance of nutrients. Here’s a closer look at the nutritional information for a serving of this hearty casserole.

Calories

Each serving of the Loaded Potato Meatloaf Casserole contains approximately 550 calories. This calorie count makes it a filling meal, perfect for satisfying hunger without feeling overly heavy. The combination of ground beef, cheese, and mashed potatoes contributes to the calorie content, providing energy for your day.

Protein

One of the standout features of this casserole is its protein content. Each serving offers about 35 grams of protein. This high protein level comes primarily from the ground beef and cheese, making it an excellent choice for those looking to increase their protein intake. Protein is essential for muscle repair and growth, making this dish a great option for active individuals.

Sodium

When it comes to sodium, each serving contains around 800 milligrams. While this is a reasonable amount for a hearty dish, it’s important to be mindful of sodium intake, especially for those with dietary restrictions. The sodium content comes from ingredients like ketchup and bacon, which are naturally higher in salt. If you’re looking to reduce sodium, consider using low-sodium versions of these ingredients.

Overall, the Loaded Potato Meatloaf Casserole Recipe provides a balanced meal with a good mix of calories, protein, and sodium. It’s a comforting dish that can fit into a healthy diet when enjoyed in moderation. Enjoy this delicious casserole while being mindful of your nutritional needs!

FAQs about Loaded Potato Meatloaf Casserole Recipe

Can I make Loaded Potato Meatloaf Casserole ahead of time?

Absolutely! You can prepare the Loaded Potato Meatloaf Casserole ahead of time. Simply assemble the casserole up to the baking step, cover it tightly with plastic wrap, and refrigerate it for up to 24 hours. When you’re ready to bake, remove the wrap and add a few extra minutes to the cooking time to ensure it heats through completely. This makes it a great option for busy weeknights or when you have guests coming over!

What can I substitute for potatoes in this recipe?

If you’re looking for a substitute for potatoes, there are several options you can try. Cauliflower is a popular choice; you can steam and mash it for a low-carb alternative. Sweet potatoes also work well, offering a slightly sweeter flavor and added nutrients. For a grain-based option, consider using quinoa or brown rice mixed with cheese and sour cream for a different texture. Each substitute will give a unique twist to the Loaded Potato Meatloaf Casserole!

How do I know when the casserole is done cooking?

To determine if your Loaded Potato Meatloaf Casserole is done cooking, look for a few key signs. First, the meatloaf should be cooked through, with no pink remaining in the center. You can use a meat thermometer to check; it should read at least 160°F. Additionally, the cheese on top should be bubbly and golden brown. If you notice the cheese browning too quickly, you can cover the casserole with aluminum foil to prevent burning while the meatloaf finishes cooking. Once these signs are present, your casserole is ready to be enjoyed!

Conclusion on Loaded Potato Meatloaf Casserole Recipe

In conclusion, the Loaded Potato Meatloaf Casserole is a delightful dish that brings comfort and satisfaction to any meal. With its rich flavors and hearty ingredients, it’s perfect for family dinners or gatherings with friends. The combination of savory ground beef, creamy mashed potatoes, and melted cheese creates a mouthwatering experience that everyone will love.

This recipe is not only easy to prepare but also highly customizable. Whether you choose to add vegetables, switch up the meats, or spice it up with jalapeños, the possibilities are endless. Plus, with the option to make it ahead of time, you can enjoy a delicious home-cooked meal even on your busiest days.

As you gather around the table to enjoy this casserole, you’ll create lasting memories with your loved ones. The Loaded Potato Meatloaf Casserole is more than just a meal; it’s a celebration of flavors and togetherness. So, roll up your sleeves, gather your ingredients, and get ready to savor every bite of this comforting dish!

Happy cooking, and enjoy your Loaded Potato Meatloaf Casserole!

Cheesy Ham and Potato Casserole Recipe is a must-try!

Introduction to Cheesy Ham and Potato Casserole Recipe

Cheesy Ham and Potato Casserole Recipe is a classic dish that brings warmth and satisfaction to any table. This casserole is not just a meal; it’s a hug in a dish. With its creamy texture and cheesy goodness, it’s perfect for family gatherings, potlucks, or a cozy dinner at home.

Imagine tender potatoes mingling with savory ham, all enveloped in a rich, cheesy sauce. It’s a dish that’s easy to prepare and even easier to enjoy. Plus, it’s a fantastic way to use up leftover ham, making it both economical and delicious. Whether you’re a seasoned cook or a beginner, this recipe is straightforward and rewarding.

In this article, we’ll guide you through the ingredients, preparation steps, and even some variations to make this casserole your own. You’ll learn how to create a dish that not only satisfies your taste buds but also nourishes your soul. So, let’s dive into the wonderful world of cheesy ham and potato casserole!

Ingredients for Cheesy Ham and Potato Casserole Recipe

Cheesy Ham and Potato Casserole Recipe, you’ll need a handful of simple ingredients. Each component plays a vital role in delivering that comforting flavor and creamy texture we all love. Here’s what you’ll need:

  • 2 cups diced cooked ham
  • 4 cups diced potatoes (about 4 medium potatoes)
  • 1 cup shredded cheddar cheese
  • 1 cup sour cream
  • 1 can (10.5 ounces) cream of mushroom soup
  • 1/2 cup milk
  • 1/2 teaspoon garlic powder
  • 1/2 teaspoon onion powder
  • 1/2 teaspoon black pepper
  • 1/2 teaspoon salt
  • 1 cup crushed cornflakes (optional, for topping)
  • 2 tablespoons melted butter (optional, for topping)

These ingredients come together to create a dish that is not only hearty but also packed with flavor. The combination of ham and potatoes is a classic pairing, while the creamy sauce adds richness. The optional cornflake topping gives a delightful crunch, making each bite even more enjoyable.

Feel free to customize this list based on your preferences. You can add vegetables or swap out the cheese for a different variety. The beauty of this casserole is its versatility, allowing you to make it your own!

Step-by-Step Preparation of Cheesy Ham and Potato Casserole Recipe

Cheesy Ham and Potato Casserole Recipe. This step-by-step guide will help you create a delicious dish that everyone will love. Let’s get started!

Step 1: Prepping the Ingredients

First things first, you need to prep your ingredients. Start by gathering everything you need. Make sure your ham is diced into small, bite-sized pieces. This will help it mix well with the potatoes and other ingredients.

Next, peel and dice your potatoes. Aim for uniform pieces so they cook evenly. If you prefer, you can soak the diced potatoes in cold water for about 10 minutes. This helps remove excess starch and keeps them from browning.

While you’re at it, shred your cheddar cheese if you haven’t done so already. Freshly shredded cheese melts better and adds more flavor. Finally, measure out your sour cream, cream of mushroom soup, and milk. Having everything ready will make the assembly process smoother.

Step 2: Assembling the Casserole

With your ingredients prepped, it’s time to assemble the casserole. In a large mixing bowl, combine the diced ham, diced potatoes, shredded cheddar cheese, sour cream, cream of mushroom soup, and milk. Add the garlic powder, onion powder, black pepper, and salt to the mix.

Using a spatula or a large spoon, gently stir everything together until well combined. You want to ensure that the potatoes and ham are evenly coated with the creamy mixture. Once everything is mixed, pour the mixture into your greased 9×13-inch baking dish. Spread it out evenly to ensure even cooking.

If you’re using the optional cornflake topping, mix the crushed cornflakes with melted butter in a small bowl. Sprinkle this mixture evenly over the top of the casserole. This will create a delightful crunch that contrasts beautifully with the creamy filling.

Step 3: Baking the Casserole

Now that your casserole is assembled, it’s time to bake! Preheat your oven to 350°F (175°C) if you haven’t done so already. Cover the baking dish with aluminum foil to keep the moisture in while it cooks.

Bake the casserole in the preheated oven for 45 minutes. After this time, carefully remove the foil and continue baking for an additional 15-20 minutes. You’ll know it’s done when the top is golden brown and the potatoes are tender.

Cheesy Ham and Potato Casserole!

Variation of Cheesy Ham and Potato Casserole Recipe

Cheesy Ham and Potato Casserole Recipe is a beloved favorite, there are many ways to switch things up! Whether you want to cater to dietary preferences or simply try something new, these variations will keep your casserole exciting and delicious.

Alternative Ingredients to Consider

One of the best things about casseroles is their versatility. Here are some alternative ingredients you can consider:

  • Vegetables: Add in some colorful veggies like broccoli, bell peppers, or peas. They not only enhance the flavor but also boost the nutritional value.
  • Cheese Varieties: Swap out cheddar for mozzarella, gouda, or even pepper jack for a spicy kick. Each cheese brings its unique flavor to the dish.
  • Protein Options: If you don’t have ham, try cooked chicken, turkey, or even crumbled sausage. These proteins will still provide that hearty feel.
  • Healthier Alternatives: For a lighter version, use Greek yogurt instead of sour cream. You can also replace half of the potatoes with cauliflower for a lower-carb option.

Feel free to mix and match these ingredients based on what you have on hand or your family’s preferences. The possibilities are endless!

Different Cooking Methods

Cheesy Ham and Potato Casserole Recipe. Here are a couple of options:

  • Slow Cooker: For a hands-off approach, you can make this casserole in a slow cooker. Simply combine all the ingredients in the slow cooker and cook on low for 6-8 hours or on high for 3-4 hours. This method allows the flavors to meld beautifully.
  • Instant Pot: If you’re short on time, the Instant Pot is a great option. Use the sauté function to cook the ham and veggies briefly, then add the remaining ingredients. Seal the lid and cook on high pressure for about 10 minutes. Quick and easy!

These alternative cooking methods can save you time and effort while still delivering a delicious casserole. Experiment with these variations to find your favorite way to enjoy this comforting dish!

Cooking Note for Cheesy Ham and Potato Casserole Recipe

Cheesy Ham and Potato Casserole Recipe, there are a few important cooking notes to keep in mind. These tips will help ensure that your casserole turns out perfectly every time, making it a dish your family will love.

First, it’s essential to use cooked ham. If you have leftover ham from a previous meal, that’s perfect! Just make sure it’s diced into small pieces for even distribution throughout the casserole. If you’re using store-bought ham, check the label for any added sugars or preservatives that might affect the flavor.

Next, the type of potatoes you choose can make a difference. Russet potatoes are a popular choice due to their fluffy texture when cooked. However, Yukon Gold potatoes work well too, offering a creamier consistency. Whichever you choose, make sure to cut them into uniform pieces to ensure even cooking.

Another important note is about the cream of mushroom soup. If you prefer a homemade version, you can easily make a simple cream sauce using butter, flour, and broth. This can enhance the flavor and allow you to control the ingredients better.

Lastly, don’t skip the resting time after baking. Allowing the casserole to cool for about 5 minutes before serving helps the layers set. This makes it easier to serve and ensures that each slice holds together nicely.

Cheesy Ham and Potato Casserole that’s sure to impress. Happy cooking!

Serving Suggestions for Cheesy Ham and Potato Casserole Recipe

Cheesy Ham and Potato Casserole Recipe is baked to perfection, it’s time to think about how to serve it. This dish is not only delicious but also versatile, making it a great centerpiece for any meal. Here are some serving suggestions to elevate your dining experience:

  • Pair with a Fresh Salad: A crisp green salad is a perfect complement to the rich flavors of the casserole. Consider a simple mixed greens salad with a light vinaigrette. The freshness of the salad balances the creaminess of the casserole.
  • Serve with Steamed Vegetables: Adding a side of steamed vegetables, like broccoli or green beans, can enhance the meal’s nutritional value. The bright colors and textures will make your plate more appealing.
  • Top with Fresh Herbs: For a burst of flavor, sprinkle some chopped fresh herbs like parsley or chives on top of the casserole before serving. This adds a pop of color and freshness that brightens the dish.
  • Include a Side of Bread: A warm, crusty bread or dinner rolls can be a delightful addition. They are perfect for soaking up any extra creamy sauce left on your plate.
  • Offer a Variety of Condiments: Consider serving your casserole with a selection of condiments. A dollop of sour cream or a drizzle of hot sauce can add an extra layer of flavor that many guests will enjoy.

Cheesy Ham and Potato Casserole will surely be a hit!

Tips for Perfecting Your Cheesy Ham and Potato Casserole Recipe

Cheesy Ham and Potato Casserole Recipe is all about attention to detail. With a few simple tips, you can elevate your dish from good to great! Here are some helpful hints to ensure your casserole turns out delicious every time:

  • Use Fresh Ingredients: Fresh ingredients make a big difference in flavor. Opt for fresh potatoes and high-quality cheese. Freshly shredded cheese melts better and enhances the overall taste.
  • Don’t Overcook the Potatoes: When dicing your potatoes, make sure they are not overcooked before adding them to the casserole. Slightly undercooked potatoes will finish cooking in the oven, ensuring they maintain their texture.
  • Season Generously: Don’t be shy with the seasonings! Adjust the garlic powder, onion powder, and pepper to suit your taste. A little extra seasoning can bring out the flavors beautifully.
  • Let It Rest: After baking, allow the casserole to rest for about 5 minutes before serving. This helps the layers set and makes it easier to cut and serve.
  • Experiment with Toppings: While cornflakes add a nice crunch, feel free to experiment with other toppings. Try crushed crackers, breadcrumbs, or even fried onions for a different texture.
  • Make It Ahead: If you’re short on time, consider preparing the casserole a day in advance. Assemble it, cover it, and store it in the fridge. Just pop it in the oven when you’re ready to bake!
  • Check for Doneness: Every oven is different, so keep an eye on your casserole as it bakes. Use a fork to check if the potatoes are tender. If they are, your casserole is ready!

Cheesy Ham and Potato Casserole Recipe. Each bite will be creamy, cheesy, and full of flavor, making it a dish everyone will love!

Breakdown of Time for Cheesy Ham and Potato Casserole Recipe

Cheesy Ham and Potato Casserole Recipe is essential for planning your meal. Here’s a simple breakdown of the time you’ll need for each step, ensuring you can enjoy this delicious dish without any surprises.

Prep Time

The prep time for this casserole is approximately 20-30 minutes. This includes gathering your ingredients, dicing the ham and potatoes, and mixing everything together. Taking your time during this step ensures that all ingredients are well-prepared and ready for assembly. If you have a helper, you can cut this time in half!

Cooking Time

Once your casserole is assembled, the cooking time is about 60-65 minutes. This includes 45 minutes of covered baking and an additional 15-20 minutes uncovered to achieve that golden, crispy top. Make sure to keep an eye on it during the last few minutes to prevent over-browning.

Total Time

Cheesy Ham and Potato Casserole is ready to serve when your guests arrive. Enjoy the process and the delicious results!

Nutritional Information for Cheesy Ham and Potato Casserole Recipe

Cheesy Ham and Potato Casserole Recipe is important for maintaining a balanced diet. This dish is not only delicious but also provides essential nutrients. Here’s a breakdown of the nutritional information per serving:

Calories

Each serving of this comforting casserole contains approximately 350 calories. This makes it a hearty meal option that can satisfy your hunger without overwhelming your daily caloric intake. The combination of ham, potatoes, and cheese contributes to the calorie count, providing energy for your day.

Protein

With about 18 grams of protein per serving, this casserole is a great source of this essential nutrient. The diced ham and cheese are the primary contributors to the protein content, helping to support muscle health and keep you feeling full longer. Including protein in your meals is vital for overall health and wellness.

Sodium

Each serving contains approximately 800 milligrams of sodium. While sodium is necessary for bodily functions, it’s important to monitor your intake. If you’re watching your sodium levels, consider using low-sodium ham and soup options. This can help reduce the overall sodium content while still allowing you to enjoy the rich flavors of the casserole.

Cheesy Ham and Potato Casserole Recipe while making informed choices about your diet. This dish can fit into a balanced meal plan, especially when paired with fresh vegetables or a light salad.

FAQs about Cheesy Ham and Potato Casserole Recipe

Can I use leftover ham for this recipe?

Cheesy Ham and Potato Casserole Recipe. In fact, it’s one of the best ways to utilize any extra ham you have from previous meals. Just make sure to dice it into small pieces so it mixes well with the other ingredients. This not only saves you time but also adds great flavor to the casserole!

What can I substitute for cheese in the casserole?

If you’re looking for a cheese substitute, there are several options you can consider. For a dairy-free version, try using nutritional yeast or a dairy-free cheese alternative. If you want to keep it cheesy but change the flavor, consider using mozzarella, gouda, or even pepper jack for a spicy twist. Each cheese brings its unique taste, so feel free to experiment!

How do I store leftovers of Cheesy Ham and Potato Casserole?

Storing leftovers is easy! Allow the casserole to cool completely before transferring it to an airtight container. You can keep it in the refrigerator for up to 3-4 days. If you want to store it for a longer period, consider freezing it. Just make sure to wrap it tightly in plastic wrap and then in aluminum foil. It can last in the freezer for up to 2-3 months. When you’re ready to enjoy it again, simply thaw it in the fridge overnight and reheat in the oven!

Can I make Cheesy Ham and Potato Casserole ahead of time?

Yes, you can definitely make this casserole ahead of time! Prepare the casserole as directed, but instead of baking it, cover it tightly and store it in the refrigerator for up to 24 hours. When you’re ready to bake, simply pop it in the oven. You may need to add a few extra minutes to the cooking time since it will be cold from the fridge. This makes it a great option for busy days or special occasions!

Conclusion on Cheesy Ham and Potato Casserole Recipe

Cheesy Ham and Potato Casserole Recipe is a delightful dish that combines comfort and flavor in every bite. It’s a perfect choice for family dinners, potlucks, or any occasion where you want to impress your guests with minimal effort. The creamy texture, savory ham, and tender potatoes create a satisfying meal that everyone will love.

Not only is this casserole easy to prepare, but it also offers endless possibilities for customization. Whether you choose to add vegetables, swap out the cheese, or try different cooking methods, the options are limitless. This versatility allows you to cater to various tastes and dietary needs, making it a go-to recipe for any household.

As you embark on your cooking journey with this casserole, remember the tips and variations shared throughout this article. They will help you create a dish that is not only delicious but also uniquely yours. So gather your ingredients, preheat your oven, and get ready to enjoy a comforting meal that warms the heart and satisfies the soul.

Cheesy Ham and Potato Casserole Recipe. Happy cooking, and may your kitchen be filled with laughter and delicious aromas!

Cheesy Pepperoni Stromboli Recipe is a must-try!

Introduction to Cheesy Pepperoni Stromboli Recipe

What is Stromboli?

Stromboli is a delicious Italian-American dish that resembles a rolled-up pizza. It’s made with pizza dough filled with various ingredients, then rolled and baked until golden brown. The name “Stromboli” comes from a volcanic island in Italy, symbolizing the dish’s explosive flavors. Traditionally, it’s filled with meats, cheeses, and vegetables, making it a versatile meal option. You can enjoy it as a snack, appetizer, or main course. The best part? It’s easy to customize based on your taste preferences!

Why You’ll Love This Cheesy Pepperoni Stromboli Recipe

This Cheesy Pepperoni Stromboli Recipe is a crowd-pleaser for many reasons. First, it combines gooey mozzarella cheese and savory pepperoni, creating a mouthwatering flavor explosion. Second, it’s simple to make, even for beginner cooks. The step-by-step instructions guide you through the process, ensuring success every time. Plus, it’s perfect for family dinners, game nights, or parties. Everyone loves a warm, cheesy treat, and this stromboli delivers just that!

Moreover, you can easily adapt this recipe to suit your dietary needs. Whether you want to go vegetarian or add some spicy flair, the options are endless. So, gather your ingredients and get ready to impress your family and friends with this delightful dish!

Ingredients for Cheesy Pepperoni Stromboli Recipe

To create the perfect Cheesy Pepperoni Stromboli, you’ll need a few simple ingredients. Each one plays a vital role in delivering that delicious flavor and texture. Here’s what you’ll need:

  • 2 cups all-purpose flour
  • 1 teaspoon sugar
  • 1 teaspoon salt
  • 1 packet (2 1/4 teaspoons) instant yeast
  • 3/4 cup warm water (about 110°F)
  • 1 tablespoon olive oil
  • 1 cup shredded mozzarella cheese
  • 1 cup sliced pepperoni
  • 1/2 cup marinara sauce (for dipping)
  • 1 teaspoon Italian seasoning
  • 1 egg (for egg wash)

These ingredients are easy to find at your local grocery store. The all-purpose flour forms the base of the dough, while the sugar and salt enhance the flavor. Instant yeast helps the dough rise, giving it that fluffy texture we all love. Warm water activates the yeast, and olive oil adds richness to the dough.

As for the fillings, mozzarella cheese provides that gooey, melty goodness, while pepperoni adds a savory kick. The Italian seasoning brings everything together with its aromatic blend of herbs. Finally, the egg wash gives the stromboli a beautiful golden finish when baked.

Feel free to get creative! You can swap out the pepperoni for other meats or even vegetables. The possibilities are endless, making this recipe a fantastic choice for any occasion!

Step-by-Step Preparation of Cheesy Pepperoni Stromboli Recipe

Step 1: Prepare the Dough

To kick off your Cheesy Pepperoni Stromboli Recipe, start by preparing the dough. In a large bowl, combine the all-purpose flour, sugar, salt, and instant yeast. Mix these dry ingredients well to ensure even distribution. Next, add the warm water and olive oil to the bowl. Stir everything together until a dough begins to form. This is where the magic starts!

Once the dough comes together, it’s time to knead. Transfer it to a floured surface and knead for about 5-7 minutes. You want the dough to become smooth and elastic. This step is crucial as it develops the gluten, giving your stromboli that perfect chewy texture. After kneading, place the dough in a greased bowl, cover it with a kitchen towel, and let it rise in a warm spot for about 30 minutes. You’ll know it’s ready when it doubles in size!

Step 2: Roll Out the Dough

Once your dough has risen, it’s time to roll it out. Start by preheating your oven to 400°F (200°C). Then, punch down the dough to release any air bubbles. On a floured surface, roll the dough into a rectangle about 1/4 inch thick. Make sure to keep the edges even for a uniform shape. This rectangle will be the canvas for your delicious fillings!

As you roll, don’t forget to sprinkle a little flour on the surface to prevent sticking. If the dough resists, let it rest for a few minutes before continuing. This will make it easier to roll out. Once you have your rectangle, you’re ready for the next step!

Step 3: Add the Fillings

Now comes the fun part—adding the fillings! Sprinkle the shredded mozzarella cheese evenly over the rolled-out dough, leaving a small border around the edges. Next, layer the sliced pepperoni on top of the cheese. Feel free to add as much or as little as you like! For an extra burst of flavor, sprinkle Italian seasoning over the cheese and pepperoni. This will enhance the taste and aroma of your stromboli.

Remember, the key to a great stromboli is balancing the fillings. You want enough to enjoy the flavors but not so much that it spills out when you roll it. Once you’ve added your fillings, it’s time to roll!

Step 4: Roll and Seal the Stromboli

Starting from one long side of the rectangle, carefully roll the dough into a log shape. Make sure to roll it tightly but not too tight, as the dough needs room to expand while baking. As you roll, seal the edges by pinching them together. This will keep all those delicious fillings inside!

Once you’ve rolled it up, place the stromboli seam-side down on a baking sheet lined with parchment paper. This will help prevent sticking and make cleanup a breeze. If you want, you can also make a few slits on top of the stromboli to allow steam to escape while baking. This will help achieve that perfect golden crust!

Step 5: Bake the Cheesy Pepperoni Stromboli

Now it’s time to bake your masterpiece! Beat the egg in a small bowl and brush it over the top of the stromboli. This egg wash will give it a beautiful golden finish. Place the baking sheet in the preheated oven and bake for 20-25 minutes. Keep an eye on it, as baking times may vary depending on your oven.

When the stromboli is golden brown and the cheese is bubbling, it’s ready to come out. Let it cool for a few minutes before slicing. This will help the cheese set a bit, making it easier to cut. Serve your Cheesy Pepperoni Stromboli with marinara sauce for dipping, and enjoy the deliciousness!

Variations of Cheesy Pepperoni Stromboli Recipe

Vegetarian Options

If you’re looking for a meat-free alternative, you can easily transform this Cheesy Pepperoni Stromboli into a delicious vegetarian dish. Instead of pepperoni, consider using a variety of colorful vegetables. Bell peppers, mushrooms, and spinach are excellent choices. You can also add some sliced olives or artichokes for extra flavor. Just make sure to sauté any vegetables that have high water content, like mushrooms, before adding them to the stromboli. This will prevent the dough from getting soggy. With these tasty fillings, you’ll have a delightful vegetarian stromboli that everyone will love!

Different Meats and Cheeses

For those who enjoy experimenting with flavors, try swapping out the pepperoni for different meats. Salami, ham, or even cooked sausage can add a unique twist to your stromboli. You can also mix and match cheeses! While mozzarella is a classic choice, adding provolone, cheddar, or even a bit of feta can elevate the taste. Just remember to balance the flavors so that no single ingredient overpowers the others. This way, you can create a personalized stromboli that suits your taste buds perfectly!

Spicy Additions

If you like a little heat, consider adding spicy elements to your Cheesy Pepperoni Stromboli. You can sprinkle crushed red pepper flakes over the cheese and pepperoni for an extra kick. Alternatively, try using spicy pepperoni or chorizo for a bolder flavor. For an even spicier option, add jalapeños or banana peppers. These additions will not only spice things up but also add a delightful crunch. Your friends and family will be amazed at the flavor explosion in every bite!

Cooking Note for Cheesy Pepperoni Stromboli Recipe

When preparing your Cheesy Pepperoni Stromboli, there are a few important cooking notes to keep in mind. These tips will help ensure that your stromboli turns out perfectly every time.

First, make sure your ingredients are at room temperature. This is especially true for the warm water and olive oil. Using warm water helps activate the yeast, which is crucial for the dough to rise properly. If the water is too hot, it can kill the yeast, so aim for about 110°F. A kitchen thermometer can be handy for this!

Next, kneading the dough is a vital step. Knead until the dough is smooth and elastic. This process develops gluten, which gives the dough its structure. If you find the dough is too sticky, sprinkle a little more flour as you knead. However, be careful not to add too much flour, as it can make the dough tough.

When rolling out the dough, ensure it’s evenly rolled to about 1/4 inch thick. An uneven thickness can lead to uneven baking. If you have a rolling pin with measurements, it can help you achieve the perfect thickness. Also, remember to leave a small border around the edges when adding your fillings. This will help seal the stromboli and keep the delicious ingredients inside.

Lastly, keep an eye on the baking time. Ovens can vary, so check your stromboli a few minutes before the suggested time. You want it to be golden brown and the cheese to be bubbling. If you notice the top is browning too quickly, you can cover it loosely with aluminum foil to prevent burning.

By following these cooking notes, you’ll be well on your way to creating a scrumptious Cheesy Pepperoni Stromboli that’s sure to impress!

Serving Suggestions for Cheesy Pepperoni Stromboli Recipe

Dipping Sauces

When it comes to serving your Cheesy Pepperoni Stromboli, the right dipping sauce can elevate the experience. While marinara sauce is a classic choice, there are plenty of other delicious options to consider. Here are a few ideas:

  • Garlic Butter: Melt some butter and mix in minced garlic and a sprinkle of parsley. This rich sauce adds a delightful flavor that complements the cheesy goodness of the stromboli.
  • Ranch Dressing: For a creamy twist, serve your stromboli with ranch dressing. The coolness of the ranch pairs well with the warm, cheesy filling.
  • Spicy Aioli: Mix mayonnaise with garlic, lemon juice, and a dash of hot sauce for a zesty dip. This adds a kick that spicy food lovers will enjoy!
  • Pesto: A fresh basil pesto can bring a burst of flavor. Its herby notes work wonderfully with the savory ingredients in the stromboli.

Feel free to get creative! You can even set up a dipping sauce bar with a variety of options. This way, everyone can choose their favorite sauce to enjoy with their slice of stromboli.

Side Dishes

Pairing your Cheesy Pepperoni Stromboli with the right side dishes can make your meal even more satisfying. Here are some tasty side options to consider:

  • Garden Salad: A fresh garden salad with mixed greens, tomatoes, cucumbers, and a light vinaigrette can balance the richness of the stromboli.
  • Garlic Bread: For a carb lover’s dream, serve garlic bread alongside your stromboli. The buttery, garlicky flavor complements the dish perfectly.
  • Roasted Vegetables: Roasted seasonal vegetables, like zucchini, bell peppers, and carrots, add a healthy touch to your meal.
  • Coleslaw: A tangy coleslaw can provide a crunchy contrast to the soft, cheesy stromboli, making for a delightful combination.

These side dishes not only enhance the meal but also add variety to your dining experience. Whether you’re hosting a party or enjoying a family dinner, these suggestions will surely impress your guests!

Tips for Perfecting Your Cheesy Pepperoni Stromboli Recipe

Creating the perfect Cheesy Pepperoni Stromboli is all about attention to detail. Here are some helpful tips to ensure your stromboli turns out delicious every time:

First, always measure your ingredients accurately. Using the right amounts of flour, water, and yeast is crucial for the dough’s texture. Too much flour can make the dough dry, while too little can lead to a soggy stromboli. A kitchen scale can help you get precise measurements.

Next, don’t rush the rising process. Allowing the dough to rise until it doubles in size is essential for achieving that light and fluffy texture. If your kitchen is cool, consider placing the dough in a slightly warm oven (turned off) to help it rise faster.

When rolling out the dough, use a rolling pin for an even thickness. This ensures that your stromboli bakes evenly. If you find the dough is sticking, sprinkle a little flour on the surface and your rolling pin to prevent it from clinging.

As you add fillings, remember to leave a border around the edges. This will help seal the stromboli and keep the delicious ingredients from spilling out during baking. A well-sealed stromboli will also have a better texture and flavor.

For a beautiful finish, brush the top of the stromboli with the egg wash generously. This not only gives it a golden color but also adds a slight sheen that makes it look appetizing. If you want to add a little extra flavor, sprinkle some grated Parmesan cheese or sesame seeds on top before baking.

Lastly, let the stromboli cool for a few minutes after baking. This allows the cheese to set, making it easier to slice. If you cut it too soon, the cheese may ooze out, making a mess. Patience is key!

By following these tips, you’ll be well on your way to mastering the art of making a Cheesy Pepperoni Stromboli that’s sure to impress everyone at your table!

Breakdown of Time for Cheesy Pepperoni Stromboli Recipe

Prep Time

The prep time for your Cheesy Pepperoni Stromboli is about 15-20 minutes. This includes gathering your ingredients, mixing the dough, and preparing the fillings. Make sure to have everything ready before you start. It makes the process smoother and more enjoyable!

Cooking Time

Once your stromboli is assembled, the cooking time is approximately 20-25 minutes. During this time, the dough will bake to a beautiful golden brown, and the cheese will melt perfectly. Keep an eye on it as it bakes to ensure it doesn’t overcook.

Total Time

In total, you can expect to spend about 1 hour to 1 hour and 15 minutes on this recipe. This includes the rising time for the dough, which takes about 30 minutes. The wait is worth it, as you’ll end up with a delicious Cheesy Pepperoni Stromboli that everyone will love!

Nutritional Information for Cheesy Pepperoni Stromboli Recipe

Calories

When enjoying a slice of Cheesy Pepperoni Stromboli, it’s good to know what you’re consuming. Each serving contains approximately 320 calories. This makes it a satisfying option for a meal or snack without going overboard on calories. The combination of dough, cheese, and pepperoni provides a hearty bite that keeps you feeling full and satisfied.

Protein

Protein is essential for building and repairing tissues, and this Cheesy Pepperoni Stromboli delivers! Each serving offers about 14 grams of protein. The protein comes mainly from the mozzarella cheese and pepperoni, making it a great choice for those looking to increase their protein intake. This makes it not only delicious but also a nutritious option for your meals.

Sodium

While enjoying your Cheesy Pepperoni Stromboli, it’s important to be mindful of sodium intake. Each serving contains around 800 milligrams of sodium. This is primarily due to the pepperoni and any added seasonings. If you’re watching your sodium levels, consider using low-sodium pepperoni or reducing the amount of added salt in the dough. Balancing flavors while keeping sodium in check can help you enjoy this dish without worry.

FAQs about Cheesy Pepperoni Stromboli Recipe

Can I make Cheesy Pepperoni Stromboli ahead of time?

Absolutely! You can prepare your Cheesy Pepperoni Stromboli ahead of time. After rolling and filling the dough, wrap it tightly in plastic wrap and refrigerate it for up to 24 hours. When you’re ready to bake, simply remove it from the fridge, let it sit at room temperature for about 15-20 minutes, and then brush with egg wash before baking. This makes it a great option for meal prep or entertaining guests!

What can I substitute for pepperoni in the Cheesy Pepperoni Stromboli Recipe?

If you’re not a fan of pepperoni or want to try something different, there are plenty of tasty substitutes! You can use sliced salami, ham, or even cooked sausage for a different flavor. For a vegetarian option, consider using vegetables like bell peppers, mushrooms, or spinach. You can also try adding cheese varieties like feta or goat cheese for a unique twist. The key is to choose ingredients that complement the cheese and dough!

How do I store leftovers of Cheesy Pepperoni Stromboli?

Storing leftovers is easy! Once your Cheesy Pepperoni Stromboli has cooled completely, wrap it tightly in plastic wrap or aluminum foil. You can also place it in an airtight container. Store it in the refrigerator for up to 3 days. When you’re ready to enjoy it again, simply reheat it in the oven at 350°F (175°C) for about 10-15 minutes, or until warmed through. This will help maintain its delicious texture!

Can I freeze Cheesy Pepperoni Stromboli?

Yes, you can freeze Cheesy Pepperoni Stromboli! To do this, wrap the cooled stromboli tightly in plastic wrap and then in aluminum foil. This will help prevent freezer burn. You can freeze it for up to 2 months. When you’re ready to eat it, thaw it in the refrigerator overnight. Then, reheat it in the oven at 350°F (175°C) until heated through. Freezing is a great way to enjoy this dish later without losing its flavor!

Conclusion on Cheesy Pepperoni Stromboli Recipe

In conclusion, the Cheesy Pepperoni Stromboli Recipe is a delightful dish that brings together the best of Italian flavors in a fun and easy-to-make format. Whether you’re preparing it for a family dinner, a game night, or a casual gathering with friends, this stromboli is sure to impress everyone at the table. Its warm, gooey cheese and savory pepperoni create a mouthwatering combination that’s hard to resist.

Moreover, the versatility of this recipe allows you to customize it to suit your taste preferences. From vegetarian options to different meats and spicy additions, the possibilities are endless. This means you can enjoy a unique stromboli every time you make it, keeping your meals exciting and fresh.

As you embark on your cooking journey, remember the tips and tricks shared throughout this article. They will help you achieve the perfect texture and flavor, ensuring your Cheesy Pepperoni Stromboli turns out delicious every time. Don’t hesitate to experiment with different fillings and dipping sauces to make it your own!

So, gather your ingredients, roll up your sleeves, and get ready to create a scrumptious Cheesy Pepperoni Stromboli that will have everyone coming back for seconds. Happy cooking!

Hearty Chicken Stew Recipe for a Cozy Family Dinner

Introduction to Hearty Chicken Stew Recipe

Hearty Chicken Stew Recipe is a delightful dish that warms the heart and fills the belly. This stew is not just a meal; it’s a hug in a bowl. Perfect for chilly evenings or family gatherings, it brings everyone together around the table.

Imagine tender chicken pieces simmering in a rich broth, surrounded by vibrant vegetables. The aroma wafting through your kitchen will make your mouth water. This recipe is simple yet satisfying, making it ideal for both novice cooks and seasoned chefs. Plus, it’s packed with nutrients, ensuring you and your loved ones enjoy a wholesome meal.

Hearty Chicken Stew Recipe is sure to become a favorite in your home. So, roll up your sleeves and let’s get cooking!

Ingredients for Hearty Chicken Stew Recipe

Hearty Chicken Stew Recipe, you’ll need a variety of fresh ingredients. Each component plays a vital role in building flavor and texture. Here’s what you’ll need:

  • 2 tablespoons olive oil
  • 1 pound boneless, skinless chicken thighs, cut into bite-sized pieces
  • 1 medium onion, diced
  • 2 cloves garlic, minced
  • 3 medium carrots, sliced
  • 2 medium potatoes, diced
  • 1 cup green beans, trimmed and cut into 1-inch pieces
  • 4 cups chicken broth
  • 1 teaspoon dried thyme
  • 1 teaspoon dried rosemary
  • Salt and pepper to taste
  • 2 tablespoons chopped fresh parsley (for garnish)

These ingredients come together to create a hearty and flavorful stew. The chicken thighs provide a rich taste, while the vegetables add color and nutrition. The herbs, thyme and rosemary, enhance the overall flavor, making each bite delightful.

Feel free to adjust the quantities based on your preferences or the number of servings you need. This recipe serves six, but it can easily be scaled up or down. Now that you have your ingredients ready, let’s move on to the preparation steps!

Step-by-Step Preparation of Hearty Chicken Stew Recipe

Hearty Chicken Stew Recipe is straightforward and fun to make. Follow these steps to create a delicious meal that everyone will love!

Step 1: Preparing the Ingredients

Start by washing and chopping all your vegetables. Dice the onion, mince the garlic, slice the carrots, and dice the potatoes. Trim the green beans and cut them into 1-inch pieces. Having everything prepped makes cooking easier and more enjoyable. Plus, it helps you stay organized in the kitchen!

Step 2: Sautéing the Aromatics

Next, heat 2 tablespoons of olive oil in a large pot over medium heat. Once the oil is hot, add the diced onion. Sauté it for about 3-4 minutes until it becomes soft and translucent. Then, add the minced garlic and cook for an additional minute. The garlic will release a wonderful aroma, making your kitchen smell amazing!

Step 3: Browning the Chicken

Now it’s time to add the chicken. Place the bite-sized pieces of chicken thighs into the pot. Season them with salt and pepper. Cook the chicken for about 5-7 minutes, stirring occasionally, until it’s browned on all sides. This step locks in the flavors and gives the chicken a nice texture.

Step 4: Adding Vegetables and Broth

Once the chicken is browned, it’s time to add the vegetables. Stir in the sliced carrots, diced potatoes, and green beans. Mix everything well to combine. Then, pour in 4 cups of chicken broth. Add 1 teaspoon of dried thyme and 1 teaspoon of dried rosemary for that extra flavor. Bring the mixture to a boil, and then reduce the heat to low.

Step 5: Simmering the Stew

Cover the pot and let the stew simmer for 25-30 minutes. This allows the flavors to meld together and the vegetables to become tender. Stir occasionally to ensure nothing sticks to the bottom of the pot. The anticipation will build as the delicious aroma fills your home!

Step 6: Final Seasoning and Serving

After simmering, taste the stew and adjust the seasoning with more salt and pepper if needed. Once you’re satisfied with the flavor, it’s time to serve! Ladle the hearty chicken stew into bowls and garnish with chopped fresh parsley. Enjoy this warm and comforting dish with your family and friends!

Variations of Hearty Chicken Stew Recipe

Hearty Chicken Stew Recipe lies in its versatility. You can easily customize it to suit your taste or to use what you have on hand. Here are some exciting variations to consider:

Adding Different Vegetables

One of the simplest ways to change up your stew is by adding different vegetables. While the classic recipe includes carrots, potatoes, and green beans, feel free to experiment! You can add:

  • Peas for a pop of sweetness
  • Bell peppers for a crunchy texture
  • Celery for added flavor
  • Sweet corn for a touch of sweetness
  • Spinach or kale for a nutritious boost

Mixing in seasonal vegetables not only enhances the flavor but also adds color and nutrition to your dish. Just remember to adjust the cooking time based on the vegetables you choose!

Using Alternative Proteins

If you want to switch things up, consider using alternative proteins. While chicken thighs are delicious, you can try:

  • Chicken breasts for a leaner option
  • Turkey for a different flavor
  • Beef chunks for a heartier stew
  • Vegetarian options like chickpeas or lentils for a meatless meal

Each protein brings its unique taste and texture, allowing you to create a stew that fits your dietary preferences. Just be mindful of the cooking times, as different proteins may require adjustments.

Spicing It Up: Flavor Variations

Hearty Chicken Stew Recipe, consider spicing it up! Here are some ideas:

  • Add a pinch of red pepper flakes for heat
  • Incorporate a tablespoon of Worcestershire sauce for depth
  • Mix in a teaspoon of smoked paprika for a smoky flavor
  • Use fresh herbs like basil or cilantro for a fresh twist

These flavor variations can elevate your stew and make it even more enjoyable. Don’t be afraid to get creative and find the perfect combination that suits your palate!

Hearty Chicken Stew Recipe can be a new experience every time you make it. Enjoy experimenting and discovering your favorite versions!

Cooking Note for Hearty Chicken Stew Recipe

Hearty Chicken Stew Recipe, there are a few important cooking notes to keep in mind. These tips will help ensure that your stew turns out perfectly every time, making it a delightful dish for you and your loved ones.

First, always use fresh ingredients when possible. Fresh vegetables and herbs not only enhance the flavor but also add nutritional value to your stew. If you can, visit your local farmer’s market for the best produce.

Next, consider the size of your chicken pieces. Cutting the chicken thighs into uniform, bite-sized pieces ensures even cooking. This way, every piece will be tender and flavorful. If you prefer larger chunks, just remember to adjust the cooking time accordingly.

Another key point is to avoid overcrowding the pot when browning the chicken. If your pot is too full, the chicken will steam instead of brown. This can lead to a less flavorful stew. If necessary, brown the chicken in batches to achieve that perfect golden color.

Additionally, don’t skip the simmering step! Allowing the stew to simmer for the recommended time is crucial. This process melds the flavors together, creating a rich and hearty broth. Stir occasionally to prevent sticking, and keep the lid on to retain moisture.

Lastly, feel free to taste as you go! Adjusting the seasoning throughout the cooking process can make a big difference. Everyone’s taste buds are different, so don’t hesitate to add more salt, pepper, or herbs to suit your preferences.

Hearty Chicken Stew Recipe. Enjoy the process and the delicious results!

Serving Suggestions for Hearty Chicken Stew Recipe

Hearty Chicken Stew Recipe is just as important as preparing it. The right accompaniments can elevate your meal and make it even more enjoyable. Here are some delightful serving suggestions to consider:

  • Crusty Bread: A warm, crusty loaf of bread is perfect for soaking up the rich broth. Consider serving a baguette or sourdough on the side. It adds a satisfying crunch and complements the stew beautifully.
  • Rice or Quinoa: For a heartier meal, serve your stew over a bed of fluffy rice or quinoa. This adds a nice texture and makes the dish more filling.
  • Salad: A fresh green salad can balance the warmth of the stew. Toss together mixed greens, cherry tomatoes, and a light vinaigrette for a refreshing side.
  • Mashed Potatoes: If you want to indulge, creamy mashed potatoes can be a fantastic base for your stew. The combination of flavors is simply irresistible!
  • Cheese: Sprinkle some grated cheese, like Parmesan or cheddar, on top of the stew before serving. It melts beautifully and adds a rich flavor.

Don’t forget to garnish your stew with fresh parsley before serving. This adds a pop of color and a hint of freshness. You can also offer hot sauce or chili flakes on the side for those who enjoy a little heat.

Hearty Chicken Stew Recipe will be a hit at the dinner table. Enjoy sharing this comforting dish with family and friends!

Tips for Perfecting Your Hearty Chicken Stew Recipe

Hearty Chicken Stew Recipe truly exceptional, consider these helpful tips. They will guide you in creating a dish that is not only delicious but also visually appealing and satisfying.

First, always start with high-quality ingredients. Fresh vegetables and good-quality chicken can make a significant difference in flavor. When possible, choose organic or locally sourced produce. This ensures that your stew is packed with nutrients and tastes amazing.

Next, don’t rush the browning process. Take your time to brown the chicken properly. This step adds depth and richness to the stew. If you crowd the pot, the chicken will steam instead of brown. Brown in batches if necessary to achieve that perfect golden color.

Another tip is to layer your flavors. After sautéing the onions and garlic, consider adding a splash of white wine or a bit of tomato paste before adding the broth. This can enhance the overall taste and add a new dimension to your stew.

When it comes to seasoning, remember that it’s best to season in stages. Start with salt and pepper when browning the chicken, then adjust the seasoning as you add the vegetables and broth. This way, you can fine-tune the flavors to your liking.

For a thicker stew, you can add a slurry made from cornstarch and water during the last few minutes of cooking. This will give your stew a heartier texture without compromising the flavor.

Lastly, let your stew rest for a few minutes before serving. This allows the flavors to meld together even more. Plus, it gives you time to prepare your sides or set the table. Your family and friends will appreciate the extra effort!

Hearty Chicken Stew Recipe. Enjoy the process and the delicious results!

Breakdown of Time for Hearty Chicken Stew Recipe

Hearty Chicken Stew Recipe can help you plan your cooking session better. Here’s a simple breakdown of the time involved in preparing and cooking this delicious dish.

Prep Time

The prep time for this hearty stew is approximately 15-20 minutes. During this time, you will wash, chop, and measure all your ingredients. Having everything ready before you start cooking makes the process smoother and more enjoyable. So, take your time to prepare the vegetables and chicken properly!

Cooking Time

Hearty Chicken Stew Recipe is about 30-35 minutes. This includes browning the chicken, sautéing the aromatics, and simmering the stew until the vegetables are tender. It’s essential to allow the stew to simmer for the full time to develop rich flavors and ensure everything is cooked through.

Total Time

In total, you can expect to spend around 50-55 minutes from start to finish. This includes both prep and cooking time. With this quick and easy recipe, you can have a warm, comforting meal ready in less than an hour. Perfect for busy weeknights or a cozy weekend dinner!

Nutritional Information for Hearty Chicken Stew Recipe

Hearty Chicken Stew Recipe not only satisfies your taste buds but also provides valuable nutrients. Here’s a breakdown of the nutritional information per serving:

Calories

Each serving of this delicious stew contains approximately 320 calories. This makes it a hearty yet manageable option for a main meal. The combination of chicken, vegetables, and broth ensures that you’re getting a filling dish without excessive calories.

Protein

Hearty Chicken Stew Recipe offers about 25 grams of protein per serving. The chicken thighs are an excellent source of lean protein, helping you feel full and satisfied after your meal.

Sodium

When it comes to sodium, each serving contains around 600 milligrams. While this is a reasonable amount for a stew, it’s always a good idea to monitor your sodium intake. You can reduce the sodium content by using low-sodium chicken broth or adjusting the amount of added salt. This way, you can enjoy your stew while keeping your health in check.

Hearty Chicken Stew Recipe is a nutritious choice that provides a good balance of calories, protein, and essential nutrients. It’s perfect for a wholesome family meal that everyone will love!

FAQs about Hearty Chicken Stew Recipe

Can I make Hearty Chicken Stew Recipe in a slow cooker?

Hearty Chicken Stew Recipe in a slow cooker is a fantastic option. Simply follow these steps:

  • Start by browning the chicken in a skillet, as mentioned in the recipe. This step adds flavor.
  • Transfer the browned chicken to the slow cooker.
  • Add the sautéed onions and garlic, along with the remaining vegetables and broth.
  • Season with thyme, rosemary, salt, and pepper.
  • Cook on low for 6-8 hours or on high for 3-4 hours until the chicken and vegetables are tender.

This method allows the flavors to meld beautifully, resulting in a rich and hearty stew. Plus, it’s perfect for busy days when you want a warm meal waiting for you!

What can I serve with Hearty Chicken Stew Recipe?

Hearty Chicken Stew Recipe. Here are some popular choices:

  • Crusty Bread: A warm loaf of bread is perfect for dipping into the stew.
  • Rice or Quinoa: Serve the stew over rice or quinoa for a filling meal.
  • Salad: A fresh green salad can provide a nice contrast to the warm stew.
  • Mashed Potatoes: Creamy mashed potatoes make a comforting base for the stew.

Feel free to mix and match these sides to create a well-rounded meal that everyone will enjoy!

How long does Hearty Chicken Stew Recipe last in the fridge?

Hearty Chicken Stew Recipe can last in the fridge for about 3-4 days when stored properly. Make sure to place it in an airtight container to keep it fresh. When you’re ready to enjoy it again, simply reheat on the stove or in the microwave until heated through.

Can I freeze Hearty Chicken Stew Recipe?

Hearty Chicken Stew Recipe for later enjoyment! Here’s how:

  • Allow the stew to cool completely before transferring it to a freezer-safe container.
  • Leave some space at the top of the container, as the stew will expand when frozen.
  • Label the container with the date and freeze for up to 3 months.

When you’re ready to eat, thaw the stew in the fridge overnight. Reheat on the stove or in the microwave until hot. Enjoy the comforting flavors of your stew even on busy days!

Conclusion on Hearty Chicken Stew Recipe

Hearty Chicken Stew Recipe is more than just a meal; it’s a comforting experience that brings warmth and joy to your dining table. With its rich flavors and nourishing ingredients, this stew is perfect for any occasion, whether it’s a cozy family dinner or a gathering with friends.

Throughout this article, we’ve explored the essential ingredients, step-by-step preparation, and various ways to customize your stew. The versatility of this recipe allows you to adapt it to your taste preferences and dietary needs. From adding different vegetables to experimenting with alternative proteins, the possibilities are endless!

Hearty Chicken Stew Recipe supports a healthy lifestyle while satisfying your hunger.

As you embark on your cooking journey, remember to embrace the process. Cooking is not just about following a recipe; it’s about creating memories and sharing love through food. So, gather your ingredients, invite your loved ones, and enjoy the delightful experience of making and savoring this hearty stew.

Hearty Chicken Stew Recipe. Happy cooking, and may your kitchen be filled with the wonderful aroma of this comforting dish!

Cheesy Chicken Broccoli Potato Casserole is delicious!

Introduction to Cheesy Chicken, Broccoli, and Potato Casserole

Cheesy Chicken, Broccoli, and Potato Casserole is a perfect choice. This dish combines tender chicken, nutritious broccoli, and hearty potatoes, all smothered in a creamy cheese sauce. It’s not just tasty; it’s also easy to prepare, making it ideal for busy weeknights or cozy family gatherings.

This casserole is a wonderful way to sneak in some veggies while satisfying those cheesy cravings. The combination of flavors and textures creates a delightful experience with every bite. Plus, it’s a one-dish meal, which means less cleanup for you!

Whether you’re a seasoned cook or just starting out, this recipe is straightforward and forgiving. You can customize it to suit your taste, making it a versatile option for any occasion. So, gather your ingredients, and let’s dive into the world of cheesy goodness!

Ingredients for Cheesy Chicken, Broccoli, and Potato Casserole

Cheesy Chicken, Broccoli, and Potato Casserole, you’ll need a few simple ingredients. Each component plays a vital role in delivering flavor and texture. Here’s what you’ll need:

  • 2 cups cooked, shredded chicken
  • 4 medium russet potatoes, peeled and diced (about 4 cups)
  • 2 cups broccoli florets (fresh or frozen)
  • 1 cup shredded cheddar cheese
  • 1 cup sour cream
  • 1 cup chicken broth
  • 1 teaspoon garlic powder
  • 1 teaspoon onion powder
  • 1 teaspoon salt
  • ½ teaspoon black pepper
  • 1 tablespoon olive oil
  • ½ cup breadcrumbs (optional, for topping)

These ingredients come together to create a creamy, cheesy delight that is sure to please everyone at the table. The chicken provides protein, while the potatoes and broccoli add heartiness and nutrition. The cheddar cheese and sour cream bring a rich creaminess that ties everything together.

Feel free to adjust the ingredients based on your preferences. For instance, you can use different types of cheese or add more vegetables. The beauty of this casserole is its flexibility, allowing you to make it your own!

Step-by-Step Preparation of Cheesy Chicken, Broccoli, and Potato Casserole

Cheesy Chicken, Broccoli, and Potato Casserole. This step-by-step guide will help you create a delicious meal that everyone will enjoy. Let’s get started!

Step 1: Prepping the Ingredients

First things first, you need to prep your ingredients. Start by gathering everything you need. This includes your cooked chicken, diced potatoes, broccoli florets, and all the seasonings. Having everything ready will make the cooking process smoother.

Next, peel and dice the russet potatoes into small cubes. Aim for uniform pieces so they cook evenly. If you’re using fresh broccoli, wash it thoroughly and cut it into bite-sized florets. If you’re using frozen broccoli, there’s no need to thaw it; just measure out the required amount.

Step 2: Cooking the Chicken

If you haven’t cooked your chicken yet, you can do so now. You can either boil, bake, or sauté it. Boiling is quick and easy. Simply place the chicken in a pot of boiling water and cook until it’s no longer pink inside, about 15-20 minutes. Once cooked, shred the chicken using two forks or your hands. Set it aside for later.

Step 3: Preparing the Broccoli and Potatoes

In a large pot, bring water to a boil. Add the diced potatoes and cook them for about 10-12 minutes, or until they are tender. You can check their doneness by poking them with a fork. Once cooked, drain the potatoes and set them aside.

If you’re using fresh broccoli, you can blanch it in boiling water for about 2-3 minutes until it turns bright green. Then, drain and rinse it under cold water to stop the cooking process. This keeps the broccoli crisp and vibrant.

Step 4: Combining Ingredients

Now it’s time to bring everything together! In a large mixing bowl, combine the shredded chicken, broccoli florets, cheddar cheese, sour cream, chicken broth, garlic powder, onion powder, salt, and black pepper. Stir everything until well mixed.

Next, gently fold in the cooked potatoes. Make sure all the ingredients are evenly coated with the creamy mixture. This step is crucial for ensuring every bite is packed with flavor!

Step 5: Baking the Casserole

Transfer the combined mixture into your greased 9×13-inch baking dish. Spread it out evenly to ensure even cooking. If you like a crunchy topping, sprinkle breadcrumbs over the top. Drizzle a little olive oil on the breadcrumbs to help them brown nicely.

Now, place the casserole in the preheated oven at 375°F (190°C). Bake for 25-30 minutes, or until the casserole is bubbly and the top is golden brown. The aroma will fill your kitchen, making it hard to wait!

Cheesy Chicken, Broccoli, and Potato Casserole!

Variation of Cheesy Chicken, Broccoli, and Potato Casserole

Cheesy Chicken, Broccoli, and Potato Casserole is a versatile dish that can be easily adapted to suit your taste and dietary needs. Whether you want to switch up the ingredients or try a different cooking method, there are plenty of options to explore. Let’s take a look at some alternative ingredients and cooking methods that can elevate your casserole experience!

Alternative Ingredients

One of the best things about this casserole is its flexibility. You can swap out ingredients to create a dish that fits your preferences. Here are some ideas:

  • Protein Options: Instead of chicken, you can use turkey, cooked sausage, or even tofu for a vegetarian option. Each protein brings its unique flavor.
  • Cheese Varieties: While cheddar cheese is a classic choice, feel free to experiment with mozzarella, Monterey Jack, or even a spicy pepper jack for a kick.
  • Vegetable Additions: Add more veggies like bell peppers, carrots, or spinach. These not only enhance the nutrition but also add vibrant colors to your dish.
  • Healthy Substitutes: For a lighter version, consider using Greek yogurt instead of sour cream. It adds creaminess while reducing calories.

These alternative ingredients can help you create a casserole that’s uniquely yours. Don’t hesitate to mix and match based on what you have on hand or what you enjoy!

Different Cooking Methods

Cheesy Chicken, Broccoli, and Potato Casserole, there are other cooking methods you can try. Here are a few options:

  • Slow Cooker: For a hands-off approach, use a slow cooker. Combine all the ingredients in the slow cooker and cook on low for 4-6 hours. This method allows the flavors to meld beautifully.
  • Instant Pot: If you’re short on time, the Instant Pot is a great option. Use the sauté function to cook the chicken and veggies, then add the remaining ingredients and cook on high pressure for about 10 minutes.
  • Stovetop Skillet: For a quick meal, you can make a stovetop version. Sauté the chicken and veggies in a large skillet, then stir in the cheese and sour cream until melted and creamy.

These different cooking methods can save you time and offer new textures and flavors. Feel free to experiment and find the method that works best for you!

Cooking Note for Cheesy Chicken, Broccoli, and Potato Casserole

Cheesy Chicken, Broccoli, and Potato Casserole, there are a few important cooking notes to keep in mind. These tips will help ensure that your casserole turns out perfectly every time, making it a delightful dish for any occasion.

First, make sure to use cooked chicken. You can use leftover chicken, rotisserie chicken, or even canned chicken. This not only saves time but also adds flavor to your casserole. If you opt for raw chicken, be sure to cook it thoroughly before mixing it with the other ingredients.

Next, consider the texture of your potatoes. Dicing them into uniform pieces is key. This ensures that they cook evenly and blend well with the other ingredients. If you prefer a creamier texture, you can mash the potatoes slightly before adding them to the mixture.

For the broccoli, if you’re using frozen florets, there’s no need to thaw them. Just add them directly to the mixture. This helps maintain their vibrant color and crispness. If using fresh broccoli, blanching it briefly will keep it bright and tender without becoming mushy.

Another important note is to keep an eye on the baking time. Ovens can vary, so check your casserole a few minutes before the suggested time. You want the top to be golden brown and the edges bubbling. If the top browns too quickly, you can cover it loosely with aluminum foil to prevent burning.

Lastly, let the casserole cool for a few minutes before serving. This allows the flavors to meld and makes it easier to cut into portions. Enjoy your delicious creation, and don’t forget to share it with family and friends!

Serving Suggestions for Cheesy Chicken, Broccoli, and Potato Casserole

Cheesy Chicken, Broccoli, and Potato Casserole is baked to perfection, it’s time to serve it up! This dish is not only delicious but also versatile, making it a great centerpiece for any meal. Here are some serving suggestions to enhance your dining experience:

  • Garnish with Fresh Herbs: A sprinkle of fresh parsley or chives on top adds a pop of color and freshness. It also enhances the flavor, making each bite even more delightful.
  • Pair with a Side Salad: A crisp green salad complements the richness of the casserole. Consider a simple mixed greens salad with a light vinaigrette to balance the flavors.
  • Serve with Crusty Bread: A slice of warm, crusty bread or garlic bread is perfect for soaking up the creamy sauce. It adds a satisfying crunch to your meal.
  • Offer a Variety of Condiments: Consider serving your casserole with hot sauce, salsa, or even a dollop of Greek yogurt. These toppings can add an exciting twist to each serving.
  • Make it a Buffet: If you’re hosting a gathering, set up a buffet-style meal. Place the casserole alongside other dishes like roasted vegetables, rice, or quinoa for a well-rounded feast.

Cheesy Chicken, Broccoli, and Potato Casserole experience. Whether it’s a family dinner or a special occasion, these ideas will help you create a memorable meal that everyone will enjoy!

Tips for Perfecting Cheesy Chicken, Broccoli, and Potato Casserole

Cheesy Chicken, Broccoli, and Potato Casserole truly shine, consider these helpful tips. They will guide you in achieving the best flavor and texture, ensuring that your dish is a hit every time you serve it.

  • Use Quality Ingredients: Fresh ingredients can make a big difference. Opt for high-quality chicken, fresh broccoli, and good cheese. This will enhance the overall taste of your casserole.
  • Don’t Overcook the Vegetables: If you’re using fresh broccoli, be careful not to overcook it. Blanching for just a couple of minutes keeps it vibrant and crunchy. This adds a nice texture to your casserole.
  • Season Generously: Don’t be shy with the seasonings! The garlic powder, onion powder, salt, and pepper are essential for flavor. Taste the mixture before baking and adjust the seasonings as needed.
  • Experiment with Cheese: While cheddar is a classic choice, mixing different cheeses can elevate your casserole. Try adding mozzarella for stretchiness or Parmesan for a nutty flavor.
  • Let It Rest: After baking, allow the casserole to rest for about 10 minutes before serving. This helps it set and makes it easier to cut into neat portions.
  • Make It Ahead: If you’re short on time, prepare the casserole a day in advance. Assemble it, cover it, and store it in the fridge. Just pop it in the oven when you’re ready to bake!
  • Customize to Your Taste: Feel free to add your favorite spices or herbs. A pinch of paprika or Italian seasoning can add a delightful twist to the flavor profile.

Cheesy Chicken, Broccoli, and Potato Casserole that’s not only delicious but also memorable. Enjoy the process and happy cooking!

Breakdown of Time for Cheesy Chicken, Broccoli, and Potato Casserole

Cheesy Chicken, Broccoli, and Potato Casserole can help you plan your cooking efficiently. Here’s a detailed breakdown of the time required for preparation and cooking.

Prep Time

The prep time for this casserole is approximately 20-25 minutes. This includes gathering your ingredients, peeling and dicing the potatoes, and preparing the broccoli. If you have cooked chicken ready, it will save you some time. Remember, having everything prepped and organized will make the cooking process smoother!

Cooking Time

Once you’ve prepped your ingredients, the cooking time is about 30-35 minutes. This includes boiling the potatoes and baking the casserole in the oven. The baking time is crucial for achieving that golden, bubbly top that everyone loves. Keep an eye on it during the last few minutes to ensure it doesn’t overcook.

Total Time

In total, you can expect to spend around 50-60 minutes from start to finish. This includes both prep and cooking time. It’s a relatively quick meal for a casserole, making it perfect for busy weeknights or family gatherings. With this time breakdown, you can easily fit this delicious dish into your schedule!

Nutritional Information for Cheesy Chicken, Broccoli, and Potato Casserole

Cheesy Chicken, Broccoli, and Potato Casserole not only satisfies your taste buds but also provides valuable nutrients. Here’s a closer look at the nutritional information per serving, so you can enjoy this dish with confidence.

Calories

Cheesy Chicken, Broccoli, and Potato Casserole contains approximately 350 calories. This makes it a hearty yet manageable option for dinner. The combination of chicken, potatoes, and cheese contributes to the calorie count, providing energy to fuel your day. If you’re watching your calorie intake, consider pairing it with a light salad to balance your meal.

Protein

One of the standout features of this casserole is its protein content. Each serving offers about 25 grams of protein. The shredded chicken is the primary source of protein, which is essential for muscle repair and overall health. Including protein in your meals can help keep you feeling full and satisfied, making this casserole a great choice for a filling dinner.

Sodium

Cheesy Chicken, Broccoli, and Potato Casserole while keeping your sodium intake in check.

Overall, this casserole is a balanced meal that provides a good mix of calories, protein, and essential nutrients. By being mindful of the ingredients and portion sizes, you can enjoy this comforting dish as part of a healthy diet!

FAQs about Cheesy Chicken, Broccoli, and Potato Casserole

Can I make Cheesy Chicken, Broccoli, and Potato Casserole ahead of time?

Cheesy Chicken, Broccoli, and Potato Casserole ahead of time. Simply assemble the casserole, cover it tightly with plastic wrap or aluminum foil, and store it in the refrigerator. It’s best to bake it within 24 hours for optimal freshness. When you’re ready to bake, just pop it in the oven. You may need to add a few extra minutes to the baking time if it’s coming straight from the fridge.

What can I substitute for chicken in Cheesy Chicken, Broccoli, and Potato Casserole?

If you’re looking for alternatives to chicken, there are plenty of options! You can use cooked turkey, sausage, or even shredded beef. For a vegetarian version, consider using tofu or chickpeas. These substitutes will still provide protein and flavor, making your casserole delicious and satisfying.

How do I store leftovers of Cheesy Chicken, Broccoli, and Potato Casserole?

Cheesy Chicken, Broccoli, and Potato Casserole to cool completely before transferring it to an airtight container. You can keep it in the refrigerator for up to 3-4 days. When you’re ready to enjoy it again, simply reheat it in the oven or microwave until warmed through. If you’re reheating in the oven, cover it with foil to prevent the top from burning.

Can I freeze Cheesy Chicken, Broccoli, and Potato Casserole?

Cheesy Chicken, Broccoli, and Potato Casserole! To do this, prepare the casserole as directed but do not bake it. Instead, cover it tightly with plastic wrap and then with aluminum foil to prevent freezer burn. It can be stored in the freezer for up to 2-3 months. When you’re ready to bake it, thaw it in the refrigerator overnight and then bake as usual. This makes for a convenient meal option on busy days!

Conclusion on Cheesy Chicken, Broccoli, and Potato Casserole

Cheesy Chicken, Broccoli, and Potato Casserole is more than just a meal; it’s a comforting dish that brings families together. With its creamy texture, rich flavors, and nutritious ingredients, this casserole is sure to become a favorite in your household. Whether you’re enjoying it on a busy weeknight or serving it at a family gathering, it’s a dish that satisfies both the stomach and the soul.

Moreover, the versatility of this recipe allows you to customize it to your liking. You can easily swap ingredients, try different cooking methods, or add your favorite spices to make it uniquely yours. This adaptability makes it a fantastic option for any occasion, ensuring that everyone at the table can enjoy a delicious meal.

Cheesy Chicken, Broccoli, and Potato Casserole, remember to have fun in the kitchen! Cooking is not just about following a recipe; it’s about creating memories and sharing love through food. So gather your loved ones, whip up this delightful casserole, and savor the moments spent together.

Cheesy Chicken, Broccoli, and Potato Casserole is bound to be a hit. Happy cooking!

Chicken Pot Pie Casserole Recipe is a must-try dish!

Introduction to Chicken Pot Pie Casserole

Chicken Pot Pie Casserole is a delightful dish that brings comfort and warmth to any table. This hearty meal combines tender chicken, colorful vegetables, and a creamy sauce, all topped with a flaky crescent roll crust. It’s a perfect choice for busy weeknights or cozy family gatherings. The beauty of this casserole lies in its simplicity and versatility, making it a favorite among both novice and experienced cooks.

Imagine coming home after a long day, the aroma of a delicious Chicken Pot Pie Casserole wafting through the air. It’s a dish that not only satisfies hunger but also warms the heart. With just a few ingredients, you can create a meal that feels like a hug in a dish. Plus, it’s an excellent way to use up leftover chicken or vegetables, reducing food waste while still serving a tasty dinner.

This casserole is not just about flavor; it’s also about convenience. You can prepare it in advance, making it a great option for meal prep. Whether you’re feeding a family or hosting friends, Chicken Pot Pie Casserole is sure to impress. So, let’s dive into the ingredients and preparation steps to create this comforting classic!

Ingredients for Chicken Pot Pie Casserole

To create a delicious Chicken Pot Pie Casserole, you’ll need a variety of ingredients that come together to form a hearty and satisfying meal. Here’s a list of what you’ll need:

  • 2 cups cooked chicken: You can use shredded or diced chicken. Leftover rotisserie chicken works great!
  • 1 cup frozen mixed vegetables: A blend of peas, carrots, corn, and green beans adds color and nutrition.
  • 1 can (10.5 ounces) cream of chicken soup: This provides a creamy base for the casserole.
  • 1 cup chicken broth: It enhances the flavor and keeps the dish moist.
  • 1 teaspoon garlic powder: For a hint of savory goodness.
  • 1 teaspoon onion powder: Adds depth to the flavor profile.
  • 1 teaspoon dried thyme: This herb brings a warm, earthy taste.
  • 1/2 teaspoon black pepper: For a touch of spice.
  • 1/2 teaspoon salt: To enhance all the flavors.
  • 1 cup milk: This helps to create a creamy texture.
  • 1 package (8 ounces) refrigerated crescent roll dough: This forms the flaky crust on top.
  • 1 cup shredded cheddar cheese: For a cheesy finish that melts beautifully.

These ingredients come together to create a comforting dish that is sure to please everyone at the table. Feel free to customize the vegetables or seasonings based on your preferences. Now that you have your ingredients ready, let’s move on to the step-by-step preparation of this delightful Chicken Pot Pie Casserole!

Step-by-Step Preparation of Chicken Pot Pie Casserole

Now that you have gathered all your ingredients, it’s time to dive into the step-by-step preparation of your Chicken Pot Pie Casserole. This process is straightforward and fun, making it a great activity for the whole family. Let’s get started!

Step 1: Preheat the Oven

The first step is to preheat your oven to 375°F (190°C). This ensures that your casserole cooks evenly and the crust becomes perfectly golden brown. While the oven heats up, you can move on to the next steps.

Step 2: Prepare the Chicken and Vegetables

In a large mixing bowl, combine your cooked chicken and frozen mixed vegetables. If you’re using leftover chicken, make sure it’s shredded or diced into bite-sized pieces. The frozen vegetables will add color and nutrition to your dish. Stir them together gently to mix well.

Step 3: Make the Sauce for Chicken Pot Pie Casserole

Next, it’s time to create the creamy sauce. In the same bowl, add the cream of chicken soup, chicken broth, garlic powder, onion powder, dried thyme, black pepper, and salt. Mix everything together until it’s smooth and well combined. This sauce will bring all the flavors together in your casserole.

Step 4: Combine Ingredients

Once your sauce is ready, pour it over the chicken and vegetable mixture. Stir everything together until all the ingredients are coated in the creamy sauce. This step is crucial as it ensures that every bite of your Chicken Pot Pie Casserole is packed with flavor.

Step 5: Assemble the Casserole

Now, take a greased 9×13-inch baking dish and pour the chicken mixture into it. Spread it evenly across the bottom. Then, unroll the crescent roll dough and lay it over the top of the chicken mixture. Pinch the seams together to create a crust. This will give your casserole a lovely flaky topping.

Step 6: Bake the Chicken Pot Pie Casserole

Finally, sprinkle the shredded cheddar cheese evenly over the crescent roll dough. Place the baking dish in the preheated oven and bake for 25-30 minutes. Keep an eye on it! You want the crust to be golden brown and the filling to be bubbly. Once done, allow it to cool for 5-10 minutes before serving. This waiting time helps the flavors settle and makes it easier to serve.

And there you have it! A delicious Chicken Pot Pie Casserole ready to be enjoyed. This step-by-step guide makes it easy to create a comforting meal that everyone will love.

Variation of Chicken Pot Pie Casserole

While the classic Chicken Pot Pie Casserole is a beloved dish, there are many ways to switch things up! Whether you want to cater to dietary preferences or simply try something new, variations can add excitement to your meal. Let’s explore some alternative ingredients and different cooking methods that can enhance your Chicken Pot Pie Casserole experience.

Alternative Ingredients

One of the best things about Chicken Pot Pie Casserole is its versatility. You can easily swap out ingredients to suit your taste or dietary needs. Here are some ideas:

  • Protein Options: Instead of chicken, try turkey, beef, or even tofu for a vegetarian option. Each protein brings its unique flavor to the dish.
  • Vegetable Choices: Feel free to mix and match vegetables! Broccoli, bell peppers, or mushrooms can add different textures and tastes. Fresh vegetables can also be used for a crunchier bite.
  • Soup Base: For a lighter version, consider using a homemade white sauce or a low-fat cream of chicken soup. This can reduce calories while still keeping the creamy texture.
  • Cheese Varieties: While cheddar is a classic choice, you can experiment with mozzarella, pepper jack, or even a blend of cheeses for a unique flavor profile.

These alternative ingredients can help you create a Chicken Pot Pie Casserole that fits your preferences while still being delicious!

Different Cooking Methods

In addition to ingredient variations, you can also explore different cooking methods to prepare your Chicken Pot Pie Casserole. Here are a few options:

  • Slow Cooker: For a hands-off approach, you can make this casserole in a slow cooker. Combine all the ingredients in the slow cooker and cook on low for 4-6 hours. Add the crescent roll dough during the last 30 minutes of cooking for a fresh crust.
  • Instant Pot: If you’re short on time, the Instant Pot is a great option. Sauté the chicken and vegetables, then add the sauce ingredients. Cook on high pressure for about 10 minutes. Top with crescent rolls and use the broil function to crisp the crust.
  • Skillet: For a quick meal, you can make a skillet version. Cook the chicken and vegetables in a large skillet, add the sauce, and top with crescent rolls. Cover and cook on the stovetop until the rolls are golden and the filling is hot.

These different cooking methods can make preparing your Chicken Pot Pie Casserole even more convenient and fun. No matter how you choose to make it, the comforting flavors will always shine through!

Cooking Note for Chicken Pot Pie Casserole

When preparing your Chicken Pot Pie Casserole, there are a few important cooking notes to keep in mind. These tips will help ensure that your dish turns out perfectly every time, making it a delightful experience for you and your guests.

First, always use cooked chicken. This can be leftover chicken, rotisserie chicken, or even poached chicken. The key is that it should be fully cooked before adding it to the casserole. This not only saves time but also ensures that the chicken remains tender and flavorful.

Next, consider the size of your vegetables. If you’re using fresh vegetables, chop them into small, uniform pieces. This helps them cook evenly and blend well with the other ingredients. If you prefer a heartier texture, you can leave them slightly larger, but be mindful that they may take longer to cook.

Another important note is to keep an eye on the baking time. Ovens can vary, so check your casserole a few minutes before the recommended time. You want the crescent roll crust to be golden brown and the filling to be bubbling. If the crust browns too quickly, you can cover it loosely with aluminum foil to prevent burning.

Lastly, let your casserole cool for a few minutes before serving. This allows the filling to set, making it easier to cut and serve. Plus, it helps prevent anyone from burning their mouth on the hot filling!

By following these cooking notes, you’ll create a Chicken Pot Pie Casserole that is not only delicious but also visually appealing. Enjoy the process and the wonderful aromas that fill your kitchen as you prepare this comforting dish!

Serving Suggestions for Chicken Pot Pie Casserole

Once your Chicken Pot Pie Casserole is baked to perfection, it’s time to serve it up! This dish is not only delicious but also visually appealing, making it a great centerpiece for any meal. Here are some serving suggestions to enhance your dining experience:

  • Garnish with Fresh Herbs: A sprinkle of fresh parsley or thyme on top of the casserole adds a pop of color and a burst of flavor. It makes the dish look even more inviting!
  • Pair with a Side Salad: A light green salad with a tangy vinaigrette complements the richness of the casserole. Consider using mixed greens, cherry tomatoes, and cucumbers for a refreshing contrast.
  • Serve with Crusty Bread: A slice of warm, crusty bread or dinner rolls is perfect for soaking up the creamy filling. It adds a comforting touch to your meal.
  • Offer a Variety of Condiments: Some people enjoy adding a dash of hot sauce or a dollop of sour cream to their serving. Providing these options allows guests to customize their plates.
  • Include Seasonal Vegetables: Roasted or steamed seasonal vegetables can be a great side dish. They add color and nutrition, making your meal even more balanced.

These serving suggestions can elevate your Chicken Pot Pie Casserole experience, making it a delightful meal for family and friends. Whether it’s a cozy weeknight dinner or a special occasion, this dish is sure to impress!

Tips for Perfect Chicken Pot Pie Casserole

Creating the perfect Chicken Pot Pie Casserole is all about attention to detail and a few helpful tips. With these suggestions, you can ensure that your casserole turns out delicious every time. Let’s explore some key tips to elevate your cooking game!

  • Use Quality Ingredients: Start with fresh, high-quality ingredients. Fresh vegetables and good-quality chicken can make a big difference in flavor. If possible, opt for organic or locally sourced products.
  • Don’t Overcook the Chicken: If you’re cooking chicken specifically for this dish, avoid overcooking it. Overcooked chicken can become dry. Aim for juicy, tender pieces that will stay moist in the casserole.
  • Season Generously: Don’t be shy with your seasonings! The right amount of herbs and spices can enhance the overall flavor. Taste your mixture before baking and adjust the seasoning as needed.
  • Let the Filling Cool Slightly: After baking, allow the casserole to cool for about 5-10 minutes before serving. This helps the filling set, making it easier to serve and preventing burns from hot filling.
  • Experiment with Toppings: While cheddar cheese is a classic choice, feel free to experiment with different cheeses or even add a sprinkle of breadcrumbs on top for extra crunch. You can also brush the crescent roll dough with melted butter for a richer flavor.
  • Make it Ahead: If you’re short on time, consider preparing the casserole ahead of time. You can assemble it and store it in the fridge for a day or two before baking. Just add a few extra minutes to the baking time if it’s cold from the fridge.
  • Use a Deep Dish: Ensure you use a deep enough baking dish to hold all the filling. This prevents overflow and allows for even cooking. A 9×13-inch dish is ideal for this recipe.
  • Check for Doneness: Keep an eye on the casserole as it bakes. If the crust is browning too quickly, cover it loosely with aluminum foil to prevent burning while the filling cooks through.

By following these tips, you’ll be well on your way to creating a Chicken Pot Pie Casserole that is not only comforting but also bursting with flavor. Enjoy the process and the delicious results!

Breakdown of Time for Chicken Pot Pie Casserole

Understanding the time required for each step in preparing your Chicken Pot Pie Casserole can help you plan your cooking efficiently. Here’s a breakdown of the time you’ll need for preparation, cooking, and the total time involved in creating this delicious dish.

Prep Time

The prep time for Chicken Pot Pie Casserole is approximately 15-20 minutes. This includes gathering your ingredients, chopping any fresh vegetables, and mixing everything together. If you’re using leftover chicken, this can save you even more time. Having everything ready before you start cooking makes the process smoother and more enjoyable.

Cooking Time

Once your casserole is assembled, the cooking time is about 25-30 minutes. During this time, the oven will work its magic, baking the crescent roll crust to a golden brown and heating the filling until it’s bubbly. Keep an eye on it to ensure the crust doesn’t brown too quickly. If it does, you can cover it with aluminum foil to prevent burning.

Total Time

In total, you can expect to spend around 40-50 minutes from start to finish. This includes both prep and cooking time. It’s a relatively quick meal to prepare, especially considering how comforting and satisfying it is. Whether you’re making it for a weeknight dinner or a special occasion, the time invested is well worth it!

Nutritional Information for Chicken Pot Pie Casserole

Understanding the nutritional content of your Chicken Pot Pie Casserole can help you make informed choices about your meals. This comforting dish is not only delicious but also provides a good balance of nutrients. Here’s a breakdown of the key nutritional information per serving:

Calories

Each serving of Chicken Pot Pie Casserole contains approximately 350 calories. This makes it a satisfying meal that can fit into a balanced diet. The calories come from a combination of protein, carbohydrates, and fats, providing energy for your day. If you’re looking to reduce calorie intake, consider using lower-calorie alternatives for some ingredients, such as low-fat cheese or a lighter soup base.

Protein

With about 25 grams of protein per serving, Chicken Pot Pie Casserole is a great source of this essential nutrient. Protein is vital for building and repairing tissues, making it an important part of any meal. The chicken and cheese in the casserole contribute significantly to the protein content, helping you feel full and satisfied.

Sodium

Each serving contains around 800 milligrams of sodium. While sodium is necessary for bodily functions, it’s important to monitor your intake. If you’re watching your sodium levels, consider using low-sodium chicken broth and a reduced-sodium cream of chicken soup. This can help lower the overall sodium content while still maintaining the delicious flavor of your casserole.

By being aware of the nutritional information, you can enjoy your Chicken Pot Pie Casserole while making choices that align with your dietary needs. This dish is not only comforting but also provides a good mix of nutrients to keep you energized and satisfied!

FAQs about Chicken Pot Pie Casserole

Can I use frozen vegetables in Chicken Pot Pie Casserole?

Absolutely! Using frozen vegetables is a great option for your Chicken Pot Pie Casserole. They are convenient, save time, and are often just as nutritious as fresh vegetables. Frozen mixed vegetables, like peas, carrots, corn, and green beans, work perfectly in this recipe. Just add them directly to the chicken mixture without thawing. They will cook beautifully in the oven, adding color and flavor to your casserole.

How do I store leftovers of Chicken Pot Pie Casserole?

Storing leftovers is easy! Allow your Chicken Pot Pie Casserole to cool completely before transferring it to an airtight container. You can keep it in the refrigerator for up to 3-4 days. If you want to store it for a longer period, consider freezing it. Wrap the casserole tightly in plastic wrap and then in aluminum foil. It can be frozen for up to 2-3 months. When you’re ready to enjoy it again, simply thaw it in the refrigerator overnight and reheat in the oven until warmed through.

Can I make Chicken Pot Pie Casserole ahead of time?

Yes, you can definitely make Chicken Pot Pie Casserole ahead of time! This makes it a fantastic option for meal prep. You can assemble the casserole a day in advance and store it in the refrigerator before baking. Just remember to cover it tightly with plastic wrap or aluminum foil. When you’re ready to bake, remove the cover and add a few extra minutes to the cooking time since it will be cold from the fridge. This way, you can enjoy a delicious homemade meal with minimal effort!

What can I serve with Chicken Pot Pie Casserole?

Chicken Pot Pie Casserole is a hearty dish that pairs well with various sides. Here are some great options:

  • Green Salad: A fresh green salad with a light vinaigrette adds a refreshing contrast to the rich casserole.
  • Steamed Vegetables: Lightly steamed broccoli, green beans, or asparagus can complement the flavors of the casserole.
  • Crusty Bread: Serve with warm, crusty bread or dinner rolls for a comforting touch.
  • Mashed Potatoes: For an extra indulgent meal, creamy mashed potatoes can be a delicious side.

These sides can enhance your dining experience, making your Chicken Pot Pie Casserole meal even more enjoyable!

Conclusion on Chicken Pot Pie Casserole

In conclusion, Chicken Pot Pie Casserole is a delightful dish that combines comfort, flavor, and convenience. This recipe is perfect for busy weeknights or special family gatherings, offering a warm and satisfying meal that everyone will love. With its creamy filling, tender chicken, and flaky crescent roll crust, it truly embodies the essence of home-cooked goodness.

Not only is this casserole easy to prepare, but it also allows for endless customization. Whether you choose to swap out ingredients or try different cooking methods, the possibilities are vast. You can make it your own by adding your favorite vegetables or experimenting with various proteins. This versatility makes Chicken Pot Pie Casserole a staple in many kitchens.

Moreover, the nutritional benefits of this dish cannot be overlooked. With a good balance of protein, carbohydrates, and fats, it provides the energy needed for a busy day. By being mindful of ingredient choices, you can create a healthier version that still delivers on taste.

As you gather around the table to enjoy this comforting meal, remember that it’s not just about the food. It’s about the memories created and the love shared with family and friends. So, roll up your sleeves, gather your ingredients, and get ready to whip up a Chicken Pot Pie Casserole that will warm hearts and fill bellies. Happy cooking!

Cowboy Casserole Recipe is a must-try for dinner!

Introduction to Cowboy Casserole Recipe

What is Cowboy Casserole?

Cowboy casserole is a hearty and comforting dish that brings together the best of flavors in one pan. This delightful recipe combines ground beef, beans, corn, and creamy mushroom soup, all topped with crispy tater tots and melted cheese. It’s a one-dish meal that’s perfect for busy weeknights or family gatherings. The combination of ingredients creates a savory and satisfying experience that everyone will love. Plus, it’s easy to prepare, making it a favorite for both novice and experienced cooks alike.

Why You Should Try This Cowboy Casserole Recipe

There are many reasons to try this cowboy casserole recipe. First, it’s incredibly versatile. You can easily customize it by adding your favorite vegetables or swapping out the meat for a lighter option. Second, it’s a crowd-pleaser! Whether you’re serving a family dinner or hosting friends, this dish is sure to impress. The combination of textures—from the crispy tater tots to the creamy filling—makes every bite enjoyable.

Moreover, this recipe is budget-friendly. With simple ingredients that are often found in your pantry, you can create a delicious meal without breaking the bank. Lastly, it’s a great way to sneak in some extra nutrition. By adding beans and corn, you’re boosting the fiber and protein content, making it a more balanced meal. So, gather your ingredients and get ready to enjoy a delightful cowboy casserole that will warm your heart and satisfy your taste buds!

Ingredients for Cowboy Casserole Recipe

To create a delicious cowboy casserole, you’ll need a few simple ingredients. Here’s what you’ll need to gather:

  • 2 pounds ground beef
  • 1 medium onion, diced
  • 1 can (15 ounces) black beans, drained and rinsed
  • 1 can (15 ounces) corn, drained
  • 1 can (10.5 ounces) cream of mushroom soup
  • 1 cup shredded cheddar cheese
  • 1 teaspoon garlic powder
  • 1 teaspoon chili powder
  • Salt and pepper to taste
  • 1 package (2.5 pounds) frozen tater tots
  • 1/2 cup milk

These ingredients come together to create a hearty meal that’s perfect for any occasion. The ground beef provides a rich flavor, while the black beans and corn add texture and nutrition. The cream of mushroom soup binds everything together, making each bite creamy and satisfying. Don’t forget the tater tots on top! They add a delightful crunch that contrasts beautifully with the soft filling.

Feel free to get creative! You can add diced bell peppers or jalapeños for an extra kick. If you prefer a lighter option, consider swapping the ground beef for ground turkey or chicken. The possibilities are endless, and that’s what makes this cowboy casserole recipe so special!

Step-by-Step Preparation of Cowboy Casserole Recipe

Step 1: Prepping Your Ingredients

Before you start cooking, it’s important to prep your ingredients. Begin by gathering all the items listed in the ingredients section. This will make the cooking process smoother and more enjoyable. Next, dice the onion into small pieces. This will help it cook evenly and blend well with the other ingredients. If you’re adding any extra vegetables, like bell peppers or jalapeños, chop those as well. Having everything ready to go will save you time and keep your kitchen organized!

Step 2: Cooking the Meat

Now it’s time to cook the meat. Heat a large skillet over medium heat. Once hot, add the ground beef and diced onion. Cook them together, stirring occasionally. You want the beef to brown nicely and the onion to become translucent. This usually takes about 7-10 minutes. Make sure to break up the meat with a spatula as it cooks. Once the meat is fully cooked, drain any excess fat from the skillet. This step is crucial to keep your casserole from becoming greasy.

Step 3: Combining Ingredients

With the meat cooked, it’s time to combine the ingredients. In the same skillet, add the drained black beans, corn, and cream of mushroom soup. Then, sprinkle in the garlic powder, chili powder, salt, and pepper. Pour in the milk as well. Stir everything together until it’s well mixed. The mixture should be creamy and colorful, with all the ingredients evenly distributed. This is where the magic happens, as the flavors meld together beautifully!

Step 4: Assembling the Casserole

Now that your filling is ready, it’s time to assemble the casserole. Take a 9×13-inch baking dish and spread the beef mixture evenly across the bottom. Make sure to cover the entire surface. This ensures that every bite is packed with flavor. Next, take the frozen tater tots and arrange them in a single layer on top of the beef mixture. It’s okay if they overlap a little; they will crisp up nicely in the oven. Finally, sprinkle the shredded cheddar cheese evenly over the tater tots. This will create a delicious, cheesy crust as it bakes!

Step 5: Baking the Cowboy Casserole

With everything assembled, it’s time to bake your cowboy casserole. Preheat your oven to 350°F if you haven’t done so already. Place the baking dish in the oven and let it bake for 30-35 minutes. You’ll know it’s ready when the tater tots are golden brown and crispy. The cheese should be melted and bubbly, creating a mouthwatering aroma that fills your kitchen. Once done, remove the casserole from the oven and let it cool for about 5 minutes before serving. This will help the layers set a bit, making it easier to serve!

Variation of Cowboy Casserole Recipe

Vegetarian Options

If you’re looking to make a vegetarian version of the cowboy casserole, you can easily swap out the ground beef for plant-based alternatives. Consider using lentils, quinoa, or a meat substitute like crumbled tofu or tempeh. These options provide a hearty texture while keeping the dish satisfying. You can also add more vegetables to enhance the flavor and nutrition. Diced bell peppers, zucchini, or mushrooms work wonderfully in this recipe. Just sauté them with the onions to bring out their natural sweetness.

For the creamy base, you can replace the cream of mushroom soup with a homemade version using vegetable broth and a bit of flour or cornstarch to thicken it. This way, you control the ingredients and keep it healthy. Don’t forget to top your vegetarian casserole with cheese or a dairy-free alternative for that delicious cheesy crust!

Gluten-Free Alternatives

For those who need a gluten-free option, making cowboy casserole is still a breeze! Start by ensuring that all your ingredients are gluten-free. Most canned goods, like black beans and corn, are naturally gluten-free, but always check the labels. Instead of using regular cream of mushroom soup, you can make a gluten-free version at home or look for store-bought options that are certified gluten-free.

When it comes to the tater tots, many brands offer gluten-free varieties. Just make sure to read the packaging to confirm. If you want to get creative, you can even make your own tater tots using grated potatoes mixed with seasonings. This way, you can enjoy a delicious cowboy casserole without worrying about gluten!

Cooking Note for Cowboy Casserole Recipe

When preparing your cowboy casserole, there are a few cooking notes to keep in mind to ensure the best results. First, always use a large skillet for cooking the meat and vegetables. This allows for even cooking and prevents overcrowding, which can lead to steaming instead of browning.

Additionally, feel free to adjust the seasonings to suit your taste. If you love a bit of heat, consider adding more chili powder or even some diced jalapeños. On the other hand, if you prefer a milder flavor, you can reduce the amount of spices. Remember, cooking is all about personal preference!

Another important tip is to let the casserole cool for a few minutes after baking. This helps the layers set, making it easier to serve. If you cut into it too soon, the filling may spill out, and you won’t get those beautiful layers. Patience is key!

Lastly, don’t hesitate to experiment with different toppings. While cheddar cheese is a classic choice, you can try pepper jack for a spicy twist or even a blend of cheeses for added flavor. The toppings can really elevate your cowboy casserole, making it even more delicious!

Serving Suggestions for Cowboy Casserole Recipe

When it comes to serving your cowboy casserole, there are plenty of delicious options to enhance the meal. This hearty dish is satisfying on its own, but pairing it with the right sides can elevate your dining experience. Here are some serving suggestions to consider:

  • Fresh Salad: A crisp green salad is a perfect complement to the rich flavors of the casserole. Consider a simple garden salad with mixed greens, cherry tomatoes, and a light vinaigrette. The freshness of the salad balances the hearty casserole.
  • Garlic Bread: Serve warm garlic bread on the side for a delightful crunch. The buttery, garlicky flavor pairs wonderfully with the creamy filling of the casserole.
  • Sour Cream or Greek Yogurt: A dollop of sour cream or Greek yogurt on top of each serving adds a creamy texture and tangy flavor. It also helps to cool down any spiciness from the chili powder.
  • Pickled Jalapeños: For those who enjoy a kick, serve pickled jalapeños on the side. They add a zesty flavor that complements the casserole beautifully.
  • Avocado Slices: Fresh avocado slices can add a creamy element to your plate. They provide healthy fats and a mild flavor that balances the dish.
  • Hot Sauce: For spice lovers, offering a variety of hot sauces can allow guests to customize their servings. A few dashes can take the flavor to the next level!

These serving suggestions not only enhance the flavor of your cowboy casserole but also create a well-rounded meal. Feel free to mix and match based on your preferences and the occasion. Whether it’s a family dinner or a gathering with friends, these sides will surely impress your guests!

Tips for Perfecting Your Cowboy Casserole Recipe

Perfecting your cowboy casserole recipe can take your dish from good to great! Here are some helpful tips to ensure your casserole turns out delicious every time:

  • Use Quality Ingredients: Start with fresh, high-quality ingredients. Fresh ground beef, ripe vegetables, and good cheese can make a noticeable difference in flavor.
  • Don’t Skip the Seasoning: Seasoning is key! Make sure to taste your mixture before baking. Adjust the salt, pepper, and spices to your liking. A little extra chili powder can add a nice kick!
  • Layering Matters: When assembling, ensure even layers. This helps with cooking and ensures every bite has a bit of everything. Spread the beef mixture evenly and arrange the tater tots in a single layer.
  • Experiment with Toppings: While cheddar cheese is a classic choice, don’t hesitate to try different cheeses. Pepper jack, mozzarella, or a blend can add unique flavors. You can also sprinkle some crushed tortilla chips on top for added crunch!
  • Check for Doneness: Keep an eye on your casserole while it bakes. Ovens can vary, so check for that golden brown color on the tater tots. If they’re not crispy enough, you can broil the casserole for a few minutes at the end.
  • Let It Rest: After baking, let your casserole sit for about 5-10 minutes before serving. This allows the layers to set, making it easier to cut and serve without falling apart.
  • Store Properly: If you have leftovers, store them in an airtight container in the fridge. This will keep your casserole fresh for up to 3 days. Reheat in the oven for the best texture.

By following these tips, you’ll be well on your way to creating a cowboy casserole that’s not only tasty but also visually appealing. Enjoy the process and have fun experimenting with flavors!

Breakdown of Time for Cowboy Casserole Recipe

Prep Time

The prep time for your cowboy casserole is quite manageable. You’ll need about 15-20 minutes to gather and prepare all your ingredients. This includes dicing the onion, draining the beans and corn, and measuring out your spices. Having everything ready will make the cooking process smoother and more enjoyable. So, take your time to get organized before you start cooking!

Cooking Time

Once you’ve prepped your ingredients, the cooking time is approximately 30-35 minutes. This includes browning the ground beef and onions, mixing in the other ingredients, and baking the casserole in the oven. The key is to ensure that the tater tots are golden brown and crispy before serving. Keep an eye on it during the last few minutes of baking to achieve that perfect texture!

Total Time

In total, you can expect to spend about 50-55 minutes from start to finish. This includes both prep and cooking time. With such a quick turnaround, you can have a delicious cowboy casserole ready to serve in less than an hour. It’s perfect for busy weeknights or when you want to impress guests without spending all day in the kitchen!

Nutritional Information for Cowboy Casserole Recipe

Calories

When it comes to enjoying a hearty meal like cowboy casserole, understanding the calorie content is essential. Each serving of this delicious dish contains approximately 450 calories. This makes it a filling option for dinner, especially when paired with a fresh salad or some garlic bread. While it’s important to enjoy your food, being mindful of calorie intake can help you maintain a balanced diet.

Protein

Protein is a vital nutrient that helps build and repair tissues in our bodies. In each serving of cowboy casserole, you’ll find about 25 grams of protein. This comes primarily from the ground beef and black beans, making it a great choice for those looking to increase their protein intake. Including protein-rich meals in your diet can help keep you feeling full and satisfied for longer periods.

Sodium

Sodium is another important factor to consider, especially for those watching their salt intake. Each serving of cowboy casserole contains around 800 milligrams of sodium. This amount can vary based on the specific brands of ingredients you use, particularly the cream of mushroom soup and cheese. If you’re looking to reduce sodium, consider using low-sodium versions of these products or adjusting the added salt to your taste. Balancing flavors while keeping sodium in check is key to a healthy meal!

FAQs about Cowboy Casserole Recipe

Can I make Cowboy Casserole ahead of time?

Absolutely! Making cowboy casserole ahead of time is a great way to save time on busy days. You can prepare the entire casserole, cover it tightly, and store it in the refrigerator for up to 24 hours before baking. When you’re ready to cook, simply preheat your oven and bake it as directed. If you’re baking it straight from the fridge, you may need to add a few extra minutes to the cooking time to ensure it’s heated through.

What can I serve with Cowboy Casserole?

There are many delicious options to serve alongside your cowboy casserole. A fresh garden salad is a great choice, as it adds a light and crisp contrast to the hearty casserole. Garlic bread or dinner rolls can also complement the meal nicely, providing a warm, buttery side. For those who enjoy a bit of spice, consider serving pickled jalapeños or a side of hot sauce. These additions can enhance the flavors and make your meal even more enjoyable!

How do I store leftovers of Cowboy Casserole?

Storing leftovers is easy! Allow the cowboy casserole to cool completely before transferring it to an airtight container. You can keep it in the refrigerator for up to three days. When you’re ready to enjoy it again, simply reheat individual portions in the microwave or warm it up in the oven. If you want to keep it longer, you can freeze the casserole. Just make sure to wrap it tightly in plastic wrap and then in aluminum foil. It can last in the freezer for up to three months!

Can I freeze Cowboy Casserole?

Yes, you can freeze cowboy casserole! It’s a fantastic option for meal prep. To freeze, prepare the casserole as directed but do not bake it. Instead, cover it tightly with plastic wrap and then with aluminum foil. Label it with the date and freeze. When you’re ready to eat, thaw it in the refrigerator overnight and then bake it according to the recipe instructions. This way, you can enjoy a homemade meal anytime you want!

Conclusion on Cowboy Casserole Recipe

In conclusion, the cowboy casserole recipe is a delightful and versatile dish that brings comfort and satisfaction to any meal. With its hearty combination of ground beef, beans, corn, and creamy mushroom soup, topped with crispy tater tots and melted cheese, it’s no wonder this recipe has become a favorite for many families. Not only is it easy to prepare, but it also allows for endless customization, making it suitable for various dietary preferences.

Whether you choose to stick to the classic version or experiment with vegetarian or gluten-free alternatives, the cowboy casserole is sure to please everyone at the table. It’s perfect for busy weeknights, potlucks, or gatherings with friends. Plus, the nutritional benefits from the beans and vegetables make it a balanced meal option.

As you embark on your cooking journey with this cowboy casserole recipe, remember to have fun and make it your own. Don’t hesitate to add your favorite ingredients or adjust the seasonings to suit your taste. With a little creativity, you can create a dish that not only fills your belly but also warms your heart.

So, gather your ingredients, follow the steps, and enjoy the deliciousness of cowboy casserole. It’s a meal that brings people together, creating memories around the dinner table. Happy cooking!

Street Corn Chicken Rice Bowl Recipe is a must-try!

Introduction to the Street Corn Chicken Rice Bowl Recipe

Street Corn Chicken Rice Bowl Recipe. This dish combines tender chicken, creamy dressing, and the sweet crunch of corn, all served over fluffy rice. It’s a delightful mix of textures and tastes that will surely please your palate.

What Makes the Street Corn Chicken Rice Bowl Special?

What sets this recipe apart is its unique blend of ingredients. The marinated chicken is infused with spices that give it a zesty kick. Meanwhile, the corn adds a sweet, fresh element that perfectly complements the savory chicken. The creamy dressing, made with mayonnaise and lime juice, ties everything together, creating a mouthwatering experience.

Street Corn Chicken Rice Bowl Recipe is sure to impress. Plus, it’s versatile! You can easily customize it to suit your taste preferences or dietary needs.

So, roll up your sleeves and get ready to enjoy a bowl of goodness that’s bursting with flavor. Let’s dive into the ingredients and preparation steps that will make your cooking experience enjoyable and rewarding!

Ingredients for the Street Corn Chicken Rice Bowl Recipe

Street Corn Chicken Rice Bowl Recipe, you’ll need a variety of fresh and flavorful ingredients. Here’s what you’ll need:

  • 2 cups cooked white rice
  • 1 lb boneless, skinless chicken breasts
  • 1 tablespoon olive oil
  • 1 teaspoon chili powder
  • 1 teaspoon garlic powder
  • 1 teaspoon cumin
  • Salt and pepper to taste
  • 1 cup corn (fresh, frozen, or canned)
  • 1/2 cup crumbled feta cheese
  • 1/4 cup mayonnaise
  • 1 tablespoon lime juice
  • 1/4 cup chopped fresh cilantro
  • 1 avocado, sliced
  • Lime wedges for serving

These ingredients come together to create a delightful dish that’s not only tasty but also nutritious. The chicken provides a good source of protein, while the corn adds fiber and sweetness. The creamy dressing enhances the overall flavor, making each bite a treat.

Feel free to adjust the ingredients based on your preferences. For instance, you can swap out the feta cheese for cotija cheese for a more authentic street corn flavor. Or, if you’re looking for a healthier grain option, consider using quinoa instead of rice. The possibilities are endless!

Step-by-Step Preparation of the Street Corn Chicken Rice Bowl Recipe

Street Corn Chicken Rice Bowl Recipe. Follow these simple steps to create a delicious meal that’s sure to impress!

Step 1: Preparing the Chicken

First, let’s focus on the chicken. In a medium bowl, combine the olive oil, chili powder, garlic powder, cumin, salt, and pepper. This spice mixture will give the chicken a wonderful flavor. Next, add the boneless, skinless chicken breasts to the bowl. Make sure to coat them well with the spices. This step is crucial for infusing the chicken with flavor.

Once coated, let the chicken marinate for at least 15 minutes. This allows the spices to penetrate the meat, making it more flavorful. If you have extra time, marinating for longer can enhance the taste even more!

Step 2: Cooking the Rice

While the chicken is marinating, it’s time to cook the rice. If you haven’t done so already, prepare 2 cups of white rice according to the package instructions. You can use a rice cooker or a pot on the stove. The goal is to have fluffy, perfectly cooked rice that will serve as the base for your bowl.

Once the rice is cooked, set it aside and keep it warm. This will ensure that your rice is ready to soak up all the delicious flavors from the chicken and toppings.

Step 3: Making the Street Corn Mixture

Next, let’s prepare the corn. If you’re using fresh corn, grill or sauté it until it’s slightly charred. This adds a lovely smoky flavor. If you’re using frozen corn, cook it according to the package instructions. For canned corn, simply drain and rinse it to remove excess sodium.

In a small bowl, mix together the mayonnaise, lime juice, and a pinch of salt. This creamy dressing will add a tangy kick to your bowl. Set it aside for later use.

Step 4: Assembling the Street Corn Chicken Rice Bowl

Now comes the fun part—assembling your bowl! Heat a grill or skillet over medium-high heat. Cook the marinated chicken for about 6-7 minutes per side, or until it’s fully cooked and no longer pink in the center. Once done, remove the chicken from the heat and let it rest for a few minutes before slicing it into strips.

To assemble, divide the cooked rice among four bowls. Top each bowl with sliced chicken, the prepared corn, and crumbled feta cheese. Drizzle the creamy dressing over the top for added flavor. Finally, garnish with chopped cilantro and sliced avocado. Serve with lime wedges on the side for an extra burst of freshness.

Street Corn Chicken Rice Bowl Recipe is ready to be enjoyed. Each bite is a delightful mix of flavors and textures that will leave you craving more.

Variations of the Street Corn Chicken Rice Bowl Recipe

Street Corn Chicken Rice Bowl Recipe is incredibly versatile. You can easily modify it to suit different dietary preferences or to add a twist to the classic flavors. Here are some exciting variations to consider:

Vegetarian Options

If you want to make a vegetarian version of this dish, you can replace the chicken with hearty plant-based proteins. Consider using grilled tofu or tempeh, which can absorb the same spices beautifully. Another great option is to use black beans or chickpeas for added protein and fiber.

For the corn, you can keep it as is, or add in some diced bell peppers and zucchini for extra veggies. These additions not only enhance the flavor but also add vibrant colors to your bowl. Top it off with the creamy dressing and avocado, and you have a delicious vegetarian meal that everyone will love!

Spicy Additions

Street Corn Chicken Rice Bowl Recipe. One simple method is to add diced jalapeños to the corn mixture. This will give your dish a nice kick without overwhelming the other flavors.

Alternatively, you can mix in some hot sauce into the creamy dressing for an extra layer of spice. If you’re feeling adventurous, try adding a sprinkle of cayenne pepper or red pepper flakes to the chicken marinade. These spicy additions will elevate your dish and make it even more exciting!

Street Corn Chicken Rice Bowl Recipe to fit your taste preferences. Whether you’re in the mood for a vegetarian delight or a spicy kick, there’s a version for everyone!

Cooking Note for the Street Corn Chicken Rice Bowl Recipe

Street Corn Chicken Rice Bowl Recipe, there are a few cooking notes to keep in mind to ensure your dish turns out perfectly every time. These tips will help you achieve the best flavor and texture, making your meal even more enjoyable.

First, marinating the chicken is essential. Allowing it to sit in the spice mixture for at least 15 minutes enhances the flavor significantly. If you have more time, consider marinating it for up to an hour. This extra time allows the spices to penetrate deeper into the meat, resulting in a more flavorful chicken.

Next, when cooking the chicken, make sure your grill or skillet is preheated. A hot cooking surface helps to sear the chicken, locking in moisture and creating a delicious crust. Use a meat thermometer to check for doneness; the internal temperature should reach 165°F (75°C) to ensure it’s safe to eat.

For the corn, whether you choose fresh, frozen, or canned, the cooking method can affect the flavor. Grilling or sautéing fresh corn adds a delightful char that enhances its sweetness. If using frozen corn, ensure it’s cooked thoroughly to avoid a mushy texture. Canned corn should be drained and rinsed well to remove excess sodium, ensuring a fresher taste.

Lastly, when assembling your bowls, don’t be afraid to get creative! Layering the ingredients can make for a more visually appealing dish. Start with rice, then add chicken, corn, and toppings. This way, each bite is a perfect mix of flavors. Remember, presentation matters, and a well-assembled bowl is more inviting!

Street Corn Chicken Rice Bowl Recipe to new heights. Enjoy the process, and savor the delicious results!

Serving Suggestions for the Street Corn Chicken Rice Bowl Recipe

Street Corn Chicken Rice Bowl Recipe, presentation and accompaniments can enhance the overall dining experience. Here are some delightful serving suggestions to consider:

  • Colorful Garnishes: Add a pop of color to your bowls with fresh garnishes. Chopped green onions, diced tomatoes, or even a sprinkle of chili flakes can make your dish visually appealing.
  • Extra Lime Wedges: Serve additional lime wedges on the side. A squeeze of fresh lime juice right before eating brightens the flavors and adds a refreshing zing.
  • Side Dishes: Pair your rice bowl with a light side salad or tortilla chips. A simple green salad with a vinaigrette can balance the richness of the creamy dressing.
  • Hot Sauce: For those who love heat, place a bottle of your favorite hot sauce on the table. This allows guests to customize their spice level according to their taste.
  • Drink Pairings: Consider serving your meal with a refreshing drink. A cold glass of iced tea, lemonade, or even a light beer can complement the flavors of the dish beautifully.

Street Corn Chicken Rice Bowl Recipe but also create a more enjoyable dining experience. Whether you’re hosting a dinner party or enjoying a casual meal at home, these tips will help you serve up a dish that’s as delightful to look at as it is to eat!

Tips for Perfecting Your Street Corn Chicken Rice Bowl Recipe

Street Corn Chicken Rice Bowl Recipe, a few tips can help you elevate your dish to restaurant-quality. These simple yet effective suggestions will ensure that every bite is bursting with flavor and texture.

First, always use fresh ingredients. Fresh corn, ripe avocados, and vibrant cilantro can make a significant difference in taste. If possible, choose seasonal produce for the best flavor. Fresh ingredients not only enhance the dish but also add nutritional value.

Next, don’t skip the marinating step. Allowing the chicken to soak in the spice mixture for at least 15 minutes is crucial. For even better results, marinate it for a few hours or overnight in the refrigerator. This extra time allows the flavors to meld beautifully, resulting in a more flavorful chicken.

When cooking the chicken, consider using a meat thermometer. This tool ensures that your chicken is cooked perfectly without being dry. Aim for an internal temperature of 165°F (75°C). This way, you can enjoy juicy, tender chicken every time.

For the corn, grilling it can add a delightful smoky flavor. If you’re using frozen corn, make sure to sauté it until it’s heated through and slightly caramelized. This adds depth to the dish. If you opt for canned corn, remember to drain and rinse it well to remove excess sodium.

As you assemble your bowls, think about layering. Start with a base of rice, then add the chicken, corn, and toppings. This not only looks appealing but also ensures that each bite is a perfect mix of flavors. Don’t forget to drizzle the creamy dressing generously over the top!

Lastly, feel free to experiment with flavors. Add your favorite spices or toppings to make the dish your own. Whether it’s a sprinkle of smoked paprika or a handful of diced jalapeños, these small changes can create a unique twist on the classic recipe.

Street Corn Chicken Rice Bowl Recipe. Enjoy the process, and most importantly, savor every delicious bite!

Breakdown of Time for the Street Corn Chicken Rice Bowl Recipe

Street Corn Chicken Rice Bowl Recipe can help you plan your cooking efficiently. Here’s a quick breakdown of the time required for preparation and cooking:

Prep Time

The prep time for this recipe is approximately 20 minutes. This includes gathering your ingredients, marinating the chicken, and preparing the corn. If you choose to chop vegetables or make any additional toppings, you might want to add a few extra minutes. However, with everything organized, you can easily keep this time to a minimum.

Cooking Time

Street Corn Chicken Rice Bowl Recipe takes about 20-25 minutes. This includes cooking the chicken, preparing the corn, and warming the rice if it’s not already hot. The chicken typically takes around 12-14 minutes to cook thoroughly, while the corn can be prepared in about 5-10 minutes, depending on the method you choose.

Total Time

In total, you can expect to spend about 40-45 minutes from start to finish. This includes both prep and cooking time. With this efficient timeline, you can have a delicious meal ready to serve in no time. Whether you’re cooking for yourself or for a group, this recipe is perfect for a quick yet satisfying dinner!

Nutritional Information for the Street Corn Chicken Rice Bowl Recipe

Street Corn Chicken Rice Bowl Recipe not only delights your taste buds but also provides a good mix of nutrients. Here’s a breakdown of the key nutritional information for this delicious dish:

Calories

Street Corn Chicken Rice Bowl Recipe contains approximately 550 calories. This makes it a satisfying meal that can fit well into your daily caloric intake. The combination of chicken, rice, and toppings ensures that you’re getting a hearty meal without going overboard on calories.

Protein

Protein is vital for muscle repair and overall health. This recipe packs a punch with about 36 grams of protein per serving. The boneless, skinless chicken breasts are the primary source of protein, making this dish an excellent choice for those looking to increase their protein intake. Pairing it with rice and corn adds additional nutrients, making it a well-rounded meal.

Sodium

Street Corn Chicken Rice Bowl Recipe contains around 800 mg per serving. This amount can vary based on the ingredients you choose, especially if you use canned corn or additional sauces. To keep sodium levels in check, consider using low-sodium options for canned ingredients and adjusting the salt in the recipe to your taste.

Street Corn Chicken Rice Bowl Recipe is a nutritious option that balances calories, protein, and sodium. It’s a great choice for a fulfilling meal that doesn’t compromise on flavor or health!

FAQs about the Street Corn Chicken Rice Bowl Recipe

Can I use frozen corn for the Street Corn Chicken Rice Bowl Recipe?

Street Corn Chicken Rice Bowl Recipe. It’s quick to prepare and retains its sweet flavor. Just cook it according to the package instructions, and it will work perfectly in your dish. If you want to enhance the flavor, consider sautéing the frozen corn in a skillet for a few minutes until it’s heated through and slightly caramelized.

What can I substitute for chicken in the Street Corn Chicken Rice Bowl Recipe?

Street Corn Chicken Rice Bowl Recipe.

How can I make the Street Corn Chicken Rice Bowl Recipe spicier?

Street Corn Chicken Rice Bowl Recipe, consider incorporating diced jalapeños into the corn mixture. You can also mix hot sauce into the creamy dressing for an extra kick. If you enjoy bold flavors, sprinkle cayenne pepper or red pepper flakes into the chicken marinade. These spicy additions will elevate your dish and satisfy your craving for heat!

Can I prepare the Street Corn Chicken Rice Bowl Recipe in advance?

Street Corn Chicken Rice Bowl Recipe in advance! You can marinate the chicken a few hours ahead or even overnight for deeper flavor. The rice can be cooked and stored in the refrigerator until you’re ready to assemble the bowls. The corn can also be prepared ahead of time. Just keep everything in separate containers, and when you’re ready to serve, simply reheat the rice and corn, cook the chicken, and assemble your bowls. This makes for a quick and easy meal on busy days!

Conclusion on the Street Corn Chicken Rice Bowl Recipe

Street Corn Chicken Rice Bowl Recipe is a delightful dish that brings together a medley of flavors and textures. With its tender marinated chicken, sweet corn, and creamy dressing, this recipe is sure to become a favorite in your household. Not only is it delicious, but it’s also easy to prepare, making it perfect for busy weeknights or casual gatherings with friends and family.

As you explore this recipe, remember that its versatility allows for endless customization. Whether you choose to make it vegetarian, add some spice, or swap out ingredients, the possibilities are truly limitless. This adaptability means you can enjoy the dish in various ways, keeping your meals exciting and fresh.

Moreover, the nutritional benefits of this bowl make it a smart choice for those looking to maintain a balanced diet. With a good source of protein, fiber, and essential vitamins, you can feel good about what you’re serving on your table.

Street Corn Chicken Rice Bowl Recipe is not just about eating; it’s about sharing good food and making memories with loved ones. We hope you enjoy every bite and find joy in the kitchen as you whip up this delightful dish!

Zesty Lemon Loaf: Brighten Your Day with This Treat!

gutenberg

Introduction to Zesty Lemon Loaf

Zesty Lemon Loaf is the perfect way to add a burst of sunshine to your day! This light, moist loaf is infused with fresh lemon zest and juice, creating a bright, tangy flavor that will awaken your taste buds. Topped with a sweet glaze, it’s the ideal balance of sweet and citrusy in every bite. Whether you’re enjoying it for breakfast, as an afternoon snack, or for dessert, this loaf is sure to bring a smile to your face. Ready to bake up something delicious? Let’s get started!

Why You’ll Love This Zesty Lemon Loaf

This Zesty Lemon Loaf is a true gem for busy days. It’s incredibly easy to whip up, taking just about 20 minutes of prep time. The bright, tangy flavor is like a burst of sunshine in every bite, making it a delightful treat for any occasion. Plus, it’s versatile enough to serve at brunch, as a snack, or even as a dessert. Trust me, your taste buds will thank you!

Ingredients for Zesty Lemon Loaf

Gathering the right ingredients is the first step to creating your Zesty Lemon Loaf. Here’s what you’ll need:

  • All-purpose flour: The backbone of your loaf, providing structure and texture.
  • Baking powder: This helps the loaf rise, giving it that light and fluffy texture we all love.
  • Baking soda: A little boost for the baking powder, ensuring your loaf is perfectly airy.
  • Salt: Just a pinch enhances the flavors, balancing the sweetness of the sugar.
  • Unsalted butter: Adds richness and moisture; make sure it’s softened for easy mixing.
  • Granulated sugar: Sweetens the loaf and contributes to its lovely golden crust.
  • Large eggs: They bind the ingredients together and add moisture, making the loaf tender.
  • Lemon zest: This is where the magic happens! It infuses the loaf with vibrant lemon flavor.
  • Vanilla extract: A touch of warmth that complements the zesty lemon beautifully.
  • Buttermilk: Adds moisture and a slight tang, making the loaf incredibly tender.
  • Fresh lemon juice: Brightens the flavor and adds that signature zesty kick.

For the glaze, you’ll need:

  • Powdered sugar: This creates a sweet, smooth glaze that adds a lovely finish.
  • Fresh lemon juice: Just a bit more to keep that zesty flavor alive in the glaze.

Feel free to get creative! You can substitute half of the butter with unsweetened applesauce for a lighter version. If you’re feeling adventurous, toss in some poppy seeds for a delightful crunch. For an extra burst of flavor, consider adding a teaspoon of lemon extract to the batter. The exact quantities for these ingredients are at the bottom of the article and available for printing.

How to Make Zesty Lemon Loaf

Now that we have our ingredients ready, let’s get to the fun part—making the Zesty Lemon Loaf! Follow these simple steps, and you’ll have a delicious treat in no time.

Step 1: Preheat and Prepare

First things first, preheat your oven to 350°F (175°C). This ensures your loaf bakes evenly. While the oven warms up, grease and flour a 9×5-inch loaf pan. This will help your loaf slide out easily once it’s baked.

Step 2: Mix Dry Ingredients

In a medium bowl, whisk together the all-purpose flour, baking powder, baking soda, and salt. This step is crucial as it evenly distributes the leavening agents, ensuring your loaf rises beautifully. Set this mixture aside for now.

Step 3: Cream Butter and Sugar

In a large mixing bowl, cream the softened butter and granulated sugar together. Use an electric mixer for about 3-4 minutes until the mixture is light and fluffy. This step adds air to the batter, making your loaf tender and airy.

Step 4: Add Eggs and Flavorings

Next, add the eggs one at a time, mixing well after each addition. This helps incorporate them fully into the batter. Stir in the lemon zest and vanilla extract, letting those bright flavors shine through. Your kitchen will smell heavenly!

Step 5: Combine Wet and Dry Ingredients

Now, it’s time to bring everything together. Gradually add the dry ingredients to the butter mixture, alternating with the buttermilk and fresh lemon juice. Start and end with the dry ingredients. Mix until just combined; overmixing can lead to a dense loaf.

Step 6: Bake the Loaf

Pour the batter into your prepared loaf pan, smoothing the top with a spatula. Bake in the preheated oven for 50-60 minutes. To check for doneness, insert a toothpick into the center. If it comes out clean, your loaf is ready!

Step 7: Cool and Glaze

Once baked, allow the loaf to cool in the pan for about 10 minutes. Then, transfer it to a wire rack to cool completely. While it cools, whisk together the powdered sugar and lemon juice for the glaze. Drizzle it over the cooled loaf for that perfect finishing touch!

Tips for Success

  • Make sure your butter is softened for easy creaming; it should be at room temperature.
  • Use fresh lemons for zest and juice; the flavor is unbeatable!
  • Don’t overmix the batter; mix until just combined for a light loaf.
  • Let the loaf cool completely before glazing for a smooth finish.
  • Store leftovers in an airtight container to keep it fresh longer.

Equipment Needed

  • 9×5-inch loaf pan: Essential for baking your Zesty Lemon Loaf. A round cake pan works in a pinch.
  • Mixing bowls: Use a large bowl for wet ingredients and a medium one for dry. Any size will do!
  • Electric mixer: Ideal for creaming butter and sugar. A whisk can work if you’re feeling strong!
  • Measuring cups and spoons: Accurate measurements are key. Use a kitchen scale for precision if you have one.

Variations

  • Poppy Seed Zesty Lemon Loaf: Add a tablespoon of poppy seeds to the batter for a delightful crunch and a touch of elegance.
  • Blueberry Lemon Loaf: Fold in a cup of fresh or frozen blueberries for a fruity twist that pairs beautifully with the lemon.
  • Gluten-Free Option: Substitute all-purpose flour with a gluten-free flour blend to make this loaf suitable for gluten-sensitive friends.
  • Vegan Zesty Lemon Loaf: Replace eggs with flax eggs (1 tablespoon ground flaxseed mixed with 2.5 tablespoons water per egg) and use coconut oil instead of butter.
  • Herbal Infusion: Add a teaspoon of fresh thyme or rosemary to the batter for a unique herbal note that complements the lemon.

Serving Suggestions

  • Pair your Zesty Lemon Loaf with a dollop of whipped cream for a delightful dessert.
  • Serve it alongside a refreshing cup of herbal tea or iced lemonade for a perfect afternoon treat.
  • For a brunch spread, slice it thin and serve with fresh berries and a sprinkle of powdered sugar.
  • Presentation tip: Arrange slices on a beautiful platter, garnished with lemon slices and mint leaves for a pop of color.

FAQs about Zesty Lemon Loaf

Can I use a different type of flour for the Zesty Lemon Loaf?

Absolutely! While all-purpose flour is the go-to, you can experiment with whole wheat flour for a nuttier flavor. Just keep in mind that it may alter the texture slightly.

How do I store leftover Zesty Lemon Loaf?

To keep your loaf fresh, store it in an airtight container at room temperature for up to three days. You can also refrigerate it for a week or freeze it for longer storage.

Can I make this loaf ahead of time?

Yes! This Zesty Lemon Loaf actually tastes better the next day as the flavors meld. Just make sure to glaze it right before serving for that fresh look!

What can I serve with Zesty Lemon Loaf?

This loaf pairs wonderfully with a cup of tea or coffee. You can also serve it with fresh fruit or a light yogurt for a delightful breakfast or snack.

Can I add other flavors to the Zesty Lemon Loaf?

Definitely! Feel free to add poppy seeds, blueberries, or even a hint of lavender for a unique twist. The lemon flavor is versatile and pairs well with many additions!

Final Thoughts

Baking this Zesty Lemon Loaf is more than just a culinary task; it’s a joyful experience that fills your home with warmth and delightful aromas. Each slice is a reminder of sunny days and sweet moments shared with loved ones. Whether you’re enjoying it with a cup of tea or serving it at a family gathering, this loaf brings smiles and satisfaction. I hope you find as much joy in making it as I do. So, roll up your sleeves, embrace the zesty goodness, and let this loaf brighten your day, one slice at a time!

“`

Print
clock clock iconcutlery cutlery iconflag flag iconfolder folder iconinstagram instagram iconpinterest pinterest iconfacebook facebook iconprint print iconsquares squares iconheart heart iconheart solid heart solid icon
Zesty Lemon Loaf

Zesty Lemon Loaf: Brighten Your Day with This Treat!


5 Stars 4 Stars 3 Stars 2 Stars 1 Star

No reviews

  • Author: Isabella
  • Total Time: 80 minutes
  • Yield: 8 servings 1x
  • Diet: Vegetarian

Description

A delightful and refreshing lemon loaf that brightens your day with its zesty flavor.


Ingredients

Scale
  • 2 cups all-purpose flour
  • 1 ½ teaspoons baking powder
  • ½ teaspoon baking soda
  • ½ teaspoon salt
  • 1 cup unsalted butter, softened
  • 1 ½ cups granulated sugar
  • 3 large eggs
  • 1 tablespoon lemon zest (from about 2 lemons)
  • 1 teaspoon vanilla extract
  • ½ cup buttermilk
  • ¼ cup fresh lemon juice
  • For the glaze: 1 cup powdered sugar
  • 2 tablespoons fresh lemon juice

Instructions

  1. Preheat your oven to 350°F (175°C). Grease and flour a 9×5-inch loaf pan.
  2. In a medium bowl, whisk together the flour, baking powder, baking soda, and salt. Set aside.
  3. In a large mixing bowl, cream the softened butter and granulated sugar together until light and fluffy, about 3-4 minutes.
  4. Add the eggs one at a time, mixing well after each addition. Stir in the lemon zest and vanilla extract.
  5. Gradually add the dry ingredients to the butter mixture, alternating with the buttermilk and lemon juice. Begin and end with the dry ingredients, mixing until just combined.
  6. Pour the batter into the prepared loaf pan and smooth the top. Bake for 50-60 minutes, or until a toothpick inserted into the center comes out clean.
  7. Allow the loaf to cool in the pan for 10 minutes before transferring it to a wire rack to cool completely.
  8. For the glaze, whisk together the powdered sugar and lemon juice until smooth. Drizzle over the cooled loaf.

Notes

  • This recipe serves 8.
  • For a lighter version, substitute half of the butter with unsweetened applesauce.
  • You can also add poppy seeds to the batter for a delightful crunch.
  • For an extra burst of flavor, consider adding a teaspoon of lemon extract to the batter.
  • Prep Time: 20 minutes
  • Cook Time: 60 minutes
  • Category: Dessert
  • Method: Baking
  • Cuisine: American

Nutrition

  • Serving Size: 1 slice
  • Calories: 280
  • Sugar: 20g
  • Sodium: 150mg
  • Fat: 13g
  • Saturated Fat: 8g
  • Unsaturated Fat: 5g
  • Trans Fat: 0g
  • Carbohydrates: 36g
  • Fiber: 0g
  • Protein: 3g
  • Cholesterol: 70mg