Watermelon Lemonade Recipe is a must-try summer drink!

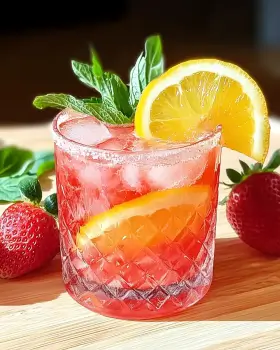
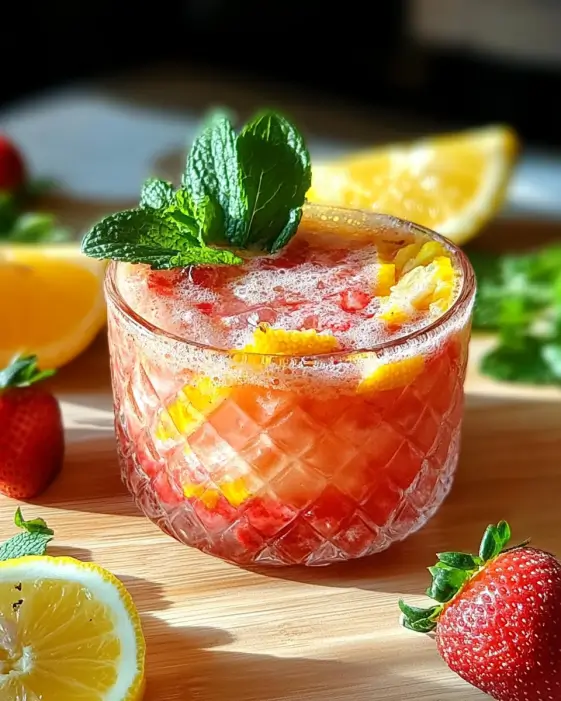
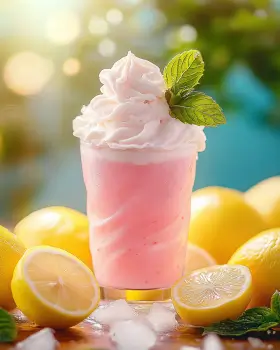
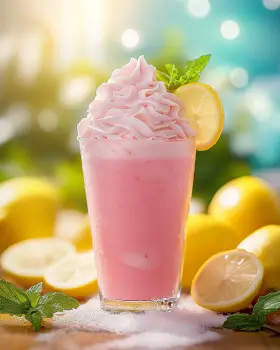
Introduction to Watermelon Lemonade Recipe

The Refreshing Appeal of Watermelon Lemonade

Watermelon Lemonade Recipe comes in! This delightful beverage combines the sweetness of watermelon with the tangy zest of lemons. It’s a perfect way to quench your thirst on a hot day.

Watermelon is not just delicious; it’s also packed with hydration. Did you know that watermelon is made up of about 92% water? This makes it an excellent choice for staying refreshed. When you blend it with fresh lemon juice, you get a drink that is both tasty and revitalizing.

Moreover, this recipe is incredibly easy to make. You only need a few simple ingredients, and you can whip it up in no time. Whether you’re hosting a summer barbecue or just enjoying a quiet afternoon, this watermelon lemonade will impress your family and friends.

Plus, you can customize it to suit your taste! Want it sweeter? Just add more sugar. Prefer a fizzy drink? Swap some water for sparkling water. The possibilities are endless! So, let’s dive into the ingredients and get started on this refreshing journey.

Ingredients for Watermelon Lemonade Recipe

Watermelon Lemonade Recipe, you’ll need a handful of fresh ingredients. Each one plays a vital role in making this drink delicious and refreshing. Here’s what you’ll need:

  • 4 cups seedless watermelon, cubed: Choose ripe, sweet watermelon for the best flavor.
  • 1 cup freshly squeezed lemon juice: This usually comes from about 4-6 lemons. Fresh juice adds a bright, tangy taste.
  • 1/2 cup granulated sugar: Adjust this to your liking. You can use less if you prefer a less sweet drink.
  • 4 cups cold water: This helps dilute the mixture and makes it refreshing.
  • Ice cubes: Essential for serving, they keep your drink chilled.
  • Fresh mint leaves for garnish (optional): These add a lovely aroma and a pop of color.

Gather these ingredients, and you’re ready to start blending! Each component contributes to the overall taste, making your watermelon lemonade a delightful treat. Now, let’s move on to the preparation steps to bring this refreshing drink to life.

Step-by-Step Preparation of Watermelon Lemonade Recipe

Watermelon Lemonade Recipe. Follow these simple steps to create a refreshing drink that everyone will love!

Step 1: Preparing the Watermelon

Start by washing the watermelon thoroughly. This ensures that any dirt or pesticides are removed. Next, cut the watermelon into quarters. Remove the rind and any seeds if you’re using a seeded variety. Then, chop the flesh into small cubes. This will make it easier to blend later. Remember, the sweeter the watermelon, the better your lemonade will taste!

Step 2: Juicing the Lemons

While the watermelon is prepped, it’s time to juice the lemons. Roll each lemon on the counter with your palm. This helps release more juice. Cut the lemons in half and use a juicer or your hands to extract the juice. Make sure to remove any seeds that may fall in. You’ll need about one cup of fresh lemon juice for the perfect balance of sweetness and tartness.

Step 3: Blending the Ingredients

Now, take your blender and add the watermelon cubes. Blend them on high speed until smooth. This should only take a minute or two. The goal is to create a watermelon puree that is vibrant and full of flavor. If your blender struggles, you can add a little water to help it along.

Step 4: Straining the Mixture

After blending, it’s time to strain the mixture. Place a fine mesh sieve over a large pitcher. Pour the watermelon puree into the sieve. Use a spatula or spoon to press down on the pulp, extracting as much juice as possible. This step ensures your lemonade is smooth and free of any pulp, making it more enjoyable to drink.

Step 5: Adding Sweetener and Water

With the watermelon juice in the pitcher, it’s time to add the freshly squeezed lemon juice and granulated sugar. Stir the mixture well until the sugar dissolves completely. Then, pour in the cold water and mix again. Taste your lemonade and adjust the sweetness if needed. If you like it sweeter, feel free to add more sugar!

Step 6: Chilling and Serving

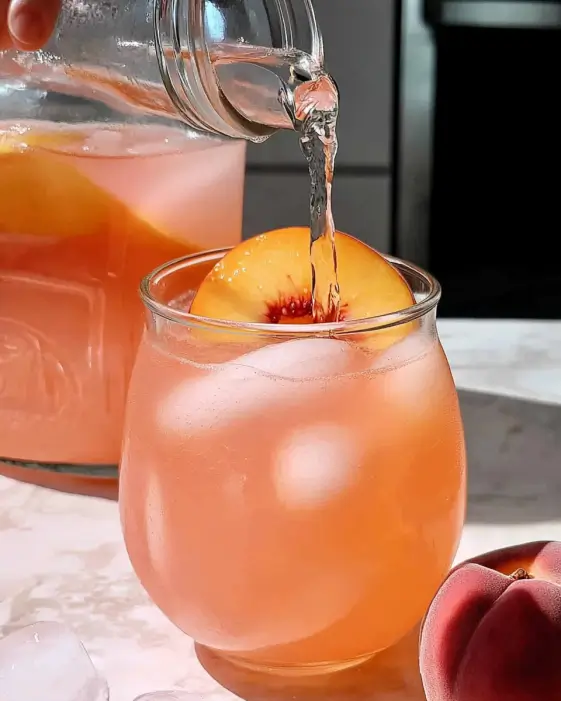
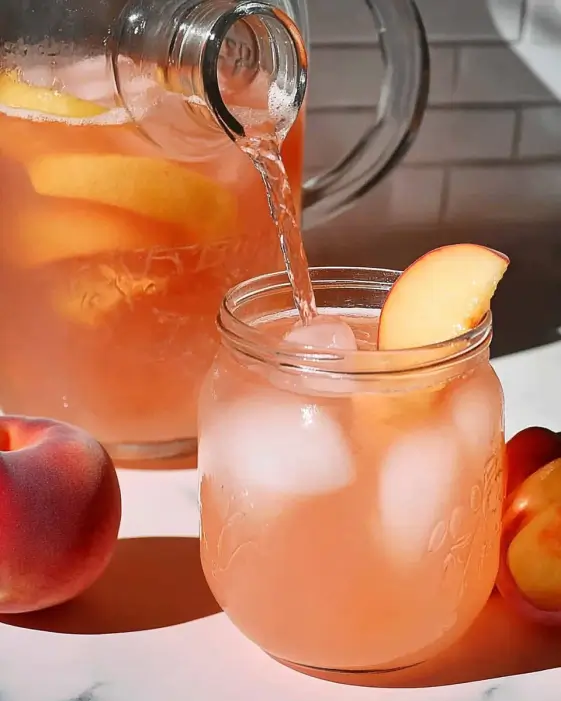
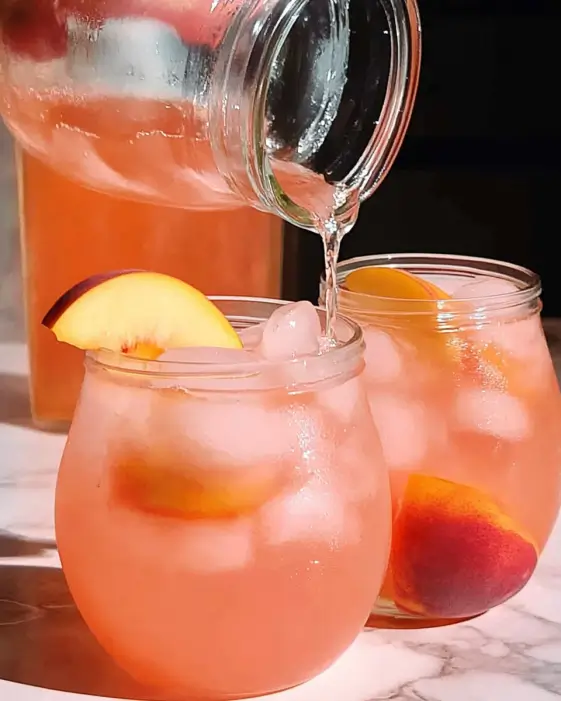
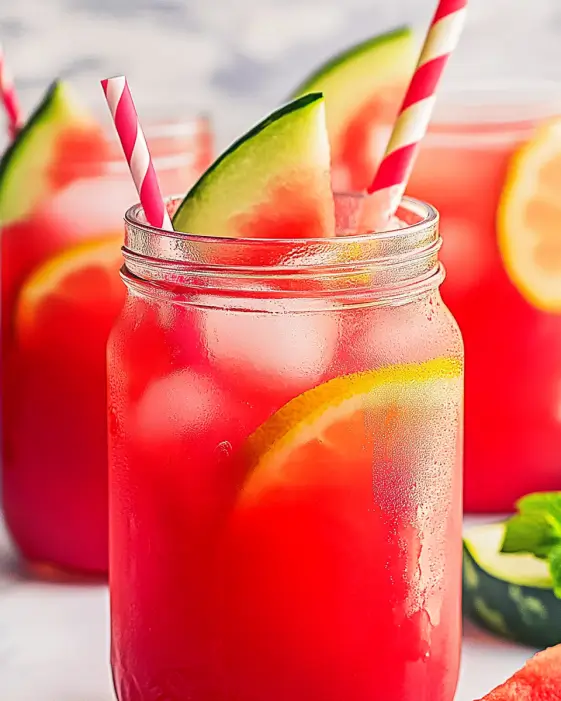
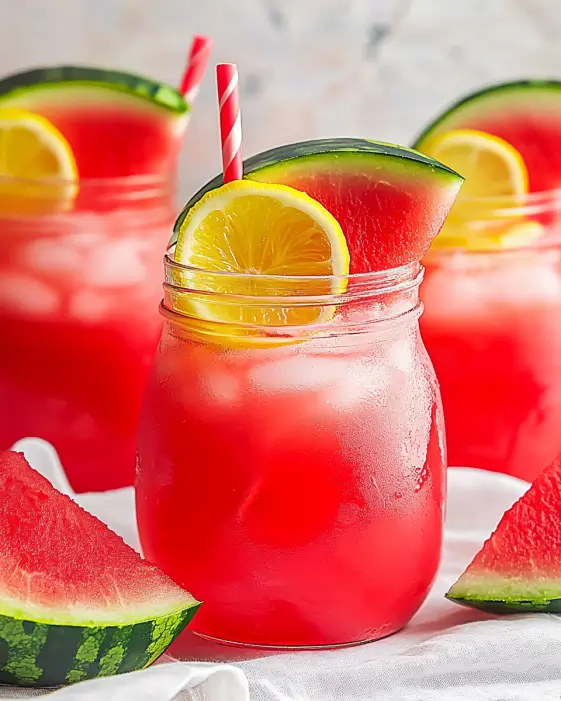
Once everything is mixed, cover the pitcher and place it in the refrigerator. Let it chill for at least 30 minutes. This allows the flavors to meld together beautifully. When you’re ready to serve, fill glasses with ice cubes and pour the chilled watermelon lemonade over the ice. For a lovely touch, garnish with fresh mint leaves. Enjoy your refreshing drink!

Variations of Watermelon Lemonade Recipe

Watermelon Lemonade Recipe is already a hit, there are many fun ways to mix it up! Here are some exciting variations that can add a unique twist to your refreshing drink. Each option brings its own flavor profile, making your lemonade experience even more delightful.

Adding Mint for Extra Freshness

Mint is a fantastic herb that pairs beautifully with watermelon. To add a refreshing minty flavor, simply muddle a handful of fresh mint leaves in the bottom of your pitcher before adding the watermelon juice. This releases the mint’s essential oils, infusing your lemonade with a cool, aromatic taste. You can also use mint leaves as a garnish for an extra pop of color and flavor!

Spicy Watermelon Lemonade with Jalapeño

If you enjoy a little heat, try adding jalapeño to your watermelon lemonade! Start by slicing a small jalapeño pepper and removing the seeds for less heat. Muddle the slices in the pitcher before adding the watermelon juice. This spicy twist will give your drink a surprising kick, making it perfect for adventurous palates. Just remember to taste as you go, so you can adjust the spice level to your liking!

Sparkling Watermelon Lemonade Recipe

For those who love a fizzy drink, consider making a sparkling version of your watermelon lemonade. Instead of using all cold water, replace half of it with club soda or sparkling water. This bubbly addition will give your lemonade a fun, effervescent quality. Serve it in tall glasses with ice, and watch your guests enjoy the refreshing fizz!

Watermelon Lemonade Recipe more exciting. Feel free to experiment with different ingredients and find your favorite combination. The summer is all about fun and creativity, so let your imagination run wild!

Cooking Note for Watermelon Lemonade Recipe

Watermelon Lemonade Recipe, there are a few important cooking notes to keep in mind. These tips will help ensure that your drink turns out perfectly every time, making it a refreshing delight for you and your guests.

First, always choose ripe watermelon. A sweet, juicy watermelon will enhance the flavor of your lemonade. Look for a watermelon that feels heavy for its size and has a uniform shape. The skin should be smooth and free of blemishes. If you can, tap the watermelon; a deep sound usually indicates ripeness.

Next, when juicing lemons, using fresh lemons is key. Bottled lemon juice may contain preservatives that can alter the taste of your lemonade. Freshly squeezed lemon juice provides a bright, zesty flavor that complements the sweetness of the watermelon beautifully.

Additionally, consider the temperature of your ingredients. Using cold water and chilled watermelon will help your lemonade stay refreshing longer. If you want to serve it immediately, you can even freeze some watermelon cubes ahead of time. This way, you can add them to your glasses instead of ice cubes, keeping your drink cold without diluting it.

Lastly, don’t hesitate to adjust the sweetness to your liking. Everyone has different preferences, so taste your mixture before serving. If you find it too tart, add a little more sugar. If it’s too sweet, a splash of lemon juice can balance it out. Remember, the goal is to create a drink that you and your guests will love!

By following these cooking notes, you’ll be well on your way to crafting the perfect watermelon lemonade. Enjoy the process, and don’t forget to have fun while making this delightful summer drink!

Serving Suggestions for Watermelon Lemonade Recipe

Watermelon Lemonade Recipe, it’s time to think about how to serve it! The right pairings and presentation can elevate your drink, making it even more enjoyable. Here are some perfect pairings and creative serving ideas to consider.

Perfect Pairings for Your Watermelon Lemonade

Watermelon lemonade is a versatile drink that complements a variety of foods. Here are some tasty pairings that will enhance your summer gatherings:

  • Grilled Meats: The sweet and tangy flavors of watermelon lemonade pair wonderfully with grilled chicken, burgers, or ribs. The refreshing drink helps balance the savory taste of grilled dishes.
  • Salads: Light salads, especially those with fruits or citrus dressings, go hand in hand with watermelon lemonade. Try a spinach salad with strawberries or a classic Caesar salad.
  • Seafood: Dishes like shrimp tacos or grilled fish are perfect companions. The lemonade’s brightness complements the flavors of the sea.
  • Snacks: Serve your watermelon lemonade with light snacks like chips and salsa, veggie platters, or cheese boards. These bites are easy to enjoy while sipping your refreshing drink.

Creative Serving Ideas

Presentation can make your watermelon lemonade even more appealing. Here are some fun and creative ways to serve it:

  • Watermelon Cups: For a fun twist, hollow out small watermelons and use them as cups. Pour the lemonade inside for a stunning presentation that’s sure to impress your guests.
  • Layered Drinks: Create a layered effect by pouring the watermelon lemonade over ice and then slowly adding a splash of lemon-lime soda or tonic water. This adds a beautiful gradient and a fizzy touch.
  • Frozen Treats: Pour leftover watermelon lemonade into ice pop molds and freeze. These refreshing popsicles are a great treat for hot days!
  • Garnish with Style: Use colorful straws, decorative cocktail umbrellas, or edible flowers to garnish your drinks. Fresh mint leaves or lemon slices on the rim of the glass add a lovely touch.

Watermelon Lemonade Recipe will not only taste great but also look fantastic. Enjoy sharing this refreshing drink with family and friends during your summer gatherings!

Tips for Perfecting Your Watermelon Lemonade Recipe

Watermelon Lemonade Recipe is all about attention to detail. With a few simple tips, you can elevate your drink from good to great! Here are some helpful suggestions to ensure your watermelon lemonade is always a hit.

First, always taste as you go. After blending and mixing your ingredients, take a moment to sample your lemonade. This allows you to adjust the sweetness or tartness to your liking. If it’s too sweet, add a splash of lemon juice. If it’s too tart, a little more sugar can balance it out. Remember, your taste buds are the best guide!

Next, consider the temperature of your ingredients. Using chilled watermelon and cold water will help keep your lemonade refreshing. If you want to serve it right away, freeze some watermelon cubes beforehand. This way, you can add them to your glasses instead of ice cubes, keeping your drink cold without diluting the flavor.

Another tip is to use fresh ingredients whenever possible. Freshly squeezed lemon juice is key to achieving that bright, zesty flavor. Bottled lemon juice often contains preservatives that can alter the taste. Fresh watermelon is also essential; choose one that feels heavy and has a uniform shape for the best flavor.

Don’t forget about garnishes! Fresh mint leaves, lemon slices, or even edible flowers can add a beautiful touch to your presentation. They not only make your drink look appealing but also enhance the overall flavor experience.

Watermelon Lemonade Recipe is versatile, so don’t hesitate to try new ingredients or variations. Whether it’s adding a splash of lime juice or incorporating fresh berries, your creativity can lead to delightful surprises. Enjoy the process and have fun making this refreshing drink!

Breakdown of Time for Watermelon Lemonade Recipe

Watermelon Lemonade Recipe can help you plan better, especially if you’re hosting a gathering. Here’s a simple breakdown of the time involved in making this refreshing drink.

Prep Time

The prep time for your watermelon lemonade is quite short. You’ll need about 15-20 minutes to gather your ingredients, wash the watermelon, juice the lemons, and blend everything together. This quick preparation makes it easy to whip up a batch whenever you want a refreshing drink!

Cooking Time

Interestingly, there’s no actual cooking involved in this recipe. However, you will need to chill the lemonade for at least 30 minutes in the refrigerator. This chilling time allows the flavors to meld beautifully, making your drink even more enjoyable.

Total Time

Watermelon Lemonade Recipe for any occasion, whether it’s a sunny afternoon or a festive gathering!

Nutritional Information for Watermelon Lemonade Recipe

Watermelon Lemonade Recipe can help you make informed choices. This refreshing drink is not only delicious but also relatively low in calories, making it a great option for those looking to enjoy a sweet treat without the guilt. Here’s a breakdown of the key nutritional components per serving:

Calories

Each serving of watermelon lemonade contains approximately 70 calories. This makes it a light and refreshing choice, especially during hot summer days. The calories primarily come from the natural sugars found in watermelon and the added sugar. If you want to reduce the calorie count, consider using less sugar or a sugar substitute.

Protein

In terms of protein, this drink offers about 1 gram per serving. While watermelon lemonade isn’t a significant source of protein, it does provide hydration and essential vitamins. Watermelon is rich in vitamins A and C, which are beneficial for your skin and immune system.

Sodium

Watermelon lemonade is naturally low in sodium, with less than 5 milligrams per serving. This makes it a heart-healthy option, as low sodium intake is important for maintaining healthy blood pressure levels. Enjoying this drink can be a tasty way to stay hydrated without worrying about excess sodium.

Watermelon Lemonade Recipe is a nutritious and refreshing beverage that can be enjoyed guilt-free. Whether you’re sipping it by the pool or serving it at a summer gathering, you can feel good about indulging in this delightful drink!

FAQs about Watermelon Lemonade Recipe

Can I use bottled lemon juice for the Watermelon Lemonade Recipe?

Watermelon Lemonade Recipe. Fresh juice has a brighter, more vibrant flavor that enhances the overall taste of your drink. Bottled lemon juice often contains preservatives, which can alter the flavor and make it less refreshing. For the best results, opt for fresh lemons whenever possible!

How long can I store Watermelon Lemonade?

You can store your watermelon lemonade in the refrigerator for up to 3 days. However, it’s best enjoyed fresh. Over time, the flavors may change, and the lemonade can become less vibrant. To keep it tasting great, make sure to store it in an airtight container. If you notice any separation, just give it a good stir before serving!

Can I make Watermelon Lemonade without sugar?

Watermelon Lemonade Recipe without sugar. The natural sweetness of watermelon can be enough for some people. If you prefer a sweeter taste, consider using a sugar substitute like honey, agave syrup, or stevia. Just remember to adjust the amount to your liking. Enjoying a sugar-free version is a great way to keep it light and refreshing!

What are some fun garnishes for Watermelon Lemonade?

Garnishes can add a lovely touch to your watermelon lemonade! Here are some fun ideas:

  • Fresh Mint Leaves: A few sprigs of mint not only look beautiful but also add a refreshing aroma.
  • Lemon Slices: Thin slices of lemon on the rim of the glass enhance the citrusy flavor.
  • Watermelon Wedges: Small wedges of watermelon can be placed on the edge of the glass for a fun presentation.
  • Edible Flowers: These can add a pop of color and elegance to your drink.
  • Colorful Straws: Bright straws can make your drink more festive and fun!

Watermelon Lemonade Recipe not only taste great but also look stunning!

Conclusion on Watermelon Lemonade Recipe

Watermelon Lemonade Recipe is a delightful and refreshing drink that perfectly captures the essence of summer. With its vibrant colors and delicious flavors, it’s sure to be a hit at any gathering. Whether you’re enjoying it by the pool, at a picnic, or during a family barbecue, this lemonade is a fantastic way to cool down and stay hydrated.

Making watermelon lemonade is not only simple but also allows for creativity. You can easily customize it to suit your taste preferences. From adding fresh mint for a cooling effect to incorporating a spicy kick with jalapeño, the possibilities are endless. Plus, with the option to make it sparkling or sugar-free, you can cater to various dietary needs and preferences.

As you prepare this refreshing drink, remember to use fresh ingredients for the best flavor. The combination of sweet watermelon and tangy lemon juice creates a perfect balance that is both satisfying and invigorating. Don’t forget to experiment with different garnishes and serving ideas to make your presentation as delightful as the drink itself!

Watermelon Lemonade Recipe is not just a drink; it’s an experience that brings people together. Cheers to summer, sunshine, and the joy of sharing delicious moments with friends and family!

Homemade Peach Lemonade Recipe is a summer delight!

Introduction to Homemade Peach Lemonade Recipe

The Refreshing Appeal of Peach Lemonade

When the sun shines bright and the temperatures rise, nothing beats a cool drink. One of the most delightful options is homemade peach lemonade. This refreshing beverage combines the sweetness of ripe peaches with the tangy zest of lemons. It’s a perfect way to quench your thirst on a hot day.

Imagine sipping a glass of this vibrant drink while lounging in your backyard or hosting a summer barbecue. The bright colors and fruity aroma will surely impress your guests. Plus, making your own peach lemonade allows you to control the sweetness and flavor, ensuring it’s just right for your taste buds.

Not only is this homemade peach lemonade recipe easy to prepare, but it also uses fresh ingredients. You can enjoy the natural flavors of summer in every sip. Whether you’re serving it at a picnic or enjoying it on a quiet afternoon, this drink is sure to bring a smile to your face.

So, gather your ingredients and get ready to create a refreshing treat that everyone will love. Let’s dive into the ingredients needed for this delightful homemade peach lemonade recipe!

Ingredients for Homemade Peach Lemonade Recipe

To create the perfect homemade peach lemonade, you’ll need a few simple ingredients. Each one plays a vital role in bringing out the delicious flavors of this refreshing drink. Here’s what you’ll need:

  • 4 ripe peaches, pitted and chopped
  • 1 cup granulated sugar
  • 1 cup water
  • 1 cup freshly squeezed lemon juice (about 4-6 lemons)
  • 4 cups cold water
  • Ice cubes
  • Fresh mint leaves for garnish (optional)

These ingredients are easy to find at your local grocery store or farmer’s market. Fresh peaches are the star of this recipe, providing a sweet and juicy base. The sugar balances the tartness of the lemons, while the cold water helps to create a refreshing drink. Don’t forget the ice cubes to keep your lemonade chilled!

If you want to add a little flair, consider using fresh mint leaves as a garnish. They not only look beautiful but also add a hint of herbal freshness to each sip. Now that you have your ingredients ready, let’s move on to the step-by-step preparation of this delightful homemade peach lemonade recipe!

Step-by-Step Preparation of Homemade Peach Lemonade Recipe

Step 1: Preparing the Peaches

First things first, let’s get those peaches ready! Start by washing the ripe peaches under cool water. This step is important to remove any dirt or residue. Next, pit the peaches and chop them into small pieces. The smaller the pieces, the easier they will break down during cooking. Place the chopped peaches in a medium saucepan. This is where the magic begins!

Step 2: Making the Lemonade Base

Now, it’s time to create the sweet peach mixture. In the same saucepan with the chopped peaches, add 1 cup of granulated sugar and 1 cup of water. Turn the heat to medium and bring the mixture to a gentle boil. Stir occasionally to help the sugar dissolve completely. As the peaches heat up, they will soften and release their natural juices. This process usually takes about 5-7 minutes. Once you see the peaches becoming tender, remove the saucepan from the heat and let it cool for about 10 minutes.

Step 3: Combining Ingredients

After the peach mixture has cooled, it’s time to blend! Pour the mixture into a blender and blend until smooth. This will create a lovely peach puree. To ensure a silky texture, strain the puree through a fine mesh sieve into a large pitcher. This step removes any solids, leaving you with a smooth base. Next, add 1 cup of freshly squeezed lemon juice to the pitcher. The tartness of the lemons will balance the sweetness of the peaches perfectly. Finally, pour in 4 cups of cold water and stir well to combine all the flavors.

Step 4: Chilling and Serving

Now that your homemade peach lemonade is ready, it’s time to chill! Taste the lemonade and adjust the sweetness if needed by adding more sugar. Once you’re satisfied with the flavor, place the pitcher in the refrigerator. Let it chill for at least 1 hour. This will allow the flavors to meld beautifully. When you’re ready to serve, fill glasses with ice cubes and pour the chilled lemonade over the ice. For a lovely touch, garnish with fresh mint leaves. Enjoy your refreshing homemade peach lemonade!

Variations of Homemade Peach Lemonade Recipe

Adding Herbs for Extra Flavor

If you want to elevate your homemade peach lemonade, consider adding herbs! Fresh herbs can bring a unique twist to your drink. One popular choice is basil. Its sweet and slightly peppery flavor pairs wonderfully with peaches. Simply add a handful of fresh basil leaves to the peach mixture while it cooks. This will infuse the lemonade with a delightful herbal note.

Another great option is rosemary. This fragrant herb adds a lovely aroma and a hint of earthiness. To use rosemary, add a few sprigs to the saucepan with the peaches and sugar. Let it simmer together, then remove the sprigs before blending. You can also try mint, which adds a refreshing touch. Just muddle a few mint leaves in the pitcher before serving for an extra burst of flavor.

Experimenting with different herbs can make your homemade peach lemonade even more exciting. Each herb brings its own character, allowing you to create a drink that’s uniquely yours. So, don’t hesitate to get creative and find the perfect herb that suits your taste!

Sparkling Peach Lemonade Twist

If you’re looking for a fizzy version of your homemade peach lemonade, try making a sparkling twist! This variation is perfect for parties or special occasions. To create sparkling peach lemonade, simply replace some of the cold water with sparkling water. The bubbles will add a fun and refreshing element to your drink.

Start by preparing the peach and lemon mixture as usual. Once you’ve combined the ingredients in the pitcher, gently stir in 2-3 cups of chilled sparkling water. Be careful not to stir too vigorously, as this can cause the bubbles to dissipate. The result is a light and bubbly beverage that’s sure to impress your guests.

For an adult version, consider adding a splash of vodka or gin. This will transform your homemade peach lemonade into a delightful cocktail. Just remember to serve it over ice and garnish with fresh fruit or herbs for a beautiful presentation. Whether you choose the sparkling version or stick with the classic, your homemade peach lemonade will be a hit!

Cooking Note for Homemade Peach Lemonade Recipe

When preparing your homemade peach lemonade, there are a few important cooking notes to keep in mind. These tips will help ensure that your drink turns out perfectly every time. First, always choose ripe peaches. The riper the peaches, the sweeter and more flavorful your lemonade will be. Look for peaches that are slightly soft to the touch and have a sweet aroma.

Next, when boiling the peach mixture, keep an eye on the heat. You want a gentle boil, not a rolling one. This helps the peaches soften without breaking down too much. Stirring occasionally will also help prevent the mixture from sticking to the bottom of the pan.

After blending the peach mixture, straining it is crucial. This step removes any fibrous bits, giving your lemonade a smooth texture. If you prefer a thicker drink, you can skip this step, but it may alter the overall mouthfeel.

Lastly, remember that the flavors of your homemade peach lemonade will develop as it chills. Allowing it to sit in the refrigerator for at least an hour will enhance the taste. If you’re in a hurry, you can serve it immediately, but the flavors will be more vibrant after chilling.

By following these cooking notes, you’ll create a delicious homemade peach lemonade that’s sure to impress. Enjoy the process and the delightful results!

Serving Suggestions for Homemade Peach Lemonade Recipe

Perfect Pairings for Your Refreshing Drink

Now that you’ve made your delicious homemade peach lemonade, it’s time to think about how to serve it! This refreshing drink pairs wonderfully with a variety of foods, making it a great choice for any occasion. Here are some perfect pairings to enhance your lemonade experience:

  • Grilled Chicken or Fish: The light and fruity flavors of peach lemonade complement grilled meats beautifully. The sweetness of the peaches balances the savory notes of chicken or fish, creating a delightful meal.
  • Salads: A fresh salad with mixed greens, nuts, and fruits pairs perfectly with your lemonade. The crispness of the salad enhances the refreshing qualities of the drink, making it a great choice for a light lunch or dinner.
  • Cheese Platter: Serve your peach lemonade alongside a cheese platter featuring soft cheeses like brie or goat cheese. The creamy textures and mild flavors of the cheese will contrast nicely with the tangy lemonade.
  • Summer Desserts: Think about serving your lemonade with light desserts like fruit tarts, sorbets, or even a peach cobbler. The fruity flavors will harmonize beautifully, making for a sweet ending to your meal.
  • Picnic Treats: If you’re enjoying a picnic, consider pairing your lemonade with sandwiches, wraps, or fresh fruit. These easy-to-eat options will keep your picnic light and refreshing.

When serving your homemade peach lemonade, consider using clear glasses to showcase its beautiful color. You can also add slices of fresh peaches or lemons to the glasses for a decorative touch. This not only looks appealing but also adds extra flavor to each sip.

Whether you’re hosting a summer gathering or enjoying a quiet afternoon, these serving suggestions will elevate your homemade peach lemonade experience. Cheers to refreshing moments!

Tips for the Best Homemade Peach Lemonade Recipe

Choosing the Right Peaches

When it comes to making the best homemade peach lemonade, selecting the right peaches is crucial. Fresh, ripe peaches will make your lemonade taste amazing. Look for peaches that are slightly soft to the touch and have a sweet aroma. These are signs that they are ripe and ready to use.

Try to avoid peaches that are hard or have blemishes. They may not have the sweet flavor you want. If peaches are out of season, frozen peaches can be a great alternative. They are picked at peak ripeness and can still provide that delicious peach flavor. Just make sure to thaw them before using in your recipe.

Another tip is to choose yellow peaches for a sweeter taste. White peaches are also an option, but they tend to be less sweet. Whichever type you choose, make sure they are juicy and flavorful. This will ensure your homemade peach lemonade is as refreshing as possible!

Adjusting Sweetness to Taste

Sweetness is a key factor in making your homemade peach lemonade just right. Everyone has different preferences, so it’s important to taste and adjust as you go. Start with the amount of sugar suggested in the recipe. After blending and mixing, take a sip to see if it meets your taste.

If you find it too tart, feel free to add more sugar, a little at a time. Stir well after each addition to ensure it dissolves completely. Remember, you can always add more sugar, but you can’t take it out once it’s in! If you prefer a healthier option, consider using honey or agave syrup as a natural sweetener.

For those who enjoy a tangy flavor, you might want to reduce the sugar slightly. This will allow the natural tartness of the lemons to shine through. The key is to find the perfect balance that suits your palate. Enjoy the process of adjusting the sweetness until it’s just right for you!

Breakdown of Time for Homemade Peach Lemonade Recipe

Prep Time

Preparing your homemade peach lemonade is quick and easy! The prep time for this delightful drink is about 15 minutes. This includes washing, pitting, and chopping the peaches, as well as squeezing the lemons for fresh juice. With just a little bit of effort, you’ll have everything ready to go!

Cooking Time

The cooking time for your peach lemonade is approximately 10 minutes. During this time, you’ll bring the peach mixture to a gentle boil, allowing the peaches to soften and the sugar to dissolve. It’s a simple process that adds wonderful flavor to your lemonade.

Total Time

In total, you can expect to spend about 1 hour and 25 minutes from start to finish. This includes the prep time, cooking time, and the chilling time in the refrigerator. Chilling is essential, as it allows the flavors to meld beautifully. So, while the active time is short, the wait will be well worth it when you take that first refreshing sip!

Nutritional Information for Homemade Peach Lemonade Recipe

Calories

When enjoying a refreshing glass of homemade peach lemonade, it’s good to know the calorie content. Each serving of this delightful drink contains approximately 120 calories. This makes it a guilt-free option for quenching your thirst on a hot day. The natural sweetness from the peaches and sugar contributes to the calorie count, but it’s all part of the delicious experience!

Protein

In terms of protein, homemade peach lemonade is quite low. Each serving contains about 1 gram of protein. While this drink isn’t a significant source of protein, it’s primarily meant to be a refreshing beverage rather than a meal replacement. Pairing it with a protein-rich snack can help balance your intake for the day.

Sodium

Another important aspect to consider is sodium content. This homemade peach lemonade recipe is naturally low in sodium, with each serving containing less than 5 milligrams. This makes it a heart-healthy choice, especially when compared to many store-bought beverages that can be high in sodium. Enjoy your homemade peach lemonade without worrying about excess sodium!

FAQs about Homemade Peach Lemonade Recipe

Can I use frozen peaches for this recipe?

Absolutely! Frozen peaches are a great alternative when fresh peaches are out of season. They are usually picked at peak ripeness and flash-frozen, preserving their sweet flavor. Just make sure to thaw them before using in your homemade peach lemonade recipe. This will help them blend smoothly and create that delicious peach puree you desire. Using frozen peaches can also save you time, making this refreshing drink even easier to prepare!

How long can I store homemade peach lemonade?

You can store your homemade peach lemonade in the refrigerator for up to 3-5 days. Just make sure to keep it in a sealed pitcher or container to maintain its freshness. Over time, the flavors may change slightly, but it will still be delicious. If you notice any separation, simply give it a good stir before serving. For the best taste, try to enjoy it within the first couple of days. This way, you can savor the vibrant flavors of summer!

What can I substitute for sugar in the recipe?

If you’re looking for a healthier option or want to reduce sugar, there are several substitutes you can use. Honey or agave syrup are excellent natural sweeteners that can enhance the flavor of your homemade peach lemonade. Start with a smaller amount, as these sweeteners can be sweeter than granulated sugar. You can also use stevia or monk fruit sweetener for a low-calorie option. Just remember to adjust the quantity to suit your taste. Enjoy experimenting with different sweeteners to find the perfect balance for your lemonade!

Conclusion on Homemade Peach Lemonade Recipe

In conclusion, making your own homemade peach lemonade is a delightful way to celebrate the flavors of summer. This refreshing drink combines the sweetness of ripe peaches with the zesty brightness of lemons, creating a perfect balance that quenches your thirst. Whether you’re enjoying it at a picnic, a barbecue, or simply on a warm afternoon, this homemade peach lemonade recipe is sure to impress.

With just a few simple ingredients and easy steps, you can whip up a batch that serves six. Plus, the variations allow you to customize your drink to suit your taste. From adding fresh herbs to creating a sparkling version, the possibilities are endless. Remember, the key to a great lemonade lies in using ripe peaches and adjusting the sweetness to your liking.

So, gather your ingredients, follow the steps, and enjoy the process of creating this delicious beverage. Your friends and family will appreciate the effort, and you’ll love the refreshing taste. Cheers to homemade peach lemonade, a drink that brings joy and refreshment to every occasion!

Summer Corn Salad with Avocado Recipe is Delicious!

Introduction to Summer Corn Salad with Avocado Recipe

Summer Corn Salad with Avocado Recipe. This salad is not only colorful but also bursting with flavor. It combines the sweetness of fresh corn, the creaminess of avocado, and the crunch of crisp vegetables. Perfect for picnics, barbecues, or a light lunch, this salad is a refreshing addition to any summer meal.

Why This Recipe is Perfect for Summer

Summer is all about enjoying fresh, seasonal ingredients. This salad highlights the best of summer produce, making it a fantastic choice for warm weather. The fresh corn kernels provide a sweet crunch, while the diced avocado adds a creamy texture that balances the dish beautifully. Moreover, the bright colors of red bell pepper, cherry tomatoes, and cucumber make it visually appealing.

Another reason this recipe shines in the summer is its versatility. You can serve it as a side dish or add protein to make it a complete meal. Plus, it’s quick and easy to prepare, allowing you to spend more time enjoying the sunshine and less time in the kitchen. With just a few simple steps, you can whip up a delicious salad that everyone will love.

So, gather your fresh ingredients and get ready to enjoy a bowl of this delightful Summer Corn Salad with Avocado. It’s a dish that celebrates the flavors of summer and brings a smile to every table!

Ingredients for Summer Corn Salad with Avocado Recipe

Summer Corn Salad with Avocado Recipe, you’ll need a selection of fresh ingredients that come together to create a vibrant and tasty dish. Here’s what you’ll need:

  • 2 cups fresh corn kernels (about 4 ears of corn)
  • 1 medium red bell pepper, diced
  • 1 medium cucumber, diced
  • 1 cup cherry tomatoes, halved
  • 1 ripe avocado, diced
  • 1/4 cup red onion, finely chopped
  • 1/4 cup fresh cilantro, chopped
  • 2 tablespoons lime juice
  • 2 tablespoons olive oil
  • 1 teaspoon honey (optional)
  • Salt and pepper to taste

These ingredients not only provide a burst of flavor but also offer a variety of textures. The sweet corn and creamy avocado create a delightful contrast, while the crunchy vegetables add freshness. Feel free to adjust the quantities based on your preferences or the number of servings you need. This salad is all about enjoying the best of summer produce!

Step-by-Step Preparation of Summer Corn Salad with Avocado Recipe

Summer Corn Salad with Avocado Recipe. Follow these simple steps to create a delicious and colorful salad that will impress your family and friends.

Step 1: Preparing the Corn

First, let’s get the corn ready. If you’re using fresh corn, bring a pot of water to a boil. Once boiling, add the corn and cook for about 3-5 minutes until it’s tender. After cooking, drain the corn and let it cool. If you prefer canned corn, simply drain it and rinse under cold water. This will help remove any excess sodium and keep the corn fresh.

Step 2: Chopping the Vegetables

Next, it’s time to chop the vegetables. Start with the red bell pepper. Dice it into small pieces, making sure they are uniform for even distribution in the salad. Then, take the cucumber and dice it as well. Halve the cherry tomatoes and set them aside. Finally, chop the red onion and cilantro finely. Each of these ingredients adds a unique flavor and texture to your salad.

Step 3: Making the Dressing

Now, let’s whip up the dressing! In a small bowl, combine the lime juice, olive oil, and honey (if you’re using it). Whisk these ingredients together until they are well blended. Add a pinch of salt and pepper to taste. This dressing will enhance the flavors of the salad and bring everything together beautifully.

Step 4: Combining Ingredients

Finally, it’s time to combine everything! In a large mixing bowl, add the cooled corn, diced red bell pepper, cucumber, halved cherry tomatoes, diced avocado, red onion, and cilantro. Pour the dressing over the top and gently toss the salad. Be careful not to mash the avocado; you want to keep those lovely chunks intact. Taste the salad and adjust the seasoning if needed. Your vibrant Summer Corn Salad with Avocado is now ready to serve!

Variation of Summer Corn Salad with Avocado Recipe

Summer Corn Salad with Avocado Recipe is delicious as is, there are many ways to customize it to suit your taste. Whether you want to add protein or try different dressings, these variations will keep your salad exciting and fresh!

Adding Protein Options

If you’re looking to make your salad more filling, consider adding some protein. Here are a few tasty options:

  • Grilled Chicken: Diced grilled chicken breast adds a savory flavor and makes the salad a complete meal.
  • Black Beans: For a vegetarian option, add a cup of rinsed black beans. They provide protein and a nice texture.
  • Feta Cheese: Crumbled feta cheese not only adds protein but also a creamy, tangy flavor that pairs well with the other ingredients.
  • Shrimp: Cooked shrimp can give your salad a seafood twist. Just toss them in with the other ingredients for a refreshing change.

These protein options not only enhance the nutritional value but also add new flavors to your salad. Feel free to mix and match based on what you have on hand!

Alternative Dressings to Try

Summer Corn Salad with Avocado Recipe. If you want to switch things up, here are some alternative dressings to consider:

  • Balsamic Vinaigrette: A balsamic vinaigrette adds a sweet and tangy flavor that complements the fresh ingredients beautifully.
  • Honey Mustard Dressing: For a bit of sweetness and a kick, try a honey mustard dressing. It pairs well with the corn and avocado.
  • Greek Yogurt Dressing: Mix Greek yogurt with lemon juice, garlic, and herbs for a creamy, healthy dressing option.
  • Avocado Lime Dressing: Blend avocado with lime juice, garlic, and a bit of water for a creamy dressing that enhances the avocado flavor.

Experimenting with different dressings can transform your salad and keep it exciting. Don’t hesitate to try new combinations that suit your palate!

Cooking Note for Summer Corn Salad with Avocado Recipe

Summer Corn Salad with Avocado Recipe, there are a few cooking notes to keep in mind to ensure your salad turns out perfectly every time. These tips will help you achieve the best flavor and texture, making your dish a hit at any gathering.

First, always use fresh ingredients when possible. Fresh corn, ripe avocados, and seasonal vegetables will elevate the taste of your salad. If you can, buy corn on the cob and cook it just before making the salad. This way, you’ll enjoy the sweetest flavor and crunch.

Next, be mindful of the avocado. Choose avocados that are ripe but not overly soft. A perfectly ripe avocado will add creaminess without turning mushy. If you find your avocado is too soft, consider using it in a smoothie or another dish instead.

Additionally, when chopping your vegetables, aim for uniform sizes. This not only makes the salad look appealing but also ensures that every bite is balanced with flavors and textures. A sharp knife will make this task easier and safer.

Lastly, if you plan to serve the salad later, consider adding the avocado just before serving. This will prevent it from browning and keep your salad looking fresh. If you do need to store it, a splash of lime juice on the avocado can help slow down the browning process.

Summer Corn Salad with Avocado Recipe that everyone will love. Enjoy the process and the delightful flavors of summer!

Serving Suggestions for Summer Corn Salad with Avocado Recipe

Summer Corn Salad with Avocado Recipe, it’s time to think about how to serve it. This salad is not only tasty but also visually appealing, making it a great centerpiece for any meal. Here are some serving suggestions to enhance your dining experience:

  • As a Side Dish: This salad pairs wonderfully with grilled meats, fish, or even veggie burgers. Serve it alongside your favorite summer barbecue dishes for a refreshing contrast.
  • In a Wrap: For a light lunch, consider wrapping the salad in a tortilla. Add some grilled chicken or turkey for extra protein, and you have a satisfying meal on the go.
  • On a Bed of Greens: Serve the salad over a bed of mixed greens or spinach. This adds extra nutrients and makes for a beautiful presentation.
  • As a Topping: Use the salad as a topping for tacos or nachos. The fresh flavors will elevate your dish and add a delightful crunch.
  • Chilled Appetizer: For a refreshing appetizer, serve the salad in small cups or bowls. This makes it easy for guests to enjoy while mingling at summer gatherings.

Summer Corn Salad with Avocado Recipe is versatile and can be enjoyed in many ways. No matter how you serve it, this salad is sure to be a hit at your next summer gathering!

Tips for Making the Best Summer Corn Salad with Avocado Recipe

Summer Corn Salad with Avocado Recipe is all about using the right techniques and ingredients. Here are some helpful tips to ensure your salad is bursting with flavor and freshness:

  • Choose Fresh Ingredients: Always opt for the freshest corn, ripe avocados, and seasonal vegetables. Fresh produce enhances the taste and texture of your salad.
  • Cook Corn Just Right: If using fresh corn, cook it until just tender. Overcooking can make it mushy. Aim for a sweet crunch that complements the other ingredients.
  • Let Flavors Marinate: Allow the salad to sit for about 30 minutes after mixing. This lets the flavors meld together, creating a more delicious dish.
  • Be Gentle with Avocado: When mixing, be careful not to mash the avocado. You want to keep those lovely chunks intact for a creamy texture in every bite.
  • Season to Taste: Don’t forget to taste your salad before serving. Adjust the seasoning with salt, pepper, or extra lime juice to suit your preference.
  • Experiment with Add-Ins: Feel free to add other ingredients like diced jalapeños for heat or nuts for crunch. This can give your salad a unique twist.
  • Store Properly: If you have leftovers, store them in an airtight container. To keep the avocado from browning, add a little extra lime juice on top before sealing.
  • Serve Chilled: This salad is best served cold. If you have time, refrigerate it for a bit before serving to enhance its refreshing qualities.

Summer Corn Salad with Avocado Recipe that will impress your family and friends. Enjoy the process and the delightful flavors of summer!

Breakdown of Time for Summer Corn Salad with Avocado Recipe

Summer Corn Salad with Avocado Recipe can help you plan your meals better. Here’s a simple breakdown of the time required for each step, so you can enjoy this delicious salad without any rush.

Prep Time

The prep time for this salad is quite short. You’ll need about 15 minutes to gather your ingredients and chop the vegetables. This includes:

  • Shucking and cutting the corn (if using fresh)
  • Dicing the red bell pepper, cucumber, and avocado
  • Halving the cherry tomatoes and chopping the onion and cilantro

With a little organization, you can have everything ready in no time!

Cooking Time

If you’re using fresh corn, the cooking time is minimal. It takes about 3-5 minutes to boil the corn until tender. If you opt for canned corn, you can skip this step entirely, making your cooking time almost nonexistent. So, the cooking time can range from:

  • 3-5 minutes (for fresh corn)
  • 0 minutes (for canned corn)

Total Time

Summer Corn Salad with Avocado Recipe is approximately:

  • 15 minutes (prep) + 3-5 minutes (cooking) = 18-20 minutes total
  • Or just 15 minutes if using canned corn!

Summer Corn Salad with Avocado Recipe in no time!

Nutritional Information for Summer Corn Salad with Avocado Recipe

Summer Corn Salad with Avocado Recipe is essential for maintaining a balanced diet. This salad is not only delicious but also packed with nutrients that can benefit your health. Here’s a breakdown of the key nutritional information per serving:

Calories

Each serving of this vibrant salad contains approximately 150 calories. This makes it a light yet satisfying option for lunch or as a side dish. The combination of fresh vegetables and healthy fats from the avocado provides a nutritious boost without overwhelming your calorie intake.

Protein

Summer Corn Salad with Avocado Recipe offers about 3 grams per serving. While this may seem modest, it’s important to remember that the salad is primarily vegetable-based. If you add protein options like grilled chicken, black beans, or feta cheese, you can significantly increase the protein content, making it a more complete meal.

Sodium

The sodium content in this salad is quite low, making it a heart-healthy choice. On average, it contains around 200 mg of sodium per serving, depending on how much salt you add. This is beneficial for those watching their sodium intake, as fresh ingredients typically have lower sodium levels compared to processed foods.

Summer Corn Salad with Avocado Recipe is a nutritious and flavorful option that can fit well into various dietary plans. With its low calorie count, moderate protein, and low sodium levels, it’s a great choice for anyone looking to enjoy a healthy meal during the summer months.

FAQs about Summer Corn Salad with Avocado Recipe

Can I use frozen corn for this recipe?

Summer Corn Salad with Avocado Recipe. It’s convenient and often just as sweet as fresh corn. To use frozen corn, simply thaw it first. You can do this by placing it in a bowl of warm water for a few minutes or by microwaving it for a short time. Once thawed, drain any excess water and add it to your salad. This way, you can enjoy the same delightful flavors without the hassle of cooking fresh corn!

How long can I store Summer Corn Salad with Avocado?

Summer Corn Salad with Avocado Recipe right after making it. However, if you have leftovers, you can store them in an airtight container in the refrigerator. The salad will stay fresh for about 1-2 days. Keep in mind that the avocado may brown over time, so it’s best to add it just before serving if you plan to store the salad. A splash of lime juice on the avocado can help slow down the browning process, keeping your salad looking vibrant for longer!

What can I substitute for avocado in this recipe?

Summer Corn Salad with Avocado Recipe, there are a few tasty options. You can use diced mango for a sweet twist, or try adding diced cucumber for a refreshing crunch. Another option is to use a dollop of Greek yogurt for creaminess without the avocado. Each of these substitutes will bring a unique flavor and texture to your salad, so feel free to experiment and find what you enjoy the most!

Conclusion on Summer Corn Salad with Avocado Recipe

Summer Corn Salad with Avocado Recipe is a delightful dish that perfectly captures the essence of summer. With its vibrant colors and fresh flavors, this salad is not only a feast for the eyes but also a treat for the taste buds. The combination of sweet corn, creamy avocado, and crunchy vegetables creates a refreshing experience that is hard to resist.

This recipe is incredibly versatile, allowing you to customize it to your liking. Whether you choose to add protein, experiment with different dressings, or incorporate additional ingredients, the possibilities are endless. It’s a fantastic way to enjoy seasonal produce while keeping your meals light and healthy.

Moreover, the ease of preparation makes it an ideal choice for busy summer days. With just a few simple steps, you can whip up a delicious salad that’s perfect for picnics, barbecues, or even a quick lunch at home. Plus, the nutritional benefits of this salad make it a smart choice for anyone looking to maintain a balanced diet.

Summer Corn Salad with Avocado Recipe. It’s sure to impress your family and friends, bringing smiles and satisfaction to every gathering. Enjoy the flavors of summer and make this salad a staple in your seasonal menu!

Strawberry Spinach Salad Recipe is a must-try dish!

Introduction to Strawberry Spinach Salad Recipe

The Appeal of Strawberry Spinach Salad

Strawberry Spinach Salad Recipe. This delightful salad combines the crispness of baby spinach with the sweetness of ripe strawberries. It’s a perfect choice for a light lunch or a side dish at dinner. The colors alone make it visually appealing, and the flavors are simply irresistible.

One of the best things about this salad is its versatility. You can enjoy it as is or customize it to suit your taste. Whether you’re a fan of nuts, cheese, or even grilled chicken, there’s a way to make this salad your own. Plus, it’s quick to prepare, making it an excellent option for busy weeknights or last-minute gatherings.

Strawberry Spinach Salad Recipe tasty, but it’s also packed with nutrients. Spinach is rich in vitamins A and C, while strawberries provide antioxidants and fiber. Together, they create a dish that’s not just good for your taste buds but also for your health.

In the following sections, we’ll dive into the ingredients, preparation steps, and some exciting variations to keep your meals fresh and exciting. So, let’s get started on this delicious journey!

Ingredients for Strawberry Spinach Salad Recipe

Strawberry Spinach Salad Recipe, you’ll need a few fresh ingredients that come together beautifully. Here’s what you’ll need:

  • 4 cups fresh baby spinach, washed and dried
  • 2 cups fresh strawberries, hulled and sliced
  • 1/2 cup sliced almonds, toasted
  • 1/4 cup crumbled feta cheese
  • 1/4 cup red onion, thinly sliced

For the dressing, gather these ingredients:

  • 1/4 cup olive oil
  • 2 tablespoons balsamic vinegar
  • 1 tablespoon honey
  • 1 teaspoon Dijon mustard
  • Salt and pepper to taste

These ingredients not only provide a burst of flavor but also contribute to the salad’s nutritional value. The spinach offers essential vitamins, while strawberries add a sweet touch. The toasted almonds give a nice crunch, and feta cheese adds creaminess. Together, they create a balanced dish that’s sure to please everyone at the table.

Strawberry Spinach Salad Recipe to life!

Step-by-Step Preparation of Strawberry Spinach Salad Recipe

Step 1: Preparing the Spinach

Strawberry Spinach Salad Recipe.

Step 2: Slicing the Strawberries

Next up, it’s time to prepare those juicy strawberries! Take your fresh strawberries and hull them, which means removing the green tops. After hulling, slice the strawberries into thin pieces. You can cut them into halves or quarters, depending on your preference. The sweetness of the strawberries will add a delightful contrast to the spinach. Once sliced, add them to the bowl with the spinach.

Step 3: Adding Additional Ingredients

Strawberry Spinach Salad Recipe truly special!

Step 4: Making the Dressing

While the salad ingredients are coming together, it’s time to whip up the dressing. In a small bowl or jar, combine the olive oil, balsamic vinegar, honey, and Dijon mustard. Use a whisk or a fork to mix everything until it’s well blended. The dressing should be smooth and slightly thick. Don’t forget to season it with salt and pepper to taste. This dressing will tie all the flavors together beautifully!

Step 5: Assembling the Salad

Strawberry Spinach Salad Recipe immediately for the best taste and texture. Enjoy your fresh and vibrant creation!

Variations of Strawberry Spinach Salad Recipe

Adding Nuts and Seeds

Strawberry Spinach Salad Recipe is how easy it is to customize. Adding different nuts and seeds can enhance the flavor and texture. For instance, if you want a richer taste, try using walnuts or pecans instead of almonds. They add a delightful crunch and a slightly sweet flavor.

Additionally, you can sprinkle some sunflower seeds or pumpkin seeds on top. These seeds not only add a nice crunch but also boost the nutritional value of your salad. They are packed with healthy fats and protein, making your salad even more satisfying. Feel free to mix and match to find your favorite combination!

Incorporating Cheese

Strawberry Spinach Salad Recipe to a whole new level. While feta cheese is a popular choice, you can experiment with other types as well. Goat cheese offers a creamy texture and tangy flavor that pairs beautifully with strawberries. If you prefer a sharper taste, try crumbled blue cheese.

For a milder option, shredded mozzarella or even a sprinkle of Parmesan can work wonders. Each cheese brings its unique flavor profile, allowing you to create a salad that suits your taste. Don’t hesitate to get creative and find the perfect cheese for your salad!

Seasonal Variations

Strawberry Spinach Salad Recipe is by incorporating seasonal ingredients. In the summer, add fresh blueberries or raspberries for a burst of color and flavor. In the fall, consider tossing in some sliced apples or pears for a sweet crunch.

During the winter months, you can add roasted butternut squash or pomegranate seeds for a festive touch. These seasonal variations not only keep your salad fresh but also make it a delightful dish year-round. Embrace the changing seasons and let your creativity shine!

Cooking Note for Strawberry Spinach Salad Recipe

Strawberry Spinach Salad Recipe, there are a few important cooking notes to keep in mind. These tips will help you achieve the best flavor and texture for your salad.

First, always use fresh ingredients. Fresh baby spinach and ripe strawberries are key to a delicious salad. Look for vibrant green spinach leaves and strawberries that are bright red and firm. This ensures that your salad is not only tasty but also visually appealing.

Next, consider the timing of your salad assembly. It’s best to prepare the salad just before serving. This way, the spinach remains crisp, and the strawberries stay juicy. If you need to prepare it in advance, keep the dressing separate until you’re ready to serve. This prevents the spinach from wilting and losing its crunch.

Additionally, when toasting the almonds, keep a close eye on them. Nuts can burn quickly, so toast them over medium heat and stir frequently. This enhances their flavor and adds a delightful crunch to your salad.

Strawberry Spinach Salad Recipe lies in its flexibility, allowing you to create a dressing that suits your palate perfectly.

By following these cooking notes, you’ll ensure that your salad is not only delicious but also a hit at any gathering!

Serving Suggestions for Strawberry Spinach Salad Recipe

Strawberry Spinach Salad Recipe, presentation is key! A beautifully arranged salad not only looks appetizing but also enhances the dining experience. Here are some delightful serving suggestions to elevate your salad:

First, consider using a large, shallow bowl for serving. This allows the vibrant colors of the spinach and strawberries to shine. You can also layer the ingredients in a clear glass bowl to showcase the beautiful colors. This makes the salad visually appealing and inviting.

For a more elegant touch, serve the salad in individual portions. Use small plates or salad bowls to create personal servings. This is perfect for dinner parties or special occasions. You can even garnish each plate with a few extra strawberry slices or a sprinkle of feta cheese for added flair.

Strawberry Spinach Salad Recipe with a variety of main dishes. It complements grilled chicken or fish beautifully, making it a great side for summer barbecues. You can also serve it alongside a hearty soup for a light lunch. The freshness of the salad balances well with warm, comforting dishes.

If you’re looking for a vegetarian option, consider serving the salad with a quinoa or chickpea dish. These protein-packed options make for a satisfying meal. Additionally, the salad can be a refreshing side to pasta dishes, adding a burst of flavor and color to your plate.

Strawberry Spinach Salad Recipe will be a hit at any gathering!

Tips for Perfecting Your Strawberry Spinach Salad Recipe

Strawberry Spinach Salad Recipe is all about attention to detail. Here are some helpful tips to ensure your salad is not only delicious but also visually stunning and satisfying.

First, always choose the freshest ingredients. Fresh baby spinach should be vibrant green and crisp. Look for strawberries that are bright red, firm, and fragrant. The quality of your ingredients will significantly impact the overall taste of your salad.

Next, consider the texture. To keep your salad crunchy, avoid over-dressing it. Add the dressing just before serving to prevent the spinach from wilting. If you have leftover salad, store the dressing separately to maintain freshness.

For added flavor, try marinating the red onion in the dressing for a few minutes before adding it to the salad. This softens the onion’s sharpness and enhances its sweetness, making it a delightful addition.

Don’t forget about presentation! Arrange the spinach, strawberries, and other ingredients in a visually appealing way. Layering the ingredients can create a beautiful display. You can also sprinkle some extra nuts or cheese on top for a finishing touch.

Another tip is to experiment with the dressing. If you prefer a creamier texture, consider adding a dollop of Greek yogurt to the dressing. This will give it a rich flavor while still keeping it healthy. You can also try different vinegars, like apple cider vinegar, for a unique twist.

Strawberry Spinach Salad Recipe is versatile. Feel free to add seasonal fruits, different nuts, or even grains like quinoa for a heartier meal. The possibilities are endless, and your salad can be as unique as you are!

Strawberry Spinach Salad Recipe. Enjoy the process and have fun experimenting with flavors!

Breakdown of Time for Strawberry Spinach Salad Recipe

Prep Time

Strawberry Spinach Salad Recipe is quick and easy! You’ll need about 15 minutes for prep time. This includes washing and drying the spinach, hulling and slicing the strawberries, and gathering all your ingredients. If you’re toasting the almonds, add a few extra minutes to keep an eye on them. Overall, it’s a simple process that won’t take much of your time!

Cooking Time

Interestingly, there’s no actual cooking involved in this salad! The only time you’ll spend is toasting the almonds, which takes about 5 minutes. Just remember to stir them frequently to avoid burning. So, while there’s no cooking time per se, the preparation and toasting will keep you busy for a short while.

Total Time

Strawberry Spinach Salad Recipe. This includes both prep and toasting time. It’s a fantastic option for a quick meal or side dish, especially when you’re short on time. With such a minimal time commitment, you can enjoy a fresh and healthy salad in no time!

Nutritional Information for Strawberry Spinach Salad Recipe

Calories

Strawberry Spinach Salad Recipe, you might be curious about its calorie content. Each serving of this vibrant salad contains approximately 210 calories. This makes it a light yet satisfying option for lunch or dinner. The combination of fresh ingredients ensures that you’re not only enjoying a tasty dish but also keeping your calorie intake in check.

Protein

Strawberry Spinach Salad Recipe, you’ll find about 5 grams of protein per serving. While this may not seem like a lot, the protein content can be boosted by adding grilled chicken, chickpeas, or even some seeds. These additions not only enhance the flavor but also make the salad more filling and nutritious.

Sodium

Strawberry Spinach Salad Recipe contains a modest amount of sodium, primarily from the feta cheese and the dressing. To keep the sodium levels in check, you can opt for low-sodium feta or adjust the amount of salt you add to the dressing. This way, you can enjoy your salad without worrying about excessive sodium intake.

Strawberry Spinach Salad Recipe is a nutritious choice that offers a balance of calories, protein, and sodium. It’s a great way to incorporate fresh ingredients into your diet while enjoying a delightful meal!

FAQs about Strawberry Spinach Salad Recipe

Can I make Strawberry Spinach Salad ahead of time?

Strawberry Spinach Salad Recipe ahead of time! You can wash and dry the spinach, slice the strawberries, and toast the almonds a day in advance. However, it’s best to wait to assemble the salad until just before serving. This keeps the spinach crisp and the strawberries fresh. If you need to store it, keep the dressing separate and add it right before serving to maintain the salad’s texture.

What can I substitute for spinach in the salad?

Strawberry Spinach Salad Recipe, there are several options! You can use kale, arugula, or mixed greens as alternatives. Each of these greens offers a unique flavor and texture. Just remember that some greens, like kale, may need to be massaged a bit to soften them before adding the other ingredients. Feel free to experiment and find the green that you enjoy the most!

How long does Strawberry Spinach Salad last in the fridge?

Strawberry Spinach Salad Recipe is best enjoyed fresh, but if you have leftovers, you can store them in the fridge. It’s recommended to eat the salad within 1 to 2 days. However, keep in mind that the spinach may wilt and the strawberries can become mushy over time. To extend freshness, store the salad without dressing and add it just before eating.

Is Strawberry Spinach Salad healthy?

Strawberry Spinach Salad Recipe is a healthy choice packed with nutrients. Spinach is rich in vitamins A and C, while strawberries provide antioxidants and fiber. The addition of nuts and feta cheese adds healthy fats and protein. Overall, this salad is a great way to enjoy fresh ingredients while keeping your meal light and nutritious. It’s perfect for anyone looking to maintain a balanced diet!

Conclusion on Strawberry Spinach Salad Recipe

Strawberry Spinach Salad Recipe is a delightful dish that brings together fresh ingredients, vibrant colors, and delicious flavors. Whether you’re enjoying it as a light lunch, a side dish, or a refreshing addition to a summer barbecue, this salad is sure to impress. Its versatility allows you to customize it to your liking, making it a favorite for many.

By following the simple steps outlined in this article, you can create a salad that not only tastes great but also nourishes your body. The combination of spinach and strawberries provides essential vitamins and antioxidants, while the nuts and cheese add a satisfying crunch and creaminess. Plus, the homemade dressing ties everything together beautifully, enhancing the overall flavor.

Strawberry Spinach Salad Recipe lies in using fresh ingredients and assembling it just before serving. This ensures that every bite is crisp and full of flavor. Don’t hesitate to experiment with different variations, whether it’s adding seasonal fruits, trying out different nuts, or incorporating your favorite cheese.

Strawberry Spinach Salad Recipe is bound to become a staple in your kitchen. Enjoy your culinary adventure, and happy eating!

Sweet and Spicy Thai Mango Salad is a must-try dish!

Introduction to Sweet and Spicy Thai Mango Salad

Sweet and Spicy Thai Mango Salad is not just a dish; it’s an experience. This salad brings together the sweetness of ripe mangoes, the crunch of fresh vegetables, and a zesty dressing that dances on your taste buds. Perfect for any occasion, this salad can brighten up your lunch, dinner, or even a picnic.

What Makes Sweet and Spicy Thai Mango Salad Unique?

Sweet and Spicy Thai Mango Salad apart is its delightful balance of flavors. The juicy mangoes provide a natural sweetness, while the red bell pepper and cucumber add a refreshing crunch. The shredded carrots contribute a lovely color and texture, making the salad visually appealing.

Moreover, the dressing is where the magic happens. With lime juice for tanginess, fish sauce for umami, and honey for sweetness, it creates a perfect harmony. The addition of sriracha gives it a spicy kick, which you can adjust based on your preference. This unique combination of ingredients makes the salad not only delicious but also a feast for the eyes.

Sweet and Spicy Thai Mango Salad is sure to impress. It’s a dish that celebrates fresh ingredients and bold flavors, making it a must-try for anyone looking to elevate their meal.

Ingredients for Sweet and Spicy Thai Mango Salad

Sweet and Spicy Thai Mango Salad starts with gathering fresh and vibrant ingredients. Each component plays a crucial role in building the salad’s unique flavor profile. Here’s what you’ll need:

  • 2 ripe mangoes, peeled and diced
  • 1 red bell pepper, diced
  • 1 cucumber, diced
  • 1 cup shredded carrots
  • 1/4 cup red onion, thinly sliced
  • 1/4 cup fresh cilantro, chopped
  • 1/4 cup roasted peanuts, chopped
  • 1 tablespoon sesame seeds

For the dressing, gather these ingredients:

  • 3 tablespoons lime juice
  • 2 tablespoons fish sauce
  • 1 tablespoon honey
  • 1 teaspoon sriracha (adjust to taste)
  • 1 teaspoon grated fresh ginger
  • 1 clove garlic, minced

These ingredients come together to create a salad that is not only delicious but also packed with nutrients. The mangoes provide vitamins A and C, while the vegetables add fiber and crunch. The dressing enhances the flavors, making every bite a delightful experience.

Sweet and Spicy Thai Mango Salad is versatile and can be tailored to suit your taste!

Step-by-Step Preparation of Sweet and Spicy Thai Mango Salad

Sweet and Spicy Thai Mango Salad. This step-by-step guide will help you create a delicious and colorful salad that’s sure to impress your family and friends.

Step 1: Preparing the Mangoes

First, let’s focus on the star of the show: the mangoes. Start by peeling the ripe mangoes. A sharp knife works best for this task. Once peeled, carefully dice the mangoes into bite-sized pieces. Make sure to remove the pit, as it can be quite tough. The mangoes should be juicy and sweet, adding a delightful flavor to your salad.

Step 2: Chopping the Vegetables

Sweet and Spicy Thai Mango Salad.

Step 3: Making the Dressing

Now, let’s whip up the dressing! In a small bowl, combine the lime juice, fish sauce, honey, sriracha, grated ginger, and minced garlic. Use a whisk to mix everything together until it’s well combined. The dressing should be tangy, sweet, and a little spicy. Taste it and adjust the sriracha if you want more heat. This dressing is what brings all the flavors together!

Step 4: Combining Ingredients

With all your ingredients prepped, it’s time to combine them. In a large bowl, add the diced mangoes, chopped red bell pepper, cucumber, shredded carrots, sliced red onion, chopped cilantro, roasted peanuts, and sesame seeds. Gently toss everything together to ensure the ingredients are evenly mixed. Then, pour the dressing over the salad and toss again. Make sure every piece is coated with that delicious dressing!

Step 5: Serving the Salad

Sweet and Spicy Thai Mango Salad chilled or at room temperature. It’s perfect as a side dish or a light main course. Enjoy the burst of flavors in every bite!

Variations of Sweet and Spicy Thai Mango Salad

Sweet and Spicy Thai Mango Salad is incredibly versatile. You can easily customize it to suit your taste or dietary needs. Here are some exciting variations to consider:

Adding Proteins to Sweet and Spicy Thai Mango Salad

If you want to make your salad more filling, consider adding proteins. Grilled chicken or shrimp pairs wonderfully with the fresh flavors of the salad. Simply grill the protein of your choice, slice it, and toss it in with the other ingredients. For a heartier option, you can also add tofu. Just cube the tofu and sauté it until golden brown before mixing it into the salad. This addition not only enhances the taste but also boosts the nutritional value, making it a complete meal.

Vegetarian Options for Sweet and Spicy Thai Mango Salad

Sweet and Spicy Thai Mango Salad can easily be adapted. As mentioned earlier, replace the fish sauce with soy sauce or tamari for a delicious vegetarian dressing. You can also add chickpeas or black beans for extra protein. These legumes will add a nice texture and make the salad more satisfying. Additionally, consider incorporating avocado for creaminess. The rich flavor of avocado complements the sweetness of the mangoes beautifully, creating a delightful contrast.

Sweet and Spicy Thai Mango Salad in many different ways. Whether you prefer it with protein or as a vegetarian delight, this salad is sure to please everyone at the table!

Cooking Note for Sweet and Spicy Thai Mango Salad

Sweet and Spicy Thai Mango Salad, a few cooking notes can help you achieve the best results. First, always choose ripe mangoes. They should be slightly soft to the touch and have a sweet aroma. This ensures that your salad will be bursting with flavor.

Next, consider the freshness of your vegetables. Crisp, fresh vegetables will enhance the overall texture of the salad. If possible, buy organic produce to maximize flavor and nutrition. Additionally, washing your vegetables thoroughly is essential to remove any dirt or pesticides.

For the dressing, whisking the ingredients together until well combined is crucial. This ensures that the flavors meld perfectly. If you prefer a smoother dressing, you can blend the ingredients in a small food processor. This method will create a creamy texture that coats the salad beautifully.

Another tip is to let the salad sit for a bit after mixing. This resting time allows the flavors to develop and intensify. However, if you plan to serve the salad later, consider adding the dressing just before serving. This will keep the vegetables crisp and prevent them from becoming soggy.

Sweet and Spicy Thai Mango Salad is adaptable, so don’t hesitate to try new combinations. Whether it’s adding different nuts, herbs, or proteins, the possibilities are endless. Enjoy the process and make this salad your own!

Serving Suggestions for Sweet and Spicy Thai Mango Salad

Sweet and Spicy Thai Mango Salad, the presentation can elevate the dining experience. Here are some delightful serving suggestions to consider:

  • As a Side Dish: This salad pairs beautifully with grilled meats, seafood, or tofu. Serve it alongside dishes like grilled chicken, shrimp skewers, or even a hearty steak. The fresh flavors of the salad will complement the richness of the main course.
  • In Lettuce Wraps: For a fun twist, serve the salad in crisp lettuce leaves. Butter lettuce or romaine works well. This makes for a light and refreshing appetizer or snack. Just scoop the salad into the leaves and enjoy!
  • As a Light Lunch: Enjoy the Sweet and Spicy Thai Mango Salad on its own for a quick and healthy lunch. You can add a protein source, like grilled chicken or chickpeas, to make it more filling. Pack it in a container for a nutritious meal on the go.
  • Garnished with Extra Herbs: For an extra burst of flavor, garnish the salad with additional fresh herbs like mint or basil. This adds a lovely aroma and enhances the overall taste.
  • With a Side of Rice: Serve the salad with a side of jasmine or brown rice. This combination makes for a satisfying meal, perfect for lunch or dinner.

Sweet and Spicy Thai Mango Salad but also make it a versatile dish suitable for various occasions. Whether you’re hosting a dinner party or enjoying a casual meal, this salad is sure to impress!

Tips for Perfecting Your Sweet and Spicy Thai Mango Salad

Sweet and Spicy Thai Mango Salad, consider these helpful tips. They will ensure that every bite is bursting with flavor and freshness.

First, always use ripe mangoes. The sweetness of the mangoes is the star of this salad. Look for mangoes that yield slightly to pressure and have a fragrant aroma. If they are too firm, they may not be sweet enough. If you can’t find ripe mangoes, you can let them sit at room temperature for a few days until they soften.

Next, balance the flavors in your dressing. The dressing is crucial for tying all the ingredients together. Taste it before adding it to the salad. If it’s too tangy, add a bit more honey. If it’s too sweet, a splash of lime juice can help. Adjust the sriracha to your preferred spice level. This way, you can create a dressing that perfectly suits your taste.

When chopping your vegetables, aim for uniform sizes. This not only makes the salad look more appealing but also ensures that every bite has a mix of flavors and textures. Use a sharp knife for clean cuts, and take your time to make sure everything is evenly diced.

For added crunch, consider toasting the peanuts or any nuts you choose to use. Toasting enhances their flavor and adds a delightful crunch to the salad. Simply place them in a dry skillet over medium heat for a few minutes, stirring frequently until they are golden brown.

Lastly, let the salad rest before serving. Allowing it to sit for 10-15 minutes after mixing gives the flavors time to meld together. This resting period enhances the overall taste, making each bite even more delicious. If you’re preparing it ahead of time, keep the dressing separate until you’re ready to serve to maintain the crispness of the vegetables.

Sweet and Spicy Thai Mango Salad that is not only delicious but also visually stunning. Enjoy the process of making this vibrant dish, and don’t hesitate to share it with family and friends!

Breakdown of Time for Sweet and Spicy Thai Mango Salad

Sweet and Spicy Thai Mango Salad can help you plan your meal better. Here’s a simple breakdown of the time involved in making this delightful dish.

Prep Time

Sweet and Spicy Thai Mango Salad is approximately 20 minutes. This includes gathering all your ingredients, peeling and dicing the mangoes, chopping the vegetables, and preparing the dressing. Taking your time during this stage ensures that everything is fresh and ready to go!

Cooking Time

Sweet and Spicy Thai Mango Salad lies in its raw ingredients. However, if you choose to grill proteins or toast nuts, you might want to add an additional 10-15 minutes for that. But for the salad itself, it’s all about fresh, uncooked ingredients!

Total Time

Sweet and Spicy Thai Mango Salad. This quick preparation time makes it an excellent choice for a healthy meal, especially when you’re short on time. Plus, the resting time of 10-15 minutes allows the flavors to meld beautifully, making it worth the wait!

Sweet and Spicy Thai Mango Salad is a quick and easy option that doesn’t compromise on flavor or nutrition.

Nutritional Information for Sweet and Spicy Thai Mango Salad

Sweet and Spicy Thai Mango Salad can help you make informed choices about your meals. This salad is not only delicious but also packed with essential nutrients. Let’s break down the key nutritional components.

Calories in Sweet and Spicy Thai Mango Salad

Sweet and Spicy Thai Mango Salad contains approximately 180 calories. This makes it a light and healthy option for lunch or dinner. The low-calorie count allows you to enjoy this vibrant dish without worrying about overindulging. Plus, the fresh ingredients provide a satisfying meal that keeps you feeling full.

Protein Content in Sweet and Spicy Thai Mango Salad

In terms of protein, the salad offers about 4 grams per serving. While this may seem modest, the protein content comes from the combination of ingredients like peanuts and vegetables. If you’re looking to increase the protein level, consider adding grilled chicken, shrimp, or tofu. These additions will not only enhance the flavor but also make the salad more filling and nutritious.

Sodium Levels in Sweet and Spicy Thai Mango Salad

Sweet and Spicy Thai Mango Salad is relatively low, making it a heart-healthy choice. The fish sauce contributes to the sodium levels, but you can easily control this by adjusting the amount used or opting for low-sodium alternatives. On average, a serving contains around 400 mg of sodium. This is well within the recommended daily intake, especially when balanced with other low-sodium foods throughout the day.

Sweet and Spicy Thai Mango Salad is a nutritious option that provides a good balance of calories, protein, and sodium. It’s a great way to incorporate fresh fruits and vegetables into your diet while enjoying a burst of flavors. Whether you’re looking for a light meal or a side dish, this salad is sure to satisfy your cravings!

FAQs about Sweet and Spicy Thai Mango Salad

Can I make Sweet and Spicy Thai Mango Salad ahead of time?

Sweet and Spicy Thai Mango Salad ahead of time! However, it’s best to keep the dressing separate until you’re ready to serve. This way, the vegetables will stay crisp and fresh. You can chop the mangoes and vegetables a few hours in advance and store them in the refrigerator. Just remember to toss everything together with the dressing right before serving to maintain the salad’s vibrant texture and flavor.

What can I substitute for mango in Sweet and Spicy Thai Mango Salad?

Sweet and Spicy Thai Mango Salad, making it just as delightful!

Is Sweet and Spicy Thai Mango Salad gluten-free?

Sweet and Spicy Thai Mango Salad can be gluten-free! The main ingredients, including mangoes, vegetables, and nuts, are naturally gluten-free. However, if you’re using fish sauce, make sure to choose a gluten-free brand. Alternatively, you can substitute fish sauce with soy sauce or tamari, which also has gluten-free options. Always check the labels to ensure your ingredients meet your dietary needs.

How can I adjust the spiciness in Sweet and Spicy Thai Mango Salad?

Sweet and Spicy Thai Mango Salad is easy! The primary source of heat comes from the sriracha in the dressing. If you prefer a milder flavor, start with less sriracha and gradually add more until it reaches your desired spice level. For those who love heat, consider adding sliced jalapeños or a pinch of red pepper flakes. Just remember, it’s always easier to add more spice than to take it away!

Conclusion on Sweet and Spicy Thai Mango Salad

Sweet and Spicy Thai Mango Salad is a delightful dish that brings together a medley of flavors and textures. Its vibrant colors and fresh ingredients make it not only a feast for the palate but also a visual treat. Whether you’re enjoying it as a side dish or a light main course, this salad is sure to impress.

Sweet and Spicy Thai Mango Salad is versatile and can be easily customized to suit your taste. You can add proteins for a heartier meal or keep it vegetarian with simple substitutions. The possibilities are endless!

Moreover, this salad is packed with nutrients, making it a healthy choice for any meal. It’s low in calories and sodium while providing essential vitamins and minerals. Plus, the quick preparation time makes it an excellent option for busy days when you want something nutritious and delicious.

Sweet and Spicy Thai Mango Salad a try? Gather your ingredients, follow the simple steps, and enjoy a burst of flavors that will brighten your day. Whether you’re hosting a gathering or simply treating yourself, this salad is bound to be a hit. Embrace the freshness and let the vibrant flavors take center stage in your kitchen!

Pineapple Cucumber Salad is a refreshing summer delight.

Introduction to Pineapple Cucumber Salad Recipe

The Refreshing Appeal of Pineapple Cucumber Salad

Pineapple Cucumber Salad Recipe is just what you need! This vibrant salad combines the sweetness of fresh pineapple with the crispness of cucumber. It’s perfect for hot summer days or as a side dish for any meal. The bright colors and flavors make it visually appealing and delicious.

Not only is this salad tasty, but it’s also packed with nutrients. Pineapple is rich in vitamins and antioxidants, while cucumber adds hydration and crunch. Together, they create a delightful mix that can brighten up any table. Plus, the addition of red bell pepper and red onion gives it a nice kick, making every bite exciting.

Pineapple Cucumber Salad Recipe is easy to prepare, and it can be customized to suit your taste. With just a few simple ingredients, you can whip up a dish that everyone will love.

So, let’s dive into the ingredients and preparation steps to create this refreshing salad. You’ll be amazed at how quickly you can bring this delightful dish to life!

Ingredients for Pineapple Cucumber Salad Recipe

Pineapple Cucumber Salad Recipe, you’ll need a few fresh ingredients. Each component adds its unique flavor and texture, making the salad a delightful experience. Here’s what you’ll need:

  • 2 cups fresh pineapple, diced
  • 1 large cucumber, peeled and diced
  • 1/2 red bell pepper, diced
  • 1/4 red onion, finely chopped
  • 1/4 cup fresh cilantro, chopped
  • 1/4 cup lime juice (about 2 limes)
  • 1 tablespoon honey (optional)
  • Salt and pepper to taste

These ingredients come together to create a salad that is not only refreshing but also colorful. The pineapple brings sweetness, while the cucumber adds a satisfying crunch. The red bell pepper and onion provide a nice contrast, both in flavor and appearance. Fresh cilantro adds a hint of earthiness, tying all the flavors together.

Pineapple Cucumber Salad Recipe is its flexibility. You can easily make it your own!

Step-by-Step Preparation of Pineapple Cucumber Salad Recipe

Step 1: Preparing the Ingredients

Pineapple Cucumber Salad Recipe, gather all your ingredients. First, wash the fresh produce thoroughly. This ensures that your salad is clean and safe to eat. Next, take the pineapple and cut it into small, bite-sized pieces. Make sure to remove the tough core. Then, peel the cucumber and dice it into similar-sized pieces. This will help create a uniform texture in your salad.

Now, chop the red bell pepper and red onion. The bell pepper adds sweetness, while the onion gives a nice crunch. Finally, chop the fresh cilantro. This herb adds a burst of flavor and freshness to the salad. Once everything is prepared, you’re ready to mix!

Step 2: Mixing the Salad

In a large mixing bowl, combine all the prepared ingredients. Start with the diced pineapple, cucumber, red bell pepper, and red onion. Add the chopped cilantro last, as it can be delicate. Gently toss the ingredients together using a spatula or large spoon. Be careful not to mash the pineapple or cucumber. You want to keep the pieces intact for a delightful crunch in every bite.

Mixing the salad well ensures that all the flavors blend together. The vibrant colors will make your salad look even more appealing. It’s a feast for the eyes as well as the taste buds!

Step 3: Adding the Dressing

Pineapple Cucumber Salad Recipe. In a small bowl, whisk together the lime juice and honey. The lime juice adds a zesty flavor, while honey brings a touch of sweetness. If you prefer a tangy taste, you can skip the honey. Once the dressing is well combined, pour it over the salad mixture.

Gently toss the salad again to ensure that every piece is coated with the dressing. This step is crucial, as it enhances the overall flavor of the salad. The lime dressing will brighten the dish and make it even more refreshing!

Step 4: Chilling the Salad

For the best flavor, let your salad chill in the refrigerator for at least 30 minutes. This allows the flavors to meld together beautifully. While it’s chilling, the salad will also become even more refreshing. If you’re in a hurry, you can serve it right away, but chilling is highly recommended.

Pineapple Cucumber Salad Recipe is ready to be enjoyed!

Variation of Pineapple Cucumber Salad Recipe

Adding Protein to Your Salad

Pineapple Cucumber Salad Recipe more filling? Adding protein is a great way to do it! You can easily transform this refreshing salad into a complete meal. Here are some tasty options:

  • Grilled Chicken: Diced grilled chicken breast adds a savory flavor. It pairs well with the sweetness of pineapple.
  • Shrimp: Cooked shrimp can bring a delightful seafood twist. Toss them in for a light and zesty touch.
  • Tofu: For a vegetarian option, add cubed tofu. It absorbs flavors well and adds a nice texture.
  • Chickpeas: Canned or cooked chickpeas are a fantastic plant-based protein. They add heartiness and a nutty flavor.

By incorporating these protein options, your salad becomes more satisfying. It’s perfect for lunch or dinner. Plus, you can mix and match based on your preferences. Enjoy experimenting with different proteins to find your favorite combination!

Alternative Dressings for Pineapple Cucumber Salad

Pineapple Cucumber Salad Recipe. While lime juice and honey are delicious, you can try other dressings for a unique twist. Here are some ideas:

  • Balsamic Vinaigrette: This adds a sweet and tangy flavor. It complements the pineapple beautifully.
  • Sesame Dressing: A sesame oil-based dressing gives an Asian flair. It pairs well with the fresh ingredients.
  • Greek Yogurt Dressing: For a creamy option, mix Greek yogurt with lime juice and herbs. It adds richness without being heavy.
  • Spicy Mango Dressing: Blend fresh mango with lime juice and a pinch of chili powder for a fruity kick.

Pineapple Cucumber Salad Recipe exciting every time you make it. Enjoy discovering new tastes!

Cooking Note for Pineapple Cucumber Salad Recipe

Pineapple Cucumber Salad Recipe, there are a few cooking notes to keep in mind. These tips will help you achieve the best flavor and texture for your salad.

First, always use fresh ingredients. Fresh pineapple, crisp cucumbers, and vibrant bell peppers will elevate your salad. If possible, choose organic produce for the best taste and quality. Fresh herbs like cilantro should also be bright and fragrant, as they add a burst of flavor.

Next, consider the ripeness of your pineapple. A perfectly ripe pineapple will be sweet and juicy, enhancing the overall taste of your salad. If your pineapple is too firm, it may lack sweetness. On the other hand, if it’s overly ripe, it could be mushy. Aim for a balance to ensure a delightful crunch in every bite.

Additionally, when dicing your vegetables, try to keep the pieces uniform in size. This not only makes the salad visually appealing but also ensures that each bite has a balanced mix of flavors. A sharp knife will make this task easier and safer.

Lastly, don’t skip the chilling step! Allowing the salad to chill in the refrigerator helps the flavors meld together. It also makes the salad more refreshing, especially on a hot day. If you have time, letting it sit for an hour or more will enhance the taste even further.

Pineapple Cucumber Salad Recipe that is not only delicious but also visually stunning. Enjoy the process and the delightful results!

Serving Suggestions for Pineapple Cucumber Salad Recipe

Ideal Pairings with Pineapple Cucumber Salad

Pineapple Cucumber Salad Recipe, the right pairings can elevate your meal. This salad is versatile and complements a variety of dishes. Here are some ideal pairings to consider:

  • Grilled Meats: The refreshing flavors of the salad balance well with grilled chicken, steak, or fish. The sweetness of the pineapple enhances the savory notes of the meat.
  • Tacos: Serve the salad alongside fish or shrimp tacos. The crunch of the salad adds a delightful contrast to the soft tortillas.
  • Rice Dishes: Pair the salad with coconut rice or jasmine rice. The lightness of the salad complements the richness of the rice.
  • Sandwiches: Enjoy the salad as a side with turkey or ham sandwiches. It adds a refreshing touch to your lunch.
  • Grain Bowls: Top a grain bowl with the salad for added texture and flavor. Quinoa or brown rice works wonderfully.

Pineapple Cucumber Salad Recipe can be a star on its own or a delightful sidekick to your favorite dishes. Feel free to mix and match based on your preferences and enjoy the burst of flavors!

Tips for Perfecting Your Pineapple Cucumber Salad Recipe

Pineapple Cucumber Salad Recipe is all about attention to detail. With a few simple tips, you can elevate your salad to new heights. Here are some helpful suggestions to ensure your salad is a hit every time:

  • Choose Ripe Ingredients: Always select ripe pineapple and fresh cucumbers. A sweet, juicy pineapple will enhance the flavor of your salad. Look for cucumbers that are firm and free of blemishes for the best crunch.
  • Chop Uniformly: When dicing your ingredients, aim for uniform sizes. This not only makes the salad visually appealing but also ensures that each bite has a balanced mix of flavors.
  • Experiment with Herbs: While cilantro is a great addition, don’t hesitate to try other herbs. Fresh mint or basil can add a unique twist to your Pineapple Cucumber Salad Recipe.
  • Adjust the Sweetness: If you prefer a sweeter salad, feel free to add more honey or even a splash of agave syrup. Taste as you go to find the perfect balance.
  • Incorporate Textures: For added crunch, consider including nuts or seeds. Chopped almonds, sunflower seeds, or even toasted coconut can provide a delightful contrast to the soft fruits and vegetables.
  • Serve Cold: Always chill your salad before serving. This enhances the flavors and makes the salad more refreshing, especially on warm days.
  • Garnish for Presentation: A sprinkle of extra cilantro or a few lime wedges can make your salad look even more inviting. Presentation matters, and a beautiful salad is always more appetizing!

Pineapple Cucumber Salad Recipe that is not only delicious but also visually stunning. Enjoy the process of making this refreshing dish, and don’t be afraid to get creative!

Breakdown of Time for Pineapple Cucumber Salad Recipe

Prep Time

Pineapple Cucumber Salad Recipe is quick and easy! The prep time typically takes about 15 to 20 minutes. This includes washing, peeling, and dicing all your fresh ingredients. If you have everything ready, you can whip up this salad in no time. Just remember to take your time when chopping to ensure uniform pieces for a beautiful presentation!

Cooking Time

Interestingly, there’s no actual cooking involved in this salad. The only time you’ll need is for the chilling process. Allowing the salad to chill in the refrigerator for at least 30 minutes is essential. This step helps the flavors meld together, making the salad even more delicious. If you have the time, letting it chill for an hour or more will enhance the taste even further!

Total Time

Pineapple Cucumber Salad Recipe without much hassle. It’s perfect for busy days when you want something light and tasty!

Nutritional Information for Pineapple Cucumber Salad Recipe

Calories

Pineapple Cucumber Salad Recipe, you’ll be pleased to know that it’s low in calories. Each serving contains approximately 80 calories. This makes it a fantastic option for those looking to maintain a healthy diet without sacrificing flavor. The combination of fresh fruits and vegetables not only keeps the calorie count low but also provides essential nutrients.

Protein

Pineapple Cucumber Salad Recipe.

Sodium

The sodium content in this salad is quite low, making it a heart-healthy choice. Each serving contains minimal sodium, especially if you choose to limit or skip the added salt. This is great news for those watching their sodium intake. The natural flavors of the fresh ingredients shine through, ensuring that you don’t miss out on taste while keeping your meal healthy.

Pineapple Cucumber Salad Recipe is not only delicious but also nutritious. It’s a perfect addition to any meal, providing a burst of flavor without the guilt. Enjoy this refreshing salad as a side dish or a light main course, knowing that you’re making a healthy choice!

FAQs about Pineapple Cucumber Salad Recipe

Can I make Pineapple Cucumber Salad ahead of time?

Pineapple Cucumber Salad Recipe ahead of time. In fact, making it a few hours in advance can enhance the flavors. Just remember to store it in an airtight container in the refrigerator. This will keep the salad fresh and crisp. However, if you plan to add avocado or other delicate ingredients, it’s best to add them just before serving. This way, they won’t brown or become mushy.

What other fruits can I add to Pineapple Cucumber Salad?

Pineapple Cucumber Salad Recipe is its versatility! You can easily add other fruits to create a unique flavor profile. Consider including:

  • Mango: Adds a tropical sweetness that pairs well with pineapple.
  • Strawberries: Their tartness complements the sweetness of the pineapple.
  • Kiwi: Offers a tangy flavor and vibrant color.
  • Blueberries: These tiny fruits add a burst of sweetness and antioxidants.

Feel free to mix and match based on your preferences. The more colorful the salad, the more appealing it will be!

Is Pineapple Cucumber Salad suitable for meal prep?

Pineapple Cucumber Salad Recipe is perfect for meal prep! It’s a great option for busy weeks. You can prepare the salad in advance and store it in individual containers. Just remember to keep the dressing separate until you’re ready to eat. This will help maintain the freshness and crunch of the ingredients. When you’re ready to enjoy, simply drizzle the dressing over the salad, toss, and dig in!

Conclusion on Pineapple Cucumber Salad Recipe

Pineapple Cucumber Salad Recipe is a delightful dish that brings together fresh ingredients and vibrant flavors. It’s not just a salad; it’s a celebration of taste and nutrition. With its sweet pineapple, crunchy cucumber, and zesty dressing, this salad is perfect for any occasion. Whether you’re enjoying a summer barbecue, a picnic in the park, or simply looking for a light meal, this salad fits the bill.

Pineapple Cucumber Salad Recipe allows you to customize it to your liking. You can add proteins, experiment with different dressings, or include other fruits to create your unique version. The possibilities are endless! Plus, with its low calorie and sodium content, you can enjoy this salad guilt-free.

So, why not give it a try? Gather your fresh ingredients, follow the simple steps, and enjoy the refreshing taste of this salad. It’s a dish that not only nourishes your body but also delights your taste buds. Share it with family and friends, and watch as they fall in love with this colorful and delicious creation. Happy cooking!

Spring Strawberry Sipper Mocktail is Refreshingly Delicious

Introduction to the Spring Strawberry Sipper Mocktail

Spring Strawberry Sipper Mocktail is the perfect way to enjoy the season’s vibrant flavors. This delightful beverage combines the sweetness of fresh strawberries with the zing of lemon and the effervescence of sparkling water. It’s a drink that not only quenches your thirst but also brings a burst of joy to your taste buds.

Whether you’re hosting a spring gathering, enjoying a picnic in the park, or simply relaxing at home, this mocktail is a fantastic choice. It’s easy to make and requires just a few simple ingredients. Plus, it’s a great alternative to sugary sodas or alcoholic beverages, making it suitable for all ages.

In this article, we will guide you through the ingredients, preparation steps, and even some fun variations to try. So, grab your fresh strawberries and let’s dive into the world of the Spring Strawberry Sipper Mocktail!

Ingredients for the Spring Strawberry Sipper Mocktail

Spring Strawberry Sipper Mocktail is a breeze, especially with the right ingredients. Here’s what you’ll need to whip up this delightful drink:

  • 1 cup fresh strawberries: Make sure they are hulled and sliced for easy mashing. Fresh strawberries are key to achieving that sweet, fruity flavor.
  • 1 tablespoon honey or agave syrup: This natural sweetener adds a touch of sweetness. You can adjust the amount based on your taste preference.
  • 1 tablespoon fresh lemon juice: The acidity of lemon juice balances the sweetness of the strawberries, giving the drink a refreshing zing.
  • 2 cups sparkling water: This is what gives the mocktail its bubbly texture. You can use plain or flavored sparkling water for an extra twist.
  • Ice cubes: These will keep your drink chilled and refreshing, perfect for warm spring days.
  • Fresh mint leaves: Use these for garnish. They not only add a pop of color but also enhance the drink’s aroma.

With these simple ingredients, you’re all set to create a delicious and refreshing mocktail that embodies the spirit of spring. Let’s move on to the next step and learn how to prepare this delightful drink!

Step-by-Step Preparation of the Spring Strawberry Sipper Mocktail

Spring Strawberry Sipper Mocktail. Follow these simple steps to create a drink that’s not only delicious but also visually appealing.

Step 1: Preparing the Strawberries

Start by washing your fresh strawberries thoroughly. Once they are clean, hull them to remove the green tops. Then, slice the strawberries into smaller pieces. This makes it easier to mash them later. Using a fork, gently mash the sliced strawberries in a medium bowl. You want them to be slightly pureed but still have some chunks for texture. This step is crucial as it releases the sweet juices, which will be the base of your mocktail.

Step 2: Mixing the Base Ingredients

Next, add the honey or agave syrup to the mashed strawberries. This natural sweetener will enhance the flavor of the strawberries. Then, squeeze in the fresh lemon juice. The lemon juice adds a refreshing zing that balances the sweetness. Stir the mixture well until everything is combined. You should have a vibrant, fruity mixture that smells amazing!

Step 3: Combining and Chilling

Now, it’s time to prepare your glasses. Fill two glasses with ice cubes to keep your drink nice and cold. Divide the strawberry mixture evenly between the glasses. This ensures that each sip is packed with flavor. Slowly pour the sparkling water into each glass, stirring gently to combine. Be careful not to stir too vigorously, as you want to keep the bubbles intact for that refreshing fizz.

Step 4: Serving the Spring Strawberry Sipper Mocktail

Finally, it’s time to serve your beautiful mocktail! Garnish each glass with fresh mint leaves. Not only do they add a pop of color, but they also enhance the aroma of your drink. Serve immediately and enjoy the delightful flavors of spring in every sip. This mocktail is perfect for any occasion, whether it’s a sunny afternoon or a festive gathering.

Variations of the Spring Strawberry Sipper Mocktail

Spring Strawberry Sipper Mocktail is a versatile drink that can be easily customized to suit your taste. By adding different fruits or infusing it with herbs, you can create unique flavors that will surprise and delight your guests. Here are some fun variations to try!

Adding Different Fruits

One of the easiest ways to switch up your mocktail is by incorporating other fruits. Here are a few ideas:

  • Raspberries: These tart berries pair beautifully with strawberries. Simply mash them along with the strawberries for a berry explosion.
  • Peaches: Fresh peach slices can add a sweet and juicy twist. Just slice them thinly and mix them in with the strawberries.
  • Watermelon: For a refreshing summer vibe, add some watermelon juice. Blend fresh watermelon and strain it before mixing it with the strawberries.
  • Blueberries: These tiny berries can add a pop of color and flavor. Toss them in whole or mash them slightly for a burst of sweetness.

Feel free to mix and match these fruits to create your own signature mocktail. The possibilities are endless!

Infusing with Herbs

Spring Strawberry Sipper Mocktail to a whole new level. Here are some herbs you can try:

  • Mint: This classic herb adds a refreshing touch. Muddle a few mint leaves in the glass before adding the strawberry mixture for an extra burst of flavor.
  • Basil: For a unique twist, try adding fresh basil. Its sweet and slightly peppery flavor pairs well with strawberries.
  • Thyme: This herb adds an earthy note. Infuse the sparkling water with thyme by steeping it in hot water, then cooling it before mixing.
  • Rosemary: A sprig of rosemary can add a fragrant aroma. Use it as a garnish or muddle it with the strawberries for a more intense flavor.

Experimenting with different fruits and herbs can make your mocktail experience even more enjoyable. So, don’t hesitate to get creative and find your favorite combination!

Cooking Note for the Spring Strawberry Sipper Mocktail

Spring Strawberry Sipper Mocktail, there are a few cooking notes to keep in mind to ensure your drink turns out perfectly every time. These tips will help you enhance the flavors and presentation of your mocktail.

First, always use fresh strawberries. The quality of your fruit directly impacts the taste of your drink. Look for strawberries that are bright red, firm, and fragrant. Avoid any that are mushy or have dark spots, as they may not provide the best flavor.

Next, consider the sweetness level. Depending on the ripeness of your strawberries, you may need to adjust the amount of honey or agave syrup. Taste the mixture before adding the sparkling water. If it’s too tart, add a little more sweetener to balance the flavors.

For the lemon juice, fresh is always best. Bottled lemon juice can have preservatives that alter the taste. Squeeze your own lemons for a bright, zesty flavor that complements the strawberries beautifully.

When it comes to sparkling water, you have options! While plain sparkling water works wonderfully, flavored varieties can add an exciting twist. Consider options like lemon-lime or berry-flavored sparkling water to enhance the fruity notes of your mocktail.

Lastly, presentation matters! Use clear glasses to showcase the vibrant colors of your drink. Layering the strawberry mixture and sparkling water can create a beautiful visual effect. Don’t forget to garnish with fresh mint leaves for that extra touch of elegance.

Spring Strawberry Sipper Mocktail that not only tastes amazing but also looks stunning. Enjoy the process and have fun experimenting with flavors!

Serving Suggestions for the Spring Strawberry Sipper Mocktail

Spring Strawberry Sipper Mocktail, presentation and pairing can elevate the experience. Here are some delightful serving suggestions to make your mocktail shine at any gathering.

First, consider the glassware. While any glass will do, using tall, clear glasses can showcase the vibrant colors of your drink. You can also use mason jars for a rustic touch, perfect for outdoor picnics or casual gatherings. For a more elegant affair, opt for stemless wine glasses or cocktail glasses.

Next, think about garnishes. Fresh mint leaves are a classic choice, but you can also add a slice of lemon or a few whole strawberries on the rim of the glass. This not only enhances the visual appeal but also gives a hint of the flavors inside. For a fun twist, try adding edible flowers like pansies or nasturtiums for a pop of color and a touch of spring charm.

Pairing your mocktail with snacks can also enhance the overall experience. Here are some tasty options:

  • Cheese Platter: A selection of cheeses, such as brie, goat cheese, or sharp cheddar, pairs beautifully with the sweetness of the mocktail.
  • Fruit Skewers: Create colorful skewers with a mix of strawberries, pineapple, and melon. They make for a refreshing bite alongside your drink.
  • Light Appetizers: Consider serving light bites like cucumber sandwiches, bruschetta, or spring rolls. These complement the fruity flavors of the mocktail.
  • Desserts: For a sweet finish, serve mini cupcakes or fruit tarts. The sweetness will harmonize with the mocktail, making for a delightful treat.

Lastly, don’t forget to create a mocktail station if you’re hosting a party. Set up a table with all the ingredients and let guests mix their own drinks. Provide a variety of fruits and herbs for them to experiment with. This interactive element adds fun and excitement to your gathering.

Spring Strawberry Sipper Mocktail will not only taste amazing but also look stunning and be a hit among your guests. Cheers to a refreshing spring celebration!

Tips for Making the Perfect Spring Strawberry Sipper Mocktail

Spring Strawberry Sipper Mocktail is all about attention to detail and a little creativity. Here are some helpful tips to ensure your mocktail turns out delicious and refreshing every time.

First, always choose ripe strawberries. The sweetness of your mocktail depends on the quality of the fruit. Look for strawberries that are bright red and firm. If they smell sweet, they’re likely perfect for your drink!

Next, don’t skip the mashing step. Mashing the strawberries releases their juices, which is essential for flavor. Use a fork to mash them gently, leaving some chunks for texture. This adds a delightful mouthfeel to your mocktail.

When it comes to sweeteners, adjust according to your taste. If your strawberries are particularly sweet, you might need less honey or agave syrup. Always taste the mixture before adding the sparkling water. This way, you can ensure the balance of flavors is just right.

For a refreshing twist, chill your sparkling water before mixing. This keeps your drink cold longer and enhances the overall experience. You can even freeze some strawberry slices or mint leaves in ice cubes to add a fun touch to your mocktail.

Don’t forget about garnishing! Fresh mint leaves not only look beautiful but also add a refreshing aroma. You can also add a slice of lemon or a few whole strawberries on the rim of the glass for an extra pop of color.

Lastly, serve your mocktail immediately after preparation. This ensures that the bubbles in the sparkling water remain intact, giving you that delightful fizz with every sip. If you need to prepare it ahead of time, keep the strawberry mixture and sparkling water separate until you’re ready to serve.

Spring Strawberry Sipper Mocktail that’s not only delicious but also visually stunning. Enjoy the process and have fun experimenting with flavors!

Breakdown of Time for the Spring Strawberry Sipper Mocktail

Spring Strawberry Sipper Mocktail, it’s helpful to know how much time you’ll need for each step. This way, you can plan accordingly and enjoy the process without feeling rushed. Here’s a simple breakdown of the time required for each part of the preparation.

Prep Time

10 minutes to gather your ingredients, wash the strawberries, hull them, and slice them. Mashing the strawberries and mixing in the sweetener and lemon juice will take just a few more minutes. Overall, you can expect to spend around 10-15 minutes on prep work.

Cooking Time

Spring Strawberry Sipper Mocktail. The only time you’ll spend is in the mixing and assembling of the drink. This part is quick and should take no more than 5 minutes. So, you can whip up this refreshing drink in no time!

Total Time

15-20 minutes from start to finish. This includes both the prep and mixing time. It’s a quick and easy process, making it perfect for spontaneous gatherings or a refreshing treat after a long day. With such a short time commitment, you can enjoy the delightful flavors of spring without any hassle!

Nutritional Information for the Spring Strawberry Sipper Mocktail

Spring Strawberry Sipper Mocktail can help you enjoy it guilt-free. This refreshing drink is not only delicious but also relatively low in calories, making it a great choice for those looking to indulge without overdoing it. Here’s a breakdown of the nutritional information per serving:

Calories

Spring Strawberry Sipper Mocktail contains approximately 80 calories. This makes it a light and refreshing option, perfect for warm spring days. The calories primarily come from the natural sugars in the strawberries and the sweetener you choose, whether it’s honey or agave syrup.

Protein

1 gram per serving. While it’s not a significant source of protein, it does provide a small amount, mainly from the strawberries. This drink is more about hydration and enjoyment than protein content, making it a delightful treat rather than a meal replacement.

Sodium

Spring Strawberry Sipper Mocktail is quite low, typically around 0 mg per serving. This makes it a heart-healthy choice, as it won’t contribute to your daily sodium intake. Enjoy this mocktail without worrying about added salt or preservatives!

Spring Strawberry Sipper Mocktail is a nutritious and refreshing drink that fits well into a balanced diet. With its low calorie count and minimal sodium, it’s a perfect way to celebrate the flavors of spring while staying mindful of your health.

FAQs about the Spring Strawberry Sipper Mocktail

Can I make the Spring Strawberry Sipper Mocktail ahead of time?

Spring Strawberry Sipper Mocktail ahead of time! You can mash the strawberries and mix them with honey and lemon juice a few hours in advance. Just store this mixture in the refrigerator until you’re ready to serve. However, it’s best to add the sparkling water and ice just before serving. This keeps the drink bubbly and refreshing. If you mix everything too early, the sparkling water may lose its fizz, and nobody wants a flat mocktail!

What can I substitute for strawberries in the Spring Strawberry Sipper Mocktail?

If strawberries aren’t your favorite or if they’re out of season, there are plenty of delicious substitutes! You can use other berries like raspberries, blueberries, or blackberries. Each of these fruits brings its own unique flavor to the mocktail. You can also try using peaches or mangoes for a tropical twist. Just remember to adjust the sweetness based on the fruit you choose, as some fruits are sweeter than others. Feel free to experiment and find your perfect combination!

Is the Spring Strawberry Sipper Mocktail suitable for kids?

Spring Strawberry Sipper Mocktail is a fantastic choice for kids. It’s non-alcoholic, refreshing, and packed with fruity goodness. The natural sweetness from the strawberries and honey makes it appealing to young taste buds. Plus, it’s a great way to encourage kids to enjoy fruits. Just be sure to supervise them while they’re enjoying their drinks, especially if they’re using ice cubes. This mocktail is perfect for birthday parties, family gatherings, or any fun springtime occasion!

Conclusion on the Spring Strawberry Sipper Mocktail

Spring Strawberry Sipper Mocktail is a delightful way to celebrate the vibrant flavors of spring. With its refreshing combination of fresh strawberries, zesty lemon, and bubbly sparkling water, this mocktail is sure to please everyone. Whether you’re hosting a gathering, enjoying a sunny day outdoors, or simply treating yourself, this drink is both easy to make and incredibly satisfying.

Not only does it taste amazing, but it also offers a healthy alternative to sugary sodas and alcoholic beverages. With just a few simple ingredients, you can create a drink that is not only visually appealing but also packed with natural goodness. Plus, the versatility of this mocktail allows you to experiment with different fruits and herbs, making it a fun and creative experience.

Spring Strawberry Sipper Mocktail, remember to enjoy the process. Take your time to select the freshest ingredients, and don’t hesitate to get creative with flavors. Whether you stick to the classic recipe or try out some of the variations, you’re bound to create a drink that brings joy and refreshment to your springtime celebrations.

So, gather your ingredients, invite some friends, and raise a glass to the beauty of spring with this delightful mocktail. Cheers to good times, great flavors, and the joy of sharing delicious drinks with loved ones!

Blueberry Infused Water Recipe is Refreshingly Delicious!

Introduction to Blueberry Infused Water Recipe

What is Blueberry Infused Water?

Blueberry infused water is a delightful and refreshing drink made by soaking fresh blueberries in water. This simple recipe combines the natural sweetness of blueberries with the zesty flavors of lemon and lime. The result is a vibrant, flavorful beverage that not only quenches your thirst but also adds a splash of color to your day. Infused water is a great alternative to sugary drinks, making it a popular choice for those looking to stay hydrated while enjoying a hint of fruitiness.

Benefits of Drinking Blueberry Infused Water

Drinking blueberry infused water comes with a variety of health benefits. First, blueberries are packed with antioxidants, which help protect your body from harmful free radicals. These tiny berries are also known to support heart health and improve brain function. Additionally, infused water encourages you to drink more fluids throughout the day, which is essential for maintaining hydration.

Moreover, the infusion process allows the flavors of the fruits to meld together, creating a delicious drink without added sugars or artificial ingredients. This makes blueberry infused water a guilt-free option for those looking to enjoy a tasty beverage. Plus, the refreshing taste can help curb cravings for sugary sodas or juices, making it a smart choice for anyone aiming for a healthier lifestyle.

In summary, blueberry infused water is not just a pretty drink; it’s a nutritious and flavorful way to stay hydrated. So, let’s dive into the ingredients and preparation steps to create this refreshing beverage!

Ingredients for Blueberry Infused Water Recipe

To create your own blueberry infused water, you’ll need a few simple ingredients. This recipe is not only easy to follow but also allows you to enjoy the natural flavors of fresh fruits. Here’s what you’ll need:

  • 2 cups fresh blueberries
  • 1 lemon, sliced
  • 1 lime, sliced
  • 8 cups water
  • Fresh mint leaves (optional, for garnish)

These ingredients come together to create a refreshing drink that’s perfect for any occasion. The blueberries provide a burst of flavor, while the lemon and lime add a zesty twist. If you want to enhance the drink further, consider adding fresh mint leaves as a garnish. This not only adds a pop of color but also a refreshing aroma that complements the fruity flavors.

Feel free to experiment with the ingredients! You can swap out blueberries for other fruits like strawberries or raspberries. This flexibility allows you to create your own unique infused water recipes. Now that you have your ingredients ready, let’s move on to the step-by-step preparation of this delightful drink!

Step-by-Step Preparation of Blueberry Infused Water Recipe

Step 1: Gather Your Ingredients

Before you start making your blueberry infused water, it’s important to gather all your ingredients. This will make the process smooth and enjoyable. You’ll need:

  • 2 cups fresh blueberries
  • 1 lemon, sliced
  • 1 lime, sliced
  • 8 cups water
  • Fresh mint leaves (optional, for garnish)

Having everything ready will help you focus on creating a delicious drink. Plus, it’s always fun to see all the colorful ingredients laid out!

Step 2: Prepare the Blueberries

Now it’s time to prepare the blueberries. Start by rinsing them under cold water. This step is crucial to remove any dirt or pesticides. After rinsing, gently pat them dry with a paper towel. Be careful not to squish the berries, as you want them to stay whole for the infusion.

Once they are clean and dry, you can set them aside. Fresh blueberries are the star of this recipe, so make sure they are ripe and juicy for the best flavor!

Step 3: Combine Ingredients

In a large pitcher, it’s time to combine all your ingredients. Begin by adding the fresh blueberries, followed by the sliced lemon and lime. The citrus fruits will add a refreshing zing to your drink.

Next, pour in the 8 cups of water. This will help extract the flavors from the fruits, creating a deliciously infused beverage. Stir gently to mix everything together. You want to combine the ingredients without crushing the blueberries.

Step 4: Infuse the Water

After combining the ingredients, it’s time to let the flavors meld together. Cover the pitcher with a lid or plastic wrap and place it in the refrigerator. For the best results, allow the water to infuse for at least 2 hours. However, if you can wait, letting it chill overnight will enhance the flavors even more.

During this time, the blueberries will release their natural sweetness, while the lemon and lime will add a zesty kick. The longer it sits, the more flavorful your infused water will become!

Step 5: Serve and Enjoy

Once your blueberry infused water has had time to infuse, it’s time to serve! Grab a glass and fill it with ice. Pour the infused water over the ice, making sure to include some of the fruit for a beautiful presentation.

If you’d like, garnish your drink with fresh mint leaves. This adds a lovely aroma and a pop of color. Now, take a moment to admire your creation before enjoying this refreshing beverage!

Blueberry infused water is perfect for hot summer days, parties, or simply as a healthy alternative to sugary drinks. Cheers to staying hydrated in a delicious way!

Variations of Blueberry Infused Water Recipe

Adding Other Fruits

One of the best things about blueberry infused water is its versatility. You can easily mix in other fruits to create exciting flavor combinations. For instance, try adding slices of strawberries or raspberries for a berry medley. These fruits not only enhance the taste but also add vibrant colors to your drink.

Another delicious option is to include slices of orange or pineapple. These tropical fruits will give your infused water a refreshing twist. Feel free to experiment with different fruits based on your preferences. The key is to choose fruits that complement the blueberries while adding their unique flavors. This way, you can enjoy a new taste experience every time!

Herbal Infusions

If you want to elevate your blueberry infused water, consider adding herbs. Fresh herbs like basil or rosemary can bring a delightful aroma and flavor to your drink. Simply add a few sprigs of your chosen herb along with the blueberries and citrus fruits.

Mint is another fantastic option. It pairs beautifully with blueberries and adds a refreshing touch. Just remember to gently bruise the mint leaves before adding them to the pitcher. This helps release their essential oils, enhancing the overall flavor of your infused water. Herbal infusions can transform your drink into a spa-like experience, making it even more enjoyable!

Sparkling Blueberry Infused Water

If you love a bit of fizz, try making sparkling blueberry infused water! Instead of using still water, substitute it with sparkling water or club soda. This bubbly version adds a fun twist to your drink, making it perfect for celebrations or special occasions.

To prepare, follow the same steps as before, but pour in the sparkling water just before serving. This way, you maintain the bubbles and enjoy a refreshing, effervescent drink. You can also add a splash of fruit juice, like cranberry or pomegranate, for an extra burst of flavor. Sparkling blueberry infused water is sure to impress your guests and keep everyone refreshed!

Cooking Note for Blueberry Infused Water Recipe

When preparing your blueberry infused water, there are a few important cooking notes to keep in mind. These tips will help you achieve the best flavor and presentation for your refreshing drink.

First, always use fresh, ripe blueberries. The quality of the fruit directly impacts the taste of your infused water. Look for berries that are plump and firm, with a deep blue color. Avoid any that are mushy or have signs of mold.

Next, consider the water you use. Filtered or spring water is ideal, as it enhances the overall flavor of the infusion. Tap water can sometimes have a strong taste or odor, which may affect your drink. If you prefer, you can also use sparkling water for a fizzy twist.

Additionally, the infusion time is crucial. While 2 hours is the minimum, letting the water sit overnight allows the flavors to develop fully. This patience pays off with a more vibrant and delicious drink. If you’re short on time, you can gently muddle the blueberries before adding water. This helps release their juices quickly, giving you a flavorful infusion in less time.

Lastly, remember to serve your blueberry infused water chilled. This drink is best enjoyed cold, especially on warm days. Adding ice not only keeps it cool but also makes for a visually appealing presentation. So, don’t skip this step!

By following these cooking notes, you’ll create a delightful blueberry infused water that’s not only refreshing but also bursting with flavor. Enjoy your healthy and tasty beverage!

Serving Suggestions for Blueberry Infused Water Recipe

Serving blueberry infused water is all about presentation and enjoyment. Here are some delightful suggestions to elevate your experience:

  • Chilled Glassware: Serve your infused water in chilled glasses. This keeps the drink refreshing and enhances the overall experience. You can chill the glasses in the freezer for a few minutes before serving.
  • Fruit Garnish: Add extra slices of lemon, lime, or even whole blueberries to each glass. This not only looks beautiful but also adds a burst of flavor as you sip.
  • Ice Cubes: For an extra touch, freeze some blueberries in ice cubes. These colorful cubes will keep your drink cool without diluting the flavor. Plus, they look stunning in the glass!
  • Pitcher Display: If you’re serving guests, consider using a clear glass pitcher. This allows everyone to see the vibrant colors of the blueberries and citrus fruits, making it an eye-catching centerpiece.
  • Pair with Snacks: Blueberry infused water pairs wonderfully with light snacks. Consider serving it alongside fresh fruit platters, cheese boards, or light salads. This makes for a refreshing and healthy snack option.
  • Outdoor Gatherings: This infused water is perfect for picnics or barbecues. Serve it in a large pitcher with a ladle, allowing guests to help themselves. It’s a great way to keep everyone hydrated on warm days.

By incorporating these serving suggestions, you can create a delightful experience for yourself and your guests. Blueberry infused water is not just a drink; it’s a refreshing treat that can brighten any occasion. So, get creative and enjoy every sip!

Tips for Making the Best Blueberry Infused Water Recipe

Creating the perfect blueberry infused water is all about attention to detail. Here are some helpful tips to ensure your drink is as delicious and refreshing as possible:

  • Choose Quality Ingredients: Always opt for fresh, ripe blueberries. The flavor of your infused water depends heavily on the quality of the fruit. Look for berries that are firm and plump, with a rich blue hue. Avoid any that are soft or have blemishes.
  • Experiment with Infusion Time: While 2 hours is the minimum for infusion, letting your water sit overnight will yield a more robust flavor. If you’re in a hurry, you can gently muddle the blueberries before adding water. This helps release their juices quickly.
  • Use Filtered Water: The type of water you use can greatly affect the taste of your infused water. Filtered or spring water is best, as it has a cleaner taste compared to tap water. If you enjoy bubbles, sparkling water is a fun alternative!
  • Keep It Chilled: Blueberry infused water is best served cold. Make sure to refrigerate it for a few hours before serving. Adding ice cubes not only keeps it cool but also enhances the visual appeal.
  • Mix and Match Flavors: Don’t hesitate to get creative! Try adding other fruits or herbs to your infusion. Strawberries, mint, or even a hint of ginger can elevate the flavor profile. Experimenting can lead to delightful new combinations!
  • Garnish for Presentation: A simple garnish can make your drink look even more inviting. Consider adding a sprig of mint or a slice of lemon to each glass. This adds a pop of color and a hint of extra flavor.
  • Stay Hydrated: Remember, the goal is to encourage hydration. Keep a pitcher of blueberry infused water in your fridge, so it’s always ready to enjoy. The more accessible it is, the more likely you are to drink it!

By following these tips, you’ll create a blueberry infused water that’s not only refreshing but also bursting with flavor. Enjoy the process and savor every sip of your delicious creation!

Breakdown of Time for Blueberry Infused Water Recipe

Prep Time

The prep time for your blueberry infused water is quite minimal. You’ll spend about 10 to 15 minutes gathering and preparing your ingredients. This includes rinsing the blueberries, slicing the lemon and lime, and combining everything in a pitcher. It’s a quick and easy process that anyone can manage!

Infusion Time

Infusion time is where the magic happens! For the best flavor, let your blueberry infused water sit in the refrigerator for at least 2 hours. However, if you can wait, allowing it to infuse overnight will yield even more delicious results. The longer the fruits sit in the water, the more their flavors will blend together, creating a refreshing drink that’s bursting with taste.

Total Time

In total, you’re looking at about 2 hours and 15 minutes to enjoy your blueberry infused water if you opt for the minimum infusion time. If you choose to let it sit overnight, the total time will be around 10 to 15 minutes for prep, plus the overnight infusion. Regardless of your choice, the wait will be worth it when you take that first sip of your refreshing drink!

Nutritional Information for Blueberry Infused Water Recipe

Calories

One of the best aspects of blueberry infused water is its low calorie count. A serving of this refreshing drink contains only about 10 calories. This makes it an excellent choice for those who are watching their calorie intake. You can enjoy a flavorful beverage without worrying about added sugars or excess calories. It’s a guilt-free way to stay hydrated!

Protein

When it comes to protein, blueberry infused water is not a significant source. Each serving contains 0 grams of protein. This is typical for infused waters, as they primarily consist of water and fruits. If you’re looking to boost your protein intake, consider pairing your infused water with a protein-rich snack, like nuts or yogurt. This way, you can enjoy the refreshing drink while still meeting your nutritional needs.

Sodium

Blueberry infused water is naturally low in sodium, making it a heart-healthy option. Each serving contains 0 milligrams of sodium. This is great news for those who are mindful of their sodium intake. Staying hydrated with this delicious drink can help you maintain a balanced diet without the worry of excess salt. It’s a refreshing choice that supports your overall health!

FAQs about Blueberry Infused Water Recipe

How long can I store blueberry infused water?

You can store blueberry infused water in the refrigerator for up to 3 days. However, for the best flavor, it’s recommended to consume it within 24 to 48 hours. After this time, the fruits may start to lose their freshness, and the water can become cloudy. If you notice any off smells or flavors, it’s best to discard it. Always keep your infused water covered to maintain its freshness and prevent any unwanted odors from affecting the taste.

Can I use frozen blueberries for the recipe?

Yes, you can use frozen blueberries for your infused water! Frozen berries are a great alternative, especially when fresh ones are out of season. They can add a nice chill to your drink and still provide flavor. Just remember that frozen blueberries may not infuse as quickly as fresh ones. To enhance the flavor, let the infused water sit for a bit longer, ideally overnight. This way, you’ll still enjoy a refreshing and tasty beverage!

What are the health benefits of blueberries in infused water?

Blueberries are known for their numerous health benefits. They are rich in antioxidants, which help protect your body from free radicals. These tiny fruits can support heart health, improve brain function, and even aid in digestion. Additionally, blueberries are low in calories and high in vitamins C and K. When infused in water, they provide a delicious way to enjoy these health benefits while staying hydrated. Drinking blueberry infused water can be a simple step towards a healthier lifestyle!

How often can I drink blueberry infused water?

You can enjoy blueberry infused water daily! It’s a healthy and refreshing alternative to sugary drinks. Drinking infused water can help you stay hydrated, which is essential for overall health. Feel free to sip on it throughout the day, especially during hot weather or after exercise. Just remember to balance your hydration with plain water as well. This way, you can enjoy the delightful flavors of blueberry infused water while maintaining optimal hydration levels!

Conclusion on Blueberry Infused Water Recipe

In conclusion, the blueberry infused water recipe is a simple yet delightful way to enhance your hydration routine. This refreshing drink not only quenches your thirst but also offers a burst of flavor and numerous health benefits. With just a few ingredients, you can create a vibrant beverage that is perfect for any occasion.

Whether you’re enjoying it on a hot summer day, serving it at a gathering, or simply looking for a healthy alternative to sugary drinks, blueberry infused water is a fantastic choice. The combination of fresh blueberries, zesty lemon, and lime creates a deliciously balanced flavor that is sure to please your taste buds.

Moreover, the versatility of this recipe allows you to experiment with different fruits and herbs, making it easy to customize your drink to suit your preferences. From adding strawberries to incorporating fresh mint, the possibilities are endless. This adaptability ensures that you can enjoy a new flavor experience every time you make it.

As you embark on your journey to create this refreshing drink, remember to follow the tips and suggestions provided. By doing so, you’ll be well on your way to crafting the perfect blueberry infused water that not only looks beautiful but also tastes amazing.

So, gather your ingredients, let the flavors meld, and enjoy the delightful experience of sipping on your homemade blueberry infused water. Cheers to a healthier, more flavorful way to stay hydrated!

Refreshing Homemade Mango Lemonade is a must-try!

Introduction to Homemade Mango Lemonade Recipe

The Refreshing Appeal of Mango Lemonade

Homemade Mango Lemonade Recipe. This drink combines the sweetness of ripe mangoes with the tangy zest of fresh lemons, creating a refreshing beverage that is perfect for any occasion.

Imagine sipping on a glass of this vibrant drink while lounging by the pool or enjoying a picnic in the park. The bright yellow color and fruity aroma instantly lift your spirits. Plus, it’s easy to make! With just a few simple ingredients, you can whip up a batch that serves six people. Whether you’re hosting a summer gathering or just want to treat yourself, this mango lemonade is sure to impress.

Not only is it delicious, but it also offers a burst of vitamins and hydration. Mangoes are rich in vitamin C, while lemons provide a refreshing zing. Together, they create a drink that is not only tasty but also beneficial for your health. So, let’s dive into the ingredients and preparation steps to make your very own homemade mango lemonade!

Ingredients for Homemade Mango Lemonade Recipe

Homemade Mango Lemonade Recipe, you’ll need a handful of fresh ingredients. Each component plays a vital role in achieving that delightful balance of sweetness and tang. Here’s what you’ll need:

  • 2 ripe mangoes, peeled and diced
  • 1 cup freshly squeezed lemon juice (about 4-6 lemons)
  • 1 cup granulated sugar (adjust to taste)
  • 4 cups cold water
  • Ice cubes
  • Lemon slices and mint leaves for garnish (optional)

These ingredients are not only easy to find but also contribute to the vibrant flavor of the drink. The ripe mangoes provide natural sweetness, while the freshly squeezed lemon juice adds a refreshing tartness. Adjusting the sugar allows you to customize the drink to your liking, making it as sweet or tangy as you prefer.

For an extra touch, consider adding a splash of coconut water or a few sprigs of fresh basil. These additions can elevate your homemade mango lemonade to a whole new level of deliciousness. Now that you have your ingredients ready, let’s move on to the preparation steps!

Step-by-Step Preparation of Homemade Mango Lemonade Recipe

Step 1: Gather Your Ingredients

Homemade Mango Lemonade Recipe, it’s important to gather all your ingredients. This makes the process smooth and enjoyable. You’ll need:

  • 2 ripe mangoes
  • 1 cup of freshly squeezed lemon juice
  • 1 cup of granulated sugar
  • 4 cups of cold water
  • Ice cubes
  • Lemon slices and mint leaves for garnish (optional)

Having everything ready will help you focus on creating this delicious drink without any interruptions. So, take a moment to check your kitchen and make sure you have all the ingredients on hand!

Step 2: Prepare the Mango

Next, it’s time to prepare the mangoes. Start by peeling the ripe mangoes. Use a sharp knife to carefully remove the skin. Once peeled, dice the mangoes into small pieces. This will make blending easier and ensure a smooth texture.

Ripe mangoes are key to a tasty lemonade. Look for mangoes that are slightly soft to the touch and have a sweet aroma. These will provide the best flavor for your drink!

Step 3: Squeeze the Lemons

Now, let’s move on to the lemons. Take about 4 to 6 fresh lemons and cut them in half. Use a citrus juicer or your hands to squeeze out the juice. Aim for 1 cup of freshly squeezed lemon juice.

Homemade Mango Lemonade Recipe. It’s much better than bottled juice, which can be overly sweet or lack flavor. Plus, squeezing lemons can be a fun task!

Step 4: Blend the Ingredients

With your mangoes diced and lemons juiced, it’s time to blend! In a blender, combine the diced mangoes with 1 cup of cold water. Blend until the mixture is smooth and creamy. This will create a delicious mango puree that forms the base of your lemonade.

Make sure to blend thoroughly. You want a silky texture that will mix well with the other ingredients. The vibrant color of the mango puree will make your drink look even more appealing!

Step 5: Strain the Mixture

After blending, it’s important to strain the mango puree. Use a fine mesh sieve and pour the mixture into a large pitcher. This step helps remove any pulp, giving you a smooth lemonade.

Use a spatula to press the puree through the sieve. This ensures you get every drop of delicious mango juice. The result will be a beautifully smooth liquid that’s ready for the next steps!

Step 6: Serve and Enjoy

Finally, it’s time to combine everything! Add the freshly squeezed lemon juice and granulated sugar to the mango juice in the pitcher. Stir well until the sugar is fully dissolved.

Next, pour in the remaining 3 cups of cold water and mix until everything is combined. Taste your lemonade and adjust the sweetness if needed. Once you’re satisfied, chill the lemonade in the refrigerator for at least 30 minutes.

When you’re ready to serve, fill glasses with ice cubes and pour the chilled mango lemonade over the ice. For a lovely touch, garnish with lemon slices and mint leaves. Enjoy your refreshing homemade drink!

Variations of Homemade Mango Lemonade Recipe

Homemade Mango Lemonade Recipe, you might want to explore some fun variations. These twists can add unique flavors and make your drink even more exciting. Here are a couple of ideas to get you started:

Adding Herbs for Extra Flavor

Herbs can elevate your mango lemonade to a whole new level. Consider adding fresh mint or basil. Simply muddle a few leaves at the bottom of your pitcher before adding the mango and lemon juice. This will infuse your drink with a refreshing herbal note that pairs beautifully with the fruity flavors.

Another option is to use rosemary. Just a sprig or two can add a lovely aromatic touch. Experiment with different herbs to find your favorite combination!

Using Different Sweeteners

If you’re looking for a healthier option, try using honey or agave syrup instead of granulated sugar. These natural sweeteners can provide a different flavor profile and are often less processed. Just remember to adjust the amount based on your taste preference, as they can be sweeter than regular sugar.

Refreshing Homemade Mango Lemonade without the added calories.

Feel free to get creative! The beauty of this recipe is its versatility. You can mix and match ingredients to suit your taste. Now that you have some ideas for variations, let’s move on to some cooking notes to ensure your lemonade turns out perfectly every time.

Cooking Note for Homemade Mango Lemonade Recipe

Refreshing Homemade Mango Lemonade, a few cooking notes can help you achieve the best results. First, always choose ripe mangoes. They should feel slightly soft when you press them gently. This ensures they are sweet and juicy, which is essential for a delicious lemonade.

Next, consider the temperature of your ingredients. Using cold water and chilled mangoes will help your lemonade stay refreshing. If you want to speed up the chilling process, you can place the pitcher in the freezer for a short time, but be careful not to forget it!

Also, remember that the sweetness of mangoes can vary. Taste your mangoes before adding sugar. If they are particularly sweet, you might want to reduce the amount of sugar you use. This way, you can create a balanced flavor that suits your palate.

Lastly, if you plan to serve your lemonade at a gathering, consider making a larger batch. This recipe can easily be doubled or tripled. Just ensure you have a big enough pitcher to hold all that deliciousness!

Serving Suggestions for Homemade Mango Lemonade Recipe

Homemade Mango Lemonade, it’s time to think about how to serve it. Presentation can enhance the experience, making your drink even more enjoyable. Here are some serving suggestions:

Perfect Pairings for Your Drink

This refreshing drink pairs wonderfully with various snacks and meals. For a light summer lunch, serve it alongside a fresh salad or grilled chicken. The fruity flavors of the lemonade complement the savory dishes beautifully.

If you’re hosting a party, consider serving your mango lemonade with tropical-themed appetizers. Think shrimp cocktails, fruit skewers, or even spicy nachos. The combination of flavors will delight your guests!

For a fun twist, you can also create a mango lemonade float. Simply add a scoop of vanilla ice cream to a glass of lemonade. The creamy texture of the ice cream combined with the tangy lemonade is a delightful treat!

Lastly, don’t forget about garnishing! Lemon slices and mint leaves not only add a pop of color but also enhance the aroma of your drink. You can even freeze some lemon slices in ice cubes for a beautiful and functional garnish.

Refreshing Homemade Mango Lemonade will be a hit at any gathering. Now, let’s move on to some tips to ensure your lemonade is the best it can be!

Cooking Note for Homemade Mango Lemonade Recipe

Refreshing Homemade Mango Lemonade, a few cooking notes can help you achieve the best results. First, always choose ripe mangoes. They should feel slightly soft when you press them gently. This ensures they are sweet and juicy, which is essential for a delicious lemonade.

Next, consider the temperature of your ingredients. Using cold water and chilled mangoes will help your lemonade stay refreshing. If you want to speed up the chilling process, you can place the pitcher in the freezer for a short time, but be careful not to forget it!

Also, remember that the sweetness of mangoes can vary. Taste your mangoes before adding sugar. If they are particularly sweet, you might want to reduce the amount of sugar you use. This way, you can create a balanced flavor that suits your palate.

Lastly, if you plan to serve your lemonade at a gathering, consider making a larger batch. This recipe can easily be doubled or tripled. Just ensure you have a big enough pitcher to hold all that deliciousness!

Homemade Mango Lemonade turns out perfectly every time. Enjoy the process and the delightful results!

Serving Suggestions for Homemade Mango Lemonade Recipe

Homemade Mango Lemonade, it’s time to think about how to serve it. Presentation can enhance the experience, making your drink even more enjoyable. Here are some serving suggestions:

Perfect Pairings for Your Drink

This refreshing drink pairs wonderfully with various snacks and meals. For a light summer lunch, serve it alongside a fresh salad or grilled chicken. The fruity flavors of the lemonade complement the savory dishes beautifully.

If you’re hosting a party, consider serving your mango lemonade with tropical-themed appetizers. Think shrimp cocktails, fruit skewers, or even spicy nachos. The combination of flavors will delight your guests!

For a fun twist, you can also create a mango lemonade float. Simply add a scoop of vanilla ice cream to a glass of lemonade. The creamy texture of the ice cream combined with the tangy lemonade is a delightful treat!

Lastly, don’t forget about garnishing! Lemon slices and mint leaves not only add a pop of color but also enhance the aroma of your drink. You can even freeze some lemon slices in ice cubes for a beautiful and functional garnish.

Refreshing Homemade Mango Lemonade will be a hit at any gathering. Now, let’s move on to some tips to ensure your lemonade is the best it can be!

Tips for the Best Homemade Mango Lemonade Recipe

Choosing the Right Mangoes

Refreshing Homemade Mango Lemonade, selecting the right mangoes is crucial. Look for mangoes that are ripe and fragrant. They should feel slightly soft when you gently press them. This softness indicates that they are juicy and sweet, perfect for your lemonade.

Popular varieties like Haden, Tommy Atkins, or Kent mangoes are great choices. Each type has its unique flavor, so feel free to experiment! If you can, buy mangoes that have a vibrant color, as this often means they are ripe and ready to eat. Avoid mangoes with dark spots or wrinkles, as these may be overripe.

Adjusting Sweetness to Taste

Homemade Mango Lemonade should reflect that! After mixing your ingredients, take a moment to taste the lemonade. If it’s too tart, add a little more sugar or your preferred sweetener. Stir well to ensure it dissolves completely.

On the other hand, if you find it too sweet, you can balance it out by adding a bit more lemon juice. This will enhance the tangy flavor and create a refreshing contrast. Remember, the goal is to achieve a delightful balance between sweet and sour, making each sip enjoyable.

Refreshing Homemade Mango Lemonade that’s perfect for any occasion. Now, let’s move on to the breakdown of time for this delicious recipe!

Breakdown of Time for Homemade Mango Lemonade Recipe

Prep Time

Refreshing Homemade Mango Lemonade is a breeze! The prep time for this delightful drink is approximately 15 minutes. This includes gathering your ingredients, peeling and dicing the mangoes, and squeezing the lemons. With everything ready, you’ll be on your way to enjoying this refreshing beverage in no time!

Cooking Time

While there’s no actual cooking involved in this recipe, you will need to blend and strain the mango puree. This process takes about 10 minutes. After blending, straining the mixture ensures a smooth texture, which is essential for a perfect lemonade. So, in total, you’ll spend around 10 minutes on this step.

Total Time

Homemade Mango Lemonade will take about 25 minutes. However, don’t forget to chill the lemonade in the refrigerator for at least 30 minutes before serving. This chilling time is crucial for achieving that refreshing taste. So, while the active time is short, plan for a total of about 55 minutes from start to finish, including chilling time.

Refreshing Homemade Mango Lemonade into your day. Whether it’s for a sunny afternoon or a gathering with friends, you’ll have a delicious drink ready to enjoy!

Nutritional Information for Homemade Mango Lemonade Recipe

Calories

Refreshing Homemade Mango Lemonade, it’s good to know the nutritional content. Each serving of this delightful drink contains approximately 150 calories. This makes it a relatively low-calorie option for a sweet treat, especially when compared to many store-bought beverages. The natural sugars from the mangoes and the added sweetness from sugar contribute to the calorie count, but they also provide a burst of energy!

Protein

In terms of protein, this homemade lemonade has about 1 gram per serving. While it’s not a significant source of protein, it’s important to remember that this drink is primarily meant for hydration and refreshment. If you’re looking to boost your protein intake, consider pairing your mango lemonade with a protein-rich snack, like nuts or yogurt, for a balanced treat.

Sodium

Homemade Mango Lemonade is quite low, containing less than 5 milligrams per serving. This makes it a heart-healthy choice, especially when compared to many commercial drinks that can be high in sodium. Staying hydrated with this refreshing beverage can be a great way to enjoy a tasty drink without worrying about excess sodium intake.

Refreshing Homemade Mango Lemonade makes it a delightful and guilt-free option for any occasion. Enjoy it knowing you’re treating yourself to something both delicious and relatively healthy!

FAQs about Homemade Mango Lemonade Recipe

Can I use frozen mango for this recipe?

Refreshing Homemade Mango Lemonade! Frozen mango is a great alternative, especially when fresh mangoes are out of season. Just make sure to let the mango thaw slightly before blending. This will help achieve a smooth consistency. Using frozen mango can also make your lemonade extra cold and refreshing, perfect for hot days!

How long can I store homemade mango lemonade?

Homemade Mango Lemonade can be stored in the refrigerator for up to 3 days. Make sure to keep it in a sealed pitcher or container to maintain its freshness. However, the flavor may change slightly over time, so it’s best enjoyed within the first couple of days. If you notice any separation, just give it a good stir before serving!

Can I make this recipe without sugar?

Refreshing Homemade Mango Lemonade without sugar. Instead, consider using natural sweeteners like honey, agave syrup, or even a sugar substitute like stevia. Just remember to adjust the amount based on your taste preference. This way, you can enjoy a delicious drink without added sugar!

What are some variations I can try?

Homemade Mango Lemonade. You can add herbs like mint or basil for a refreshing twist. Another idea is to mix in other fruits, such as strawberries or pineapples, for a tropical blend. If you want a fizzy drink, try adding sparkling water instead of still water. The possibilities are endless, so feel free to get creative!

Conclusion on Homemade Mango Lemonade Recipe

Refreshing Homemade Mango Lemonade is a delightful drink that brings together the sweetness of mangoes and the tanginess of lemons. It’s not just a beverage; it’s a celebration of flavors that can brighten up any occasion. Whether you’re enjoying a sunny day by the pool or hosting a summer gathering, this lemonade is sure to impress your friends and family.

With its simple ingredients and easy preparation, making this drink is a breeze. You can customize it to suit your taste, whether you prefer it sweeter or with a hint of herbal freshness. Plus, the nutritional benefits of mangoes and lemons make it a guilt-free indulgence.

Homemade Mango Lemonade Recipe a try? Gather your ingredients, follow the steps, and enjoy the refreshing taste of summer in a glass. Your taste buds will thank you, and you’ll find yourself reaching for this recipe time and time again. Cheers to delicious homemade drinks!

Whipped Pink Lemonade Recipe is a must-try drink!

Introduction to Whipped Pink Lemonade Recipe

Whipped Pink Lemonade Recipe is not just a drink; it’s an experience! Imagine sipping on a delightful blend of tangy lemon and sweet raspberry, all topped with a fluffy whipped cream that melts in your mouth. This drink is a fantastic way to cool down on a hot day or to add a splash of color to your next gathering.

This recipe combines the classic taste of lemonade with a fun twist. The vibrant pink hue comes from the raspberry puree, making it visually appealing and delicious. Plus, it’s easy to make! With just a few simple ingredients, you can whip up a batch that serves six people. Whether you’re hosting a summer party, celebrating a birthday, or just enjoying a sunny afternoon, this whipped pink lemonade will surely impress your guests.

Not only is this drink tasty, but it also offers a unique way to enjoy fresh fruits. The combination of lemon and raspberry provides a perfect balance of tartness and sweetness. And let’s not forget about the creamy topping that adds a luxurious touch. So, grab your lemons and raspberries, and let’s dive into this delightful recipe!

Ingredients for Whipped Pink Lemonade Recipe

Whipped Pink Lemonade Recipe, you’ll need a handful of fresh and simple ingredients. Each component plays a vital role in achieving that delightful balance of flavors. Here’s what you’ll need:

  • 1 cup freshly squeezed lemon juice (about 4-6 lemons)
  • 1 cup granulated sugar
  • 4 cups cold water
  • 1 cup heavy whipping cream
  • 1/2 cup sweetened condensed milk
  • 1/2 teaspoon vanilla extract
  • 1/4 cup raspberry puree (fresh or frozen raspberries blended)
  • Ice cubes
  • Lemon slices and raspberries for garnish

These ingredients come together to create a refreshing drink that’s both sweet and tangy. The freshly squeezed lemon juice is essential for that zesty flavor, while the sugar balances the tartness. The heavy whipping cream and sweetened condensed milk add a rich, creamy texture that makes this lemonade truly special.

Don’t forget the raspberry puree! It not only gives the drink its beautiful pink color but also adds a fruity twist that complements the lemon perfectly. Finally, garnishing with lemon slices and fresh raspberries elevates the presentation, making it a feast for the eyes as well as the taste buds.

Now that you have your ingredients ready, let’s move on to the next step of preparing this delightful drink!

Step-by-Step Preparation of Whipped Pink Lemonade Recipe

Whipped Pink Lemonade Recipe. Follow these simple steps to create a delicious and refreshing drink that everyone will love!

Step 1: Gather Your Ingredients

Before you start, make sure you have everything you need. Gather your freshly squeezed lemon juice, granulated sugar, cold water, heavy whipping cream, sweetened condensed milk, vanilla extract, raspberry puree, ice cubes, and garnishes. Having everything in one place will make the process smoother and more enjoyable.

Step 2: Prepare the Lemonade Base

In a large pitcher, combine the freshly squeezed lemon juice and granulated sugar. Stir the mixture well until the sugar is fully dissolved. This step is crucial because it ensures that your lemonade is sweet and refreshing. Once the sugar is dissolved, add the cold water to the pitcher and mix thoroughly. Taste your lemonade and adjust the sweetness if needed by adding more sugar.

Step 3: Whip the Cream

In a separate mixing bowl, pour in the heavy whipping cream. Using a hand mixer or a whisk, whip the cream until soft peaks form. This means that when you lift the whisk, the cream should hold its shape but still be soft. Be careful not to over-whip, as it can turn into butter!

Step 4: Combine Ingredients

Now, gently fold in the sweetened condensed milk and vanilla extract into the whipped cream. Mix until well combined, creating a rich and creamy texture. Next, add the raspberry puree to the whipped cream mixture. Use a spatula to gently swirl it in, creating a beautiful marbled effect. This step adds a lovely color and flavor to your whipped topping.

Step 5: Serve and Enjoy

Whipped Pink Lemonade Recipe is now ready to be enjoyed!

Variations of Whipped Pink Lemonade Recipe

Whipped Pink Lemonade Recipe is already a delightful treat, there are many ways to customize it to suit your taste. By adding fresh fruits or experimenting with alternative sweeteners, you can create a unique version that’s just as refreshing. Let’s explore some fun variations!

Adding Fresh Fruits

One of the best ways to enhance your whipped pink lemonade is by adding fresh fruits. Not only do they add flavor, but they also make the drink even more visually appealing. Here are some ideas:

  • Strawberries: Blend fresh strawberries into a puree and mix it with the lemonade. This will give your drink a sweet and fruity twist.
  • Peaches: Puree ripe peaches for a summery flavor. The sweetness of peaches pairs beautifully with the tartness of lemons.
  • Mango: For a tropical touch, add mango puree. It will create a vibrant color and a deliciously sweet taste.
  • Blueberries: Blend blueberries into a puree or muddle them at the bottom of the glass for a burst of flavor.

Feel free to mix and match these fruits to create your own signature version of whipped pink lemonade. The possibilities are endless!

Alternative Sweeteners

If you’re looking to reduce sugar or try something different, consider using alternative sweeteners. Here are a few options:

  • Honey: Substitute granulated sugar with honey for a natural sweetness. Just remember that honey is sweeter than sugar, so adjust the amount accordingly.
  • Agave Syrup: This syrup is a great alternative that dissolves easily in cold liquids. It has a mild flavor that won’t overpower your lemonade.
  • Stevia: For a low-calorie option, stevia is a fantastic choice. It’s much sweeter than sugar, so use it sparingly.
  • Maple Syrup: This adds a unique flavor to your lemonade. It pairs well with the lemon and raspberry, giving a delightful twist.

Whipped Pink Lemonade Recipe that fits your dietary needs while still being delicious!

Cooking Note for Whipped Pink Lemonade Recipe

Whipped Pink Lemonade Recipe, there are a few important cooking notes to keep in mind. These tips will help ensure that your drink turns out perfectly every time, making it a delightful treat for you and your guests.

First, always use fresh lemons for the best flavor. Freshly squeezed lemon juice is key to achieving that bright, zesty taste that makes lemonade so refreshing. If you can, choose organic lemons, as they tend to have a more robust flavor and are free from harmful pesticides.

Next, when measuring your ingredients, be precise. Accurate measurements will help maintain the balance of flavors. For instance, too much sugar can overpower the tartness of the lemons, while too little can make the drink taste flat. If you prefer a sweeter lemonade, start with the recommended amount of sugar and adjust to your taste.

Additionally, when whipping the cream, make sure your mixing bowl and beaters are cold. This helps the cream whip up faster and achieve the desired soft peaks. If you have time, place them in the refrigerator for about 15 minutes before whipping.

Whipped Pink Lemonade Recipe is best served chilled. If you want to keep it cold for longer, you can freeze some of the lemonade mixture in ice cube trays. These lemonade ice cubes can be added to your glasses without diluting the flavor.

By following these cooking notes, you’ll create a delicious and refreshing whipped pink lemonade that everyone will love. Enjoy the process and have fun experimenting with flavors!

Serving Suggestions for Whipped Pink Lemonade Recipe

Whipped Pink Lemonade Recipe can be just as fun as making it! Presentation plays a big role in how much your guests will enjoy this delightful drink. Here are some creative serving suggestions to elevate your lemonade experience:

  • Charming Glassware: Use clear glasses to showcase the beautiful pink color of your lemonade. Mason jars or tall, elegant glasses can add a rustic or sophisticated touch, respectively.
  • Layered Presentation: For a stunning visual effect, pour the lemonade and whipped cream mixture separately. Start with the lemonade, then gently spoon the whipped topping on top. This creates a layered look that’s sure to impress.
  • Fun Straws: Add colorful or patterned straws to each glass. This not only makes drinking more enjoyable but also adds a festive touch to your presentation.
  • Garnish Creatively: Besides lemon slices and raspberries, consider adding mint leaves for a pop of green. Edible flowers can also make your drink look extra special and inviting.
  • Serve with Snacks: Pair your whipped pink lemonade with light snacks like fruit skewers, cookies, or mini sandwiches. This makes it a perfect addition to picnics, brunches, or summer parties.
  • Ice Cream Float: For a fun twist, serve the lemonade over a scoop of vanilla ice cream. This creates a creamy, dreamy float that’s perfect for hot days.

Whipped Pink Lemonade Recipe but also create a delightful experience for your guests. Remember, the way you present your drink can make it feel even more special. So, get creative and enjoy serving this refreshing treat!

Tips for Perfecting Your Whipped Pink Lemonade Recipe

Whipped Pink Lemonade Recipe truly stand out, consider these helpful tips. They will ensure that every sip is as delightful as the last, making your drink a hit at any gathering!

First, always taste as you go. After mixing the lemonade base, take a small sip. This allows you to adjust the sweetness or tartness to your liking. If it’s too tart, add a bit more sugar. If it’s too sweet, a splash of lemon juice can balance it out.

Next, chill your ingredients beforehand. Cold water and cream will help keep your lemonade refreshing. You can even chill your serving glasses in the freezer for a few minutes before pouring the drink. This extra step keeps your lemonade icy and enjoyable for longer.

When whipping the cream, be careful not to over-whip. Stop when you see soft peaks forming. Over-whipped cream can become grainy and lose its smooth texture. If this happens, you can gently fold in a little more heavy cream to salvage it.

For a more intense raspberry flavor, consider using fresh raspberries instead of frozen. Fresh berries will give a brighter taste and a more vibrant color. If you’re using frozen raspberries, make sure to thaw and drain them before blending to avoid excess water in your puree.

Whipped Pink Lemonade Recipe to new heights.

By following these tips, you’ll create a whipped pink lemonade that’s not only delicious but also memorable. Enjoy the process and have fun sharing this delightful drink with friends and family!

Breakdown of Time for Whipped Pink Lemonade Recipe

Whipped Pink Lemonade Recipe can help you plan better, especially if you’re hosting a gathering. Here’s a simple breakdown of the time required for each step of the process.

Prep Time

The prep time for this delightful drink is approximately 15 minutes. This includes gathering all your ingredients, squeezing the lemons, and preparing the raspberry puree. Having everything ready will make the process smoother and more enjoyable.

Cooking Time

There’s no actual cooking involved in this recipe, but you will need about 10 minutes to mix the lemonade base and whip the cream. This step is crucial for achieving the perfect texture and flavor. Make sure to take your time to ensure everything is well combined.

Total Time

Whipped Pink Lemonade Recipe. This quick and easy drink is perfect for any occasion, and the time spent is well worth the refreshing result. Once you’ve made it, you can serve it immediately or chill it for later!

Nutritional Information for Whipped Pink Lemonade Recipe

Whipped Pink Lemonade Recipe can help you enjoy it guilt-free. This refreshing drink is not only delicious but also provides some essential nutrients. Here’s a breakdown of the nutritional information per serving:

Calories

Whipped Pink Lemonade Recipe contains approximately 180 calories. This makes it a delightful treat that can fit into your daily calorie intake without overwhelming your diet. The combination of lemon juice, sugar, and cream contributes to the calorie count, but the refreshing taste is worth every sip!

Protein

In terms of protein, this drink offers about 2 grams per serving. While it’s not a significant source of protein, the heavy whipping cream and sweetened condensed milk do provide a small amount. If you’re looking to boost the protein content, consider adding a dollop of Greek yogurt to the whipped topping. This will enhance the creaminess while adding more protein to your drink.

Sodium

Whipped Pink Lemonade Recipe is quite low, making it a heart-healthy option. Each serving contains approximately 50 milligrams of sodium. This is beneficial for those watching their sodium intake, as it allows you to enjoy a flavorful drink without the worry of excess salt.

Whipped Pink Lemonade Recipe is a tasty and refreshing option that can be enjoyed in moderation. With its balance of flavors and nutritional benefits, it’s perfect for summer gatherings or a relaxing afternoon at home. So, go ahead and treat yourself to this delightful drink!

FAQs about Whipped Pink Lemonade Recipe

Can I make Whipped Pink Lemonade Recipe ahead of time?

Whipped Pink Lemonade Recipe ahead of time. However, it’s best to keep the lemonade base and the whipped cream mixture separate until you’re ready to serve. This way, the whipped cream stays fluffy and doesn’t lose its texture. You can store the lemonade in the refrigerator for up to 2 days. Just remember to give it a good stir before serving. When you’re ready to enjoy, whip up the cream and combine everything for a refreshing treat!

What can I substitute for lemon juice in the Whipped Pink Lemonade Recipe?

If you don’t have lemon juice on hand, there are a few substitutes you can use. Lime juice is a great alternative, providing a similar tartness. You can also use bottled lemon juice, but fresh is always best for flavor. If you want to try something different, consider using a mix of citrus juices, like orange or grapefruit, to create a unique twist on the classic lemonade. Just keep in mind that the flavor will change slightly!

Is the Whipped Pink Lemonade Recipe suitable for kids?

Whipped Pink Lemonade Recipe is perfect for kids! It’s a fun and colorful drink that they will love. The combination of sweet and tangy flavors makes it appealing to young taste buds. Just be mindful of the sugar content. You can reduce the sugar or use alternative sweeteners to make it a healthier option. Serve it at birthday parties or family gatherings, and watch the kids enjoy every sip!

How can I make the Whipped Pink Lemonade Recipe less sweet?

Whipped Pink Lemonade Recipe, there are several ways to adjust the sweetness. Start by reducing the amount of granulated sugar in the lemonade base. You can also use less sweetened condensed milk in the whipped cream mixture. Another option is to add more lemon juice, which will enhance the tartness and balance out the sweetness. Taste as you go to find the perfect balance that suits your palate!

Conclusion on Whipped Pink Lemonade Recipe

Whipped Pink Lemonade Recipe is a delightful and refreshing drink that brings joy to any occasion. Its vibrant color and delicious flavor make it a standout choice for summer gatherings, birthday parties, or simply enjoying a sunny afternoon. With just a few simple ingredients, you can create a drink that not only tastes amazing but also looks beautiful.

This recipe allows for creativity, whether you choose to add fresh fruits or experiment with alternative sweeteners. The versatility of the whipped pink lemonade means you can tailor it to your taste preferences, making it a drink everyone can enjoy. Plus, the creamy topping adds a luxurious touch that elevates the experience.

As you prepare your whipped pink lemonade, remember to have fun and enjoy the process. Taste as you go, and don’t hesitate to make adjustments to suit your palate. With the tips and variations provided, you can perfect your recipe and impress your friends and family.

Whipped Pink Lemonade Recipe. Cheers to refreshing moments and sweet memories!