Creamy Beef and Shells Recipe for a Cozy Dinner Delight

Introduction to Creamy Beef and Shells Recipe

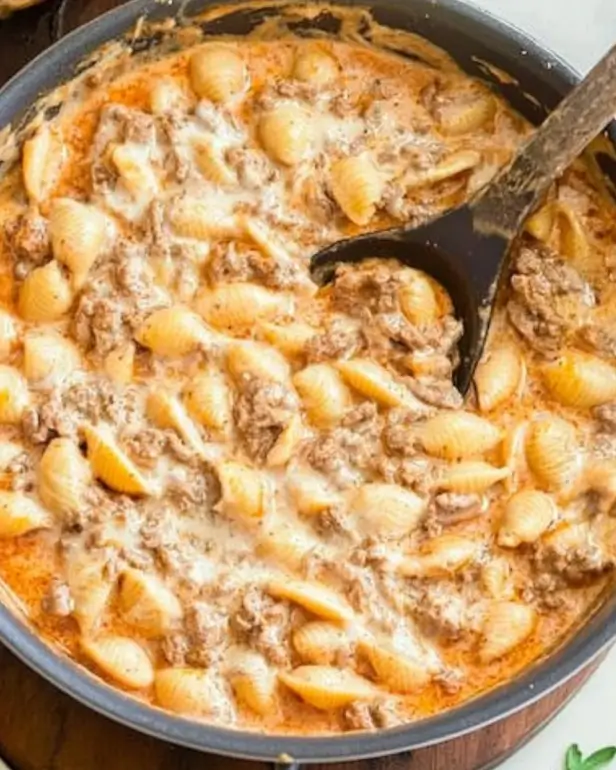
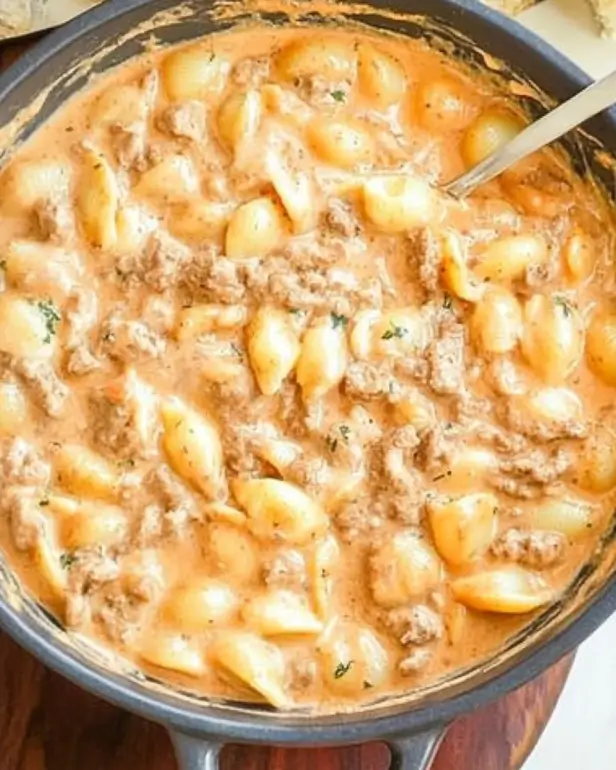
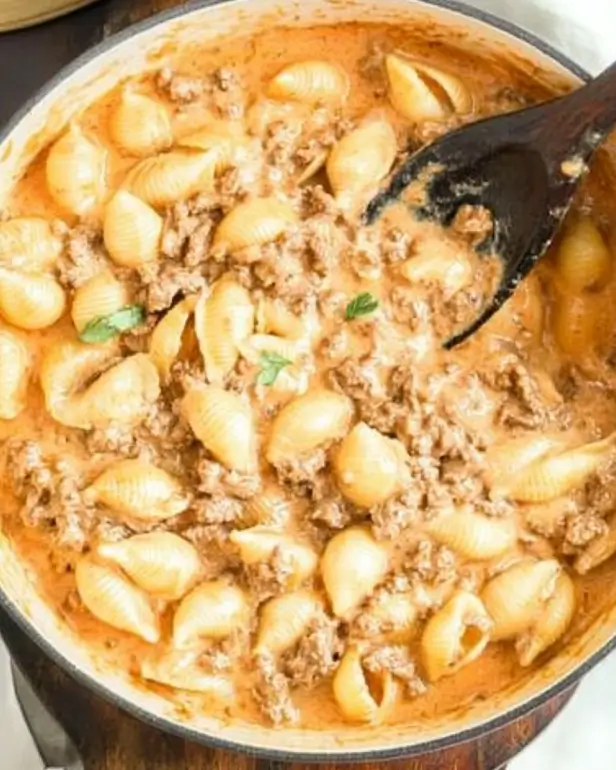
Creamy Beef and Shells Recipe is a dish that brings warmth and satisfaction to any table. This recipe combines tender pasta shells with savory ground beef, all enveloped in a rich and creamy sauce. It’s perfect for family dinners or a cozy night in. With just a few simple ingredients, you can create a meal that feels indulgent yet is easy to prepare.

What Makes the Creamy Beef and Shells Recipe Special?

What sets this recipe apart is its creamy texture and robust flavor. The combination of sharp cheddar and Parmesan cheese creates a luscious sauce that clings to each shell. Moreover, the addition of Italian herbs adds a fragrant touch, making every bite a delightful experience. This dish is not only delicious but also versatile. You can easily customize it by adding your favorite vegetables or swapping out the protein.

Another reason this recipe shines is its quick preparation time. In under 30 minutes, you can have a hearty meal ready to serve. This makes it an excellent choice for busy weeknights when you want something satisfying without spending hours in the kitchen. Plus, it’s a hit with both kids and adults, making it a family favorite.

So, gather your ingredients and get ready to whip up this creamy, cheesy delight. Your taste buds will thank you!

Ingredients for Creamy Beef and Shells Recipe

Creamy Beef and Shells Recipe, you’ll need a handful of simple yet flavorful ingredients. Each component plays a vital role in building the dish’s rich taste and creamy texture. Here’s what you’ll need:

  • 1 pound ground beef: This is the star of the dish, providing protein and a savory flavor.
  • 1 small onion, finely chopped: Adds sweetness and depth to the dish.
  • 2 cloves garlic, minced: Infuses the recipe with aromatic goodness.
  • 1 teaspoon sea salt: Enhances the overall flavor of the dish.
  • 1/2 teaspoon freshly ground black pepper: Adds a touch of heat and spice.
  • 1 teaspoon dried Italian herbs: Brings a fragrant, herbal note to the creamy sauce.
  • 1 cup beef stock: Provides a rich base for the sauce.
  • 1 cup heavy whipping cream: Creates the creamy texture that makes this dish so delightful.
  • 8 ounces medium shell pasta: Perfect for holding the creamy sauce.
  • 1 cup shredded sharp cheddar cheese: Adds a bold, cheesy flavor.
  • 1/2 cup grated Parmesan cheese: Offers a nutty taste and enhances the creaminess.
  • Chopped fresh parsley for garnish: Adds a pop of color and freshness to the dish.

Creamy Beef and Shells Recipe is sure to impress your family and friends!

Step-by-Step Preparation of Creamy Beef and Shells Recipe

Creamy Beef and Shells Recipe. Each step is designed to ensure that your dish turns out perfectly creamy and delicious.

Step 1: Cooking the Pasta

Start by bringing a large pot of salted water to a boil. Once boiling, add the medium shell pasta. Cook according to the package instructions until al dente, usually about 8-10 minutes. Stir occasionally to prevent sticking. Once cooked, drain the pasta and set it aside. Remember, you want the pasta to be firm since it will continue to cook later in the creamy sauce.

Step 2: Browning the Beef

In a large skillet, heat a drizzle of oil over medium heat. Add the pound of ground beef to the skillet. Use a spatula to break it up as it cooks. Brown the beef for about 5-7 minutes until it’s no longer pink. This step is crucial as it adds flavor to your dish. Once browned, drain any excess fat to keep the dish from becoming greasy.

Step 3: Adding the Creamy Sauce

Next, toss in the finely chopped onion and minced garlic into the skillet with the beef. Sauté for about 3-4 minutes until the onion is soft and translucent. Then, season the mixture with sea salt, black pepper, and dried Italian herbs. Stir well to combine. Now, pour in the beef stock and heavy whipping cream, mixing gently. Allow this mixture to come to a gentle simmer, which will help meld the flavors together.

Step 4: Combining Pasta and Beef Mixture

Once your sauce is simmering, it’s time to add the cooked pasta. Carefully fold the medium shell pasta into the creamy beef mixture. Make sure each shell is well-coated in the sauce. Cover the skillet and let it cook for about 10-12 minutes. Stir occasionally to ensure the pasta absorbs the flavors and becomes tender.

Step 5: Final Touches and Serving

Creamy Beef and Shells Recipe warm, and enjoy every cheesy bite!

Variations of Creamy Beef and Shells Recipe

Creamy Beef and Shells Recipe is not only delicious but also versatile. You can easily adapt it to suit your taste or dietary needs. Here are some fun variations to consider that will add extra flavor and nutrition to your dish.

Adding Vegetables for Extra Nutrition

Creamy Beef and Shells Recipe is a fantastic way to boost its nutritional value. You can add a variety of veggies to enhance both flavor and texture. Here are some great options:

  • Spinach: Stir in fresh spinach during the last few minutes of cooking. It wilts quickly and adds a lovely green color.
  • Bell Peppers: Dice some bell peppers and sauté them with the onion and garlic for a sweet crunch.
  • Mushrooms: Sliced mushrooms can be added when browning the beef. They absorb flavors beautifully and add a meaty texture.
  • Zucchini: Grate or dice zucchini and mix it in with the pasta. It cooks quickly and adds moisture.

These vegetables not only make your dish more colorful but also provide essential vitamins and minerals. Plus, they can help you meet your daily vegetable intake!

Alternative Protein Options

Creamy Beef and Shells Recipe. Here are some tasty alternatives:

  • Ground Turkey: A leaner option, ground turkey works well and has a mild flavor that pairs nicely with the creamy sauce.
  • Ground Chicken: Similar to turkey, ground chicken is another healthy alternative that can be seasoned to your liking.
  • Plant-Based Crumbles: For a vegetarian option, try using plant-based meat substitutes. They provide a similar texture and flavor.
  • Shredded Chicken: If you have leftover rotisserie chicken, shred it and mix it in for a quick and easy protein boost.

Creamy Beef and Shells Recipe will still be a hit!

Cooking Note for Creamy Beef and Shells Recipe

Creamy Beef and Shells Recipe, there are a few important cooking notes to keep in mind. These tips will help ensure that your dish turns out perfectly every time, with the right balance of flavors and textures.

First, always use a large skillet for this recipe. A spacious skillet allows for even cooking and prevents overcrowding. This is especially important when browning the ground beef. If the skillet is too small, the beef may steam instead of brown, which can affect the flavor.

Next, be mindful of the heat. Cooking over medium heat is ideal for browning the beef and sautéing the onions and garlic. If the heat is too high, the ingredients may burn, leading to a bitter taste. On the other hand, cooking on too low of a heat can result in undercooked meat and vegetables.

Additionally, when adding the heavy whipping cream, make sure to stir gently. This helps to create a smooth and creamy sauce without curdling. Allow the mixture to simmer gently, as this will help the flavors meld together beautifully.

Creamy Beef and Shells Recipe.

By following these cooking notes, you’ll be well on your way to creating a delicious and satisfying meal that your family will love. Enjoy the process and happy cooking!

Serving Suggestions for Creamy Beef and Shells Recipe

Creamy Beef and Shells Recipe is ready, it’s time to think about how to serve it! Presentation can elevate your dish and make it even more enjoyable. Here are some delightful serving suggestions to consider:

  • Garnish with Fresh Herbs: A sprinkle of chopped fresh parsley or basil on top adds a pop of color and freshness. It also enhances the dish’s aroma, making it even more inviting.
  • Pair with a Side Salad: A crisp green salad with a light vinaigrette complements the richness of the creamy pasta. Consider adding cherry tomatoes, cucumbers, and a sprinkle of feta cheese for extra flavor.
  • Serve with Garlic Bread: Warm, buttery garlic bread is a perfect side. It’s great for soaking up any leftover creamy sauce on your plate.
  • Offer Grated Cheese: Set out a small bowl of extra shredded cheddar or Parmesan cheese for guests to sprinkle on top. This allows everyone to customize their dish to their liking.
  • Include a Vegetable Side: Steamed or roasted vegetables, like broccoli or green beans, can add a nutritious touch. They also provide a nice contrast to the creamy pasta.

Creamy Beef and Shells Recipe feel like a special occasion. Whether it’s a family dinner or a gathering with friends, these ideas will surely impress your guests!

Tips for Perfecting Your Creamy Beef and Shells Recipe

Creamy Beef and Shells Recipe turns out perfectly every time, consider these helpful tips. They will guide you in achieving the best flavor, texture, and presentation for your dish.

  • Choose Quality Ingredients: Start with fresh, high-quality ingredients. Fresh ground beef, real cheese, and organic vegetables can significantly enhance the flavor of your dish.
  • Don’t Overcook the Pasta: Cook the medium shell pasta until it’s al dente. This means it should be firm to the bite. Overcooked pasta can become mushy when mixed with the creamy sauce.
  • Adjust the Creaminess: If you prefer a lighter sauce, you can reduce the amount of heavy whipping cream. Alternatively, for a richer flavor, add a bit more cheese. Experiment to find your perfect balance!
  • Incorporate Fresh Herbs: Fresh herbs can elevate the dish. Consider adding basil or thyme along with the parsley for an extra layer of flavor. Fresh herbs can brighten up the creamy sauce.
  • Let It Rest: After cooking, let the dish sit for a few minutes before serving. This allows the flavors to meld together and makes it easier to serve.
  • Use Leftovers Creatively: If you have leftovers, consider repurposing them. You can turn them into a baked casserole by topping with breadcrumbs and cheese, then baking until golden brown.
  • Experiment with Spices: Don’t hesitate to add your favorite spices. A pinch of red pepper flakes can add a nice kick, while smoked paprika can introduce a smoky flavor.

Creamy Beef and Shells Recipe. Each suggestion is designed to help you create a dish that is not only delicious but also visually appealing. Enjoy the cooking process and the delightful meal that follows!

Breakdown of Time for Creamy Beef and Shells Recipe

Creamy Beef and Shells Recipe can help you plan your cooking efficiently. Here’s a simple breakdown of the time required for preparation and cooking:

Prep Time

The prep time for this delicious dish is quite short. You’ll need about 10-15 minutes to gather and prepare your ingredients. This includes chopping the onion, mincing the garlic, and measuring out the spices and cheeses. Having everything ready before you start cooking will make the process smoother and more enjoyable.

Cooking Time

Once you begin cooking, the total cooking time is approximately 20-25 minutes. This includes:

  • Cooking the pasta: 8-10 minutes
  • Browning the beef and sautéing the vegetables: 8-10 minutes
  • Simmering the creamy sauce and combining everything: 5-7 minutes

These steps are quick and straightforward, making it easy to whip up this meal even on busy nights.

Total Time

Creamy Beef and Shells Recipe is perfect for a satisfying weeknight dinner that doesn’t require hours in the kitchen. Enjoy the process and the delicious results!

Nutritional Information for Creamy Beef and Shells Recipe

Creamy Beef and Shells Recipe not only satisfies your taste buds but also provides valuable nutrients. Here’s a breakdown of the key nutritional components per serving:

Calories

Creamy Beef and Shells Recipe contains approximately 600-700 calories. This calorie count can vary based on the specific ingredients used, such as the type of ground beef and the amount of cheese. While this dish is hearty, it’s important to enjoy it in moderation, especially if you’re watching your calorie intake.

Protein

Creamy Beef and Shells Recipe a great choice for active individuals or anyone looking to increase their protein intake.

Sodium

Sodium is another important factor to consider, especially for those monitoring their salt intake. Each serving contains about 800-900 milligrams of sodium. This amount can vary based on the beef stock and added salt. To reduce sodium levels, consider using low-sodium beef stock and adjusting the salt added during cooking. This way, you can enjoy the flavors without compromising your health.

Creamy Beef and Shells Recipe. It’s a delicious meal that can fit into a balanced diet when enjoyed mindfully!

FAQs about Creamy Beef and Shells Recipe

Can I make the Creamy Beef and Shells Recipe ahead of time?

Creamy Beef and Shells Recipe ahead of time. To do this, follow the recipe up until the point of combining the pasta and the creamy sauce. Once everything is mixed, let it cool completely. Then, store it in an airtight container in the refrigerator for up to 2 days. When you’re ready to serve, simply reheat it on the stove over low heat, stirring occasionally. You may need to add a splash of milk or cream to loosen the sauce if it thickens while stored.

What can I substitute for beef in the Creamy Beef and Shells Recipe?

Creamy Beef and Shells Recipe will still be delicious!

How can I make the Creamy Beef and Shells Recipe healthier?

Creamy Beef and Shells Recipe healthier is easy with a few simple tweaks. First, opt for lean ground beef or substitute it with ground turkey or chicken. You can also use whole wheat pasta for added fiber. Incorporating more vegetables, like spinach or zucchini, boosts the nutritional value without sacrificing flavor. Additionally, consider using low-fat cream or a combination of milk and Greek yogurt to reduce calories and fat. These adjustments will help you enjoy a lighter version of this comforting dish!

Can I freeze leftovers of the Creamy Beef and Shells Recipe?

Creamy Beef and Shells Recipe! To do this, let the dish cool completely before transferring it to a freezer-safe container. It can be stored in the freezer for up to 3 months. When you’re ready to enjoy it again, thaw it in the refrigerator overnight. Reheat it on the stove over low heat, adding a little milk or cream if needed to restore the creamy texture. This way, you can savor the deliciousness of your meal even after some time!

Conclusion on Creamy Beef and Shells Recipe

Creamy Beef and Shells Recipe is a delightful dish that combines comfort and flavor in every bite. With its creamy sauce, tender pasta, and savory beef, it’s a meal that can easily become a family favorite. Whether you’re cooking for a busy weeknight or a special occasion, this recipe is sure to impress.

Not only is it simple to prepare, but it also offers plenty of room for creativity. You can customize it with your favorite vegetables or alternative proteins, making it versatile for any dietary preference. Plus, the quick cooking time means you can enjoy a hearty meal without spending hours in the kitchen.

Creamy Beef and Shells Recipe is bound to be a hit.

So, gather your ingredients, follow the steps, and enjoy the process of cooking. Your family and friends will appreciate the effort, and you’ll be rewarded with a delicious meal that warms the heart. Happy cooking!

Creamy Roasted Red Pepper Pasta Recipe is a must-try!

Introduction to Creamy Roasted Red Pepper Pasta Recipe

Welcome to the delightful world of creamy roasted red pepper pasta! This dish is not just a meal; it’s an experience that brings warmth and comfort to your dining table. With its rich flavors and creamy texture, this pasta recipe is sure to impress family and friends alike. Whether you’re cooking for a special occasion or just a cozy night in, this recipe is a fantastic choice.

What Makes This Recipe Special?

What sets this creamy roasted red pepper pasta recipe apart is its unique blend of flavors. The roasted red peppers add a sweet, smoky taste that perfectly complements the creamy sauce. Plus, the addition of garlic and Italian herbs elevates the dish, making it aromatic and inviting. Each bite is a burst of flavor that dances on your palate, leaving you wanting more. It’s a simple yet elegant dish that showcases how a few quality ingredients can create something truly special.

The Perfect Dish for Any Occasion

This creamy roasted red pepper pasta is incredibly versatile. It’s perfect for a romantic dinner, a family gathering, or even a casual get-together with friends. The dish is easy to prepare, making it suitable for both novice cooks and seasoned chefs. You can serve it as a main course or as a side dish alongside grilled meats or fresh salads. No matter the occasion, this pasta will surely be a hit!

So, gather your ingredients and get ready to create a delicious meal that everyone will love. Let’s dive into the ingredients and preparation steps to make this creamy roasted red pepper pasta recipe a reality!

Ingredients for Creamy Roasted Red Pepper Pasta Recipe

To create this mouthwatering creamy roasted red pepper pasta, you’ll need a selection of fresh and flavorful ingredients. Each component plays a vital role in crafting the rich and creamy sauce that envelops the pasta. Here’s what you’ll need:

  • 8 ounces of your favorite pasta (such as penne or fettuccine) – Choose a pasta shape that holds the sauce well.
  • 1 tablespoon extra virgin olive oil – This adds a lovely richness to the dish.
  • 1 medium onion, finely chopped – Onions provide a sweet and savory base for the sauce.
  • 3 cloves garlic, minced – Garlic enhances the flavor with its aromatic qualities.
  • 1 jar (12 ounces) roasted red peppers, drained and diced – These peppers bring a sweet, smoky flavor to the dish.
  • 1 cup heavy cream – This is the key ingredient for a luscious, creamy sauce.
  • 1 teaspoon dried Italian herbs – A blend of herbs adds depth and warmth to the flavor profile.
  • Salt and freshly ground black pepper to taste – Essential for seasoning and enhancing the overall taste.
  • 1/2 cup freshly grated Parmesan cheese – This cheese adds a salty, nutty flavor that complements the creaminess.
  • Fresh basil leaves for garnish (optional) – A touch of fresh basil adds color and a burst of freshness.

Gather these ingredients, and you’re ready to embark on a culinary adventure that will delight your taste buds. Each item contributes to the overall harmony of flavors, making this creamy roasted red pepper pasta a dish you’ll want to make again and again!

Step-by-Step Preparation of Creamy Roasted Red Pepper Pasta Recipe

Now that you have all your ingredients ready, it’s time to dive into the preparation of this creamy roasted red pepper pasta recipe. Follow these simple steps to create a dish that’s bursting with flavor and sure to impress!

Step 1: Roasting the Red Peppers

If you’re using fresh red peppers, start by roasting them. Preheat your oven to 450°F (230°C). Place the whole peppers on a baking sheet and roast them for about 20-25 minutes, turning occasionally. You want the skin to blister and char. Once done, remove them from the oven and place them in a bowl, covering it with plastic wrap. This will help steam the peppers, making it easier to peel off the skin. After about 10 minutes, peel the skin off, remove the seeds, and dice the peppers. If you’re using jarred roasted red peppers, simply drain and dice them as mentioned in the ingredients.

Step 2: Preparing the Pasta

While the peppers are roasting, bring a large pot of salted water to a boil. Add your favorite pasta, such as penne or fettuccine, and cook according to the package instructions until it reaches an al dente texture. This usually takes about 8-10 minutes. Once cooked, drain the pasta in a colander and set it aside. Remember, you want the pasta to have a slight bite to it, as it will continue to cook when mixed with the sauce.

Step 3: Blending the Sauce

In a spacious skillet, heat the extra virgin olive oil over medium heat. Add the finely chopped onion and sauté for about 5 minutes until it becomes translucent and tender. Next, stir in the minced garlic and cook for an additional minute, allowing the aroma to fill your kitchen. Now, add the diced roasted red peppers to the skillet and let them cook for 2-3 minutes, stirring occasionally. This step helps to meld the flavors together beautifully.

After that, pour in the heavy cream and sprinkle in the dried Italian herbs. Stir everything together and let it simmer gently for about 5 minutes. This allows the sauce to thicken slightly, creating a rich and creamy texture. Don’t forget to season with salt and freshly ground black pepper to taste!

Step 4: Combining Pasta and Sauce

Once your sauce is ready, it’s time to bring everything together. Add the cooked pasta to the skillet, tossing it gently to ensure every piece is coated with the luscious sauce. This is where the magic happens! Allow the pasta to heat through for an additional 2 minutes, ensuring it absorbs all the wonderful flavors of the sauce.

Step 5: Final Touches

To finish off your creamy roasted red pepper pasta, fold in the freshly grated Parmesan cheese. Stir until the cheese melts into the sauce, adding a delightful creaminess. If you like, garnish your dish with fresh basil leaves for a pop of color and a hint of freshness. Serve immediately and enjoy the deliciousness!

Variations of Creamy Roasted Red Pepper Pasta Recipe

This creamy roasted red pepper pasta recipe is not only delicious but also highly adaptable. You can easily customize it to suit your taste preferences or dietary needs. Here are some exciting variations to consider:

Adding Protein Options

If you want to boost the protein content of your creamy roasted red pepper pasta, there are several tasty options. Adding cooked chicken or shrimp can elevate the dish and make it more filling. Simply sauté the protein of your choice in the skillet before adding the onions. This way, the flavors meld beautifully. For a heartier meal, consider using grilled chicken breast or sautéed shrimp. Both options pair wonderfully with the creamy sauce and roasted red peppers.

Another great protein option is to include Italian sausage. Cook the sausage in the skillet until browned, then remove it and set it aside. After preparing the sauce, mix the sausage back in before combining it with the pasta. This adds a savory depth to the dish that is simply irresistible!

Vegetarian and Vegan Alternatives

For those following a vegetarian or vegan diet, this creamy roasted red pepper pasta can easily be modified. To make it vegetarian, simply omit any meat and consider adding vegetables like spinach, zucchini, or mushrooms. Sauté these veggies along with the onions for added flavor and nutrition.

If you want to make this dish vegan, swap the heavy cream for a non-dairy alternative, such as coconut cream or cashew cream. These options provide a creamy texture without the dairy. Additionally, use nutritional yeast instead of Parmesan cheese for a cheesy flavor that’s plant-based. You can also add some fresh herbs like parsley or cilantro for an extra burst of flavor.

With these variations, you can enjoy creamy roasted red pepper pasta in a way that suits your dietary preferences while still savoring its rich and delicious taste!

Cooking Note for Creamy Roasted Red Pepper Pasta Recipe

When preparing your creamy roasted red pepper pasta, a few cooking notes can help ensure your dish turns out perfectly every time. First, always taste your sauce as you cook. This allows you to adjust the seasoning to your liking. Remember, the balance of flavors is key to a delicious meal!

Another important tip is to use high-quality ingredients. Fresh garlic, good olive oil, and freshly grated Parmesan cheese can make a significant difference in flavor. If possible, opt for organic or locally sourced ingredients. They often have a richer taste and can elevate your dish.

Additionally, be mindful of the cooking time for your pasta. Overcooking can lead to mushy pasta that doesn’t hold the sauce well. Aim for al dente, which means the pasta should still have a slight bite. This texture will enhance your overall dining experience.

Lastly, if you find that your sauce is too thick, you can easily adjust it. Simply add a splash of pasta water or more cream to reach your desired consistency. This little trick helps the sauce cling to the pasta beautifully, ensuring every bite is creamy and flavorful.

By keeping these cooking notes in mind, you’ll be well on your way to mastering the creamy roasted red pepper pasta recipe. Enjoy the process and happy cooking!

Serving Suggestions for Creamy Roasted Red Pepper Pasta Recipe

Once you’ve prepared your creamy roasted red pepper pasta, it’s time to think about how to serve it. This dish is not only delicious on its own, but it also pairs wonderfully with various sides and beverages. Here are some fantastic serving suggestions to elevate your dining experience!

Pairing with Sides and Salads

To complement the rich flavors of your creamy roasted red pepper pasta, consider serving it with light and refreshing sides. A simple green salad is an excellent choice. Toss together mixed greens, cherry tomatoes, and cucumber with a light vinaigrette. This adds a crisp contrast to the creamy pasta.

Another great option is garlic bread. The crunchy, buttery texture of garlic bread pairs perfectly with the smooth pasta. You can easily make it by spreading butter and minced garlic on slices of baguette, then toasting them in the oven.

If you want to add more vegetables to your meal, consider roasted or steamed broccoli. The slight bitterness of broccoli balances the sweetness of the roasted red peppers, creating a harmonious plate. You can also serve sautéed spinach with a squeeze of lemon for a zesty touch.

For a heartier option, grilled vegetables like zucchini, bell peppers, and asparagus can be a delightful addition. Their smoky flavor enhances the overall taste of the meal, making it even more satisfying.

Ideal Wine Pairings

When it comes to wine, choosing the right bottle can elevate your creamy roasted red pepper pasta experience. A crisp white wine, such as Pinot Grigio or Sauvignon Blanc, pairs beautifully with the creamy sauce. These wines have a refreshing acidity that cuts through the richness of the dish.

If you prefer red wine, opt for a light-bodied option like a Chianti or a Pinot Noir. These wines offer fruity notes that complement the roasted red peppers without overpowering the flavors.

For those who enjoy sparkling wine, a Prosecco or Champagne can add a festive touch to your meal. The bubbles and acidity in sparkling wines enhance the overall dining experience, making it feel special.

With these serving suggestions, you can create a well-rounded meal that highlights the deliciousness of your creamy roasted red pepper pasta. Enjoy your culinary creation with friends and family, and savor every bite!

Tips for Perfecting Your Creamy Roasted Red Pepper Pasta Recipe

To ensure your creamy roasted red pepper pasta turns out perfectly every time, consider these helpful tips. From ingredient substitutions to storage and reheating advice, these suggestions will help you create a dish that’s not only delicious but also tailored to your preferences.

Ingredient Substitutions

Sometimes, you may not have all the ingredients on hand. No worries! Here are some easy substitutions to keep your creamy roasted red pepper pasta delightful:

  • Pasta: If you’re out of penne or fettuccine, any pasta shape will work. Try spaghetti, rigatoni, or even gluten-free pasta for a different twist.
  • Heavy Cream: For a lighter option, use half-and-half or a non-dairy cream like almond or oat milk. These alternatives will still give you a creamy texture.
  • Parmesan Cheese: If you don’t have Parmesan, try Pecorino Romano or nutritional yeast for a vegan option. Both will add a nice cheesy flavor.
  • Olive Oil: You can substitute olive oil with butter or avocado oil for a different taste profile.
  • Herbs: If you don’t have dried Italian herbs, use fresh herbs like basil or oregano for a burst of flavor.

These substitutions can help you whip up a delicious meal without a trip to the store. Feel free to get creative and make the recipe your own!

Storage and Reheating Tips

After enjoying your creamy roasted red pepper pasta, you might have some leftovers. Here’s how to store and reheat them properly:

  • Storage: Allow the pasta to cool completely before transferring it to an airtight container. Store it in the refrigerator for up to 3 days. If you want to keep it longer, consider freezing it for up to 2 months.
  • Reheating: To reheat, place the pasta in a skillet over low heat. Add a splash of water or cream to help loosen the sauce. Stir gently until heated through. You can also microwave it in a covered dish, stirring halfway through to ensure even heating.
  • Tip: If the sauce thickens too much after refrigeration, adding a little extra cream or pasta water while reheating can restore its creamy consistency.

By following these tips, you can enjoy your creamy roasted red pepper pasta even after the initial meal. It’s a great way to savor the flavors again and minimize food waste!

Breakdown of Time for Creamy Roasted Red Pepper Pasta Recipe

Understanding the time needed for each step in your creamy roasted red pepper pasta recipe can help you plan your cooking efficiently. Here’s a breakdown of the time required for preparation and cooking:

Prep Time

The prep time for this creamy roasted red pepper pasta recipe is approximately 15 minutes. During this time, you will gather all your ingredients, chop the onion and garlic, and prepare the roasted red peppers if you’re using fresh ones. This step is crucial as it sets the stage for a smooth cooking process.

Cooking Time

The cooking time for this dish is about 20 minutes. This includes boiling the pasta, sautéing the onions and garlic, blending the sauce, and combining everything together. Each step is designed to build flavor and ensure that your pasta is cooked to perfection.

Total Time

In total, you can expect to spend around 35 minutes from start to finish. This makes it a quick and easy meal option for busy weeknights or when you want to impress guests without spending hours in the kitchen. With just a little bit of time and effort, you can create a delicious creamy roasted red pepper pasta that everyone will love!

Nutritional Information for Creamy Roasted Red Pepper Pasta Recipe

Understanding the nutritional content of your meals is essential for maintaining a balanced diet. This creamy roasted red pepper pasta recipe not only delights your taste buds but also provides valuable nutrients. Here’s a breakdown of the nutritional information per serving:

Calories

450 calories. This calorie count makes it a satisfying meal that can fit into various dietary plans. The combination of pasta, cream, and cheese contributes to the overall caloric content, providing energy for your day.

Protein

14 grams per serving. The protein primarily comes from the Parmesan cheese and the pasta. If you choose to add protein options like chicken or shrimp, the protein content will increase, making it an even more filling meal.

Sodium

600 milligrams per serving. This amount can vary based on the type of cheese and the amount of salt you add during cooking. If you’re watching your sodium intake, consider using low-sodium broth or cheese alternatives to help reduce the overall sodium level.

By keeping these nutritional facts in mind, you can enjoy your creamy roasted red pepper pasta while being aware of its health benefits. It’s a delicious way to nourish your body and satisfy your cravings!

FAQs about Creamy Roasted Red Pepper Pasta Recipe

Can I use jarred roasted red peppers instead of fresh?

Absolutely! Using jarred roasted red peppers is a convenient option that saves time. They are already cooked and packed with flavor, making them a great substitute for fresh peppers. Just drain and dice them before adding to your sauce. This way, you can enjoy the same delicious taste without the extra effort of roasting.

How can I make this recipe gluten-free?

Making this creamy roasted red pepper pasta gluten-free is simple! All you need to do is swap out regular pasta for gluten-free pasta. Many brands offer gluten-free options made from rice, quinoa, or chickpeas. Just follow the cooking instructions on the package, and you’ll have a delightful gluten-free meal that everyone can enjoy!

What can I serve with creamy roasted red pepper pasta?

There are plenty of delicious options to serve alongside your creamy roasted red pepper pasta. A fresh green salad with a light vinaigrette is a perfect complement. You can also serve garlic bread for a crunchy side that pairs well with the creamy sauce. For a heartier meal, consider grilled vegetables or roasted broccoli. These sides add color and nutrition to your plate, making your meal even more satisfying!

Conclusion on Creamy Roasted Red Pepper Pasta Recipe

In conclusion, the creamy roasted red pepper pasta recipe is a delightful dish that combines rich flavors and a creamy texture, making it a favorite for many. This recipe is not only easy to prepare but also versatile, allowing you to customize it to suit your taste preferences. Whether you choose to add protein, vegetables, or even make it vegan, the possibilities are endless!

As you gather your ingredients and follow the steps, remember that cooking is about enjoying the process. The aroma of sautéed garlic and roasted red peppers will fill your kitchen, creating a warm and inviting atmosphere. Each bite of this pasta will transport you to a place of comfort and satisfaction.

So, whether you’re cooking for a special occasion or just a cozy dinner at home, this creamy roasted red pepper pasta is sure to impress. Serve it with a side salad or some garlic bread, and you have a complete meal that everyone will love. Don’t forget to share your culinary creation with family and friends, as good food is meant to be enjoyed together!

Now that you have all the tips, variations, and serving suggestions, it’s time to get cooking. Enjoy the delightful experience of making and savoring this creamy roasted red pepper pasta recipe. Happy cooking!

Beef and Broccoli Stir-Fry is a quick, tasty meal!

Introduction to Beef and Broccoli Stir-Fry Recipe

Welcome to the world of delicious and nutritious meals! Today, we’re diving into a classic dish that has captured the hearts of many: the Beef and Broccoli Stir-Fry Recipe. This dish is not only quick to prepare but also packed with flavor and essential nutrients. It’s a perfect choice for busy weeknights or when you want to impress your family and friends with your cooking skills.

Beef and broccoli stir-fry is a delightful combination of tender beef and vibrant broccoli, all coated in a savory sauce. The beauty of this recipe lies in its simplicity. With just a handful of ingredients, you can create a meal that is both satisfying and healthy. Plus, it’s versatile! You can easily customize it to suit your taste preferences or dietary needs.

In this article, we will guide you through the ingredients, preparation steps, and even some variations to make this dish your own. Whether you’re a seasoned chef or a beginner in the kitchen, you’ll find this recipe easy to follow and enjoyable to make. So, let’s get started on this culinary adventure and discover how to whip up a delightful Beef and Broccoli Stir-Fry!

Ingredients for Beef and Broccoli Stir-Fry Recipe

To create a mouthwatering Beef and Broccoli Stir-Fry, you’ll need a selection of fresh ingredients that come together to form a delicious meal. Here’s what you’ll need:

  • 1 pound ground beef: Choose lean ground beef for a healthier option.
  • 4 cups broccoli florets: Fresh broccoli adds a nice crunch and vibrant color.
  • 2 tablespoons canola oil: This oil is perfect for high-heat cooking.
  • 3 cloves garlic, finely chopped: Garlic brings a wonderful aroma and flavor.
  • 1 tablespoon fresh ginger, grated: Ginger adds a zesty kick to the dish.
  • 1/4 cup soy sauce: This savory sauce is essential for flavor.
  • 2 tablespoons hoisin sauce: Hoisin sauce adds a touch of sweetness.
  • 1 tablespoon cornstarch: This helps thicken the sauce.
  • 1/4 cup chicken broth: Chicken broth enhances the overall taste.
  • 1 teaspoon toasted sesame oil: This oil gives a nutty flavor to the dish.
  • Salt and black pepper to taste: Season according to your preference.
  • Steamed jasmine rice or quinoa for serving: These grains make a perfect base for your stir-fry.

Gathering these ingredients will set you on the right path to creating a delightful Beef and Broccoli Stir-Fry. Each component plays a vital role in building the flavors and textures that make this dish so enjoyable. Now that you have everything you need, let’s move on to the preparation steps!

Step-by-Step Preparation of Beef and Broccoli Stir-Fry Recipe

Now that you have all your ingredients ready, it’s time to dive into the step-by-step preparation of your Beef and Broccoli Stir-Fry. This process is straightforward and will guide you to create a delicious meal in no time. Let’s get started!

Step 1: Preparing the Ingredients

First things first, let’s prepare all the ingredients. Start by washing the broccoli florets under cold water. This ensures they are clean and ready to cook. Next, chop the garlic finely and grate the fresh ginger. Having everything prepped will make the cooking process smooth and quick. Remember, a well-organized kitchen is a happy kitchen!

Step 2: Marinating the Beef

While you can cook the ground beef directly, marinating it can enhance the flavor. In a bowl, mix the ground beef with a tablespoon of soy sauce and a pinch of black pepper. Let it sit for about 10 minutes. This step allows the beef to absorb the flavors, making your stir-fry even tastier.

Step 3: Cooking the Broccoli

Now, let’s focus on the broccoli. Heat 1 tablespoon of canola oil in a large skillet or wok over medium-high heat. Once the oil is hot, add the broccoli florets. Stir-fry them for about 3-4 minutes. You want them to be bright green and slightly tender but still crisp. This will keep their nutrients intact and add a lovely crunch to your dish.

Step 4: Stir-Frying the Beef

After the broccoli is cooked, remove it from the skillet and set it aside. In the same skillet, add another tablespoon of canola oil if needed. Then, add the marinated ground beef. Cook it for about 5-7 minutes, stirring frequently. You want the beef to be browned and crumbly. If there’s excess fat, drain it off to keep your dish light and healthy.

Step 5: Combining Ingredients

Once the beef is cooked, it’s time to bring everything together. Add the chopped garlic and grated ginger to the skillet. Stir for about a minute until fragrant. Then, return the broccoli to the skillet. In a separate bowl, whisk together the soy sauce, hoisin sauce, cornstarch, and chicken broth until smooth. Pour this sauce over the beef and broccoli mixture. Stir well to coat everything evenly. Let it simmer for 2-3 minutes until the sauce thickens. Finally, drizzle with toasted sesame oil and season with salt and black pepper to taste.

And there you have it! Your Beef and Broccoli Stir-Fry is ready to be served. This dish is not only delicious but also colorful and nutritious. Let’s move on to some variations you can try!

Variation of Beef and Broccoli Stir-Fry Recipe

While the classic Beef and Broccoli Stir-Fry is a favorite for many, there are plenty of ways to switch things up! You can easily customize this dish to suit your taste or dietary needs. Let’s explore some alternative proteins and different vegetables you can include in your stir-fry.

Alternative Proteins

If you’re looking to change the protein in your Beef and Broccoli Stir-Fry, there are several delicious options. Here are a few alternatives:

  • Chicken: Use ground chicken or thinly sliced chicken breast for a lighter option. It cooks quickly and absorbs flavors well.
  • Pork: Ground pork or thinly sliced pork tenderloin can add a different flavor profile. It pairs nicely with the savory sauce.
  • Tofu: For a vegetarian or vegan option, use firm tofu. Press it to remove excess moisture, then cube and sauté until golden.
  • Shrimp: Shrimp cooks quickly and adds a delightful seafood twist. Just be sure to adjust the cooking time to avoid overcooking.

These alternative proteins can make your Beef and Broccoli Stir-Fry unique while still being delicious and satisfying!

Different Vegetables to Include

Another great way to vary your Beef and Broccoli Stir-Fry is by adding different vegetables. This not only enhances the flavor but also boosts the nutritional value. Here are some tasty options:

  • Bell Peppers: Sliced bell peppers add sweetness and color. They cook quickly and complement the beef beautifully.
  • Carrots: Thinly sliced or julienned carrots provide a nice crunch and a hint of sweetness.
  • Snow Peas: These add a crisp texture and a fresh taste. Toss them in during the last few minutes of cooking.
  • Mushrooms: Sliced mushrooms bring an earthy flavor. They absorb the sauce well and add a nice umami touch.
  • Baby Corn: This adds a fun crunch and a unique flavor. It’s a great addition to any stir-fry!

Feel free to mix and match these vegetables based on what you have on hand or what you enjoy most. The possibilities are endless, making your Beef and Broccoli Stir-Fry a versatile dish!

Cooking Note for Beef and Broccoli Stir-Fry Recipe

Cooking a Beef and Broccoli Stir-Fry is not just about following the recipe; it’s also about understanding the cooking process. Here are some important notes to keep in mind to ensure your dish turns out perfectly every time.

First, the key to a great stir-fry is high heat. This helps to sear the meat quickly, locking in the juices and flavors. Make sure your skillet or wok is hot before adding the ingredients. If the pan isn’t hot enough, the beef may steam instead of sear, resulting in a less flavorful dish.

Next, don’t overcrowd the pan. If you add too much beef or broccoli at once, the temperature of the pan will drop. This can lead to uneven cooking. It’s better to cook in batches if you have a lot of ingredients. This way, each piece gets the attention it deserves!

Also, remember to keep stirring! Stir-frying is all about movement. Constantly stirring the ingredients ensures they cook evenly and don’t stick to the pan. It also helps to distribute the flavors from the sauce throughout the dish.

Lastly, timing is crucial. You want your broccoli to be bright green and tender-crisp, not mushy. Keep an eye on the cooking time, especially when adding the vegetables. They should retain their vibrant color and nutrients while still being cooked through.

By following these cooking notes, you’ll elevate your Beef and Broccoli Stir-Fry to a whole new level. Enjoy the process, and don’t be afraid to experiment with flavors and textures!

Serving Suggestions for Beef and Broccoli Stir-Fry Recipe

Now that your Beef and Broccoli Stir-Fry is ready, it’s time to think about how to serve it! Presentation can elevate your meal, making it even more enjoyable. Here are some delightful serving suggestions to consider:

  • Over Steamed Rice: Serve your stir-fry over a bed of fluffy steamed jasmine rice. The rice absorbs the savory sauce, making each bite delicious.
  • With Quinoa: For a healthier twist, try serving the stir-fry with quinoa. This grain is packed with protein and adds a nutty flavor.
  • In Lettuce Wraps: For a fun and low-carb option, spoon the stir-fry into crisp lettuce leaves. This makes for a fresh and crunchy bite!
  • Garnished with Green Onions: Sprinkle chopped green onions on top for a pop of color and a mild onion flavor. It adds a nice finishing touch!
  • With Sesame Seeds: Toasted sesame seeds can add a delightful crunch and nutty flavor. Just sprinkle them over the dish before serving.

Don’t forget to pair your Beef and Broccoli Stir-Fry with a refreshing drink! A light iced tea or a sparkling water with lemon can complement the flavors beautifully. Enjoy your meal with family or friends, and watch as they savor every bite of this delicious dish!

Tips for Perfecting Your Beef and Broccoli Stir-Fry Recipe

Creating the perfect Beef and Broccoli Stir-Fry is all about technique and attention to detail. Here are some valuable tips to help you achieve a dish that is not only delicious but also visually appealing and nutritious.

  • Choose Quality Ingredients: Fresh ingredients make a big difference. Opt for high-quality beef and vibrant broccoli. Fresh produce enhances the flavor and texture of your stir-fry.
  • Prep Ahead: To save time, prepare all your ingredients before you start cooking. Chop the vegetables, marinate the beef, and mix the sauce in advance. This will make the cooking process smoother and quicker.
  • Use a Hot Pan: Always preheat your skillet or wok before adding ingredients. A hot pan ensures that the beef sears properly, locking in juices and flavors. This step is crucial for a great stir-fry.
  • Cook in Batches: If you have a lot of ingredients, consider cooking them in batches. This prevents overcrowding in the pan, allowing each piece to cook evenly and maintain its texture.
  • Don’t Overcook the Vegetables: Keep an eye on your broccoli and other vegetables. They should be tender-crisp and bright in color. Overcooking can lead to mushy veggies that lose their nutrients and appeal.
  • Adjust the Sauce: Feel free to tweak the sauce to your liking. If you prefer a sweeter taste, add more hoisin sauce. For a spicier kick, consider adding a dash of chili sauce or red pepper flakes.
  • Garnish for Presentation: A simple garnish can elevate your dish. Consider adding chopped green onions, sesame seeds, or a drizzle of extra sesame oil before serving. This adds a pop of color and flavor.
  • Serve Immediately: Stir-fries are best enjoyed fresh. Serve your Beef and Broccoli Stir-Fry right after cooking to enjoy the vibrant flavors and textures at their peak.

By following these tips, you’ll be well on your way to mastering the art of Beef and Broccoli Stir-Fry. Enjoy the process, and don’t hesitate to make it your own!

Breakdown of Time for Beef and Broccoli Stir-Fry Recipe

Understanding the time needed for each step in your Beef and Broccoli Stir-Fry Recipe can help you plan your cooking efficiently. Here’s a simple breakdown of the time required for preparation and cooking.

Prep Time

Preparing your ingredients is a crucial step in making a delicious Beef and Broccoli Stir-Fry. This includes washing, chopping, and marinating. You can expect to spend about 15-20 minutes on prep time. Here’s what you’ll do:

  • Wash the broccoli florets.
  • Chop the garlic and grate the ginger.
  • Marinate the ground beef.

Having everything ready will make the cooking process much smoother and quicker!

Cooking Time

The actual cooking time for your Beef and Broccoli Stir-Fry is relatively short. You’ll need about 10-15 minutes to cook everything. Here’s how the time breaks down:

  • Cooking the broccoli: 3-4 minutes.
  • Stir-frying the beef: 5-7 minutes.
  • Combining and simmering: 2-3 minutes.

This quick cooking time is one of the reasons why stir-fries are so popular for busy weeknights!

Total Time

When you combine both prep and cooking times, the total time to make your Beef and Broccoli Stir-Fry is approximately 25-35 minutes. This makes it a fantastic option for a weeknight dinner when you want something delicious without spending hours in the kitchen.

With this time breakdown, you can easily fit this delightful dish into your busy schedule. Enjoy the process and the delicious results!

Nutritional Information for Beef and Broccoli Stir-Fry Recipe

Understanding the nutritional content of your meals is essential for maintaining a balanced diet. The Beef and Broccoli Stir-Fry is not only delicious but also packed with nutrients. Here’s a breakdown of the key nutritional information for one serving of this delightful dish:

Calories

One serving of Beef and Broccoli Stir-Fry contains approximately 350-400 calories. This makes it a satisfying meal without being overly heavy. The combination of lean ground beef and fresh broccoli provides a good balance of energy and nutrients, making it a great choice for lunch or dinner.

Protein

This dish is a fantastic source of protein, with about 25-30 grams per serving. The ground beef contributes significantly to this protein content, which is essential for muscle repair and overall health. Including protein in your meals helps keep you feeling full and satisfied, making it easier to maintain a healthy diet.

Sodium

The sodium content in Beef and Broccoli Stir-Fry is around 600-800 milligrams per serving, depending on the amount of soy sauce used. While soy sauce adds flavor, it can also increase sodium levels. If you’re watching your sodium intake, consider using low-sodium soy sauce or adjusting the amount to suit your dietary needs. Balancing flavors while keeping sodium in check is key to a healthy meal.

Overall, the Beef and Broccoli Stir-Fry is a nutritious option that provides a good mix of calories, protein, and essential nutrients. Enjoy this dish as part of a balanced diet, and feel good about the choices you make for your health!

FAQs about Beef and Broccoli Stir-Fry Recipe

Can I use frozen broccoli for the Beef and Broccoli Stir-Fry Recipe?

Yes, you can use frozen broccoli for your Beef and Broccoli Stir-Fry! Frozen broccoli is convenient and can save you time. Just make sure to thaw it before cooking. You can quickly run it under warm water or microwave it for a minute. Keep in mind that frozen broccoli may cook faster than fresh, so adjust your cooking time accordingly. This way, you’ll still achieve that vibrant color and tender-crisp texture!

What can I substitute for beef in the Beef and Broccoli Stir-Fry Recipe?

If you want to substitute beef in your Beef and Broccoli Stir-Fry, there are several tasty options. You can use chicken, pork, or shrimp for a different flavor. For a vegetarian or vegan option, tofu is a great choice. Just make sure to press the tofu to remove excess moisture before cooking. Each alternative will bring its unique taste and texture, making your stir-fry just as delicious!

How do I make the Beef and Broccoli Stir-Fry Recipe gluten-free?

To make your Beef and Broccoli Stir-Fry gluten-free, simply swap out the soy sauce for a gluten-free version. Many brands offer gluten-free soy sauce or tamari, which works perfectly in this recipe. Additionally, check the hoisin sauce for gluten-containing ingredients. By making these small adjustments, you can enjoy a flavorful stir-fry without gluten!

Can I prepare the Beef and Broccoli Stir-Fry Recipe in advance?

Yes, you can prepare parts of the Beef and Broccoli Stir-Fry in advance! You can chop the vegetables and marinate the beef a few hours ahead of time. Just store them in the refrigerator until you’re ready to cook. However, it’s best to cook the stir-fry fresh for the best texture and flavor. If you have leftovers, they can be stored in an airtight container in the fridge for up to three days. Just reheat gently before serving!

Conclusion on Beef and Broccoli Stir-Fry Recipe

In conclusion, the Beef and Broccoli Stir-Fry is a fantastic dish that combines flavor, nutrition, and ease of preparation. This recipe is perfect for anyone looking to whip up a quick meal that doesn’t compromise on taste or health. With its vibrant colors and delicious aroma, it’s sure to impress your family and friends.

Throughout this article, we’ve explored the essential ingredients, step-by-step preparation, and various ways to customize this dish to suit your preferences. Whether you choose to stick with the classic beef or experiment with alternative proteins and vegetables, the possibilities are endless. The beauty of stir-frying lies in its versatility, allowing you to create a meal that is uniquely yours.

Remember, cooking is not just about following a recipe; it’s about enjoying the process and making it your own. With the tips and techniques shared here, you’ll be well on your way to mastering the art of stir-frying. So, gather your ingredients, heat up that skillet, and get ready to enjoy a delightful Beef and Broccoli Stir-Fry that will leave everyone asking for seconds!

Happy cooking!

Hearty Beef Stew Recipe: A Comforting Family Favorite

Introduction to Hearty Beef Stew Recipe

hearty beef stew recipe is a classic comfort food that brings families together around the dinner table. This dish is not only delicious but also packed with nutrients from the vegetables and protein from the beef. It’s a meal that warms you from the inside out.

Imagine the rich aroma of tender beef simmering with fresh vegetables, filling your kitchen with a delightful scent. This savory stew is perfect for cozy evenings or gatherings with friends. Plus, it’s easy to prepare, making it a great choice for both novice cooks and seasoned chefs alike.

hearty beef stew recipe. You’ll learn how to create a dish that not only satisfies your hunger but also delights your taste buds. So, roll up your sleeves and get ready to make a meal that everyone will love!

Ingredients for Hearty Beef Stew Recipe

hearty beef stew recipe, you’ll need a variety of fresh ingredients. Each component plays a vital role in building flavor and texture. Here’s what you’ll need:

  • 2 pounds beef chuck, cut into 1-inch pieces
  • 2 tablespoons olive oil
  • 1 large onion, diced
  • 3 cloves garlic, minced
  • 4 carrots, chopped
  • 3 medium potatoes, cubed
  • 2 cups beef stock
  • 1 cup red wine (optional)
  • 2 tablespoons tomato puree
  • 1 teaspoon dried thyme
  • 1 teaspoon dried rosemary
  • Salt and freshly ground pepper to taste
  • 2 bay leaves
  • 1 cup frozen green peas (optional)

These ingredients come together to create a rich and flavorful stew. The beef chuck is the star of the show, providing a hearty base. Meanwhile, the vegetables add color and nutrition, making this dish not only tasty but also wholesome.

hearty beef stew recipe lies in its versatility. So, gather your ingredients and get ready to cook up something special!

Preparation of Hearty Beef Stew Recipe

hearty beef stew recipe. Each step is crucial for building flavor and ensuring a delicious outcome. Let’s break it down step by step.

Step 1: Preparing the Ingredients

Start by washing and chopping your vegetables. Dice the onion and mince the garlic. Next, chop the carrots into bite-sized pieces and cube the potatoes. Having everything prepped and ready will make the cooking process smoother. Remember, a well-prepared kitchen is a happy kitchen!

Step 2: Browning the Beef

Heat the olive oil in a large pot or Dutch oven over medium-high heat. Once the oil is hot, add the beef pieces. Sear them for about 5-7 minutes until they develop a rich brown crust on all sides. This step is essential as it locks in the flavors. After browning, transfer the beef to a plate and set it aside. This will help keep the beef juicy and tender.

Step 3: Sautéing the Vegetables

In the same pot, toss in the diced onion and minced garlic. Sauté them for about 3-4 minutes until the onion becomes soft and translucent. This step enhances the flavor base of your stew. The aroma of sautéing onions and garlic is simply irresistible!

Step 4: Combining Ingredients

Now, it’s time to bring everything together. Add the tomato puree, dried thyme, and rosemary to the pot. Stir the mixture for about a minute to release the herbs’ delightful aromas. Then, return the seared beef to the pot. Add the chopped carrots, cubed potatoes, beef stock, and red wine if you’re using it. Don’t forget to season with salt and pepper. Stir everything well to combine.

Step 5: Simmering the Stew

Bring the mixture to a rolling boil. Once boiling, reduce the heat to low, cover the pot, and let it simmer gently for 1.5 to 2 hours. This slow cooking process allows the flavors to meld beautifully and makes the beef fork-tender. Stir occasionally to prevent sticking. If you’re adding peas, stir them in during the last 10 minutes of cooking to heat through.

hearty beef stew recipe is now ready to be served!

Variation of Hearty Beef Stew Recipe

hearty beef stew recipe is delicious on its own, there are many ways to switch things up. You can experiment with alternative ingredients or try different cooking methods. This flexibility allows you to tailor the stew to your taste preferences or dietary needs. Let’s explore some exciting variations!

Alternative Ingredients for Hearty Beef Stew Recipe

hearty beef stew recipe is its versatility. You can easily swap out ingredients to create a unique dish. Here are some alternative ingredients to consider:

  • Meat Options: Instead of beef chuck, try using lamb or pork for a different flavor profile. You can also use chicken for a lighter version.
  • Vegetable Choices: Feel free to add bell peppers, zucchini, or parsnips. These vegetables can enhance the stew’s flavor and nutrition.
  • Herbs and Spices: Experiment with fresh herbs like parsley or cilantro. You can also add a pinch of cayenne pepper for a spicy kick.
  • Beans or Lentils: For added protein and fiber, consider mixing in some canned beans or lentils. They can make the stew heartier and more filling.

These alternatives can help you create a stew that suits your taste and dietary preferences. Don’t hesitate to get creative!

Different Cooking Methods for Hearty Beef Stew Recipe

hearty beef stew recipe. Here are a few popular options:

  • Slow Cooker: This method is perfect for busy days. Simply brown the beef and sauté the vegetables, then transfer everything to a slow cooker. Cook on low for 6-8 hours for a tender and flavorful stew.
  • Pressure Cooker: If you’re short on time, a pressure cooker can significantly speed up the cooking process. Cook the stew for about 30-40 minutes under high pressure for a quick and delicious meal.
  • Oven-Braised: After browning the beef and sautéing the vegetables, transfer the pot to a preheated oven at 325°F (160°C). Let it braise for 2-3 hours for a rich and deeply flavored stew.

Each cooking method offers a unique texture and flavor. Choose the one that fits your schedule and enjoy a delightful meal!

Cooking Note for Hearty Beef Stew Recipe

hearty beef stew recipe is not just about following steps; it’s about understanding the process. Each ingredient and technique plays a crucial role in creating a delicious dish. Here are some important cooking notes to keep in mind as you prepare your stew:

First, the quality of your beef matters. Choose a good cut, like beef chuck, which has enough fat to keep the meat tender and flavorful during cooking. The marbling in the beef will break down as it simmers, adding richness to the stew.

Next, don’t rush the browning process. Searing the beef properly creates a deep, rich flavor that enhances the overall taste of the stew. Make sure your pot is hot enough before adding the meat. If the pot is too cool, the beef will steam instead of brown.

When it comes to vegetables, cut them into uniform sizes. This ensures even cooking. Larger pieces will take longer to soften, while smaller ones may become mushy. Aim for bite-sized chunks for the best texture.

Also, remember to taste as you go! Adjusting the seasoning throughout the cooking process can make a big difference. You might find that a little extra salt or a dash of pepper can elevate the flavors significantly.

Lastly, patience is key. Allowing the stew to simmer for the full time will yield the best results. The longer it cooks, the more the flavors meld together, creating a comforting and hearty dish that warms the soul.

hearty beef stew recipe that your family and friends will love. Enjoy the process, and happy cooking!

Serving Suggestions for Hearty Beef Stew Recipe

hearty beef stew recipe is ready, it’s time to think about how to serve it. A well-presented dish can enhance the dining experience and make your meal even more enjoyable. Here are some delightful serving suggestions to consider:

  • Accompany with Bread: Serve your stew with a side of crusty bread or warm dinner rolls. This allows everyone to soak up the delicious broth, making each bite even more satisfying.
  • Garnish with Fresh Herbs: A sprinkle of fresh parsley or thyme on top of the stew adds a pop of color and freshness. It also enhances the aroma, making the dish even more inviting.
  • Pair with a Salad: A light green salad can balance the richness of the stew. Consider a simple mixed greens salad with a vinaigrette dressing to complement the flavors.
  • Serve with Rice or Mashed Potatoes: For a heartier meal, serve the stew over a bed of fluffy rice or creamy mashed potatoes. This adds an extra layer of comfort and makes the dish more filling.
  • Offer a Side of Vegetables: Steamed or roasted vegetables can add a nutritious touch to your meal. Consider serving green beans, broccoli, or Brussels sprouts for a colorful plate.

hearty beef stew recipe, consider the occasion. For a casual family dinner, a simple presentation will do. However, for special gatherings, you might want to serve the stew in individual bowls or even in a bread bowl for a fun twist.

Don’t forget to provide plenty of napkins! Stews can be a bit messy, but that’s part of the fun. Enjoy your meal with family and friends, and savor the warmth and comfort that this delicious dish brings.

Tips for Perfecting Hearty Beef Stew Recipe

hearty beef stew recipe is an art that combines quality ingredients, proper techniques, and a dash of love. Here are some valuable tips to help you elevate your stew to the next level:

  • Choose the Right Cut of Meat: Opt for cuts like beef chuck or brisket. These cuts have enough fat and connective tissue, which break down during cooking, resulting in tender, flavorful meat.
  • Marinate for Extra Flavor: If you have time, marinate the beef in red wine or a mixture of herbs and spices for a few hours or overnight. This adds depth to the flavor and makes the meat even more tender.
  • Don’t Skip the Browning: Browning the beef is crucial. It creates a rich, caramelized crust that enhances the stew’s overall flavor. Make sure not to overcrowd the pot; brown in batches if necessary.
  • Use Fresh Herbs: Fresh herbs can make a significant difference in flavor. If possible, use fresh thyme, rosemary, or parsley instead of dried. Add them towards the end of cooking to preserve their vibrant taste.
  • Adjust the Liquid: Depending on how thick or soupy you like your stew, adjust the amount of beef stock or wine. If you prefer a thicker stew, reduce the liquid slightly or add a cornstarch slurry towards the end.
  • Let It Rest: After cooking, let the stew sit for about 30 minutes before serving. This resting period allows the flavors to meld together, making each bite even more delicious.
  • Store Leftovers Properly: If you have leftovers, store them in an airtight container in the fridge. The flavors will deepen overnight, making the stew even tastier the next day!

hearty beef stew recipe that will impress your family and friends. Enjoy the process, and don’t hesitate to make it your own!

Breakdown of Time for Hearty Beef Stew Recipe

hearty beef stew recipe can help you plan your cooking better. Here’s a simple breakdown of the time you’ll need for preparation and cooking:

Prep Time

hearty beef stew recipe, you should set aside about 20-30 minutes for prep time. This ensures that you have everything ready to go, making the cooking process smoother and more enjoyable.

Cooking Time

The cooking time is where the magic happens! After you’ve prepped your ingredients, the actual cooking will take about 1.5 to 2 hours. This includes browning the beef, sautéing the vegetables, and simmering the stew until the beef is tender. The slow cooking allows the flavors to meld beautifully, creating a rich and hearty dish.

Total Time

hearty beef stew recipe will be approximately 2 to 2.5 hours. This includes the time spent preparing your ingredients and the time spent cooking the stew. While it may seem like a long time, the end result is well worth the wait!

By planning your time effectively, you can enjoy a delicious homemade stew that warms your heart and satisfies your hunger. So, gather your ingredients, set aside some time, and get ready to create a comforting meal that everyone will love!

Nutritional Information for Hearty Beef Stew Recipe

hearty beef stew recipe is essential for maintaining a balanced diet. This dish is not only delicious but also provides a good mix of nutrients. Here’s a breakdown of the key nutritional information per serving:

Calories

hearty beef stew recipe contains approximately 350 calories. This makes it a satisfying meal that can keep you full without overloading on calories. The combination of beef and vegetables provides a hearty base, making it a great choice for a filling dinner.

Protein

Protein is a vital nutrient for our bodies, and this stew delivers! Each serving contains about 30 grams of protein. The beef chuck is an excellent source of high-quality protein, which is essential for muscle repair and overall health. Including protein in your meals can help you feel fuller for longer, making this stew a smart choice for dinner.

Sodium

hearty beef stew recipe has around 800 milligrams per serving. While sodium is necessary for our bodies, it’s important to monitor your intake. You can reduce the sodium content by using low-sodium beef stock or by adjusting the amount of salt you add during cooking. This way, you can enjoy a flavorful stew without excessive sodium.

hearty beef stew recipe is a nutritious option that provides a good balance of calories, protein, and essential nutrients. It’s a meal that not only satisfies your taste buds but also supports your health. Enjoy this comforting dish knowing it’s good for you!

FAQs about Hearty Beef Stew Recipe

What can I substitute for beef in a hearty stew?

hearty beef stew recipe, there are several options. You can use lamb or pork for a different flavor. Chicken is also a great choice for a lighter stew. For a vegetarian option, consider using hearty vegetables like mushrooms, eggplant, or even chickpeas. These substitutes can provide a satisfying texture and flavor, making your stew just as delicious!

How can I thicken my hearty beef stew?

hearty beef stew recipe can be done in a few simple ways. One popular method is to mix 2 tablespoons of cornstarch with 2 tablespoons of cold water to create a slurry. Stir this mixture into the stew during the last 10 minutes of cooking. Another option is to mash some of the potatoes or carrots in the stew, which will naturally thicken the broth. You can also let the stew simmer uncovered for a while to reduce the liquid and achieve a thicker consistency.

Can I make hearty beef stew in a slow cooker?

hearty beef stew recipe in a slow cooker is a fantastic option, especially for busy days. Start by browning the beef and sautéing the vegetables in a skillet. Then, transfer everything to the slow cooker along with the remaining ingredients. Cook on low for 6-8 hours or on high for 3-4 hours. This method allows the flavors to develop beautifully while you go about your day!

How long does hearty beef stew last in the fridge?

hearty beef stew recipe can last in the fridge for about 3-4 days when stored in an airtight container. To keep it fresh, make sure it cools down before placing it in the fridge. If you want to enjoy it later, consider freezing the stew. It can last in the freezer for up to 3 months. Just remember to thaw it in the fridge overnight before reheating!

Conclusion on Hearty Beef Stew Recipe

hearty beef stew recipe is more than just a meal; it’s a comforting experience that brings warmth and joy to any table. With its rich flavors and tender ingredients, this stew is perfect for family gatherings, cozy nights in, or even meal prep for the week ahead. The combination of beef, vegetables, and aromatic herbs creates a dish that is not only satisfying but also nourishing.

hearty beef stew recipe a staple in many kitchens.

Remember, the key to a successful stew is patience. Allowing the ingredients to simmer together will enhance the flavors and create a dish that everyone will love. Don’t forget to enjoy the process of cooking, as it’s just as important as the final result. Gather your loved ones, share stories, and create memories around the dinner table.

hearty beef stew recipe. It’s sure to warm your heart and satisfy your hunger. Happy cooking!

Cheesy Hamburger Potato Casserole Recipe is a must-try!

Introduction to Cheesy Hamburger Potato Casserole Recipe

Cheesy Hamburger Potato Casserole Recipe is a delightful dish that brings warmth and joy to any family gathering. This casserole is not just a meal; it’s a hug on a plate. With its rich flavors and creamy textures, it’s no wonder this recipe has become a family favorite across many households.

What Makes This Casserole a Family Favorite?

There are several reasons why this casserole stands out. First, it combines simple ingredients that are often found in your pantry. Ground beef, potatoes, and cheese come together to create a hearty meal that satisfies even the pickiest eaters. Plus, it’s easy to prepare, making it perfect for busy weeknights.

Another reason for its popularity is the versatility of the recipe. You can easily customize it to suit your family’s tastes. Want to add some veggies? Go for it! Prefer a different type of cheese? That works too! This flexibility allows everyone to enjoy a dish that feels personal and special.

Cheesy Hamburger Potato Casserole Recipe is a great way to bring the family together. Whether you’re serving it at a casual dinner or a festive gathering, it sparks conversations and creates lasting memories. The aroma of the casserole baking in the oven fills the home with a sense of comfort and anticipation.

In summary, this casserole is not just about the ingredients; it’s about the love and warmth it brings to the table. So, let’s dive into the ingredients and get started on making this delicious dish!

Ingredients for Cheesy Hamburger Potato Casserole Recipe

Cheesy Hamburger Potato Casserole Recipe, you’ll need a few key ingredients. Each component plays a vital role in delivering that rich, savory flavor that everyone loves. Here’s what you’ll need:

  • 2 pounds ground beef: This is the star of the dish, providing protein and a hearty base.
  • 1 medium onion, diced: Onions add sweetness and depth to the flavor.
  • 2 cloves garlic, minced: Garlic brings a wonderful aroma and enhances the overall taste.
  • 4 cups frozen hash brown potatoes: These make the casserole easy to prepare and add a delightful texture.
  • 1 can (10.5 ounces) cream of mushroom soup: This creamy soup binds the ingredients together and adds richness.
  • 1 cup sour cream: Sour cream contributes creaminess and a slight tang.
  • 1 cup shredded sharp cheddar cheese: Cheddar cheese gives a bold flavor and gooey texture.
  • 1 teaspoon salt: Salt enhances all the flavors in the dish.
  • 1/2 teaspoon black pepper: Black pepper adds a hint of spice.
  • 1 teaspoon smoked paprika: This spice adds a smoky flavor that elevates the dish.
  • 1 cup shredded mozzarella cheese: Mozzarella provides a stretchy, melty topping that everyone loves.

With these ingredients on hand, you’re well on your way to creating a delicious casserole that will impress your family and friends. Now, let’s move on to the step-by-step preparation of this delightful dish!

Step-by-Step Preparation of Cheesy Hamburger Potato Casserole Recipe

Cheesy Hamburger Potato Casserole Recipe. This step-by-step guide will help you create a delicious meal that your family will love. Let’s get started!

Step 1: Prepping the Ingredients

First things first, you need to prep your ingredients. Start by dicing the onion and mincing the garlic. This will ensure that they cook evenly and blend well with the beef. Next, measure out your frozen hash browns, cream of mushroom soup, sour cream, and cheeses. Having everything ready will make the cooking process smooth and enjoyable.

Tip: If you prefer fresh potatoes, you can peel and cube them instead of using frozen hash browns. Just remember to adjust the cooking time accordingly!

Step 2: Cooking the Ground Beef

In a large skillet, heat a bit of oil over medium heat. Once hot, add the ground beef. Use a spatula to break it apart as it cooks. Stir in the diced onion and minced garlic. Cook until the beef is browned and the onions are soft and translucent, about 5-7 minutes. Make sure to drain any excess grease from the skillet to keep the casserole from becoming too oily.

As you cook, season the mixture with salt, black pepper, and smoked paprika. This will infuse the beef with flavor, making every bite delicious!

Step 3: Layering the Casserole

Now it’s time to assemble your casserole! In a large mixing bowl, combine the cooked beef mixture with the frozen hash browns, cream of mushroom soup, and sour cream. Stir until everything is well mixed.

Next, take a greased 9×13-inch baking dish and layer half of the beef and potato mixture evenly across the bottom. Sprinkle half of the sharp cheddar cheese over this layer. Then, add the remaining beef and potato mixture on top. Finish by adding the rest of the cheddar cheese and a generous layer of mozzarella cheese. This will create a beautiful, cheesy topping!

Step 4: Baking the Casserole

Preheat your oven to 350°F (175°C) if you haven’t done so already. Cover the baking dish with aluminum foil and place it in the oven. Bake for 30 minutes. This allows the flavors to meld together and the casserole to heat through.

After 30 minutes, carefully remove the foil. Continue baking for another 15-20 minutes, or until the cheese is melted, bubbly, and golden brown. The aroma will be irresistible!

Cheesy Hamburger Potato Casserole Recipe!

Variations of Cheesy Hamburger Potato Casserole Recipe

Cheesy Hamburger Potato Casserole Recipe is a fantastic base that allows for many delicious variations. By adding different ingredients, you can create a unique dish that suits your family’s tastes. Let’s explore some exciting ways to customize this casserole!

Adding Vegetables for Extra Nutrition

One of the best ways to enhance your casserole is by incorporating vegetables. Not only do they add flavor, but they also boost the nutritional value. Here are some great options:

  • Bell Peppers: Diced bell peppers add a sweet crunch. You can use any color you like!
  • Spinach: Fresh or frozen spinach can be mixed in for a healthy green touch.
  • Mushrooms: Sautéed mushrooms bring an earthy flavor that pairs well with beef.
  • Broccoli: Chopped broccoli florets add a nice texture and are packed with vitamins.

To add these veggies, simply sauté them with the onions and garlic in Step 2. This will ensure they are cooked through and flavorful by the time the casserole is ready.

Alternative Cheeses to Use

Cheesy Hamburger Potato Casserole Recipe, and using different types can change the flavor profile significantly. Here are some alternatives to consider:

  • Monterey Jack: This cheese melts beautifully and adds a mild flavor.
  • Colby Cheese: Colby has a creamy texture and a slightly sweet taste that complements the beef.
  • Pepper Jack: For those who enjoy a bit of spice, pepper jack cheese adds a kick!
  • Parmesan: Mixing in some grated Parmesan can add a nutty flavor and a crispy topping when baked.

Feel free to mix and match these cheeses to create a flavor combination that your family will love. The possibilities are endless!

Cooking Note for Cheesy Hamburger Potato Casserole Recipe

Cheesy Hamburger Potato Casserole Recipe, there are a few important cooking notes to keep in mind. These tips will help ensure that your casserole turns out perfectly every time, making it a dish your family will request again and again.

First, always preheat your oven. This step is crucial for even cooking. If the oven isn’t hot enough, the casserole may not bake properly, leading to uneven textures. A well-preheated oven helps the cheese melt beautifully and the flavors to meld together.

Next, consider the type of ground beef you use. While regular ground beef works well, you can opt for lean ground beef to reduce the fat content. This choice can make the dish a bit healthier without sacrificing flavor. If you prefer a different protein, ground turkey or chicken can be great substitutes.

Another tip is to let the casserole rest after baking. Allowing it to sit for about 5 minutes before serving helps the layers set. This makes it easier to cut and serve, ensuring that each portion holds its shape. Plus, it gives the flavors a chance to meld even more!

Lastly, don’t be afraid to experiment with spices. While the recipe calls for smoked paprika, you can add other spices like Italian seasoning or garlic powder for an extra flavor boost. Just remember to adjust the amounts to suit your taste.

Cheesy Hamburger Potato Casserole Recipe that’s sure to impress. Happy cooking!

Serving Suggestions for Cheesy Hamburger Potato Casserole Recipe

Cheesy Hamburger Potato Casserole Recipe is ready, it’s time to think about what to serve alongside it. The right side dishes can enhance the meal and create a well-rounded dining experience. Here are some ideal side dishes that pair perfectly with this comforting casserole:

Ideal Side Dishes to Pair

  • Green Salad: A fresh green salad adds a crisp contrast to the rich flavors of the casserole. Consider using mixed greens, cherry tomatoes, and a light vinaigrette for a refreshing touch.
  • Steamed Vegetables: Steamed broccoli, carrots, or green beans provide a healthy side that complements the casserole. Their vibrant colors and nutrients balance the meal beautifully.
  • Garlic Bread: For those who love bread, garlic bread is a fantastic option. Its buttery, garlicky flavor pairs well with the cheesy casserole, making every bite delightful.
  • Coleslaw: A tangy coleslaw can add a crunchy texture and a bit of acidity, which helps cut through the richness of the casserole. It’s a great way to add some crunch!
  • Fruit Salad: For a sweet finish, consider serving a fruit salad. The natural sweetness of fruits like berries, melons, and citrus can provide a refreshing contrast to the savory casserole.

Cheesy Hamburger Potato Casserole Recipe but also add variety to your meal. Feel free to mix and match based on your family’s preferences. Enjoy your delicious dinner!

Tips for Perfecting Your Cheesy Hamburger Potato Casserole Recipe

Cheesy Hamburger Potato Casserole Recipe truly shine, consider these helpful tips. They will guide you in creating a dish that is not only delicious but also visually appealing and satisfying. Let’s explore some expert advice to elevate your casserole game!

First, always use fresh ingredients when possible. Fresh vegetables and high-quality cheese can significantly enhance the flavor of your casserole. If you’re using frozen hash browns, ensure they are not clumped together. This will help them cook evenly and create a better texture.

Next, don’t skip the seasoning! While the recipe includes salt, pepper, and smoked paprika, feel free to add your favorite herbs and spices. A pinch of Italian seasoning or a dash of cayenne pepper can add an exciting twist. Just remember to taste as you go to find the perfect balance.

Another tip is to layer your ingredients thoughtfully. When layering the casserole, make sure to spread the mixture evenly. This ensures that every bite is packed with flavor. Additionally, try to distribute the cheese evenly across the top. This will create a beautiful, golden crust that everyone will love.

Consider using a combination of cheeses for a richer flavor. Mixing sharp cheddar with mozzarella or Monterey Jack can create a delightful blend of tastes and textures. The sharpness of cheddar pairs wonderfully with the creaminess of mozzarella, making each bite irresistible.

Lastly, don’t rush the resting time after baking. Allowing the casserole to sit for about 5 minutes before serving helps the layers set. This makes it easier to cut and serve, ensuring that each portion holds its shape. Plus, it gives the flavors a chance to meld even more!

Cheesy Hamburger Potato Casserole Recipe that is sure to impress your family and friends. Happy cooking!

Breakdown of Time for Cheesy Hamburger Potato Casserole Recipe

Cheesy Hamburger Potato Casserole Recipe can help you plan your cooking efficiently. Here’s a detailed breakdown of the time required for preparation and cooking, ensuring you can serve this delicious dish without any stress.

Prep Time

The prep time for this casserole is approximately 15-20 minutes. During this time, you will gather all your ingredients, dice the onion, mince the garlic, and measure out the other components. Having everything ready will make the cooking process smoother and more enjoyable.

Cooking Time

Cheesy Hamburger Potato Casserole Recipe is about 45-50 minutes. This includes:

  • 30 minutes: Baking the casserole covered with foil to allow the flavors to meld.
  • 15-20 minutes: Baking uncovered to achieve that golden, bubbly cheese topping.

Total Time

In total, you can expect the entire process to take around 1 hour to 1 hour and 10 minutes. This includes both prep and cooking time. With this timeline, you can easily plan your meal and have everything ready for your family or guests.

Cheesy Hamburger Potato Casserole Recipe turns out perfectly every time. Enjoy the cooking process and the delicious results!

Nutritional Information for Cheesy Hamburger Potato Casserole Recipe

Cheesy Hamburger Potato Casserole Recipe is essential for those who are mindful of their diet. This casserole is not only delicious but also provides a good balance of nutrients. Here’s a breakdown of the key nutritional information per serving:

Calories

Each serving of this hearty casserole contains approximately 450 calories. This makes it a filling option for dinner, providing energy to keep you satisfied throughout the evening. The combination of ground beef, potatoes, and cheese contributes to the calorie count, but it also ensures a rich and comforting meal.

Protein

Cheesy Hamburger Potato Casserole Recipe is a great source of this essential nutrient. Protein is vital for muscle repair and growth, making this dish a good choice for active individuals or families. The ground beef and cheese are the primary contributors to the protein content, ensuring that each bite is not only tasty but also nutritious.

Sodium

Each serving contains approximately 800 milligrams of sodium. While sodium is necessary for bodily functions, it’s important to monitor your intake. If you’re watching your sodium levels, consider using low-sodium versions of the cream of mushroom soup and cheese. This small adjustment can help reduce the overall sodium content while still keeping the casserole delicious.

Cheesy Hamburger Potato Casserole Recipe offers a satisfying meal with a good balance of calories, protein, and sodium. By being aware of these nutritional aspects, you can enjoy this comforting dish while maintaining a healthy diet. Now, let’s move on to some frequently asked questions about this delightful casserole!

FAQs about Cheesy Hamburger Potato Casserole Recipe

Can I make Cheesy Hamburger Potato Casserole Recipe ahead of time?

Cheesy Hamburger Potato Casserole Recipe is perfect for making ahead of time. You can prepare the casserole up to the point of baking, cover it tightly with plastic wrap or aluminum foil, and store it in the refrigerator for up to 24 hours. When you’re ready to bake, simply remove it from the fridge, let it sit at room temperature for about 30 minutes, and then bake as directed. This makes it a great option for busy weeknights or when hosting guests!

What can I substitute for ground beef in this recipe?

Cheesy Hamburger Potato Casserole Recipe, so feel free to experiment!

How do I store leftovers of Cheesy Hamburger Potato Casserole Recipe?

Storing leftovers is easy! Once the casserole has cooled to room temperature, transfer it to an airtight container. You can keep it in the refrigerator for up to 3-4 days. If you want to store it for a longer period, consider freezing it. Wrap the casserole tightly in plastic wrap and then in aluminum foil, or use a freezer-safe container. It can be frozen for up to 2-3 months. When you’re ready to enjoy it again, simply thaw it in the refrigerator overnight and reheat in the oven until warmed through.

Conclusion on Cheesy Hamburger Potato Casserole Recipe

Cheesy Hamburger Potato Casserole Recipe is more than just a meal; it’s a comforting dish that brings families together. With its rich flavors, creamy textures, and cheesy goodness, it’s no wonder this casserole has earned a special place in many hearts and homes. Whether you’re enjoying it on a busy weeknight or serving it at a family gathering, this recipe is sure to please everyone at the table.

As you’ve seen, the versatility of this casserole allows for endless customization. You can easily add vegetables, swap out proteins, or experiment with different cheeses to create a dish that suits your family’s preferences. This adaptability not only makes it a practical choice for any occasion but also encourages creativity in the kitchen.

Moreover, the preparation and cooking process is straightforward, making it accessible for cooks of all skill levels. With just a few simple steps, you can create a hearty meal that is both satisfying and delicious. Plus, the nutritional benefits, including a good source of protein and essential nutrients, make it a wholesome option for your family.

Cheesy Hamburger Potato Casserole Recipe. We hope this recipe becomes a beloved staple in your home, just as it has in so many others. Happy cooking, and may your meals be filled with love and laughter!

Smash Burger Tacos Recipe: A Delicious Fusion Dish!

Introduction to Smash Burger Tacos Recipe

What Are Smash Burger Tacos?

Smash Burger Tacos are a delicious fusion of two beloved dishes: smash burgers and tacos. Imagine a juicy, flavorful beef patty, perfectly seared to create a crispy crust, nestled inside a warm corn tortilla. This delightful combination brings together the best of both worlds, offering a unique twist on traditional tacos. The beef is seasoned with spices that enhance its taste, while the toppings add freshness and crunch. Each bite is a burst of flavor, making these tacos a hit at any gathering or family dinner.

Why You Should Try This Recipe

There are many reasons to try the Smash Burger Tacos Recipe. First, it’s incredibly easy to make, even for beginner cooks. With just a few simple ingredients, you can whip up a meal that impresses everyone. Second, the recipe is versatile. You can customize it with your favorite toppings, making it suitable for all taste preferences. Whether you like it spicy with jalapeños or prefer a milder flavor with just cheese and lettuce, the choice is yours!

Moreover, these tacos are perfect for any occasion. They work well for casual weeknight dinners, game day snacks, or even festive gatherings. Plus, they are fun to eat! Everyone loves tacos, and adding a burger twist makes them even more exciting. So, gather your ingredients and get ready to enjoy a meal that’s sure to become a family favorite!

Ingredients for Smash Burger Tacos Recipe

To create the perfect Smash Burger Tacos, you’ll need a selection of fresh ingredients that come together to deliver a mouthwatering experience. Here’s what you’ll need:

  • 1 pound ground beef (80/20 blend)
  • 1 teaspoon garlic powder
  • 1 teaspoon onion powder
  • 1 teaspoon chili powder
  • Salt and pepper to taste
  • 8 small corn tortillas
  • 1 cup shredded Monterey Jack cheese
  • 1 cup shredded iceberg lettuce
  • 1 cup chopped fresh salsa
  • 1/2 cup Greek yogurt
  • 1/4 cup sliced jalapeños
  • 1/4 cup chopped cilantro
  • Cooking oil for frying

These ingredients are not only easy to find but also work harmoniously to create a delightful flavor profile. The ground beef serves as the star of the show, while the spices add depth. The corn tortillas provide a sturdy base, and the toppings bring freshness and crunch. Feel free to adjust the quantities based on your preferences or the number of servings you need. Now that you have your ingredients ready, let’s move on to the preparation steps!

Step-by-Step Preparation of Smash Burger Tacos Recipe

Step 1: Preparing the Ingredients

Before diving into cooking, it’s essential to prepare all your ingredients. Start by gathering everything you need. This makes the cooking process smoother and more enjoyable. First, measure out the ground beef and place it in a mixing bowl. Next, add the garlic powder, onion powder, chili powder, salt, and pepper. Mix gently with your hands or a spoon until just combined. Be careful not to overwork the meat, as this can make the patties tough.

While you’re at it, chop the fresh salsa and slice the jalapeños. Shred the iceberg lettuce and Monterey Jack cheese if you haven’t done so already. Having everything ready will help you assemble the tacos quickly once the patties are cooked. Now that your ingredients are prepped, you’re ready to move on to cooking!

Step 2: Cooking the Burger Patties

Heat a generous drizzle of cooking oil in a large skillet over medium heat. Once the oil is hot, it’s time to cook the burger patties. Form the beef mixture into small, even patties, about the size of your tortillas. This ensures that each taco has a perfectly fitting patty.

Carefully place the patties in the skillet. Cook for about 3-4 minutes on one side until a nice crust forms. This crust adds flavor and texture. After that, flip the patties and cook for an additional 2-3 minutes until they are fully cooked through. You can check for doneness by cutting into one patty; it should be brown and no longer pink inside. Once cooked, remove the patties from the skillet and set them aside.

Step 3: Assembling the Tacos

Now comes the fun part—assembling your Smash Burger Tacos! Start by lightly toasting the corn tortillas in another skillet until they are warm and slightly crispy. This step adds a delightful crunch to your tacos.

Once the tortillas are ready, place a beef patty on each one. Make sure the patty is centered so it’s easy to eat. Next, sprinkle a generous amount of shredded Monterey Jack cheese on top of each patty. The heat from the patty will start to melt the cheese, creating a gooey, delicious layer.

Step 4: Adding Toppings and Sauces

With the patties and cheese in place, it’s time to add your favorite toppings! Start with a handful of shredded iceberg lettuce for a refreshing crunch. Then, add a spoonful of fresh salsa for a burst of flavor. If you like a little heat, don’t forget to include the sliced jalapeños. Finally, finish off each taco with a dollop of Greek yogurt and a sprinkle of chopped cilantro for a fresh touch.

Once all the toppings are added, your Smash Burger Tacos are ready to be served! Enjoy them immediately while the cheese is gooey and the flavors are vibrant. These tacos are sure to be a hit!

Variations of Smash Burger Tacos Recipe

Different Meat Options

While the classic Smash Burger Tacos use ground beef, there are many other meat options you can try. For instance, ground turkey or chicken can be a leaner alternative. They still provide great flavor when seasoned well. If you’re feeling adventurous, consider using ground lamb for a unique twist. The rich taste of lamb pairs wonderfully with the spices in this recipe. You can also experiment with different blends, like a mix of beef and pork, to create a juicy patty that’s bursting with flavor. Each meat option brings its own character to the tacos, so feel free to explore!

Vegetarian Alternatives

If you’re looking for a vegetarian option, you can easily swap out the meat for plant-based ingredients. One popular choice is using black beans or lentils. Simply mash them up and mix with spices to form patties. Another great alternative is using a store-bought veggie burger. These are often packed with flavor and can be cooked just like the beef patties. For a fun twist, try using grilled portobello mushrooms. Their meaty texture makes them a satisfying substitute. No matter which option you choose, you can still enjoy all the delicious toppings!

Unique Topping Ideas

When it comes to toppings, the possibilities are endless! While the classic toppings are delicious, you can get creative. For a southwestern flair, try adding avocado slices or guacamole. This adds creaminess and a fresh taste. If you love heat, consider using spicy salsa or a drizzle of hot sauce. You can also switch up the cheese; pepper jack adds a nice kick! For a refreshing twist, try adding pickled onions or radishes. These toppings not only enhance the flavor but also add a pop of color to your tacos. Don’t hesitate to mix and match to find your perfect combination!

Cooking Note for Smash Burger Tacos Recipe

Cooking Smash Burger Tacos is a delightful experience, but there are a few important notes to keep in mind to ensure your tacos turn out perfectly every time. First, the quality of your ground beef matters. Opt for an 80/20 blend, as it provides the right amount of fat for juicy patties. If you choose leaner meat, your patties may end up dry.

Next, be mindful of the cooking temperature. Medium heat is ideal for cooking the patties. If the heat is too high, the outside may burn while the inside remains undercooked. Conversely, cooking on too low a heat can lead to a lack of that delicious crust. A good rule of thumb is to listen for a sizzle when you place the patties in the skillet. This sound indicates that the meat is searing properly.

Additionally, don’t overcrowd the skillet. Cooking too many patties at once can lower the temperature of the pan, resulting in uneven cooking. Instead, cook in batches if necessary. This way, each patty gets the attention it deserves, ensuring a perfect sear and flavor.

Lastly, let the patties rest for a minute after cooking. This allows the juices to redistribute, making each bite more flavorful and juicy. By following these cooking notes, you’ll create Smash Burger Tacos that are not only delicious but also a hit with family and friends!

Serving Suggestions for Smash Burger Tacos Recipe

Pairing with Sides

When it comes to serving Smash Burger Tacos, the right sides can elevate your meal to a whole new level. Consider pairing your tacos with classic sides that complement their flavors. Here are some delicious options:

  • Mexican Street Corn: This dish, also known as Elote, features grilled corn on the cob slathered in creamy sauce, cheese, and spices. It adds a sweet and savory touch to your meal.
  • Refried Beans: Creamy refried beans are a traditional side that pairs perfectly with tacos. They add protein and a rich flavor that balances the meal.
  • Chips and Salsa: A bowl of crispy tortilla chips served with fresh salsa is always a hit. It’s a great way to start your meal and keeps everyone munching while the tacos are being prepared.
  • Guacamole: This creamy avocado dip is a fantastic addition. It adds a refreshing taste and pairs well with the spices in the tacos.

These sides not only enhance the overall dining experience but also provide a variety of textures and flavors. Feel free to mix and match based on your preferences and the occasion!

Beverage Recommendations

Choosing the right beverages to accompany your Smash Burger Tacos can make your meal even more enjoyable. Here are some refreshing drink options that pair well:

  • Margaritas: A classic choice, margaritas bring a zesty kick that complements the flavors of the tacos. You can opt for traditional lime or get creative with fruit flavors like mango or strawberry.
  • Mexican Beer: Light beers, such as Corona or Pacifico, are perfect for washing down the rich flavors of the tacos. They are refreshing and enhance the overall experience.
  • Agua Fresca: For a non-alcoholic option, try agua fresca. This refreshing drink made from fruits, water, and sugar is light and hydrating, making it a great match for tacos.
  • Iced Tea: A glass of sweetened iced tea can also be a delightful pairing. Its sweetness balances the savory flavors of the tacos.

With these sides and beverages, your Smash Burger Tacos will be a complete meal that everyone will love. Enjoy the flavors and the company!

Tips for Perfecting Your Smash Burger Tacos Recipe

Common Mistakes to Avoid

Making Smash Burger Tacos can be a fun and rewarding experience, but there are a few common mistakes to watch out for. First, avoid overmixing the ground beef. When you mix too much, the patties can become tough. Just mix until the spices are evenly distributed.

Another mistake is not letting the skillet heat up enough before adding the patties. If the oil isn’t hot, the patties won’t sear properly, leading to a less flavorful crust. Always wait for that sizzle when you place the patties in the skillet.

Also, be careful not to overcrowd the skillet. Cooking too many patties at once can lower the temperature, resulting in uneven cooking. Instead, cook in batches to ensure each patty gets the right amount of heat.

Lastly, don’t skip the resting step after cooking. Letting the patties rest for a minute allows the juices to redistribute, making each bite juicy and flavorful. By avoiding these common mistakes, you’ll create Smash Burger Tacos that are sure to impress!

Storage Tips for Leftovers

If you happen to have leftovers, storing them properly is key to enjoying them later. First, let the cooked patties cool down to room temperature. Then, place them in an airtight container. You can store the patties separately from the tortillas and toppings to keep everything fresh.

For best results, consume the leftovers within 2-3 days. When reheating, use a skillet over medium heat to warm the patties. This helps maintain their texture. You can also microwave them, but be cautious not to overheat, as this can make them tough.

As for the tortillas, it’s best to store them in a sealed bag at room temperature. If you have leftover toppings, keep them in separate containers in the fridge. This way, you can easily assemble fresh tacos when you’re ready to enjoy them again. With these storage tips, your Smash Burger Tacos will taste just as delicious the next day!

Breakdown of Time for Smash Burger Tacos Recipe

Prep Time

Preparing your Smash Burger Tacos is a breeze! The prep time typically takes about 15-20 minutes. This includes gathering all your ingredients, measuring them out, and chopping any fresh toppings like lettuce, salsa, and jalapeños. Having everything ready before you start cooking makes the process smoother and more enjoyable. So, take your time to get organized, and you’ll be set for a fun cooking experience!

Cooking Time

The cooking time for the Smash Burger Tacos is around 15-20 minutes. This includes cooking the beef patties, which takes about 6-7 minutes, and toasting the corn tortillas, which should only take a few minutes. If you’re cooking in batches, you might need a little extra time, but it’s worth it for those perfectly seared patties. Just keep an eye on the heat to ensure everything cooks evenly!

Total Time

In total, you can expect to spend about 30-40 minutes from start to finish. This includes both prep and cooking time. It’s a quick and satisfying meal that’s perfect for busy weeknights or casual gatherings. With just a little time and effort, you’ll have a delicious plate of Smash Burger Tacos ready to enjoy!

Nutritional Information for Smash Burger Tacos Recipe

Calories

When it comes to enjoying Smash Burger Tacos, being mindful of the calories can help you make informed choices. Each taco contains approximately 250-300 calories, depending on the specific ingredients and portion sizes used. The ground beef, cheese, and toppings contribute to the overall calorie count. If you’re looking to reduce calories, consider using leaner meat or less cheese. However, the delicious flavors are worth every bite!

Protein Content

Protein is an essential nutrient, and Smash Burger Tacos deliver a satisfying amount. Each taco typically contains around 15-20 grams of protein, thanks to the ground beef and cheese. Protein is vital for muscle repair and growth, making these tacos a great option for a post-workout meal. If you opt for alternatives like turkey or plant-based patties, the protein content may vary slightly, but you can still enjoy a hearty meal.

Sodium Levels

Sodium levels in Smash Burger Tacos can vary based on the ingredients used, especially if you add sauces or pre-packaged toppings. On average, each taco may contain about 400-600 mg of sodium. To keep sodium levels in check, consider using low-sodium options for ingredients like salsa and cheese. Additionally, you can control the amount of salt added during cooking. Being mindful of sodium can help you enjoy these tasty tacos while maintaining a balanced diet.

FAQs About Smash Burger Tacos Recipe

Can I make Smash Burger Tacos ahead of time?

Yes, you can prepare some components of Smash Burger Tacos ahead of time! You can cook the beef patties and store them in an airtight container in the refrigerator for up to 3 days. When you’re ready to serve, simply reheat the patties in a skillet or microwave. You can also chop your toppings, like lettuce and salsa, in advance. Just keep them in separate containers to maintain freshness. However, it’s best to assemble the tacos right before serving to keep the tortillas crispy and the cheese gooey!

What type of cheese works best for Smash Burger Tacos?

Monterey Jack cheese is a fantastic choice for Smash Burger Tacos due to its creamy texture and mild flavor. It melts beautifully, creating that gooey goodness we all love. However, you can also experiment with other cheeses! Cheddar adds a sharp flavor, while pepper jack gives a spicy kick. Feel free to mix and match different cheeses to find your perfect combination. The key is to choose a cheese that melts well and complements the flavors of the beef and toppings.

Are Smash Burger Tacos gluten-free?

Smash Burger Tacos can be made gluten-free with a few simple adjustments. The corn tortillas used in the recipe are typically gluten-free, but always check the packaging to be sure. Additionally, ensure that any sauces or toppings you use, like salsa or Greek yogurt, are also gluten-free. If you want to make your own tortillas, you can use gluten-free flour alternatives. With these modifications, everyone can enjoy these delicious tacos!

How can I make Smash Burger Tacos spicier?

If you love heat, there are several ways to spice up your Smash Burger Tacos! Start by adding sliced jalapeños, as they provide a nice kick. You can also use spicy salsa or hot sauce to amp up the flavor. For an extra layer of heat, consider mixing some cayenne pepper or crushed red pepper flakes into the beef mixture before cooking. If you want to get creative, try adding a spicy cheese like pepper jack or even a drizzle of sriracha on top. With these tips, you can customize the spice level to suit your taste!

Conclusion on Smash Burger Tacos Recipe

In conclusion, Smash Burger Tacos are a delightful and innovative dish that combines the best elements of two beloved favorites: burgers and tacos. This recipe is not only easy to prepare but also allows for endless customization, making it perfect for any occasion. Whether you’re hosting a casual get-together or simply enjoying a weeknight dinner, these tacos are sure to impress your family and friends.

With their juicy beef patties, warm corn tortillas, and a variety of fresh toppings, each bite is a burst of flavor that will leave everyone wanting more. Plus, the versatility of this recipe means you can easily adapt it to suit different dietary preferences, whether you choose to use different meats or go for a vegetarian option.

As you explore the world of Smash Burger Tacos, remember to have fun with the process. Experiment with unique toppings, try out different cheeses, and don’t hesitate to pair them with delicious sides and refreshing beverages. The joy of cooking lies in creativity, and these tacos offer a fantastic canvas for your culinary imagination.

So, gather your ingredients, follow the steps, and get ready to enjoy a meal that’s not only satisfying but also brings a smile to everyone’s face. Happy cooking, and may your Smash Burger Tacos become a cherished favorite in your home!

Philly Cheesesteak Sloppy Joe Recipe is a must-try!

Introduction to Philly Cheesesteak Sloppy Joe Recipe

Philly Cheesesteak Sloppy Joe Recipe combines two beloved comfort foods into one mouthwatering dish. Imagine the rich, savory flavors of a classic Philly cheesesteak, all wrapped up in a messy, satisfying sloppy joe. This recipe is perfect for family dinners, game day gatherings, or any time you crave something hearty and delicious.

What makes this dish so special? It’s all about the blend of flavors and textures. You get the juicy ground beef, sautéed vegetables, and gooey melted cheese, all piled high on a soft sandwich roll. Plus, it’s quick and easy to prepare, making it a great option for busy weeknights. With just a few simple ingredients, you can whip up a meal that everyone will love.

In this article, we’ll guide you through the ingredients, preparation steps, and even some fun variations to try. Whether you’re a seasoned cook or a kitchen novice, you’ll find this recipe approachable and enjoyable. So, let’s dive in and discover how to create this cheesy, beefy delight that’s sure to become a family favorite!

Ingredients for Philly Cheesesteak Sloppy Joe Recipe

Philly Cheesesteak Sloppy Joe Recipe, you’ll need a few key ingredients. Each one plays a vital role in building the rich flavors and textures that make this dish so irresistible. Here’s what you’ll need:

  • 1 pound ground beef
  • 1 tablespoon olive oil
  • 1 medium onion, chopped
  • 1 medium green bell pepper, chopped
  • 2 cloves garlic, minced
  • 1 tablespoon balsamic vinegar
  • 1 teaspoon soy sauce
  • 1 teaspoon sea salt
  • 1/2 teaspoon black pepper
  • 1 cup shredded mozzarella cheese
  • 4 soft sandwich rolls
  • Chopped chives (for garnish)

These ingredients come together to create a mouthwatering blend of flavors. The ground beef provides a hearty base, while the sautéed onions and bell peppers add sweetness and crunch. The garlic brings a wonderful aroma, and the balsamic vinegar and soy sauce enhance the overall taste. Finally, the melted mozzarella cheese adds that gooey, cheesy goodness we all love!

Feel free to customize your ingredients based on your preferences. For instance, you can use ground turkey or chicken for a lighter option. If you’re looking for a vegetarian twist, consider using black beans or a plant-based meat alternative. The possibilities are endless, making this recipe versatile and fun!

Step-by-Step Preparation of Philly Cheesesteak Sloppy Joe Recipe

Philly Cheesesteak Sloppy Joe Recipe is simple and straightforward. Follow these steps to create a delicious meal that will impress your family and friends!

Step 1: Preparing the Meat Mixture

Start by heating a large frying pan over medium heat. Add the olive oil and let it warm up. Once the oil is hot, add the ground beef. Use a wooden spoon to break the meat apart. Cook it until it’s browned and no longer pink, which should take about 6-8 minutes. Remember to drain any excess grease to keep your dish from becoming too oily.

Step 2: Sautéing the Vegetables

Next, it’s time to add some flavor! Toss in the chopped onion and green bell pepper. Sauté these vegetables for about 5 minutes, or until they become tender. The aroma will fill your kitchen, making it hard to resist. After that, add the minced garlic and cook for another minute. This will enhance the flavor even more!

Step 3: Combining Ingredients

Once the meat and vegetables are cooked, it’s time to mix in the seasonings. Pour in the balsamic vinegar and soy sauce. Then, sprinkle in the sea salt and black pepper. Stir everything together well, ensuring that the flavors blend nicely. This step is crucial for achieving that delicious taste!

Step 4: Simmering the Mixture

Lower the heat and let the mixture simmer for about 2-3 minutes. This allows the flavors to meld together beautifully. You’ll notice the rich aroma filling the air, making your mouth water in anticipation. Keep an eye on it, stirring occasionally to prevent sticking.

Step 5: Toasting the Buns

While the mixture simmers, it’s a great time to prepare the sandwich rolls. You can toast them in a toaster or on a skillet for a few minutes until they are golden brown. Toasting the buns adds a nice crunch and helps them hold up against the juicy filling. Once they’re ready, set them aside.

Philly Cheesesteak Sloppy Joe Recipe. The next section will guide you through combining everything into a delicious sandwich!

Variation of Philly Cheesesteak Sloppy Joe Recipe

Philly Cheesesteak Sloppy Joe Recipe is its versatility. You can easily switch up the ingredients to create a unique twist on this classic dish. Whether you want to add a little extra flavor or cater to different dietary preferences, there are plenty of options to explore. Let’s dive into some alternative ingredients and vegetarian options!

Alternative Ingredients for a Unique Twist

If you’re looking to spice things up, consider these alternative ingredients:

  • Different Cheeses: While mozzarella is delicious, you can try provolone or cheddar for a sharper flavor. Mixing cheeses can also create a delightful taste.
  • Spicy Additions: For those who love heat, add diced jalapeños or a splash of hot sauce to the meat mixture. This will give your sloppy joes a fiery kick!
  • Different Meats: Swap out the ground beef for ground pork or even sausage. Each option brings its own unique flavor profile to the dish.
  • Additional Veggies: Consider adding mushrooms or spinach for extra nutrition and flavor. These veggies can enhance the overall taste and texture.

These alternatives can help you create a dish that suits your taste buds perfectly. Feel free to experiment and find your favorite combination!

Vegetarian Options for Philly Cheesesteak Sloppy Joe Recipe

Philly Cheesesteak Sloppy Joe Recipe:

  • Black Beans: Use canned black beans as a hearty base. Mash them slightly for a texture similar to ground beef.
  • Plant-Based Meat Alternatives: Products like Beyond Meat or Impossible Burger can be used to mimic the taste and texture of ground beef.
  • Lentils: Cooked lentils are another great option. They are packed with protein and have a satisfying texture.
  • Chickpeas: Mashed chickpeas can also work well. They add a nutty flavor and are very filling.

These vegetarian options allow everyone to enjoy the deliciousness of sloppy joes without compromising on flavor. You can still follow the same preparation steps, ensuring a delightful meal for all!

Cooking Note for Philly Cheesesteak Sloppy Joe Recipe

Philly Cheesesteak Sloppy Joe Recipe, there are a few cooking notes to keep in mind. These tips will help you achieve the best flavor and texture, ensuring your dish turns out perfectly every time.

First, always use fresh ingredients. Fresh vegetables and quality ground beef can make a significant difference in taste. If possible, choose organic or locally sourced produce for the best flavor. Fresh ingredients not only enhance the dish but also add nutritional value.

Next, don’t rush the sautéing process. Allow the onions and bell peppers to cook until they are tender and slightly caramelized. This step brings out their natural sweetness, which balances the savory flavors of the beef. A little patience goes a long way in developing rich flavors.

Additionally, when mixing in the seasonings, taste as you go. Everyone has different preferences for saltiness and spice. Adjust the soy sauce and sea salt according to your taste. This way, you can create a dish that suits your palate perfectly.

Another important note is to keep an eye on the cheese. When you sprinkle the mozzarella over the beef mixture, cover the pan to help it melt evenly. This will create that gooey, cheesy goodness that makes sloppy joes so delightful. Just a few minutes under the lid will do the trick!

Lastly, consider serving your sloppy joes with a side of crispy fries or a fresh salad. This adds a nice contrast to the rich flavors of the sandwich. Enjoying your meal with a refreshing drink can also enhance the overall experience.

Philly Cheesesteak Sloppy Joe Recipe. Happy cooking!

Serving Suggestions for Philly Cheesesteak Sloppy Joe Recipe

Philly Cheesesteak Sloppy Joe Recipe, it’s time to think about how to serve it! Presentation can elevate your meal, making it even more enjoyable. Here are some fantastic serving suggestions to consider:

  • Classic Side Dishes: Pair your sloppy joes with classic sides like crispy French fries or sweet potato fries. The crunchiness of the fries complements the soft, cheesy sandwich perfectly.
  • Fresh Salads: A light, refreshing salad can balance the richness of the sloppy joes. Consider a simple green salad with mixed greens, cherry tomatoes, and a tangy vinaigrette.
  • Coleslaw: Creamy coleslaw adds a nice crunch and a bit of tang. It’s a great way to add some freshness to your meal.
  • Pickles: Serve your sloppy joes with a side of dill pickles. The tartness of the pickles cuts through the richness of the beef and cheese.
  • Chips: For a casual touch, serve your sloppy joes with a side of potato chips or tortilla chips. They add a fun crunch and are easy to munch on!

For a fun twist, consider creating a sloppy joe bar! Set out various toppings like jalapeños, extra cheese, or hot sauce. This allows everyone to customize their sandwiches to their liking, making it a hit at gatherings.

Don’t forget about drinks! A cold soda, iced tea, or lemonade pairs wonderfully with the savory flavors of the sloppy joes. If you’re feeling adventurous, try a craft beer that complements the dish.

Philly Cheesesteak Sloppy Joe Recipe will be a hit at any meal. Enjoy the deliciousness with family and friends!

Tips for Perfecting Your Philly Cheesesteak Sloppy Joe Recipe

Philly Cheesesteak Sloppy Joe Recipe, a few tips can help elevate your dish to the next level. These simple yet effective suggestions will ensure that every bite is packed with flavor and satisfaction. Let’s explore some key tips to perfect your sloppy joes!

  • Choose Quality Meat: Opt for high-quality ground beef. Look for meat with a good fat content, around 80/20, for a juicy and flavorful result. If you prefer leaner options, ground turkey or chicken can work well too.
  • Don’t Skip the Seasoning: Season your meat generously. The combination of balsamic vinegar and soy sauce adds depth, but don’t hesitate to add a pinch of garlic powder or onion powder for extra flavor.
  • Experiment with Cheese: While mozzarella is a classic choice, try mixing in provolone or even pepper jack for a spicy kick. A blend of cheeses can create a delightful melty texture.
  • Let It Rest: After cooking, let the meat mixture sit for a few minutes before serving. This allows the flavors to meld together, making each bite even more delicious.
  • Use Fresh Herbs: Fresh herbs like parsley or cilantro can brighten up the dish. Sprinkle them on top just before serving for a pop of color and flavor.
  • Adjust the Consistency: If your mixture seems too thick, add a splash of beef broth or water to loosen it up. This will help create a saucier filling that’s perfect for the rolls.
  • Toast the Buns: Don’t forget to toast your sandwich rolls! This adds a delightful crunch and prevents them from getting soggy from the filling.
  • Serve Immediately: Sloppy joes are best enjoyed fresh. Serve them right after assembling to ensure the cheese is gooey and the flavors are at their peak.

Philly Cheesesteak Sloppy Joe Recipe. Each bite will be a delicious blend of flavors and textures that your family and friends will love!

Breakdown of Time for Philly Cheesesteak Sloppy Joe Recipe

Philly Cheesesteak Sloppy Joe Recipe can help you plan your meal better. Whether you’re cooking for a family dinner or a casual gathering, knowing the prep and cooking times will ensure everything runs smoothly. Here’s a quick breakdown:

Prep Time

The prep time for this delicious recipe is about 10-15 minutes. During this time, you’ll gather all your ingredients, chop the vegetables, and measure out the seasonings. Having everything ready before you start cooking makes the process much easier and more enjoyable!

Cooking Time

Once you start cooking, the total cooking time is approximately 20-25 minutes. This includes browning the ground beef, sautéing the vegetables, and allowing the flavors to meld together. The cheese will melt beautifully during this time, creating that gooey texture we all love.

Total Time

Philly Cheesesteak Sloppy Joe Recipe a quick and satisfying meal option, perfect for busy weeknights or last-minute gatherings. With just a little time and effort, you’ll have a hearty dish that everyone will enjoy!

Nutritional Information for Philly Cheesesteak Sloppy Joe Recipe

Philly Cheesesteak Sloppy Joe Recipe can help you make informed choices about your meals. This dish is not only delicious but also provides a good balance of nutrients. Here’s a closer look at the nutritional breakdown per serving:

Calories

Philly Cheesesteak Sloppy Joe Recipe contains approximately 450 calories. This makes it a hearty meal that can satisfy your hunger without going overboard. The combination of ground beef, cheese, and vegetables contributes to the calorie count, providing energy for your day.

Protein

One of the standout features of this recipe is its protein content. Each serving offers about 30 grams of protein. This is essential for muscle repair and growth, making it a great option for active individuals. The ground beef and cheese are excellent sources of protein, helping you feel full and satisfied.

Sodium

The sodium content in each serving is around 800 milligrams. While this adds flavor to the dish, it’s important to be mindful of your sodium intake, especially if you’re watching your salt consumption. You can reduce the sodium by using low-sodium soy sauce or adjusting the amount of added salt in the recipe.

Philly Cheesesteak Sloppy Joe Recipe offers a balanced meal with a good mix of calories, protein, and flavor. By being aware of the nutritional information, you can enjoy this delicious dish while keeping your dietary goals in mind!

FAQs about Philly Cheesesteak Sloppy Joe Recipe

What is the origin of the Sloppy Joe?

The Sloppy Joe has an interesting history! It is believed to have originated in the United States in the early 20th century. Some say it was created by a cook named Joe in a bar in Key West, Florida. Others think it came from a similar dish called “loose meat sandwiches” that was popular in the Midwest. Regardless of its exact origin, the Sloppy Joe has become a beloved comfort food across the country, known for its messy, flavorful filling.

Can I make Philly Cheesesteak Sloppy Joe Recipe ahead of time?

Philly Cheesesteak Sloppy Joe Recipe can be made ahead of time, making it a great option for meal prep. Simply prepare the meat mixture and store it in an airtight container in the refrigerator for up to 3 days. When you’re ready to serve, just reheat the mixture on the stove until warmed through. Toast the buns fresh for the best texture, and you’ll have a quick and delicious meal ready to go!

What can I serve with Philly Cheesesteak Sloppy Joe Recipe?

Philly Cheesesteak Sloppy Joe Recipe. Classic options include crispy French fries, sweet potato fries, or a fresh green salad. You can also serve coleslaw for a crunchy contrast or pickles for a tangy bite. For a fun twist, consider a sloppy joe bar with various toppings, allowing everyone to customize their sandwiches!

How can I store leftovers of Philly Cheesesteak Sloppy Joe Recipe?

Storing leftovers is easy! Place any remaining meat mixture in an airtight container and refrigerate it. It will stay fresh for about 3-4 days. If you want to keep it longer, consider freezing the mixture. Just make sure to let it cool completely before transferring it to a freezer-safe container. When you’re ready to enjoy it again, simply thaw it in the refrigerator overnight and reheat on the stove or in the microwave.

Conclusion on Philly Cheesesteak Sloppy Joe Recipe

Philly Cheesesteak Sloppy Joe Recipe is a delightful fusion of flavors that brings together the best of both worlds. This dish is not only easy to prepare but also offers a satisfying meal that can please even the pickiest eaters. With its juicy ground beef, sautéed vegetables, and gooey melted cheese, it’s a comfort food that everyone can enjoy.

Whether you’re hosting a family dinner, planning a game day feast, or simply craving something hearty, this recipe is a fantastic choice. The versatility of the ingredients allows you to customize it to your liking, making it suitable for various dietary preferences. From spicy additions to vegetarian alternatives, the possibilities are endless!

As you embark on your cooking journey, remember the tips and tricks shared throughout this article. They will help you create a dish that’s not only delicious but also visually appealing. Don’t forget to serve your sloppy joes with tasty sides and refreshing drinks to elevate the dining experience.

Philly Cheesesteak Sloppy Joe Recipe and the smiles it brings to your table!

Spicy Chicken Lettuce Wraps Recipe for a Healthy Meal

Introduction to Spicy Chicken Lettuce Wraps Recipe

What Are Spicy Chicken Lettuce Wraps?

Spicy chicken lettuce wraps are a delicious and healthy meal option. They consist of seasoned ground chicken served in crisp lettuce leaves. This dish is not only flavorful but also low in carbs, making it a great choice for those watching their diet. The combination of spices and sauces gives the chicken a zesty kick, while the lettuce adds a refreshing crunch. You can enjoy these wraps as a light lunch, a quick dinner, or even as an appetizer at gatherings.

Why You Should Try This Spicy Chicken Lettuce Wraps Recipe

There are many reasons to try this spicy chicken lettuce wraps recipe. First, it’s quick and easy to prepare, taking less than 30 minutes from start to finish. Second, it’s versatile; you can customize the filling to suit your taste. Whether you prefer it spicier or milder, you can adjust the ingredients accordingly. Additionally, this recipe is packed with protein and nutrients, making it a satisfying meal. Plus, it’s a fun way to enjoy your food by wrapping it in lettuce, which adds a unique twist to your dining experience. So, gather your ingredients and get ready to enjoy a delightful dish that’s sure to impress!

Ingredients for Spicy Chicken Lettuce Wraps Recipe

To create the perfect spicy chicken lettuce wraps, you’ll need a variety of fresh and flavorful ingredients. Here’s what you’ll need:

  • 1 pound ground chicken: This is the main protein source, providing a hearty base for your wraps.
  • 1 tablespoon olive oil: Used for sautéing the onions and adding a rich flavor.
  • 1 small onion, diced: Adds sweetness and depth to the dish.
  • 2 cloves garlic, minced: Brings a wonderful aroma and taste.
  • 1 tablespoon fresh ginger, grated: Offers a zesty kick and enhances the overall flavor.
  • 1/4 cup tamari or soy sauce: Provides a savory umami flavor that complements the chicken.
  • 1 tablespoon sweet chili sauce: Adds a touch of sweetness and spice.
  • 1 tablespoon apple cider vinegar: Balances the flavors with a hint of acidity.
  • 1 teaspoon toasted sesame oil: Infuses a nutty flavor that elevates the dish.
  • 1/2 cup water chestnuts, diced: Adds a delightful crunch to the filling.
  • 1/2 cup scallions, chopped: Provides freshness and a mild onion flavor.
  • 1 head of romaine or butter lettuce: The perfect vessel for your spicy chicken filling.
  • Salt and pepper to taste: Essential for seasoning your dish to perfection.

These ingredients come together to create a mouthwatering experience. The combination of savory chicken, crunchy vegetables, and zesty sauces makes these wraps a must-try. Gather your ingredients, and let’s move on to the next step of preparing your spicy chicken lettuce wraps!

Step-by-Step Preparation of Spicy Chicken Lettuce Wraps Recipe

Step 1: Preparing the Chicken

To start, gather all your ingredients. This makes the cooking process smoother. First, take the ground chicken and place it in a bowl. You can season it lightly with salt and pepper. This step helps to enhance the flavor of the chicken. Set it aside while you prepare the other ingredients. Make sure to wash your hands after handling raw chicken to maintain kitchen hygiene.

Step 2: Making the Sauce

Next, it’s time to create the sauce that will bring your spicy chicken lettuce wraps to life. In a small bowl, combine the tamari or soy sauce, sweet chili sauce, apple cider vinegar, and toasted sesame oil. Whisk these ingredients together until they are well blended. This sauce will add a delicious depth of flavor to your chicken. You can taste it and adjust the sweetness or saltiness according to your preference. Set the sauce aside for later use.

Step 3: Cooking the Chicken

Now, heat the olive oil in a large skillet over medium heat. Once the oil is hot, add the diced onion. Sauté the onion for about 4-5 minutes until it becomes translucent. Then, add the minced garlic and grated ginger. Stir these ingredients for another minute until they release their wonderful aroma. Increase the heat to medium-high and add the seasoned ground chicken. Cook the chicken for about 6-8 minutes, breaking it apart with a spatula until it is fully browned and crumbly. Pour in the sauce you prepared earlier and stir well. Let the mixture simmer for 3-4 minutes to allow the flavors to meld together.

Step 4: Assembling the Wraps

Once the chicken is cooked and flavorful, it’s time to assemble your wraps. Remove the skillet from the heat and fold in the diced water chestnuts and chopped scallions. These ingredients add a nice crunch and freshness to the filling. Now, take a lettuce leaf and spoon a generous amount of the chicken mixture into the center. Fold the lettuce around the filling like a taco. Repeat this process until all the chicken is used up. Your spicy chicken lettuce wraps are now ready to be enjoyed!

Variations of Spicy Chicken Lettuce Wraps Recipe

Vegetarian Alternatives

If you’re looking for a vegetarian twist on the spicy chicken lettuce wraps, there are plenty of delicious alternatives. One popular option is to use crumbled tempeh. Tempeh has a firm texture and absorbs flavors well, making it a great substitute. Simply sauté the tempeh in the same way you would the ground chicken, adding the same spices and sauces for that zesty kick.

Another fantastic option is to use lentils. Cooked lentils provide a hearty base and are packed with protein. You can season them with the same tamari, sweet chili sauce, and spices to create a flavorful filling. Additionally, you can mix in diced bell peppers or shredded carrots for added color and crunch. These vegetarian alternatives not only taste great but also offer a healthy option for those who prefer plant-based meals.

Different Sauces to Try

While the original sauce is delicious, experimenting with different sauces can elevate your spicy chicken lettuce wraps even further. For a tangy twist, consider using a hoisin sauce. This sweet and savory sauce pairs wonderfully with chicken and adds a unique flavor profile.

If you enjoy a bit of heat, try adding sriracha or chili garlic sauce to your original sauce mix. This will give your wraps an extra kick that spice lovers will appreciate. Alternatively, a peanut sauce can add a creamy texture and nutty flavor that complements the chicken beautifully.

Feel free to mix and match these sauces to find your perfect combination. The beauty of spicy chicken lettuce wraps is their versatility, allowing you to customize them to suit your taste buds. So, don’t hesitate to get creative and make these wraps your own!

Cooking Note for Spicy Chicken Lettuce Wraps Recipe

When preparing your spicy chicken lettuce wraps, there are a few important cooking notes to keep in mind. These tips will help ensure that your dish turns out perfectly every time.

First, always use fresh ingredients. Fresh vegetables and herbs not only enhance the flavor but also add vibrant colors to your wraps. For the best results, choose crisp lettuce leaves that are free from blemishes. Romaine or butter lettuce works well, but feel free to experiment with other varieties like iceberg or even cabbage for a different texture.

Next, pay attention to the cooking temperature. Cooking the chicken over medium-high heat allows it to brown nicely, which adds depth to the flavor. However, be careful not to overcook it, as this can lead to dry chicken. Stirring frequently will help ensure even cooking and prevent sticking.

Additionally, when adding the sauce to the chicken, make sure to let it simmer for a few minutes. This step is crucial as it allows the flavors to meld together, creating a more cohesive taste. If you find the mixture too thick, you can add a splash of water to achieve your desired consistency.

Lastly, don’t hesitate to taste as you go! Adjusting the seasoning to your liking is key to making these wraps truly delicious. Whether you prefer them spicier or sweeter, small tweaks can make a big difference. Enjoy the cooking process, and remember that the best meals are made with love and care!

Serving Suggestions for Spicy Chicken Lettuce Wraps Recipe

Pairing with Dipping Sauces

To elevate your spicy chicken lettuce wraps, consider serving them with a variety of dipping sauces. These sauces can enhance the flavors and add an extra layer of enjoyment to your meal. Here are some delicious options:

  • Peanut Sauce: This creamy and nutty sauce pairs perfectly with the savory chicken. It adds a rich flavor that complements the spices in the wraps.
  • Sweet Chili Sauce: For those who love a touch of sweetness, sweet chili sauce is a fantastic choice. Its mild heat and sweetness balance the spiciness of the chicken.
  • Sriracha: If you’re a fan of heat, serve your wraps with sriracha on the side. This hot sauce will give your wraps an extra kick!
  • Hoisin Sauce: This sweet and tangy sauce adds a unique flavor that pairs well with the chicken and vegetables.

Feel free to mix and match these sauces to find your favorite combination. Having a variety of dipping sauces allows everyone to customize their wraps to their liking, making the meal even more enjoyable!

Side Dishes to Complement the Wraps

To create a well-rounded meal, consider serving your spicy chicken lettuce wraps with some tasty side dishes. Here are a few ideas that pair wonderfully with the wraps:

  • Asian Slaw: A crunchy slaw made with cabbage, carrots, and a light dressing adds freshness and texture to your meal.
  • Rice or Quinoa: A side of steamed rice or quinoa can help soak up any extra sauce and provide a filling component to your meal.
  • Stir-Fried Vegetables: A colorful mix of stir-fried vegetables, such as bell peppers, broccoli, and snap peas, adds nutrition and flavor.
  • Edamame: Steamed edamame sprinkled with sea salt makes for a healthy and protein-packed side dish.

These side dishes not only complement the spicy chicken lettuce wraps but also add variety to your dining experience. Enjoy mixing and matching to create a delightful meal that everyone will love!

Tips for Perfecting Your Spicy Chicken Lettuce Wraps Recipe

Choosing the Right Lettuce

Choosing the right lettuce is crucial for making the best spicy chicken lettuce wraps. The lettuce acts as the vessel for your flavorful filling, so it should be sturdy and crisp. Here are some great options:

  • Romaine Lettuce: This is a popular choice due to its long, sturdy leaves. Romaine provides a nice crunch and holds the filling well.
  • Butter Lettuce: Known for its soft, pliable leaves, butter lettuce offers a delicate texture. It’s easy to fold and adds a mild flavor.
  • Iceberg Lettuce: If you prefer a super crunchy option, iceberg is perfect. Its thick leaves can hold up to the filling without tearing.
  • Green Leaf Lettuce: This variety has a slightly ruffled edge and a tender texture. It’s a great option for those who enjoy a bit of flair in their wraps.

When selecting your lettuce, look for fresh, vibrant leaves without any brown spots or wilting. Wash the leaves thoroughly and dry them gently to remove excess moisture. This will help prevent sogginess and keep your wraps crisp. Remember, the right lettuce can make all the difference in your spicy chicken lettuce wraps!

Storing Leftovers

If you have leftover spicy chicken filling, storing it properly is essential to maintain its flavor and freshness. Here are some tips for storing your leftovers:

  • Cool Down: Allow the chicken filling to cool to room temperature before storing. This helps prevent condensation, which can make the filling soggy.
  • Use Airtight Containers: Transfer the chicken filling into airtight containers. This keeps it fresh and prevents any odors from affecting the taste.
  • Refrigerate: Store the containers in the refrigerator. The filling can last for up to 3 days. If you want to keep it longer, consider freezing it.
  • Freezing Tips: If you choose to freeze the filling, use freezer-safe bags or containers. Label them with the date for easy tracking. The filling can be frozen for up to 3 months.

When you’re ready to enjoy your leftovers, simply reheat the chicken filling in a skillet over medium heat until warmed through. Serve it in fresh lettuce leaves for a quick and delicious meal. Proper storage ensures that you can savor your spicy chicken lettuce wraps even after the initial meal!

Breakdown of Time for Spicy Chicken Lettuce Wraps Recipe

Prep Time

Preparing your spicy chicken lettuce wraps is quick and easy. The prep time typically takes about 10-15 minutes. During this time, you will gather all your ingredients, wash and chop the vegetables, and prepare the chicken. Having everything ready before you start cooking makes the process smoother and more enjoyable. So, take a moment to set up your workspace and get organized!

Cooking Time

The cooking time for this recipe is approximately 15-20 minutes. This includes sautéing the onions, garlic, and ginger, cooking the ground chicken, and allowing the flavors to meld together with the sauce. It’s a fast process, making it perfect for a weeknight dinner or a quick lunch. Just keep an eye on the chicken to ensure it cooks evenly and doesn’t dry out.

Total Time

In total, you can expect to spend around 30-35 minutes from start to finish. This includes both prep and cooking time. With such a quick turnaround, you can enjoy a delicious and healthy meal without spending hours in the kitchen. Plus, the delightful flavors and fresh ingredients make it well worth the effort!

Nutritional Information for Spicy Chicken Lettuce Wraps Recipe

Calories

When it comes to enjoying a tasty meal, knowing the calorie content is essential. Each serving of these spicy chicken lettuce wraps contains approximately 280 calories. This makes them a great option for those looking to maintain a balanced diet without sacrificing flavor. The low-calorie count allows you to indulge in a satisfying meal while keeping your calorie intake in check.

Protein

Protein is a vital nutrient that helps build and repair tissues in our bodies. Each serving of the spicy chicken lettuce wraps provides about 24 grams of protein. This high protein content comes primarily from the ground chicken, making these wraps a filling choice. Including protein in your meals can help you feel fuller for longer, which is beneficial for weight management and overall health.

Sodium

Monitoring sodium intake is important for maintaining heart health. Each serving of these spicy chicken lettuce wraps contains around 600 milligrams of sodium. This amount is reasonable, especially considering the flavorful sauces used in the recipe. However, if you are watching your sodium levels, you can easily adjust the recipe by using low-sodium tamari or soy sauce. This way, you can enjoy the delicious taste of the wraps while keeping your sodium intake in check.

FAQs About Spicy Chicken Lettuce Wraps Recipe

Can I make Spicy Chicken Lettuce Wraps ahead of time?

Yes, you can prepare spicy chicken lettuce wraps ahead of time! The chicken filling can be made in advance and stored in the refrigerator for up to three days. Just make sure to let it cool completely before placing it in an airtight container. When you’re ready to serve, simply reheat the filling in a skillet over medium heat until warmed through. However, it’s best to assemble the wraps just before serving. This keeps the lettuce crisp and fresh, ensuring a delightful crunch with every bite.

What type of lettuce is best for wraps?

Choosing the right lettuce is key to making delicious spicy chicken lettuce wraps. Romaine and butter lettuce are popular choices. Romaine has sturdy leaves that hold up well to the filling, while butter lettuce offers a soft, pliable texture that’s easy to fold. Iceberg lettuce is another great option for its crispness. Each type of lettuce brings a unique texture, so feel free to experiment and find your favorite!

How can I make the wraps less spicy?

If you prefer a milder flavor, there are several ways to tone down the spice in your spicy chicken lettuce wraps. First, you can reduce the amount of sweet chili sauce or omit it altogether. Additionally, consider using less ginger and garlic, as these ingredients can add heat. You can also serve the wraps with a cooling dipping sauce, like yogurt or a creamy dressing, to balance the flavors. Lastly, adding more vegetables, such as shredded carrots or cucumber, can help dilute the spiciness while adding extra crunch!

Conclusion on Spicy Chicken Lettuce Wraps Recipe

In conclusion, the spicy chicken lettuce wraps recipe is a fantastic choice for anyone looking to enjoy a healthy and flavorful meal. With its combination of savory ground chicken, fresh vegetables, and zesty sauces, this dish is sure to please your taste buds. Not only is it quick and easy to prepare, but it also offers endless possibilities for customization. Whether you prefer it spicy or mild, vegetarian or with added crunch, you can make this recipe your own.

Moreover, the nutritional benefits of this dish make it a smart option for those mindful of their diet. With a good balance of protein, low calories, and the ability to adjust sodium levels, you can enjoy a satisfying meal without guilt. Plus, the fun of wrapping the filling in crisp lettuce adds an interactive element to your dining experience.

So, gather your ingredients, follow the steps, and get ready to impress your family and friends with these delightful spicy chicken lettuce wraps. They are perfect for any occasion, whether it’s a casual weeknight dinner or a festive gathering. Enjoy the burst of flavors and the joy of sharing this delicious dish with others!

Herb-Roasted Chicken in a Slow Cooker is Delicious!

Introduction to Herb-Roasted Chicken in a Slow Cooker

Are you looking for a delicious and easy meal that will impress your family and friends? Look no further! Herb-roasted chicken in a slow cooker is the perfect dish. This recipe combines the rich flavors of herbs with the tenderness of slow-cooked chicken. It’s not just a meal; it’s an experience that fills your home with delightful aromas.

Using a slow cooker makes this dish incredibly simple. You can prepare it in the morning and let it cook while you go about your day. When you return, a warm, hearty meal awaits you. The chicken becomes juicy and flavorful, while the vegetables soak up all the delicious juices. Plus, it’s a one-pot meal, which means less cleanup for you!

Whether you’re hosting a dinner party or just enjoying a cozy night in, this herb-roasted chicken is sure to be a hit. The combination of fresh herbs, zesty lemon, and hearty vegetables creates a comforting dish that everyone will love. So, roll up your sleeves and get ready to create a culinary masterpiece that’s both satisfying and nourishing.

In the following sections, we will guide you through the ingredients, preparation steps, and tips to make your herb-roasted chicken in a slow cooker a success. Let’s dive in and discover how to make this delightful dish!

Ingredients for Herb-Roasted Chicken in a Slow Cooker

To create a mouthwatering herb-roasted chicken in a slow cooker, you’ll need a few simple yet flavorful ingredients. Each component plays a vital role in enhancing the overall taste of the dish. Here’s what you’ll need:

  • 3 to 4 pounds whole chicken: Choose a fresh or thawed chicken for the best flavor.
  • 2 tablespoons extra virgin olive oil: This adds richness and helps the herbs stick to the chicken.
  • 1 teaspoon sea salt: Essential for seasoning and bringing out the flavors.
  • 1 teaspoon freshly ground black pepper: Adds a mild heat and depth to the dish.
  • 1 tablespoon garlic granules: Provides a robust garlic flavor without the hassle of peeling.
  • 1 tablespoon onion granules: Enhances the savory taste of the chicken.
  • 1 tablespoon dried thyme leaves: A classic herb that pairs beautifully with chicken.
  • 1 tablespoon dried rosemary needles: Adds a fragrant, earthy note to the dish.
  • 1 lemon, cut into wedges: Infuses a zesty brightness into the chicken.
  • 1 onion, cut into wedges: Adds sweetness and depth to the flavor profile.
  • 4 large carrots, chopped into thick pieces: Provides sweetness and color.
  • 4 medium potatoes, diced: A hearty addition that makes the meal more filling.
  • 1 cup low-sodium chicken broth: Keeps everything moist and adds extra flavor.

These ingredients come together to create a delightful dish that is not only tasty but also nutritious. The combination of herbs and vegetables ensures that every bite is packed with flavor. Now that you have your ingredients ready, let’s move on to the preparation steps!

Preparation of Herb-Roasted Chicken in a Slow Cooker

Now that you have gathered all your ingredients, it’s time to prepare your herb-roasted chicken in a slow cooker. This process is straightforward and allows you to enjoy the delightful flavors of herbs and tender chicken. Follow these simple steps to create a meal that will impress everyone at your table.

Step 1: Preparing the Chicken

Start by taking your whole chicken and patting it dry with paper towels. This step is crucial as it helps the skin crisp up during cooking. A dry surface allows the seasoning to adhere better, enhancing the flavor. Once dried, place the chicken in the slow cooker, ready for seasoning.

Step 2: Mixing the Herb Seasoning

In a mixing bowl, combine the extra virgin olive oil, sea salt, black pepper, garlic granules, onion granules, dried thyme, and dried rosemary. Stir the mixture well until all the ingredients are evenly blended. This fragrant herb blend will infuse the chicken with delicious flavors as it cooks.

Step 3: Applying the Seasoning

Now it’s time to apply the seasoning! Generously massage the herb mixture all over the chicken. Make sure to get under the skin as well, as this is where the magic happens. The herbs will penetrate the meat, making it flavorful and juicy. Don’t forget to season the cavity of the chicken too!

Step 4: Setting Up the Slow Cooker

Next, fill the chicken’s cavity with lemon and onion wedges. This adds a zesty kick and aromatic flavor. Surround the chicken with the chopped carrots and diced potatoes, creating a colorful medley. These vegetables will soak up the delicious juices from the chicken as it cooks.

Step 5: Cooking the Chicken

Finally, gently pour the low-sodium chicken broth over the vegetables and around the chicken. This will keep everything moist during cooking. Secure the lid on your slow cooker and set it to low for 6 to 8 hours or high for 4 to 5 hours. The chicken is done when it reaches an internal temperature of 165°F and is tender enough to fall off the bone.

Once cooked, carefully lift the chicken from the slow cooker and let it rest for about 10 minutes before slicing. This resting period allows the juices to redistribute, ensuring every bite is juicy and flavorful. Now you’re ready to enjoy your herb-roasted chicken in a slow cooker!

Variation of Herb-Roasted Chicken in a Slow Cooker

While the classic herb-roasted chicken recipe is delightful on its own, there are many ways to customize it. You can experiment with different herbs and add various vegetables to create a unique flavor profile. Let’s explore some exciting variations that will elevate your dish!

Different Herbs to Use

Herbs are the heart of this recipe, and you can mix and match to suit your taste. Here are some alternatives to consider:

  • Oregano: This herb adds a warm, slightly bitter flavor that pairs well with chicken.
  • Basil: Fresh or dried basil brings a sweet, aromatic touch to your dish.
  • Sage: Known for its earthy flavor, sage can add depth to your chicken.
  • Parsley: Fresh parsley can brighten the dish and add a pop of color.
  • Herbes de Provence: This blend of herbs offers a fragrant and complex flavor profile.

Feel free to mix these herbs with the original thyme and rosemary for a more robust flavor. The key is to find a combination that you love!

Adding Vegetables for Extra Flavor

Vegetables not only enhance the taste but also add nutrition to your meal. Here are some great options to consider:

  • Bell Peppers: These add sweetness and a vibrant color to your dish.
  • Zucchini: This vegetable cooks quickly and absorbs flavors beautifully.
  • Sweet Potatoes: They provide a natural sweetness and a creamy texture.
  • Green Beans: These add a nice crunch and a fresh taste.
  • Mushrooms: They bring an earthy flavor and a meaty texture to the dish.

When adding vegetables, consider their cooking times. Some may need to be added later in the cooking process to avoid becoming mushy. Experimenting with different combinations can lead to delightful surprises!

Cooking Note for Herb-Roasted Chicken in a Slow Cooker

Cooking herb-roasted chicken in a slow cooker is a fantastic way to achieve tender, juicy meat with minimal effort. However, there are a few important notes to keep in mind to ensure your dish turns out perfectly every time.

First, always check the size of your slow cooker. A 3 to 4-pound chicken fits well in most standard slow cookers. If your chicken is larger, it may not cook evenly. In such cases, consider cutting the chicken into parts for better heat distribution.

Next, the cooking time can vary based on your slow cooker model. Some cookers run hotter than others. Therefore, it’s wise to use a meat thermometer to check the internal temperature. The chicken should reach 165°F in the thickest part of the breast and thigh. This ensures that it is safe to eat and perfectly cooked.

Additionally, avoid opening the lid during cooking. Each time you lift the lid, heat escapes, which can extend the cooking time. Trust the slow cooker to do its job! If you need to check on the chicken, try to do so only in the last hour of cooking.

Lastly, for those who enjoy a crispy skin, consider broiling the chicken for a few minutes after it’s done cooking. This step adds a delightful crunch that contrasts beautifully with the tender meat. Just be sure to watch it closely to prevent burning.

By following these cooking notes, you’ll be well on your way to creating a delicious herb-roasted chicken in a slow cooker that will impress everyone at your table!

Serving Suggestions for Herb-Roasted Chicken in a Slow Cooker

Once your herb-roasted chicken in a slow cooker is ready, it’s time to serve it up! This dish is not only delicious but also visually appealing, making it perfect for any occasion. Here are some serving suggestions to enhance your dining experience:

  • Plating the Chicken: Carefully carve the chicken and arrange the pieces on a large serving platter. You can place the vegetables around the chicken for a colorful presentation. The vibrant carrots and potatoes will make the dish look inviting.
  • Garnishing: Add a sprinkle of fresh herbs, like parsley or thyme, on top of the chicken for a pop of color and freshness. This simple touch elevates the dish and adds a lovely aroma.
  • Serving with Gravy: If you prefer a saucy dish, consider making a quick gravy with the juices left in the slow cooker. Simply strain the liquid into a saucepan, bring it to a simmer, and thicken it with a cornstarch slurry. Drizzle this over the chicken and vegetables for added flavor.
  • Pairing with Sides: Herb-roasted chicken pairs wonderfully with various sides. Consider serving it with:
    • Steamed Green Beans: Their crisp texture complements the tender chicken.
    • Rice or Quinoa: These grains soak up the delicious juices and make for a hearty meal.
    • Salad: A fresh garden salad with a light vinaigrette can balance the richness of the chicken.
  • Leftover Ideas: If you have leftovers, shred the chicken and use it in sandwiches, salads, or tacos. The flavorful meat can be a great addition to many dishes!

With these serving suggestions, your herb-roasted chicken in a slow cooker will not only taste amazing but also look stunning on the table. Enjoy the compliments from your family and friends as they savor every bite!

Tips for Perfect Herb-Roasted Chicken in a Slow Cooker

Creating the perfect herb-roasted chicken in a slow cooker is all about attention to detail. With a few simple tips, you can elevate your dish and ensure it turns out delicious every time. Here are some helpful suggestions to keep in mind:

  • Choose the Right Chicken: Opt for a fresh, organic chicken if possible. This choice often results in better flavor and texture. If you can, buy a free-range chicken for a more robust taste.
  • Season Generously: Don’t be shy with the seasoning! A well-seasoned chicken is key to a flavorful dish. Make sure to cover every inch of the chicken with your herb blend.
  • Let It Marinate: For even more flavor, consider marinating the chicken in the herb mixture for a few hours or overnight. This allows the herbs to penetrate the meat deeply.
  • Use Fresh Ingredients: Whenever possible, use fresh herbs and vegetables. Fresh ingredients can significantly enhance the overall taste of your dish.
  • Layering Matters: When placing vegetables in the slow cooker, layer them properly. Place denser vegetables like potatoes and carrots at the bottom, as they take longer to cook. This ensures everything cooks evenly.
  • Don’t Overcrowd: Avoid cramming too many ingredients into the slow cooker. Overcrowding can lead to uneven cooking. Stick to the recommended amounts for the best results.
  • Check for Doneness: Always use a meat thermometer to check the chicken’s internal temperature. It should reach 165°F for safe consumption. This step is crucial for ensuring your chicken is perfectly cooked.
  • Rest Before Serving: Allow the chicken to rest for about 10 minutes after cooking. This resting period helps the juices redistribute, making the meat more tender and juicy.
  • Experiment with Flavors: Don’t hesitate to try different herbs and spices. Each combination can create a unique flavor profile. Have fun experimenting!

By following these tips, you’ll be well on your way to mastering the art of herb-roasted chicken in a slow cooker. Each meal will be a delightful experience, filled with rich flavors and tender meat that your family and friends will love!

Breakdown of Time for Herb-Roasted Chicken in a Slow Cooker

Understanding the time required for each step in preparing herb-roasted chicken in a slow cooker is essential for planning your meal. Here’s a detailed breakdown of the time you’ll need for preparation and cooking.

Prep Time

The prep time for this delicious dish is quite manageable. You’ll need about 15 to 20 minutes to gather your ingredients and prepare the chicken. This includes:

  • Drying the chicken
  • Mixing the herb seasoning
  • Applying the seasoning
  • Chopping vegetables and filling the chicken cavity

With a little organization, you can have everything ready to go in no time!

Cooking Time

The cooking time is where the magic happens. Depending on your slow cooker settings, the chicken will need:

  • Low setting: 6 to 8 hours
  • High setting: 4 to 5 hours

During this time, the chicken will become tender and flavorful, while the vegetables will soak up all the delicious juices.

Total Time

When you combine the prep time and cooking time, the total time for making herb-roasted chicken in a slow cooker is:

  • On Low: Approximately 6 hours and 15 to 20 minutes
  • On High: Approximately 4 hours and 15 to 20 minutes

This means you can easily fit this meal into your day, whether you’re home or busy with other activities. Just set it and forget it, and you’ll be rewarded with a delightful dinner!

Nutritional Information for Herb-Roasted Chicken in a Slow Cooker

Understanding the nutritional content of your meals is essential for maintaining a balanced diet. The herb-roasted chicken in a slow cooker is not only delicious but also provides a good source of nutrients. Here’s a breakdown of the nutritional information per serving:

Calories

Each serving of herb-roasted chicken contains approximately 320 calories. This makes it a satisfying meal without being overly heavy. The combination of chicken and vegetables ensures that you get a hearty dish that can keep you full for hours.

Protein

Protein is vital for building and repairing tissues, and this dish delivers! With about 30 grams of protein per serving, herb-roasted chicken is an excellent choice for those looking to increase their protein intake. The chicken provides high-quality protein, which is essential for muscle health and overall well-being.

Sodium

When it comes to sodium, this recipe is relatively low, with around 600 mg per serving. Using low-sodium chicken broth helps keep the sodium levels in check, making it a heart-healthy option. Monitoring sodium intake is important for maintaining healthy blood pressure levels, and this dish fits well into a balanced diet.

Overall, herb-roasted chicken in a slow cooker is a nutritious meal that offers a good balance of calories, protein, and sodium. It’s a great option for families looking to enjoy a wholesome dinner without compromising on flavor. Enjoy this delightful dish knowing it’s not only tasty but also good for you!

FAQs about Herb-Roasted Chicken in a Slow Cooker

Can I use frozen chicken for Herb-Roasted Chicken in a Slow Cooker?

Using frozen chicken in a slow cooker is not recommended. Slow cookers cook food at low temperatures, which can allow harmful bacteria to grow if the chicken is frozen. It’s best to thaw the chicken completely before cooking. You can do this by placing it in the refrigerator overnight or using the defrost setting on your microwave. Once thawed, you can follow the recipe as usual for a delicious herb-roasted chicken.

How long can I store leftovers of Herb-Roasted Chicken in a Slow Cooker?

Leftover herb-roasted chicken can be stored in the refrigerator for up to 3 to 4 days. Make sure to place the chicken in an airtight container to keep it fresh. If you want to keep it longer, consider freezing the leftovers. Properly stored, frozen chicken can last for about 4 months. When you’re ready to enjoy it again, simply thaw it in the refrigerator and reheat it thoroughly before serving.

What sides pair well with Herb-Roasted Chicken in a Slow Cooker?

Herb-roasted chicken is versatile and pairs well with a variety of sides. Here are some delicious options:

  • Steamed Broccoli: This adds a nice crunch and a pop of color to your plate.
  • Garlic Mashed Potatoes: Creamy mashed potatoes complement the flavors of the chicken beautifully.
  • Roasted Brussels Sprouts: Their slight bitterness balances the richness of the chicken.
  • Quinoa Salad: A light quinoa salad with fresh veggies can provide a refreshing contrast.
  • Crusty Bread: Serve with a loaf of crusty bread to soak up the delicious juices.

These sides not only enhance the meal but also make it more satisfying. Feel free to mix and match based on your preferences!

Conclusion on Herb-Roasted Chicken in a Slow Cooker

In conclusion, herb-roasted chicken in a slow cooker is a fantastic dish that combines convenience with incredible flavor. This recipe is perfect for busy families or anyone looking to enjoy a hearty meal without spending hours in the kitchen. The slow cooking process ensures that the chicken becomes tender and juicy, while the herbs and vegetables create a delightful medley of tastes.

By following the steps outlined in this article, you can easily prepare a delicious meal that will impress your family and friends. The versatility of this dish allows you to experiment with different herbs and vegetables, making it a great option for any occasion. Whether you’re hosting a dinner party or simply enjoying a cozy night at home, this herb-roasted chicken is sure to be a crowd-pleaser.

Remember to take advantage of the tips and variations provided to customize your dish to your liking. With a little creativity, you can make this recipe your own. Plus, the nutritional benefits of this meal make it a smart choice for those looking to maintain a balanced diet.

So, gather your ingredients, set your slow cooker, and get ready to enjoy a comforting and flavorful herb-roasted chicken. It’s a meal that not only satisfies the taste buds but also warms the heart. Happy cooking!

Marry Me Chicken Meatballs Recipe is a must-try dish!

Introduction to Marry Me Chicken Meatballs Recipe

Welcome to the delightful world of Marry Me Chicken Meatballs! This recipe is not just about food; it’s about creating a memorable experience. Imagine serving these tender, flavorful chicken meatballs to your loved ones. The moment they take a bite, you can almost hear the gasps of delight. It’s no wonder this dish has earned its charming name. With a perfect blend of ingredients, these meatballs are sure to impress anyone at your dinner table.

What Makes Marry Me Chicken Meatballs Special?

So, what makes these meatballs so special? First, it’s the combination of fresh ingredients. Ground chicken, herbs, and cheese come together to create a mouthwatering flavor. The addition of panko breadcrumbs gives them a delightful crunch, while the melted provolone cheese adds a creamy richness. Each bite is a burst of flavor that leaves you wanting more.

Moreover, the preparation is simple and quick. You can whip up this dish in no time, making it perfect for busy weeknights or special occasions. The aroma that fills your kitchen while they bake is simply irresistible. Plus, they are versatile! You can serve them as an appetizer, main dish, or even in a sandwich.

In essence, Marry Me Chicken Meatballs are not just a meal; they are a celebration of love and togetherness. Whether you’re cooking for a romantic dinner or a family gathering, these meatballs will surely steal the show. So, let’s dive into the ingredients and get started on this culinary adventure!

Ingredients for Marry Me Chicken Meatballs Recipe

To create the delicious Marry Me Chicken Meatballs, you’ll need a selection of fresh and flavorful ingredients. Each component plays a vital role in achieving that perfect taste and texture. Here’s what you’ll need:

  • 1 pound ground chicken: This is the star of the dish, providing a lean protein base.
  • 1/2 cup panko breadcrumbs: These breadcrumbs add a delightful crunch and help bind the meatballs.
  • 1/4 cup shredded Parmesan cheese: This cheese brings a savory flavor that enhances the overall taste.
  • 1/4 cup finely chopped basil: Fresh basil adds a burst of freshness and aroma.
  • 1/4 cup minced shallots: Shallots offer a mild onion flavor that complements the chicken.
  • 2 cloves garlic, finely chopped: Garlic adds depth and richness to the meatballs.
  • 1 large egg: The egg acts as a binder, helping to hold the meatballs together.
  • 1 teaspoon dried oregano: Oregano brings an earthy flavor that pairs well with the other ingredients.
  • 1/2 teaspoon sea salt: Salt enhances the flavors of all the ingredients.
  • 1/4 teaspoon freshly ground black pepper: This adds a hint of spice to the mix.
  • 1/2 cup tomato sauce: The sauce adds moisture and a tangy flavor to the dish.
  • 1/2 cup provolone cheese, shredded: Provolone melts beautifully, creating a creamy topping.
  • Fresh parsley for garnish (optional): A sprinkle of parsley adds a pop of color and freshness.

Gather these ingredients, and you’re ready to embark on your cooking journey. Each item contributes to the overall deliciousness of the Marry Me Chicken Meatballs, making them a dish that’s hard to resist!

Step-by-Step Preparation of Marry Me Chicken Meatballs Recipe

Now that you have all your ingredients ready, it’s time to dive into the fun part: preparing the Marry Me Chicken Meatballs! Follow these simple steps to create a dish that will surely impress.

Step 1: Preparing the Meatball Mixture

Start by grabbing a large mixing bowl. In this bowl, combine the ground chicken, panko breadcrumbs, and shredded Parmesan cheese. Next, add the finely chopped basil, minced shallots, and chopped garlic. These ingredients will create a flavorful base for your meatballs. Then, crack the large egg into the mixture. This will help bind everything together. Finally, sprinkle in the dried oregano, sea salt, and black pepper. Use your hands or a spoon to mix everything until well combined. Make sure there are no dry spots left!

Step 2: Shaping the Meatballs

Once your mixture is ready, it’s time to shape the meatballs. Take a small amount of the mixture, about the size of a golf ball, and roll it between your palms. This helps create a nice, round shape. Place each meatball on the prepared baking tray, leaving some space between them. This will ensure they cook evenly. Continue this process until all the mixture is shaped into meatballs. It’s okay if they aren’t perfect; they’ll still taste amazing!

Step 3: Cooking the Meatballs

Now, it’s time to cook those delicious meatballs! Place the baking tray in your preheated oven at 400°F (200°C). Bake the meatballs for about 20 minutes. You’ll know they’re ready when they turn a lovely golden brown and are fully cooked through. The aroma wafting through your kitchen will be irresistible!

Step 4: Making the Sauce

While the meatballs are baking, you can prepare the sauce. In a small saucepan, heat the tomato sauce over medium heat. Stir occasionally to prevent it from sticking. You can add a pinch of salt or some herbs if you like. This step is simple but adds a nice touch to the dish. Let the sauce simmer gently while the meatballs finish cooking.

Step 5: Combining Meatballs and Sauce

Once the meatballs are done, take them out of the oven. Carefully pour the warm tomato sauce over the meatballs, ensuring they are well coated. Then, sprinkle the shredded provolone cheese generously on top. Place the tray back in the oven for an additional 5-7 minutes. This will allow the cheese to melt and bubble, creating a deliciously gooey topping. When you take them out, they will look and smell heavenly!

And there you have it! Your Marry Me Chicken Meatballs are now ready to be served. The combination of flavors and textures will surely make this dish a hit at your table.

Variations of Marry Me Chicken Meatballs Recipe

While the classic Marry Me Chicken Meatballs are delicious as they are, there’s always room for creativity in the kitchen! You can easily adapt this recipe to suit different dietary needs or to explore new flavors. Let’s dive into some exciting variations you can try!

Alternative Ingredients for Different Diets

If you or your guests have specific dietary preferences, don’t worry! You can modify the ingredients without sacrificing flavor. Here are some alternatives:

  • Ground Turkey or Beef: If you prefer a different protein, ground turkey or lean beef can be used instead of chicken. Both options will still yield tasty meatballs.
  • Gluten-Free Breadcrumbs: For a gluten-free version, substitute panko breadcrumbs with gluten-free breadcrumbs or crushed gluten-free crackers.
  • Vegan Option: To make a vegan version, use plant-based ground meat and replace the egg with a flaxseed egg (1 tablespoon ground flaxseed mixed with 2.5 tablespoons water).
  • Non-Dairy Cheese: If you’re avoiding dairy, opt for non-dairy cheese alternatives that melt well, like cashew cheese or almond-based cheese.

These alternatives ensure everyone can enjoy the delightful flavors of Marry Me Chicken Meatballs, regardless of their dietary restrictions!

Flavor Variations to Try

Feeling adventurous? Here are some flavor variations to elevate your Marry Me Chicken Meatballs:

  • Spicy Kick: Add a teaspoon of red pepper flakes or a dash of hot sauce to the meatball mixture for a spicy twist.
  • Italian Herbs: Mix in additional herbs like thyme or rosemary for a more aromatic flavor profile.
  • Cheesy Delight: Incorporate different cheeses into the meatball mixture, such as mozzarella or feta, for a unique taste.
  • Sweet and Savory: Add a tablespoon of honey or maple syrup to the sauce for a sweet contrast to the savory meatballs.

These variations allow you to customize the Marry Me Chicken Meatballs to your liking. Whether you want to cater to dietary needs or simply explore new flavors, the possibilities are endless!

Cooking Note for Marry Me Chicken Meatballs Recipe

Cooking is an art, and every dish has its unique nuances. When it comes to the Marry Me Chicken Meatballs, a few tips can help you achieve the best results. First, ensure that your ground chicken is fresh. Fresh meat not only enhances the flavor but also contributes to the texture of the meatballs. If you can, buy it from a trusted butcher or grocery store.

Next, don’t skip the resting time after mixing the ingredients. Allowing the meatball mixture to rest for about 10-15 minutes can help the flavors meld together. This step also allows the breadcrumbs to absorb moisture, resulting in a juicier meatball.

When shaping the meatballs, try to keep them uniform in size. This ensures they cook evenly. If you find the mixture too sticky, wet your hands slightly before rolling. This little trick makes the process much easier!

As for baking, keep an eye on the meatballs during the last few minutes. Ovens can vary, and you want to avoid overcooking them. The goal is a golden brown exterior while keeping the inside moist and tender.

Lastly, feel free to experiment with the sauce. If you prefer a richer flavor, consider adding a splash of red wine or a pinch of sugar to balance the acidity of the tomato sauce. These small adjustments can elevate your dish to new heights!

With these cooking notes in mind, you’re well on your way to creating the perfect Marry Me Chicken Meatballs. Enjoy the process, and don’t forget to savor every bite!

Serving Suggestions for Marry Me Chicken Meatballs Recipe

Now that your Marry Me Chicken Meatballs are ready, it’s time to think about how to serve them. The right side dishes and creative serving ideas can elevate your meal and make it even more enjoyable. Let’s explore some fantastic options!

Best Side Dishes to Pair

Choosing the right side dishes can enhance the flavors of your meatballs. Here are some delicious options to consider:

  • Garlic Bread: A classic choice! The buttery, garlicky goodness of garlic bread pairs perfectly with the savory meatballs and sauce.
  • Mixed Green Salad: A fresh salad with a light vinaigrette adds a refreshing contrast to the rich flavors of the meatballs.
  • Roasted Vegetables: Colorful roasted veggies like zucchini, bell peppers, and carrots bring a healthy touch to your meal.
  • Pasta: Serve the meatballs over a bed of spaghetti or penne for a hearty and satisfying dish.
  • Rice or Quinoa: A side of fluffy rice or quinoa can soak up the delicious tomato sauce, making every bite delightful.

These side dishes not only complement the Marry Me Chicken Meatballs but also create a well-rounded meal that everyone will love!

Creative Serving Ideas

Want to impress your guests? Here are some creative serving ideas that will make your Marry Me Chicken Meatballs stand out:

  • Meatball Sub: Place the meatballs in a toasted sub roll, top with extra sauce and cheese, and serve as a delicious sandwich.
  • Skewers: For a fun twist, thread the meatballs onto skewers with cherry tomatoes and basil leaves for a colorful appetizer.
  • Meatball Appetizer Platter: Arrange the meatballs on a platter with toothpicks and serve with dipping sauces like marinara or pesto.
  • Stuffed Peppers: Hollow out bell peppers and fill them with the meatball mixture before baking for a unique presentation.
  • Cheesy Meatball Bake: Layer the meatballs in a baking dish with sauce and cheese, then bake until bubbly for a comforting casserole.

These creative serving ideas will not only make your meal visually appealing but also add a fun twist to the dining experience. Enjoy sharing your Marry Me Chicken Meatballs in style!

Tips for Perfecting Marry Me Chicken Meatballs Recipe

Creating the perfect Marry Me Chicken Meatballs is all about attention to detail. With a few helpful tips, you can elevate your dish to new heights. Here are some essential tips to ensure your meatballs turn out delicious every time:

  • Use Fresh Ingredients: Fresh herbs, garlic, and chicken make a big difference in flavor. Always opt for fresh over dried when possible.
  • Don’t Overmix: When combining the ingredients, mix just until everything is combined. Overmixing can lead to tough meatballs.
  • Chill the Mixture: If you have time, chill the meatball mixture for about 30 minutes before shaping. This helps the flavors meld and makes it easier to handle.
  • Test a Small Meatball: Before baking the entire batch, cook a small meatball in a skillet. This allows you to adjust seasoning if needed.
  • Keep Them Uniform: Aim for consistent sizes when shaping the meatballs. This ensures even cooking and a pleasing presentation.
  • Use a Meat Thermometer: To ensure they are fully cooked, use a meat thermometer. The internal temperature should reach 165°F (74°C).
  • Let Them Rest: After baking, let the meatballs rest for a few minutes before serving. This helps retain their juices and enhances flavor.
  • Experiment with Sauces: While tomato sauce is classic, feel free to try different sauces like pesto or Alfredo for a unique twist.

By following these tips, you’ll be well on your way to mastering the art of Marry Me Chicken Meatballs. Each bite will be a delightful experience, making your dish a true crowd-pleaser!

Breakdown of Time for Marry Me Chicken Meatballs Recipe

Prep Time

Getting everything ready for your Marry Me Chicken Meatballs is a breeze! The prep time usually takes about 15-20 minutes. This includes gathering your ingredients, chopping herbs, and mixing everything together. If you have your ingredients prepped and organized, you can whip up the mixture in no time!

Cooking Time

Once your meatballs are shaped and ready, the cooking time is approximately 25-30 minutes. First, you’ll bake the meatballs for about 20 minutes until they are golden brown. After that, you’ll add the tomato sauce and provolone cheese, then return them to the oven for an additional 5-7 minutes. This step allows the cheese to melt beautifully, creating a delicious topping.

Total Time

In total, you can expect to spend around 40-50 minutes from start to finish. This includes both prep and cooking time. With such a quick turnaround, you can enjoy a delightful meal without spending hours in the kitchen. Perfect for busy weeknights or last-minute gatherings!

Nutritional Information for Marry Me Chicken Meatballs Recipe

Understanding the nutritional content of your meals is essential for maintaining a balanced diet. The Marry Me Chicken Meatballs are not only delicious but also provide a good source of nutrients. Here’s a breakdown of the nutritional information for this delightful dish:

Calories

Each serving of Marry Me Chicken Meatballs contains approximately 350 calories. This makes it a satisfying option for dinner without being overly heavy. The combination of lean ground chicken, cheese, and wholesome ingredients ensures you’re getting a fulfilling meal.

Protein Content

Protein is vital for muscle repair and overall health. Each serving of these meatballs provides about 30 grams of protein. This high protein content comes primarily from the ground chicken and cheese, making it an excellent choice for those looking to boost their protein intake.

Sodium Levels

When it comes to sodium, each serving contains around 600 milligrams. While this is a reasonable amount for a flavorful dish, it’s always good to be mindful of your sodium intake. You can reduce the sodium levels by using low-sodium tomato sauce and cheese if desired.

Overall, the Marry Me Chicken Meatballs offer a balanced meal option that is rich in protein and flavor. Enjoying them as part of a varied diet can contribute to your overall health and well-being!

FAQs about Marry Me Chicken Meatballs Recipe

Can I make Marry Me Chicken Meatballs ahead of time?

Absolutely! You can prepare the Marry Me Chicken Meatballs ahead of time. Simply mix the ingredients and shape the meatballs. Then, cover them and store them in the refrigerator for up to 24 hours before baking. This makes it super convenient for busy days. When you’re ready to cook, just pop them in the oven as directed. You’ll have a delicious meal ready in no time!

What can I substitute for chicken in the Marry Me Chicken Meatballs Recipe?

If you want to switch things up, there are several great substitutes for chicken. Ground turkey or lean beef works well and still keeps the meatballs tasty. For a vegetarian option, try using plant-based ground meat. You can also use lentils or chickpeas for a hearty, meat-free alternative. Just remember to adjust the seasonings to match your chosen protein!

How do I store leftovers of Marry Me Chicken Meatballs?

Storing leftovers is easy! Place any uneaten Marry Me Chicken Meatballs in an airtight container. They can be kept in the refrigerator for up to 3 days. When you’re ready to enjoy them again, simply reheat in the oven or microwave until warmed through. This way, you can savor the delicious flavors even after the first meal!

Can I freeze Marry Me Chicken Meatballs?

Yes, you can freeze Marry Me Chicken Meatballs! To do this, let them cool completely after cooking. Then, place them in a freezer-safe container or bag. They can be frozen for up to 3 months. When you’re ready to eat, thaw them in the refrigerator overnight and reheat in the oven or microwave. Freezing is a great way to have a quick meal on hand for busy nights!

Conclusion on Marry Me Chicken Meatballs Recipe

In conclusion, the Marry Me Chicken Meatballs recipe is a delightful dish that brings joy to any table. With its perfect blend of flavors and textures, it’s no wonder this recipe has captured the hearts of many. From the tender ground chicken to the rich provolone cheese, every bite is a celebration of taste.

Not only is this dish easy to prepare, but it also offers versatility. Whether you’re hosting a dinner party, enjoying a cozy family meal, or simply craving something delicious, these meatballs fit the bill. Plus, with the option to customize ingredients and flavors, you can make them your own!

As you gather around the table to share this meal, remember that food is more than just sustenance; it’s about connection and love. The Marry Me Chicken Meatballs are sure to create lasting memories with your loved ones. So, roll up your sleeves, gather your ingredients, and embark on this culinary adventure. You won’t regret it!

Happy cooking, and may your Marry Me Chicken Meatballs bring smiles and satisfaction to everyone who tries them!