Teriyaki Chicken Bake Recipe is a family favorite!

Introduction to Teriyaki Chicken Bake Recipe

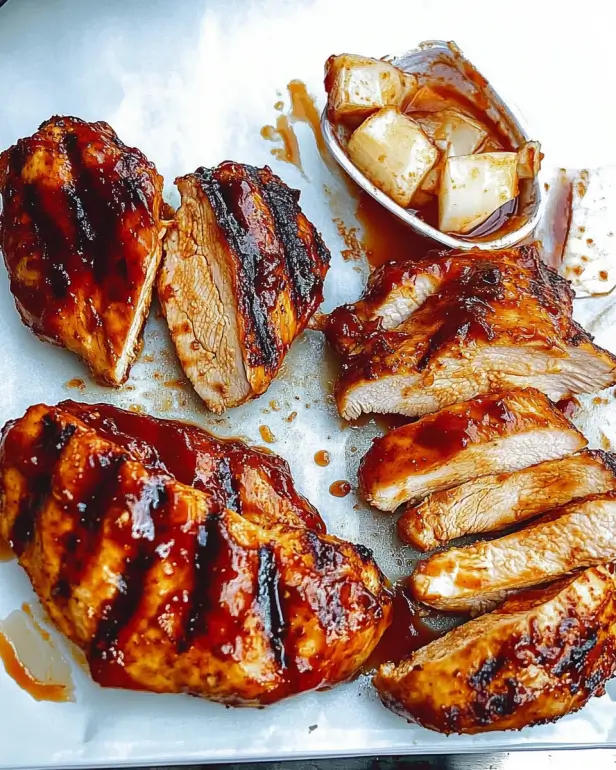
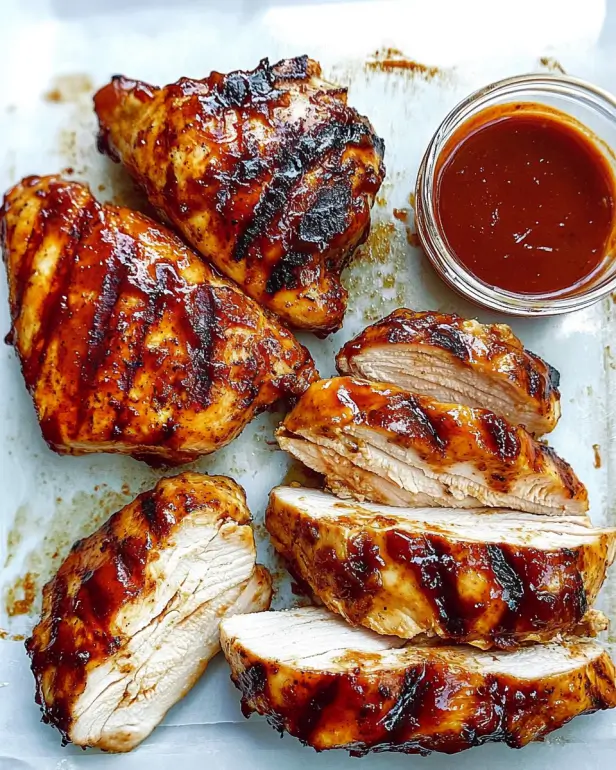
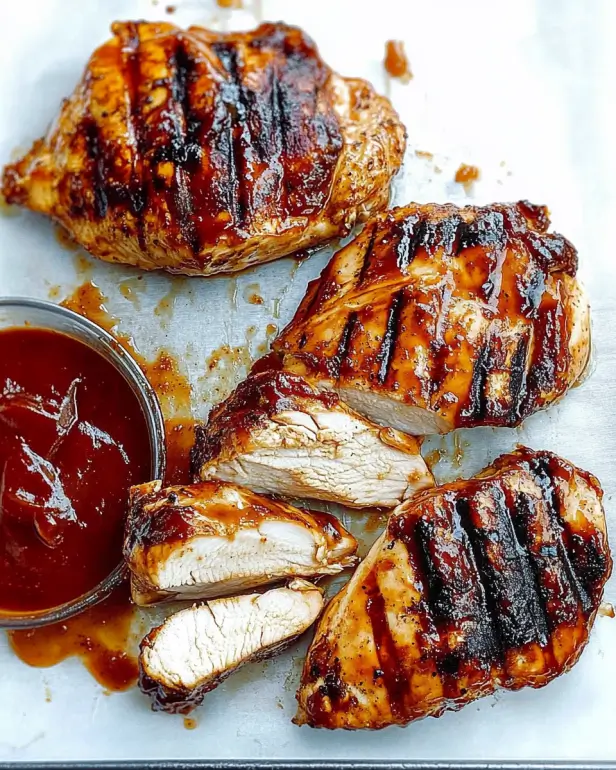
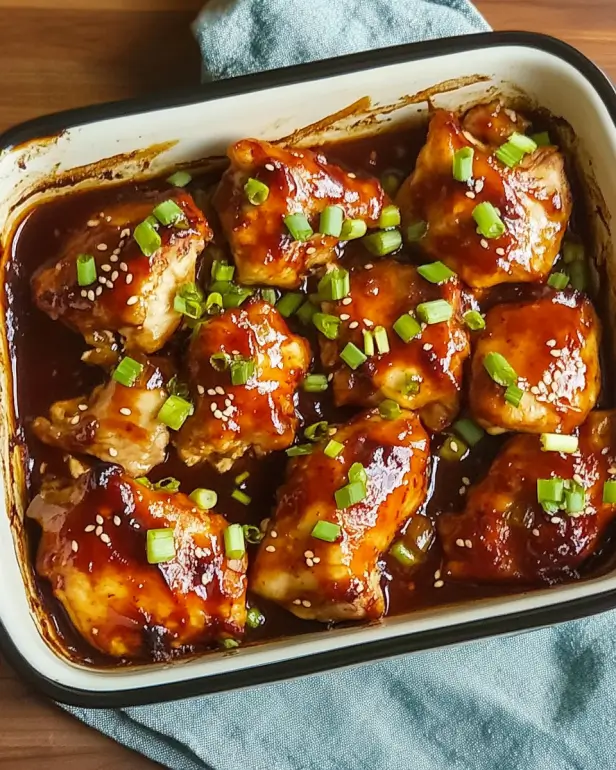
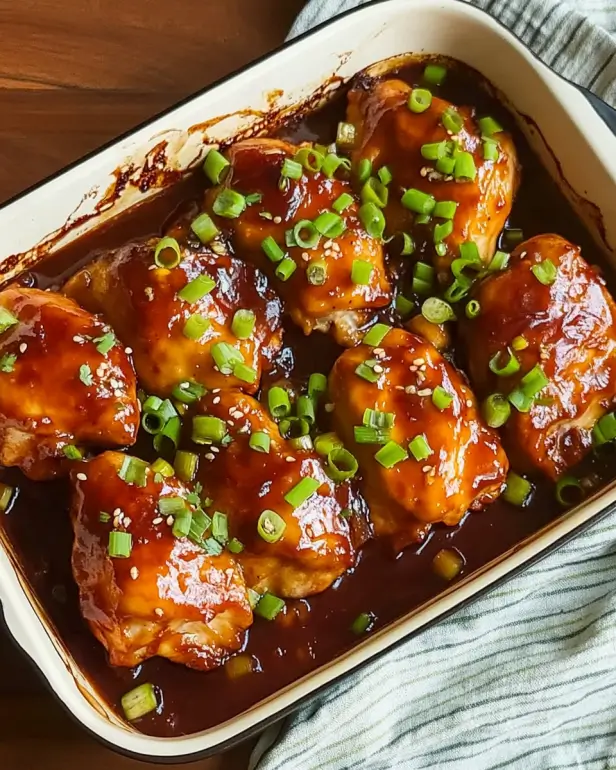
Teriyaki Chicken Bake Recipe. This dish combines tender chicken breasts with vibrant vegetables, all coated in a sweet and savory teriyaki sauce. It’s not just tasty; it’s also a breeze to prepare!

Imagine coming home after a long day and having a warm, comforting meal ready in no time. This recipe is perfect for busy weeknights or even for meal prepping. With just a few simple ingredients, you can create a wholesome dinner that’s packed with flavor and nutrition.

Teriyaki Chicken Bake Recipe lies in its versatility. You can easily customize it to suit your taste. Whether you prefer extra veggies or a different protein, this dish can adapt to your preferences. Plus, it’s a great way to introduce your family to new flavors while keeping things simple.

So, roll up your sleeves and get ready to enjoy a delightful meal that’s sure to impress. Let’s dive into the ingredients and preparation steps to make this scrumptious teriyaki chicken bake!

Ingredients for Teriyaki Chicken Bake Recipe

Teriyaki Chicken Bake Recipe, you’ll need a handful of fresh ingredients. Each component plays a vital role in delivering that delicious flavor and texture. Here’s what you’ll need:

  • 4 boneless, skinless chicken breasts (about 1.5 pounds) – This is the star of the dish, providing lean protein.
  • 1 cup teriyaki sauce – This sweet and savory sauce adds depth and richness to the chicken.
  • 1 tablespoon olive oil – A healthy fat that helps to keep the chicken moist during baking.
  • 2 cups broccoli florets – These vibrant green veggies add color and crunch.
  • 1 cup sliced bell peppers (any color) – They bring sweetness and a pop of color to the dish.
  • 1 cup cooked rice (white or brown) – This serves as a hearty base for the chicken and veggies.
  • 1 teaspoon garlic powder – A must-have for that aromatic flavor.
  • 1 teaspoon ground ginger – This spice enhances the teriyaki flavor profile.
  • 1 tablespoon sesame seeds (optional) – These add a delightful crunch and nutty flavor.
  • 2 green onions, sliced (for garnish) – They provide a fresh finish to the dish.

Gathering these ingredients is the first step toward creating your delicious teriyaki chicken bake. Each item contributes to the overall taste and presentation, making it a feast for both the eyes and the palate. Now that you have everything ready, let’s move on to the preparation steps!

Preparation of Teriyaki Chicken Bake Recipe

Teriyaki Chicken Bake Recipe. This process is simple and straightforward, making it easy for anyone to follow. Let’s break it down step by step!

Step 1: Preheat the Oven

The first thing you need to do is preheat your oven to 375°F (190°C). This ensures that your chicken bakes evenly and thoroughly. While the oven is heating up, you can move on to the next steps. It’s a great way to save time!

Step 2: Prepare the Chicken

Next, take your boneless, skinless chicken breasts and place them in a large bowl. This is where the magic begins! You’ll want to coat the chicken with a flavorful marinade. So, let’s get started on that.

Step 3: Make the Teriyaki Sauce

In the same bowl, combine the teriyaki sauce, olive oil, garlic powder, and ground ginger. Mix these ingredients well until they are fully blended. This marinade is what gives your chicken that delicious teriyaki flavor. Once mixed, add the chicken breasts to the bowl and coat them thoroughly. For the best flavor, let the chicken marinate for at least 15 minutes. If you have more time, marinating for up to 2 hours in the refrigerator will enhance the taste even more!

Step 4: Combine Ingredients

After marinating, it’s time to assemble your dish. Take a 9×13 inch baking dish and arrange the marinated chicken breasts in a single layer. Pour any remaining marinade over the chicken to keep it moist. Now, scatter the broccoli florets and sliced bell peppers around the chicken. This not only adds color but also makes the dish more nutritious!

Step 5: Bake the Dish

Cover the baking dish with aluminum foil and place it in the preheated oven. Bake for 25 minutes. After that, remove the foil and continue baking for an additional 15-20 minutes. You’ll know it’s done when the chicken reaches an internal temperature of 165°F. This step is crucial for ensuring your chicken is safe to eat and perfectly cooked!

Once baked, let the chicken rest for about 5 minutes before slicing. This allows the juices to redistribute, making the chicken even more tender. Now, you’re ready to serve your delicious teriyaki chicken bake!

Variation of Teriyaki Chicken Bake Recipe

Teriyaki Chicken Bake Recipe is not only delicious but also highly adaptable. You can easily switch up the proteins or even make it vegetarian. This flexibility allows you to cater to different dietary preferences and keep your meals exciting. Let’s explore some alternative proteins and vegetarian options!

Alternative Proteins

If you’re looking to mix things up, consider using different proteins in your teriyaki bake. Here are a few tasty alternatives:

  • Tofu: For a plant-based option, firm tofu works wonderfully. Press the tofu to remove excess moisture, then cut it into cubes. Marinate and bake just like the chicken. It absorbs the teriyaki flavor beautifully!
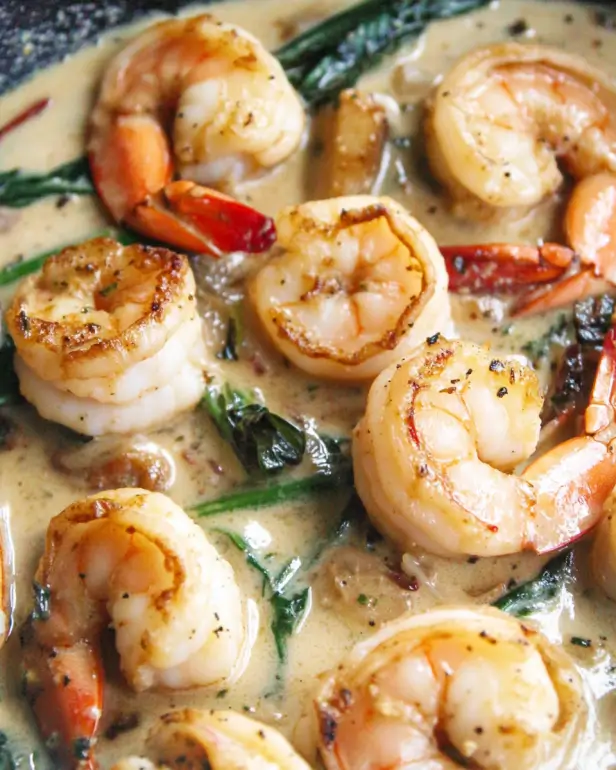
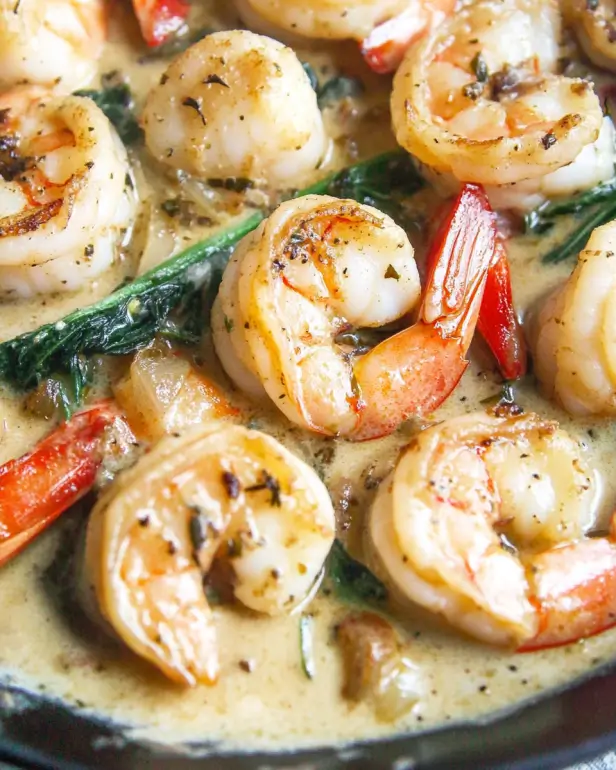
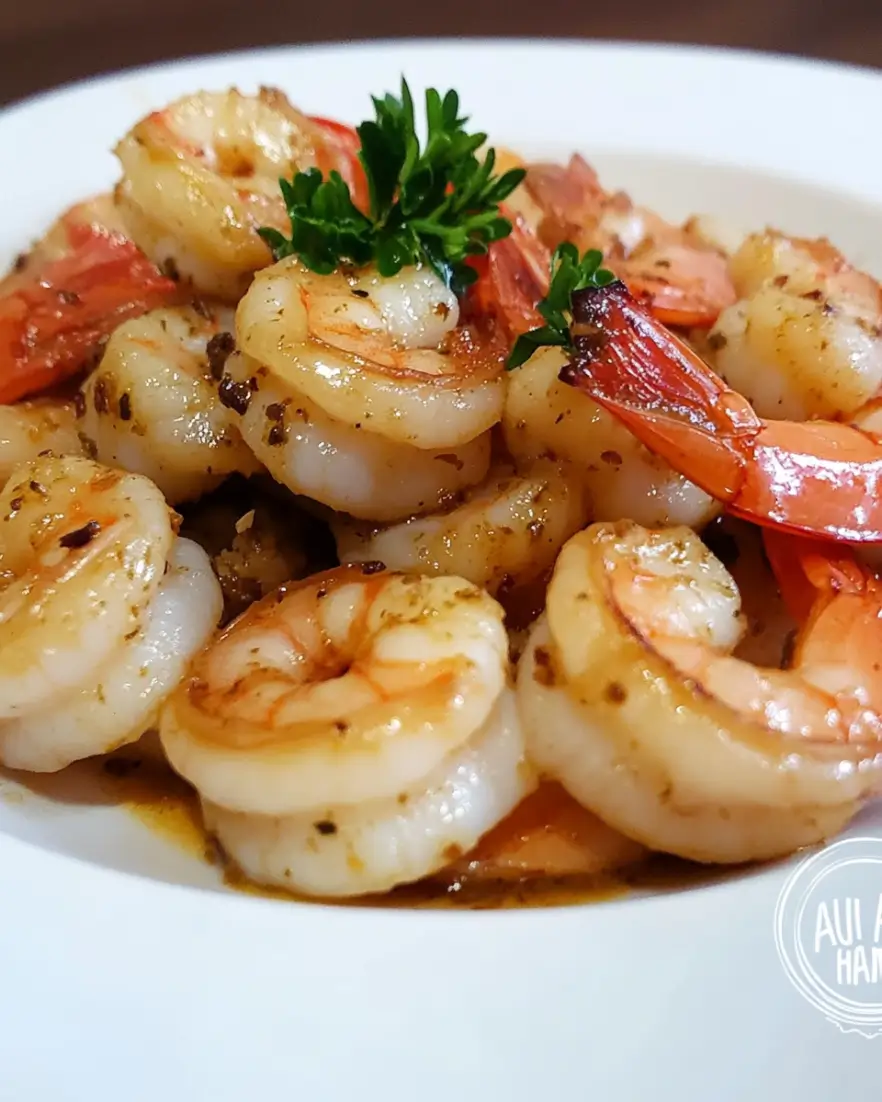
  • Shrimp: Shrimp is another great choice. They cook quickly, so add them to the baking dish during the last 10 minutes of cooking. This way, they won’t overcook and will remain tender.
  • Pork Tenderloin: If you enjoy pork, try using pork tenderloin. Slice it into medallions and marinate as you would the chicken. Bake until the internal temperature reaches 145°F for a juicy result.

Teriyaki Chicken Bake Recipe. Feel free to experiment and find your favorite combination!

Vegetarian Options

For those who prefer a vegetarian meal, there are plenty of options to create a satisfying dish. Here are some ideas:

  • Mixed Vegetables: Instead of chicken, load your baking dish with a variety of vegetables. Think zucchini, carrots, snap peas, and mushrooms. Toss them in the teriyaki sauce for a flavorful veggie bake.
  • Quinoa: For a hearty base, consider using quinoa instead of rice. It’s packed with protein and adds a nutty flavor that pairs well with teriyaki sauce.
  • Chickpeas: Roasted chickpeas can add a nice crunch and protein boost. Toss them in the marinade and bake alongside your veggies for a filling meal.

Teriyaki Chicken Bake Recipe by trying out these variations!

Cooking Note for Teriyaki Chicken Bake Recipe

Teriyaki Chicken Bake Recipe, there are a few important cooking notes to keep in mind. These tips will help ensure that your dish turns out perfectly every time. Let’s take a closer look!

First, always check the freshness of your ingredients. Fresh chicken and vegetables will enhance the overall flavor of your dish. If possible, choose organic or locally sourced chicken for the best taste and quality.

Next, marinating the chicken is key. The longer you let it soak in the teriyaki sauce, the more flavorful it will be. If you have time, marinate the chicken overnight in the refrigerator. This allows the flavors to penetrate deeply, resulting in a more delicious meal.

Another important note is to ensure even cooking. When arranging the chicken and vegetables in the baking dish, make sure they are spread out in a single layer. This helps them cook evenly and prevents steaming, which can happen if they are overcrowded.

Additionally, using a meat thermometer is a great way to check for doneness. For chicken, the internal temperature should reach 165°F. This ensures that it is safe to eat and perfectly cooked. For shrimp, aim for a temperature of 145°F, while pork should reach 145°F as well.

Lastly, let the dish rest after baking. Allowing the chicken to sit for a few minutes before slicing helps retain its juices. This simple step can make a big difference in the tenderness of your chicken.

Teriyaki Chicken Bake Recipe that your family will love. Happy cooking!

Serving Suggestions for Teriyaki Chicken Bake Recipe

Teriyaki Chicken Bake Recipe is ready, it’s time to think about how to serve it. Presentation can elevate your meal, making it even more enjoyable. Here are some delightful serving suggestions to enhance your dining experience:

  • Over Rice: Serve the teriyaki chicken and vegetables over a bed of fluffy cooked rice. This classic pairing absorbs the delicious sauce, making every bite flavorful.
  • With a Side Salad: A fresh side salad can add a nice crunch and balance to the meal. Consider a simple green salad with a light vinaigrette or a cucumber salad for a refreshing touch.
  • In Lettuce Wraps: For a fun twist, serve the chicken and veggies in crisp lettuce leaves. This makes for a light and healthy option that’s perfect for a casual meal.
  • With Noodles: If you want to switch things up, serve the teriyaki chicken over cooked noodles. Soba or rice noodles work well and soak up the teriyaki sauce beautifully.
  • Garnished: Don’t forget to garnish your dish! Sprinkle sesame seeds and sliced green onions on top for a pop of color and added flavor. This simple step can make your meal look restaurant-worthy.

Teriyaki Chicken Bake Recipe but also allow you to customize the meal to your liking. Whether you prefer it over rice, in wraps, or with a side salad, there’s no wrong way to enjoy this delicious dish. Get creative and make it your own!

Tips for Perfecting Your Teriyaki Chicken Bake Recipe

Teriyaki Chicken Bake Recipe truly shine, there are several tips you can follow. These simple suggestions will help you achieve the best flavor and texture, ensuring that your dish is a hit every time. Let’s explore some helpful tips!

First, always use fresh ingredients. Fresh chicken and vegetables not only taste better but also enhance the overall quality of your meal. If you can, opt for organic chicken and seasonal vegetables. This choice can make a noticeable difference in flavor.

Next, don’t rush the marinating process. While 15 minutes is the minimum, marinating for a longer time—up to 2 hours or even overnight—allows the flavors to penetrate the chicken deeply. This extra time can transform your dish from good to great!

Another important tip is to cut your vegetables into uniform sizes. This ensures that they cook evenly alongside the chicken. If some pieces are larger than others, they may not cook through at the same rate, leading to uneven textures.

When it comes to baking, consider using a meat thermometer. This handy tool takes the guesswork out of cooking. For chicken, aim for an internal temperature of 165°F. This guarantees that your chicken is safe to eat and perfectly juicy.

Additionally, let your dish rest after baking. Allowing the chicken to sit for about 5 minutes before slicing helps retain its juices. This simple step can make your chicken more tender and flavorful.

Teriyaki Chicken Bake Recipe uniquely yours!

By following these tips, you’ll be well on your way to creating a delicious and satisfying teriyaki chicken bake that your family will love. Enjoy the process and happy cooking!

Breakdown of Time for Teriyaki Chicken Bake Recipe

Teriyaki Chicken Bake Recipe is essential for planning your meal. Knowing how long each step takes can help you manage your time effectively. Here’s a breakdown of the prep time, cooking time, and total time required to make this delicious dish.

Prep Time

Teriyaki Chicken Bake Recipe is approximately 15 to 20 minutes. This includes gathering your ingredients, marinating the chicken, and preparing the vegetables. If you choose to marinate the chicken for longer, you can adjust this time accordingly. Remember, the longer the chicken marinates, the more flavorful it will be!

Cooking Time

Once you’ve prepped everything, the cooking time is about 40 to 45 minutes. This includes:

  • 25 minutes of covered baking to ensure the chicken cooks through.
  • 15 to 20 minutes of uncovered baking to achieve a nice glaze and finish.

During this time, you can prepare your rice or any side dishes you plan to serve with the chicken.

Total Time

In total, you can expect to spend about 55 to 65 minutes from start to finish. This includes both prep and cooking time. If you decide to marinate the chicken for a longer period, such as 2 hours, you’ll need to factor that into your overall meal prep time. However, the hands-on time remains relatively short, making this recipe perfect for busy weeknights!

Teriyaki Chicken Bake Recipe with minimal fuss. Happy cooking!

Nutritional Information for Teriyaki Chicken Bake Recipe

Teriyaki Chicken Bake Recipe not only offers great taste but also provides valuable nutrients. Here’s a closer look at the nutritional information per serving:

Calories

Teriyaki Chicken Bake Recipe contains approximately 350 calories. This makes it a satisfying option for dinner without being overly heavy. The combination of chicken, vegetables, and rice provides a well-rounded meal that can fit into various dietary plans.

Protein

Protein is essential for building and repairing tissues, and this recipe delivers! Each serving contains about 30 grams of protein. The chicken breasts are a great source of lean protein, making this dish perfect for those looking to increase their protein intake. Pairing it with rice and veggies adds even more nutritional value.

Sodium

When it comes to sodium, each serving has around 800 milligrams. While teriyaki sauce does contribute to the sodium content, you can easily adjust this by using low-sodium teriyaki sauce if you’re watching your salt intake. This way, you can enjoy the flavors without compromising your health goals.

Teriyaki Chicken Bake Recipe is a nutritious choice that balances calories, protein, and sodium. It’s a delicious way to nourish your body while enjoying a flavorful meal. Whether you’re cooking for yourself or your family, this dish is sure to please everyone at the table!

FAQs about Teriyaki Chicken Bake Recipe

Can I use frozen chicken for the Teriyaki Chicken Bake Recipe?

Teriyaki Chicken Bake Recipe, but there are a few important steps to follow. First, make sure to thaw the chicken completely before marinating. This ensures that the marinade penetrates the meat properly, enhancing the flavor. You can thaw the chicken in the refrigerator overnight or use the defrost setting on your microwave. Once thawed, proceed with the marinating and baking steps as usual. Just remember that cooking times may vary slightly, so always check the internal temperature to ensure it reaches 165°F.

What can I serve with Teriyaki Chicken Bake Recipe?

Teriyaki Chicken Bake Recipe. Here are a few ideas:

  • Steamed Rice: White or brown rice is a classic pairing that absorbs the teriyaki sauce beautifully.
  • Quinoa: For a nutritious twist, serve the chicken over quinoa, which adds protein and fiber.
  • Salad: A fresh green salad with a light dressing can balance the flavors and add crunch.
  • Stir-Fried Vegetables: Additional sautéed or steamed vegetables can complement the dish and add more nutrients.
  • Egg Noodles: For a different texture, serve the chicken over egg noodles, which soak up the sauce nicely.

Feel free to mix and match these sides to create a well-rounded meal that everyone will enjoy!

How do I store leftovers from the Teriyaki Chicken Bake Recipe?

Teriyaki Chicken Bake Recipe is easy! Allow the dish to cool completely before transferring it to an airtight container. You can store the leftovers in the refrigerator for up to 3-4 days. If you want to keep them longer, consider freezing the chicken and vegetables. Just make sure to use a freezer-safe container or bag. When you’re ready to enjoy the leftovers, simply thaw them in the refrigerator overnight and reheat in the oven or microwave until heated through.

Can I make the Teriyaki Chicken Bake Recipe ahead of time?

Teriyaki Chicken Bake Recipe ahead of time is a great way to save time on busy days. You can marinate the chicken and prepare the dish up to a day in advance. Just cover it tightly and store it in the refrigerator until you’re ready to bake. When you’re ready to cook, simply follow the baking instructions. If you prefer, you can also bake the dish ahead of time and reheat it when needed. Just be sure to store it properly to maintain its flavor and texture.

Conclusion on Teriyaki Chicken Bake Recipe

Teriyaki Chicken Bake Recipe is a fantastic choice for anyone looking to create a delicious and nutritious meal with minimal effort. This dish combines tender chicken, vibrant vegetables, and a flavorful teriyaki sauce, making it a hit for family dinners or meal prep. With its simple preparation steps and adaptable ingredients, it’s easy to see why this recipe is a favorite among home cooks.

Whether you stick to the classic chicken version or explore alternative proteins and vegetarian options, the versatility of this recipe allows you to cater to various tastes and dietary needs. Plus, the nutritional benefits, including a good balance of protein and vegetables, make it a wholesome choice for any meal.

Teriyaki Chicken Bake Recipe can easily become a staple in your kitchen. Remember to follow the tips for marinating, cooking, and serving to ensure the best results every time. With just a little effort, you can create a dish that not only satisfies your hunger but also delights your taste buds.

So, gather your ingredients, preheat your oven, and get ready to enjoy a delightful meal that’s sure to impress. Happy cooking, and enjoy every bite of your delicious teriyaki chicken bake!

“Bow Tie Pasta Salad is a Perfect Summer Dish!”

Introduction to Bow Tie Pasta Salad Recipe

Bow tie pasta salad is a delightful dish that brings together vibrant flavors and textures. This recipe is not just about the pasta; it’s a celebration of fresh ingredients. The unique shape of bow tie pasta, also known as farfalle, adds a fun twist to your meal. Each bite is a mix of crunchy vegetables, creamy feta, and zesty dressing, making it a favorite for many.

What Makes Bow Tie Pasta Salad Unique?

What sets bow tie pasta salad apart is its charming appearance and the way it holds onto dressings and flavors. The bow tie shape is not only visually appealing but also perfect for capturing bits of vegetables and cheese. This salad is a feast for the eyes and the palate. The combination of colorful ingredients like cherry tomatoes, cucumbers, and bell peppers creates a vibrant dish that is as nutritious as it is delicious.

Moreover, the use of fresh herbs, like parsley, enhances the flavor profile. The crumbled feta cheese adds a creamy texture that balances the crunch of the vegetables. This unique blend makes every bite exciting and satisfying. Whether you’re serving it at a picnic or a family dinner, this salad is sure to impress.

The Versatility of Bow Tie Pasta Salad

One of the best things about bow tie pasta salad is its versatility. You can easily customize it to suit your taste or dietary needs. Want to add protein? Toss in some grilled chicken or chickpeas. Prefer a different flavor? Swap the Italian dressing for a balsamic vinaigrette. The possibilities are endless!

This salad can be served as a side dish or a main course, making it perfect for any occasion. It’s great for summer barbecues, potlucks, or even a light lunch. Plus, it can be made ahead of time, allowing the flavors to meld beautifully. No matter how you choose to enjoy it, bow tie pasta salad is a dish that everyone will love.

Ingredients for Bow Tie Pasta Salad Recipe

Essential Ingredients

To create a delicious bow tie pasta salad, you need a few essential ingredients. These ingredients come together to form a colorful and tasty dish. Here’s what you’ll need:

  • 8 ounces of bow tie pasta
  • 1 cup of cherry tomatoes, halved
  • 1 cup of cucumber, diced
  • 1/2 cup of red bell pepper, diced
  • 1/2 cup of red onion, finely chopped
  • 1/2 cup of black olives, sliced
  • 1/2 cup of feta cheese, crumbled
  • 1/4 cup of fresh parsley, chopped
  • 1/2 cup of Italian dressing
  • Salt and pepper to taste

These ingredients are not only easy to find but also packed with nutrients. The bow tie pasta serves as a hearty base, while the vegetables add crunch and freshness. Feta cheese brings a creamy element, and the Italian dressing ties everything together with its zesty flavor. This combination makes for a delightful salad that everyone will enjoy.

Optional Add-ins for Bow Tie Pasta Salad

If you want to get creative, consider adding some optional ingredients to enhance your bow tie pasta salad. Here are a few ideas:

  • Grilled chicken or chickpeas for extra protein
  • Artichoke hearts for a Mediterranean twist
  • Sun-dried tomatoes for a burst of flavor
  • Avocado for creaminess and healthy fats
  • Spinach or arugula for added greens

These add-ins can elevate your salad and make it even more satisfying. Feel free to mix and match based on your preferences. The beauty of this recipe lies in its flexibility, allowing you to create a dish that suits your taste perfectly.

Step-by-Step Preparation of Bow Tie Pasta Salad Recipe

Step 1: Cooking the Bow Tie Pasta

To start, bring a large pot of salted water to a boil. Add the 8 ounces of bow tie pasta and cook according to the package instructions until it reaches an al dente texture. This usually takes about 8 to 10 minutes. Once cooked, drain the pasta in a colander and rinse it under cold water. This step cools the pasta and prevents it from sticking together. Set it aside to let it drain completely.

Step 2: Preparing the Vegetables

While the pasta is cooking, you can prepare the vegetables. Take 1 cup of cherry tomatoes and cut them in half. Next, dice 1 cup of cucumber and 1/2 cup of red bell pepper. For added flavor, finely chop 1/2 cup of red onion. Lastly, slice 1/2 cup of black olives. These fresh ingredients will add color and crunch to your salad.

Step 3: Mixing the Dressing

In a small bowl, pour 1/2 cup of Italian dressing. If you prefer a different flavor, feel free to use balsamic vinaigrette instead. This dressing will bring all the flavors together. You can also add a pinch of salt and pepper to enhance the taste. Whisk the dressing until it’s well combined.

Step 4: Combining Ingredients

In a large mixing bowl, combine the cooled bow tie pasta with the prepared vegetables: cherry tomatoes, cucumber, red bell pepper, red onion, and black olives. Next, add 1/2 cup of crumbled feta cheese and 1/4 cup of chopped fresh parsley. Pour the dressing over the mixture and toss gently. Make sure everything is evenly coated with the dressing.

Step 5: Chilling the Salad

Once everything is mixed, cover the bowl with plastic wrap or a lid. Place the salad in the refrigerator for at least 30 minutes. This chilling time allows the flavors to meld beautifully. When you’re ready to serve, you can enjoy the salad chilled or at room temperature. It’s a refreshing dish that’s perfect for any occasion!

Step-by-Step Preparation of Bow Tie Pasta Salad Recipe

Step 1: Cooking the Bow Tie Pasta

To kick off your bow tie pasta salad, start by boiling a large pot of salted water. Once the water is bubbling, add the 8 ounces of bow tie pasta. Cook it according to the package instructions until it’s al dente, which usually takes about 8 to 10 minutes. After cooking, drain the pasta in a colander. Rinse it under cold water to cool it down and stop the cooking process. This step is crucial to keep the pasta from becoming mushy. Set the pasta aside to drain completely.

Step 2: Preparing the Vegetables

While your pasta is cooking, it’s time to chop up the fresh vegetables. Start with 1 cup of cherry tomatoes, slicing them in half. Next, take 1 cup of cucumber and dice it into small pieces. For a pop of color and flavor, chop 1/2 cup of red bell pepper. Don’t forget to finely chop 1/2 cup of red onion for that extra zing! Lastly, slice 1/2 cup of black olives. These vibrant veggies will add crunch and freshness to your salad.

Step 3: Mixing the Dressing

Now, let’s prepare the dressing! In a small bowl, pour in 1/2 cup of Italian dressing. If you’re feeling adventurous, you can swap it for a balsamic vinaigrette for a different taste. This dressing is key to bringing all the flavors together. For an extra kick, add a pinch of salt and pepper. Whisk the dressing until it’s well combined and set it aside for later.

Step 4: Combining Ingredients

In a large mixing bowl, combine the cooled bow tie pasta with the chopped vegetables: cherry tomatoes, cucumber, red bell pepper, red onion, and black olives. Next, sprinkle in 1/2 cup of crumbled feta cheese and 1/4 cup of chopped fresh parsley. Pour the prepared dressing over the mixture. Gently toss everything together, ensuring that all the ingredients are evenly coated with the dressing. This step is where the magic happens, as the flavors start to blend beautifully!

Step 5: Chilling the Salad

After mixing, cover the bowl with plastic wrap or a lid. Place the salad in the refrigerator for at least 30 minutes. This chilling time is essential as it allows the flavors to meld together, creating a deliciously refreshing dish. When you’re ready to serve, you can enjoy the salad chilled or at room temperature. It’s a perfect dish for any gathering or a light meal!

Variations of Bow Tie Pasta Salad Recipe

Mediterranean Bow Tie Pasta Salad

If you’re looking to add a Mediterranean twist to your bow tie pasta salad, this variation is perfect! Start by incorporating ingredients like artichoke hearts, sun-dried tomatoes, and kalamata olives. These ingredients will give your salad a rich, savory flavor. You can also add some diced cucumbers and crumbled feta cheese for that classic Mediterranean taste. To enhance the flavor, drizzle with a lemon vinaigrette instead of Italian dressing. This refreshing salad is not only delicious but also packed with nutrients, making it a great choice for a light lunch or dinner.

Italian Bow Tie Pasta Salad

For an Italian-inspired version, consider adding ingredients like pepperoni slices, mozzarella balls, and roasted red peppers. These additions will give your salad a hearty and satisfying flavor. You can also toss in some fresh basil and oregano to enhance the Italian flair. Using a zesty Italian dressing will tie all the flavors together beautifully. This Italian bow tie pasta salad is perfect for picnics or potlucks, as it’s sure to be a crowd-pleaser!

Vegetarian Bow Tie Pasta Salad

If you prefer a vegetarian option, you can easily create a delicious bow tie pasta salad without any meat. Focus on adding a variety of colorful vegetables like bell peppers, zucchini, and carrots. You can also include chickpeas for added protein and fiber. For a burst of flavor, mix in some fresh herbs like basil or cilantro. A light vinaigrette or a creamy dressing can enhance the taste. This vegetarian bow tie pasta salad is not only healthy but also satisfying, making it a great choice for any meal.

Cooking Note for Bow Tie Pasta Salad Recipe

Tips for Perfectly Cooked Pasta

Cooking pasta may seem simple, but a few tips can make a big difference in your bow tie pasta salad. First, always use a large pot of salted water. This helps the pasta absorb flavor as it cooks. A good rule of thumb is to add about 1 tablespoon of salt for every 4 quarts of water.

Next, keep an eye on the cooking time. For bow tie pasta, aim for al dente, which means it should be firm to the bite. This texture holds up better in salads. To check, taste a piece a minute or two before the package time is up. If it’s done, drain it immediately to stop the cooking process.

After draining, rinse the pasta under cold water. This step cools it down and prevents it from sticking together. If you want to add a little extra flavor, consider tossing the cooled pasta with a splash of olive oil. This will keep it from clumping and add a nice taste.

Storing Leftovers

Leftover bow tie pasta salad can be a tasty treat for the next day! To store it properly, place the salad in an airtight container. This helps keep it fresh and prevents any odors from the fridge from affecting the flavor.

Bow tie pasta salad can last in the refrigerator for up to 3 days. However, the vegetables may lose some crunch over time. If you notice the salad becoming soggy, you can add a little more dressing before serving to revive the flavors.

When you’re ready to enjoy your leftovers, give the salad a good stir. This will help redistribute the dressing and flavors. You can serve it cold or let it sit at room temperature for a bit before enjoying. With these tips, your bow tie pasta salad will remain delicious even after a day in the fridge!

Serving Suggestions for Bow Tie Pasta Salad Recipe

Ideal Pairings with Bow Tie Pasta Salad

Bow tie pasta salad is a versatile dish that pairs wonderfully with a variety of foods. Its fresh flavors and colorful ingredients make it a great addition to any meal. Here are some ideal pairings to consider:

  • Grilled Meats: Serve your bow tie pasta salad alongside grilled chicken, steak, or shrimp. The smoky flavors of the grilled meats complement the salad’s freshness.
  • Sandwiches: This salad makes a perfect side for sandwiches, especially those with Italian or Mediterranean flavors. Try it with a turkey and provolone sandwich or a classic Italian sub.
  • Seafood: Pair the salad with seafood dishes like baked salmon or shrimp scampi. The lightness of the salad balances the richness of the seafood.
  • Vegetable Dishes: For a vegetarian meal, serve the salad with roasted vegetables or stuffed peppers. The combination of flavors will create a satisfying and colorful plate.

These pairings not only enhance the meal but also make it more enjoyable. The bow tie pasta salad adds a refreshing touch to any dish, making it a favorite for family dinners or casual gatherings.

Serving Bow Tie Pasta Salad at Gatherings

When it comes to serving bow tie pasta salad at gatherings, presentation is key! Here are some tips to make your salad stand out:

  • Use a Large Bowl: Serve the salad in a large, colorful bowl to showcase its vibrant ingredients. This will draw attention and make it look inviting.
  • Garnish: Add a sprinkle of fresh parsley or a few extra cherry tomatoes on top for a pop of color. This simple touch can elevate the presentation.
  • Individual Portions: For a more elegant touch, consider serving the salad in individual cups or small bowls. This makes it easy for guests to grab and enjoy.
  • Chill Before Serving: Ensure the salad is well-chilled before serving. This enhances the flavors and makes it refreshing, especially on warm days.

Bow tie pasta salad is not only delicious but also visually appealing. By following these serving suggestions, you can create a delightful experience for your guests. Whether it’s a picnic, barbecue, or family gathering, this salad is sure to be a hit!

Tips for Making the Best Bow Tie Pasta Salad Recipe

Choosing the Right Pasta

When it comes to making the best bow tie pasta salad, selecting the right pasta is crucial. While bow tie pasta, or farfalle, is the star of this dish, you can experiment with other pasta shapes if you wish. For instance, rotini or fusilli can also work well, as their twists and turns hold onto the dressing and flavors beautifully.

However, if you stick with bow tie pasta, ensure it’s cooked to perfection. Remember to follow the package instructions for cooking time. Al dente pasta is ideal because it maintains a nice bite, preventing it from becoming mushy in the salad. Additionally, consider using whole wheat or gluten-free pasta for a healthier option. These alternatives can add a unique flavor and texture to your salad while keeping it nutritious.

Enhancing Flavor with Fresh Herbs

Fresh herbs can elevate your bow tie pasta salad to a whole new level. While the recipe calls for parsley, don’t hesitate to get creative! Basil, cilantro, or dill can add a refreshing twist. For instance, basil pairs wonderfully with the Mediterranean version of the salad, while cilantro can enhance a more zesty flavor profile.

To incorporate fresh herbs, chop them finely and mix them in with the other ingredients. This will allow their flavors to infuse throughout the salad. You can also use dried herbs if fresh ones aren’t available, but remember that dried herbs are more potent. Use about one-third of the amount you would use for fresh herbs. This simple addition can make your bow tie pasta salad burst with flavor, making it even more enjoyable!

Breakdown of Time for Bow Tie Pasta Salad Recipe

Prep Time

Preparing your bow tie pasta salad is quick and easy! The prep time for this recipe is about 15 minutes. During this time, you will gather all your ingredients, chop the vegetables, and mix the dressing. Having everything ready before you start cooking will make the process smoother. So, grab your cutting board and knife, and let’s get chopping!

Cooking Time

The cooking time for the bow tie pasta is approximately 10 minutes. You’ll need to boil the pasta in salted water until it reaches that perfect al dente texture. Remember, it’s important to keep an eye on the clock to avoid overcooking. Once the pasta is done, drain it and rinse it under cold water to cool it down. This step is crucial for a refreshing salad!

Total Time

In total, you can expect to spend about 25 minutes on the preparation and cooking of your bow tie pasta salad. However, don’t forget to factor in the chilling time! It’s best to let the salad sit in the refrigerator for at least 30 minutes. This allows the flavors to meld beautifully, making your salad even more delicious. So, while the active time is short, the total time from start to finish is about 55 minutes, including chilling. It’s well worth the wait for such a tasty dish!

Nutritional Information for Bow Tie Pasta Salad Recipe

Calories in Bow Tie Pasta Salad

When it comes to enjoying a delicious bow tie pasta salad, knowing the calorie content can help you make informed choices. Each serving of this delightful salad contains approximately 220 calories. This makes it a light yet satisfying option for lunch or dinner. The combination of fresh vegetables and pasta provides a balanced meal without overwhelming your calorie intake.

Protein Content

Protein is an essential nutrient that helps build and repair tissues in our bodies. In each serving of bow tie pasta salad, you’ll find about 7 grams of protein. This protein mainly comes from the feta cheese and any optional add-ins you choose to include, such as grilled chicken or chickpeas. If you’re looking to boost the protein content even further, consider adding more protein-rich ingredients to your salad. This way, you can enjoy a nutritious meal that keeps you feeling full and energized!

Sodium Levels

Sodium is another important factor to consider when enjoying your bow tie pasta salad. Each serving contains around 400 milligrams of sodium. This amount can vary based on the type of Italian dressing you use and any additional ingredients you add. If you’re watching your sodium intake, you can opt for a low-sodium dressing or make your own at home. This way, you can enjoy the flavors of your salad while keeping your sodium levels in check.

FAQs about Bow Tie Pasta Salad Recipe

Can I make Bow Tie Pasta Salad ahead of time?

Absolutely! Making bow tie pasta salad ahead of time is a great idea. In fact, it often tastes even better after sitting for a while. Preparing it a few hours or even a day in advance allows the flavors to meld beautifully. Just remember to cover it tightly and store it in the refrigerator. This way, you can enjoy a delicious, chilled salad whenever you’re ready to serve it!

What can I substitute for bow tie pasta?

If you don’t have bow tie pasta on hand, don’t worry! You can easily substitute it with other pasta shapes. Options like rotini, fusilli, or even penne work well. These shapes hold onto the dressing and ingredients nicely, just like bow tie pasta. If you prefer a gluten-free option, look for gluten-free pasta varieties available in stores. They can be a great alternative while still providing that satisfying texture!

How long does Bow Tie Pasta Salad last in the fridge?

Bow tie pasta salad can last in the fridge for up to 3 days when stored properly in an airtight container. However, keep in mind that the vegetables may lose some of their crunch over time. If you notice the salad becoming a bit soggy, you can add a splash of dressing before serving to refresh it. Enjoying it within a couple of days is best for optimal taste and texture!

Conclusion on Bow Tie Pasta Salad Recipe

Final Thoughts on Enjoying Bow Tie Pasta Salad

In conclusion, bow tie pasta salad is a delightful dish that combines vibrant flavors and fresh ingredients. Its unique shape and colorful components make it not only visually appealing but also a nutritious option for any meal. Whether you’re preparing it for a family gathering, a picnic, or a simple weeknight dinner, this salad is sure to impress.

With its versatility, you can easily customize the recipe to suit your taste. From adding proteins like grilled chicken to experimenting with different dressings, the possibilities are endless. Plus, the ease of preparation and the ability to make it ahead of time make it a practical choice for busy lifestyles.

As you enjoy your bow tie pasta salad, remember that it’s not just about the food; it’s about sharing moments with family and friends. This salad can be a centerpiece at gatherings, bringing people together over delicious flavors. So, gather your ingredients, get creative, and savor every bite of this delightful dish!

Grilled BBQ Chicken Breasts Recipe is a must-try!

Introduction to Grilled BBQ Chicken Breasts Recipe

Grilled BBQ chicken breasts are a delightful dish that brings joy to many tables. This recipe is not just about cooking; it’s about creating memories with family and friends. The smoky flavor from the grill combined with the tangy sweetness of BBQ sauce makes this dish a favorite for gatherings, picnics, or even a cozy dinner at home.

Why Grilled BBQ Chicken Breasts are a Favorite

There are several reasons why grilled BBQ chicken breasts are loved by so many. First, they are incredibly easy to prepare. With just a few ingredients, you can whip up a delicious meal in no time. Second, chicken breasts are a lean source of protein, making them a healthy choice for those watching their diet. Plus, they are versatile! You can customize the flavors to suit your taste.

Another reason for their popularity is the grilling process itself. Grilling adds a unique flavor that you simply can’t achieve with other cooking methods. The high heat caramelizes the sugars in the BBQ sauce, creating a beautiful glaze that is both tasty and visually appealing. Whether you’re a seasoned grill master or a beginner, this recipe is sure to impress.

Lastly, grilled BBQ chicken breasts are perfect for any occasion. They can be served at summer barbecues, family dinners, or even meal prep for the week. The leftovers, if there are any, can be used in salads, sandwiches, or wraps, making them a practical choice for busy lifestyles.

In the following sections, we will dive deeper into the ingredients, preparation steps, and tips to ensure your grilled BBQ chicken breasts turn out perfectly every time. Get ready to fire up the grill and enjoy a meal that everyone will love!

Ingredients for Grilled BBQ Chicken Breasts Recipe

To create the perfect grilled BBQ chicken breasts, you’ll need a handful of simple ingredients. Each one plays a vital role in enhancing the flavor and ensuring a juicy, tender result. Here’s what you’ll need:

  • 2 pounds boneless, skinless chicken breasts: This is the star of the dish. Choose fresh chicken for the best taste.
  • 1 cup BBQ sauce: Use your favorite brand. The sauce adds sweetness and tang, making the chicken irresistible.
  • 2 tablespoons olive oil: This helps to keep the chicken moist and adds a rich flavor.
  • 1 teaspoon garlic powder: Garlic powder gives a savory kick that complements the BBQ sauce.
  • 1 teaspoon onion powder: This adds depth to the flavor profile, making the chicken even tastier.
  • 1 teaspoon smoked paprika: Smoked paprika brings a subtle smokiness that enhances the grilled flavor.
  • 1 teaspoon salt: Salt is essential for bringing out the natural flavors of the chicken.
  • 1/2 teaspoon black pepper: A little heat from black pepper balances the sweetness of the BBQ sauce.
  • 1 tablespoon apple cider vinegar: This adds a tangy note that brightens the overall flavor.

Gathering these ingredients is the first step toward creating a delicious meal. Each component works together to create a mouthwatering dish that everyone will enjoy. Now that you have your ingredients ready, let’s move on to the preparation steps!

Step-by-Step Preparation of Grilled BBQ Chicken Breasts Recipe

Now that you have gathered all your ingredients, it’s time to dive into the preparation of your grilled BBQ chicken breasts. Following these steps will ensure that your chicken is flavorful, juicy, and perfectly cooked. Let’s get started!

Step 1: Marinating the Chicken

Marinating the chicken is a crucial step that enhances its flavor. Start by mixing the olive oil, garlic powder, onion powder, smoked paprika, salt, and black pepper in a small bowl. This mixture will serve as your marinade. Once combined, rub the marinade evenly over the chicken breasts. Make sure every piece is well-coated to absorb all those delicious flavors.

After marinating, let the chicken sit for at least 15 minutes. This resting time allows the flavors to penetrate the meat, making it more delicious. If you have time, consider marinating the chicken for a few hours or even overnight in the refrigerator. This extra time will deepen the flavors even more!

Step 2: Prepping the Grill

While the chicken is marinating, it’s time to prepare your grill. Preheat your grill to medium-high heat, which is about 400°F. This temperature is perfect for grilling chicken breasts, as it allows for a nice sear while keeping the inside juicy.

Before placing the chicken on the grill, make sure the grates are clean. You can use a grill brush to remove any leftover residue from previous grilling sessions. Additionally, lightly oil the grates with a paper towel dipped in oil to prevent sticking. This simple step will help you achieve those beautiful grill marks!

Step 3: Grilling the Chicken

Once your grill is hot and ready, it’s time to place the marinated chicken breasts on the grates. Cook the chicken for about 6-7 minutes on one side. Avoid moving the chicken around too much; this will help create a nice sear.

After the first side is cooked, flip the chicken over. This is where the magic happens! You’ll want to brush a generous amount of BBQ sauce on the cooked side. This adds a layer of flavor and helps create a sticky glaze as it cooks. Grill for another 6-7 minutes.

Step 4: Applying the BBQ Sauce

After flipping the chicken for the second time, it’s time to apply more BBQ sauce. Brush the other side with sauce and let it cook for an additional 2-3 minutes. This step is essential for achieving that sweet, tangy flavor that everyone loves.

To ensure your chicken is fully cooked, use a meat thermometer. The internal temperature should reach 165°F. This ensures that the chicken is safe to eat while remaining juicy and tender.

Step 5: Resting the Chicken

Once the chicken is cooked to perfection, remove it from the grill. Let it rest for about 5 minutes before slicing. Resting allows the juices to redistribute throughout the meat, making each bite tender and flavorful.

If you like, drizzle some extra BBQ sauce over the chicken before serving. This adds an extra burst of flavor and makes the dish even more appealing. Now, your grilled BBQ chicken breasts are ready to be enjoyed!

Variations of Grilled BBQ Chicken Breasts Recipe

While the classic grilled BBQ chicken breasts recipe is delicious on its own, there are many ways to switch things up! Exploring different marinades and cooking methods can add exciting flavors and textures to your dish. Let’s dive into some tasty variations that you can try!

Different Marinades to Try

Marinades are a fantastic way to infuse your chicken with unique flavors. Here are a few ideas to get you started:

  • Citrus Marinade: Combine the juice of 2 limes, 2 tablespoons of honey, and 1 teaspoon of cumin. This marinade adds a refreshing zing to your chicken.
  • Honey Mustard Marinade: Mix 1/4 cup of honey, 1/4 cup of Dijon mustard, and 1 tablespoon of soy sauce. This sweet and tangy blend is sure to please!
  • Teriyaki Marinade: Use 1/4 cup of teriyaki sauce, 1 tablespoon of sesame oil, and 1 teaspoon of grated ginger. This Asian-inspired marinade gives a delightful twist.
  • Spicy Chipotle Marinade: Blend 2 tablespoons of chipotle sauce with 1 tablespoon of lime juice and 1 teaspoon of garlic powder. This will add a smoky heat to your chicken.

Feel free to experiment with these marinades! Marinating your chicken for a few hours or overnight will enhance the flavors even more.

Alternative Cooking Methods

If grilling isn’t an option, don’t worry! There are several other cooking methods that can yield delicious results:

  • Baking: Preheat your oven to 375°F. Place the marinated chicken breasts in a baking dish and cover with foil. Bake for 25-30 minutes, then remove the foil and brush with BBQ sauce. Bake for an additional 10 minutes to caramelize the sauce.
  • Stovetop Searing: Heat a skillet over medium-high heat and add a little olive oil. Sear the chicken breasts for 5-6 minutes on each side. Finish by brushing with BBQ sauce and covering the skillet for a few minutes to let the sauce set.
  • Slow Cooking: Place the marinated chicken in a slow cooker. Cook on low for 4-6 hours or high for 2-3 hours. Add BBQ sauce during the last hour of cooking for a rich flavor.

These alternative methods can help you enjoy grilled BBQ chicken breasts even when you can’t fire up the grill. Each method brings its own unique taste and texture, so feel free to try them all!

Cooking Note for Grilled BBQ Chicken Breasts Recipe

When it comes to grilling BBQ chicken breasts, a few key points can make a big difference in the outcome. Understanding these cooking notes will help you achieve the best results every time you fire up the grill.

First, always start with high-quality chicken breasts. Fresh, organic chicken not only tastes better but also tends to be juicier. If possible, choose chicken that is free from antibiotics and hormones. This choice not only benefits your health but also enhances the flavor of your dish.

Next, pay attention to the thickness of the chicken breasts. If they are uneven, consider pounding them to an even thickness. This ensures that they cook evenly, preventing some parts from drying out while others remain undercooked. A meat mallet or rolling pin works well for this task.

Another important note is to avoid flipping the chicken too often. Letting it cook undisturbed for the first few minutes allows for a nice sear to form. This sear locks in the juices and creates that delicious grilled flavor. Patience is key here!

Lastly, always use a meat thermometer to check for doneness. Chicken should reach an internal temperature of 165°F to be safe for consumption. This tool is invaluable for ensuring that your chicken is perfectly cooked without being dry.

By keeping these cooking notes in mind, you’ll be well on your way to mastering the art of grilling BBQ chicken breasts. Enjoy the process and the delicious results!

Serving Suggestions for Grilled BBQ Chicken Breasts Recipe

Once your grilled BBQ chicken breasts are ready, it’s time to think about how to serve them. The right side dishes and creative serving ideas can elevate your meal and make it even more enjoyable. Here are some delicious suggestions to complement your chicken dish!

Side Dishes that Pair Well

Choosing the right side dishes can enhance the flavors of your grilled BBQ chicken breasts. Here are some tasty options:

  • Coleslaw: A crunchy coleslaw adds a refreshing contrast to the smoky chicken. The creamy dressing balances the flavors perfectly.
  • Grilled Vegetables: Toss some bell peppers, zucchini, and corn on the grill alongside your chicken. The charred veggies add color and nutrition to your plate.
  • Potato Salad: A classic potato salad is a hearty side that pairs wonderfully with BBQ chicken. The creamy texture complements the grilled flavors.
  • Rice Pilaf: Fluffy rice pilaf with herbs and spices is a great way to soak up any extra BBQ sauce. It’s a simple yet satisfying side.
  • Baked Beans: Sweet and savory baked beans are a traditional BBQ side. Their rich flavor pairs beautifully with the chicken.

Feel free to mix and match these sides based on your preferences and the occasion. Each option brings its own unique taste to the table!

Creative Serving Ideas

Serving your grilled BBQ chicken breasts creatively can make your meal more exciting. Here are some fun ideas:

  • BBQ Chicken Sandwiches: Slice the grilled chicken and serve it on a toasted bun with extra BBQ sauce, lettuce, and pickles. This makes for a delicious and easy meal.
  • Chicken Tacos: Shred the chicken and fill soft tortillas with it. Top with avocado, salsa, and cilantro for a fresh twist.
  • Salad Toppers: Dice the grilled chicken and add it to a fresh salad. Toss with your favorite dressing for a light and healthy meal.
  • Skewers: Cut the chicken into cubes and thread them onto skewers with veggies. Grill for a few more minutes for a fun and portable meal.
  • BBQ Chicken Pizza: Use the grilled chicken as a topping for pizza. Add cheese, onions, and peppers for a delicious BBQ chicken pizza.

These creative serving ideas can turn your grilled BBQ chicken breasts into a variety of meals, making them perfect for any occasion. Enjoy experimenting with different presentations and flavors!

Tips for Perfect Grilled BBQ Chicken Breasts Recipe

To achieve the best grilled BBQ chicken breasts, a few tips can make all the difference. These simple yet effective strategies will help you create a dish that is juicy, flavorful, and perfectly cooked. Let’s explore some essential tips!

Choosing the Right Chicken Breasts

When it comes to chicken, quality matters. Start by selecting fresh, boneless, skinless chicken breasts. Look for chicken that is pink and plump, with no signs of discoloration. Organic or free-range chicken is often a better choice, as it tends to be more flavorful and tender.

Consider the size of the chicken breasts as well. If they are too thick, they may cook unevenly. For the best results, choose chicken breasts that are similar in size. If you have larger pieces, you can pound them to an even thickness. This helps them cook uniformly, ensuring that every bite is juicy and delicious.

Ensuring Even Cooking

Even cooking is key to perfect grilled BBQ chicken breasts. To achieve this, follow these tips:

  • Preheat the Grill: Always preheat your grill to the right temperature. A hot grill helps sear the chicken, locking in moisture and flavor.
  • Use a Meat Thermometer: Invest in a good meat thermometer. This tool is essential for checking the internal temperature. Chicken should reach 165°F to be safe to eat.
  • Let the Chicken Rest: After grilling, allow the chicken to rest for a few minutes. This resting period lets the juices redistribute, making the chicken more tender.
  • Flip Sparingly: Avoid flipping the chicken too often. Let it cook undisturbed for the first few minutes to develop a nice sear. This also helps prevent drying out.

By following these tips, you’ll ensure that your grilled BBQ chicken breasts are not only safe to eat but also bursting with flavor. Enjoy the grilling process and the delicious results!

Breakdown of Time for Grilled BBQ Chicken Breasts Recipe

Understanding the time needed for each step in the grilled BBQ chicken breasts recipe is essential for planning your meal. Here’s a breakdown of the time you’ll need for preparation and cooking, ensuring everything runs smoothly.

Prep Time

The prep time for this recipe is quite manageable. You’ll need about 15 minutes to gather your ingredients and prepare the marinade. This includes mixing the marinade and coating the chicken breasts. If you choose to marinate the chicken for longer, you can set it aside for a few hours or overnight, but the initial prep remains at 15 minutes.

Cooking Time

Once your grill is preheated, the cooking time for the chicken breasts is approximately 15-20 minutes. This includes:

  • 6-7 minutes on the first side
  • 6-7 minutes on the second side with BBQ sauce
  • 2-3 minutes after flipping again with more BBQ sauce

Always check the internal temperature to ensure it reaches 165°F for safe consumption.

Total Time

In total, if you include the marinating time, the total time can vary. However, if you stick to the minimum marinating time of 15 minutes, the total time for the entire process is about 30-35 minutes. This includes prep and cooking time, making it a quick and delicious meal option!

By keeping track of these time frames, you can easily plan your meal and enjoy perfectly grilled BBQ chicken breasts without any stress. Happy grilling!

Nutritional Information for Grilled BBQ Chicken Breasts Recipe

Understanding the nutritional content of your meals is essential for maintaining a balanced diet. Grilled BBQ chicken breasts are not only delicious but also provide a good source of nutrients. Here’s a breakdown of the nutritional information for this recipe, helping you make informed choices.

Calories

Each serving of grilled BBQ chicken breasts contains approximately 320 calories. This makes it a satisfying option for those looking to enjoy a hearty meal without overindulging. The calorie count is primarily derived from the chicken and the BBQ sauce, which adds flavor and sweetness.

Protein Content

One of the standout features of this dish is its high protein content. Each serving provides about 30 grams of protein. This makes grilled BBQ chicken breasts an excellent choice for anyone looking to increase their protein intake, whether for muscle building or overall health. Protein is essential for repairing tissues and supporting various bodily functions.

Sodium Levels

When it comes to sodium, each serving contains around 800 milligrams. While sodium is necessary for bodily functions, it’s important to monitor your intake, especially if you are watching your salt consumption. To reduce sodium levels, consider using low-sodium BBQ sauce or making your own sauce at home. This way, you can control the amount of salt added to your dish.

By being aware of the nutritional information, you can enjoy your grilled BBQ chicken breasts while keeping your dietary goals in mind. This dish is not only tasty but also a great addition to a healthy eating plan!

FAQs about Grilled BBQ Chicken Breasts Recipe

How long should I marinate the chicken?

Marinating the chicken is essential for flavor. Ideally, you should marinate the chicken for at least 15 minutes. However, for the best results, consider marinating it for a few hours or even overnight. This extra time allows the flavors to penetrate deeply, making the chicken even more delicious.

Can I use skinless chicken breasts for this recipe?

Absolutely! Skinless chicken breasts are perfect for this recipe. They are lean and cook well on the grill. Just make sure to follow the same marinating and cooking instructions to ensure they remain juicy and flavorful. Skinless chicken breasts are a healthy choice that pairs wonderfully with BBQ sauce.

What type of BBQ sauce is best for grilling?

The best BBQ sauce for grilling really depends on your personal taste. Some prefer a sweet and tangy sauce, while others enjoy a smoky or spicy flavor. Look for sauces that have a good balance of sweetness and acidity. You can also experiment with homemade BBQ sauces to customize the flavors to your liking. Whichever you choose, make sure it complements the chicken well!

How do I know when the chicken is fully cooked?

To ensure your chicken is fully cooked, use a meat thermometer. The internal temperature should reach 165°F. This temperature guarantees that the chicken is safe to eat while remaining juicy. If you don’t have a thermometer, you can cut into the thickest part of the chicken; the juices should run clear, and the meat should no longer be pink. Always prioritize food safety when grilling!

Conclusion on Grilled BBQ Chicken Breasts Recipe

In conclusion, grilled BBQ chicken breasts are a fantastic dish that combines simplicity with flavor. This recipe is not only easy to follow but also allows for creativity in the kitchen. Whether you’re hosting a summer barbecue or preparing a quick weeknight dinner, this dish is sure to impress.

By using fresh ingredients and following the steps outlined, you can achieve juicy, flavorful chicken that everyone will love. The versatility of this recipe means you can experiment with different marinades and cooking methods, making it a staple in your meal rotation.

Remember, the key to perfect grilled BBQ chicken breasts lies in the details. From marinating the chicken to ensuring even cooking, each step contributes to the final result. Don’t forget to pair your chicken with delicious side dishes and creative serving ideas to elevate your meal.

So, fire up your grill and get ready to enjoy a delightful dish that brings people together. With this grilled BBQ chicken breasts recipe, you’re not just cooking; you’re creating memories and sharing joy with those you love. Happy grilling!

Creamy Garlic Parmesan Chicken is a must-try recipe!

Introduction to Creamy Garlic Parmesan Chicken

Creamy Garlic Parmesan Chicken. This delightful recipe is not only easy to prepare but also brings a touch of elegance to your dinner table. Whether you’re cooking for family or hosting friends, this dish is sure to impress.

What Makes Creamy Garlic Parmesan Chicken Special?

Creamy Garlic Parmesan Chicken apart is its perfect blend of ingredients. The chicken breasts are tender and juicy, while the creamy garlic sauce adds a burst of flavor. The combination of heavy cream and Parmesan cheese creates a luscious sauce that clings to the chicken beautifully. Plus, the addition of garlic gives it a savory kick that elevates the dish to new heights.

Another reason this recipe shines is its versatility. You can easily customize it to suit your taste. Want to add some veggies? Go ahead! Prefer a bit of heat? Toss in some red pepper flakes. The possibilities are endless, making it a go-to recipe for any occasion.

Creamy Garlic Parmesan Chicken that will leave everyone asking for seconds!

Ingredients for Creamy Garlic Parmesan Chicken

Creamy Garlic Parmesan Chicken, you’ll need a few simple ingredients. Each one plays a vital role in building the rich flavors and creamy texture that make this dish so special. Here’s what you’ll need:

  • 2 tablespoons olive oil: This will help cook the chicken and add a nice flavor.
  • 4 boneless, skinless chicken breasts: About 1.5 pounds, these are the star of the dish.
  • 1 teaspoon salt: Essential for seasoning the chicken perfectly.
  • 1/2 teaspoon black pepper: Adds a touch of spice to enhance the flavor.
  • 4 cloves garlic, minced: Fresh garlic gives the sauce its wonderful aroma and taste.
  • 1 cup heavy cream: This is what makes the sauce creamy and rich.
  • 1 cup grated Parmesan cheese: Adds a savory, cheesy flavor that complements the dish.
  • 1 teaspoon Italian seasoning: A blend of herbs that brings a delightful taste.
  • 1/2 teaspoon red pepper flakes (optional): For those who enjoy a little heat in their meal.
  • Fresh parsley, chopped: This is for garnish, adding a pop of color and freshness.

Creamy Garlic Parmesan Chicken.

Step-by-Step Preparation of Creamy Garlic Parmesan Chicken

Creamy Garlic Parmesan Chicken is straightforward and fun! Follow these steps to create a delicious meal that everyone will love.

Step 1: Preparing the Chicken

First, let’s get the chicken ready. Start by heating 2 tablespoons of olive oil in a large skillet over medium-high heat. While the oil heats, season the 4 boneless, skinless chicken breasts with 1 teaspoon of salt and 1/2 teaspoon of black pepper. This seasoning is crucial as it enhances the chicken’s natural flavor.

Once the oil is hot, carefully add the chicken breasts to the skillet. Cook them for about 6-7 minutes on each side. You want the chicken to be golden brown and cooked through, with no pink remaining in the center. After cooking, remove the chicken from the skillet and set it aside on a plate. This step ensures that the chicken stays juicy and tender.

Step 2: Making the Creamy Garlic Sauce

Next, it’s time to make the creamy garlic sauce. In the same skillet, reduce the heat to medium. Add the minced garlic (4 cloves) to the skillet and sauté it for about 1 minute. You want to cook it just until it becomes fragrant, but be careful not to burn it, as burnt garlic can taste bitter.

After the garlic is ready, pour in 1 cup of heavy cream. Stir the mixture well to combine the garlic with the cream. Bring this mixture to a gentle simmer. As it heats, the cream will start to thicken, creating a rich base for your sauce.

Step 3: Combining Chicken and Sauce

Now, it’s time to bring everything together! Add 1 cup of grated Parmesan cheese to the simmering cream. Also, sprinkle in 1 teaspoon of Italian seasoning and, if you like a bit of heat, add 1/2 teaspoon of red pepper flakes. Stir the sauce until the cheese melts completely, creating a creamy and flavorful sauce.

Once the sauce is ready, return the cooked chicken to the skillet. Spoon the creamy sauce over the chicken, ensuring each piece is well-coated. Let it simmer for an additional 2-3 minutes. This allows the chicken to heat through and soak up some of that delicious sauce.

Step 4: Final Touches and Cooking

Creamy Garlic Parmesan Chicken with freshly chopped parsley. This adds a lovely pop of color and freshness to the dish.

Now, your meal is ready to serve! Pair it with your favorite sides, and enjoy the creamy goodness of this delightful dish. With these simple steps, you’ve created a restaurant-quality meal right in your kitchen!

Variations of Creamy Garlic Parmesan Chicken

Creamy Garlic Parmesan Chicken is delicious on its own, there are many ways to customize this dish. Adding different ingredients can enhance the flavors and make it even more exciting. Here are a couple of variations to consider:

Adding Vegetables to Creamy Garlic Parmesan Chicken

Creamy Garlic Parmesan Chicken is by adding vegetables. Not only do they add color, but they also provide extra vitamins and minerals. Here are some tasty options:

  • Broccoli: Steamed broccoli adds a nice crunch and pairs well with the creamy sauce. Simply add it to the skillet during the last few minutes of cooking.
  • Spinach: Fresh spinach wilts quickly and adds a lovely green color. Stir it into the sauce just before serving for a nutritious boost.
  • Mushrooms: Sauté sliced mushrooms with the garlic for an earthy flavor that complements the dish beautifully.
  • Bell Peppers: Diced bell peppers can add sweetness and a pop of color. Sauté them along with the garlic for a delightful addition.

Feel free to mix and match your favorite vegetables. This not only makes the dish healthier but also adds a variety of textures and flavors!

Spicy Twist on Creamy Garlic Parmesan Chicken

Creamy Garlic Parmesan Chicken a spicy twist. Here are some ideas to spice things up:

  • Red Pepper Flakes: As mentioned in the original recipe, adding red pepper flakes can give your dish a nice kick. Adjust the amount based on your heat preference.
  • Hot Sauce: A few dashes of your favorite hot sauce can elevate the flavor and add a zesty touch. Stir it into the sauce for an extra layer of heat.
  • Jalapeños: Fresh or pickled jalapeños can add a spicy crunch. Slice them thin and sauté them with the garlic for a fiery flavor.
  • Chipotle Peppers: For a smoky flavor, consider adding chopped chipotle peppers in adobo sauce. They bring both heat and depth to the dish.

Creamy Garlic Parmesan Chicken into a dish that excites your taste buds. Experiment with different levels of heat to find your perfect balance!

Cooking Note for Creamy Garlic Parmesan Chicken

Creamy Garlic Parmesan Chicken, there are a few important cooking notes to keep in mind. These tips will help ensure that your dish turns out perfectly every time.

First, always use a meat thermometer to check the chicken’s doneness. The internal temperature should reach 165°F (75°C) to ensure it is safe to eat. This step is crucial for both flavor and food safety.

Next, be mindful of the heat when cooking the garlic. Garlic can burn quickly, leading to a bitter taste. Sauté it just until fragrant, which usually takes about a minute. If you notice it starting to brown too much, reduce the heat immediately.

Additionally, when adding the heavy cream, make sure to stir continuously. This helps prevent the cream from curdling and ensures a smooth, creamy sauce. If you find the sauce too thick, you can thin it out with a splash of chicken broth or water.

Lastly, let the dish rest for a few minutes after cooking. This allows the flavors to meld together and makes serving easier. The creamy sauce will also thicken slightly as it cools, enhancing the overall texture.

Creamy Garlic Parmesan Chicken that everyone will love. Happy cooking!

Serving Suggestions for Creamy Garlic Parmesan Chicken

Creamy Garlic Parmesan Chicken is ready, it’s time to think about how to serve it. The right sides can elevate your meal and create a well-rounded dining experience. Here are some delicious serving suggestions to complement your dish:

  • Garlic Bread: A classic pairing! Serve warm, buttery garlic bread on the side. It’s perfect for soaking up the creamy sauce.
  • Rice: Fluffy white rice or a flavorful risotto can be a great base for the chicken. The rice will absorb the delicious sauce, making every bite delightful.
  • Pasta: Consider serving your chicken over a bed of pasta. Fettuccine or penne works wonderfully, allowing the creamy sauce to cling to the noodles.
  • Steamed Vegetables: Lightly steamed vegetables like green beans, asparagus, or carrots add color and nutrition to your plate. They also provide a nice contrast to the richness of the chicken.
  • Salad: A fresh garden salad with a light vinaigrette can balance the richness of the dish. The crisp greens and veggies will add a refreshing touch.
  • Mashed Potatoes: Creamy mashed potatoes are another comforting option. They pair beautifully with the sauce, making for a hearty meal.

Creamy Garlic Parmesan Chicken will shine on the dinner table!

Tips for Perfecting Creamy Garlic Parmesan Chicken

Creamy Garlic Parmesan Chicken truly exceptional, consider these helpful tips. They will guide you in achieving the best flavor and texture, ensuring that your dish impresses everyone at the table.

  • Choose Quality Chicken: Opt for fresh, high-quality chicken breasts. Organic or free-range options often have better flavor and texture. This choice can elevate your dish significantly.
  • Marinate for Extra Flavor: If you have time, marinate the chicken in olive oil, garlic, and herbs for at least 30 minutes before cooking. This step infuses the chicken with flavor and keeps it moist.
  • Use Fresh Garlic: Freshly minced garlic provides a stronger flavor than pre-minced options. It enhances the overall taste of the sauce, making it more aromatic and delicious.
  • Adjust the Creaminess: If you prefer a lighter sauce, substitute half of the heavy cream with chicken broth. This will still give you a creamy texture while reducing calories.
  • Don’t Rush the Sauce: Allow the sauce to simmer gently after adding the cheese. This helps the flavors meld together and creates a smoother consistency. Stir occasionally to prevent sticking.
  • Experiment with Cheese: While Parmesan is traditional, feel free to mix in other cheeses like mozzarella or Asiago for a different flavor profile. Just ensure they melt well into the sauce.
  • Garnish Generously: Don’t skip the fresh parsley! It adds a burst of color and freshness. You can also sprinkle some extra cheese on top for an appealing finish.
  • Serve Immediately: For the best experience, serve your Creamy Garlic Parmesan Chicken right after cooking. The sauce is creamiest when fresh, and the chicken will be at its juiciest.

Creamy Garlic Parmesan Chicken that is not only delicious but also visually stunning. Enjoy the process and savor every bite!

Breakdown of Time for Creamy Garlic Parmesan Chicken

Creamy Garlic Parmesan Chicken can help you plan your meal better. Here’s a simple breakdown of the time involved in each step of the process.

Prep Time

Creamy Garlic Parmesan Chicken is quite short. You’ll need about 10-15 minutes to gather your ingredients and prepare the chicken. This includes seasoning the chicken breasts and mincing the garlic. Having everything ready before you start cooking makes the process smoother and more enjoyable.

Cooking Time

Once you start cooking, the total cooking time is approximately 20-25 minutes. This includes:

  • Cooking the Chicken: About 12-14 minutes to cook the chicken breasts until they are golden brown and fully cooked.
  • Making the Sauce: Around 8-10 minutes to sauté the garlic, add the cream, and melt the cheese into a creamy sauce.
  • Combining Everything: An additional 2-3 minutes to let the chicken soak in the sauce and heat through.

Total Time

Creamy Garlic Parmesan Chicken a perfect option for a weeknight dinner or a special occasion. With just a little time and effort, you’ll have a delicious meal ready to serve!

Nutritional Information for Creamy Garlic Parmesan Chicken

Creamy Garlic Parmesan Chicken is not only delicious but also provides a good amount of nutrients. Here’s a breakdown of the key nutritional information for this dish:

Calories

Creamy Garlic Parmesan Chicken contains approximately 450 calories. This makes it a satisfying option for dinner without being overly heavy. The calorie count comes primarily from the chicken, heavy cream, and Parmesan cheese, which contribute to the rich flavor and creamy texture.

Protein

One of the standout features of this dish is its high protein content. Each serving provides about 38 grams of protein. This is excellent for muscle repair and growth, making it a great choice for those who are active or looking to maintain a healthy lifestyle. The chicken is the primary source of protein, ensuring you get a hearty serving in every bite.

Sodium

Creamy Garlic Parmesan Chicken contains around 800 milligrams per serving. While this is a reasonable amount for a flavorful dish, it’s important to be mindful of your overall sodium intake, especially if you are watching your salt consumption. You can reduce the sodium by using low-sodium chicken broth or cheese alternatives if desired.

Creamy Garlic Parmesan Chicken is a nutritious meal option that balances flavor and health. With its rich protein content and moderate calorie count, it can fit well into a variety of dietary plans. Enjoy this dish knowing it not only tastes great but also nourishes your body!

FAQs about Creamy Garlic Parmesan Chicken

Can I use chicken thighs instead of breasts for Creamy Garlic Parmesan Chicken?

Creamy Garlic Parmesan Chicken. Thighs are often juicier and more flavorful, making them a great alternative. Just be sure to adjust the cooking time slightly, as thighs may take a bit longer to cook through. Aim for an internal temperature of 165°F (75°C) to ensure they are safe to eat.

How can I make Creamy Garlic Parmesan Chicken healthier?

Creamy Garlic Parmesan Chicken while still keeping it delicious. Here are a few tips:

  • Use Low-Fat Cream: Substitute half of the heavy cream with low-fat milk or Greek yogurt. This will reduce the calorie count while still providing creaminess.
  • Add More Vegetables: Incorporate more vegetables like spinach, broccoli, or zucchini. This not only boosts nutrition but also adds volume to the dish.
  • Choose Leaner Cuts: Opt for skinless chicken thighs or even turkey breast for a leaner protein option.
  • Reduce Cheese: Use less Parmesan cheese or try a lower-fat cheese alternative. You can still achieve a cheesy flavor without all the calories.

What sides pair well with Creamy Garlic Parmesan Chicken?

Creamy Garlic Parmesan Chicken can enhance the meal experience. Here are some delicious options:

  • Garlic Bread: Perfect for soaking up the creamy sauce.
  • Steamed Vegetables: Lightly steamed green beans or asparagus add color and nutrition.
  • Rice or Pasta: Fluffy rice or pasta can absorb the sauce beautifully.
  • Salad: A fresh garden salad with a light dressing balances the richness of the chicken.

Can I make Creamy Garlic Parmesan Chicken ahead of time?

Creamy Garlic Parmesan Chicken ahead of time! Cook the chicken and sauce as directed, then store them separately in airtight containers in the refrigerator. When you’re ready to serve, simply reheat the chicken and sauce together in a skillet over low heat until warmed through. This makes it a convenient option for meal prep or entertaining!

Conclusion on Creamy Garlic Parmesan Chicken

Creamy Garlic Parmesan Chicken is a delightful dish that brings together rich flavors and a creamy texture, making it a favorite for many. Its simplicity in preparation, combined with the ability to customize it to your taste, makes it a versatile option for any meal. Whether you’re cooking for a special occasion or a cozy weeknight dinner, this recipe is sure to impress.

With just a few ingredients, you can create a restaurant-quality meal right in your own kitchen. The tender chicken, paired with the luscious garlic Parmesan sauce, creates a comforting dish that is both satisfying and delicious. Plus, the nutritional benefits, including high protein content and the option to add vegetables, make it a smart choice for health-conscious eaters.

Creamy Garlic Parmesan Chicken can easily adapt to your preferences. From adding vegetables for extra nutrition to spicing it up for those who love heat, the possibilities are endless. So, gather your ingredients, follow the steps, and enjoy the process of creating this wonderful dish.

Creamy Garlic Parmesan Chicken with your loved ones. It’s a meal that not only nourishes the body but also warms the heart. Happy cooking!

Spicy Chicken Tortilla Soup Recipe is a must-try!

Introduction to Spicy Chicken Tortilla Soup Recipe

What Makes This Soup Special?

Spicy Chicken Tortilla Soup is not just a meal; it’s an experience! This delightful dish combines vibrant flavors and textures that dance on your palate. The rich, savory broth is infused with spices like cumin and chili powder, giving it a warm kick. Each spoonful is packed with tender chicken, hearty beans, and sweet corn, making it a filling option for any time of the year. Plus, the garnishes of crispy tortilla strips, creamy avocado, and fresh cilantro add a delightful crunch and freshness. It’s a perfect blend of comfort and excitement!

The Comfort of Homemade Soup

There’s something truly comforting about a bowl of homemade soup. It warms you from the inside out, especially on chilly days. Making Spicy Chicken Tortilla Soup at home allows you to control the ingredients, ensuring freshness and quality. The aroma that fills your kitchen while it simmers is simply irresistible. This soup is not only nourishing but also brings people together. Whether you’re serving it for a family dinner or a gathering with friends, it’s sure to be a hit. So, grab your ingredients and let’s dive into this delicious recipe!

Ingredients for Spicy Chicken Tortilla Soup Recipe

To create a delicious Spicy Chicken Tortilla Soup, you’ll need a variety of fresh ingredients. Each component plays a vital role in building the rich flavors and textures that make this dish so special. Here’s what you’ll need:

  • 2 tablespoons olive oil
  • 1 medium onion, diced
  • 2 cloves garlic, minced
  • 1 bell pepper, diced (any color)
  • 1 teaspoon ground cumin
  • 1 teaspoon chili powder
  • 1/2 teaspoon smoked paprika
  • 1 can (14.5 ounces) diced tomatoes, undrained
  • 4 cups chicken broth
  • 2 cups cooked chicken, shredded
  • 1 can (15 ounces) black beans, rinsed and drained
  • 1 cup corn (fresh, frozen, or canned)
  • Salt and pepper to taste
  • 1/4 cup fresh cilantro, chopped
  • Juice of 1 lime
  • Tortilla strips for garnish
  • Avocado slices for garnish
  • Shredded cheese for garnish (optional)

These ingredients come together to create a hearty and flavorful soup. The olive oil helps to sauté the vegetables, while the spices add warmth and depth. The combination of chicken, beans, and corn ensures that each bowl is satisfying and nutritious. Don’t forget the garnishes! They elevate the dish, adding freshness and texture. Now that you have your ingredients ready, let’s move on to the preparation steps!

Step-by-Step Preparation of Spicy Chicken Tortilla Soup Recipe

Step 1: Preparing the Chicken

To start, you need to prepare the chicken. If you have leftover cooked chicken, that’s perfect! Simply shred it into bite-sized pieces. If you’re starting with raw chicken, you can boil or bake it until fully cooked. Once done, let it cool slightly before shredding. This step is crucial as it adds protein and heartiness to your soup. Remember, the more flavorful the chicken, the better your soup will taste!

Step 2: Sautéing the Vegetables

Next, it’s time to sauté the vegetables. In a large pot, heat the olive oil over medium heat. Add the diced onion and cook for about 5 minutes until it becomes soft and translucent. Then, stir in the minced garlic and diced bell pepper. Cook these for another 2-3 minutes. The aroma will fill your kitchen, making it hard to resist! This step builds the foundation of flavor for your soup.

Step 3: Adding the Spices and Broth

Now, let’s spice things up! Add the ground cumin, chili powder, and smoked paprika to the pot. Stir everything together and let it cook for about a minute. This allows the spices to release their flavors. After that, pour in the can of diced tomatoes along with their juice and the chicken broth. Bring the mixture to a boil. The broth is what makes this soup so comforting and delicious!

Step 4: Simmering the Soup

Once boiling, reduce the heat to a simmer. It’s time to add the shredded chicken, black beans, and corn. Season with salt and pepper to taste. Let the soup simmer for 15-20 minutes. This allows all the flavors to meld together beautifully. You’ll notice the soup thickening slightly, making it even more satisfying. Stir occasionally to prevent anything from sticking to the bottom of the pot.

Step 5: Final Touches and Garnishing

Finally, it’s time for the finishing touches! Just before serving, stir in the chopped cilantro and the juice of one lime. This adds a fresh burst of flavor that brightens the soup. Serve it hot, garnished with crispy tortilla strips, creamy avocado slices, and shredded cheese if you like. These garnishes not only enhance the taste but also add a lovely presentation to your dish. Enjoy your homemade Spicy Chicken Tortilla Soup!

Variations of Spicy Chicken Tortilla Soup Recipe

Vegetarian Option

If you’re looking for a vegetarian twist on the Spicy Chicken Tortilla Soup, you’re in luck! Simply replace the chicken with additional beans or quinoa. Black beans work wonderfully, but you can also use pinto or kidney beans for variety. For a heartier texture, consider adding cooked quinoa. This not only boosts the protein content but also adds a delightful chewiness. Use vegetable broth instead of chicken broth to keep it vegetarian-friendly. The rest of the ingredients remain the same, ensuring you still enjoy that rich, spicy flavor!

Adding Extra Heat

For those who love a fiery kick, adding extra heat is a great option! You can increase the amount of chili powder or add diced jalapeños to the pot when sautéing the vegetables. If you want a smoky flavor, consider adding a dash of cayenne pepper or even some chipotle peppers in adobo sauce. These additions will elevate the spice level, making your soup even more exciting. Just remember to taste as you go, so you can find the perfect balance for your palate!

Alternative Proteins

While shredded chicken is a classic choice, there are many alternative proteins you can use in your Spicy Chicken Tortilla Soup. For a different flavor profile, try using shredded pork or turkey. Both options will add a unique taste while keeping the soup hearty. If you prefer seafood, shrimp can be a delicious addition. Just add the shrimp during the last few minutes of cooking to ensure they don’t overcook. These alternatives will keep your soup fresh and exciting every time you make it!

Cooking Note for Spicy Chicken Tortilla Soup Recipe

When preparing your Spicy Chicken Tortilla Soup, there are a few important cooking notes to keep in mind. First, always taste your soup as it simmers. This allows you to adjust the seasoning to your liking. If you find it needs more flavor, consider adding a pinch of salt or a dash of your favorite hot sauce.

Another tip is to use high-quality chicken broth. The broth is the base of your soup, so a rich, flavorful broth will enhance the overall taste. If you have homemade broth, that’s even better! It adds a personal touch and depth of flavor that store-bought options may lack.

Additionally, if you prefer a thicker soup, you can blend a portion of it. Use an immersion blender to puree some of the soup directly in the pot. This will create a creamier texture while still leaving chunks of chicken and vegetables. Just be careful not to over-blend; you want to maintain some texture!

Lastly, don’t hesitate to experiment with the cooking time. If you have more time, let the soup simmer longer. This will deepen the flavors even more. However, if you’re in a hurry, the suggested cooking time will still yield a delicious result. Enjoy the process, and happy cooking!

Serving Suggestions for Spicy Chicken Tortilla Soup Recipe

Ideal Accompaniments

When it comes to serving your Spicy Chicken Tortilla Soup, the right accompaniments can elevate the meal to new heights. Here are some ideal pairings that complement the flavors of the soup:

  • Fresh Bread: A warm, crusty bread or soft rolls are perfect for dipping into the soup. They soak up the delicious broth and add a satisfying texture.
  • Salad: A light salad with mixed greens, tomatoes, and a zesty vinaigrette can balance the richness of the soup. Consider adding avocado slices for extra creaminess.
  • Rice: Serving the soup with a side of cilantro-lime rice can enhance the meal. The flavors of the rice will harmonize beautifully with the soup.
  • Chips and Salsa: For a fun twist, serve tortilla chips with fresh salsa or guacamole. This adds a crunchy element that pairs well with the soup’s warmth.

These accompaniments not only enhance the dining experience but also provide a variety of textures and flavors that make your meal more enjoyable. Feel free to mix and match based on your preferences!

Presentation Tips

Presentation plays a key role in making your Spicy Chicken Tortilla Soup visually appealing. Here are some tips to make your dish stand out:

  • Use Colorful Bowls: Serve the soup in vibrant bowls to highlight the colorful ingredients. Bright colors can make the dish more inviting.
  • Layer the Garnishes: When garnishing, layer the tortilla strips, avocado slices, and cheese artfully on top. This creates a beautiful visual effect.
  • Fresh Herbs: Sprinkle extra chopped cilantro on top just before serving. The fresh green color adds a pop and enhances the aroma.
  • Lime Wedges: Place lime wedges on the side of the bowl. This not only looks appealing but also allows guests to add a splash of lime juice to their liking.

By following these presentation tips, you’ll create a dish that is not only delicious but also a feast for the eyes. Enjoy serving your Spicy Chicken Tortilla Soup with pride!

Tips for Perfecting Your Spicy Chicken Tortilla Soup Recipe

Ingredient Substitutions

Sometimes, you may not have all the ingredients on hand. No worries! Here are some easy substitutions to keep your Spicy Chicken Tortilla Soup delicious:

  • Olive Oil: You can use vegetable oil or avocado oil instead. Both will work well for sautéing.
  • Chicken: If you don’t have cooked chicken, rotisserie chicken is a great shortcut. You can also use canned chicken for convenience.
  • Beans: If black beans aren’t available, pinto beans or chickpeas can be used instead. They add a different flavor but still provide protein.
  • Broth: For a vegetarian option, vegetable broth is perfect. It keeps the soup flavorful without meat.
  • Spices: If you don’t have smoked paprika, regular paprika or even cayenne pepper can add a nice touch. Adjust the amount based on your spice preference.

These substitutions ensure you can still enjoy a hearty bowl of soup, even if you’re missing a few ingredients. Feel free to get creative and make the recipe your own!

Storage and Reheating Tips

Making a big batch of Spicy Chicken Tortilla Soup? Great idea! Here’s how to store and reheat it properly:

  • Storage: Allow the soup to cool completely before transferring it to an airtight container. It can be stored in the refrigerator for up to 3-4 days. For longer storage, freeze it in freezer-safe containers for up to 3 months.
  • Reheating: When you’re ready to enjoy your soup again, reheat it on the stove over medium heat. Stir occasionally until it’s heated through. If frozen, let it thaw in the refrigerator overnight before reheating.
  • Texture Tip: If the soup thickens too much after refrigeration, add a splash of chicken or vegetable broth while reheating. This will help restore its original consistency.

By following these storage and reheating tips, you can enjoy your Spicy Chicken Tortilla Soup multiple times without losing any flavor. It’s a perfect meal prep option!

Breakdown of Time for Spicy Chicken Tortilla Soup Recipe

Prep Time

Preparing your Spicy Chicken Tortilla Soup is quick and easy! The prep time typically takes about 15-20 minutes. This includes gathering your ingredients, dicing the vegetables, and shredding the chicken if it’s not already cooked. Having everything ready before you start cooking makes the process smoother and more enjoyable. So, take a moment to chop, measure, and organize your ingredients!

Cooking Time

The cooking time for this delicious soup is around 30-35 minutes. This includes sautéing the vegetables, simmering the soup, and allowing the flavors to meld together. The actual cooking is quite straightforward, as you’ll be combining ingredients and letting them work their magic on the stove. Just keep an eye on the pot, and you’ll have a warm, comforting soup in no time!

Total Time

In total, you can expect to spend about 45-55 minutes from start to finish. This includes both prep and cooking time. It’s a perfect option for a weeknight dinner or a cozy weekend meal. Plus, the time spent is well worth it for the delicious flavors and comforting warmth of your homemade Spicy Chicken Tortilla Soup. Enjoy every moment of the cooking process!

Nutritional Information for Spicy Chicken Tortilla Soup Recipe

Calories

When it comes to enjoying a hearty bowl of Spicy Chicken Tortilla Soup, knowing the calorie content can help you make informed choices. Each serving of this delicious soup contains approximately 320 calories. This makes it a satisfying option without being overly heavy. The balance of ingredients ensures you get a fulfilling meal that won’t weigh you down. Plus, with the variety of toppings, you can customize your bowl while keeping an eye on your calorie intake!

Protein

Protein is essential for a balanced diet, and this soup delivers! Each serving provides about 28 grams of protein. The shredded chicken and black beans contribute significantly to this protein content, making it a great choice for those looking to boost their protein intake. Whether you’re an athlete or just someone who wants to feel full longer, this soup is a fantastic option. It supports muscle health and keeps you energized throughout the day!

Sodium

Sodium is another important factor to consider, especially for those watching their salt intake. Each serving of Spicy Chicken Tortilla Soup contains around 800 milligrams of sodium. This amount can vary based on the chicken broth and canned ingredients you use. To reduce sodium levels, opt for low-sodium broth and rinse canned beans thoroughly. This way, you can enjoy the rich flavors of the soup while keeping your sodium intake in check. Always remember to taste and adjust seasoning as needed!

FAQs about Spicy Chicken Tortilla Soup Recipe

Can I make Spicy Chicken Tortilla Soup Recipe in advance?

Absolutely! Making your Spicy Chicken Tortilla Soup in advance is a great idea. In fact, the flavors often deepen and improve after sitting for a day. To do this, simply prepare the soup as directed and let it cool completely. Then, store it in an airtight container in the refrigerator for up to 3-4 days. If you want to keep it longer, consider freezing it. Just remember to leave some space in the container, as the soup will expand when frozen. When you’re ready to enjoy it, thaw it in the fridge overnight and reheat on the stove. It’s a convenient way to have a delicious meal ready to go!

What can I use instead of chicken in the Spicy Chicken Tortilla Soup Recipe?

If you’re looking for alternatives to chicken, there are plenty of options! For a vegetarian version, you can use additional beans, such as pinto or kidney beans, or even quinoa for added texture. If you prefer a different protein, shredded pork or turkey can work well too. For seafood lovers, shrimp is a tasty option; just add it during the last few minutes of cooking to prevent overcooking. These substitutions will keep your soup hearty and flavorful while catering to different dietary preferences!

How can I make the Spicy Chicken Tortilla Soup Recipe less spicy?

If you want to tone down the heat in your Spicy Chicken Tortilla Soup, there are a few simple adjustments you can make. First, reduce the amount of chili powder and omit the smoked paprika. You can also use mild diced tomatoes instead of regular ones. If you still want some flavor without the heat, consider adding sweet bell peppers or corn for a touch of sweetness. For an even milder option, serve the soup with a dollop of sour cream or yogurt, which can help balance the spice. Enjoy your soup at your preferred heat level!

What toppings are best for Spicy Chicken Tortilla Soup Recipe?

Toppings can truly elevate your Spicy Chicken Tortilla Soup! Here are some of the best options to consider:

  • Tortilla Strips: Crispy tortilla strips add a delightful crunch and texture.
  • Avocado Slices: Creamy avocado complements the soup’s flavors and adds richness.
  • Shredded Cheese: A sprinkle of cheese, like cheddar or Monterey Jack, melts beautifully and enhances the taste.
  • Fresh Cilantro: Chopped cilantro adds a burst of freshness and color.
  • Lime Wedges: A squeeze of lime juice brightens the flavors and adds a zesty kick.

Feel free to mix and match these toppings based on your preferences. They not only enhance the flavor but also make your soup visually appealing!

Conclusion on Spicy Chicken Tortilla Soup Recipe

In conclusion, the Spicy Chicken Tortilla Soup is a delightful dish that brings warmth and comfort to any table. With its rich flavors, hearty ingredients, and customizable options, it’s perfect for family dinners or gatherings with friends. The combination of tender chicken, nutritious beans, and sweet corn creates a satisfying meal that everyone will love.

Moreover, this recipe is incredibly versatile. Whether you choose to make it vegetarian, add extra heat, or experiment with different proteins, the possibilities are endless. Plus, the ease of preparation makes it a go-to option for busy weeknights or cozy weekends. You can whip it up in under an hour, and the aroma that fills your kitchen will have everyone eagerly waiting for a bowl.

Don’t forget the garnishes! Crispy tortilla strips, creamy avocado, and fresh cilantro not only enhance the flavor but also add a beautiful presentation to your dish. With the right accompaniments, you can create a complete meal that is both delicious and visually appealing.

So, gather your ingredients, follow the steps, and enjoy the process of making this comforting soup. Whether you’re enjoying it on a chilly evening or sharing it with loved ones, the Spicy Chicken Tortilla Soup is sure to become a favorite in your home. Happy cooking!

Creamy Chicken Tortilla Soup Recipe is a must-try!

Introduction to Creamy Chicken Tortilla Soup Recipe

Creamy Chicken Tortilla Soup Recipe. This dish is not just a meal; it’s a warm hug in a bowl. Perfect for chilly evenings or cozy family gatherings, this soup combines rich flavors and comforting textures. With its creamy base and vibrant ingredients, it’s sure to become a favorite in your household.

What Makes This Soup Special?

What sets this creamy chicken tortilla soup apart? First, it’s the blend of spices that creates a warm, inviting aroma. The cumin and chili powder add depth, while the smoked paprika gives it a unique twist. Moreover, the addition of heavy cream transforms the soup into a luscious delight. Each spoonful is a perfect balance of savory chicken, hearty beans, and sweet corn, topped with crispy tortilla strips for that satisfying crunch.

Additionally, this recipe is versatile. You can easily adjust the ingredients to suit your taste. Whether you prefer it spicy or mild, vegetarian or meaty, this soup can adapt to your preferences. It’s not just a meal; it’s an experience that brings people together.

A Brief History of Tortilla Soup

Tortilla soup has a rich history that dates back to the ancient Aztecs. Originally, it was a simple broth made with corn tortillas, spices, and local ingredients. Over time, it evolved into the creamy, flavorful dish we enjoy today. The addition of chicken and cream is a modern twist that enhances its appeal.

In Mexico, tortilla soup is often served during celebrations and family gatherings. It symbolizes warmth and togetherness, making it a beloved dish across generations. Today, you can find various versions of this soup, each reflecting the unique flavors of different regions. However, the essence remains the same: a comforting bowl of goodness that warms the heart.

Creamy Chicken Tortilla Soup Recipe, remember that you’re not just cooking; you’re participating in a culinary tradition that has delighted taste buds for centuries. So, gather your ingredients and let’s dive into the preparation!

Ingredients for Creamy Chicken Tortilla Soup Recipe

Essential Ingredients

Creamy Chicken Tortilla Soup Recipe, you’ll need a variety of essential ingredients. These components work together to build the rich flavors and creamy texture that make this soup so special. Here’s what you’ll need:

  • 2 tablespoons olive oil
  • 1 medium onion, diced
  • 2 cloves garlic, minced
  • 1 bell pepper, diced (any color)
  • 1 teaspoon ground cumin
  • 1 teaspoon chili powder
  • 1/2 teaspoon smoked paprika
  • 1/4 teaspoon cayenne pepper (optional)
  • 4 cups chicken broth
  • 1 can (15 ounces) black beans, drained and rinsed
  • 1 can (15 ounces) diced tomatoes (with juices)
  • 2 cups cooked chicken, shredded
  • 1 cup corn (frozen or canned)
  • 1 cup heavy cream
  • Salt and pepper to taste

These ingredients form the backbone of your soup. The olive oil helps sauté the vegetables, while the spices add depth and warmth. The chicken broth serves as the base, and the heavy cream gives it that creamy finish. Together, they create a comforting dish that’s perfect for any occasion.

Optional Ingredients for Extra Flavor

Creamy Chicken Tortilla Soup Recipe, you can also enhance the flavor with some optional ingredients. These additions can elevate your soup and make it even more delightful:

  • Tortilla strips (for garnish)
  • Chopped cilantro (for garnish)
  • Lime wedges (for serving)
  • Diced avocado (for creaminess)
  • Jalapeños (for a spicy kick)

Garnishing your soup with tortilla strips and cilantro adds a fresh touch. Lime wedges provide a zesty contrast that brightens the flavors. If you enjoy a bit of heat, consider adding jalapeños or diced avocado for extra creaminess. These optional ingredients allow you to customize your soup to suit your taste, making it truly your own.

Step-by-Step Preparation of Creamy Chicken Tortilla Soup Recipe

Step 1: Preparing the Chicken

Creamy Chicken Tortilla Soup Recipe, start by preparing the chicken. If you have leftover cooked chicken, that’s perfect! Simply shred it into bite-sized pieces. If you’re starting from raw chicken, you can boil or bake it until fully cooked. Once done, let it cool slightly before shredding. This step is crucial as it adds the main protein to your soup, making it hearty and satisfying.

Step 2: Sautéing the Vegetables

Next, grab a large pot and heat the olive oil over medium heat. Add the diced onion and sauté for about 5 minutes. You want the onion to become translucent and fragrant. Then, stir in the minced garlic and diced bell pepper. Cook these for an additional 3-4 minutes until the bell pepper softens. This combination of vegetables forms the flavor base of your soup, creating a delicious aroma that fills your kitchen.

Step 3: Combining Ingredients

Now it’s time to bring everything together! Add the ground cumin, chili powder, smoked paprika, and cayenne pepper (if you like it spicy) to the pot. Stir well and let the spices toast for about a minute. This step enhances the flavors, making your soup even more delightful. After that, pour in the chicken broth, followed by the black beans, diced tomatoes, shredded chicken, and corn. Bring the mixture to a gentle simmer and let it cook for about 10 minutes. This allows all the flavors to meld beautifully.

Step 4: Adding Creaminess

Once your soup has simmered, it’s time to add the star ingredient: heavy cream. Reduce the heat to low and stir in the cream gently. Allow the soup to heat through for another 5 minutes. This step transforms your soup into a creamy delight, making it rich and comforting. Don’t forget to taste and season with salt and pepper to your liking. Adjusting the seasoning is key to achieving the perfect flavor balance.

Step 5: Final Touches

Creamy Chicken Tortilla Soup Recipe. Ladle the hot soup into bowls and garnish with crispy tortilla strips and chopped cilantro. For an extra zing, add lime wedges on the side. These final touches not only enhance the presentation but also add layers of flavor. Enjoy your delicious creation with family and friends, and watch as they savor every spoonful!

Variations of Creamy Chicken Tortilla Soup Recipe

Vegetarian Version

Creamy Chicken Tortilla Soup Recipe can easily be transformed into a delicious vegetarian dish. Simply replace the shredded chicken with additional beans or vegetables. Consider using black beans, pinto beans, or even chickpeas for added protein. You can also add diced zucchini, mushrooms, or bell peppers to enhance the texture and flavor. The rest of the ingredients remain the same, ensuring you still enjoy that creamy goodness. This vegetarian version is not only hearty but also packed with nutrients, making it a great choice for everyone!

Spicy Twist

Creamy Chicken Tortilla Soup Recipe a spicy twist? Start by adding more cayenne pepper or a few dashes of hot sauce during the cooking process. You can also include diced jalapeños for an extra kick. For those who enjoy smoky flavors, consider adding chipotle peppers in adobo sauce. These additions will elevate the spice level and create a bold flavor profile. Just remember to adjust the creaminess to balance the heat, ensuring every spoonful is both spicy and satisfying!

Low-Carb Adaptation

Creamy Chicken Tortilla Soup Recipe to fit your needs. Start by omitting the corn and black beans, as they can add extra carbs. Instead, consider adding more non-starchy vegetables like spinach, kale, or cauliflower. You can also use a low-carb thickener, such as xanthan gum, to maintain that creamy texture without the added carbs. This version is not only lighter but still packed with flavor, making it a perfect option for anyone watching their carb intake.

Cooking Note for Creamy Chicken Tortilla Soup Recipe

Tips for Achieving the Perfect Consistency

Creamy Chicken Tortilla Soup Recipe is essential for a delightful experience. Here are some tips to help you achieve that perfect texture:

  • Adjust the Cream: If you prefer a thicker soup, add a bit more heavy cream. For a lighter version, reduce the amount of cream or substitute it with half-and-half or coconut milk.
  • Use a Blender: For an ultra-smooth texture, consider blending a portion of the soup. This will create a creamy base while keeping some chunks for texture.
  • Thicken with Cornstarch: If your soup is too thin, mix a tablespoon of cornstarch with cold water and stir it into the simmering soup. This will help thicken it without altering the flavor.
  • Simmer Longer: Allowing the soup to simmer longer can help the flavors meld and thicken naturally. Just be sure to stir occasionally to prevent sticking.

By following these tips, you can customize the consistency of your soup to match your personal preference, ensuring a satisfying bowl every time.

Storage and Reheating Tips

Creamy Chicken Tortilla Soup Recipe properly will help maintain its delicious flavor and texture. Here are some helpful tips:

  • Cool Before Storing: Allow the soup to cool completely before transferring it to an airtight container. This prevents condensation, which can make the soup watery.
  • Refrigerate: Store the soup in the refrigerator for up to 3-4 days. Make sure to label the container with the date for easy tracking.
  • Freeze for Later: If you want to keep it longer, consider freezing the soup. It can last up to 3 months in the freezer. Just remember to leave some space in the container for expansion.
  • Reheat Gently: When reheating, do so on low heat to avoid curdling the cream. Stir frequently and add a splash of chicken broth or water if the soup is too thick.

Creamy Chicken Tortilla Soup Recipe even days after making it, without losing any of its delightful flavors!

Serving Suggestions for Creamy Chicken Tortilla Soup Recipe

Ideal Accompaniments

Creamy Chicken Tortilla Soup Recipe, the right accompaniments can elevate the meal to new heights. Here are some ideal pairings that complement the rich flavors of the soup:

  • Fresh Bread: A warm, crusty bread or soft dinner rolls are perfect for dipping into the creamy soup. They soak up the flavors beautifully.
  • Salad: A light, refreshing salad can balance the richness of the soup. Consider a simple green salad with a tangy vinaigrette.
  • Rice or Quinoa: Serving the soup over a bed of rice or quinoa adds a hearty touch. It makes the meal more filling and satisfying.
  • Cheese Quesadillas: Crispy cheese quesadillas are a delightful side. They add a cheesy, crunchy element that pairs wonderfully with the soup.

These accompaniments not only enhance the dining experience but also provide a variety of textures and flavors that complement the creamy chicken tortilla soup.

Garnishing Ideas

Creamy Chicken Tortilla Soup Recipe is a fun way to add color and flavor. Here are some creative garnishing ideas to make your soup visually appealing and even more delicious:

  • Avocado Slices: Creamy avocado slices add richness and a fresh taste. They also look beautiful on top of the soup.
  • Crumbled Cheese: Feta or cotija cheese sprinkled on top adds a salty kick that contrasts nicely with the soup’s creaminess.
  • Chopped Green Onions: Fresh green onions provide a mild onion flavor and a pop of color. They make a great finishing touch.
  • Hot Sauce: For those who enjoy a bit of heat, a few dashes of hot sauce can be drizzled on top for an extra kick.

Creamy Chicken Tortilla Soup Recipe. Feel free to mix and match to create your perfect bowl!

Tips for Making the Best Creamy Chicken Tortilla Soup Recipe

Common Mistakes to Avoid

Creamy Chicken Tortilla Soup Recipe, avoiding common mistakes can make a big difference in the final result. Here are some pitfalls to watch out for:

  • Overcooking the Vegetables: Sautéing the vegetables is essential, but be careful not to overcook them. They should be tender but still have a bit of crunch. Overcooked veggies can turn mushy and lose their flavor.
  • Skipping the Spice Toasting: Toasting the spices in the oil before adding the broth is crucial. This step enhances their flavors and aroma. Don’t skip it!
  • Adding Cream Too Early: If you add the heavy cream too soon, it may curdle. Always wait until the soup has simmered and is off the heat before stirring in the cream.
  • Not Tasting as You Go: Always taste your soup at different stages. This allows you to adjust the seasoning and ensure the flavors are balanced. A little salt or pepper can go a long way!
  • Using Low-Quality Ingredients: Since this soup relies on a few key ingredients, using high-quality chicken broth, fresh vegetables, and good spices will significantly improve the taste. Don’t compromise on quality!

Ingredient Substitutions

Creamy Chicken Tortilla Soup Recipe. Here are some easy substitutions that can still yield delicious results:

  • Chicken Broth: If you don’t have chicken broth, vegetable broth or even water can work in a pinch. Just be sure to adjust the seasoning accordingly.
  • Heavy Cream: For a lighter option, you can use half-and-half or coconut milk. Both will still provide creaminess without the extra calories.
  • Black Beans: If you’re out of black beans, kidney beans or pinto beans can be great alternatives. They will still add protein and texture to your soup.
  • Cooked Chicken: If you don’t have cooked chicken, rotisserie chicken is a fantastic shortcut. You can also use shredded turkey or even tofu for a vegetarian option.
  • Spices: If you’re missing a spice, don’t worry! You can experiment with similar spices. For example, if you don’t have smoked paprika, regular paprika with a dash of liquid smoke can work.

Creamy Chicken Tortilla Soup Recipe turns out perfectly every time!

Breakdown of Time for Creamy Chicken Tortilla Soup Recipe

Prep Time

Creamy Chicken Tortilla Soup Recipe is a breeze! The prep time usually takes about 15 to 20 minutes. During this time, you’ll chop the vegetables, shred the chicken, and gather all your ingredients. Having everything prepped and organized will make the cooking process smooth and enjoyable. So, take a moment to set up your workspace, and you’ll be on your way to a delicious meal!

Cooking Time

Once you’ve prepped your ingredients, the cooking time for this soup is approximately 25 to 30 minutes. This includes sautéing the vegetables, simmering the soup, and allowing the flavors to meld together. The actual cooking is quick, but the simmering allows the spices and ingredients to create a rich, flavorful broth. It’s a perfect time to relax and enjoy the delightful aroma filling your kitchen!

Total Time

Creamy Chicken Tortilla Soup Recipe. This includes both prep and cooking time. It’s a relatively quick meal that’s perfect for busy weeknights or when you want to impress guests without spending hours in the kitchen. With just under an hour, you’ll have a comforting, hearty soup ready to serve!

Nutritional Information for Creamy Chicken Tortilla Soup Recipe

Calories and Macronutrients

Creamy Chicken Tortilla Soup Recipe is essential for maintaining a balanced diet. Each serving of this delicious soup contains approximately 380 calories. Here’s a breakdown of the macronutrients:

  • Protein: 25g
  • Fat: 25g
  • Net Carbohydrates: 20g

This soup is a great source of protein, thanks to the chicken and beans. The healthy fats from the olive oil and heavy cream contribute to its creamy texture, while the carbohydrates come mainly from the beans and corn. This balance makes it a satisfying meal that can keep you full for hours.

Health Benefits of Key Ingredients

Creamy Chicken Tortilla Soup Recipe is not only delicious but also packed with health benefits from its key ingredients. Here’s a closer look at some of the nutritious components:

  • Chicken: A fantastic source of lean protein, chicken helps build and repair tissues. It also provides essential vitamins and minerals, including B vitamins and selenium.
  • Black Beans: Rich in fiber and protein, black beans support digestive health and help maintain stable blood sugar levels. They are also loaded with antioxidants, which can help reduce inflammation.
  • Bell Peppers: These colorful veggies are high in vitamins A and C, which are important for immune function and skin health. They also add a sweet crunch to the soup.
  • Corn: Corn is a good source of fiber and provides energy through its carbohydrates. It also contains antioxidants that promote eye health.
  • Heavy Cream: While it adds richness, heavy cream also provides calcium and vitamin D, which are essential for bone health. For a lighter option, consider using half-and-half or coconut milk.

Creamy Chicken Tortilla Soup Recipe becomes a wholesome meal that not only satisfies your taste buds but also supports your overall health. Enjoy this comforting dish knowing it’s good for you!

FAQs about Creamy Chicken Tortilla Soup Recipe

Can I make this soup ahead of time?

Creamy Chicken Tortilla Soup Recipe ahead of time is a great idea. In fact, the flavors often deepen and improve after sitting for a while. You can prepare the soup a day in advance and store it in the refrigerator. Just remember to let it cool completely before transferring it to an airtight container. When you’re ready to serve, simply reheat it on low heat, stirring occasionally. This way, you can enjoy a delicious meal without the last-minute rush!

What can I use instead of chicken?

Creamy Chicken Tortilla Soup Recipe. For a vegetarian option, consider using additional beans like pinto or kidney beans. You can also add hearty vegetables such as zucchini, mushrooms, or even tofu for protein. If you prefer a different meat, shredded turkey or cooked shrimp can work well too. These substitutions will still provide a satisfying and flavorful soup!

How can I make it spicier?

Creamy Chicken Tortilla Soup Recipe. Start by adding more cayenne pepper or chili powder during cooking. You can also toss in diced jalapeños or even chipotle peppers for a smoky flavor. For those who enjoy a fiery touch, a few dashes of your favorite hot sauce can do the trick. Just remember to taste as you go, so you can find the perfect level of spice for your palate!

Can I freeze creamy chicken tortilla soup?

Creamy Chicken Tortilla Soup Recipe for later enjoyment! To do this, allow the soup to cool completely before transferring it to a freezer-safe container. It’s best to leave some space at the top for expansion. The soup can be frozen for up to three months. When you’re ready to enjoy it, thaw it in the refrigerator overnight and reheat on low heat. If the soup seems too thick after freezing, simply add a splash of chicken broth or water to reach your desired consistency.

Conclusion on Creamy Chicken Tortilla Soup Recipe

Recap of Key Points

Creamy Chicken Tortilla Soup Recipe is a delightful dish that combines rich flavors and comforting textures. With its essential ingredients like chicken, black beans, and spices, this soup is not only satisfying but also versatile. You can easily adapt it to suit your dietary preferences, whether you choose a vegetarian version or a spicy twist. Remember to follow the step-by-step preparation for the best results, and don’t forget the garnishes that add a fresh touch!

Moreover, understanding the nutritional benefits of the key ingredients helps you appreciate this dish even more. From the protein-packed chicken to the fiber-rich black beans, each component contributes to a wholesome meal. With proper storage and reheating tips, you can enjoy this soup for days, making it a convenient option for busy weeknights.

Encouragement to Try the Recipe

Creamy Chicken Tortilla Soup Recipe yourself! Whether you’re cooking for family, friends, or just for yourself, this soup is sure to impress. The warm, creamy goodness will fill your home with delightful aromas, creating a cozy atmosphere.

So, gather your ingredients, follow the steps, and enjoy the process of creating this comforting dish. Don’t hesitate to experiment with flavors and make it your own. We hope this recipe brings joy to your table and becomes a cherished favorite in your household. Happy cooking!

Tuscan Shrimp and Scallops is a must-try recipe!

Introduction to Tuscan Shrimp and Scallops Recipe

If you’re looking for a dish that brings the flavors of Italy right to your kitchen, the Tuscan Shrimp and Scallops Recipe is a must-try. This delightful seafood dish combines succulent shrimp and tender scallops with fresh ingredients, creating a meal that is both satisfying and elegant. Perfect for a weeknight dinner or a special occasion, this recipe is sure to impress your family and friends.

What Makes the Tuscan Shrimp and Scallops Recipe Unique?

What sets the Tuscan Shrimp and Scallops Recipe apart is its rich blend of flavors and textures. The combination of garlic, cherry tomatoes, and fresh spinach creates a vibrant sauce that perfectly complements the seafood. The addition of heavy cream and Parmesan cheese adds a creamy richness that elevates the dish to a whole new level. Moreover, the use of Italian seasoning brings a touch of authenticity, making each bite a delightful experience.

Another unique aspect of this recipe is its versatility. You can easily adapt it to suit your taste preferences or dietary needs. Whether you want to add a splash of white wine for extra depth or substitute heavy cream for a lighter option, the possibilities are endless. This adaptability makes it a favorite among home cooks, as it can be tailored to fit any occasion.

In summary, the Tuscan Shrimp and Scallops Recipe is not just a meal; it’s a celebration of flavors that transports you to the sun-kissed shores of Tuscany. With its simple yet delicious ingredients, this dish is sure to become a staple in your culinary repertoire.

Ingredients for Tuscan Shrimp and Scallops Recipe

To create the mouthwatering Tuscan Shrimp and Scallops Recipe, you’ll need a selection of fresh and flavorful ingredients. Each component plays a vital role in building the dish’s rich taste and creamy texture. Here’s what you’ll need:

  • 1 pound large shrimp: Peeled and deveined for easy cooking.
  • 1 pound sea scallops: Patted dry to ensure a nice sear.
  • 2 tablespoons olive oil: For sautéing and adding healthy fats.
  • 4 cloves garlic: Minced to infuse the dish with aromatic flavor.
  • 1 cup cherry tomatoes: Halved to add sweetness and color.
  • 1 cup fresh spinach: For a nutritious boost and vibrant green.
  • 1/2 cup heavy cream: To create a rich and creamy sauce.
  • 1/2 cup grated Parmesan cheese: For a savory, cheesy finish.
  • 1 teaspoon Italian seasoning: A blend of herbs that enhances the dish’s flavor.
  • Salt and pepper: To taste, ensuring the dish is well-seasoned.
  • Fresh basil: For garnish, adding a pop of color and freshness.

These ingredients come together to create a delightful meal that is both satisfying and elegant. The combination of seafood, fresh vegetables, and creamy sauce makes this dish a true culinary delight. Make sure to gather everything before you start cooking, as it will help streamline the preparation process and ensure a smooth cooking experience.

Step-by-Step Preparation of Tuscan Shrimp and Scallops Recipe

Now that you have all your ingredients ready, it’s time to dive into the step-by-step preparation of the Tuscan Shrimp and Scallops Recipe. Following these simple steps will help you create a delicious meal that is sure to impress. Let’s get started!

Step 1: Preparing the Seafood

First, ensure your shrimp and scallops are prepped and ready to go. If you haven’t done so already, peel and devein the shrimp. This step is crucial for removing the shell and any unwanted bits. Next, pat the scallops dry with a paper towel. This helps them sear nicely in the skillet. Once your seafood is prepped, season both the shrimp and scallops with salt and pepper. This simple seasoning enhances their natural flavors.

Step 2: Sautéing the Aromatics

In a large skillet, heat the olive oil over medium-high heat. Once the oil is hot, add the minced garlic. Sauté the garlic for about 30 seconds, or until it becomes fragrant. Be careful not to burn it, as burnt garlic can taste bitter. After the garlic is aromatic, add the halved cherry tomatoes to the skillet. Cook them for 2-3 minutes, allowing them to soften and release their juices. This step adds a burst of flavor to your dish.

Step 3: Cooking the Shrimp and Scallops

Now it’s time to cook the shrimp and scallops. Carefully add them to the skillet, making sure they are in a single layer. Cook for 2-3 minutes on each side. You want them to turn golden brown and be cooked through. Once they are done, remove them from the skillet and set them aside. This step ensures that your seafood remains tender and juicy.

Step 4: Creating the Tuscan Sauce

In the same skillet, reduce the heat to low. Pour in the heavy cream, stirring gently to combine it with the garlic and tomatoes. As the cream heats up, add the grated Parmesan cheese and Italian seasoning. Stir until the cheese melts and the sauce becomes creamy. This rich sauce is what makes the Tuscan Shrimp and Scallops Recipe so special. It’s packed with flavor and adds a luxurious touch to the dish.

Step 5: Combining Ingredients

Finally, return the cooked shrimp and scallops to the skillet. Toss them gently in the creamy sauce, ensuring they are well-coated. Cook for an additional 1-2 minutes, just until everything is heated through. This step allows the seafood to absorb the delicious flavors of the sauce. Once done, your Tuscan Shrimp and Scallops are ready to be served!

With these steps, you’ll have a beautiful and flavorful dish that showcases the best of Tuscan cuisine. Enjoy the process, and get ready to savor every bite!

Variations of the Tuscan Shrimp and Scallops Recipe

The beauty of the Tuscan Shrimp and Scallops Recipe lies in its versatility. While the original recipe is delicious, you can easily modify it to suit your taste or dietary preferences. Here are some exciting variations to consider:

Alternative Seafood Options

If you’re not a fan of shrimp or scallops, don’t worry! There are plenty of alternative seafood options that work wonderfully in this recipe. For instance, you can use:

  • Fish fillets: White fish like cod or tilapia can be a great substitute. Just cut them into bite-sized pieces and follow the same cooking steps.
  • Lobster: For a touch of luxury, add lobster meat. Cook it briefly to avoid overcooking.
  • Crab meat: Lump crab meat can be folded into the sauce at the end for a sweet and delicate flavor.
  • Mussels or clams: These shellfish can add a briny depth to the dish. Steam them until they open, then mix them in with the sauce.

These alternatives can bring new flavors and textures to your Tuscan dish, making it exciting every time you prepare it.

Vegetarian Adaptations

If you’re looking for a vegetarian version of the Tuscan Shrimp and Scallops Recipe, you can easily adapt it without losing the essence of the dish. Here are some ideas:

  • Substitute seafood with mushrooms: Use a mix of portobello and shiitake mushrooms for a meaty texture. Sauté them until golden brown.
  • Add more vegetables: Consider adding zucchini, bell peppers, or asparagus. These veggies will add color and nutrition.
  • Use tofu: Firm tofu can be cubed and sautéed to absorb the flavors of the sauce. It’s a great protein source for vegetarians.
  • Chickpeas: For a hearty option, add canned chickpeas. They will provide a nice texture and protein boost.

With these vegetarian adaptations, you can enjoy a creamy Tuscan dish that is both satisfying and full of flavor. Whether you choose seafood or go meatless, the Tuscan Shrimp and Scallops Recipe can be tailored to fit your needs.

Cooking Note for Tuscan Shrimp and Scallops Recipe

When preparing the Tuscan Shrimp and Scallops Recipe, a few cooking notes can help ensure your dish turns out perfectly every time. These tips will enhance your cooking experience and the final result, making your meal even more enjoyable.

First, always choose fresh seafood when possible. Fresh shrimp and scallops not only taste better but also have a firmer texture. If you must use frozen seafood, make sure to thaw it completely before cooking. This helps maintain the right consistency and flavor.

Next, pay attention to the cooking times. Shrimp and scallops cook quickly, so avoid overcooking them. Overcooked seafood can become rubbery and lose its delicate flavor. Aim for a golden brown color on the outside while ensuring they remain tender inside.

Additionally, when sautéing garlic, keep a close eye on it. Garlic can burn easily, which can lead to a bitter taste in your sauce. If you notice it starting to brown too quickly, lower the heat immediately.

Lastly, feel free to adjust the seasoning to your liking. Taste the sauce before serving and add more salt, pepper, or Italian seasoning if needed. This step allows you to customize the dish to suit your palate.

By following these cooking notes, you’ll be well on your way to creating a delicious Tuscan Shrimp and Scallops dish that will impress everyone at your table. Enjoy the process and the delightful flavors that come together in this wonderful recipe!

Serving Suggestions for Tuscan Shrimp and Scallops Recipe

Once you’ve prepared the delicious Tuscan Shrimp and Scallops Recipe, it’s time to think about how to serve it. The right side dishes and beverages can elevate your meal, making it even more enjoyable. Here are some ideal serving suggestions to complement your dish.

Ideal Side Dishes

Pairing your Tuscan Shrimp and Scallops with the right side dishes can enhance the overall dining experience. Here are some fantastic options:

  • Garlic Bread: A classic choice, garlic bread is perfect for soaking up the creamy sauce. You can make it easily by spreading butter and minced garlic on slices of baguette, then toasting them until golden.
  • Risotto: Creamy risotto, especially with lemon or herbs, complements the seafood beautifully. Its rich texture pairs well with the Tuscan sauce.
  • Steamed Vegetables: Lightly steamed asparagus, broccoli, or green beans add a fresh crunch and color to your plate. They also provide a healthy balance to the richness of the dish.
  • Mixed Green Salad: A simple salad with mixed greens, cherry tomatoes, and a light vinaigrette can refresh your palate. The acidity of the dressing will cut through the creaminess of the sauce.

These side dishes not only enhance the flavors of the Tuscan Shrimp and Scallops but also create a well-rounded meal that is visually appealing.

Wine Pairings

Choosing the right wine can elevate your dining experience. Here are some excellent wine pairings for the Tuscan Shrimp and Scallops Recipe:

  • Sauvignon Blanc: This white wine is crisp and refreshing, with citrus notes that complement the seafood beautifully. Its acidity balances the richness of the cream sauce.
  • Pinot Grigio: Another great white option, Pinot Grigio is light and fruity. It enhances the flavors of the shrimp and scallops without overpowering them.
  • Chardonnay: A lightly oaked Chardonnay can add a creamy texture that matches the sauce. Look for one with bright acidity to keep the pairing lively.
  • Prosecco: If you prefer sparkling wine, Prosecco is a delightful choice. Its bubbles and slight sweetness can add a festive touch to your meal.

These wine pairings will not only complement the flavors of your Tuscan Shrimp and Scallops but also create a memorable dining experience. Cheers to a wonderful meal!

Tips for Perfecting Your Tuscan Shrimp and Scallops Recipe

To truly master the Tuscan Shrimp and Scallops Recipe, a few tips can make all the difference. These suggestions will help you achieve the best flavor and texture, ensuring your dish is a hit every time. Let’s explore some essential tips for perfecting this delightful seafood meal.

First, always use high-quality seafood. Fresh shrimp and scallops will provide the best taste and texture. If you can, buy them from a trusted fishmonger or local market. If using frozen seafood, ensure it is properly thawed and patted dry before cooking. This step prevents excess moisture, which can affect the searing process.

Next, don’t overcrowd the skillet. When cooking shrimp and scallops, it’s important to give them enough space. Overcrowding can lead to steaming instead of searing, resulting in less flavor. If you have a lot of seafood, consider cooking in batches. This way, each piece gets that beautiful golden crust.

Another tip is to adjust the heat as needed. Cooking seafood requires careful attention to temperature. Start with medium-high heat to sear the shrimp and scallops, then lower the heat when adding the cream. This prevents the sauce from boiling and helps maintain its creamy consistency.

Additionally, taste as you go! Seasoning is key to a delicious dish. After adding the cream and cheese, taste the sauce and adjust the seasoning if necessary. A little extra salt or Italian seasoning can elevate the flavors significantly.

Lastly, don’t forget the garnish! Fresh basil not only adds a pop of color but also enhances the dish’s aroma and flavor. A sprinkle of freshly cracked black pepper can also add a nice finishing touch.

By following these tips, you’ll be well on your way to creating a Tuscan Shrimp and Scallops dish that is not only delicious but also visually stunning. Enjoy the cooking process and the delightful flavors that come together in this wonderful recipe!

Breakdown of Time for Tuscan Shrimp and Scallops Recipe

Understanding the time required for each step of the Tuscan Shrimp and Scallops Recipe can help you plan your cooking efficiently. Here’s a breakdown of the time you’ll need for preparation and cooking, ensuring you can enjoy this delightful dish without any rush.

Prep Time

The prep time for the Tuscan Shrimp and Scallops Recipe is approximately 15 minutes. During this time, you will:

  • Peeled and devein the shrimp.
  • Pat the scallops dry.
  • Minced the garlic and halved the cherry tomatoes.
  • Gather all your ingredients and seasonings.

Having everything ready before you start cooking will make the process smoother and more enjoyable.

Cooking Time

The cooking time for this recipe is about 15-20 minutes. This includes:

  • Sautéing the garlic and tomatoes (about 5 minutes).
  • Cooking the shrimp and scallops (approximately 6-8 minutes).
  • Creating the creamy sauce and combining all ingredients (around 5 minutes).

Keep an eye on the seafood to ensure it cooks perfectly without becoming rubbery.

Total Time

In total, you can expect the Tuscan Shrimp and Scallops Recipe to take about 30-35 minutes from start to finish. This includes both prep and cooking time. It’s a quick and easy meal that’s perfect for busy weeknights or when you want to impress guests without spending hours in the kitchen.

With this time breakdown, you can confidently prepare your Tuscan Shrimp and Scallops, knowing exactly how long each step will take. Enjoy the cooking process and the delicious meal that awaits!

Nutritional Information for Tuscan Shrimp and Scallops Recipe

Understanding the nutritional information of the Tuscan Shrimp and Scallops Recipe can help you make informed choices about your meal. This dish is not only delicious but also packed with nutrients that can contribute to a balanced diet. Here’s a closer look at the nutritional content per serving:

Calories

Each serving of the Tuscan Shrimp and Scallops Recipe contains approximately 350 calories. This makes it a satisfying yet moderate option for a main course. The combination of seafood, cream, and vegetables provides a hearty meal without excessive calorie intake. If you’re watching your calorie consumption, this dish can fit well into a balanced diet.

Protein Content

One of the standout features of this recipe is its high protein content. Each serving offers about 32 grams of protein. The shrimp and scallops are excellent sources of lean protein, which is essential for muscle repair and overall health. Including protein-rich meals like this can help keep you feeling full and satisfied for longer periods.

Sodium Levels

The sodium levels in the Tuscan Shrimp and Scallops Recipe are approximately 600 milligrams per serving. While this is a reasonable amount for a flavorful dish, it’s important to be mindful of your overall sodium intake, especially if you are on a low-sodium diet. You can reduce the sodium content by using low-sodium broth or cheese alternatives if desired.

In summary, the Tuscan Shrimp and Scallops Recipe is a nutritious option that provides a good balance of calories, protein, and flavor. By being aware of the nutritional information, you can enjoy this delightful dish while maintaining a healthy lifestyle.

FAQs about Tuscan Shrimp and Scallops Recipe

Can I use frozen shrimp and scallops for this recipe?

Yes, you can use frozen shrimp and scallops for the Tuscan Shrimp and Scallops Recipe. However, it’s important to thaw them completely before cooking. To do this, place them in the refrigerator overnight or run them under cold water for a quicker thaw. Once thawed, pat them dry with a paper towel to remove excess moisture. This step helps achieve a nice sear and prevents the seafood from becoming rubbery during cooking.

What can I substitute for heavy cream in the Tuscan sauce?

If you’re looking for a lighter option, you can substitute heavy cream with half-and-half or coconut milk. Both alternatives will still provide a creamy texture. For a dairy-free option, coconut milk is a great choice, adding a subtle sweetness to the sauce. If you prefer a lower-calorie option, consider using Greek yogurt or a mixture of milk and cornstarch to thicken the sauce. Just be sure to add these substitutes gradually and adjust the seasoning as needed.

How can I make the Tuscan Shrimp and Scallops Recipe spicier?

To add some heat to your Tuscan Shrimp and Scallops Recipe, consider incorporating red pepper flakes or diced fresh chili peppers. Start with a small amount and adjust to your taste. You can also add a dash of hot sauce to the creamy sauce for an extra kick. Another option is to use spicy Italian sausage instead of some of the seafood, which will infuse the dish with a delightful spiciness while still keeping the Tuscan flavors intact.

Is this recipe suitable for meal prep?

Absolutely! The Tuscan Shrimp and Scallops Recipe is great for meal prep. You can prepare the dish ahead of time and store it in airtight containers in the refrigerator. It will stay fresh for up to three days. When reheating, do so gently on the stove over low heat to prevent the seafood from overcooking. This dish can be served over rice, pasta, or alongside vegetables, making it a versatile option for your weekly meal planning.

Conclusion on Tuscan Shrimp and Scallops Recipe

In conclusion, the Tuscan Shrimp and Scallops Recipe is a delightful dish that brings the essence of Italian cuisine right to your table. With its rich flavors, creamy sauce, and fresh ingredients, this recipe is not only easy to prepare but also incredibly satisfying. Whether you’re cooking for a special occasion or a simple weeknight dinner, this dish is sure to impress.

By following the steps outlined in this article, you can create a meal that showcases the best of seafood and Tuscan flavors. The versatility of the recipe allows you to make adjustments based on your preferences, whether you choose to stick with the classic version or explore exciting variations. From alternative seafood options to vegetarian adaptations, the possibilities are endless.

Moreover, the nutritional benefits of this dish make it a smart choice for those looking to enjoy a balanced meal. With a good amount of protein and essential nutrients, the Tuscan Shrimp and Scallops Recipe can fit well into a healthy lifestyle.

So, gather your ingredients, follow the steps, and enjoy the process of creating this delicious meal. Don’t forget to share it with family and friends, as good food is best enjoyed together. Bon appétit!

Creamy Garlic Parmesan Pasta Recipe is a must-try!

Introduction to Creamy Garlic Parmesan Pasta Recipe

What Makes This Recipe Special?

When it comes to comfort food, few dishes can compete with a creamy garlic parmesan pasta. This recipe stands out for its rich flavors and simple preparation. The combination of garlic, cream, and parmesan creates a luscious sauce that clings to every strand of pasta. It’s a dish that feels indulgent yet is easy enough for a weeknight dinner. Plus, it can be customized with various ingredients, making it versatile for any palate.

What truly makes this creamy garlic parmesan pasta recipe special is its ability to bring people together. Whether it’s a family gathering or a cozy dinner for two, this dish is sure to impress. The aroma of sautéed garlic fills the kitchen, inviting everyone to the table. With just a handful of ingredients, you can create a meal that feels gourmet without the fuss. It’s a perfect blend of simplicity and elegance, making it a favorite among home cooks and food lovers alike.

A Brief History of Pasta Dishes

Pasta has a rich history that dates back thousands of years. Originating in ancient China, it made its way to Italy, where it evolved into the beloved staple we know today. The first recorded mention of pasta in Italy was in the 13th century. Since then, it has become a cornerstone of Italian cuisine.

Over the years, pasta dishes have transformed, with various regions in Italy developing their unique styles. From the hearty ragù of Bologna to the light, fresh flavors of the Mediterranean, pasta adapts to local ingredients and traditions. Creamy sauces, like the one in our recipe, became popular in the 20th century, showcasing the versatility of pasta. Today, creamy garlic parmesan pasta is enjoyed worldwide, celebrated for its comforting qualities and delightful taste.

Ingredients for Creamy Garlic Parmesan Pasta Recipe

Essential Ingredients

To create a delicious creamy garlic parmesan pasta, you’ll need a few essential ingredients. These components work together to form the base of the dish, ensuring a rich and satisfying flavor. Here’s what you’ll need:

  • Pasta: 8 ounces of fettuccine or spaghetti is perfect for this recipe. Choose your favorite type for a personal touch.
  • Olive Oil: 2 tablespoons of olive oil adds a lovely richness and helps sauté the garlic.
  • Garlic: 4 cloves of minced garlic provide that aromatic flavor that makes this dish irresistible.
  • Heavy Cream: 1 cup of heavy cream creates the creamy texture that coats the pasta beautifully.
  • Parmesan Cheese: 1 cup of grated Parmesan cheese is essential for that cheesy goodness.
  • Salt: 1 teaspoon of salt enhances all the flavors in the dish.
  • Black Pepper: 1/2 teaspoon of black pepper adds a subtle kick.
  • Red Pepper Flakes: 1/4 teaspoon of red pepper flakes is optional but adds a nice heat if you enjoy a bit of spice.
  • Fresh Parsley: 2 tablespoons of chopped fresh parsley for garnish adds a pop of color and freshness.

Optional Ingredients for Extra Flavor

While the essential ingredients create a fantastic dish, you can elevate your creamy garlic parmesan pasta with a few optional ingredients. These additions can enhance the flavor and make the dish even more delightful:

  • Protein: Consider adding grilled chicken, shrimp, or sautéed tofu for a protein boost.
  • Vegetables: Spinach, mushrooms, or sun-dried tomatoes can add color and nutrition.
  • Herbs: Fresh basil or thyme can provide an aromatic twist to the dish.
  • Nutmeg: A pinch of nutmeg can add warmth and depth to the creamy sauce.

Feel free to mix and match these optional ingredients to suit your taste. The beauty of this creamy garlic parmesan pasta recipe lies in its versatility!

Step-by-Step Preparation of Creamy Garlic Parmesan Pasta Recipe

Step 1: Cooking the Pasta

To start, bring a large pot of salted water to a boil. Add 8 ounces of fettuccine or spaghetti to the boiling water. Cook according to the package instructions until the pasta is al dente. This usually takes about 8 to 10 minutes. Remember to stir occasionally to prevent sticking. Once cooked, drain the pasta in a colander, but don’t forget to reserve 1/2 cup of the pasta water. This starchy water will help adjust the sauce later. Set the drained pasta aside while you prepare the sauce.

Step 2: Preparing the Garlic Sauce

Next, grab a large skillet and heat 2 tablespoons of olive oil over medium heat. Once the oil is hot, add 4 cloves of minced garlic. Sauté the garlic for about 1 minute, stirring frequently. You want it to become fragrant but not browned, as burnt garlic can taste bitter. After the garlic is ready, pour in 1 cup of heavy cream. Bring the mixture to a gentle simmer, stirring occasionally. This step is crucial as it allows the flavors to meld together beautifully.

Step 3: Combining Pasta and Sauce

After the cream has simmered for a few minutes, it’s time to add the cooked pasta. Carefully add the drained fettuccine or spaghetti to the skillet. Toss the pasta in the creamy garlic sauce, ensuring every strand is coated. If the sauce seems too thick, gradually add the reserved pasta water, a little at a time, until you reach your desired consistency. This will help create a silky sauce that clings perfectly to the pasta.

Step 4: Adding Parmesan and Final Touches

Now comes the best part! Stir in 1 cup of grated Parmesan cheese, along with 1 teaspoon of salt, 1/2 teaspoon of black pepper, and 1/4 teaspoon of red pepper flakes if you’re using them. Mix everything well until the cheese melts and the sauce thickens slightly. This will create a rich, creamy texture that is simply irresistible. Once everything is combined, remove the skillet from heat. Garnish your creamy garlic parmesan pasta with 2 tablespoons of chopped fresh parsley for a pop of color and freshness. Serve immediately and enjoy!

Variations of Creamy Garlic Parmesan Pasta Recipe

Adding Vegetables for a Healthier Twist

Incorporating vegetables into your creamy garlic parmesan pasta is a fantastic way to boost its nutritional value. Not only do they add color and texture, but they also enhance the flavor profile of the dish. Here are some great vegetable options to consider:

  • Spinach: Fresh spinach wilts beautifully in the creamy sauce, adding a vibrant green color and a wealth of vitamins.
  • Mushrooms: Sautéed mushrooms bring an earthy flavor that complements the garlic and parmesan perfectly.
  • Broccoli: Steamed or sautéed broccoli florets add crunch and a healthy dose of fiber.
  • Cherry Tomatoes: Halved cherry tomatoes can provide a burst of sweetness and acidity, balancing the richness of the sauce.
  • Peas: Sweet peas add a pop of color and a hint of sweetness, making the dish even more delightful.

To add these vegetables, simply sauté them in the olive oil before adding the garlic. This way, they will absorb the flavors and become tender. Feel free to mix and match your favorites for a personalized touch!

Protein Additions: Chicken, Shrimp, or Tofu

If you’re looking to make your creamy garlic parmesan pasta more filling, consider adding a protein source. This not only enhances the dish but also makes it a complete meal. Here are some delicious options:

  • Grilled Chicken: Sliced grilled chicken breast adds a hearty element and pairs wonderfully with the creamy sauce.
  • Shrimp: Sautéed shrimp cooks quickly and adds a touch of elegance to your pasta dish.
  • Tofu: For a vegetarian or vegan option, sautéed tofu is a great choice. It absorbs the flavors of the sauce beautifully.
  • Bacon or Pancetta: For a savory twist, crispy bacon or pancetta can add a delightful crunch and smoky flavor.

To incorporate these proteins, cook them separately and then toss them with the pasta and sauce just before serving. This way, you’ll have a deliciously satisfying meal that everyone will love!

Cooking Note for Creamy Garlic Parmesan Pasta Recipe

Tips for Perfectly Cooked Pasta

Cooking pasta may seem simple, but a few tips can elevate your dish to perfection. First, always use a large pot filled with plenty of water. This helps the pasta cook evenly and prevents it from sticking together. Adding a generous amount of salt to the boiling water is crucial. It enhances the pasta’s flavor, making it taste better overall.

When you add the pasta, stir it occasionally. This prevents it from clumping and ensures even cooking. Keep an eye on the clock and taste the pasta a minute or two before the package’s suggested cooking time. You want it to be al dente, which means it should be firm to the bite. Once cooked, drain the pasta but remember to reserve some pasta water. This starchy water is a secret weapon for adjusting your sauce later!

Adjusting Sauce Consistency

Getting the sauce just right is key to a delicious creamy garlic parmesan pasta. If your sauce is too thick, don’t worry! You can easily adjust it using the reserved pasta water. Start by adding a small amount, about a tablespoon at a time, and stir well. This will help loosen the sauce without making it watery.

On the other hand, if your sauce is too thin, let it simmer for a few more minutes. This will allow it to thicken naturally. Stirring frequently will help prevent it from sticking to the bottom of the skillet. Remember, the goal is a creamy, luscious sauce that clings to the pasta perfectly. With these tips, you’ll achieve a delightful consistency every time!

Serving Suggestions for Creamy Garlic Parmesan Pasta Recipe

Ideal Pairings: Sides and Drinks

When it comes to serving creamy garlic parmesan pasta, the right sides and drinks can elevate your meal. Here are some delightful pairings to consider:

  • Garlic Bread: A classic choice, garlic bread complements the creamy pasta beautifully. The crunchy texture and buttery flavor make it a perfect side.
  • Caesar Salad: A fresh Caesar salad adds a crisp contrast to the rich pasta. The tangy dressing and crunchy croutons balance the meal nicely.
  • Steamed Vegetables: Lightly steamed vegetables, like broccoli or green beans, provide a healthy touch and add color to your plate.
  • Wine: Pair your pasta with a glass of white wine, such as Chardonnay or Pinot Grigio. These wines enhance the creamy flavors and make for a sophisticated dining experience.
  • Sparkling Water: For a non-alcoholic option, sparkling water with a slice of lemon is refreshing and cleanses the palate.

These pairings not only enhance the flavors of your creamy garlic parmesan pasta but also create a well-rounded meal that everyone will enjoy.

Presentation Tips for Serving

Presentation plays a key role in making your creamy garlic parmesan pasta look as good as it tastes. Here are some simple tips to impress your guests:

  • Use a Large Serving Bowl: Serve the pasta in a large, shallow bowl. This allows the creamy sauce to spread out, making it visually appealing.
  • Garnish Generously: Sprinkle chopped fresh parsley or basil on top for a pop of color. You can also add extra grated Parmesan for a gourmet touch.
  • Twirl the Pasta: When plating individual servings, use a fork to twirl the pasta into a neat mound. This creates an elegant look on the plate.
  • Serve with a Side of Bread: Place a slice of garlic bread or a breadstick on the side of the plate. This adds texture and makes the meal feel complete.
  • Use Colorful Plates: Brightly colored plates can make the creamy pasta stand out. Choose dishes that contrast with the pasta for a vibrant presentation.

With these presentation tips, your creamy garlic parmesan pasta will not only taste delicious but also look stunning on the table, making it a feast for the eyes as well!

Tips for Making the Best Creamy Garlic Parmesan Pasta Recipe

Ingredient Substitutions

Sometimes, you may not have all the ingredients on hand. No worries! Here are some great substitutions to keep your creamy garlic parmesan pasta delicious:

  • Pasta: If you don’t have fettuccine or spaghetti, any pasta shape will work. Penne, linguine, or even gluten-free pasta are excellent alternatives.
  • Olive Oil: You can use butter instead of olive oil for a richer flavor. It adds a lovely creaminess to the sauce.
  • Heavy Cream: For a lighter option, half-and-half or whole milk can be used. Just keep in mind that the sauce may be less thick.
  • Parmesan Cheese: If you’re out of Parmesan, Pecorino Romano or Grana Padano can be great substitutes. They offer a similar salty and nutty flavor.
  • Fresh Herbs: If you don’t have fresh parsley, dried herbs like Italian seasoning or dried basil can work in a pinch. Just use less, as dried herbs are more potent.

These substitutions can help you whip up a tasty dish even when you’re missing a few ingredients. Feel free to get creative and adjust the recipe to suit your pantry!

Storage and Reheating Tips

Leftover creamy garlic parmesan pasta can be just as delightful the next day! Here’s how to store and reheat it properly:

  • Storage: Allow the pasta to cool completely before transferring it to an airtight container. It can be stored in the refrigerator for up to 3 days.
  • Reheating: To reheat, place the pasta in a skillet over low heat. Add a splash of milk or reserved pasta water to help loosen the sauce. Stir frequently until heated through.
  • Microwave Option: If you prefer the microwave, place the pasta in a microwave-safe dish. Cover it with a damp paper towel and heat in 30-second intervals, stirring in between.
  • Freezing: While it’s best enjoyed fresh, you can freeze the pasta for up to 2 months. Just be aware that the texture may change slightly upon thawing.

By following these storage and reheating tips, you can enjoy your creamy garlic parmesan pasta even after the initial meal. It’s a great way to save time and reduce food waste!

Breakdown of Time for Creamy Garlic Parmesan Pasta Recipe

Prep Time

Preparing your creamy garlic parmesan pasta is quick and easy! The prep time for this recipe is about 10 minutes. During this time, you’ll gather all your ingredients, chop the garlic, and measure out the necessary components. Having everything ready before you start cooking makes the process smoother and more enjoyable.

Cooking Time

The cooking time for this dish is approximately 15 minutes. This includes boiling the pasta and making the creamy garlic sauce. The pasta usually takes about 8 to 10 minutes to cook until al dente. Meanwhile, you’ll be sautéing the garlic and preparing the sauce, which only takes a few minutes. It’s a quick meal that’s perfect for busy weeknights!

Total Time

In total, you can expect to spend around 25 minutes from start to finish. This includes both prep and cooking time. With such a short time commitment, you can whip up a delicious creamy garlic parmesan pasta that’s sure to impress your family or guests. It’s a fantastic option for those who want a satisfying meal without spending hours in the kitchen!

Nutritional Information for Creamy Garlic Parmesan Pasta Recipe

Calories and Macronutrients

Understanding the nutritional content of your meals is essential for maintaining a balanced diet. This creamy garlic parmesan pasta recipe serves four and provides a satisfying portion of deliciousness. Here’s a breakdown of the nutritional information per serving:

  • Calories: 540
  • Net Carbs: 40g
  • Protein: 15g
  • Fat: 36g

These values can vary based on the specific ingredients you use, especially if you opt for different types of pasta or cheese. However, this recipe offers a hearty meal that balances carbohydrates, protein, and fats, making it a great choice for a filling dinner.

Health Benefits of Ingredients

While creamy garlic parmesan pasta is undeniably delicious, it also contains ingredients that offer various health benefits:

  • Garlic: Known for its immune-boosting properties, garlic can help reduce the risk of heart disease and lower blood pressure.
  • Olive Oil: Rich in healthy fats, olive oil is a staple of the Mediterranean diet. It’s known to promote heart health and reduce inflammation.
  • Parmesan Cheese: This cheese is a good source of calcium and protein, which are essential for strong bones and muscle health.
  • Fresh Parsley: Not just a garnish, parsley is packed with vitamins A, C, and K. It also contains antioxidants that can help fight inflammation.
  • Pasta: Whole grain or legume-based pasta options can provide additional fiber, which is beneficial for digestive health.

By incorporating these ingredients into your creamy garlic parmesan pasta, you’re not only treating your taste buds but also nourishing your body. Enjoy this delightful dish knowing it has some health benefits too!

FAQs about Creamy Garlic Parmesan Pasta Recipe

Can I make this recipe gluten-free?

Absolutely! To make a gluten-free version of creamy garlic parmesan pasta, simply substitute regular pasta with gluten-free pasta. There are many options available, such as rice pasta, quinoa pasta, or chickpea pasta. These alternatives cook similarly to traditional pasta and will still deliver a delicious meal. Just be sure to follow the cooking instructions on the package for the best results!

How can I make the sauce lighter?

If you want a lighter sauce for your creamy garlic parmesan pasta, there are a few easy adjustments you can make. First, consider using half-and-half or whole milk instead of heavy cream. This will reduce the fat content while still providing a creamy texture. You can also add more vegetables to the dish, which will increase the volume without adding many calories. Lastly, using less cheese or opting for a lower-fat cheese can help lighten the dish while still keeping it flavorful.

What can I substitute for Parmesan cheese?

If you find yourself without Parmesan cheese, don’t worry! There are several great substitutes you can use. Pecorino Romano is a popular alternative that has a similar salty and nutty flavor. Grana Padano is another excellent choice, offering a slightly milder taste. For a dairy-free option, nutritional yeast can provide a cheesy flavor without the dairy. Just remember to adjust the quantity to suit your taste, as some substitutes may be saltier than Parmesan.

How long does leftover pasta last?

Leftover creamy garlic parmesan pasta can be stored in the refrigerator for up to 3 days. To keep it fresh, make sure to place it in an airtight container. When you’re ready to enjoy it again, you can reheat it on the stove or in the microwave. Just add a splash of milk or reserved pasta water to help loosen the sauce and keep it creamy. Enjoy your leftovers while they’re still tasty!

Conclusion on Creamy Garlic Parmesan Pasta Recipe

Recap of Key Points

In summary, the creamy garlic parmesan pasta recipe is a delightful dish that combines simplicity with rich flavors. With just a few essential ingredients, you can create a meal that feels indulgent yet is easy to prepare. From cooking the pasta to making the creamy sauce, each step is straightforward and quick. The optional ingredients allow for customization, making it a versatile choice for any occasion.

We explored various ways to enhance the dish, including adding vegetables and proteins, which not only boost nutrition but also add exciting flavors. Additionally, we discussed tips for perfect pasta cooking, adjusting sauce consistency, and serving suggestions that elevate your dining experience. With its comforting qualities and delicious taste, this recipe is sure to become a favorite in your household.

Encouragement to Try the Recipe

Now that you have all the information you need, it’s time to roll up your sleeves and try making this creamy garlic parmesan pasta! Whether you’re cooking for family, friends, or just treating yourself, this dish is bound to impress. Don’t hesitate to experiment with different ingredients and make it your own. Remember, cooking is all about creativity and enjoyment.

So gather your ingredients, follow the steps, and savor the delightful flavors of your homemade creamy garlic parmesan pasta. We hope you enjoy every bite and share this recipe with others who will appreciate its deliciousness. Happy cooking!

Garlic Butter Shrimp and Scallops Recipe is easy to make.

Introduction to Garlic Butter Shrimp and Scallops Recipe

Garlic Butter Shrimp and Scallops Recipe is a perfect choice. This delightful seafood dish is not only quick to prepare but also bursting with flavor. Imagine succulent shrimp and tender scallops, all enveloped in a rich garlic butter sauce. It’s a meal that can impress guests or simply satisfy your cravings after a long day.

Seafood lovers will appreciate the freshness of the ingredients, while the garlic and butter create a mouthwatering aroma that fills your kitchen. This recipe is versatile, allowing you to customize it with your favorite spices or add vegetables for a more colorful presentation. Whether you serve it over pasta, rice, or enjoy it on its own, this dish is sure to become a favorite in your household.

In this article, we will guide you through the ingredients, preparation steps, and variations of this delicious recipe. You’ll also find helpful tips to ensure your shrimp and scallops turn out perfectly every time. So, let’s dive into the world of garlic butter goodness and discover how to create this delightful dish!

Ingredients for Garlic Butter Shrimp and Scallops Recipe

Garlic Butter Shrimp and Scallops Recipe, you’ll need a few simple yet flavorful ingredients. Each component plays a vital role in bringing out the best in this dish. Here’s what you’ll need:

  • 1 pound large shrimp: Make sure they are peeled and deveined for easy cooking.
  • 1 pound sea scallops: Pat them dry to ensure a nice sear.
  • 4 tablespoons unsalted butter: This will create the rich garlic butter sauce.
  • 4 cloves garlic: Minced garlic adds a robust flavor.
  • 1 teaspoon paprika: This spice gives a hint of warmth and color.
  • 1 teaspoon lemon juice: Fresh lemon juice brightens the dish.
  • Salt and pepper: To taste, enhancing the overall flavor.
  • 2 tablespoons fresh parsley: Chopped, for garnish and a pop of color.
  • Lemon wedges: For serving, adding a zesty touch.

These ingredients come together to create a delightful seafood experience. The combination of shrimp and scallops, along with the garlic butter sauce, makes for a dish that is both satisfying and elegant. Now that you have your ingredients ready, let’s move on to the preparation steps!

Step-by-Step Preparation of Garlic Butter Shrimp and Scallops Recipe

Garlic Butter Shrimp and Scallops Recipe. This process is straightforward and will have your kitchen smelling amazing in no time. Let’s break it down into four easy steps.

Step 1: Preparing the Shrimp and Scallops

First, ensure your shrimp are peeled and deveined. This makes them ready to cook. If you’re using frozen shrimp, make sure to thaw them completely. Next, take your sea scallops and pat them dry with a paper towel. This step is crucial because it helps achieve a nice golden sear when cooking. If they are wet, they will steam instead of sear, which can affect the texture.

Step 2: Making the Garlic Butter Sauce

In a large skillet, melt 2 tablespoons of unsalted butter over medium heat. Once the butter is melted, add the minced garlic. Sauté the garlic for about 1 minute until it becomes fragrant. Be careful not to burn it, as burnt garlic can taste bitter. This garlic butter sauce is the heart of the dish, so take your time to get it just right!

Step 3: Cooking the Shrimp and Scallops

After the garlic is ready, it’s time to add the shrimp. Season them with salt, pepper, and paprika. Cook the shrimp for about 2-3 minutes until they turn pink and opaque. Once cooked, remove the shrimp from the skillet and set them aside. In the same skillet, add the remaining 2 tablespoons of butter. When it’s melted, add the scallops. Season them with salt and pepper as well. Sear the scallops for about 2-3 minutes on each side until they are golden brown and cooked through.

Step 4: Combining Ingredients

Now that both the shrimp and scallops are cooked, it’s time to bring everything together. Return the shrimp to the skillet and add the fresh lemon juice. Gently toss everything together to combine. Cook for an additional minute to heat through. This final step allows the flavors to meld beautifully, creating a delicious seafood dish that’s ready to serve!

Garlic Butter Shrimp and Scallops Recipe. Next, let’s explore some variations to make this dish even more exciting!

Variations of Garlic Butter Shrimp and Scallops Recipe

Garlic Butter Shrimp and Scallops Recipe is delicious on its own, but you can easily customize it to suit your taste. Here are some fun variations to consider, making your dish even more delightful and unique!

Adding Vegetables to the Garlic Butter Shrimp and Scallops Recipe

Garlic Butter Shrimp and Scallops Recipe not only adds color but also boosts the nutritional value. You can choose from a variety of vegetables, such as:

  • Bell Peppers: Slice them into strips and sauté them with the garlic for a sweet crunch.
  • Zucchini: Cut into half-moons, zucchini cooks quickly and adds a lovely texture.
  • Spinach: Toss in fresh spinach at the end for a pop of green and added nutrients.
  • Cherry Tomatoes: Halve them and add during the last minute of cooking for a burst of flavor.

Simply add your chosen vegetables to the skillet after the garlic is sautéed. Cook them until they are tender before adding the shrimp and scallops. This way, you’ll have a colorful and nutritious seafood dish that everyone will love!

Spicy Twist on Garlic Butter Shrimp and Scallops Recipe

Garlic Butter Shrimp and Scallops Recipe a spicy twist. Here are a couple of ideas to spice things up:

  • Red Pepper Flakes: Add a pinch of red pepper flakes when sautéing the garlic. This will infuse the dish with a warm, spicy flavor.
  • Hot Sauce: Drizzle your favorite hot sauce over the finished dish for an extra kick.
  • Chili Paste: Mix in a teaspoon of chili paste with the garlic for a deeper, richer heat.

These spicy additions will elevate your dish and make it even more exciting. Just remember to adjust the amount based on your heat preference. Enjoy the bold flavors that come with this spicy variation!

Garlic Butter Shrimp and Scallops Recipe to fit your mood or the ingredients you have on hand. Now, let’s move on to some important cooking notes to ensure your dish turns out perfectly every time!

Cooking Note for Garlic Butter Shrimp and Scallops Recipe

Garlic Butter Shrimp and Scallops Recipe, there are a few key cooking notes to keep in mind. These tips will help you achieve the best results and ensure your seafood dish is both delicious and visually appealing.

First, always use fresh seafood when possible. Fresh shrimp and scallops have a better texture and flavor compared to frozen options. If you must use frozen seafood, make sure to thaw it completely before cooking. This helps in achieving that perfect sear and prevents excess moisture from affecting the dish.

Next, pay attention to the cooking times. Shrimp cook quickly, usually in just 2-3 minutes. Overcooking can lead to rubbery shrimp, which is not pleasant. Similarly, scallops should be seared for about 2-3 minutes on each side. They should be golden brown on the outside and opaque in the center. Timing is crucial for both ingredients to ensure they are cooked perfectly.

Another important note is to avoid overcrowding the skillet. If you add too many shrimp or scallops at once, they will steam instead of sear. This can result in a less flavorful dish. If you have a lot of seafood, consider cooking in batches. This way, each piece gets the attention it deserves, leading to a beautifully cooked meal.

Garlic Butter Shrimp and Scallops Recipe truly shine.

By following these cooking notes, you’ll be well on your way to creating a stunning seafood dish that’s sure to impress. Now, let’s explore some serving suggestions to complement your delicious creation!

Serving Suggestions for Garlic Butter Shrimp and Scallops Recipe

Garlic Butter Shrimp and Scallops Recipe, it’s time to think about how to serve this delightful dish. Presentation can elevate your meal, making it even more enjoyable. Here are some serving suggestions to enhance your dining experience:

  • Over Pasta: Serve the shrimp and scallops over a bed of cooked pasta, such as linguine or fettuccine. The garlic butter sauce will cling beautifully to the noodles, creating a rich and satisfying meal.
  • With Rice: A fluffy serving of white or brown rice makes a great base for this dish. The rice will soak up the delicious garlic butter sauce, ensuring every bite is packed with flavor.
  • On a Bed of Greens: For a lighter option, serve the seafood over a bed of fresh greens, like arugula or spinach. Drizzle with a bit of extra lemon juice for a refreshing touch.
  • With Crusty Bread: Pair your dish with slices of crusty bread or garlic bread. This is perfect for soaking up any leftover garlic butter sauce, making every bite count!
  • Garnished with Fresh Herbs: Don’t forget to sprinkle extra fresh parsley or even basil on top before serving. This adds a pop of color and freshness that enhances the overall presentation.

Garlic Butter Shrimp and Scallops Recipe. A light vinaigrette salad can balance the richness of the dish, while steamed asparagus or broccoli adds a nutritious touch.

Finally, don’t forget the lemon wedges! They not only add a zesty flavor but also make for a beautiful garnish. A squeeze of fresh lemon juice right before eating can brighten the dish and enhance the seafood flavors.

Garlic Butter Shrimp and Scallops Recipe will not only taste amazing but also look stunning on the table. Now, let’s move on to some tips for perfecting this delicious seafood dish!

Tips for Perfecting Garlic Butter Shrimp and Scallops Recipe

Garlic Butter Shrimp and Scallops Recipe, there are several tips that can help you achieve the best results. These simple yet effective suggestions will ensure your dish is flavorful, beautifully cooked, and a delight to serve. Let’s explore some of these helpful tips!

First, always start with high-quality seafood. Fresh shrimp and scallops will provide the best flavor and texture. If you can, buy them from a trusted fishmonger or grocery store. If using frozen seafood, ensure it is properly thawed and patted dry before cooking. This prevents excess moisture, which can lead to steaming instead of searing.

Next, don’t rush the cooking process. Cooking shrimp and scallops requires attention to detail. For shrimp, cook them just until they turn pink and opaque. This usually takes about 2-3 minutes. Overcooking can make them rubbery, which is not enjoyable. Similarly, scallops should be golden brown on the outside and opaque in the center. Searing them for 2-3 minutes on each side will give you that perfect crust.

Another important tip is to season generously. Salt and pepper are essential, but don’t be afraid to experiment with other spices. A sprinkle of paprika or a dash of cayenne can add depth to the dish. Taste as you go, adjusting the seasoning to your preference. This will help you create a dish that is perfectly balanced and bursting with flavor.

Additionally, consider using a combination of cooking oils. While butter is the star of this recipe, adding a splash of olive oil can help raise the smoke point. This means you can achieve a nice sear without burning the butter. Just remember to keep the butter for that rich flavor!

Garlic Butter Shrimp and Scallops Recipe, don’t forget to garnish with fresh parsley and serve with lemon wedges. This not only enhances the presentation but also adds a fresh burst of flavor when squeezed over the dish.

Garlic Butter Shrimp and Scallops Recipe. With practice, you’ll create a dish that impresses family and friends alike. Now, let’s break down the time needed for this delicious recipe!

Breakdown of Time for Garlic Butter Shrimp and Scallops Recipe

Garlic Butter Shrimp and Scallops Recipe can help you plan your meal better. Whether you’re cooking for a special occasion or a weeknight dinner, knowing the prep and cooking times will ensure everything runs smoothly. Here’s a breakdown of the time needed for this delicious seafood dish.

Prep Time

Garlic Butter Shrimp and Scallops Recipe is approximately 15 minutes. This includes gathering your ingredients, peeling and deveining the shrimp, and patting the scallops dry. If you choose to add vegetables, such as bell peppers or zucchini, you’ll need a few extra minutes to chop them. Having everything ready before you start cooking will make the process much easier!

Cooking Time

The cooking time for this recipe is about 10 minutes. This includes sautéing the garlic, cooking the shrimp, searing the scallops, and combining all the ingredients. Since both shrimp and scallops cook quickly, it’s essential to keep an eye on them to avoid overcooking. The total cooking time is short, making this dish perfect for a quick yet impressive meal.

Total Time

Garlic Butter Shrimp and Scallops Recipe to take around 25 minutes from start to finish. This includes both prep and cooking times. With such a quick turnaround, you can enjoy a gourmet seafood dish without spending hours in the kitchen. It’s an ideal choice for busy weeknights or when you want to impress guests with minimal effort!

Now that you have a clear understanding of the time involved, you’re ready to dive into the cooking process. Let’s move on to the nutritional information for this delightful dish!

Nutritional Information for Garlic Butter Shrimp and Scallops Recipe

Garlic Butter Shrimp and Scallops Recipe not only delights your taste buds but also provides valuable nutrients. Here’s a breakdown of the nutritional information per serving, so you can enjoy this dish while keeping track of your dietary needs.

Calories

Garlic Butter Shrimp and Scallops Recipe contains approximately 320 calories. This makes it a satisfying yet light option for dinner. The combination of shrimp and scallops provides a rich source of protein while keeping the calorie count reasonable. Enjoying this dish can fit well into a balanced meal plan.

Protein

One of the standout features of this recipe is its high protein content. Each serving offers about 30 grams of protein. Shrimp and scallops are excellent sources of lean protein, which is essential for muscle repair and overall health. Including this dish in your diet can help you meet your daily protein requirements while enjoying a delicious seafood meal.

Sodium

Garlic Butter Shrimp and Scallops Recipe is approximately 600 milligrams per serving. While this is a moderate amount, it’s important to be mindful of your sodium intake, especially if you are watching your salt consumption. You can adjust the seasoning to your taste, using less salt if desired. Fresh ingredients and herbs can also enhance flavor without adding extra sodium.

Garlic Butter Shrimp and Scallops Recipe is a nutritious choice that provides a good balance of calories, protein, and flavor. It’s a fantastic option for those looking to enjoy a healthy seafood dish without compromising on taste. Now that you have the nutritional information, let’s address some frequently asked questions about this delightful recipe!

FAQs about Garlic Butter Shrimp and Scallops Recipe

Can I use frozen shrimp and scallops for this recipe?

Garlic Butter Shrimp and Scallops Recipe. However, it’s important to thaw them completely before cooking. To do this, place them in the refrigerator overnight or run them under cold water for a quicker thaw. Once thawed, pat them dry with a paper towel to remove excess moisture. This step is crucial for achieving that perfect sear and preventing the seafood from becoming rubbery. Using frozen seafood can still yield delicious results, so don’t hesitate to use what you have on hand!

What can I serve with Garlic Butter Shrimp and Scallops?

Garlic Butter Shrimp and Scallops Recipe. Here are some great ideas:

  • Pasta: Serve the seafood over a bed of linguine or fettuccine, allowing the garlic butter sauce to coat the noodles.
  • Rice: Fluffy white or brown rice makes an excellent base, soaking up the rich flavors of the dish.
  • Salad: A light side salad with mixed greens, cherry tomatoes, and a vinaigrette can balance the richness of the seafood.
  • Vegetables: Steamed or roasted vegetables, such as asparagus or broccoli, add color and nutrition to your meal.
  • Crusty Bread: Serve with slices of crusty bread or garlic bread for dipping into the delicious garlic butter sauce.

These options will complement your dish beautifully, making for a well-rounded and satisfying meal!

How do I store leftovers of Garlic Butter Shrimp and Scallops?

Garlic Butter Shrimp and Scallops Recipe, storing them properly is key to maintaining their flavor and texture. Here’s how to do it:

  • Cool Down: Allow the dish to cool to room temperature before storing. This helps prevent condensation in the container.
  • Use an Airtight Container: Transfer the leftovers to an airtight container. This will keep the seafood fresh and prevent any odors from affecting the taste.
  • Refrigerate: Store the container in the refrigerator for up to 2 days. For best quality, try to consume the leftovers within this time frame.
  • Reheat Gently: When you’re ready to enjoy the leftovers, reheat them gently in a skillet over low heat. Add a splash of water or broth to help keep the seafood moist.

Garlic Butter Shrimp and Scallops Recipe even after the initial meal!

Conclusion on Garlic Butter Shrimp and Scallops Recipe

Garlic Butter Shrimp and Scallops Recipe is a delightful dish that brings together the best of seafood in a simple yet elegant way. With its rich flavors and quick preparation, it’s perfect for both special occasions and casual weeknight dinners. The combination of succulent shrimp and tender scallops, all enveloped in a luscious garlic butter sauce, creates a meal that is sure to impress.

Throughout this article, we’ve explored the essential ingredients, step-by-step preparation, and various ways to customize this recipe to suit your taste. Whether you choose to add vegetables for a nutritious boost or spice things up with a kick of heat, the possibilities are endless. The cooking notes and tips provided will help you achieve the best results, ensuring that your dish is not only delicious but also visually appealing.

Garlic Butter Shrimp and Scallops Recipe, remember to pair it with your favorite sides, such as pasta, rice, or a fresh salad. The right accompaniments can elevate your meal, making it a truly memorable dining experience. And don’t forget the lemon wedges for that extra burst of freshness!

Garlic Butter Shrimp and Scallops Recipe, delighting family and friends with your culinary skills. Happy cooking!

Garlic Parmesan Pasta Recipe is a must-try dish!

Introduction to Garlic Parmesan Pasta Recipe

Welcome to the delightful world of Garlic Parmesan Pasta! This dish is a creamy, comforting meal that brings together the rich flavors of garlic and Parmesan cheese. It’s perfect for a cozy dinner or a quick weeknight meal. With just a handful of ingredients, you can create a dish that feels gourmet yet is incredibly easy to prepare.

What Makes Garlic Parmesan Pasta Special?

What sets Garlic Parmesan Pasta apart is its simplicity and flavor. The combination of garlic and Parmesan creates a savory sauce that clings beautifully to the pasta. The creamy texture makes every bite feel indulgent, while the garlic adds a fragrant kick that elevates the dish. Plus, it’s versatile! You can easily customize it by adding proteins or vegetables, making it suitable for everyone at the table.

Another reason this recipe shines is its quick preparation time. In less than 30 minutes, you can whip up a delicious meal that will impress your family and friends. Whether you’re a seasoned cook or a beginner, this Garlic Parmesan Pasta Recipe is sure to become a favorite in your kitchen.

So, let’s dive into the ingredients and get started on this mouthwatering journey!

Ingredients for Garlic Parmesan Pasta Recipe

To create the perfect Garlic Parmesan Pasta, you’ll need a few simple ingredients. Each one plays a vital role in building the rich, creamy flavor that makes this dish so special. Here’s what you’ll need:

  • 8 ounces of spaghetti or fettuccine: Choose your favorite pasta type for a delightful base.
  • 4 tablespoons of unsalted butter: This adds richness and helps create a smooth sauce.
  • 4 cloves of garlic, finely chopped: Fresh garlic is key for that aromatic flavor.
  • 1 teaspoon of crushed red pepper flakes (optional): For those who enjoy a little heat, this adds a nice kick.
  • 1 cup of heavy cream: This is what makes the sauce creamy and luscious.
  • 1 cup of freshly grated Parmesan cheese: Freshly grated cheese melts better and enhances the flavor.
  • Salt and black pepper to taste: Essential for seasoning and bringing out the flavors.
  • Chopped fresh parsley for garnish: This adds a pop of color and freshness to your dish.

These ingredients come together to create a delicious Garlic Parmesan Pasta that is sure to please everyone. The combination of creamy sauce, savory garlic, and cheesy goodness makes this dish a standout. Now that you have your ingredients ready, let’s move on to the step-by-step preparation!

Step-by-Step Preparation of Garlic Parmesan Pasta Recipe

Now that you have all your ingredients ready, it’s time to bring this Garlic Parmesan Pasta to life! Follow these simple steps to create a creamy, delicious dish that everyone will love.

Step 1: Cooking the Pasta

Start by boiling a large pot of salted water. This is important because it helps flavor the pasta as it cooks. Once the water is boiling, add your spaghetti or fettuccine. Cook according to the package instructions until the pasta is al dente, which means it should be firm to the bite. This usually takes about 8-10 minutes. Remember to stir occasionally to prevent sticking!

When the pasta is done, save about a cup of the starchy pasta water. This water is great for adjusting the sauce later. After saving the water, drain the rest of the pasta and set it aside. This step is crucial as it prepares the base for your creamy sauce.

Step 2: Preparing the Garlic and Butter Mixture

In the same pot you used for the pasta, melt 4 tablespoons of unsalted butter over medium heat. The butter adds a rich flavor to the dish. Once melted, add the finely chopped garlic. If you like a bit of spice, sprinkle in the crushed red pepper flakes at this point.

Sauté the garlic for about 1-2 minutes. Stir frequently to ensure it becomes fragrant but doesn’t brown. Burnt garlic can taste bitter, so keep an eye on it! This step is where the magic begins, as the aroma of garlic fills your kitchen.

Step 3: Combining Ingredients

Once the garlic is fragrant, it’s time to add the heavy cream. Pour it into the pot and let it come to a gentle simmer. This will create a luscious base for your sauce. Stir the mixture occasionally to combine the flavors.

After the cream has warmed up, it’s time to introduce the drained pasta back into the pot. Toss the pasta in the creamy garlic mixture, ensuring every strand is coated. This is where the dish starts to come together beautifully!

Step 4: Adding Parmesan Cheese

Now comes the best part—adding the Parmesan cheese! Gradually stir in 1 cup of freshly grated Parmesan cheese. As you mix, the cheese will melt into the sauce, creating a creamy and cheesy delight. If the sauce seems too thick, don’t worry! Just add a splash of the reserved pasta water until you reach your desired consistency.

Make sure to taste the sauce at this point. You can adjust the seasoning with salt and black pepper to enhance the flavors. This step is essential for making sure your Garlic Parmesan Pasta is perfectly seasoned.

Step 5: Final Touches and Serving

Once everything is well combined and heated through, it’s time to serve! Dish out the creamy Garlic Parmesan Pasta onto plates or into bowls. For a beautiful presentation, garnish with chopped fresh parsley. This adds a lovely pop of color and freshness to your dish.

Serve the pasta hot and enjoy the delightful flavors! This Garlic Parmesan Pasta is not only easy to make but also incredibly satisfying. Your family and friends will surely be impressed!

Variations of Garlic Parmesan Pasta Recipe

While the classic Garlic Parmesan Pasta is delicious on its own, there are many ways to customize it. Adding different ingredients can enhance the flavors and make the dish even more satisfying. Here are some tasty variations to consider!

Adding Protein: Chicken or Shrimp

If you want to make your Garlic Parmesan Pasta heartier, consider adding protein. Cooked chicken or shrimp are excellent choices. For chicken, you can grill or sauté it in a separate pan with a bit of olive oil, salt, and pepper. Once cooked, slice it into bite-sized pieces and toss it with the pasta just before serving.

Shrimp is another fantastic option. Simply sauté peeled and deveined shrimp in the same pot after cooking the garlic. Cook them until they turn pink, which usually takes about 3-4 minutes. Then, follow the steps to add the cream and cheese. The shrimp will soak up the flavors, making your dish even more delightful!

Vegetarian Options: Adding Vegetables

For those who prefer a vegetarian dish, adding vegetables is a great way to boost nutrition and flavor. You can sauté vegetables like spinach, broccoli, or bell peppers along with the garlic. This not only adds color but also enhances the taste of your Garlic Parmesan Pasta.

To do this, simply add your chosen vegetables to the pot after the garlic has sautéed. Cook them until they are tender, then proceed with adding the cream and cheese. This way, you’ll have a creamy, cheesy pasta dish packed with healthy veggies!

These variations allow you to tailor the Garlic Parmesan Pasta to your taste. Whether you choose to add protein or vegetables, each option brings a unique twist to this classic recipe. Enjoy experimenting and finding your favorite combination!

Cooking Note for Garlic Parmesan Pasta Recipe

When preparing your Garlic Parmesan Pasta, a few cooking notes can help ensure your dish turns out perfectly every time. First, always use fresh ingredients. Fresh garlic and freshly grated Parmesan cheese make a significant difference in flavor. Pre-grated cheese often contains anti-caking agents that can affect the melting process, resulting in a less creamy sauce.

Next, pay attention to the cooking time of your pasta. Cooking it to al dente is crucial. This means the pasta should be firm yet tender. Overcooked pasta can become mushy and won’t hold up well in the creamy sauce. Remember, the pasta will continue to cook slightly after you drain it, so it’s best to err on the side of undercooking it just a bit.

Another important tip is to reserve that starchy pasta water! This water is a secret weapon for adjusting the sauce’s consistency. If your sauce is too thick, adding a splash of this water can help loosen it up while also adding flavor. The starch in the water helps the sauce cling to the pasta better, creating a more cohesive dish.

Lastly, don’t rush the process. Allow the garlic to sauté gently without browning. This step is essential for developing the rich, aromatic flavor that defines this dish. Take your time, and enjoy the cooking experience. The result will be a creamy, delicious Garlic Parmesan Pasta that you and your loved ones will savor!

Serving Suggestions for Garlic Parmesan Pasta Recipe

Once you’ve prepared your delicious Garlic Parmesan Pasta, it’s time to think about how to serve it. The right side dishes and beverages can elevate your meal, making it even more enjoyable. Here are some fantastic serving suggestions to complement your creamy pasta dish.

Pairing with Side Dishes

When it comes to side dishes, you want to choose options that balance the richness of the Garlic Parmesan Pasta. Here are a few ideas:

  • Garlic Bread: A classic pairing! The crispy, buttery garlic bread is perfect for soaking up any leftover sauce.
  • Caesar Salad: A fresh Caesar salad adds a crunchy texture and a tangy flavor that contrasts beautifully with the creamy pasta.
  • Steamed Vegetables: Lightly steamed broccoli, asparagus, or green beans provide a healthy and colorful addition to your meal.
  • Caprese Salad: Fresh tomatoes, mozzarella, and basil drizzled with balsamic glaze offer a refreshing side that complements the pasta’s flavors.

These side dishes not only enhance your meal but also add variety to your dining experience. Choose one or two to serve alongside your Garlic Parmesan Pasta for a well-rounded dinner.

Wine Pairings

Pairing the right wine with your Garlic Parmesan Pasta can elevate the entire dining experience. Here are some excellent wine options to consider:

  • Chardonnay: A buttery Chardonnay complements the creamy sauce beautifully, enhancing the flavors of the dish.
  • Sauvignon Blanc: This wine’s crisp acidity cuts through the richness of the pasta, providing a refreshing contrast.
  • Pinot Grigio: A light and fruity Pinot Grigio pairs well with the garlic and cheese, making it a delightful choice.
  • Prosecco: If you prefer sparkling wine, Prosecco adds a fun, bubbly touch that can brighten up your meal.

Choosing the right wine can make your Garlic Parmesan Pasta dinner feel extra special. Whether you prefer white or sparkling, these options will enhance the flavors of your dish.

With these serving suggestions, your Garlic Parmesan Pasta will be a hit at the dinner table. Enjoy the delightful combination of flavors and the company of your loved ones!

Tips for Perfecting Your Garlic Parmesan Pasta Recipe

To make your Garlic Parmesan Pasta truly shine, a few tips can help you achieve the best results. These simple tricks will enhance the flavor and texture of your dish, ensuring it’s a hit every time you serve it. Here are some essential tips to keep in mind:

  • Use Fresh Ingredients: Always opt for fresh garlic and freshly grated Parmesan cheese. Fresh ingredients significantly improve the flavor of your dish. Pre-grated cheese often contains additives that can affect the creaminess of your sauce.
  • Don’t Overcook the Pasta: Cooking your pasta to al dente is crucial. This means it should be firm yet tender. Overcooked pasta can become mushy and won’t hold up well in the sauce. Remember, the pasta will continue to cook slightly after draining.
  • Reserve Pasta Water: Always save a cup of the starchy pasta water before draining. This water is a great tool for adjusting the sauce’s consistency. If your sauce is too thick, adding a splash of this water can help loosen it while enhancing the flavor.
  • Control the Heat: When sautéing garlic, keep the heat at medium. This prevents the garlic from burning, which can create a bitter taste. Stir frequently to ensure even cooking and to release the garlic’s aromatic flavor.
  • Season Generously: Don’t forget to season your dish with salt and black pepper. Taste the sauce before serving and adjust the seasoning as needed. This step is essential for bringing out the flavors in your Garlic Parmesan Pasta.
  • Experiment with Add-Ins: Feel free to customize your dish by adding proteins or vegetables. Cooked chicken, shrimp, or sautéed spinach can enhance the meal and make it more filling. Get creative and find your favorite combinations!
  • Garnish for Presentation: A sprinkle of fresh parsley not only adds color but also a hint of freshness. This simple touch can elevate the presentation of your dish, making it look as good as it tastes.

By following these tips, you’ll be well on your way to creating a delicious Garlic Parmesan Pasta that impresses everyone at the table. Enjoy the process and savor the delightful flavors of this creamy dish!

Breakdown of Time for Garlic Parmesan Pasta Recipe

Understanding the time needed for each step in your Garlic Parmesan Pasta Recipe can help you plan your cooking efficiently. Here’s a simple breakdown of the time required for preparation and cooking, so you can enjoy your meal without any rush.

Prep Time

The prep time for this Garlic Parmesan Pasta is quite short. You’ll need about 10 minutes to gather and prepare your ingredients. This includes:

  • Measuring out the pasta, butter, and cream.
  • Chopping the garlic and parsley.
  • Grating the Parmesan cheese.

Having everything ready before you start cooking makes the process smoother and more enjoyable!

Cooking Time

The cooking time for this dish is approximately 15-20 minutes. Here’s how it breaks down:

  • Cooking the pasta: 8-10 minutes.
  • Sautéing the garlic: 1-2 minutes.
  • Making the sauce and combining ingredients: 5-8 minutes.

With these steps, you’ll have a delicious meal ready in no time!

Total Time

In total, you can expect to spend about 25-30 minutes from start to finish. This makes Garlic Parmesan Pasta a fantastic option for a quick weeknight dinner or a last-minute meal for guests. With just a little time and effort, you can create a creamy, flavorful dish that everyone will love!

Nutritional Information for Garlic Parmesan Pasta Recipe

Understanding the nutritional content of your Garlic Parmesan Pasta is essential for making informed choices about your meals. This dish is not only delicious but also provides a satisfying balance of macronutrients. Here’s a closer look at the nutritional information per serving:

Calories

Each serving of Garlic Parmesan Pasta contains approximately 490 calories. This calorie count makes it a hearty meal that can keep you full and satisfied. The combination of creamy sauce and pasta provides a comforting experience, perfect for a cozy dinner.

Protein Content

In terms of protein, this dish offers about 12 grams per serving. While this is a decent amount, you can easily boost the protein content by adding cooked chicken, shrimp, or even beans. These additions not only enhance the flavor but also make the meal more filling and nutritious.

Sodium Levels

The sodium levels in Garlic Parmesan Pasta can vary based on the ingredients used. On average, you can expect around 800 mg of sodium per serving. To manage sodium intake, consider using low-sodium butter and cheese. Additionally, be mindful of how much salt you add during cooking. This way, you can enjoy your meal while keeping your sodium levels in check.

By being aware of the nutritional information, you can enjoy your Garlic Parmesan Pasta while making choices that align with your dietary needs. Whether you’re looking for a comforting meal or a quick dinner option, this dish fits the bill!

FAQs about Garlic Parmesan Pasta Recipe

Can I make Garlic Parmesan Pasta ahead of time?

Yes, you can prepare Garlic Parmesan Pasta ahead of time! However, it’s best to store the pasta and sauce separately. Cook the pasta until al dente, then toss it with a little olive oil to prevent sticking. For the sauce, prepare it as directed and let it cool before storing it in an airtight container. When you’re ready to serve, simply reheat the sauce on the stove and add the pasta. You may need to add a splash of reserved pasta water to loosen the sauce.

What can I substitute for Parmesan cheese?

If you don’t have Parmesan cheese, there are several substitutes you can use. Pecorino Romano is a great alternative, offering a similar salty flavor. Nutritional yeast is an excellent dairy-free option that adds a cheesy taste without the calories. For a milder flavor, you can use Grana Padano or even a blend of mozzarella and cheddar. Just keep in mind that each substitute will slightly change the flavor profile of your Garlic Parmesan Pasta.

Is Garlic Parmesan Pasta recipe suitable for meal prep?

Absolutely! Garlic Parmesan Pasta is perfect for meal prep. You can make a large batch and divide it into individual portions. Store the pasta and sauce separately to maintain the best texture. When you’re ready to eat, simply reheat the pasta and sauce together. This makes for a quick and satisfying meal during busy weekdays. Just remember to add a little water or cream when reheating to keep the sauce creamy!

How can I make Garlic Parmesan Pasta spicier?

If you love a bit of heat, there are several ways to spice up your Garlic Parmesan Pasta. Start by adding more crushed red pepper flakes to the garlic and butter mixture. You can also include diced jalapeños or a splash of hot sauce for an extra kick. For a smoky flavor, consider adding a pinch of smoked paprika. Adjust the spice level to your liking, and enjoy a deliciously fiery twist on this classic dish!

Conclusion on Garlic Parmesan Pasta Recipe

In conclusion, the Garlic Parmesan Pasta Recipe is a delightful dish that combines simplicity with rich flavors. It’s a perfect choice for anyone looking to create a comforting meal without spending hours in the kitchen. With just a few ingredients, you can whip up a creamy, cheesy pasta that will impress your family and friends.

This recipe not only offers a satisfying taste but also allows for endless customization. Whether you choose to add proteins like chicken or shrimp, or incorporate fresh vegetables, the possibilities are endless. Each variation brings its own unique twist, making this dish versatile for any occasion.

Moreover, the quick preparation time makes it an ideal option for busy weeknights or last-minute gatherings. In just about 30 minutes, you can serve a delicious meal that feels gourmet. Plus, with the tips and variations provided, you can easily adapt the recipe to suit your preferences and dietary needs.

So, gather your ingredients, follow the steps, and enjoy the delightful experience of making Garlic Parmesan Pasta. Whether you’re cooking for yourself or hosting a dinner party, this dish is sure to be a hit. Embrace the creamy goodness and savor every bite of this comforting classic!