Southern Squash Casserole Recipe is a must-try dish!

Introduction to Southern Squash Casserole Recipe

What is Southern Squash Casserole?

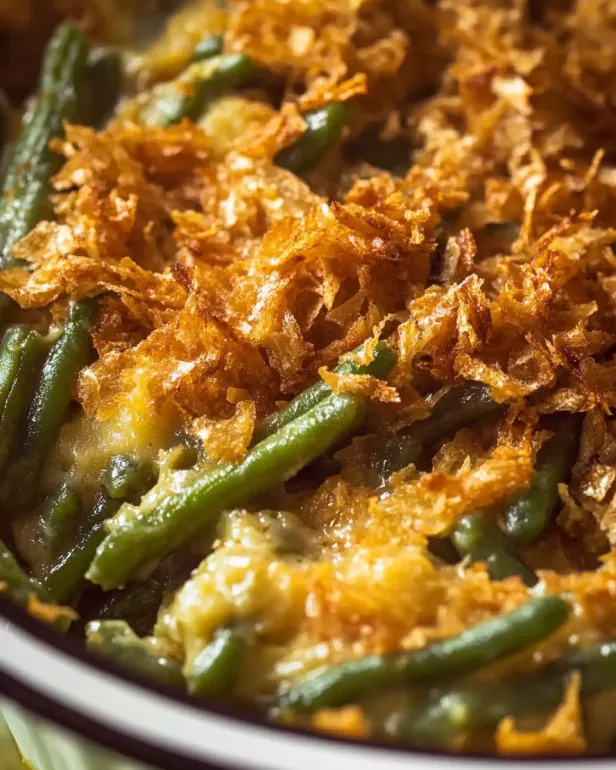
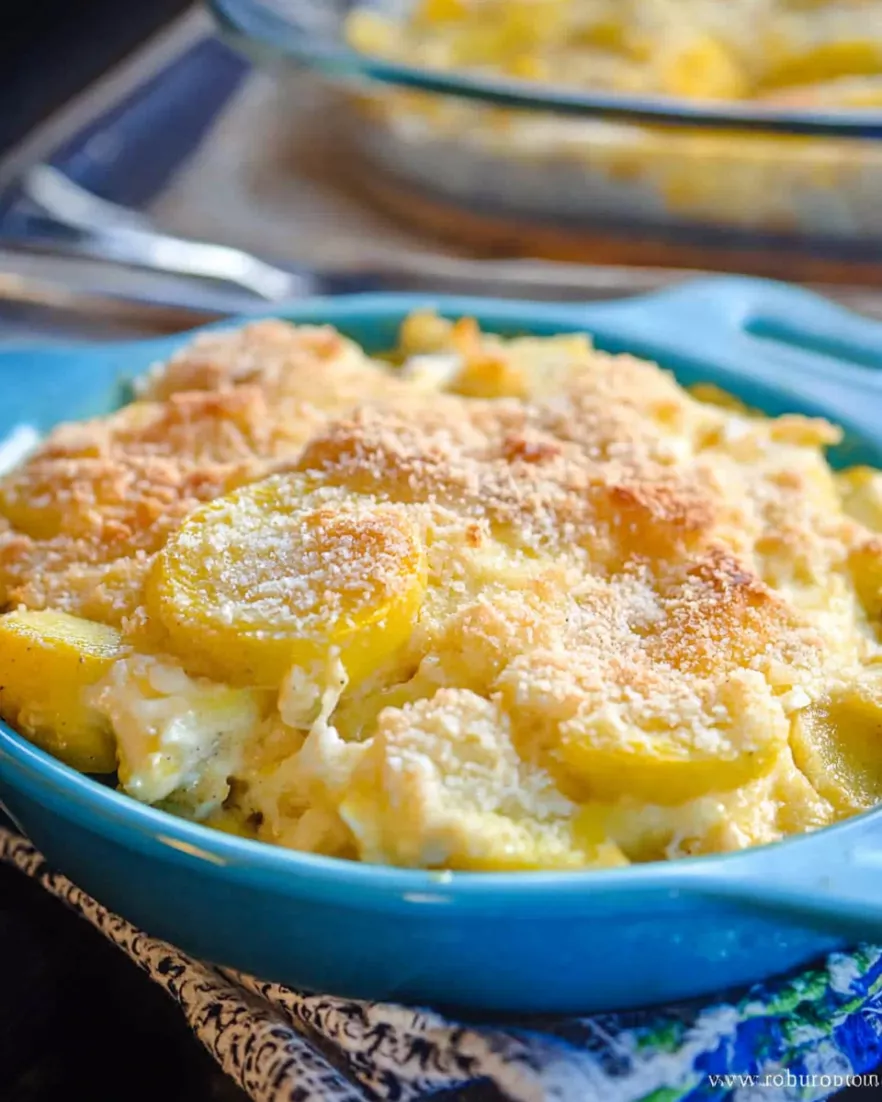
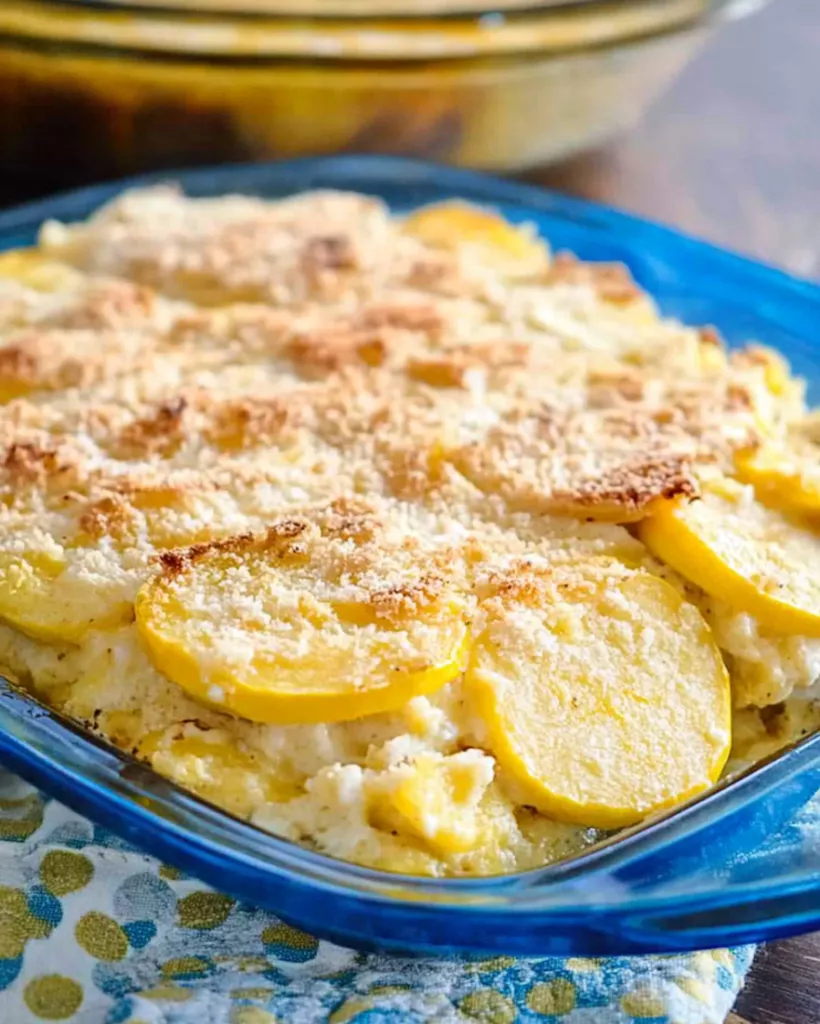
Southern Squash Casserole is a delightful dish that showcases the fresh flavors of summer squash and zucchini. This comforting casserole combines tender vegetables with creamy cheese and crunchy cracker topping, making it a favorite at family gatherings and potlucks. The dish is not only delicious but also easy to prepare, making it a go-to recipe for busy weeknights. With its rich flavors and satisfying texture, Southern Squash Casserole is sure to please both kids and adults alike.

The History of Southern Squash Casserole

The roots of Southern Squash Casserole can be traced back to the heart of Southern cooking, where fresh produce and hearty ingredients are celebrated. Squash has long been a staple in Southern gardens, and this casserole emerged as a way to use up the bountiful harvest. Traditionally, families would gather to enjoy this dish during the summer months when squash was in season. Over the years, variations have sprouted, incorporating different cheeses and spices, but the essence of the dish remains the same. It reflects the warmth and hospitality of Southern culture, bringing people together around the dinner table.

Ingredients for Southern Squash Casserole Recipe

To create a mouthwatering Southern Squash Casserole, you’ll need a selection of fresh ingredients. Each component plays a vital role in delivering the rich flavors and textures that make this dish so beloved. Here’s what you’ll need:

  • 2 medium yellow squash, sliced (about 4 cups)
  • 2 medium zucchini, sliced (about 4 cups)
  • 1 medium onion, chopped
  • 2 tablespoons olive oil
  • 1 teaspoon salt
  • 1/2 teaspoon black pepper
  • 1/2 teaspoon garlic powder
  • 1/2 teaspoon onion powder
  • 1 cup shredded cheddar cheese
  • 1 cup crushed buttery crackers (like Ritz)
  • 1/4 cup milk
  • 2 large eggs, beaten
  • 1/4 cup grated Parmesan cheese

These ingredients come together to create a delightful blend of flavors. The yellow squash and zucchini provide a fresh, light base, while the cheeses add creaminess and richness. The crushed crackers give a satisfying crunch on top, making every bite enjoyable. With just a few simple ingredients, you can whip up this comforting casserole that’s perfect for any occasion.

Step-by-Step Preparation of Southern Squash Casserole Recipe

Step 1: Preparing the Squash

First, wash the yellow squash and zucchini thoroughly. Then, slice them into thin rounds. Aim for uniform slices to ensure even cooking. This step is crucial as it helps the squash cook properly and blend well with the other ingredients. Once sliced, set them aside while you prepare the other components of the casserole.

Step 2: Cooking the Onions and Garlic

Next, heat 2 tablespoons of olive oil in a large skillet over medium heat. Add the chopped onion and sauté for about 3-4 minutes. You want the onions to become translucent and fragrant. This step adds a wonderful depth of flavor to your casserole. After the onions are ready, you can add the sliced squash and zucchini to the skillet.

Step 3: Mixing the Ingredients

Once the squash is tender, it’s time to mix everything together. In a large bowl, combine the cooked squash mixture with 1 cup of shredded cheddar cheese, 1 cup of crushed buttery crackers, 1/4 cup of milk, and 2 beaten eggs. Don’t forget to season with 1 teaspoon of salt, 1/2 teaspoon of black pepper, 1/2 teaspoon of garlic powder, and 1/2 teaspoon of onion powder. Stir well until all ingredients are evenly combined. This mixture will be the heart of your casserole, so make sure it’s well blended!

Step 4: Assembling the Casserole

Now, pour the mixture into a greased 2-quart baking dish. Spread it out evenly to ensure even cooking. Finally, sprinkle 1/4 cup of grated Parmesan cheese on top. This will create a deliciously golden crust as it bakes. The combination of cheddar and Parmesan adds a rich flavor that enhances the overall dish.

Step 5: Baking the Casserole

Preheat your oven to 350°F (175°C) if you haven’t done so already. Place the assembled casserole in the oven and bake for 30-35 minutes. You’ll know it’s ready when the casserole is set and the top is golden brown. Once baked, allow it to cool for about 5 minutes before serving. This cooling time helps the casserole firm up a bit, making it easier to serve.

Variations of Southern Squash Casserole Recipe

Adding Different Vegetables

One of the best things about Southern Squash Casserole is its versatility. You can easily add different vegetables to enhance the flavor and nutrition. For instance, consider incorporating bell peppers, carrots, or even spinach. These additions not only boost the color but also provide extra vitamins and minerals. Simply chop the vegetables into small pieces and sauté them along with the onions. This way, they will blend seamlessly into the casserole, creating a delightful medley of flavors.

Another great option is to use seasonal vegetables. In the fall, you might try adding diced butternut squash or sweet potatoes. In the spring, fresh asparagus or peas can add a nice crunch. The key is to keep the cooking time in mind. Some vegetables may require a bit more time to soften, so adjust your sautéing time accordingly. This flexibility allows you to customize the dish based on what you have on hand or what’s in season, making it a perfect recipe for any time of year.

Cheese Variations in Southern Squash Casserole Recipe

Cheese is a star ingredient in Southern Squash Casserole, and you can play around with different types to suit your taste. While cheddar cheese is a classic choice, you might want to experiment with other varieties. For a spicier kick, try using pepper jack cheese. It melts beautifully and adds a creamy, zesty flavor that pairs well with the squash.

If you prefer a milder taste, mozzarella cheese is another excellent option. It will give your casserole a gooey texture without overpowering the other flavors. You can also mix different cheeses for a more complex flavor profile. Combining cheddar, mozzarella, and Parmesan can create a rich, cheesy experience that everyone will love. Just remember to adjust the amount of salt in your recipe, as some cheeses can be saltier than others.

Cooking Note for Southern Squash Casserole Recipe

When preparing your Southern Squash Casserole, there are a few important cooking notes to keep in mind. These tips will help ensure that your dish turns out perfectly every time. First, always choose fresh squash and zucchini. Fresh vegetables not only taste better but also provide the best texture for your casserole. Look for firm, unblemished squash with vibrant colors.

Another key point is to avoid overcooking the squash during the sautéing process. You want the squash to be tender but not mushy. Overcooked squash can lead to a watery casserole, which is not ideal. Stirring occasionally while cooking will help achieve the right consistency.

Additionally, if you prefer a creamier casserole, consider adding a bit more milk or even sour cream to the mixture. This will enhance the richness and make every bite even more satisfying. On the other hand, if you want a lighter version, you can reduce the amount of cheese or use low-fat alternatives.

Lastly, let your casserole cool for a few minutes after baking. This cooling period allows the flavors to meld together and makes it easier to serve. If you cut into it too soon, it may fall apart. By following these cooking notes, you’ll create a delicious Southern Squash Casserole that everyone will rave about!

Serving Suggestions for Southern Squash Casserole Recipe

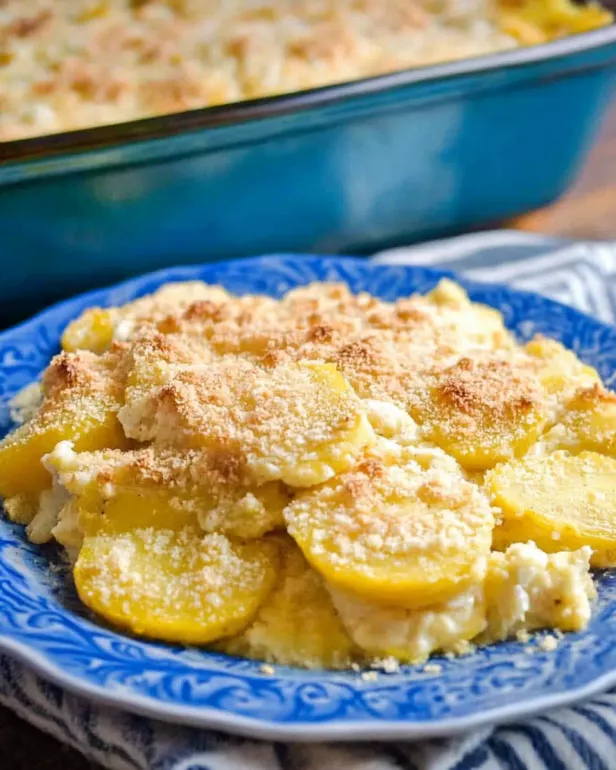
Serving Southern Squash Casserole is a delightful experience, as this dish pairs well with a variety of meals. Its creamy texture and rich flavors make it a versatile side dish that complements many main courses. Here are some serving suggestions to enhance your dining experience:

  • Grilled Meats: Southern Squash Casserole pairs beautifully with grilled chicken, pork chops, or steak. The smoky flavors from the grill contrast nicely with the creamy casserole, creating a balanced meal.
  • Barbecue Dishes: If you’re hosting a barbecue, serve the casserole alongside ribs or pulled pork. The casserole’s comforting nature will be a hit among your guests, adding a touch of Southern charm to your spread.
  • Salads: For a lighter meal, consider serving the casserole with a fresh garden salad or a classic coleslaw. The crispness of the salad will provide a refreshing contrast to the warm, cheesy casserole.
  • Breakfast or Brunch: Southern Squash Casserole can also shine at breakfast or brunch. Serve it alongside scrambled eggs, bacon, or a quiche for a hearty start to the day.
  • Vegetarian Options: If you’re looking for a vegetarian meal, pair the casserole with roasted vegetables or a quinoa salad. This combination will create a colorful and nutritious plate.

Don’t forget to garnish your casserole with fresh herbs like parsley or chives before serving. This adds a pop of color and a burst of freshness that enhances the overall presentation. With these serving suggestions, your Southern Squash Casserole will be the star of the meal, delighting everyone at the table!

Tips for Perfecting Southern Squash Casserole Recipe

Perfecting your Southern Squash Casserole is all about attention to detail and a few helpful tips. With these suggestions, you can elevate your dish to new heights, ensuring it’s a hit every time you serve it. Here are some essential tips to keep in mind:

  • Choose the Right Squash: Always opt for fresh, firm yellow squash and zucchini. Look for vegetables that are free from blemishes and have a vibrant color. Fresh squash will enhance the flavor and texture of your casserole.
  • Don’t Overcook the Vegetables: When sautéing the squash and onions, cook them just until tender. Overcooking can lead to a mushy casserole. Aim for a slight crunch to maintain the vegetables’ integrity.
  • Season Generously: Don’t be shy with your seasonings! Adjust the salt, pepper, and spices to your taste. A well-seasoned casserole will bring out the natural flavors of the squash.
  • Experiment with Toppings: While crushed buttery crackers are traditional, feel free to get creative. Try using panko breadcrumbs, crushed cornflakes, or even a sprinkle of fried onions for a different texture and flavor.
  • Let It Rest: After baking, allow the casserole to cool for about 5 minutes before serving. This resting time helps the casserole set, making it easier to cut and serve without falling apart.
  • Make It Ahead: If you’re short on time, consider preparing the casserole a day in advance. Assemble it, cover it, and store it in the fridge. When you’re ready to bake, just pop it in the oven. You may need to add a few extra minutes to the baking time.
  • Pair with Fresh Herbs: Adding fresh herbs like basil, thyme, or parsley as a garnish can brighten the dish. It adds a pop of color and a fresh flavor that complements the richness of the casserole.

By following these tips, you’ll create a Southern Squash Casserole that’s not only delicious but also visually appealing. Each bite will be a delightful experience, making your dish a favorite at any gathering!

Breakdown of Time for Southern Squash Casserole Recipe

Prep Time

Preparing your Southern Squash Casserole is a breeze! The prep time typically takes about 15-20 minutes. This includes washing and slicing the squash and zucchini, chopping the onion, and gathering all your ingredients. Having everything ready before you start cooking will make the process smoother and more enjoyable.

Cooking Time

The cooking time for the casserole is approximately 30-35 minutes. This is when the magic happens! You’ll sauté the onions and squash, mix everything together, and then bake it until golden brown. During this time, your kitchen will fill with a delightful aroma that will have everyone eagerly waiting for dinner.

Total Time

In total, you can expect to spend about 45-55 minutes from start to finish. This includes both prep and cooking time. It’s a quick and easy dish that’s perfect for busy weeknights or special occasions. With just under an hour, you can serve a delicious Southern Squash Casserole that will impress your family and friends!

Nutritional Information for Southern Squash Casserole Recipe

Calories in Southern Squash Casserole Recipe

When it comes to enjoying a delicious Southern Squash Casserole, knowing the calorie content can help you make informed choices. Each serving of this delightful dish contains approximately 220 calories. This makes it a relatively light option for a side dish or even a main course. The combination of fresh vegetables, cheese, and eggs provides a satisfying meal without overwhelming your daily calorie intake. So, you can indulge in this comforting casserole without any guilt!

Protein Content in Southern Squash Casserole Recipe

Protein is an essential nutrient that helps build and repair tissues in our bodies. Each serving of Southern Squash Casserole offers about 8 grams of protein. This protein comes from the eggs and cheese used in the recipe. Including protein in your meals is important for maintaining energy levels and keeping you feeling full longer. So, not only is this casserole tasty, but it also contributes to your daily protein needs!

Sodium Levels in Southern Squash Casserole Recipe

Monitoring sodium intake is crucial for maintaining a healthy diet. Each serving of Southern Squash Casserole contains a moderate amount of sodium, primarily from the added salt and cheese. While the exact sodium content can vary based on the specific brands of ingredients used, it’s generally around 400-500 mg per serving. If you’re watching your sodium levels, consider using low-sodium cheese or reducing the amount of added salt. This way, you can enjoy the flavors of the casserole while keeping your sodium intake in check.

FAQs about Southern Squash Casserole Recipe

Can I make Southern Squash Casserole ahead of time?

Absolutely! Making Southern Squash Casserole ahead of time is a great way to save time on busy days. You can prepare the casserole, assemble it, and then cover it tightly with plastic wrap or aluminum foil. Store it in the refrigerator for up to 24 hours before baking. When you’re ready to enjoy it, simply preheat your oven and bake as directed. You may need to add a few extra minutes to the cooking time since it will be cold from the fridge. This makes it a perfect dish for gatherings or family meals!

What can I substitute for squash in Southern Squash Casserole Recipe?

If you’re looking to switch things up, there are several delicious substitutes for squash in this casserole. You can use other vegetables like cauliflower, broccoli, or even sweet potatoes. Just remember to chop them into small, even pieces to ensure they cook properly. If you want to keep the same texture, zucchini and yellow squash are the best options. However, feel free to experiment with your favorite vegetables! Just keep in mind that cooking times may vary, so adjust accordingly.

How do I store leftovers of Southern Squash Casserole?

Storing leftovers of Southern Squash Casserole is simple! Allow the casserole to cool completely before transferring it to an airtight container. You can keep it in the refrigerator for up to 3-4 days. If you want to store it for a longer period, consider freezing it. Wrap the casserole tightly in plastic wrap and then in aluminum foil, or place it in a freezer-safe container. It can last in the freezer for up to 2-3 months. When you’re ready to enjoy it again, thaw it in the refrigerator overnight and reheat in the oven until warmed through. This way, you can savor the delicious flavors of your casserole even after a few days!

Conclusion on Southern Squash Casserole Recipe

In conclusion, the Southern Squash Casserole is more than just a dish; it’s a celebration of flavors and a testament to Southern hospitality. This recipe brings together the freshness of summer squash and zucchini, the creaminess of cheese, and the crunch of buttery crackers, creating a delightful experience for your taste buds. Whether you’re serving it at a family gathering, a potluck, or simply enjoying it on a cozy weeknight, this casserole is sure to impress.

Moreover, its versatility allows you to customize it according to your preferences. You can add different vegetables, experiment with various cheeses, or even spice it up with a kick of cayenne pepper. The possibilities are endless! Plus, with its straightforward preparation and cooking process, you can whip it up in no time, making it a perfect choice for busy cooks.

As you gather around the table to enjoy this comforting dish, remember that food is not just about nourishment; it’s about connection. Southern Squash Casserole brings people together, creating memories and sharing laughter. So, don’t hesitate to make this recipe your own and share it with loved ones. With every bite, you’ll be savoring not just a meal, but a piece of Southern tradition that warms the heart.

So, roll up your sleeves, gather your ingredients, and get ready to create a delicious Southern Squash Casserole that will surely become a favorite in your home. Happy cooking!

Air Fryer Blackened Salmon Bites are a must-try dish!

Introduction to Air Fryer Blackened Salmon Bites

What Are Air Fryer Blackened Salmon Bites?

Air Fryer Blackened Salmon Bites are delicious, bite-sized pieces of salmon that are seasoned and cooked to perfection in an air fryer. This cooking method gives the salmon a crispy exterior while keeping the inside tender and flaky. The blackening seasoning typically includes spices like paprika, garlic powder, and thyme, which create a zesty flavor profile. These nuggets are not only tasty but also a healthy option for any meal. They can be enjoyed as a snack, appetizer, or main dish, making them versatile for any occasion.

Why Choose Air Fryer Blackened Salmon Bites?

Choosing Air Fryer Blackened Salmon Bites comes with numerous benefits. First, air frying uses significantly less oil than traditional frying methods, making it a healthier choice. This means you can enjoy the crispy texture without the added calories from excess fat. Additionally, the air fryer cooks food quickly and evenly, ensuring that your salmon bites are perfectly cooked every time. The ease of preparation and cleanup makes this recipe a favorite for busy weeknights or casual gatherings. Plus, the rich flavors and delightful crunch will impress your family and friends!

Ingredients for Air Fryer Blackened Salmon Bites

To create mouthwatering Air Fryer Blackened Salmon Bites, you’ll need a few simple ingredients. These ingredients not only enhance the flavor but also ensure that your salmon bites are healthy and satisfying. Here’s what you’ll need:

  • 1 pound fresh salmon fillet, skinless and diced into small chunks
  • 2 tablespoons extra virgin olive oil
  • 1 teaspoon smoked paprika
  • 1 teaspoon garlic powder
  • 1 teaspoon onion powder
  • 1 teaspoon dried thyme
  • 1 teaspoon chili powder (adjust for heat preference)
  • 1 teaspoon sea salt
  • 1/2 teaspoon freshly ground black pepper
  • 1 tablespoon freshly squeezed lemon juice
  • Chopped cilantro for garnish (optional)

These ingredients come together to create a delightful blend of flavors. The salmon is rich in protein and omega-3 fatty acids, making it a nutritious choice. The spices add a zesty kick, while the olive oil helps achieve that perfect crispy texture in the air fryer. Don’t forget the lemon juice! It brightens up the dish and adds a refreshing touch. Feel free to get creative with your seasonings or add your favorite herbs to make this recipe your own!

Step-by-Step Preparation of Air Fryer Blackened Salmon Bites

Step 1: Preparing the Salmon

Start by selecting a fresh salmon fillet. Make sure it is skinless for the best texture. Rinse the salmon under cold water and pat it dry with paper towels. Next, cut the salmon into small, bite-sized chunks. Aim for uniform pieces to ensure even cooking. This step is crucial as it helps the salmon absorb the flavors of the marinade better. Once cut, set the salmon aside while you prepare the seasoning.

Step 2: Making the Blackening Seasoning

In a mixing bowl, combine the spices to create your blackening seasoning. Add 2 tablespoons of extra virgin olive oil, 1 teaspoon of smoked paprika, 1 teaspoon of garlic powder, 1 teaspoon of onion powder, 1 teaspoon of dried thyme, 1 teaspoon of chili powder, 1 teaspoon of sea salt, and 1/2 teaspoon of freshly ground black pepper. Whisk these ingredients together until they form a smooth mixture. This seasoning blend is what gives your salmon bites that zesty and flavorful kick!

Step 3: Coating the Salmon Bites

Now it’s time to coat the salmon chunks. Gently fold the salmon pieces into the blackening seasoning mixture. Make sure each piece is thoroughly coated. This ensures that every bite is packed with flavor. Allow the salmon to marinate for about 20-25 minutes at room temperature. This step is essential as it allows the spices to penetrate the salmon, enhancing the overall taste.

Step 4: Preheating the Air Fryer

While the salmon is marinating, preheat your air fryer to 390°F (200°C). Preheating is important as it helps achieve that crispy texture on the outside of the salmon bites. It also ensures that the salmon cooks evenly. Most air fryers take just a few minutes to reach the desired temperature, so keep an eye on it while you wait.

Step 5: Cooking the Salmon Bites

Once the air fryer is hot, carefully arrange the marinated salmon nuggets in a single layer in the basket. Avoid overcrowding the basket, as this can prevent the salmon from getting crispy. Air fry the salmon bites for 7-9 minutes. Remember to shake the basket halfway through cooking to promote even browning. The salmon should be golden and flaky when done. Keep an eye on them to avoid overcooking!

Step 6: Serving the Air Fryer Blackened Salmon Bites

After cooking, carefully remove the salmon nuggets from the air fryer. Drizzle them with freshly squeezed lemon juice for a burst of freshness. If you like, sprinkle some chopped cilantro on top for a vibrant touch. Serve the Air Fryer Blackened Salmon Bites hot, and enjoy the delightful flavors! They make a perfect snack, appetizer, or main dish.

Variations of Air Fryer Blackened Salmon Bites

Different Seasoning Options

While the classic blackening seasoning is delicious, you can easily switch things up! Experimenting with different spices can lead to exciting new flavors. For instance, try adding a teaspoon of cumin for a warm, earthy taste. You could also use Cajun seasoning for a spicier kick. If you prefer a milder flavor, consider using Italian herbs like oregano and basil. Another fun option is to mix in some lemon zest for a bright, citrusy twist. The beauty of Air Fryer Blackened Salmon Bites is their versatility. Feel free to get creative and find the perfect blend that suits your taste!

Alternative Cooking Methods

If you don’t have an air fryer, don’t worry! You can still enjoy these tasty salmon bites using other cooking methods. Baking is a great alternative. Preheat your oven to 400°F (200°C) and place the coated salmon nuggets on a baking sheet lined with parchment paper. Bake for about 12-15 minutes, flipping halfway through, until they are golden and cooked through. Grilling is another fantastic option. Simply preheat your grill and cook the salmon bites for about 3-4 minutes on each side. This method adds a lovely smoky flavor. No matter how you cook them, these salmon bites are sure to be a hit!

Cooking Note for Air Fryer Blackened Salmon Bites

When preparing Air Fryer Blackened Salmon Bites, there are a few important cooking notes to keep in mind. First, the quality of your salmon matters. Always choose fresh, high-quality salmon for the best flavor and texture. Look for bright, firm fillets without any off-putting smells. If you can, buy wild-caught salmon, as it tends to have a richer taste and is often more nutritious.

Next, consider the size of your salmon chunks. Uniform pieces ensure even cooking. If your chunks are too large, they may not cook through properly, while smaller pieces can dry out quickly. Aim for bite-sized pieces, about 1 to 1.5 inches in size, for the perfect balance of crispy exterior and tender interior.

Another tip is to monitor the cooking time closely. Air fryers can vary in temperature and cooking efficiency. If you notice that your salmon bites are browning too quickly, reduce the cooking time or lower the temperature slightly. Conversely, if they are not cooking fast enough, you can increase the time by a minute or two. Always check for doneness by ensuring the salmon is opaque and flakes easily with a fork.

Lastly, let the salmon rest for a minute or two after cooking. This allows the juices to redistribute, making each bite even more flavorful. With these cooking notes in mind, you’ll be well on your way to creating perfectly cooked Air Fryer Blackened Salmon Bites every time!

Serving Suggestions for Air Fryer Blackened Salmon Bites

Pairing with Sides

When it comes to serving Air Fryer Blackened Salmon Bites, the right sides can elevate your meal. Here are some delicious options to consider:

  • Fresh Salad: A crisp green salad with mixed greens, cherry tomatoes, and a light vinaigrette pairs wonderfully. The freshness of the salad complements the zesty salmon bites.
  • Roasted Vegetables: Roasted asparagus, broccoli, or bell peppers add a colorful and nutritious touch. The slight char from roasting enhances the overall flavor.
  • Quinoa or Rice: Serve the salmon bites over a bed of fluffy quinoa or brown rice. This adds a hearty element to your meal and absorbs the delicious juices.
  • Coleslaw: A tangy coleslaw can provide a crunchy contrast to the tender salmon. The creaminess of the slaw balances the spices beautifully.

These sides not only complement the flavors of the salmon but also create a well-rounded meal. Feel free to mix and match based on your preferences and what you have on hand!

Creative Serving Ideas

Get creative with how you serve your Air Fryer Blackened Salmon Bites! Here are some fun ideas to impress your guests:

  • Salmon Tacos: Use small corn tortillas to create tasty salmon tacos. Top with avocado, cabbage, and a drizzle of lime crema for a fresh twist.
  • Salmon Sliders: Serve the salmon bites on mini buns with lettuce and a spicy mayo. These sliders make for a fun appetizer at parties!
  • Skewers: Thread the salmon bites onto skewers with bell peppers and onions. This makes for a colorful presentation and is perfect for grilling or serving at a barbecue.
  • Dip and Enjoy: Pair the salmon bites with a zesty dipping sauce, like a garlic aioli or a spicy remoulade. This adds an extra layer of flavor and makes for a fun finger food option.

These creative serving ideas will not only make your meal more exciting but also allow you to showcase your culinary skills. Enjoy experimenting with different presentations and flavors!

Tips for Perfect Air Fryer Blackened Salmon Bites

Choosing the Right Salmon

When it comes to making Air Fryer Blackened Salmon Bites, the type of salmon you choose can make a big difference. Freshness is key! Look for salmon that is bright in color and has a firm texture. Wild-caught salmon is often the best choice, as it tends to have a richer flavor and is more nutritious than farmed varieties. If you opt for farmed salmon, ensure it is sustainably sourced. Additionally, consider the cut of salmon. Fillets are great, but you can also use salmon steaks. Just remember to cut them into bite-sized pieces for even cooking. Choosing high-quality salmon will enhance the taste and texture of your blackened bites!

Adjusting Cooking Time for Different Sizes

Cooking time is crucial for achieving perfectly cooked Air Fryer Blackened Salmon Bites. The size of your salmon chunks will affect how long they need to cook. If your pieces are larger than 1.5 inches, they may require a bit more time in the air fryer. Conversely, smaller pieces may cook faster. Always keep an eye on them as they cook. A good rule of thumb is to start with the recommended cooking time of 7-9 minutes and check for doneness. The salmon should be opaque and flake easily with a fork. If you find that your salmon bites are not quite done, add an extra minute or two, but be careful not to overcook them. This way, you’ll ensure that your salmon bites are juicy and flavorful every time!

Breakdown of Time for Air Fryer Blackened Salmon Bites

Prep Time

Preparing Air Fryer Blackened Salmon Bites is quick and easy! The prep time typically takes about 30 minutes. This includes the time needed to gather your ingredients, cut the salmon into bite-sized pieces, and mix the blackening seasoning. Additionally, you’ll want to allow the salmon to marinate for 20-25 minutes. This marinating time is essential for infusing the salmon with flavor, so don’t skip it!

Cooking Time

The cooking time for Air Fryer Blackened Salmon Bites is relatively short. Once your air fryer is preheated to 390°F, the actual cooking takes about 7-9 minutes. During this time, the salmon bites will become golden and flaky. Remember to shake the basket halfway through to ensure even cooking. This quick cooking method is one of the reasons why air frying is so popular!

Total Time

In total, you can expect to spend around 40-45 minutes from start to finish when making Air Fryer Blackened Salmon Bites. This includes both the prep and cooking times. With such a short time commitment, you can enjoy a delicious and healthy meal without spending hours in the kitchen. Perfect for busy weeknights or when you want to impress guests with minimal effort!

Nutritional Information for Air Fryer Blackened Salmon Bites

Calories

When it comes to enjoying Air Fryer Blackened Salmon Bites, you can feel good about the calories. Each serving contains approximately 240 calories. This makes it a great option for those looking to maintain a balanced diet without sacrificing flavor. The air frying method helps keep the calorie count lower compared to traditional frying, allowing you to indulge without the guilt!

Protein

One of the standout features of Air Fryer Blackened Salmon Bites is their high protein content. Each serving provides around 28 grams of protein. Salmon is an excellent source of protein, which is essential for building and repairing tissues in the body. This makes these salmon bites not only delicious but also a nutritious choice for anyone looking to boost their protein intake.

Sodium

In terms of sodium, each serving of Air Fryer Blackened Salmon Bites contains about 600 milligrams. While this is a moderate amount, it’s important to be mindful of your overall sodium intake, especially if you are watching your salt consumption. You can easily adjust the seasoning to lower the sodium content by using less salt or opting for low-sodium alternatives. This way, you can enjoy the zesty flavors without worrying too much about sodium levels!

FAQs About Air Fryer Blackened Salmon Bites

Can I use frozen salmon for Air Fryer Blackened Salmon Bites?

Yes, you can use frozen salmon for Air Fryer Blackened Salmon Bites! However, it’s best to thaw the salmon first for even cooking. To do this, place the frozen salmon in the refrigerator overnight or use the defrost setting on your microwave. Once thawed, follow the same steps for marinating and cooking. Just keep in mind that cooking times may vary slightly, so check for doneness to ensure your salmon bites are perfectly cooked!

How do I store leftovers of Air Fryer Blackened Salmon Bites?

Storing leftovers of Air Fryer Blackened Salmon Bites is easy! Allow the salmon bites to cool completely before placing them in an airtight container. You can store them in the refrigerator for up to 3 days. When you’re ready to enjoy them again, simply reheat in the air fryer at 350°F for about 3-5 minutes until warmed through. This will help maintain their crispy texture. Avoid microwaving, as it can make the salmon soggy.

What can I serve with Air Fryer Blackened Salmon Bites?

Air Fryer Blackened Salmon Bites pair wonderfully with a variety of sides! Consider serving them with a fresh salad, roasted vegetables, or a grain like quinoa or brown rice. You can also create fun dishes like salmon tacos or sliders. For a complete meal, add a tangy dipping sauce or a zesty coleslaw. The options are endless, so feel free to mix and match based on your preferences!

How do I know when the salmon is cooked through?

To check if your salmon is cooked through, look for a few key signs. The salmon should be opaque and flake easily with a fork. If you have a food thermometer, the internal temperature should reach 145°F (63°C). This ensures that the salmon is safe to eat and perfectly cooked. If you’re unsure, it’s always better to check a little earlier to avoid overcooking!

Conclusion on Air Fryer Blackened Salmon Bites

In conclusion, Air Fryer Blackened Salmon Bites are a fantastic addition to any meal. They offer a delightful combination of flavor, texture, and nutrition. With their crispy exterior and tender interior, these salmon bites are sure to please everyone at the table. The ease of preparation and quick cooking time make them perfect for busy weeknights or casual gatherings with friends and family.

By using simple ingredients and a few spices, you can create a dish that is not only delicious but also healthy. The high protein content and low calorie count make these bites a guilt-free option for those looking to maintain a balanced diet. Plus, the versatility of this recipe allows you to experiment with different seasonings and serving ideas, ensuring that you can enjoy them in various ways.

Whether you serve them as an appetizer, a main dish, or even in creative forms like tacos or sliders, Air Fryer Blackened Salmon Bites are bound to impress. So, gather your ingredients, fire up your air fryer, and treat yourself to this zesty and satisfying dish. Enjoy the delightful flavors and the joy of cooking something special!

Green Bean Casserole with a Twist is a must-try!

Introduction to Twisted Green Bean Casserole

Welcome to the delightful world of the Twisted Green Bean Casserole! This dish takes a classic favorite and gives it a fresh, exciting twist. It’s not just your ordinary green bean casserole; it’s a creamy, savory delight that will impress your family and friends. Whether you’re preparing for a holiday feast or a cozy family dinner, this casserole is sure to be a hit.

What Makes Twisted Green Bean Casserole Unique?

What sets the Twisted Green Bean Casserole apart from traditional recipes? First, it features fresh green beans, which provide a vibrant color and a satisfying crunch. The addition of cremini mushrooms and sautéed onions adds depth and flavor, making each bite a savory experience. Instead of using just cream of mushroom soup, this recipe incorporates Greek yogurt, which not only enhances the creaminess but also adds a healthy twist.

Moreover, the use of balsamic vinegar and tamari sauce introduces a unique flavor profile that elevates the dish. These ingredients create a perfect balance of tanginess and umami, making the casserole stand out. Finally, the crunchy onion rings on top provide a delightful texture contrast, ensuring that every forkful is a delicious adventure.

In essence, the Twisted Green Bean Casserole is a modern take on a beloved classic. It combines familiar flavors with innovative ingredients, making it a must-try for anyone looking to spice up their meal. So, let’s dive into the ingredients and preparation of this scrumptious dish!

Ingredients for Twisted Green Bean Casserole

Gathering the right ingredients is key to creating a delicious Twisted Green Bean Casserole. Below is a list of everything you’ll need to whip up this savory dish. Each ingredient plays a vital role in enhancing the flavor and texture, making your casserole truly special.

  • 2 pounds fresh green beans: Trimmed and cut into 2-inch pieces for that perfect bite.
  • 1 cup diced cremini mushrooms: These mushrooms add a rich, earthy flavor.
  • 1 medium yellow onion: Finely chopped to provide sweetness and depth.
  • 2 cloves garlic: Minced for a fragrant kick.
  • 1 cup Greek yogurt: This creamy ingredient adds a healthy twist and richness.
  • 1 cup grated mozzarella cheese: For that gooey, melty topping.
  • 1 can (10.5 ounces) condensed cream of mushroom soup: A classic base that brings everything together.
  • 1 tablespoon balsamic vinegar: Adds a tangy depth of flavor.
  • 1 tablespoon tamari sauce: A gluten-free alternative to soy sauce, enhancing umami.
  • 1 teaspoon sea salt: To season the dish perfectly.
  • 1/2 teaspoon freshly ground black pepper: For a touch of spice.
  • 1 cup crunchy onion rings: These provide a delightful crunch on top.
  • 1 tablespoon avocado oil: A healthy oil for sautéing the vegetables.

With these ingredients, you’re well on your way to creating a mouthwatering Twisted Green Bean Casserole. Each component contributes to the overall flavor, making it a dish that everyone will love. Now that you have your ingredients ready, let’s move on to the preparation steps!

Preparation of Twisted Green Bean Casserole

Now that you have gathered all the ingredients, it’s time to prepare your Twisted Green Bean Casserole. The preparation is straightforward and fun! Follow these steps to create a dish that will surely impress.

Step 1: Prepping the Green Beans

Start by prepping the green beans. First, trim the ends and cut them into 2-inch pieces. This size is perfect for even cooking and easy eating. Next, bring a large saucepan of salted water to a boil. Once boiling, add the green beans and blanch them for about 5 minutes. This process helps to keep their vibrant color and slightly tender texture. After 5 minutes, drain the beans and set them aside. They will be ready to mix into the casserole!

Step 2: Making the Sauce

While the green beans are cooling, it’s time to make the creamy sauce. In a skillet, heat 1 tablespoon of avocado oil over medium heat. Add the finely chopped yellow onion and diced cremini mushrooms. Sauté them for about 5-7 minutes until they become soft and fragrant. Then, add the minced garlic and cook for another minute. This step enhances the flavors and aroma of your casserole.

In a separate mixing bowl, combine the Greek yogurt, condensed cream of mushroom soup, balsamic vinegar, tamari sauce, sea salt, and black pepper. Whisk these ingredients together until smooth. This creamy mixture will coat the green beans and add a rich flavor to the casserole.

Step 3: Combining Ingredients

Now it’s time to bring everything together! In the bowl with the creamy sauce, gently fold in the blanched green beans and the sautéed mushroom-onion mixture. Make sure every piece of green bean is evenly coated with the sauce. This step is crucial for ensuring that every bite is packed with flavor!

Step 4: Baking the Casserole

Once everything is combined, pour the mixture into a greased 9×13-inch baking dish. Spread it out evenly, and then sprinkle the grated mozzarella cheese on top. This cheese will melt beautifully and create a deliciously gooey layer. Place the dish in your preheated oven at 350°F and bake for 25 minutes. After this time, take it out and sprinkle the crunchy onion rings on top. Return it to the oven for an additional 10 minutes, or until the onion rings are golden and crispy. Your Twisted Green Bean Casserole is almost ready!

Once baked, allow the casserole to cool slightly before serving. This dish is perfect for family gatherings or as a comforting side for any meal. Enjoy the delightful flavors and textures of your homemade Twisted Green Bean Casserole!

Variation of Twisted Green Bean Casserole

While the classic Twisted Green Bean Casserole is delicious on its own, there are many ways to customize it. Whether you want to try different flavors or accommodate dietary needs, these variations will help you create a dish that suits your taste. Let’s explore some alternative ingredients and dietary modifications!

Alternative Ingredients for Twisted Green Bean Casserole

Switching up ingredients can bring new life to your Twisted Green Bean Casserole. Here are some fun alternatives to consider:

  • Vegetables: You can add other vegetables like sliced bell peppers, carrots, or even corn for a pop of color and flavor.
  • Cheese: Instead of mozzarella, try using cheddar or gouda for a different cheesy experience.
  • Protein: For a heartier dish, mix in cooked bacon, sausage, or shredded turkey. This addition will make it a complete meal.
  • Herbs and Spices: Fresh herbs like thyme or rosemary can enhance the flavor. A pinch of red pepper flakes can add a nice kick!

These alternatives allow you to personalize your casserole while keeping the essence of the original recipe. Feel free to experiment and find your favorite combination!

Dietary Modifications for Twisted Green Bean Casserole

Making your Twisted Green Bean Casserole suitable for various dietary needs is easier than you might think. Here are some modifications to consider:

  • Gluten-Free: Ensure that the cream of mushroom soup and tamari sauce are gluten-free. You can also make your own cream of mushroom soup using gluten-free ingredients.
  • Dairy-Free: Substitute Greek yogurt and mozzarella cheese with dairy-free alternatives like cashew cream and vegan cheese.
  • Low-Carb: For a low-carb version, replace the cream of mushroom soup with a homemade sauce made from blended cauliflower and nutritional yeast.
  • Vegan: Use plant-based yogurt and cheese, and skip any meat additions to keep it completely vegan.

These dietary modifications ensure that everyone can enjoy the Twisted Green Bean Casserole, no matter their dietary preferences. With a little creativity, you can make this dish accessible and delicious for all!

Cooking Note for Twisted Green Bean Casserole

When preparing the Twisted Green Bean Casserole, a few cooking notes can help you achieve the best results. These tips will ensure that your dish turns out perfectly every time, making it a favorite at your table.

First, always choose fresh green beans. They should be bright green and firm to the touch. Avoid beans that look wilted or have brown spots. Fresh beans will give your casserole a vibrant color and a satisfying crunch.

Next, when blanching the green beans, make sure to not overcook them. Blanching is meant to soften them slightly while keeping their bright color. If you cook them too long, they can become mushy in the casserole. Remember, they will continue to cook in the oven!

For the sautéed vegetables, ensure that your skillet is hot enough before adding the onions and mushrooms. This helps to release their natural flavors and prevents them from steaming. Stir them frequently to avoid burning, and cook until they are soft and fragrant.

When mixing the creamy sauce, whisk it thoroughly to avoid lumps. A smooth sauce will coat the green beans evenly, ensuring every bite is delicious. If you prefer a thicker sauce, you can add a bit more Greek yogurt or reduce the amount of cream of mushroom soup.

Lastly, keep an eye on the casserole while it’s baking. Ovens can vary in temperature, so check for doneness a few minutes before the suggested baking time. The casserole is ready when the cheese is melted and bubbly, and the onion rings are golden brown.

By following these cooking notes, you’ll create a Twisted Green Bean Casserole that is not only tasty but also visually appealing. Enjoy the process and the delightful aroma that fills your kitchen as you prepare this comforting dish!

Serving Suggestions for Twisted Green Bean Casserole

Once your Twisted Green Bean Casserole is baked to perfection, it’s time to serve it up! This dish is versatile and pairs well with a variety of meals. Here are some delightful serving suggestions to enhance your dining experience:

  • As a Side Dish: The Twisted Green Bean Casserole makes an excellent side dish for roasted meats. Serve it alongside a juicy roast chicken or a tender beef brisket. The creamy texture complements the savory flavors of the meat beautifully.
  • With Grains: For a complete meal, serve the casserole over a bed of fluffy rice or quinoa. This adds a hearty element and makes the dish more filling. The grains soak up the creamy sauce, creating a delicious combination.
  • With Salad: Pair the casserole with a fresh garden salad. A light salad with mixed greens, cherry tomatoes, and a tangy vinaigrette balances the richness of the casserole. This combination is perfect for a light lunch or dinner.
  • As a Main Dish: If you want to make the casserole the star of the meal, consider adding protein. Mix in shredded chicken or turkey before baking. This transforms the casserole into a hearty main dish that’s satisfying and delicious.
  • Garnish: For an extra touch, garnish the casserole with fresh herbs like parsley or thyme before serving. This adds a pop of color and freshness, making the dish even more appealing.

These serving suggestions will help you create a memorable meal with your Twisted Green Bean Casserole. Whether you choose to serve it as a side or a main dish, it’s sure to be a crowd-pleaser. Enjoy the delightful flavors and the smiles it brings to your table!

Tips for Perfecting Twisted Green Bean Casserole

Creating the perfect Twisted Green Bean Casserole is all about attention to detail. With a few helpful tips, you can elevate this dish to new heights. Here are some expert suggestions to ensure your casserole turns out delicious every time.

First, always taste as you go. When preparing the creamy sauce, take a moment to taste it before mixing in the green beans. This allows you to adjust the seasoning to your liking. If you prefer a bit more tang, add a splash more balsamic vinegar. If you like it creamier, consider adding a bit more Greek yogurt.

Next, consider the texture of your casserole. For a creamier dish, you can blend the Greek yogurt and cream of mushroom soup until smooth. This will create a velvety sauce that clings beautifully to the green beans. If you enjoy a chunkier texture, simply mix the ingredients as directed.

When it comes to baking, use a glass or ceramic dish. These materials distribute heat evenly, ensuring that your casserole cooks uniformly. If you use a metal dish, keep an eye on the cooking time, as it may bake faster.

Don’t forget about the onion rings! For an extra crunch, you can toast them lightly in the oven before adding them to the casserole. This will enhance their flavor and ensure they stay crispy even after baking.

Lastly, let your casserole rest for a few minutes after baking. This allows the flavors to meld together and makes serving easier. The casserole will hold its shape better, and you’ll have a more appealing presentation.

By following these tips, you’ll create a Twisted Green Bean Casserole that is not only delicious but also visually stunning. Enjoy the process and the delightful results!

Breakdown of Time for Twisted Green Bean Casserole

Understanding the time needed to prepare and cook your Twisted Green Bean Casserole is essential for planning your meal. Here’s a simple breakdown of the time involved in each step, so you can manage your kitchen time effectively.

Prep Time

The prep time for the Twisted Green Bean Casserole is approximately 20-25 minutes. This includes:

  • Trimming and cutting the green beans.
  • Dicing the cremini mushrooms and chopping the onion.
  • Minced garlic preparation.
  • Measuring out all the ingredients for the creamy sauce.

Taking your time during prep ensures that everything is ready for a smooth cooking process.

Cooking Time

The cooking time for this casserole is about 35-40 minutes. This consists of:

  • Blanching the green beans for 5 minutes.
  • Sautéing the onions and mushrooms for 7 minutes.
  • Baking the casserole for 25 minutes, followed by an additional 10 minutes for the onion rings.

These steps are crucial for achieving the perfect texture and flavor in your dish.

Total Time

In total, you can expect to spend around 55-65 minutes from start to finish. This includes both prep and cooking time. With this timeline, you can easily fit the Twisted Green Bean Casserole into your meal planning, making it a convenient option for any occasion.

Now that you have a clear understanding of the time involved, you can confidently prepare this delicious dish for your family and friends!

Nutritional Information for Twisted Green Bean Casserole

Understanding the nutritional content of your Twisted Green Bean Casserole is essential for making informed choices about your meals. This dish not only delights the taste buds but also provides a good balance of nutrients. Below, we break down the key nutritional components of this savory casserole.

Calories

Each serving of the Twisted Green Bean Casserole contains approximately 220 calories. This makes it a relatively light option for a side dish, allowing you to enjoy it without feeling overly full. The combination of fresh green beans, Greek yogurt, and mozzarella cheese contributes to this calorie count while providing essential nutrients.

Protein

In terms of protein, this casserole offers about 6 grams per serving. The protein comes primarily from the Greek yogurt and mozzarella cheese, which help to keep you feeling satisfied. If you choose to add shredded chicken or turkey, the protein content will increase, making it an even more filling meal option.

Sodium

The sodium content in each serving is around 500 milligrams. This amount is reasonable for a dish that includes ingredients like tamari sauce and cream of mushroom soup. If you are watching your sodium intake, consider using low-sodium versions of these ingredients or adjusting the amount of added salt to suit your dietary needs.

Overall, the Twisted Green Bean Casserole is a nutritious choice that can fit well into a balanced diet. With its creamy texture and savory flavors, it’s a dish that everyone can enjoy while also being mindful of their nutritional goals.

FAQs about Twisted Green Bean Casserole

Can I make Twisted Green Bean Casserole ahead of time?

Absolutely! You can prepare the Twisted Green Bean Casserole ahead of time. Simply follow all the preparation steps, but instead of baking it right away, cover the dish with plastic wrap or aluminum foil and refrigerate it. When you’re ready to serve, just pop it in the oven. You may need to add a few extra minutes to the baking time since it will be cold from the fridge. This makes it a great option for busy days or holiday gatherings!

What can I substitute for green beans in Twisted Green Bean Casserole?

If you’re looking for a substitute for green beans, there are several options! You can use fresh or frozen asparagus, broccoli, or even cauliflower. Each of these vegetables will provide a different flavor and texture, but they will still work well with the creamy sauce. Just remember to adjust the cooking time based on the vegetable you choose. For example, broccoli may need a bit longer to cook than green beans.

Is Twisted Green Bean Casserole suitable for freezing?

Yes, the Twisted Green Bean Casserole can be frozen! To do this, prepare the casserole as directed but do not bake it. Instead, cover it tightly with plastic wrap and then aluminum foil to prevent freezer burn. It can be stored in the freezer for up to three months. When you’re ready to enjoy it, thaw it in the refrigerator overnight and then bake as usual. This makes it a convenient meal option for later!

How can I make Twisted Green Bean Casserole healthier?

Making the Twisted Green Bean Casserole healthier is easy! Here are a few tips:

  • Use low-fat Greek yogurt: This will reduce the overall fat content while keeping the creaminess.
  • Opt for whole grain or gluten-free breadcrumbs: If you want to add a crunchy topping instead of onion rings, this is a great option.
  • Add more vegetables: Incorporate additional veggies like bell peppers or spinach to boost the nutritional value.
  • Reduce sodium: Use low-sodium cream of mushroom soup and tamari sauce to lower the sodium content.

These simple changes can help you enjoy a delicious and nutritious version of the Twisted Green Bean Casserole!

Conclusion on Twisted Green Bean Casserole

In conclusion, the Twisted Green Bean Casserole is a delightful and modern take on a classic dish. With its creamy texture, savory flavors, and crunchy topping, it’s sure to become a favorite at your table. This casserole not only brings comfort but also offers versatility, allowing you to customize it to suit your taste and dietary needs.

Whether you’re serving it as a side dish for a holiday feast or as a main course for a cozy family dinner, the Twisted Green Bean Casserole is bound to impress. The combination of fresh green beans, sautéed mushrooms, and a rich creamy sauce creates a dish that is both satisfying and nutritious. Plus, with the option to add proteins or other vegetables, you can easily make it your own.

As you prepare this casserole, remember the tips and variations shared throughout the article. They will help you achieve the best results and make the cooking process enjoyable. Don’t hesitate to experiment with different ingredients and flavors to find your perfect version of this dish.

So, gather your ingredients, roll up your sleeves, and get ready to create a Twisted Green Bean Casserole that will delight your family and friends. Enjoy the process, savor the flavors, and celebrate the joy of cooking together. Happy baking!

Bang Bang Salmon Recipe: A Delicious Culinary Delight

Introduction to Bang Bang Salmon Recipe

Are you ready to dive into a delicious culinary adventure? The Bang Bang Salmon recipe is a delightful dish that combines the rich flavors of salmon with a zesty glaze. This recipe is not just about taste; it’s about creating a meal that brings joy to your dining table. With its unique blend of ingredients, this dish is sure to impress your family and friends.

What Makes Bang Bang Salmon Unique?

What sets Bang Bang Salmon apart from other salmon recipes? It’s all in the sauce! The creamy Greek yogurt mixed with sweet chili sauce creates a perfect balance of sweetness and heat. The addition of smoked paprika and fresh lemon juice adds depth and brightness to the dish. This combination not only enhances the flavor but also keeps the salmon moist and tender. Plus, the crispy skin adds a delightful texture that makes every bite enjoyable.

The Popularity of Bang Bang Salmon

Bang Bang Salmon has gained popularity in recent years, and for good reason! It’s a dish that’s easy to prepare yet feels gourmet. Many people love it for its versatility; you can serve it for a casual weeknight dinner or dress it up for a special occasion. The vibrant colors and enticing aroma make it a feast for the senses. Additionally, with the rise of healthy eating, salmon has become a favorite among health-conscious individuals. This recipe not only satisfies your taste buds but also provides essential nutrients, making it a win-win for everyone!

Ingredients for Bang Bang Salmon Recipe

To create the mouthwatering Bang Bang Salmon, you’ll need a few key ingredients. Each component plays a vital role in building the dish’s unique flavor profile. Here’s what you’ll need:

  • 4 salmon fillets (6 ounces each) – Fresh salmon is the star of this recipe, providing a rich source of protein and omega-3 fatty acids.
  • 1/2 cup Greek yogurt – This creamy base adds a tangy flavor and helps keep the salmon moist.
  • 3 tablespoons sweet chili sauce – This sauce brings a delightful sweetness and a hint of spice to the dish.
  • 1 tablespoon hot sauce – Adjust this to your taste for an extra kick!
  • 1 tablespoon fresh lemon juice – The acidity brightens the flavors and balances the richness of the salmon.
  • 1 teaspoon smoked paprika – This adds a smoky depth that enhances the overall taste.
  • 1 teaspoon dried dill – Dill complements the salmon beautifully with its fresh, herbal notes.
  • Salt and pepper to taste – Essential for seasoning and enhancing the flavors of the dish.
  • 2 tablespoons avocado oil – This oil is perfect for cooking, as it has a high smoke point and a mild flavor.
  • Fresh cilantro, chopped – For garnish, adding a pop of color and freshness.
  • Chopped peanuts – These provide a delightful crunch and nutty flavor to finish off the dish.

Gathering these ingredients will set you on the path to creating a delicious Bang Bang Salmon that’s sure to impress. Each ingredient contributes to the overall taste, making this dish a true delight for your palate!

Step-by-Step Preparation of Bang Bang Salmon Recipe

Now that you have all your ingredients ready, it’s time to dive into the preparation of your Bang Bang Salmon. This step-by-step guide will help you create a dish that’s not only delicious but also visually appealing. Let’s get started!

Step 1: Preparing the Salmon

First, you need to prepare the salmon fillets. Start by preheating your oven to 425°F (220°C). This ensures that your salmon cooks evenly and gets that perfect texture. Next, take your salmon fillets and pat them dry with paper towels. This step is crucial as it helps the skin get crispy when cooked. After drying, season both sides of the fillets lightly with salt and pepper. This simple seasoning enhances the natural flavors of the salmon.

Step 2: Making the Bang Bang Sauce

While the oven is heating, it’s time to whip up the zesty Bang Bang sauce. In a mixing bowl, combine the Greek yogurt, sweet chili sauce, hot sauce, fresh lemon juice, smoked paprika, dried dill, and a pinch of salt and pepper. Stir the mixture until it’s well blended. The sauce should be creamy with a hint of sweetness and spice. Set it aside for now; it will be the star of the dish!

Step 3: Cooking the Salmon

Now, let’s cook the salmon! In a large oven-safe skillet, heat the avocado oil over medium-high heat. Once the oil is shimmering, carefully place the salmon fillets skin-side down in the skillet. Cook them for about 4-5 minutes. You want the skin to turn golden and crispy. This step adds a wonderful texture to the dish. After that, gently flip the salmon fillets over. Be careful not to break them apart!

Step 4: Combining Salmon and Sauce

Once the salmon is flipped, it’s time to add the Bang Bang sauce. Generously coat the top of each fillet with the yogurt mixture. Make sure each piece is well covered, as this will keep the salmon moist and flavorful during baking. After coating, transfer the skillet to the preheated oven. Bake for 10-12 minutes, or until the salmon is opaque and flakes easily with a fork. This final step ensures that the flavors meld beautifully, creating a dish that’s bursting with taste!

Variation of Bang Bang Salmon Recipe

While the classic Bang Bang Salmon recipe is delicious as is, there are many ways to switch things up! Whether you want to try different ingredients or explore various cooking methods, these variations will keep your meals exciting and flavorful.

Alternative Ingredients for Bang Bang Salmon

Sometimes, you might not have all the ingredients on hand. No worries! Here are some alternative ingredients you can use:

  • Salmon Alternatives: If you don’t have salmon, try using trout or tilapia. Both fish have a mild flavor and cook similarly.
  • Yogurt Substitutes: If Greek yogurt isn’t available, sour cream or a dairy-free yogurt can work well. They will still provide creaminess.
  • Sweet Chili Sauce Alternatives: You can make your own sweet chili sauce by mixing honey with a bit of sriracha or using a store-bought alternative.
  • Herbs and Spices: Instead of dill, try using fresh parsley or basil for a different flavor profile. You can also experiment with other spices like cumin or coriander.
  • Garnishes: Instead of peanuts, consider using sesame seeds or sunflower seeds for a crunchy topping.

These alternatives can help you create a unique version of Bang Bang Salmon that suits your taste and pantry. Feel free to mix and match!

Different Cooking Methods for Bang Bang Salmon

In addition to the oven-baking method, there are several other ways to cook your Bang Bang Salmon. Here are a few options:

  • Grilling: Preheat your grill to medium-high heat. Cook the salmon fillets for about 4-5 minutes on each side. This method adds a lovely smoky flavor.
  • Pan-Seering: If you prefer a quick method, you can pan-sear the salmon in a skillet over medium heat. Cook for 3-4 minutes on each side until golden brown.
  • Broiling: For a crispy top, place the salmon under the broiler for 5-7 minutes after coating with the sauce. Keep a close eye to prevent burning!
  • Air Frying: Preheat your air fryer to 400°F (200°C). Cook the salmon for about 8-10 minutes for a crispy texture without much oil.

These cooking methods can add variety to your meals while still delivering the delicious flavors of Bang Bang Salmon. Choose the one that fits your cooking style and enjoy!

Cooking Note for Bang Bang Salmon Recipe

When preparing your Bang Bang Salmon, a few cooking notes can help ensure your dish turns out perfectly every time. These tips will guide you through the process, making it easier and more enjoyable.

First, always choose fresh salmon fillets. Fresh fish not only tastes better but also has a firmer texture, which is essential for achieving that crispy skin. If you can, buy wild-caught salmon for the best flavor and health benefits.

Next, pay attention to the cooking temperature. Preheating your oven to 425°F (220°C) is crucial. This high temperature helps the salmon cook quickly while keeping it moist. If your oven runs hot, consider using a meat thermometer to check for doneness. Salmon is perfectly cooked when it reaches an internal temperature of 145°F (63°C).

Additionally, don’t skip the resting time after baking. Allowing the salmon to rest for a few minutes before serving helps the juices redistribute, making each bite tender and flavorful. This small step can make a big difference in the overall taste of your dish.

Lastly, feel free to adjust the spice levels in the Bang Bang sauce. If you prefer a milder flavor, reduce the amount of hot sauce. On the other hand, if you love heat, add more! Cooking is all about personal preference, so make this recipe your own.

By keeping these cooking notes in mind, you’ll be well on your way to creating a delicious Bang Bang Salmon that’s sure to impress everyone at your table!

Serving Suggestions for Bang Bang Salmon Recipe

Once your Bang Bang Salmon is ready, it’s time to think about how to serve it. The right side dishes and presentation can elevate your meal, making it even more enjoyable. Here are some ideas to help you create a complete dining experience.

Ideal Side Dishes

Pairing your Bang Bang Salmon with the right side dishes can enhance the flavors and create a balanced meal. Here are some ideal options:

  • Steamed Vegetables: Fresh, steamed veggies like broccoli, asparagus, or green beans add color and nutrients to your plate. They complement the salmon without overpowering its flavors.
  • Rice or Quinoa: A side of fluffy jasmine rice or nutty quinoa provides a hearty base. You can even mix in some herbs or lemon zest for added flavor.
  • Salad: A light salad with mixed greens, cherry tomatoes, and a citrus vinaigrette can refresh your palate. The acidity of the dressing pairs well with the richness of the salmon.
  • Roasted Potatoes: Crispy roasted potatoes seasoned with herbs make a satisfying side. Their texture contrasts nicely with the tender salmon.
  • Coleslaw: A crunchy coleslaw with a tangy dressing can add a delightful crunch and balance the dish’s creaminess.

These side dishes not only complement the Bang Bang Salmon but also create a colorful and appetizing plate. Feel free to mix and match based on your preferences!

Presentation Tips for Bang Bang Salmon

Presentation is key when serving your Bang Bang Salmon. A beautifully arranged plate can make your meal feel special. Here are some tips to enhance the visual appeal:

  • Use a White Plate: A simple white plate provides a clean backdrop that allows the vibrant colors of the salmon and garnishes to shine.
  • Garnish Generously: Don’t forget to sprinkle chopped cilantro and peanuts on top of the salmon. This adds a pop of color and texture, making the dish more inviting.
  • Arrange Thoughtfully: Place the salmon fillet slightly off-center on the plate. Surround it with your chosen side dishes for a balanced look.
  • Add a Lemon Wedge: A lemon wedge on the side not only looks appealing but also allows guests to add a splash of freshness to their salmon.
  • Drizzle Sauce: If you have extra Bang Bang sauce, consider drizzling it around the plate for an artistic touch.

By following these presentation tips, you’ll create a stunning plate that’s sure to impress your guests. Remember, we eat with our eyes first, so make it count!

Tips for Perfecting Your Bang Bang Salmon Recipe

Creating the perfect Bang Bang Salmon is all about attention to detail. With a few helpful tips, you can avoid common pitfalls and enhance the flavors of this delightful dish. Let’s explore some key points to keep in mind as you prepare your meal!

Common Mistakes to Avoid

Even the best chefs make mistakes! Here are some common errors to watch out for when making Bang Bang Salmon:

  • Skipping the Drying Step: Not patting the salmon dry can lead to soggy skin. Always use paper towels to remove excess moisture before cooking.
  • Overcooking the Salmon: Salmon can dry out quickly if overcooked. Keep an eye on the cooking time and use a fork to check for flakiness.
  • Ignoring Seasoning: Don’t forget to season the salmon well. A little salt and pepper go a long way in enhancing the natural flavors.
  • Not Preheating the Oven: Failing to preheat your oven can result in uneven cooking. Always ensure your oven is hot before placing the salmon inside.
  • Using Low-Quality Ingredients: The quality of your ingredients matters! Fresh salmon and high-quality sauces will make a noticeable difference in taste.

By avoiding these common mistakes, you’ll be on your way to creating a delicious Bang Bang Salmon that everyone will love!

Enhancing Flavor in Bang Bang Salmon

Want to take your Bang Bang Salmon to the next level? Here are some tips to enhance the flavor:

  • Marinate the Salmon: For an extra burst of flavor, consider marinating the salmon in the Bang Bang sauce for 30 minutes before cooking. This allows the flavors to penetrate the fish.
  • Add Fresh Herbs: Fresh herbs like basil or parsley can brighten the dish. Sprinkle them on top just before serving for a fresh touch.
  • Experiment with Citrus: Besides lemon juice, try adding lime or orange juice to the sauce for a different citrus twist.
  • Incorporate Garlic: A clove of minced garlic in the sauce can add depth and richness. Just be careful not to overpower the other flavors.
  • Use a Flavorful Oil: Instead of avocado oil, try using sesame oil for a nutty flavor that complements the dish beautifully.

These tips will help you create a Bang Bang Salmon that’s bursting with flavor and sure to impress your guests. Enjoy the process and have fun experimenting!

Breakdown of Time for Bang Bang Salmon Recipe

Understanding the time needed for each step in the Bang Bang Salmon recipe can help you plan your meal better. Here’s a simple breakdown of the time required for preparation and cooking. This way, you can enjoy a delicious meal without feeling rushed!

Prep Time

The prep time for the Bang Bang Salmon is quite manageable. You’ll need about 15-20 minutes to gather your ingredients and prepare the salmon and sauce. This includes:

  • Gathering all ingredients
  • Patting the salmon dry
  • Mixing the Bang Bang sauce

With everything ready, you’ll be set to move on to the cooking process!

Cooking Time

Cooking the Bang Bang Salmon takes approximately 15-17 minutes. This includes:

  • 4-5 minutes for searing the salmon in the skillet
  • 10-12 minutes for baking in the oven

This quick cooking time makes it easy to whip up a delicious meal even on busy nights!

Total Time

In total, you can expect the entire process to take around 30-40 minutes from start to finish. This includes both prep and cooking time. Here’s a quick summary:

  • Prep Time: 15-20 minutes
  • Cooking Time: 15-17 minutes
  • Total Time: 30-40 minutes

With this breakdown, you can easily fit the Bang Bang Salmon recipe into your schedule. Enjoy the process and the delightful flavors that await you!

Nutritional Information for Bang Bang Salmon Recipe

Understanding the nutritional content of your meals is essential for maintaining a balanced diet. The Bang Bang Salmon recipe not only delights your taste buds but also provides valuable nutrients. Let’s break down the nutritional information for this delicious dish!

Calories in Bang Bang Salmon

Each serving of Bang Bang Salmon, which includes one salmon fillet and the accompanying sauce, contains approximately 350-400 calories. This calorie count can vary based on the specific ingredients used and portion sizes. Salmon is a nutrient-dense food, meaning it provides a lot of nutrition for the calories it contains. It’s a great choice for those looking to enjoy a satisfying meal without overindulging.

Protein Content in Bang Bang Salmon

One of the standout features of Bang Bang Salmon is its high protein content. Each salmon fillet offers about 40 grams of protein. Protein is essential for building and repairing tissues, making it a crucial part of a healthy diet. Including this dish in your meal plan can help you meet your daily protein needs while enjoying a flavorful dish.

Sodium Levels in Bang Bang Salmon

When it comes to sodium, the Bang Bang Salmon recipe contains approximately 600-700 milligrams per serving. This level can vary based on the amount of salt added and the specific brands of sauces used. While sodium is necessary for bodily functions, it’s important to monitor your intake. If you’re watching your sodium levels, consider using low-sodium versions of sauces or reducing the added salt in the recipe.

Overall, Bang Bang Salmon is a nutritious option that provides a good balance of calories, protein, and flavor. Enjoy this dish knowing that you’re nourishing your body while indulging in a delightful meal!

FAQs about Bang Bang Salmon Recipe

Can I use frozen salmon for Bang Bang Salmon?

Yes, you can use frozen salmon for your Bang Bang Salmon recipe! However, it’s important to thaw the salmon properly before cooking. The best way to do this is to place the frozen fillets in the refrigerator overnight. If you’re short on time, you can also thaw them under cold running water for about 30 minutes. Once thawed, pat the salmon dry and follow the recipe as usual. Just keep in mind that cooking times may vary slightly, so check for doneness to ensure your salmon is perfectly cooked!

What can I substitute for the Bang Bang sauce?

If you don’t have sweet chili sauce on hand, there are several alternatives you can use for your Bang Bang sauce. One option is to mix honey with a bit of sriracha to create a similar sweet and spicy flavor. You can also use a combination of mayonnaise and hot sauce for a creamy twist. If you prefer a lighter option, consider using a yogurt-based sauce with a touch of honey and chili flakes. Feel free to get creative and adjust the ingredients to suit your taste!

How spicy is the Bang Bang Salmon Recipe?

The spiciness of the Bang Bang Salmon recipe can be adjusted to your liking. The recipe includes hot sauce, which adds heat, but you can control the level of spice by adjusting the amount you use. If you prefer a milder flavor, start with a smaller amount of hot sauce and taste the sauce before adding more. On the other hand, if you love heat, feel free to add extra hot sauce or even some red pepper flakes for an added kick. Cooking is all about personal preference, so make it your own!

Can I make Bang Bang Salmon ahead of time?

Yes, you can prepare some components of the Bang Bang Salmon ahead of time! You can make the Bang Bang sauce a day in advance and store it in the refrigerator. This allows the flavors to meld together beautifully. However, it’s best to cook the salmon fresh for the best texture and flavor. If you have leftovers, you can store them in an airtight container in the fridge for up to two days. Just reheat gently in the oven or microwave before serving. Enjoy the convenience of meal prep while still savoring this delicious dish!

Conclusion on Bang Bang Salmon Recipe

In conclusion, the Bang Bang Salmon recipe is a delightful dish that brings together vibrant flavors and healthy ingredients. With its creamy sauce and perfectly cooked salmon, this meal is sure to impress anyone at your table. Whether you’re cooking for a special occasion or a casual weeknight dinner, this recipe fits the bill perfectly.

Not only is it easy to prepare, but it also offers plenty of room for creativity. You can experiment with different ingredients and cooking methods to make it your own. Plus, the nutritional benefits of salmon make it a smart choice for those looking to eat healthily without sacrificing taste.

As you embark on your culinary journey with Bang Bang Salmon, remember to enjoy the process. Cooking is not just about the end result; it’s about the joy of creating something delicious. So gather your ingredients, follow the steps, and savor every bite of this zesty dish. Your taste buds will thank you!

We hope this recipe inspires you to bring the flavors of Bang Bang Salmon into your kitchen. Happy cooking!

Creamy Garlic Shrimp with Spinach is a must-try dish!

Introduction to Creamy Garlic Shrimp Spinach Recipe

Creamy Garlic Shrimp Spinach Recipe. This dish is not just a meal; it’s an experience that brings together the rich flavors of garlic, the freshness of spinach, and the succulent taste of shrimp. Whether you’re cooking for a special occasion or just a cozy dinner at home, this recipe is sure to impress.

What Makes This Recipe Special?

What sets this recipe apart is its perfect balance of flavors and textures. The garlic-infused shrimp are tender and juicy, while the creamy spinach sauce adds a luscious touch. The combination of smoked paprika and fresh lemon juice elevates the dish, making it vibrant and exciting. Plus, it’s quick to prepare, taking less than 30 minutes from start to finish. This means you can enjoy a gourmet meal without spending hours in the kitchen!

The Health Benefits of Shrimp and Spinach

Not only is this dish delicious, but it’s also packed with health benefits. Shrimp is a fantastic source of protein, low in calories, and rich in essential nutrients like selenium and vitamin B12. On the other hand, spinach is a powerhouse of vitamins A, C, and K, along with iron and antioxidants. Together, they create a nutritious meal that supports overall health. So, you can indulge in this creamy delight while knowing you’re making a healthy choice!

Ingredients for Creamy Garlic Shrimp Spinach Recipe

Creamy Garlic Shrimp Spinach Recipe, you’ll need a few simple yet flavorful ingredients. Here’s what you’ll gather:

  • 1 pound large shrimp, peeled and deveined
  • 2 tablespoons extra virgin olive oil
  • 4 cloves garlic, finely chopped
  • 1 cup heavy whipping cream
  • 1 cup fresh spinach, roughly chopped
  • 1 teaspoon fresh lemon juice
  • 1 teaspoon smoked paprika
  • Salt and black pepper to taste
  • Chopped fresh parsley for garnish

These ingredients come together to create a dish that is not only delicious but also visually appealing. The vibrant green spinach and the pink shrimp make for a stunning presentation. Plus, the creamy sauce ties everything together, making each bite a delightful experience.

When selecting your shrimp, opt for large, fresh shrimp for the best texture and flavor. If you prefer, you can also use frozen shrimp; just ensure they are fully thawed before cooking. Fresh spinach is key for that bright taste, but you can substitute with frozen spinach in a pinch. Just remember to drain any excess water before adding it to the sauce.

Now that you have your ingredients ready, let’s move on to the next step of preparing this scrumptious dish!

Step-by-Step Preparation of Creamy Garlic Shrimp Spinach Recipe

Creamy Garlic Shrimp Spinach Recipe. Following these simple steps will ensure that your dish turns out perfectly every time!

Step 1: Preparing the Ingredients

Start by prepping your ingredients. First, peel and devein the shrimp if you haven’t done so already. Rinse them under cold water and pat them dry with a paper towel. This helps the shrimp sear nicely in the skillet. Next, finely chop the garlic and roughly chop the fresh spinach. Having everything ready will make the cooking process smooth and enjoyable!

Step 2: Cooking the Shrimp

Heat the extra virgin olive oil in a large skillet over medium heat. Once the oil is hot, add the finely chopped garlic. Sauté it for about a minute until it becomes fragrant, but be careful not to let it brown. Then, add the shrimp to the skillet. Season them with salt, black pepper, and smoked paprika. Cook the shrimp for about 2-3 minutes on each side. They should turn a lovely pink color when fully cooked. Once done, transfer the shrimp to a plate and set them aside.

Step 3: Sautéing the Spinach

In the same skillet, pour in the heavy whipping cream. Allow it to come to a gentle simmer. This is where the magic happens! Stir in the roughly chopped spinach and let it cook for around 2 minutes. You’ll notice the spinach wilting down beautifully, adding a vibrant green color to the sauce. This step is crucial as it infuses the cream with the fresh flavor of spinach.

Step 4: Making the Creamy Garlic Sauce

Once the spinach has wilted, return the cooked shrimp to the skillet. Add the fresh lemon juice to brighten the flavors. Mix everything together gently, allowing the shrimp to heat through for an additional 2 minutes. This step ensures that all the flavors meld beautifully, creating a rich and creamy sauce that coats the shrimp and spinach perfectly.

Step 5: Combining All Ingredients

Creamy Garlic Shrimp Spinach Recipe is now ready to be enjoyed!

Variations of Creamy Garlic Shrimp Spinach Recipe

Creamy Garlic Shrimp Spinach Recipe is delicious as is, there are many ways to customize it to suit your taste or dietary needs. Here are some exciting variations to consider!

Adding Different Proteins

If shrimp isn’t your favorite, you can easily swap it out for other proteins. Chicken is a fantastic alternative. Simply cut boneless chicken breasts into bite-sized pieces and cook them in the same way as the shrimp. For a vegetarian option, try using tofu. Press the tofu to remove excess moisture, then cube it and sauté until golden brown. Both options will absorb the creamy sauce beautifully, making for a satisfying meal.

Vegetarian Alternatives

For a fully vegetarian dish, consider adding more vegetables instead of shrimp. Bell peppers, mushrooms, or zucchini can be sautéed along with the garlic. You can also add chickpeas for a protein boost. They will add a nice texture and flavor to the creamy sauce. This way, you can enjoy a hearty meal that’s still rich and creamy without any meat!

Flavor Enhancements

Creamy Garlic Shrimp Spinach Recipe, consider adding a splash of white wine to the cream before adding the spinach. This will give the sauce a lovely depth. You can also experiment with different herbs and spices. Fresh basil or thyme can add a delightful aroma. A pinch of red pepper flakes can introduce a bit of heat, making the dish even more exciting. Don’t hesitate to get creative and make this recipe your own!

Cooking Note for Creamy Garlic Shrimp Spinach Recipe

Creamy Garlic Shrimp Spinach Recipe, there are a few important cooking notes to keep in mind. These tips will help you achieve the best results and ensure your dish is both delicious and visually appealing.

First, always use fresh ingredients whenever possible. Fresh shrimp and spinach will enhance the flavor and texture of your dish. If you must use frozen shrimp, make sure they are completely thawed and patted dry before cooking. This prevents excess moisture, which can lead to a watery sauce.

Next, pay attention to the cooking times. Shrimp cook quickly, so avoid overcooking them. They should be opaque and pink when done. Overcooked shrimp can become rubbery, which is not pleasant. Keep an eye on them as they cook, and remove them from the skillet as soon as they reach the perfect doneness.

Additionally, when sautéing the garlic, be cautious not to let it brown. Burnt garlic can impart a bitter taste to your sauce. Sauté it just until fragrant, which usually takes about a minute. This will ensure a lovely garlic flavor without any bitterness.

Lastly, don’t forget to taste your sauce before serving. Adjust the seasoning to your liking. A little extra salt or a squeeze of lemon juice can make a big difference in flavor. Remember, cooking is all about personal preference, so feel free to make adjustments that suit your taste!

Creamy Garlic Shrimp Spinach Recipe that is not only delicious but also a feast for the eyes. Enjoy the process and savor the delightful flavors of this dish!

Serving Suggestions for Creamy Garlic Shrimp Spinach Recipe

Creamy Garlic Shrimp Spinach Recipe, it’s time to think about how to serve it. The right side dishes and beverages can elevate your meal, making it even more enjoyable. Here are some fantastic serving suggestions to consider!

Best Side Dishes to Pair

When it comes to side dishes, you want something that complements the creamy flavors of the shrimp and spinach. Here are a few ideas:

  • Garlic Bread: A classic choice! The crunchy texture and garlic flavor of the bread pair perfectly with the creamy sauce.
  • Steamed Rice: White or brown rice can soak up the delicious sauce, making every bite satisfying.
  • Quinoa: For a healthier option, serve the shrimp over quinoa. It adds a nutty flavor and extra protein.
  • Roasted Vegetables: A mix of seasonal vegetables like carrots, zucchini, and bell peppers adds color and nutrition to your plate.
  • Simple Salad: A fresh green salad with a light vinaigrette can balance the richness of the dish.

These side dishes not only enhance the meal but also provide a variety of textures and flavors that make dining more enjoyable.

Ideal Wine Pairings

Creamy Garlic Shrimp Spinach Recipe can elevate the dining experience. Here are some excellent wine options:

  • Sauvignon Blanc: This white wine has crisp acidity that complements the creaminess of the sauce and the freshness of the shrimp.
  • Chardonnay: A lightly oaked Chardonnay can enhance the buttery flavors of the dish, making it a delightful match.
  • Pinot Grigio: This wine is light and refreshing, perfect for balancing the richness of the creamy sauce.
  • Prosecco: If you prefer something bubbly, a glass of Prosecco adds a fun and festive touch to your meal.

Choosing the right wine can enhance the flavors of your dish and create a memorable dining experience. So, pour yourself a glass and enjoy your meal!

Tips for Perfecting Your Creamy Garlic Shrimp Spinach Recipe

Creamy Garlic Shrimp Spinach Recipe turns out perfectly every time, here are some helpful tips. These insights will help you avoid common pitfalls and make the most of your cooking experience.

Common Mistakes to Avoid

Even the best cooks can make mistakes. Here are a few common ones to watch out for:

  • Overcooking the Shrimp: Shrimp cook quickly. If you leave them in the skillet too long, they can become rubbery. Aim for a cooking time of 2-3 minutes per side until they turn pink and opaque.
  • Burning the Garlic: Garlic can go from fragrant to burnt in seconds. Sauté it just until it’s aromatic, usually about a minute. This will keep your sauce flavorful without bitterness.
  • Not Tasting the Sauce: Always taste your sauce before serving. Adjust the seasoning to your liking. A little extra salt or lemon juice can enhance the flavors significantly.
  • Using Cold Ingredients: Cold cream can curdle when added to a hot skillet. Let it sit at room temperature for a few minutes before using it. This helps it blend smoothly into the sauce.

By avoiding these common mistakes, you’ll create a dish that’s not only delicious but also visually appealing!

Storage Tips for Leftovers

Creamy Garlic Shrimp Spinach Recipe, here’s how to store them properly:

  • Refrigeration: Store leftovers in an airtight container in the refrigerator. They can last for up to 2 days. Make sure to cool the dish to room temperature before sealing it.
  • Reheating: When reheating, do so gently on the stove over low heat. Add a splash of cream or broth to help restore the sauce’s creaminess. Stir frequently to prevent sticking.
  • Freezing: While it’s best to enjoy this dish fresh, you can freeze leftovers. Place them in a freezer-safe container, and they can last for up to 3 months. Thaw in the refrigerator overnight before reheating.

Creamy Garlic Shrimp Spinach Recipe even after the initial meal. Enjoy every bite, whether fresh or reheated!

Breakdown of Time for Creamy Garlic Shrimp Spinach Recipe

Creamy Garlic Shrimp Spinach Recipe can help you plan your cooking efficiently. Here’s a simple breakdown of the time required for preparation and cooking.

Prep Time

The prep time for this delicious dish is quite short. You’ll need about 10 minutes to gather and prepare your ingredients. This includes peeling and deveining the shrimp, chopping the garlic, and roughly chopping the spinach. Having everything ready will make the cooking process smooth and enjoyable!

Cooking Time

Once you start cooking, the total cooking time is approximately 15 minutes. This includes:

  • 1 minute for sautéing the garlic
  • 6 minutes for cooking the shrimp (2-3 minutes on each side)
  • 2 minutes for simmering the cream and sautéing the spinach
  • 2 minutes for combining everything and heating through

In total, you’ll spend about 15 minutes cooking, making this a quick and easy meal!

Total Time

Creamy Garlic Shrimp Spinach Recipe is around 25 minutes. This makes it a perfect option for a weeknight dinner or a last-minute gathering. You can enjoy a gourmet meal without spending hours in the kitchen!

Nutritional Information for Creamy Garlic Shrimp Spinach Recipe

Creamy Garlic Shrimp Spinach Recipe not only delights your taste buds but also provides valuable nutrients. Here’s a closer look at the nutritional information per serving:

Calories

Each serving of this delicious dish contains approximately 350 calories. This makes it a satisfying option for dinner without overwhelming your daily caloric intake. The combination of shrimp, cream, and spinach offers a rich flavor while keeping the calorie count reasonable.

Protein Content

Creamy Garlic Shrimp Spinach Recipe is its high protein content. Each serving provides about 28 grams of protein. Shrimp is an excellent source of lean protein, which is essential for muscle repair and overall health. This makes the dish a great choice for those looking to increase their protein intake.

Sodium Levels

When it comes to sodium, this recipe contains approximately 600 milligrams per serving. While this is a moderate amount, it’s important to be mindful of your overall sodium intake, especially if you are watching your salt consumption. You can reduce the sodium levels by using low-sodium broth or seasoning the dish with herbs instead of salt.

Creamy Garlic Shrimp Spinach Recipe is a nutritious option that balances flavor and health. With its rich protein content and reasonable calorie count, it’s a dish you can feel good about enjoying!

FAQs about Creamy Garlic Shrimp Spinach Recipe

Can I use frozen shrimp for this recipe?

Creamy Garlic Shrimp Spinach Recipe. Just make sure to thaw them completely before cooking. To do this, place the shrimp in the refrigerator overnight or run them under cold water for a quicker thaw. Once thawed, pat them dry with a paper towel to remove excess moisture. This will help achieve that perfect sear and prevent a watery sauce.

What can I substitute for heavy cream?

If you’re looking for a substitute for heavy cream, there are several options available. You can use half-and-half for a lighter version, which will still provide creaminess. Another option is to use coconut milk for a dairy-free alternative. If you prefer a lower-calorie option, consider using Greek yogurt mixed with a little milk to achieve a creamy consistency. Just remember that these substitutes may slightly alter the flavor and texture of the sauce, but they can still be delicious!

How do I store leftovers of creamy garlic shrimp spinach?

Creamy Garlic Shrimp Spinach Recipe is easy! Place any remaining dish in an airtight container and refrigerate it. It can last for up to 2 days. When you’re ready to enjoy it again, gently reheat on the stove over low heat. Adding a splash of cream or broth can help restore the sauce’s creaminess. Avoid reheating in the microwave, as it can make the shrimp rubbery. Enjoy your leftovers while they’re still fresh!

Conclusion on Creamy Garlic Shrimp Spinach Recipe

Creamy Garlic Shrimp Spinach Recipe is a delightful dish that combines rich flavors with nutritious ingredients. It’s perfect for any occasion, whether you’re hosting a dinner party or enjoying a quiet meal at home. The ease of preparation and the quick cooking time make it an ideal choice for busy weeknights.

This recipe not only satisfies your taste buds but also provides a healthy dose of protein and essential nutrients. With shrimp as the star ingredient, paired with the vibrant spinach and creamy sauce, every bite is a celebration of flavor. Plus, the versatility of this dish allows you to customize it to your liking, whether you choose to add different proteins or enhance the flavors with herbs and spices.

Creamy Garlic Shrimp Spinach Recipe is a wonderful way to showcase your culinary skills while enjoying a delicious and nutritious meal. So, gather your ingredients, follow the steps, and savor the delightful flavors that await you!

We hope you enjoy making and sharing this recipe with family and friends. Happy cooking!

Garlic Butter Shrimp Scampi Recipe is a must-try dish!

Introduction to Garlic Butter Shrimp Scampi Recipe

What is Shrimp Scampi?

Shrimp scampi is a delightful dish that features shrimp cooked in a rich, buttery sauce. Traditionally, it combines garlic, lemon, and white wine, creating a flavor explosion that tantalizes the taste buds. The shrimp are usually sautéed until they are tender and juicy, making them the star of the meal. This dish is often served over pasta, which absorbs the delicious sauce, making every bite a treat. It’s a classic Italian-American dish that has won hearts around the world.

Why Garlic Butter Shrimp Scampi is a Favorite Dish

Garlic butter shrimp scampi is a favorite for many reasons. First, it’s incredibly easy to prepare, making it perfect for busy weeknights or special occasions. The combination of garlic and butter creates a rich flavor that pairs beautifully with shrimp. Plus, the addition of lemon juice adds a refreshing zing that brightens the dish. Many people love how quickly it comes together, allowing you to enjoy a gourmet meal in under 30 minutes.

Moreover, this dish is versatile. You can customize it by adding your favorite vegetables or adjusting the spice level to suit your taste. Whether you’re cooking for family or entertaining guests, garlic butter shrimp scampi is sure to impress. Its delightful aroma and vibrant presentation make it a standout dish that everyone will love.

Ingredients for Garlic Butter Shrimp Scampi Recipe

To create a mouthwatering garlic butter shrimp scampi, you’ll need a few key ingredients. Each component plays a vital role in building the dish’s rich flavor and delightful texture. Here’s what you’ll need:

  • 1 pound large shrimp: Peeled and deveined for easy cooking.
  • 8 ounces fettuccine or spaghetti: Choose your favorite pasta to serve as the base.
  • 4 tablespoons unsalted butter: This adds richness and depth to the sauce.
  • 4 cloves garlic: Finely chopped to infuse the dish with aromatic flavor.
  • 1/4 teaspoon crushed red pepper: Optional, for a hint of heat.
  • 1/2 cup vegetable broth: Provides moisture and enhances the flavor.
  • 1/2 cup dry white wine: Adds acidity and complexity; you can substitute with extra vegetable broth if preferred.
  • Juice of 1 lemon: Brightens the dish and balances the richness.
  • Salt and freshly ground black pepper: To taste, enhancing all the flavors.
  • 1/4 cup fresh basil: Chopped, for a fresh and fragrant finish.
  • Grated Pecorino Romano cheese: Optional, for serving and added flavor.

These ingredients come together to create a delightful garlic butter shrimp scampi that is sure to impress. The combination of shrimp, garlic, and butter is a classic that never goes out of style. Plus, with the addition of lemon and fresh herbs, this dish is not only delicious but also visually appealing. Gather your ingredients, and let’s move on to the next step in preparing this scrumptious meal!

Step-by-Step Preparation of Garlic Butter Shrimp Scampi Recipe

Step 1: Preparing the Shrimp

First, let’s get the shrimp ready. If you’re using frozen shrimp, make sure to thaw them completely. You can do this by placing them in the refrigerator overnight or running them under cold water for a few minutes. Once thawed, peel and devein the shrimp if they aren’t already. This step is crucial as it ensures a clean and tasty bite. After that, pat the shrimp dry with a paper towel. This helps them sear nicely in the pan.

Step 2: Making the Garlic Butter Sauce

Next, it’s time to create the delicious garlic butter sauce. In a large skillet, melt the unsalted butter over medium heat. As the butter melts, add the finely chopped garlic. Sauté the garlic for about a minute, stirring constantly. You want it to become fragrant but not browned. If you enjoy a bit of heat, now is the time to sprinkle in the crushed red pepper. This will add a lovely kick to your sauce!

Step 3: Cooking the Shrimp

Now, let’s cook the shrimp! Add the prepared shrimp to the skillet, seasoning them with salt and freshly ground black pepper. Sauté the shrimp for about 2-3 minutes. You’ll know they’re done when they turn pink and opaque. Be careful not to overcook them, as shrimp can become rubbery if left too long. Once cooked, remove the skillet from the heat to prevent further cooking.

Step 4: Combining Ingredients

It’s time to bring everything together! Pour in the vegetable broth and dry white wine into the skillet. Stir gently to combine all the flavors. Allow the mixture to come to a gentle simmer for about 3-4 minutes. This will help reduce the liquid slightly and intensify the flavors. After that, add the juice of one lemon and the drained pasta. Toss everything together until the pasta is well coated in the sauce. If the dish seems too dry, gradually add some reserved pasta water until you reach your desired consistency.

Step 5: Serving the Dish

Finally, it’s time to serve your garlic butter shrimp scampi! Remove the skillet from the heat and fold in the chopped fresh basil for a burst of flavor. Serve the dish hot, garnished with grated Pecorino Romano cheese if desired. This adds a nice touch of creaminess and flavor. Enjoy your meal with a side of crusty bread to soak up the delicious sauce!

Variations of Garlic Butter Shrimp Scampi Recipe

Adding Vegetables

One of the best things about garlic butter shrimp scampi is its versatility. You can easily enhance the dish by adding seasonal vegetables. For instance, asparagus, bell peppers, or cherry tomatoes can bring vibrant colors and extra nutrition. Simply sauté the vegetables in the garlic butter sauce before adding the shrimp. This way, they will absorb all the delicious flavors. You can also try adding spinach or zucchini for a fresh twist. Not only do these veggies add flavor, but they also make the dish more filling and nutritious.

Alternative Proteins

If you’re looking to switch things up, consider using alternative proteins. Chicken breast or scallops can be great substitutes for shrimp. Just remember to adjust the cooking time accordingly. For chicken, cut it into bite-sized pieces and cook until golden brown. If you choose scallops, they will only need a few minutes to cook. This flexibility allows you to enjoy the same rich garlic butter flavor with different proteins, making it a great option for various dietary preferences.

Gluten-Free Options

For those who are gluten-sensitive, you can still enjoy this delightful dish! Simply replace traditional pasta with gluten-free options. There are many delicious gluten-free pasta varieties available, such as rice or quinoa pasta. You can also use spiralized vegetables like zucchini or carrots for a lighter, low-carb alternative. These options will still provide a satisfying base for the garlic butter sauce while keeping the dish gluten-free. Enjoy your garlic butter shrimp scampi without any worries!

Cooking Note for Garlic Butter Shrimp Scampi Recipe

When preparing garlic butter shrimp scampi, a few cooking notes can help you achieve the best results. First, always use fresh shrimp if possible. Fresh shrimp not only taste better but also have a firmer texture. If you must use frozen shrimp, ensure they are completely thawed and patted dry before cooking. This step is crucial for achieving that perfect sear.

Next, pay attention to the heat level while cooking. Medium heat is ideal for sautéing garlic and shrimp. Cooking at too high a temperature can burn the garlic, leading to a bitter flavor. On the other hand, cooking at too low a temperature may result in rubbery shrimp. Keep an eye on the shrimp as they cook; they should turn pink and opaque in just a few minutes.

Additionally, don’t skip the step of reserving pasta water. This starchy water is a secret weapon for creating a silky sauce. If your dish seems dry, adding a splash of this water can help achieve the desired consistency. It also helps the sauce cling to the pasta better, enhancing the overall flavor.

Lastly, remember that garlic butter shrimp scampi is best enjoyed fresh. While leftovers can be stored in the refrigerator, the texture of the shrimp may change. If you do have leftovers, reheat them gently on low heat to avoid overcooking the shrimp. With these cooking notes in mind, you’ll be well on your way to creating a delicious garlic butter shrimp scampi that will impress everyone at your table!

Serving Suggestions for Garlic Butter Shrimp Scampi Recipe

Best Side Dishes

When it comes to serving garlic butter shrimp scampi, choosing the right side dishes can elevate your meal. Here are some delightful options that pair beautifully with this dish:

  • Garlic Bread: A classic choice! The buttery, garlicky flavor of garlic bread complements the shrimp scampi perfectly. Plus, it’s great for soaking up the delicious sauce.
  • Caesar Salad: A fresh Caesar salad adds a crisp contrast to the rich flavors of the scampi. The crunchy romaine and creamy dressing balance the meal nicely.
  • Steamed Asparagus: Lightly steamed asparagus adds a pop of color and nutrition. Its mild flavor pairs well with the garlic butter sauce.
  • Roasted Vegetables: A medley of roasted vegetables, such as zucchini, bell peppers, and carrots, can enhance the dish. Their natural sweetness complements the savory shrimp.
  • Rice Pilaf: For a heartier option, serve the scampi over a bed of fluffy rice pilaf. The rice absorbs the sauce, making every bite delightful.

These side dishes not only enhance the overall dining experience but also add variety to your plate. Choose one or two to create a well-rounded meal that everyone will enjoy!

Wine Pairings

Pairing the right wine with garlic butter shrimp scampi can elevate your dining experience. Here are some excellent wine options to consider:

  • Sauvignon Blanc: This white wine is crisp and refreshing, with citrus notes that complement the lemon in the dish. Its acidity balances the richness of the butter.
  • Pinot Grigio: Another great white wine choice, Pinot Grigio is light and fruity. It enhances the flavors of the shrimp without overpowering them.
  • Chardonnay: A lightly oaked Chardonnay can add a creamy texture that pairs well with the buttery sauce. Look for one that is not too heavy.
  • Prosecco: If you prefer sparkling wine, Prosecco is a fantastic option. Its bubbles and slight sweetness make it a fun pairing with the savory shrimp.
  • Rosé: A dry rosé can also work well, offering a nice balance of fruitiness and acidity that complements the dish.

Choosing the right wine can enhance the flavors of your garlic butter shrimp scampi, making your meal even more enjoyable. Cheers to a delightful dining experience!

Tips for Perfecting Garlic Butter Shrimp Scampi Recipe

Choosing the Right Shrimp

When it comes to making a fantastic garlic butter shrimp scampi, selecting the right shrimp is essential. Fresh shrimp is always the best choice, as it offers superior flavor and texture. Look for shrimp that are firm and have a mild, ocean-like scent. If you opt for frozen shrimp, ensure they are high-quality and properly thawed before cooking. You can tell if shrimp are fresh by their color; they should be a vibrant pink or gray, depending on the variety. Avoid shrimp that have a strong fishy smell or are discolored, as these can indicate poor quality.

Additionally, consider the size of the shrimp. Large shrimp, often labeled as “jumbo” or “extra-large,” are ideal for this dish. They hold up well during cooking and provide a satisfying bite. If you prefer smaller shrimp, just be mindful of the cooking time, as they will cook faster. Ultimately, the right shrimp will enhance the overall taste and presentation of your garlic butter shrimp scampi.

Adjusting Flavor Profiles

Another way to perfect your garlic butter shrimp scampi is by adjusting the flavor profiles to suit your taste. Start with the basics: garlic and butter. If you love garlic, feel free to add an extra clove or two for a more robust flavor. On the other hand, if you prefer a milder taste, you can reduce the amount of garlic used.

For those who enjoy a bit of heat, consider increasing the crushed red pepper or adding a dash of hot sauce. This can elevate the dish and give it a delightful kick. Additionally, experimenting with herbs can add depth to the flavor. Fresh parsley, thyme, or even a sprinkle of oregano can complement the dish beautifully. Don’t forget to taste as you go! Adjusting the seasoning with salt, pepper, or lemon juice can make a significant difference in the final result. With these tips, you can create a garlic butter shrimp scampi that is perfectly tailored to your palate.

Breakdown of Time for Garlic Butter Shrimp Scampi Recipe

Prep Time

Preparing garlic butter shrimp scampi is quick and straightforward. The prep time typically takes about 10-15 minutes. During this time, you’ll gather all your ingredients, peel and devein the shrimp if necessary, and chop the garlic and basil. If you’re using fresh vegetables, you can also prepare them during this time. Having everything ready will make the cooking process smoother and more enjoyable.

Cooking Time

The cooking time for garlic butter shrimp scampi is relatively short, usually around 10-15 minutes. This includes cooking the pasta until al dente and sautéing the shrimp in the garlic butter sauce. The key is to keep an eye on the shrimp, as they cook quickly. You want them to turn pink and opaque without overcooking. The entire cooking process is designed to be efficient, allowing you to enjoy a delicious meal in no time.

Total Time

In total, you can expect to spend about 20-30 minutes from start to finish when making garlic butter shrimp scampi. This makes it an excellent option for a weeknight dinner or a last-minute gathering. With just a little bit of preparation and cooking, you’ll have a delightful dish ready to serve. So, gather your ingredients and get ready to impress your family or guests with this quick and tasty meal!

Nutritional Information for Garlic Butter Shrimp Scampi Recipe

Calories

When enjoying garlic butter shrimp scampi, it’s essential to be mindful of the calories. Each serving of this delightful dish contains approximately 360 calories. This makes it a satisfying yet manageable option for a meal. The balance of flavors and ingredients ensures that you get a fulfilling experience without overindulging. If you’re watching your calorie intake, consider pairing it with lighter side dishes to maintain a balanced meal.

Protein

Garlic butter shrimp scampi is not only delicious but also a great source of protein. Each serving provides about 25 grams of protein, thanks to the shrimp. Protein is vital for building and repairing tissues, making it an essential part of a healthy diet. Including this dish in your meal plan can help you meet your daily protein needs while enjoying a flavorful experience. For those looking to increase their protein intake, consider adding more shrimp or incorporating other protein-rich ingredients.

Sodium

While garlic butter shrimp scampi is a tasty dish, it’s important to be aware of its sodium content. Each serving contains around 600 milligrams of sodium. This amount can vary based on the broth and cheese used. If you’re watching your sodium intake, consider using low-sodium vegetable broth and reducing the amount of added salt. This way, you can enjoy the rich flavors of the dish while keeping your sodium levels in check. Always remember to balance your meals with fresh vegetables and whole grains for a healthier approach.

FAQs about Garlic Butter Shrimp Scampi Recipe

Can I use frozen shrimp for this recipe?

Yes, you can absolutely use frozen shrimp for garlic butter shrimp scampi! Just make sure to thaw them completely before cooking. You can do this by placing them in the refrigerator overnight or running them under cold water for a few minutes. Once thawed, pat them dry with a paper towel to ensure they sear nicely in the pan. Using frozen shrimp is a convenient option, and they can still taste delicious when cooked properly!

How can I make this dish spicier?

If you love a bit of heat, there are several ways to spice up your garlic butter shrimp scampi. One simple method is to increase the amount of crushed red pepper flakes in the recipe. You can also add a dash of hot sauce or a sprinkle of cayenne pepper for an extra kick. If you enjoy fresh ingredients, consider adding sliced jalapeños or diced serrano peppers to the garlic butter sauce. Just remember to adjust the spice level to your preference, and enjoy the added flavor!

What can I substitute for butter in this recipe?

If you’re looking for a butter substitute, there are several options you can try. For a dairy-free alternative, use olive oil or coconut oil. Both will provide a rich flavor and help create a delicious sauce. You can also use vegan butter if you want to keep it plant-based. If you prefer a lighter option, consider using a combination of olive oil and a splash of vegetable broth. This will still give you a tasty sauce while reducing the overall fat content.

How do I store leftovers of Garlic Butter Shrimp Scampi?

Storing leftovers of garlic butter shrimp scampi is easy! Allow the dish to cool down to room temperature, then transfer it to an airtight container. You can store it in the refrigerator for up to 2-3 days. When reheating, do so gently on low heat to avoid overcooking the shrimp. If the dish seems dry, add a splash of vegetable broth or a little olive oil to help restore its creamy texture. Enjoy your leftovers for a quick and delicious meal!

Conclusion on Garlic Butter Shrimp Scampi Recipe

In conclusion, garlic butter shrimp scampi is a delightful dish that brings together the rich flavors of garlic, butter, and succulent shrimp. This recipe is not only easy to prepare but also offers a wonderful way to impress family and friends with minimal effort. The combination of fresh ingredients, such as lemon juice and basil, adds brightness and depth to the dish, making it a favorite for many.

Whether you’re enjoying it on a busy weeknight or serving it at a special gathering, garlic butter shrimp scampi is sure to be a hit. Its versatility allows for endless variations, whether you choose to add seasonal vegetables or substitute proteins. Plus, with the option to make it gluten-free, everyone can enjoy this delicious meal.

As you explore this recipe, remember to pay attention to the cooking notes and tips provided. Choosing the right shrimp and adjusting the flavors to your liking can elevate your dish to new heights. Pair it with a refreshing salad or a glass of wine, and you have a complete dining experience that is both satisfying and enjoyable.

So, gather your ingredients, follow the steps, and indulge in the delightful flavors of garlic butter shrimp scampi. It’s a dish that not only nourishes the body but also warms the heart. Happy cooking!

Grilled Salmon with Avocado Greek Salsa and Orzo delights!

Introduction to Grilled Salmon with Avocado Salsa and Orzo

Are you looking for a delicious and healthy meal that’s easy to prepare? Look no further! Grilled Salmon with Avocado Salsa and Orzo is the perfect dish for you. This recipe combines the rich flavors of grilled salmon with a refreshing avocado salsa, all served over a bed of tender orzo pasta. It’s not just a feast for the taste buds; it’s also packed with nutrients!

Salmon is known for its high omega-3 fatty acids, which are great for heart health. Plus, it’s a fantastic source of protein. When paired with the creamy avocado and zesty salsa, you get a delightful mix of textures and flavors. The orzo adds a nice touch, making the dish filling and satisfying.

This meal is perfect for any occasion, whether it’s a family dinner, a weekend barbecue, or a special celebration. It’s simple enough for a weeknight but impressive enough to serve guests. With just a few fresh ingredients, you can create a dish that looks and tastes gourmet.

In this article, we’ll guide you through the ingredients, preparation steps, and tips to make your Grilled Salmon with Avocado Salsa and Orzo a success. So, let’s dive in and discover how to make this delightful dish!

Ingredients for Grilled Salmon with Avocado Salsa and Orzo

To create the mouthwatering Grilled Salmon with Avocado Salsa and Orzo, you’ll need a selection of fresh and flavorful ingredients. Each component plays a vital role in bringing this dish to life. Here’s what you’ll need:

  • 2 cups orzo pasta: This small, rice-shaped pasta is perfect for soaking up flavors.
  • 1 tablespoon extra virgin olive oil: A drizzle of this oil adds richness and depth.
  • Salt and freshly ground black pepper: Essential for seasoning your salmon and orzo.
  • 4 salmon fillets (6 ounces each): Fresh salmon is the star of this dish, providing protein and healthy fats.
  • 1 teaspoon dried garlic: This adds a savory kick to the salmon.
  • 1 teaspoon smoked paprika: A touch of smokiness enhances the flavor of the grilled salmon.
  • 1 ripe avocado, diced: Creamy avocado brings a delightful texture to the salsa.
  • 1 cup halved cherry tomatoes: These sweet tomatoes add freshness and color.
  • 1 cucumber, diced: Crunchy cucumber provides a refreshing contrast.
  • 1/4 cup finely chopped red onion: This adds a bit of sharpness to the salsa.
  • 1/4 cup chopped fresh parsley: Fresh herbs brighten up the dish.
  • Juice of 1 fresh lemon: A splash of lemon juice adds zesty brightness.
  • 1/2 cup crumbled feta cheese: Feta adds a salty, creamy element to the salsa.

Gathering these ingredients will set you on the right path to creating a delicious meal. Each item contributes to the overall flavor and texture, making your Grilled Salmon with Avocado Salsa and Orzo a delightful experience. Now that you have everything you need, let’s move on to the preparation steps!

Preparation of Grilled Salmon with Avocado Salsa and Orzo

Now that you have all the ingredients ready, it’s time to dive into the preparation of your Grilled Salmon with Avocado Salsa and Orzo. This process is straightforward and will have your kitchen smelling amazing in no time. Let’s break it down into easy steps!

Step 1: Preparing the Salmon

First, take your salmon fillets and rinse them under cold water. Pat them dry with a paper towel. This helps the seasoning stick better. Next, sprinkle the dried garlic, smoked paprika, salt, and pepper evenly over both sides of the salmon. This seasoning will enhance the flavor of the fish while it grills.

Step 2: Making the Avocado Salsa

While the salmon is resting with its seasoning, grab a mixing bowl. Add the diced avocado, halved cherry tomatoes, diced cucumber, finely chopped red onion, and chopped parsley. Squeeze the juice of one fresh lemon over the mixture. This not only adds flavor but also keeps the avocado from browning. Gently fold the ingredients together, being careful not to mash the avocado. You want a chunky salsa that looks vibrant and fresh!

Step 3: Cooking the Orzo

Next, bring a large pot of salted water to a boil. Add the orzo pasta and cook according to the package instructions, usually about 8-10 minutes. Stir occasionally to prevent sticking. Once the orzo is al dente, drain it in a colander. Drizzle with a tablespoon of extra virgin olive oil and season with salt and pepper to taste. Toss it gently to combine and let it cool slightly.

Step 4: Grilling the Salmon

Now, it’s time to grill the salmon! Preheat your grill to medium-high heat. Once hot, place the seasoned salmon fillets on the grill. Cook for about 4-5 minutes on each side. You’ll know the salmon is done when it flakes easily with a fork and has a nice char. After grilling, let the salmon rest for a few minutes. This helps keep it juicy!

Step 5: Combining the Ingredients

Finally, it’s time to bring everything together. On each plate, place a generous serving of the seasoned orzo. Top it with a grilled salmon fillet, and then add a hearty scoop of the avocado salsa on top. The colors and textures will make your dish look as good as it tastes!

And there you have it! Your Grilled Salmon with Avocado Salsa and Orzo is ready to be enjoyed. This dish is not only delicious but also visually appealing, making it perfect for any occasion.

Variation of Grilled Salmon with Avocado Salsa and Orzo

While the classic Grilled Salmon with Avocado Salsa and Orzo is a delightful dish, there are many ways to switch things up! Variations can enhance flavors or cater to different dietary preferences. Let’s explore some alternative ingredients and cooking methods that can make this dish even more exciting.

Alternative Ingredients for the Salsa

If you want to give your avocado salsa a twist, consider these alternatives:

  • Mango: Diced mango adds a sweet and tropical flavor that pairs beautifully with salmon.
  • Pineapple: Fresh pineapple chunks can bring a zesty sweetness to the salsa.
  • Jalapeño: For a spicy kick, finely chopped jalapeño can be added to the mix.
  • Black Beans: Adding black beans can boost the protein content and add a hearty texture.

Feel free to mix and match these ingredients to create a salsa that suits your taste!

Different Cooking Methods for Salmon

Grilling is a fantastic way to cook salmon, but there are other methods you can try:

  • Baking: Preheat your oven to 400°F (200°C). Place the seasoned salmon on a baking sheet and bake for 12-15 minutes.
  • Pan-Seering: Heat a skillet over medium heat with a little olive oil. Cook the salmon for about 4-5 minutes on each side until golden brown.
  • Broiling: Place the salmon under the broiler for about 6-8 minutes for a crispy top.

Each method offers a unique flavor and texture, so don’t hesitate to experiment!

Cooking Note for Grilled Salmon with Avocado Salsa and Orzo

When preparing Grilled Salmon with Avocado Salsa and Orzo, a few cooking notes can help ensure your dish turns out perfectly every time. First, always choose fresh salmon fillets. Fresh fish not only tastes better but also has a firmer texture, making it easier to grill. If you can, opt for wild-caught salmon, as it tends to have a richer flavor compared to farmed varieties.

Another important tip is to preheat your grill properly. A hot grill helps achieve those beautiful grill marks and prevents the salmon from sticking. If you’re using a charcoal grill, let the coals burn until they are covered with white ash. For gas grills, allow it to heat for about 10-15 minutes before placing the salmon on it.

Additionally, consider using a fish spatula when flipping the salmon. This tool is designed to handle delicate fish without breaking it apart. If you don’t have one, a regular spatula will work, but be gentle!

Lastly, remember to let the salmon rest after grilling. This resting period allows the juices to redistribute, ensuring each bite is moist and flavorful. Following these cooking notes will elevate your Grilled Salmon with Avocado Salsa and Orzo, making it a dish to remember!

Serving Suggestions for Grilled Salmon with Avocado Salsa and Orzo

Serving your Grilled Salmon with Avocado Salsa and Orzo can be just as fun as preparing it! Presentation plays a key role in making your meal appealing. Here are some serving suggestions to enhance your dining experience:

  • Garnish: Add a sprinkle of fresh parsley or cilantro on top of the salmon for a pop of color. A lemon wedge on the side can also brighten the plate.
  • Side Dishes: Pair the dish with a light green salad or steamed vegetables for a complete meal. Roasted asparagus or sautéed spinach complements the flavors beautifully.
  • Serving Style: For a more casual setting, serve the salmon and orzo family-style on a large platter. This encourages sharing and creates a warm atmosphere.
  • Wine Pairing: A chilled glass of white wine, such as Sauvignon Blanc or Pinot Grigio, pairs wonderfully with the flavors of the dish.

These serving suggestions will not only make your meal look inviting but also enhance the overall dining experience. Enjoy your delicious Grilled Salmon with Avocado Salsa and Orzo!

Tips for Perfect Grilled Salmon with Avocado Salsa and Orzo

Creating the perfect Grilled Salmon with Avocado Salsa and Orzo is all about attention to detail. Here are some helpful tips to ensure your dish turns out delicious every time:

  • Choose Quality Salmon: Always opt for fresh, high-quality salmon. Look for fillets that are bright in color and have a fresh smell. Wild-caught salmon is often more flavorful than farmed varieties.
  • Marinate for Extra Flavor: For an added depth of flavor, consider marinating the salmon for 30 minutes before grilling. A simple mix of olive oil, lemon juice, and herbs works wonders!
  • Preheat the Grill: Make sure your grill is hot before placing the salmon on it. A well-heated grill helps achieve those beautiful grill marks and prevents sticking.
  • Use a Meat Thermometer: To ensure your salmon is cooked perfectly, use a meat thermometer. The internal temperature should reach 145°F (63°C) for safe consumption.
  • Let It Rest: After grilling, allow the salmon to rest for a few minutes. This helps the juices redistribute, making each bite tender and juicy.
  • Customize the Salsa: Feel free to experiment with the avocado salsa. Add your favorite ingredients like corn, bell peppers, or even a splash of hot sauce for a kick!
  • Serve Immediately: This dish is best enjoyed fresh. Serve it right after preparing to enjoy the vibrant flavors and textures at their peak.
  • Pair with Seasonal Vegetables: Enhance your meal by serving it with seasonal vegetables. Grilled zucchini, asparagus, or a fresh garden salad can complement the dish beautifully.

By following these tips, you’ll elevate your Grilled Salmon with Avocado Salsa and Orzo to a whole new level. Enjoy the process and savor the delicious results!

Breakdown of Time for Grilled Salmon with Avocado Salsa and Orzo

Understanding the time needed for each step in preparing Grilled Salmon with Avocado Salsa and Orzo can help you plan your cooking efficiently. Here’s a simple breakdown of the time required for preparation and cooking:

Prep Time

The prep time for this delicious dish is approximately 20 minutes. This includes gathering your ingredients, seasoning the salmon, and preparing the avocado salsa. Taking your time during this stage ensures that everything is ready for cooking, making the process smoother.

Cooking Time

Cooking the Grilled Salmon with Avocado Salsa and Orzo will take about 15-20 minutes. This includes:

  • Cooking the orzo pasta for about 8-10 minutes.
  • Grilling the salmon fillets for 8-10 minutes, depending on thickness.

Having everything prepped beforehand allows you to multitask, making the cooking time efficient.

Total Time

In total, you can expect to spend around 35-40 minutes from start to finish. This includes both prep and cooking time. With this quick and easy timeline, you can enjoy a healthy and flavorful meal without spending hours in the kitchen!

Nutritional Information for Grilled Salmon with Avocado Salsa and Orzo

Understanding the nutritional content of your meals is essential for maintaining a balanced diet. Grilled Salmon with Avocado Salsa and Orzo is not only delicious but also packed with nutrients. Here’s a breakdown of the key nutritional information for this dish:

Calories

Each serving of Grilled Salmon with Avocado Salsa and Orzo contains approximately 480 calories. This makes it a satisfying meal that provides energy without being overly heavy. The combination of salmon, avocado, and orzo ensures you’re getting a good mix of healthy fats, proteins, and carbohydrates.

Protein

One of the standout features of this dish is its protein content. Each serving offers about 32 grams of protein. Salmon is an excellent source of high-quality protein, which is essential for muscle repair and growth. The orzo also contributes to the protein content, making this meal a great option for those looking to increase their protein intake.

Sodium

The sodium content in each serving is approximately 600 milligrams. While this is a moderate amount, it’s important to be mindful of your overall sodium intake, especially if you’re watching your salt consumption. Using fresh ingredients and controlling the amount of added salt can help keep the sodium levels in check.

In summary, Grilled Salmon with Avocado Salsa and Orzo is a nutritious choice that provides a balanced mix of calories, protein, and essential nutrients. Enjoying this dish can be a delicious way to support your health and well-being!

FAQs about Grilled Salmon with Avocado Salsa and Orzo

Can I use frozen salmon for this recipe?

Yes, you can use frozen salmon for this recipe! Just make sure to thaw it completely before cooking. You can do this by placing the salmon in the refrigerator overnight or using the defrost setting on your microwave. Once thawed, season and grill as you would with fresh salmon. Keep in mind that frozen salmon may have a slightly different texture, but it will still be delicious!

What can I substitute for orzo?

If you don’t have orzo on hand, there are several great substitutes you can use. Quinoa is a nutritious alternative that adds a nutty flavor. Brown rice is another option that provides a hearty base. For a gluten-free choice, try using gluten-free pasta or even cauliflower rice for a lighter option. Each of these substitutes will work well with the grilled salmon and avocado salsa!

How do I know when the salmon is done?

To check if your salmon is done, look for a few key signs. The fish should be opaque and flake easily with a fork. A meat thermometer is the best way to ensure it’s cooked perfectly. The internal temperature should reach 145°F (63°C). If you don’t have a thermometer, you can also gently press the salmon with a fork; if it flakes apart easily, it’s ready to eat!

Can I make the avocado salsa ahead of time?

Yes, you can prepare the avocado salsa ahead of time! However, it’s best to make it no more than a few hours in advance. To keep the avocado from browning, squeeze extra lemon juice over the salsa and store it in an airtight container in the refrigerator. Just give it a gentle stir before serving to mix everything back together. This way, you can save time and still enjoy a fresh-tasting salsa!

Conclusion on Grilled Salmon with Avocado Salsa and Orzo

In conclusion, Grilled Salmon with Avocado Salsa and Orzo is a delightful dish that brings together vibrant flavors and nutritious ingredients. This recipe is not only easy to prepare but also offers a wonderful balance of protein, healthy fats, and carbohydrates. Whether you’re cooking for a special occasion or a simple weeknight dinner, this meal is sure to impress.

The combination of tender grilled salmon, creamy avocado salsa, and perfectly cooked orzo creates a satisfying experience for your taste buds. Plus, the versatility of the ingredients allows you to customize the dish to suit your preferences. You can easily swap out ingredients or try different cooking methods to keep things exciting.

As you enjoy this delicious meal, remember the health benefits it provides. Salmon is rich in omega-3 fatty acids, which are essential for heart health, while the fresh vegetables in the salsa add vitamins and minerals. This dish is a great way to nourish your body while indulging in a flavorful feast.

So, gather your ingredients, fire up the grill, and treat yourself and your loved ones to this scrumptious Grilled Salmon with Avocado Salsa and Orzo. With its bright colors and fresh flavors, it’s a dish that’s sure to become a favorite in your home. Happy cooking!

Honey Sriracha Chicken Recipe is a must-try dish!

Introduction to Honey Sriracha Chicken Recipe

Honey Sriracha Chicken Recipe is here to bring excitement to your table! This dish combines the sweetness of honey with the fiery kick of Sriracha sauce, creating a flavor explosion that will leave your taste buds dancing. Whether you’re cooking for family or friends, this recipe is sure to impress.

What Makes Honey Sriracha Chicken Special?

What sets this recipe apart? First, it’s all about the balance of flavors. The honey adds a delightful sweetness, while the Sriracha brings a bold heat. Together, they create a perfect harmony that enhances the juicy chicken thighs. Plus, the marinade not only infuses the chicken with flavor but also helps keep it tender and moist during cooking.

Another reason to love this dish is its versatility. You can easily adjust the spice level by adding more or less Sriracha, making it suitable for everyone. Additionally, the recipe is quick and simple, making it perfect for busy weeknights or casual gatherings. With just a few ingredients and minimal prep time, you can whip up a delicious meal that feels gourmet.

Finally, the vibrant colors of the finished dish, topped with green onions and sesame seeds, make it visually appealing. It’s not just a meal; it’s a feast for the eyes! So, let’s dive into the ingredients and get started on this mouthwatering journey.

Ingredients for Honey Sriracha Chicken Recipe

Honey Sriracha Chicken Recipe, you’ll need a few simple ingredients. Each one plays a vital role in building the flavor profile of this dish. Here’s what you’ll need:

  • 2 pounds boneless, skinless chicken thighs
  • 1/4 cup honey
  • 1/4 cup Sriracha sauce
  • 2 tablespoons soy sauce
  • 2 tablespoons rice vinegar
  • 2 cloves garlic, minced
  • 1 teaspoon ground ginger
  • 1 tablespoon vegetable oil
  • Salt and pepper to taste
  • Chopped green onions and sesame seeds for garnish

These ingredients are easy to find at your local grocery store. The chicken thighs are the star of the show, providing a juicy and tender base. Honey and Sriracha create a sweet and spicy glaze that makes every bite irresistible. Soy sauce adds depth, while rice vinegar gives a hint of tanginess. Garlic and ginger bring aromatic flavors that elevate the dish even further.

Don’t forget the garnishes! Chopped green onions and sesame seeds not only add a pop of color but also enhance the overall taste. Now that you have your ingredients ready, let’s move on to the preparation steps to make this delightful meal!

Step-by-Step Preparation of Honey Sriracha Chicken Recipe

Honey Sriracha Chicken Recipe. This step-by-step guide will help you create a delicious meal that’s sure to impress. Let’s get started!

Step 1: Marinating the Chicken

First, we need to marinate the chicken. This step is crucial for infusing flavor and ensuring the chicken stays juicy. In a mixing bowl, combine the honey, Sriracha sauce, soy sauce, rice vinegar, minced garlic, and ground ginger. Stir the mixture until it’s smooth and well blended.

Next, season the chicken thighs with salt and pepper. Then, immerse the chicken in the marinade, making sure each piece is thoroughly coated. Cover the bowl with plastic wrap and let it marinate in the refrigerator. Aim for at least 30 minutes, but if you have time, letting it sit for up to 2 hours will enhance the flavor even more.

Step 2: Preparing the Honey Sriracha Sauce

While the chicken is marinating, you can prepare the sauce. After the marinating time is up, take the reserved marinade and pour it into a small saucepan. Bring it to a boil over medium heat. Once boiling, reduce the heat and let it simmer for about 5-7 minutes. This will help thicken the sauce and intensify the flavors.

Keep an eye on it, stirring occasionally to prevent sticking. Once it reaches a nice, thick consistency, remove it from the heat. This sauce will be used later to glaze the chicken, adding an extra layer of flavor.

Step 3: Cooking the Chicken

Now it’s time to cook the chicken! Heat a grill or a large skillet over medium-high heat. If you’re using a skillet, add a tablespoon of vegetable oil to prevent sticking. Once the pan is hot, take the chicken out of the marinade, allowing any excess to drip off.

Place the chicken thighs in the skillet or on the grill. Cook them for about 6-7 minutes on each side. You want the chicken to reach an internal temperature of 165°F. This ensures it’s fully cooked and safe to eat. The sizzling sound will let you know that the chicken is cooking perfectly!

Step 4: Glazing the Chicken with Sauce

After the chicken is fully cooked, it’s time to add that delicious glaze. Brush the thickened marinade over the chicken, coating it evenly. Let it cook for an additional minute on each side. This step caramelizes the sauce, creating a beautiful, sticky glaze that enhances the flavor.

Once glazed, remove the chicken from the heat and let it rest for a few minutes. This resting period allows the juices to redistribute, making the chicken even more tender. After resting, slice the chicken and serve it garnished with chopped green onions and sesame seeds. Enjoy your flavorful creation!

Variations of Honey Sriracha Chicken Recipe

Honey Sriracha Chicken Recipe is not only delicious on its own, but it also offers plenty of room for creativity. You can easily customize this dish to suit your taste or to incorporate seasonal ingredients. Here are a couple of tasty variations to try!

Honey Sriracha Chicken with Vegetables

Honey Sriracha Chicken Recipe? This variation not only boosts the nutritional value but also adds vibrant colors to your plate. To make this dish, simply chop your favorite vegetables, such as bell peppers, broccoli, or snap peas.

After marinating the chicken, toss the vegetables in the remaining marinade. You can either grill the chicken and vegetables together or sauté them in a skillet. Cook the veggies until they are tender but still crisp. This method allows the flavors to meld beautifully, creating a delightful one-pan meal.

Serve the chicken and vegetables together, garnished with green onions and sesame seeds. This variation is perfect for a quick weeknight dinner and is sure to please everyone at the table!

Grilled Honey Sriracha Chicken Recipe

Grilled Honey Sriracha Chicken Recipe takes the original recipe to the next level. Start by marinating the chicken thighs as usual. When it’s time to cook, preheat your grill to medium-high heat.

Once the grill is hot, place the marinated chicken directly on the grates. Grill each side for about 6-7 minutes, or until the internal temperature reaches 165°F. The grill marks and smoky flavor will add an extra layer of deliciousness to the chicken.

For an added twist, you can grill some pineapple slices alongside the chicken. The sweetness of the pineapple pairs wonderfully with the spicy glaze. After grilling, serve the chicken with the grilled pineapple for a tropical touch!

Honey Sriracha Chicken Recipe are just a few ideas to inspire your cooking. Feel free to experiment with different ingredients and cooking methods to find your favorite version!

Cooking Note for Honey Sriracha Chicken Recipe

Honey Sriracha Chicken Recipe, there are a few important cooking notes to keep in mind. These tips will help ensure that your chicken turns out perfectly every time, making your meal a delightful experience.

First, always check the freshness of your chicken. Fresh chicken thighs will yield the best flavor and texture. If possible, choose organic or free-range chicken for a more robust taste. Additionally, make sure to thaw frozen chicken in the refrigerator overnight for safe cooking.

Next, marinating is key! The longer you let the chicken soak in the marinade, the more flavorful it will be. If you have time, aim for the full two hours. However, even a quick 30-minute soak will still impart great flavor.

When cooking, use a meat thermometer to check the internal temperature. This ensures that your chicken is cooked through without being dry. Remember, the safe cooking temperature for chicken is 165°F. If you don’t have a thermometer, cut into the thickest part of the chicken; the juices should run clear, not pink.

Lastly, let the chicken rest after cooking. This step is often overlooked but is crucial for juicy chicken. Resting allows the juices to redistribute throughout the meat, making each bite tender and flavorful. Cover the chicken loosely with foil while it rests for about 5 minutes before slicing.

Honey Sriracha Chicken Recipe to new heights. Enjoy the process and savor the delicious results!

Serving Suggestions for Honey Sriracha Chicken Recipe

Honey Sriracha Chicken Recipe, it’s time to think about how to serve it. The right sides can elevate your meal and create a well-rounded dining experience. Here are some fantastic serving suggestions to complement your chicken dish!

Pairing with Rice or Noodles

One of the best ways to enjoy your Honey Sriracha Chicken is by pairing it with rice or noodles. Both options absorb the flavorful sauce beautifully, making each bite even more delightful. For rice, consider using jasmine or basmati for a fragrant touch. Simply cook the rice according to package instructions, and serve it alongside the chicken.

If you prefer noodles, try stir-fried rice noodles or even soba noodles. Cook them according to the package directions, then toss them with a splash of soy sauce and a sprinkle of sesame oil for added flavor. Place the glazed chicken on top of the rice or noodles, and drizzle with extra sauce for a mouthwatering presentation.

This combination not only fills you up but also balances the spicy and sweet flavors of the chicken. It’s a satisfying meal that’s perfect for any occasion!

Serving with Fresh Salad

For a lighter option, consider serving your Honey Sriracha Chicken with a fresh salad. A crisp salad adds a refreshing contrast to the rich flavors of the chicken. You can create a simple green salad with mixed greens, cherry tomatoes, and cucumber. Drizzle with a light vinaigrette to enhance the flavors.

For a more substantial salad, try adding ingredients like avocado, bell peppers, or even mango for a tropical twist. The sweetness of the mango pairs wonderfully with the spicy chicken, creating a delightful balance. Top the salad with some chopped nuts or seeds for added crunch.

Serving your chicken with a fresh salad not only adds color to your plate but also boosts the nutritional value of your meal. It’s a great way to enjoy a well-rounded dish that’s both delicious and healthy!

Honey Sriracha Chicken Recipe will shine on the dinner table. Whether you choose rice, noodles, or a fresh salad, you’re sure to create a memorable meal that everyone will love!

Tips for Perfecting Your Honey Sriracha Chicken Recipe

Honey Sriracha Chicken Recipe truly unforgettable, consider these helpful tips. They will guide you in achieving the best flavor and texture, ensuring that every bite is a delight!

First, always taste your marinade before using it. This way, you can adjust the sweetness or spiciness to your liking. If you prefer a milder flavor, add more honey. For extra heat, increase the Sriracha. Finding the right balance is key to a delicious dish!

Next, consider using a zip-top bag for marinating. This method allows the marinade to coat the chicken evenly and saves space in your refrigerator. Simply place the chicken and marinade in the bag, seal it, and massage the bag gently to ensure every piece is covered.

When cooking, avoid overcrowding the pan or grill. If you have too many chicken thighs at once, they may steam instead of sear. This can lead to less crispy skin and a less flavorful result. Cook in batches if necessary, giving each piece enough room to develop a nice golden crust.

For an extra layer of flavor, try adding a splash of citrus juice to the marinade. Lime or lemon juice can brighten the dish and enhance the overall taste. Just a tablespoon or two will do the trick!

Lastly, don’t skip the resting step after cooking. Allowing the chicken to rest for a few minutes before slicing helps keep it juicy. Cover it loosely with foil to retain warmth while the juices settle.

Honey Sriracha Chicken Recipe to perfection. Enjoy the process and savor the delicious results!

Breakdown of Time for Honey Sriracha Chicken Recipe

Honey Sriracha Chicken Recipe can help you plan your meal better. Here’s a simple breakdown of the time required for preparation and cooking. This way, you can enjoy a delicious dinner without any stress!

Prep Time

The prep time for this recipe is quite manageable. You’ll need about 10-15 minutes to gather your ingredients and prepare the marinade. This includes measuring out the honey, Sriracha, soy sauce, and other ingredients. Additionally, seasoning the chicken and marinating it will take another 30 minutes to 2 hours, depending on how much time you have. So, in total, you can expect around 40 minutes to 2 hours for prep time, including marinating.

Cooking Time

Once your chicken is marinated, the cooking time is relatively quick. You’ll need about 12-15 minutes to cook the chicken thighs. This includes 6-7 minutes on each side until they reach the safe internal temperature of 165°F. If you’re using a grill, the time remains the same. Just keep an eye on the chicken to ensure it cooks evenly and doesn’t burn.

Total Time

Honey Sriracha Chicken Recipe ranges from about 52 minutes to 2 hours and 15 minutes. This total time includes the marinating period, which can be adjusted based on your schedule. If you’re in a hurry, a quick 30-minute marinade will still yield tasty results!

Honey Sriracha Chicken Recipe fits perfectly into your schedule!

Nutritional Information for Honey Sriracha Chicken Recipe

Honey Sriracha Chicken Recipe not only delights your taste buds but also provides valuable nutrients. Here’s a breakdown of the key nutritional information for this delicious dish.

Calories

Honey Sriracha Chicken Recipe contains approximately 300-350 calories. This calorie count can vary based on the specific ingredients used and portion sizes. The chicken thighs contribute a significant amount of protein and healthy fats, while the honey and Sriracha add a touch of sweetness and spice without excessive calories.

Protein

Protein is a vital nutrient for building and repairing tissues. In this recipe, each serving provides around 25-30 grams of protein. Chicken thighs are an excellent source of high-quality protein, making this dish a great option for those looking to increase their protein intake. Pairing it with rice or vegetables can further enhance the overall protein content of your meal.

Sodium

Honey Sriracha Chicken Recipe contains approximately 600-800 milligrams per serving. This amount can vary depending on the soy sauce used and how much salt you add during cooking. If you’re watching your sodium intake, consider using low-sodium soy sauce or reducing the amount of added salt. Balancing flavors with fresh herbs or spices can also help minimize sodium without sacrificing taste.

Honey Sriracha Chicken Recipe while being mindful of your dietary needs. This dish is not only flavorful but also a nutritious choice for any meal!

FAQs about Honey Sriracha Chicken Recipe

Can I use other types of meat for this recipe?

Honey Sriracha Chicken Recipe features chicken thighs, you can easily swap in other meats. Pork, beef, or even shrimp can work well with this flavorful marinade. Just keep in mind that cooking times may vary. For example, shrimp cooks much faster than chicken, so adjust your cooking time accordingly to avoid overcooking.

How spicy is the Honey Sriracha Chicken?

Honey Sriracha Chicken Recipe largely depends on how much Sriracha you use. Sriracha has a moderate heat level, making it suitable for most palates. If you prefer a milder dish, you can reduce the amount of Sriracha or mix in more honey to balance the heat. On the other hand, if you love spice, feel free to add extra Sriracha for a fiery kick!

Can I make the sauce ahead of time?

Yes, you can definitely make the sauce ahead of time! Preparing the sauce in advance can save you time on busy days. Simply follow the steps to create the marinade, then store it in an airtight container in the refrigerator. It will stay fresh for up to a week. When you’re ready to cook, just bring it to a boil and thicken it as directed in the recipe. This way, you’ll have a delicious sauce ready to go!

What can I substitute for Sriracha?

If you don’t have Sriracha on hand, there are several alternatives you can use. Hot sauce varieties like Frank’s RedHot or Tabasco can work well, though they may have a different flavor profile. You can also make your own spicy sauce by mixing chili paste with a bit of honey for sweetness. Another option is to use a combination of red pepper flakes and a dash of vinegar to mimic the heat and tang of Sriracha. Just remember to adjust the quantities to suit your taste!

Conclusion on Honey Sriracha Chicken Recipe

Honey Sriracha Chicken Recipe is a delightful dish that brings together the perfect blend of sweet and spicy flavors. It’s not just a meal; it’s an experience that can elevate any dinner table. With its simple ingredients and easy preparation, this recipe is perfect for both novice cooks and seasoned chefs alike.

By following the steps outlined in this article, you can create a dish that is not only delicious but also visually appealing. The vibrant colors of the glazed chicken, topped with green onions and sesame seeds, make it a feast for the eyes as well as the palate. Plus, the versatility of this recipe allows you to customize it to suit your taste preferences, whether you prefer it spicier or milder.

Moreover, the nutritional benefits of this dish make it a great choice for a balanced meal. With a good amount of protein and the option to pair it with healthy sides like rice, noodles, or fresh salads, you can enjoy a satisfying and wholesome dinner.

Honey Sriracha Chicken Recipe a try? Whether you’re cooking for family, friends, or just for yourself, this dish is sure to impress. Embrace the flavors, enjoy the cooking process, and savor every bite of this delicious creation. Happy cooking!

Crispy Smashed Potato Salad is a must-try dish!

Introduction to Crispy Smashed Potato Salad

Welcome to the delightful world of Crispy Smashed Potato Salad! This dish is not just your average potato salad; it’s a vibrant blend of textures and flavors that will tantalize your taste buds. Imagine crispy, golden potatoes paired with a creamy dressing and fresh vegetables. It’s a dish that brings comfort and joy to any meal.

What sets this salad apart is its unique preparation method. By boiling the potatoes first, you ensure they are tender inside. Then, smashing them creates a crispy exterior that adds a satisfying crunch. The combination of herbs and spices elevates the flavor, making each bite a burst of deliciousness. Plus, the addition of creamy yogurt and mustard dressing gives it a tangy twist that perfectly complements the potatoes.

What Makes Crispy Smashed Potato Salad Unique?

One of the standout features of Crispy Smashed Potato Salad is its versatility. You can easily customize it to suit your taste preferences. Whether you prefer a classic version or want to experiment with different ingredients, this salad can adapt to your culinary desires. The crispy texture of the smashed potatoes contrasts beautifully with the creamy dressing and fresh veggies, creating a delightful eating experience.

Moreover, this dish is perfect for any occasion. It can be served as a side dish at barbecues, picnics, or family gatherings. Alternatively, it can shine as a main dish for a light lunch or dinner. The vibrant colors from the tomatoes and bell peppers make it visually appealing, while the crispy pancetta adds a savory touch that many will love.

In summary, Crispy Smashed Potato Salad is a unique and delicious dish that combines crispy potatoes, creamy dressing, and fresh ingredients. It’s a crowd-pleaser that’s sure to impress your family and friends. So, let’s dive into the ingredients and preparation steps to create this delightful salad!

Ingredients for Crispy Smashed Potato Salad

To create the perfect Crispy Smashed Potato Salad, you’ll need a selection of fresh and flavorful ingredients. Each component plays a vital role in achieving that delightful taste and texture. Here’s what you’ll need:

  • 2 pounds small potatoes: Choose waxy varieties like baby Yukon Gold or red potatoes for the best results.
  • 1/4 cup extra virgin olive oil: This adds richness and helps achieve that crispy finish.
  • 1 teaspoon garlic granules: For a hint of savory flavor that enhances the overall taste.
  • 1 teaspoon dried onion flakes: These provide a subtle sweetness and depth to the dish.
  • 1 teaspoon paprika: Adds a touch of smokiness and vibrant color.
  • Sea salt and freshly ground black pepper: Essential for seasoning and bringing out the flavors.
  • 1/2 cup creamy yogurt: This forms the base of the dressing, adding creaminess and tang.
  • 2 tablespoons whole grain mustard: For a zesty kick that complements the yogurt.
  • 2 tablespoons white wine vinegar: This adds acidity, balancing the richness of the dressing.
  • 1/4 cup finely chopped parsley: Fresh herbs brighten the dish and add a pop of color.
  • 1/4 cup crispy pancetta (optional): This ingredient adds a crunchy, savory element, but can be omitted for a lighter version.
  • 1/2 cup halved grape tomatoes: These provide sweetness and juiciness, enhancing the salad’s freshness.
  • 1/4 cup finely chopped green bell pepper: Adds a nice crunch and a hint of bitterness that balances the flavors.

With these ingredients, you’re well on your way to creating a delicious Crispy Smashed Potato Salad. Each item contributes to the overall flavor profile, making this dish a delightful addition to any meal. Now, let’s move on to the preparation steps to bring this salad to life!

Preparation of Crispy Smashed Potato Salad

Now that you have gathered all the ingredients, it’s time to prepare your Crispy Smashed Potato Salad. Each step is essential to ensure the potatoes are perfectly cooked and full of flavor. Let’s break it down step by step!

Step 1: Boiling the Potatoes

Start by placing the small potatoes in a large saucepan. Fill the pot with water, making sure the potatoes are completely submerged. Add a generous amount of sea salt to the water. This will help season the potatoes as they cook. Bring the water to a rolling boil over high heat.

Once boiling, reduce the heat to medium and let the potatoes simmer. Cook them for about 15-20 minutes, or until they are tender enough to pierce with a fork. You want them soft but not falling apart. After cooking, drain the potatoes and let them cool for a few minutes. This cooling period is important for the next steps.

Step 2: Smashed Technique for Perfect Texture

After the potatoes have cooled slightly, it’s time to smash them! On a baking tray lined with parchment paper, place each potato. Using a fork or the bottom of a cup, gently press down on each potato. The goal is to flatten them without breaking them apart completely. This technique creates more surface area, which will help achieve that crispy texture when baking.

Step 3: Seasoning and Flavoring

Now that your potatoes are smashed, it’s time to add flavor! Drizzle the extra virgin olive oil over the smashed potatoes. This oil not only adds richness but also helps them crisp up beautifully in the oven. Next, sprinkle the garlic granules, dried onion flakes, paprika, sea salt, and freshly ground black pepper over the potatoes. Toss them gently to ensure every potato is evenly coated in the seasoning.

Step 4: Baking for Crispiness

Preheat your oven to 450°F (230°C) if you haven’t done so already. Once the oven is hot, place the seasoned potatoes inside. Bake them for about 20-25 minutes. Keep an eye on them as they roast. You want them to turn golden brown and crispy. The aroma will fill your kitchen, making it hard to wait!

Step 5: Mixing the Salad Ingredients

While the potatoes are baking, prepare the dressing. In a mixing bowl, combine the creamy yogurt, whole grain mustard, white wine vinegar, and a pinch of salt and pepper. Whisk these ingredients together until smooth. Once the potatoes are done roasting, let them cool for a few moments before transferring them to a large mixing bowl.

Add the dressing, chopped parsley, crispy pancetta (if using), halved grape tomatoes, and chopped green bell pepper to the bowl. Gently mix everything together, ensuring an even distribution of flavors. Your Crispy Smashed Potato Salad is now ready to be enjoyed!

Variation of Crispy Smashed Potato Salad

One of the best things about Crispy Smashed Potato Salad is its flexibility. You can easily switch up the ingredients to create different flavors and textures. Whether you want to add a twist or cater to specific dietary needs, there are plenty of options to explore. Let’s dive into some alternative ingredients and options for this delightful dish!

Alternative Ingredients for Different Flavors

To give your Crispy Smashed Potato Salad a unique flair, consider these alternative ingredients:

  • Cheese: Adding crumbled feta or shredded cheddar can enhance the creaminess and flavor.
  • Herbs: Fresh dill, chives, or basil can replace parsley for a different herbal note.
  • Vegetables: Try adding roasted bell peppers, corn, or even avocado for extra texture and taste.
  • Spices: Experiment with spices like cumin or chili powder for a spicy kick.
  • Protein: Swap pancetta for crispy bacon or grilled chicken for a heartier salad.

These alternatives can transform your salad into something new and exciting. Feel free to mix and match based on what you have on hand or what flavors you enjoy most!

Vegan and Gluten-Free Options

If you’re looking for vegan or gluten-free options, you can easily adapt this recipe. Here’s how:

  • Vegan Dressing: Replace the creamy yogurt with a plant-based yogurt or a cashew cream for a rich, creamy texture.
  • Gluten-Free Mustard: Ensure the whole grain mustard is gluten-free, as some brands may contain gluten.
  • Skip the Pancetta: Omit the pancetta or use a vegan bacon alternative to keep it plant-based.

These adjustments make the Crispy Smashed Potato Salad suitable for various dietary preferences. You can enjoy this dish without compromising on flavor or texture!

Cooking Note for Crispy Smashed Potato Salad

When preparing your Crispy Smashed Potato Salad, a few cooking notes can help ensure your dish turns out perfectly every time. These tips will guide you through the process, making it easier and more enjoyable. Let’s explore some essential cooking notes to keep in mind!

First, selecting the right potatoes is crucial. Waxy potatoes, like baby Yukon Gold or red potatoes, hold their shape well after boiling. This characteristic is important for achieving that delightful smashed texture. Avoid starchy potatoes, as they may become too mushy.

Next, when boiling the potatoes, make sure to add enough salt to the water. This step enhances the flavor of the potatoes from the inside out. A well-seasoned potato is the foundation of a tasty salad.

While smashing the potatoes, be gentle. You want to flatten them without breaking them apart completely. This technique increases the surface area, allowing for more crispiness when baking. If you press too hard, you may end up with mashed potatoes instead of crispy ones!

When it comes to seasoning, feel free to adjust the spices to your liking. If you enjoy a bit of heat, consider adding cayenne pepper or chili flakes. On the other hand, if you prefer a milder flavor, you can reduce the amount of garlic granules or paprika.

Lastly, keep an eye on the potatoes while they bake. Ovens can vary in temperature, so check for that golden brown color. If they need a little extra time, don’t hesitate to leave them in for a few more minutes. The goal is to achieve that perfect crispiness!

By following these cooking notes, you’ll be well on your way to creating a delicious and satisfying Crispy Smashed Potato Salad. Enjoy the process, and don’t forget to taste as you go!

Serving Suggestions for Crispy Smashed Potato Salad

Now that you’ve prepared your Crispy Smashed Potato Salad, it’s time to think about how to serve it. This dish is not only delicious but also versatile, making it a great addition to various meals. Here are some ideal pairings and creative serving ideas to elevate your dining experience!

Ideal Pairings with Main Dishes

Crispy Smashed Potato Salad pairs wonderfully with a variety of main dishes. Here are some suggestions:

  • Grilled Chicken: The juicy flavors of grilled chicken complement the crispy potatoes perfectly. The salad adds a refreshing crunch to the meal.
  • Steak: A hearty steak dinner is enhanced by the creamy and crispy elements of the salad. The flavors balance beautifully.
  • Fish Tacos: Serve the salad alongside fish tacos for a delightful contrast. The freshness of the salad brightens the dish.
  • Vegetable Stir-Fry: For a vegetarian option, pair the salad with a colorful vegetable stir-fry. The textures and flavors work harmoniously together.
  • BBQ Ribs: The smoky flavors of BBQ ribs are a match made in heaven with the crispy salad. It’s a perfect side for summer cookouts!

These pairings not only enhance the meal but also make your Crispy Smashed Potato Salad the star of the table!

Creative Serving Ideas

To make your serving experience even more enjoyable, consider these creative ideas:

  • Individual Servings: Serve the salad in small bowls or mason jars for a fun, individual presentation. This is perfect for parties or picnics!
  • Layered Salad: Create a layered salad by placing the smashed potatoes at the bottom and topping them with the dressing and veggies. This adds visual appeal.
  • Garnish with Fresh Herbs: Add a sprinkle of fresh herbs like dill or chives on top before serving. This not only looks beautiful but also enhances the flavor.
  • Serve with Dipping Sauces: Offer a variety of dipping sauces, such as ranch or spicy aioli, for guests to enjoy with their salad. It adds an interactive element to the meal.
  • Chilled Version: For a refreshing twist, chill the salad in the refrigerator before serving. This makes it a great option for hot summer days.

These creative serving ideas will not only impress your guests but also make your Crispy Smashed Potato Salad a memorable part of any meal. Enjoy the deliciousness and the compliments that come your way!

Tips for Perfecting Your Crispy Smashed Potato Salad

Creating the perfect Crispy Smashed Potato Salad is all about attention to detail. With a few helpful tips, you can elevate your dish to new heights. These suggestions will ensure that your salad is not only delicious but also visually appealing. Let’s explore some essential tips for perfecting your Crispy Smashed Potato Salad!

First, always choose the right potatoes. Waxy potatoes, like baby Yukon Gold or red potatoes, are ideal for this recipe. They hold their shape well and provide a creamy texture inside. Avoid starchy potatoes, as they can become mushy and lose that delightful crunch.

Next, don’t skip the salting step when boiling the potatoes. Adding a generous amount of sea salt to the water enhances the flavor of the potatoes. This simple step makes a big difference in the overall taste of your salad.

When smashing the potatoes, be gentle. You want to flatten them without breaking them apart completely. This technique increases the surface area, allowing for more crispiness when baking. If you press too hard, you may end up with mashed potatoes instead of crispy ones!

For the seasoning, feel free to get creative! While the recipe provides a great base, you can adjust the spices to suit your taste. If you enjoy a bit of heat, consider adding cayenne pepper or chili flakes. On the other hand, if you prefer a milder flavor, you can reduce the amount of garlic granules or paprika.

Another important tip is to keep an eye on the potatoes while they bake. Ovens can vary in temperature, so check for that golden brown color. If they need a little extra time, don’t hesitate to leave them in for a few more minutes. The goal is to achieve that perfect crispiness!

Lastly, let the salad sit for a few minutes after mixing. This resting time allows the flavors to meld together beautifully. It also gives the potatoes a chance to absorb some of the dressing, enhancing the overall taste.

By following these tips, you’ll be well on your way to creating a delicious and satisfying Crispy Smashed Potato Salad. Enjoy the process, and don’t forget to taste as you go!

Breakdown of Time for Crispy Smashed Potato Salad

Understanding the time required for each step in preparing your Crispy Smashed Potato Salad can help you plan your cooking efficiently. Here’s a detailed breakdown of the time you’ll need for preparation and cooking.

Prep Time

The prep time for this delightful salad is approximately 15-20 minutes. This includes gathering your ingredients, washing the potatoes, and preparing the dressing. Make sure to have everything ready before you start cooking. This will make the process smoother and more enjoyable!

Cooking Time

Cooking the potatoes takes about 15-20 minutes, depending on their size. After boiling, you’ll need an additional 20-25 minutes for roasting them in the oven. So, the total cooking time is around 35-45 minutes. Keep an eye on the potatoes as they roast to ensure they reach that perfect golden crispiness!

Total Time

In total, you can expect to spend about 50-65 minutes from start to finish. This includes both prep and cooking time. With this timeline, you can easily fit the preparation of Crispy Smashed Potato Salad into your meal planning. It’s a delicious dish that’s worth every minute spent in the kitchen!

Nutritional Information for Crispy Smashed Potato Salad

Understanding the nutritional content of your Crispy Smashed Potato Salad is essential for making informed dietary choices. This dish is not only delicious but also packed with nutrients. Let’s break down the key nutritional components to give you a clearer picture of what you’re enjoying!

Calories

One serving of Crispy Smashed Potato Salad contains approximately 250-300 calories. This number can vary based on the specific ingredients used, especially if you include optional items like crispy pancetta or additional toppings. The combination of potatoes, yogurt, and vegetables provides a satisfying meal without excessive calories, making it a great choice for a side dish or light lunch.

Protein Content

This salad offers a moderate amount of protein, with each serving containing around 6-8 grams. The protein primarily comes from the creamy yogurt and any added ingredients like pancetta or cheese. If you’re looking to boost the protein content, consider adding grilled chicken or chickpeas, which can enhance the nutritional value while keeping the dish delicious.

Sodium Levels

The sodium content in Crispy Smashed Potato Salad can range from 400-600 milligrams per serving, depending on how much sea salt you add during cooking and the type of mustard used in the dressing. To keep sodium levels in check, you can reduce the amount of added salt or opt for low-sodium mustard. This way, you can enjoy the flavors without compromising your dietary needs.

In summary, Crispy Smashed Potato Salad is a nutritious option that balances calories, protein, and sodium. It’s a delightful addition to any meal, providing both flavor and essential nutrients. Enjoy this tasty dish while being mindful of your nutritional goals!

FAQs about Crispy Smashed Potato Salad

Can I make Crispy Smashed Potato Salad ahead of time?

Absolutely! You can prepare your Crispy Smashed Potato Salad ahead of time. To do this, follow the recipe up to the mixing step. After roasting the potatoes, let them cool completely before combining them with the dressing and other ingredients. Store the salad in an airtight container in the refrigerator. It’s best to mix in the dressing just before serving to maintain the crispiness of the potatoes. This way, you can enjoy a delicious salad without the last-minute rush!

What types of potatoes are best for this salad?

For the best results, choose waxy potatoes like baby Yukon Gold or red potatoes. These types hold their shape well after boiling and provide a creamy texture inside. Avoid starchy potatoes, such as Russets, as they can become too mushy and won’t give you that delightful crispy exterior. Waxy potatoes are perfect for achieving the ideal balance of tenderness and crunch in your Crispy Smashed Potato Salad.

How can I make my Crispy Smashed Potato Salad spicier?

If you’re looking to add some heat to your Crispy Smashed Potato Salad, there are several ways to do so! You can sprinkle in some cayenne pepper or chili flakes when seasoning the potatoes. Additionally, consider using a spicy mustard instead of whole grain mustard for an extra kick. If you enjoy fresh flavors, adding diced jalapeños or a dash of hot sauce to the dressing can also elevate the spice level. Adjust the heat to your liking, and enjoy the flavorful twist!

Is Crispy Smashed Potato Salad suitable for meal prep?

Yes, Crispy Smashed Potato Salad is a fantastic option for meal prep! It stores well in the refrigerator and can be enjoyed over several days. Just remember to keep the dressing separate until you’re ready to eat. This will help maintain the crispiness of the potatoes. Portion the salad into individual containers for easy grab-and-go meals. It’s a delicious and satisfying dish that makes meal prep a breeze!

Conclusion on Crispy Smashed Potato Salad

In conclusion, Crispy Smashed Potato Salad is a delightful dish that combines the best of both worlds: crispy textures and creamy flavors. This salad is not only easy to prepare but also incredibly versatile, allowing you to customize it to suit your taste preferences. Whether you enjoy it as a side dish or a light main course, it’s sure to impress your family and friends.

The unique preparation method of boiling and then smashing the potatoes creates a satisfying crunch that pairs beautifully with the creamy yogurt dressing. The addition of fresh vegetables and herbs adds a burst of color and nutrition, making this salad a wholesome choice for any meal. Plus, with options for vegan and gluten-free adaptations, everyone can enjoy this tasty treat!

As you explore the various serving suggestions and tips for perfecting your Crispy Smashed Potato Salad, remember that the key to a great dish lies in the quality of your ingredients and the love you put into preparing it. So, gather your ingredients, follow the steps, and enjoy the process of creating this delicious salad.

We hope you find joy in making and sharing this Crispy Smashed Potato Salad. It’s a dish that brings people together, making every meal a little more special. Happy cooking!

Teriyaki Pineapple Chicken Stuffed Peppers Recipe delights!

Introduction to Teriyaki Pineapple Chicken Stuffed Peppers Recipe

Teriyaki Pineapple Chicken Stuffed Peppers Recipe is a fantastic choice for anyone who loves a mix of sweet and savory. This dish not only looks appealing but also packs a punch of nutrition. With juicy ground chicken, fresh pineapple, and colorful bell peppers, it’s a meal that’s sure to impress your family and friends.

What Makes Teriyaki Pineapple Chicken Stuffed Peppers Unique?

What sets this recipe apart is its unique blend of flavors. The teriyaki glaze adds a rich, sweet taste that perfectly complements the savory ground chicken. Meanwhile, the pineapple chunks bring a refreshing burst of sweetness, making each bite a delightful experience. The bell peppers serve as a colorful and nutritious vessel, providing essential vitamins and minerals.

Teriyaki Pineapple Chicken Stuffed Peppers Recipe can adapt to your needs. Plus, it’s a fun way to get kids involved in cooking, as they can help with stuffing the peppers!

In the following sections, we will guide you through the ingredients, preparation steps, and tips to make this dish a success. Get ready to enjoy a meal that’s not only delicious but also a feast for the eyes!

Ingredients for Teriyaki Pineapple Chicken Stuffed Peppers Recipe

Teriyaki Pineapple Chicken Stuffed Peppers Recipe, you will need a variety of fresh and flavorful ingredients. Each component plays a vital role in bringing this dish to life. Here’s what you’ll need:

  • 1 pound ground chicken: This is the main protein source, providing a hearty base for the filling.
  • 1 cup cooked jasmine rice: The rice adds texture and helps to bind the filling together.
  • 1 cup fresh or canned pineapple chunks, drained: Pineapple adds a sweet and tangy flavor that brightens the dish.
  • 1/2 cup teriyaki glaze: This sauce infuses the filling with a rich, savory sweetness.
  • 1/2 cup finely chopped bell peppers: Adding more bell peppers enhances the flavor and color of the dish.
  • 1/4 cup sliced green onions: These provide a fresh, mild onion flavor that complements the other ingredients.
  • 4 large bell peppers (any color): These serve as the edible bowls for your delicious filling.
  • 1 tablespoon extra virgin olive oil: Used for cooking the chicken, it adds healthy fats and flavor.
  • 1 teaspoon garlic powder: This seasoning enhances the overall taste with its aromatic flavor.
  • 1/2 teaspoon freshly ground black pepper: A pinch of pepper adds a subtle kick to the filling.
  • 1/4 teaspoon sea salt: This helps to bring out the flavors of all the ingredients.
  • Sesame seeds for garnish (optional): These add a nice crunch and visual appeal when sprinkled on top.

Teriyaki Pineapple Chicken Stuffed Peppers Recipe a dish that’s both satisfying and enjoyable. Now that you have everything you need, let’s move on to the preparation steps!

Step-by-Step Preparation of Teriyaki Pineapple Chicken Stuffed Peppers Recipe

Teriyaki Pineapple Chicken Stuffed Peppers Recipe. Follow these simple steps to create a delicious meal that everyone will love!

Step 1: Preparing the Peppers

First, let’s get the bell peppers ready. Start by washing them under cool water. This helps remove any dirt or residue. Next, carefully slice off the tops of the peppers. Make sure to keep the tops intact, as they can be used later for presentation. After that, remove the seeds and membranes inside the peppers. This step is important because it makes room for the tasty filling. Once done, place the hollowed peppers upright in a baking dish. This will help them hold their shape while baking.

Step 2: Cooking the Chicken

Now, it’s time to cook the ground chicken. Heat a skillet over medium heat and add the extra virgin olive oil. Once the oil is warm, add the ground chicken. Cook it for about 5-7 minutes, stirring occasionally. You want the chicken to turn golden brown and be fully cooked. This step is crucial as it ensures your filling is flavorful and safe to eat. Once the chicken is cooked, remove it from the heat and set it aside.

Step 3: Mixing the Teriyaki Sauce and Pineapple

In the same skillet, add the cooked jasmine rice, pineapple chunks, teriyaki glaze, finely chopped bell peppers, sliced green onions, garlic powder, black pepper, and sea salt. Stir everything together until well combined. Let this mixture cook for another 3-5 minutes. This allows the flavors to meld together beautifully. The sweet and savory notes will create a delicious filling for your peppers!

Step 4: Stuffing the Peppers

Once your filling is ready, it’s time to stuff the peppers! Take a generous amount of the chicken and rice mixture and fill each pepper. Press the filling down gently to ensure they are well packed. This will help the flavors stay intact while baking. Make sure to fill each pepper to the top, as they will shrink slightly during cooking. If you have any leftover filling, you can serve it on the side or save it for another meal.

Step 5: Baking the Stuffed Peppers

Now, it’s time to bake your stuffed peppers! Cover the baking dish with aluminum foil to keep the moisture in. Place it in the preheated oven at 375°F (190°C) and bake for 25 minutes. After that, carefully remove the foil and continue baking for an additional 10-15 minutes. This will allow the peppers to become tender and slightly charred, enhancing their flavor. Once they are done, take them out of the oven and let them cool for a few moments. If you like, sprinkle sesame seeds on top for an added crunch before serving!

Teriyaki Pineapple Chicken Stuffed Peppers Recipe is ready to be enjoyed. These colorful and flavorful peppers are sure to be a hit at your dinner table!

Variations of Teriyaki Pineapple Chicken Stuffed Peppers Recipe

Teriyaki Pineapple Chicken Stuffed Peppers Recipe is not only delicious but also highly adaptable. You can easily modify it to suit different dietary preferences or to use what you have on hand. Here are some exciting variations to consider!

Vegetarian Options

If you’re looking for a vegetarian twist, you can replace the ground chicken with a variety of plant-based ingredients. Here are some ideas:

  • Quinoa: This protein-packed grain is a great substitute. Cook it according to package instructions and mix it with the teriyaki sauce and pineapple.
  • Black Beans: Canned or cooked black beans add a hearty texture and are rich in protein. Rinse and drain them before mixing with the other ingredients.
  • Tofu: Crumbled or diced tofu can be sautéed until golden brown. It absorbs flavors well and makes a satisfying filling.
  • Vegetable Medley: Use a mix of your favorite vegetables, such as zucchini, corn, and mushrooms, to create a colorful and nutritious filling.

These vegetarian options not only maintain the delicious flavor but also provide a healthy alternative for those who prefer plant-based meals.

Alternative Proteins

Teriyaki Pineapple Chicken Stuffed Peppers Recipe, there are plenty of alternatives to ground chicken. Here are some tasty options:

  • Ground Turkey: A leaner option, ground turkey works well and has a similar texture to chicken.
  • Ground Beef: For a heartier flavor, use ground beef. Just be sure to drain any excess fat after cooking.
  • Shredded Chicken: If you have leftover rotisserie chicken, shred it and mix it with the other ingredients for a quick and easy filling.
  • Fish: For a unique twist, try using cooked and flaked fish, such as salmon or tuna, mixed with the teriyaki sauce.

These alternative proteins can add new flavors and textures to your stuffed peppers, making each meal a delightful surprise!

Cooking Note for Teriyaki Pineapple Chicken Stuffed Peppers Recipe

Teriyaki Pineapple Chicken Stuffed Peppers Recipe, there are a few important cooking notes to keep in mind. These tips will help ensure that your dish turns out perfectly every time!

First, always choose fresh bell peppers. Look for ones that are firm and vibrant in color. This not only enhances the visual appeal but also ensures a crisp texture. If you prefer a sweeter flavor, opt for red or yellow bell peppers, as they tend to be sweeter than green ones.

Next, when cooking the ground chicken, make sure to break it apart into small pieces. This helps it cook evenly and allows the flavors to blend better with the other ingredients. Stirring frequently will also prevent it from sticking to the skillet.

Additionally, feel free to adjust the amount of teriyaki glaze according to your taste. If you love a stronger flavor, add a bit more glaze. On the other hand, if you prefer a milder taste, you can reduce the amount. Just remember that the glaze is what gives the dish its signature sweet and savory profile.

While baking, keep an eye on the peppers. Ovens can vary in temperature, so check for doneness a few minutes before the suggested time. You want the peppers to be tender but not mushy. A slight char on the outside adds a wonderful flavor, so don’t be afraid to let them brown a bit!

Lastly, let the stuffed peppers cool for a few minutes before serving. This allows the filling to set slightly, making them easier to eat. Plus, it gives you a chance to enjoy the delightful aroma that fills your kitchen!

Teriyaki Pineapple Chicken Stuffed Peppers Recipe that everyone will love. Happy cooking!

Serving Suggestions for Teriyaki Pineapple Chicken Stuffed Peppers Recipe

Teriyaki Pineapple Chicken Stuffed Peppers Recipe is ready, it’s time to think about how to serve this delightful dish. Presentation can elevate your meal, making it even more enjoyable. Here are some serving suggestions to enhance your dining experience:

  • Garnish with Fresh Herbs: A sprinkle of fresh cilantro or parsley can add a pop of color and freshness. It also complements the flavors beautifully.
  • Serve with a Side Salad: A light salad with mixed greens, cherry tomatoes, and a tangy vinaigrette pairs well with the sweet and savory stuffed peppers. It adds a refreshing crunch to your meal.
  • Offer Extra Teriyaki Sauce: For those who love extra flavor, serve additional teriyaki sauce on the side. This allows everyone to customize their dish to their liking.
  • Pair with Rice or Quinoa: If you want to make the meal heartier, serve the stuffed peppers alongside a scoop of jasmine rice or quinoa. This adds more texture and makes it a filling meal.
  • Include a Fruit Platter: A platter of fresh fruits like mango, kiwi, or berries can provide a sweet contrast to the savory peppers. It’s a great way to round out the meal.
  • Top with Avocado: Slices of creamy avocado or a dollop of guacamole can add richness and a delightful creaminess to each bite.

Teriyaki Pineapple Chicken Stuffed Peppers Recipe but also create a well-rounded meal. Feel free to mix and match based on your preferences and what you have on hand. Enjoy your delicious creation with family and friends!

Tips for Perfecting Teriyaki Pineapple Chicken Stuffed Peppers Recipe

Teriyaki Pineapple Chicken Stuffed Peppers Recipe truly shine, consider these helpful tips. They will guide you in achieving the best flavor and texture, ensuring that your dish is a hit every time!

  • Choose the Right Peppers: Select bell peppers that are firm and free from blemishes. Colorful peppers not only look great but also offer different flavor profiles. Red and yellow peppers are sweeter, while green ones have a more savory taste.
  • Don’t Overcook the Chicken: When cooking the ground chicken, avoid overcooking it. Aim for a golden brown color, as this will keep the meat juicy and flavorful. Overcooked chicken can become dry and tough.
  • Mix Well: Ensure that all ingredients are mixed thoroughly. This helps distribute the flavors evenly throughout the filling. A well-mixed filling means every bite will be delicious!
  • Pack the Peppers Tightly: When stuffing the peppers, pack the filling tightly. This prevents the filling from falling out during baking and ensures that each pepper is filled to the brim with flavor.
  • Experiment with Seasonings: Feel free to add your favorite spices or herbs to the filling. A dash of ginger or a sprinkle of red pepper flakes can add an exciting twist to the flavor profile.
  • Check for Doneness: Ovens can vary, so check your peppers a few minutes before the suggested baking time. You want them tender but not mushy. A slight char on the outside adds a delicious flavor!
  • Let Them Rest: After baking, allow the stuffed peppers to rest for a few minutes before serving. This helps the filling set and makes them easier to eat.
  • Get Creative with Toppings: Don’t hesitate to get creative with toppings! Consider adding shredded cheese, chopped nuts, or a drizzle of sriracha for an extra kick. These additions can elevate your dish even further.

Teriyaki Pineapple Chicken Stuffed Peppers Recipe. Each step contributes to a delicious and satisfying meal that your family and friends will love. Happy cooking!

Breakdown of Time for Teriyaki Pineapple Chicken Stuffed Peppers Recipe

Teriyaki Pineapple Chicken Stuffed Peppers Recipe can help you plan your cooking efficiently. Here’s a simple breakdown of the time required for preparation and cooking:

Prep Time

The prep time for this recipe is approximately 20 minutes. This includes gathering all your ingredients, washing the bell peppers, and preparing the filling. Taking your time during this step ensures that everything is ready for cooking. It’s a great opportunity to enjoy the process and maybe even involve your family or friends!

Cooking Time

Teriyaki Pineapple Chicken Stuffed Peppers Recipe is about 35-40 minutes. This includes:

  • Cooking the ground chicken (5-7 minutes)
  • Mixing the filling ingredients (3-5 minutes)
  • Baking the stuffed peppers (35 minutes total: 25 minutes covered and 10-15 minutes uncovered)

Each step is essential to ensure that your dish is flavorful and cooked to perfection. Keep an eye on the peppers as they bake to achieve that perfect tenderness!

Total Time

In total, you can expect to spend about 55-60 minutes from start to finish. This includes both prep and cooking time. With this timeline, you can easily plan your meal and enjoy a delicious dinner without feeling rushed. Plus, the end result is well worth the time spent in the kitchen!

Teriyaki Pineapple Chicken Stuffed Peppers Recipe. Happy cooking!

Nutritional Information for Teriyaki Pineapple Chicken Stuffed Peppers Recipe

Teriyaki Pineapple Chicken Stuffed Peppers Recipe not only delights your taste buds but also provides valuable nutrients. Here’s a breakdown of the key nutritional information for this delicious dish:

Calories

Teriyaki Pineapple Chicken Stuffed Peppers Recipe contains approximately 350-400 calories. This calorie count can vary based on the specific ingredients used and portion sizes. The combination of ground chicken, rice, and vegetables makes it a satisfying meal without being overly heavy. It’s a great option for lunch or dinner, providing energy without excess calories.

Protein

Protein is an essential nutrient for building and repairing tissues. Each serving of this recipe offers about 25-30 grams of protein. The ground chicken is the primary source of protein, while the rice and vegetables contribute additional nutrients. This protein content makes the dish a filling choice, helping you feel satisfied and energized throughout the day.

Sodium

When it comes to sodium, each serving contains around 600-700 milligrams. The teriyaki glaze contributes significantly to the sodium content, so it’s important to be mindful of your overall sodium intake, especially if you are watching your salt consumption. You can opt for low-sodium teriyaki sauce to reduce the sodium levels while still enjoying the delicious flavors of this dish.

Teriyaki Pineapple Chicken Stuffed Peppers Recipe is a nutritious meal that balances calories, protein, and sodium. It’s a great way to enjoy a flavorful dish while also nourishing your body. Whether you’re cooking for yourself or for family and friends, this recipe is sure to be a hit!

FAQs about Teriyaki Pineapple Chicken Stuffed Peppers Recipe

Can I make Teriyaki Pineapple Chicken Stuffed Peppers ahead of time?

Teriyaki Pineapple Chicken Stuffed Peppers Recipe ahead of time. To do this, follow the steps for preparing the filling and stuffing the peppers. Once you have filled the peppers, cover them tightly with plastic wrap or aluminum foil and store them in the refrigerator. They can be kept for up to 24 hours before baking. When you’re ready to cook, simply preheat your oven and bake as directed. This makes it a convenient option for busy weeknights or meal prep!

What can I substitute for chicken in this recipe?

Teriyaki Pineapple Chicken Stuffed Peppers Recipe, there are plenty of delicious options! You can use:

  • Ground Turkey: A lean alternative that works well in this recipe.
  • Ground Beef: For a heartier flavor, ground beef is a great choice.
  • Tofu: Crumbled or diced tofu can be sautéed and used for a vegetarian option.
  • Quinoa or Black Beans: These plant-based proteins can add texture and flavor while keeping the dish vegetarian.

Feel free to get creative with your protein choice! Each option will bring its own unique flavor to the dish.

How do I store leftovers of Teriyaki Pineapple Chicken Stuffed Peppers?

Teriyaki Pineapple Chicken Stuffed Peppers Recipe is easy! Allow the stuffed peppers to cool completely before storing. Place them in an airtight container and refrigerate. They can be kept for up to 3-4 days. When you’re ready to enjoy them again, simply reheat in the microwave or oven until warmed through. If you want to freeze them, wrap each pepper tightly in plastic wrap and then place them in a freezer-safe container. They can be frozen for up to 3 months. Just remember to thaw them in the refrigerator before reheating!

Conclusion on Teriyaki Pineapple Chicken Stuffed Peppers Recipe

Teriyaki Pineapple Chicken Stuffed Peppers Recipe is a delightful dish that brings together a wonderful mix of flavors and textures. With its vibrant colors and mouthwatering taste, it’s perfect for family dinners, gatherings, or even meal prep for the week ahead. The combination of juicy ground chicken, sweet pineapple, and savory teriyaki glaze creates a filling that is both satisfying and nutritious.

This recipe is not only easy to prepare but also highly adaptable. Whether you choose to stick with the classic chicken filling or explore vegetarian options, the possibilities are endless. You can customize the ingredients to suit your taste preferences, making it a versatile choice for any occasion.

Teriyaki Pineapple Chicken Stuffed Peppers Recipe is a wholesome meal that can fuel your day.

So, gather your ingredients, follow the steps, and enjoy the process of creating this delicious dish. Your family and friends will surely appreciate the effort, and you’ll love the delightful flavors that come together in each bite. Happy cooking, and bon appétit!