Watercolor Buttercream Cake Recipe is a must-try!

Introduction to Watercolor Buttercream Cake Recipe

What is a Watercolor Buttercream Cake?

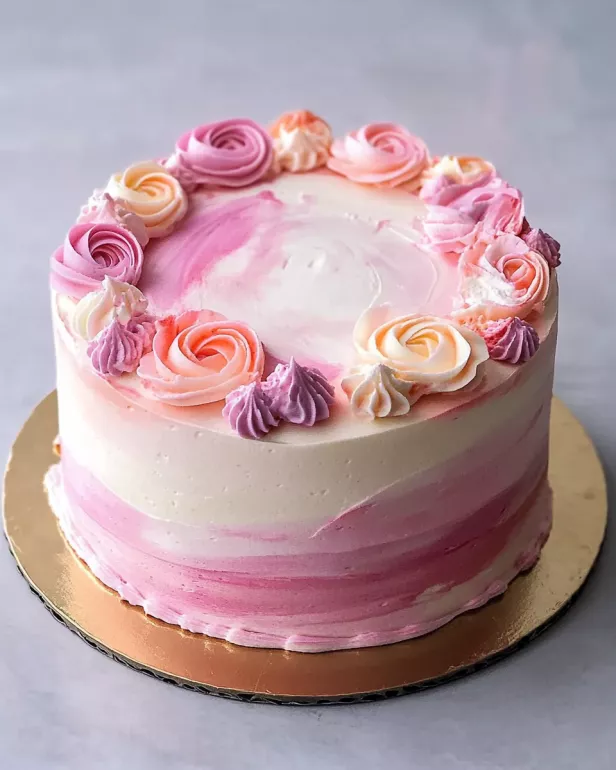
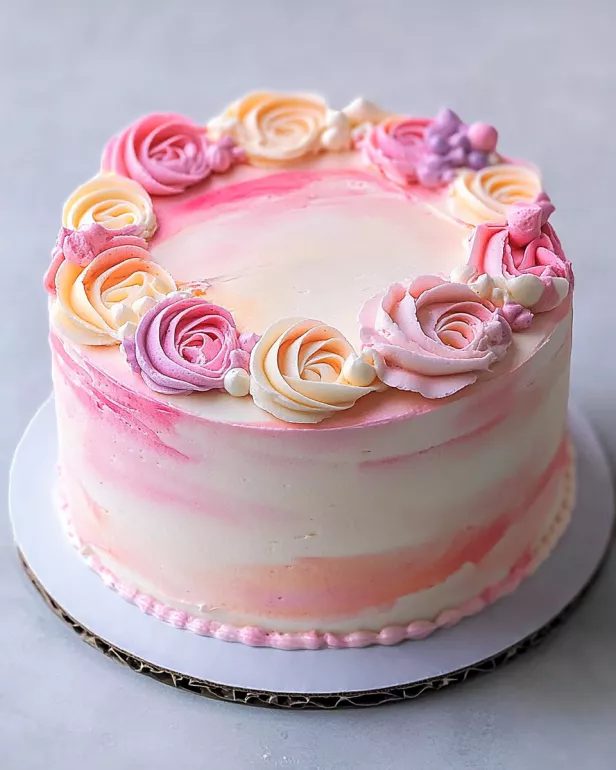
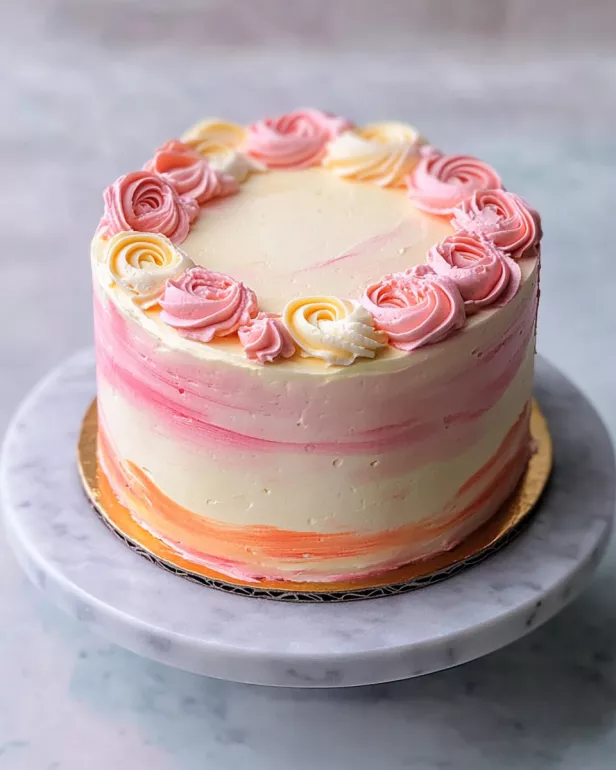
The Watercolor Buttercream Cake is a delightful dessert that combines the beauty of art with the joy of baking. This cake features layers of moist, fluffy cake, generously frosted with a creamy buttercream that mimics the soft, flowing colors of watercolor paintings. The unique technique of blending various shades of buttercream creates a stunning visual effect, making it perfect for celebrations, birthdays, or any special occasion. Not only does it look impressive, but it also tastes delicious, with a rich buttery flavor that pairs wonderfully with the sweetness of the frosting.

Why Choose the Watercolor Buttercream Cake Recipe?

Choosing the Watercolor Buttercream Cake Recipe means opting for a dessert that is both visually appealing and scrumptious. This cake is versatile, allowing you to customize flavors and colors to suit your preferences or the theme of your event. Whether you want a pastel palette for a baby shower or vibrant hues for a birthday party, this cake can adapt to your needs. Additionally, the recipe is straightforward, making it accessible for bakers of all skill levels. With just a few simple steps, you can create a masterpiece that will impress your guests and leave them wanting more. Plus, the joy of creating art with food adds an extra layer of fun to your baking experience!

Ingredients for Watercolor Buttercream Cake Recipe

To create a stunning Watercolor Buttercream Cake, you’ll need a selection of fresh ingredients. Each component plays a vital role in achieving the perfect texture and flavor. Here’s what you’ll need:

For the Cake:

  • 2 ½ cups all-purpose flour
  • 2 ½ teaspoons baking powder
  • ½ teaspoon salt
  • 1 cup unsalted butter, softened
  • 2 cups granulated sugar
  • 4 large eggs
  • 1 tablespoon vanilla extract
  • 1 cup whole milk

For the Buttercream:

  • 1 cup unsalted butter, softened
  • 4 cups powdered sugar
  • 2-4 tablespoons heavy cream
  • 1 teaspoon vanilla extract
  • Food coloring (various colors for watercolor effect)

These ingredients come together to create a moist cake with a rich, creamy frosting. The combination of butter and sugar in the cake gives it a delightful sweetness, while the buttercream adds a smooth finish. Don’t forget to choose vibrant food coloring to achieve that beautiful watercolor effect!

Step-by-Step Preparation of Watercolor Buttercream Cake Recipe

Step 1: Baking the Cake

To start your Watercolor Buttercream Cake, preheat your oven to 350°F (175°C). This temperature is perfect for baking a fluffy cake. Next, grease and flour two 9-inch round cake pans. This step ensures that your cakes will come out easily after baking.

In a medium bowl, whisk together the all-purpose flour, baking powder, and salt. This mixture is the foundation of your cake. Set it aside for now. In a large mixing bowl, cream the softened butter and granulated sugar together. Beat them until the mixture is light and fluffy, which should take about 3-5 minutes. This process adds air to the batter, making your cake rise beautifully.

Now, add the eggs one at a time, mixing well after each addition. Stir in the vanilla extract for that lovely flavor. Gradually add the dry ingredients to the wet mixture, alternating with the milk. Start and end with the flour mixture. Mix until just combined. Over-mixing can make the cake dense, so be gentle!

Once your batter is ready, divide it evenly between the prepared cake pans. Bake for 25-30 minutes. To check if they are done, insert a toothpick in the center. If it comes out clean, your cakes are ready! Allow them to cool in the pans for 10 minutes before transferring them to wire racks to cool completely.

Step 2: Preparing the Buttercream

While your cakes are cooling, it’s time to prepare the buttercream. In a large bowl, beat the softened butter until it’s creamy. This step is crucial for a smooth frosting. Gradually add the powdered sugar, mixing until the mixture is smooth and fluffy. You can adjust the sweetness by adding more or less sugar, depending on your taste.

Next, add the heavy cream and vanilla extract. Mix well until the buttercream reaches your desired consistency. If it’s too thick, add a little more cream. If it’s too thin, add more powdered sugar. The perfect buttercream should be spreadable but not runny, making it ideal for frosting your cake.

Step 3: Coloring the Buttercream

Now comes the fun part—coloring the buttercream! Divide the buttercream into small bowls. Add different colors of food coloring to each bowl. You can create a variety of shades to achieve that beautiful watercolor effect. Start with a small amount of food coloring and mix well. You can always add more if you want a bolder color.

Remember, the colors will blend together on the cake, so choose shades that complement each other. Pastels work well for a soft look, while bright colors can create a vibrant masterpiece. Get creative and have fun with it!

Step 4: Assembling the Cake

Once your cakes are completely cool, it’s time to assemble them. Place one layer of cake on a serving plate. Spread a generous layer of buttercream on top. This layer adds flavor and moisture. Then, carefully place the second cake layer on top. Make sure it’s centered for a beautiful finish.

Use the remaining buttercream to frost the top and sides of the cake. Don’t worry about making it perfect just yet; this is just the base layer. It will help the watercolor effect stand out later.

Step 5: Applying the Watercolor Effect

To create the stunning watercolor effect, take your colored buttercream and start applying it to the sides of the cake. Use a spatula or a bench scraper to spread the colors. Blend the colors together gently, allowing them to flow into each other. This technique mimics the soft, flowing look of watercolor paintings.

Feel free to layer the colors and experiment with different techniques. You can create swirls, waves, or even a gradient effect. The key is to have fun and let your creativity shine! Once you’re satisfied with the look, your Watercolor Buttercream Cake is ready to impress!

Variations of Watercolor Buttercream Cake Recipe

Flavor Variations

While the classic Watercolor Buttercream Cake is delicious on its own, you can easily switch things up with different flavors. Here are some fun ideas to consider:

  • Chocolate Cake: Replace half of the all-purpose flour with cocoa powder for a rich chocolate flavor. Pair it with vanilla or chocolate buttercream for a delightful treat.
  • Lemon Cake: Add the zest of one lemon and replace the vanilla extract with lemon extract. This will give your cake a refreshing citrus twist.
  • Almond Cake: Substitute vanilla extract with almond extract for a nutty flavor. This pairs beautifully with a light buttercream.
  • Red Velvet Cake: Use red food coloring and a hint of cocoa powder to create a classic red velvet cake. Cream cheese frosting can be a great alternative to buttercream.
  • Spice Cake: Add cinnamon, nutmeg, and ginger to the batter for a warm, spiced flavor. This is perfect for fall celebrations!

These flavor variations can make your Watercolor Buttercream Cake even more exciting. Feel free to mix and match flavors with different buttercream styles to create your unique masterpiece!

Color Palette Ideas

The beauty of the Watercolor Buttercream Cake lies in its vibrant colors. Here are some color palette ideas to inspire your creation:

  • Pastel Palette: Soft pinks, blues, and yellows create a gentle, dreamy look. This palette is perfect for baby showers or spring celebrations.
  • Bold and Bright: Use vibrant reds, yellows, and greens for a fun, festive cake. This palette is great for birthday parties or summer gatherings.
  • Monochromatic: Choose different shades of a single color, like various blues or purples. This creates a sophisticated and elegant appearance.
  • Sunset Colors: Blend warm oranges, pinks, and purples to mimic a beautiful sunset. This palette is perfect for summer or outdoor events.
  • Rainbow Effect: Use all the colors of the rainbow for a cheerful and playful cake. This is a hit for children’s parties!

When selecting your colors, consider the theme of your event. The right color palette can enhance the overall look of your cake and make it even more special!

Cooking Note for Watercolor Buttercream Cake Recipe

When preparing your Watercolor Buttercream Cake, there are a few important cooking notes to keep in mind. These tips will help ensure that your cake turns out perfectly every time.

First, always measure your ingredients accurately. Baking is a science, and even a small difference in measurements can affect the final product. Use a kitchen scale for precise measurements, especially for flour and sugar.

Next, make sure your butter is softened but not melted. Softened butter should be at room temperature, allowing it to cream well with sugar. This step is crucial for achieving a light and fluffy cake texture.

Additionally, when mixing your batter, be careful not to over-mix. Over-mixing can lead to a dense cake. Mix just until the ingredients are combined, and you’ll achieve a tender crumb.

For the buttercream, if you find it too sweet, you can balance the flavor by adding a pinch of salt. This will enhance the overall taste and make the frosting more enjoyable.

Lastly, when applying the watercolor effect, work quickly. Buttercream can start to set as it sits, making it harder to blend the colors. If you notice the buttercream getting too firm, you can warm it slightly with your hands or a spatula to make it easier to work with.

By following these cooking notes, you’ll be well on your way to creating a stunning and delicious Watercolor Buttercream Cake that will impress everyone!

Serving Suggestions for Watercolor Buttercream Cake Recipe

Once your Watercolor Buttercream Cake is beautifully decorated and ready to serve, it’s time to think about how to present it. Here are some delightful serving suggestions to enhance your cake experience:

Presentation Ideas

  • Elegant Cake Stand: Place your cake on a decorative cake stand. This elevates the cake and makes it the centerpiece of your dessert table.
  • Fresh Flowers: Add fresh flowers around the base of the cake or on top for a natural touch. Choose edible flowers like pansies or violets for a beautiful and safe option.
  • Colorful Plates: Serve slices on colorful plates that match the cake’s color palette. This adds a fun and festive vibe to your dessert presentation.
  • Garnishes: Consider garnishing each slice with a dollop of whipped cream or a sprinkle of edible glitter. This adds an extra touch of elegance and excitement.

Pairing Suggestions

To complement the flavors of your Watercolor Buttercream Cake, consider serving it with:

  • Coffee or Tea: A warm cup of coffee or tea pairs wonderfully with the sweetness of the cake. Choose a light roast coffee or herbal tea for a balanced flavor.
  • Fruit Compote: A side of fruit compote, such as raspberry or strawberry, adds a tangy contrast to the rich buttercream.
  • Ice Cream: Serve slices with a scoop of vanilla or fruit-flavored ice cream. The cold ice cream complements the cake’s creamy texture perfectly.
  • Fresh Berries: Fresh berries like strawberries, blueberries, or raspberries can enhance the presentation and add a burst of freshness to each bite.

These serving suggestions will not only make your Watercolor Buttercream Cake look stunning but also elevate the overall dessert experience for you and your guests. Enjoy every slice!

Tips for Perfecting Your Watercolor Buttercream Cake Recipe

Creating a stunning Watercolor Buttercream Cake is an exciting journey, but a few tips can help you achieve perfection. Here are some essential tips to ensure your cake turns out beautifully every time:

Use Quality Ingredients

Start with high-quality ingredients. Fresh eggs, real vanilla extract, and good butter can make a significant difference in flavor. The better the ingredients, the tastier your cake will be!

Room Temperature Ingredients

Make sure your butter, eggs, and milk are at room temperature before you begin. This helps them blend together smoothly, resulting in a lighter and fluffier cake.

Don’t Rush the Mixing

When mixing your batter, take your time. Cream the butter and sugar until light and fluffy. This step is crucial for incorporating air, which helps the cake rise. Mix just until combined when adding dry ingredients to avoid a dense texture.

Cool Completely

Allow your cakes to cool completely before frosting. If the cakes are warm, the buttercream can melt and slide off. Patience is key here!

Experiment with Colors

Don’t be afraid to experiment with colors! Mix different shades to create unique effects. You can even try using natural food colorings for a healthier option. Just remember to start with small amounts and adjust as needed.

Practice the Watercolor Technique

If you’re new to the watercolor effect, practice on a piece of parchment paper first. This will help you get a feel for blending colors and using your spatula or scraper effectively.

Keep It Cool

After frosting, keep your cake in a cool place until serving. This helps the buttercream set and maintain its shape. If it’s a hot day, consider refrigerating the cake for a short time before serving.

Have Fun!

Lastly, remember to have fun! Baking is an art, and your Watercolor Buttercream Cake is a canvas. Enjoy the process, and don’t stress about perfection. Your creativity will shine through in your delicious creation!

By following these tips, you’ll be well on your way to mastering the Watercolor Buttercream Cake Recipe. Each cake you make will be a delightful masterpiece that you can be proud of!

Breakdown of Time for Watercolor Buttercream Cake Recipe

Prep Time

The prep time for your Watercolor Buttercream Cake is approximately 30 minutes. This includes gathering all your ingredients, measuring them accurately, and preparing the cake batter. It’s essential to take your time during this stage to ensure everything is ready for baking. Remember to preheat your oven while you prepare the batter, so it’s hot and ready when you’re done!

Cooking Time

Once your cake batter is ready, the cooking time is about 25-30 minutes. During this time, the cakes will rise and bake to perfection. Keep an eye on them, and use the toothpick test to check for doneness. Insert a toothpick in the center of the cakes; if it comes out clean, they are ready to come out of the oven!

Total Time

In total, you can expect the entire process to take around 1 hour and 15 minutes. This includes prep time, cooking time, and a short cooling period before frosting. Once the cakes are cool, you can spend additional time decorating them with the beautiful watercolor effect. So, set aside a little over an hour for this delightful baking adventure!

Nutritional Information for Watercolor Buttercream Cake Recipe

Calories

When indulging in a slice of Watercolor Buttercream Cake, it’s good to know the calorie content. Each slice contains approximately 450 calories. This number can vary slightly based on the specific ingredients and portion sizes. While this cake is a treat, enjoying it in moderation is key to maintaining a balanced diet.

Protein

In terms of protein, each slice of this delightful cake offers about 4 grams. While cake isn’t typically a high-protein food, it does provide some essential nutrients. Pairing your cake with a protein-rich side, like a scoop of Greek yogurt, can enhance your overall meal.

Sodium

The sodium content in a slice of Watercolor Buttercream Cake is around 200 milligrams. This amount is relatively moderate, making it a suitable option for most diets. However, if you’re watching your sodium intake, consider enjoying a smaller slice or balancing it with lower-sodium foods throughout the day.

Overall, the Watercolor Buttercream Cake is a delicious dessert that can fit into a balanced diet when enjoyed occasionally. Remember, the joy of baking and sharing this cake with loved ones is just as important as the nutritional content!

FAQs about Watercolor Buttercream Cake Recipe

Can I use store-bought cake for this recipe?

Yes, you can use store-bought cake if you’re short on time or prefer convenience. However, the magic of the Watercolor Buttercream Cake lies in the homemade layers. If you choose to go this route, make sure to select a cake that is moist and flavorful. You can still apply the watercolor buttercream technique to the store-bought cake, making it visually stunning and delicious!

How do I store leftover Watercolor Buttercream Cake?

To store leftover Watercolor Buttercream Cake, cover it with plastic wrap or place it in an airtight container. This will help keep the cake fresh and moist. You can store it at room temperature for up to three days. If you want to keep it longer, consider refrigerating it. Just remember to let it come to room temperature before serving for the best flavor and texture!

What types of food coloring work best for this recipe?

For the best results, use gel or paste food coloring. These types provide vibrant colors without adding too much liquid to your buttercream. Liquid food coloring can work, but it may alter the consistency of your frosting. If you prefer a natural option, consider using fruit or vegetable purees to achieve beautiful colors while keeping it healthy!

Can I make this cake ahead of time?

Absolutely! You can bake the cake layers a day or two in advance. Just make sure to wrap them tightly in plastic wrap once they are completely cool. This will help keep them fresh. You can also prepare the buttercream ahead of time and store it in the refrigerator. Just remember to let it soften at room temperature before frosting the cake. Assembling the cake on the day of serving will ensure it looks and tastes its best!

Conclusion on Watercolor Buttercream Cake Recipe

In conclusion, the Watercolor Buttercream Cake is not just a dessert; it’s a delightful experience that combines creativity and flavor. This recipe allows you to express your artistic side while enjoying the sweet rewards of your efforts. With its moist layers and vibrant frosting, this cake is sure to be a showstopper at any gathering.

Whether you’re celebrating a birthday, hosting a tea party, or simply indulging in a sweet treat, this cake fits the occasion perfectly. The versatility of flavors and colors means you can customize it to match your theme or personal taste. Plus, the step-by-step instructions make it accessible for bakers of all skill levels.

As you embark on your baking journey, remember to have fun and embrace the process. Each cake you create will be unique, reflecting your personality and style. So gather your ingredients, unleash your creativity, and enjoy the delicious results of your Watercolor Buttercream Cake!

Happy baking!

Cheesy Tater Tot Casserole Recipe is a family favorite!

Introduction to Cheesy Tater Tot Casserole Recipe

Cheesy Tater Tot Casserole Recipe is just what you need. This hearty casserole combines savory ground beef, creamy ingredients, and crispy tater tots, making it a family favorite. It’s perfect for busy weeknights or cozy gatherings with friends.

Imagine a bubbling dish fresh from the oven, with golden tater tots on top and a cheesy, flavorful filling underneath. This recipe is not only easy to prepare but also allows for plenty of creativity. You can customize it to suit your taste or dietary needs. Whether you prefer a vegetarian version or want to spice things up, the options are endless!

In this article, we will guide you through the ingredients, preparation steps, and variations of this delicious casserole. You’ll also find helpful tips to ensure your dish turns out perfectly every time. So, roll up your sleeves and get ready to create a meal that will have everyone asking for seconds!

Ingredients for Cheesy Tater Tot Casserole Recipe

Cheesy Tater Tot Casserole Recipe, you’ll need a selection of simple yet flavorful ingredients. Gather the following items to ensure your casserole is a hit:

  • 2 pounds ground beef
  • 1 medium onion, diced
  • 2 cloves garlic, minced
  • 1 can (10.5 ounces) cream of mushroom soup
  • 1 cup sour cream
  • 1 cup shredded cheddar cheese
  • 1 cup frozen mixed vegetables (peas, carrots, corn)
  • 1 package (32 ounces) frozen tater tots
  • Salt and pepper to taste
  • 1 teaspoon paprika (optional)

These ingredients come together to create a deliciously creamy and cheesy casserole that everyone will love. The ground beef provides a hearty base, while the cream of mushroom soup and sour cream add richness. The frozen mixed vegetables not only enhance the flavor but also add a pop of color and nutrition. Finally, the tater tots and cheddar cheese create a crispy, cheesy topping that is simply irresistible!

Feel free to adjust the ingredients based on your preferences. For instance, you can swap out the ground beef for ground turkey or chicken for a lighter option. Or, if you’re looking for a vegetarian twist, consider using a plant-based meat alternative. The beauty of this recipe lies in its versatility!

Step-by-Step Preparation of Cheesy Tater Tot Casserole Recipe

Cheesy Tater Tot Casserole Recipe. Follow these simple steps to create a dish that will impress your family and friends!

Step 1: Preheat the Oven

First things first, preheat your oven to 350°F (175°C). This step is crucial as it ensures your casserole cooks evenly. While the oven heats up, you can start preparing the meat mixture.

Step 2: Prepare the Meat Mixture

In a large skillet, heat over medium heat. Add the 2 pounds of ground beef, along with the diced onion and minced garlic. Cook until the meat is browned and the onion is soft, which usually takes about 5-7 minutes. Remember to stir occasionally to prevent sticking. Once cooked, drain any excess fat to keep your casserole from being greasy.

Step 3: Combine the Cheese and Vegetables

Next, stir in the cream of mushroom soup and sour cream into the skillet. Mix well until everything is combined. Then, add the frozen mixed vegetables, salt, pepper, and paprika (if you’re using it). This mixture should be creamy and colorful, making it even more appetizing!

Step 4: Layer the Ingredients

Now, it’s time to assemble your casserole. Spread the beef mixture evenly in a 9×13-inch baking dish. Make sure it covers the bottom completely. This layer is the heart of your casserole, so take your time to spread it out nicely.

Step 5: Add the Tater Tots

Once the beef mixture is in place, it’s time for the star of the show: the tater tots! Arrange the frozen tater tots in a single layer on top of the beef mixture. This will create a crispy topping that everyone loves. Don’t worry about them being perfect; a little overlap is just fine!

Step 6: Bake the Casserole

Finally, sprinkle the shredded cheddar cheese evenly over the tater tots. This will melt beautifully while baking. Place the casserole in the preheated oven and bake for 30-35 minutes. Keep an eye on it; you want the tater tots to be golden brown and crispy. Once done, remove it from the oven and let it cool for a few minutes before serving. Enjoy your delicious creation!

Variations of Cheesy Tater Tot Casserole Recipe

Cheesy Tater Tot Casserole Recipe is a fantastic base that allows for many delicious variations. Whether you want to cater to dietary preferences or simply try something new, these variations will keep your meals exciting. Let’s explore some tasty options!

Vegetarian Options

If you’re looking for a meat-free alternative, the vegetarian version of this casserole is just as satisfying. Start by replacing the ground beef with a plant-based meat substitute or a mix of your favorite vegetables. Consider using ingredients like:

  • 1 can of black beans or kidney beans for protein
  • Chopped bell peppers and zucchini for added flavor
  • Cooked quinoa or lentils for a hearty texture

Follow the same preparation steps as the original recipe. Combine your chosen vegetables or meat substitute with the cream of mushroom soup and sour cream. Layer it in the baking dish, top with tater tots, and sprinkle cheese as usual. This vegetarian twist is not only delicious but also packed with nutrients!

Spicy Cheesy Tater Tot Casserole Recipe

Cheesy Tater Tot Casserole Recipe is sure to please those who enjoy bold flavors. Here are some ideas to add a kick:

  • Add diced jalapeños or green chilies to the meat mixture for a zesty flavor.
  • Incorporate a splash of hot sauce or sriracha into the creamy mixture.
  • Top with pepper jack cheese instead of cheddar for an extra spicy twist.

These additions will elevate your casserole, making it a delightful dish for spice lovers. Just remember to adjust the amount of spice based on your preference. Enjoy the burst of flavors in every bite!

Cheesy Tater Tot Casserole Recipe to suit any occasion or taste. Whether you go vegetarian or add some heat, your family and friends will love the creativity you bring to the table!

Cooking Note for Cheesy Tater Tot Casserole Recipe

Cheesy Tater Tot Casserole Recipe, there are a few important cooking notes to keep in mind. These tips will help ensure your casserole turns out perfectly every time, making it a dish everyone will rave about!

First, always use a large skillet for browning the ground beef. This allows for even cooking and prevents overcrowding, which can lead to steaming instead of browning. Browning the meat properly enhances the flavor of your casserole.

Next, when mixing in the cream of mushroom soup and sour cream, make sure to stir thoroughly. This ensures that all ingredients are well combined, creating a creamy texture throughout the casserole. If you prefer a lighter version, consider using low-fat sour cream without sacrificing flavor.

Another tip is to let the casserole cool for a few minutes after baking. This resting time allows the layers to set, making it easier to serve. If you cut into it right away, the layers may not hold together as well.

Lastly, feel free to experiment with different cheeses! While cheddar is a classic choice, you can mix in mozzarella, gouda, or even a blend of cheeses for a unique flavor profile. Just remember to adjust the amount based on your taste preferences.

Cheesy Tater Tot Casserole Recipe that is sure to impress. Happy cooking!

Serving Suggestions for Cheesy Tater Tot Casserole Recipe

Cheesy Tater Tot Casserole Recipe is baked to perfection, it’s time to serve it up! This dish is not only delicious but also versatile, making it suitable for various occasions. Here are some serving suggestions to enhance your meal experience:

  • Garnish with Fresh Herbs: A sprinkle of chopped parsley or chives on top adds a pop of color and freshness. It also enhances the flavor, making each bite even more enjoyable.
  • Pair with a Side Salad: A crisp green salad complements the richness of the casserole. Consider a simple mixed greens salad with a light vinaigrette to balance the flavors.
  • Serve with Dipping Sauces: Offer a variety of dipping sauces like ranch, barbecue, or hot sauce. These can add an extra layer of flavor and allow guests to customize their plates.
  • Include Bread Rolls: Soft dinner rolls or garlic bread make a great addition. They are perfect for soaking up any creamy sauce left on the plate.
  • Make it a Brunch Dish: This casserole can easily transition to brunch. Serve it alongside scrambled eggs or a fruit platter for a delightful morning meal.

Cheesy Tater Tot Casserole Recipe and make it a hit at any gathering. Whether it’s a family dinner or a casual get-together with friends, your guests will appreciate the thoughtful touches!

Tips for Perfecting Your Cheesy Tater Tot Casserole Recipe

Cheesy Tater Tot Casserole Recipe turns out perfectly every time, consider these helpful tips. They will enhance the flavor, texture, and overall presentation of your dish, making it a favorite among family and friends!

  • Use Fresh Ingredients: Whenever possible, opt for fresh vegetables and high-quality meat. Fresh ingredients can significantly improve the taste of your casserole. If you can, chop your own vegetables instead of using frozen ones for a fresher flavor.
  • Don’t Overcook the Meat: When browning the ground beef, be careful not to overcook it. Overcooked meat can become tough and dry. Aim for a nice brown color while keeping it juicy.
  • Mix Well: Ensure that all ingredients are mixed thoroughly. This helps distribute flavors evenly throughout the casserole. A well-mixed filling will make every bite delicious!
  • Layering is Key: When layering the casserole, make sure to spread the beef mixture evenly. This ensures that every serving has a balanced amount of meat, vegetables, and tater tots.
  • Experiment with Toppings: While cheddar cheese is a classic choice, don’t hesitate to try different cheeses. Mixing in mozzarella, gouda, or even a sprinkle of parmesan can add unique flavors to your casserole.
  • Check for Doneness: Keep an eye on the casserole as it bakes. Ovens can vary, so check for that golden brown color on the tater tots. If they’re not crispy enough, you can broil the casserole for a few minutes at the end.
  • Let it Rest: After baking, allow the casserole to rest for about 5-10 minutes before serving. This resting time helps the layers set, making it easier to cut and serve without falling apart.
  • Store Leftovers Properly: If you have leftovers, store them in an airtight container in the refrigerator. Reheat in the oven for the best texture, or use the microwave for a quick meal.

Cheesy Tater Tot Casserole Recipe. Each time you make it, you’ll discover new ways to enhance this comforting dish, ensuring it remains a beloved staple in your home!

Breakdown of Time for Cheesy Tater Tot Casserole Recipe

Cheesy Tater Tot Casserole Recipe can help you plan your cooking efficiently. Here’s a simple breakdown of the time required for preparation and cooking:

Prep Time

The prep time for this delicious casserole is approximately 15-20 minutes. During this time, you will gather all your ingredients, dice the onion, mince the garlic, and brown the ground beef. This step is essential as it sets the foundation for your casserole. Make sure to have everything ready before you start cooking!

Cooking Time

Once your casserole is assembled, the cooking time is about 30-35 minutes. This allows the tater tots to become golden brown and crispy while the flavors meld together beautifully. Keep an eye on the casserole during this time to ensure it cooks evenly. If you want an extra crispy topping, you can broil it for a few minutes at the end!

Total Time

Cheesy Tater Tot Casserole Recipe to take around 45-55 minutes from start to finish. This includes both prep and cooking time. It’s a quick and satisfying meal that’s perfect for busy weeknights or family gatherings. With this time breakdown, you can easily fit this delightful dish into your schedule!

Nutritional Information for Cheesy Tater Tot Casserole Recipe

Cheesy Tater Tot Casserole Recipe is not only delicious but also provides a good mix of nutrients. Here’s a breakdown of the nutritional information per serving, so you can enjoy this comforting dish while keeping your health in mind.

Calories

Cheesy Tater Tot Casserole Recipe contains approximately 450 calories. This calorie count makes it a hearty meal that can satisfy your hunger without being overly indulgent. It’s perfect for a filling dinner after a long day!

Protein

With about 25 grams of protein per serving, this casserole is a great source of this essential nutrient. The ground beef and cheese contribute significantly to the protein content, helping to keep you full and energized. Protein is vital for muscle repair and overall health, making this dish a smart choice for active individuals.

Sodium

Cheesy Tater Tot Casserole Recipe while keeping your sodium consumption in check.

Cheesy Tater Tot Casserole Recipe with confidence. It’s a balanced meal that offers a satisfying mix of calories, protein, and flavor, making it a wonderful addition to your dinner rotation!

FAQs about Cheesy Tater Tot Casserole Recipe

Can I make Cheesy Tater Tot Casserole Recipe ahead of time?

Cheesy Tater Tot Casserole Recipe ahead of time, making it a great option for busy days. To do this, follow the recipe up to the point of baking. Once you’ve layered the ingredients in the baking dish, cover it tightly with plastic wrap or aluminum foil. You can store it in the refrigerator for up to 24 hours before baking. When you’re ready to cook, simply remove the cover and bake as directed. If it’s been in the fridge, you may need to add a few extra minutes to the cooking time to ensure it’s heated through.

What can I substitute for tater tots in the Cheesy Tater Tot Casserole Recipe?

Cheesy Tater Tot Casserole Recipe, so feel free to experiment!

How do I store leftovers from the Cheesy Tater Tot Casserole Recipe?

Cheesy Tater Tot Casserole Recipe is simple! Allow the casserole to cool completely before transferring it to an airtight container. You can keep it in the refrigerator for up to 3-4 days. If you want to store it for a longer period, consider freezing it. To freeze, cut the casserole into individual portions and wrap them tightly in plastic wrap, then place them in a freezer-safe container. When you’re ready to enjoy the leftovers, simply reheat them in the oven or microwave until heated through. This way, you can savor the deliciousness of your casserole even days later!

Conclusion on Cheesy Tater Tot Casserole Recipe

Cheesy Tater Tot Casserole Recipe is a delightful dish that brings comfort and satisfaction to any meal. Its combination of savory ground beef, creamy ingredients, and crispy tater tots creates a flavor explosion that is hard to resist. Whether you’re cooking for a busy weeknight dinner or a cozy gathering with friends, this casserole is sure to impress.

Not only is it easy to prepare, but it also offers endless possibilities for customization. From vegetarian options to spicy variations, you can tailor the recipe to suit your taste and dietary needs. The tips and serving suggestions provided will help you elevate your casserole, making it a standout dish at any table.

As you embark on your cooking journey with this recipe, remember to enjoy the process. Cooking is not just about the final dish; it’s about the love and creativity you put into it. So gather your ingredients, follow the steps, and savor the delicious results. Your family and friends will surely appreciate the effort, and you’ll create lasting memories around the dinner table.

Cheesy Tater Tot Casserole Recipe today. Happy cooking!

No-Bake Biscoff Cheesecake is a must-try dessert!

Introduction to No-Bake Biscoff Cheesecake Recipe

If you’re looking for a dessert that’s both easy to make and incredibly delicious, then the No-Bake Biscoff Cheesecake is the perfect choice! This delightful treat combines the rich, caramel-like flavor of Biscoff cookies with the creamy texture of cheesecake, creating a dessert that will impress your family and friends. Plus, it requires no baking, making it a fantastic option for those warm days when you want something sweet without heating up the kitchen.

This cheesecake is not only simple to prepare, but it also offers a unique twist on traditional cheesecake recipes. The Biscoff cookie crust adds a crunchy texture that perfectly complements the smooth filling. With just a few ingredients, you can whip up this indulgent dessert in no time. Whether you’re hosting a gathering or just treating yourself, this No-Bake Biscoff Cheesecake is sure to be a hit!

In this article, we’ll guide you through the ingredients, preparation steps, and some fun variations to make your cheesecake even more exciting. So, roll up your sleeves and get ready to create a dessert that’s as delightful to make as it is to eat!

Ingredients for No-Bake Biscoff Cheesecake Recipe

To create the delicious No-Bake Biscoff Cheesecake, you’ll need a few simple ingredients. Each one plays a vital role in achieving that creamy texture and delightful flavor. Here’s what you’ll need:

  • 1 ½ cups Biscoff cookie crumbs
  • ½ cup unsalted butter, melted
  • 16 ounces cream cheese, softened
  • 1 cup powdered sugar
  • 1 teaspoon vanilla extract
  • 1 cup heavy whipping cream
  • ½ cup Biscoff spread (plus extra for drizzling)
  • Pinch of salt

These ingredients are easy to find at your local grocery store. The Biscoff cookies are the star of the show, providing that unique flavor that makes this cheesecake stand out. The cream cheese and heavy whipping cream create a rich and creamy filling that pairs perfectly with the crunchy cookie crust.

Before you start, make sure to gather all your ingredients. This will make the preparation process smoother and more enjoyable. Now that you have everything ready, let’s move on to the next step: preparing the crust!

Step-by-Step Preparation of No-Bake Biscoff Cheesecake Recipe

Now that you have all your ingredients ready, it’s time to dive into the fun part: preparing your No-Bake Biscoff Cheesecake! This process is straightforward and enjoyable, making it perfect for bakers of all skill levels. Let’s break it down into easy steps.

Step 1: Prepare the Crust

First, you’ll want to create the delicious crust that will hold your cheesecake together. In a medium bowl, combine the Biscoff cookie crumbs and melted butter. Mix them well until the crumbs are fully coated with butter. This mixture should resemble wet sand.

Next, take a 9-inch springform pan and press the crumb mixture firmly into the bottom. Make sure it’s even and compact. This will help the crust hold its shape once the cheesecake is set. After pressing it down, chill the crust in the refrigerator for about 15 minutes. This step is crucial as it allows the crust to firm up before adding the filling.

Step 2: Make the Cheesecake Filling

While the crust is chilling, it’s time to prepare the creamy filling. In a large mixing bowl, beat the softened cream cheese until it’s smooth and creamy. This should take about 2-3 minutes. Gradually add the powdered sugar and vanilla extract, mixing until everything is well combined. The mixture should be light and fluffy.

In a separate bowl, whip the heavy cream until stiff peaks form. This means that when you lift the whisk, the cream should hold its shape. Gently fold the whipped cream into the cream cheese mixture. Be careful not to deflate the whipped cream; you want to keep that light and airy texture!

Step 3: Assemble the No-Bake Biscoff Cheesecake

Now that your filling is ready, it’s time to add the Biscoff spread. Add the spread and a pinch of salt to the cream cheese mixture. Fold gently until everything is smooth and well combined. The Biscoff spread adds a rich flavor that enhances the cheesecake.

Pour the cheesecake filling over the chilled crust. Use a spatula to spread it evenly across the top. If you like, you can drizzle some extra Biscoff spread on top for a beautiful finish. This will not only look great but also add more flavor!

Step 4: Chill the Cheesecake

Once you’ve assembled your cheesecake, cover it with plastic wrap. Place it in the refrigerator and let it chill for at least 4 hours. For the best results, leave it overnight. This allows the cheesecake to set properly, making it easier to slice and serve.

After the chilling time is up, carefully remove the cheesecake from the springform pan. Slice it into wedges and get ready to enjoy your delicious No-Bake Biscoff Cheesecake!

Variation of No-Bake Biscoff Cheesecake Recipe

While the classic No-Bake Biscoff Cheesecake is already a delightful treat, there are many ways to add your personal touch. Variations can enhance the flavor and make it even more exciting. Here are some alternative flavors and add-ins you might consider:

Alternative Flavors and Add-ins

  • Chocolate Twist: For chocolate lovers, add ¼ cup of cocoa powder to the cream cheese mixture. This will give your cheesecake a rich chocolate flavor that pairs beautifully with the Biscoff.
  • Fruit Infusion: Incorporate fresh fruit like strawberries or raspberries into the filling. You can blend them into the cream cheese mixture or layer them on top for a fruity surprise.
  • Nutty Crunch: Add crushed nuts, such as almonds or hazelnuts, to the crust or sprinkle them on top. This will add a delightful crunch and a nutty flavor.
  • Spiced Version: Mix in a pinch of cinnamon or nutmeg to the filling for a warm, spiced flavor. This is especially nice during the fall and winter months.
  • Caramel Drizzle: Drizzle caramel sauce over the top before serving. This adds a sweet touch that complements the Biscoff flavor perfectly.

Feel free to mix and match these ideas to create your own unique version of the No-Bake Biscoff Cheesecake. The possibilities are endless, and experimenting can lead to delicious discoveries!

Cooking Note for No-Bake Biscoff Cheesecake Recipe

When making the No-Bake Biscoff Cheesecake, there are a few important cooking notes to keep in mind. These tips will help ensure that your cheesecake turns out perfectly every time.

First, make sure your cream cheese is at room temperature. This will make it easier to beat and will help create a smooth filling. If your cream cheese is too cold, it can lead to lumps in your cheesecake.

Next, when whipping the heavy cream, be careful not to over-whip it. If you whip it too much, it can turn into butter. You want to achieve stiff peaks, which means the cream should hold its shape but still be smooth and creamy.

Additionally, if you’re using a springform pan, ensure it’s properly sealed. This will prevent any leaks during the chilling process. If you’re worried about leaks, you can wrap the outside of the pan with aluminum foil before adding the crust.

Lastly, patience is key! Allowing the cheesecake to chill for the recommended time is crucial. This helps the flavors meld together and gives the cheesecake a firm texture. Rushing this step can lead to a runny cheesecake that doesn’t slice well.

By following these cooking notes, you’ll be well on your way to creating a delicious No-Bake Biscoff Cheesecake that everyone will love!

Serving Suggestions for No-Bake Biscoff Cheesecake Recipe

Once your No-Bake Biscoff Cheesecake is ready to serve, you’ll want to present it in a way that highlights its deliciousness. Here are some serving suggestions to make your cheesecake even more appealing:

  • Garnish with Biscoff Crumbs: Sprinkle crushed Biscoff cookies on top of the cheesecake for an extra crunch and a beautiful presentation.
  • Fresh Fruit: Serve slices of cheesecake with fresh berries, such as strawberries or blueberries. The tartness of the fruit balances the sweetness of the cheesecake.
  • Whipped Cream: Add a dollop of whipped cream on top of each slice for a creamy finish. You can even flavor the whipped cream with a hint of vanilla or cinnamon.
  • Chocolate Shavings: For a touch of elegance, sprinkle chocolate shavings over the cheesecake. This adds a rich flavor and a beautiful visual element.
  • Serve with Coffee: Pair your cheesecake with a cup of coffee or tea. The warm beverage complements the sweet flavors of the cheesecake perfectly.

These serving suggestions will not only enhance the look of your No-Bake Biscoff Cheesecake but also elevate the overall dessert experience. Enjoy sharing this delightful treat with family and friends!

Cooking Note for No-Bake Biscoff Cheesecake Recipe

When making the No-Bake Biscoff Cheesecake, there are a few important cooking notes to keep in mind. These tips will help ensure that your cheesecake turns out perfectly every time.

First, make sure your cream cheese is at room temperature. This will make it easier to beat and will help create a smooth filling. If your cream cheese is too cold, it can lead to lumps in your cheesecake.

Next, when whipping the heavy cream, be careful not to over-whip it. If you whip it too much, it can turn into butter. You want to achieve stiff peaks, which means the cream should hold its shape but still be smooth and creamy.

Additionally, if you’re using a springform pan, ensure it’s properly sealed. This will prevent any leaks during the chilling process. If you’re worried about leaks, you can wrap the outside of the pan with aluminum foil before adding the crust.

Lastly, patience is key! Allowing the cheesecake to chill for the recommended time is crucial. This helps the flavors meld together and gives the cheesecake a firm texture. Rushing this step can lead to a runny cheesecake that doesn’t slice well.

By following these cooking notes, you’ll be well on your way to creating a delicious No-Bake Biscoff Cheesecake that everyone will love!

Serving Suggestions for No-Bake Biscoff Cheesecake Recipe

Once your No-Bake Biscoff Cheesecake is ready to serve, you’ll want to present it in a way that highlights its deliciousness. Here are some serving suggestions to make your cheesecake even more appealing:

  • Garnish with Biscoff Crumbs: Sprinkle crushed Biscoff cookies on top of the cheesecake for an extra crunch and a beautiful presentation. This not only adds texture but also enhances the Biscoff flavor.
  • Fresh Fruit: Serve slices of cheesecake with fresh berries, such as strawberries or blueberries. The tartness of the fruit balances the sweetness of the cheesecake, creating a delightful contrast.
  • Whipped Cream: Add a dollop of whipped cream on top of each slice for a creamy finish. You can even flavor the whipped cream with a hint of vanilla or cinnamon to complement the cheesecake.
  • Chocolate Shavings: For a touch of elegance, sprinkle chocolate shavings over the cheesecake. This adds a rich flavor and a beautiful visual element that will impress your guests.
  • Serve with Coffee: Pair your cheesecake with a cup of coffee or tea. The warm beverage complements the sweet flavors of the cheesecake perfectly, making for a delightful dessert experience.

These serving suggestions will not only enhance the look of your No-Bake Biscoff Cheesecake but also elevate the overall dessert experience. Enjoy sharing this delightful treat with family and friends!

Tips for Perfecting Your No-Bake Biscoff Cheesecake Recipe

Creating the perfect No-Bake Biscoff Cheesecake is all about attention to detail. With a few helpful tips, you can ensure that your cheesecake turns out creamy, flavorful, and visually appealing. Here are some essential tips to keep in mind:

  • Use Quality Ingredients: The flavor of your cheesecake largely depends on the quality of the ingredients. Opt for high-quality cream cheese and Biscoff spread for the best taste. Fresh ingredients will elevate your dessert.
  • Room Temperature Cream Cheese: Always let your cream cheese sit at room temperature before mixing. This helps it blend smoothly, preventing lumps in your cheesecake filling.
  • Don’t Overmix: When combining the whipped cream with the cream cheese mixture, fold gently. Overmixing can deflate the whipped cream, resulting in a denser cheesecake.
  • Chill Properly: Allow your cheesecake to chill for the recommended time. Chilling overnight is ideal, as it allows the flavors to meld and the texture to firm up perfectly.
  • Check for Doneness: Before serving, ensure the cheesecake is set. It should be firm to the touch but still slightly jiggly in the center. This indicates it’s ready to slice.
  • Presentation Matters: Take time to present your cheesecake beautifully. Use a sharp knife to slice clean pieces, and consider garnishing with fresh fruit or chocolate shavings for an elegant touch.
  • Experiment with Flavors: Don’t hesitate to try different flavors and add-ins. Whether it’s a hint of cinnamon or a layer of fruit, experimenting can lead to delightful surprises!

By following these tips, you’ll be well on your way to mastering the art of making a No-Bake Biscoff Cheesecake. Each step you take will contribute to a dessert that’s not only delicious but also a feast for the eyes!

Breakdown of Time for No-Bake Biscoff Cheesecake Recipe

Understanding the time required for each step of the No-Bake Biscoff Cheesecake recipe is essential for planning. This will help you manage your time effectively and ensure that your cheesecake is ready when you need it. Here’s a breakdown of the time involved:

Prep Time

The prep time for the No-Bake Biscoff Cheesecake is approximately 30 minutes. This includes gathering your ingredients, preparing the crust, and mixing the cheesecake filling. It’s a straightforward process, and with everything ready, you’ll be able to whip it up in no time!

Cooking Time

Since this is a no-bake recipe, there’s no actual cooking time involved. However, you will need to chill the cheesecake for at least 4 hours. For the best results, it’s recommended to chill it overnight. This allows the flavors to meld beautifully and gives the cheesecake a perfect texture.

Total Time

In total, you should plan for about 4 hours and 30 minutes to 24 hours, depending on how long you choose to chill your cheesecake. The majority of this time is spent chilling, so you can use it to prepare other dishes or simply relax while your cheesecake sets!

By keeping track of these timeframes, you can ensure that your No-Bake Biscoff Cheesecake is ready to impress your guests or satisfy your sweet tooth at just the right moment!

Nutritional Information for No-Bake Biscoff Cheesecake Recipe

Understanding the nutritional information of your No-Bake Biscoff Cheesecake is important, especially if you’re mindful of your dietary choices. This cheesecake is a delightful treat, but it’s good to know what you’re indulging in. Here’s a breakdown of the key nutritional components per serving:

Calories

Each slice of this delicious No-Bake Biscoff Cheesecake contains approximately 360 calories. This makes it a rich dessert, perfect for special occasions or when you want to treat yourself. While it’s higher in calories, the unique flavors and creamy texture make it worth every bite!

Protein

In terms of protein, each serving provides about 5 grams. The cream cheese and heavy whipping cream contribute to this protein content, making it a bit more satisfying. While it’s not a high-protein dessert, it does offer a small boost, especially when enjoyed as part of a balanced meal.

Sodium

The sodium content in each slice is approximately 200 milligrams. This is a moderate amount, so if you’re watching your sodium intake, it’s good to keep this in mind. The salt added to the recipe helps enhance the flavors, but it’s always wise to enjoy treats like this in moderation.

Overall, the No-Bake Biscoff Cheesecake is a delightful indulgence that can fit into a balanced diet. Just remember to savor each slice and enjoy the rich flavors it has to offer!

FAQs about No-Bake Biscoff Cheesecake Recipe

Can I use a different cookie for the crust?

Absolutely! While Biscoff cookies create a unique flavor, you can use other cookies for the crust. Graham crackers, Oreos, or even digestive biscuits work well. Just make sure to adjust the amount of butter if the cookie type varies in texture. This way, you can customize your cheesecake to suit your taste!

How long does the cheesecake need to chill?

The cheesecake needs to chill for at least 4 hours to set properly. However, for the best results, it’s recommended to chill it overnight. This allows the flavors to meld beautifully and gives the cheesecake a firmer texture, making it easier to slice.

Can I make this cheesecake ahead of time?

Yes, you can! The No-Bake Biscoff Cheesecake is perfect for making ahead of time. In fact, making it a day in advance is ideal. Just store it in the refrigerator, covered with plastic wrap. This way, you can save time on the day of your event and enjoy a delicious dessert that’s ready to serve!

What can I substitute for cream cheese?

If you’re looking for a cream cheese substitute, there are a few options. You can use mascarpone cheese for a similar creamy texture. Alternatively, Greek yogurt can work, but it may alter the flavor slightly. For a dairy-free option, consider using cashew cream or a vegan cream cheese alternative. Just keep in mind that these substitutes may change the overall taste and texture of your cheesecake.

Conclusion on No-Bake Biscoff Cheesecake Recipe

In conclusion, the No-Bake Biscoff Cheesecake is a delightful dessert that combines simplicity with rich flavors. Its creamy texture and the unique taste of Biscoff cookies make it a standout treat for any occasion. Whether you’re celebrating a special event or simply indulging in a sweet craving, this cheesecake is sure to impress.

With easy-to-follow steps and minimal preparation time, even novice bakers can create this delicious dessert. The variations and serving suggestions allow for creativity, making it a versatile recipe that can be tailored to suit your preferences. From adding chocolate to incorporating fresh fruit, the possibilities are endless!

Remember to take your time during the chilling process, as this is key to achieving the perfect texture. By following the tips and notes provided, you can ensure that your No-Bake Biscoff Cheesecake turns out beautifully every time.

So, gather your ingredients, roll up your sleeves, and get ready to create a dessert that will not only satisfy your sweet tooth but also leave a lasting impression on your family and friends. Enjoy every bite of your homemade No-Bake Biscoff Cheesecake!

Crispy Baked Chicken Tenders Recipe is a must-try!

Introduction to Crispy Baked Chicken Tenders Recipe

Welcome to the world of crispy baked chicken tenders! This delightful dish is not only a favorite among kids but also a hit with adults. Whether you’re preparing a family dinner or hosting a gathering, these chicken tenders are sure to impress. They are juicy, flavorful, and have a satisfying crunch that makes them irresistible.

What makes this recipe stand out is its simplicity and health-conscious approach. Unlike traditional fried chicken tenders, which can be heavy and greasy, our baked version offers a lighter alternative without sacrificing taste. You can enjoy the same crispy texture and delicious flavor while keeping your meal healthier.

Why Choose Baked Over Fried?

Choosing baked chicken tenders over fried ones comes with several benefits. First, baking significantly reduces the amount of oil used, which means fewer calories and less fat. This is especially important for those who are watching their diet or trying to maintain a healthy lifestyle.

Moreover, baking allows for even cooking, ensuring that every bite is tender and juicy. You won’t have to worry about undercooked or overcooked pieces. Plus, the oven does most of the work for you, freeing up your time to prepare other dishes or enjoy time with family and friends.

Another advantage is the versatility of baked chicken tenders. You can easily customize the flavors and seasonings to suit your taste. Whether you prefer classic flavors or something with a spicy kick, the options are endless. This recipe is a fantastic base that you can adapt to your liking.

In summary, crispy baked chicken tenders are a delicious, healthier alternative to fried chicken. They are easy to make, versatile, and perfect for any occasion. So, let’s dive into the ingredients and get started on this mouthwatering recipe!

Ingredients for Crispy Baked Chicken Tenders Recipe

To create the perfect crispy baked chicken tenders, you’ll need a few simple ingredients. Each component plays a vital role in achieving that delicious flavor and satisfying crunch. Here’s what you’ll need:

  • 1 pound boneless, skinless chicken breasts: Cut into strips for easy handling and cooking.
  • 1 cup buttermilk: This helps tenderize the chicken and adds moisture.
  • 1 teaspoon garlic powder: For a savory flavor that enhances the chicken.
  • 1 teaspoon onion powder: Adds a subtle sweetness and depth to the dish.
  • 1 teaspoon paprika: Gives a lovely color and a hint of smokiness.
  • 1 teaspoon salt: Essential for bringing out the flavors in the chicken.
  • 1/2 teaspoon black pepper: Adds a mild kick to the seasoning.
  • 1 cup breadcrumbs: Preferably panko for that extra crunch.
  • 1/2 cup grated Parmesan cheese: This adds a rich, cheesy flavor to the coating.
  • Cooking spray or olive oil: For drizzling on top to achieve a golden finish.

These ingredients are not only easy to find but also affordable. You can often have most of them in your pantry already. The combination of buttermilk and spices creates a flavorful marinade that makes the chicken tender and juicy. Meanwhile, the breadcrumbs and Parmesan cheese provide that delightful crunch we all love.

Now that you have your ingredients ready, let’s move on to the step-by-step preparation of these crispy baked chicken tenders!

Step-by-Step Preparation of Crispy Baked Chicken Tenders Recipe

Now that you have gathered all your ingredients, it’s time to dive into the preparation of your crispy baked chicken tenders. This step-by-step guide will help you create a delicious dish that everyone will love. Let’s get started!

Step 1: Prepping the Chicken

First, take your pound of boneless, skinless chicken breasts. Cut them into strips, about 1 to 1.5 inches wide. This size ensures they cook evenly and are easy to handle. Once cut, place the chicken strips in a large bowl.

Next, pour in the buttermilk. This ingredient is key for tenderizing the chicken. It also adds moisture, making your tenders juicy. Add the garlic powder, onion powder, paprika, salt, and black pepper to the bowl. Stir everything together until the chicken is well coated. Cover the bowl with plastic wrap and refrigerate for at least 30 minutes. If you have time, letting it marinate for up to 2 hours will enhance the flavor even more!

Step 2: Creating the Breading Station

While the chicken is marinating, it’s time to set up your breading station. Grab two shallow bowls. In the first bowl, combine the breadcrumbs and grated Parmesan cheese. Mix them well to ensure an even distribution of cheese throughout the breadcrumbs.

In the second bowl, you can keep it empty for now. This will be where you place the coated chicken tenders before baking. Having a clean space helps keep things organized and makes the process smoother.

Step 3: Coating the Chicken Tenders

After the chicken has marinated, it’s time to coat the strips. Remove the chicken from the buttermilk mixture, allowing any excess to drip off. Take one chicken strip and place it in the breadcrumb mixture. Press gently to ensure the breadcrumbs stick well. This step is crucial for achieving that crispy texture.

Once coated, place the chicken tender on the empty plate. Repeat this process for all the chicken strips. Make sure each piece is evenly coated for the best results. If you want extra crunch, you can double-dip by returning the coated chicken to the buttermilk and then back to the breadcrumbs.

Step 4: Baking the Chicken Tenders

Now that your chicken tenders are coated, it’s time to bake them! Preheat your oven to 425°F if you haven’t done so already. Line a baking sheet with parchment paper and lightly spray it with cooking spray. This prevents sticking and helps achieve a golden finish.

Arrange the coated chicken tenders on the prepared baking sheet, making sure they are spaced out. This allows hot air to circulate around them, ensuring even cooking. Lightly spray the tops of the chicken tenders with cooking spray or drizzle with olive oil for that extra crunch.

Bake in the preheated oven for 20-25 minutes. Keep an eye on them, and look for a golden brown color. To ensure they are fully cooked, check that the internal temperature reaches 165°F. Once done, remove them from the oven and let them cool slightly before serving.

And there you have it! Your crispy baked chicken tenders are ready to be enjoyed. Let’s explore some delicious variations next!

Variation of Crispy Baked Chicken Tenders Recipe

While the classic crispy baked chicken tenders recipe is already a hit, there are plenty of ways to switch things up! Here are two delicious variations that cater to different tastes and dietary needs. Whether you want a spicy kick or a gluten-free option, we’ve got you covered!

Spicy Version

If you love a bit of heat, this spicy version of crispy baked chicken tenders is perfect for you! To add some zing, simply incorporate cayenne pepper into your breadcrumb mixture. Start with 1/4 teaspoon and adjust according to your spice preference. You can also add a dash of hot sauce to the buttermilk marinade for an extra kick.

For an even bolder flavor, consider using spicy seasonings like chili powder or smoked paprika. These will not only enhance the taste but also give your chicken tenders a beautiful color. Serve these spicy tenders with a cooling dipping sauce, like ranch or blue cheese, to balance the heat!

Gluten-Free Option

For those who are gluten-sensitive or prefer a gluten-free diet, you can easily adapt this recipe. Instead of traditional breadcrumbs, use gluten-free panko or crushed cornflakes. Both options provide that satisfying crunch without the gluten.

When selecting your ingredients, make sure to check that your buttermilk and any other seasonings are gluten-free. This way, you can enjoy crispy baked chicken tenders without any worries. The flavor remains just as delicious, and everyone can enjoy this tasty dish!

These variations not only keep the recipe exciting but also allow you to cater to different dietary preferences. Now, let’s move on to some cooking notes to ensure your chicken tenders turn out perfectly every time!

Cooking Note for Crispy Baked Chicken Tenders Recipe

Cooking crispy baked chicken tenders is a straightforward process, but a few key notes can help you achieve the best results. Here are some important tips to keep in mind while preparing this delicious dish:

First, ensure that your chicken strips are uniform in size. This helps them cook evenly, preventing some pieces from being overcooked while others remain undercooked. Aim for strips that are about 1 to 1.5 inches wide, as mentioned earlier. This size is perfect for quick cooking and easy eating.

Next, marinating the chicken in buttermilk is crucial. The longer you let it sit, the more tender and flavorful your chicken will be. If you can, try to marinate it overnight. This extra time allows the spices to penetrate deeply, enhancing the overall taste.

When it comes to the breadcrumb mixture, feel free to get creative! You can add herbs like dried oregano or thyme for an aromatic touch. Additionally, mixing in some grated cheese, like cheddar or mozzarella, can elevate the flavor profile even further.

Another important note is to avoid overcrowding the baking sheet. If the chicken tenders are too close together, they may steam instead of bake, resulting in a less crispy texture. Make sure to leave space between each piece to allow hot air to circulate freely.

Lastly, keep an eye on the cooking time. Ovens can vary, so check your chicken tenders a few minutes before the suggested time. Look for a golden brown color and an internal temperature of 165°F to ensure they are fully cooked.

By following these cooking notes, you’ll be well on your way to creating perfectly crispy baked chicken tenders every time. Now, let’s explore some serving suggestions to make your meal even more enjoyable!

Serving Suggestions for Crispy Baked Chicken Tenders Recipe

Now that your crispy baked chicken tenders are ready, it’s time to think about how to serve them! This dish is incredibly versatile and pairs well with a variety of dipping sauces and side dishes. Let’s explore some delicious options that will elevate your meal!

Dipping Sauces

Dipping sauces can take your crispy baked chicken tenders to the next level. Here are some popular choices:

  • Ranch Dressing: A classic choice, ranch dressing adds a creamy and tangy flavor that complements the crunch of the chicken.
  • Honey Mustard: This sweet and tangy sauce is perfect for those who enjoy a bit of sweetness with their savory chicken.
  • Barbecue Sauce: For a smoky flavor, barbecue sauce is an excellent option. It adds a nice kick and pairs well with the crispy texture.
  • Buffalo Sauce: If you love heat, try serving your chicken tenders with buffalo sauce. It adds a spicy kick that’s sure to please!
  • Sweet and Sour Sauce: This sauce offers a delightful balance of sweetness and tanginess, making it a fun option for dipping.

Feel free to mix and match these sauces to find your favorite combination. You can even create a dipping sauce bar for gatherings, allowing guests to choose their preferred flavors!

Side Dishes

To round out your meal, consider serving your crispy baked chicken tenders with some tasty side dishes. Here are a few ideas:

  • French Fries: A classic pairing, crispy fries are always a hit. You can also try sweet potato fries for a healthier twist.
  • Coleslaw: This crunchy salad adds a refreshing contrast to the warm chicken tenders. It’s a great way to add some veggies to your meal!
  • Vegetable Sticks: Carrot and celery sticks with a side of ranch or hummus make for a healthy and crunchy side.
  • Macaroni and Cheese: For a comforting side, creamy macaroni and cheese is a delicious option that kids and adults alike will love.
  • Steamed Broccoli: For a nutritious choice, serve your chicken tenders with steamed broccoli. It adds color and health benefits to your plate.

These side dishes not only complement the chicken tenders but also create a well-rounded meal. Whether you’re hosting a family dinner or a casual get-together, these serving suggestions will make your crispy baked chicken tenders a hit!

Tips for Perfect Crispy Baked Chicken Tenders Recipe

To ensure your crispy baked chicken tenders turn out perfectly every time, here are some helpful tips to keep in mind. These simple suggestions can make a big difference in flavor and texture, making your dish even more enjoyable!

First, always start with fresh chicken. Fresh chicken breasts will yield the best flavor and texture. If you use frozen chicken, make sure to thaw it completely before marinating. This helps the buttermilk penetrate the meat better, resulting in tender and juicy tenders.

Next, don’t skip the marinating step! Allowing the chicken to soak in the buttermilk mixture for at least 30 minutes is essential. For even better results, marinate it overnight. This extra time allows the flavors to meld and the chicken to become more tender.

When it comes to the breadcrumb mixture, consider adding some extra seasonings. A pinch of dried herbs like oregano or thyme can enhance the flavor. You can also mix in some garlic powder or onion powder for an extra kick. This little addition can elevate your chicken tenders to a whole new level!

Another important tip is to use panko breadcrumbs. Panko is lighter and flakier than regular breadcrumbs, giving your chicken tenders that extra crunch. If you can’t find panko, you can crush regular breadcrumbs or even cornflakes for a similar effect.

While baking, make sure to space the chicken tenders out on the baking sheet. This allows hot air to circulate around each piece, ensuring they cook evenly and become crispy. If they are too close together, they may steam instead of bake, resulting in a soggy texture.

Lastly, keep an eye on the cooking time. Ovens can vary, so check your chicken tenders a few minutes before the suggested time. Look for a golden brown color and an internal temperature of 165°F to ensure they are fully cooked. If you want an extra crispy finish, you can broil them for the last 1-2 minutes, but watch closely to prevent burning.

By following these tips, you’ll be well on your way to creating the perfect crispy baked chicken tenders that everyone will love. Now, let’s break down the time needed for this delicious recipe!

Breakdown of Time for Crispy Baked Chicken Tenders Recipe

Understanding the time commitment for your crispy baked chicken tenders recipe is essential for planning your meal. Here’s a detailed breakdown of the time needed for each step, so you can manage your cooking efficiently and enjoy a delicious dish without any stress!

Prep Time

The prep time for this recipe is approximately 10 minutes. This includes gathering your ingredients, cutting the chicken into strips, and mixing the buttermilk marinade. It’s a quick process that sets the stage for your flavorful chicken tenders. However, remember that marinating the chicken will require additional time.

Cooking Time

Once your chicken has marinated, the cooking time is about 20-25 minutes. This is when the magic happens! The chicken tenders bake in the oven, transforming into crispy, golden delights. Make sure to check the internal temperature to ensure they reach 165°F for safe consumption.

Total Time

When you combine the prep time and cooking time, the total time for this crispy baked chicken tenders recipe is around 30-35 minutes, not including the marinating time. If you choose to marinate the chicken for longer, such as 2 hours or overnight, be sure to factor that into your overall meal preparation time. This allows the flavors to develop beautifully, resulting in even tastier chicken tenders!

With this time breakdown, you can easily plan your cooking schedule. Whether you’re making these tenders for a weeknight dinner or a special occasion, knowing how long each step takes will help you serve up a delicious meal with ease!

Nutritional Information for Crispy Baked Chicken Tenders Recipe

Understanding the nutritional information of your meals is essential for maintaining a balanced diet. Our crispy baked chicken tenders recipe not only satisfies your taste buds but also provides valuable nutrients. Here’s a breakdown of the nutritional content per serving, so you can enjoy your meal with confidence!

Calories

Each serving of crispy baked chicken tenders contains approximately 320 calories. This makes it a great option for a satisfying meal without going overboard on calories. The combination of chicken, buttermilk, and breadcrumbs provides a hearty dish that keeps you full and energized.

Protein

One of the standout features of this recipe is its high protein content. Each serving offers about 30 grams of protein. Protein is essential for building and repairing tissues, making it a crucial part of your diet. Enjoying these chicken tenders can help you meet your daily protein needs, especially if you’re active or looking to build muscle.

Sodium

In terms of sodium, each serving contains around 600 milligrams. While sodium is necessary for various bodily functions, it’s important to monitor your intake. If you’re watching your sodium levels, consider using low-sodium breadcrumbs or reducing the amount of salt in the recipe. This way, you can still enjoy the delicious flavor of your chicken tenders while keeping your sodium intake in check.

Overall, this crispy baked chicken tenders recipe is a nutritious choice that balances flavor and health. With its moderate calorie count, high protein content, and manageable sodium levels, you can feel good about serving this dish to your family and friends. Now, let’s move on to some frequently asked questions about this delightful recipe!

FAQs about Crispy Baked Chicken Tenders Recipe

Can I use chicken breasts instead of tenders?

Absolutely! You can use boneless, skinless chicken breasts instead of chicken tenders. Just cut the chicken breasts into strips, about 1 to 1.5 inches wide. This size ensures they cook evenly and remain juicy. The cooking time may be slightly longer, so keep an eye on them to ensure they reach an internal temperature of 165°F. Enjoy the same delicious flavor and crispy texture with this simple substitution!

How do I store leftover chicken tenders?

Storing leftover chicken tenders is easy! Allow them to cool completely before placing them in an airtight container. You can keep them in the refrigerator for up to 3 days. When you’re ready to enjoy them again, simply reheat in the oven at 350°F for about 10-15 minutes, or until heated through. This will help maintain their crispy texture. Avoid microwaving, as it can make them soggy.

Can I freeze the chicken tenders?

Yes, you can freeze crispy baked chicken tenders! To do this, let them cool completely, then place them in a single layer on a baking sheet. Freeze them for about 1-2 hours until they are firm. After that, transfer the tenders to a freezer-safe bag or container. They can be stored in the freezer for up to 3 months. When you’re ready to eat, bake them directly from frozen at 425°F for about 25-30 minutes, or until heated through and crispy.

Conclusion on Crispy Baked Chicken Tenders Recipe

In conclusion, the crispy baked chicken tenders recipe is a fantastic choice for anyone looking to enjoy a delicious meal without the guilt of frying. This dish combines the best of both worlds: a satisfying crunch and juicy chicken, all while being healthier than traditional fried options. With simple ingredients and easy preparation steps, you can whip up this delightful dish in no time.

Whether you’re serving them for a family dinner, a party, or just a cozy night in, these chicken tenders are sure to please everyone at the table. The versatility of the recipe allows you to customize flavors and pair them with a variety of dipping sauces and side dishes, making it a perfect fit for any occasion.

Remember, the key to achieving that perfect crispy texture lies in the marinating and breading process. Don’t hesitate to experiment with different spices and variations to make this recipe your own. With the tips and variations provided, you can create a dish that suits your taste and dietary needs.

So, gather your ingredients, follow the steps, and enjoy the delightful crunch of your homemade crispy baked chicken tenders. They are not just a meal; they are a celebration of flavor and health. Happy cooking!

Tex-Mex Beef Enchiladas Recipe is a must-try dish!

Introduction to Tex-Mex Beef Enchiladas Recipe

What are Tex-Mex Beef Enchiladas?

Tex-Mex beef enchiladas are a delicious and hearty dish that combines the flavors of traditional Mexican cuisine with a Texan twist. These enchiladas are made by rolling corn tortillas around a savory filling, typically ground beef, and then smothering them in a rich sauce. The dish is often topped with melted cheese, making it a favorite among many. The combination of spices, cheese, and fresh ingredients creates a mouthwatering experience that is both comforting and satisfying.

The History of Enchiladas in Tex-Mex Cuisine

The history of enchiladas dates back to ancient times when the Aztecs would fill tortillas with various ingredients. However, the Tex-Mex version we know today evolved in the United States, particularly in Texas. As Mexican immigrants settled in Texas, they brought their culinary traditions with them. Over time, these dishes adapted to local tastes and available ingredients, leading to the creation of Tex-Mex cuisine.

Tex-Mex beef enchiladas became popular in the 20th century, especially as restaurants began to serve them. The dish reflects a blend of cultures, showcasing the rich flavors of Mexico while incorporating American elements. Today, Tex-Mex beef enchiladas are enjoyed by many and are often a staple at family gatherings and celebrations.

Whether you’re a fan of spicy food or prefer milder flavors, this dish can be customized to suit your taste. With its vibrant colors and bold flavors, Tex-Mex beef enchiladas are sure to impress anyone at your dinner table.

Ingredients for Tex-Mex Beef Enchiladas Recipe

To create the perfect Tex-Mex beef enchiladas, you’ll need a variety of fresh ingredients. Each component plays a vital role in delivering that authentic flavor. Here’s what you’ll need:

  • 1 pound ground beef: This is the main protein source, providing a rich and savory flavor.
  • 1 small onion, diced: Onions add sweetness and depth to the filling.
  • 2 cloves garlic, minced: Garlic enhances the overall taste with its aromatic qualities.
  • 1 teaspoon ground cumin: This spice gives a warm, earthy flavor that is essential in Tex-Mex cuisine.
  • 1 teaspoon chili powder: Chili powder adds a mild heat and a beautiful color to the dish.
  • 1/2 teaspoon salt: Salt is crucial for bringing out the flavors of the other ingredients.
  • 1/4 teaspoon black pepper: Black pepper adds a subtle kick to the filling.
  • 1 can (15 ounces) tomato sauce: This forms the base of the sauce, providing moisture and tanginess.
  • 1 can (4 ounces) diced green chilies: Green chilies add a mild heat and a burst of flavor.
  • 8 corn tortillas: Corn tortillas are the traditional wrap for enchiladas, holding all the delicious filling.
  • 2 cups shredded cheddar cheese: Cheese is a must for that gooey, melty topping.
  • 1/4 cup chopped fresh cilantro (optional): Cilantro adds a fresh, herbal note to the dish.
  • Sour cream (for serving, optional): Sour cream provides a creamy contrast to the spicy enchiladas.

Gathering these ingredients will set you on the right path to making a delightful Tex-Mex beef enchiladas recipe. Each ingredient contributes to the overall taste, making your meal a hit with family and friends!

Step-by-Step Preparation of Tex-Mex Beef Enchiladas Recipe

Step 1: Preparing the Beef Filling

To start, heat a large skillet over medium heat. Add the ground beef and cook it until it’s browned. This usually takes about 5-7 minutes. As the beef cooks, use a spoon to break it apart into smaller pieces. Once browned, drain any excess fat to keep your filling lean and tasty.

Next, add the diced onion and minced garlic to the skillet. Cook these ingredients together for about 3-4 minutes. You want the onion to become translucent, which means it’s soft and sweet. This step adds a wonderful flavor base to your beef filling.

Now, it’s time to spice things up! Stir in the ground cumin, chili powder, salt, and black pepper. Cook this mixture for an additional minute. The spices will release their aromas, making your kitchen smell amazing!

Finally, pour in the tomato sauce and diced green chilies. Stir everything together and let it simmer for about 5 minutes. This allows the flavors to meld beautifully, creating a savory filling for your enchiladas.

Step 2: Making the Enchilada Sauce

While the beef filling simmers, you can prepare the enchilada sauce. If you prefer a homemade sauce, you can use the remaining tomato sauce from the filling. Simply add a bit more chili powder and cumin to enhance the flavor. If you want a quicker option, store-bought enchilada sauce works perfectly too!

To make your sauce extra special, consider adding a splash of lime juice or a pinch of sugar. This will balance the flavors and give your sauce a delightful twist. Remember, the sauce is what brings everything together, so make it as flavorful as you like!

Step 3: Assembling the Enchiladas

Now that your beef filling and sauce are ready, it’s time to assemble the enchiladas. Start by lightly heating the corn tortillas in a separate skillet. This makes them pliable and easier to roll. Heat each tortilla for about 30 seconds on each side.

Once warmed, take a tortilla and spoon about 1/4 cup of the beef mixture onto the center. Sprinkle a little cheese on top for added flavor. Carefully roll the tortilla up, making sure to tuck in the sides as you go. Place the rolled enchilada seam-side down in a greased 9×13-inch baking dish.

Repeat this process for all the tortillas. Once they are all in the dish, pour any remaining beef mixture over the top. Don’t forget to sprinkle the remaining cheese on top as well. This will create a delicious, cheesy crust when baked!

Step 4: Baking the Enchiladas

Preheat your oven to 350°F (175°C). Once the oven is ready, place the baking dish inside. Bake the enchiladas for 20-25 minutes. You’ll know they’re done when the cheese is melted and bubbly, creating a golden layer on top.

After baking, let the enchiladas cool for a few minutes. This will make them easier to serve. Garnish with chopped cilantro if desired, and serve with a dollop of sour cream on the side. Enjoy your homemade Tex-Mex beef enchiladas!

Variations of Tex-Mex Beef Enchiladas Recipe

Vegetarian Options

If you’re looking for a meat-free alternative, there are plenty of delicious vegetarian options for your Tex-Mex beef enchiladas recipe. One popular choice is to use black beans or pinto beans as the main filling. These beans are packed with protein and fiber, making them a healthy substitute. Simply mash the beans and mix them with sautéed onions, garlic, and spices for a flavorful filling.

Another great option is to use a mix of vegetables. You can include bell peppers, zucchini, and corn for a colorful and nutritious filling. Sauté the vegetables until they are tender, then combine them with cheese and spices. This will create a vibrant and tasty enchilada that everyone will enjoy.

For a creamy twist, consider adding some cream cheese or ricotta to your vegetable filling. This will give your enchiladas a rich texture and flavor. Top with your favorite enchilada sauce and cheese before baking for a delightful vegetarian dish!

Different Sauces and Toppings

The beauty of Tex-Mex beef enchiladas lies in their versatility. You can easily switch up the sauce and toppings to create a new flavor experience. Instead of the traditional tomato sauce, try using green enchilada sauce for a tangy twist. This sauce is made from tomatillos and green chilies, giving your enchiladas a fresh and zesty flavor.

If you prefer a spicier kick, opt for a chipotle sauce. This smoky sauce adds depth and heat, perfect for those who love bold flavors. You can also experiment with different types of cheese. While cheddar is a classic choice, Monterey Jack or pepper jack cheese can add a unique taste and creaminess.

When it comes to toppings, the options are endless! Consider adding sliced jalapeños, diced avocados, or fresh tomatoes for a burst of freshness. A sprinkle of crumbled queso fresco or feta cheese can also elevate your dish. Don’t forget to finish with a drizzle of sour cream or a dollop of guacamole for that extra touch of deliciousness!

Cooking Note for Tex-Mex Beef Enchiladas Recipe

When preparing your Tex-Mex beef enchiladas, there are a few cooking notes to keep in mind to ensure your dish turns out perfectly every time. First, the quality of your ingredients matters. Fresh vegetables and high-quality ground beef will enhance the overall flavor of your enchiladas. Always opt for fresh herbs, like cilantro, to add a burst of freshness at the end.

Another important tip is to avoid overcooking the beef. Ground beef should be cooked until it’s just browned. Overcooking can lead to a dry filling, which is not what you want in a delicious enchilada. Additionally, when heating the corn tortillas, be careful not to let them get too crispy. You want them soft and pliable for easy rolling.

As you assemble your enchiladas, don’t be afraid to get creative! Feel free to adjust the amount of cheese or sauce according to your taste. If you love cheese, add more to the filling or on top before baking. If you prefer a lighter dish, you can reduce the cheese or use a lower-fat option.

Lastly, let your enchiladas rest for a few minutes after baking. This allows the flavors to settle and makes serving easier. Enjoy your cooking adventure, and remember that practice makes perfect. Each time you make these enchiladas, you’ll discover new ways to enhance your recipe!

Serving Suggestions for Tex-Mex Beef Enchiladas Recipe

Side Dishes to Pair with Enchiladas

When serving your Tex-Mex beef enchiladas, consider pairing them with delicious side dishes that complement their rich flavors. Here are some great options:

  • Mexican Rice: This fluffy, seasoned rice is a classic side that pairs perfectly with enchiladas. The mild flavors balance the spices in the dish.
  • Refried Beans: Creamy refried beans add a hearty element to your meal. They can be served on the side or even spread on the tortillas before adding the filling.
  • Guacamole: A fresh and creamy guacamole adds a cool contrast to the spicy enchiladas. The avocado’s richness enhances the overall experience.
  • Elote (Mexican Street Corn): Grilled corn on the cob, slathered with mayo, cheese, and chili powder, makes for a tasty and fun side dish.
  • Salad: A light salad with fresh greens, tomatoes, and a zesty lime vinaigrette can provide a refreshing crunch alongside the enchiladas.

These side dishes not only enhance the meal but also create a colorful and inviting presentation on your table. Feel free to mix and match based on your preferences and what you have on hand!

Garnishes and Toppings

Garnishes and toppings can elevate your Tex-Mex beef enchiladas, adding flavor and visual appeal. Here are some tasty ideas:

  • Chopped Fresh Cilantro: This herb adds a burst of freshness and color. Sprinkle it generously over the enchiladas before serving.
  • Sour Cream: A dollop of sour cream provides a creamy contrast to the spicy filling. It’s a must-have for many enchilada lovers!
  • Shredded Lettuce: Adding shredded lettuce on top gives a nice crunch and freshness, balancing the richness of the cheese and beef.
  • Diced Tomatoes: Fresh diced tomatoes add a juicy pop of flavor and color. They can be sprinkled on top or served on the side.
  • Pickled Jalapeños: For those who enjoy heat, pickled jalapeños can add a tangy kick that enhances the overall flavor profile.

By incorporating these garnishes and toppings, you can customize your Tex-Mex beef enchiladas to suit your taste. They not only enhance the flavor but also make your dish look more appealing. Enjoy your meal with family and friends, and watch them savor every bite!

Tips for Perfecting Your Tex-Mex Beef Enchiladas Recipe

Creating the perfect Tex-Mex beef enchiladas is an art that can be mastered with a few helpful tips. Whether you’re a seasoned cook or a beginner, these suggestions will ensure your enchiladas turn out delicious every time.

First, always use fresh ingredients. Fresh vegetables, herbs, and quality ground beef will enhance the flavor of your dish. When possible, choose organic or locally sourced produce for the best taste.

Next, don’t skip the seasoning! The spices are what give your enchiladas their signature Tex-Mex flavor. Adjust the amount of cumin and chili powder to suit your taste. If you enjoy a bit of heat, consider adding cayenne pepper or diced jalapeños to the beef mixture.

When it comes to tortillas, opt for corn tortillas for an authentic experience. If you find them too stiff, warm them in a skillet or microwave before rolling. This will make them more pliable and easier to work with.

Another tip is to layer your flavors. When assembling the enchiladas, don’t just add the filling and cheese. Consider adding a layer of sauce between the tortillas and the filling. This will keep the tortillas moist and flavorful.

For a cheesy topping, use a blend of cheeses. Mixing cheddar with Monterey Jack or pepper jack can create a delightful flavor profile. Don’t be shy with the cheese; a generous layer on top will create that gooey, melty goodness everyone loves.

Lastly, let your enchiladas rest for a few minutes after baking. This allows the flavors to meld and makes serving easier. Enjoy your Tex-Mex beef enchiladas with confidence, knowing you’ve perfected your recipe!

Breakdown of Time for Tex-Mex Beef Enchiladas Recipe

Prep Time

Preparing your Tex-Mex beef enchiladas is a fun and engaging process. The prep time for this recipe is approximately 15-20 minutes. During this time, you will gather all your ingredients, chop the onion and garlic, and prepare the beef filling. Having everything ready before you start cooking will make the process smoother and more enjoyable.

Cooking Time

The cooking time for your Tex-Mex beef enchiladas is about 30-35 minutes. This includes browning the ground beef, simmering the filling, and baking the assembled enchiladas in the oven. The baking time is crucial, as it allows the cheese to melt and the flavors to meld together beautifully. Keep an eye on them to ensure they don’t overcook!

Total Time

In total, you can expect to spend around 45-55 minutes from start to finish. This includes both prep and cooking time. With this quick and easy recipe, you can have a delicious meal ready in no time. Perfect for busy weeknights or when you want to impress guests with a homemade dish!

Nutritional Information for Tex-Mex Beef Enchiladas Recipe

Calories

When enjoying a serving of Tex-Mex beef enchiladas, you can expect to consume approximately 450 calories. This makes it a hearty meal that can satisfy your hunger while still being mindful of your daily caloric intake. The balance of protein, fats, and carbohydrates in this dish contributes to its overall nutritional value, making it a great option for a fulfilling dinner.

Protein

Each serving of Tex-Mex beef enchiladas provides about 28 grams of protein. This protein comes primarily from the ground beef and cheese, which are essential for muscle repair and growth. Including protein in your meals can help keep you feeling full longer, making these enchiladas a smart choice for anyone looking to maintain a balanced diet.

Sodium

In terms of sodium content, a serving of Tex-Mex beef enchiladas contains around 800 milligrams. While sodium is necessary for bodily functions, it’s important to monitor your intake. If you’re watching your sodium levels, consider using low-sodium tomato sauce and cheese to help reduce the overall sodium content of the dish. This way, you can enjoy your enchiladas without compromising your health goals.

FAQs about Tex-Mex Beef Enchiladas Recipe

Can I make Tex-Mex Beef Enchiladas ahead of time?

Absolutely! You can prepare Tex-Mex beef enchiladas ahead of time, making them a great option for busy days. Simply assemble the enchiladas as directed, but do not bake them. Cover the baking dish tightly with plastic wrap or aluminum foil and store it in the refrigerator for up to 24 hours. When you’re ready to enjoy them, just pop them in the oven and bake as instructed. This way, you can have a delicious meal ready with minimal effort!

What can I substitute for beef in Tex-Mex Beef Enchiladas?

If you’re looking for alternatives to ground beef, there are plenty of tasty options! Ground turkey or chicken can be used for a leaner protein choice. For a vegetarian version, consider using black beans, pinto beans, or lentils. You can also fill the enchiladas with sautéed vegetables like bell peppers, zucchini, and mushrooms. These substitutions will still provide a hearty and satisfying meal while catering to different dietary preferences.

How do I store leftover Tex-Mex Beef Enchiladas?

Storing leftover Tex-Mex beef enchiladas is easy! Allow them to cool completely, then transfer them to an airtight container. You can keep them in the refrigerator for up to 3-4 days. When you’re ready to enjoy them again, simply reheat in the oven at 350°F (175°C) until warmed through. You can also microwave individual portions for a quick meal. Just be sure to cover them to prevent drying out!

Can I freeze Tex-Mex Beef Enchiladas?

Yes, you can freeze Tex-Mex beef enchiladas! To do this, assemble the enchiladas but do not bake them. Instead, cover the baking dish tightly with plastic wrap and then with aluminum foil to prevent freezer burn. They can be frozen for up to 3 months. When you’re ready to eat, thaw them in the refrigerator overnight and then bake as directed. This makes for a convenient meal option that you can prepare in advance!

Conclusion on Tex-Mex Beef Enchiladas Recipe

In conclusion, the Tex-Mex beef enchiladas recipe is a delightful dish that brings together the best of both Mexican and American flavors. With its savory beef filling, rich sauce, and gooey cheese, it’s no wonder this dish has become a favorite for many families. Whether you’re preparing a weeknight dinner or hosting a gathering, these enchiladas are sure to impress your guests.

Not only is this recipe easy to follow, but it also allows for plenty of customization. You can experiment with different fillings, sauces, and toppings to create a version that suits your taste. From vegetarian options to spicy variations, the possibilities are endless. This flexibility makes Tex-Mex beef enchiladas a versatile dish that can cater to various dietary preferences.

Moreover, the nutritional benefits of this recipe, including a good balance of protein, carbohydrates, and fats, make it a satisfying meal. With a little planning, you can prepare these enchiladas ahead of time, making them a convenient choice for busy days. Plus, leftovers can be easily stored or frozen for future enjoyment.

So, gather your ingredients, roll up your sleeves, and get ready to create a delicious batch of Tex-Mex beef enchiladas. Your family and friends will love the flavors, and you’ll enjoy the satisfaction of making a homemade meal that brings everyone together. Happy cooking!

Garlic Herb Beef Tenderloin Recipe is a must-try dish!

Introduction to Garlic Herb Beef Tenderloin Recipe

Welcome to the delightful world of cooking! Today, we’re diving into a mouthwatering dish that is sure to impress your family and friends: the Garlic Herb Beef Tenderloin Recipe. This dish is not just a meal; it’s an experience that brings together rich flavors and tender meat, making it perfect for special occasions or a cozy dinner at home.

What Makes Garlic Herb Beef Tenderloin Special?

So, what makes this Garlic Herb Beef Tenderloin so special? First, it’s all about the beef. Tenderloin is one of the most tender cuts of beef, known for its buttery texture. When cooked properly, it melts in your mouth, leaving you craving more.

Next, let’s talk about the flavor. The combination of garlic, fresh herbs like rosemary and thyme, and a hint of balsamic vinegar creates a symphony of tastes. This herb paste not only enhances the beef but also fills your kitchen with an irresistible aroma. It’s a dish that brings warmth and comfort, making it a favorite for many.

Moreover, this recipe is versatile. You can easily adjust the herbs to suit your taste or even marinate the beef for a few hours to deepen the flavors. Whether you’re a seasoned chef or a beginner, this Garlic Herb Beef Tenderloin Recipe is straightforward and rewarding.

In the following sections, we’ll guide you through the ingredients, preparation steps, and tips to make this dish a success. Get ready to impress your guests with a meal that’s as delicious as it is beautiful!

Ingredients for Garlic Herb Beef Tenderloin Recipe

To create the perfect Garlic Herb Beef Tenderloin, you’ll need a few simple yet flavorful ingredients. Each component plays a vital role in enhancing the taste of the beef. Here’s what you’ll need:

  • 2 pounds beef tenderloin: This is the star of the dish. Make sure it’s trimmed for the best results.
  • 4 tablespoons olive oil: Divided into two portions, this oil helps in both marinating and searing the beef.
  • 4 cloves garlic: Minced garlic adds a robust flavor that complements the tenderloin beautifully.
  • 2 tablespoons fresh rosemary: Chopped rosemary brings a fragrant, earthy note to the dish.
  • 2 tablespoons fresh thyme: This herb adds a subtle sweetness and depth to the flavor profile.
  • 1 teaspoon salt: Essential for enhancing the overall taste of the beef.
  • 1 teaspoon black pepper: Freshly ground pepper adds a bit of heat and complexity.
  • 1 tablespoon Dijon mustard: This tangy mustard gives a nice kick and helps the herb paste stick to the meat.
  • 1 tablespoon balsamic vinegar: A splash of balsamic vinegar adds a sweet and tangy finish to the dish.

These ingredients come together to create a delightful flavor explosion. Remember, using fresh herbs will elevate your dish, but if you can’t find them, dried herbs can work too. Just use about one-third of the amount for the best results. Now that you have your ingredients ready, let’s move on to the preparation steps!

Step-by-Step Preparation of Garlic Herb Beef Tenderloin Recipe

Now that you have gathered all your ingredients, it’s time to dive into the preparation of your Garlic Herb Beef Tenderloin. This step-by-step guide will help you create a delicious meal that will leave everyone asking for seconds. Let’s get started!

Step 1: Preparing the Marinade

First, let’s make the herb paste that will coat our beef tenderloin. In a small bowl, combine 2 tablespoons of olive oil, minced garlic, chopped rosemary, chopped thyme, salt, and black pepper. Mix these ingredients well until they form a smooth paste. This mixture is packed with flavor and will enhance the taste of the beef.

Step 2: Marinating the Beef Tenderloin

Next, take your trimmed beef tenderloin and rub the herb paste all over it. Make sure to cover every inch of the meat for maximum flavor. If you have time, consider marinating the beef for a few hours or even overnight in the refrigerator. This will allow the flavors to penetrate deeper into the meat, making it even more delicious.

Step 3: Prepping the Oven and Cooking Equipment

While the beef is marinating, preheat your oven to 425°F. This high temperature will help create a beautiful crust on the tenderloin. Also, grab an oven-safe skillet, as you’ll need it for searing and roasting the beef. Make sure it’s ready to go when the marinating time is up!

Step 4: Cooking the Garlic Herb Beef Tenderloin

Once your beef has marinated, it’s time to cook! Heat the remaining 2 tablespoons of olive oil in your skillet over medium-high heat. When the oil is hot, carefully place the beef tenderloin in the skillet. Sear it on all sides until it’s nicely browned, which should take about 3-4 minutes per side. This step locks in the juices and adds a lovely color.

After searing, remove the skillet from heat. Brush the tenderloin with Dijon mustard and balsamic vinegar. This adds a tangy flavor that complements the herbs beautifully. Now, transfer the skillet to your preheated oven and roast the beef for 20-25 minutes. You’re aiming for a medium-rare doneness, which is about 135°F internally.

Step 5: Resting and Slicing the Tenderloin

Once your beef is cooked to perfection, take the skillet out of the oven. It’s important to let the beef rest for about 10 minutes before slicing. This resting period allows the juices to redistribute throughout the meat, ensuring each slice is tender and juicy. After resting, slice the tenderloin into thick pieces and get ready to serve!

With these steps, you’re well on your way to creating a stunning Garlic Herb Beef Tenderloin that will impress everyone at the table. Enjoy the process and the delicious results!

Variations of Garlic Herb Beef Tenderloin Recipe

While the classic Garlic Herb Beef Tenderloin Recipe is already a showstopper, there are many ways to switch things up! Whether you want to experiment with different flavors or try new cooking techniques, these variations will keep your meals exciting. Let’s explore some options!

Different Herbs to Use

Herbs are the heart of this recipe, and you can easily customize them to suit your taste. Here are some alternatives:

  • Oregano: This herb adds a warm, slightly bitter flavor that pairs well with beef.
  • Sage: Known for its earthy taste, sage can bring a unique twist to your tenderloin.
  • Parsley: Fresh parsley adds a bright, fresh note that lightens the dish.
  • Basil: Sweet basil can give your beef a fragrant, aromatic quality.

Feel free to mix and match these herbs! Just remember to adjust the quantities, especially if you’re using dried herbs. A little creativity can lead to delightful new flavors!

Alternative Cooking Methods

If you’re looking to change up how you cook your Garlic Herb Beef Tenderloin, consider these alternative methods:

  • Grilling: For a smoky flavor, grill the tenderloin over medium-high heat. This method adds a delicious char and is perfect for summer barbecues.
  • Slow Cooking: If you have more time, try slow cooking the beef. This method makes the meat incredibly tender and allows the flavors to meld beautifully.
  • Sous Vide: Cooking sous vide ensures precise temperature control. Seal the beef in a bag and cook it in a water bath for a perfectly tender result.

Each cooking method brings its own unique flavor and texture to the dish. So, don’t hesitate to experiment and find your favorite way to prepare this Garlic Herb Beef Tenderloin!

Cooking Note for Garlic Herb Beef Tenderloin Recipe

Cooking a Garlic Herb Beef Tenderloin is a delightful experience, but there are a few important notes to keep in mind to ensure your dish turns out perfectly every time. Here are some tips to help you achieve the best results:

First, always start with a high-quality beef tenderloin. Look for meat that is bright red with a good amount of marbling. This marbling is the fat that melts during cooking, keeping the meat juicy and flavorful. If possible, ask your butcher for recommendations on the best cuts available.

Next, don’t skip the resting period after cooking. Allowing the beef to rest for about 10 minutes is crucial. This step helps the juices redistribute throughout the meat, making each slice tender and moist. If you cut into the beef too soon, you risk losing those delicious juices, resulting in a drier texture.

Additionally, using a meat thermometer is highly recommended. This tool takes the guesswork out of cooking. For medium-rare, aim for an internal temperature of 135°F. If you prefer your beef cooked more, adjust the temperature accordingly. Remember, the beef will continue to cook slightly while resting, so it’s okay to take it out of the oven a few degrees early.

Lastly, feel free to get creative with your seasonings! While the garlic and herbs are fantastic, you can also add a pinch of red pepper flakes for a bit of heat or a splash of Worcestershire sauce for extra depth. The key is to balance flavors without overpowering the natural taste of the beef.

By following these cooking notes, you’ll be well on your way to mastering the Garlic Herb Beef Tenderloin Recipe. Enjoy the process and the delicious results that come with it!

Serving Suggestions for Garlic Herb Beef Tenderloin Recipe

Now that you’ve prepared a stunning Garlic Herb Beef Tenderloin, it’s time to think about how to serve it. The right side dishes and beverages can elevate your meal, making it even more enjoyable. Let’s explore some ideal side dishes and wine pairings that will complement your delicious beef tenderloin!

Ideal Side Dishes

When it comes to side dishes, you want to choose options that balance the rich flavors of the beef. Here are some fantastic ideas:

  • Roasted Vegetables: A mix of seasonal vegetables like carrots, Brussels sprouts, and bell peppers, roasted until caramelized, adds color and nutrition to your plate.
  • Garlic Mashed Potatoes: Creamy mashed potatoes infused with garlic provide a comforting and classic pairing with beef.
  • Green Beans Almondine: Sautéed green beans with toasted almonds offer a crunchy texture and a fresh taste that complements the tenderloin.
  • Cauliflower Gratin: This cheesy, baked dish adds a rich and creamy element that pairs beautifully with the savory beef.
  • Quinoa Salad: A light quinoa salad with cherry tomatoes, cucumber, and a lemon vinaigrette can provide a refreshing contrast to the hearty beef.

These side dishes not only enhance the meal but also add a variety of flavors and textures that everyone will love. Feel free to mix and match based on your preferences and what’s in season!

Wine Pairings

To truly elevate your dining experience, consider pairing your Garlic Herb Beef Tenderloin with the right wine. Here are some excellent options:

  • Cabernet Sauvignon: This full-bodied red wine has bold flavors that complement the richness of the beef. Its tannins help cut through the fat, enhancing the overall taste.
  • Merlot: A softer red wine, Merlot offers fruity notes that can balance the savory flavors of the tenderloin.
  • Malbec: Known for its dark fruit flavors and smoky finish, Malbec pairs wonderfully with grilled or roasted meats.
  • Pinot Noir: If you prefer a lighter option, Pinot Noir’s acidity and fruitiness can provide a lovely contrast to the beef.
  • Châteauneuf-du-Pape: This French wine, with its complex flavors, can elevate your meal to a gourmet experience.

Choosing the right wine can enhance the flavors of your Garlic Herb Beef Tenderloin, making your meal even more memorable. So, pour a glass, sit back, and enjoy the delightful combination of flavors!

Tips for Perfecting Your Garlic Herb Beef Tenderloin Recipe

Cooking the perfect Garlic Herb Beef Tenderloin is an art, and with a few helpful tips, you can elevate your dish to new heights. Here are some expert suggestions to ensure your tenderloin turns out delicious every time:

First, always let your beef come to room temperature before cooking. This step helps the meat cook evenly. Take the tenderloin out of the refrigerator about 30 minutes before you plan to start cooking. This simple trick can make a big difference in the final result.

Next, don’t rush the searing process. Searing the beef on all sides is crucial for developing a rich, brown crust. Make sure your skillet is hot enough before adding the meat. If the oil shimmers, it’s ready! A good sear locks in the juices and enhances the flavor.

Another important tip is to use a meat thermometer. This tool is your best friend in the kitchen! It takes the guesswork out of cooking. For medium-rare, aim for an internal temperature of 135°F. Remember, the beef will continue to cook slightly while resting, so it’s okay to take it out a few degrees early.

Additionally, consider adding a touch of butter during the last few minutes of roasting. This adds richness and flavor to the beef. Simply place a couple of tablespoons of butter on top of the tenderloin before transferring it to the oven. The melted butter will baste the meat as it cooks, creating a deliciously moist result.

Lastly, don’t forget to slice the beef against the grain. This technique ensures each piece is tender and easy to chew. Look for the lines in the meat and cut perpendicular to them. This small detail can make a big difference in texture.

By following these tips, you’ll be well on your way to mastering the Garlic Herb Beef Tenderloin Recipe. Enjoy the cooking process and the delightful flavors that come with it!

Breakdown of Time for Garlic Herb Beef Tenderloin Recipe

Understanding the time needed for each step in the Garlic Herb Beef Tenderloin Recipe is essential for planning your meal. Here’s a detailed breakdown of the time you’ll need for preparation and cooking. This will help you manage your kitchen time effectively and ensure everything is ready when you want to serve.

Prep Time

The prep time for this Garlic Herb Beef Tenderloin Recipe is approximately 15-20 minutes. This includes gathering your ingredients, making the herb paste, and marinating the beef. If you choose to marinate the beef for a few hours or overnight, you can extend this time, but the active prep time remains short. This makes it a great option for both busy weeknights and special occasions!

Cooking Time

Once you’re ready to cook, the cooking time will take about 25-30 minutes. This includes searing the beef for about 12-16 minutes and then roasting it in the oven for 20-25 minutes. The exact time may vary slightly based on your oven and the thickness of the tenderloin. Using a meat thermometer will help you achieve the perfect doneness without overcooking.

Total Time

In total, you can expect the Garlic Herb Beef Tenderloin Recipe to take around 40-50 minutes, not including any marinating time. This makes it a relatively quick dish to prepare, especially considering the impressive flavors and tender results. With just a little planning, you can have a delicious meal ready to impress your guests or family in no time!

Nutritional Information for Garlic Herb Beef Tenderloin Recipe

Understanding the nutritional content of your meals is essential for maintaining a balanced diet. The Garlic Herb Beef Tenderloin Recipe not only delights your taste buds but also provides valuable nutrients. Here’s a breakdown of the nutritional information per serving, which serves as a great guide for those mindful of their dietary intake.

Calories

Each serving of Garlic Herb Beef Tenderloin contains approximately 350 calories. This makes it a satisfying yet manageable option for a main course. The calorie count is primarily derived from the beef and olive oil, both of which contribute to the dish’s rich flavor and texture. Enjoying this dish as part of a balanced meal can help you stay within your daily caloric goals.

Protein Content

One of the standout features of this recipe is its high protein content. Each serving provides about 40 grams of protein. This is excellent for muscle repair and growth, making it a great choice for those who are active or looking to increase their protein intake. The beef tenderloin is a lean cut, ensuring you get quality protein without excessive fat.

Sodium Levels

In terms of sodium, each serving contains approximately 500 milligrams. This level is reasonable for a flavorful dish, especially considering the use of salt and Dijon mustard. If you’re watching your sodium intake, you can adjust the amount of salt used in the herb paste or opt for low-sodium mustard. Balancing flavors while keeping sodium levels in check is key to a healthy meal.

Overall, the Garlic Herb Beef Tenderloin Recipe is not only delicious but also packed with nutrients. It’s a fantastic option for those looking to enjoy a hearty meal without compromising on health. Remember to pair it with nutritious sides for a well-rounded dining experience!

FAQs about Garlic Herb Beef Tenderloin Recipe

How do I know when the beef tenderloin is done?

Knowing when your beef tenderloin is perfectly cooked is essential for achieving the best flavor and texture. The most reliable way to check doneness is by using a meat thermometer. For medium-rare, aim for an internal temperature of 135°F. If you prefer medium, look for a temperature of 145°F. Remember, the beef will continue to cook slightly while resting, so it’s okay to take it out of the oven a few degrees early. This ensures your tenderloin remains juicy and tender!

Can I use a different cut of beef for this recipe?

Absolutely! While beef tenderloin is the star of this recipe, you can use other cuts if you prefer. Cuts like ribeye, sirloin, or filet mignon can work well too. Just keep in mind that cooking times may vary based on the thickness and fat content of the cut you choose. Adjust your cooking time accordingly, and always use a meat thermometer to ensure perfect doneness.

What are some good sides to serve with beef tenderloin?

Pairing your Garlic Herb Beef Tenderloin with the right sides can elevate your meal. Some excellent options include:

  • Roasted Vegetables: A colorful mix of seasonal veggies adds nutrition and flavor.
  • Garlic Mashed Potatoes: Creamy and comforting, they complement the beef beautifully.
  • Green Beans Almondine: This dish adds a crunchy texture and fresh taste.
  • Cauliflower Gratin: Rich and cheesy, it pairs well with the savory beef.
  • Quinoa Salad: A light salad can provide a refreshing contrast to the hearty meat.

Feel free to mix and match based on your preferences and what’s in season!

How long should I let the beef rest after cooking?

Resting your beef tenderloin is a crucial step that should not be overlooked. After cooking, let the beef rest for about 10 minutes. This resting period allows the juices to redistribute throughout the meat, ensuring each slice is tender and juicy. If you cut into the beef too soon, you risk losing those delicious juices, resulting in a drier texture. So, be patient and enjoy the aroma while you wait!

Conclusion on Garlic Herb Beef Tenderloin Recipe

In conclusion, the Garlic Herb Beef Tenderloin Recipe is a fantastic choice for anyone looking to create a memorable meal. With its tender, juicy beef and aromatic herb blend, this dish is sure to impress your family and friends. Whether you’re celebrating a special occasion or simply enjoying a cozy dinner at home, this recipe delivers both flavor and elegance.

Throughout this article, we’ve explored the essential ingredients, step-by-step preparation, and various tips to help you achieve the best results. Remember, the key to a successful Garlic Herb Beef Tenderloin lies in using high-quality ingredients and allowing the beef to rest after cooking. This ensures that every bite is bursting with flavor and tenderness.

Don’t hesitate to experiment with different herbs and cooking methods to make this dish your own. The versatility of the Garlic Herb Beef Tenderloin allows you to tailor it to your taste preferences, making it a dish you can enjoy time and time again.

As you embark on your culinary journey with this recipe, keep in mind the joy of cooking and sharing delicious meals with loved ones. So, gather your ingredients, follow the steps, and savor the delightful experience of creating a Garlic Herb Beef Tenderloin that will leave everyone asking for seconds. Happy cooking!

Southern Squash Casserole is a must-try comfort dish.

Introduction to Southern Squash Casserole Recipe

What is Southern Squash Casserole?

Southern Squash Casserole is a delightful dish that showcases the fresh flavors of summer squash. This comforting casserole combines tender yellow squash with creamy ingredients, making it a perfect side dish for any meal. The blend of cheddar cheese, mayonnaise, and spices creates a rich and savory flavor that is hard to resist. Topped with crunchy buttery crackers, this dish offers a wonderful texture contrast. Whether served at a family gathering or a casual dinner, Southern Squash Casserole is sure to please everyone at the table.

The History of Southern Squash Casserole

The roots of Southern Squash Casserole can be traced back to the agricultural traditions of the Southern United States. Squash, particularly yellow squash, has been a staple in Southern cooking for generations. Farmers would grow this versatile vegetable in their gardens, and it became a popular ingredient in many home-cooked meals. Over time, families began to experiment with different ways to prepare squash, leading to the creation of this beloved casserole.

In the early 20th century, as more families embraced the convenience of casseroles, the Southern Squash Casserole gained popularity. It became a go-to dish for potlucks and holiday gatherings. The combination of simple ingredients and easy preparation made it a favorite among home cooks. Today, this casserole remains a cherished part of Southern cuisine, often passed down through generations. Its comforting flavors and hearty texture continue to make it a beloved dish in many households.

Ingredients for Southern Squash Casserole Recipe

To create a delicious Southern Squash Casserole, you’ll need a few simple ingredients. Each component plays a vital role in building the rich flavors and textures that make this dish so special. Here’s what you’ll need:

  • 2 pounds yellow squash: Sliced into thin rounds for even cooking.
  • 1 medium onion: Chopped finely to add sweetness and depth.
  • 1 cup shredded cheddar cheese: This adds creaminess and a sharp flavor.
  • 1 cup crushed buttery crackers: Such as Ritz, for a crunchy topping.
  • 1/2 cup milk: To create a creamy texture.
  • 2 large eggs: These help bind the ingredients together.
  • 1/4 cup mayonnaise: For added richness and moisture.
  • 1 teaspoon salt: Enhances the overall flavor.
  • 1/2 teaspoon black pepper: Adds a touch of heat.
  • 1/2 teaspoon garlic powder: For a savory kick.
  • 1/2 teaspoon onion powder: To complement the fresh onion.
  • 1 tablespoon olive oil: Used for sautéing the vegetables.
  • 1/2 cup grated Parmesan cheese: For a flavorful topping that adds a nice crust.

These ingredients come together to create a comforting and satisfying dish. The combination of squash, cheese, and spices makes this casserole a delightful addition to any meal. Plus, it’s easy to prepare, making it perfect for busy weeknights or special occasions.

Step-by-Step Preparation of Southern Squash Casserole Recipe

Step 1: Preparing the Squash

First, you need to prepare the squash. Start by washing the yellow squash thoroughly under running water. This step is important to remove any dirt or pesticides. Next, slice the squash into thin rounds, about 1/4 inch thick. This ensures even cooking and a tender texture. If you prefer, you can also cut the squash into half-moons for a different look. Once sliced, set the squash aside while you move on to the next step.

Step 2: Sautéing the Vegetables

Now, it’s time to sauté the vegetables. In a large skillet, heat 1 tablespoon of olive oil over medium heat. Once the oil is hot, add the sliced squash and chopped onion. Sauté the mixture for about 5-7 minutes. You want the squash to become tender and the onion to turn translucent. Stir occasionally to prevent sticking. Once done, remove the skillet from heat and let the mixture cool slightly. This step enhances the flavors and softens the vegetables, making them perfect for the casserole.

Step 3: Mixing the Ingredients

In a large mixing bowl, combine the creamy ingredients. Start by adding 1/2 cup of milk, 2 large eggs, and 1/4 cup of mayonnaise. Then, sprinkle in 1 teaspoon of salt, 1/2 teaspoon of black pepper, 1/2 teaspoon of garlic powder, and 1/2 teaspoon of onion powder. Whisk everything together until well blended. This mixture will bind the casserole and add a rich flavor. After that, stir in the sautéed squash and onion mixture. Finally, fold in 1 cup of shredded cheddar cheese and half of the crushed buttery crackers. Mix until all ingredients are evenly coated.

Step 4: Assembling the Casserole

Now it’s time to assemble your casserole. Pour the mixture into the greased 9×13-inch baking dish. Spread it out evenly with a spatula. This ensures that every bite is delicious! Next, take the remaining crushed crackers and sprinkle them over the top. This will create a crunchy layer that contrasts beautifully with the creamy filling. Finally, add 1/2 cup of grated Parmesan cheese on top for an extra cheesy crust. This step is crucial for achieving that golden-brown finish.

Step 5: Baking the Casserole

Preheat your oven to 350°F (175°C) if you haven’t done so already. Once the oven is ready, place the assembled casserole inside. Bake it for 30-35 minutes. You’ll know it’s done when the casserole is set and the top is golden brown. After baking, let it cool for about 10 minutes before serving. This cooling time allows the casserole to firm up a bit, making it easier to cut into squares. Enjoy your delicious Southern Squash Casserole!

Variations of Southern Squash Casserole Recipe

Adding Proteins to Southern Squash Casserole

If you want to make your Southern Squash Casserole heartier, consider adding proteins. This can transform the dish into a complete meal. One popular option is to include cooked ground beef or turkey. Simply brown the meat in the skillet before adding the squash and onion. This adds a savory flavor that pairs well with the creamy filling.

Another great choice is shredded chicken. You can use leftover rotisserie chicken for convenience. Just mix it in with the other ingredients during the preparation stage. For a unique twist, try adding crumbled bacon. The smoky flavor of bacon complements the squash beautifully. Just cook the bacon until crispy, crumble it, and fold it into the mixture before baking.

For a vegetarian protein option, consider adding cooked lentils or chickpeas. These legumes are packed with protein and will make your casserole filling and nutritious. Just mix them in with the other ingredients, and you’ll have a delicious, protein-rich dish that everyone will love.

Vegetarian Options for Southern Squash Casserole

Southern Squash Casserole is naturally vegetarian, but you can enhance its flavors with additional vegetables. For instance, consider adding bell peppers or diced tomatoes. These ingredients add color and a fresh taste to the casserole. Simply sauté them along with the squash and onion for a delightful mix.

Another option is to incorporate spinach or kale. These leafy greens are packed with nutrients and add a lovely texture. You can sauté them briefly until wilted before mixing them into the casserole. This not only boosts the nutritional value but also adds a vibrant green color.

If you want to experiment with flavors, try adding herbs like thyme or basil. Fresh herbs can elevate the dish and provide a fragrant aroma. Just sprinkle them in while mixing the ingredients. With these variations, your Southern Squash Casserole will be a delightful and colorful dish that everyone will enjoy!

Cooking Note for Southern Squash Casserole Recipe

When preparing your Southern Squash Casserole, there are a few cooking notes to keep in mind. First, ensure that your squash is fresh. Fresh vegetables not only taste better but also provide the best texture. If you can, choose squash that feels firm and has a vibrant color.

Another important tip is to avoid overcooking the squash during the sautéing step. You want it tender but not mushy. Overcooked squash can lead to a watery casserole, which is not ideal. Keep an eye on the cooking time and stir occasionally to achieve the perfect tenderness.

Lastly, feel free to adjust the seasonings to your taste. If you love garlic, add a bit more garlic powder. If you prefer a milder flavor, reduce the amount of black pepper. Cooking is all about personal preference, so make this dish your own!

Serving Suggestions for Southern Squash Casserole Recipe

Southern Squash Casserole is a versatile dish that pairs well with many meals. It makes a fantastic side dish for grilled meats, such as chicken or pork. The creamy texture complements the smoky flavors of grilled foods beautifully. You can also serve it alongside roasted vegetables for a wholesome meal.

If you’re hosting a brunch, consider serving the casserole with a fresh salad and some crusty bread. This combination creates a delightful balance of flavors and textures. For a more casual gathering, it can be served as a main dish with a side of cornbread or biscuits.

Don’t forget to garnish your casserole with fresh herbs like parsley or chives before serving. This adds a pop of color and freshness to the dish. With its comforting flavors and beautiful presentation, Southern Squash Casserole is sure to impress your guests!

Tips for Perfecting Your Southern Squash Casserole Recipe

To ensure your Southern Squash Casserole turns out perfectly every time, here are some helpful tips. First, always preheat your oven. This step is crucial for even cooking and achieving that golden-brown top. If you skip this, your casserole may not cook properly.

Next, consider using a mix of yellow squash and zucchini. This adds variety in flavor and texture. The two squashes complement each other well and create a more colorful dish. Additionally, try to let the casserole cool for a few minutes before serving. This helps it set and makes it easier to cut into neat squares.

Lastly, don’t hesitate to experiment with different cheeses. While cheddar is a classic choice, you can also try Monterey Jack or even a spicy pepper jack for a kick. Each cheese will bring its unique flavor to the casserole, making it even more delicious!

Breakdown of Time for Southern Squash Casserole Recipe

Prep Time

The prep time for Southern Squash Casserole is approximately 15-20 minutes. This includes washing, slicing the squash, and chopping the onion. It’s a quick process that allows you to get started on the cooking right away.

Cooking Time

Once you’ve prepared the ingredients, the cooking time is about 30-35 minutes. This is when the casserole bakes in the oven, allowing all the flavors to meld together beautifully.

Total Time

In total, you can expect to spend around 50-55 minutes from start to finish. This makes Southern Squash Casserole a great option for busy weeknights or when you want to impress guests without spending all day in the kitchen.

Nutritional Information for Southern Squash Casserole Recipe

Calories in Southern Squash Casserole

Each serving of Southern Squash Casserole contains approximately 210 calories. This makes it a relatively light side dish that won’t weigh you down.

Protein Content in Southern Squash Casserole

With about 8 grams of protein per serving, this casserole provides a good source of protein, especially when paired with additional proteins like chicken or turkey.

Sodium Levels in Southern Squash Casserole

The sodium content is around 500 mg per serving, primarily from the cheese and added salt. If you’re watching your sodium intake, consider using low-sodium cheese and reducing the salt in the recipe.

FAQs about Southern Squash Casserole Recipe

Can I make Southern Squash Casserole ahead of time?

Yes, you can prepare the casserole a day in advance. Just assemble it, cover it, and store it in the refrigerator. When you’re ready to bake, simply add a few extra minutes to the cooking time.

What can I substitute for squash in Southern Squash Casserole?

If you don’t have squash, zucchini is a great substitute. You can also try using other vegetables like cauliflower or broccoli for a different flavor profile.

How do I store leftovers of Southern Squash Casserole?

Store any leftovers in an airtight container in the refrigerator. They will keep well for about 3-4 days. Reheat in the oven or microwave before serving.

Can I freeze Southern Squash Casserole?

Yes, you can freeze the casserole. Just make sure it’s completely cooled before transferring it to a freezer-safe container. It can be frozen for up to 3 months. Thaw in the refrigerator before reheating.

Conclusion on Southern Squash Casserole Recipe

Southern Squash Casserole is a delightful dish that brings comfort and flavor to any table. With its creamy texture and cheesy goodness, it’s a favorite among families and friends. Whether you enjoy it as a side dish or a main course, this casserole is sure to satisfy. With the tips and variations provided, you can easily customize it to suit your taste. So gather your ingredients and get ready to enjoy a delicious Southern classic!

Cooking Note for Southern Squash Casserole Recipe

When preparing your Southern Squash Casserole, there are a few cooking notes to keep in mind. First, ensure that your squash is fresh. Fresh vegetables not only taste better but also provide the best texture. If you can, choose squash that feels firm and has a vibrant color.

Another important tip is to avoid overcooking the squash during the sautéing step. You want it tender but not mushy. Overcooked squash can lead to a watery casserole, which is not ideal. Keep an eye on the cooking time and stir occasionally to achieve the perfect tenderness.

Lastly, feel free to adjust the seasonings to your taste. If you love garlic, add a bit more garlic powder. If you prefer a milder flavor, reduce the amount of black pepper. Cooking is all about personal preference, so make this dish your own!

Additionally, consider letting the casserole sit for a few minutes after baking. This resting time allows the flavors to meld and makes it easier to cut into neat squares. If you want to add a bit of crunch, you can also broil the casserole for a couple of minutes at the end of baking. Just keep a close eye on it to prevent burning.

By following these cooking notes, you’ll ensure that your Southern Squash Casserole turns out delicious every time. Enjoy the process and the wonderful flavors that come together in this classic dish!

Serving Suggestions for Southern Squash Casserole Recipe

Southern Squash Casserole is a versatile dish that pairs well with many meals. It makes a fantastic side dish for grilled meats, such as chicken or pork. The creamy texture complements the smoky flavors of grilled foods beautifully. You can also serve it alongside roasted vegetables for a wholesome meal.

If you’re hosting a brunch, consider serving the casserole with a fresh salad and some crusty bread. This combination creates a delightful balance of flavors and textures. For a more casual gathering, it can be served as a main dish with a side of cornbread or biscuits.

Don’t forget to garnish your casserole with fresh herbs like parsley or chives before serving. This adds a pop of color and freshness to the dish. With its comforting flavors and beautiful presentation, Southern Squash Casserole is sure to impress your guests!

For a complete meal, pair the casserole with a light soup, such as tomato or vegetable. This combination is not only satisfying but also adds variety to your dining experience. You can also serve it with a refreshing drink, like iced tea or lemonade, to enhance the Southern charm of your meal.

Another great idea is to serve Southern Squash Casserole at potlucks or family gatherings. It’s easy to transport and can be enjoyed warm or at room temperature. Your friends and family will appreciate the delicious flavors and comforting nature of this dish. No matter how you choose to serve it, Southern Squash Casserole is sure to be a hit!

Tips for Perfecting Your Southern Squash Casserole Recipe

To ensure your Southern Squash Casserole turns out perfectly every time, here are some helpful tips. First, always preheat your oven. This step is crucial for even cooking and achieving that golden-brown top. If you skip this, your casserole may not cook properly.

Next, consider using a mix of yellow squash and zucchini. This adds variety in flavor and texture. The two squashes complement each other well and create a more colorful dish. Additionally, try to let the casserole cool for a few minutes before serving. This helps it set and makes it easier to cut into neat squares.

Another tip is to use fresh ingredients whenever possible. Fresh squash not only tastes better but also provides a better texture. Look for squash that feels firm and has a vibrant color. If you can, buy local produce to enhance the flavor of your casserole.

Don’t hesitate to experiment with different cheeses. While cheddar is a classic choice, you can also try Monterey Jack or even a spicy pepper jack for a kick. Each cheese will bring its unique flavor to the casserole, making it even more delicious!

For added flavor, consider mixing in fresh herbs like thyme or basil. These herbs can elevate the dish and provide a fragrant aroma. Just sprinkle them in while mixing the ingredients. You can also add a dash of hot sauce for a little heat, if you like.

Lastly, if you want a creamier texture, consider adding a bit more mayonnaise or milk. This will make the casserole richer and more indulgent. Just be careful not to overdo it, as too much liquid can make the casserole soggy.

By following these tips, you’ll ensure that your Southern Squash Casserole is not only delicious but also a standout dish at any meal. Enjoy the process and the wonderful flavors that come together in this classic recipe!

Breakdown of Time for Southern Squash Casserole Recipe

Prep Time

The prep time for Southern Squash Casserole is approximately 15-20 minutes. This includes washing, slicing the squash, and chopping the onion. It’s a quick process that allows you to get started on the cooking right away. Having all your ingredients ready before you start will make the cooking process smoother and more enjoyable.

Cooking Time

Once you’ve prepared the ingredients, the cooking time is about 30-35 minutes. This is when the casserole bakes in the oven, allowing all the flavors to meld together beautifully. During this time, you can clean up your kitchen or prepare any side dishes you plan to serve with the casserole.

Total Time

In total, you can expect to spend around 50-55 minutes from start to finish. This makes Southern Squash Casserole a great option for busy weeknights or when you want to impress guests without spending all day in the kitchen. With its relatively short preparation and cooking time, you can enjoy a delicious homemade meal in no time!

Nutritional Information for Southern Squash Casserole Recipe

Calories in Southern Squash Casserole

Each serving of Southern Squash Casserole contains approximately 210 calories. This makes it a relatively light side dish that won’t weigh you down. The combination of squash, cheese, and other ingredients provides a satisfying meal without excessive calories. This is especially beneficial for those who are mindful of their caloric intake while still wanting to enjoy a delicious dish.

Protein Content in Southern Squash Casserole

With about 8 grams of protein per serving, this casserole provides a good source of protein, especially when paired with additional proteins like chicken or turkey. The eggs and cheese contribute to this protein content, making it a nutritious option for those looking to increase their protein intake. Adding proteins like shredded chicken or ground turkey can further enhance the protein levels, making it a well-rounded meal.

Sodium Levels in Southern Squash Casserole

The sodium content is around 500 mg per serving, primarily from the cheese and added salt. If you’re watching your sodium intake, consider using low-sodium cheese and reducing the salt in the recipe. This way, you can enjoy the flavors of the casserole without worrying about excessive sodium. It’s always a good idea to check the labels on your ingredients to make informed choices about your dietary needs.

FAQs about Southern Squash Casserole Recipe

Can I make Southern Squash Casserole ahead of time?

Absolutely! You can prepare Southern Squash Casserole a day in advance. Just assemble the casserole, cover it tightly, and store it in the refrigerator. When you’re ready to bake, simply add a few extra minutes to the cooking time. This makes it a convenient option for busy days or special occasions, allowing you to enjoy a homemade dish without the last-minute rush.

What can I substitute for squash in Southern Squash Casserole?

If you don’t have squash on hand, zucchini is a fantastic substitute. It has a similar texture and flavor profile. You can also experiment with other vegetables like cauliflower or broccoli for a different taste. Just remember to adjust the cooking time as needed, since different vegetables may require varying amounts of time to become tender.

How do I store leftovers of Southern Squash Casserole?

Storing leftovers is easy! Place any remaining casserole in an airtight container and keep it in the refrigerator. It will stay fresh for about 3-4 days. When you’re ready to enjoy it again, simply reheat in the oven or microwave until warmed through. This makes for a quick and delicious meal option later in the week!

Can I freeze Southern Squash Casserole?

Yes, you can freeze Southern Squash Casserole! Just make sure it’s completely cooled before transferring it to a freezer-safe container. It can be frozen for up to 3 months. When you’re ready to eat it, thaw the casserole in the refrigerator overnight before reheating. This way, you can enjoy the comforting flavors of this dish even on busy days!

Conclusion on Southern Squash Casserole Recipe

In conclusion, Southern Squash Casserole is more than just a dish; it’s a celebration of flavors and traditions. This comforting casserole brings together the fresh taste of yellow squash, creamy cheese, and crunchy toppings, making it a delightful addition to any meal. Whether you’re serving it at a family gathering, a potluck, or simply enjoying it on a weeknight, this recipe is sure to impress.

With its easy preparation and versatility, you can customize the casserole to suit your taste. From adding proteins to experimenting with different vegetables, the possibilities are endless. Plus, the nutritional benefits make it a smart choice for those looking to enjoy a wholesome meal without sacrificing flavor.

As you gather your ingredients and prepare to bake, remember that cooking is about joy and creativity. Don’t hesitate to make this recipe your own by adjusting seasonings or trying new variations. With each bite, you’ll experience the warmth and comfort that Southern Squash Casserole brings to the table.

So, roll up your sleeves, preheat that oven, and get ready to enjoy a delicious Southern classic. Your family and friends will thank you for it, and you might just find that this casserole becomes a cherished favorite in your home, just as it has in many Southern kitchens for generations.

Savory Garlic Herb Beef Tenderloin is a must-try dish!

Introduction to Savory Garlic Herb Beef Tenderloin

Savory Garlic Herb Beef Tenderloin. This dish is not only a feast for the eyes but also a treat for the taste buds. The tenderloin, known for its rich flavor and buttery texture, is enhanced by a blend of aromatic herbs and garlic. This combination creates a mouthwatering experience that leaves everyone wanting more.

What Makes Savory Garlic Herb Beef Tenderloin Special?

Savory Garlic Herb Beef Tenderloin apart is its unique flavor profile. The fresh rosemary and thyme bring a fragrant touch, while the garlic adds a savory depth. The Dijon mustard and balsamic vinegar provide a tangy kick that perfectly balances the richness of the beef. This dish is not just about taste; it’s also about the experience of cooking and sharing a meal with loved ones.

Moreover, the beef tenderloin is one of the most tender cuts of meat available. When cooked properly, it melts in your mouth, making it a favorite for special occasions. Whether it’s a family gathering, a holiday feast, or a romantic dinner, this dish is sure to impress. The ease of preparation also makes it accessible for cooks of all skill levels, allowing anyone to create a restaurant-quality meal at home.

The Perfect Dish for Any Occasion

Savory Garlic Herb Beef Tenderloin is incredibly versatile. It can be served at a formal dinner party or a casual family meal. Its elegant presentation makes it suitable for celebrations, while its comforting flavors make it a hit at any gathering. Pair it with seasonal vegetables or a fresh salad, and you have a complete meal that satisfies both the palate and the heart.

In addition, this dish can be easily adapted to suit various dietary preferences. For instance, you can adjust the herbs and spices to match your taste or even marinate the beef for a richer flavor. This adaptability ensures that everyone can enjoy this delicious dish, making it a staple in many households.

Ingredients for Savory Garlic Herb Beef Tenderloin

Savory Garlic Herb Beef Tenderloin, you’ll need a few simple yet flavorful ingredients. Each component plays a vital role in enhancing the overall taste of the dish. Here’s what you’ll need:

  • 2 pounds beef tenderloin: This is the star of the dish. Make sure it’s trimmed for the best results.
  • 2 tablespoons olive oil: This helps to sear the meat and adds a rich flavor.
  • 4 cloves garlic, minced: Fresh garlic gives a robust taste that complements the beef.
  • 2 tablespoons fresh rosemary, chopped: This herb adds a fragrant aroma and earthy flavor.
  • 2 tablespoons fresh thyme, chopped: Thyme brings a subtle sweetness and depth to the dish.
  • 1 teaspoon salt: Essential for enhancing the flavors of the beef and herbs.
  • 1 teaspoon black pepper: Adds a bit of heat and balances the richness of the meat.
  • 1 tablespoon Dijon mustard: This ingredient provides a tangy kick that brightens the dish.
  • 1 tablespoon balsamic vinegar: The vinegar adds a touch of sweetness and acidity, enhancing the overall flavor.

Savory Garlic Herb Beef Tenderloin truly special. When selecting your ingredients, opt for fresh herbs whenever possible. They will elevate the dish and provide a vibrant taste that dried herbs simply can’t match. Now that you have your ingredients ready, you’re one step closer to preparing this delicious meal!

Step-by-Step Preparation of Savory Garlic Herb Beef Tenderloin

Savory Garlic Herb Beef Tenderloin. This step-by-step guide will help you create a delicious meal that will impress your family and friends. Let’s get started!

Step 1: Preparing the Marinade

Savory Garlic Herb Beef Tenderloin, infusing the meat with rich flavors.

Step 2: Marinating the Beef Tenderloin

Next, take your trimmed beef tenderloin and rub it with olive oil. This step is crucial as it helps the marinade stick to the meat. After coating the tenderloin with olive oil, generously apply the garlic herb paste all over the beef. Make sure to cover every inch for maximum flavor. For best results, let the beef marinate for at least 30 minutes. If you have time, marinating it for a few hours or even overnight will enhance the taste even more.

Step 3: Prepping the Oven and Cooking Equipment

While the beef is marinating, preheat your oven to 400°F. This temperature is perfect for roasting the tenderloin, ensuring it cooks evenly. Additionally, heat a large oven-safe skillet over medium-high heat. This skillet will be used for searing the beef, so make sure it’s hot before moving on to the next step.

Step 4: Cooking the Savory Garlic Herb Beef Tenderloin

Once your skillet is hot, carefully place the marinated beef tenderloin in the skillet. Sear the meat for about 3-4 minutes on each side until it develops a beautiful brown crust. This step locks in the juices and adds a lovely texture. After searing, transfer the skillet to the preheated oven. Roast the tenderloin for 20-25 minutes, or until the internal temperature reaches 135°F for medium-rare. Use a meat thermometer for accuracy.

Step 5: Resting and Slicing the Tenderloin

Savory Garlic Herb Beef Tenderloin!

Variation of Savory Garlic Herb Beef Tenderloin

Savory Garlic Herb Beef Tenderloin recipe is a crowd-pleaser, there are many ways to switch things up. By experimenting with different herbs and cooking methods, you can create a unique dish that suits your taste. Let’s explore some exciting variations!

Alternative Herbs and Spices

Savory Garlic Herb Beef Tenderloin is by changing the herbs and spices. If you don’t have fresh rosemary or thyme, consider using other herbs like:

  • Oregano: This herb adds a warm, slightly bitter flavor that pairs well with beef.
  • Sage: Known for its earthy taste, sage can bring a unique twist to your dish.
  • Parsley: Fresh parsley adds a bright, fresh flavor that lightens the dish.
  • Smoked Paprika: For a hint of smokiness, add smoked paprika to the marinade.

Feel free to mix and match these herbs to create a flavor profile that you love. You can also add a pinch of red pepper flakes for a bit of heat or a squeeze of lemon juice for brightness. The possibilities are endless!

Cooking Methods: Grilling vs. Roasting

Savory Garlic Herb Beef Tenderloin is by changing the cooking method. While roasting in the oven is a classic approach, grilling can add a delightful smoky flavor. Here’s how to do both:

  • Grilling: Preheat your grill to medium-high heat. After marinating the beef, place it on the grill. Cook for about 4-5 minutes on each side, depending on the thickness. Use a meat thermometer to check for doneness, aiming for 135°F for medium-rare.
  • Roasting: As described in the original recipe, roasting in the oven allows for even cooking and a tender result. This method is perfect for a cozy indoor meal.

Savory Garlic Herb Beef Tenderloin will surely impress!

Cooking Note for Savory Garlic Herb Beef Tenderloin

Savory Garlic Herb Beef Tenderloin requires attention to detail to ensure the best results. Here are some essential notes to keep in mind while preparing this delicious dish:

First, always start with a high-quality beef tenderloin. The better the cut, the more tender and flavorful your dish will be. Look for a piece that has a nice marbling of fat, as this will enhance the juiciness and flavor of the meat.

Next, remember that cooking times can vary based on the size and thickness of your tenderloin. It’s crucial to use a meat thermometer to check the internal temperature. For medium-rare, aim for 135°F. If you prefer your beef cooked more, adjust the temperature accordingly:

  • Medium: 145°F
  • Medium-well: 150°F
  • Well done: 160°F

Additionally, the resting time after cooking is vital. Allowing the beef to rest for about 10 minutes helps the juices redistribute, making each slice tender and juicy. Cutting too soon can result in a dry tenderloin, so be patient!

Lastly, don’t hesitate to experiment with the cooking process. If you’re feeling adventurous, try adding a splash of red wine to the skillet after searing the beef. This will create a delicious sauce that can be drizzled over the sliced tenderloin for added flavor.

Savory Garlic Herb Beef Tenderloin turns out perfectly every time. Enjoy the process and the delightful meal that awaits!

Serving Suggestions for Savory Garlic Herb Beef Tenderloin

Savory Garlic Herb Beef Tenderloin, it’s time to think about how to serve it. The right side dishes and beverages can elevate your meal, making it even more enjoyable. Here are some fantastic serving suggestions to complement your delicious beef tenderloin.

Ideal Side Dishes

Savory Garlic Herb Beef Tenderloin. Here are some ideal options:

  • Roasted Vegetables: A mix of seasonal vegetables like carrots, Brussels sprouts, and asparagus, roasted to perfection, adds color and nutrition to your plate.
  • Garlic Mashed Potatoes: Creamy mashed potatoes infused with garlic provide a comforting and rich side that pairs beautifully with the tenderloin.
  • Fresh Salad: A light salad with mixed greens, cherry tomatoes, and a vinaigrette dressing can balance the richness of the beef.
  • Grilled Corn on the Cob: Sweet, grilled corn adds a delightful crunch and sweetness that complements the savory flavors of the dish.
  • Herb Rice Pilaf: Fluffy rice cooked with herbs and spices can soak up the juices from the beef, making each bite flavorful.

These side dishes not only taste great but also create a visually appealing plate. Feel free to mix and match based on your preferences and the season!

Wine Pairing Recommendations

Savory Garlic Herb Beef Tenderloin can enhance the dining experience. Here are some excellent wine options:

  • Cabernet Sauvignon: This full-bodied red wine has bold flavors that complement the richness of the beef. Its tannins help cut through the fat, making it a classic choice.
  • Merlot: A softer red wine, Merlot offers fruity notes that can balance the savory flavors of the dish without overpowering it.
  • Malbec: Known for its dark fruit flavors and smoky finish, Malbec pairs wonderfully with grilled or roasted meats, enhancing the overall taste.
  • Pinot Noir: If you prefer a lighter option, Pinot Noir is a great choice. Its acidity and fruitiness can brighten the meal and complement the herbs.
  • Chardonnay: For those who enjoy white wine, a full-bodied Chardonnay can work well, especially if it has a buttery finish that matches the tenderloin’s richness.

When selecting a wine, consider your personal taste and the preferences of your guests. A good wine can elevate your meal and create a memorable dining experience.

Tips for Perfecting Savory Garlic Herb Beef Tenderloin

Choosing the Right Cut of Beef

Savory Garlic Herb Beef Tenderloin, selecting the right cut of beef is crucial. The tenderloin is known for its tenderness and flavor, but not all tenderloins are created equal. Look for a cut that has a good amount of marbling. Marbling refers to the small flecks of fat within the meat. This fat melts during cooking, keeping the beef juicy and flavorful.

Additionally, consider the grade of the beef. USDA Prime is the highest quality, followed by Choice and Select. Prime beef is more tender and flavorful, making it an excellent choice for special occasions. If you’re looking for a more budget-friendly option, USDA Choice is still a great choice and will yield delicious results.

Savory Garlic Herb Beef Tenderloin.

Importance of Resting Time

Savory Garlic Herb Beef Tenderloin. After cooking, it’s tempting to slice into the beef right away, but patience is key. Allowing the beef to rest for about 10 minutes after cooking helps the juices redistribute throughout the meat. This means that when you slice into it, the juices won’t run out, leaving you with a dry piece of meat.

During the resting period, the internal temperature of the beef may rise slightly, which is known as carryover cooking. This is normal and helps achieve the perfect doneness. If you prefer your beef medium-rare, aim for an internal temperature of 135°F before resting. After resting, the temperature will rise to about 140°F, which is ideal.

Savory Garlic Herb Beef Tenderloin is tender, juicy, and bursting with flavor.

Breakdown of Time for Savory Garlic Herb Beef Tenderloin

Savory Garlic Herb Beef Tenderloin is essential for a smooth cooking experience. Here’s a detailed breakdown of the time you’ll need for preparation and cooking.

Prep Time

Savory Garlic Herb Beef Tenderloin is approximately 15-20 minutes. This includes gathering your ingredients, preparing the marinade, and marinating the beef. If you choose to marinate the beef for a longer period, such as a few hours or overnight, you can enhance the flavors even more. However, the initial prep time remains relatively short, making this dish accessible for busy cooks.

Cooking Time

Savory Garlic Herb Beef Tenderloin is about 25-30 minutes. This includes searing the beef for 6-8 minutes and roasting it in the oven for 20-25 minutes. The exact cooking time may vary based on the thickness of the tenderloin and your desired level of doneness. Always use a meat thermometer to ensure accuracy, aiming for 135°F for medium-rare.

Total Time

Savory Garlic Herb Beef Tenderloin a fantastic option for a weeknight dinner or a special occasion. With minimal time spent in the kitchen, you can enjoy a delicious, restaurant-quality meal that will impress your family and friends.

Nutritional Information for Savory Garlic Herb Beef Tenderloin

Savory Garlic Herb Beef Tenderloin not only delights the palate but also provides valuable nutrients. Here’s a closer look at the nutritional information for this delicious dish.

Calories

Savory Garlic Herb Beef Tenderloin contains approximately 350 calories. This makes it a satisfying option for dinner without overwhelming your daily caloric intake. The combination of protein and healthy fats in this dish helps keep you full and satisfied.

Protein Content

Savory Garlic Herb Beef Tenderloin is its high protein content. Each serving provides about 50 grams of protein. Protein is essential for building and repairing tissues, making it a crucial part of a healthy diet. This dish is an excellent choice for those looking to increase their protein intake, whether for muscle building or overall health.

Sodium Levels

Savory Garlic Herb Beef Tenderloin while keeping your sodium levels in check.

Savory Garlic Herb Beef Tenderloin is a nutritious and delicious option for any meal. With its balance of calories, protein, and sodium, it can fit well into a healthy eating plan. Enjoy this dish knowing that you’re treating yourself to something both tasty and beneficial for your body!

FAQs about Savory Garlic Herb Beef Tenderloin

How do I know when the beef tenderloin is done?

Savory Garlic Herb Beef Tenderloin is done is crucial for achieving the perfect doneness. The best way to check is by using a meat thermometer. For medium-rare, aim for an internal temperature of 135°F. If you prefer your beef cooked more, here are the temperatures to keep in mind:

  • Medium: 145°F
  • Medium-well: 150°F
  • Well done: 160°F

Insert the thermometer into the thickest part of the tenderloin for an accurate reading. Remember, the beef will continue to cook slightly while resting, so it’s okay to remove it from the oven when it’s a few degrees below your target temperature.

Can I use a different cut of beef for this recipe?

Yes, you can use different cuts of beef for this recipe, but the results may vary. While the tenderloin is the most tender and flavorful option, you can also try:

  • Filet Mignon: This cut is similar to tenderloin and offers a buttery texture.
  • Ribeye: Known for its marbling, ribeye is flavorful and juicy, but it may require a longer cooking time.
  • Sirloin: A more affordable option, sirloin is leaner but can still be delicious when cooked properly.

Keep in mind that cooking times may vary based on the cut you choose. Always use a meat thermometer to ensure your beef is cooked to your desired doneness.

What are some good side dishes to serve with beef tenderloin?

Savory Garlic Herb Beef Tenderloin with the right side dishes can elevate your meal. Here are some excellent options:

  • Roasted Vegetables: Seasonal veggies like carrots, Brussels sprouts, and asparagus add color and nutrition.
  • Garlic Mashed Potatoes: Creamy and rich, these potatoes complement the tenderloin perfectly.
  • Fresh Salad: A light salad with mixed greens and vinaigrette balances the richness of the beef.
  • Herb Rice Pilaf: Fluffy rice cooked with herbs soaks up the beef’s juices, enhancing the flavor.

Feel free to mix and match based on your preferences and the season. These sides will create a well-rounded meal that everyone will enjoy!

How long should I let the beef tenderloin rest before slicing?

Savory Garlic Herb Beef Tenderloin rest for about 10 minutes. This resting period allows the juices to redistribute throughout the meat, ensuring each slice is tender and juicy.

During this time, the internal temperature may rise slightly, which is normal. To keep the beef warm while it rests, loosely cover it with aluminum foil. This will help retain heat without steaming the meat. By allowing the beef to rest properly, you’ll ensure a delicious and satisfying meal!

Conclusion on Savory Garlic Herb Beef Tenderloin

Savory Garlic Herb Beef Tenderloin is more than just a meal; it’s an experience that brings people together. With its rich flavors and tender texture, this dish is perfect for any occasion, from family dinners to festive celebrations. The combination of fresh herbs, garlic, and a touch of acidity from balsamic vinegar creates a delightful harmony that tantalizes the taste buds.

As you prepare this dish, remember that the key to success lies in the quality of your ingredients and the care you take during cooking. Choosing a high-quality beef tenderloin and allowing it to rest after cooking will ensure that every bite is juicy and flavorful. Plus, the versatility of this recipe allows you to experiment with different herbs and cooking methods, making it easy to tailor the dish to your preferences.

Savory Garlic Herb Beef Tenderloin is sure to impress your guests and leave them asking for seconds. So, gather your loved ones, set the table, and enjoy the wonderful flavors of this exquisite dish. Happy cooking!

Chicken Burrito Casserole Recipe is a must-try dish!

Introduction to Chicken Burrito Casserole Recipe

What is a Chicken Burrito Casserole?

A Chicken Burrito Casserole is a delightful dish that combines all the flavors of a classic burrito into a warm, comforting casserole. Imagine layers of tender shredded chicken, hearty black beans, sweet corn, and zesty salsa, all topped with melted cheddar cheese. This dish is not only delicious but also easy to prepare, making it a perfect choice for busy weeknights or family gatherings. The best part? You can customize it to suit your taste, whether you prefer it mild or spicy!

Why You Should Try This Chicken Burrito Casserole Recipe

There are many reasons to try this Chicken Burrito Casserole Recipe. First, it’s a one-dish meal, which means less cleanup for you! Second, it’s packed with protein and fiber, making it a nutritious option for your family. Plus, it’s incredibly versatile. You can easily swap ingredients based on what you have on hand. Whether you’re a busy parent, a college student, or just someone who loves good food, this casserole is sure to please. It’s comforting, filling, and bursting with flavor, making it a dish everyone will love!

Ingredients for Chicken Burrito Casserole Recipe

To create a mouthwatering Chicken Burrito Casserole, you’ll need a variety of ingredients that come together to form a delicious meal. Here’s what you’ll need:

  • 2 cups cooked chicken, shredded
  • 1 can (15 oz) black beans, drained and rinsed
  • 1 cup corn, frozen or canned
  • 1 cup salsa
  • 1 teaspoon chili powder
  • 1 teaspoon cumin
  • 1/2 teaspoon garlic powder
  • 1/2 teaspoon onion powder
  • 1 cup cooked rice (white or brown)
  • 2 cups shredded cheddar cheese
  • 8 small flour tortillas
  • 1/4 cup fresh cilantro, chopped (optional)
  • Sour cream, for serving (optional)

These ingredients are not only easy to find but also work together to create a flavorful dish. The combination of shredded chicken, beans, and cheese provides a hearty base, while the spices add a delightful kick. You can also customize the ingredients based on your preferences. For instance, if you prefer a vegetarian option, you can easily substitute the chicken with more beans or vegetables. This flexibility makes the Chicken Burrito Casserole Recipe a fantastic choice for any occasion!

Step-by-Step Preparation of Chicken Burrito Casserole Recipe

Step 1: Prepping the Ingredients

Before you start cooking, it’s important to prep all your ingredients. First, gather everything you need. This includes your cooked chicken, black beans, corn, salsa, spices, rice, cheese, and tortillas. If you haven’t cooked the rice yet, do that first. You can use either white or brown rice, depending on your preference. Once the rice is ready, shred the chicken if you haven’t done so already. You can use leftover chicken or rotisserie chicken for convenience. Rinse the black beans under cold water to remove excess sodium. This step ensures your casserole is not too salty. Lastly, chop the cilantro if you plan to use it as a garnish. Having everything ready will make the cooking process smooth and enjoyable!

Step 2: Cooking the Chicken

If you’re starting with raw chicken, you’ll need to cook it first. You can boil, bake, or sauté the chicken until it’s fully cooked. If you choose to boil, place the chicken in a pot of water and let it simmer for about 15-20 minutes. Once cooked, let it cool slightly before shredding it with two forks. If you prefer baking, season the chicken with salt and pepper, then bake at 375°F (190°C) for about 25-30 minutes. After cooking, shred the chicken into bite-sized pieces. This step is crucial as it allows the chicken to mix well with the other ingredients, ensuring every bite is flavorful!

Step 3: Assembling the Casserole

Now that your ingredients are prepped and the chicken is cooked, it’s time to assemble the casserole. Start by greasing a 9×13 inch baking dish to prevent sticking. Lay down 4 tortillas at the bottom, overlapping them slightly. This creates a solid base for your casserole. Next, spread half of the chicken mixture over the tortillas. Make sure to distribute it evenly. Then, sprinkle 1 cup of shredded cheddar cheese on top. This layer of cheese adds a creamy texture and rich flavor. Repeat the process with the remaining tortillas, chicken mixture, and top it off with the last cup of cheese. This layering technique ensures that every bite is packed with deliciousness!

Step 4: Baking the Casserole

With your casserole assembled, it’s time to bake! Preheat your oven to 350°F (175°C). Cover the baking dish with aluminum foil to keep the moisture in. Bake for 20 minutes. This allows the flavors to meld together beautifully. After 20 minutes, carefully remove the foil. Bake for an additional 10-15 minutes, or until the cheese is bubbly and golden brown. The aroma will fill your kitchen, making it hard to wait! Once done, let the casserole cool for about 5 minutes before serving. This cooling time helps the layers set, making it easier to cut and serve. Enjoy your delicious Chicken Burrito Casserole!

Variations of Chicken Burrito Casserole Recipe

Vegetarian Options

If you’re looking for a vegetarian twist on the Chicken Burrito Casserole, you’re in luck! You can easily swap out the chicken for a variety of delicious ingredients. Consider using extra black beans or pinto beans for added protein. You can also incorporate vegetables like bell peppers, zucchini, or mushrooms. These veggies not only add flavor but also enhance the nutritional value of the dish. Another great option is to use quinoa instead of rice for a protein-packed base. With these substitutions, you can create a hearty and satisfying vegetarian casserole that everyone will enjoy!

Spicy Chicken Burrito Casserole Variations

If you love a bit of heat, there are several ways to spice up your Chicken Burrito Casserole. One simple method is to add diced jalapeños or serrano peppers to the chicken mixture. This will give your casserole a nice kick! You can also mix in some hot salsa or a few dashes of your favorite hot sauce. For an extra layer of flavor, consider using pepper jack cheese instead of cheddar. This cheese melts beautifully and adds a creamy, spicy touch. With these spicy variations, your Chicken Burrito Casserole will be a hit at any gathering!

Cooking Note for Chicken Burrito Casserole Recipe

When preparing your Chicken Burrito Casserole, there are a few important cooking notes to keep in mind. First, ensure that your chicken is fully cooked before shredding. Undercooked chicken can lead to food safety issues, so always check that it reaches an internal temperature of 165°F (75°C).

Next, consider the type of tortillas you use. Flour tortillas are soft and pliable, making them perfect for layering. However, if you prefer a bit of crunch, you can opt for corn tortillas. Just keep in mind that corn tortillas may break more easily, so handle them gently.

Another tip is to let the casserole rest after baking. This cooling period allows the layers to set, making it easier to cut and serve. If you’re in a hurry, you can skip this step, but the casserole may be a bit messy when served.

Lastly, feel free to experiment with the spices. If you enjoy a more robust flavor, increase the amounts of chili powder and cumin. On the other hand, if you prefer a milder taste, you can reduce the spices. Cooking is all about personal preference, so don’t hesitate to make this recipe your own!

Serving Suggestions for Chicken Burrito Casserole Recipe

Ideal Side Dishes

When serving your Chicken Burrito Casserole, pairing it with the right side dishes can elevate the meal. Here are some ideal options:

  • Mexican Rice: A side of fluffy Mexican rice complements the flavors of the casserole perfectly. You can make it with tomatoes, onions, and spices for added zest.
  • Refried Beans: Creamy refried beans are a classic side that pairs well with any Mexican dish. They add a rich texture and flavor that balances the casserole.
  • Guacamole: Fresh guacamole adds a creamy, cool element to your meal. The avocado’s richness contrasts nicely with the warm casserole.
  • Simple Green Salad: A light salad with lettuce, tomatoes, and a tangy vinaigrette can provide a refreshing crunch. It’s a great way to add some greens to your plate!

These side dishes not only enhance the meal but also make it more filling. Choose one or two to serve alongside your Chicken Burrito Casserole for a complete dining experience!

Garnishes and Toppings

Garnishes and toppings can take your Chicken Burrito Casserole to the next level. Here are some delicious options to consider:

  • Chopped Cilantro: Fresh cilantro adds a burst of flavor and color. Sprinkle it on top just before serving for a vibrant touch.
  • Sour Cream: A dollop of sour cream provides a creamy contrast to the spicy flavors of the casserole. It’s a classic topping that many enjoy.
  • Avocado Slices: Creamy avocado slices can add a rich texture. They also bring a fresh taste that balances the dish.
  • Hot Sauce: For those who love heat, a drizzle of hot sauce can add an extra kick. Offer it on the side so everyone can customize their serving.

These garnishes and toppings not only enhance the flavor but also make your Chicken Burrito Casserole visually appealing. Feel free to mix and match based on your preferences!

Tips for Perfecting Your Chicken Burrito Casserole Recipe

To make your Chicken Burrito Casserole truly shine, consider these helpful tips. They will ensure that your dish is not only delicious but also visually appealing and satisfying!

  • Use Quality Ingredients: Fresh, high-quality ingredients can make a big difference in flavor. Opt for organic chicken, fresh vegetables, and good-quality cheese. This will elevate your casserole and impress your family and friends.
  • Don’t Overcook the Chicken: If you’re cooking raw chicken, be careful not to overcook it. Overcooked chicken can become dry and tough. Aim for juicy, tender pieces that will blend well with the other ingredients.
  • Layer Wisely: When assembling your casserole, make sure to layer the ingredients evenly. This ensures that every bite is packed with flavor. Don’t skimp on the cheese; it adds a delicious creaminess!
  • Experiment with Spices: Feel free to adjust the spices to suit your taste. If you love bold flavors, add more chili powder or cumin. For a milder dish, reduce the spices. Cooking is all about personal preference!
  • Let It Rest: After baking, allow the casserole to rest for about 5 minutes before serving. This helps the layers set and makes it easier to cut. Plus, it allows the flavors to meld together even more.
  • Make It Ahead: If you’re short on time, consider preparing the casserole ahead of time. You can assemble it the night before and store it in the fridge. Just pop it in the oven when you’re ready to bake!
  • Serve with Love: Presentation matters! Serve your Chicken Burrito Casserole in a beautiful dish and garnish it with fresh cilantro or avocado slices. A well-presented meal is always more enjoyable!

By following these tips, you’ll create a Chicken Burrito Casserole that’s not only tasty but also a hit at any gathering. Enjoy the process and have fun in the kitchen!

Breakdown of Time for Chicken Burrito Casserole Recipe

Prep Time

Preparing your Chicken Burrito Casserole is quick and easy! The prep time typically takes about 15-20 minutes. This includes gathering all your ingredients, cooking the rice, shredding the chicken, and rinsing the black beans. If you have everything ready, you’ll be able to move smoothly into the assembly phase. Remember, having all your ingredients prepped will make the cooking process much more enjoyable!

Cooking Time

The cooking time for your Chicken Burrito Casserole is approximately 30-35 minutes. This includes 20 minutes of covered baking to allow the flavors to meld, followed by an additional 10-15 minutes uncovered to achieve that golden, bubbly cheese topping. Keep an eye on it during the last few minutes to ensure it doesn’t overcook. The aroma will be irresistible, and you’ll want to dig in as soon as it’s ready!

Total Time

In total, you can expect to spend about 45-55 minutes from start to finish. This includes both prep and cooking time. With such a quick turnaround, you can have a delicious Chicken Burrito Casserole ready for your family or guests in no time. It’s perfect for busy weeknights or when you want to impress without spending hours in the kitchen!

Nutritional Information for Chicken Burrito Casserole Recipe

Calories

When it comes to enjoying a hearty meal, knowing the calorie content is essential. Each serving of the Chicken Burrito Casserole contains approximately 350 calories. This makes it a satisfying option without going overboard on calories. The combination of chicken, beans, and cheese provides a filling meal that can keep you energized throughout the day. Plus, with the added vegetables, you’re getting a nutritious boost in every bite!

Protein

Protein is a vital nutrient for our bodies, and this Chicken Burrito Casserole delivers! Each serving packs about 25 grams of protein. The shredded chicken and black beans are excellent sources of protein, helping to keep you full and satisfied. This makes the casserole a great choice for those looking to maintain or build muscle. It’s a delicious way to fuel your body, especially after a workout or a long day!

Sodium

Monitoring sodium intake is important for maintaining a healthy diet. Each serving of the Chicken Burrito Casserole contains around 600 mg of sodium. While this is a reasonable amount for a flavorful dish, you can always adjust the sodium levels to suit your dietary needs. For instance, using low-sodium black beans and salsa can help reduce the overall sodium content. This way, you can enjoy your casserole while keeping your health goals in check!

FAQs about Chicken Burrito Casserole Recipe

Can I make Chicken Burrito Casserole ahead of time?

Absolutely! Making Chicken Burrito Casserole ahead of time is a great idea. You can assemble the casserole the night before and store it in the refrigerator. Just cover it tightly with plastic wrap or aluminum foil. When you’re ready to bake, simply remove it from the fridge and let it sit at room temperature for about 20 minutes. Then, bake it as directed. This method not only saves time but also allows the flavors to meld together, making it even tastier!

What can I substitute for chicken in the Chicken Burrito Casserole Recipe?

If you’re looking for a substitute for chicken, there are plenty of delicious options! You can use ground turkey or beef for a different flavor profile. For a vegetarian version, consider using extra beans, such as pinto or kidney beans, or even lentils. You can also add more vegetables like bell peppers, zucchini, or mushrooms. These substitutions will still give you a hearty and satisfying casserole while catering to different dietary preferences!

How do I store leftovers of Chicken Burrito Casserole?

Storing leftovers of your Chicken Burrito Casserole is easy! Allow the casserole to cool completely before transferring it to an airtight container. You can keep it in the refrigerator for up to 3-4 days. If you want to store it for a longer period, consider freezing it. Just make sure to wrap it tightly in plastic wrap and then in aluminum foil or place it in a freezer-safe container. It can last in the freezer for up to 2-3 months. When you’re ready to enjoy it again, simply thaw it in the refrigerator overnight and reheat in the oven or microwave!

Conclusion on Chicken Burrito Casserole Recipe

In conclusion, the Chicken Burrito Casserole Recipe is a fantastic dish that brings together the best flavors of a classic burrito in a convenient and hearty casserole form. With its layers of tender chicken, nutritious beans, and melted cheese, this recipe is sure to become a family favorite. Not only is it easy to prepare, but it also allows for endless customization, making it suitable for various dietary preferences.

Whether you’re hosting a gathering, preparing a weeknight dinner, or simply craving something delicious, this casserole fits the bill perfectly. The combination of spices adds a delightful kick, while the cheese provides a creamy texture that everyone loves. Plus, with the option to make it ahead of time, you can enjoy a stress-free cooking experience.

So, gather your ingredients, follow the steps, and get ready to enjoy a warm, comforting meal that’s packed with flavor. Don’t forget to experiment with different variations and toppings to make it your own. With the Chicken Burrito Casserole, you’re not just making a meal; you’re creating a delightful experience that brings people together. Happy cooking!

Cheeseburger Tater Tot Casserole Recipe is a must-try!

Introduction to Cheeseburger Tater Tot Casserole Recipe

Are you looking for a dish that combines comfort and flavor? Look no further than the Cheeseburger Tater Tot Casserole Recipe! This delightful meal brings together the classic flavors of a cheeseburger and the crispy goodness of tater tots. It’s perfect for family dinners, potlucks, or even a cozy night in. With its hearty ingredients and simple preparation, this casserole is sure to become a favorite in your household.

What Makes This Recipe Special?

What sets this Cheeseburger Tater Tot Casserole apart is its unique blend of textures and flavors. The ground beef provides a savory base, while the creamy mixture of cheese and sour cream adds richness. Topping it all off, the tater tots create a crispy layer that contrasts beautifully with the soft filling underneath. Plus, it’s customizable! You can add your favorite toppings or spices to make it your own. Whether you’re a fan of classic cheeseburgers or just love a good casserole, this recipe has something for everyone.

A Brief History of Casseroles

Casseroles have a long and rich history in American cooking. They became popular in the mid-20th century, especially during the post-war era when families sought easy and economical meal solutions. The word “casserole” comes from the French term for “saucepan,” which reflects the dish’s origins. Traditionally, casseroles are baked dishes that combine various ingredients, often including a protein, vegetables, and a starch. Over the years, they have evolved to include countless variations, making them a staple in many kitchens. The Cheeseburger Tater Tot Casserole is a modern twist on this classic, bringing together beloved flavors in a fun and satisfying way.

Ingredients for Cheeseburger Tater Tot Casserole Recipe

To create the delicious Cheeseburger Tater Tot Casserole, you’ll need a few simple ingredients. Each one plays a vital role in building the flavors and textures that make this dish so special. Here’s what you’ll need:

  • 1 pound ground beef: This is the main protein source, providing a hearty base.
  • 1 small onion, diced: Adds sweetness and depth to the flavor.
  • 1 teaspoon garlic powder: Enhances the overall taste with a hint of garlic.
  • 1 teaspoon salt: Essential for seasoning the beef and balancing flavors.
  • 1/2 teaspoon black pepper: Adds a touch of spice and warmth.
  • 1 cup shredded cheddar cheese: Brings creaminess and a rich cheeseburger flavor.
  • 1 cup sour cream: Contributes creaminess and a slight tang.
  • 1 can (10.5 ounces) cream of mushroom soup: Acts as a binder and adds moisture.
  • 1 bag (32 ounces) frozen tater tots: The crispy topping that makes this casserole fun!
  • 1/4 cup ketchup: A classic condiment that adds sweetness and tang.
  • 1/4 cup mustard: Provides a zesty kick that complements the beef.
  • 1/4 cup dill pickles, chopped (optional): For those who love a bit of crunch and tang.

Gathering these ingredients is the first step to creating a delightful meal that your family will love. Each component contributes to the overall taste, making this casserole a true crowd-pleaser. Now that you have everything ready, let’s move on to the preparation!

Step-by-Step Preparation of Cheeseburger Tater Tot Casserole Recipe

Now that you have all your ingredients ready, it’s time to dive into the step-by-step preparation of the Cheeseburger Tater Tot Casserole Recipe. This process is straightforward and fun, making it a great activity for the whole family. Let’s get started!

Step 1: Preheat the Oven

First things first, preheat your oven to 375°F (190°C). This step is crucial as it ensures that your casserole cooks evenly and thoroughly. While the oven heats up, you can move on to the next step.

Step 2: Cook the Ground Beef

In a large skillet, over medium heat, add the pound of ground beef along with the diced onion. Cook this mixture for about 5-7 minutes. You want the beef to be browned and the onion to be soft. Remember to stir occasionally to prevent sticking. Once cooked, drain any excess fat to keep your casserole from becoming greasy.

Step 3: Prepare the Casserole Mixture

Next, transfer the cooked beef and onion mixture into a large mixing bowl. Add the garlic powder, salt, black pepper, shredded cheddar cheese, sour cream, and cream of mushroom soup. Mix everything together until well combined. This creamy mixture is what makes the casserole so delicious!

Step 4: Layer the Ingredients

Now, it’s time to spread the beef mixture evenly in a greased 9×13 inch baking dish. Make sure to cover the bottom completely. This layer will serve as the hearty base of your casserole, so take your time to spread it out nicely.

Step 5: Add Tater Tots

Once the beef mixture is in place, it’s time to add the star of the show: the tater tots! Arrange the frozen tater tots in a single layer on top of the beef mixture. This crispy topping will create a delightful contrast to the creamy filling below.

Step 6: Bake to Perfection

In a small bowl, mix together the ketchup and mustard. Drizzle this mixture over the tater tots for an extra burst of flavor. If you’re using dill pickles, sprinkle them on top as well. Now, place the casserole in the preheated oven and bake for 30-35 minutes. You’ll know it’s ready when the tater tots are golden brown and crispy. Once done, let it cool for a few minutes before serving. Enjoy your delicious Cheeseburger Tater Tot Casserole!

Variations of Cheeseburger Tater Tot Casserole Recipe

The Cheeseburger Tater Tot Casserole Recipe is incredibly versatile. You can easily adapt it to suit different tastes and dietary preferences. Here are some fun variations to consider, ensuring everyone can enjoy this delightful dish!

Vegetarian Options

If you want to make a vegetarian version of this casserole, simply swap out the ground beef for a plant-based alternative. You can use lentils, black beans, or even a store-bought meat substitute. Sauté the vegetables like bell peppers, mushrooms, or zucchini along with the onions for added flavor and texture. This way, you’ll still get that hearty feel without the meat. Plus, it’s a great way to sneak in some extra veggies!

Different Cheese Choices

Cheese lovers rejoice! While cheddar cheese is a classic choice, you can experiment with different types of cheese to change the flavor profile. Try using mozzarella for a gooey texture, or pepper jack for a spicy kick. You could even mix several cheeses together for a rich and creamy topping. The possibilities are endless, and each cheese will bring its unique taste to the casserole.

Spicy Additions

If you enjoy a bit of heat, consider adding spicy ingredients to your casserole. Diced jalapeños can be mixed into the beef mixture for a zesty flavor. Alternatively, you can sprinkle some crushed red pepper flakes on top before baking. For an extra kick, try using spicy mustard instead of regular mustard in the sauce. These spicy additions will elevate your Cheeseburger Tater Tot Casserole to a whole new level!

With these variations, you can customize your Cheeseburger Tater Tot Casserole Recipe to fit any occasion or preference. Whether you’re cooking for vegetarians, cheese enthusiasts, or spice lovers, there’s a version for everyone!

Cooking Note for Cheeseburger Tater Tot Casserole Recipe

When preparing the Cheeseburger Tater Tot Casserole, there are a few important cooking notes to keep in mind. These tips will help ensure that your casserole turns out perfectly every time, making it a delightful dish for you and your family.

First, always use a large skillet for cooking the ground beef and onions. This allows for even cooking and prevents overcrowding, which can lead to steaming instead of browning. Browning the meat properly enhances the flavor of the casserole.

Next, be mindful of the seasoning. The combination of garlic powder, salt, and black pepper is essential for bringing out the flavors. However, feel free to adjust the seasonings to your taste. If you prefer a bolder flavor, consider adding more garlic powder or even some onion powder.

Another tip is to ensure that the tater tots are arranged in a single layer on top of the beef mixture. This helps them cook evenly and become crispy. If they are piled on top of each other, some may remain soggy, which can affect the overall texture of the casserole.

Lastly, let the casserole cool for a few minutes after baking. This allows the layers to set, making it easier to serve. If you cut into it too soon, the layers may not hold together well. Patience is key for a beautiful presentation!

By following these cooking notes, you’ll be well on your way to creating a delicious and satisfying Cheeseburger Tater Tot Casserole that everyone will love. Happy cooking!

Serving Suggestions for Cheeseburger Tater Tot Casserole Recipe

Once your Cheeseburger Tater Tot Casserole is baked to perfection, it’s time to think about how to serve it. This dish is hearty and filling on its own, but pairing it with the right sides and beverages can elevate your meal even further. Here are some ideal serving suggestions to consider!

Ideal Side Dishes

To complement the rich flavors of the casserole, consider serving it with lighter side dishes. Here are a few great options:

  • Garden Salad: A fresh garden salad with mixed greens, tomatoes, and cucumbers adds a refreshing crunch. Drizzle with a light vinaigrette for a zesty touch.
  • Coleslaw: Creamy coleslaw provides a nice contrast to the warm casserole. The crunchiness of the cabbage and carrots balances the dish perfectly.
  • Steamed Vegetables: Lightly steamed broccoli, green beans, or carrots can add color and nutrition to your meal. Season them with a bit of salt and pepper for extra flavor.
  • Garlic Bread: For those who love bread, garlic bread is a fantastic side. Its buttery, garlicky flavor pairs well with the casserole.

These sides not only enhance the meal but also provide a variety of textures and flavors that complement the Cheeseburger Tater Tot Casserole beautifully.

Perfect Pairings with Beverages

When it comes to beverages, you want something that balances the richness of the casserole. Here are some perfect pairings:

  • Iced Tea: A refreshing glass of iced tea, sweetened or unsweetened, is a classic choice. It cleanses the palate and complements the flavors of the dish.
  • Lemonade: The tartness of lemonade can cut through the richness of the casserole, making it a delightful pairing.
  • Beer: If you enjoy beer, a light lager or a pale ale can be a great match. The carbonation helps to balance the heaviness of the meal.
  • Sparkling Water: For a non-sweet option, sparkling water with a slice of lemon or lime is refreshing and pairs well with the casserole.

Choosing the right sides and beverages can enhance your dining experience. With these serving suggestions, your Cheeseburger Tater Tot Casserole will be a hit at any gathering!

Tips for Perfecting Your Cheeseburger Tater Tot Casserole Recipe

To ensure your Cheeseburger Tater Tot Casserole turns out perfectly every time, it’s essential to keep a few tips in mind. These insights will help you avoid common pitfalls and make the most of your cooking experience. Let’s dive into some helpful advice!

Common Mistakes to Avoid

Even the best cooks can make mistakes. Here are some common errors to watch out for:

  • Overcooking the Beef: Make sure not to overcook the ground beef. It should be browned but not dry. Overcooked meat can lead to a tough texture.
  • Skipping the Drain: Always drain excess fat after cooking the beef. Leaving too much fat can make the casserole greasy and unappetizing.
  • Not Mixing Well: Ensure that all ingredients in the casserole mixture are well combined. This helps distribute flavors evenly throughout the dish.
  • Piling Tater Tots: Avoid stacking the tater tots on top of each other. They need space to crisp up nicely. A single layer is key for that perfect crunch!
  • Cutting Too Soon: Patience is essential! Let the casserole cool for a few minutes before serving. This allows the layers to set, making it easier to cut and serve.

By being mindful of these common mistakes, you can create a delicious Cheeseburger Tater Tot Casserole that everyone will love!

Storage Tips for Leftovers

If you have leftovers, storing them properly is crucial to maintain freshness. Here are some tips for storing your Cheeseburger Tater Tot Casserole:

  • Cool Before Storing: Allow the casserole to cool completely before transferring it to an airtight container. This prevents condensation, which can make the dish soggy.
  • Refrigerate Promptly: Store leftovers in the refrigerator within two hours of cooking. This helps prevent bacterial growth and keeps your food safe.
  • Use Within a Few Days: For the best taste, consume leftovers within 3-4 days. Reheat only the portion you plan to eat to keep the rest fresh.
  • Freezing for Later: If you want to store it for a longer period, consider freezing the casserole. Wrap it tightly in plastic wrap and then in aluminum foil. It can last up to 2-3 months in the freezer.
  • Reheating Tips: When reheating, do so in the oven for the best texture. Cover with foil to prevent drying out, and heat at 350°F until warmed through.

By following these storage tips, you can enjoy your Cheeseburger Tater Tot Casserole even after the first serving. It’s a great way to savor the flavors again!

Breakdown of Time for Cheeseburger Tater Tot Casserole Recipe

Understanding the time needed for each step of the Cheeseburger Tater Tot Casserole Recipe can help you plan your cooking efficiently. Here’s a breakdown of the time required for preparation and cooking, so you can enjoy this delicious dish without any stress!

Prep Time

The prep time for this casserole is quite manageable. You’ll need about 15-20 minutes to gather your ingredients and prepare them. This includes:

  • Dicing the onion
  • Measuring out spices and other ingredients
  • Cooking the ground beef and onion mixture

With everything ready, you’ll be set to move on to the next steps!

Cooking Time

Once you’ve prepped your ingredients, the cooking time is approximately 30-35 minutes. This includes:

  • Baking the casserole in the preheated oven until the tater tots are golden brown and crispy

This time allows the flavors to meld beautifully, creating a satisfying meal.

Total Time

In total, you can expect the entire process to take about 45-55 minutes from start to finish. This includes both prep and cooking time. It’s a quick and easy meal that’s perfect for busy weeknights or family gatherings!

With this time breakdown, you can easily fit the Cheeseburger Tater Tot Casserole into your schedule. Enjoy the cooking process and the delicious results!

Nutritional Information for Cheeseburger Tater Tot Casserole Recipe

Understanding the nutritional content of your meals is essential for maintaining a balanced diet. The Cheeseburger Tater Tot Casserole Recipe is not only delicious but also provides a good amount of nutrients. Here’s a breakdown of the nutritional information per serving, so you can enjoy this dish while being mindful of your dietary needs.

Calories

Each serving of the Cheeseburger Tater Tot Casserole contains approximately 400 calories. This makes it a hearty meal that can satisfy your hunger without going overboard. The combination of ground beef, cheese, and tater tots contributes to the calorie count, providing energy for your day.

Protein Content

Protein is an essential nutrient for building and repairing tissues. This casserole packs a punch with about 20 grams of protein per serving. The ground beef and cheese are excellent sources of protein, making this dish a great option for those looking to increase their protein intake. It’s perfect for active individuals or anyone needing a filling meal.

Sodium Levels

While the Cheeseburger Tater Tot Casserole is tasty, it’s important to be aware of its sodium content. Each serving contains around 800 milligrams of sodium. This is primarily due to the cream of mushroom soup, ketchup, and mustard used in the recipe. If you’re watching your sodium intake, consider using low-sodium versions of these ingredients or reducing the amount of added salt.

By keeping these nutritional facts in mind, you can enjoy your Cheeseburger Tater Tot Casserole while making informed choices about your diet. It’s a delightful dish that balances flavor and nutrition, making it a great addition to your meal rotation!

FAQs About Cheeseburger Tater Tot Casserole Recipe

Can I make Cheeseburger Tater Tot Casserole ahead of time?

Absolutely! You can prepare the Cheeseburger Tater Tot Casserole ahead of time. Simply follow the recipe up to the point of baking. After layering the ingredients in the baking dish, cover it tightly with plastic wrap or aluminum foil. Store it in the refrigerator for up to 24 hours before baking. When you’re ready to cook, just remove the cover and bake as directed. This makes it a great option for busy weeknights or gatherings!

What can I substitute for ground beef in this recipe?

If you’re looking for alternatives to ground beef, there are several options you can try. Ground turkey or chicken are excellent substitutes that provide a lighter option while still being flavorful. For a vegetarian version, consider using lentils, black beans, or a plant-based meat substitute. These alternatives will still give you that hearty feel while catering to different dietary preferences.

How do I store leftovers of Cheeseburger Tater Tot Casserole?

Storing leftovers is easy! Allow the casserole to cool completely before transferring it to an airtight container. Store it in the refrigerator for up to 3-4 days. When you’re ready to enjoy it again, simply reheat individual portions in the oven or microwave. If you want to keep it longer, consider freezing the leftovers. Wrap the casserole tightly in plastic wrap and then in aluminum foil. It can last up to 2-3 months in the freezer.

Can I freeze Cheeseburger Tater Tot Casserole?

Yes, you can freeze Cheeseburger Tater Tot Casserole! To do this, prepare the casserole as directed but do not bake it. Instead, cover it tightly with plastic wrap and then with aluminum foil. This will help prevent freezer burn. When you’re ready to eat it, thaw it in the refrigerator overnight and then bake it as usual. This makes it a convenient meal option for future busy days!

Conclusion on Cheeseburger Tater Tot Casserole Recipe

In conclusion, the Cheeseburger Tater Tot Casserole Recipe is a delightful dish that brings comfort and joy to any meal. Its combination of savory ground beef, creamy cheese, and crispy tater tots creates a satisfying experience for the taste buds. Whether you’re cooking for a family dinner, a potluck, or just a cozy night at home, this casserole is sure to impress.

Not only is it easy to prepare, but it also offers endless possibilities for customization. From vegetarian options to spicy variations, you can tailor this recipe to suit your preferences. Plus, with the ability to make it ahead of time or freeze leftovers, it fits perfectly into a busy lifestyle.

As you gather around the table to enjoy this hearty meal, you’ll create lasting memories with family and friends. The Cheeseburger Tater Tot Casserole is more than just a dish; it’s a celebration of flavors and togetherness. So, roll up your sleeves, gather your ingredients, and get ready to savor every bite of this delicious casserole!

Happy cooking, and enjoy your Cheeseburger Tater Tot Casserole!