


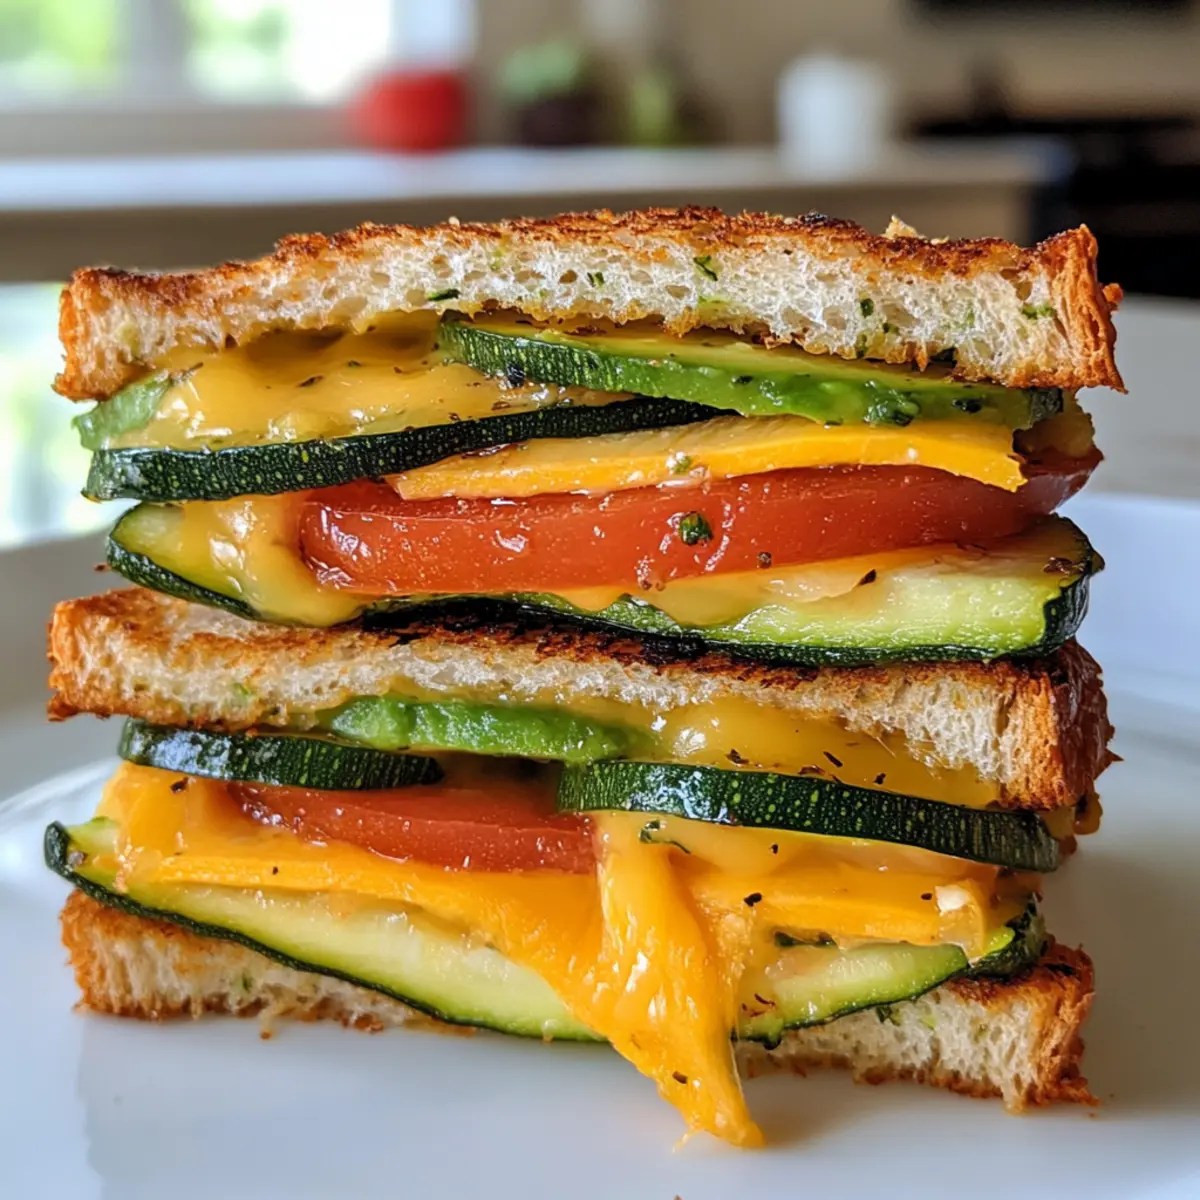
As I wandered through the local farmer’s market, the vibrant green zucchini caught my eye, whispering promises of culinary creativity. Enter the Ultimate Guilt-Free Zucchini Breadwich, a delightful twist on traditional sandwiches that’s here to rescue your meals from the clutches of fast food. This recipe combines the crispiness of baked zucchini slices with layers of sharp cheddar and tangy Dijon, all while being low-carb and wonderfully versatile. Whether you’re meal prepping for busy weekdays or looking for a simple yet satisfying snack, this zucchini breadwich delivers on flavor without the guilt. Plus, it’s adaptable for various diets—think vegetarian, Mediterranean, or even a spicy Southwest twist! So, are you ready to step into the world of guilt-free sandwich bliss?
Why is This Zucchini Breadwich Amazing?
Guilt-Free Indulgence: Enjoy all the flavor without the carbs—perfect for keto enthusiasts.
Versatile Options: Swap ingredients to fit your cravings, whether you prefer a spicy kick or a Mediterranean flair.
Easy to Prepare: This simple recipe requires minimal time and expertise, making it ideal for busy home cooks.
Crowd-Pleasing Appeal: Impress family and friends with a unique twist on the classic sandwich that everyone can enjoy.
Nutritious and Delicious: Packed with fresh veggies and wholesome ingredients, it’s a nourishing meal that doesn’t compromise on taste.
Meal Prep Friendly: Pre-made components store well, making weeknight dinners a breeze—consider pairing it with a mixed green salad for a complete meal!
Zucchini Breadwich Ingredients
• A delightful foundation for a healthy, guilt-free sandwich!
For the Zucchini Layers
- Zucchini – The star of the show; provides structure and nutrition; substitute with medium-sized zucchini for optimal texture.
- Sharp Cheddar Cheese – Adds flavor and holds the sandwich together; aged gruyere or gouda make for delicious variations.
- Garlic Powder – Infuses depth and aroma into the dish, enhancing the overall flavor experience.
- Smoked Paprika – Contributes a hint of smokiness that elevates the taste profile.
For the Sandwich Spread
- Avocado Mayonnaise – A creamy layer rich in healthy fats; regular mayonnaise is a non-healthy alternative if desired.
- Dijon Mustard – Provides a zesty, tangy kick to enhance the flavors.
For the Filling
- Sliced Organic Chicken Breast – A protein-packed choice for meat lovers; replace with grilled portobello mushrooms for a vegetarian option.
- Butter Lettuce Leaves – Adds a crisp texture; feel free to diversify with other varieties.
- Tomato – Offers refreshing sweetness and juiciness that balances the fillings.
- Red Onion – Adds a satisfying crunch with a touch of bitterness for balance.
- Ripe Avocado – Brings creaminess to each bite; omit to keep the calories in check.
For the Finishing Touch
- Everything Bagel Seasoning – Enhances flavor with a delightful crunch; swap for your preferred seasoning if desired.
This Zucchini Breadwich is a wonderful way to enjoy a homemade meal that prioritizes nutrition without compromising on flavor!
Step‑by‑Step Instructions for Zucchini Breadwich
Step 1: Preheat Your Oven
Begin by preheating your oven to 400°F (200°C). While the oven heats up, line a baking sheet with parchment paper to prevent sticking. This preparation ensures that your Zucchini Breadwich bakes evenly and releases easily once done, setting the stage for your delicious sandwich creation.
Step 2: Prepare the Zucchini
Carefully slice the zucchini lengthwise into 1/8-inch thick strips using a mandoline or sharp knife. Once cut, pat the slices dry with paper towels to remove any excess moisture; this step is critical to avoid a soggy breadwich. Arrange the slices in a single layer to maximize crispiness during baking.
Step 3: Create the Cheese Base
Layer half of the sharp cheddar cheese directly on the parchment-lined baking sheet. This acts as the foundational layer for your Zucchini Breadwich. The cheese will melt and help hold everything together, enhancing the texture and flavor of your dish, while providing a comforting, gooey base.
Step 4: Assemble the Zucchini Layers
Carefully arrange the sliced zucchini in overlapping patterns over the melted cheese on the baking sheet. Next, sprinkle with garlic powder and smoked paprika to infuse the zucchini with aromatic flavors. Finally, top the zucchini with the remaining sharp cheddar cheese, ensuring an even distribution to maximize cheesy goodness.
Step 5: Bake to Crispy Perfection
Place the assembled layers in the preheated oven and bake for 14-15 minutes. Keep an eye on them as they bake; you’ll know they’re ready when the edges are golden brown and crispy. This visual cue is essential to achieving the perfect texture for your Zucchini Breadwich.
Step 6: Cool and Cut
Once baked, remove the zucchini-cheese layer from the oven and let it cool slightly for about 5 minutes. This will make it easier to cut without falling apart. Use a sharp knife to slice the baked zucchini layers into the desired sandwich size, preparing them for the delicious fillings that will come next.
Step 7: Add Your Spreads
Spread a generous layer of avocado mayonnaise and Dijon mustard on one side of the zucchini slice. These spreads will add creaminess and a tangy kick, complementing the savory elements of the Zucchini Breadwich. Don’t skip this vital step; the spreads are essential for a flavorful bite.
Step 8: Layer the Filling
On top of the spreads, layer sliced organic chicken breast (or grilled portobello mushrooms for a vegetarian option), butter lettuce leaves, fresh tomato slices, red onion, and diced avocado. Ensure an even distribution of ingredients for a balanced taste in every bite; these fillings enhance the overall freshness of your Zucchini Breadwich.
Step 9: Final Touch and Serve
Sprinkle a dash of everything bagel seasoning over the fillings before placing the other half of the zucchini on top. Press down gently to secure the sandwich, then serve your Zucchini Breadwich immediately, reveling in the crispiness and flavors of this delightful, guilt-free creation!
What to Serve with Ultimate Guilt-Free Zucchini Breadwich
Enhance your dining experience with delightful side dishes that complement the crispy, cheesy flavors of this nutritious sandwich.
- Mixed Green Salad: A refreshing complement that adds crunch and nutrients, this salad brightens the meal with fresh veggies and tangy vinaigrette.
- Sweet Potato Fries: The natural sweetness and delightful crispness of these fries create a satisfying contrast to the savory zucchini breadwich.
- Fruit Skewers: Vibrantly colored skewers of seasonal fruits provide a refreshing palate cleanser, making each bite of your breadwich even more enjoyable.
- Crispy Roasted Chickpeas: These offer a crunchy texture and a protein boost, turning your meal into a wholesome dining experience.
- Creamy Coleslaw: The cool, creamy slaw pairs beautifully with the warm, hearty breadwich, adding a lovely texture and flavor balance.
- Herbed Quinoa: Light and nutty, this dish adds an earthy flavor while maintaining a healthy profile, serving as a perfect base with the zucchini breadwich.
- Chilled Cucumber Soup: Light and refreshing, this soup serves as a delightful starter that awakens your taste buds for the main event.
- Sparkling Water with Lemon: A bubbly, refreshing drink brings a touch of elegance and perfectly cleanses your palate, enhancing your meal experience.
How to Store and Freeze Zucchini Breadwich
Fridge: Store assembled Zucchini Breadwich in an airtight container for up to 2 days. Reheat in the oven for best results, ensuring crispiness is retained.
Freezer: Freeze the cooked zucchini-cheese base for up to 3 months. When ready to enjoy, thaw and reheat before assembling with your chosen fillings.
Reheating: For optimal taste and texture, always reheat your Zucchini Breadwich in the oven rather than the microwave; this preserves its delightful crunch.
Meal Prep: Consider making the zucchini layers ahead of time, cooling them completely, and storing in the fridge to simplify weeknight meal prep!
Make Ahead Options
These Zucchini Breadwiches are a fantastic meal prep solution for busy home cooks! You can prepare the zucchini layers and bake them up to 24 hours in advance, allowing them to cool completely before refrigerating in an airtight container. If you’re looking to save even more time, consider freezing the baked zucchini-cheese base for up to 3 months; simply let it thaw overnight in the refrigerator before assembling your sandwich. To maintain quality, ensure the zucchini slices are well-dried to avoid sogginess. When you’re ready to serve, layer your spreads and fillings, then enjoy a quick, delicious meal that feels fresh and satisfying—all without the fuss!
Expert Tips for Zucchini Breadwich
-
Slice Thickness: Ensure zucchini slices are uniform and around 1/8-inch thick. This helps achieve the perfect balance between crisp and tender in your sandwich.
-
Drying the Zucchini: Patting the zucchini slices dry is crucial! Moisture can lead to a soggy Zucchini Breadwich, ruining the delightful crunch you’re aiming for.
-
Cheese Choice: Don’t hesitate to experiment with different cheeses! Aged gruyere or gouda can lend a unique flavor twist, while still complementing the overall dish beautifully.
-
Filling Balance: Be mindful not to overload the fillings. Too much can cause your sandwich to become unwieldy and difficult to manage. Aim for a balance that highlights the zucchini layers.
-
Reheating Tips: For the best texture, always reheat in the oven rather than the microwave. This ensures the zucchini remains crispy and the cheese gooey, enhancing your Zucchini Breadwich experience.
-
Custom Flavor Profiles: Feel free to get creative with spices and seasonings. Tailoring the flavor profile can make each Zucchini Breadwich uniquely yours!
Zucchini Breadwich Variations & Substitutions
Embrace your culinary creativity and customize the Zucchini Breadwich to suit your preferences with these delightful twists!
-
Vegetarian Delight: Substitute grilled portobello mushrooms for chicken, adding rich umami flavor. This option is perfect for veggie lovers seeking a hearty bite.
-
Mediterranean Flavor: Include crumbled feta cheese, diced cucumber, and sliced kalamata olives for a fresh, briny twist. This combination celebrates the sunny flavors of the Mediterranean and elevates your sandwich.
-
Breakfast Bonanza: Top your Zucchini Breadwich with a sunny-side-up egg and crispy bacon for a delightful morning treat. The creamy yolk adds richness, making this a hearty breakfast choice.
-
Spicy Southwest: Incorporate sliced jalapeños and pepper jack cheese, complemented by chipotle mayo for a fiery kick. Perfect for those who crave a bit of heat!
-
Italian Inspired: Layer fresh basil and mozzarella, drizzling with balsamic glaze for a tantalizing Italian taste. This refreshing combination adds brightness and flavor, transforming your sandwich into a gourmet delight.
-
Sweet and Savory: Add slices of fresh peach or pear paired with creamy goat cheese for a unique flavor explosion. The sweetness balances beautifully with the savory elements.
-
Nutty Crunch: Sprinkle in some sunflower seeds or slivered almonds for extra texture and nutritional benefits. This addition brings a delightful crunch to every bite, enhancing the overall experience.
With so many possibilities, your Zucchini Breadwich can reflect your mood and cravings, while remaining a healthy and satisfying option. If you’re looking for additional inspiration, try serving it alongside a mixed green salad or some sweet potato fries for a complete meal!
Zucchini Breadwich Recipe FAQs
How do I choose the right zucchini for my Zucchini Breadwich?
Absolutely! The best zucchinis for this recipe are medium-sized, as they strike the perfect balance between moisture and flavor. Look for zucchini that is firm and free of dark spots; these indicate freshness and quality. Smaller zucchinis may be tender but could lead to a soggier texture, while larger ones often have a spongy center that isn’t ideal for slicing.
How should I store leftover Zucchini Breadwich?
Very! To store leftover Zucchini Breadwich, place it in an airtight container in the fridge for up to 2 days. I recommend reheating it in the oven for about 10 minutes to retain its crispy texture, as microwaving can lead to sogginess. This way, you can enjoy your delicious creation with that delightful crunch even after a day!
Can I freeze Zucchini Breadwich, and how do I do it?
Certainly! To freeze your Zucchini Breadwich, first ensure that it’s completely cooled. Then, wrap the cooked zucchini-cheese base tightly in plastic wrap or aluminum foil, and place it in an airtight freezer bag. It can be stored for up to 3 months. When you’re ready to enjoy it, simply thaw in the fridge overnight and reheat in the oven until crisp before assembling your sandwich with fresh ingredients.
I’m worried about sogginess; what can I do?
No problem! To prevent sogginess, make sure to pat the zucchini slices dry after slicing. This helps remove excess moisture. Additionally, avoid overloading your sandwich with too many fillings; aim for a balanced amount that complements rather than overpowers the zucchini layers. A good rule of thumb is to keep the fillings to a minimum but flavorful, keeping that crunchy texture intact!
Are there any dietary considerations for the Zucchini Breadwich?
Absolutely! This recipe is already gluten-free and low-carb, making it a great option for many diets. However, if you or someone you are serving has specific allergies, such as dairy or eggs, consider using vegan cheese alternatives or omit the cheese altogether for a fresh veggie delight. If you have pets, avoid sharing the avocado and onion components, as those can be harmful to them. Always customize and enjoy without worry!
Guilt-Free Zucchini Breadwich: Your New Low-Carb Favorite
Ingredients
Equipment
Method
- Preheat your oven to 400°F (200°C) and line a baking sheet with parchment paper.
- Slice the zucchini lengthwise into 1/8-inch thick strips and pat dry with paper towels.
- Layer half of the sharp cheddar cheese on the lined baking sheet.
- Arrange the sliced zucchini on top of the melted cheese, then sprinkle with garlic powder and smoked paprika.
- Top with the remaining sharp cheddar cheese and bake for 14-15 minutes until golden brown.
- Let it cool for about 5 minutes before slicing into sandwich sizes.
- Spread avocado mayonnaise and Dijon mustard on one side of the zucchini slice.
- Layer the filling ingredients evenly on top of the spreads.
- Sprinkle everything bagel seasoning on the fillings and top with another zucchini slice.