Lemon Velvet Cake with Cream Cheese Frosting delights all!

Introduction to Lemon Velvet Cake with Cream Cheese Frosting

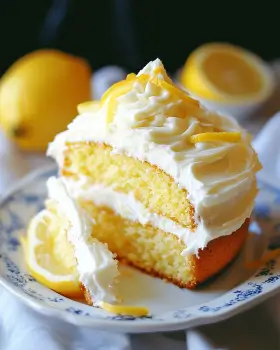
Lemon Velvet Cake with Cream Cheese Frosting is a delightful dessert that brings a burst of sunshine to any occasion. This cake is not just a treat for the taste buds; it’s a feast for the eyes too. The vibrant yellow color, combined with the creamy frosting, makes it a showstopper at parties and gatherings. Whether you’re celebrating a birthday, hosting a tea party, or simply indulging in a sweet craving, this cake is sure to impress.

What Makes Lemon Velvet Cake Unique?

What sets Lemon Velvet Cake apart from other cakes is its light and fluffy texture. The use of buttermilk and the perfect balance of lemon zest and juice create a moist cake that melts in your mouth. The addition of baking soda and baking powder ensures that the cake rises beautifully, giving it that velvety feel. Each bite is a harmonious blend of sweet and tangy flavors, making it a refreshing choice for dessert lovers.

Moreover, the lemon zest adds a fragrant aroma that enhances the overall experience. This cake is not just about taste; it’s about the joy of baking and sharing something special with loved ones. The unique combination of ingredients makes it a standout dessert that is both comforting and sophisticated.

The Perfect Pairing: Cream Cheese Frosting

No cake is complete without frosting, and the cream cheese frosting for this Lemon Velvet Cake is simply divine. Its rich and creamy texture complements the lightness of the cake perfectly. The tangy flavor of the cream cheese balances the sweetness of the cake, creating a delightful contrast that keeps you coming back for more.

Additionally, the frosting is easy to make and can be whipped up in just a few minutes. With the addition of fresh lemon juice and zest, it ties the whole dessert together, enhancing the lemony goodness of the cake. This pairing is not only delicious but also elevates the cake to a whole new level of indulgence.

Ingredients for Lemon Velvet Cake with Cream Cheese Frosting

To create the delightful Lemon Velvet Cake with Cream Cheese Frosting, you’ll need a selection of fresh and quality ingredients. Each component plays a vital role in achieving that perfect balance of flavor and texture. Here’s what you’ll need:

For the Cake:

  • 2 ½ cups all-purpose flour
  • 1 ½ cups granulated sugar
  • 1 teaspoon baking powder
  • 1 teaspoon baking soda
  • ½ teaspoon salt
  • 1 cup unsalted butter, softened
  • 1 cup buttermilk, room temperature
  • 3 large eggs, room temperature
  • 2 teaspoons vanilla extract
  • Zest of 2 lemons
  • ½ cup fresh lemon juice

For the Frosting:

  • 8 ounces cream cheese, softened
  • ½ cup unsalted butter, softened
  • 4 cups powdered sugar
  • 2 tablespoons fresh lemon juice
  • Zest of 1 lemon

These ingredients come together to create a cake that is not only delicious but also visually appealing. The combination of lemon zest and juice gives the cake its signature flavor, while the cream cheese frosting adds a creamy finish. Make sure to use fresh lemons for the best taste, as their zest and juice are key to achieving that bright, zesty flavor profile.

Gathering these ingredients is the first step in your baking adventure. Once you have everything ready, you’ll be well on your way to creating a stunning Lemon Velvet Cake that will delight your family and friends!

Step-by-Step Preparation of Lemon Velvet Cake with Cream Cheese Frosting

Now that you have gathered all your ingredients, it’s time to dive into the fun part: baking! Follow these simple steps to create your Lemon Velvet Cake with Cream Cheese Frosting. Each step is designed to guide you through the process, ensuring a delicious outcome.

Step 1: Prepping Your Baking Tools

Before you start mixing, make sure you have everything ready. Gather your baking tools, including:

  • Two 9-inch round cake pans
  • Mixing bowls
  • Electric mixer
  • Measuring cups and spoons
  • Rubber spatula
  • Wire racks for cooling

Don’t forget to preheat your oven to 350°F (175°C) and grease and flour your cake pans. This will help your cakes come out easily after baking.

Step 2: Mixing the Dry Ingredients

In a large mixing bowl, whisk together the dry ingredients. Combine:

  • 2 ½ cups all-purpose flour
  • 1 ½ cups granulated sugar
  • 1 teaspoon baking powder
  • 1 teaspoon baking soda
  • ½ teaspoon salt

Mix these ingredients well to ensure even distribution. This step is crucial for a uniform texture in your cake.

Step 3: Preparing the Wet Ingredients

In another bowl, gather your wet ingredients. You’ll need:

  • 1 cup unsalted butter, softened
  • 1 cup buttermilk, at room temperature
  • 3 large eggs, at room temperature
  • 2 teaspoons vanilla extract
  • Zest of 2 lemons
  • ½ cup fresh lemon juice

Using an electric mixer, beat these ingredients together until they are well combined and smooth. This mixture will add moisture and flavor to your cake.

Step 4: Combining Ingredients for Lemon Velvet Cake

Now, it’s time to bring everything together! Gradually add the wet mixture to the dry ingredients. Beat on medium speed for about 2-3 minutes. The batter should be smooth and creamy. Make sure to scrape down the sides of the bowl with a rubber spatula to incorporate all the ingredients.

Step 5: Baking the Cake

Once your batter is ready, divide it evenly between the two prepared cake pans. Smooth the tops with a spatula for an even bake. Place the pans in the preheated oven and bake for 25-30 minutes. To check if they are done, insert a toothpick into the center. If it comes out clean, your cakes are ready!

Step 6: Making the Cream Cheese Frosting

While the cakes are cooling, it’s time to prepare the frosting. In a mixing bowl, beat together:

  • 8 ounces cream cheese, softened
  • ½ cup unsalted butter, softened

Mix until creamy and smooth. Gradually add:

  • 4 cups powdered sugar
  • 2 tablespoons fresh lemon juice
  • Zest of 1 lemon

Continue mixing until everything is well combined. Your frosting should be light and fluffy, perfect for spreading!

Step 7: Frosting the Cake

Once the cakes are completely cooled, it’s time to frost! Place one layer on a serving plate. Spread a generous layer of frosting on top. Then, carefully place the second layer on top and frost the top and sides of the cake. For a beautiful finish, you can use a spatula to create swirls or peaks in the frosting.

Finally, refrigerate the cake for at least 30 minutes. This helps the frosting set and makes it easier to slice. Now, your Lemon Velvet Cake with Cream Cheese Frosting is ready to be enjoyed!

Variations of Lemon Velvet Cake with Cream Cheese Frosting

While the classic Lemon Velvet Cake with Cream Cheese Frosting is a delightful treat on its own, there are many ways to customize this recipe. Adding different flavors or making adjustments can create a unique twist that suits your taste. Here are some fun variations to consider:

Adding Fruit Flavors

One of the easiest ways to enhance your Lemon Velvet Cake is by incorporating other fruits. For instance, you can add:

  • Blueberries: Fold in 1 cup of fresh or frozen blueberries into the batter for a burst of flavor.
  • Raspberries: Swirl in raspberry puree before baking for a beautiful marbled effect.
  • Strawberries: Add chopped strawberries to the batter or use them as a topping for a fresh finish.

These fruity additions not only add flavor but also create a colorful presentation that is sure to impress your guests!

Gluten-Free Options

If you or your guests are gluten-sensitive, you can easily make a gluten-free version of this cake. Simply substitute the all-purpose flour with a gluten-free flour blend. Make sure to choose a blend that includes xanthan gum, as it helps mimic the texture of traditional flour. Additionally, check that all other ingredients, like baking powder and sugar, are gluten-free. This way, everyone can enjoy a slice of this delicious cake!

Alternative Frosting Ideas

While the cream cheese frosting is a classic choice, you can experiment with different frosting options to suit your preferences. Here are a few ideas:

  • Whipped Cream: For a lighter option, top your cake with freshly whipped cream mixed with a bit of lemon zest.
  • Buttercream: Create a lemon buttercream by mixing softened butter with powdered sugar and lemon juice for a sweeter alternative.
  • Chocolate Ganache: For a decadent twist, drizzle chocolate ganache over the top of the cake for a rich contrast to the lemon flavor.

These alternative frostings can add a new dimension to your Lemon Velvet Cake, making it even more enjoyable!

Cooking Note for Lemon Velvet Cake with Cream Cheese Frosting

When baking your Lemon Velvet Cake with Cream Cheese Frosting, a few cooking notes can help ensure your cake turns out perfectly every time. Here are some essential tips to keep in mind:

First, always use room temperature ingredients. This includes your butter, eggs, and buttermilk. Room temperature ingredients blend more easily, resulting in a smoother batter. If you forget to take them out ahead of time, you can warm the eggs in a bowl of warm water for about 10 minutes. For butter, cut it into small pieces to help it soften faster.

Next, be careful not to overmix your batter. Once you combine the wet and dry ingredients, mix just until everything is incorporated. Overmixing can lead to a dense cake instead of the light, fluffy texture you want. Remember, a few lumps are okay!

Additionally, keep an eye on your baking time. Ovens can vary, so start checking your cakes a few minutes before the recommended time. Insert a toothpick into the center of the cake; if it comes out clean or with a few moist crumbs, your cake is done. If it comes out wet, give it a few more minutes.

Lastly, allow your cakes to cool completely before frosting. If the cakes are even slightly warm, the frosting can melt and slide off. Patience is key here! Once cooled, you can frost and refrigerate the cake to set the frosting, making it easier to slice and serve.

By following these cooking notes, you’ll be well on your way to creating a stunning Lemon Velvet Cake with Cream Cheese Frosting that will impress everyone at your gathering!

Serving Suggestions for Lemon Velvet Cake with Cream Cheese Frosting

Once your Lemon Velvet Cake with Cream Cheese Frosting is ready, it’s time to think about how to serve it. This delightful cake is perfect for various occasions, and pairing it with the right beverages can enhance the overall experience. Here are some suggestions to make your serving moments even more special.

Ideal Occasions for Serving

Lemon Velvet Cake is a versatile dessert that fits perfectly into many celebrations. Here are some ideal occasions to serve this delicious cake:

  • Birthday Parties: Celebrate with a burst of flavor! This cake is a fantastic choice for anyone who loves citrus.
  • Tea Parties: The light and refreshing taste of lemon pairs beautifully with tea, making it a perfect addition to any afternoon gathering.
  • Weddings: For a summer wedding, this cake can be a stunning centerpiece. Its bright color and flavor will delight guests.
  • Brunch Events: Serve slices of this cake alongside other brunch favorites for a sweet treat that complements savory dishes.
  • Holiday Celebrations: Whether it’s Easter or a summer picnic, this cake adds a cheerful touch to any festive table.

Each of these occasions allows the Lemon Velvet Cake to shine, bringing joy and sweetness to your gatherings.

Pairing Beverages with Your Cake

To elevate your dessert experience, consider pairing your Lemon Velvet Cake with the right beverages. Here are some delightful options:

  • Tea: A cup of Earl Grey or chamomile tea complements the lemon flavor beautifully. The warmth of the tea enhances the cake’s lightness.
  • Lemonade: For a refreshing twist, serve your cake with a glass of homemade lemonade. The citrus notes will harmonize perfectly.
  • Sparkling Water: A bubbly drink can cleanse the palate between bites, making each slice of cake even more enjoyable.
  • White Wine: A chilled glass of Sauvignon Blanc or a sweet Riesling pairs well with the cake, adding a touch of elegance to your dessert.
  • Coffee: For coffee lovers, a cup of freshly brewed coffee can balance the sweetness of the cake, creating a delightful contrast.

Choosing the right beverage can enhance the flavors of your Lemon Velvet Cake, making your dessert experience even more memorable. Enjoy serving this delightful cake at your next gathering!

Tips for Perfecting Lemon Velvet Cake with Cream Cheese Frosting

To ensure your Lemon Velvet Cake with Cream Cheese Frosting turns out perfectly every time, it’s essential to keep a few tips in mind. Baking is both an art and a science, and small details can make a big difference. Here are some helpful tips to guide you through the process.

Common Mistakes to Avoid

Even experienced bakers can make mistakes. Here are some common pitfalls to watch out for:

  • Using Cold Ingredients: Always use room temperature ingredients. Cold butter or eggs can lead to a lumpy batter and uneven baking.
  • Overmixing the Batter: Once you combine the wet and dry ingredients, mix just until incorporated. Overmixing can make the cake dense instead of light and fluffy.
  • Not Measuring Ingredients Accurately: Baking is precise. Use measuring cups and spoons for accuracy. Too much flour can lead to a dry cake.
  • Skipping the Cooling Time: Allow your cakes to cool completely before frosting. If they are warm, the frosting will melt and slide off.
  • Not Testing for Doneness: Always check your cakes a few minutes before the suggested baking time. Use a toothpick to ensure they are fully baked.

By avoiding these common mistakes, you’ll be on your way to baking a delicious Lemon Velvet Cake that everyone will love!

Storage Tips for Leftovers

If you have leftover Lemon Velvet Cake, proper storage is key to keeping it fresh. Here are some tips:

  • Refrigerate: Store the cake in an airtight container in the refrigerator. This will help keep the frosting from melting and maintain the cake’s moisture.
  • Wrap It Up: If you don’t have a container, wrap the cake tightly in plastic wrap. This prevents it from drying out and absorbing odors from the fridge.
  • Freeze for Longer Storage: If you want to keep the cake for an extended period, consider freezing it. Wrap individual slices in plastic wrap and then place them in a freezer bag. This way, you can enjoy a slice whenever you crave it!
  • Thawing: When ready to enjoy, thaw the cake in the refrigerator overnight. This helps maintain its texture and flavor.

By following these storage tips, you can savor your Lemon Velvet Cake with Cream Cheese Frosting for days to come!

Breakdown of Time for Lemon Velvet Cake with Cream Cheese Frosting

Understanding the time required for each step in making your Lemon Velvet Cake with Cream Cheese Frosting can help you plan better. Here’s a breakdown of the time you’ll need for preparation, cooking, and the total time involved in creating this delightful dessert.

Prep Time

The prep time for this cake is approximately 30 minutes. This includes:

  • Gathering and measuring all your ingredients.
  • Prepping your baking tools and greasing the cake pans.
  • Mixing the dry and wet ingredients separately.
  • Combining the ingredients to create the batter.

Taking your time during this stage ensures that everything is ready for a smooth baking process.

Cooking Time

The cooking time for the Lemon Velvet Cake is about 25-30 minutes. Here’s what to expect:

  • Baking the cake layers in the preheated oven until they are golden brown and a toothpick comes out clean.
  • Allowing the cakes to cool in the pans for 10 minutes before transferring them to wire racks.

Keep an eye on the cakes as they bake, as oven temperatures can vary. Checking a few minutes early can prevent overbaking.

Total Time

In total, you can expect to spend around 1 hour and 15 minutes to 1 hour and 30 minutes from start to finish. This includes:

  • 30 minutes for prep.
  • 25-30 minutes for baking.
  • 10 minutes for cooling in the pans.
  • Additional time for making the frosting and frosting the cake, which can take about 15-20 minutes.

After frosting, it’s best to refrigerate the cake for at least 30 minutes before serving. This helps the frosting set and makes for easier slicing.

By planning your time wisely, you can enjoy the process of baking and look forward to serving a beautiful Lemon Velvet Cake with Cream Cheese Frosting!

Nutritional Information for Lemon Velvet Cake with Cream Cheese Frosting

Understanding the nutritional content of your Lemon Velvet Cake with Cream Cheese Frosting can help you enjoy it mindfully. Here’s a breakdown of the key nutritional components per serving, which is based on a standard slice of cake:

Calories

350 calories. This calorie count includes the cake and the cream cheese frosting, making it a satisfying treat for those special occasions. While it’s a delightful dessert, moderation is key to enjoying it as part of a balanced diet.

Protein

3 grams. While this isn’t a high-protein dessert, it does contribute to your daily intake. Pairing the cake with a protein-rich beverage, like a glass of milk or a yogurt parfait, can help balance your meal.

Sodium

200 milligrams. This amount is relatively low, making it a suitable option for those watching their sodium intake. However, if you’re on a strict low-sodium diet, it’s always good to be mindful of the ingredients used, especially in the frosting.

Overall, while Lemon Velvet Cake with Cream Cheese Frosting is a delicious indulgence, being aware of its nutritional information can help you enjoy it as part of a healthy lifestyle. Remember, it’s all about balance and treating yourself occasionally!

FAQs about Lemon Velvet Cake with Cream Cheese Frosting

Can I use a different frosting for Lemon Velvet Cake?

Absolutely! While the cream cheese frosting is a classic choice, you can experiment with various frostings to suit your taste. For a lighter option, consider using whipped cream mixed with lemon zest. If you prefer something sweeter, a lemon buttercream frosting can be a delightful alternative. You could even try a chocolate ganache for a rich contrast to the lemon flavor. The possibilities are endless, so feel free to get creative!

How do I store leftover Lemon Velvet Cake?

To keep your leftover Lemon Velvet Cake fresh, store it in an airtight container in the refrigerator. This will help maintain the cake’s moisture and prevent the frosting from melting. If you don’t have a container, wrap the cake tightly in plastic wrap. For longer storage, you can freeze individual slices. Just wrap them in plastic wrap and place them in a freezer bag. When you’re ready to enjoy, thaw the slices in the refrigerator overnight.

Can I make Lemon Velvet Cake ahead of time?

Yes, you can make Lemon Velvet Cake ahead of time! You can bake the cake layers a day or two in advance. Just make sure to cool them completely before wrapping them in plastic wrap and storing them in the refrigerator. You can also prepare the frosting ahead of time and store it in the fridge. When you’re ready to serve, simply frost the cake and let it chill for about 30 minutes to set the frosting.

What is the best way to serve Lemon Velvet Cake?

The best way to serve Lemon Velvet Cake is chilled, as this helps the frosting set and makes it easier to slice. For an elegant touch, consider garnishing each slice with a sprinkle of lemon zest or a few fresh berries. Pairing the cake with a cup of tea or a glass of lemonade can enhance the experience. Whether it’s for a special occasion or a casual gathering, this cake is sure to impress!

Conclusion on Lemon Velvet Cake with Cream Cheese Frosting

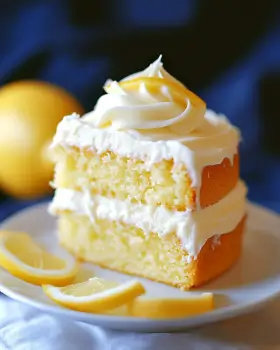
In conclusion, Lemon Velvet Cake with Cream Cheese Frosting is a delightful dessert that brings joy to any occasion. Its light, fluffy texture combined with the tangy sweetness of lemon makes it a favorite among cake lovers. The vibrant color and creamy frosting not only make it visually appealing but also create a deliciously refreshing experience for your taste buds.

Whether you’re celebrating a special event or simply treating yourself, this cake is sure to impress. The step-by-step preparation ensures that even novice bakers can create a stunning masterpiece. Plus, the variations and tips provided allow you to customize the cake to suit your preferences and dietary needs.

As you gather with family and friends, sharing a slice of this Lemon Velvet Cake can create lasting memories. The laughter, conversations, and smiles that accompany each bite make it more than just a dessert; it becomes a part of your cherished moments.

So, roll up your sleeves, gather your ingredients, and embark on this baking adventure. With each slice, you’ll experience the joy of creating something special. Enjoy the process, and most importantly, savor every delicious bite of your Lemon Velvet Cake with Cream Cheese Frosting!

Air Fryer Breakfast Pizza Recipe for a Quick Morning Meal

Introduction to Air Fryer Breakfast Pizza Recipe

Air Fryer Breakfast Pizza Recipe is not just any pizza; it’s a delightful combination of breakfast staples that will make your mornings brighter. Imagine crispy tortillas topped with fluffy eggs, savory sausage, and melted cheese, all cooked to perfection in an air fryer. This recipe is not only easy to make but also packed with flavor!

What Makes Air Fryer Breakfast Pizza Unique?

What sets this breakfast pizza apart is its unique cooking method. The air fryer circulates hot air around the food, creating a crispy texture without the need for excessive oil. This means you can enjoy a guilt-free breakfast that still satisfies your cravings. Plus, the use of tortillas instead of traditional pizza dough makes it a fun and quick option. You can customize it with your favorite ingredients, making each pizza a personal masterpiece!

Benefits of Using an Air Fryer for Breakfast Pizza

Using an air fryer for your breakfast pizza comes with several benefits. First, it cooks faster than a conventional oven, saving you precious time in the morning. Second, it requires less oil, making your meal healthier without sacrificing taste. The air fryer also ensures even cooking, so every bite is just as delicious as the last. Lastly, cleanup is a breeze, allowing you to enjoy your meal without the hassle of a messy kitchen.

Air Fryer Breakfast Pizza Recipe is a unique and convenient way to enjoy breakfast. With its crispy texture and customizable toppings, it’s sure to become a family favorite. So, let’s dive into the ingredients and get cooking!

Ingredients for Air Fryer Breakfast Pizza Recipe

Essential Ingredients

Air Fryer Breakfast Pizza Recipe, you’ll need a few essential ingredients. These ingredients come together to form a delicious and satisfying meal that everyone will love. Here’s what you’ll need:

  • 2 large flour tortillas
  • 1 cup shredded mozzarella cheese
  • 4 large eggs
  • 1/2 cup cooked and crumbled breakfast sausage
  • 1/2 cup diced bell peppers (any color)
  • 1/4 cup diced onion
  • 1/4 teaspoon salt
  • 1/4 teaspoon black pepper
  • 1/4 teaspoon garlic powder
  • 1/4 teaspoon Italian seasoning
  • 1 tablespoon olive oil
  • Fresh parsley or basil for garnish (optional)

These ingredients are not only easy to find but also work together to create a delightful flavor profile. The combination of eggs, cheese, and sausage provides protein, while the vegetables add freshness and color. This makes your breakfast pizza not just tasty but also nutritious!

Optional Toppings and Variations

Air Fryer Breakfast Pizza Recipe is the ability to customize it to your liking. Here are some optional toppings and variations you can try:

  • For a vegetarian option, swap the breakfast sausage for cooked spinach or mushrooms.
  • Add sliced tomatoes for a fresh burst of flavor.
  • Include jalapeños for a spicy kick.
  • Top with avocado slices for creaminess and healthy fats.
  • Experiment with different cheeses like cheddar or pepper jack for a unique twist.

Feel free to mix and match these toppings to create your perfect breakfast pizza. The possibilities are endless, and you can make it as simple or as extravagant as you like!

Step-by-Step Preparation of Air Fryer Breakfast Pizza Recipe

Step 1: Prepare the Dough

Air Fryer Breakfast Pizza Recipe, you’ll need to prepare the base. Instead of traditional pizza dough, we’re using flour tortillas. This not only saves time but also gives a delightful crunch. Simply lay out your tortillas on a clean surface. If you want, you can lightly brush them with olive oil for extra flavor and crispiness. This step is optional but highly recommended!

Step 2: Preheat the Air Fryer

Next, it’s time to preheat your air fryer. Set it to 350°F (175°C) and let it warm up for about 5 minutes. Preheating is crucial as it ensures that your breakfast pizza cooks evenly. While the air fryer is heating, you can prepare the filling, making the most of your time!

Step 3: Assemble the Pizza

Now comes the fun part—assembling your pizza! In a skillet, heat olive oil and sauté the diced onion and bell peppers until they soften. Then, whisk together the eggs with salt, pepper, garlic powder, and Italian seasoning. Pour this mixture into the skillet and cook until the eggs are just set. Once done, it’s time to layer your pizza.

Place one tortilla in the air fryer basket. Spread half of the cooked egg mixture over it. Next, sprinkle half of the mozzarella cheese and half of the crumbled sausage on top. Place the second tortilla over this layer and repeat the process with the remaining ingredients. This stacking method creates a hearty and satisfying pizza!

Step 4: Cook the Pizza in the Air Fryer

With your pizza assembled, it’s time to cook! Carefully place the stacked pizza in the preheated air fryer. Cook it at 350°F (175°C) for about 8-10 minutes. Keep an eye on it; you want the cheese to melt and the tortillas to turn golden brown. The air fryer will work its magic, giving you a crispy and delicious breakfast pizza!

Step 5: Let it Cool and Slice

Air Fryer Breakfast Pizza Recipe is ready to be enjoyed!

Variations of Air Fryer Breakfast Pizza Recipe

Vegetarian Options

Air Fryer Breakfast Pizza Recipe can easily be transformed into a delicious vegetarian delight. Instead of using breakfast sausage, consider adding cooked spinach, mushrooms, or even zucchini. These vegetables not only add flavor but also boost the nutritional value of your pizza. You can also include a variety of cheeses, such as feta or goat cheese, for a tangy twist. Don’t forget to load up on colorful bell peppers and onions for added crunch and sweetness!

Meat Lover’s Air Fryer Breakfast Pizza

Air Fryer Breakfast Pizza Recipe is the way to go! Start with the basic ingredients, but add extra proteins like diced ham, crispy bacon, or even pepperoni. You can mix and match your favorite meats to create a filling and satisfying meal. Just remember to adjust the cooking time slightly if you add thicker meats to ensure everything is cooked through. This version is sure to please anyone who loves a protein-packed breakfast!

Gluten-Free Alternatives

Air Fryer Breakfast Pizza Recipe with a few simple swaps. Instead of flour tortillas, opt for gluten-free tortillas or even cauliflower crusts. These alternatives provide a great base while keeping your meal gluten-free. Be sure to check the labels on your ingredients to ensure they are gluten-free. With these adjustments, you can savor a delicious breakfast pizza without any worries!

Cooking Note for Air Fryer Breakfast Pizza Recipe

Tips for Perfect Cooking Times and Temperatures

Air Fryer Breakfast Pizza Recipe requires attention to time and temperature. Here are some essential tips to ensure your pizza turns out just right:

  • Preheat Your Air Fryer: Always preheat your air fryer for about 5 minutes before cooking. This step helps achieve an even cook and crispy texture.
  • Monitor Cooking Time: Cooking times can vary based on the air fryer model. Start with 8 minutes and check for doneness. If the cheese isn’t melted or the tortillas aren’t golden, add a minute or two.
  • Layering Matters: When assembling your pizza, ensure even distribution of ingredients. This helps in cooking everything uniformly.
  • Don’t Overcrowd: If you’re making multiple pizzas, cook them one at a time. Overcrowding can lead to uneven cooking.
  • Use a Food Thermometer: If you’re unsure whether the eggs are fully cooked, use a food thermometer. The internal temperature should reach 160°F (71°C) for safety.
  • Let it Rest: After cooking, let your pizza rest for a minute. This allows the cheese to set, making it easier to slice.

Air Fryer Breakfast Pizza Recipe is not only delicious but also perfectly cooked every time. Enjoy the delightful crunch and flavor that comes from this quick and easy breakfast option!

Serving Suggestions for Air Fryer Breakfast Pizza Recipe

Pairing Ideas for a Complete Breakfast

Air Fryer Breakfast Pizza Recipe into a complete breakfast, consider pairing it with a few delicious sides. Here are some tasty ideas:

  • Fresh Fruit Salad: A colorful mix of seasonal fruits adds a refreshing touch. Think strawberries, blueberries, and kiwi for a burst of flavor.
  • Yogurt Parfait: Layer yogurt with granola and fruits for a creamy and crunchy side. This adds protein and probiotics to your meal.
  • Smoothies: Blend your favorite fruits with spinach or kale for a nutritious drink. Smoothies are a great way to sneak in extra vitamins!
  • Crispy Hash Browns: Serve some golden-brown hash browns on the side for that classic breakfast feel. They add a satisfying crunch!
  • Breakfast Sausages: If you love meat, serve some extra breakfast sausages on the side. They complement the flavors of the pizza perfectly.

These pairing ideas not only enhance your breakfast experience but also provide a balanced meal. You can mix and match based on your preferences and dietary needs!

Creative Serving Styles

Air Fryer Breakfast Pizza Recipe, presentation matters! Here are some creative serving styles to impress your family or guests:

  • Pizza Wedges: Slice your pizza into wedges and serve them on a wooden board. This rustic style is perfect for sharing!
  • Individual Plates: For a more formal setting, serve each wedge on a plate with a garnish of fresh herbs. This adds a touch of elegance.
  • Breakfast Pizza Stack: Create a stack of pizza wedges, alternating with layers of fresh greens or avocado slices. This adds height and visual appeal.
  • Dip Station: Set up a dip station with salsa, guacamole, or sour cream. This interactive style allows everyone to customize their pizza experience.
  • Brunch Buffet: If you’re hosting a brunch, include your breakfast pizza as part of a buffet spread. Add other breakfast items for a delightful feast!

Air Fryer Breakfast Pizza Recipe!

Tips for Making the Best Air Fryer Breakfast Pizza Recipe

Common Mistakes to Avoid

Air Fryer Breakfast Pizza Recipe, avoiding common mistakes can make a big difference in the final result. Here are some pitfalls to watch out for:

  • Skipping the Preheat: Always preheat your air fryer. Skipping this step can lead to uneven cooking and a less crispy texture.
  • Overloading the Basket: Avoid overcrowding the air fryer. If you stack too many ingredients, they won’t cook evenly. Stick to one pizza at a time for the best results.
  • Not Monitoring Cooking Time: Every air fryer is different. Keep an eye on your pizza as it cooks. If it looks done before the timer goes off, check it early!
  • Using Cold Ingredients: Make sure your ingredients are at room temperature. Cold eggs or cheese can affect cooking time and texture.
  • Ignoring the Resting Time: After cooking, let your pizza rest for a minute. This helps the cheese set and makes slicing easier.

Air Fryer Breakfast Pizza Recipe turns out perfectly every time. Enjoy the deliciousness without the hassle!

Storage and Reheating Tips

Air Fryer Breakfast Pizza Recipe, storing and reheating them properly is key to maintaining flavor and texture. Here are some helpful tips:

  • Storing Leftovers: Allow the pizza to cool completely before storing. Place it in an airtight container and refrigerate. It can last for up to 3 days.
  • Freezing Options: If you want to keep it longer, you can freeze the pizza. Wrap it tightly in plastic wrap and then in aluminum foil. It can be frozen for up to 2 months.
  • Reheating in the Air Fryer: To reheat, place the pizza in the air fryer at 350°F (175°C) for about 5 minutes. This will help restore its crispy texture.
  • Microwave Method: If you’re in a hurry, you can use the microwave. Heat on medium power for 30-60 seconds. However, this may make the crust less crispy.
  • Adding Fresh Toppings: When reheating, consider adding fresh toppings like herbs or avocado to enhance the flavor.

Air Fryer Breakfast Pizza Recipe even after the first serving. It’s a great way to save time and reduce food waste!

Breakdown of Time for Air Fryer Breakfast Pizza Recipe

Prep Time

Air Fryer Breakfast Pizza Recipe is quick and easy! The prep time usually takes about 15 minutes. This includes gathering your ingredients, chopping vegetables, and whisking the eggs. If you have everything ready, you’ll be enjoying your delicious breakfast pizza in no time!

Cooking Time

The cooking time for your breakfast pizza is approximately 8 to 10 minutes in the air fryer. This is when the magic happens! The air fryer will crisp up the tortillas and melt the cheese beautifully. Just keep an eye on it to ensure it reaches that perfect golden brown color.

Total Time

Air Fryer Breakfast Pizza Recipe is perfect for busy mornings or even a leisurely weekend brunch. You can whip it up in no time and enjoy a hearty meal that everyone will love!

Nutritional Information for Air Fryer Breakfast Pizza Recipe

Calories and Macronutrients

Air Fryer Breakfast Pizza Recipe is not only delicious but also provides a good mix of macronutrients. Here’s a breakdown of the nutritional information per serving:

  • Calories: 290
  • Net Carbs: 18g
  • Protein: 18g
  • Fat: 16g

This meal is a great source of protein, thanks to the eggs and sausage. The tortillas provide carbohydrates, while the cheese adds healthy fats. With just 290 calories per serving, it’s a satisfying option that won’t weigh you down. Plus, the balance of macronutrients makes it a great choice for breakfast or brunch!

Health Benefits of Ingredients

Air Fryer Breakfast Pizza Recipe offer various health benefits that contribute to a nutritious meal. Here’s a closer look at some of the key ingredients:

  • Eggs: Packed with high-quality protein, eggs are also rich in vitamins like B12 and D. They support muscle health and provide essential nutrients for overall well-being.
  • Breakfast Sausage: While delicious, opt for leaner sausage options to keep the fat content lower. Sausage provides protein and can be a good source of iron.
  • Bell Peppers: These colorful veggies are loaded with vitamins A and C, which are great for your immune system. They also add fiber, helping with digestion.
  • Onions: Onions are known for their antioxidant properties. They can help reduce inflammation and support heart health.
  • Olive Oil: A healthy fat, olive oil is rich in monounsaturated fats, which are beneficial for heart health. It also contains antioxidants that can help protect your cells.

Air Fryer Breakfast Pizza Recipe, you’re not just enjoying a tasty meal; you’re also fueling your body with essential nutrients. This makes it a smart choice for anyone looking to start their day on a healthy note!

FAQs about Air Fryer Breakfast Pizza Recipe

Can I use store-bought dough for the Air Fryer Breakfast Pizza Recipe?

Absolutely! If you prefer convenience, using store-bought dough is a great option. You can find pre-made pizza dough or even flatbreads at your local grocery store. Just make sure to roll it out to fit your air fryer basket. This will save you time and still give you a delicious breakfast pizza. Just remember to adjust the cooking time as needed, since store-bought dough may require a different cooking duration compared to tortillas.

How do I know when the pizza is done cooking?

Air Fryer Breakfast Pizza Recipe is done is key to enjoying a perfect meal. Look for a few signs: the cheese should be melted and bubbly, and the tortillas should be golden brown and crispy. You can also use a food thermometer to check the internal temperature. It should reach at least 160°F (71°C) to ensure the eggs are fully cooked. If you’re unsure, it’s always better to check a little early to avoid overcooking.

Can I make Air Fryer Breakfast Pizza Recipe ahead of time?

Air Fryer Breakfast Pizza Recipe ahead of time! You can assemble the pizza and store it in the refrigerator for up to 24 hours before cooking. Just cover it tightly with plastic wrap or foil to keep it fresh. When you’re ready to cook, simply pop it in the air fryer. If you’re making it further in advance, consider freezing it. Just remember to thaw it in the fridge overnight before cooking for the best results!

What are some good toppings for Air Fryer Breakfast Pizza Recipe?

Air Fryer Breakfast Pizza Recipe is its versatility! You can get creative with toppings based on your preferences. Here are some tasty options:

  • Fresh Vegetables: Add spinach, mushrooms, or zucchini for extra nutrition.
  • Cheeses: Try different cheeses like cheddar, feta, or pepper jack for varied flavors.
  • Herbs: Fresh herbs like basil or cilantro can brighten up the dish.
  • Spices: Sprinkle some red pepper flakes or smoked paprika for a kick.
  • Fruits: For a sweet twist, consider adding sliced strawberries or peaches on top after cooking.

Feel free to mix and match these toppings to create your perfect breakfast pizza. The options are endless, making it a fun dish to customize!

Conclusion on Air Fryer Breakfast Pizza Recipe

Recap of Key Points

Air Fryer Breakfast Pizza Recipe is a delightful and versatile dish that brings a fun twist to your morning routine. With its crispy tortillas, fluffy eggs, and savory toppings, it’s a meal that everyone can enjoy. We explored the essential ingredients, step-by-step preparation, and various delicious variations to suit different tastes. Whether you prefer a vegetarian option, a meat lover’s delight, or a gluten-free alternative, this recipe has something for everyone.

We also discussed helpful tips for cooking times and temperatures, ensuring that your pizza comes out perfectly every time. Plus, with creative serving suggestions and storage tips, you can make the most of your breakfast pizza experience. Remember, the key to a great breakfast pizza lies in the quality of ingredients and the joy of customizing it to your liking!

Encouragement to Try the Recipe

Air Fryer Breakfast Pizza Recipe a try! It’s a quick and easy meal that can be prepared in just 25 minutes, making it perfect for busy mornings or leisurely weekends. Don’t hesitate to experiment with different toppings and flavors to make it your own. Your family and friends will be impressed, and you’ll love the satisfaction of creating a delicious breakfast from scratch.

So, gather your ingredients, fire up that air fryer, and enjoy a delightful breakfast pizza that’s sure to become a new favorite in your household. Happy cooking!

Peruvian Grilled Chicken Recipe is a must-try delight.

Introduction to Peruvian Grilled Chicken Recipe

Peruvian grilled chicken, known as “Pollo a la Brasa,” is a beloved dish that captures the essence of Peru’s rich culinary heritage. This recipe is not just about cooking chicken; it’s about creating a flavorful experience that brings people together. The combination of spices, citrus, and grilling techniques makes this dish stand out. Whether you’re hosting a barbecue or enjoying a family dinner, this Peruvian grilled chicken recipe is sure to impress.

What Makes Peruvian Grilled Chicken Unique?

What sets Peruvian grilled chicken apart from other grilled chicken recipes? The secret lies in its marinade. The blend of lime juice, garlic, and spices infuses the chicken with a burst of flavor. The use of cumin and paprika adds warmth and depth, while the option of cayenne pepper gives it a delightful kick. This unique combination creates a taste that is both savory and tangy.

Moreover, the cooking method plays a crucial role. Grilling the chicken skin-side down allows the fat to render, resulting in crispy skin and juicy meat. This technique is a hallmark of Peruvian cuisine, showcasing the importance of grilling in their food culture.

In addition, serving this dish with fresh cilantro and lime wedges enhances its vibrant flavors. The bright green cilantro adds a refreshing touch, while the lime juice elevates the taste even further. Together, these elements create a dish that is not only delicious but also visually appealing.

In summary, the uniqueness of Peruvian grilled chicken lies in its flavorful marinade, expert grilling technique, and vibrant garnishes. This recipe is a celebration of Peru’s culinary traditions, making it a must-try for anyone looking to explore new flavors.

Ingredients for Peruvian Grilled Chicken Recipe

To create the perfect Peruvian grilled chicken, you’ll need a selection of fresh ingredients that come together to form a delicious marinade. Here’s what you’ll need:

  • 2 pounds bone-in, skin-on chicken thighs
  • 1/4 cup olive oil
  • 1/4 cup lime juice (about 2 limes)
  • 4 cloves garlic, minced
  • 1 tablespoon ground cumin
  • 1 tablespoon paprika
  • 1 teaspoon dried oregano
  • 1 teaspoon salt
  • 1/2 teaspoon black pepper
  • 1/2 teaspoon cayenne pepper (optional, for heat)
  • Fresh cilantro, for garnish

These ingredients are not only easy to find but also work together to create a mouthwatering flavor profile. The chicken thighs are juicy and tender, while the marinade adds a zesty kick. The lime juice brightens the dish, and the spices bring warmth and depth. If you want to add a smoky flavor, consider using smoked paprika instead of regular paprika.

Gather these ingredients, and you’re ready to embark on a culinary adventure that will transport your taste buds straight to Peru!

Step-by-Step Preparation of Peruvian Grilled Chicken Recipe

Step 1: Marinating the Chicken

Marinating the chicken is the first and most crucial step in this Peruvian grilled chicken recipe. Start by taking a large bowl and whisking together the olive oil, lime juice, minced garlic, cumin, paprika, oregano, salt, black pepper, and cayenne pepper. This mixture is where the magic happens! It’s packed with flavor and will soak into the chicken, making it tender and delicious.

Once your marinade is ready, add the chicken thighs to the bowl. Make sure each piece is well coated with the marinade. This is important for achieving that rich flavor. After coating the chicken, cover the bowl with plastic wrap. Place it in the refrigerator for at least one hour. For the best results, let it marinate overnight. This allows the flavors to penetrate deeply into the meat.

Step 2: Preparing the Grill

While the chicken is marinating, it’s time to prepare your grill. Preheat your grill to medium-high heat. This is essential for achieving that perfect sear on the chicken. If you’re using a charcoal grill, make sure the coals are evenly distributed and glowing. For gas grills, simply turn on the burners and let them heat up.

Before placing the chicken on the grill, it’s a good idea to oil the grates lightly. This helps prevent sticking and ensures that the skin gets crispy. You can use a paper towel dipped in oil and tongs to wipe the grates. Once the grill is hot and ready, you’re all set to grill the chicken!

Step 3: Grilling the Chicken

Now comes the exciting part—grilling the chicken! Remove the chicken thighs from the marinade, allowing any excess to drip off. Discard the leftover marinade, as it has come into contact with raw chicken. Place the chicken skin-side down on the grill. Cook for about 6-8 minutes without moving it. This helps to achieve that beautiful char and crispy skin.

After the first side is nicely browned, flip the chicken over. Cook for another 6-8 minutes. Use a meat thermometer to check the internal temperature. It should reach 165°F for safe consumption. The skin should be golden brown and crispy, while the meat remains juicy and tender.

Step 4: Resting and Serving

Once the chicken is cooked, remove it from the grill and let it rest for about 5 minutes. This resting period allows the juices to redistribute throughout the meat, making it even more flavorful. After resting, it’s time to serve!

Garnish the grilled chicken with fresh cilantro and serve it with lime wedges on the side. The bright flavors of the lime and the freshness of the cilantro will enhance the dish beautifully. Enjoy your Peruvian grilled chicken with family and friends, and watch them savor every bite!

Variations of Peruvian Grilled Chicken Recipe

Alternative Marinades

While the traditional marinade for Peruvian grilled chicken is delicious, there are many ways to switch things up! You can experiment with different flavors to create your own unique twist. Here are a few alternative marinades to consider:

  • Herb Marinade: Blend fresh herbs like parsley, basil, and mint with olive oil, lemon juice, and garlic. This will give your chicken a fresh and vibrant taste.
  • Spicy Mustard Marinade: Combine Dijon mustard, honey, lime juice, and a pinch of cayenne pepper. This adds a sweet and spicy kick to the chicken.
  • Yogurt Marinade: Use plain yogurt mixed with garlic, cumin, and lemon juice. The yogurt tenderizes the chicken while adding a creamy texture.
  • Teriyaki Marinade: For a fusion twist, try a teriyaki marinade made with soy sauce, ginger, garlic, and brown sugar. This will give your chicken a sweet and savory flavor.

Feel free to mix and match ingredients to create a marinade that suits your taste. The key is to let the chicken soak in the flavors for at least an hour, or overnight for the best results.

Different Cooking Methods

Grilling is a fantastic way to prepare Peruvian grilled chicken, but there are other cooking methods that can yield delicious results as well. Here are some alternatives:

  • Oven Roasting: Preheat your oven to 425°F. Place the marinated chicken on a baking sheet and roast for about 35-40 minutes, or until the internal temperature reaches 165°F. This method gives you crispy skin and juicy meat without the grill.
  • Air Frying: For a healthier option, use an air fryer. Preheat it to 375°F and cook the marinated chicken for about 25-30 minutes, flipping halfway through. The air fryer will give you a crispy texture with less oil.
  • Stovetop Searing: Heat a skillet over medium-high heat and add a little oil. Sear the chicken thighs skin-side down for about 6-8 minutes, then flip and cover to cook through. This method is quick and perfect for indoor cooking.
  • Slow Cooking: For a hands-off approach, place the marinated chicken in a slow cooker. Cook on low for 6-8 hours or high for 3-4 hours. The chicken will be incredibly tender and flavorful.

Each cooking method brings out different flavors and textures in the chicken. Choose the one that fits your cooking style and enjoy the delicious results!

Cooking Note for Peruvian Grilled Chicken Recipe

When preparing your Peruvian grilled chicken, there are a few important cooking notes to keep in mind. These tips will help ensure that your chicken turns out perfectly every time, bursting with flavor and cooked to perfection.

First, always use a meat thermometer to check the internal temperature of the chicken. This is crucial for food safety. The chicken should reach an internal temperature of 165°F. This ensures that it is fully cooked and safe to eat. Undercooked chicken can pose health risks, so it’s better to be safe than sorry!

Next, consider the thickness of the chicken thighs. If they are particularly thick, you may need to adjust your cooking time. Thicker pieces will take longer to cook through. If you find that the skin is browning too quickly, you can move the chicken to a cooler part of the grill to finish cooking without burning.

Another tip is to let the chicken rest after grilling. This resting period allows the juices to redistribute throughout the meat, making it more tender and juicy. If you cut into the chicken too soon, the juices will run out, leaving you with dry meat.

Lastly, don’t forget about the importance of garnishing! Fresh cilantro and lime wedges not only enhance the presentation but also add a burst of flavor. The acidity from the lime juice brightens the dish, while the cilantro adds a fresh touch. These simple additions can elevate your Peruvian grilled chicken to a whole new level.

By following these cooking notes, you’ll be well on your way to mastering the art of Peruvian grilled chicken. Enjoy the process and savor the delicious results!

Serving Suggestions for Peruvian Grilled Chicken Recipe

Side Dishes to Pair

When it comes to serving your Peruvian grilled chicken, the right side dishes can elevate the meal to new heights. Here are some delicious options that pair perfectly with this flavorful chicken:

  • Peruvian-Style Rice: This dish is a staple in Peruvian cuisine. Cook rice with garlic, onions, and a touch of lime for a fragrant and tasty side.
  • Roasted Vegetables: A mix of seasonal vegetables like bell peppers, zucchini, and corn, roasted until tender, adds color and nutrition to your plate.
  • Quinoa Salad: Quinoa is a nutritious grain that complements grilled chicken well. Toss it with diced tomatoes, cucumbers, and a light vinaigrette for a refreshing salad.
  • French Fries: Crispy fries are a popular side in Peru. Serve them alongside your chicken for a comforting and satisfying meal.
  • Coleslaw: A tangy coleslaw made with cabbage, carrots, and a zesty dressing adds crunch and balances the richness of the chicken.

These side dishes not only enhance the meal but also bring a variety of textures and flavors to your dining experience. Choose one or more to create a well-rounded plate that everyone will enjoy!

Sauces and Condiments

To take your Peruvian grilled chicken to the next level, consider adding some delicious sauces and condiments. Here are a few popular options:

  • Aji Verde: This spicy green sauce made from cilantro, jalapeños, garlic, and lime juice is a must-try. It adds a fresh and zesty kick to the chicken.
  • Chimichurri: A vibrant sauce made with parsley, garlic, vinegar, and olive oil. It’s perfect for drizzling over grilled chicken for added flavor.
  • Garlic Sauce: A creamy garlic sauce can be a delightful addition. It pairs well with the spices in the chicken and adds a rich texture.
  • Lime Wedges: Always serve lime wedges on the side. A squeeze of fresh lime juice brightens the flavors and adds a refreshing touch.
  • Hot Sauce: For those who love heat, a few drops of your favorite hot sauce can enhance the dish and satisfy spicy cravings.

These sauces and condiments not only complement the grilled chicken but also allow guests to customize their meal to their liking. Enjoy experimenting with different combinations to find your favorite!

Tips for Perfecting Your Peruvian Grilled Chicken Recipe

To truly master the art of making Peruvian grilled chicken, there are several tips that can help you achieve the best results. These simple yet effective strategies will ensure your chicken is flavorful, juicy, and perfectly cooked every time.

First, always start with high-quality chicken. Bone-in, skin-on thighs are ideal for this recipe. They remain juicy during cooking and the skin crisps up beautifully on the grill. If you prefer, you can use skinless chicken breasts, but keep in mind they may dry out more easily.

Next, don’t rush the marinating process. Allowing the chicken to marinate for at least one hour is essential, but overnight is even better. This extra time lets the flavors penetrate deeply into the meat, resulting in a more flavorful dish.

When grilling, make sure your grill is preheated properly. A hot grill helps to sear the chicken, locking in moisture and creating that desirable crispy skin. If you’re using a charcoal grill, wait until the coals are glowing and covered with ash before cooking.

Another important tip is to avoid flipping the chicken too often. Let it cook undisturbed for the first 6-8 minutes. This allows the skin to develop a nice char. Once you flip it, resist the urge to move it around. Let it cook until it reaches the right internal temperature.

Using a meat thermometer is crucial for ensuring your chicken is cooked perfectly. Insert it into the thickest part of the thigh, avoiding the bone. The chicken should reach an internal temperature of 165°F for safe consumption.

Lastly, don’t skip the resting period after grilling. Allowing the chicken to rest for about 5 minutes before serving helps the juices redistribute, making each bite tender and juicy. This small step can make a big difference in the overall quality of your dish.

By following these tips, you’ll be well on your way to creating the perfect Peruvian grilled chicken. Enjoy the process and the delicious results!

Breakdown of Time for Peruvian Grilled Chicken Recipe

Prep Time

The prep time for this Peruvian grilled chicken recipe is quite manageable. You’ll spend about 15-20 minutes gathering your ingredients and preparing the marinade. This includes whisking together the olive oil, lime juice, garlic, and spices. After that, you’ll need to coat the chicken thighs in the marinade. Once everything is mixed, cover the bowl and place it in the refrigerator. For the best flavor, let the chicken marinate for at least one hour, but overnight is ideal.

Cooking Time

When it comes to cooking, the grilling process takes about 12-16 minutes. Start by preheating your grill to medium-high heat, which usually takes around 10 minutes. Once the grill is ready, place the marinated chicken on it. Cook the chicken skin-side down for 6-8 minutes, then flip and grill for another 6-8 minutes. Always check the internal temperature to ensure it reaches 165°F for safe consumption.

Total Time

In total, you can expect to spend about 1 hour and 35 minutes on this recipe, including marinating time. If you choose to marinate overnight, the total time will extend to about 24 hours, but the active cooking time remains the same. This makes it a great option for meal prep or a weekend gathering, allowing you to enjoy delicious Peruvian grilled chicken with minimal fuss!

Nutritional Information for Peruvian Grilled Chicken Recipe

Calories

380 calories per serving. This makes it a satisfying option for those looking to enjoy a flavorful dish without overindulging. The balance of protein and healthy fats in this recipe contributes to its overall nutritional value.

Protein Content

30 grams of protein. This high protein content makes it an excellent choice for anyone looking to maintain a healthy diet or build muscle. Pairing this chicken with nutritious sides can further enhance your protein intake for a well-rounded meal.

Sodium Levels

600 milligrams of sodium per serving. While this is a reasonable amount for a flavorful dish, you can always adjust the salt in the marinade to suit your dietary needs. Using fresh herbs and spices can also enhance flavor without adding extra sodium.

In summary, this Peruvian grilled chicken recipe is not only delicious but also offers a good balance of calories, protein, and sodium. Enjoying this dish as part of a balanced diet can contribute to your overall health and well-being.

FAQs about Peruvian Grilled Chicken Recipe

What is the best way to marinate chicken for grilling?

The best way to marinate chicken for grilling is to use a combination of acidic ingredients, like lime juice or vinegar, along with flavorful herbs and spices. This helps to tenderize the meat while infusing it with delicious flavors. For the Peruvian grilled chicken recipe, the marinade includes lime juice, garlic, cumin, and paprika, which work together to create a mouthwatering taste. Always ensure the chicken is well-coated and let it marinate for at least one hour, or overnight for maximum flavor.

Can I use other types of meat for this recipe?

Absolutely! While this recipe is traditionally made with chicken, you can use other types of meat as well. Pork, beef, or even fish can be marinated and grilled using the same flavorful marinade. Just keep in mind that cooking times may vary depending on the type of meat you choose. For example, pork may take a bit longer to cook, while fish will require less time. Always check the internal temperature to ensure it’s safe to eat.

How long should I grill the chicken?

Grilling chicken thighs typically takes about 12-16 minutes. Start by cooking the chicken skin-side down for 6-8 minutes. Then, flip it over and grill for another 6-8 minutes. The key is to check the internal temperature, which should reach 165°F for safe consumption. If you’re using thicker pieces of chicken, you may need to adjust the cooking time accordingly. Always ensure the chicken is cooked through before serving.

What are some common side dishes for Peruvian grilled chicken?

When serving Peruvian grilled chicken, there are several delicious side dishes that pair well. Some popular options include:

  • Peruvian-Style Rice: Flavored with garlic and lime, this rice is a perfect complement.
  • Roasted Vegetables: A colorful mix of seasonal veggies adds nutrition and flavor.
  • Quinoa Salad: A light and refreshing salad with quinoa, tomatoes, and cucumbers.
  • French Fries: Crispy fries are a classic side that everyone loves.
  • Coleslaw: A tangy coleslaw adds crunch and balances the richness of the chicken.

These sides not only enhance the meal but also provide a variety of textures and flavors that everyone will enjoy!

Conclusion on Peruvian Grilled Chicken Recipe

In conclusion, the Peruvian grilled chicken recipe is a delightful dish that brings together vibrant flavors and a rich culinary tradition. With its zesty marinade and expert grilling technique, this recipe is sure to impress your family and friends. The combination of lime juice, garlic, and spices creates a mouthwatering experience that is both savory and refreshing.

Whether you choose to grill, roast, or air fry, the versatility of this recipe allows you to enjoy it in various ways. Plus, the nutritional benefits, including high protein content and low net carbs, make it a healthy choice for any meal. Pair it with delicious side dishes and sauces, and you have a complete dining experience that everyone will love.

As you embark on your culinary journey with this Peruvian grilled chicken recipe, remember to embrace the process. Take your time with the marinating, grilling, and serving. Each step contributes to the overall flavor and enjoyment of the dish. Don’t hesitate to experiment with different marinades and cooking methods to find what suits your taste best.

So fire up your grill, gather your ingredients, and get ready to savor the deliciousness of Peruvian grilled chicken. It’s not just a meal; it’s a celebration of flavors that will transport you to the heart of Peru. Enjoy every bite and share the joy of cooking with those you love!

Air Fryer Frittata Recipe: A Quick and Tasty Breakfast!

Introduction to the Air Fryer Frittata Recipe

Air Fryer Frittata Recipe is just what you need! This dish is not only easy to make but also packed with flavor and nutrition. Frittatas are versatile, allowing you to mix and match ingredients based on your preferences. Whether you’re in a rush or enjoying a leisurely weekend brunch, this recipe fits perfectly into your schedule.

Using an air fryer makes the cooking process even simpler. It cooks the frittata evenly while giving it a delightful golden top. Plus, it requires less oil than traditional frying methods, making it a healthier choice. With just a few ingredients, you can whip up a meal that serves four people, making it ideal for families or meal prep.

In this article, we will guide you through the ingredients, preparation steps, and variations of the air fryer frittata. You’ll discover how to create a dish that not only satisfies your taste buds but also fuels your day. So, let’s dive into the world of frittatas and explore how to make this delightful breakfast treat!

Ingredients for the Air Fryer Frittata Recipe

Air Fryer Frittata Recipe, you’ll need a few simple ingredients. Each component plays a vital role in building flavor and texture. Here’s what you’ll need:

  • 6 large eggs
  • 1/4 cup milk
  • 1/2 cup shredded cheddar cheese
  • 1/2 cup diced bell peppers (any color)
  • 1/2 cup diced cooked ham or cooked sausage
  • 1/4 cup diced onion
  • 1/2 teaspoon salt
  • 1/4 teaspoon black pepper
  • 1/4 teaspoon garlic powder
  • 1 tablespoon olive oil

These ingredients come together to create a fluffy and flavorful frittata. The eggs provide a rich base, while the milk adds creaminess. Cheddar cheese gives it a delightful cheesy flavor, and the bell peppers, ham or sausage, and onion contribute to the overall taste and texture.

Feel free to customize your frittata by adding your favorite vegetables or proteins. For instance, you can use spinach, mushrooms, or zucchini for a vegetarian twist. The possibilities are endless, making this recipe a fantastic choice for any meal!

Step-by-Step Preparation of the Air Fryer Frittata Recipe

Air Fryer Frittata Recipe. Follow these simple steps to create a delicious breakfast that everyone will love!

Step 1: Gather Your Ingredients

Before you start cooking, make sure you have all your ingredients on hand. This will make the process smoother and more enjoyable. Gather the eggs, milk, cheese, bell peppers, ham or sausage, onion, salt, pepper, garlic powder, and olive oil. Having everything ready will help you stay organized and focused.

Step 2: Prepare the Vegetables

Next, it’s time to prepare your vegetables. Start by washing the bell peppers and onion. Then, dice them into small pieces. This ensures they cook evenly and blend well with the eggs. If you’re adding any other vegetables, like spinach or mushrooms, chop them up as well. Fresh ingredients will enhance the flavor of your frittata!

Step 3: Whisk the Eggs

In a large mixing bowl, crack the six eggs. Add the 1/4 cup of milk to the eggs. Using a whisk, beat the mixture until it’s well combined. The goal is to create a fluffy texture. Make sure there are no streaks of egg white left. This step is crucial for achieving a light and airy frittata.

Step 4: Combine Ingredients

Now, it’s time to combine everything! Add the shredded cheddar cheese, diced bell peppers, ham or sausage, diced onion, salt, black pepper, and garlic powder to the egg mixture. Stir everything together until all the ingredients are evenly distributed. This will ensure that every bite of your frittata is packed with flavor.

Step 5: Preheat the Air Fryer

Before cooking, preheat your air fryer to 300°F. Preheating is important as it helps the frittata cook evenly. While the air fryer is warming up, you can prepare your baking dish. Grease a 7-inch round cake pan or baking dish with olive oil to prevent sticking.

Step 6: Cook the Frittata

Once the air fryer is preheated, pour the egg mixture into the prepared pan. Carefully place the pan in the air fryer basket. Cook the frittata for 15-18 minutes. You’ll know it’s done when the center is set and the top is lightly golden. Keep an eye on it to avoid overcooking. When finished, carefully remove the pan and let it cool for a few minutes before slicing.

And there you have it! A delicious air fryer frittata ready to be enjoyed. This step-by-step guide makes it easy to create a breakfast that’s both satisfying and nutritious.

Variations of the Air Fryer Frittata Recipe

Air Fryer Frittata Recipe lies in its versatility. You can easily customize it to suit your taste preferences or dietary needs. Here are some exciting variations to consider:

Vegetarian Options

If you’re looking for a meat-free meal, a vegetarian frittata is a fantastic choice. Simply replace the ham or sausage with a variety of colorful vegetables. Consider using:

  • Spinach
  • Mushrooms
  • Zucchini
  • Cherry tomatoes
  • Broccoli

These vegetables not only add flavor but also boost the nutritional value of your frittata. You can also sprinkle in some feta cheese for a tangy twist. This vegetarian option is perfect for brunch or a light dinner!

Meat Lover’s Frittata

For those who enjoy a heartier meal, a meat lover’s frittata is the way to go. You can mix and match different types of meats to create a protein-packed dish. Try adding:

  • Cooked bacon
  • Chorizo
  • Ground turkey
  • Smoked salmon

These ingredients will give your frittata a rich and savory flavor. Just remember to adjust the seasoning accordingly, as some meats can be saltier than others. This variation is sure to satisfy any meat enthusiast!

Cheese and Herb Variations

Cheese lovers will appreciate the endless possibilities for adding different cheeses to the frittata. Instead of cheddar, consider using:

  • Swiss cheese
  • Goat cheese
  • Monterey Jack
  • Parmesan

Additionally, fresh herbs can elevate the flavor profile. Try incorporating:

  • Basil
  • Chives
  • Parsley
  • Dill

These herbs not only add freshness but also enhance the overall taste of your frittata. Mixing different cheeses and herbs can create a delightful culinary experience that keeps your breakfast exciting!

Air Fryer Frittata Recipe to suit your cravings. Whether you prefer a vegetarian delight, a meat-packed feast, or a cheesy herb-infused dish, the possibilities are endless. Enjoy experimenting with flavors and ingredients to find your perfect frittata!

Cooking Note for the Air Fryer Frittata Recipe

Air Fryer Frittata Recipe, there are a few important cooking notes to keep in mind. These tips will help ensure that your frittata turns out perfectly every time.

First, always check the size of your air fryer. Different models may have varying capacities. If your air fryer is smaller, you might need to adjust the recipe or cook the frittata in batches. A 7-inch round pan fits well in most air fryers, but if yours is smaller, consider using a smaller baking dish.

Next, be mindful of the cooking time. While the recipe suggests 15-18 minutes, cooking times can vary based on the air fryer model and the thickness of your frittata. It’s a good idea to check for doneness a few minutes before the suggested time. The frittata should be set in the center and lightly golden on top. If it’s still jiggly, give it a few more minutes.

Another tip is to avoid overcrowding the pan. If you add too many ingredients, the frittata may not cook evenly. Stick to the recommended amounts for the best results. If you want to add more vegetables or meats, consider reducing the quantity of other ingredients to maintain balance.

Lastly, let the frittata cool for a few minutes after cooking. This allows it to set further and makes slicing easier. If you try to cut it too soon, it may fall apart. Patience is key!

Air Fryer Frittata Recipe. Enjoy the process and the delicious results!

Serving Suggestions for the Air Fryer Frittata Recipe

Air Fryer Frittata Recipe is cooked to perfection, it’s time to think about how to serve it. This dish is not only delicious but also visually appealing, making it a great centerpiece for any breakfast or brunch table. Here are some serving suggestions to elevate your frittata experience:

  • Fresh Salad: Pair your frittata with a light salad. A simple mix of greens, cherry tomatoes, and a drizzle of olive oil can complement the rich flavors of the frittata.
  • Toast or Bread: Serve slices of whole-grain toast or crusty bread on the side. This adds a nice crunch and can be used to scoop up the frittata.
  • Fruit Platter: A colorful fruit platter can brighten up your meal. Consider including berries, melon, or citrus fruits for a refreshing contrast.
  • Yogurt Parfait: For a balanced breakfast, serve a yogurt parfait with granola and fresh fruit. This adds a creamy texture and sweetness to your meal.
  • Hot Sauce or Salsa: If you enjoy a bit of heat, offer hot sauce or salsa on the side. This can add an exciting kick to each bite of your frittata.

Additionally, consider garnishing your frittata with fresh herbs like parsley or chives. This not only enhances the presentation but also adds a burst of flavor. You can also sprinkle some extra cheese on top for a cheesy finish.

Air Fryer Frittata Recipe is versatile enough to stand alone or shine alongside other dishes. Enjoy your delicious creation!

Tips for Perfecting Your Air Fryer Frittata Recipe

Air Fryer Frittata Recipe, a few helpful tips can go a long way. These suggestions will help you achieve a fluffy, flavorful frittata every time. Let’s explore some key tips to elevate your cooking experience!

First, always use fresh ingredients. Fresh eggs, vegetables, and herbs will enhance the flavor of your frittata. If possible, choose organic eggs and seasonal vegetables for the best taste. Fresh ingredients not only improve the dish but also add nutritional value.

Next, consider the size of your ingredients. Chop vegetables into small, uniform pieces. This ensures they cook evenly and blend well with the eggs. If you’re using denser vegetables like potatoes, pre-cook them slightly before adding them to the frittata mixture. This will help them soften and cook through during the air frying process.

Another important tip is to avoid overmixing the egg mixture. While you want to combine the ingredients well, overmixing can lead to a dense frittata. Gently fold the ingredients together until just combined. This will help maintain a light and airy texture.

Don’t forget to season your frittata! While the recipe includes salt, pepper, and garlic powder, feel free to experiment with other spices. A pinch of paprika, cayenne pepper, or Italian seasoning can add a delightful twist. Taste the mixture before cooking to ensure it’s seasoned to your liking.

Lastly, let your frittata rest after cooking. Allowing it to cool for a few minutes helps it set and makes slicing easier. This resting period also allows the flavors to meld together, enhancing the overall taste.

Air Fryer Frittata Recipe. Enjoy the process of creating a delicious breakfast that everyone will love!

Breakdown of Time for the Air Fryer Frittata Recipe

Air Fryer Frittata Recipe can help you plan your cooking efficiently. Here’s a simple breakdown of the time required for preparation and cooking:

Prep Time

The prep time for this frittata is quite short. You’ll need about 10-15 minutes to gather your ingredients and prepare the vegetables. This includes washing, dicing, and measuring everything you need. Having everything ready will make the cooking process smoother and more enjoyable.

Cooking Time

Once your ingredients are prepped, the cooking time in the air fryer is approximately 15-18 minutes. During this time, the frittata will cook evenly, becoming fluffy and golden. Keep an eye on it as it cooks to ensure it doesn’t overcook. Checking for doneness a few minutes before the timer goes off is a good practice.

Total Time

Air Fryer Frittata Recipe an excellent choice for busy mornings or last-minute brunch plans. With just a little time, you can enjoy a delicious and nutritious meal!

Nutritional Information for the Air Fryer Frittata Recipe

Air Fryer Frittata Recipe is not only delicious but also offers a good mix of nutrients. Here’s a breakdown of the nutritional information per serving:

Calories

Each serving of the air fryer frittata contains approximately 200 calories. This makes it a great option for breakfast or brunch without overwhelming your daily caloric intake. The combination of eggs, cheese, and vegetables provides a satisfying meal that keeps you energized throughout the day.

Protein

Protein is vital for building and repairing tissues, and this frittata delivers! Each serving contains about 14 grams of protein. The eggs and cheese contribute significantly to this protein content, making it an excellent choice for those looking to increase their protein intake. This protein-rich meal can help keep you feeling full and satisfied.

Sodium

When it comes to sodium, each serving of the air fryer frittata has around 400 milligrams. While this is a reasonable amount for a meal, it’s essential to be mindful of your overall sodium intake throughout the day. If you’re watching your sodium levels, consider using low-sodium ham or cheese, or adjust the seasoning to suit your dietary needs.

Air Fryer Frittata Recipe is a nutritious option that provides a good balance of calories, protein, and sodium. It’s a fantastic way to start your day with a meal that’s both satisfying and healthy!

FAQs about the Air Fryer Frittata Recipe

Can I make the Air Fryer Frittata Recipe ahead of time?

Air Fryer Frittata Recipe is perfect for meal prep. You can make it a day in advance and store it in the refrigerator. Just let it cool completely before covering it with plastic wrap or placing it in an airtight container. When you’re ready to enjoy it, simply reheat individual slices in the air fryer or microwave. This makes for a quick and easy breakfast option on busy mornings!

What can I substitute for eggs in the Air Fryer Frittata Recipe?

If you’re looking for an egg substitute, there are several options available. For a vegan version, you can use a mixture of silken tofu blended until smooth. Typically, 1/4 cup of blended tofu can replace one egg. Another option is to use chickpea flour mixed with water, which can mimic the texture of eggs. For every egg, mix 3 tablespoons of chickpea flour with 3 tablespoons of water. These alternatives will help you create a delicious frittata without eggs!

How do I store leftovers from the Air Fryer Frittata Recipe?

Storing leftovers is easy! Once your frittata has cooled, slice it into individual portions. Place the slices in an airtight container and store them in the refrigerator. They will stay fresh for up to 3-4 days. If you want to keep them longer, consider freezing the slices. Wrap each piece in plastic wrap and then place them in a freezer-safe bag. When you’re ready to eat, simply thaw and reheat!

Can I use frozen vegetables in the Air Fryer Frittata Recipe?

Air Fryer Frittata Recipe. Just make sure to thaw and drain them before adding them to the egg mixture. This helps prevent excess moisture, which can make the frittata soggy. Frozen vegetables like spinach, bell peppers, and broccoli work well. They are convenient and can save you time in the kitchen!

Air Fryer Frittata Recipe. Enjoy experimenting with this versatile dish and make it your own!

Conclusion on the Air Fryer Frittata Recipe

Air Fryer Frittata Recipe is a fantastic addition to your breakfast repertoire. It combines simplicity, flavor, and nutrition, making it an ideal choice for busy mornings or leisurely brunches. With just a few ingredients and minimal prep time, you can create a dish that is not only satisfying but also versatile enough to cater to various tastes and dietary preferences.

Whether you opt for a classic version with ham and cheese, a vibrant vegetarian mix, or a hearty meat lover’s delight, the possibilities are endless. The air fryer ensures that your frittata cooks evenly, resulting in a fluffy texture and a delightful golden top. Plus, it’s a healthier cooking method that requires less oil than traditional frying.

As you experiment with different ingredients and flavors, you’ll discover your own favorite combinations. Remember to follow the tips and variations provided to perfect your frittata-making skills. This dish is not just a meal; it’s an opportunity to get creative in the kitchen!

So, gather your ingredients, fire up your air fryer, and enjoy the deliciousness of your homemade frittata. It’s a meal that brings joy to the table and fuels your day with wholesome goodness. Happy cooking!

Burrata Caprese salad is a delicious summer delight.

Introduction to Burrata Caprese Salad

What is Burrata Caprese Salad?

Burrata Caprese salad is a delightful dish that combines the creamy richness of burrata cheese with the fresh flavors of ripe tomatoes and fragrant basil. This salad is not just a feast for the eyes; it’s also a treat for the taste buds. The burrata, with its soft outer shell and creamy interior, adds a luxurious touch to the classic Caprese salad. Each bite offers a perfect balance of textures and flavors, making it a popular choice for summer gatherings or light meals.

The Origins of Burrata Caprese Salad

The origins of Burrata Caprese salad can be traced back to Italy, where the Caprese salad itself was first created on the island of Capri. Traditionally, this salad features fresh mozzarella, tomatoes, and basil, representing the colors of the Italian flag. Burrata, a cheese that originated in the Apulia region of Italy, is a newer addition to this classic dish. It was first made in the early 20th century and has since gained popularity worldwide. The creamy texture of burrata enhances the original Caprese, making it a beloved variation among cheese lovers and food enthusiasts alike.

Ingredients for Burrata Caprese Salad

To create a delicious Burrata Caprese salad, you need fresh and high-quality ingredients. The beauty of this dish lies in its simplicity, so choosing the best components is essential. Here’s what you’ll need:

  • 8 ounces burrata cheese
  • 2 large ripe tomatoes, sliced
  • 1 cup fresh basil leaves
  • 3 tablespoons extra virgin olive oil
  • 1 tablespoon balsamic glaze
  • Salt, to taste
  • Freshly cracked black pepper, to taste

These ingredients come together to create a vibrant and flavorful salad. The burrata cheese is the star of the show, providing a creamy texture that pairs beautifully with the juicy tomatoes and aromatic basil. The olive oil and balsamic glaze add depth and richness, while the salt and pepper enhance the overall taste.

Step-by-Step Preparation of Burrata Caprese Salad

Step 1: Gather Your Ingredients

Before you start, make sure you have all your ingredients ready. Freshness is key, especially for the tomatoes and basil. Gather everything on your kitchen counter for easy access.

Step 2: Prepare the Tomatoes

Next, slice the tomatoes into thick rounds. Aim for about half an inch in thickness. This will help them hold their shape and provide a satisfying bite. Arrange the slices on a serving platter, overlapping them slightly for a beautiful presentation.

Step 3: Slice the Burrata

Now it’s time to prepare the burrata cheese. Gently tear it into pieces using your hands. This method keeps the cheese soft and creamy, which is perfect for this salad. Place the torn burrata pieces on top of the arranged tomatoes.

Step 4: Assemble the Salad

Once the tomatoes and burrata are in place, scatter the fresh basil leaves over the top. The vibrant green of the basil adds a pop of color and a burst of flavor. Feel free to tear the basil leaves for a more rustic look.

Step 5: Drizzle with Olive Oil and Balsamic Vinegar

Finally, drizzle the extra virgin olive oil evenly over the entire dish. Follow this with a drizzle of balsamic glaze for a touch of sweetness and tang. Season with salt and freshly cracked black pepper to taste. Your Burrata Caprese salad is now ready to be enjoyed!

Variations of Burrata Caprese Salad

While the classic Burrata Caprese salad is delicious on its own, there are many fun ways to mix things up! Adding different ingredients can enhance the flavors and make the dish even more exciting. Here are a couple of variations to consider:

Adding Fruits to Burrata Caprese Salad

Fruits can add a sweet twist to your Burrata Caprese salad. Consider adding slices of ripe peaches or juicy strawberries. These fruits pair wonderfully with the creamy burrata and fresh basil. The sweetness of the fruit balances the savory flavors, creating a delightful contrast. You can also try adding pomegranate seeds for a burst of color and a crunchy texture.

Herb Variations for Burrata Caprese Salad

Herbs can elevate the taste of your salad. While basil is traditional, you can experiment with other herbs like mint or arugula. Mint adds a refreshing flavor, while arugula brings a peppery kick. Mixing different herbs can create a unique flavor profile that keeps your Burrata Caprese salad interesting. Don’t hesitate to get creative with your herb choices!

These variations not only enhance the taste but also make your salad visually appealing. Feel free to mix and match ingredients based on your preferences and what’s in season. The possibilities are endless!

Step-by-Step Preparation of Burrata Caprese Salad

Step 1: Gather Your Ingredients

Before diving into the preparation, it’s essential to gather all your ingredients. Freshness is key for this dish, so make sure your tomatoes are ripe and your basil is fragrant. Lay everything out on your kitchen counter. This will make the process smoother and more enjoyable. You’ll need burrata cheese, tomatoes, basil, olive oil, balsamic glaze, salt, and pepper. Having everything ready will help you create a beautiful salad without any fuss!

Step 2: Prepare the Tomatoes

Now, let’s focus on the tomatoes. Start by washing them thoroughly under cool water. Once clean, slice the tomatoes into thick rounds, about half an inch thick. This thickness helps them maintain their shape and adds a satisfying bite. Arrange the tomato slices on a serving platter, overlapping them slightly. This not only looks appealing but also allows the flavors to meld together beautifully.

Step 3: Slice the Burrata

Next, it’s time to prepare the star of the show: the burrata cheese. Instead of cutting it with a knife, gently tear the burrata into pieces using your hands. This method keeps the cheese soft and creamy, which is perfect for this salad. Place the torn burrata pieces on top of the arranged tomatoes. The creamy texture of the burrata will contrast wonderfully with the juicy tomatoes, creating a delightful experience in every bite.

Step 4: Assemble the Salad

With the tomatoes and burrata in place, it’s time to add some freshness. Scatter the fresh basil leaves over the top of the salad. The vibrant green of the basil not only adds color but also a burst of flavor. For a more rustic look, feel free to tear the basil leaves instead of leaving them whole. This will release more of their aromatic oils, enhancing the overall taste of your Burrata Caprese salad.

Step 5: Drizzle with Olive Oil and Balsamic Vinegar

Finally, it’s time to add the finishing touches. Drizzle the extra virgin olive oil evenly over the entire dish. This adds richness and depth to the flavors. Next, add a drizzle of balsamic glaze for a touch of sweetness and tang. It beautifully complements the creamy burrata and juicy tomatoes. Don’t forget to season with salt and freshly cracked black pepper to taste. Your Burrata Caprese salad is now ready to be served! Enjoy it fresh for the best experience.

Variations of Burrata Caprese Salad

While the classic Burrata Caprese salad is delicious on its own, there are many fun ways to mix things up! Adding different ingredients can enhance the flavors and make the dish even more exciting. Here are a couple of variations to consider:

Adding Fruits to Burrata Caprese Salad

Fruits can add a sweet twist to your Burrata Caprese salad. Consider adding slices of ripe peaches or juicy strawberries. These fruits pair wonderfully with the creamy burrata and fresh basil. The sweetness of the fruit balances the savory flavors, creating a delightful contrast. You can also try adding pomegranate seeds for a burst of color and a crunchy texture. Not only do these fruits enhance the taste, but they also make the salad visually appealing. The vibrant colors of the fruits combined with the green basil and white burrata create a stunning presentation that is sure to impress your guests.

Herb Variations for Burrata Caprese Salad

Herbs can elevate the taste of your salad. While basil is traditional, you can experiment with other herbs like mint or arugula. Mint adds a refreshing flavor, while arugula brings a peppery kick. Mixing different herbs can create a unique flavor profile that keeps your Burrata Caprese salad interesting. You might even consider adding chives or dill for a different twist. Don’t hesitate to get creative with your herb choices! The addition of various herbs not only enhances the flavor but also adds a beautiful touch to the overall presentation of the salad.

These variations not only enhance the taste but also make your salad visually appealing. Feel free to mix and match ingredients based on your preferences and what’s in season. The possibilities are endless!

Cooking Note for Burrata Caprese Salad

When preparing Burrata Caprese salad, a few cooking notes can help you achieve the best results. First, always choose the freshest ingredients. The quality of your tomatoes and burrata cheese significantly impacts the overall flavor of the dish. Look for tomatoes that are ripe and fragrant, as they will provide the best taste. Heirloom tomatoes are an excellent choice for their unique flavors and colors.

Next, consider the temperature of your ingredients. For the best experience, serve the salad at room temperature. If you prefer a chilled salad, you can refrigerate it for up to 15 minutes before serving. However, avoid leaving it in the fridge for too long, as the burrata can lose its creamy texture.

Additionally, when drizzling olive oil and balsamic glaze, do so sparingly. A little goes a long way in enhancing the flavors without overpowering the dish. Finally, remember to taste as you go! Adjust the seasoning with salt and pepper to suit your preferences. This simple step can elevate your Burrata Caprese salad to new heights.

Serving Suggestions for Burrata Caprese Salad

Serving your Burrata Caprese salad can be just as delightful as preparing it. The presentation plays a significant role in enhancing the dining experience. Here are some creative serving suggestions to make your salad shine:

  • Chilled Plates: For a refreshing touch, chill your serving plates in the refrigerator before plating the salad. This keeps the salad cool and enhances the overall experience, especially on warm days.
  • Accompany with Bread: Serve the salad alongside crusty bread or toasted baguette slices. This allows guests to scoop up the creamy burrata and juicy tomatoes, making each bite even more enjoyable.
  • Pair with Wine: A light white wine, such as Pinot Grigio or Sauvignon Blanc, pairs beautifully with the flavors of the salad. The crispness of the wine complements the creaminess of the burrata and the acidity of the tomatoes.
  • Garnish with Extra Basil: For an extra pop of color and flavor, garnish the salad with additional fresh basil leaves just before serving. This not only enhances the visual appeal but also adds a burst of freshness.
  • Serve as an Appetizer: Consider serving the Burrata Caprese salad as a starter at your next dinner party. Its vibrant colors and fresh flavors will impress your guests and set the tone for a delightful meal.

These serving suggestions can elevate your Burrata Caprese salad, making it a centerpiece at any gathering. Whether it’s a casual lunch or a festive dinner, this salad is sure to impress with its beauty and taste. Enjoy the delightful combination of flavors and textures, and watch as your guests savor every bite!

Tips for Making the Perfect Burrata Caprese Salad

Creating the perfect Burrata Caprese salad is all about attention to detail and using high-quality ingredients. Here are some helpful tips to ensure your salad is a hit every time:

  • Choose Quality Ingredients: The success of your salad starts with the ingredients. Opt for fresh, ripe tomatoes and high-quality burrata cheese. Look for burrata that is creamy and soft, as this will enhance the overall flavor of the dish.
  • Use Seasonal Produce: Whenever possible, use seasonal tomatoes. Heirloom varieties are particularly flavorful and add a beautiful array of colors to your salad. Fresh basil should also be vibrant and fragrant, as this will elevate the taste.
  • Slice with Care: When slicing your tomatoes, aim for even thickness. This ensures that each bite has a consistent texture. A serrated knife works well for cutting tomatoes without squishing them.
  • Let It Rest: After assembling your salad, let it sit for a few minutes before serving. This allows the flavors to meld together, creating a more harmonious taste experience.
  • Balance the Flavors: Taste your salad before serving. Adjust the seasoning with salt and freshly cracked black pepper to enhance the flavors. A pinch of salt can bring out the sweetness of the tomatoes and the creaminess of the burrata.
  • Experiment with Acidity: If you enjoy a bit of tang, consider adding a splash of fresh lemon juice along with the balsamic glaze. This can brighten the flavors and add a refreshing twist.
  • Presentation Matters: Take the time to arrange your salad beautifully. Overlapping the tomato slices and artfully placing the burrata can make your dish visually stunning. A well-presented salad is always more appetizing!
  • Serve Fresh: Burrata Caprese salad is best enjoyed fresh. If you need to prepare it ahead of time, keep the components separate until just before serving. This will maintain the texture and flavor of the ingredients.

By following these tips, you can create a Burrata Caprese salad that not only looks beautiful but also tastes incredible. Enjoy the process of making this delightful dish, and share it with family and friends for a truly memorable experience!

Breakdown of Time for Burrata Caprese Salad

Prep Time

Preparing your Burrata Caprese salad is quick and easy! The prep time typically takes about 15 minutes. This includes gathering your ingredients, washing the tomatoes and basil, slicing the tomatoes, and tearing the burrata cheese. With everything ready, you’ll be on your way to enjoying this delicious salad in no time!

Cooking Time

Interestingly, there’s no actual cooking involved in making a Burrata Caprese salad. Instead, the focus is on assembling fresh ingredients. This means your cooking time is effectively zero! The beauty of this dish lies in its simplicity and the quality of the ingredients, allowing you to enjoy a gourmet experience without any cooking hassle.

Total Time

In total, you can expect to spend around 15 minutes from start to finish when making your Burrata Caprese salad. This makes it a perfect option for a quick lunch, a light dinner, or an impressive appetizer for guests. With minimal time investment, you can create a stunning and flavorful dish that everyone will love!

Nutritional Information for Burrata Caprese Salad

Calories in Burrata Caprese Salad

When it comes to enjoying a delicious Burrata Caprese salad, understanding its nutritional value is essential. Each serving of this delightful salad contains approximately 250 calories. This makes it a great option for those looking for a light yet satisfying meal. The combination of fresh ingredients not only provides flavor but also contributes to a balanced diet. Enjoying this salad can be a guilt-free way to indulge in a creamy and flavorful dish.

Protein Content in Burrata Caprese Salad

Protein is an important part of any meal, and the Burrata Caprese salad delivers on this front as well. Each serving contains about 10 grams of protein, primarily from the burrata cheese. This protein content helps keep you feeling full and satisfied. Pairing this salad with whole-grain bread can further enhance the protein intake, making it a well-rounded option for lunch or dinner.

Sodium Levels in Burrata Caprese Salad

Monitoring sodium intake is crucial for maintaining a healthy diet. In a serving of Burrata Caprese salad, the sodium levels are relatively low, making it a heart-healthy choice. The amount of salt you add can vary based on personal preference, but it’s important to keep it moderate. This salad allows you to enjoy fresh flavors without excessive sodium, making it suitable for those watching their salt intake.

FAQs about Burrata Caprese Salad

Can I use regular mozzarella instead of burrata in a Burrata Caprese salad?

Yes, you can use regular mozzarella in place of burrata if needed. However, keep in mind that burrata offers a unique creamy texture that mozzarella lacks. If you choose mozzarella, opt for fresh mozzarella for the best flavor. It will still create a delicious salad, but the experience will be different. Burrata adds a luxurious touch that many find irresistible!

What is the best type of tomato for Burrata Caprese salad?

The best type of tomato for Burrata Caprese salad is a ripe, juicy tomato. Heirloom tomatoes are a fantastic choice due to their rich flavors and vibrant colors. They come in various shapes and sizes, adding visual appeal to your dish. If heirloom tomatoes are not available, look for vine-ripened tomatoes or beefsteak tomatoes. The key is to choose tomatoes that are fresh and fragrant, as they will enhance the overall taste of your salad.

How do I store leftover Burrata Caprese salad?

Storing leftover Burrata Caprese salad can be tricky due to the creamy burrata. If you have leftovers, it’s best to keep the components separate. Store the tomatoes and basil in one container and the burrata in another. This helps maintain the texture of the burrata. You can refrigerate the salad for up to a day. However, for the best taste and texture, it’s recommended to enjoy the salad fresh. If you must store it, consume it as soon as possible!

Can I make Burrata Caprese salad ahead of time?

While it’s best to serve Burrata Caprese salad fresh, you can prepare some components ahead of time. You can slice the tomatoes and tear the basil leaves a few hours in advance. However, it’s advisable to add the burrata and drizzle the olive oil and balsamic glaze just before serving. This ensures that the burrata remains creamy and the salad stays vibrant. Preparing the ingredients ahead of time can save you effort when it’s time to serve!

Conclusion on Burrata Caprese Salad

In conclusion, Burrata Caprese salad is a delightful dish that brings together the best of fresh ingredients. The creamy burrata, ripe tomatoes, and fragrant basil create a harmonious blend of flavors and textures. This salad is not only visually stunning but also incredibly easy to prepare, making it a perfect choice for any occasion.

Whether you’re hosting a summer gathering, enjoying a light lunch, or simply treating yourself to a delicious meal, Burrata Caprese salad is sure to impress. Its versatility allows for endless variations, so feel free to experiment with different fruits and herbs to suit your taste. Remember, the key to a great salad lies in the quality of your ingredients, so always opt for the freshest produce available.

As you prepare and serve this delightful dish, take a moment to appreciate the vibrant colors and enticing aromas. Each bite offers a burst of flavor that celebrates the simplicity of Italian cuisine. So gather your loved ones, share this beautiful salad, and enjoy the wonderful experience it brings. With its rich history and delicious taste, Burrata Caprese salad is destined to become a favorite in your culinary repertoire.

Tomato Burrata Salad Recipe is a must-try delight!

Introduction to Tomato Burrata Salad Recipe

The Tomato Burrata Salad Recipe is a delightful dish that brings together fresh ingredients in a simple yet elegant way. This salad is perfect for warm days or as a light appetizer. With its vibrant colors and rich flavors, it’s sure to impress your family and friends. The creamy burrata cheese pairs beautifully with the juicy cherry tomatoes, creating a refreshing experience for your taste buds.

What is Burrata Cheese?

Burrata cheese is a fresh Italian cheese made from mozzarella and cream. It has a soft outer shell and a rich, creamy center. When you cut into it, the creamy filling oozes out, making it a luxurious addition to any dish. Burrata is often enjoyed with salads, pasta, or simply on its own with a drizzle of olive oil. Its mild flavor and creamy texture make it a favorite among cheese lovers.

The Origin of Tomato Burrata Salad

The Tomato Burrata Salad has its roots in Italian cuisine, where fresh ingredients are celebrated. This salad showcases the best of summer produce, particularly ripe tomatoes and creamy burrata. Traditionally, it is served as an antipasto, or appetizer, in Italy. Over the years, it has gained popularity worldwide, becoming a staple in many restaurants and homes. The combination of flavors and textures makes it a versatile dish that can be enjoyed in various settings, from casual picnics to elegant dinner parties.

Ingredients for Tomato Burrata Salad Recipe

To create a delicious Tomato Burrata Salad, you’ll need a few fresh ingredients. Each component plays a vital role in enhancing the overall flavor and texture of the dish. Here’s what you’ll need:

  • 2 cups cherry tomatoes – Halved for easy eating and maximum flavor.
  • 8 ounces burrata cheese – The star of the salad, providing creaminess.
  • 1/4 cup fresh basil leaves – Torn to release their aromatic oils.
  • 2 tablespoons extra virgin olive oil – Adds richness and depth.
  • 1 tablespoon balsamic vinegar – Provides a tangy contrast to the sweetness of the tomatoes.
  • Salt and pepper to taste – Essential for enhancing all the flavors.

These ingredients come together to create a vibrant and flavorful salad. The combination of juicy tomatoes, creamy burrata, and fragrant basil is simply irresistible. Plus, the olive oil and balsamic vinegar dressing ties everything together beautifully. Make sure to use the freshest ingredients possible for the best results!

Step-by-Step Preparation of Tomato Burrata Salad Recipe

Now that you have all your ingredients ready, it’s time to prepare your Tomato Burrata Salad. This step-by-step guide will help you create a delicious and visually appealing dish. Let’s dive in!

Step 1: Gather Your Ingredients

Before you start, make sure you have everything you need. Gather the cherry tomatoes, burrata cheese, fresh basil, olive oil, balsamic vinegar, salt, and pepper. Having all your ingredients in one place makes the process smoother and more enjoyable.

Step 2: Prepare the Tomatoes

Next, take your cherry tomatoes and wash them thoroughly under cold water. After rinsing, slice each tomato in half. This step is crucial as it allows the flavors to meld beautifully with the dressing. Plus, halved tomatoes are easier to eat and look great on the plate!

Step 3: Slice the Burrata Cheese

Now, it’s time to prepare the burrata cheese. Carefully remove it from its packaging and drain any excess liquid. Using your hands, gently tear the burrata into bite-sized pieces. This method not only makes it easier to serve but also adds a rustic touch to your salad.

Step 4: Assemble the Salad

In a large bowl, combine the halved cherry tomatoes and torn basil leaves. Gently toss them together to mix the flavors. Then, transfer this mixture to a serving platter. Next, place the torn burrata pieces on top of the tomato and basil mixture. This layering creates a beautiful presentation that will impress your guests.

Step 5: Drizzle with Dressing

Finally, it’s time to add the finishing touches. Drizzle the extra virgin olive oil and balsamic vinegar over the salad. Season with salt and pepper to taste. Gently toss everything together to ensure the dressing coats all the ingredients evenly. For the best flavor, let the salad sit for about 10 minutes before serving. This allows the flavors to meld together beautifully.

And there you have it! Your Tomato Burrata Salad is ready to be enjoyed. This simple yet elegant dish is perfect for any occasion.

Variations of Tomato Burrata Salad Recipe

While the classic Tomato Burrata Salad is delicious on its own, there are many ways to customize it. Adding different ingredients can enhance the flavors and make the dish even more exciting. Here are some variations to consider:

Adding Fresh Herbs

Fresh herbs can elevate your Tomato Burrata Salad to new heights. Consider adding herbs like parsley, chives, or mint for a refreshing twist. These herbs not only add flavor but also bring a pop of color to your dish. Simply chop the herbs finely and sprinkle them over the salad before serving. You can mix and match herbs based on your preference or what you have on hand. The addition of fresh herbs will make your salad taste even more vibrant and aromatic.

Incorporating Other Vegetables

Another great way to vary your Tomato Burrata Salad is by incorporating other vegetables. For instance, you can add sliced cucumbers for a crunchy texture or bell peppers for a sweet crunch. Roasted vegetables, like zucchini or eggplant, can also be a delicious addition. Just make sure to prepare them properly, either by grilling or roasting, to enhance their flavors. Mixing in different vegetables not only adds variety but also boosts the nutritional value of your salad.

Feel free to experiment with these variations to create a Tomato Burrata Salad that suits your taste. The possibilities are endless, and each twist can lead to a delightful new experience!

Cooking Note for Tomato Burrata Salad Recipe

When preparing your Tomato Burrata Salad, there are a few important cooking notes to keep in mind. These tips will help you achieve the best flavor and presentation for your dish.

First, always choose the freshest ingredients. The quality of your tomatoes and burrata cheese can significantly impact the overall taste. Look for ripe, vibrant cherry tomatoes that are firm to the touch. They should have a sweet aroma, indicating their freshness. For the burrata, opt for cheese that is creamy and soft, with a slight sheen on the surface. This ensures a rich and luxurious texture in your salad.

Next, consider the timing of your salad preparation. It’s best to assemble the salad just before serving. This way, the tomatoes remain juicy, and the burrata stays creamy. If you need to prepare it in advance, keep the dressing separate until you’re ready to serve. This prevents the salad from becoming soggy and helps maintain the vibrant colors of the ingredients.

Additionally, when tearing the burrata, do so gently. This preserves its creamy center and creates a beautiful presentation. Avoid using a knife, as it can compress the cheese and affect its texture. Instead, use your hands to pull it apart, allowing the creamy filling to ooze out naturally.

Lastly, don’t forget to taste as you go! Adjust the seasoning with salt and pepper according to your preference. A little extra seasoning can make a big difference in enhancing the flavors of your Tomato Burrata Salad. Enjoy the process, and let your creativity shine through!

Serving Suggestions for Tomato Burrata Salad Recipe

Serving your Tomato Burrata Salad is just as important as preparing it. The way you present this dish can enhance the dining experience and make it even more enjoyable. Here are some delightful serving suggestions to consider:

  • Chilled Plates: Serve the salad on chilled plates. This keeps the ingredients fresh and cool, especially on warm days. It also adds a touch of elegance to your presentation.
  • Accompany with Bread: Pair your salad with crusty bread or toasted baguette slices. The bread is perfect for scooping up the creamy burrata and juicy tomatoes, making each bite even more satisfying.
  • Wine Pairing: Consider serving your Tomato Burrata Salad with a glass of white wine, such as Sauvignon Blanc or Pinot Grigio. These wines complement the flavors of the salad beautifully and enhance the overall dining experience.
  • Garnish with Extra Basil: For a pop of color and flavor, garnish the salad with additional fresh basil leaves just before serving. This not only looks appealing but also adds a burst of freshness.
  • Serve as a Side Dish: This salad makes a fantastic side dish for grilled meats or seafood. Its lightness balances out heavier main courses, making it a versatile addition to any meal.

By following these serving suggestions, you can elevate your Tomato Burrata Salad to a whole new level. Whether it’s a casual family dinner or a special gathering with friends, this salad is sure to impress!

Tips for Perfecting Your Tomato Burrata Salad Recipe

Creating the perfect Tomato Burrata Salad is all about attention to detail. With a few simple tips, you can elevate your dish and impress your guests. Here are some helpful suggestions to ensure your salad is a hit every time:

  • Choose the Right Tomatoes: Opt for ripe, in-season cherry tomatoes. They should be vibrant in color and firm to the touch. The sweetness of fresh tomatoes is key to a delicious salad.
  • Use High-Quality Burrata: Select burrata that is fresh and creamy. Look for cheese with a soft exterior and a rich, gooey center. This will enhance the overall texture and flavor of your salad.
  • Fresh Basil is Essential: Always use fresh basil leaves instead of dried. The aromatic oils in fresh basil add a burst of flavor that dried herbs simply can’t match. Tear the leaves gently to release their oils.
  • Season Generously: Don’t be shy with salt and pepper. A little seasoning can bring out the natural flavors of the tomatoes and cheese. Taste as you go to find the perfect balance.
  • Let it Rest: Allow your salad to sit for about 10 minutes after assembling. This resting time lets the flavors meld together, creating a more harmonious taste.
  • Experiment with Dressings: While olive oil and balsamic vinegar are classic choices, feel free to experiment. Try adding a squeeze of lemon juice or a sprinkle of red pepper flakes for an extra kick.
  • Presentation Matters: Take the time to arrange your salad beautifully. Layer the ingredients artfully on a platter. A visually appealing dish is always more appetizing!
  • Serve Fresh: For the best experience, serve your salad immediately after preparation. This ensures the tomatoes are juicy, and the burrata remains creamy.

By following these tips, you can create a Tomato Burrata Salad that not only tastes amazing but also looks stunning. Enjoy the process and have fun experimenting with flavors!

Breakdown of Time for Tomato Burrata Salad Recipe

Understanding the time needed to prepare your Tomato Burrata Salad is essential for planning your meal. This dish is quick and easy to make, making it perfect for busy days or last-minute gatherings. Here’s a breakdown of the time involved:

Prep Time

The prep time for your Tomato Burrata Salad is approximately 15 minutes. This includes gathering your ingredients, washing the cherry tomatoes, tearing the basil, and preparing the burrata cheese. Since the steps are straightforward, you can easily manage this time, even if you’re new to cooking.

Cooking Time

Interestingly, there is no actual cooking time involved in this salad. The beauty of the Tomato Burrata Salad lies in its simplicity and freshness. All you need to do is assemble the ingredients and drizzle the dressing. This makes it a fantastic option for those who want a delicious meal without the hassle of cooking.

Total Time

In total, you can expect to spend about 15 minutes preparing your Tomato Burrata Salad. This quick preparation time allows you to enjoy a fresh and flavorful dish without spending hours in the kitchen. Whether you’re serving it as an appetizer or a side dish, this salad is sure to impress with its vibrant colors and delightful taste!

Nutritional Information for Tomato Burrata Salad Recipe

Understanding the nutritional content of your Tomato Burrata Salad is essential for maintaining a balanced diet. This salad not only delights your taste buds but also provides valuable nutrients. Here’s a breakdown of the key nutritional information per serving:

Calories

Each serving of the Tomato Burrata Salad contains approximately 220 calories. This makes it a light yet satisfying option for lunch or dinner. The combination of fresh ingredients ensures that you’re getting a nutritious meal without excessive calories. Enjoying this salad can help you stay within your daily caloric goals while still indulging in delicious flavors.

Protein

In terms of protein, this salad offers about 8 grams per serving. The burrata cheese contributes significantly to the protein content, making it a great choice for those looking to increase their protein intake. Protein is essential for muscle repair and growth, making this salad a smart option for active individuals or anyone looking to maintain a healthy lifestyle.

Sodium

The sodium content in the Tomato Burrata Salad is relatively low, making it a heart-healthy choice. Each serving contains around 200 milligrams of sodium, depending on how much salt you add during preparation. Keeping sodium levels in check is important for overall health, especially for those monitoring their blood pressure. This salad allows you to enjoy a flavorful dish without worrying about excessive sodium intake.

Overall, the Tomato Burrata Salad is not only delicious but also packed with nutrients. It’s a fantastic way to enjoy fresh produce while keeping your meals healthy and balanced. Whether you’re looking for a light lunch or a refreshing side dish, this salad fits the bill perfectly!

FAQs about Tomato Burrata Salad Recipe

Can I use other types of cheese in the Tomato Burrata Salad Recipe?

Absolutely! While burrata cheese is the star of this salad, you can certainly experiment with other types of cheese. Fresh mozzarella is a popular substitute, offering a similar creamy texture. Feta cheese can add a tangy flavor, while goat cheese provides a unique taste that pairs well with tomatoes. Just remember to choose a cheese that complements the freshness of the salad. Each cheese will bring its own character to the dish, so feel free to get creative!

How long can I store the Tomato Burrata Salad?

For the best taste and texture, it’s recommended to enjoy your Tomato Burrata Salad fresh. However, if you have leftovers, you can store them in an airtight container in the refrigerator for up to 1 day. Keep in mind that the tomatoes may release moisture, and the burrata could lose its creamy texture over time. To maintain the salad’s quality, it’s best to keep the dressing separate until you’re ready to eat. This way, you can enjoy the salad as if it were freshly made!

What are the best tomatoes to use for Tomato Burrata Salad Recipe?

When it comes to tomatoes, cherry tomatoes are the ideal choice for this salad. They are sweet, juicy, and easy to handle. Look for vibrant, firm cherry tomatoes that are in season for the best flavor. If you want to mix things up, you can also use heirloom tomatoes or grape tomatoes. These varieties offer different flavors and colors, adding visual appeal to your dish. Ultimately, the best tomatoes are those that are fresh and bursting with flavor!

Conclusion on Tomato Burrata Salad Recipe

The Tomato Burrata Salad Recipe is a celebration of fresh ingredients and simple preparation. This dish not only tantalizes your taste buds but also brings a burst of color to your table. With its creamy burrata, juicy cherry tomatoes, and fragrant basil, it’s a delightful option for any occasion. Whether you’re hosting a summer gathering or enjoying a quiet dinner at home, this salad is sure to impress.

Moreover, the versatility of the Tomato Burrata Salad allows you to customize it to your liking. You can add different herbs, vegetables, or even substitute the cheese to create a unique twist. The possibilities are endless, making it a dish you can enjoy time and time again without getting bored.

As you prepare this salad, remember to focus on the quality of your ingredients. Fresh, ripe tomatoes and creamy burrata are key to achieving the best flavor. Take your time to assemble the salad beautifully, and don’t forget to let it rest for a few minutes before serving. This will enhance the flavors and make every bite a delightful experience.

In conclusion, the Tomato Burrata Salad Recipe is not just a meal; it’s an experience. It invites you to savor the freshness of summer produce and enjoy the simple pleasures of good food. So, gather your ingredients, follow the steps, and treat yourself and your loved ones to this delicious salad. Happy cooking!

Burrata Bruschetta Recipe: A Delicious Italian Delight

Introduction to Burrata Bruschetta Recipe

What is Burrata Bruschetta?

Burrata bruschetta is a delightful Italian appetizer that combines the creamy richness of burrata cheese with the fresh flavors of tomatoes and basil. This dish features toasted bread topped with a vibrant mixture of cherry tomatoes, garlic, and herbs. The star of the show, burrata, is a soft cheese that oozes creaminess when you cut into it. This makes each bite a heavenly experience, blending textures and flavors that dance on your palate. Whether you’re hosting a gathering or enjoying a quiet evening at home, burrata bruschetta is sure to impress.

Why You Should Try This Burrata Bruschetta Recipe

There are many reasons to try this burrata bruschetta recipe. First, it’s incredibly easy to make, requiring just a few simple ingredients. In less than 30 minutes, you can whip up a dish that looks and tastes gourmet. Second, the combination of fresh ingredients makes it a healthy choice. With juicy tomatoes, fragrant basil, and creamy burrata, you’re treating yourself to a burst of flavor without the guilt.

Moreover, this recipe is versatile. You can customize it with different toppings or spices to suit your taste. Want a little heat? Add red pepper flakes! Prefer a more robust flavor? A layer of pesto works wonders. Finally, burrata bruschetta is perfect for any occasion. It can be served as an appetizer, a light lunch, or even a snack. So, gather your ingredients and get ready to enjoy a delicious dish that will leave everyone asking for seconds!

Ingredients for Burrata Bruschetta Recipe

To create the perfect burrata bruschetta, you’ll need a handful of fresh ingredients. Each component plays a vital role in delivering that delightful taste. Here’s what you’ll need:

  • 1 cup cherry tomatoes, halved
  • 1 tablespoon balsamic vinegar
  • 1 tablespoon olive oil
  • 1 clove garlic, minced
  • 1 teaspoon fresh basil, chopped (plus extra for garnish)
  • Salt and pepper, to taste
  • 1 French baguette, sliced into 1/2-inch pieces
  • 8 ounces burrata cheese
  • 1 tablespoon extra virgin olive oil (for drizzling)

These ingredients come together to create a burst of flavor in every bite. The cherry tomatoes provide sweetness, while the balsamic vinegar adds a tangy kick. Olive oil enhances the richness, and garlic brings in a savory note. Fresh basil adds a fragrant touch, making this dish truly special.

When selecting your ingredients, opt for ripe cherry tomatoes for the best flavor. Fresh basil is also key; it elevates the dish with its aromatic qualities. And, of course, the burrata cheese is essential. Its creamy texture is what makes this bruschetta stand out. With these ingredients in hand, you’re ready to embark on your culinary adventure!

Step-by-Step Preparation of Burrata Bruschetta Recipe

Step 1: Preparing the Bread

To start, preheat your oven to 400°F. This temperature is perfect for toasting the bread. While the oven heats up, take your French baguette and slice it into 1/2-inch pieces. This thickness allows for a nice crunch while still being soft enough to hold the toppings.

Next, arrange the baguette slices on a baking sheet. To enhance the flavor, lightly brush each side with olive oil. This step not only adds taste but also helps achieve that golden-brown color. Once your oven is ready, place the baking sheet inside. Toast the bread for about 5-7 minutes, or until it’s crispy and golden. Keep an eye on it to prevent burning!

Step 2: Making the Topping

While the bread is toasting, it’s time to prepare the delicious topping. In a medium bowl, combine the halved cherry tomatoes, balsamic vinegar, olive oil, minced garlic, and chopped basil. Sprinkle in some salt and pepper to taste. Gently toss the mixture to ensure all the ingredients are well combined.

Let this mixture sit for about 10 minutes. This resting time allows the flavors to meld beautifully. The tomatoes will soak up the balsamic vinegar, creating a juicy topping that pairs perfectly with the crispy bread.

Step 3: Assembling the Burrata Bruschetta

Once the bread is toasted and the topping is ready, it’s time to assemble your burrata bruschetta. Start by removing the toasted baguette slices from the oven. Place them on a serving platter. Now, take a generous spoonful of the tomato mixture and top each slice. Make sure to include some of the flavorful juices for extra taste.

Next, carefully tear the burrata cheese into pieces. Place these creamy chunks on top of the tomato-topped bruschetta. The burrata will melt slightly from the warmth of the bread, creating a delightful texture.

Step 4: Final Touches

To finish off your burrata bruschetta, drizzle a little extra virgin olive oil over the top. This adds a rich flavor and a beautiful sheen. For a pop of color and freshness, garnish with additional chopped basil. This final touch not only looks appealing but also enhances the overall taste.

Now, your burrata bruschetta is ready to serve! Enjoy it immediately while the bread is warm and the burrata is creamy. Each bite will be a delightful explosion of flavors!

Variations of Burrata Bruschetta Recipe

Different Toppings for Burrata Bruschetta

While the classic burrata bruschetta is delicious, there are many ways to switch things up! You can experiment with different toppings to create unique flavor profiles. Here are some tasty ideas:

  • Roasted Red Peppers: Add roasted red peppers for a smoky flavor. They pair wonderfully with the creamy burrata.
  • Avocado: For a creamy twist, mash some ripe avocado and spread it on the toasted bread before adding the tomato mixture.
  • Fig Jam: Spread a thin layer of fig jam on the bread for a sweet contrast to the savory toppings.
  • Olives: Chopped olives can add a briny kick. Mix them into the tomato topping for an extra burst of flavor.
  • Prosciutto: Add thin slices of prosciutto for a salty, savory addition that complements the burrata beautifully.

Feel free to mix and match these toppings to create your perfect burrata bruschetta. The possibilities are endless, and each variation brings its own delightful twist!

Alternative Bread Choices for Burrata Bruschetta

The type of bread you use can greatly influence the taste and texture of your burrata bruschetta. While a French baguette is a classic choice, consider these alternatives:

  • Sourdough: The tangy flavor of sourdough adds depth to your bruschetta. Its chewy texture holds up well against the toppings.
  • Ciabatta: This Italian bread has a rustic crust and airy interior, making it perfect for soaking up the juices from the toppings.
  • Whole Wheat Bread: For a healthier option, whole wheat bread adds a nutty flavor and extra fiber.
  • Gluten-Free Bread: If you’re gluten-sensitive, opt for gluten-free bread. It can be just as delicious when toasted!

Choosing the right bread can elevate your burrata bruschetta experience. So, don’t hesitate to try different types to find your favorite!

Cooking Note for Burrata Bruschetta Recipe

When preparing your burrata bruschetta, a few cooking notes can help ensure your dish turns out perfectly every time. First, always use fresh ingredients. Fresh cherry tomatoes and basil will enhance the flavor significantly. The quality of your burrata cheese is also crucial. Look for burrata that is creamy and soft, as this will provide the best texture and taste.

Next, pay attention to the toasting process. The goal is to achieve a crispy exterior while keeping the inside soft. If your oven has a broil setting, you can use it for the last minute of toasting. Just be sure to watch closely to prevent burning!

Additionally, consider the timing of your assembly. It’s best to assemble the bruschetta just before serving. This way, the bread remains crispy, and the burrata stays creamy. If you prepare the tomato topping in advance, store it in the refrigerator. Just remember to let it come to room temperature before topping the bread.

Lastly, don’t hesitate to get creative! Feel free to adjust the seasoning to your liking. A pinch of salt or a dash of pepper can make a big difference. And if you enjoy a bit of heat, adding red pepper flakes to the tomato mixture can elevate the flavor profile.

By keeping these cooking notes in mind, you’ll be well on your way to creating a delicious burrata bruschetta that will impress your family and friends!

Serving Suggestions for Burrata Bruschetta Recipe

When it comes to serving your burrata bruschetta, presentation and pairing can elevate the experience. Here are some delightful serving suggestions to consider:

  • Platter Presentation: Arrange the bruschetta on a large wooden or ceramic platter. This rustic look adds charm to your table. You can also sprinkle some extra basil leaves around for a pop of color.
  • Accompany with a Salad: Serve your bruschetta alongside a fresh arugula or mixed greens salad. A light vinaigrette can complement the flavors of the bruschetta beautifully.
  • Pair with Wine: A crisp white wine, like Sauvignon Blanc or Pinot Grigio, pairs wonderfully with the creamy burrata. If you prefer red, a light Chianti can also work well.
  • Serve as Part of a Charcuterie Board: Include your burrata bruschetta on a charcuterie board with cured meats, olives, and nuts. This makes for a delightful appetizer spread.
  • Garnish with Balsamic Reduction: Drizzle a balsamic reduction over the bruschetta just before serving. This adds a sweet and tangy flavor that enhances the dish.

These serving suggestions not only enhance the visual appeal of your burrata bruschetta but also create a more enjoyable dining experience. Whether it’s a casual gathering or a special occasion, these ideas will help you impress your guests!

Tips for Perfecting Your Burrata Bruschetta Recipe

Creating the perfect burrata bruschetta is all about attention to detail. Here are some helpful tips to ensure your dish turns out delicious every time:

  • Choose Quality Ingredients: The flavor of your bruschetta starts with the ingredients. Opt for ripe, juicy cherry tomatoes and fresh basil. High-quality burrata cheese is essential for that creamy texture.
  • Let the Topping Marinate: Allowing the tomato mixture to sit for at least 10 minutes helps the flavors meld together. This step enhances the overall taste of your bruschetta.
  • Don’t Overcrowd the Baking Sheet: When toasting the baguette slices, make sure they are spaced out. This allows for even toasting and prevents them from steaming.
  • Experiment with Seasoning: Feel free to adjust the salt and pepper to your liking. A pinch of red pepper flakes can add a delightful kick if you enjoy some heat.
  • Serve Immediately: For the best experience, serve your bruschetta right after assembling. This keeps the bread crispy and the burrata creamy, making each bite a delight.
  • Try Different Oils: While extra virgin olive oil is a classic choice, consider using flavored oils, like garlic-infused or herb-infused oils, for an extra layer of flavor.
  • Garnish Creatively: Fresh herbs like basil or even microgreens can add a beautiful touch. A sprinkle of sea salt or a drizzle of balsamic reduction can elevate the presentation.

By following these tips, you’ll be well on your way to mastering the art of burrata bruschetta. Each bite will be bursting with flavor, making it a hit at any gathering!

Breakdown of Time for Burrata Bruschetta Recipe

Prep Time

The prep time for your burrata bruschetta is quite minimal. You’ll need about 10-15 minutes to gather your ingredients and prepare the tomato topping. This includes washing and halving the cherry tomatoes, mincing the garlic, and chopping the fresh basil. It’s a quick and easy process that sets the stage for a delicious dish!

Cooking Time

Once your ingredients are prepped, the cooking time is also brief. Toasting the baguette slices in the oven takes about 5-7 minutes. During this time, you can let the tomato mixture sit to meld the flavors. This multitasking makes the cooking process efficient and enjoyable!

Total Time

In total, you can expect to spend around 20-25 minutes from start to finish. This includes both prep and cooking time. With such a quick turnaround, you can easily whip up this delightful burrata bruschetta for a last-minute gathering or a cozy night in. It’s a fantastic way to impress your guests without spending hours in the kitchen!

Nutritional Information for Burrata Bruschetta Recipe

Calories

When enjoying burrata bruschetta, it’s good to be aware of its nutritional content. Each serving contains approximately 320 calories. This makes it a satisfying yet light option for an appetizer or snack. The balance of ingredients ensures that you’re not just indulging in empty calories, but rather enjoying a dish packed with flavor and nutrients.

Protein

In terms of protein, each serving of burrata bruschetta provides about 10 grams. The burrata cheese contributes significantly to this protein content, making it a great choice for those looking to add some protein to their diet. Pairing this dish with a side of protein-rich foods can create a well-rounded meal.

Sodium

As for sodium, each serving contains around 400 milligrams. This amount is reasonable for an appetizer, but if you’re watching your sodium intake, consider adjusting the salt added to the tomato mixture. Using fresh ingredients can also help keep sodium levels in check while still delivering a burst of flavor.

Overall, burrata bruschetta is a delicious and nutritious option that can fit into a balanced diet. With its combination of fresh ingredients and creamy burrata, it’s a dish that not only tastes great but also provides essential nutrients. Enjoy it as part of a healthy lifestyle!

FAQs about Burrata Bruschetta Recipe

Can I use regular mozzarella instead of burrata?

Yes, you can use regular mozzarella instead of burrata. However, keep in mind that burrata has a unique creamy texture that mozzarella lacks. If you choose mozzarella, opt for fresh mozzarella for a better flavor and texture. It will still be delicious, but the experience will be slightly different without the creaminess of burrata.

How do I store leftover burrata bruschetta?

Storing leftover burrata bruschetta can be a bit tricky, as the bread may become soggy. If you have leftover toppings, store them in an airtight container in the refrigerator. For the best results, keep the toasted bread separate. When you’re ready to enjoy the leftovers, reheat the bread in the oven for a few minutes to restore its crispiness. Then, top it with the fresh tomato mixture and burrata just before serving.

What wine pairs well with burrata bruschetta?

When it comes to wine pairings, a crisp white wine is an excellent choice for burrata bruschetta. Sauvignon Blanc or Pinot Grigio complements the creamy burrata and fresh tomatoes beautifully. If you prefer red wine, a light Chianti can also work well. The key is to choose a wine that enhances the flavors without overpowering them.

Can I make burrata bruschetta ahead of time?

While it’s best to assemble burrata bruschetta just before serving, you can prepare some components ahead of time. You can make the tomato topping a few hours in advance and store it in the refrigerator. Just remember to let it come to room temperature before topping the bread. However, for the best texture, toast the bread right before serving to keep it crispy and delicious.

Conclusion on Burrata Bruschetta Recipe

In conclusion, the burrata bruschetta recipe is a delightful dish that brings together fresh ingredients and rich flavors. It’s not just an appetizer; it’s an experience that can elevate any meal. The creamy burrata, juicy tomatoes, and fragrant basil create a perfect harmony that is sure to please your taste buds.

This recipe is incredibly versatile, allowing you to customize it to your liking. Whether you prefer a classic version or want to experiment with different toppings, the possibilities are endless. Plus, it’s quick and easy to prepare, making it a fantastic option for both casual gatherings and special occasions.

As you gather your ingredients and follow the steps, remember to enjoy the process. Cooking should be fun and rewarding! With each bite of your burrata bruschetta, you’ll savor the love and effort you put into creating this dish. So, don’t hesitate to share it with family and friends, and watch as they delight in its flavors.

Next time you’re looking for a delicious appetizer or a light meal, remember this burrata bruschetta recipe. It’s a simple yet elegant dish that will leave everyone asking for more. Happy cooking!

Caramel Coffee Buttercream Cake Recipe is a must-try!

Introduction to Caramel Coffee Buttercream Cake Recipe

Caramel Coffee Buttercream Cake Recipe is not just a cake; it’s an experience. This cake is perfect for coffee lovers and anyone with a sweet tooth. With its moist layers and creamy buttercream, it’s sure to impress your family and friends.

What Makes This Cake Special?

What sets this cake apart is its unique blend of flavors. The brewed coffee adds a deep, rich taste that pairs beautifully with the sweet caramel. Each bite is a perfect balance of sweetness and a hint of bitterness from the coffee. The buttercream frosting is light and fluffy, making it a delightful topping. Plus, the caramel drizzle on top adds an extra touch of elegance. This cake is not only delicious but also visually appealing, making it a showstopper at any gathering.

Perfect Occasions for Caramel Coffee Buttercream Cake

Caramel Coffee Buttercream Cake Recipe fits right in. It’s also a fantastic choice for holiday celebrations, like Thanksgiving or Christmas, where sweet treats are a must. Additionally, if you’re looking to impress guests at a dinner party, this cake will surely be a hit. Its rich flavors and beautiful presentation make it a perfect centerpiece for any dessert table.

Ingredients for Caramel Coffee Buttercream Cake Recipe

Caramel Coffee Buttercream Cake Recipe, you’ll need a selection of simple yet essential ingredients. Each component plays a vital role in achieving the perfect flavor and texture. Here’s what you’ll need:

  • 2 cups all-purpose flour
  • 1 ½ cups granulated sugar
  • ½ cup unsweetened cocoa powder
  • 1 ½ teaspoons baking powder
  • 1 teaspoon baking soda
  • ½ teaspoon salt
  • 2 large eggs
  • 1 cup brewed coffee, cooled
  • ½ cup vegetable oil
  • 2 teaspoons vanilla extract
  • 1 cup caramel sauce (store-bought or homemade)

For the buttercream, gather the following:

  • 1 cup unsalted butter, softened
  • 4 cups powdered sugar
  • ¼ cup brewed coffee, cooled
  • ½ cup caramel sauce

These ingredients come together to create a cake that is not only rich in flavor but also incredibly satisfying. Make sure to have everything ready before you start baking. This will help streamline the process and ensure a smooth experience in the kitchen!

Step-by-Step Preparation of Caramel Coffee Buttercream Cake Recipe

Caramel Coffee Buttercream Cake Recipe. Follow these simple steps to create a delicious cake that will wow your taste buds!

Step 1: Preparing the Cake Batter

Start by preheating your oven to 350°F (175°C). This ensures that your cake bakes evenly. Next, grease and flour two 9-inch round cake pans. This step is crucial to prevent the cake from sticking.

In a large mixing bowl, combine the all-purpose flour, granulated sugar, cocoa powder, baking powder, baking soda, and salt. Whisk these dry ingredients together until they are well blended. This helps to evenly distribute the leavening agents, ensuring a fluffy cake.

Now, add the eggs, cooled brewed coffee, vegetable oil, and vanilla extract to the dry mixture. Mix everything on medium speed for about 2 minutes. You want the batter to be smooth and well combined. Don’t worry if it looks a bit runny; that’s perfectly normal!

Step 2: Baking the Cake Layers

Once your batter is ready, divide it evenly between the two prepared cake pans. This helps both layers bake evenly. Place the pans in the preheated oven and bake for 25-30 minutes. To check if they are done, insert a toothpick into the center of the cakes. If it comes out clean, they are ready!

After baking, let the cakes cool in the pans for about 10 minutes. Then, carefully transfer them to a wire rack to cool completely. This step is important because frosting a warm cake can cause the buttercream to melt.

Step 3: Making the Caramel Coffee Buttercream

While the cakes are cooling, it’s time to prepare the buttercream. In a large bowl, beat the softened unsalted butter until it’s creamy. This usually takes about 2-3 minutes. Gradually add the powdered sugar, mixing on low speed until it’s combined. This helps prevent a sugary cloud in your kitchen!

Next, add the cooled brewed coffee and caramel sauce to the butter mixture. Beat on medium speed until the buttercream is fluffy and smooth. This should take another 2-3 minutes. The result should be a rich, creamy frosting that’s perfect for your cake.

Step 4: Assembling the Cake

Once the cakes are completely cool, it’s time to assemble! Place one layer of cake on a serving plate. Spread a generous layer of the caramel coffee buttercream on top. Then, drizzle some caramel sauce over the buttercream for added flavor.

Carefully place the second layer on top. Now, frost the top and sides of the cake with the remaining buttercream. Make sure to cover it evenly for a beautiful finish. Don’t worry about perfection; a little rustic charm adds character!

Step 5: Decorating the Cake

To finish off your masterpiece, drizzle additional caramel sauce over the top of the cake. This not only adds flavor but also makes it look stunning. If you like, you can sprinkle chocolate shavings or chopped nuts on top for extra texture and flavor.

Caramel Coffee Buttercream Cake Recipe is now complete! You can serve it immediately or refrigerate it for up to three days. Enjoy every delicious bite!

Variations of Caramel Coffee Buttercream Cake Recipe

Caramel Coffee Buttercream Cake Recipe is already a delightful treat, there are many ways to switch things up! Here are some fun variations to consider, whether you want to explore new flavors or accommodate dietary preferences.

Alternative Flavors to Try

If you’re feeling adventurous, why not experiment with different flavors? Here are a few ideas:

  • Mocha Delight: Replace half of the cocoa powder with finely ground espresso for a stronger coffee flavor. This will give your cake a rich mocha taste that coffee lovers will adore.
  • Nutty Caramel: Add 1 cup of finely chopped nuts, like walnuts or pecans, to the batter. This adds a delightful crunch and enhances the overall flavor.
  • Spiced Caramel: Incorporate a teaspoon of cinnamon or nutmeg into the dry ingredients. This will give your cake a warm, cozy flavor, perfect for fall or winter gatherings.
  • Chocolate Chip Surprise: Fold in 1 cup of chocolate chips into the batter before baking. This adds pockets of melted chocolate that complement the caramel beautifully.

Gluten-Free Options

If you or your guests are gluten-sensitive, you can still enjoy this delicious cake! Here’s how to make a gluten-free version:

  • Gluten-Free Flour Blend: Substitute the all-purpose flour with a gluten-free flour blend. Make sure it’s a 1:1 ratio blend that includes xanthan gum for the best results.
  • Almond Flour Twist: For a nutty flavor, replace half of the all-purpose flour with almond flour. This not only makes the cake gluten-free but also adds a unique taste.
  • Check Ingredients: Ensure that all other ingredients, like baking powder and caramel sauce, are gluten-free. Many brands offer gluten-free options, so read the labels carefully.

Caramel Coffee Buttercream Cake Recipe to suit your taste and dietary needs. Enjoy experimenting and finding your favorite version!

Cooking Note for Caramel Coffee Buttercream Cake Recipe

Caramel Coffee Buttercream Cake Recipe. Here are some important cooking notes to keep in mind as you embark on this delicious journey:

First, always measure your ingredients accurately. Baking is a science, and even a small difference in measurements can affect the outcome. Use measuring cups and spoons for dry ingredients and a liquid measuring cup for wet ingredients. This ensures that your cake has the right texture and flavor.

Next, make sure your ingredients are at room temperature. This includes eggs, butter, and any other refrigerated items. Room temperature ingredients mix more easily, resulting in a smoother batter. It also helps the cake rise better, giving you that fluffy texture we all love.

Another important note is to avoid overmixing the batter. Once you combine the wet and dry ingredients, mix just until everything is incorporated. Overmixing can lead to a dense cake, which is not what we want. A light hand will yield a tender crumb.

When baking, keep an eye on the time. Ovens can vary, so start checking your cakes a few minutes before the recommended baking time. Use the toothpick test: insert a toothpick into the center of the cake, and if it comes out clean or with a few moist crumbs, your cake is done.

Lastly, let your cakes cool completely before frosting. This prevents the buttercream from melting and sliding off. If you’re in a hurry, you can place the cakes in the refrigerator for a short time to speed up the cooling process.

Caramel Coffee Buttercream Cake Recipe. Happy baking!

Serving Suggestions for Caramel Coffee Buttercream Cake Recipe

Caramel Coffee Buttercream Cake Recipe, it’s time to think about how to serve it! The right presentation and beverage pairings can elevate your cake experience. Here are some delightful suggestions to make your cake shine even brighter.

Pairing Beverages with the Cake

Choosing the right beverage can enhance the flavors of your cake. Here are some excellent options to consider:

  • Coffee: A classic pairing! Brew a fresh pot of coffee to complement the cake’s rich coffee flavor. You can serve it black or with cream and sugar, depending on your guests’ preferences.
  • Espresso: For a more intense coffee experience, serve a shot of espresso alongside the cake. The bold flavor of espresso pairs beautifully with the sweetness of the caramel.
  • Tea: If you prefer tea, opt for a robust black tea or a spiced chai. The warmth and spices in chai can enhance the cake’s flavors, making for a cozy treat.
  • Milk: A glass of cold milk is a timeless choice. The creaminess of milk balances the sweetness of the cake, making each bite even more enjoyable.
  • Hot Chocolate: For a decadent twist, serve hot chocolate. The chocolatey goodness complements the cocoa in the cake, creating a delightful combination.

Presentation Tips

Caramel Coffee Buttercream Cake Recipe. Here are some tips to make your cake look as good as it tastes:

  • Use a Cake Stand: Elevate your cake on a decorative cake stand. This adds height and makes it the centerpiece of your dessert table.
  • Garnish: Consider garnishing the top of the cake with chocolate shavings, chopped nuts, or a sprinkle of sea salt. These small touches add visual appeal and extra flavor.
  • Slice Neatly: Use a sharp knife to cut clean slices. Wipe the knife between cuts for a tidy presentation. This ensures each piece looks inviting.
  • Serve with a Side: Place a small dollop of whipped cream or a scoop of vanilla ice cream next to each slice. This adds a creamy element that pairs wonderfully with the cake.
  • Decorative Plates: Use colorful or patterned plates to serve the cake. This can enhance the overall presentation and make the dessert feel special.

Caramel Coffee Buttercream Cake Recipe with family and friends!

Tips for Perfecting Your Caramel Coffee Buttercream Cake Recipe

Common Mistakes to Avoid

Caramel Coffee Buttercream Cake Recipe, it’s easy to make a few common mistakes. Here are some pitfalls to watch out for:

  • Not Prepping the Pans: Always grease and flour your cake pans. Skipping this step can lead to cakes that stick, making it hard to remove them.
  • Overmixing the Batter: Mixing too much can make your cake dense. Mix just until the ingredients are combined for a light, fluffy texture.
  • Using Cold Ingredients: Cold eggs or butter can affect how well they mix. Always use room temperature ingredients for the best results.
  • Ignoring Baking Time: Every oven is different. Start checking your cakes a few minutes before the suggested baking time to avoid overbaking.
  • Frosting Too Soon: Make sure your cakes are completely cool before frosting. Frosting a warm cake can cause the buttercream to melt and slide off.

Caramel Coffee Buttercream Cake Recipe that everyone will love!

Storage Tips for Leftovers

If you have leftover cake, proper storage is key to keeping it fresh. Here are some helpful tips:

  • Refrigerate: Store the cake in an airtight container in the refrigerator. This helps maintain its moisture and flavor for up to three days.
  • Wrap It Up: If you don’t have a container, wrap the cake tightly in plastic wrap. This prevents it from drying out and absorbing other odors in the fridge.
  • Freeze for Later: If you want to keep the cake longer, consider freezing it. Wrap individual slices in plastic wrap and then place them in a freezer bag. This way, you can enjoy a slice whenever you crave it!
  • Thawing: To thaw frozen cake, place it in the refrigerator overnight. This keeps it from becoming soggy. You can also let it sit at room temperature for a couple of hours before serving.

Caramel Coffee Buttercream Cake Recipe will stay delicious and ready to enjoy for days to come!

Breakdown of Time for Caramel Coffee Buttercream Cake Recipe

Prep Time

Caramel Coffee Buttercream Cake Recipe is a fun and engaging process. The prep time typically takes about 20-30 minutes. This includes gathering your ingredients, measuring them accurately, and mixing the batter. Make sure to have everything ready before you start to streamline the process. It’s a great way to ensure that your baking experience is smooth and enjoyable!

Cooking Time

The cooking time for this delicious cake is approximately 25-30 minutes. During this time, the cake layers will rise and bake to perfection in the oven. Keep an eye on them, as oven temperatures can vary. Remember to perform the toothpick test to check for doneness. If the toothpick comes out clean, your cakes are ready to cool!

Total Time

Caramel Coffee Buttercream Cake Recipe. This includes both prep and cooking time. Once the cakes are baked and cooled, you’ll spend a little extra time assembling and decorating. The result is a stunning cake that’s well worth the time and effort!

Nutritional Information for Caramel Coffee Buttercream Cake Recipe

Caramel Coffee Buttercream Cake Recipe can help you enjoy it mindfully. Here’s a breakdown of the key nutritional components per serving, which is based on a total of 12 servings:

Calories

450 calories. This calorie count includes the rich flavors from the cake layers and the creamy buttercream frosting. While it’s a treat, it’s important to enjoy it in moderation, especially if you’re watching your calorie intake.

Protein

4 grams. The protein comes mainly from the eggs and butter used in the recipe. While this isn’t a high-protein dessert, it does contribute to your daily intake when enjoyed as part of a balanced diet.

Sodium

200 milligrams. This amount is relatively moderate, making it a suitable option for most diets. However, if you’re on a low-sodium diet, it’s good to be mindful of this when indulging in the cake.

Caramel Coffee Buttercream Cake Recipe is a delightful dessert that can be enjoyed on special occasions. By being aware of its nutritional information, you can savor each bite while keeping your dietary goals in mind!

FAQs about Caramel Coffee Buttercream Cake Recipe

Can I make this cake ahead of time?

Caramel Coffee Buttercream Cake Recipe can be made ahead of time. You can bake the cake layers a day or two in advance. Just make sure to let them cool completely before wrapping them in plastic wrap. This keeps them fresh. You can also prepare the buttercream ahead of time and store it in the refrigerator. Just remember to let it come to room temperature and re-whip it before frosting the cake.

How do I store leftover cake?

Caramel Coffee Buttercream Cake in an airtight container in the refrigerator. This will help maintain its moisture and flavor for up to three days. If you don’t have a container, you can wrap the cake tightly in plastic wrap. For longer storage, consider freezing individual slices. Just wrap them well and place them in a freezer bag. Thaw them in the refrigerator when you’re ready to enjoy!

Can I use instant coffee instead of brewed coffee?

Caramel Coffee Buttercream Cake Recipe. To do this, dissolve 2 tablespoons of instant coffee in 1 cup of hot water. Let it cool before adding it to the batter and buttercream. This will give you a similar coffee flavor, although brewed coffee tends to have a richer taste. Feel free to adjust the amount based on your preference!

What can I substitute for butter in the buttercream?

If you need a substitute for butter in the buttercream, you can use margarine or a dairy-free butter alternative. For a healthier option, consider using coconut oil. Just make sure it’s softened to room temperature for easy mixing. Keep in mind that using a substitute may slightly change the flavor and texture, but it will still be delicious!

Conclusion on Caramel Coffee Buttercream Cake Recipe

Caramel Coffee Buttercream Cake Recipe is a delightful treat that brings together the rich flavors of coffee and caramel in a beautifully layered cake. Whether you’re celebrating a special occasion or simply indulging in a sweet moment, this cake is sure to impress. Its moist texture, creamy buttercream, and elegant caramel drizzle make it a standout dessert.

As you embark on your baking journey, remember that the joy of creating this cake lies not just in the final product but also in the process. From measuring ingredients to frosting the layers, each step is an opportunity to express your creativity. Don’t hesitate to experiment with variations and make it your own!

Sharing this cake with family and friends will surely create lasting memories. The smiles and compliments you receive will make all the effort worthwhile. So, gather your ingredients, preheat your oven, and get ready to bake a cake that’s not only delicious but also a true labor of love.

Caramel Coffee Buttercream Cake Recipe! May it bring sweetness to your life and joy to your gatherings.

Greek Chicken Souvlaki Recipe: A Delicious Delight!

Introduction to Greek Chicken Souvlaki Recipe

What is Souvlaki?

Souvlaki is a popular Greek dish that consists of small pieces of meat and sometimes vegetables grilled on a skewer. Traditionally, it is made with pork, but chicken is also a favorite choice. The meat is marinated in a blend of olive oil, lemon juice, and spices, which gives it a delicious flavor. Souvlaki is often served with pita bread and a refreshing tzatziki sauce, making it a delightful meal for any occasion. This dish is not only tasty but also easy to prepare, making it a great option for family dinners or gatherings with friends.

The Origins of Greek Chicken Souvlaki

The origins of souvlaki can be traced back to ancient Greece, where skewered meat was a common way to cook and enjoy food. The word “souvlaki” comes from the Greek word “souvla,” which means skewer. Over the years, this dish has evolved and gained popularity, becoming a staple in Greek cuisine. Today, souvlaki is enjoyed not just in Greece but around the world. It represents the rich culinary heritage of Greece and showcases the use of fresh ingredients and bold flavors. Whether enjoyed at a street vendor or made at home, Greek chicken souvlaki is a dish that brings people together, celebrating the joy of good food and good company.

Ingredients for Greek Chicken Souvlaki Recipe

To create a mouthwatering Greek chicken souvlaki, you’ll need a few simple yet flavorful ingredients. Each component plays a vital role in enhancing the taste of the dish. Here’s what you’ll need:

  • 2 pounds boneless, skinless chicken thighs: Cut into 1-inch pieces for even cooking.
  • 1/4 cup olive oil: This adds richness and helps the marinade stick to the chicken.
  • 3 tablespoons lemon juice: Freshly squeezed lemon juice brightens the flavors and tenderizes the meat.
  • 3 cloves garlic: Minced garlic infuses the chicken with a robust flavor.
  • 1 tablespoon dried oregano: A classic herb in Greek cuisine, it adds a fragrant touch.
  • 1 teaspoon salt: Essential for enhancing the overall taste of the dish.
  • 1/2 teaspoon black pepper: Adds a mild heat and depth of flavor.
  • 1/2 teaspoon paprika: This gives a subtle smokiness and a lovely color to the chicken.
  • 8 wooden skewers: Soaked in water for 30 minutes to prevent burning on the grill.
  • Tzatziki sauce: A creamy, tangy sauce that pairs perfectly with the souvlaki.
  • Pita bread: Soft and warm, it’s perfect for wrapping around the chicken.
  • Chopped fresh parsley: For garnish, adding a pop of color and freshness.

These ingredients come together to create a delightful Greek chicken souvlaki that is sure to impress your family and friends. The combination of marinated chicken, fresh herbs, and zesty flavors makes this dish a true crowd-pleaser. So, gather your ingredients and get ready to enjoy a taste of Greece right in your kitchen!

Step-by-Step Preparation of Greek Chicken Souvlaki Recipe

Step 1: Marinating the Chicken

The first step in making your Greek chicken souvlaki is marinating the chicken. This is crucial for infusing the meat with flavor. Start by taking a large bowl and combining the olive oil, lemon juice, minced garlic, dried oregano, salt, black pepper, and paprika. Whisk these ingredients together until they are well blended. Next, add the chicken pieces to the marinade. Make sure each piece is thoroughly coated. Cover the bowl with plastic wrap and place it in the refrigerator. For the best flavor, let the chicken marinate for at least one hour. If you have more time, marinating it for up to four hours will enhance the taste even more.

Step 2: Preparing the Skewers

While the chicken is marinating, it’s time to prepare the skewers. If you’re using wooden skewers, soak them in water for about 30 minutes. This step is important as it prevents the skewers from burning on the grill. After soaking, remove the skewers from the water and let them dry slightly. Once the chicken has finished marinating, you can start threading the chicken pieces onto the skewers. Be sure to leave a little space between each piece. This allows for even cooking and helps the chicken develop those beautiful grill marks.

Step 3: Grilling the Chicken

Now that your skewers are ready, it’s time to fire up the grill! Preheat your grill to medium-high heat. Once it’s hot, place the skewers on the grill. Cook the chicken for about 10 to 12 minutes, turning them occasionally. This ensures that the chicken cooks evenly and gets that delicious char. You’ll know the chicken is done when it’s cooked through and has nice grill marks. The internal temperature should reach 165°F (75°C) for safe consumption. Once cooked, remove the skewers from the grill and let them rest for a few minutes. This resting period allows the juices to redistribute, making the chicken even more tender and juicy.

Step 4: Assembling the Souvlaki

After the chicken has rested, it’s time to assemble your souvlaki! Start by placing the grilled chicken skewers on a serving platter. Serve them alongside warm pita bread and a generous portion of tzatziki sauce. The cool, creamy tzatziki complements the warm, flavorful chicken perfectly. For an extra touch, sprinkle some chopped fresh parsley over the top. This not only adds a pop of color but also enhances the dish’s freshness. Your Greek chicken souvlaki is now ready to be enjoyed! Gather your family and friends, and dig in!

Variations of Greek Chicken Souvlaki Recipe

Vegetarian Alternatives

If you’re looking for a vegetarian option, you can easily adapt the Greek chicken souvlaki recipe. Instead of chicken, consider using firm tofu or tempeh. These plant-based proteins absorb flavors well and provide a satisfying texture. Cut the tofu or tempeh into 1-inch cubes, just like the chicken. Marinate them in the same mixture of olive oil, lemon juice, garlic, oregano, salt, black pepper, and paprika. You can also add colorful vegetables like bell peppers, zucchini, or mushrooms to the skewers. These veggies not only add nutrition but also enhance the visual appeal of your dish. Grill the skewers as you would with chicken, and enjoy a delicious vegetarian souvlaki that everyone will love!

Different Marinades for Greek Chicken Souvlaki

While the classic marinade is delightful, experimenting with different flavors can elevate your Greek chicken souvlaki. For a spicy kick, try adding some cayenne pepper or chili flakes to the marinade. If you prefer a sweeter taste, a tablespoon of honey or maple syrup can balance the flavors beautifully. Another option is to incorporate yogurt into the marinade for a creamier texture. This not only adds richness but also helps tenderize the chicken. You can also explore regional variations by adding herbs like thyme or rosemary for a unique twist. Each marinade brings its own character to the dish, allowing you to customize your Greek chicken souvlaki to suit your taste preferences.

Cooking Note for Greek Chicken Souvlaki Recipe

When preparing your Greek chicken souvlaki, there are a few important cooking notes to keep in mind. First, always ensure that your grill is preheated to the right temperature. A medium-high heat is ideal for achieving those perfect grill marks while ensuring the chicken cooks evenly. If the grill is too hot, the outside may char before the inside is fully cooked. Conversely, if it’s too cool, the chicken may dry out.

Another key point is to avoid overcrowding the grill. If you place too many skewers at once, the temperature can drop, leading to uneven cooking. Instead, grill in batches if necessary. This way, each skewer gets the attention it deserves, resulting in juicy, flavorful chicken.

Additionally, using a meat thermometer can be a game-changer. It helps you check the internal temperature of the chicken, ensuring it reaches 165°F (75°C) for safe consumption. This step is especially important if you’re grilling larger pieces of chicken or if you’re unsure about doneness.

Lastly, don’t skip the resting period after grilling. Allowing the chicken to rest for a few minutes before serving helps the juices redistribute throughout the meat. This simple step makes a big difference in achieving tender and juicy souvlaki. With these cooking notes in mind, you’re well on your way to creating a delicious Greek chicken souvlaki that will impress everyone at your table!

Serving Suggestions for Greek Chicken Souvlaki Recipe

Traditional Accompaniments

When it comes to serving Greek chicken souvlaki, traditional accompaniments enhance the overall experience. Start with warm pita bread, which is perfect for wrapping around the grilled chicken. The soft texture of the pita complements the juicy meat beautifully. Next, don’t forget the tzatziki sauce! This creamy, tangy sauce made from yogurt, cucumber, and garlic adds a refreshing contrast to the savory chicken. A generous dollop of tzatziki on your souvlaki elevates the flavors and makes each bite delightful.

Additionally, consider serving a simple Greek salad alongside your souvlaki. A mix of fresh tomatoes, cucumbers, red onions, olives, and feta cheese drizzled with olive oil and lemon juice creates a vibrant and healthy side dish. The crispness of the salad balances the richness of the chicken, making for a well-rounded meal. For a touch of authenticity, you can also include some lemon wedges on the side. A squeeze of fresh lemon juice over the souvlaki adds brightness and enhances the flavors even more.

Creative Serving Ideas

If you want to get a bit creative with your Greek chicken souvlaki, there are plenty of fun serving ideas to explore. One option is to create a souvlaki platter. Arrange the grilled chicken skewers on a large serving board, surrounded by various dips like hummus, baba ganoush, and, of course, tzatziki. This makes for a fantastic appetizer or party dish that encourages sharing and mingling.

Another idea is to make souvlaki wraps. Instead of serving the chicken on skewers, remove the pieces and place them in a warm pita with fresh veggies like lettuce, tomatoes, and cucumbers. Drizzle with tzatziki and roll it up for a delicious handheld meal. You can also add some pickled onions or spicy peppers for an extra kick.

For a fun twist, consider making Greek chicken souvlaki tacos! Use small corn or flour tortillas instead of pita bread. Fill them with the grilled chicken, top with tzatziki, and add some chopped cilantro or mint for a fresh touch. This fusion of flavors will surprise and delight your guests.

With these serving suggestions, you can enjoy Greek chicken souvlaki in various ways, making it a versatile dish for any occasion. Whether you stick to traditional accompaniments or try something new, your souvlaki will surely be a hit!

Tips for Perfecting Your Greek Chicken Souvlaki Recipe

To make your Greek chicken souvlaki truly unforgettable, consider these helpful tips. Each suggestion will enhance the flavor and texture of your dish, ensuring that every bite is delicious.

  • Choose the Right Cut of Chicken: While chicken thighs are juicy and flavorful, you can also use chicken breasts for a leaner option. If you prefer a more tender result, stick with thighs, as they remain moist during grilling.
  • Marinate Longer for More Flavor: If time allows, marinate the chicken overnight. This extra time allows the flavors to penetrate deeper, resulting in a more flavorful souvlaki.
  • Use Fresh Ingredients: Fresh herbs and spices can make a significant difference in taste. Whenever possible, opt for fresh garlic and herbs instead of dried ones. Fresh ingredients elevate the overall flavor profile of your dish.
  • Don’t Skip the Soaking: Soaking wooden skewers in water is essential. This simple step prevents them from burning on the grill, ensuring your chicken cooks perfectly without any charred bits.
  • Preheat the Grill: Always preheat your grill to medium-high heat before cooking. A hot grill helps achieve those beautiful grill marks and ensures even cooking. If the grill isn’t hot enough, the chicken may stick and not sear properly.
  • Check for Doneness: Use a meat thermometer to check the internal temperature of the chicken. It should reach 165°F (75°C) for safe consumption. This ensures your chicken is cooked through while remaining juicy.
  • Let It Rest: After grilling, allow the chicken to rest for a few minutes. This resting period helps the juices redistribute, making the chicken more tender and flavorful.
  • Experiment with Vegetables: For added nutrition and flavor, consider adding vegetables to your skewers. Bell peppers, zucchini, and cherry tomatoes not only enhance the dish’s appearance but also provide a delightful crunch.
  • Serve with a Variety of Dips: While tzatziki is a classic choice, don’t hesitate to offer other dips like hummus or spicy feta dip. This variety allows guests to customize their souvlaki experience.
  • Garnish for Presentation: A sprinkle of fresh parsley or dill adds a pop of color and freshness to your dish. A beautiful presentation makes the meal even more enjoyable.

By following these tips, you’ll be well on your way to perfecting your Greek chicken souvlaki recipe. Each step contributes to a delicious and memorable meal that your family and friends will love!

Breakdown of Time for Greek Chicken Souvlaki Recipe

Prep Time

The prep time for your Greek chicken souvlaki is quite manageable. You’ll need about 15 minutes to gather and prepare your ingredients. This includes cutting the chicken into 1-inch pieces and mixing the marinade. After that, allow at least 1 hour for marinating the chicken. If you have more time, marinating it for up to 4 hours will enhance the flavor even further. So, in total, you can expect around 1 hour and 15 minutes to 4 hours for the prep stage, depending on how long you choose to marinate.

Cooking Time

Once your chicken is marinated, the cooking time is relatively quick. Preheating the grill takes about 10 minutes. After that, grilling the chicken skewers will take approximately 10 to 12 minutes. Make sure to turn them occasionally for even cooking. In total, you can expect around 20 to 25 minutes for the cooking phase.

Total Time

When you combine both the prep and cooking times, the total time for making Greek chicken souvlaki ranges from about 1 hour and 35 minutes to 4 hours and 25 minutes. This includes the marinating time, which is essential for flavor. Overall, this dish is quite efficient to prepare, making it perfect for a weeknight dinner or a weekend gathering with friends and family.

Nutritional Information for Greek Chicken Souvlaki Recipe

Calories

When enjoying Greek chicken souvlaki, it’s good to know the calorie content. Each serving contains approximately 320 calories. This makes it a satisfying yet relatively light meal option. The balance of protein and healthy fats contributes to its nutritional value, allowing you to enjoy a delicious dish without overindulging.

Protein

Protein is an essential nutrient, and Greek chicken souvlaki delivers a hearty amount. Each serving provides about 25 grams of protein. This high protein content is beneficial for muscle repair and growth, making it an excellent choice for those who lead an active lifestyle. The chicken thighs used in this recipe are particularly rich in protein, ensuring you feel full and satisfied after your meal.

Sodium

Monitoring sodium intake is important for maintaining a healthy diet. Each serving of Greek chicken souvlaki contains around 600 milligrams of sodium. While this is a moderate amount, it’s wise to be mindful of additional sodium from sauces or sides. Pairing the souvlaki with fresh vegetables and homemade tzatziki can help keep the overall sodium content in check, making for a balanced meal.

FAQs about Greek Chicken Souvlaki Recipe

Can I use other meats for Greek Chicken Souvlaki?

Absolutely! While chicken is a popular choice, you can use other meats for your souvlaki. Pork is a traditional option in Greece and offers a rich flavor. Lamb is another delicious alternative, providing a unique taste that pairs well with the marinade. If you prefer beef, that works too! Just remember to adjust the cooking time based on the type of meat you choose. Each meat will bring its own character to the dish, allowing you to enjoy a variety of flavors.

How long should I marinate the chicken?

For the best flavor, marinate the chicken for at least one hour. However, if you have the time, marinating it for up to four hours is ideal. This longer marination allows the chicken to absorb the flavors of the marinade more deeply. If you want to take it a step further, marinating overnight can yield even more delicious results. Just be cautious not to marinate for too long, as the acid in the lemon juice can start to break down the chicken, making it mushy.

What is the best way to serve Greek Chicken Souvlaki?

The best way to serve Greek chicken souvlaki is with warm pita bread and a generous side of tzatziki sauce. This combination creates a delightful meal that is both satisfying and refreshing. You can also add a simple Greek salad on the side for a burst of color and nutrition. For a fun twist, consider making souvlaki wraps or even tacos using small tortillas. This allows everyone to customize their meal, making it a hit at gatherings!

Can I make Greek Chicken Souvlaki in the oven?

Yes, you can definitely make Greek chicken souvlaki in the oven! Preheat your oven to 400°F (200°C). Place the marinated chicken skewers on a baking sheet lined with parchment paper. Bake for about 15 to 20 minutes, turning halfway through, until the chicken is cooked through and has a nice golden color. Using the oven is a great alternative, especially if grilling isn’t an option. Just be sure to keep an eye on the chicken to prevent overcooking!

Conclusion on Greek Chicken Souvlaki Recipe

In conclusion, the Greek chicken souvlaki recipe is a delightful dish that brings the flavors of Greece right to your kitchen. With its tender, marinated chicken and the perfect blend of spices, this recipe is sure to impress your family and friends. The ease of preparation makes it an excellent choice for both casual weeknight dinners and festive gatherings.

By following the steps outlined in this article, you can create a mouthwatering meal that is not only delicious but also nutritious. The combination of protein-rich chicken, fresh herbs, and zesty flavors makes this dish a well-rounded option for any occasion. Plus, with the various serving suggestions and creative ideas, you can customize your souvlaki experience to suit your taste.

Whether you choose to stick with the traditional accompaniments or explore new variations, Greek chicken souvlaki is a versatile dish that everyone will love. So, gather your ingredients, fire up the grill, and enjoy the wonderful flavors of this classic Greek dish. Happy cooking!

Steak Frites Recipe: Enjoy a Classic French Dish Today!

Introduction to Steak Frites Recipe

What is Steak Frites?

Steak frites is a classic dish that combines two beloved elements: juicy steak and crispy fries. This delightful meal is often served in bistros and brasseries, especially in France and Belgium. The term “frites” simply means fries in French, and they are typically made from fresh potatoes, cut into thin strips and fried until golden brown. The steak is usually seasoned and cooked to perfection, making it a hearty and satisfying dish.

What makes steak frites special is the simplicity of its ingredients. The focus is on the quality of the steak and the fries, allowing the natural flavors to shine. Often, the steak is accompanied by a rich sauce, such as a buttery herb sauce or a tangy béarnaise, enhancing the overall experience. This dish is perfect for a casual dinner or a special occasion, as it brings together comfort and elegance in every bite.

The Origin of Steak Frites

The origins of steak frites can be traced back to the streets of Paris and the bistros of Belgium. It is believed that the dish emerged in the late 19th century, becoming a staple in French cuisine. The combination of steak and fries quickly gained popularity, as it offered a filling meal that was both delicious and affordable.

As time went on, steak frites became a symbol of French culinary culture. It is often enjoyed with a glass of red wine, making it a favorite among locals and tourists alike. Today, you can find variations of steak frites in many restaurants around the world, each adding their unique twist to this timeless dish. Whether you prefer a classic ribeye or a tender filet mignon, steak frites remains a beloved choice for meat lovers everywhere.

Ingredients for Steak Frites Recipe

To create a delicious steak frites dish, you’ll need a few key ingredients. Each component plays a vital role in delivering the rich flavors and satisfying textures that make this meal so enjoyable. Here’s what you’ll need:

  • 1 1/2 pounds ribeye steak: This cut is known for its marbling and tenderness, making it perfect for steak frites.
  • Salt and pepper: Essential for seasoning the steak, enhancing its natural flavors.
  • 2 tablespoons vegetable oil: Used for searing the steak, providing a nice crust.
  • 4 tablespoons unsalted butter: Adds richness and flavor to the steak as it cooks.
  • 3 cloves garlic: Smashed garlic infuses the butter with aromatic flavor.
  • 2 sprigs fresh rosemary (or thyme): Fresh herbs elevate the dish with their fragrant notes.
  • 1 tablespoon Worcestershire sauce: This sauce adds a savory depth to the finished steak.
  • 2 pounds potatoes: Choose a starchy variety like Russet or Yukon Gold for the frites.
  • Oil for frying: Canola or peanut oil works well for frying the frites until crispy.

With these ingredients on hand, you’re well on your way to preparing a delightful steak frites meal. Remember, the quality of your ingredients can significantly impact the final dish, so opt for fresh and high-quality products whenever possible. Now that you have everything ready, let’s move on to the step-by-step preparation of this classic recipe!

Step-by-Step Preparation of Steak Frites Recipe

Step 1: Preparing the Steak

Before you start cooking, it’s important to prepare the steak properly. First, take your ribeye steak out of the refrigerator and let it sit at room temperature for about 30 minutes. This helps the steak cook evenly. While it’s resting, season both sides generously with salt and pepper. This simple seasoning enhances the natural flavors of the meat. If you want to add more flavor, consider marinating the steak in olive oil, garlic, and herbs for a few hours before cooking.

Step 2: Cooking the Steak

Now, it’s time to cook the steak! Heat a large skillet over medium-high heat and add 2 tablespoons of vegetable oil. Wait until the oil is shimmering, which indicates it’s hot enough. Carefully place the seasoned steak in the skillet. Sear it for about 4-5 minutes without moving it. This creates a beautiful crust. After that, flip the steak over. Add 4 tablespoons of unsalted butter, 3 smashed garlic cloves, and 2 sprigs of fresh rosemary or thyme to the skillet. As the butter melts, use a spoon to baste the steak with the melted butter for another 4-5 minutes. This will add flavor and moisture to the steak. Cook until it reaches your desired doneness, around 130°F for medium-rare.

Step 3: Preparing the Frites

While the steak is cooking, you can prepare the frites. Start by washing and peeling 2 pounds of potatoes. Cut them into thin strips, about 1/4 inch thick. This size will help them cook evenly and become crispy. After cutting, soak the potato strips in cold water for at least 30 minutes. This step removes excess starch and helps achieve that perfect crunch. Once soaked, drain the potatoes and pat them dry with a clean towel.

Step 4: Cooking the Frites

To cook the frites, heat oil in a deep fryer or a large pot to 350°F. You can use canola or peanut oil for frying. Carefully add the dried potato strips in batches, making sure not to overcrowd the pot. Fry them for about 4-5 minutes until they turn golden brown and crispy. Once cooked, remove the frites and place them on a paper towel-lined plate to absorb excess oil. Season them with salt while they are still hot for the best flavor.

Step 5: Plating the Steak Frites

After the steak has rested for at least 5 minutes, it’s time to plate your delicious meal. Slice the steak against the grain into thick pieces. Arrange the steak slices on a plate alongside a generous serving of crispy frites. Drizzle the pan sauce over the steak for added flavor. You can also add a sprinkle of fresh herbs for a pop of color. Serve immediately and enjoy your homemade steak frites!

Variations of Steak Frites Recipe

Different Cuts of Steak

While ribeye is a popular choice for steak frites, there are several other cuts you can use to create a delicious meal. Each cut offers a unique flavor and texture, allowing you to customize your dish to your liking. Here are some great alternatives:

  • Filet Mignon: This cut is incredibly tender and has a mild flavor. It’s perfect for those who prefer a softer bite.
  • New York Strip: Known for its rich flavor and good marbling, this cut provides a nice balance of tenderness and chewiness.
  • Sirloin: A more affordable option, sirloin is leaner but still offers great flavor. It’s a good choice for those on a budget.
  • T-bone: This cut combines both the tenderloin and strip steak, giving you the best of both worlds. It’s great for sharing!

Feel free to experiment with these cuts to find your favorite. Each one can bring a different experience to your steak frites, making it a versatile dish for any occasion.

Alternative Cooking Methods for Frites

Frites can be prepared in various ways, each offering a different texture and flavor. While frying is the traditional method, here are some alternative cooking techniques you might consider:

  • Baking: For a healthier option, toss the potato strips in olive oil and seasonings, then bake them in the oven at 425°F for about 30-35 minutes. Flip halfway through for even crispiness.
  • Air Frying: An air fryer is a fantastic tool for making crispy frites with less oil. Cook the potato strips at 400°F for about 15-20 minutes, shaking the basket halfway through.
  • Grilling: For a smoky flavor, try grilling your potato strips. Wrap them in foil with some oil and seasonings, then place them on the grill for about 20 minutes, turning occasionally.

These alternative methods can add a unique twist to your steak frites, allowing you to enjoy this classic dish in new and exciting ways. Whether you prefer the traditional fry or a healthier baked version, the choice is yours!

Cooking Note for Steak Frites Recipe

Cooking steak frites is not just about following a recipe; it’s about understanding the process and making adjustments as needed. Here are some important cooking notes to keep in mind for the best results:

  • Resting the Steak: After cooking, always let your steak rest for at least 5 minutes. This allows the juices to redistribute, ensuring a juicy and flavorful bite.
  • Temperature Control: Use a meat thermometer to check the doneness of your steak. For medium-rare, aim for an internal temperature of 130°F. Adjust cooking time based on the thickness of your steak.
  • Oil Temperature: When frying the frites, ensure the oil is at the right temperature (350°F). If the oil is too cool, the frites will absorb more oil and become soggy. If it’s too hot, they may burn before cooking through.
  • Batch Cooking: When frying frites, cook them in small batches. Overcrowding the pot can lower the oil temperature, leading to uneven cooking.
  • Seasoning: Season your frites immediately after frying while they are still hot. This helps the salt stick and enhances the flavor.

By keeping these cooking notes in mind, you can elevate your steak frites experience. Each step is crucial in achieving that perfect balance of flavors and textures. Enjoy the process, and don’t hesitate to make adjustments based on your preferences!

Serving Suggestions for Steak Frites Recipe

Ideal Side Dishes

When serving steak frites, the right side dishes can enhance the meal and create a well-rounded dining experience. Here are some ideal side dishes to consider:

  • Roasted Vegetables: A mix of seasonal vegetables, such as carrots, zucchini, and bell peppers, roasted until tender adds color and nutrition to your plate.
  • Fresh Salad: A light salad with mixed greens, cherry tomatoes, and a simple vinaigrette can provide a refreshing contrast to the richness of the steak and frites.
  • Garlic Mashed Potatoes: Creamy mashed potatoes with a hint of garlic can complement the steak beautifully, adding a comforting element to the meal.
  • Coleslaw: A tangy coleslaw can add crunch and a zesty flavor, balancing the heaviness of the steak and fries.

These side dishes not only enhance the flavors of your steak frites but also add variety to your meal. Choose one or two to create a delightful dining experience that everyone will enjoy!

Recommended Sauces

To elevate your steak frites, consider serving it with a variety of sauces. Each sauce can bring a unique flavor profile to the dish. Here are some recommended sauces:

  • Béarnaise Sauce: This classic French sauce made with butter, egg yolks, and herbs is rich and creamy, perfect for drizzling over your steak.
  • Chimichurri: A fresh and zesty sauce made with parsley, garlic, vinegar, and olive oil. It adds a vibrant flavor that pairs wonderfully with grilled meats.
  • Garlic Butter: A simple yet delicious option, melted garlic butter can be drizzled over the steak for added richness.
  • Mustard Sauce: A tangy mustard sauce can provide a nice kick, balancing the richness of the steak and frites.

These sauces can enhance the overall flavor of your steak frites, allowing you to customize each bite. Feel free to mix and match to find your perfect combination!

Tips for Perfecting Your Steak Frites Recipe

Creating the perfect steak frites is an art that combines technique, timing, and quality ingredients. Here are some valuable tips to help you master this classic dish:

  • Choose Quality Ingredients: Start with high-quality steak and fresh potatoes. The better the ingredients, the better the final dish will taste. Look for marbled cuts of beef for added flavor and tenderness.
  • Season Generously: Don’t be shy with salt and pepper. Seasoning enhances the natural flavors of the steak. A good rule of thumb is to season just before cooking to lock in moisture.
  • Use a Meat Thermometer: To achieve the perfect doneness, use a meat thermometer. This ensures your steak is cooked to your liking, whether it’s rare, medium, or well-done.
  • Let the Steak Rest: After cooking, allow the steak to rest for at least 5 minutes. This helps the juices redistribute, resulting in a juicier and more flavorful steak.
  • Double Fry the Frites: For extra crispy frites, consider double frying. First, fry the potato strips at a lower temperature to cook them through, then increase the heat for a second fry to achieve that golden crispiness.
  • Experiment with Seasonings: While salt is essential, feel free to experiment with other seasonings for your frites. Try adding garlic powder, paprika, or even fresh herbs for a unique twist.
  • Serve Immediately: Steak frites are best enjoyed fresh. Serve them right after cooking to maintain the crispiness of the frites and the juiciness of the steak.
  • Pair with the Right Wine: A good wine can elevate your meal. Consider a full-bodied red wine, like Cabernet Sauvignon or Merlot, to complement the richness of the steak.

By following these tips, you can elevate your steak frites to a whole new level. Enjoy the process, and don’t hesitate to make it your own!

Breakdown of Time for Steak Frites Recipe

Prep Time

Preparing steak frites is a delightful process that requires some time to ensure everything is just right. The prep time for this dish is approximately 30 minutes. This includes:

  • Allowing the steak to come to room temperature (about 30 minutes).
  • Washing, peeling, and cutting the potatoes into frites (around 10-15 minutes).
  • Soaking the potato strips in cold water (at least 30 minutes, but this can overlap with the steak resting time).

Overall, you can expect to spend about 30 minutes actively preparing your ingredients before cooking.

Cooking Time

The cooking time for steak frites is relatively quick, making it a great option for a weeknight dinner. Here’s a breakdown:

  • Cooking the steak takes about 10-12 minutes, depending on your desired doneness.
  • Frying the frites will take around 8-10 minutes, depending on the batch size and oil temperature.

In total, the cooking time will be approximately 20-25 minutes, allowing you to enjoy a delicious meal in no time!

Total Time

When you combine both the prep and cooking times, the total time for making steak frites is about 50-55 minutes. This includes:

  • Prep Time: 30 minutes
  • Cooking Time: 20-25 minutes

This makes steak frites a fantastic choice for a satisfying meal that doesn’t require hours in the kitchen. With a little planning, you can have a delicious dish ready to serve in under an hour!

Nutritional Information for Steak Frites Recipe

Calories

When enjoying steak frites, it’s important to be aware of the caloric content. Each serving of this delicious dish contains approximately 400 calories. This makes it a hearty meal that can satisfy your hunger while still being mindful of your daily caloric intake. The balance of protein and fats in the steak, along with the carbohydrates from the frites, contributes to this total. If you’re looking to manage your calorie consumption, consider pairing your steak frites with lighter side dishes, such as a fresh salad or steamed vegetables.

Protein

Protein is a key component of steak frites, making it a great choice for those looking to increase their protein intake. Each serving provides about 34 grams of protein. This high protein content is beneficial for muscle repair and growth, making steak frites an excellent option for active individuals. The ribeye steak is particularly rich in protein, which helps keep you feeling full and satisfied. Including protein in your meals can also support overall health and wellness.

Sodium

Sodium is another important factor to consider when enjoying steak frites. Each serving contains approximately 800 milligrams of sodium. While sodium is essential for bodily functions, it’s important to monitor your intake, especially if you have dietary restrictions. To reduce sodium levels, you can adjust the amount of salt used in seasoning or opt for low-sodium sauces. Balancing your meal with fresh ingredients can also help manage sodium levels while still enjoying the rich flavors of steak frites.

FAQs about Steak Frites Recipe

What type of steak is best for Steak Frites?

When it comes to steak frites, the best type of steak is one that is tender and flavorful. Ribeye is a popular choice due to its marbling, which adds juiciness and taste. However, you can also use cuts like filet mignon for tenderness or New York strip for a balance of flavor and texture. Ultimately, the best steak for your dish depends on your personal preference and budget. Experimenting with different cuts can lead to delightful discoveries!

Can I make Steak Frites in an air fryer?

Absolutely! An air fryer is a fantastic option for making steak frites. It allows you to achieve crispy frites with less oil, making it a healthier choice. Simply cut your potatoes into strips, season them, and air fry at 400°F for about 15-20 minutes, shaking the basket halfway through. For the steak, you can sear it in a skillet and then finish cooking it in the air fryer for a perfectly cooked meal. This method saves time and reduces cleanup!

What are the best potatoes for making frites?

The best potatoes for making frites are starchy varieties, as they yield the crispiest results. Russet potatoes are a classic choice due to their high starch content and low moisture. Yukon Gold potatoes are another excellent option, offering a buttery flavor and creamy texture. Both types will give you delicious, crispy frites that pair perfectly with your steak. Remember to soak the cut potatoes in cold water before frying to remove excess starch for that perfect crunch!

How do I achieve the perfect doneness for steak?

Achieving the perfect doneness for steak is all about timing and temperature. The best way to ensure your steak is cooked to your liking is to use a meat thermometer. For medium-rare, aim for an internal temperature of 130°F. For medium, look for 140°F, and for well-done, aim for 160°F or higher. Remember to let the steak rest for at least 5 minutes after cooking. This allows the juices to redistribute, resulting in a tender and flavorful bite every time!

Conclusion on Steak Frites Recipe

In conclusion, steak frites is a delightful dish that brings together the best of both worlds: a juicy steak and crispy fries. This classic meal is not only satisfying but also versatile, allowing you to experiment with different cuts of steak and cooking methods for the frites. Whether you choose to fry, bake, or air fry your potatoes, the end result is sure to please your taste buds.

By following the steps outlined in this article, you can create a restaurant-quality steak frites right in your own kitchen. Remember to focus on quality ingredients, proper seasoning, and cooking techniques to elevate your dish. With a little practice, you’ll master the art of cooking steak frites and impress your family and friends with your culinary skills.

Don’t forget to pair your steak frites with delicious side dishes and sauces to enhance the overall dining experience. From roasted vegetables to tangy sauces, the right accompaniments can take your meal to the next level. So, gather your ingredients, roll up your sleeves, and enjoy the process of creating this timeless dish.

Whether it’s a casual weeknight dinner or a special occasion, steak frites is a meal that brings joy and satisfaction. So, go ahead and indulge in this classic French dish, and savor every bite of your homemade steak frites!