St. Patrick’s Day Charcuterie Board: A Festive Irish Feast

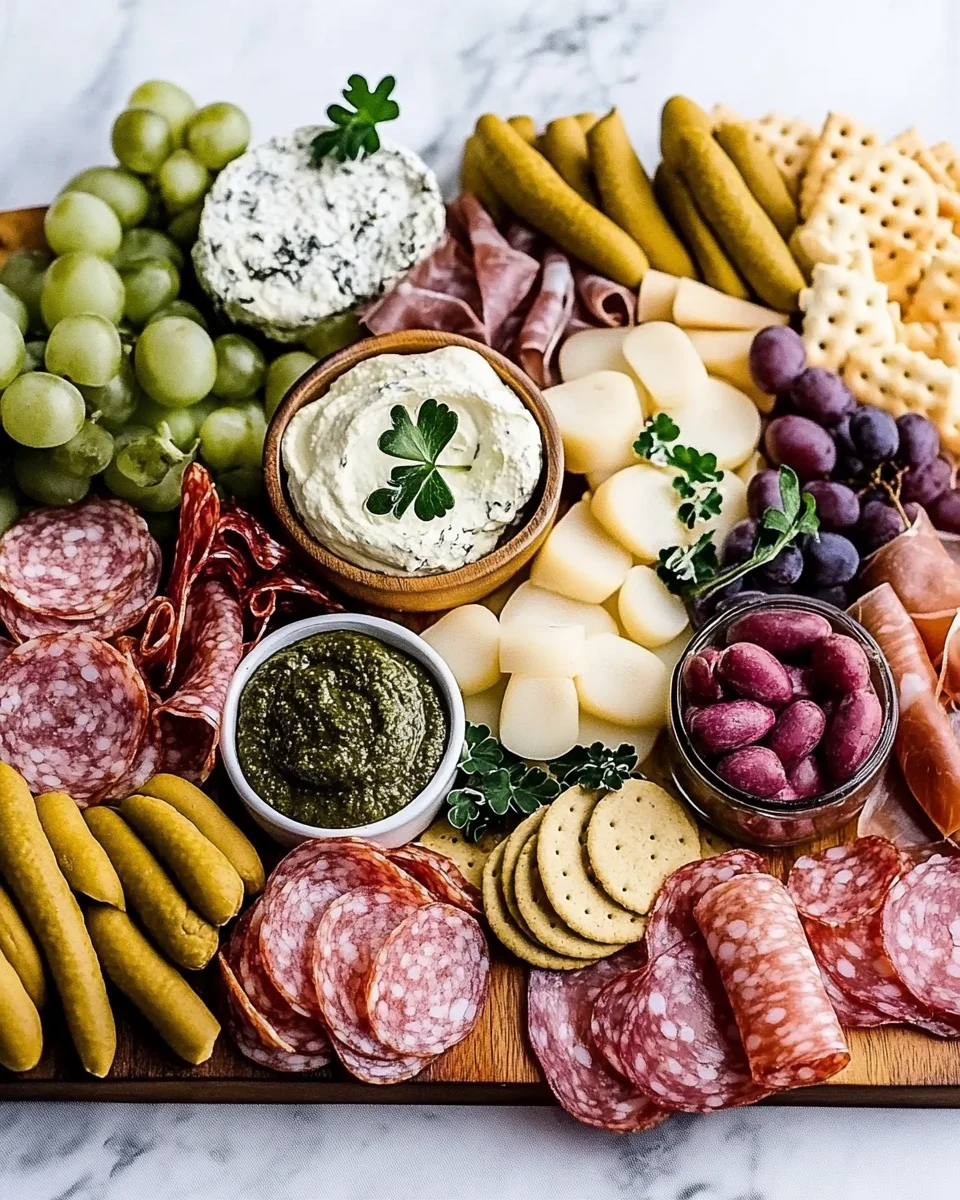
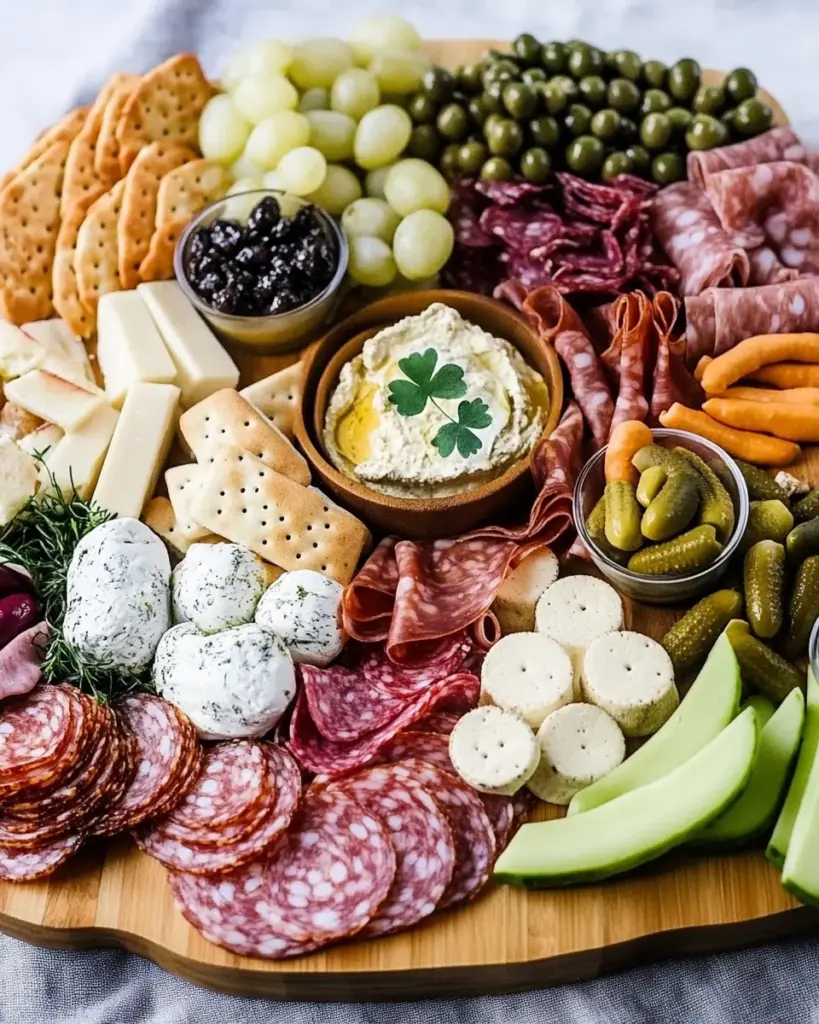
Charcuterie boards have become a staple at gatherings, offering a perfect combination of flavors, textures, and visual appeal. This St. Patrick’s Day Charcuterie Board takes the concept to the next level by incorporating traditional Irish-inspired ingredients with a fun, green-themed presentation. Whether you’re hosting a party, celebrating with family, or simply enjoying a festive snack, this board is sure to impress.

Why This Charcuterie Board is Perfect for St. Patrick’s Day

1. A Balance of Flavors and Textures

This charcuterie board isn’t just about appearance—it’s a delicious mix of savory, tangy, and creamy flavors that come together beautifully. With rich cheeses, salty meats, tangy pickles, and crispy crostinis, every bite is an adventure.

2. A Visual Celebration of Irish Culture

By incorporating green ingredients like cucumbers, green peppers, and broccoli alongside Irish classics such as corned beef and cheddar, this board captures the essence of St. Patrick’s Day. A splash of Guinness beer served in shot glasses adds an extra festive touch.

3. Easy to Assemble, Hard to Resist

Unlike complex recipes that require hours in the kitchen, this charcuterie board is simple to put together but looks stunning. With a little planning and creative arrangement, you’ll have a centerpiece-worthy appetizer that sets the tone for your celebration.

Ingredients: A Lucky Spread of Flavors

  • Fresh Produce & Greens
    • English Cucumber
    • Broccoli Florets
    • Green Peppers
  • Savory Meats & Cheeses
    • Sliced Pastrami
    • Sliced Corned Beef
    • Two Types of Irish Cheddar
  • Dips & Accompaniments
    • Ranch Dressing
    • Beer Cheese Dip
    • Spicy Brown Mustard
    • Cornichons
    • Sauerkraut
  • Breads & Crunchy Bites
    • Soft Pretzels
    • Crostinis
  • Fruits & Drinks
    • Green Grapes
    • Guinness Stout Beer (served in shot glasses)

Directions: Assembling the Ultimate Irish-Inspired Board

  1. Prep the Ingredients: Cook soft pretzels, slice cheeses, and prepare the green peppers as dip containers.
  2. Start with the Centerpieces: Place soft pretzels in the middle and arrange the filled green peppers around them.
  3. Add Small Bowls: Fill bowls with mustard, sauerkraut, and cornichons, distributing them evenly.
  4. Layer the Meats & Cheeses: Roll up pastrami and corned beef, slice in half, and arrange neatly. Place cheese slices around the board.
  5. Fill the Gaps: Add fresh veggies, grapes, and crostinis to complete the look.
  6. Final Touches: Pour Guinness into shot glasses and place them on the board. Adjust until visually balanced.

Nutritional Info: A Hearty Irish Celebration

(Per serving, approximately)

  • Calories: 1040
  • Total Fat: 52g
  • Saturated Fat: 17g
  • Cholesterol: 171mg
  • Sodium: 2969mg
  • Carbohydrates: 87g
  • Fiber: 5g
  • Protein: 48g

Tips for Creating the Perfect St. Patrick’s Day Charcuterie Board

Choose a Board That Fits Your Crowd

  • Small gathering (2-4 people): A round or small rectangle board (8-10 inches) works well.
  • Medium party (4-6 people): A board around 11×14 inches or a 12-14 inch round tray is ideal.
  • Large celebration (8+ people): Use a 20+ inch board or multiple boards arranged together.

Incorporate a Mix of Textures and Shapes

To make the board more visually appealing, arrange ingredients with different textures and sizes. Stack meats, layer cheeses, place grapes in clusters, and mix soft dips with crunchy elements like crostinis and pretzels.

Roll and Stack the Meats for a Sophisticated Look

Rather than laying meats flat, roll and stack them to create an elegant, professional-style charcuterie board. This technique also makes it easier for guests to grab a piece without disrupting the entire arrangement.

Use Edible Containers for Dips

Instead of standard bowls, hollowed-out green peppers serve as a fun and functional way to hold dips like beer cheese or ranch dressing. Not only does this save space, but it also enhances the board’s aesthetic.

Balance the Colors for Maximum Appeal

Even though green is the main color theme, balancing it with neutral tones from cheeses, breads, and meats prevents the board from looking overwhelming. A touch of gold from pretzels or caramelized nuts can also add warmth to the presentation.

Creative Variations to Customize Your Board

1. Vegetarian Irish-Inspired Charcuterie Board

If you’re serving guests who prefer a meat-free option, swap out the pastrami and corned beef for:

  • Irish soda bread slices
  • Aged cheddar and gouda
  • Roasted brussels sprouts
  • Hummus or herbed cream cheese dip

2. St. Patrick’s Day Dessert Charcuterie Board

For those with a sweet tooth, replace the savory elements with:

  • Green macarons or mint chocolates
  • Pistachio-flavored cookies
  • Vanilla yogurt dip with green sprinkles
  • Gold-wrapped chocolate coins for a festive touch

3. Pub-Style Irish Charcuterie Board

To create a more pub-inspired experience, add hearty elements like:

  • Mini shepherd’s pie bites
  • Soda bread slices with butter
  • Hard-boiled eggs dusted with paprika
  • Irish whiskey shots alongside Guinness beer

Serving and Storage Tips

How to Serve Your Charcuterie Board

  • Let cheeses sit at room temperature for 15-20 minutes before serving to bring out their full flavors.
  • Place small serving tongs or toothpicks around the board for easy access.
  • Pair with a crisp cider, stout beer, or sparkling water for a refreshing contrast to the salty and creamy elements.

How to Store Leftovers

  • Cheese & meats: Wrap tightly in plastic wrap and refrigerate for up to 3 days.
  • Dips & sauces: Store in airtight containers and consume within 2-3 days.
  • Bread & pretzels: Keep in a sealed bag at room temperature for up to 2 days.

Frequently Asked Questions

1. How much meat and cheese should I plan per person?

A general rule is 3-4 slices of meat and 1-2 ounces of cheese per person. Adjust based on the number of guests and the variety of other items on the board.

2. Can I prepare this charcuterie board ahead of time?

Yes! You can assemble most of the board a few hours in advance and store it in the refrigerator. However, add bread and pretzels just before serving to keep them from getting stale.

3. What can I use instead of Guinness if I want a non-alcoholic version?

If you want to keep the St. Patrick’s Day theme but avoid alcohol, try:

  • Root beer or cream soda in shot glasses
  • Sparkling apple cider
  • Non-alcoholic stout beer alternatives

4. What are some kid-friendly additions to this board?

To make it fun for kids, consider adding:

  • Shamrock-shaped crackers
  • Mild cheeses like mozzarella or cheddar
  • Green apple slices
  • Green M&M’s or jelly beans for a sweet touch

5. What kind of cheese pairs best with corned beef?

Sharp or aged Irish cheddar is the perfect match for corned beef, as its bold flavor holds up well against the saltiness of the meat.

6. Can I use store-bought dips, or should I make them from scratch?

Either option works! Store-bought ranch dressing and beer cheese dip are convenient, but if you have time, making them from scratch can elevate the flavors even more.

7. What’s the best way to arrange the items on the board?

Start with the largest items like soft pretzels and dip bowls, then work outward, filling gaps with meats, cheeses, and small items like pickles and grapes.

8. Do I need a wooden board, or can I use a different surface?

While a wooden charcuterie board looks classic, you can also use:

  • A large serving platter
  • A marble slab for a modern touch
  • A baking sheet lined with parchment paper for easy cleanup

9. What can I do if I don’t have enough green-themed ingredients?

While green items add to the theme, you can still keep it festive by focusing on Irish flavors like soda bread, aged cheddar, and hearty meats. A few sprigs of fresh herbs like parsley or dill can also bring in a pop of color.

10. Can I make a budget-friendly version of this board?

Yes! Stick to affordable cheeses, deli meats, and store-brand dips. Swap expensive Irish cheddar for a basic sharp cheddar, and use crackers instead of crostinis.

Conclusion: A St. Patrick’s Day Celebration in Every Bite

A St. Patrick’s Day Charcuterie Board is more than just an appetizer—it’s an experience that brings together the best of Irish flavors in a visually stunning way. Whether you’re celebrating with family, friends, or coworkers, this board offers something for everyone.

With easy customization, simple preparation, and a variety of textures and flavors, this festive charcuterie board will be the highlight of your celebration. So, gather your favorite Irish-inspired ingredients, pour a glass of Guinness, and enjoy a delicious, memorable holiday feast!

Brazilian Carrot Cake: A Chocolate-Glazed Twist on a Classic

Brazilian carrot cake, or “Bolo de Cenoura,” is a beloved dessert in Brazil, vastly different from its American counterpart. While the traditional carrot cake in the United States is often packed with shredded carrots, cinnamon, nuts, and a tangy cream cheese frosting, the Brazilian version takes a simpler, more refined approach.

Blended carrots create a smooth batter that results in a light, moist cake with a stunning golden hue. Instead of a spice-forward flavor, this cake lets the natural sweetness of the carrots shine, balanced by a rich chocolate brigadeiro glaze. The result? A fluffy, slightly sweet cake topped with a decadent, fudgy layer of chocolate that complements every bite.

If you’re looking for a unique take on carrot cake that is easy to make, visually stunning, and absolutely delicious, this Brazilian carrot cake is the perfect recipe to try.

Why Brazilian Carrot Cake is Special

1. A Smooth, Velvety Texture

Unlike American carrot cake, which has a chunkier texture due to grated carrots and mix-ins, Brazilian carrot cake is completely smooth because the carrots are blended into the batter. This technique allows the natural flavors to infuse into the cake while keeping the crumb incredibly tender.

2. Naturally Sweet and Moist

Carrots provide natural sweetness and moisture, reducing the need for excessive sugar or oil. This cake is not overly sweet, making it a versatile treat for dessert, breakfast, or an afternoon snack.

3. The Iconic Brigadeiro Glaze

Instead of a traditional frosting, this cake is topped with brigadeiro, a Brazilian chocolate fudge sauce made with condensed milk and butter. The glaze is thick, glossy, and slightly chewy once it sets, creating a rich contrast to the airy cake beneath it.

4. A Simple Yet Stunning Cake

With its bright yellow crumb and deep chocolate topping, Brazilian carrot cake looks as good as it tastes. Its beautiful color and shiny chocolate drizzle make it a standout dessert with minimal effort.

Ingredients: A Sweet Brazilian Classic

For the Cake:
  • Peeled Carrots (cut into chunks) – 300g (10.6 ounces)
  • Large Eggs – 3
  • Sugar – 1¾ cups
  • Vegetable Oil – 1 cup
  • Pinch of Salt
  • Flour (sifted) – 2 cups
  • Baking Powder (sifted) – 1 tablespoon
For the Brigadeiro Frosting:
  • Bittersweet Chocolate (chopped) – 3 ounces
  • Sweet Condensed Milk – 1 (14-ounce) can
  • Unsalted Butter – 2 tablespoons
  • Heavy Cream – ½ cup
  • Chocolate Sprinkles (optional)

Directions: The Road to Chocolate-Coated Perfection

  1. Blend & Prep: Blend carrots, eggs, sugar, oil, and salt until smooth. Mix with sifted flour and baking powder.
  2. Bake the Cake: Pour batter into a greased bundt pan and bake at 350°F for about 50 minutes. Let cool before removing from the pan.
  3. Make the Brigadeiro Frosting: Cook chocolate, condensed milk, and butter until thickened. Stir in heavy cream for a pourable consistency.
  4. Assemble & Decorate: Drizzle the warm brigadeiro over the cake and sprinkle with chocolate sprinkles. Let set before serving.

Nutritional Info: A Slice of Brazilian Indulgence

(Per serving, approximately)

  • Calories: 320
  • Carbohydrates: 45g
  • Fat: 15g
  • Protein: 5g
  • Sugar: 30g
  • Fiber: 1g

Tips for Making the Perfect Brazilian Carrot Cake

Blend the Carrots Until Completely Smooth

For the best texture, ensure that the carrots are fully blended with the wet ingredients before mixing with the flour. Any remaining carrot chunks can lead to a denser cake.

Measure Your Carrots Precisely

Too many carrots can make the cake heavy, while too few can result in a dry texture. Weighing your carrots ensures accuracy and consistency.

Sift the Dry Ingredients

Sifting flour and baking powder helps incorporate air, leading to a lighter and fluffier cake. It also prevents lumps that could affect the cake’s texture.

Gently Fold in the Dry Ingredients

Once the dry ingredients are added, mix gently and minimally to avoid overworking the batter, which can make the cake tough.

Bake Until Just Set

The cake should be golden brown and spring back when lightly touched. Overbaking will result in a dry cake, so use a toothpick to check for doneness—it should come out clean with just a few crumbs.

Let the Cake Cool Before Adding the Brigadeiro Glaze

If the cake is too warm, the glaze will seep into the cake instead of sitting on top. Allow it to cool slightly before pouring the chocolate over.

Make the Brigadeiro Thick But Pourable

Brigadeiro glaze should be rich and velvety but still pourable. If it’s too thick, add a little heavy cream to loosen it up. If it’s too thin, cook it a little longer until it thickens.

Delicious Variations to Try

1. Coconut Brigadeiro Topping

For a twist on the classic, replace the chocolate brigadeiro with a white coconut brigadeiro made from condensed milk, butter, and shredded coconut. This creates a tropical, creamy topping that pairs beautifully with the carrot cake.

2. Orange-Scented Carrot Cake

Add orange zest or a splash of orange juice to the batter for a citrusy brightness that enhances the natural sweetness of the carrots.

3. Nutty Crunch

Sprinkle chopped walnuts, pecans, or almonds over the chocolate glaze before it sets for a crunchy contrast to the smooth cake.

4. Layered Brazilian Carrot Cake

Bake the cake in two layers and add a middle filling of brigadeiro or a thin layer of dulce de leche for an extra indulgent treat.

5. Gluten-Free Version

Substitute the all-purpose flour with a gluten-free 1:1 flour blend, and the results will be just as soft and delicious.

Serving and Storage Tips

How to Serve Brazilian Carrot Cake

  • This cake is perfect warm, at room temperature, or chilled.
  • Serve with a cup of coffee, tea, or a glass of milk for an authentic Brazilian experience.
  • Dust the top with chocolate sprinkles for a festive touch.

How to Store Brazilian Carrot Cake

  • Room Temperature: Store in an airtight container for up to 3 days.
  • Refrigeration: If keeping longer, refrigerate for up to a week, but let it sit at room temperature before serving to soften.
  • Freezing: Freeze unfrosted cake for up to 3 months. Thaw and add the brigadeiro glaze before serving.

Frequently Asked Questions

1. How is Brazilian carrot cake different from American carrot cake?

Brazilian carrot cake has a smoother texture and does not contain spices, nuts, or raisins. Instead of cream cheese frosting, it is topped with a chocolate brigadeiro glaze.

2. Can I make this cake without a blender?

Yes, but the carrots must be grated finely and mixed thoroughly to avoid chunks. A blender or food processor is recommended for the best texture.

3. Can I use butter instead of oil?

Vegetable oil is preferred because it keeps the cake moist and light. Butter can be used, but the cake may be slightly denser.

4. Why did my cake turn out dense?

A dense cake may result from adding too many carrots, overmixing the batter, or using expired baking powder. Weigh the carrots, sift the flour, and mix gently to avoid this issue.

5. Can I make the brigadeiro frosting ahead of time?

Yes! Store brigadeiro in an airtight container in the fridge for up to 5 days. Reheat gently before pouring over the cake.

6. Can I use a different type of chocolate for the glaze?

Yes! While traditional brigadeiro uses bittersweet chocolate, you can substitute milk chocolate for a sweeter topping or dark chocolate for a richer, slightly bitter contrast.

7. Do I need to use a bundt pan?

No, you can bake this cake in a round, square, or loaf pan. Adjust baking time as needed.

8. Can I make this cake vegan?

Yes! Replace eggs with flax eggs, use dairy-free chocolate for the glaze, and swap heavy cream for coconut cream.

9. What can I serve with Brazilian carrot cake?

This cake pairs well with Brazilian coffee, espresso, or fresh fruit for a balanced dessert.

10. Can I use canned carrots?

Fresh carrots are best for texture and flavor, as canned carrots contain excess moisture that can alter the cake’s consistency.

Conclusion: A Must-Try Brazilian Dessert

Brazilian carrot cake is a simple yet extraordinary treat that proves less is more. With its moist, golden crumb and rich chocolate glaze, this cake is a standout for any occasion—breakfast, dessert, or an afternoon snack.

Its smooth texture, naturally sweet flavor, and easy preparation make it a must-try for anyone looking to explore authentic Brazilian flavors. Whether you follow the traditional recipe or try one of the many variations, this cake is guaranteed to be a crowd-pleaser.

If you’re ready to step outside the usual carrot cake and indulge in a Brazilian classic, this recipe is the perfect place to start!

Thanksgiving Piecaken: The Ultimate Holiday Dessert Fusion

Thanksgiving is a time for indulgence, and what better way to celebrate than with a dessert that combines not one, but three classic holiday treats? Enter the Thanksgiving Piecaken—a spectacular fusion of pumpkin pie, cinnamon cheesecake, and spice cake, all enveloped in a luscious buttercream frosting.

This over-the-top dessert is the ultimate showstopper for your holiday table, blending creamy, spiced, and rich flavors into every bite. If you’re looking to impress your guests with something unique, this dessert will have everyone talking (and coming back for seconds).

What Is a Piecaken?

The concept of a piecaken first gained popularity in 2015 when renowned pastry chefs started stacking pies inside cakes to create jaw-dropping, multilayered desserts. The idea is simple but brilliant: take a fully baked pie, sandwich it between cake layers, and frost the entire creation for a hybrid dessert that delivers multiple textures and flavors in a single slice.

While traditional piecakens often incorporate pecan, apple, or chocolate pies, this Thanksgiving version highlights pumpkin pie, cinnamon cheesecake, and spice cake—three quintessential holiday flavors that work harmoniously together.

Why You’ll Love This Thanksgiving Piecaken

1. A Unique and Eye-Catching Centerpiece

Forget the standard pumpkin pie—this piecaken is a true conversation starter. The towering layers and decadent frosting make it the perfect holiday showpiece.

2. Three Desserts in One Slice

Can’t decide between pumpkin pie, cheesecake, or spice cake? Now you don’t have to! Each forkful offers a taste of creamy cheesecake, spiced cake, and smooth pumpkin pie, ensuring that no one has to choose just one dessert.

3. A Balanced Blend of Textures and Flavors

  • Pumpkin pie delivers a silky, custard-like texture.
  • Cinnamon cheesecake adds a velvety richness.
  • Spice cake brings warmth and depth with its aromatic spices.
  • Buttercream frosting ties everything together with a smooth, sweet finish.

4. The Perfect Make-Ahead Dessert

Since each layer needs time to set, this dessert is best prepared in advance—ideal for reducing stress on Thanksgiving Day. Simply assemble the layers the night before, frost in the morning, and let the compliments roll in at dinner.

Ingredients: Layers of Holiday Perfection

Cheesecake Layer:
  • Cream Cheese, softened – 3 (8-ounce) packages
  • Granulated Sugar – ½ cup
  • All-Purpose Flour – 3 tablespoons
  • Vanilla Extract – 1 teaspoon
  • Ground Cinnamon – 2 teaspoons
  • Heavy Whipping Cream – ½ cup
  • Large Eggs – 2
Spice Cake Layer:
  • All-Purpose Flour – ⅔ cup
  • Baking Powder – ½ teaspoon
  • Ground Cinnamon – ¾ teaspoon
  • Ground Ginger – ½ teaspoon
  • Nutmeg – ½ teaspoon
  • Ground Cloves – ¼ teaspoon
  • Allspice – ¼ teaspoon
  • Butter, softened – ¼ cup
  • Brown Sugar, packed – ⅓ cup
  • Vegetable Oil – 1 tablespoon
  • Vanilla Extract – ½ teaspoon
  • Large Egg – 1
  • Milk – ⅓ cup + 1 tablespoon
Pumpkin Pie Layer:
  • Store-bought or premade 9-inch pumpkin pie
Frosting Layer:
  • Unsalted Butter, softened – 12 ounces (3 sticks)
  • Powdered Sugar – 5 cups
  • Vanilla Extract – 2 teaspoons
  • Cinnamon (optional) – ½ teaspoon
  • Heavy Whipping Cream, cold – 3-4 tablespoons

Directions: Building a Show-Stopping Dessert

  1. Bake the Cheesecake: Prepare and bake the cheesecake in a springform pan, allowing it to chill overnight.
  2. Prepare the Spice Cake: Mix dry and wet ingredients separately, then combine and bake in a cake pan. Let cool completely.
  3. Assemble the Layers: Remove the pumpkin pie from its shell, trim edges if necessary, and prepare to stack.
  4. Layer and Frost: Place the cheesecake layer on a cake stand, frost lightly, add the spice cake, frost again, then place the pumpkin pie on top.
  5. Cover in Buttercream: Spread a thin crumb coat, refrigerate for 20-30 minutes, then apply the final layer of buttercream.
  6. Decorate and Serve: Pipe borders, sprinkle cinnamon on top, and slice into this multi-layer masterpiece!

Nutritional Info: A Slice of Holiday Indulgence

(Per serving, approximately)

  • Calories: 351
  • Carbohydrates: 64g
  • Fat: 30g
  • Protein: 3g
  • Sugar: 13g
  • Saturated Fat: 18g

Tips for Making the Perfect Piecaken

Use a Sturdy Cake Base

Since this dessert involves stacking multiple layers, the cake must be firm enough to support the weight of the cheesecake and pie. A dense spice cake works perfectly because it holds its structure while providing a flavorful contrast to the other layers.

Chill Each Layer Before Assembling

To prevent your piecaken from collapsing or shifting, allow each component to cool completely before stacking. The cheesecake should be refrigerated overnight, and the cake should be fully cooled before assembling.

Trim Layers for a Professional Finish

For the cleanest look, use a serrated knife to trim the edges of each layer so they are uniform in size. If the pumpkin pie is larger than the cake layers, remove the crust or adjust accordingly.

Apply a Crumb Coat Before Frosting

Because of its many layers, a piecaken can be tricky to frost. To achieve a smooth buttercream finish, apply a thin “crumb coat” of frosting, refrigerate for 30 minutes, then add the final layer of buttercream.

Slice with a Warm Knife

For picture-perfect slices, dip a sharp knife in hot water, wipe it dry, and cut through the piecaken. The warmth helps slice cleanly through the different textures without dragging the layers.

Flavor Variations & Customization Ideas

If you love the idea of a piecaken but want to personalize it, here are some variations to try:

1. Pecan Piecaken

Swap out the pumpkin pie for pecan pie for a nutty, caramelized twist. Since pecan pie is heavier, place it at the bottom to prevent it from weighing down the cake.

2. Apple Piecaken

For a more autumnal spin, replace the pumpkin pie with a spiced apple pie. The soft apple filling pairs beautifully with the cinnamon cheesecake and spice cake.

3. Chocolate Lovers’ Piecaken

Substitute the spice cake with chocolate cake and add a chocolate ganache drizzle over the buttercream frosting for a rich and indulgent variation.

4. Gingerbread Piecaken

For a winter holiday version, replace the spice cake with gingerbread cake and top the piecaken with crushed gingersnap cookies for added crunch.

Serving and Storage Tips

How to Serve

  • Serve at room temperature for the best flavor and texture.
  • Slice carefully to showcase the beautiful layers.
  • Pair with coffee, chai tea, or spiced cider for a cozy holiday treat.

How to Store

  • Refrigerator: Cover the piecaken tightly with plastic wrap and store for up to 4 days.
  • Freezing: Freeze individual slices in airtight containers for up to 2 months. Thaw in the refrigerator before serving.

Frequently Asked Questions

1. How difficult is it to make a piecaken?

While this dessert requires multiple steps, none of them are particularly difficult. Breaking up the process over two days—baking the layers on day one and assembling on day two—makes it much more manageable.

2. Can I use store-bought components?

Absolutely! If you’re short on time, you can use a premade pumpkin pie, cheesecake, or spice cake and simply assemble them with homemade frosting. This shortcut still delivers incredible results with less effort.

3. Can I make a mini version?

Yes! Use smaller 6-inch cake pans and a mini pie to create an adorable, single-serving piecaken.

4. My layers are uneven—how do I fix this?

If your layers don’t align perfectly, trim them with a serrated knife. Once frosted, slight imperfections will be hidden.

5. Can I make this gluten-free?

Yes! Use gluten-free flour in the cake layer and ensure the pie and cheesecake are made with gluten-free ingredients.

6. How do I prevent the pie from sinking into the cake?

Ensure the cake is fully cooled before stacking, and consider placing the pie in the middle layer rather than at the bottom to prevent sinking.

7. What’s the best way to transport a piecaken?

Since this dessert is tall and delicate, transport it in a cake carrier and refrigerate it before moving to keep it stable.

8. How can I make the frosting more festive?

Add cinnamon or nutmeg to the buttercream, drizzle with caramel sauce, or sprinkle crushed cookies or nuts on top for extra flair.

Conclusion: A Must-Try Thanksgiving Dessert

The Thanksgiving Piecaken is more than just a dessert—it’s a celebration of flavors that brings together the best parts of the holiday season. Whether you’re making it from scratch or using store-bought shortcuts, this impressive dessert will leave a lasting impression on your guests.

With its beautiful layers, rich flavors, and perfect balance of textures, this piecaken is worth the effort and guarantees that no one will miss out on their favorite Thanksgiving treat.

So, if you’re looking to elevate your holiday dessert game, give this piecaken a try—it just might become your new Thanksgiving tradition!

Fluffernutter Bars: A Nostalgic Peanut Butter & Marshmallow Treat

Fluffernutter bars take the classic combination of peanut butter and marshmallow and transform it into a rich, indulgent dessert that’s both gooey and satisfying. With a soft peanut butter-infused base, a creamy peanut butter filling, and a generous layer of marshmallow fluff on top, these bars offer the perfect balance of sweet and salty flavors.

Inspired by the famous fluffernutter sandwich, these bars elevate childhood nostalgia into a dessert that’s ideal for any occasion. Whether you’re making them for a bake sale, a weekend treat, or simply because you love peanut butter, this recipe is a must-try.

Why These Fluffernutter Bars Are So Irresistible

1. The Perfect Combination of Flavors

Few pairings are as timeless as peanut butter and marshmallow. The rich, nutty taste of peanut butter balances the sweetness of the marshmallow fluff, creating a harmonious bite every time.

2. A Trio of Textures

  • The Base: A soft and chewy peanut butter cookie-like crust.
  • The Filling: A smooth, creamy peanut butter layer that adds richness.
  • The Topping: A fluffy marshmallow layer that melts into the other components, giving each bar a gooey finish.

3. Easy to Make, Impossible to Resist

Despite their impressive layers, these bars are surprisingly simple to prepare. The recipe requires only basic pantry ingredients, and the process is straightforward—making them accessible for both beginner and experienced bakers.

4. Great for Any Occasion

Fluffernutter bars are versatile and can be served for various occasions:

  • A fun after-school snack
  • A crowd-pleasing bake sale treat
  • A sweet addition to holiday dessert tables
  • A nostalgic dessert for peanut butter lovers

Ingredients: The Perfect Sweet and Salty Blend

For the Peanut Butter Bars:
  • All-Purpose Flour – 2½ cups
  • Baking Soda – ½ teaspoon
  • Salt – 1 teaspoon
  • Unsalted Butter (room temperature) – ¾ cup
  • Smooth Peanut Butter – ¾ cup
  • Granulated Sugar – ½ cup
  • Light Brown Sugar (packed) – 1 cup
  • Large Eggs (room temperature) – 2
  • Vanilla Extract – 2 teaspoons
  • Marshmallow Fluff – 1 (7-ounce) jar (for topping)
For the Peanut Butter Filling:
  • Smooth Peanut Butter – ½ cup
  • Unsalted Butter (room temperature) – 3 tablespoons
  • Powdered Sugar (sifted) – 1½ cups
  • Heavy Cream – 3 tablespoons
  • Vanilla Extract – ½ teaspoon

Directions: Creating Layers of Sweet Perfection

  1. Prepare the Pan & Preheat: Heat oven to 350°F. Grease and line a 9×9-inch baking pan with parchment paper, leaving an overhang for easy removal.
  2. Mix Dry Ingredients: In a medium bowl, whisk together flour, baking soda, and salt. Set aside.
  3. Cream Butter & Sugars: In a large bowl, beat butter, peanut butter, granulated sugar, and brown sugar until light and fluffy.
  4. Incorporate Wet Ingredients: Add eggs one at a time, mixing well after each addition. Stir in vanilla extract.
  5. Form the Dough: Gradually mix in dry ingredients until just combined.
  6. Bake the Bars: Press dough evenly into the prepared pan. Bake for 25-30 minutes until golden brown and a toothpick comes out clean. Let cool slightly.
  7. Prepare the Peanut Butter Filling: Beat peanut butter and butter together until smooth. Add powdered sugar, vanilla, and 2 tablespoons of heavy cream, mixing until creamy. If needed, add an additional tablespoon of cream for a spreadable consistency.
  8. Layer the Filling: Spread the peanut butter filling over the warm bars using an offset spatula.
  9. Add the Fluff: Microwave the Marshmallow Fluff for a few seconds to soften, then spread it over the peanut butter layer.
  10. Cool & Serve: Let the bars cool completely in the pan before slicing into squares.

Nutritional Info: Indulgence in Every Bite

(Per serving, approximately)

  • Calories: 320
  • Carbohydrates: 42g
  • Fat: 16g
  • Protein: 6g
  • Sugar: 28g
  • Fiber: 1g

Baking Tips for the Best Fluffernutter Bars

Use High-Quality Peanut Butter

For the richest flavor, use a creamy peanut butter that has a smooth consistency. Natural peanut butter can be used, but it may alter the texture slightly due to its higher oil content.

Don’t Overbake the Base

The peanut butter bar base should be baked until just golden brown around the edges. Overbaking will result in a dry texture rather than the soft and chewy consistency you want.

Warm the Marshmallow Fluff for Easy Spreading

Marshmallow fluff can be sticky and difficult to spread evenly. A quick 10-second microwave zap will soften it, making it much easier to layer over the peanut butter filling.

Let the Bars Cool Completely Before Slicing

These bars need time to set before cutting into them. Let them cool at room temperature or in the refrigerator to achieve clean, perfect slices.

Creative Variations to Try

Want to customize these bars? Here are a few fun ways to put a new twist on the classic recipe:

1. Chocolate Drizzle Fluffernutter Bars

Melt some chocolate chips and drizzle over the top for a peanut butter-chocolate-marshmallow masterpiece.

2. Crunchy Fluffernutter Bars

Mix in chopped peanuts into the peanut butter filling for extra crunch and texture.

3. S’mores Fluffernutter Bars

Add crushed graham crackers to the base or sprinkle them on top of the marshmallow layer for a s’mores-inspired version.

4. Nutella Fluffernutter Bars

Swap out the peanut butter filling for a Nutella layer to create a chocolate-hazelnut variation.

5. Salted Caramel Fluffernutter Bars

Drizzle salted caramel over the marshmallow topping to balance the sweetness with a rich, buttery depth.

How to Store and Serve Fluffernutter Bars

Storage Tips

  • Room Temperature: Store in an airtight container for up to three days.
  • Refrigeration: If you prefer a firmer texture, store them in the refrigerator for up to a week.
  • Freezing: Wrap each bar individually in plastic wrap and freeze for up to two months. Thaw at room temperature before serving.

Best Ways to Serve

  • As-Is: These bars are perfect straight out of the pan.
  • With Ice Cream: Pair with a scoop of vanilla or chocolate ice cream for a decadent dessert.
  • With Coffee or Hot Chocolate: The sweetness pairs wonderfully with a warm beverage.

Frequently Asked Questions

1. What Are Fluffernutter Bars?

Fluffernutter bars are dessert bars inspired by the classic fluffernutter sandwich, which consists of peanut butter and marshmallow fluff between slices of bread. This recipe transforms those flavors into a three-layered treat with a peanut butter cookie base, a peanut butter filling, and a marshmallow topping.

2. Can I Use Crunchy Peanut Butter Instead of Smooth?

Yes! Crunchy peanut butter will add bits of peanut texture throughout the bars, giving them an extra crunch.

3. Can I Use Homemade Marshmallow Fluff?

Absolutely! If you prefer homemade marshmallow fluff, you can substitute it for store-bought. Just be sure it has a spreadable consistency.

4. Why Is My Marshmallow Layer So Sticky?

Marshmallow fluff is naturally sticky, but warming it in the microwave for a few seconds makes it easier to spread evenly over the peanut butter layer.

5. How Do I Get Clean Slices?

For perfect slices, refrigerate the bars for about 30 minutes before cutting. Use a sharp knife and wipe it clean between cuts for neat edges.

6. Are These Bars Gluten-Free?

The recipe as written is not gluten-free because of the all-purpose flour in the base. However, you can substitute a gluten-free 1:1 baking flour to make a gluten-free version.

7. Can I Make These Without the Peanut Butter Filling?

Yes! If you prefer a simpler version, you can omit the peanut butter filling and just spread marshmallow fluff over the baked base.

8. How Can I Reduce the Sweetness?

If you want to tone down the sweetness, reduce the powdered sugar in the peanut butter filling or add a pinch of sea salt to balance the flavors.

9. Can I Make These Bars Vegan?

To make them vegan, use dairy-free butter, a plant-based peanut butter, and a vegan marshmallow fluff substitute.

10. Can I Add Other Toppings?

Of course! Some great toppings include crushed peanuts, mini chocolate chips, or a dusting of cocoa powder for added flavor and texture.

Conclusion: A Must-Try Dessert for Peanut Butter Lovers

Fluffernutter bars are the ultimate treat for anyone who loves peanut butter and marshmallow. Their soft, chewy base, rich peanut butter filling, and gooey marshmallow topping make them completely irresistible.

With simple ingredients and an easy-to-follow process, these bars are perfect for beginner bakers and seasoned pros alike. Whether you’re looking for a nostalgic dessert to share or just want to satisfy a peanut butter craving, this recipe delivers every time.

Try making a batch today, and enjoy the magic of peanut butter and marshmallow in every bite!

Soft Almond Sugar Cookies: A Delicate, Buttery Indulgence

Soft almond sugar cookies offer a delightful twist on the traditional sugar cookie, combining a buttery base with the warm, nutty essence of almond extract. These cookies are incredibly tender, with a melt-in-your-mouth texture that makes them irresistible. Finished with a creamy almond buttercream frosting, they strike the perfect balance between rich flavor and light sweetness.

Ideal for any season, these cookies are a hit at holiday gatherings, bake sales, or as an everyday treat. Whether you enjoy them plain or frosted, their soft and chewy consistency will keep you reaching for more.

What Makes These Cookies Special?

1. A Buttery, Soft Texture

Unlike traditional sugar cookies that can sometimes be crisp, these cookies remain soft and tender thanks to a perfectly balanced dough. The combination of butter, sugar, and just the right amount of flour creates a light yet decadent texture that stays fresh for days.

2. The Richness of Almond Extract

Almond extract gives these cookies a distinct and aromatic flavor. Unlike vanilla, which adds a subtle sweetness, almond extract enhances the depth of the cookie, making each bite taste like a blend of marzipan and classic sugar cookie goodness.

3. No Chill Time Needed

Many cookie recipes require chilling the dough before baking, but not this one. These cookies are designed to be quick and easy, allowing you to mix, bake, and enjoy them in under 30 minutes.

4. A Dreamy Almond Buttercream Finish

The almond buttercream frosting adds an extra layer of richness, perfectly complementing the cookie base. Light, fluffy, and slightly sweet, it enhances the almond flavor without overpowering it.

Ingredients: A Sweet Symphony of Flavors

  • For the Cookies:
    • Butter (softened) – 1 cup (regular or dairy-free)
    • Granulated Sugar – 1 cup
    • Egg – 1 large (or flax egg for a vegan alternative)
    • Almond Extract – 2 teaspoons
    • Salt – ¾ teaspoon
    • Baking Powder – 1 teaspoon
    • Baking Soda – 1 teaspoon
    • All-Purpose Flour – 2½ cups
  • For the Almond Buttercream Frosting:
    • Butter (softened) – ¾ cup (regular or dairy-free)
    • Almond Extract – ½ teaspoon
    • Salt – ⅛ teaspoon
    • Powdered Sugar – 1½ cups (adjust for desired consistency)

Directions: Bake Your Way to Bliss

  1. Preheat & Prep: Heat oven to 350°F and line two baking sheets with parchment paper.
  2. Mix Dry Ingredients: In a medium bowl, whisk together flour, baking powder, baking soda, and salt.
  3. Cream Butter & Sugar: In a separate bowl, beat butter and sugar until light and fluffy.
  4. Add Egg & Flavoring: Mix in the egg and almond extract until fully combined.
  5. Combine Wet & Dry: Gradually add dry ingredients to the wet mixture, stirring just until combined.
  6. Shape & Space: Scoop out 1½ tablespoon-sized dough balls and place them 4-5 inches apart on the baking sheets.
  7. Bake to Perfection: Bake one tray at a time for 8-11 minutes until the edges are set and the centers remain soft.
  8. Cool Down: Let cookies cool on the baking sheet for 10 minutes before transferring them to a wire rack.
  9. Make the Frosting: Beat butter, almond extract, salt, and powdered sugar until smooth. Adjust consistency with more powdered sugar if needed.
  10. Frost & Garnish: Spread frosting over cooled cookies and top with sliced almonds for extra texture.

Nutritional Info: Sweet Treats with a Balanced Bite

(Per Cookie, Approximate)

  • Calories: 209
  • Carbohydrates: 26g
  • Fat: 11g
  • Protein: 2g
  • Sugar: 16g
  • Fiber: 0.4g

Baking Tips for the Best Results

Use High-Quality Almond Extract

The almond extract is the star ingredient in these cookies, so using a high-quality brand will make a significant difference. Artificial extracts can taste overly sweet and lack the deep nuttiness that real almond extract provides.

Measure Your Flour Correctly

Adding too much flour can make the cookies dense instead of soft. The best way to measure flour is by using a kitchen scale. If measuring by volume, use the spoon-and-level method—fluff the flour with a spoon, scoop it into the measuring cup, and level it off with a knife.

Cream the Butter and Sugar Properly

Beating the butter and sugar until light and fluffy is key to achieving a tender cookie. This process aerates the dough, ensuring the cookies bake up with a delicate, soft texture.

Don’t Overmix the Dough

Once you add the dry ingredients, mix just until combined. Overmixing can lead to dense cookies instead of the soft, chewy texture you want.

Bake Just Until Set

These cookies should be taken out of the oven when the edges are set but the centers still look slightly underbaked. They will continue to firm up as they cool, ensuring a soft and tender bite.

Delicious Variations to Try

If you love the base of this recipe but want to experiment with new flavors, here are some creative variations:

1. Chocolate-Dipped Almond Cookies

After frosting the cookies, dip half of each one in melted dark chocolate and sprinkle with crushed almonds for an elegant twist.

2. Citrus Almond Cookies

Add a teaspoon of lemon or orange zest to the dough for a bright, citrusy contrast to the nutty almond flavor.

3. Raspberry Almond Thumbprint Cookies

Before baking, make a small indentation in the center of each cookie and fill it with raspberry jam for a fruity variation.

4. Coconut Almond Cookies

Mix shredded coconut into the dough for a tropical take on the classic almond cookie.

5. Maple Almond Cookies

Swap out half the granulated sugar for pure maple syrup for a warm, caramel-like sweetness that pairs beautifully with almond extract.

Storage and Serving Suggestions

How to Store These Cookies

  • Room Temperature: Store in an airtight container for up to five days.
  • Refrigeration: If frosted, these cookies can be kept in the fridge for up to a week. Let them come to room temperature before serving for the best texture.
  • Freezing: Both the cookies and the frosting freeze well. Store unfrosted cookies in a freezer-safe bag for up to two months. Thaw at room temperature before frosting.

Best Ways to Serve

  • Enjoy with a hot cup of coffee or tea for a relaxing treat.
  • Pair with vanilla or almond ice cream for an indulgent dessert.
  • Arrange them on a holiday cookie tray with other favorites like gingerbread or shortbread cookies.

Frequently Asked Questions

1. What makes these cookies different from regular sugar cookies?

These cookies have a softer texture and a distinct almond flavor, setting them apart from traditional sugar cookies. They are also topped with almond buttercream instead of royal icing, making them extra indulgent.

2. Can I make these cookies vegan?

Yes! Simply swap the butter for a dairy-free alternative and use a flax egg (1 tablespoon ground flaxseed mixed with 2½ tablespoons water) instead of a regular egg.

3. How do I make sure the cookies stay soft?

Store them in an airtight container and avoid overbaking. Pull them out of the oven while the centers are still slightly soft.

4. Can I use vanilla extract instead of almond extract?

Yes, but the cookies won’t have the same distinct almond flavor. If you prefer a milder taste, you can use half almond extract and half vanilla extract.

5. My cookies turned out too hard. What went wrong?

Overmixing, adding too much flour, or baking too long can lead to hard cookies. Use a light hand when mixing, measure your flour properly, and remove the cookies from the oven before they look fully baked.

6. Can I make these cookies ahead of time?

Yes! You can prepare the dough a day in advance and keep it in the refrigerator until ready to bake. You can also bake the cookies ahead and frost them later.

7. How can I make the frosting thicker or thinner?

If the frosting is too thick, add a teaspoon of milk or almond milk at a time until it reaches your desired consistency. If it’s too thin, gradually add more powdered sugar.

8. Can I make these cookies without frosting?

Absolutely! They are delicious on their own, but the frosting adds an extra layer of flavor. If skipping the frosting, you can dust them with powdered sugar or drizzle them with melted white chocolate.

9. How can I add a crunchy element to these cookies?

Sprinkle sliced almonds on top of the frosting or mix chopped almonds into the dough for added texture.

10. Do these cookies hold their shape for decorating?

Since they are soft and slightly puffy, they may not be ideal for intricate cookie decorating. However, they work well with simple frosting designs and garnishes.

Conclusion: A Cookie That Deserves a Spot in Your Recipe Collection

Soft almond sugar cookies are more than just another sweet treat; they are a perfect blend of simplicity and elegance. The rich almond aroma, combined with a delicate, buttery texture, makes them a favorite for any occasion. Whether enjoyed plain, frosted, or with a creative twist, these cookies are sure to become a staple in your baking routine.

Their easy preparation, no-chill dough, and versatile nature make them ideal for both beginner and experienced bakers. Whether you’re looking for a holiday treat, a bake sale favorite, or a simple dessert to enjoy at home, this recipe delivers every time.

Bake a batch today, and experience the magic of soft almond sugar cookies—simple, sweet, and absolutely delicious!

Cherry Almond Amish Sugar Cookies: A Delightful Twist on a Classic Treat

Cherry Almond Amish Sugar Cookies bring together the best of two worlds—soft, melt-in-your-mouth Amish sugar cookies infused with the sweet and tart essence of cherries and the nutty crunch of almonds. This recipe transforms the traditional sugar cookie into something truly special, making it a perfect addition to any dessert table.

These cookies are ideal for holidays, special occasions, or simply indulging in a sweet treat with a cup of tea. Their unique combination of flavors and textures makes them stand out from ordinary sugar cookies. Whether you enjoy them fresh out of the oven or store them for later, they offer a satisfying balance of sweetness, nuttiness, and chewiness.

Why You’ll Love These Cookies

1. A Perfect Balance of Flavors

Unlike standard sugar cookies that lean heavily on sweetness, these cookies incorporate the delicate nuttiness of almonds and the juicy burst of maraschino cherries. The almond extract enhances the overall depth of flavor, creating a sophisticated yet comforting taste.

2. Soft Yet Slightly Crunchy

Amish sugar cookies are known for their soft, pillowy texture. Adding sliced almonds provides a slight crunch that makes every bite more exciting. The contrast between the softness of the cookie and the crispness of the almonds adds a wonderful complexity.

3. Beautiful Presentation

The red cherries speckled throughout the cookies create a visually appealing treat, making them perfect for festive occasions. A light drizzle of glaze takes their appearance to the next level, adding a delicate sweetness and shine.

4. Easy to Make, Hard to Resist

These cookies require simple ingredients and an easy process, making them a great option for both experienced bakers and beginners. No special equipment or complicated techniques are needed—just mix, scoop, and bake!

Ingredients: The Magic Makers

  • Granulated Sugar – 1 cup (for a sweet and tender base)
  • Butter – ½ cup (softened, for a rich and buttery texture)
  • Egg – 1 large (to bind everything together)
  • Vanilla Extract – 1 teaspoon (for added depth of flavor)
  • Almond Extract – ½ teaspoon (for a nutty aroma)
  • All-Purpose Flour – 2 cups (to form the dough base)
  • Baking Powder – 1½ teaspoons (to help the cookies rise)
  • Salt – ¼ teaspoon (to balance the sweetness)
  • Chopped Maraschino Cherries – 1 cup (for a pop of fruity goodness)
  • Sliced Almonds – ¼ cup (for a delightful crunch)
  • Optional Glaze: 1 cup powdered sugar + 2-3 tablespoons milk (for a sweet finish)

Directions: Bake Your Way to Happiness

  1. Preheat & Prep – Heat oven to 350°F (175°C) and line a baking sheet with parchment paper.
  2. Cream Butter & Sugar – In a mixing bowl, beat together butter and sugar until light and fluffy.
  3. Add Egg & Flavorings – Mix in the egg, vanilla extract, and almond extract until well blended.
  4. Whisk Dry Ingredients – In another bowl, combine flour, baking powder, and salt.
  5. Combine Everything – Gradually add dry ingredients to wet, stirring until just combined. Fold in cherries and almonds.
  6. Shape & Space – Drop rounded tablespoons of dough onto the baking sheet, spacing them 2 inches apart.
  7. Bake to Perfection – Bake for 10-12 minutes until edges turn golden.
  8. Cool & Glaze – Let cookies cool for 5 minutes before transferring to a wire rack. Drizzle with glaze if desired.
  9. Enjoy! – Serve with a glass of milk or a cup of tea.

Nutritional Info: A Sweet Treat with a Nutty Twist

(Per cookie, approximately)

  • Calories: ~150
  • Carbohydrates: 22g
  • Fat: 6g
  • Protein: 2g
  • Sugar: 12g
  • Fiber: 1g

Tips for Making the Best Cherry Almond Amish Sugar Cookies

Choose the Right Cherries

Maraschino cherries add both color and sweetness, but they contain a lot of moisture. To prevent excess liquid from affecting the dough, pat them dry with a paper towel before adding them to the batter.

Enhancing the Almond Flavor

If you’re an almond lover, consider toasting the sliced almonds before folding them into the dough. This deepens their flavor and brings out their natural oils, making them even more aromatic.

Don’t Overmix the Dough

To achieve that perfect soft texture, mix the dough just until the ingredients are combined. Overmixing can result in a denser cookie rather than a light, delicate one.

Spacing is Key

These cookies spread slightly while baking, so be sure to leave about two inches of space between them on the baking sheet. This ensures they bake evenly without merging together.

Glazing for Extra Sweetness

The optional glaze, made from powdered sugar and milk, adds a lovely sweetness that complements the tartness of the cherries. You can even swap out the milk for fresh lemon juice to introduce a subtle citrusy note.

Variations to Try

If you love the base recipe but want to experiment with new flavors, here are a few exciting variations:

1. Chocolate Cherry Almond Cookies

Add ½ cup of mini chocolate chips to the dough for a rich and indulgent twist. The combination of chocolate and cherries is always a winning pair.

2. Coconut Cherry Almond Cookies

For a tropical touch, mix in ½ cup of shredded coconut. This adds extra texture and a slight chewiness that pairs beautifully with almonds.

3. Lemon Cherry Almond Cookies

A tablespoon of lemon zest and a splash of lemon juice can add a refreshing citrus balance to the sweetness of the cherries.

4. Maple Cherry Almond Cookies

Swap out ¼ cup of the sugar for pure maple syrup to infuse the cookies with a warm, caramel-like sweetness.

5. Raspberry Almond Cookies

Replace maraschino cherries with fresh or frozen raspberries for a more tart and fruity variation.

Serving and Storage Tips

Serving Suggestions

  • Pair with a warm drink: These cookies taste divine alongside coffee, tea, or a glass of milk.
  • Dress them up: Dust with powdered sugar or drizzle extra glaze on top before serving.
  • Create a dessert platter: Pair with shortbread, chocolate chip cookies, and almond biscotti for a variety of flavors and textures.

How to Store for Maximum Freshness

  • Room Temperature: Store in an airtight container for up to a week.
  • Refrigeration: Extend freshness up to two weeks by keeping them in the fridge.
  • Freezing: For long-term storage, freeze cookies in a single layer, then transfer them to a freezer-safe bag for up to three months. Thaw at room temperature before serving.

Frequently Asked Questions

1. What Makes These Cookies “Amish” Sugar Cookies?

Amish sugar cookies are known for their soft, tender texture and slightly crumbly consistency. Unlike traditional sugar cookies, they are usually made with a mix of butter and oil, though this variation keeps things simple with just butter.

2. Can I Use Fresh Cherries Instead of Maraschino Cherries?

Yes, but fresh cherries contain more moisture. Be sure to pit and chop them finely, then pat them dry with a paper towel before adding them to the dough.

3. What’s the Best Way to Get Uniform Cookies?

A cookie scoop ensures evenly sized cookies that bake at the same rate. If you don’t have one, use a tablespoon to portion out the dough.

4. Can I Make These Cookies Gluten-Free?

Absolutely! Substitute all-purpose flour with a gluten-free flour blend. Just ensure it includes xanthan gum for structure, or add ½ teaspoon separately.

5. Why Did My Cookies Spread Too Much?

If your cookies spread excessively, it may be due to:

  • Warm butter: Ensure your butter is softened but not melted.
  • Too much moisture from cherries: Pat them dry before adding them to the dough.
  • Baking sheet preparation: Using parchment paper helps prevent excessive spreading.

6. Can I Make the Dough in Advance?

Yes! The dough can be refrigerated for up to 48 hours before baking. If it becomes too firm, let it sit at room temperature for 10-15 minutes before scooping.

7. How Can I Make These Cookies Dairy-Free?

Substituting butter with coconut oil or a plant-based butter alternative works well. Just note that coconut oil may alter the flavor slightly.

8. Are These Cookies Too Sweet?

Despite the sugar and cherries, these cookies have a balanced sweetness. If you prefer a less sweet version, reduce the sugar by ¼ cup or use unsweetened cherries.

9. Can I Add Other Nuts?

Yes! Walnuts, pecans, or pistachios can replace almonds for a different nutty twist.

10. What’s the Best Way to Decorate These Cookies?

Beyond the glaze, you can dip half of each cookie in melted white or dark chocolate and sprinkle with crushed almonds for an elegant touch.

Conclusion: A Cookie Worth Baking Again and Again

Cherry Almond Amish Sugar Cookies are a delightful combination of classic sugar cookies with a fruity and nutty twist. Whether you’re baking for the holidays, sharing them as a homemade gift, or simply treating yourself, these cookies are sure to impress.

With simple ingredients, easy preparation, and endless variations, this recipe is perfect for any level of baker. From their beautiful appearance to their irresistible flavor, these cookies are bound to become a staple in your kitchen.

Try them today, and you might just discover your new favorite cookie!

Crinkly Crackly Butter Toffee Sugar Cookies: A Sweet Masterpiece

Some cookies are simply irresistible, and these Crinkly Crackly Butter Toffee Sugar Cookies fall into that category. With crisp, golden edges, a chewy center, and bits of buttery toffee in every bite, this recipe is the perfect combination of texture and flavor. Whether you’re baking for a special occasion, a cozy afternoon treat, or just to satisfy a sweet craving, these cookies deliver pure joy.

Unlike traditional sugar cookies that can be smooth and uniform, these stand out with their signature crinkly, crackly tops—a sign of a perfectly baked cookie. The addition of toffee bits gives a subtle caramelized crunch, elevating them from ordinary to extraordinary.

This recipe is quick, simple, and requires only one bowl, making it ideal for busy bakers or those who prefer minimal cleanup. If you love cookies with personality, rich buttery flavor, and a hint of caramelized goodness, then these Butter Toffee Sugar Cookies deserve a permanent spot in your baking rotation.

Why These Cookies Are a Must-Bake

1. The Perfect Texture: Crispy Yet Chewy

The contrast between crispy edges and a soft, chewy center is what makes these cookies so special. The secret lies in the perfect ratio of butter, sugar, and egg yolks—giving the cookies a rich, tender crumb with just the right amount of crispiness.

2. Irresistible Toffee Flavor

Toffee bits add a deep caramel-like sweetness with just a hint of crunch. As they bake, they melt slightly into the dough, creating little pockets of rich, buttery toffee throughout the cookies.

3. One-Bowl Wonder (No Mixer Required!)

This recipe doesn’t require an electric mixer—just a sturdy spatula and a bowl. The ingredients come together quickly, making this a great last-minute dessert idea.

4. No Rolling or Cutting Required

Unlike classic sugar cookies that require rolling and cutting, this recipe is as simple as scoop-and-bake. No special skills are needed—just form the dough into mounds and pop them in the oven.

5. Perfect for Any Occasion

  • Holiday Baking: A great addition to cookie platters or gift baskets.
  • Everyday Treat: Perfect for lunchboxes, after-school snacks, or late-night cravings.
  • Celebrations: A crowd-pleaser for birthdays, parties, and gatherings.
  • Pairing with Ice Cream: Serve with vanilla ice cream and butterscotch sauce for an indulgent dessert.

Ingredients: A Sweet Symphony of Flavors

  • Butter Base:
    • 1 cup very soft butter (salted)
    • 1¼ cups sugar
  • For the Perfect Texture:
    • 3 large egg yolks
    • 1½ teaspoons pure vanilla extract
  • Leavening Agents:
    • 1 teaspoon baking soda
    • ¾ teaspoon baking powder
  • Flour & Mix-Ins:
    • 2½ cups all-purpose flour
    • 10 ounces toffee bits
  • Finishing Touch:
    • Sugar for sprinkling

Step-by-Step: The Art of Cookie Perfection

1. Preheat & Prepare:

  • Preheat oven to 350°F (175°C).
  • Line two baking sheets with parchment paper.

2. Create the Dough:

  • In a large bowl, mix soft butter and sugar until creamy.
  • Stir in egg yolks and vanilla until combined.
  • Add baking soda and baking powder, mixing well.
  • Gradually fold in the flour until a dough forms.
  • Stir in toffee bits, ensuring even distribution.

3. Shape & Bake:

  • Use a 1½–2 tablespoon scoop to portion the dough onto the baking sheets, spacing them 2 inches apart.
  • Bake for 12-16 minutes or until golden brown and crinkly.
  • Remove from the oven and sprinkle lightly with sugar.
  • Let them rest on the baking sheet for 4-5 minutes before transferring to a cooling rack.

Nutritional Breakdown: Indulgence in Every Bite

  • Calories per cookie: 153 kcal
  • Carbohydrates: 19g
  • Protein: 1g
  • Fat: 8g
  • Saturated Fat: 5g
  • Cholesterol: 38mg
  • Sodium: 87mg
  • Sugar: 12g

Tips & Tricks for the Best Butter Toffee Sugar Cookies

1. Measuring Flour Correctly is Key

To get the right texture, always spoon the flour into the measuring cup and level it off with a knife. Scooping directly from the bag can lead to excess flour, making the cookies too dry.

2. Don’t Overmix the Dough

Once the flour is added, mix just until combined. Overmixing can lead to tough cookies instead of soft, chewy perfection.

3. Chill the Dough for More Flavor

While this recipe doesn’t require chilling, letting the dough rest in the fridge for 30 minutes before baking can deepen the flavors and enhance the chewy texture.

4. Use a Cookie Scoop for Uniform Size

A retractable cookie scoop ensures that all cookies bake evenly. Uniform cookies also look more appealing when serving or gifting.

5. Bake One Sheet at a Time

For the best results, bake one tray at a time on the middle rack. This allows the cookies to cook evenly and develop their signature crinkly texture.

6. Let the Cookies Rest Before Transferring

When removed from the oven, these cookies will be slightly soft in the center. Let them rest on the baking sheet for 4-5 minutes before moving them to a wire rack. This helps them set properly while keeping that perfect chewiness.

Serving Suggestions: Take Your Cookies to the Next Level

1. Classic Pairings

  • Milk & Cookies: The timeless duo—nothing beats a warm toffee cookie with a cold glass of milk.
  • Coffee or Tea: The buttery richness complements a cup of freshly brewed coffee or black tea.

2. Ice Cream Sandwiches

  • Sandwich two cookies with vanilla, caramel, or butter pecan ice cream for a decadent homemade ice cream sandwich.

3. Dessert Platter Favorite

  • Pair with brownies, chocolate chip cookies, and shortbread for a varied dessert tray.

4. Drizzle with Chocolate

  • For an extra indulgence, drizzle melted dark or white chocolate over the cookies.

Storage & Freezing Guide

Short-Term Storage

  • Store cooled cookies in an airtight container at room temperature for up to 5 days.
  • To keep them extra fresh, add a slice of bread to the container—it absorbs excess moisture and keeps the cookies soft.

Freezing Baked Cookies

  • Let cookies cool completely before storing in a freezer-safe container.
  • They can be frozen for up to 2 months.
  • To serve, let them thaw at room temperature or warm them in the oven at 300°F for 5 minutes.

Freezing Cookie Dough

  • Scoop out cookie dough portions and place them on a baking sheet.
  • Freeze until solid, then transfer to a zip-top freezer bag.
  • Bake directly from frozen, adding an extra 2 minutes to the baking time.

Frequently Asked Questions (FAQs)

1. Can I Use Unsalted Butter Instead of Salted Butter?

Yes! If using unsalted butter, simply add ¼ teaspoon of salt to balance the flavors.

2. What if I Can’t Find Toffee Bits?

If toffee bits aren’t available, try:

  • Crushed Heath or Skor bars
  • Chopped caramel candies
  • Mini chocolate chips for a different flavor twist

3. Can I Make These Cookies Gluten-Free?

Yes! Swap the all-purpose flour with a 1:1 gluten-free baking blend for a gluten-free version.

4. Why Are My Cookies Not Crinkling?

If your cookies don’t have that signature crinkly texture, check the following:

  • Too much flour – Make sure you measure correctly.
  • Oven temperature too low – A hotter oven (350°F) helps create the perfect crackly tops.
  • Overmixing – Stir only until combined.

5. Can I Add Nuts or Other Mix-Ins?

Absolutely! Some great additions include:

  • Chopped pecans or almonds for a nutty crunch
  • Sea salt flakes sprinkled on top for a sweet-salty contrast
  • Coconut flakes for a tropical twist

6. How Can I Make the Cookies Extra Chewy?

For chewier cookies, try these tips:

  • Use dark brown sugar instead of white sugar for a richer, deeper flavor.
  • Let the dough chill for at least an hour before baking.
  • Underbake slightly—take them out when the edges are golden but the center looks slightly underdone. They’ll firm up as they cool.

Conclusion: A Cookie Worth Baking Again and Again

These Crinkly Crackly Butter Toffee Sugar Cookies are everything you want in a dessert—easy to make, packed with flavor, and irresistibly delicious. They require minimal effort but deliver bakery-quality results with their golden, crackly tops and chewy, caramel-like centers.

Whether you’re making them for a special occasion, gifting them to a friend, or enjoying them with a cup of coffee, these cookies are bound to be a hit. Plus, with their simple ingredients and no-fuss preparation, they are perfect for both beginner bakers and seasoned pros alike.

So next time you’re in the mood for something sweet, give these cookies a try—you won’t be disappointed!

Honey Pepper Chicken Pasta: A Perfect Blend of Sweet, Spicy, and Creamy

Honey Pepper Chicken Pasta is a dish that combines bold flavors with comforting textures, making it a favorite for weeknight dinners and special occasions alike. The magic of this recipe lies in the balance—honey lends a gentle sweetness, black pepper adds just the right amount of heat, and a rich, creamy sauce ties everything together.

This dish is perfect for anyone who enjoys contrasting flavors in a single bite. It’s hearty yet refined, simple to make yet impressive enough for guests. Whether you’re a fan of grilled chicken, a lover of pasta, or just looking for a new dish to add to your rotation, Honey Pepper Chicken Pasta is sure to satisfy.

Why You’ll Love This Dish

1. The Perfect Flavor Harmony

The sweetness of honey and the heat of black pepper are a match made in culinary heaven. While honey smooths out the bold spice, black pepper cuts through the richness of the creamy sauce, creating a dish that’s flavorful without being overwhelming.

2. Creamy, Dreamy Comfort

A luscious, velvety sauce made with heavy cream and Parmesan cheese clings to every bite of pasta, making this dish irresistibly indulgent. The sauce is thick but not too heavy, striking the perfect balance between decadence and comfort food.

3. Quick and Easy to Prepare

With a total cook time of just 30 minutes, this recipe is ideal for busy weeknights when you need a satisfying meal without hours in the kitchen. Plus, most of the cooking happens in just one skillet, making cleanup a breeze.

4. Customizable to Suit Your Taste

One of the best things about this dish is its versatility. Want more heat? Add a pinch of red pepper flakes. Prefer a tangy twist? A squeeze of lemon juice works wonders. You can also throw in some veggies, swap the chicken for shrimp, or even use a different type of pasta to make it your own.

Ingredients: A Symphony of Flavors

  • For the Chicken:
    • 2 large boneless, skinless chicken breasts
    • 2 tablespoons olive oil
    • Salt and pepper, to taste
    • 2 tablespoons honey
    • 1 tablespoon black pepper (adjust to taste)
  • For the Pasta & Sauce:
    • 12 oz penne pasta (or preferred pasta)
    • 1 cup heavy cream
    • ½ cup grated Parmesan cheese
    • 1 tablespoon fresh parsley (optional, for garnish)
    • 1 tablespoon garlic, minced
    • 1 tablespoon butter

Step-by-Step: Crafting the Perfect Dish

1. Cook the Pasta:

  • Bring a large pot of salted water to a boil.
  • Add pasta and cook according to package instructions until al dente.
  • Drain the pasta, reserving 1 cup of pasta water, and set aside.

2. Prepare the Chicken:

  • Season both sides of the chicken breasts with salt and pepper.
  • Heat olive oil in a skillet over medium-high heat.
  • Cook chicken for 6-7 minutes per side until fully cooked (internal temp: 165°F or 74°C).
  • Remove from the skillet, let it rest for a few minutes, then slice into strips or bite-sized pieces.

3. Make the Creamy Honey Pepper Sauce:

  • In the same skillet, melt butter over medium heat.
  • Add minced garlic and sauté for 1-2 minutes until fragrant.
  • Stir in honey and black pepper, letting the mixture simmer for 2-3 minutes until slightly caramelized.
  • Pour in heavy cream, stirring to combine. Simmer for 3-4 minutes until the sauce thickens slightly.
  • If the sauce is too thick, add a bit of reserved pasta water to adjust consistency.

4. Bring it All Together:

  • Add cooked pasta to the skillet, tossing to coat in the creamy sauce.
  • Stir in grated Parmesan cheese until melted and smooth.
  • Add the sliced chicken, mixing everything thoroughly.

5. Serve & Enjoy:

  • Plate the pasta and garnish with fresh parsley if desired.
  • Serve immediately and savor every bite!

Nutritional Breakdown: Indulgence with Balance

  • Calories per serving: 450-500 kcal
  • Protein: 30g
  • Carbohydrates: 45g
  • Fat: 20g

Serving Suggestions: Elevate Your Meal

While Honey Pepper Chicken Pasta is incredible on its own, pairing it with the right sides and drinks can take it to the next level.

1. The Perfect Side Dishes

  • Garlic Bread: A crispy slice of garlic bread is the perfect vehicle for scooping up extra sauce.
  • Fresh Salad: A simple arugula or Caesar salad provides a refreshing contrast to the creamy pasta.
  • Roasted Vegetables: Try roasted bell peppers, asparagus, or zucchini for added color and nutrition.

2. Best Drinks to Pair

  • White Wine: A crisp Sauvignon Blanc or a lightly oaked Chardonnay complements the creamy sauce beautifully.
  • Sparkling Lemonade: The citrusy tang balances the richness of the dish.
  • Iced Tea: A subtly sweet iced tea with a hint of lemon enhances the honey notes in the sauce.

How to Store and Reheat Honey Pepper Chicken Pasta

1. Refrigeration:

Store leftovers in an airtight container in the refrigerator for up to 3-4 days. The sauce may thicken as it cools, but don’t worry—it can easily be revived when reheating.

2. Freezing:

This dish freezes well for up to 2 months. To freeze, let it cool completely before transferring to a freezer-safe container. When ready to eat, thaw in the refrigerator overnight before reheating.

3. Reheating Tips:

  • Stovetop: Heat in a skillet over medium-low heat, adding a splash of milk, cream, or pasta water to loosen the sauce.
  • Microwave: Reheat in 30-second intervals, stirring between each, until heated through. Add a little liquid if needed to maintain creaminess.

Recipe Variations: Make It Your Own

1. Spicy Honey Pepper Chicken Pasta

If you love extra heat, increase the black pepper and add a teaspoon of crushed red pepper flakes or a dash of hot sauce.

2. Honey Lemon Chicken Pasta

A squeeze of fresh lemon juice brightens the flavors and adds a citrusy zing that balances the sweetness of the honey.

3. Honey Garlic Chicken Pasta

For a deeper umami flavor, increase the garlic and use roasted garlic paste in the sauce.

4. Shrimp Version

Swap the chicken for shrimp for a seafood twist. Just cook the shrimp for a couple of minutes per side until pink and opaque.

5. Vegetarian Honey Pepper Pasta

Replace the chicken with sautéed mushrooms, zucchini, or roasted chickpeas for a delicious meat-free alternative.

Frequently Asked Questions (FAQs)

1. Can I Use a Different Type of Pasta?

Yes! While penne works beautifully in this dish, you can use fettuccine, spaghetti, rigatoni, or even a short pasta like rotini. Whole wheat or gluten-free pasta are great alternatives as well.

2. How Can I Make This Recipe Lighter?

If you want to lighten up the dish, try these swaps:

  • Use half-and-half instead of heavy cream.
  • Replace some of the cream with chicken broth for a thinner, lower-calorie sauce.
  • Use a smaller amount of Parmesan or opt for a lower-fat cheese alternative.

3. What Can I Use Instead of Honey?

Maple syrup or agave nectar can be substituted for honey if needed. They will provide a similar sweetness with slightly different flavor notes.

4. Can I Make This Dish Ahead of Time?

Yes! If you’re prepping for a dinner party or meal planning, cook the chicken and sauce separately, then store them in the fridge. Reheat everything together just before serving, adding a bit of pasta water or cream to bring the sauce back to life.

5. Will This Dish Be Too Spicy?

Not at all! The black pepper adds a warm heat, but it’s balanced by the honey and cream. If you’re sensitive to spice, start with a smaller amount of black pepper and adjust to taste.

6. Can I Use Pre-Cooked Chicken?

Absolutely! If you have leftover grilled or rotisserie chicken, just slice it and add it to the pasta when mixing everything together.

Conclusion: A Dish Worth Savoring

Honey Pepper Chicken Pasta is the kind of recipe that checks all the right boxes—quick, flavorful, creamy, and utterly satisfying. The contrast of sweet honey and bold black pepper creates a unique and memorable dish that feels both comforting and sophisticated.

Whether you’re making it for a cozy night in, serving it to guests, or meal prepping for the week, this pasta is sure to impress. And with so many ways to customize it, you can tweak it to fit your tastes perfectly.

So grab your skillet, gather your ingredients, and enjoy every forkful of this irresistible pasta dish. It’s guaranteed to become a staple in your recipe collection!

Colored Deviled Eggs: Delightfully Fun and Tasty!

Colored Deviled Eggs

Introduction to Colored Deviled Eggs

Colored Deviled Eggs bring a fun, vibrant twist to a classic favorite! These eye-catching eggs are filled with a creamy, tangy filling and decorated with natural food dyes to create a colorful and playful look. Whether you’re making them for a holiday gathering, a picnic, or just for fun, they’re sure to be a crowd-pleaser. With the same delicious flavor of traditional deviled eggs, but with an added pop of color, these are as delightful to look at as they are to eat! Ready to add some color to your plate? Let’s get started!

Why You’ll Love This Colored Deviled Eggs

These Colored Deviled Eggs are a game-changer for any busy kitchen. They’re not just easy to make; they’re also a delightful way to impress your guests. With just a few simple ingredients, you can create a dish that’s bursting with flavor and color. Plus, they’re perfect for any occasion, from casual family dinners to festive celebrations. You’ll love how quickly they come together, leaving you more time to relax and enjoy.

Ingredients for Colored Deviled Eggs

Gathering the right ingredients is the first step to creating these vibrant Colored Deviled Eggs. Here’s what you’ll need:

  • Large eggs: The star of the show. Fresh eggs yield the best results.
  • Mayonnaise: This creamy base adds richness to the filling. You can use light mayo or even Greek yogurt for a healthier twist.
  • Dijon mustard: A touch of tanginess that elevates the flavor. Feel free to swap it with yellow mustard if that’s what you have on hand.
  • White vinegar: This helps balance the flavors and adds a slight zing. Apple cider vinegar can be a nice alternative.
  • Salt and pepper: Essential seasonings to taste. Don’t skip these; they enhance the overall flavor.
  • Food coloring: The fun part! Use various colors to make your eggs pop. Gel food coloring works best for vibrant hues.
  • Water: Just a tablespoon per color to mix with the food coloring. It helps the color adhere to the egg whites.

For those who like a little heat, consider adding a dash of hot sauce or cayenne pepper to the yolk mixture. And don’t forget to garnish with fresh herbs like chives or dill for an extra burst of flavor and color.

Exact quantities for each ingredient can be found at the bottom of the article, ready for printing.

How to Make Colored Deviled Eggs

Now that you have your ingredients ready, let’s dive into the fun part: making these Colored Deviled Eggs! Follow these simple steps, and you’ll have a colorful appetizer that’s sure to impress.

Step 1: Prepare the Eggs

Start by placing your large eggs in a pot. Cover them completely with cold water. Make sure there’s enough water to submerge the eggs by at least an inch. This helps them cook evenly and prevents cracking.

Step 2: Boil the Eggs

Next, bring the water to a boil over medium-high heat. Once it starts bubbling, cover the pot with a lid and remove it from the heat. Let the eggs sit in the hot water for about 12 minutes. This method ensures perfectly cooked yolks without any greenish tint.

Step 3: Cool the Eggs

After the time is up, it’s time to cool those eggs down. Carefully transfer them to an ice bath. Fill a bowl with ice and cold water, then place the eggs in it for about 5 minutes. This stops the cooking process and makes peeling easier.

Step 4: Peel and Slice

Once the eggs are cool, gently tap them on a hard surface to crack the shell. Peel the eggs under running water for easier removal. Slice each egg in half lengthwise and carefully scoop out the yolks into a mixing bowl.

Step 5: Make the Filling

Now, let’s create that creamy filling. Mash the yolks with a fork until they’re crumbly. Add in the mayonnaise, Dijon mustard, white vinegar, salt, and pepper. Mix everything until it’s smooth and creamy. Taste and adjust the seasoning if needed.

Step 6: Prepare the Colors

Here comes the fun part. In separate small bowls, mix a few drops of food coloring with 1 tablespoon of water for each color you want to use. Stir until the color is well blended. You can get creative with your color choices.

Step 7: Color the Egg Whites

Now, dip the egg whites into the colored water. Let them soak for about 5-10 minutes, depending on how vibrant you want the colors to be. The longer they sit, the more intense the color will be. Just be careful not to leave them too long.

Step 8: Fill the Eggs

Once your egg whites are beautifully colored, it’s time to fill them. Use a spoon or a piping bag to carefully add the yolk mixture into each colored egg white. Don’t be shy; pile it high for a delicious bite.

Step 9: Chill and Serve

Finally, place your filled Colored Deviled Eggs in the refrigerator for at least 30 minutes before serving. This chilling time allows the flavors to meld together beautifully. When you’re ready, serve them up and watch your guests’ faces light up.

Tips for Success

  • Use fresh eggs for easier peeling and better flavor.
  • Experiment with different food coloring combinations for unique designs.
  • Don’t rush the chilling time; it enhances the flavors.
  • For a smoother filling, use a food processor to blend the yolks.
  • Keep a damp paper towel handy to wipe your hands while coloring.

Equipment Needed

  • Pot: A medium-sized pot for boiling eggs. A large saucepan works too.
  • Mixing bowl: For combining the yolk filling. Any bowl will do.
  • Fork: To mash the yolks. A potato masher can also work.
  • Small bowls: For mixing food coloring. Use any small containers you have.
  • Spoon or piping bag: For filling the eggs. A zip-top bag with a corner cut works great.

Variations

  • Spicy Deviled Eggs: Add a dash of hot sauce or a pinch of cayenne pepper to the yolk mixture for a fiery kick.
  • Herbed Delight: Mix in fresh herbs like dill, chives, or parsley into the yolk filling for an aromatic twist.
  • Avocado Twist: Substitute half of the mayonnaise with mashed avocado for a creamy, healthier filling.
  • Smoky Flavor: Incorporate a bit of smoked paprika into the yolk mixture for a unique, smoky taste.
  • Vegan Option: Use silken tofu blended with mustard and vinegar instead of eggs for a plant-based version.

Serving Suggestions

  • Pair your Colored Deviled Eggs with a fresh garden salad for a light meal.
  • Serve alongside crispy veggie sticks for a colorful appetizer platter.
  • Complement with a refreshing lemonade or iced tea for a delightful drink.
  • Present on a vibrant platter to showcase their beautiful colors.

FAQs about Colored Deviled Eggs

Can I make Colored Deviled Eggs ahead of time?

Absolutely! You can prepare the eggs and filling a day in advance. Just keep the egg whites and yolk mixture separate until you’re ready to fill them. This way, they stay fresh and delicious.

What type of food coloring works best?

Gel food coloring is my go-to for vibrant Colored Deviled Eggs. It provides rich colors without diluting the water too much. Liquid food coloring works too, but you may need to use more to achieve the same intensity.

How do I store leftover Colored Deviled Eggs?

Store any leftovers in an airtight container in the refrigerator. They should stay fresh for up to 2 days. Just be aware that the colors may fade slightly over time.

Can I use different types of vinegar?

Yes! While white vinegar is traditional, you can experiment with apple cider vinegar or even rice vinegar for a different flavor profile. Each will add its unique twist to your Colored Deviled Eggs.

What can I do if my egg yolks are hard to mash?

If your yolks are stubborn, try using a food processor for a smoother filling. It’s a quick way to achieve that creamy texture without much effort.

Final Thoughts

Creating these Colored Deviled Eggs is more than just a cooking task; it’s a joyful experience that brings a splash of color and fun to any gathering. Watching my family and friends light up as they take their first bite is truly rewarding. This recipe not only satisfies the taste buds but also sparks creativity in the kitchen. Whether it’s a holiday celebration or a casual get-together, these vibrant bites are sure to be a hit. So roll up your sleeves, get colorful, and enjoy the delightful moments that come with sharing these tasty treats.

“`

Print
clock clock iconcutlery cutlery iconflag flag iconfolder folder iconinstagram instagram iconpinterest pinterest iconfacebook facebook iconprint print iconsquares squares iconheart heart iconheart solid heart solid icon
Colored Deviled Eggs

Colored Deviled Eggs: Delightfully Fun and Tasty!


5 Stars 4 Stars 3 Stars 2 Stars 1 Star

No reviews

  • Author: Isabella
  • Total Time: 57 minutes
  • Yield: 6 servings 1x
  • Diet: Vegetarian

Description

Colored Deviled Eggs are a fun and tasty twist on the classic deviled eggs, perfect for parties and gatherings.


Ingredients

Scale
  • 6 large eggs
  • 1/4 cup mayonnaise
  • 1 teaspoon Dijon mustard
  • 1 teaspoon white vinegar
  • Salt and pepper to taste
  • Food coloring (various colors)
  • 1 tablespoon water per color

Instructions

  1. Prepare the eggs by placing them in a pot and covering them with cold water.
  2. Bring the water to a boil over medium-high heat.
  3. Once boiling, cover the pot, remove it from the heat, and let it sit for 12 minutes.
  4. Transfer the eggs to an ice bath for 5 minutes to cool.
  5. Peel the cooled eggs and slice them in half lengthwise. Remove the yolks and place them in a mixing bowl.
  6. Mash the yolks with a fork and add the mayonnaise, Dijon mustard, white vinegar, salt, and pepper. Mix until smooth and creamy.
  7. In separate small bowls, mix a few drops of food coloring with 1 tablespoon of water for each color you want to use.
  8. Dip the egg whites into the colored water for about 5-10 minutes, or until they reach your desired color intensity.
  9. Fill each white with the yolk mixture using a spoon or piping bag.
  10. Chill the colored deviled eggs in the refrigerator for at least 30 minutes before serving.

Notes

  • For a spicy kick, add a dash of hot sauce or a pinch of cayenne pepper to the yolk mixture.
  • Garnish the filled eggs with fresh herbs like chives or dill for added flavor and color.
  • Prep Time: 15 minutes
  • Cook Time: 12 minutes
  • Category: Appetizer
  • Method: Boiling and Mixing
  • Cuisine: American

Nutrition

  • Serving Size: 1 egg half
  • Calories: 120
  • Sugar: 0g
  • Sodium: 150mg
  • Fat: 10g
  • Saturated Fat: 2g
  • Unsaturated Fat: 8g
  • Trans Fat: 0g
  • Carbohydrates: 1g
  • Fiber: 0g
  • Protein: 6g
  • Cholesterol: 186mg

Mint Chocolate Chip Fudgy Brownies: A Rich and Refreshing Dessert

There’s something truly irresistible about the combination of deep, fudgy chocolate and cool, refreshing mint. These Mint Chocolate Chip Fudgy Brownies bring together rich cocoa, creamy mint frosting, and a smooth chocolate drizzle, making them a decadent treat perfect for any occasion. Whether you’re baking for St. Patrick’s Day, Christmas, a holiday gathering, or just indulging in a chocolate craving, this dessert is guaranteed to impress.

These brownies are thick, chewy, and packed with flavor, featuring a homemade fudgy base, a luscious mint frosting, and a silky chocolate drizzle that ties everything together. Unlike store-bought brownies, this homemade version delivers a superior texture and flavor, ensuring that every bite is as satisfying as the last.

In this guide, we’ll explore why these brownies are so special, creative ways to customize them, the best pairings, baking tips, storage instructions, and answers to common questions to help you master this indulgent dessert.

Why You’ll Love These Brownies

1. The Perfect Balance of Chocolate and Mint

Mint and chocolate are a classic pairing, offering a refreshing contrast between the rich, deep cocoa and the cool, bright mint flavor. The smooth chocolate drizzle enhances the richness, creating a well-rounded dessert.

2. Thick, Fudgy, and Chewy Texture

These brownies are not cakey—they’re made to be chewy, moist, and dense. The key to their ultra-fudgy texture is the right balance of butter, sugar, and cocoa, along with careful baking techniques.

3. A Bakery-Worthy Presentation

With three layers—brownie base, mint frosting, and chocolate drizzle—these brownies look as amazing as they taste. They’re perfect for gifting, bake sales, or dessert tables.

4. Easy to Customize

From extra chocolate chips to alternative flavors like mocha or caramel, this recipe can be modified in countless ways to suit different tastes.

5. Perfect for Any Occasion

Whether you’re celebrating a holiday, making treats for a party, or just indulging in a sweet craving, these brownies are always a hit.

Rich, Fudgy, and Perfectly Minty (Ingredients)

For the Brownie Base:
  • Unsalted butter
  • Granulated sugar
  • Unsweetened cocoa powder
  • Vanilla extract
  • Eggs
  • All-purpose flour
  • Baking powder
  • Kosher salt
  • Andes creme de menthe thins (chopped)
For the Mint Chocolate Chip Frosting:
  • Powdered sugar
  • Unsalted butter (room temperature)
  • Whole milk
  • Peppermint extract (not mint extract)
  • Green food coloring
  • Mini chocolate chips
For the Chocolate Drizzle:
  • Mini chocolate chips
  • Heavy cream

A Perfect Balance of Chocolate and Mint (Directions)

  1. Prepare the Brownie Batter – Melt butter, then mix in sugar, cocoa powder, vanilla, and eggs. Stir in flour, baking powder, and salt. Fold in chopped Andes mints.
  2. Bake the Brownies – Pour the batter into a prepared 8×8 baking dish and bake at 350°F for 20 minutes or until a toothpick inserted comes out clean. Let cool completely.
  3. Make the Mint Frosting – Beat butter, powdered sugar, and salt. Gradually add milk and peppermint extract until smooth. Mix in green food coloring and fold in mini chocolate chips.
  4. Frost and Chill – Spread the frosting over the cooled brownies and chill for 10 minutes.
  5. Prepare the Chocolate Drizzle – Melt mini chocolate chips with heavy cream, then drizzle over the frosted brownies.
  6. Slice and Serve – Let the brownies set before cutting into squares.

Nutritional Breakdown (Per Brownie – Approximate)

  • Calories: 249 kcal
  • Carbohydrates: 36g
  • Protein: 2g
  • Fat: 12g
  • Saturated Fat: 7g
  • Sugar: 31g
  • Sodium: 59mg

Creative Variations to Try

1. Double Chocolate Mint Brownies

For even more chocolate flavor, add dark chocolate chips or chunks to the brownie batter. This makes them extra gooey and rich.

2. Peppermint Bark Brownies

Top the mint frosting with crushed peppermint candies or white chocolate shavings for a festive holiday touch.

3. Espresso Mint Brownies

Add a teaspoon of espresso powder to the brownie batter to enhance the chocolate flavor and give the brownies a slight coffee kick.

4. Oreo Mint Brownies

Crush Oreo cookies and mix them into the frosting or sprinkle them on top for extra crunch and flavor.

5. Gluten-Free Mint Brownies

Replace the all-purpose flour with a gluten-free flour blend to make these brownies gluten-free without sacrificing texture.

Best Ways to Serve Mint Chocolate Chip Brownies

1. Warm with a Scoop of Ice Cream

Serve these brownies warm with a scoop of vanilla or mint chocolate chip ice cream for an indulgent dessert. The warm brownies melt into the ice cream, creating a heavenly bite.

2. Chilled for an Extra Fudgy Texture

For a denser, fudgier texture, chill the brownies in the refrigerator before serving. This also intensifies the chocolate flavor.

3. With a Cup of Coffee or Hot Cocoa

The richness of chocolate and cool mint pairs beautifully with a warm drink. Try serving these brownies with a latte, hot cocoa, or a peppermint mocha.

4. As a Holiday Dessert Platter

Arrange these brownies on a dessert platter with truffles, chocolate-covered pretzels, and peppermint bark for an impressive holiday spread.

5. Dipped in Melted Chocolate

For a bakery-style touch, dip the brownies halfway into melted chocolate and let them set before serving.

Expert Baking Tips for the Best Brownies

1. Use High-Quality Cocoa Powder

For the best chocolate flavor, use a rich, unsweetened cocoa powder. Dutch-processed cocoa will give the brownies a smoother, more intense chocolate taste.

2. Don’t Overmix the Batter

Overmixing the batter can lead to tough, dry brownies. Mix only until the ingredients are combined to maintain a soft, fudgy texture.

3. Line Your Baking Pan with Parchment Paper

Lining the pan with parchment paper prevents sticking and makes it easier to lift the brownies out for clean slicing.

4. Let the Brownies Cool Completely Before Frosting

If the brownies are too warm when you add the mint frosting, it will melt and become runny. Let them cool completely before frosting and adding the chocolate drizzle.

5. Adjust the Mint Flavor to Your Preference

Start with a small amount of peppermint extract and add more as needed. Too much can make the brownies taste overpoweringly minty.

Storage and Make-Ahead Instructions

How to Store Brownies

  • Room Temperature: Store in an airtight container for up to 3 days.
  • Refrigeration: Keep in the fridge for up to 5 days for a firmer, fudgier texture.

Can You Freeze Mint Brownies?

Yes! Here’s how:

  1. Cut the brownies into squares and place them on a baking sheet.
  2. Freeze until firm, then transfer to a sealed container with parchment paper between layers.
  3. Thaw in the fridge overnight before serving.

Best Way to Reheat Brownies

  • Microwave: Warm for 10-15 seconds for a soft, gooey texture.
  • Oven: Bake at 300°F for 5 minutes to refresh the texture.

Frequently Asked Questions (FAQs)

1. Can I Use Mint Extract Instead of Peppermint Extract?

Peppermint extract is preferred because it has a purer, more refreshing flavor. Mint extract contains a mix of peppermint and spearmint, which can taste different in baked goods.

2. How Do I Get Perfectly Clean Brownie Slices?

For clean, sharp edges, use a sharp knife and wipe it clean between cuts. You can also chill the brownies before slicing to make cutting easier.

3. What If My Brownies Are Too Dry?

Dry brownies can result from overbaking. Always check for doneness with a toothpick—it should come out with moist crumbs, not wet batter.

4. Can I Use Boxed Brownie Mix Instead?

Yes! If you’re short on time, use a boxed brownie mix and simply add the homemade mint frosting and chocolate drizzle for an upgraded version.

5. How Can I Make the Brownies Extra Gooey?

To achieve a gooier texture, slightly reduce the flour and bake for a few minutes less. Adding extra butter or melted chocolate to the batter also helps.

Final Thoughts: A Decadent Mint-Chocolate Indulgence

Mint Chocolate Chip Fudgy Brownies are a rich, refreshing, and indulgent dessert that combines deep chocolate flavor with a cool, creamy mint frosting. Whether you serve them warm with ice cream, chilled for extra chewiness, or dressed up with a chocolate drizzle, they are guaranteed to be a crowd-pleaser.

With endless customization options, simple storage solutions, and expert baking tips, this recipe is perfect for any occasion, from holidays to casual indulgences. Give them a try and enjoy the perfect balance of fudgy chocolate and refreshing mint in every bite!