Leprechaun Booty Dip: A Sweet and Festive St. Patrick’s Day Treat

A Taste of St. Patrick’s Day Magic

Every year, as St. Patrick’s Day approaches, my family gears up for a celebration filled with laughter, festive decorations, and, of course, plenty of delicious food. Growing up, my mother had a knack for transforming even the simplest recipes into something fun and memorable. One of my absolute favorite traditions was gathering around the kitchen table, creating colorful and playful treats that felt like they had a bit of leprechaun magic in them.

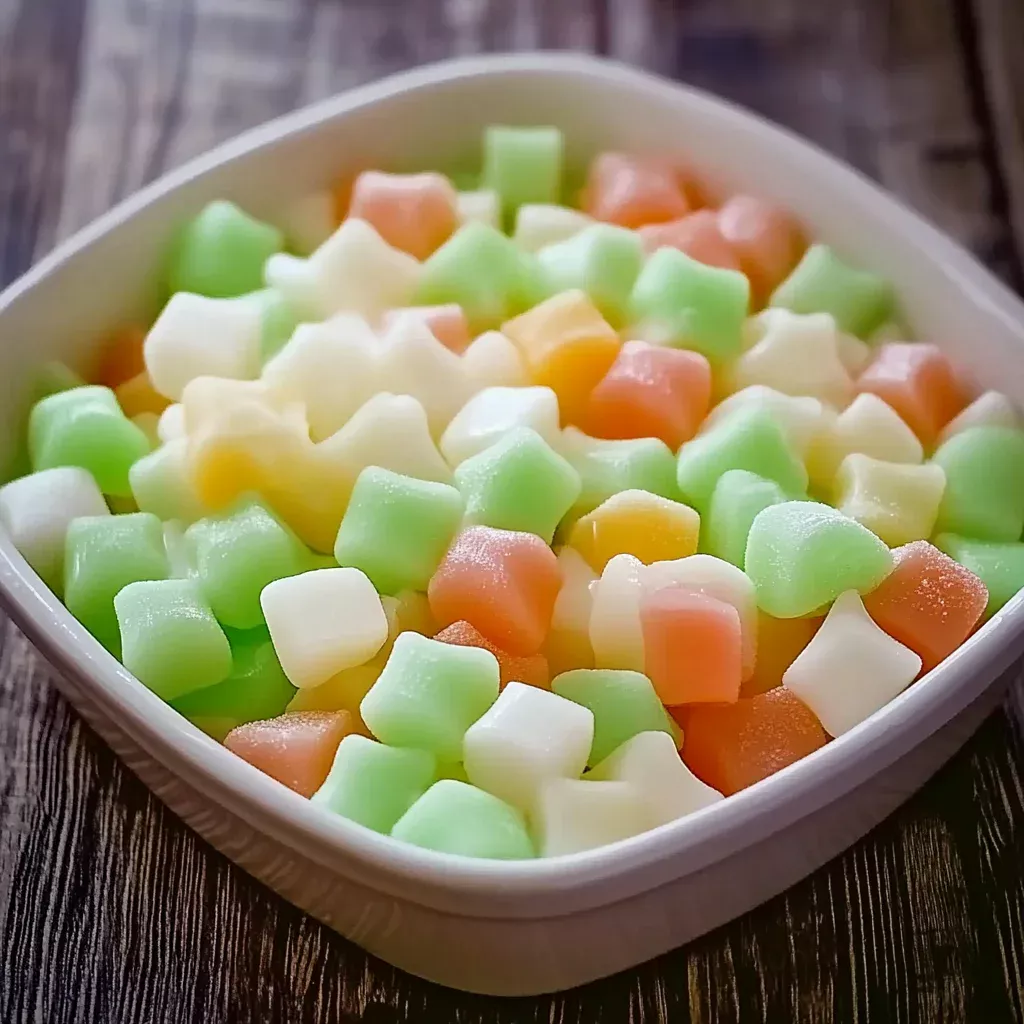
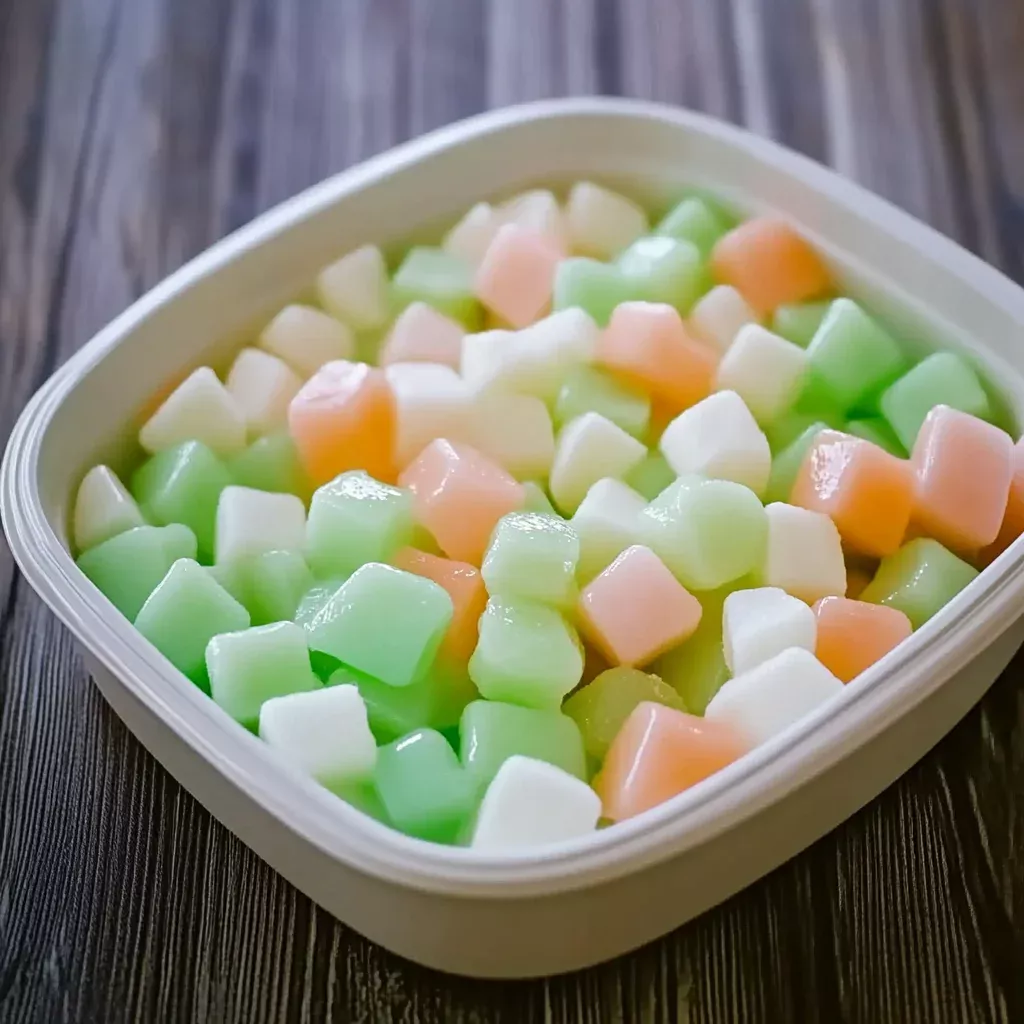
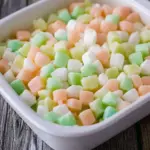
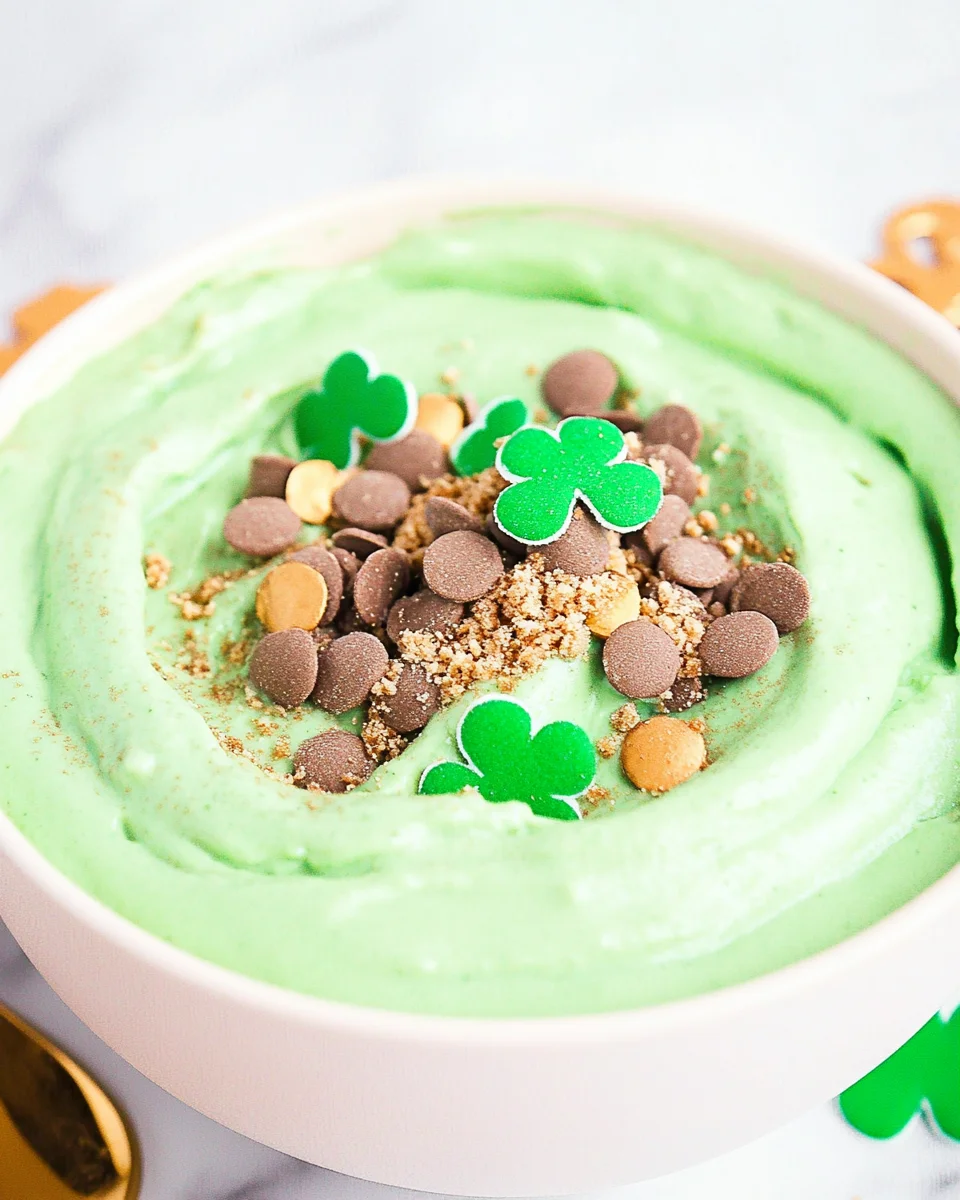
One year, she surprised us with a dip so creamy, sweet, and irresistibly fun that it instantly became a St. Paddy’s Day staple in our home. She called it Leprechaun Booty Dip, a whimsical name that made us giggle as kids and still brings a smile to my face today. It was unlike anything I had tasted before—a light and fluffy blend of cream cheese, marshmallow fluff, and whipped topping, tinted a festive green and sprinkled with all things lucky. Paired with graham crackers, cookies, or fresh fruit, it became the highlight of our St. Patrick’s Day gatherings.

Now, as I prepare this dip for my own family, I realize it’s more than just a fun dessert. It’s a reminder that food has the power to bring people together, create traditions, and add a little magic to our lives. Whether you’re making this for a festive party or a quiet night at home, Leprechaun Booty Dip is guaranteed to spread joy with every bite.

Why This Dip is the Perfect St. Patrick’s Day Treat

1. No-Bake and Ready in Minutes

This dip requires no baking, no cooking, and barely any effort. Simply mix, color, and serve. Perfect for when you need a last-minute party dish.

2. Fun, Festive, and Kid-Friendly

With its bright green color, chocolatey bites, and rainbow garnishes, this dip is a visual and flavorful delight. It’s an excellent way to get kids involved in the kitchen—they’ll love helping mix the ingredients and decorating with sprinkles.

3. Versatile and Customizable

This recipe is incredibly easy to tweak to your taste. Want a richer texture? Use extra whipped topping. Prefer a tangier flavor? Add a splash of vanilla or a pinch of sea salt.

4. Perfect for Any Celebration

While it’s ideal for St. Patrick’s Day, this dip can easily be adapted for other occasions by changing the food coloring and sprinkles. Make it red and pink for Valentine’s Day or blue and white for a winter wonderland treat.

5. Crowd-Pleasing Sweetness

The combination of fluffy marshmallow, creamy cheesecake-like texture, and chocolate chips creates an irresistible dessert dip that pairs perfectly with a variety of dippers.

Ingredients: A Magical Mix of Sweetness

  • 8 oz cream cheese, softened
  • 1 cup marshmallow fluff
  • ½ cup whipped topping, thawed
  • 1 cup chocolate chips (mini or regular)
  • 1 tbsp brown sugar
  • Green food coloring
  • St. Patrick’s Day sprinkles
  • Rainbow candy strips (for garnish)

Directions: From Simple Ingredients to a Festive Delight

  1. Blend the Base:
    • In a large bowl, mix cream cheese, marshmallow fluff, whipped topping, and brown sugar until smooth.
  2. Add the Lucky Green Touch:
    • Stir in green food coloring a few drops at a time until you achieve the desired shade.
  3. Fold in the Chocolate Magic:
    • Gently mix in the chocolate chips to distribute evenly.
  4. Assemble & Garnish:
    • Transfer the dip to a serving bowl.
    • Sprinkle with St. Patrick’s Day sprinkles and add rainbow candy strips as garnish.
  5. Serve & Enjoy:
    • Pair with cookies, vanilla wafers, graham crackers, or any favorite dippers!

Nutritional Highlights (Per Serving, Approximate)

  • Calories: ~180
  • Total Fat: ~10g
  • Carbohydrates: ~20g
  • Sugar: ~15g
  • Protein: ~2g

Best Dippers for Leprechaun Booty Dip

One of the best things about this dip is how versatile it is when it comes to serving. Here are some of the best sweet and crunchy dippers to pair with it:

  • Vanilla wafers – A soft and subtly sweet option that complements the dip’s creamy texture.
  • Graham crackers – Adds a slight crunch and a hint of honey flavor.
  • Shortbread cookies – Buttery and rich, perfect for scooping.
  • Pretzels – A salty contrast to the sweet dip.
  • Strawberries and apple slices – A fresh and juicy way to enjoy it.
  • Animal crackers – A nostalgic childhood favorite that works beautifully with this dip.

For an extra festive touch, arrange the dippers in a rainbow shape around the dip to tie in the St. Patrick’s Day theme.

Fun Variations to Try

1. White Chocolate Mint Version

For an extra minty kick, swap the chocolate chips for white chocolate chips and add a drop or two of peppermint extract. The result is a cool, creamy dip reminiscent of mint chocolate chip ice cream.

2. Fruity Marshmallow Version

Replace the chocolate chips with fruity mini marshmallows for a burst of color and a different kind of sweetness.

3. Lucky Charms Cereal Dip

Crush Lucky Charms cereal and fold it into the mixture for a crunchy, nostalgic treat. Top with extra Lucky Charms marshmallows for an even more festive look.

4. Oreo Cookie Crumble Version

Add crushed Oreos into the dip for a cookies-and-cream-inspired variation. The chocolatey crunch pairs beautifully with the creamy base.

5. Peanut Butter Chocolate Delight

For a Reese’s-inspired flavor, swirl in a tablespoon of peanut butter and use peanut butter chips instead of chocolate chips.

FAQs About Leprechaun Booty Dip

1. Can I Make This Dip Ahead of Time?

Yes! Prepare the dip up to 24 hours in advance and store it in an airtight container in the refrigerator. Just give it a quick stir before serving.

2. How Long Does This Dip Last?

Stored properly in the fridge, this dip stays fresh for 2-3 days. However, it’s best enjoyed within the first 24 hours for the best texture.

3. Can I Freeze This Dip?

Freezing is not recommended, as the texture may become grainy once thawed.

4. What’s the Best Way to Keep It Cool at a Party?

If serving at a party, place the dip bowl inside a larger bowl filled with ice to keep it chilled.

5. Can I Use a Sugar-Free Version?

Yes! Swap out the marshmallow fluff and whipped topping for sugar-free versions, and use sugar-free chocolate chips to reduce the sugar content.

6. What Can I Use Instead of Green Food Coloring?

If you prefer to avoid artificial food coloring, use:

  • Matcha powder (adds a mild earthy taste)
  • Spinach juice (adds color without altering flavor)
  • Avocado puree (for a naturally creamy green hue)

7. Can I Make This Dairy-Free?

Absolutely! Use dairy-free cream cheese, coconut whipped topping, and dairy-free chocolate chips for a completely vegan and dairy-free version.

A Sweet Ending to a Magical Treat

Leprechaun Booty Dip is more than just a dessert—it’s an experience. It’s a dip that brings joy, sparks laughter, and adds a playful touch to any gathering. Whether you’re making it for a St. Patrick’s Day party, a family get-together, or just because you need a little extra magic in your life, this dip is sure to be a hit.

The beauty of this recipe is that it’s endlessly customizable, ridiculously easy, and always delicious. No matter how you choose to serve it—whether with cookies, fruit, or straight from the spoon—each bite feels like a lucky little treasure.

So this year, add a touch of leprechaun mischief to your festivities and whip up a bowl of this creamy, dreamy dip. Because when it comes to celebrating with food, the best recipes are the ones that make you feel like a kid again. And this one does exactly that.

Soft & Chewy Jello Cookies: A Burst of Color and Flavor

A Sweet Memory in Every Bite

There’s something about colorful, chewy cookies that instantly transports me back to childhood. I remember standing on a stool in my grandmother’s kitchen, watching her hands expertly mix dough while I eagerly waited for my turn to help. She had a way of making baking feel like an adventure, and one of the most magical recipes she introduced me to was Jello Cookies.

At first, I was confused—wasn’t Jello meant for wobbly desserts? But as soon as she let me scoop the bright, fruity powder into the dough, I was hooked. The vibrant colors swirled into the mixture, turning ordinary cookie dough into a rainbow of possibilities. The sweet, tangy aroma filled the kitchen, and the anticipation grew as the cookies baked to soft, chewy perfection.

By the time they came out of the oven, their slightly crisp edges and tender centers made them irresistible. My grandmother and I would sit at the table, nibbling on the warm cookies, marveling at how something so simple could bring so much joy. To this day, whenever I bake Soft & Chewy Jello Cookies, I’m reminded that food isn’t just about flavor—it’s about the memories we create around it.

Why You’ll Love These Jello Cookies

1. A Fun, Colorful Treat for Any Occasion

Jello Cookies are as much a feast for the eyes as they are for the taste buds. The bright hues make them perfect for birthday parties, baby showers, or even a fun baking session with kids.

2. Soft, Chewy, and Irresistible

Unlike traditional sugar cookies, these have a slightly crisp edge and a soft, chewy center, thanks to the unique texture Jello powder adds to the dough.

3. Easy to Make, Even for Beginners

With just a few simple ingredients and steps, this recipe is practically foolproof. No fancy equipment needed—just a bowl, a spoon, and a bit of creativity.

4. Endless Flavor Combinations

Because the recipe uses flavored Jello, you can experiment with different fruit flavors to create unique cookies every time. Mix and match for strawberry-lemon, raspberry-lime, or orange-cherry combinations!

5. Kid-Friendly and Perfect for Family Bonding

These cookies are perfect for baking with children. Kids love choosing their favorite Jello flavors, rolling the dough into balls, and watching the colors come to life in the oven.

Ingredients: A Colorful Blend of Sweetness

  • 3/4 cup unsalted butter, softened
  • 1 cup granulated sugar
  • 1 egg
  • 2 1/2 cups all-purpose flour
  • 1 tsp baking powder
  • 1/4 tsp salt
  • 2 packages (3 oz each) Jello mix (choose your favorite flavors/colors)

Directions: From Dough to Delightful Bites

  1. Preheat & Prep:
    • Preheat oven to 350°F (175°C).
    • Line baking sheets with parchment paper.
  2. Mix the Dough:
    • Cream butter and sugar until light and fluffy.
    • Add the egg and mix until well combined.
  3. Combine Dry Ingredients:
    • In a separate bowl, whisk together flour, baking powder, and salt.
    • Gradually add the dry ingredients to the wet mixture.
  4. Add Jello Flavors:
    • Divide the dough into portions.
    • Mix different Jello powders into each portion until evenly colored.
  5. Shape & Bake:
    • Roll dough into 1-inch balls, place on a baking sheet, and flatten slightly.
    • Bake for 8-10 minutes, or until edges are set.
    • Cool on a wire rack before serving.

Nutritional Highlights (Per Cookie, Approximate)

  • Calories: ~120-140
  • Total Fat: ~5g
  • Carbohydrates: ~18g
  • Sugar: ~10g
  • Protein: ~1g

Tips for Perfect Jello Cookies Every Time

Choose the Right Butter Consistency

For the best texture, use softened butter, not melted. Softened butter ensures the dough comes together properly without becoming too sticky or greasy.

Don’t Overmix the Dough

Once you add the dry ingredients, mix just until combined. Overmixing can make the cookies dense instead of light and chewy.

Experiment with Colors & Flavors

  • For bold colors, add extra Jello powder to intensify the hues.
  • For multi-colored cookies, divide the dough into sections and use a different flavor in each one. Swirl them together for a marbled effect.

Chill the Dough if Needed

If your dough becomes too sticky to handle, refrigerate it for 15 minutes before rolling. This makes shaping the cookies much easier.

Slightly Underbake for Extra Softness

Bake the cookies until the edges are set, but the centers still look slightly soft. They’ll continue to firm up as they cool, creating the perfect chewy bite.

Fun Variations to Try

1. Citrus Twist

Try using lemon or lime Jello for a bright, zesty flavor. Add a little lemon zest for an extra citrusy kick!

2. Holiday-Inspired Cookies

  • Christmas: Use red (strawberry or cherry) and green (lime) Jello for a festive touch.
  • Easter: Soft pastel hues like pink, yellow, and light green make these perfect for spring celebrations.
  • Halloween: Try orange (orange Jello) and purple (grape Jello) for a spooky theme.

3. Frosted Jello Cookies

Top cooled cookies with a simple vanilla glaze or buttercream frosting for an extra indulgent treat. Sprinkle with sanding sugar for a bakery-style finish.

4. Jello Sugar Crystals

For a crunchy, flavorful coating, roll the cookie dough balls in extra Jello powder before baking. This enhances both the flavor and color.

5. Layered Jello Cookies

Create a two-tone effect by flattening two differently colored dough balls together before baking. The result? A beautifully layered, fruity cookie.

Frequently Asked Questions

1. Can I Use Sugar-Free Jello?

Yes, but the texture and flavor may be slightly different. Sugar-free Jello tends to have a milder taste and less vibrant color, but the cookies will still turn out delicious.

2. How Do I Store These Cookies?

Store them in an airtight container at room temperature for up to a week. For longer storage, freeze them in a sealed bag for up to three months.

3. Can I Make the Dough in Advance?

Absolutely! You can refrigerate the dough for up to 24 hours before baking. Let it sit at room temperature for a few minutes before shaping.

4. Do I Need to Use an Electric Mixer?

No, these cookies can be made with just a hand whisk and spoon, but an electric mixer makes creaming the butter and sugar easier.

5. Can I Add Mix-Ins?

Yes! Try adding:

  • White chocolate chips for a creamy contrast.
  • Sprinkles for extra fun and crunch.
  • Coconut flakes for a tropical touch.

Why Jello Cookies Deserve a Spot in Your Baking Routine

Jello Cookies aren’t just a recipe—they’re a joyful baking experience. They remind us that food should be fun, creative, and filled with color. They bring people together, whether it’s kids laughing as they mix the dough, friends marveling at the bright hues, or family members sneaking one more cookie when they think no one’s looking.

Baking is about more than just ingredients; it’s about creating memories, sharing happiness, and finding little moments of magic in everyday life. And that’s exactly what these Soft & Chewy Jello Cookies deliver.

So the next time you’re looking for a simple, vibrant, and utterly delightful treat, grab your favorite Jello flavors and bake up a batch of these nostalgic, fruit-flavored cookies. Because sometimes, the best things in life are as sweet and colorful as a plate of freshly baked Jello Cookies.

Philly Cheesesteak Sloppy Joes: A Mouthwatering Delight!

Introduction to Philly Cheesesteak Sloppy Joes

When two iconic comfort foods collide, magic happens—and that’s exactly the case with these Philly Cheesesteak Sloppy Joes. This recipe brings together the rich, savory flavors of a classic Philly cheesesteak and the messy, satisfying bite of a traditional sloppy joe. Imagine tender ground beef sautéed with onions and peppers, smothered in melted provolone or cheese sauce, all piled high on a soft toasted bun. It’s a hearty, flavorful twist that’s quick enough for busy weeknights yet indulgent enough to feel like a treat. Prepare to savor every deliciously messy bite!

Why You’ll Love This Philly Cheesesteak Sloppy Joes

These Philly Cheesesteak Sloppy Joes are not just delicious; they’re a lifesaver for busy nights! With a prep time of just 10 minutes and a total cook time of 20, you can have a satisfying meal on the table in half an hour. The combination of flavors is simply irresistible, making it a hit with both kids and adults. Plus, who doesn’t love a cheesy, meaty sandwich that’s easy to eat?

Ingredients for Philly Cheesesteak Sloppy Joes

Gathering the right ingredients is key to making these Philly Cheesesteak Sloppy Joes a hit! Here’s what you’ll need:

  • Ground Beef: The star of the show! It provides a rich, meaty flavor that pairs perfectly with the other ingredients.
  • Olive Oil: A splash of this healthy fat helps sauté the veggies and adds a lovely depth of flavor.
  • Onion: Diced onions bring sweetness and aroma, making your kitchen smell divine as they cook.
  • Green Bell Pepper: This adds a crunchy texture and a pop of color to your dish.
  • Garlic: Minced garlic is a must for that aromatic kick that elevates the entire dish.
  • Mushrooms: Diced mushrooms add earthiness and a nice umami flavor, enhancing the overall taste.
  • Worcestershire Sauce: A splash of this sauce brings a savory depth that’s hard to resist.
  • Soy Sauce: Just a hint of soy sauce adds a touch of saltiness and complexity to the mix.
  • Salt and Black Pepper: Essential seasonings that enhance all the flavors in your sloppy joes.
  • Paprika: This spice adds a subtle smokiness and a beautiful color to the dish.
  • Provolone Cheese: The gooey, melted cheese is what makes these sandwiches truly indulgent!
  • Hamburger Buns: Choose your favorite buns to hold all that delicious filling together.

For those looking to spice things up, consider adding diced jalapeños or a dash of hot sauce. If you prefer a leaner option, ground turkey or chicken works beautifully as a substitute. You can find the exact quantities for each ingredient at the bottom of the article, ready for printing!

How to Make Philly Cheesesteak Sloppy Joes

Now that you have all your ingredients ready, let’s dive into making these mouthwatering Philly Cheesesteak Sloppy Joes! Follow these simple steps, and you’ll have a delicious meal in no time.

Step 1: Heat the Olive Oil

Start by heating a tablespoon of olive oil in a large skillet over medium heat. This will create a lovely base for your veggies and beef. The oil should shimmer but not smoke, which means it’s just right!

Step 2: Sauté the Vegetables

Add the diced onion and green bell pepper to the skillet. Sauté them for about 5 minutes until they soften and become fragrant. The aroma will fill your kitchen, making everyone curious about dinner!

Step 3: Add the Ground Beef

Next, stir in the ground beef. Use a wooden spoon to break it up as it cooks. You want it browned and no longer pink, which should take about 6-8 minutes. Don’t forget to drain any excess fat to keep your sloppy joes from being greasy!

Step 4: Season the Mixture

Now it’s time to add flavor! Stir in the Worcestershire sauce, soy sauce, salt, black pepper, and paprika. Cook for another 2-3 minutes, allowing the flavors to meld together beautifully. This is where the magic happens!

Step 5: Melt the Cheese

Remove the skillet from heat and sprinkle the shredded provolone cheese over the beef mixture. Stir until the cheese melts and becomes gooey. Trust me, this step is what makes these Philly Cheesesteak Sloppy Joes truly indulgent!

Step 6: Prepare the Buns

If you like a little crunch, toast your hamburger buns lightly. This adds a nice texture and helps hold all that delicious filling. You can do this in a toaster or on a skillet for a few minutes.

Step 7: Assemble and Serve

Finally, spoon the cheesy beef mixture onto the bottom half of each bun. Top with the other half and serve immediately. These sandwiches are best enjoyed fresh, so gather your family and dig in!

Tips for Success

  • Prep your ingredients ahead of time to save precious minutes during cooking.
  • Don’t rush the sautéing process; it enhances the flavors of the veggies.
  • Feel free to experiment with different cheeses like cheddar or mozzarella for a unique twist.
  • For extra flavor, consider adding a splash of hot sauce to the beef mixture.
  • Serve with a side of crispy fries or a fresh salad for a complete meal.

Equipment Needed

  • Large Skillet: A non-stick skillet works best, but any large pan will do.
  • Wooden Spoon: Perfect for stirring and breaking up the meat; a spatula can also work.
  • Measuring Spoons: Handy for measuring sauces; you can use your regular kitchen spoons in a pinch.
  • Toaster or Skillet: For toasting buns; a broiler can also be used for a quick toast.

Variations

  • Spicy Kick: Add diced jalapeños or a splash of your favorite hot sauce for a fiery twist.
  • Vegetarian Option: Substitute ground beef with lentils or a plant-based meat alternative for a meatless meal.
  • Cheese Lovers: Experiment with different cheeses like cheddar, gouda, or even pepper jack for added flavor.
  • Low-Carb Version: Serve the cheesesteak mixture in lettuce wraps instead of buns for a lighter option.
  • Herb Infusion: Add fresh herbs like parsley or basil to the mixture for a burst of freshness.

Serving Suggestions

  • Crispy Fries: Serve with a side of golden, crispy fries for a classic pairing.
  • Coleslaw: A refreshing coleslaw adds crunch and balances the richness of the sandwiches.
  • Pickles: Offer dill pickles on the side for a tangy contrast.
  • Refreshing Drinks: Pair with iced tea or lemonade to complement the flavors.
  • Presentation: Serve on a wooden board for a rustic touch that impresses!

FAQs about Philly Cheesesteak Sloppy Joes

Can I make Philly Cheesesteak Sloppy Joes ahead of time?


Absolutely! You can prepare the beef mixture in advance and store it in the fridge. Just reheat it when you’re ready to serve, and toast the buns fresh for the best experience.


What can I use instead of ground beef?


If you’re looking for a leaner option, ground turkey or chicken works wonderfully. For a vegetarian twist, try using lentils or a plant-based meat substitute.


How can I make these Sloppy Joes spicier?


For a spicy kick, add diced jalapeños or a few dashes of your favorite hot sauce to the beef mixture. It’s a great way to elevate the flavor!


Can I freeze the leftovers?


Yes, you can freeze the cheesesteak mixture! Just let it cool completely, then store it in an airtight container. When you’re ready to enjoy, thaw and reheat it on the stove.


What sides pair well with Philly Cheesesteak Sloppy Joes?


These sandwiches are delicious with crispy fries, a fresh salad, or even coleslaw. They balance the richness of the Sloppy Joes perfectly!

Final Thoughts

Making Philly Cheesesteak Sloppy Joes is more than just cooking; it’s about creating moments with family and friends. The joy of watching everyone dig into these cheesy, savory sandwiches is truly heartwarming. This recipe is a reminder that delicious meals don’t have to be complicated or time-consuming. With just a few ingredients and simple steps, you can bring smiles to the dinner table. So, whether it’s a busy weeknight or a casual gathering, these Sloppy Joes are sure to impress. I can’t wait for you to experience the delight they bring to your home!

“`

Print
clock clock iconcutlery cutlery iconflag flag iconfolder folder iconinstagram instagram iconpinterest pinterest iconfacebook facebook iconprint print iconsquares squares iconheart heart iconheart solid heart solid icon
Philly Cheesesteak Sloppy Joes

Philly Cheesesteak Sloppy Joes: A Mouthwatering Delight!


5 Stars 4 Stars 3 Stars 2 Stars 1 Star

No reviews

  • Author: Isabella
  • Total Time: 30 minutes
  • Yield: 4 servings 1x

Description

Philly Cheesesteak Sloppy Joes are a delicious twist on the classic cheesesteak, combining ground beef with savory vegetables and melted provolone cheese, all served on a toasted bun.


Ingredients

Scale
  • 1 pound ground beef
  • 1 tablespoon olive oil
  • 1 medium onion, diced
  • 1 medium green bell pepper, diced
  • 2 cloves garlic, minced
  • 1 cup mushrooms, diced
  • 1 teaspoon Worcestershire sauce
  • 1 teaspoon soy sauce
  • 1 teaspoon salt
  • 1/2 teaspoon black pepper
  • 1/2 teaspoon paprika
  • 1 cup provolone cheese, shredded
  • 4 hamburger buns

Instructions

  1. In a large skillet, heat the olive oil over medium heat.
  2. Add the diced onion and green bell pepper, cooking until softened, about 5 minutes.
  3. Stir in the minced garlic and diced mushrooms, cooking for an additional 3-4 minutes until the mushrooms are tender.
  4. Add the ground beef to the skillet, breaking it up with a spoon. Cook until browned and no longer pink, about 6-8 minutes. Drain any excess fat.
  5. Stir in the Worcestershire sauce, soy sauce, salt, black pepper, and paprika. Cook for another 2-3 minutes to combine the flavors.
  6. Remove from heat and stir in the shredded provolone cheese until melted and well combined.
  7. Toast the hamburger buns lightly if desired.
  8. Spoon the cheesesteak mixture onto the bottom half of each bun and top with the other half. Serve immediately.

Notes

  • For a spicier version, add diced jalapeños or a dash of hot sauce to the meat mixture.
  • You can also substitute ground turkey or chicken for a leaner option.
  • Prep Time: 10 minutes
  • Cook Time: 20 minutes
  • Category: Main Dish
  • Method: Skillet
  • Cuisine: American

Nutrition

  • Serving Size: 1 sandwich
  • Calories: 450
  • Sugar: 3g
  • Sodium: 800mg
  • Fat: 28g
  • Saturated Fat: 10g
  • Unsaturated Fat: 18g
  • Trans Fat: 0g
  • Carbohydrates: 30g
  • Fiber: 2g
  • Protein: 28g
  • Cholesterol: 80mg

Spring Jello Salad: A Refreshing Treat for Spring!

Spring Jello Salad

Introduction to Spring Jello Salad

As the flowers bloom and the sun shines brighter, I find myself craving something light and refreshing. That’s where my beloved Spring Jello Salad comes in! This delightful dish is not just a treat for the eyes with its vibrant colors, but it’s also a quick solution for busy days. Whether you’re hosting a family gathering or simply want to impress your loved ones, this salad is a crowd-pleaser. With just a few simple ingredients, you can whip up a dessert that brings smiles and nostalgia, making it perfect for any spring occasion.

Why You’ll Love This Spring Jello Salad

This Spring Jello Salad is a breeze to make, taking just 15 minutes of your time. It’s perfect for those busy days when you want to serve something special without the fuss. The combination of sweet strawberries and fluffy marshmallows creates a delightful taste that will have everyone coming back for seconds. Plus, it’s a fun way to get the kids involved in the kitchen, making memories while you whip up this colorful treat!

Ingredients for Spring Jello Salad

Gathering the right ingredients is the first step to creating this delightful Spring Jello Salad. Here’s what you’ll need:

  • Strawberry-flavored gelatin: This is the star of the show, providing that sweet, fruity flavor and vibrant color.
  • Boiling water: Essential for dissolving the gelatin, it helps create that smooth texture we all love.
  • Cold water: This balances the temperature, ensuring the gelatin sets perfectly without becoming too firm.
  • Diced fresh strawberries: These juicy gems add a burst of freshness and a lovely texture to the salad.
  • Mini marshmallows: They bring a fun, chewy element that kids adore, making the salad even more enjoyable.
  • Whipped topping: This fluffy addition lightens the salad and gives it a creamy finish that’s simply irresistible.
  • Chopped pecans (optional): For those who enjoy a bit of crunch, these nuts add a delightful contrast to the softness of the other ingredients.

Feel free to get creative! If you want to switch things up, you can substitute the strawberry gelatin with pineapple or orange gelatin for a tropical twist. And if you’re looking for a lighter option, consider using sugar-free gelatin and light whipped topping. For exact measurements, check the bottom of the article where you can find everything available for printing!

How to Make Spring Jello Salad

Now that you have all your ingredients ready, let’s dive into the fun part—making this delightful Spring Jello Salad! Follow these simple steps, and you’ll have a colorful treat that’s sure to impress.

Step 1: Dissolve the Gelatin

Start by pouring the strawberry-flavored gelatin into a mixing bowl. Then, add one cup of boiling water. Stir it well until the gelatin is completely dissolved. This step is crucial for achieving that smooth, luscious texture.

Step 2: Add Cold Water

Next, it’s time to cool things down! Add one cup of cold water to the gelatin mixture. Stir gently to combine. This helps balance the temperature, ensuring your salad sets perfectly without becoming too firm.

Step 3: Refrigerate to Thicken

Now, cover the bowl and pop it into the refrigerator for about 30 minutes. You want it to thicken but not fully set. This is the sweet spot where you can still fold in your delicious ingredients!

Step 4: Fold in Ingredients

Once the gelatin has thickened, it’s time to add the fun stuff! Gently fold in the diced fresh strawberries, mini marshmallows, and whipped topping. If you’re using chopped pecans, toss those in too. Be careful not to overmix; you want to keep that fluffy texture!

Step 5: Pour into Dish

Grab a 9-inch round or square dish and pour the mixture in. Spread it evenly with a spatula. This is where the magic happens, as it transforms into a beautiful, colorful salad.

Step 6: Chill Until Set

Cover the dish and return it to the refrigerator. Let it chill for at least 2 hours, or until it’s fully set. This waiting time is the hardest part, but trust me, it’s worth it!

Step 7: Serve and Enjoy

Finally, it’s time to dig in! Cut the salad into squares or wedges and serve chilled. Watch as your family and friends delight in this refreshing Spring Jello Salad. It’s a guaranteed hit!

Tips for Success

  • Make sure your gelatin is fully dissolved for a smooth texture.
  • Use fresh strawberries for the best flavor and texture.
  • Don’t skip the chilling time; it’s essential for the salad to set properly.
  • For a fun twist, try adding shredded coconut or diced pineapple.
  • Keep leftovers covered in the fridge for up to three days.

Equipment Needed

  • Mixing bowl: A medium-sized bowl works best, but any bowl will do.
  • Whisk or spoon: Use a whisk for smooth mixing, or a spoon if that’s what you have on hand.
  • Measuring cups: Essential for accuracy, but you can estimate if needed.
  • 9-inch dish: A round or square dish is perfect; any similar-sized container will work.

Variations

  • Tropical Twist: Swap the strawberry gelatin for pineapple or orange gelatin and use diced pineapple instead of strawberries for a refreshing tropical flavor.
  • Berry Medley: Mix in a combination of fresh berries like blueberries and raspberries for a colorful and antioxidant-rich salad.
  • Nut-Free Option: Omit the chopped pecans to make it suitable for those with nut allergies.
  • Vegan Version: Use plant-based whipped topping and gelatin alternatives like agar-agar for a vegan-friendly treat.
  • Low-Sugar Option: Choose sugar-free gelatin and light whipped topping to create a guilt-free dessert that everyone can enjoy.

Serving Suggestions

  • Pair your Spring Jello Salad with grilled chicken or fish for a light, balanced meal.
  • Serve it alongside a fresh garden salad for a colorful spread.
  • For drinks, consider a refreshing lemonade or iced tea to complement the sweetness.
  • Garnish with mint leaves for an elegant touch.
  • Use clear glass bowls to showcase the vibrant layers of the salad.

FAQs about Spring Jello Salad

Can I make Spring Jello Salad ahead of time?


Absolutely! This salad is perfect for making ahead. You can prepare it a day in advance and store it in the refrigerator. Just make sure to cover it well to keep it fresh.


What can I substitute for strawberry gelatin?


If you’re looking for a different flavor, you can easily swap strawberry gelatin for pineapple or orange gelatin. This gives your Spring Jello Salad a fun twist!


How long does Spring Jello Salad last in the fridge?


When stored properly in an airtight container, your Spring Jello Salad can last up to three days in the fridge. Just be sure to keep it covered to maintain its freshness.


Can I use fresh whipped cream instead of whipped topping?


Yes, you can! Fresh whipped cream adds a lovely homemade touch to your Spring Jello Salad. Just be aware that it may not hold its shape as well as whipped topping.


Is this recipe suitable for vegetarians?


Yes, this Spring Jello Salad is vegetarian-friendly! Just ensure you use gelatin that is labeled as vegetarian or opt for alternatives like agar-agar for a vegan version.

Final Thoughts

Creating this Spring Jello Salad is more than just whipping up a dessert; it’s about bringing joy to your table. The vibrant colors and delightful flavors evoke the essence of spring, making every bite a celebration. I love how this recipe invites family and friends to gather around, sharing laughter and stories. Plus, it’s a fantastic way to involve the kids in the kitchen, creating memories that last a lifetime. So, whether it’s a picnic or a family dinner, this refreshing treat is sure to brighten your day and leave everyone smiling!

“`

Print
clock clock iconcutlery cutlery iconflag flag iconfolder folder iconinstagram instagram iconpinterest pinterest iconfacebook facebook iconprint print iconsquares squares iconheart heart iconheart solid heart solid icon
Spring Jello Salad

Spring Jello Salad: A Refreshing Treat for Spring!


5 Stars 4 Stars 3 Stars 2 Stars 1 Star

No reviews

  • Author: Isabella
  • Total Time: 15 minutes
  • Yield: 8 servings 1x

Description

A refreshing and colorful Spring Jello Salad made with strawberry-flavored gelatin, fresh strawberries, mini marshmallows, and whipped topping, perfect for spring gatherings.


Ingredients

Scale
  • 1 package (3 oz) strawberry-flavored gelatin
  • 1 cup boiling water
  • 1 cup cold water
  • 1 cup diced fresh strawberries
  • 1 cup mini marshmallows
  • 1 cup whipped topping (like Cool Whip)
  • 1/2 cup chopped pecans (optional)

Instructions

  1. In a mixing bowl, dissolve the strawberry gelatin in boiling water, stirring until completely dissolved.
  2. Add the cold water to the gelatin mixture and stir well.
  3. Refrigerate the mixture for about 30 minutes, or until it starts to thicken but is not fully set.
  4. Gently fold in the diced strawberries, mini marshmallows, whipped topping, and chopped pecans (if using) until well combined.
  5. Pour the mixture into a 9-inch round or square dish and spread evenly.
  6. Cover and refrigerate for at least 2 hours, or until fully set.
  7. Serve chilled, cutting into squares or wedges.

Notes

  • For a tropical twist, substitute the strawberry gelatin with pineapple or orange gelatin and add diced pineapple instead of strawberries.
  • To make it a bit healthier, use sugar-free gelatin and light whipped topping.
  • Prep Time: 15 minutes
  • Cook Time: 0 minutes
  • Category: Dessert
  • Method: Refrigeration
  • Cuisine: American

Nutrition

  • Serving Size: 1 serving
  • Calories: 120
  • Sugar: 10g
  • Sodium: 50mg
  • Fat: 5g
  • Saturated Fat: 2g
  • Unsaturated Fat: 3g
  • Trans Fat: 0g
  • Carbohydrates: 18g
  • Fiber: 0g
  • Protein: 1g
  • Cholesterol: 5mg

Cheese-Stuffed Buns: A Soft, Gooey Delight That Brings People Together

A Warm Memory in Every Bite

There’s something magical about the aroma of freshly baked bread filling the house. It’s the kind of scent that instantly makes a place feel like home, wrapping you in warmth and comfort. Growing up, I remember watching my mother knead dough with effortless grace, her hands moving rhythmically as she transformed simple ingredients into something extraordinary.

One of my fondest memories is of the weekends when she made cheese-stuffed buns. We’d eagerly gather around the kitchen, peeking into the oven as the dough rose and turned golden brown. The moment they came out, we couldn’t resist pulling them apart, watching the gooey cheese stretch and melt in our hands. They weren’t just delicious—they were a tradition, a reminder that food has the power to bring people together.

Now, every time I bake these melt-in-your-mouth cheese-stuffed buns, I’m transported back to those cozy mornings. Whether served as a snack, a side dish, or even a breakfast treat, these buns capture the essence of homemade comfort. They are the perfect blend of soft, fluffy bread and rich, gooey cheese—simple, yet utterly irresistible.

Why You’ll Love These Cheese-Stuffed Buns

1. Soft, Fluffy, and Incredibly Satisfying

These buns have the perfect texture—crispy on the outside, pillowy soft on the inside, with a melty cheese center that makes every bite indulgent.

2. Perfect for Any Occasion

Whether you’re serving them at breakfast, brunch, or as a dinner side, these buns complement any meal. They’re also a hit at parties, potlucks, and family gatherings.

3. Easy to Customize

One of the best things about this recipe is its versatility. You can experiment with different types of cheeses, fillings, and even dough variations to make them uniquely yours.

4. A Fun Baking Project

There’s something deeply satisfying about making bread from scratch. Kneading the dough, shaping the buns, and watching them bake to perfection makes this a rewarding experience for both beginners and seasoned bakers.

5. A Family Favorite

Kids and adults alike love these buns. They’re great for lunchboxes, after-school snacks, or as a comforting bite with a warm bowl of soup.

Ingredients: The Pillowy Goodness Begins Here

  • 1 cup warm milk (110°F)
  • 2 1/4 tsp active dry yeast
  • 1 tbsp sugar
  • 3 cups all-purpose flour
  • 1 tsp salt
  • 4 tbsp unsalted butter, melted
  • 1 large egg
  • 2 cups grated cheese (mozzarella, cheddar, or a mix)

Directions: From Dough to Golden Perfection

  1. Activate the Yeast:
    • Mix warm milk, sugar, and yeast in a bowl. Let it sit for 5-10 minutes until it turns frothy.
  2. Form the Dough:
    • In a separate bowl, combine flour and salt.
    • Make a well in the center, then add the yeast mixture, melted butter, and egg.
    • Mix until a dough forms.
  3. Knead & Rise:
    • Knead the dough on a floured surface for 8-10 minutes until smooth and elastic.
    • Place it in a greased bowl, cover, and let it rise for 1 hour until doubled in size.
  4. Stuff with Cheese:
    • Punch down the dough and divide it into 12 equal pieces.
    • Flatten each piece, place a tablespoon of cheese in the center, and fold into a bun.
  5. Second Rise:
    • Arrange the buns on a parchment-lined baking sheet, cover, and let them rise for another 30 minutes.
  6. Bake to Perfection:
    • Preheat the oven to 375°F (190°C).
    • Brush the buns with milk or beaten egg for a golden crust.
    • Bake for 15-20 minutes until golden brown and cheese starts oozing out.
  7. Cool & Serve:
    • Let them cool slightly before enjoying their melty, cheesy center!

Nutritional Highlights (Per Serving, Approximate)

  • Calories: ~220-250
  • Protein: ~8g
  • Carbohydrates: ~28g
  • Fat: ~10g
  • Fiber: ~1g

The Secret to the Perfect Cheese-Stuffed Buns

Choosing the Right Cheese

The cheese is the heart of this recipe, so it’s important to choose one that melts beautifully. Mozzarella is a classic choice for a stretchy, gooey filling, while cheddar adds a sharp, bold flavor. You can also experiment with gruyère, gouda, or fontina for a more complex taste.

Getting the Dough Just Right

A well-risen dough is key to soft, fluffy buns. Make sure your yeast is active (it should foam up when mixed with warm milk and sugar) and let the dough rest in a warm place until it doubles in size.

Sealing the Buns Properly

When shaping the buns, ensure the edges are sealed well so the cheese doesn’t leak out during baking. Pinch the dough tightly around the filling and place the seam side down on the baking sheet.

The Golden Touch

Brushing the buns with milk or an egg wash before baking gives them a beautiful golden crust. If you want an extra rich flavor, try brushing them with melted butter after baking.

Creative Variations to Try

1. Add a Flavor Twist

  • Garlic and Herb: Mix minced garlic and dried herbs into the dough for an aromatic touch.
  • Spicy Kick: Add chopped jalapeños or a pinch of red pepper flakes for a bit of heat.
  • Savory Fillings: Try adding cooked bacon, caramelized onions, or sun-dried tomatoes to the cheese mixture.

2. Swap the Cheese

  • Gorgonzola or Blue Cheese: For a sharp, tangy flavor.
  • Smoked Gouda: Adds a deliciously smoky depth.
  • Brie or Camembert: For a creamy, luxurious center.

3. Make Them Sweet

  • Replace the cheese with Nutella, peanut butter, or jam for a dessert version.
  • Dust with powdered sugar for an extra touch of sweetness.

4. Turn Them into Mini Pizzas

Flatten the dough, add tomato sauce, shredded cheese, and pepperoni, then fold into buns for a pizza-inspired treat.

FAQs: Everything You Need to Know

1. Can I Make the Dough Ahead of Time?

Yes! You can prepare the dough the night before and let it rise in the refrigerator overnight. This slow fermentation enhances the flavor. When ready to bake, let the dough come to room temperature before shaping the buns.

2. How Do I Store These Buns?

Store the buns in an airtight container at room temperature for up to 2 days or in the refrigerator for up to 5 days. If they start to dry out, warm them in the oven or microwave before serving.

3. Can I Freeze Cheese-Stuffed Buns?

Absolutely! To freeze:

  • Let the buns cool completely.
  • Wrap them individually in plastic wrap and store them in a freezer-safe bag.
  • When ready to eat, reheat in a 350°F oven for 10-12 minutes or microwave for 30-40 seconds.

4. What’s the Best Way to Reheat Them?

For the best results, warm the buns in a toaster oven or conventional oven at 350°F for a few minutes until heated through. This keeps the outside crispy while melting the cheese inside.

5. Can I Use Whole Wheat Flour Instead of All-Purpose Flour?

Yes, but keep in mind that whole wheat flour makes the buns denser. For a softer texture, try using half whole wheat and half all-purpose flour.

6. What Can I Serve with These Buns?

These buns pair wonderfully with:

  • Soup: Tomato soup, potato soup, or creamy mushroom soup.
  • Salads: A fresh green salad with vinaigrette.
  • Eggs: Serve with scrambled or poached eggs for a delicious breakfast.
  • Grilled Meats: They make an excellent side for roasted chicken or steak.

A Bite of Happiness in Every Bun

Cheese-stuffed buns are more than just a recipe—they’re an experience. From the moment you mix the dough to the first warm, gooey bite, there’s a joy in making and sharing them. They bring people together, whether it’s for a weekend brunch, a family dinner, or a cozy snack on a rainy afternoon.

Baking has always been a way to create comfort, and these buns are a perfect example of that. They remind us that sometimes, the simplest ingredients—flour, milk, yeast, cheese—can create something truly special.

So the next time you’re in the mood for a warm, cheesy, pull-apart delight, gather your ingredients, knead some dough, and let your kitchen fill with the scent of freshly baked bread. Because no matter where you are or who you’re with, food made with love always tastes better.

Golden Cabbage Dumpling Skillet: A Nostalgic Comfort Dish

A Taste of Home in Every Bite

There’s something special about the meals that remind us of home. For me, cabbage has always been more than just a vegetable—it’s a symbol of tradition, resilience, and simple, honest cooking. Growing up, my grandmother had a way of turning the most humble ingredients into something extraordinary. Whether it was slow-cooked cabbage with smoked sausage, buttery cabbage rolls, or a rustic skillet dish, every meal carried a story.

On busy nights, when time was short but a hearty meal was needed, she would whip up a cabbage skillet with tender dumplings, infused with the warmth of caraway and nutmeg. The aroma would fill the kitchen, drawing us to the table before she even called us. It was food that didn’t just satisfy hunger; it wrapped you in a sense of belonging.

This Golden Cabbage Dumpling Skillet brings back those memories in every forkful. It’s a dish that celebrates the beauty of simple ingredients—earthy cabbage, fragrant spices, and soft, delicate dumplings—coming together in a way that feels both nourishing and indulgent. Whether you’re making this for a weeknight dinner or sharing it with loved ones, it’s a recipe that proves comfort food doesn’t need to be complicated.

Why This Dish Deserves a Spot at Your Table

1. A Simple Dish with Bold Flavors

Despite its short ingredient list, this dish is packed with depth. The cabbage becomes tender and slightly caramelized, while the dumplings soak up the rich flavors of the skillet. Caraway seeds add an unmistakable warmth, and nutmeg brings a subtle, nutty sweetness that ties everything together.

2. A Nutrient-Packed Comfort Food

Cabbage is a powerhouse of nutrition—low in calories but high in fiber, vitamins, and antioxidants. Almond flour adds healthy fats and protein to the dumplings, making this dish not just delicious but also nourishing.

3. One-Pan Wonder: Easy Prep, Minimal Cleanup

This entire dish comes together in a single skillet, making it an ideal choice for busy nights. No juggling multiple pots and pans—just straightforward cooking with maximum flavor.

4. Perfect for Any Occasion

While it makes for a satisfying main course, this dish also pairs beautifully with roasted meats, grilled vegetables, or a fresh salad. Serve it as a rustic side dish at a family gathering, or enjoy it on its own as a comforting meal.

5. Naturally Gluten-Free and Customizable

Since the dumplings are made with almond flour instead of wheat flour, this recipe is naturally gluten-free. It can also be easily adjusted for different dietary preferences, making it a great choice for anyone looking for a wholesome, home-cooked meal.

Ingredients: A Savory Blend of Comfort

  • 1 medium head of cabbage, chopped
  • 2 tablespoons olive oil
  • 1 onion, finely chopped
  • 2 cloves garlic, minced
  • 1 teaspoon caraway seeds
  • Salt and pepper, to taste
  • 1 cup almond flour
  • 2 large eggs
  • 1/4 cup grated Parmesan cheese
  • 1/4 teaspoon nutmeg

Directions: From Skillet to Table in No Time

  1. Sauté the Base:
    • Heat olive oil in a large skillet over medium heat.
    • Add onion and garlic, cooking until the onion turns translucent and fragrant.
  2. Cook the Cabbage:
    • Stir in the chopped cabbage and caraway seeds.
    • Cook for 10-15 minutes, stirring occasionally, until the cabbage softens.
    • Season with salt and pepper to taste.
  3. Prepare the Dumpling Dough:
    • In a mixing bowl, combine almond flour, eggs, Parmesan cheese, and nutmeg.
    • Mix until a dough forms.
  4. Shape & Cook the Dumplings:
    • Roll the dough into small dumplings, about the size of a walnut.
    • Add the dumplings to the skillet, nestling them into the cabbage mixture.
    • Cover and cook for 10 more minutes, until the dumplings are firm and cooked through.
  5. Serve & Enjoy:
    • Serve hot, garnished with a sprinkle of fresh parsley, if desired.

Nutritional Highlights (Per Serving, Approximate)

  • Calories: ~250-300
  • Protein: ~10g
  • Carbohydrates: ~15g
  • Fat: ~18g
  • Fiber: ~5g

The Secret to Perfect Dumplings

One of the highlights of this dish is the soft, pillowy dumplings that soak up all the rich flavors from the cabbage and seasonings. Here’s how to get them just right:

  • Keep the dough slightly sticky. If it’s too dry, the dumplings may become dense rather than light and tender.
  • Shape them gently. Avoid compacting the dough too much—light hands make for fluffier dumplings.
  • Let them steam properly. Covering the skillet ensures the dumplings cook through while absorbing all the delicious flavors of the dish.

Delicious Variations & Serving Suggestions

Boost the Protein

For a heartier meal, consider adding:

  • Cooked ground sausage or bacon for a smoky, savory touch.
  • Grilled or roasted chicken for a leaner protein option.
  • Crumbled feta or goat cheese sprinkled on top for an extra layer of flavor.

Add More Vegetables

If you want to pack in even more nutrients, try:

  • Sautéed mushrooms for a rich, umami flavor.
  • Carrots or bell peppers for a hint of sweetness.
  • Spinach or kale stirred in at the end for a fresh, vibrant finish.

Make It Creamy

For a more indulgent twist, stir in a splash of heavy cream or a dollop of sour cream just before serving. This adds a luxurious texture that pairs beautifully with the dumplings.

Serve It With…

While this dish is satisfying on its own, here are a few ideas to round out the meal:

  • A crisp green salad with a tangy vinaigrette for balance.
  • Roasted potatoes or crusty bread for extra heartiness.
  • A side of applesauce for a sweet contrast, a common pairing in Eastern European cuisine.

Frequently Asked Questions

1. Can I make this dish ahead of time?

Yes! This dish stores well and can be reheated easily. To make ahead:

  • Prepare the cabbage mixture and dumplings as directed.
  • Let the dish cool and store it in an airtight container in the refrigerator for up to 3 days.
  • Reheat in a skillet over low heat, adding a splash of water or broth if needed to prevent drying out.

2. Can I freeze this dish?

While cabbage can soften slightly when frozen, this dish should freeze well overall.

  • Allow the dish to cool completely before transferring it to a freezer-safe container.
  • Store for up to 2 months.
  • To reheat, thaw in the fridge overnight and warm on the stovetop.

3. Can I use a different flour for the dumplings?

Yes! If you don’t have almond flour, try:

  • Coconut flour (but reduce the amount slightly, as it absorbs more liquid).
  • Oat flour for a heartier texture.
  • Gluten-free all-purpose flour if you prefer a more traditional dumpling consistency.

4. What if I don’t like caraway seeds?

Caraway seeds have a distinct, slightly earthy flavor that enhances the dish, but if you’re not a fan, you can replace them with:

  • Fennel seeds for a milder, slightly sweet taste.
  • Thyme or rosemary for a more herbaceous touch.
  • Omit them altogether and let the other flavors shine.

5. Can I make this dish vegan?

Yes! Here’s how:

  • Replace the eggs with flax eggs (1 tablespoon ground flaxseed + 2.5 tablespoons water per egg).
  • Use nutritional yeast instead of Parmesan for a cheesy, umami flavor.
  • Swap the olive oil for vegan butter for a richer taste.

A Dish Rooted in Tradition, Perfected for Today

There’s a reason simple, rustic dishes like this Golden Cabbage Dumpling Skillet have stood the test of time. They take humble ingredients and transform them into something deeply satisfying, something that brings people together.

Cooking should never feel overwhelming—it should feel like a moment of connection, a way to nourish both body and soul. Whether you’re making this dish to honor family traditions, to try something new, or simply to enjoy a wholesome, home-cooked meal, it’s bound to become a favorite.

So the next time you’re in need of a comforting, hearty dish, pull out your skillet and let the rich aroma of caramelized cabbage and warm spices fill your kitchen. Because sometimes, the simplest meals are the ones that stay with us the longest.

Irish Cheddar & Cabbage Hash Brown Skillet: A Golden, Cheesy Delight

A Taste of Home in Every Bite

Growing up, Sunday mornings were a sacred time in our house. The kitchen would fill with the scent of sizzling butter, caramelized onions, and crisping potatoes. My mother, never one to rush a meal, would hum softly as she cooked, layering flavors with the patience of someone who truly believed that food was an expression of love.

One of her signature dishes was a hash brown skillet, always made with whatever was on hand—sometimes bacon, sometimes spinach, but always plenty of cheese. It was the kind of dish that brought everyone to the table without being called, a warm and welcoming comfort food that made you feel at home.

Years later, I discovered Irish Cheddar & Cabbage Hash Brown Skillet, a dish that felt like a perfect blend of my childhood memories and my love for bold, comforting flavors. Inspired by traditional Irish Colcannon, this dish takes the simple, rustic goodness of potatoes and cabbage and transforms it into a golden, cheesy delight. It’s crispy on the outside, soft and melty on the inside, with the rich tang of Irish cheddar tying it all together.

Whether you’re making it as a cozy breakfast, a hearty side dish, or a unique addition to your St. Patrick’s Day menu, this skillet is the kind of recipe that fills the house with warmth and keeps people coming back for more.

Why This Dish Stands Out

1. A Unique Twist on Tradition

Inspired by Colcannon, a classic Irish dish made with mashed potatoes and cabbage, this recipe swaps out the mashed potatoes for crispy hash browns, adding a satisfying texture. The melted Irish cheddar brings a creamy sharpness that elevates every bite.

2. Quick and Easy, Yet Packed with Flavor

With frozen hash browns as a shortcut, this dish comes together in no time. Cooking it all in one skillet means minimal cleanup, making it perfect for busy mornings or effortless entertaining.

3. Perfect for Any Occasion

While it’s often associated with St. Patrick’s Day, this dish is far too delicious to save for just one day a year. Serve it for breakfast, brunch, or as a side dish alongside grilled meats, eggs, or a fresh salad.

4. Customizable to Your Taste

This recipe is incredibly flexible. Want to add protein? Throw in some crispy bacon or crumbled sausage. Looking for extra greens? Stir in kale or spinach. Need a dairy-free option? Swap out the butter and cheese for plant-based alternatives.

5. The Magic of Irish Cheddar

Unlike regular cheddar, Irish cheddar is known for its rich, creamy texture and slightly tangy, nutty flavor. Often made from grass-fed cow’s milk, it melts beautifully, adding depth and character to the dish.

Ingredients: A Flavorful Fusion

  • 4 tablespoons butter (try Irish butter for an authentic touch)
  • 1 cup diced yellow onion
  • 10 ounces shredded green cabbage
  • ½ teaspoon sea salt (or to taste)
  • 2 garlic cloves (minced or grated)
  • 20-ounce bag of frozen hash browns
  • 2½ cups shredded Irish cheddar (divided)
  • 2 green onions (chopped, for garnish)

Directions: Simple Steps to Cheesy Perfection

  1. Start with the Skillet:
    • Preheat the oven to 375°F.
    • In a large skillet, melt butter over medium-high heat.
  2. Build the Flavor Base:
    • Sauté onions for 2-3 minutes until fragrant and translucent.
    • Stir in cabbage, season with salt, and cook for about 5-6 minutes until softened and lightly golden.
    • Add minced garlic and cook for another minute.
  3. Bring in the Hash Browns & Cheese:
    • Reduce heat to medium-low.
    • Stir in frozen hash browns and 1½ cups of shredded cheese, mixing everything well.
    • Flatten the mixture slightly with a spatula.
  4. Bake to Golden Perfection:
    • Transfer the skillet to the oven and bake for 30-35 minutes, until the top turns golden brown.
    • Sprinkle the remaining cheese over the top and bake for another 4-5 minutes until melted and bubbly.
  5. Garnish & Serve:
    • Remove from the oven and top with chopped green onions.
    • Serve warm and enjoy!

Nutritional Breakdown (Per Serving, Approximate)

  • Calories: ~320-350
  • Protein: ~12g
  • Carbohydrates: ~25g
  • Fat: ~22g
  • Fiber: ~3g

The Secret to a Perfectly Golden, Crispy Skillet

Achieving that irresistible golden crust requires just a few simple techniques:

  • Don’t rush the cooking process. Let the hash browns crisp up before stirring to create a crispy, golden base.
  • Use an oven-safe skillet. Finishing the dish in the oven allows the cheese to melt evenly while keeping the edges perfectly crisp.
  • Layer flavors with care. Cooking the onions and cabbage first brings out their natural sweetness, adding depth to the dish.

Creative Ways to Make It Your Own

Add a Protein Boost

  • Crispy bacon or crumbled breakfast sausage for a smoky, savory kick.
  • Leftover corned beef for a true Irish-inspired meal.
  • Chopped kielbasa or smoked sausage for a heartier, dinner-friendly version.

Make It Extra Green

  • Kale or spinach stirred in at the end for a nutrition boost.
  • Green peas for a pop of color and natural sweetness.
  • Chopped scallions for a fresh, mild onion flavor.

Kick Up the Heat

  • A dash of hot sauce or cayenne pepper for those who love spice.
  • Sautéed jalapeños or crushed red pepper flakes for a fiery upgrade.

Turn It into a Full Meal

  • Top with a fried or poached egg for a delicious breakfast skillet.
  • Serve with roasted chicken or grilled steak for a filling dinner.
  • Layer with shredded rotisserie chicken and bake for a cheesy casserole-style dish.

Frequently Asked Questions

1. What is Irish cheddar, and can I use regular cheddar instead?

Irish cheddar is a high-quality, creamy cheese made in Ireland, often from grass-fed cows. It has a richer, more complex flavor than standard cheddar. While regular sharp cheddar can be substituted, using Irish cheddar brings a more authentic and distinctive taste.

2. Can I make this dish ahead of time?

Yes! Prepare the skillet as directed, then cool and store it in the refrigerator. When ready to serve, reheat in a 375°F oven until warmed through and the cheese is bubbly again.

3. Can this dish be frozen?

Hash browns generally freeze well, so while the texture may be slightly softer after reheating, it should work. To freeze:

  • Let the cooked dish cool completely.
  • Wrap it tightly in foil and store in an airtight container.
  • To reheat, bake at 375°F until warmed through.

4. What should I serve with this dish?

This skillet pairs beautifully with:

  • A simple green salad for a fresh contrast.
  • Grilled meats like steak or chicken.
  • Eggs and toast for a complete breakfast.
  • A bowl of soup for a cozy meal.

5. Can I use fresh potatoes instead of frozen hash browns?

Absolutely! If using fresh potatoes:

  • Shred them and soak them in cold water for 10 minutes to remove excess starch.
  • Drain and pat dry before adding them to the skillet to ensure crispiness.

6. Is this dish vegetarian?

Yes, this recipe is naturally vegetarian. To make it vegan, swap the butter for plant-based butter and use a vegan cheese substitute.

Bringing It All Together: A Dish for Every Season

Irish Cheddar & Cabbage Hash Brown Skillet is a dish that bridges nostalgia and innovation. Whether you grew up eating hash browns at weekend breakfasts or discovered the magic of Irish flavors later in life, this skillet is a celebration of simple ingredients coming together in the most satisfying way.

What makes this dish special isn’t just the crispy potatoes, the gooey cheese, or the rich buttery flavor—it’s the way it brings people together. It’s a dish you’ll want to share, whether gathered around the table with family or bringing a taste of comfort to a holiday feast.

So the next time you’re looking for a warm, cheesy, crispy dish that’s just as perfect for St. Patrick’s Day as it is for a cozy Sunday brunch, give this skillet a try. It may just become your new favorite comfort food tradition.

Potsticker Soup: A Bowl of Comfort and Tradition

A Childhood Memory in Every Spoon

There’s something magical about a bowl of soup—it has the power to heal, comfort, and transport you back to cherished memories. For me, Potsticker Soup is more than just a meal; it’s a reminder of cozy winter nights spent in my grandmother’s kitchen. She wasn’t one to follow strict recipes, but rather cooked with intuition, love, and whatever ingredients she had on hand.

One of my favorite memories is sitting at her worn wooden table, watching her make dumplings from scratch. She’d pinch the edges with the precision of an artist and tell me stories about how dumplings were a symbol of prosperity and family unity in her childhood home. Although I often take a modern shortcut by using store-bought potstickers, the essence of those moments remains every time I make this soup. It’s the perfect balance of convenience and tradition, blending a savory broth with delicate dumplings to create a meal that feels like a warm embrace.

Whether you’re seeking comfort on a cold day, an easy weeknight dinner, or a nostalgic taste of home, Potsticker Soup is the answer. It’s quick to prepare, endlessly customizable, and a beautiful way to enjoy dumplings beyond their usual pan-fried or steamed forms.

Why You’ll Love This Recipe

  • Quick and easy: Store-bought potstickers eliminate the need for extensive prep.
  • Rich, flavorful broth: A blend of soy sauce, sesame oil, and aromatics makes this soup taste like it’s been simmering all day.
  • Versatile: Add your favorite vegetables, spices, or even noodles to suit your taste.
  • Comforting and nourishing: Perfect for chilly evenings, under-the-weather days, or when you just need a cozy meal.
  • Customizable for dietary preferences: Easily make it vegetarian or vegan by swapping the broth and dumplings.

Ingredients: The Flavorful Foundations

  • 12–15 frozen potstickers (store-bought or homemade)
  • 4 cups chicken broth (or vegetable broth for a vegetarian option)
  • 1 tablespoon soy sauce
  • 1 tablespoon sesame oil
  • 2 teaspoons grated ginger
  • 2 cloves garlic, minced
  • 2–3 green onions, chopped (for garnish)
  • 1/2 cup sliced mushrooms (optional)
  • 1/2 cup spinach or bok choy (optional)
  • 1 tablespoon rice vinegar (optional, for a tangy touch)
  • Salt and pepper to taste
  • 1 teaspoon chili oil or red pepper flakes (optional, for spice)

Directions: A Step-by-Step Guide to Cozy Comfort

  1. Prepare the Broth:
    • Heat sesame oil in a large pot over medium heat.
    • Add garlic and ginger, sautéing for about 1 minute until fragrant.
    • Pour in the chicken or vegetable broth, soy sauce, and optional rice vinegar.
    • Let the broth simmer for 5–10 minutes to develop rich flavors.
  2. Cook the Potstickers and Vegetables:
    • Add frozen potstickers to the simmering broth.
    • Cook for 5–7 minutes, or until the dumplings are heated through and floating.
    • If using mushrooms or spinach, stir them in during the last few minutes of cooking.
  3. Season the Soup:
    • Taste the broth and adjust seasoning with salt, pepper, and chili oil if desired.
    • Remove the soup from heat once the flavors are well blended.
  4. Serve and Garnish:
    • Ladle the soup into bowls, ensuring each portion has a good mix of broth, dumplings, and veggies.
    • Garnish with chopped green onions and a drizzle of sesame oil for an extra flavor boost.

Nutritional Highlights: A Hearty Yet Healthy Bowl

(Approximate per serving)

  • Calories: ~250–300
  • Protein: ~10–15g
  • Carbohydrates: ~30–35g
  • Fat: ~10–12g
  • Fiber: ~2–4g

The Magic Behind Potsticker Soup

At its core, Potsticker Soup is a beautiful combination of flavors and textures. The broth is infused with ginger, garlic, and soy sauce, creating a rich umami base that complements the soft, chewy dumplings. The addition of leafy greens or mushrooms adds a fresh contrast, while a touch of chili oil can introduce a gentle heat.

But the true magic of this soup is its adaptability. You can transform it into a heartier dish by adding cooked noodles like ramen or udon, or keep it light and brothy for a more delicate experience. Some even choose to experiment with different dumpling fillings, from classic pork or chicken to vegetarian-friendly options like tofu and vegetables.

What makes Potsticker Soup stand out from other dumpling soups is the use of pre-made frozen potstickers, which absorb the broth’s flavors as they cook, creating a perfect bite every time.

The Art of Customization: Make It Your Own

Boost the Umami Factor

If you want to enhance the depth of flavor, try adding a splash of tamari or fish sauce. A small amount can make a significant difference in creating a well-rounded broth.

Vegetable Variations

Potsticker Soup is a fantastic way to use up vegetables in your fridge. Some great additions include:

  • Napa cabbage for a delicate crunch
  • Shredded carrots for sweetness
  • Baby bok choy for a mild bitterness
  • Snow peas for extra freshness

Spice It Up

If you love heat, don’t be afraid to increase the spice level. A teaspoon of chili oil, fresh sliced chilies, or a dash of Sriracha can bring the perfect amount of warmth.

Make It a Full Meal

For a more filling version, stir in cooked noodles like ramen, udon, or even rice noodles. This turns the soup into a satisfying one-bowl meal.

A Vegan Twist

Want to keep it plant-based? Simply swap the chicken broth for vegetable broth and use vegan dumplings. The result is just as delicious and comforting.

Frequently Asked Questions

1. How can I keep my potstickers from falling apart in the soup?

One of the most common concerns is that dumplings can break apart in hot broth. To prevent this:

  • Add the potstickers gently and avoid excessive stirring.
  • Follow the cooking time on the package—overcooking can cause them to become too soft.
  • If using homemade dumplings, ensure the edges are well-sealed to prevent filling from leaking out.

2. Can I freeze Potsticker Soup?

While you can freeze the broth separately, it’s best to avoid freezing the soup with the potstickers already in it. Dumplings tend to absorb liquid over time, which can make them mushy when reheated. Instead, store the broth in a freezer-safe container and add fresh dumplings when reheating.

3. What’s the best type of potstickers to use?

This soup works well with most types of frozen potstickers. Whether they’re filled with pork, chicken, shrimp, or vegetables, they will all complement the flavors of the broth. For a homemade touch, you can make your own dumplings with your favorite filling.

4. Can I make this soup gluten-free?

Absolutely! Simply use gluten-free dumplings and replace soy sauce with tamari or coconut aminos. Check your broth ingredients to ensure there’s no hidden gluten.

5. What are some good side dishes to serve with Potsticker Soup?

If you want to make this part of a larger meal, consider serving it with:

  • Steamed dumplings for extra indulgence
  • Spring rolls with a sweet chili dipping sauce
  • A simple cucumber salad with sesame dressing for a refreshing contrast
  • Scallion pancakes for a crispy, savory bite

Storage and Reheating Tips

If you have leftovers, store them in an airtight container in the refrigerator for up to 3 days. Keep in mind that the dumplings will continue to absorb broth over time, so they may become softer.

To reheat, warm the soup over low heat on the stove, stirring gently. If the broth has thickened, add a splash of water or broth to restore its consistency.

Bringing It All Together: The Ultimate Comfort Food

Potsticker Soup is more than just a quick meal—it’s a bowl of nostalgia, warmth, and tradition. Whether you’re recreating family memories, seeking comfort on a cold day, or simply looking for an easy yet satisfying dish, this soup delivers on every level.

The beauty of this recipe lies in its flexibility. It can be light or hearty, spicy or mild, vegetarian or meaty. No matter how you customize it, each spoonful brings a balance of rich broth, tender dumplings, and vibrant vegetables that make every bite satisfying.

So the next time you’re craving something cozy, grab a pot, toss in some dumplings, and let the magic of Potsticker Soup bring warmth to your table.

Slow Cooker French Dip Sandwiches: A Comforting Classic with Bold Flavor

A Meal That Feels Like Home

There are certain meals that bring a sense of warmth, nostalgia, and pure comfort. For me, French Dip Sandwiches are one of them. Growing up, Sundays were for slow-cooked meals, the kind that made the whole house smell incredible and brought everyone to the table with eager anticipation. My mom would start a roast early in the morning, and by the afternoon, it had transformed into the most tender, flavorful beef, ready to be piled onto crusty rolls with melted cheese and a side of rich, savory au jus.

I still remember how my dad would carefully dip his sandwich into the steaming broth, letting just enough of it soak in before taking a bite. He always said that the secret to a perfect French Dip wasn’t just the meat or the bread, but the balance of textures and flavors—the crunch of the toasted roll, the melt-in-your-mouth beef, and the deep, savory dip that tied it all together.

Now, whenever I make Slow Cooker French Dip Sandwiches, it brings back those memories. It’s a dish that requires minimal effort but delivers maximum flavor, making it perfect for busy families, game-day gatherings, or even a simple weeknight meal.

What Makes French Dip Sandwiches So Special?

French Dip Sandwiches are a classic American comfort food, consisting of slow-cooked beef served on a toasted roll with melted cheese and a side of warm au jus for dipping. Despite its name, the French Dip isn’t actually French—it’s believed to have originated in Los Angeles in the early 1900s, with two rival restaurants claiming its invention.

The real magic of a French Dip lies in the au jus—the deeply flavorful broth made from the slow-cooked juices of the beef. When you dip the sandwich into the au jus, it enhances the flavor and adds an irresistible richness to every bite.

While many recipes require hours of oven roasting, this slow cooker version makes it effortless. The beef cooks low and slow, becoming fall-apart tender, while the broth develops an incredible depth of flavor.

Ingredients: A Perfect Balance of Tender Beef and Bold Flavor

For the Beef & Au Jus:
  • 2.5 to 3 lbs boneless chuck roast
  • 1 tablespoon vegetable oil
  • 1 large onion, sliced
  • 2 cloves garlic, smashed
  • 1 cup red wine (or substitute with more beef broth)
  • 2 cups low-sodium beef broth
  • 1 bay leaf
  • 2 teaspoons kosher salt
  • ½ teaspoon freshly ground black pepper
For the Sandwiches:
  • 6 sandwich rolls, hoagie rolls, or hoagie buns
  • 6 slices provolone cheese
  • 3 tablespoons butter, melted
  • ½ teaspoon garlic powder
  • Chopped fresh parsley (for garnish)

Directions: Slow-Cooked Perfection in Every Bite

Step 1: Searing and Slow Cooking
  1. Pat the chuck roast dry and season it with salt and pepper.
  2. Sear it in a hot skillet with vegetable oil until browned on both sides.
  3. Transfer the roast to a slow cooker. In the same pan, sauté onions for 2-3 minutes, then deglaze with red wine.
  4. Pour the onion and wine mixture into the slow cooker, then add beef broth, garlic, and a bay leaf.
  5. Cover and cook on low for 8 hours or high for 6 hours, until the beef is fork-tender.
Step 2: Shredding the Beef & Preparing the Au Jus
  1. Remove the beef and shred it using two forks.
  2. Strain the cooking liquid to create a smooth, flavorful dipping sauce (au jus).
Step 3: Toasting and Assembling the Sandwiches
  1. Brush the sandwich rolls with melted garlic butter and toast them under the broiler until golden.
  2. Pile the shredded beef onto each roll, top with provolone cheese, and return to the broiler until the cheese melts.
  3. Serve with a side of warm au jus for dipping and sprinkle with fresh parsley.

Nutritional Breakdown: A Hearty and Satisfying Meal

  • Calories: 675 kcal
  • Protein: 50g
  • Carbohydrates: 35g
  • Fat: 35g
  • Sodium: 850mg
  • Sugar: 4g

Why You’ll Love This Recipe

  • Set It and Forget It – The slow cooker does all the work, making this recipe perfect for busy days.
  • Rich, Savory Flavor – The beef is slow-cooked with onions, garlic, and red wine, creating an au jus that’s packed with umami goodness.
  • Restaurant-Quality at Home – These sandwiches taste like they came from a high-end deli but are made right in your own kitchen.
  • Perfect for Any Occasion – Whether it’s a casual weeknight dinner, a family gathering, or game day, French Dip Sandwiches are always a hit.
  • Easy to Customize – You can switch up the bread, cheese, or even add a spicy kick for a fun twist.

Frequently Asked Questions About French Dip Sandwiches

1. What is the Best Cut of Beef for French Dip?

A boneless chuck roast is the best choice for slow cooker French Dip Sandwiches because it has enough fat to keep the meat tender and flavorful. Other options include:

  • Beef brisket – Rich in flavor but requires a longer cooking time.
  • Top round roast – Leaner but still works well if cooked low and slow.

2. Do I Have to Sear the Meat Before Slow Cooking?

While it’s not required, searing the meat first enhances the flavor by creating a deep, caramelized crust. It also adds richness to the au jus. If you’re short on time, you can skip this step, but it’s highly recommended for the best results.

3. What Type of Bread Works Best?

The best bread for French Dip Sandwiches is something sturdy enough to hold up to the dipping process without falling apart. Great choices include:

  • Hoagie Rolls – Classic and easy to find.
  • French Baguette – Crusty and sturdy.
  • Ciabatta – Adds a rustic touch.

4. What Cheese Pairs Well with French Dip?

Cheese is optional, but it adds extra creaminess and depth to the sandwich. The best options are:

  • Provolone – Mild, melty, and slightly nutty.
  • Swiss Cheese – Sharp and tangy.
  • Mozzarella – Super melty with a mild flavor.
  • Gruyère – A rich, slightly sweet option for a gourmet touch.

5. Can I Make This Recipe Without Wine?

Yes! While red wine enhances the richness of the au jus, you can substitute it with an extra cup of beef broth or a splash of balsamic vinegar for depth.

6. How Do I Thicken the Au Jus?

If you prefer a slightly thicker dipping sauce, whisk in a small amount of cornstarch mixed with water and simmer it on the stovetop for a few minutes.

7. Can I Make This Recipe Ahead of Time?

Absolutely! The beef and au jus can be made up to 3 days in advance and stored in the refrigerator. Simply reheat before assembling the sandwiches.

8. Can I Freeze Leftover Beef?

Yes! Shred the leftover beef and store it in an airtight container with some au jus. Freeze for up to 3 months. Thaw overnight in the refrigerator and reheat in a pan with some au jus.

9. How Do I Prevent the Bread from Getting Too Soggy?

  • Toast the bread before assembling to create a barrier against moisture.
  • Dip lightly rather than soaking the sandwich completely in the au jus.
  • Serve au jus in small portions so you can control how much dipping you do.

10. What Can I Serve with French Dip Sandwiches?

Pair these savory sandwiches with classic sides for a complete meal:

  • Crispy French Fries or Sweet Potato Fries
  • Coleslaw for a fresh contrast
  • Roasted Vegetables like Brussels sprouts or asparagus
  • Potato Wedges or Mashed Potatoes
  • A Simple Green Salad

Tips for the Best French Dip Sandwiches

  • Let the Beef Rest Before Shredding – This keeps it juicy and tender.
  • Strain the Au Jus – Removing extra fat results in a cleaner, more flavorful dipping sauce.
  • Melt the Cheese Under the Broiler – This ensures an even, gooey melt over the beef.
  • Use High-Quality Beef Broth – A good broth makes all the difference in the final flavor.
  • Don’t Overload the Sandwich – Too much beef can make the sandwich difficult to dip.

Conclusion: A Timeless Classic Worth Savoring

Slow Cooker French Dip Sandwiches are more than just a meal—they’re an experience. From the tender, slow-cooked beef to the crusty bread and rich au jus, every bite is a combination of comfort and indulgence.

Whether you’re making them for a cozy family dinner, meal prepping for the week, or feeding a crowd on game day, this recipe is a foolproof way to impress. The best part? It’s made almost entirely in the slow cooker, giving you a restaurant-quality meal with minimal effort.

So grab your favorite sandwich roll, load it up with savory, juicy beef, and don’t forget to dip generously—because the real magic of a French Dip is in the au jus.

Green Velvet Cheesecake Cake: A Festive Indulgence for Every Celebration

A Slice of Memories: How This Cake Became a Family Tradition

Every year, as St. Patrick’s Day approaches, I find myself in the kitchen, sifting flour, whipping cream cheese, and carefully measuring out vibrant green food coloring. The ritual of baking has always been more than just about food—it’s about the stories, the laughter, and the nostalgia that each recipe carries.

This Green Velvet Cheesecake Cake, in particular, holds a special place in my heart. It all started a few years ago when I wanted to surprise my husband, who comes from a proud Irish lineage, with something unique for St. Patrick’s Day. He’s a lover of both red velvet cake and cheesecake, so I thought, why not combine them with a festive twist? The result was pure magic—layers of rich green velvet cake sandwiching a creamy cheesecake center, all wrapped in a luscious marshmallow cream cheese frosting.

The moment I sliced into the cake, revealing the perfect layers, I knew it was a success. But the real joy came when I saw my husband’s face light up as he took the first bite. “This tastes like a celebration,” he said with a grin, and from that moment on, this cake became a cherished tradition in our household. Whether it’s for a holiday, a family gathering, or simply a day when we crave something decadent, this cake has a way of bringing people together.

Now, I’m thrilled to share this recipe and the story behind it, hoping it finds a place in your kitchen and creates as many sweet memories for you as it has for us.

What Makes This Cake Special?

At first glance, Green Velvet Cheesecake Cake might look like a simple variation of red velvet, but it’s so much more than that. The combination of textures and flavors makes this cake stand out in ways that few desserts can.

A Celebration of Layers

This cake is not just about flavor—it’s about texture. The softness of the green velvet cake layers contrasts beautifully with the rich, creamy cheesecake in the center. Unlike traditional cakes, which rely solely on frosting for a creamy element, this cake builds an indulgent experience by incorporating an entire cheesecake as a filling.

The Perfect Fusion of Two Classics

While red velvet cake is known for its slight cocoa flavor and signature buttermilk tang, green velvet carries the same delightful notes but with an added festive charm. Meanwhile, the cheesecake adds a smooth, melt-in-your-mouth element that complements the cake layers perfectly.

A Frosting That Steals the Show

Most velvet cakes are paired with classic cream cheese frosting, but this one takes it a step further with a marshmallow cream cheese frosting. The marshmallow fluff gives it a light, airy texture that spreads beautifully over the cake while adding a subtle sweetness that balances the tangy elements of the cream cheese.

A St. Patrick’s Day Essential (Or Any Occasion Treat!)

This cake may have been inspired by St. Patrick’s Day, but it’s perfect for any time of year. Whether you’re celebrating a birthday, a special occasion, or just want an eye-catching dessert, this cake is bound to impress. Plus, you can customize it with different colors for other holidays—imagine a blue velvet version for a winter wonderland theme!

Ingredients: The Magic Behind the Layers

Cheesecake Layer

  • 16 oz cream cheese (room temperature)
  • 2/3 cup granulated sugar
  • Pinch of salt
  • 2 large eggs
  • 1/3 cup sour cream
  • 1/3 cup heavy whipping cream
  • 1 tsp vanilla extract
  • A few drops of green food coloring (optional)

Green Velvet Cake Layers

  • 2 ½ cups all-purpose flour
  • 2 tbsp unsweetened cocoa powder
  • ½ tsp salt
  • 1 ½ cups canola or vegetable oil
  • 1 ½ cups granulated sugar
  • 2 large eggs
  • 1 tsp vanilla extract
  • 1 tsp white vinegar
  • 1 tsp baking soda
  • 1 cup buttermilk
  • 2 tbsp (1 oz bottle) green food coloring (or gel paste)

Marshmallow Cream Cheese Frosting

  • 16 oz cream cheese (room temperature)
  • ½ cup (1 stick) unsalted butter (room temperature)
  • 7 oz marshmallow creme
  • 1 cup powdered sugar
  • A few drops of green food coloring (optional)

Directions: Building the Layers of Deliciousness

Step 1: Prepare the Cheesecake Layer

  1. Preheat oven to 325°F. Place a large roasting pan on the lower third rack. Boil water in a kettle.
  2. Grease a 9-inch springform pan and line the bottom with parchment paper. Wrap the pan in heavy-duty foil to prevent leaks.
  3. In a bowl, beat cream cheese until smooth. Add sugar and salt, blending well.
  4. Add eggs one at a time, mixing in between. Stir in sour cream, whipping cream, vanilla, and food coloring (if using).
  5. Pour batter into the prepared pan. Set the pan in the roasting pan and pour hot water into the roasting pan (about 1 inch up the sides).
  6. Bake for 45 minutes, until set. Let cool for 1 hour, then freeze for 4-5 hours (or overnight).

Step 2: Bake the Cake Layers

  1. Preheat oven to 350°F. Grease two 9-inch round cake pans and line with parchment paper.
  2. In a bowl, sift together flour, cocoa powder, and salt.
  3. In another bowl, beat oil and sugar for 2 minutes. Add eggs and vanilla, beating for 2 more minutes.
  4. In a small bowl, mix vinegar and baking soda, then add to the batter along with buttermilk and food coloring.
  5. Gradually add dry ingredients, mixing until smooth.
  6. Divide batter between the pans and bake for 30-35 minutes. Let cool for 20 minutes before removing from pans.

Step 3: Whip Up the Frosting

  1. Beat cream cheese and butter until smooth. Add marshmallow creme and mix well.
  2. Add powdered sugar and food coloring (if using), beating until creamy.

Step 4: Assemble the Cake

  1. Place one cake layer on a serving plate.
  2. Remove cheesecake from freezer, peel off parchment, and trim if needed to match cake size. Place on top of the first cake layer.
  3. Add the second cake layer on top of the cheesecake.

Step 5: Frost and Decorate

  1. Apply a thin crumb coat of frosting and refrigerate for 30 minutes.
  2. Spread a final layer of frosting over the cake.
  3. Decorate as desired with festive sprinkles or green chocolate designs.

Nutritional Breakdown: A Slice of Indulgence

  • Calories: 646
  • Carbohydrates: 72g
  • Protein: 9g
  • Fat: 36g
  • Saturated Fat: 19g
  • Cholesterol: 161mg
  • Sodium: 418mg
  • Sugar: 51g

FAQs: Everything You Need to Know About Green Velvet Cheesecake Cake

Can I Make This Cake Ahead of Time?

Absolutely! In fact, making it ahead of time can enhance the flavors. The cheesecake needs time to freeze, so you can prepare it a day in advance. The cake layers can also be baked and stored in an airtight container for up to two days before assembling. Once the cake is fully frosted, it keeps well in the refrigerator for up to five days.

Do I Have to Use a Water Bath for the Cheesecake?

While you can technically bake the cheesecake without a water bath, it’s highly recommended to prevent cracking. The water bath ensures gentle, even heat, which keeps the cheesecake smooth and creamy. If you skip the water bath, your cheesecake may still taste great, but it might not have the same flawless texture.

What’s the Best Way to Get Vibrant Green Cake Layers?

Using liquid green food coloring works fine, but gel food coloring is even better. Gel food coloring is more concentrated, so you need less of it, which means it won’t alter the consistency of your batter. If you’re looking for a natural alternative, try using matcha powder or spinach juice, though the color may not be as vibrant.

Can I Use Store-Bought Cheesecake Instead?

If you’re in a pinch, you can use a pre-made cheesecake, but homemade always delivers the best results. Store-bought cheesecakes are often slightly firmer and may not have the same smooth, creamy texture that blends seamlessly into the cake layers.

What’s the Best Way to Frost This Cake Without Making a Mess?

Applying a crumb coat is the key! A crumb coat is a thin layer of frosting that seals in any loose cake crumbs. After applying this layer, refrigerate the cake for about 30 minutes before adding the final coat of frosting. This ensures a smooth, professional-looking finish.

How Do I Store Leftovers?

Store any leftover slices in an airtight container in the refrigerator for up to five days. If you’d like to keep it longer, wrap slices individually in plastic wrap and freeze them. When you’re ready to enjoy, simply thaw a slice in the refrigerator overnight.

Can I Make This Cake Gluten-Free?

Yes! Simply swap out the all-purpose flour for a high-quality gluten-free flour blend that contains xanthan gum. Make sure all other ingredients, including cocoa powder and food coloring, are gluten-free.

What Other Frosting Options Work Well with This Cake?

If you’re not a fan of marshmallow cream cheese frosting, you can opt for a classic cream cheese frosting, white chocolate buttercream, or even a whipped cream frosting for a lighter touch.

A Cake Worth Celebrating

There’s something truly magical about a dessert that brings people together, and this Green Velvet Cheesecake Cake does just that. It’s not just a cake—it’s an experience. Every bite is a harmony of textures and flavors, from the soft, cocoa-infused cake to the rich, velvety cheesecake, all tied together with a dreamy frosting.

More than anything, this cake represents the joy of baking and sharing. Whether you’re making it for a special holiday, a family gathering, or just to treat yourself, it’s a dessert that invites celebration.

I still remember the first time I made this cake, the excitement of slicing into it, and the happiness it brought to my family. Now, it’s your turn. Bake it, share it, and create your own sweet memories—because some cakes are more than just dessert. They’re a tradition in the making.