Carrot-Shaped Candy Pretzels: A Sweet and Crunchy Easter Delight

A Childhood Memory Wrapped in a Treat

Springtime always brings back memories of Easter egg hunts, pastel-colored decorations, and the aroma of homemade treats filling the kitchen. As a child, I eagerly anticipated the moment I could help my grandmother prepare Easter goodies, carefully dipping pretzels in chocolate and decorating them with whatever colorful toppings we could find.

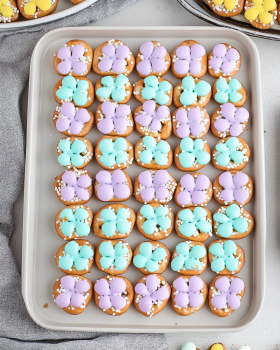
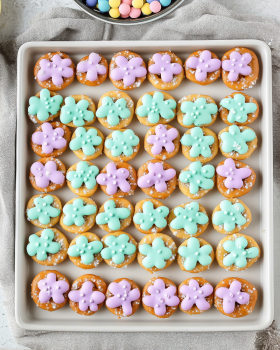
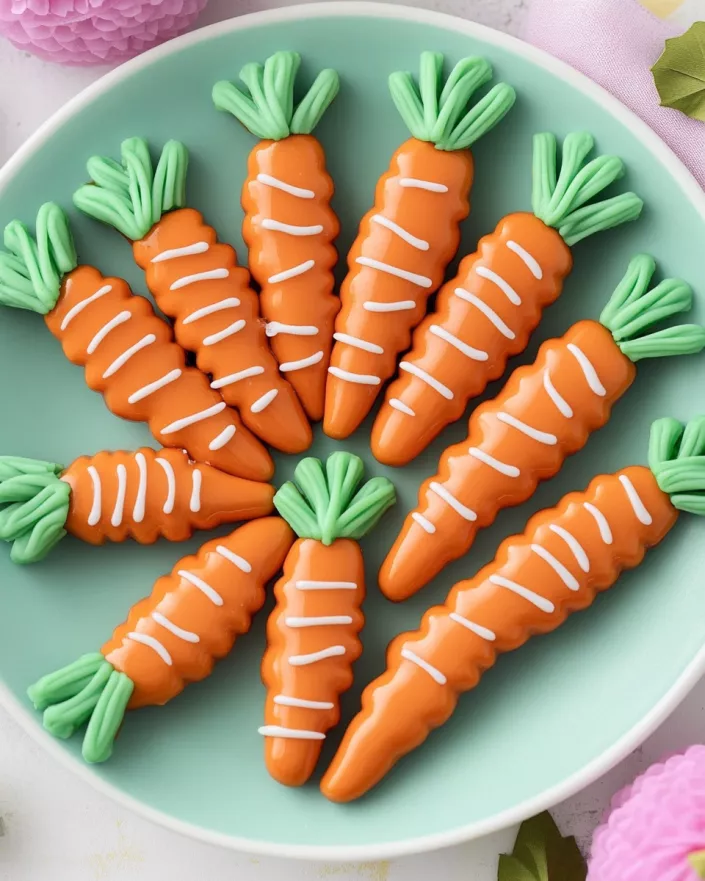
One of the simplest yet most delightful treats we made was Carrot-Shaped Candy Pretzels. They weren’t just fun to make—they were a symbol of the season, bright orange, crunchy, and perfectly sweet with just a touch of saltiness. We’d pack them into little bags, tie them with ribbons, and give them out as gifts to neighbors and friends.

Now, years later, I find myself making these same treats with my own family. They’re effortless, festive, and bring the same joy they did when I was a child. Whether you’re making them for an Easter gathering, a school event, or just for fun, these pretzels are a guaranteed hit with both kids and adults.

Why This Recipe Is a Must-Try

1. An Easy, No-Bake Treat

No need to turn on the oven—this recipe comes together in just a few minutes, making it perfect for last-minute Easter celebrations.

2. A Perfect Balance of Sweet and Salty

The combination of crispy pretzels, creamy candy melts, and a hint of salt makes for an irresistible snack.

3. A Fun Activity for Kids

This is a great recipe for little hands. Kids love dipping the pretzels in chocolate and piping the green “leaves” on top.

4. Beautiful for Gifting and Decorating

These pretzels make adorable party favors, dessert table additions, or even place-setting decorations for an Easter brunch.

5. Customizable for Any Occasion

Change the colors, add sprinkles, or try different chocolate coatings to make these fit any holiday or theme.

Ingredients You’ll Need

For the Crunchy Pretzel Base:

  • 24 pretzel rods

For the Vibrant Candy Coating:

  • 12 oz orange candy melts
  • 4 oz green candy melts

For Decorating and Assembly:

  • Piping bag or zip-top bag (for the green candy leaves)

Step-by-Step Directions

Prepping for Perfection

  1. Line a baking sheet with parchment paper or a silicone mat to prevent sticking.

Melting the Candy Coating

  1. In a microwave-safe bowl, melt the orange candy melts in 30-second intervals, stirring between each session until smooth.

Dipping the Pretzels

  1. Dip each pretzel rod into the melted orange candy, leaving about 2 inches uncovered at the top.
  2. Gently shake off any excess coating and place the dipped pretzels on the prepared baking sheet.

Adding the Carrot Tops

  1. Melt the green candy melts using the same microwave method.
  2. Transfer the melted green candy to a piping bag (or a zip-top bag with the corner snipped off).
  3. Pipe small green “leaves” at the top of each pretzel to resemble carrot tops.

Setting and Serving

  1. Let the pretzels cool and harden at room temperature or refrigerate for faster setting.
  2. Arrange on a festive platter or package them for gifting!

Nutritional Breakdown (Per Serving, Approximate)

  • Calories: 140 kcal
  • Carbohydrates: 22g
  • Protein: 1g
  • Fat: 6g
  • Sodium: 70mg
  • Sugar: 12g

Tips for Making the Best Carrot Pretzels

Use Fresh Pretzels for the Best Crunch

Stale pretzels can ruin the texture, so always use a fresh, crispy batch for the best bite.

Melt Candy in Short Intervals for a Smooth Finish

Candy melts can seize or burn if overheated, so always melt in 30-second bursts, stirring in between.

Let the Chocolate Set Before Storing

To prevent smudging, allow the dipped pretzels to harden completely at room temperature or in the fridge before handling.

Use a Piping Bag for Precise Carrot Leaves

A piping bag or a zip-top bag with the corner snipped off makes it easier to create realistic, leafy tops for your candy carrots.

Experiment with Designs and Toppings

  • Add sprinkles for extra flair.
  • Drizzle with white chocolate for a fancier look.
  • Use green licorice or edible grass instead of piped candy for a different texture.

Creative Ways to Serve Carrot Pretzels

1. Easter Basket Goodies

Pack these pretzels into clear treat bags, tie them with pastel ribbons, and tuck them into Easter baskets for a festive surprise.

2. Party Favors

These make perfect individual party favors for Easter brunches, school events, or spring birthday parties.

3. Centerpiece for Dessert Tables

Arrange them in a basket or mason jar alongside cupcakes, cookies, and chocolates for a beautiful Easter-themed dessert spread.

4. Fun Snack for Spring Picnics

Take these pretzels on a picnic or outdoor gathering, where they make a mess-free, easy-to-eat snack.

5. A Sweet Addition to Charcuterie Boards

Add a little Easter flair to a dessert charcuterie board, pairing them with chocolate-covered strawberries, pastel candies, and cookies.

Frequently Asked Questions

1. Can I Use White Chocolate Instead of Candy Melts?

Yes, but white chocolate doesn’t melt as smoothly as candy melts. If using white chocolate, add ½ teaspoon coconut oil to help it coat evenly.

2. How Long Do These Pretzels Last?

Stored in an airtight container at room temperature, they stay fresh for about a week. Avoid refrigeration, as it can make the pretzels lose their crunch.

3. Can I Use Regular Pretzels Instead of Pretzel Rods?

Absolutely! Mini pretzel twists or pretzel snaps work great, though they may not have the same “carrot” look.

4. What If My Candy Melts Harden Too Quickly?

If the candy starts thickening before you finish dipping, reheat it in short bursts in the microwave, stirring in between.

5. Are There Any Allergy-Friendly Alternatives?

Yes! Try:

  • Gluten-free pretzels for a gluten-free version.
  • Dairy-free candy melts for a dairy-free option.
  • Dark chocolate melts if you prefer a less sweet treat.

6. Can I Make These in Advance?

Yes! These are perfect for make-ahead treats. Just store them in an airtight container until you’re ready to serve.

7. How Can I Make These More Realistic?

For a more carrot-like appearance, drizzle the orange candy coating with a darker shade of orange before adding the green tops.

Final Thoughts: A Simple Treat That Sparks Joy

There’s something incredibly satisfying about creating simple, beautiful, and delicious treats that bring a smile to people’s faces. These Carrot-Shaped Candy Pretzels are more than just a snack—they’re a symbol of spring, a fun activity for families, and a delightful addition to any Easter celebration.

Whether you’re making them with kids, gifting them to loved ones, or just enjoying them for yourself, one thing is certain—they’re as fun to make as they are to eat. So gather your ingredients, get creative with your decorations, and let these sweet, crunchy treats add a little extra joy to your Easter season.

Springtime Flower Pretzels: A Fun and Festive Treat

A Sweet Memory in Every Bite

Some of the best memories come from the simplest moments—standing in the kitchen with my grandmother, giggling as we dipped, drizzled, and decorated homemade treats. Spring was always an exciting time in our home, not just because of the warming weather and blooming flowers, but because it meant fun, colorful desserts that celebrated the season.

One of my favorite traditions was making Flower Pretzels, a treat that felt like sunshine on a plate. They were simple enough for me to help with as a child, yet beautiful enough to impress guests at Easter gatherings. My grandmother would let me carefully arrange the pastel M&M’s into flower shapes, a task that, at the time, felt like serious artistry. Then, we’d wait impatiently for them to set, only to sneak a few before they made it to the dessert tray.

Now, years later, I make these crunchy, salty-sweet flower pretzels with my own family. They bring the same joy, laughter, and sense of tradition that they always have. Whether you’re making them for a holiday gathering, a school event, or just a fun afternoon activity with kids, these treats are guaranteed to bring smiles.

Why You’ll Love This Recipe

1. Three Simple Ingredients, Big Flavor

With just pretzels, white candy melts, and pastel M&M’s, this recipe proves that you don’t need a long list of ingredients to make something delicious.

2. A Perfect Balance of Sweet and Salty

The crunchy pretzel base combined with melty white chocolate and candy-coated M&M’s makes for a delightful contrast of textures and flavors.

3. Quick and Easy to Make

In less than 15 minutes, you’ll have a batch of adorable, festive treats ready to enjoy.

4. Kid-Friendly and Fun to Decorate

This is a fantastic activity for kids, helping them practice fine motor skills as they carefully place each M&M in a flower shape.

5. No Baking Required

A stress-free, mess-free treat that requires no baking, making it perfect for last-minute dessert needs.

6. Great for Any Occasion

Whether it’s Easter, Mother’s Day, baby showers, or just a springtime snack, these flower pretzels fit right in.

Ingredients You’ll Need

For the Crunchy Pretzel Base:

  • 42 square or mini pretzel twists

For the Melty Chocolate Center:

  • 42 white candy melts

For the Colorful Flower Design:

  • 10 oz bag of pastel Easter M&M’s

Step-by-Step Directions

Setting the Foundation

  1. Preheat oven to 250°F and line a baking sheet with parchment paper.
  2. Arrange pretzels in a single layer, ensuring they are evenly spaced.

Adding the Melty Center

  1. Place one white candy melt on top of each pretzel.
  2. Bake for 2 minutes, just until softened—be careful not to over-melt!

Decorating the Flowers

  1. Press one M&M in the center of the softened candy melt.
  2. Surround it with six more M&Ms in a circular pattern to form flower petals.

Setting and Serving

  1. Let the pretzels sit for at least 30 minutes until fully hardened.
  2. Serve and enjoy as a festive Easter or spring snack!

Nutritional Breakdown (Per Serving, Approximate)

  • Calories: 146 kcal
  • Carbohydrates: 30g
  • Protein: 3g
  • Fat: 1g
  • Sodium: 365mg
  • Sugar: 5g

Pro Tips for the Best Flower Pretzels

Work Quickly While the Chocolate is Warm

Candy melts harden fast once out of the oven, so be ready to decorate immediately to ensure the M&M’s stick.

Separate Your M&M’s by Color Before You Start

To save time, sort the M&M’s into bowls by color before melting the chocolate—this makes decorating much easier.

Use a Toothpick for Perfect Placement

If you want your M&M flowers to look extra precise, use a toothpick to gently adjust the candy pieces before they set.

Don’t Overheat the Candy Melts

The candy should be soft but not completely melted—too much heat and it will start running through the pretzel.

Let Them Fully Set Before Storing

For best results, let the pretzels cool at room temperature for 30 minutes before transferring them to an airtight container.

Creative Variations to Try

Use Different Chocolate Bases

  • Milk Chocolate Melts – For a richer, cocoa-infused version.
  • Dark Chocolate Disks – A more sophisticated, less sweet twist.
  • Colored Candy Melts – Use pink, blue, or yellow melts for extra colorful flowers.

Swap Out the Pretzels

  • Mini Pretzel Twists – Create a different look with twisted shapes.
  • Square Pretzel Snaps – The flat surface makes for easy decorating.

Try Other Candy Centers

  • Peanut Butter M&M’s – Adds a creamy peanut butter center.
  • Chocolate Kisses – For a fuller, meltier flower base.
  • Gumdrops or Jelly Beans – A fun, chewy variation.

Make It a Holiday Treat

  • Christmas Version – Use red and green M&M’s with a white chocolate base.
  • Halloween Edition – Orange, purple, and black candies for a spooky theme.
  • Fourth of July – Red, white, and blue for a patriotic twist.

How to Store and Serve Flower Pretzels

Storage Tips

  • Room Temperature: Store in an airtight container for up to 7 days.
  • Refrigeration: Not necessary, but can help if you’re in a warm climate.
  • Freezing: Not recommended, as condensation can affect the candy’s texture.

Serving Ideas

  • On a Dessert Platter – Arrange with other spring-themed treats like cupcakes and cookies.
  • As Edible Gifts – Pack them in a cute tin or cellophane bag with a ribbon.
  • For a Tea Party – Serve alongside small cakes and lemonade.
  • In Lunchboxes – A fun surprise treat for kids and adults alike.

Frequently Asked Questions

1. Can I Use White Chocolate Chips Instead of Candy Melts?

Yes, but they may not melt as evenly. If using white chocolate chips, add ½ teaspoon coconut oil to help with the melting process.

2. How Do I Keep the M&M’s from Sliding?

Work quickly and press the M&M’s gently into the softened candy melt before it hardens.

3. Can I Use Different Types of Pretzels?

Absolutely! Mini pretzel twists or pretzel snaps both work well for this recipe.

4. What If My Candy Melts Harden Too Fast?

If you’re decorating in batches, only melt a few pretzels at a time to prevent hardening before you finish placing the M&M’s.

5. Can I Make These in Advance?

Yes! They can be made several days ahead and stored in an airtight container until ready to serve.

6. Are There Any Allergy-Friendly Substitutions?

  • Nut-Free: Double-check M&M’s for possible nut traces and use an alternative candy.
  • Dairy-Free: Use dairy-free chocolate melts and vegan candy-coated chocolates.
  • Gluten-Free: Swap for gluten-free pretzels.

Final Thoughts: A Delightful Treat for Any Occasion

What I love most about these Flower Pretzels is how effortlessly joyful they are. They’re not just a snack; they’re a reminder of childhood fun, of family traditions, and of the simple pleasure of creating something beautiful with your hands.

This recipe is proof that you don’t need elaborate ingredients or hours in the kitchen to make something special. Whether you’re crafting these as a holiday treat, a classroom activity, or just a fun afternoon project with kids, one thing is certain—they will bring smiles, laughter, and a little extra sweetness to your day.

So go ahead, grab your ingredients, get creative with colors and patterns, and let your kitchen bloom with these adorable, delicious Flower Pretzels.

Slow Cooker Fiesta Chicken: A Bold and Creamy Tex-Mex Favorite

A Dish That Feels Like a Celebration

There are meals that nourish, and then there are meals that bring joy, laughter, and togetherness—this Slow Cooker Fiesta Chicken is the latter. Every time I make this dish, it reminds me of warm gatherings, where the air is filled with the comforting aroma of slow-cooked spices, creamy cheese, and zesty tomatoes.

I first discovered this recipe during a chaotic time in my life. Between work, family commitments, and trying to juggle everything in between, I found myself searching for meals that were both effortless and satisfying. Enter Fiesta Chicken—a meal that practically cooks itself but delivers rich, bold flavors that taste like you spent hours in the kitchen.

One bite, and I was hooked. The tender, shredded chicken paired with the sweetness of corn, the heartiness of beans, and the creamy, tangy ranch-infused sauce made it an instant favorite. I quickly realized that this dish wasn’t just about convenience—it was about creating something comforting and delicious with minimal effort.

Now, it has become a staple in my home, making its way onto the dinner table when I need something easy yet impressive. Whether it’s wrapped in warm tortillas, piled high over rice, or stuffed into a crispy taco shell, Fiesta Chicken never disappoints.

If you’re looking for a slow cooker meal that is vibrant, flavorful, and incredibly simple, this recipe is for you.

Why This Recipe Is a Must-Try

1. A True Dump-and-Go Meal

Simply add everything to the slow cooker, turn it on, and let it work its magic—no complicated steps required.

2. Creamy, Spicy, and Loaded with Flavor

The combination of ranch seasoning, Rotel tomatoes, black beans, and cream cheese creates a rich, zesty, and slightly spicy sauce that coats every bite.

3. Versatile and Family-Friendly

This dish can be served in so many ways—as tacos, burrito bowls, quesadillas, or even on its own with a side of tortilla chips. It’s a hit with both kids and adults.

4. Perfect for Meal Prep

Fiesta Chicken stores beautifully and tastes even better the next day, making it a great option for meal prepping or freezing for later.

5. A Hearty and Filling Meal

With lean protein from the chicken, fiber from the beans, and a creamy sauce that ties it all together, this dish is both nutritious and satisfying.

Ingredients You’ll Need

For the Tex-Mex Chicken Base:

  • 2 lbs boneless, skinless chicken breasts
  • 1 oz packet spicy or fiesta ranch mix
  • 15 oz can black beans, drained
  • 15.25 oz can whole kernel corn, drained
  • 10 oz can Rotel tomatoes (do not drain)
  • 1 small sweet yellow onion, diced
  • 8 oz cream cheese

Step-by-Step Directions

Setting Up the Slow Cooker

  1. Place chicken breasts in the slow cooker.

Adding the Flavorful Ingredients

  1. Sprinkle the ranch seasoning mix over the chicken.
  2. Pour in the black beans, corn, and Rotel tomatoes.
  3. Add the diced onion and place the cream cheese block on top.

Slow Cooking to Perfection

  1. Cover and cook on LOW for 6-8 hours or HIGH for 4 hours, until the chicken is tender.

Shredding and Serving

  1. Shred the chicken with two forks and mix everything together until creamy.
  2. Serve as tacos, burrito bowls, or over rice.

Nutritional Breakdown (Per Serving, Approximate)

  • Calories: 356 kcal
  • Protein: 31g
  • Carbohydrates: 28g
  • Fat: 14g
  • Saturated Fat: 6g
  • Cholesterol: 104mg
  • Sodium: 700mg
  • Fiber: 6g
  • Sugar: 6g

Tips for Making the Best Slow Cooker Fiesta Chicken

Use Chicken Thighs for Extra Juiciness

While chicken breasts work well, boneless, skinless chicken thighs stay extra tender and moist after slow cooking.

Adjust the Spice Level to Your Taste

  • If you prefer it spicier, add a dash of cayenne, jalapeños, or chipotle powder.
  • For a milder version, use mild Rotel tomatoes and regular ranch seasoning instead of spicy.

Add Fresh Ingredients at the End

For extra freshness, stir in chopped cilantro, diced avocados, or a squeeze of lime juice just before serving.

Don’t Skip the Cream Cheese

This ingredient makes the sauce incredibly creamy and rich, balancing the bold spices perfectly.

Make It Extra Cheesy

For a gooey, cheesy finish, stir in shredded cheddar, pepper jack, or queso fresco before serving.

Creative Ways to Serve Fiesta Chicken

1. Classic Soft Tacos

Spoon the shredded chicken into warm tortillas, then top with sour cream, shredded lettuce, and cheese.

2. Burrito Bowls

Serve the chicken over steamed white or brown rice, then add toppings like black olives, diced avocado, and fresh salsa.

3. Crunchy Taco Shells

Stuff the chicken into crispy taco shells, then top with pico de gallo and cotija cheese.

4. Quesadillas

Spread the chicken between two tortillas with shredded cheese, then grill until crispy and golden brown.

5. Loaded Nachos

Pile the chicken onto a bed of crispy tortilla chips, then drizzle with melted cheese, guacamole, and sour cream.

6. Over a Fresh Salad

For a lighter option, serve the shredded chicken over a crisp romaine or mixed greens salad, topped with cherry tomatoes, black beans, and a drizzle of ranch dressing.

Frequently Asked Questions

1. Can I Use Frozen Chicken?

Yes! You can add frozen chicken directly to the slow cooker—just increase the cooking time by about an hour.

2. How Do I Store Leftovers?

  • Refrigerate: Store in an airtight container for up to 4 days.
  • Freeze: Place in a freezer-safe bag or container for up to 3 months.
  • Reheat: Warm on the stove over medium heat or microwave in 30-second intervals.

3. Can I Use a Different Type of Bean?

Yes! While black beans are commonly used, you can also use pinto beans, red beans, or even chickpeas.

4. What If I Don’t Have Rotel Tomatoes?

Substitute with:

  • A can of diced tomatoes + a small can of green chilies.
  • 16 oz. jar of mild salsa.

5. Can I Make It in an Instant Pot?

Yes! Cook on high pressure for 15 minutes, then do a quick release and shred the chicken before mixing everything together.

6. What Can I Use Instead of Ranch Seasoning?

If you don’t have ranch seasoning, use:

  • 1 teaspoon garlic powder
  • 1 teaspoon onion powder
  • ½ teaspoon dried dill
  • ½ teaspoon paprika

7. How Do I Make This Dish Healthier?

  • Use Greek yogurt instead of cream cheese for a lighter, tangy twist.
  • Serve it over cauliflower rice or lettuce wraps for a low-carb version.

Final Thoughts: A Meal That Feels Like a Celebration

There’s a reason Slow Cooker Fiesta Chicken has become a household favorite—it’s effortless, delicious, and endlessly versatile. Whether you’re making it for a busy weeknight dinner, meal prepping for the week, or feeding a crowd, this dish is guaranteed to be a hit.

What I love most about this recipe is how it brings people together. There’s something comforting about a dish that requires minimal effort but delivers maximum flavor. It’s the kind of meal that makes you slow down, enjoy each bite, and appreciate the simplicity of good food.

So, the next time you need a no-fail, flavor-packed meal that practically cooks itself, give Fiesta Chicken a try. One bite, and it just might become a new tradition in your home too.

Crispy, Creamy Chicken Cordon Bleu: A Classic Dish with Timeless Elegance

A Meal That Feels Like a Special Occasion

Some dishes have a way of elevating even the simplest dinner into something unforgettable. Chicken Cordon Bleu is one of those meals. It carries an air of sophistication, yet it’s surprisingly easy to make at home.

I still remember the first time I had Chicken Cordon Bleu. It was at a small family gathering, and my aunt—who was known for her love of French-inspired cuisine—served it with a flourish. I was mesmerized by the golden, crispy crust, the way the cheese oozed out when the knife sliced through, and the rich, savory aroma that filled the air. As I took my first bite, I understood why this dish had become such a beloved classic.

Years later, I found myself making this recipe for my own family, hoping to recreate that same magic. There’s something special about the combination of tender chicken, salty ham, and creamy melted cheese, all wrapped in a crispy, golden crust. But what truly takes it over the top is the luxuriously smooth Dijon cream sauce—a finishing touch that brings all the flavors together.

This dish is perfect for date nights, holiday dinners, or whenever you want to treat yourself to something indulgent. And the best part? You don’t need to be a trained chef to make it. With just a few simple steps, you can create a restaurant-quality meal right in your own kitchen.

Why You’ll Love This Recipe

1. A Crispy Coating with a Creamy, Melty Center

The golden breadcrumb crust gives the perfect crunch, while the melted Swiss cheese inside creates a creamy, savory contrast.

2. A Dish That Feels Fancy but Is Easy to Make

Despite its elegant presentation, Chicken Cordon Bleu is deceptively simple—it takes a few basic ingredients and turns them into something truly spectacular.

3. A Crowd-Pleaser for Any Occasion

Whether you’re cooking for family, hosting a dinner party, or making something special for yourself, this dish is universally loved.

4. A Perfectly Balanced Flavor Profile

The smokiness of the ham, the nuttiness of the Swiss cheese, and the buttery Dijon sauce all work together to create a meal that is both comforting and refined.

5. Pairs Well with a Variety of Side Dishes

From buttery mashed potatoes to fresh green salads, this dish can be served with nearly any side, making it incredibly versatile.

Ingredients You’ll Need

For the Stuffed Chicken Rolls:

  • 4 boneless, skinless chicken breasts
  • 4 slices of ham
  • 4 slices of Swiss cheese
  • ½ teaspoon garlic powder
  • ½ teaspoon paprika
  • Salt and black pepper, to taste

For the Crispy Coating:

  • ½ cup all-purpose flour
  • 2 large eggs, whisked
  • 1 cup breadcrumbs
  • 2 tablespoons olive oil

For the Creamy Dijon Sauce:

  • ½ cup heavy cream
  • ½ cup chicken broth
  • 1 tablespoon Dijon mustard
  • 1 tablespoon butter

Step-by-Step Directions

Preparing the Chicken Rolls

  1. Pound the chicken breasts evenly and season with garlic powder, paprika, salt, and pepper.
  2. Layer each piece with ham and Swiss cheese, then roll tightly and secure with toothpicks.

Coating for a Golden Crisp

  1. Dredge each roll in flour, then dip in whisked eggs, and finally coat with breadcrumbs.

Cooking to Perfection

  1. Sear in olive oil until golden brown on all sides.
  2. Transfer to the oven and bake at 375°F for 20-25 minutes.

Making the Rich, Creamy Sauce

  1. In a saucepan, melt butter, then stir in Dijon mustard, chicken broth, and heavy cream.
  2. Simmer for 5 minutes, whisking until smooth.

Serving the Ultimate Comfort Dish

  1. Let the chicken rest for 5 minutes, then slice and drizzle with the warm Dijon sauce.

Nutritional Breakdown (Per Serving, Approximate)

  • Calories: 430 kcal
  • Protein: 32g
  • Carbohydrates: 18g
  • Fat: 20g
  • Saturated Fat: 10g
  • Cholesterol: 120mg
  • Sodium: 620mg

Secrets to the Best Chicken Cordon Bleu

Pound the Chicken Evenly for Consistent Cooking

Flattening the chicken breasts ensures even cooking and makes them easier to roll without breaking.

Use Panko Breadcrumbs for Extra Crispiness

While traditional breadcrumbs work fine, panko breadcrumbs create a crunchier, more golden coating.

Secure the Rolls with Toothpicks

To prevent the ham and cheese from slipping out, use toothpicks to hold everything together while cooking—just don’t forget to remove them before serving.

Let the Chicken Rest Before Slicing

Allowing the chicken to rest for a few minutes after baking helps keep the juices inside, making for a more tender bite.

Whisk the Dijon Sauce Until Velvety Smooth

The Dijon cream sauce should be silky and lump-free, so whisk continuously while it simmers. Adding a touch of nutmeg can enhance the flavors even more.

Delicious Ways to Serve Chicken Cordon Bleu

Classic Pairings

  • Creamy Mashed Potatoes – The perfect side for soaking up the rich Dijon sauce.
  • Steamed Asparagus or Green Beans – A fresh, crisp contrast to the creamy dish.
  • Buttered Egg Noodles – Simple but effective at complementing the flavors.

Lighter Options

  • A Fresh Arugula Salad – Tossed with a lemon vinaigrette to cut through the richness.
  • Cauliflower Rice – A low-carb alternative that still pairs well with the sauce.

Creative Twists

  • Slice and Serve on a Sandwich Roll – Turn leftovers into a gourmet sandwich.
  • Chop and Toss into Pasta – Combine with penne and extra sauce for a delicious pasta dish.
  • Use as a Salad Topper – Slice and serve over mixed greens for a high-protein salad.

Frequently Asked Questions

1. Can I Make This Recipe Ahead of Time?

Yes! You can assemble the chicken rolls up to a day in advance, store them in the fridge, and then bread and cook them when you’re ready to eat.

2. Can I Bake Instead of Fry?

Absolutely. Bake at 375°F for 25-30 minutes on a wire rack for an evenly crispy finish. Lightly spray with oil to help achieve a golden crust.

3. Can I Use a Different Cheese?

Yes! While Swiss cheese is traditional, you can also try:

  • Mozzarella for extra meltiness
  • Gruyère for a richer, nuttier flavor
  • Provolone for a milder, creamier taste

4. What If My Chicken Is Too Hard to Roll?

If your chicken is too thick or stiff, it may need more flattening. Pound it gently with a rolling pin or meat mallet until it’s about ¼-inch thick.

5. How Do I Store and Reheat Leftovers?

  • Refrigerate: Store in an airtight container for up to 3 days.
  • Freeze: Wrap tightly in plastic wrap and freeze for up to 3 months.
  • Reheat: Warm in a 350°F oven for 10 minutes to maintain crispiness.

6. Can I Make a Gluten-Free Version?

Yes! Simply swap the breadcrumbs for gluten-free breadcrumbs and use cornstarch instead of flour for dredging.

7. What Can I Use Instead of Ham?

If you don’t eat pork, try:

  • Turkey slices for a leaner option
  • Prosciutto for a saltier, richer flavor
  • Roasted red peppers for a vegetarian twist

Final Thoughts: A Dish Worth Mastering

Chicken Cordon Bleu is more than just a meal—it’s an experience. From the crispy, golden crust to the creamy, savory center, every bite is a perfect balance of textures and flavors.

What I love most about this dish is its versatility. It can be elegant enough for a romantic dinner yet simple enough for a weeknight meal. It’s a recipe that has stood the test of time, proving that classic flavors never go out of style.

So whether you’re making this dish to impress guests, surprise a loved one, or simply treat yourself, one thing is certain—you’ll want to make it again and again.

Sweet Chili Crockpot Meatballs: A Flavor-Packed Party Favorite

The Dish That Brings People Together

There are some recipes that instantly make a gathering feel special. Whether it’s a holiday party, a casual get-together, or just a cozy night in, Sweet Chili Crockpot Meatballs are the kind of dish that disappears fast and leaves everyone asking for more.

For me, meatballs have always been a comfort food. I remember my mother making them for almost every special occasion—whether it was a birthday, a football game, or a simple Sunday dinner. She would spend hours rolling each one by hand, carefully simmering them in sauce, filling the house with the warm, inviting aroma of a home-cooked meal.

But life gets busy, and sometimes, standing over the stove just isn’t an option. That’s where this crockpot version of sweet chili meatballs comes in. It’s effortless, uses just four ingredients, and still delivers the same nostalgic, crowd-pleasing flavor. It’s a little bit sweet, a little bit spicy, and completely irresistible.

Whether you’re serving these meatballs as an appetizer with toothpicks or as a main dish over rice, one thing is certain—this is a recipe that brings people together.

Why You’ll Love This Recipe

1. Effortless Cooking with Maximum Flavor

This recipe is a true set-it-and-forget-it dish. Just throw everything in the slow cooker, let the flavors meld, and come back to a dish that tastes like you spent hours making it.

2. The Perfect Balance of Sweet and Spicy

The combination of sweet chili sauce, grape jelly, and pineapple creates a bold and tangy glaze that coats every meatball in deliciousness.

3. Four Simple Ingredients

No complicated prep, no hard-to-find ingredients—just meatballs, chili sauce, jelly, and pineapple. That’s it.

4. A Versatile Dish for Any Occasion

These meatballs work as:

  • A party appetizer with toothpicks.
  • A main course over rice or noodles.
  • A quick weeknight dinner when you need something easy but flavorful.

5. Perfect for Meal Prep and Leftovers

The flavors get even better the next day, making these meatballs a great option for make-ahead meals.

Ingredients You’ll Need

For the Sweet and Spicy Glaze:

  • 12 ounces sweet red chili sauce (such as Thai Kitchen)
  • 20 ounces grape jelly
  • 20-ounce can pineapple tidbits, drained

For the Meatballs:

  • 48-ounce bag of fully cooked frozen homestyle meatballs

Step-by-Step Directions

Building the Perfect Flavor Base

  1. Place the frozen meatballs into the crockpot.

Creating the Tangy Sweet Sauce

  1. Pour in the sweet chili sauce, grape jelly, and drained pineapple tidbits.
  2. Stir everything together to coat the meatballs evenly.

Slow Cooking to Perfection

  1. Cover and cook on high for 1-2 hours or low for 3-4 hours, stirring occasionally.

Serving Up a Crowd-Pleasing Appetizer

  1. Give everything one final stir before serving hot.
  2. Serve with toothpicks for appetizers or over steamed rice for a full meal.

Nutritional Breakdown (Per Serving, Approximate)

  • Calories: 480 kcal
  • Protein: 22g
  • Carbohydrates: 48g
  • Fat: 21g
  • Cholesterol: 89mg
  • Sodium: 459mg

Secrets to the Best Sweet Chili Meatballs

Use Homestyle Meatballs for the Best Texture

While you can use Italian-style or turkey meatballs, homestyle beef or pork meatballs work best because they don’t compete with the sweet chili sauce.

Let the Sauce Thicken Naturally

If the sauce seems thin when the cooking time is up, let it sit for 10-15 minutes with the lid off to thicken naturally.

Stir Occasionally for Even Coating

Giving the meatballs a stir halfway through cooking ensures every bite is coated in the rich, sticky sauce.

Adjust the Spice Level to Your Taste

Want it spicier? Add red pepper flakes or sriracha. Prefer it milder? Mix in a little honey or brown sugar.

Don’t Skip the Pineapple

The pineapple adds a bright, citrusy contrast to the sweet and spicy sauce. If you don’t have pineapple tidbits, use crushed pineapple or a splash of pineapple juice instead.

Creative Ways to Serve Sweet Chili Meatballs

As a Party Appetizer

  • Serve in a slow cooker on the “Warm” setting so guests can help themselves.
  • Provide toothpicks or small skewers for easy grabbing.

Over Rice for a Complete Meal

  • Spoon over steamed white or jasmine rice to soak up the sauce.
  • Garnish with chopped green onions and sesame seeds for an Asian-inspired twist.

Stuffed in a Sandwich

  • Make sweet chili meatball subs by stuffing them in hoagie rolls with melted cheese.
  • Add coleslaw or pickled onions for extra crunch.

Turn It Into a Casserole

  • Layer meatballs in a baking dish with cooked pasta, then top with mozzarella cheese and bake until bubbly.

Low-Carb and Keto-Friendly Options

  • Serve over cauliflower rice or zucchini noodles for a lighter option.
  • Skip the jelly and use sugar-free chili sauce for a lower-carb version.

Frequently Asked Questions

1. Can I Use Store-Bought Meatballs Instead of Homemade?

Absolutely! Frozen, fully cooked meatballs are perfect for this recipe and make it even easier. Just toss them into the crockpot and let the sauce do the work.

2. How Can I Adjust the Spice Level?

  • For more heat: Add red pepper flakes, cayenne, or sriracha to the sauce.
  • For less heat: Use half the amount of chili sauce and replace with BBQ sauce or honey.

3. Can I Make This Recipe Ahead of Time?

Yes! The meatballs can be cooked ahead and stored in the fridge for up to 3 days. When ready to serve, reheat in the crockpot on “Low” for 1-2 hours.

4. Can I Freeze These Meatballs?

Yes! Store the fully cooked meatballs in an airtight container in the freezer for up to 3 months. Thaw overnight in the fridge before reheating.

5. What If I Don’t Have Grape Jelly?

Try these substitutes:

  • Apricot preserves
  • Orange marmalade
  • Honey mixed with a splash of apple juice

6. Can I Make This Recipe on the Stovetop Instead?

Yes! Simply simmer the sauce ingredients in a large skillet over medium heat, add the meatballs, and cook for about 20-25 minutes, stirring occasionally.

7. What’s the Best Way to Keep These Warm for a Party?

Keep the crockpot on the “Warm” setting and stir occasionally to prevent sticking.

Final Thoughts: A Dish That Will Have Everyone Coming Back for More

There’s a reason Sweet Chili Crockpot Meatballs have become a go-to recipe in so many kitchens. They’re quick, easy, and packed with bold flavors that make them a guaranteed hit at any gathering.

What I love most about this dish is how effortless yet impressive it is. Whether you’re making them for a holiday party, a family dinner, or just because you’re craving something delicious, these meatballs are the kind of meal that makes people smile.

So next time you need a stress-free dish that delivers big flavor, give these sweet chili meatballs a try. They may just become your new favorite crowd-pleaser!

Crockpot Ranch Chicken: A Creamy, Comforting Classic

A Meal That Feels Like Home

There’s something special about walking into a home filled with the warm, inviting aroma of a slow-cooked meal. It’s the kind of scent that instantly makes you feel comforted, like a hug from the kitchen. For me, Crockpot Ranch Chicken is one of those meals.

I still remember the first time I had a dish like this. It was at my grandmother’s house, where the kitchen was always a place of warmth, laughter, and the promise of something delicious. She had a way of turning the simplest ingredients into something extraordinary, and this dish was no exception. The tender, juicy chicken coated in a rich, creamy ranch sauce was unlike anything I had ever tasted. Served over buttery mashed potatoes, every bite was packed with flavor and nostalgia.

Years later, when life became busier and time in the kitchen felt shorter, I found myself longing for that same comforting meal. That’s when I discovered the beauty of Crockpot Ranch Chicken—a recipe that brings all the flavor and warmth of home with almost no effort at all. Just a few ingredients, a slow cooker, and the patience to let it work its magic, and by dinnertime, you have a meal that feels like it took all day, even though you barely lifted a finger.

Now, this dish has become a family favorite, showing up in our weekly rotation whenever we need something easy, delicious, and guaranteed to be a hit.

Why You’ll Love This Recipe

1. Set It and Forget It

The slow cooker does all the work, letting you focus on your day while a flavorful, creamy meal simmers to perfection.

2. Creamy, Buttery, and Full of Ranch Flavor

The combination of ranch seasoning, cream cheese, and Parmesan creates a luxuriously smooth sauce that coats the chicken in rich, tangy goodness.

3. Simple Ingredients, Big Flavor

This recipe uses basic pantry staples, yet delivers a restaurant-quality meal without the fuss.

4. Versatile and Customizable

Whether served over mashed potatoes, rice, pasta, or even in a sandwich, this dish can be adapted to suit any meal preference.

5. Perfect for Meal Prep

This recipe stores well and reheats beautifully, making it a great option for busy weekdays or preparing meals in advance.

Ingredients You’ll Need

For the Tender, Flavorful Chicken:

  • 4 boneless, skinless chicken breasts
  • 1 packet ranch seasoning mix
  • ½ teaspoon black pepper
  • 1 tablespoon garlic powder
  • 1 tablespoon onion powder

For the Creamy, Savory Sauce:

  • 1 cup cream cheese, softened
  • ½ cup chicken broth
  • ¼ cup grated Parmesan cheese

Step-by-Step Directions

Building the Flavor Base

  1. Place the chicken breasts in the bottom of your slow cooker.
  2. In a bowl, mix ranch seasoning, garlic powder, onion powder, and black pepper, then sprinkle over the chicken.

Creating the Creamy Sauce

  1. In another bowl, whisk together cream cheese, chicken broth, and Parmesan cheese until smooth.
  2. Pour the mixture over the chicken, coating evenly.

Slow Cooking to Perfection

  1. Cover and cook on low for 6-7 hours or high for 3-4 hours, until the chicken is fork-tender.

Shredding and Serving

  1. Shred the chicken using two forks and mix it into the creamy sauce.
  2. Serve hot over mashed potatoes, rice, pasta, or with steamed vegetables.

Nutritional Breakdown (Per Serving, Approximate)

  • Calories: 320 kcal
  • Protein: 37g
  • Carbohydrates: 5g
  • Fat: 16g
  • Saturated Fat: 8g
  • Cholesterol: 120mg
  • Sodium: 680mg
  • Fiber: 1g
  • Sugar: 2g

Tips for Making the Best Crockpot Ranch Chicken

Use Boneless Chicken for Easy Shredding

While bone-in chicken can be used, boneless, skinless chicken breasts or thighs make shredding much easier and create a smoother texture in the sauce.

Let the Chicken Soak in the Sauce

For the most flavor-packed bites, stir the shredded chicken back into the sauce before serving. This allows it to absorb even more of the creamy ranch goodness.

Don’t Overcook the Chicken

Slow cooking is forgiving, but chicken can dry out if left too long. Stick to 6-7 hours on low or 3-4 hours on high for the best results.

Add a Crunchy Topping for Texture

To balance the richness, serve the chicken with crisp bacon bits, toasted breadcrumbs, or even crushed Ritz crackers sprinkled on top.

Make It Spicy

If you love heat, add red pepper flakes, cayenne pepper, or a dash of hot sauce to give the creamy sauce a kick.

Delicious Ways to Serve Crockpot Ranch Chicken

Classic Comfort

  • Spoon over garlic mashed potatoes for a hearty, comforting meal.
  • Serve with buttery egg noodles to soak up the rich sauce.

Light and Fresh

  • Pair with steamed broccoli, roasted asparagus, or a crisp salad to balance the creaminess.
  • Wrap in lettuce leaves for a low-carb option.

Sandwich or Wrap Style

  • Pile onto toasted sandwich rolls with crispy bacon and cheddar for a ranch chicken sandwich.
  • Stuff into warm tortillas with shredded lettuce and tomatoes for an easy ranch chicken wrap.

Turn It Into a Casserole

  • Mix with cooked pasta, top with extra cheese, and bake until bubbly for a quick and delicious ranch chicken casserole.

Frequently Asked Questions

1. Can I Use Frozen Chicken in the Slow Cooker?

Yes! If using frozen chicken, increase the cook time by about an hour and ensure the internal temperature reaches 165°F before serving.

2. Can I Use a Different Type of Cheese?

Absolutely! While Parmesan adds a salty depth, you can also use cheddar, mozzarella, or even pepper jack for different flavors.

3. How Do I Store and Reheat Leftovers?

  • Refrigerate: Store in an airtight container for up to 4 days.
  • Freeze: Place in freezer-safe bags for up to 3 months.
  • Reheat: Warm on the stovetop over low heat or microwave in 30-second intervals, stirring in between.

4. Can I Make This Dish Dairy-Free?

Yes! Use dairy-free cream cheese, coconut milk instead of heavy cream, and a dairy-free ranch seasoning mix. The flavor will be slightly different but still delicious.

5. What’s the Best Way to Thicken the Sauce?

If the sauce is too thin after cooking, mix 1 tablespoon of cornstarch with 2 tablespoons of water, stir it in, and let the slow cooker run for an additional 15 minutes.

6. Can I Make This Recipe in an Instant Pot?

Yes! Cook on high pressure for 15 minutes, then do a quick release. Shred the chicken and mix it back into the sauce.

7. Can I Add Vegetables Directly to the Crockpot?

Definitely! Add mushrooms, bell peppers, or baby spinach in the last hour of cooking for a one-pot meal.

Final Thoughts: A Meal Worth Coming Home To

At the end of a long day, there’s nothing better than walking into your kitchen and knowing that dinner is ready, warm, and waiting for you. That’s exactly what makes Crockpot Ranch Chicken so special—it’s simple, stress-free, and full of comforting flavors that make any meal feel like home.

What I love most about this dish is its ability to bring people together. Whether it’s a cozy weeknight dinner, a meal prep lifesaver, or a dish to share with friends and family, this slow-cooked classic never disappoints.

So, if you’re looking for a foolproof, creamy, and flavorful recipe that practically makes itself, give this Crockpot Ranch Chicken a try. One bite, and it just might become your new favorite go-to meal.

Crockpot Marry Me Chicken: A Slow-Cooked Dish Worth Falling For

A Recipe That Stirs Up More Than Just Flavor

There are certain dishes that are more than just meals—they are experiences. They bring warmth, comfort, and sometimes, even a little romance. Crockpot Marry Me Chicken is one of those special recipes that lives up to its name. Some say it’s so delicious, it could inspire a marriage proposal. While I can’t guarantee that, I can promise that this dish will win hearts, impress dinner guests, and make your home smell absolutely amazing.

I first heard about this dish from a friend who had made it for her fiancé when they first started dating. She laughed as she told me how he looked at her, mid-bite, and jokingly said, “If you keep cooking like this, I might have to marry you.” A few years later, they were engaged, and the story of Marry Me Chicken became a running joke in their family.

The beauty of this dish is that it feels fancy and indulgent, yet it requires minimal effort thanks to the slow cooker. With tender chicken slow-cooked in a creamy, garlicky Parmesan sauce, accented by sun-dried tomatoes and herbs, every bite is packed with rich, comforting flavors. Whether you’re making it for a romantic dinner, a cozy family meal, or simply because you want something delicious and easy, this recipe is a winner.

Why This Recipe Is a Must-Try

1. A Restaurant-Worthy Dish Without the Effort

With just a handful of simple ingredients, this dish delivers big, bold flavors that taste like they came from a fancy restaurant.

2. Slow Cooker Magic

No need to stand over the stove—just set it and forget it. The crockpot does all the work, leaving you with incredibly tender, juicy chicken.

3. Luxuriously Creamy Sauce

The combination of heavy cream, Parmesan, and chicken broth creates a silky, velvety sauce that you’ll want to pour over everything.

4. Perfect for Any Occasion

This dish is versatile—serve it over pasta for an Italian-inspired meal, with rice for a comforting dinner, or alongside roasted vegetables for a low-carb option.

5. Guaranteed Crowd-Pleaser

Whether you’re serving kids, picky eaters, or gourmet food lovers, this dish is universally loved. It’s rich but not overwhelming, flavorful but not overpowering.

Ingredients You’ll Need

For the Creamy, Flavorful Chicken:

  • 4 boneless, skinless chicken breasts
  • 1 cup chicken broth
  • 1 cup heavy cream
  • ½ cup grated Parmesan cheese
  • 1 tablespoon garlic, minced
  • 1 teaspoon dried oregano
  • ½ teaspoon dried thyme
  • ¼ teaspoon red pepper flakes (optional for spice)
  • ½ cup sun-dried tomatoes, chopped
  • 2 tablespoons butter
  • Salt and black pepper, to taste
  • Fresh basil or parsley for garnish (optional)

Step-by-Step Directions

Setting Up the Slow Cooker

  1. Season chicken breasts with salt and pepper and place them in the slow cooker.

Creating the Creamy Sauce

  1. In a bowl, whisk together chicken broth, heavy cream, Parmesan, garlic, oregano, thyme, and red pepper flakes.
  2. Pour the mixture over the chicken, ensuring it is evenly coated.

Adding Layers of Flavor

  1. Sprinkle sun-dried tomatoes on top for a tangy contrast.

Slow Cooking to Perfection

  1. Cover and cook on low for 4 hours or high for 2 hours, until the chicken is tender.

Finishing Touches

  1. In the last 30 minutes, stir in butter to enrich the sauce.

Serving Up Comfort

  1. Garnish with fresh basil or parsley and serve with rice, pasta, or roasted vegetables.

Nutritional Breakdown (Per Serving, Approximate)

  • Calories: 354 kcal
  • Protein: 29g
  • Carbohydrates: 6g
  • Fat: 24g
  • Saturated Fat: 14g
  • Cholesterol: 131mg
  • Sodium: 459mg
  • Fiber: 1g
  • Sugar: 3g

Tips for Making the Best Crockpot Marry Me Chicken

Use Chicken Thighs for Extra Juiciness

While chicken breasts work perfectly, boneless, skinless chicken thighs add extra moisture and tenderness.

Sear the Chicken First for a Flavor Boost

For an even richer taste, sear the chicken in a hot pan for 2-3 minutes per side before placing it in the slow cooker. This step isn’t necessary, but it adds a golden crust and deeper flavor.

Let the Sauce Thicken

If the sauce is too thin after cooking, remove the chicken and let the sauce simmer uncovered for 10-15 minutes until it thickens.

Enhance the Flavor with Fresh Herbs

While dried herbs work well, adding fresh basil or thyme at the end gives the dish a bright, fresh contrast to the creamy sauce.

Pair It with the Right Side Dish

Serve this dish with something that soaks up the delicious sauce—think mashed potatoes, buttery noodles, or crusty bread.

Variations to Try

Make It Spicy

  • Add extra red pepper flakes or a dash of hot sauce for a fiery kick.
  • Use spicy sun-dried tomatoes for added heat.

Turn It Into a Pasta Dish

  • Shred the chicken and toss it with cooked pasta for a creamy, restaurant-style pasta dish.

Add More Vegetables

  • Toss in fresh spinach, mushrooms, or bell peppers during the last hour of cooking.
  • Stir in peas or roasted cherry tomatoes for extra texture.

Make It Lighter

  • Substitute half-and-half or Greek yogurt for the heavy cream for a lower-calorie version.
  • Use light Parmesan cheese and reduce the butter for a healthier twist.

How to Serve and Store Crockpot Marry Me Chicken

Serving Suggestions

This dish pairs beautifully with:

  • Creamy mashed potatoes – The sauce soaks right in.
  • Steamed or roasted asparagus – A light, crisp contrast to the rich sauce.
  • Rice or risotto – Absorbs the flavors perfectly.
  • Garlic bread – For scooping up every last drop of the sauce.

Storing Leftovers

  • Refrigerate: Store in an airtight container for up to 4 days.
  • Freeze: Cool completely and freeze in a sealed container for up to 3 months.
  • Reheat: Warm on the stovetop over low heat, adding a splash of broth or cream if needed.

Frequently Asked Questions

1. Can I Make This Recipe on the Stovetop?

Yes! Simply cook the chicken in a large skillet over medium heat, then add the sauce ingredients and let everything simmer for 20-25 minutes until the chicken is cooked through.

2. What If I Don’t Have Sun-Dried Tomatoes?

You can substitute:

  • Roasted red peppers for a slightly sweeter flavor.
  • Cherry tomatoes, halved and sautéed, for a fresher taste.

3. How Can I Make This Dish Keto-Friendly?

This dish is already low in carbs, but to keep it keto:

  • Serve over cauliflower rice or zucchini noodles.
  • Replace sun-dried tomatoes with roasted bell peppers to lower the sugar content.

4. Can I Use Pre-Grated Parmesan?

Freshly grated Parmesan melts better and gives a richer, smoother texture. Pre-grated versions often contain anti-caking agents that affect how they blend into the sauce.

5. Can I Use a Different Type of Cheese?

Yes! Try using:

  • Asiago or Pecorino Romano for a sharper taste.
  • Mozzarella for a milder, gooey texture.

Final Thoughts: A Meal That Brings People Together

Some dishes have a way of creating lasting memories, and Crockpot Marry Me Chicken is one of them. Whether it’s the irresistible creamy sauce, the tender chicken, or the way it fills your home with the comforting aroma of garlic and herbs, this meal is sure to bring people to the table.

What I love most about this dish is its versatility—it’s perfect for romantic date nights, family dinners, meal prepping, or simply indulging in a cozy meal. It requires minimal effort but delivers maximum flavor, making it a recipe you’ll want to keep in your back pocket for any occasion.

So, will this dish inspire a proposal? Who knows. But one thing is certain—once you make it, you’ll fall in love with it.

Baked Caesar Chicken: A Creamy, Flavor-Packed Favorite

A Family Recipe That Never Fails

Some recipes are more than just meals—they’re traditions, comfort, and the flavors of home. Baked Caesar Chicken is one of those dishes that feels special, even though it’s incredibly simple to make.

I first discovered this dish on a busy weeknight when I needed something quick but satisfying. I had a bottle of Caesar dressing in the fridge, some chicken breasts ready to cook, and a bit of Parmesan cheese. I decided to combine them, hoping for a creamy, flavorful result. What came out of the oven was better than I ever expected—the chicken was tender, the sauce was rich and tangy, and the Parmesan baked into a golden, cheesy crust.

That night, my family cleaned their plates in record time. Even my pickiest eater, who normally turns down anything with sauce, asked for seconds. Since then, this recipe has become a staple in our home, requested regularly and perfect for any occasion, from casual weeknight dinners to gatherings with friends.

The best part? It requires minimal ingredients, no complicated steps, and is ready in under an hour. If you’re looking for a meal that’s creamy, comforting, and incredibly easy to make, this Baked Caesar Chicken will not disappoint.

Why This Recipe Works Every Time

1. Rich and Creamy with Minimal Effort

The combination of Caesar dressing, Parmesan cheese, and sour cream creates a thick, velvety sauce that coats the chicken, keeping it moist and bursting with flavor.

2. Just Four Simple Ingredients

This recipe proves that you don’t need a long list of ingredients to make something delicious. Caesar dressing, Parmesan, chicken, and sour cream (optional) are all you need to create a meal that tastes like it took hours to prepare.

3. Perfect for Busy Weeknights

With only five minutes of prep time, this is one of the easiest meals you’ll ever make. Pop it in the oven, let it bake, and dinner is served—no need to stand over the stove or monitor a complicated process.

4. Great for Meal Prep

This chicken reheats beautifully, making it a great choice for meal prepping. Store leftovers in the fridge, and enjoy them in sandwiches, salads, or with a side of rice and vegetables throughout the week.

5. A Crowd-Pleaser

The flavors of Caesar dressing and Parmesan cheese appeal to both kids and adults. Even those who aren’t big fans of creamy sauces often love the tangy, garlicky, and cheesy taste of this dish.

Ingredients You’ll Need

For the Creamy Caesar Coating:

  • 1 ½ cups grated Parmesan cheese
  • 1 cup Caesar salad dressing (creamy version)
  • ½ cup sour cream (optional, for extra richness)

For the Juicy Chicken Base:

  • 4 boneless, skinless chicken breasts
  • Freshly ground black pepper, to taste

Step-by-Step Directions

Prepping the Chicken

  1. Preheat oven to 375°F and grease an 8×11-inch baking dish with cooking spray.
  2. If the chicken breasts are uneven in thickness, pound them to an even ¾-inch to 1-inch thickness for even cooking.

Coating and Baking

  1. Sprinkle chicken breasts with grated Parmesan and black pepper, then place them in the baking dish.
  2. In a small bowl, mix Caesar dressing and sour cream, then spread the mixture over each chicken breast.
  3. Sprinkle more grated Parmesan on top for a cheesy crust.
  4. Bake for 30 minutes at 375°F.

Finishing Touches

  1. Switch the oven to broil for 2-4 minutes to create a golden, slightly crispy top.
  2. Ensure the chicken reaches an internal temperature of 165°F, then remove from the oven.
  3. Let it rest for 5-10 minutes, then serve with fresh parsley for garnish (optional).

Nutritional Breakdown (Per Serving, Approximate)

  • Calories: 649 kcal
  • Protein: 52g
  • Carbohydrates: 3g
  • Fat: 45g
  • Saturated Fat: 18g
  • Cholesterol: 180mg
  • Sodium: 960mg
  • Fiber: 0g
  • Sugar: 1g

Expert Tips for the Best Baked Caesar Chicken

Use High-Quality Caesar Dressing

Since the dressing is the star of this dish, choosing a good-quality, creamy Caesar dressing makes all the difference. Look for one with real Parmesan, garlic, and anchovy flavors for the most authentic taste.

Don’t Overcook the Chicken

Chicken breasts can dry out quickly, so using a meat thermometer ensures they come out juicy and tender. The internal temperature should reach 165°F before removing them from the oven.

Let the Chicken Rest Before Serving

After baking, let the chicken rest for 5-10 minutes. This allows the juices to redistribute, keeping every bite flavorful and moist.

Use Freshly Grated Parmesan

Pre-grated Parmesan contains anti-caking agents that can affect the texture. Freshly grated Parmesan melts better and creates a richer, more flavorful crust.

Broil for a Golden, Crispy Finish

For extra color and texture, broil the chicken for the last 2-4 minutes of cooking. This gives the top a slightly crisp, golden finish.

Delicious Variations to Try

Make It Spicy

  • Add red pepper flakes or a dash of hot sauce to the Caesar dressing before spreading it over the chicken.
  • Use spicy Caesar dressing if you can find it.

Add More Cheese

  • Mix mozzarella or provolone with the Parmesan for an extra cheesy layer.
  • Sprinkle a bit of shredded cheddar on top for a unique twist.

Swap the Chicken for a Different Protein

  • Try boneless chicken thighs for a richer, juicier version.
  • Use pork chops instead of chicken and bake until tender.
  • Swap out the chicken for salmon fillets and reduce the baking time to 15-18 minutes.

Make It a One-Pan Meal

  • Add broccoli, asparagus, or zucchini around the chicken before baking for a built-in side dish.
  • Layer sliced potatoes or cauliflower under the chicken to soak up the creamy sauce.

What to Serve with Baked Caesar Chicken

This dish pairs well with a variety of sides, making it easy to create a balanced meal. Here are some great options:

Classic Comfort Sides

  • Garlic mashed potatoes – The creamy sauce is perfect for spooning over mashed potatoes.
  • Buttered pasta – A simple side of noodles tossed in butter and Parmesan complements the rich flavors.

Lighter, Healthier Options

  • Steamed green beans – Adds a fresh, crisp contrast to the creamy chicken.
  • Roasted Brussels sprouts – Their slightly nutty flavor pairs beautifully with the tangy Caesar dressing.

Something Unexpected

  • Crispy garlic bread – Perfect for scooping up the extra sauce.
  • Quinoa or wild rice – Adds a hearty, nutty element to balance the meal.

Frequently Asked Questions

1. Can I Use Light Caesar Dressing?

Yes! You can use light or low-fat Caesar dressing to reduce calories while still keeping the dish flavorful.

2. Can I Make This Recipe Ahead of Time?

Absolutely! You can assemble the chicken and store it in the fridge for up to 24 hours before baking.

3. How Do I Store Leftovers?

Store leftovers in an airtight container in the refrigerator for up to 3 days.

4. Can I Freeze This Dish?

Yes, but the texture of the sauce may change slightly. Freeze the fully cooked chicken in an airtight container for up to 3 months. Thaw overnight in the fridge and reheat in the oven at 350°F until warmed through.

5. What’s the Best Way to Reheat It?

For the best texture, reheat in the oven at 325°F for 10-15 minutes. Avoid microwaving, as it may make the sauce separate.

6. Can I Make This in an Air Fryer?

Yes! Cook at 375°F for about 15 minutes, checking for an internal temperature of 165°F.

Final Thoughts: A Go-To Recipe for Every Occasion

There’s a reason Baked Caesar Chicken has become a favorite in so many households—it’s simple, delicious, and works for any meal, any time. Whether you’re cooking for family, friends, or just yourself, this dish delivers bold flavors with minimal effort.

What I love most about this recipe is how it transforms a few pantry staples into something special. It’s creamy without being heavy, cheesy without being overwhelming, and incredibly easy to make. Best of all, it’s a meal that brings people together, just like all great comfort foods do.

So the next time you need a quick, satisfying dinner that tastes like a restaurant-quality dish, give this Baked Caesar Chicken a try. One bite, and it just might become a new favorite in your home too.

Easter Basket Bundt Cake: A Sweet Spring Delight!

gutenberg

Introduction to Easter Basket Bundt Cake

Spring is in the air, and with it comes the joy of Easter celebrations! If you’re like me, you’re always on the lookout for delightful treats that can bring a smile to your loved ones. That’s where my Easter Basket Bundt Cake comes in! This cake is not just a feast for the eyes; it’s a quick solution for busy days filled with family activities. With its moist texture, shredded coconut, and colorful chocolate candies, it’s sure to impress everyone at your table. Let’s dive into this sweet spring delight that captures the essence of Easter!

Why You’ll Love This Easter Basket Bundt Cake

This Easter Basket Bundt Cake is a true gem for busy moms and professionals alike. It’s incredibly easy to whip up, taking just about 20 minutes of prep time. The delightful combination of moist cake and vibrant chocolate candies makes it a hit with both kids and adults. Plus, it’s a stunning centerpiece for your Easter table, bringing joy and sweetness to your celebrations without the fuss!

Ingredients for Easter Basket Bundt Cake

Gathering the right ingredients is the first step to creating your Easter Basket Bundt Cake. Here’s what you’ll need:

  • All-purpose flour: The foundation of your cake, providing structure and texture.
  • Baking powder: This leavening agent helps the cake rise, making it light and fluffy.
  • Baking soda: Another leavening agent that works with acidic ingredients for a perfect rise.
  • Salt: Just a pinch enhances the flavors and balances the sweetness.
  • Unsalted butter: Adds richness and moisture; make sure it’s softened for easy mixing.
  • Granulated sugar: Sweetens the cake and contributes to its tender crumb.
  • Large eggs: They bind the ingredients together and add moisture and richness.
  • Vanilla extract: A splash of this adds a warm, comforting flavor to the cake.
  • Buttermilk: This ingredient keeps the cake moist and adds a subtle tang.
  • Shredded coconut: Provides a delightful texture and a hint of tropical flavor.
  • Pastel-colored chocolate candies: These not only add sweetness but also bring a festive touch to your cake.
  • Green food coloring (optional): Use this to create a fun ‘grass’ effect with your coconut decoration.
  • Powdered sugar: A light dusting on top adds a sweet finish and a beautiful presentation.

For exact measurements, check the bottom of the article where you can find everything listed for easy printing. Happy baking!

How to Make Easter Basket Bundt Cake

Step 1: Preheat and Prepare

First things first, preheat your oven to 350°F (175°C). This ensures your cake bakes evenly. While the oven warms up, grab your 10-inch bundt pan. Grease it well with butter or cooking spray, then dust it with flour. This step is crucial to prevent your cake from sticking. Trust me, there’s nothing worse than a cake that won’t come out of the pan!

Step 2: Mix Dry Ingredients

In a medium bowl, whisk together the all-purpose flour, baking powder, baking soda, and salt. This mixture is the backbone of your Easter Basket Bundt Cake. Whisking helps to aerate the flour, ensuring a light and fluffy texture. Set this bowl aside for now; we’ll come back to it shortly. It’s like a little waiting game, but it’s worth it!

Step 3: Cream Butter and Sugar

In a large mixing bowl, cream the softened unsalted butter and granulated sugar together. Use an electric mixer on medium speed for about 3-5 minutes. You want it to be light and fluffy, almost like a cloud! This step is essential for incorporating air into the batter, which helps your cake rise beautifully. Don’t rush it; enjoy the process!

Step 4: Add Eggs and Vanilla

Now, it’s time to add the eggs. Incorporate them one at a time, mixing well after each addition. This ensures they blend smoothly into the batter. Next, stir in the vanilla extract. The aroma will fill your kitchen, making it feel like a warm hug. This is where the magic begins, and your cake starts to take shape!

Step 5: Combine Wet and Dry Ingredients

Gradually add the dry ingredients to the butter mixture, alternating with the buttermilk. Start with a third of the dry mix, then add half of the buttermilk, and repeat until everything is combined. This method keeps the batter smooth and prevents lumps. Mix until just combined; overmixing can lead to a dense cake. We want it light and airy, just like spring!

Step 6: Fold in Coconut and Candies

Gently fold in the shredded coconut and half of the pastel-colored chocolate candies. Use a spatula to mix, being careful not to deflate the batter. This step adds texture and sweetness, making your Easter Basket Bundt Cake even more delightful. The colorful candies will peek through, adding a festive touch that everyone will love!

Step 7: Bake the Cake

Pour the batter into your prepared bundt pan, smoothing the top with a spatula. Bake in the preheated oven for 50-60 minutes. To check for doneness, insert a toothpick into the center; it should come out clean. The aroma wafting through your kitchen will be irresistible, and you’ll know you’re in for a treat!

Step 8: Cool and Decorate

Once baked, allow the cake to cool in the pan for about 15 minutes. Then, carefully invert it onto a wire rack to cool completely. Once cooled, dust the top with powdered sugar for a snowy finish. Decorate with the remaining pastel candies. If you want to get creative, mix a few drops of green food coloring into shredded coconut to mimic grass. It’s the perfect finishing touch for your Easter Basket Bundt Cake!

Tips for Success

  • Make sure your butter is softened for easy creaming; it should be at room temperature.
  • Don’t skip greasing and flouring the bundt pan; it’s key to a smooth release.
  • Use a toothpick to check for doneness; it should come out clean or with a few crumbs.
  • Let the cake cool completely before decorating to prevent melting the powdered sugar.
  • Feel free to customize with your favorite candies for a personal touch!

Equipment Needed

  • 10-inch bundt pan: Essential for shaping your cake; a regular cake pan can work in a pinch.
  • Mixing bowls: Use a large bowl for wet ingredients and a medium one for dry.
  • Electric mixer: A hand mixer is perfect; a whisk can work if you’re feeling adventurous!
  • Spatula: Great for folding in ingredients and smoothing the batter.
  • Wire rack: Ideal for cooling; a plate can substitute if needed.

Variations

  • Chocolate Lovers: For a rich twist, substitute ½ cup of flour with unsweetened cocoa powder. This will give your cake a delightful chocolate flavor.
  • Gluten-Free Option: Use a gluten-free all-purpose flour blend to make this cake suitable for those with gluten sensitivities.
  • Fruit Additions: Fold in some chopped fresh strawberries or blueberries for a fruity burst of flavor that complements the coconut.
  • Nutty Delight: Add ½ cup of chopped walnuts or pecans for a crunchy texture that pairs beautifully with the moist cake.
  • Vegan Version: Replace eggs with flaxseed meal (1 tablespoon flaxseed meal + 2.5 tablespoons water per egg) and use a plant-based butter substitute.

Serving Suggestions

  • Fresh Fruit Salad: Pair your cake with a refreshing fruit salad for a light and colorful side.
  • Whipped Cream: A dollop of whipped cream adds a creamy touch that complements the cake’s sweetness.
  • Springtime Beverages: Serve with iced tea or lemonade for a delightful springtime drink.
  • Festive Platter: Arrange slices on a decorative platter, garnished with edible flowers for a beautiful presentation.

FAQs about Easter Basket Bundt Cake

Can I make this cake ahead of time?
Absolutely! The Easter Basket Bundt Cake can be baked a day in advance. Just store it in an airtight container at room temperature. This allows the flavors to meld beautifully, making it even more delicious!

What can I use instead of buttermilk?
If you don’t have buttermilk on hand, you can easily make a substitute. Just mix 1 cup of milk with 1 tablespoon of vinegar or lemon juice. Let it sit for about 5 minutes, and you’ll have a perfect buttermilk replacement!

How do I store leftovers?
To keep your cake fresh, store any leftovers in an airtight container at room temperature for up to three days. If you want to keep it longer, you can freeze slices wrapped in plastic wrap for up to three months.

Can I use different candies for decoration?
Of course! Feel free to get creative with your decorations. Use your favorite chocolate candies, jelly beans, or even sprinkles to make your Easter Basket Bundt Cake uniquely yours!

Is this cake suitable for a gluten-free diet?
Yes! You can easily make this cake gluten-free by substituting the all-purpose flour with a gluten-free flour blend. Just ensure that all other ingredients are also gluten-free.

Final Thoughts

Creating the Easter Basket Bundt Cake is more than just baking; it’s about making memories with your loved ones. The joy of watching their faces light up as they take that first bite is priceless. This cake brings a touch of spring to your table, combining delightful flavors and vibrant colors that celebrate the season. Whether you’re hosting a family gathering or simply enjoying a quiet afternoon, this cake is sure to add sweetness to your day. So, roll up your sleeves, gather your ingredients, and let the magic of baking fill your home with love and laughter!

“`

Print
clock clock iconcutlery cutlery iconflag flag iconfolder folder iconinstagram instagram iconpinterest pinterest iconfacebook facebook iconprint print iconsquares squares iconheart heart iconheart solid heart solid icon
Easter Basket Bundt Cake

Easter Basket Bundt Cake: A Sweet Spring Delight!


5 Stars 4 Stars 3 Stars 2 Stars 1 Star

No reviews

  • Author: Isabella
  • Total Time: 80 minutes
  • Yield: 12 servings 1x
  • Diet: Vegetarian

Description

Easter Basket Bundt Cake is a delightful spring dessert that combines a moist cake with shredded coconut and colorful chocolate candies, perfect for celebrating Easter.


Ingredients

Scale
  • 2 cups all-purpose flour
  • 1 ½ teaspoons baking powder
  • ½ teaspoon baking soda
  • ½ teaspoon salt
  • 1 cup unsalted butter, softened
  • 2 cups granulated sugar
  • 4 large eggs
  • 1 teaspoon vanilla extract
  • 1 cup buttermilk
  • 1 cup shredded coconut
  • 1 cup pastel-colored chocolate candies (e.g., M&M’s or similar)
  • Green food coloring (optional)
  • Powdered sugar for dusting

Instructions

  1. Preheat your oven to 350°F (175°C). Grease and flour a 10-inch bundt pan.
  2. In a medium bowl, whisk together the flour, baking powder, baking soda, and salt. Set aside.
  3. In a large bowl, cream the softened butter and granulated sugar together until light and fluffy, about 3-5 minutes.
  4. Add the eggs one at a time, mixing well after each addition. Stir in the vanilla extract.
  5. Gradually add the dry ingredients to the butter mixture, alternating with the buttermilk. Mix until just combined.
  6. Fold in the shredded coconut and half of the pastel-colored chocolate candies.
  7. Pour the batter into the prepared bundt pan and smooth the top.
  8. Bake for 50-60 minutes, or until a toothpick inserted into the center comes out clean.
  9. Allow the cake to cool in the pan for 15 minutes before inverting onto a wire rack to cool completely.
  10. Once cooled, dust the top with powdered sugar and decorate with the remaining pastel candies. If desired, mix a few drops of green food coloring into shredded coconut to create ‘grass’ and sprinkle it around the candies.

Notes

  • For a chocolate version, substitute ½ cup of the flour with unsweetened cocoa powder.
  • You can add a layer of cream cheese frosting between two layers of the bundt cake for added richness.
  • Prep Time: 20 minutes
  • Cook Time: 60 minutes
  • Category: Dessert
  • Method: Baking
  • Cuisine: American

Nutrition

  • Serving Size: 1 slice
  • Calories: 320
  • Sugar: 30g
  • Sodium: 200mg
  • Fat: 15g
  • Saturated Fat: 9g
  • Unsaturated Fat: 6g
  • Trans Fat: 0g
  • Carbohydrates: 45g
  • Fiber: 1g
  • Protein: 3g
  • Cholesterol: 70mg

Easter Popcorn: A Sweet and Crunchy Celebration

A Treat That Brings Back the Magic of Easter

Easter has always been a time of joy, renewal, and of course, sweets. As a child, I remember waking up to the sight of a beautifully arranged Easter basket, brimming with pastel-colored candies, chocolate bunnies, and tiny speckled eggs. But among all those treats, there was one that always stood out—homemade Easter popcorn.

It was a tradition in our family to make a big batch of it the night before Easter. My siblings and I would gather in the kitchen, eagerly watching as the creamy white chocolate melted into a smooth, glossy pool. We’d scatter handfuls of candy across the surface, each of us trying to create the perfect blend of colors and textures. There was laughter, there were sticky fingers, and in the end, there was a tray of beautifully imperfect popcorn clusters that felt uniquely ours.

Now, as an adult, I still make Easter Popcorn every year. It’s a simple recipe, yet it carries so much nostalgia. It reminds me that sometimes, the best moments in life are the simplest ones—melting chocolate, sprinkling candy, and sharing a homemade treat with the people you love.

Why This Easter Popcorn Is a Must-Try

1. Quick and Easy with Minimal Ingredients

This recipe is perfect for beginner bakers or anyone short on time. Since it uses popcorn as a base, there’s no need to measure out flour, sugar, or leavening agents—everything comes together in a single bowl with just a few simple mix-ins.

2. Sweet, Crunchy, and Packed with Flavor

Unlike traditional caramel popcorn, which can sometimes be too sticky, this white chocolate-covered version is perfectly sweet and crispy. The combination of salty popcorn, melted chocolate, and crunchy candies makes every bite irresistible.

3. Festive and Fun for Any Occasion

The pastel candies and sprinkles make this popcorn perfect for Easter, but you can easily switch up the colors and toppings for any holiday. Think red and green for Christmas, orange and black for Halloween, or rainbow sprinkles for a birthday celebration.

4. A Great Make-Ahead Treat

Since this popcorn stays fresh for several days, it’s a great choice if you’re looking to prepare a snack ahead of time. It can be stored at room temperature or even frozen for later enjoyment.

5. Kid-Friendly and Perfect for Making Together

If you’re looking for a fun kitchen activity with your kids, this is the one! Little hands will love tossing the popcorn, sprinkling in the candy, and helping to spread everything out before it sets. It’s a great way to create memories in the kitchen.

Ingredients: A Perfect Mix of Sweet and Salty

For the Popcorn Base:
  • 8 cups popped popcorn
  • 2 cups mini marshmallows
For the Coating & Toppings:
  • 1 (10 oz) bag white chocolate melting wafers
  • ¼ cup sprinkles
  • 1 (10 oz) bag candy-coated chocolate eggs

Directions: Bringing the Fun to Your Snack Bowl

  1. Combine the Base – In a large bowl, mix the popped popcorn and mini marshmallows.
  2. Melt the Chocolate – Melt white chocolate wafers according to package directions and pour over the popcorn mixture. Stir to coat evenly.
  3. Add the Festive Touches – Spread the coated popcorn on a wax paper-lined tray and sprinkle with colorful candy eggs and sprinkles.
  4. Set and Serve – Refrigerate for 5 minutes to harden, then break apart and store in an airtight container.

Nutritional Breakdown: A Delightful Indulgence

  • Calories: ~190 per serving
  • Total Fat: ~7g
  • Saturated Fat: ~3g
  • Carbohydrates: ~31g
  • Sugar: ~22g
  • Protein: ~2g
  • Sodium: ~56mg

Common Mistakes to Avoid

Even though this recipe is simple, a few common pitfalls can affect the texture and flavor of your Easter popcorn. Here’s how to get it perfect every time.

1. Not Removing Unpopped Kernels

Nothing ruins a bite of sweet popcorn like accidentally crunching on an unpopped kernel. Always sift through your popcorn and discard any hard kernels before adding the melted chocolate.

2. Overheating the White Chocolate

White chocolate can be tricky to melt. If it gets too hot, it can seize up and become grainy. To avoid this, melt it slowly in 30-second intervals, stirring in between each. If it starts to thicken, you can add a teaspoon of coconut oil to help smooth it out.

3. Waiting Too Long to Add Toppings

For the best results, sprinkle your candies and sprinkles onto the popcorn immediately after coating it with white chocolate. This ensures that everything sticks before the chocolate hardens.

4. Not Spreading the Popcorn Evenly

To prevent large clumps of chocolate-covered popcorn, make sure to spread it out in a thin layer on a baking sheet before letting it set. This allows every piece to be evenly coated and makes it easier to break apart.

5. Storing It Incorrectly

While this popcorn can last for a few days, keeping it in an airtight container is key to maintaining its crunch. Exposure to air can make it stale and chewy rather than crisp.

FAQs: Everything You Need to Know

1. Can I Make This Popcorn in Advance?

Yes! This popcorn stays fresh for up to 3 days in an airtight container. If you need it to last longer, you can freeze it for up to 2 months.

2. Can I Use a Different Type of Chocolate?

Absolutely! While white chocolate gives this popcorn its signature light and pastel Easter look, you can also try:

  • Milk chocolate for a richer flavor
  • Dark chocolate for a more sophisticated taste
  • Colored candy melts for an extra festive touch

3. What Other Mix-Ins Can I Use?

Beyond Easter candy and sprinkles, you can experiment with:

  • Chopped nuts (almonds, peanuts, or pecans)
  • Mini marshmallows for extra chewiness
  • Pretzel pieces for a salty contrast
  • Coconut flakes for a tropical twist

4. Can I Make This Popcorn Dairy-Free?

Yes! Just use dairy-free white chocolate chips or vegan candy melts to make this treat completely dairy-free.

5. How Do I Store Leftovers?

  • Room Temperature: Store in an airtight container for up to 3 days.
  • Refrigerator: Not recommended, as it can make the popcorn too hard.
  • Freezer: Freeze in a zip-top bag for up to 2 months.

6. Can I Use Air-Popped Popcorn Instead of Microwave Popcorn?

Yes! Air-popped popcorn works perfectly and can actually be a healthier option since it doesn’t contain added butter or oil.

7. Can I Add Food Coloring to the White Chocolate?

Yes! If you want to add a pastel hue to the white chocolate, use oil-based or gel food coloring. Avoid water-based food coloring, as it can cause the chocolate to seize.

8. How Can I Package This Popcorn as a Gift?

For a cute Easter gift, package the popcorn in clear cellophane bags and tie them with pastel ribbons. You can also place it in decorative tins or mason jars for an extra special touch.

Why You’ll Love Making This Every Year

  • It’s incredibly easy to make – No baking required, just melt, mix, and enjoy!
  • It’s a family-friendly activity – Kids and adults alike will love decorating and snacking.
  • It’s festive and fun – Perfect for Easter baskets, parties, or a seasonal movie night.
  • It’s completely customizable – Switch up the candies and colors to match any occasion.

Conclusion: A Sweet Treat That Brings Joy

Easter Popcorn is more than just a snack—it’s a celebration of spring, family, and childhood memories. Whether you’re making it for a family movie night, gifting it to loved ones, or adding it to an Easter spread, this treat is guaranteed to bring smiles.

With its perfect combination of salty popcorn, creamy chocolate, and crunchy candy, every handful is a delicious reminder that the simplest recipes are often the most memorable. So grab a bowl, gather your loved ones, and enjoy the magic of Easter in every bite!