Pineapple Chicken Stir-Fry Recipe is a must-try dish!

Introduction to Pineapple Chicken Stir-Fry Recipe

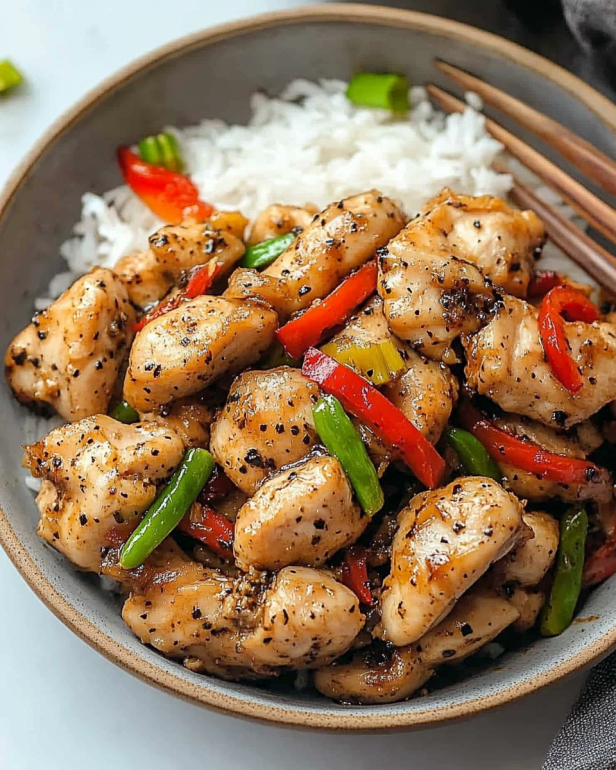
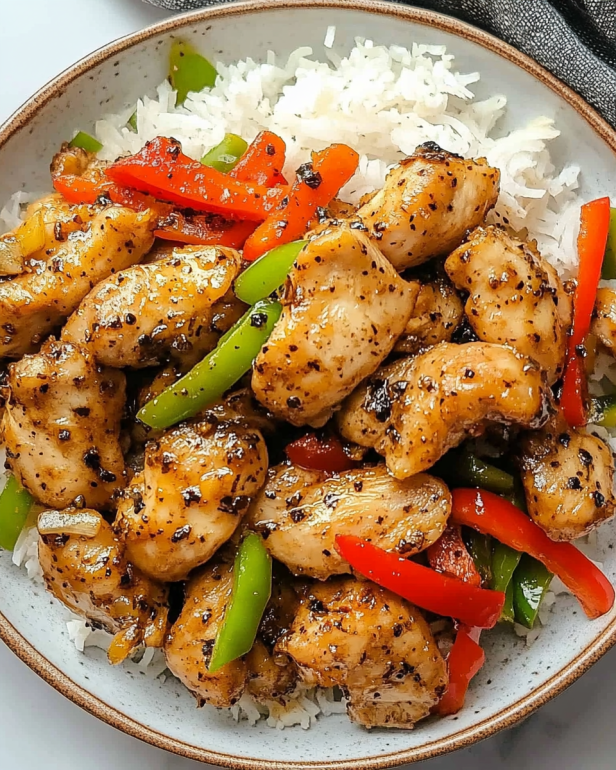
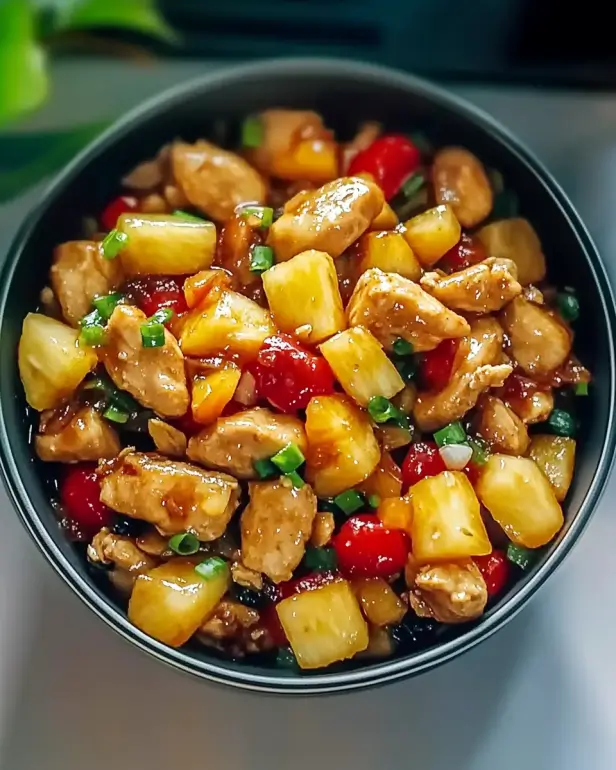
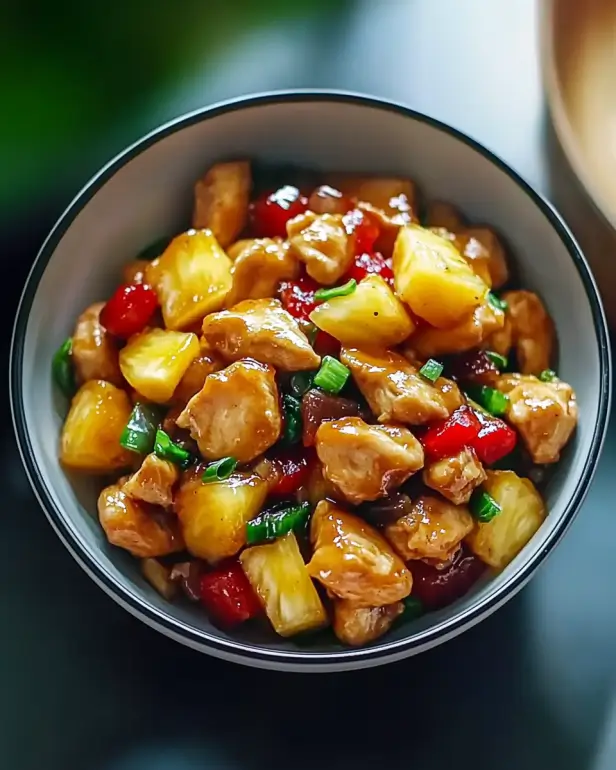
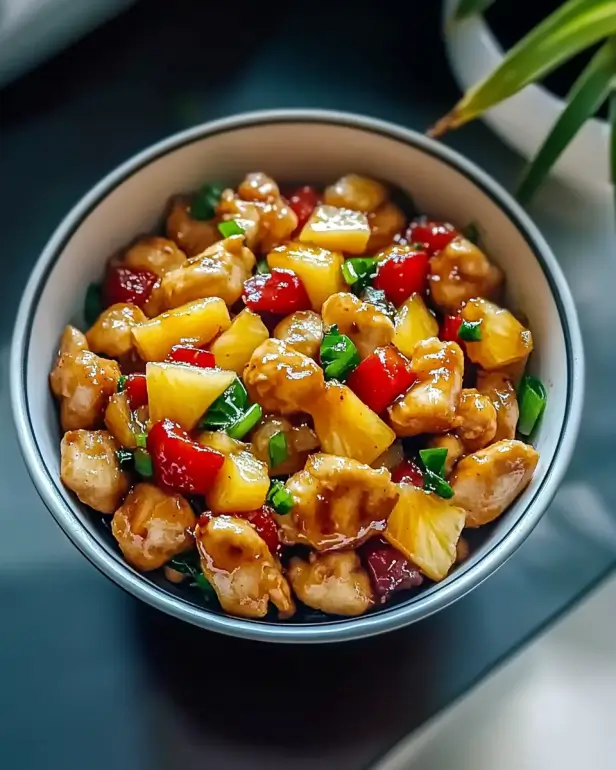
Pineapple Chicken Stir-Fry Recipe. This delightful meal is not only easy to prepare but also packed with nutrients. It’s perfect for busy weeknights or when you want to impress your family and friends with a colorful plate.

What Makes Pineapple Chicken Stir-Fry Special?

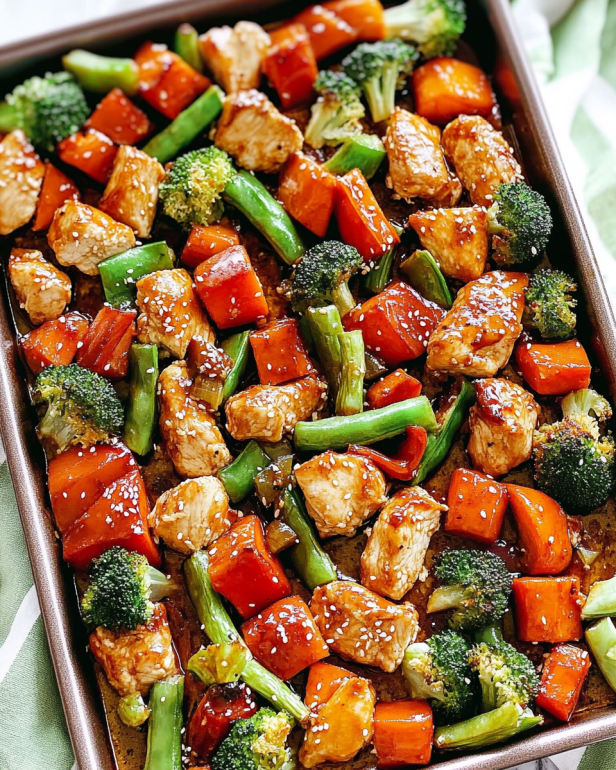
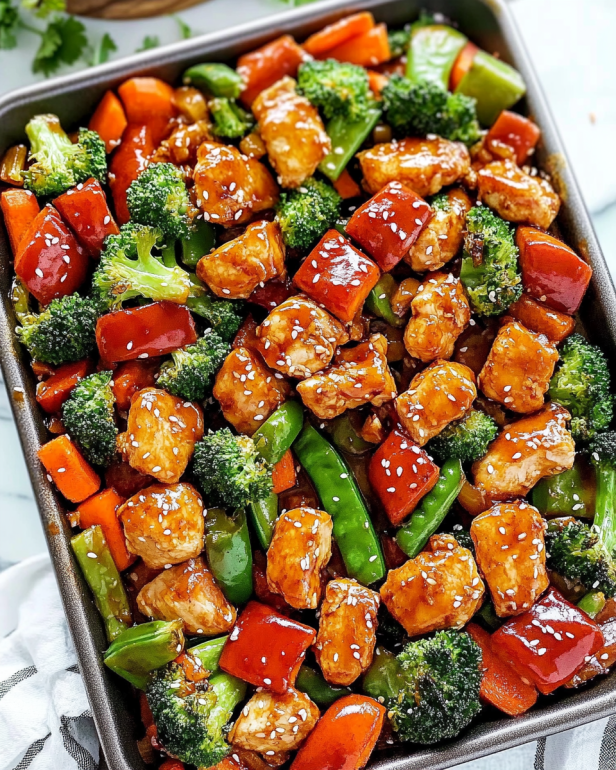
The magic of this dish lies in its unique combination of ingredients. The tender chicken pairs beautifully with fresh pineapple, creating a sweet and tangy flavor explosion. The colorful vegetables add crunch and nutrition, making every bite exciting. Plus, the quick cooking method ensures that the ingredients retain their vibrant colors and nutrients. This stir-fry is not just a meal; it’s an experience!

The Benefits of Cooking with Pineapple

Pineapple is more than just a tasty fruit; it’s a powerhouse of health benefits. Rich in vitamins C and B6, pineapple supports your immune system and helps your body produce energy. Additionally, it contains bromelain, an enzyme that aids digestion and reduces inflammation. By incorporating pineapple into your meals, you’re not only enhancing flavor but also boosting your health. So, why not enjoy a dish that’s both delicious and nutritious?

Ingredients for Pineapple Chicken Stir-Fry Recipe

Essential Ingredients

Pineapple Chicken Stir-Fry Recipe, you’ll need a few key ingredients. These essentials will ensure your dish is flavorful and satisfying. Here’s what you’ll need:

  • 1 pound boneless, skinless chicken breasts, cut into bite-sized pieces
  • 2 tablespoons vegetable oil
  • 1 cup fresh pineapple chunks
  • 1 bell pepper, sliced (any color)
  • 1 cup broccoli florets
  • 1 medium onion, sliced
  • 2 cloves garlic, minced
  • 1 tablespoon fresh ginger, minced
  • 1/4 cup soy sauce
  • 2 tablespoons honey
  • 1 tablespoon cornstarch
  • 1/4 cup water
  • 1 teaspoon sesame oil
  • Cooked rice or noodles, for serving

These ingredients come together to create a delightful balance of flavors. The chicken provides protein, while the vegetables add crunch and color. The pineapple brings a sweet twist that makes this dish stand out.

Optional Ingredients for Extra Flavor

If you want to elevate your stir-fry even further, consider adding some optional ingredients. These can enhance the taste and make your dish even more exciting:

  • 1 teaspoon red pepper flakes for a spicy kick
  • A splash of sriracha for heat
  • Chopped green onions for garnish
  • Sesame seeds for added crunch
  • Other vegetables like snap peas or carrots for variety

Feel free to mix and match these optional ingredients based on your preferences. The beauty of stir-fry is its versatility, allowing you to customize it to your liking. Enjoy experimenting with flavors!

Preparation of Pineapple Chicken Stir-Fry Recipe

Step 1: Preparing the Chicken

First things first, let’s get the chicken ready! Start by cutting 1 pound of boneless, skinless chicken breasts into bite-sized pieces. This helps the chicken cook evenly and makes it easy to eat. Once cut, you can season the chicken lightly with salt and pepper if you like. This simple step adds a bit of flavor right from the start!

Step 2: Chopping the Vegetables

Next, it’s time to chop the vegetables. You’ll need a bell pepper, broccoli florets, and a medium onion. Slice the bell pepper into thin strips, and cut the onion into slices. For the broccoli, just break it into small florets. The more colorful your vegetables, the more appealing your dish will look! Plus, each vegetable adds its own unique taste and texture.

Step 3: Making the Stir-Fry Sauce

Now, let’s whip up the stir-fry sauce! In a small bowl, combine 1/4 cup of soy sauce, 2 tablespoons of honey, 1 tablespoon of cornstarch, 1/4 cup of water, and 1 teaspoon of sesame oil. Whisk these ingredients together until smooth. This sauce is what brings all the flavors together, so make sure it’s well mixed. You can also add a teaspoon of red pepper flakes here if you want some heat!

Step 4: Cooking the Chicken

Heat 2 tablespoons of vegetable oil in a large skillet or wok over medium-high heat. Once the oil is hot, add the chicken pieces. Cook them for about 5-7 minutes, stirring occasionally, until they are browned and cooked through. This step is crucial, as it gives the chicken a nice texture and flavor. Once done, remove the chicken from the skillet and set it aside.

Step 5: Adding Vegetables and Pineapple

In the same skillet, add the sliced onion, bell pepper, and broccoli. Stir-fry these vegetables for about 3-4 minutes until they are tender-crisp. Then, add the minced garlic and ginger, cooking for an additional minute until fragrant. Finally, toss in the fresh pineapple chunks. The pineapple will add a sweet and juicy element to your stir-fry!

Step 6: Combining Everything Together

Now it’s time to bring everything together! Pour the stir-fry sauce over the vegetables in the skillet. Return the cooked chicken to the skillet and stir to combine all the ingredients. Cook for another 2-3 minutes until the sauce thickens and everything is heated through. This is where the magic happens! The sauce will coat the chicken and vegetables, making them deliciously flavorful. Serve your stir-fry over cooked rice or noodles, and enjoy!

Variation of Pineapple Chicken Stir-Fry Recipe

Alternative Proteins to Use

Pineapple Chicken Stir-Fry Recipe. Each option brings its own unique flavor and texture to the dish. Here are some great alternatives:

  • Shrimp: Shrimp cooks quickly and adds a delightful seafood flavor. Just be sure to adjust the cooking time, as shrimp only needs about 3-4 minutes to cook through.
  • Tofu: For a vegetarian option, tofu is a fantastic choice. Use firm or extra-firm tofu, and make sure to press it to remove excess moisture. This will help it absorb the flavors of the sauce better.
  • Pork: Thinly sliced pork tenderloin can also work well. It has a slightly sweet flavor that complements the pineapple beautifully.
  • Beef: If you prefer beef, use flank steak or sirloin, sliced thinly against the grain. This will ensure it remains tender and flavorful.

Feel free to experiment with these proteins based on your taste preferences. Each option can create a delicious twist on the classic stir-fry!

Vegetarian Options for Pineapple Chicken Stir-Fry

Pineapple Chicken Stir-Fry Recipe without meat. Here are some tasty vegetarian options:

  • Tempeh: This fermented soy product is packed with protein and has a nutty flavor. Cut it into cubes and sauté it just like chicken.
  • Seitan: Known as wheat meat, seitan has a chewy texture that mimics meat. It absorbs flavors well, making it a great addition to stir-fries.
  • Mixed Vegetables: Load up on a variety of vegetables like bell peppers, snap peas, carrots, and mushrooms. The more colorful, the better!
  • Chickpeas: These legumes are a great source of protein and add a hearty texture. Toss them in during the last few minutes of cooking to warm them through.

By using these vegetarian options, you can create a delicious and satisfying stir-fry that everyone will love. Enjoy the versatility of this dish!

Cooking Note for Pineapple Chicken Stir-Fry Recipe

Tips for Achieving the Perfect Stir-Fry Texture

Pineapple Chicken Stir-Fry Recipe is key to making it truly enjoyable. Here are some helpful tips to ensure your stir-fry turns out perfectly every time:

  • Use High Heat: Stir-frying is all about quick cooking at high temperatures. Make sure your skillet or wok is hot before adding the oil and ingredients. This helps to sear the chicken and vegetables, locking in their flavors.
  • Don’t Overcrowd the Pan: If you add too many ingredients at once, they will steam instead of fry. Cook in batches if necessary. This way, each piece gets the chance to brown nicely.
  • Cut Ingredients Uniformly: To ensure even cooking, cut your chicken and vegetables into similar sizes. This helps everything cook at the same rate, giving you that perfect tender-crisp texture.
  • Prep Everything Ahead: Have all your ingredients chopped and ready to go before you start cooking. Stir-frying happens quickly, so being prepared will help you keep up with the pace.
  • Stir Constantly: Keep the ingredients moving in the pan. This prevents burning and ensures that everything cooks evenly. Use a spatula to toss the ingredients frequently.
  • Finish with a Quick Toss: Once everything is cooked, give it a final toss in the pan. This helps to mix the flavors and ensures that the sauce coats all the ingredients evenly.

By following these tips, you’ll achieve a stir-fry that’s not only delicious but also has the perfect texture. Enjoy the delightful crunch of the vegetables and the tender chicken in every bite!

Serving Suggestions for Pineapple Chicken Stir-Fry Recipe

Best Side Dishes to Pair with Pineapple Chicken Stir-Fry

Pineapple Chicken Stir-Fry Recipe, choosing the right side dishes can enhance the meal. Here are some fantastic options that complement the flavors of your stir-fry:

  • Steamed Rice: A classic choice, steamed white or brown rice absorbs the delicious sauce and balances the sweetness of the pineapple.
  • Fried Rice: For a twist, serve your stir-fry over fried rice. This adds extra flavor and texture, making the meal even more satisfying.
  • Noodles: Whether you prefer rice noodles, egg noodles, or soba, they make a great base for your stir-fry. Toss them in the sauce for a delightful combination.
  • Quinoa: For a healthier option, quinoa is a great choice. It’s packed with protein and adds a nutty flavor that pairs well with the stir-fry.
  • Spring Rolls: Serve some crispy spring rolls on the side for a crunchy contrast. They can be filled with vegetables or shrimp for added flavor.

These side dishes not only complement the stir-fry but also add variety to your meal. Choose one or more to create a well-rounded dining experience!

Creative Serving Ideas

Pineapple Chicken Stir-Fry Recipe from ordinary to extraordinary. Here are some creative serving ideas to impress your guests:

  • Serve in Pineapple Halves: For a fun twist, hollow out a pineapple and serve the stir-fry inside. This not only looks stunning but also adds a tropical flair.
  • Garnish with Fresh Herbs: Sprinkle chopped cilantro or green onions on top for a burst of color and freshness. This adds a lovely aroma and enhances the dish’s visual appeal.
  • Use Colorful Bowls: Serve the stir-fry in vibrant bowls to make the colors pop. This simple change can make your meal feel more festive.
  • Make a Wrap: Use lettuce leaves to create wraps filled with the stir-fry. This is a fun, interactive way to enjoy the dish and adds a crunchy texture.
  • Pair with a Salad: A light salad with a citrus dressing can balance the richness of the stir-fry. Consider a simple cucumber and carrot salad for a refreshing side.

Pineapple Chicken Stir-Fry Recipe in style!

Tips for Perfecting Your Pineapple Chicken Stir-Fry Recipe

Common Mistakes to Avoid

Pineapple Chicken Stir-Fry Recipe, avoiding common mistakes can make a big difference in the final dish. Here are some pitfalls to watch out for:

  • Overcooking the Chicken: It’s easy to overcook chicken, making it dry and tough. Cook it just until it’s no longer pink in the center. This keeps it juicy and tender.
  • Not Prepping Ingredients: Stir-frying is a quick process. If you don’t prep your ingredients ahead of time, you may end up with overcooked vegetables or burnt chicken. Always have everything ready to go!
  • Using Low Heat: Stir-frying requires high heat to achieve that perfect sear. If your pan isn’t hot enough, the ingredients will steam instead of fry, resulting in a soggy stir-fry.
  • Ignoring the Sauce: The sauce is what ties the dish together. Make sure to whisk it well and pour it over the stir-fry at the right time to ensure even coating.
  • Skipping the Marinade: If you have time, marinating the chicken in soy sauce and ginger for 30 minutes can enhance the flavor. Don’t skip this step if you want a deeper taste!

By avoiding these common mistakes, you’ll be on your way to creating a delicious and satisfying stir-fry that everyone will love!

Enhancing Flavor with Seasonings

Pineapple Chicken Stir-Fry Recipe to the next level, consider adding some extra seasonings. Here are a few ideas to enhance the flavor:

  • Fresh Herbs: Adding fresh herbs like basil or cilantro at the end of cooking can brighten the dish. They add a fresh aroma and a burst of flavor.
  • Sesame Seeds: Toasted sesame seeds sprinkled on top add a nutty flavor and a nice crunch. They also make for a beautiful presentation.
  • Chili Paste: For those who enjoy heat, a spoonful of chili paste can elevate the dish. It adds depth and a spicy kick that pairs well with the sweetness of pineapple.
  • Rice Vinegar: A splash of rice vinegar can add a tangy note that balances the sweetness of the honey and pineapple. It’s a great way to enhance the overall flavor profile.
  • Garlic Powder: If you love garlic, a sprinkle of garlic powder can intensify the flavor. Just be careful not to overdo it, as it can overpower the dish.

Experimenting with these seasonings can help you find the perfect balance of flavors in your stir-fry. Enjoy the process of creating a dish that’s uniquely yours!

Breakdown of Time for Pineapple Chicken Stir-Fry Recipe

Prep Time

Pineapple Chicken Stir-Fry Recipe. The prep time usually takes about 15-20 minutes. During this time, you’ll chop the chicken, slice the vegetables, and prepare the stir-fry sauce. Having everything prepped in advance makes the cooking process smooth and quick. Plus, it helps you avoid any last-minute rush!

Cooking Time

The actual cooking time for this delicious stir-fry is around 10-15 minutes. This includes cooking the chicken until it’s golden brown, stir-frying the vegetables, and combining everything with the sauce. Stir-frying is a fast cooking method, so be sure to keep an eye on the ingredients to prevent overcooking. The quick cooking time helps retain the vibrant colors and nutrients of the vegetables.

Total Time

In total, you can expect to spend about 25-35 minutes from start to finish. This includes both prep and cooking time. With such a quick turnaround, you can enjoy a flavorful and nutritious meal without spending hours in the kitchen. It’s perfect for busy weeknights or when you want to whip up something special in no time!

Nutritional Information for Pineapple Chicken Stir-Fry Recipe

Calories and Macronutrients

Pineapple Chicken Stir-Fry Recipe is not only delicious but also provides a good mix of macronutrients. Here’s a breakdown of the nutritional information per serving:

  • Calories: 320
  • Net Carbs: 25g
  • Protein: 28g
  • Fat: 10g

This dish is a great source of protein, thanks to the chicken, while the vegetables and pineapple contribute essential vitamins and minerals. The balance of carbohydrates and fats makes it a well-rounded meal that can fit into various dietary plans.

Health Benefits of Ingredients

Pineapple Chicken Stir-Fry Recipe offers unique health benefits, making this dish not just tasty but also nutritious. Here’s a closer look at some of the key ingredients:

  • Chicken: A lean source of protein, chicken helps build and repair tissues. It’s also rich in B vitamins, which are important for energy production.
  • Pineapple: Packed with vitamin C, pineapple boosts your immune system. It also contains bromelain, which aids digestion and reduces inflammation.
  • Broccoli: This superfood is high in fiber, vitamins C and K, and antioxidants. It supports heart health and may help reduce the risk of chronic diseases.
  • Bell Peppers: Rich in vitamins A and C, bell peppers promote healthy skin and vision. They also contain antioxidants that protect your cells from damage.
  • Onion and Garlic: Both are known for their anti-inflammatory properties. They can help boost your immune system and may even lower the risk of certain diseases.

By enjoying this stir-fry, you’re not only treating your taste buds but also nourishing your body with essential nutrients. It’s a perfect example of how healthy eating can be both enjoyable and satisfying!

FAQs about Pineapple Chicken Stir-Fry Recipe

Can I use canned pineapple for this recipe?

Pineapple Chicken Stir-Fry Recipe. However, fresh pineapple is recommended for the best flavor and texture. If you choose canned pineapple, make sure to drain it well to avoid excess moisture in your stir-fry. This will help maintain the right consistency of the sauce and prevent the dish from becoming too watery.

What vegetables work best in a stir-fry?

Stir-fries are incredibly versatile, and you can use a variety of vegetables. Some great options include:

  • Bell Peppers: They add color and sweetness.
  • Broccoli: This adds crunch and is packed with nutrients.
  • Carrots: They provide a nice sweetness and vibrant color.
  • Snap Peas: These add a delightful crunch.
  • Mushrooms: They bring an earthy flavor to the dish.

Feel free to mix and match based on your preferences and what you have on hand. The key is to choose vegetables that cook quickly and maintain their texture!

How can I make this dish gluten-free?

Pineapple Chicken Stir-Fry Recipe gluten-free, simply substitute the soy sauce with a gluten-free alternative. There are many options available, such as tamari or coconut aminos. Additionally, ensure that any other sauces or condiments you use are also gluten-free. This way, you can enjoy a delicious stir-fry without worrying about gluten!

Can I prepare the sauce in advance?

Pineapple Chicken Stir-Fry Recipe even faster on busy nights!

Conclusion on Pineapple Chicken Stir-Fry Recipe

Recap of Key Points

Pineapple Chicken Stir-Fry Recipe is a delightful dish that combines sweet and savory flavors in a quick and easy manner. With its vibrant ingredients, including tender chicken, fresh pineapple, and colorful vegetables, this stir-fry is not only visually appealing but also packed with nutrients. The simple preparation steps make it perfect for busy weeknights, while the versatility of the recipe allows for various protein and vegetable options. Remember to follow the tips for achieving the perfect stir-fry texture and to experiment with seasonings to enhance the flavor even further.

Encouragement to Try the Recipe

Pineapple Chicken Stir-Fry Recipe for your next meal. Whether you’re cooking for family, friends, or just yourself, this dish is sure to impress. Enjoy the process of preparing it, and feel free to make it your own by adding your favorite ingredients. Happy cooking, and enjoy every delicious bite!

Grilled Chicken Bites with Creamy Garlic Sauce delightfully impress!

Introduction to Grilled Chicken Bites with Garlic Cream Sauce

Are you looking for a delicious and easy recipe that will impress your family and friends? Look no further! Grilled Chicken Bites with Garlic Cream Sauce is the perfect dish for any occasion. This recipe combines tender, juicy chicken with a rich and creamy sauce that adds a burst of flavor to every bite.

Grilling chicken bites not only enhances their taste but also gives them a delightful smoky flavor. The garlic cream sauce is a wonderful complement, making it a crowd-pleaser. Whether you’re hosting a summer barbecue or simply enjoying a cozy dinner at home, this dish is sure to be a hit.

Moreover, this recipe is versatile. You can easily customize it to suit your taste preferences. From adding spices to experimenting with different dipping sauces, the possibilities are endless. Plus, it’s a great way to incorporate lean protein into your diet while keeping things fun and flavorful.

In this article, we will guide you through the ingredients, preparation steps, and tips to make the best Grilled Chicken Bites with Garlic Cream Sauce. So, let’s get started on this culinary adventure that will surely tantalize your taste buds!

Ingredients for Grilled Chicken Bites with Garlic Cream Sauce

To create the mouthwatering Grilled Chicken Bites with Garlic Cream Sauce, you’ll need a few simple ingredients. Each component plays a vital role in delivering flavor and texture. Here’s what you’ll need:

  • 1 pound boneless, skinless chicken breasts: Cut into bite-sized pieces for easy grilling and dipping.
  • 1 teaspoon paprika: This spice adds a warm, smoky flavor to the chicken.
  • 1 teaspoon garlic powder: Enhances the garlic flavor in the dish.
  • 1 teaspoon onion powder: Adds depth and sweetness to the seasoning mix.
  • Salt and pepper to taste: Essential for bringing out the flavors of the chicken.
  • 2 tablespoons olive oil: Helps to keep the chicken moist and adds a rich taste.

For the creamy garlic sauce, gather the following:

  • 1 cup sour cream: The base of the sauce, providing creaminess and tang.
  • 2 tablespoons mayonnaise: Adds richness and smoothness to the sauce.
  • 2 cloves garlic, minced: Fresh garlic gives the sauce a robust flavor.
  • 1 tablespoon fresh lemon juice: Brightens the sauce and balances the creaminess.
  • 1 tablespoon chopped fresh parsley (optional): For a pop of color and freshness.

These ingredients come together to create a delightful dish that’s perfect for any gathering. The combination of spices and the creamy sauce will surely make your taste buds dance with joy!

Preparation of Grilled Chicken Bites with Garlic Cream Sauce

Now that you have all your ingredients ready, it’s time to dive into the preparation of your Grilled Chicken Bites with Garlic Cream Sauce. This process is simple and straightforward, ensuring that you can whip up this delicious dish in no time. Let’s break it down into easy steps!

Step 1: Marinating the Chicken

Marinating the chicken is a crucial step that enhances its flavor. Start by placing the bite-sized chicken pieces in a large bowl. Add the paprika, garlic powder, onion powder, salt, pepper, and olive oil. Toss everything together until the chicken is well coated. For best results, let the chicken marinate for at least 30 minutes. This allows the spices to penetrate the meat, making it more flavorful and juicy.

Step 2: Preparing the Garlic Cream Sauce

While the chicken is marinating, you can prepare the creamy garlic sauce. In a medium bowl, combine the sour cream, mayonnaise, minced garlic, lemon juice, and chopped parsley (if using). Stir the mixture until it’s smooth and well blended. This sauce is not only creamy but also packed with flavor, making it the perfect dip for your grilled chicken bites.

Step 3: Grilling the Chicken Bites

Once the chicken has marinated, it’s time to grill! Preheat your grill or grill pan over medium-high heat. If you’re using skewers, thread the marinated chicken pieces onto them. If not, you can place the chicken directly on the grill. Grill the chicken for about 8-10 minutes, turning occasionally. You want the chicken to be cooked through and have those beautiful grill marks. The aroma will be irresistible!

Step 4: Combining Chicken with Sauce

After grilling, let the chicken bites rest for a few minutes. This helps retain their juices. Once rested, serve the grilled chicken bites on a platter with the creamy garlic sauce on the side. This way, everyone can dip their chicken bites into the sauce, adding that extra burst of flavor. Enjoy your delicious creation!

Variation of Grilled Chicken Bites with Garlic Cream Sauce

While the classic Grilled Chicken Bites with Garlic Cream Sauce is a delightful dish, there are many ways to switch things up! By using alternative ingredients and different cooking methods, you can create exciting variations that cater to your taste buds. Let’s explore some options!

Alternative Ingredients for Different Flavors

Experimenting with ingredients can lead to new and exciting flavors. Here are some ideas:

  • Spices: Instead of paprika, try using smoked paprika for a deeper flavor. You can also add cayenne pepper for a spicy kick!
  • Herbs: Fresh herbs like thyme or rosemary can be added to the marinade for a fragrant twist. They pair beautifully with chicken.
  • Cheese: For a cheesy sauce, mix in some grated Parmesan or feta cheese into the creamy garlic sauce. This adds a rich, savory element.
  • Yogurt: Swap sour cream for Greek yogurt for a tangy and healthier option. It’s a great way to lighten up the dish!
  • Vegetables: Add bell peppers or zucchini to the skewers for a colorful and nutritious addition. They grill beautifully alongside the chicken.

These alternative ingredients can transform your dish while keeping it delicious and satisfying. Feel free to mix and match based on what you have on hand or what flavors you enjoy!

Cooking Methods Beyond Grilling

Grilling is fantastic, but there are other cooking methods that can yield equally tasty results. Here are a few alternatives:

  • Baking: Preheat your oven to 400°F (200°C). Place the marinated chicken bites on a baking sheet lined with parchment paper. Bake for about 15-20 minutes, flipping halfway through, until cooked through.
  • Sautéing: Heat a skillet over medium heat with a little olive oil. Add the marinated chicken and cook for about 8-10 minutes, stirring occasionally, until golden brown and cooked through.
  • Air Frying: For a healthier option, use an air fryer. Preheat it to 375°F (190°C) and cook the chicken bites for about 10-12 minutes, shaking the basket halfway through for even cooking.

These methods not only provide variety but also make it easy to enjoy Grilled Chicken Bites with Garlic Cream Sauce any time of year, regardless of the weather!

Cooking Note for Grilled Chicken Bites with Garlic Cream Sauce

When preparing Grilled Chicken Bites with Garlic Cream Sauce, there are a few important cooking notes to keep in mind. These tips will help ensure that your chicken is juicy, flavorful, and perfectly cooked every time.

First, always start with high-quality chicken. Fresh, boneless, skinless chicken breasts are ideal for this recipe. They cook evenly and absorb the marinade well. If you can, choose organic or free-range chicken for the best flavor and texture.

Next, marinating the chicken is key. As mentioned earlier, letting the chicken sit in the marinade for at least 30 minutes enhances its flavor. However, if you have more time, marinating for a few hours or even overnight will yield even better results. Just remember to keep it in the refrigerator during this time to ensure food safety.

When grilling, preheating your grill or grill pan is essential. A hot grill creates those beautiful grill marks and helps seal in the juices. If you’re using skewers, soak wooden skewers in water for about 30 minutes before threading the chicken. This prevents them from burning on the grill.

Keep an eye on the cooking time. Chicken bites can cook quickly, so it’s important to check for doneness. The internal temperature should reach 165°F (75°C) for safe consumption. Using a meat thermometer can help you avoid overcooking, which can lead to dry chicken.

Lastly, let the grilled chicken rest for a few minutes after cooking. This allows the juices to redistribute, making each bite tender and juicy. Following these cooking notes will help you create the best Grilled Chicken Bites with Garlic Cream Sauce, ensuring a delightful meal every time!

Serving Suggestions for Grilled Chicken Bites with Garlic Cream Sauce

Once you’ve prepared your Grilled Chicken Bites with Garlic Cream Sauce, it’s time to think about how to serve them. The right sides and presentation can elevate your dish, making it even more appealing. Here are some great serving suggestions to consider!

Pairing with Sides

Choosing the right sides can enhance the overall meal experience. Here are some delicious options to pair with your grilled chicken bites:

  • Fresh Salad: A crisp garden salad with mixed greens, cherry tomatoes, and cucumbers adds a refreshing touch. Drizzle with a light vinaigrette for extra flavor.
  • Grilled Vegetables: Grilled zucchini, bell peppers, and asparagus complement the chicken beautifully. Their smoky flavor pairs well with the garlic cream sauce.
  • Rice or Quinoa: Serve the chicken bites over a bed of fluffy rice or quinoa. This adds a hearty element to the meal and absorbs the creamy sauce nicely.
  • Potato Wedges: Crispy baked or grilled potato wedges are a fun and satisfying side. They can be seasoned with herbs and spices to match the chicken.
  • Garlic Bread: For a comforting option, serve with warm garlic bread. It’s perfect for dipping into the creamy sauce!

These sides not only complement the flavors of the grilled chicken but also create a well-rounded meal that everyone will enjoy.

Presentation Tips

Presentation is key when serving your Grilled Chicken Bites with Garlic Cream Sauce. Here are some tips to make your dish look as good as it tastes:

  • Use a Platter: Arrange the grilled chicken bites on a large platter. This makes it easy for guests to serve themselves and creates an inviting display.
  • Garnish: Sprinkle some chopped fresh parsley or chives over the chicken bites for a pop of color. This adds a fresh touch and makes the dish visually appealing.
  • Serve in Bowls: Place the creamy garlic sauce in a small bowl in the center of the platter. This keeps the sauce accessible for dipping and adds to the overall presentation.
  • Colorful Sides: When plating, use colorful sides to create contrast. Bright greens, reds, and yellows make the meal look vibrant and appetizing.
  • Use Skewers: If you’ve threaded the chicken onto skewers, consider serving them directly on the skewers for a fun and casual presentation.

With these serving suggestions and presentation tips, your Grilled Chicken Bites with Garlic Cream Sauce will not only taste amazing but also look fantastic on the table. Enjoy your meal with family and friends!

Tips for Perfect Grilled Chicken Bites with Garlic Cream Sauce

To ensure your Grilled Chicken Bites with Garlic Cream Sauce turn out perfectly every time, consider these helpful tips. They will enhance the flavor, texture, and overall experience of your dish.

Choose the Right Chicken

Start with high-quality chicken. Fresh, boneless, skinless chicken breasts are ideal. They cook evenly and absorb the marinade well. If possible, opt for organic or free-range chicken for the best flavor and texture.

Marinate for Maximum Flavor

Marinating the chicken is crucial. Let it sit in the marinade for at least 30 minutes. For even better results, marinate for a few hours or overnight. Just remember to keep it in the refrigerator to ensure food safety.

Preheat Your Grill

Preheating your grill or grill pan is essential. A hot grill creates beautiful grill marks and helps seal in the juices. If using wooden skewers, soak them in water for about 30 minutes before grilling. This prevents them from burning.

Check for Doneness

Keep an eye on the cooking time. Chicken bites can cook quickly, so check for doneness. The internal temperature should reach 165°F (75°C) for safe consumption. A meat thermometer can help you avoid overcooking, which can lead to dry chicken.

Let the Chicken Rest

After grilling, let the chicken bites rest for a few minutes. This allows the juices to redistribute, making each bite tender and juicy. Following these tips will help you create the best Grilled Chicken Bites with Garlic Cream Sauce, ensuring a delightful meal every time!

Breakdown of Time for Grilled Chicken Bites with Garlic Cream Sauce

Understanding the time required for each step in preparing Grilled Chicken Bites with Garlic Cream Sauce is essential for a smooth cooking experience. Here’s a detailed breakdown of the time you’ll need for preparation, cooking, and the total time involved in making this delicious dish.

Prep Time

The prep time for this recipe is approximately 10-15 minutes. This includes gathering your ingredients, cutting the chicken into bite-sized pieces, and mixing the marinade. If you choose to marinate the chicken for a longer period, you can add an additional 30 minutes to several hours, depending on your schedule. However, the actual hands-on time remains short, making it easy to fit into your day.

Cooking Time

Cooking the chicken bites takes about 8-10 minutes on the grill. This time may vary slightly based on your grill’s heat and the size of the chicken pieces. It’s important to monitor the chicken closely to ensure it cooks evenly and reaches the safe internal temperature of 165°F (75°C). While the chicken is grilling, you can also prepare the creamy garlic sauce, which takes about 5 minutes. This means that the cooking time for the entire dish is around 15 minutes when done simultaneously.

Total Time

In total, you can expect to spend about 25-30 minutes to prepare and cook your Grilled Chicken Bites with Garlic Cream Sauce. If you include marinating time, the total time can extend to 1 hour or more, depending on how long you choose to let the chicken soak in the flavors. This makes it a quick and easy meal option, perfect for busy weeknights or casual gatherings!

Nutritional Information for Grilled Chicken Bites with Garlic Cream Sauce

Understanding the nutritional content of your meals is important for maintaining a balanced diet. Grilled Chicken Bites with Garlic Cream Sauce not only taste great but also provide valuable nutrients. Here’s a breakdown of the nutritional information per serving, which serves as a helpful guide for your meal planning.

Calories

320 calories. This makes it a satisfying option without being overly heavy. The combination of chicken and creamy sauce provides a good balance of energy, making it perfect for a main dish.

Protein

30 grams of protein. This high protein content is beneficial for muscle health and can help keep you feeling full longer. It’s an excellent choice for those looking to increase their protein intake.

Sodium

600 milligrams. While this is a reasonable amount for a flavorful dish, it’s always good to be mindful of your sodium intake, especially if you are watching your salt consumption. You can reduce sodium by using low-sodium versions of the ingredients or adjusting the seasoning to your taste.

Overall, Grilled Chicken Bites with Garlic Cream Sauce is a nutritious meal option that provides a good balance of calories, protein, and flavor. Enjoy this dish as part of a healthy diet, and feel free to pair it with fresh vegetables or whole grains for a complete meal!

FAQs about Grilled Chicken Bites with Garlic Cream Sauce

Can I use other meats instead of chicken?

Absolutely! While this recipe features chicken, you can easily substitute other meats. Turkey is a great alternative, as it has a similar texture and flavor. You can also use pork tenderloin or shrimp for a different twist. Just remember to adjust the cooking time based on the type of meat you choose. For example, shrimp cooks much faster than chicken, so keep an eye on it to avoid overcooking!

How can I make the garlic cream sauce healthier?

There are several ways to lighten up the garlic cream sauce while keeping it delicious. One option is to replace sour cream with Greek yogurt. This swap reduces calories and adds protein. You can also use low-fat mayonnaise instead of regular mayonnaise. Additionally, consider adding more fresh herbs like dill or chives for flavor without extra calories. These simple changes can make your sauce healthier without sacrificing taste!

What are some good side dishes to serve with grilled chicken bites?

Pairing your Grilled Chicken Bites with the right sides can enhance the meal. Here are some tasty options:

  • Steamed Vegetables: Broccoli, green beans, or carrots add color and nutrition.
  • Coleslaw: A crunchy coleslaw can provide a refreshing contrast to the creamy sauce.
  • Cauliflower Rice: A low-carb alternative to traditional rice, it’s light and fluffy.
  • Sweet Potato Fries: These offer a sweet and savory flavor that pairs well with the chicken.

These sides not only complement the chicken bites but also create a balanced meal that everyone will enjoy!

Can I prepare the chicken bites in advance?

Yes, you can prepare the chicken bites in advance! Marinate the chicken pieces a few hours or even a day ahead of time. Just store them in the refrigerator until you’re ready to grill. This not only saves time but also allows the flavors to develop even more. If you have leftovers, they can be stored in an airtight container in the fridge for up to three days. Reheat them gently in the oven or on the stovetop to enjoy later!

Conclusion on Grilled Chicken Bites with Garlic Cream Sauce

In conclusion, Grilled Chicken Bites with Garlic Cream Sauce is a delightful dish that combines simplicity with flavor. This recipe is not only easy to prepare but also offers a wonderful way to enjoy lean protein in a fun and tasty manner. The juicy chicken bites, paired with the creamy garlic sauce, create a perfect balance that will satisfy your taste buds.

Whether you’re hosting a gathering or enjoying a quiet dinner at home, this dish is sure to impress. The versatility of the recipe allows you to customize it to your liking, making it suitable for various occasions. From experimenting with different spices to trying out alternative cooking methods, the possibilities are endless.

Moreover, the nutritional benefits of this meal make it a smart choice for those looking to maintain a healthy diet. With a good amount of protein and the option to incorporate fresh vegetables, you can create a well-rounded meal that is both delicious and nourishing.

So, gather your ingredients, fire up the grill, and get ready to enjoy a plate of Grilled Chicken Bites with Garlic Cream Sauce. Your family and friends will surely appreciate the effort, and you’ll love the delightful flavors that come together in this easy-to-make dish. Happy cooking!

Croque Madame recipe: A delicious French delight!

Introduction to the Croque Madame Recipe

What is a Croque Madame?

The Croque Madame is a delightful French sandwich that combines the rich flavors of ham and cheese with a creamy béchamel sauce. It is similar to its counterpart, the Croque Monsieur, but with a special twist. The addition of a fried egg on top makes it a Croque Madame. This dish is not only delicious but also visually appealing, making it a perfect choice for brunch or a cozy dinner. The combination of crispy bread, savory ham, and melted cheese creates a comforting meal that warms the heart.

The History of the Croque Madame

The origins of the Croque Madame date back to the early 20th century in France. It is believed that the sandwich was first served in cafés and bistros, quickly becoming a popular choice among locals. The name “Croque” comes from the French word for “crunch,” which describes the crispy texture of the toasted bread. The addition of the egg, which resembles a woman’s hat, is what gives it the name “Madame.” Over the years, this dish has evolved, and many variations have emerged, but the classic recipe remains a beloved staple in French cuisine. Today, the Croque Madame is enjoyed worldwide, often served with a side salad or fries, making it a versatile and satisfying meal.

Ingredients for the Croque Madame Recipe

To create a delicious Croque Madame, you’ll need a few key ingredients. Each component plays a vital role in achieving that perfect balance of flavors and textures. Here’s what you’ll need:

  • 2 slices gluten-free bread: This serves as the base of your sandwich. Choose a hearty gluten-free bread for the best results.
  • 2 ounces sliced ham: Opt for high-quality ham for a savory flavor. You can use smoked or regular ham based on your preference.
  • 2 ounces Gruyère cheese, grated: This cheese melts beautifully and adds a rich, nutty flavor. Feel free to substitute with other cheeses if desired.
  • 1 tablespoon unsalted butter: This is used to create a creamy cheese sauce and adds richness to the dish.
  • 1 tablespoon all-purpose gluten-free flour: This helps thicken the cheese sauce, making it creamy and smooth.
  • 1 cup milk: Whole milk is recommended for a richer sauce, but you can use any milk you prefer.
  • 1 teaspoon Dijon mustard: This adds a tangy kick to the cheese sauce, enhancing the overall flavor.
  • Salt and pepper to taste: These seasonings will help bring out the flavors of the dish.
  • 1 large egg: The crowning touch of the Croque Madame, adding protein and richness.
  • Fresh parsley, chopped (for garnish): This adds a pop of color and freshness to your finished dish.

With these ingredients on hand, you’re ready to embark on your culinary adventure. The combination of flavors will surely impress anyone who takes a bite. Now, let’s move on to the step-by-step preparation of this delightful Croque Madame!

Step-by-Step Preparation of the Croque Madame Recipe

Step 1: Preparing the Bread

To start, take your gluten-free bread and lay it out on a clean surface. If you prefer, you can lightly toast the bread slices in a toaster or on a skillet. This step helps to create a crispy texture that holds up well against the creamy cheese sauce. Once toasted, set the bread aside while you prepare the cheese sauce. This will ensure that your sandwich has a delightful crunch when served.

Step 2: Making the Cheese Sauce

Next, grab a small saucepan and place it on medium heat. Add the unsalted butter and let it melt completely. Once melted, sprinkle in the gluten-free flour. Whisk the mixture for about a minute until it forms a smooth paste. This is known as a roux, which is the base for your cheese sauce. Gradually pour in the milk while whisking continuously. This helps to avoid any lumps in your sauce. Keep cooking for about 3-5 minutes until the sauce thickens. Stir in the Dijon mustard, salt, and pepper to taste. Finally, mix in half of the grated Gruyère cheese until it melts into the sauce, creating a creamy delight.

Step 3: Assembling the Croque Madame

Now it’s time to assemble your Croque Madame! Start by placing one slice of the prepared gluten-free bread on a baking sheet. Layer it with the sliced ham, followed by half of the creamy cheese sauce. Then, place the second slice of bread on top. Pour the remaining cheese sauce over this top slice, ensuring it’s generously covered. Finally, sprinkle the rest of the grated Gruyère cheese on top for that extra cheesy goodness.

Step 4: Cooking the Croque Madame

Preheat your oven to 400°F (200°C) if you haven’t done so already. Once the oven is ready, place your assembled sandwich inside. Bake it for about 10-12 minutes, or until the cheese is bubbly and golden brown. The aroma will fill your kitchen, making it hard to resist! Keep an eye on it to ensure it doesn’t overcook.

Step 5: Adding the Egg

While your Croque Madame is baking, it’s the perfect time to fry the egg. Heat a non-stick skillet over medium heat and add a little oil or butter. Crack the egg into the skillet and cook it to your desired doneness. Whether you like it sunny-side up or over-easy, the egg will add a rich, velvety touch to your sandwich. Once the Croque Madame is out of the oven, carefully place the fried egg on top. Garnish with freshly chopped parsley for a pop of color and flavor.

Variations of the Croque Madame Recipe

Vegetarian Croque Madame

If you’re looking for a meat-free option, a vegetarian Croque Madame is a fantastic choice! Instead of ham, you can use sautéed mushrooms or fresh spinach. Both options add a wonderful depth of flavor. For mushrooms, simply slice them and cook them in a bit of olive oil until they’re golden brown. If you prefer spinach, sauté it until wilted. Layer your chosen filling between the slices of gluten-free bread, just like in the traditional recipe. The creamy cheese sauce and fried egg will still provide that comforting richness, making this vegetarian version just as satisfying!

Gluten-Free Croque Madame

For those who need to avoid gluten, this Croque Madame recipe is already gluten-free! By using gluten-free bread and flour, you can enjoy this classic dish without worry. Just make sure to check the labels on your ingredients to ensure they are certified gluten-free. The rest of the recipe remains the same, allowing you to indulge in the delicious flavors of ham, cheese, and a perfectly fried egg. This gluten-free Croque Madame is a delightful way to enjoy a French classic while adhering to dietary needs.

Cooking Note for the Croque Madame Recipe

When preparing your Croque Madame, there are a few important cooking notes to keep in mind. First, the choice of bread is crucial. A sturdy gluten-free bread will hold up better against the creamy cheese sauce. If your bread is too soft, it may become soggy. Toasting the bread lightly before assembling the sandwich can help prevent this issue.

Next, pay attention to the cheese sauce. Whisking continuously while adding the milk is essential to avoid lumps. If you find that your sauce is too thick, you can add a splash more milk to reach your desired consistency. On the other hand, if it’s too thin, let it cook a bit longer to thicken up.

When baking the sandwich, keep an eye on it to ensure the cheese doesn’t burn. Every oven is different, so you may need to adjust the baking time slightly. If you notice the cheese is browning too quickly, you can cover the sandwich loosely with aluminum foil to prevent over-browning while it finishes cooking.

Lastly, the fried egg is the crowning glory of your Croque Madame. For the best results, use a non-stick skillet and a little oil or butter to prevent sticking. If you prefer a runny yolk, cook the egg for a shorter time. If you like it firmer, let it cook a bit longer. The egg should be cooked to your liking, adding that perfect touch to your sandwich.

By following these cooking notes, you’ll ensure that your Croque Madame turns out delicious and satisfying every time. Enjoy the process and savor the delightful flavors of this classic French dish!

Serving Suggestions for the Croque Madame Recipe

When it comes to serving your Croque Madame, presentation and pairing can elevate this dish to new heights. Here are some delightful serving suggestions to enhance your dining experience:

  • Side Salad: A fresh side salad is a perfect complement to the rich flavors of the Croque Madame. Consider a simple mixed greens salad with a light vinaigrette. The crispness of the greens balances the creamy sandwich beautifully.
  • Fries or Sweet Potato Fries: For a heartier meal, serve your Croque Madame with a side of crispy fries or sweet potato fries. The crunchiness adds a satisfying texture that pairs well with the soft sandwich.
  • Pickles: Adding a few pickles on the side can provide a tangy contrast to the richness of the cheese and ham. Their acidity cuts through the creaminess, making each bite more enjoyable.
  • Tomato Soup: For a comforting combination, serve your Croque Madame with a warm bowl of tomato soup. The classic pairing of grilled cheese and tomato soup is taken to the next level with this French twist.
  • Herb Garnish: Don’t forget to sprinkle some fresh herbs, like chives or basil, on top of your Croque Madame before serving. This adds a pop of color and freshness, making the dish even more appealing.

These serving suggestions not only enhance the flavor of your Croque Madame but also create a well-rounded meal. Whether you’re enjoying it for brunch, lunch, or dinner, these pairings will surely impress your guests and make your dining experience memorable. Enjoy your delicious creation!

Tips for Perfecting Your Croque Madame Recipe

Creating the perfect Croque Madame is all about attention to detail. Here are some helpful tips to ensure your sandwich turns out delicious every time:

  • Choose the Right Bread: A sturdy gluten-free bread is essential. Look for a loaf that has a good texture and can hold up against the creamy sauce. Avoid overly soft bread, as it may become soggy.
  • Toast the Bread: Lightly toasting the bread before assembling the sandwich adds a delightful crunch. This step helps the bread maintain its texture when layered with the cheese sauce.
  • Make a Smooth Cheese Sauce: To achieve a lump-free cheese sauce, whisk continuously while adding the milk. If lumps do form, you can use an immersion blender to smooth it out.
  • Experiment with Cheeses: While Gruyère is traditional, feel free to mix in other cheeses like cheddar or mozzarella for a unique flavor. Each cheese brings its own character to the dish.
  • Season Generously: Don’t be shy with the salt and pepper. Proper seasoning enhances the flavors of the ham and cheese, making your Croque Madame even more delicious.
  • Watch the Baking Time: Keep an eye on your sandwich while it bakes. Ovens can vary, so check for that golden brown color and bubbly cheese to know when it’s done.
  • Perfect the Fried Egg: For the best fried egg, use a non-stick skillet and a little oil or butter. Cook it to your liking—whether you prefer a runny yolk or a firmer texture, it should complement the sandwich perfectly.
  • Garnish Wisely: Fresh herbs like parsley or chives not only add color but also a burst of flavor. A sprinkle on top before serving makes your dish look restaurant-worthy.
  • Serve Immediately: Croque Madame is best enjoyed fresh out of the oven. The combination of warm, melted cheese and a hot fried egg is a treat that should be savored right away.

By following these tips, you’ll be well on your way to mastering the art of making a Croque Madame. Each bite will be a delightful experience, filled with rich flavors and satisfying textures. Enjoy the process and the delicious results!

Breakdown of Time for the Croque Madame Recipe

Prep Time

Preparing your Croque Madame is a breeze! The prep time for this delightful dish is approximately 15 minutes. During this time, you will gather all your ingredients, toast the bread, and whip up the creamy cheese sauce. Having everything ready will make the cooking process smooth and enjoyable.

Cooking Time

The cooking time for the Croque Madame is about 15-20 minutes. This includes baking the assembled sandwich in the oven for 10-12 minutes until the cheese is bubbly and golden brown. Additionally, you’ll need a few minutes to fry the egg to your desired doneness. The combination of these cooking steps ensures that your sandwich is perfectly cooked and ready to serve.

Total Time

In total, you can expect to spend around 30-35 minutes from start to finish. This includes both the prep and cooking times. With such a quick turnaround, you can enjoy a delicious Croque Madame for brunch, lunch, or dinner without spending hours in the kitchen. It’s a fantastic option for busy days when you still want to indulge in a comforting meal!

Nutritional Information for the Croque Madame Recipe

Calories

When enjoying a Croque Madame, it’s important to be aware of its caloric content. Each serving of this delightful sandwich contains approximately 450 calories. This makes it a satisfying meal option, especially when paired with a light side salad or some fresh fruit. The balance of flavors and textures in this dish makes every calorie worth it!

Protein

Protein is a key component of the Croque Madame, making it a filling choice for any meal. Each serving provides about 25 grams of protein. This protein comes primarily from the ham and the egg, both of which contribute to the sandwich’s hearty nature. Including protein in your meals helps keep you feeling full and energized throughout the day.

Sodium

While enjoying your Croque Madame, it’s also essential to consider its sodium content. Each serving contains around 800 milligrams of sodium. This amount can vary based on the type of ham and cheese used. If you’re watching your sodium intake, consider using low-sodium ham or cheese alternatives. Balancing your meal with fresh vegetables can also help offset the sodium levels, making it a healthier choice overall.

FAQs about the Croque Madame Recipe

Can I make a Croque Madame recipe ahead of time?

Yes, you can prepare some components of the Croque Madame ahead of time! You can make the cheese sauce and store it in the refrigerator for up to two days. Just reheat it gently before assembling your sandwich. You can also layer the sandwich without baking it and keep it in the fridge. When you’re ready to enjoy it, simply bake it in the oven until the cheese is bubbly and golden. This makes it a convenient option for busy days!

What is the difference between a Croque Madame and a Croque Monsieur?

The main difference between a Croque Madame and a Croque Monsieur lies in the addition of the egg. A Croque Monsieur is a classic ham and cheese sandwich topped with béchamel sauce, while a Croque Madame includes a fried egg on top. The egg adds richness and a lovely visual appeal, making the Croque Madame a bit more special. Both sandwiches are delicious, but the egg is what truly sets the Croque Madame apart!

Can I use different types of cheese in the Croque Madame recipe?

Absolutely! While Gruyère cheese is traditional for a Croque Madame, you can experiment with different types of cheese to suit your taste. Cheddar, mozzarella, or even a blend of cheeses can work wonderfully. Each cheese brings its own unique flavor and texture to the dish. Just make sure to choose cheeses that melt well for that creamy, gooey goodness!

How do I make a lighter version of the Croque Madame recipe?

If you’re looking to lighten up your Croque Madame, there are a few simple adjustments you can make. First, use whole grain or low-calorie gluten-free bread instead of regular gluten-free bread. You can also opt for leaner ham or turkey instead of traditional ham. For the cheese sauce, consider using low-fat milk and reduced-fat cheese. Lastly, you can skip the egg or use an egg white instead. These changes will help reduce calories while still allowing you to enjoy this delicious dish!

Conclusion on the Croque Madame Recipe

The Croque Madame is more than just a sandwich; it’s a delightful culinary experience that brings together rich flavors and comforting textures. This French classic, with its layers of ham, melted cheese, and a perfectly fried egg, is sure to impress anyone who takes a bite. Whether you’re enjoying it for brunch, lunch, or dinner, the Croque Madame is versatile enough to fit any occasion.

By following the steps outlined in this recipe, you can create a delicious Croque Madame right in your own kitchen. The combination of gluten-free ingredients ensures that everyone can enjoy this dish, regardless of dietary restrictions. Plus, with the various variations available, such as vegetarian options or different cheese choices, you can customize it to suit your taste.

Remember to pay attention to the details, from choosing the right bread to perfecting the cheese sauce. These small touches can make a big difference in the final result. And don’t forget to serve it with a side salad or some crispy fries for a complete meal that’s sure to satisfy.

So, gather your ingredients, roll up your sleeves, and get ready to indulge in the delightful flavors of a homemade Croque Madame. It’s a dish that not only nourishes the body but also warms the heart. Enjoy every bite of this classic French treat!

Teriyaki Salmon Sushi Bake Recipe is a must-try dish!

Introduction to Teriyaki Salmon Sushi Bake Recipe

What is Teriyaki Salmon Sushi Bake?

Teriyaki Salmon Sushi Bake is a delightful twist on traditional sushi. Instead of rolling sushi by hand, this recipe combines all the delicious flavors into a warm, baked dish. It features tender salmon, seasoned sushi rice, and a savory teriyaki sauce, all baked together to create a comforting meal. This dish is perfect for gatherings or a cozy family dinner. Plus, it’s easy to prepare, making it a great option for both novice and experienced cooks.

Why You Should Try This Recipe

There are many reasons to try the Teriyaki Salmon Sushi Bake Recipe. First, it’s a fun and unique way to enjoy sushi flavors without the fuss of rolling. Second, it’s packed with nutrients, thanks to the salmon and fresh toppings like avocado and green onions. Additionally, this dish is versatile; you can easily customize it to suit your taste. Whether you prefer a spicy kick or a vegetarian option, this recipe can adapt to your preferences. Lastly, it’s a crowd-pleaser! Your family and friends will love digging into this warm, flavorful dish. So, gather your ingredients and get ready to impress everyone with your culinary skills!

Ingredients for Teriyaki Salmon Sushi Bake Recipe

To create a delicious Teriyaki Salmon Sushi Bake, you’ll need a few key ingredients. Each component plays a vital role in delivering the rich flavors and textures that make this dish so special. Here’s what you’ll need:

  • 2 cups sushi rice: This is the base of your dish, providing a sticky and flavorful foundation.
  • 2 1/2 cups water: Essential for cooking the sushi rice to perfection.
  • 1/4 cup rice vinegar: Adds a tangy flavor that complements the rice.
  • 2 tablespoons sugar: Balances the acidity of the vinegar.
  • 1 teaspoon salt: Enhances the overall taste of the rice.
  • 1 pound salmon fillet: The star of the dish, providing protein and rich flavor.
  • 1/4 cup teriyaki sauce: Adds a sweet and savory glaze to the salmon.
  • 1/2 teaspoon garlic powder: Infuses a warm, aromatic flavor.
  • 1/2 teaspoon ginger powder: Offers a hint of spice and warmth.
  • 1 avocado, sliced: Adds creaminess and freshness to the dish.
  • 1/4 cup green onions, chopped: Provides a crunchy texture and bright flavor.
  • 1 tablespoon sesame seeds: For garnish, adding a nutty flavor and visual appeal.
  • Nori sheets: Used for wrapping the sushi bake, enhancing the sushi experience.

Gather these ingredients before you start cooking. Having everything ready will make the preparation process smooth and enjoyable. Now that you know what you need, let’s move on to the step-by-step preparation of this delightful Teriyaki Salmon Sushi Bake!

Step-by-Step Preparation of Teriyaki Salmon Sushi Bake Recipe

Step 1: Preparing the Sushi Rice

To start, you need to prepare the sushi rice. First, rinse the rice under cold water. This step is crucial as it removes excess starch, ensuring your rice is fluffy. Keep rinsing until the water runs clear. Next, combine the rinsed rice and water in a medium saucepan. Bring it to a boil over medium heat. Once boiling, reduce the heat to low, cover the pot, and let it simmer for 18-20 minutes. This allows the rice to absorb all the water and become tender. After cooking, remove the pot from heat and let it sit, covered, for 10 minutes. This resting period helps the rice finish cooking and become sticky.

Step 2: Making the Teriyaki Sauce

While the rice is cooking, you can prepare the teriyaki sauce. If you’re using store-bought teriyaki sauce, you can skip this step. However, if you want to make your own, combine soy sauce, honey, and a splash of rice vinegar in a small bowl. Mix well until the honey dissolves. This homemade sauce will add a fresh touch to your dish. If you prefer a thicker sauce, you can simmer it on low heat until it reduces slightly. This will enhance the flavor and give it a nice glaze for the salmon.

Step 3: Preparing the Salmon

Now, let’s focus on the salmon. Take your salmon fillet and place it in a separate bowl. Drizzle the teriyaki sauce over the salmon, ensuring it’s well-coated. Then, sprinkle garlic powder and ginger powder on top. These spices will enhance the flavor of the fish. Preheat your oven to 375°F. Once the oven is ready, place the salmon on a baking sheet lined with parchment paper. Bake it for 15-20 minutes. The salmon is done when it flakes easily with a fork. This step is essential for achieving that tender, melt-in-your-mouth texture.

Step 4: Assembling the Sushi Bake

After the salmon is cooked, it’s time to assemble your sushi bake. Start by breaking the salmon into bite-sized pieces. Spread the cooked sushi rice evenly in a greased 9×13-inch baking dish. This will be the base of your dish. Next, layer the salmon pieces over the rice. Drizzle any remaining teriyaki sauce on top for extra flavor. This combination of rice and salmon creates a delicious foundation for your sushi bake.

Step 5: Baking the Dish

Finally, it’s time to bake the assembled dish. Place the baking dish in the oven and bake for an additional 10 minutes. This step warms everything through and allows the flavors to meld together. Once done, remove the dish from the oven and let it cool slightly. This cooling period makes it easier to serve. Your Teriyaki Salmon Sushi Bake is now ready to be topped with fresh ingredients!

Variations of Teriyaki Salmon Sushi Bake Recipe

Alternative Proteins to Use

If you want to switch things up, there are several alternative proteins you can use in your Teriyaki Salmon Sushi Bake. For instance, cooked shrimp is a fantastic option. It cooks quickly and pairs well with the teriyaki sauce. Simply replace the salmon with an equal amount of shrimp, and follow the same baking instructions. Another great choice is chicken. Use cooked, shredded chicken breast for a different flavor profile. Just make sure to coat it with the teriyaki sauce and spices before baking.

For those who enjoy a heartier option, try using crab meat. It adds a sweet and delicate flavor that complements the other ingredients beautifully. You can also use tofu for a plant-based alternative. Firm tofu works best; just press it to remove excess moisture, then cube it and marinate it in teriyaki sauce before baking. These alternatives not only provide variety but also cater to different dietary preferences, making your sushi bake even more versatile!

Vegetarian Options for Sushi Bake

Creating a vegetarian version of the Teriyaki Salmon Sushi Bake is easy and delicious! Start by replacing the salmon with a mix of vegetables. Bell peppers, zucchini, and mushrooms are excellent choices. Chop them into bite-sized pieces and toss them in teriyaki sauce, garlic powder, and ginger powder. Bake the vegetables until they are tender, about 15-20 minutes.

Another option is to use a combination of cooked quinoa and black beans. This mix provides a hearty base and is packed with protein. Season it with the same teriyaki sauce for a cohesive flavor. You can also add sliced avocado and fresh herbs like cilantro or basil for extra freshness. These vegetarian variations ensure that everyone can enjoy the delightful flavors of the Teriyaki Sushi Bake, regardless of their dietary choices!

Cooking Note for Teriyaki Salmon Sushi Bake Recipe

When preparing the Teriyaki Salmon Sushi Bake, there are a few important cooking notes to keep in mind. These tips will help you achieve the best results and ensure your dish is a hit!

First, always use high-quality sushi rice. This type of rice is sticky and helps hold the dish together. If you can’t find sushi rice, short-grain rice can be a suitable substitute. However, avoid using long-grain rice, as it won’t provide the same texture.

Next, be mindful of the salmon. Fresh salmon is ideal for this recipe, but frozen salmon can work too. Just make sure to thaw it completely before cooking. This ensures even cooking and helps maintain the fish’s flavor and texture.

Additionally, when baking the salmon, keep an eye on it. Ovens can vary in temperature, so check for doneness a few minutes early. The salmon should flake easily with a fork when it’s perfectly cooked. Overcooking can lead to dry fish, which is not what you want!

Lastly, let the dish cool slightly before serving. This cooling period allows the flavors to settle and makes it easier to cut into portions. You want to enjoy every bite of this delicious Teriyaki Salmon Sushi Bake, so taking a moment to let it rest is worth it!

By following these cooking notes, you’ll create a flavorful and satisfying Teriyaki Salmon Sushi Bake that everyone will love. Happy cooking!

Serving Suggestions for Teriyaki Salmon Sushi Bake Recipe

Ideal Side Dishes

When serving your Teriyaki Salmon Sushi Bake, consider pairing it with some delightful side dishes. These accompaniments can enhance the overall dining experience and complement the flavors of the main dish. Here are a few ideal side dishes to consider:

  • Edamame: Steamed edamame sprinkled with sea salt makes for a healthy and tasty side. It adds a nice crunch and is rich in protein.
  • Miso Soup: A warm bowl of miso soup is a classic Japanese side that pairs perfectly with sushi. Its savory flavor balances the richness of the salmon.
  • Seaweed Salad: This refreshing salad adds a unique texture and flavor. The slight tanginess of the dressing complements the teriyaki sauce beautifully.
  • Pickled Vegetables: A small serving of pickled vegetables can provide a nice contrast to the warm sushi bake. The acidity cuts through the richness of the dish.
  • Steamed Broccoli: Lightly steamed broccoli adds a pop of color and nutrients. Drizzle a little sesame oil for added flavor.

These side dishes not only enhance the meal but also add variety to your table. Feel free to mix and match based on your preferences and what you have on hand!

Pairing with Beverages

Choosing the right beverages to accompany your Teriyaki Salmon Sushi Bake can elevate your dining experience. Here are some excellent beverage options to consider:

  • Green Tea: A classic choice, green tea is light and refreshing. Its subtle flavors complement the dish without overpowering it.
  • Sake: For a more authentic experience, serve sake. This Japanese rice wine can be enjoyed warm or chilled, depending on your preference.
  • Japanese Beer: A crisp Japanese lager, like Asahi or Sapporo, pairs well with the savory flavors of the sushi bake.
  • Sparkling Water: If you prefer a non-alcoholic option, sparkling water with a slice of lemon or lime is refreshing and cleanses the palate.
  • Fruit-Infused Iced Tea: A lightly sweetened iced tea with fruit infusions can add a refreshing twist to your meal.

These beverage pairings will enhance the flavors of your Teriyaki Salmon Sushi Bake and create a delightful dining experience. Enjoy your meal with family and friends!

Tips for Perfecting Your Teriyaki Salmon Sushi Bake Recipe

To ensure your Teriyaki Salmon Sushi Bake turns out perfectly every time, consider these helpful tips. They will guide you through the cooking process and help you achieve the best flavors and textures.

First, always rinse your sushi rice thoroughly. This step is crucial for removing excess starch. Rinsing until the water runs clear will result in fluffy rice that holds together well. If you skip this step, your rice may become gummy.

Next, pay attention to the cooking time for the rice. Each stove and pot can vary, so keep an eye on it. If the rice is not tender after the suggested time, add a little more water and continue cooking. You want it to be soft but not mushy.

When preparing the salmon, consider marinating it for a longer time if you have the chance. Letting it sit in the teriyaki sauce for 30 minutes to an hour can enhance the flavor. Just remember to keep it in the refrigerator during this time.

For a beautiful presentation, use fresh toppings. Sliced avocado, chopped green onions, and sesame seeds not only add flavor but also make your dish visually appealing. Arrange them artfully on top of the sushi bake before serving.

If you want to add a bit of crunch, consider topping your dish with crispy fried onions or tempura flakes. These additions provide a delightful texture contrast to the soft rice and salmon.

Lastly, don’t rush the cooling process. Allowing the dish to cool slightly before serving helps the flavors meld together. It also makes it easier to cut into portions. Enjoying your Teriyaki Salmon Sushi Bake at the right temperature will enhance the overall experience.

By following these tips, you’ll create a delicious and impressive Teriyaki Salmon Sushi Bake that everyone will love. Happy cooking!

Breakdown of Time for Teriyaki Salmon Sushi Bake Recipe

Prep Time

The prep time for the Teriyaki Salmon Sushi Bake is approximately 30 minutes. This includes gathering your ingredients, rinsing the sushi rice, and preparing the salmon. Taking your time during this stage ensures that everything is ready for cooking. It’s a good idea to measure out all your ingredients beforehand. This way, you can focus on the cooking process without any interruptions.

Cooking Time

The cooking time for this dish is about 30-40 minutes. This includes 18-20 minutes for cooking the sushi rice and an additional 15-20 minutes for baking the salmon. After assembling the sushi bake, you’ll need to bake it for another 10 minutes. This step allows all the flavors to meld together beautifully. Keep an eye on the salmon to ensure it’s perfectly cooked and flakes easily.

Total Time

In total, you can expect the Teriyaki Salmon Sushi Bake to take around 1 hour to 1 hour and 10 minutes from start to finish. This includes both prep and cooking times. It’s a relatively quick dish to prepare, especially considering the delicious flavors and satisfying results. Whether you’re making it for a family dinner or a gathering with friends, this time investment is well worth it!

Nutritional Information for Teriyaki Salmon Sushi Bake Recipe

Calories

When it comes to enjoying a delicious meal, knowing the calorie content can help you make informed choices. Each serving of the Teriyaki Salmon Sushi Bake contains approximately 350 calories. This makes it a satisfying option without being overly heavy. The combination of salmon, rice, and fresh toppings provides a balanced meal that can fit into various dietary plans.

Protein Content

Protein is essential for maintaining muscle health and overall well-being. In this recipe, each serving offers about 20 grams of protein. The salmon is a fantastic source of high-quality protein, which is vital for growth and repair in the body. Additionally, the sushi rice contributes a small amount of protein, making this dish a great choice for those looking to boost their protein intake.

Sodium Levels

Monitoring sodium intake is important for maintaining heart health. Each serving of the Teriyaki Salmon Sushi Bake contains around 600 milligrams of sodium. This level is reasonable for a flavorful dish, especially considering the use of teriyaki sauce. If you are watching your sodium intake, consider using a low-sodium teriyaki sauce or adjusting the amount used in the recipe. This way, you can enjoy the delicious flavors while keeping your sodium levels in check.

FAQs about Teriyaki Salmon Sushi Bake Recipe

Can I use frozen salmon for this recipe?

Yes, you can use frozen salmon for the Teriyaki Salmon Sushi Bake Recipe! Just make sure to thaw it completely before cooking. Thawing ensures even cooking and helps maintain the salmon’s flavor and texture. You can thaw the salmon overnight in the refrigerator or use the quick-thaw method by placing it in a sealed bag and submerging it in cold water for about 30 minutes. Once thawed, follow the recipe as usual for delicious results!

How do I store leftovers of Teriyaki Salmon Sushi Bake?

Storing leftovers of your Teriyaki Salmon Sushi Bake is easy! Allow the dish to cool completely before transferring it to an airtight container. You can store it in the refrigerator for up to 3 days. When you’re ready to enjoy it again, simply reheat individual portions in the microwave or in the oven at 350°F until warmed through. This way, you can savor the flavors of your sushi bake even after the first serving!

Can I make this recipe ahead of time?

Absolutely! You can prepare the Teriyaki Salmon Sushi Bake ahead of time. To do this, follow the recipe up to the assembly step. After layering the salmon over the sushi rice, cover the baking dish tightly with plastic wrap or aluminum foil. You can store it in the refrigerator for up to 24 hours before baking. When you’re ready to serve, simply remove the cover and bake as directed. This makes it a convenient option for meal prep or entertaining!

What can I substitute for sushi rice?

If you can’t find sushi rice, there are a few suitable substitutes. Short-grain rice is the best alternative, as it has a similar sticky texture. You can also use medium-grain rice if short-grain is unavailable. However, avoid long-grain rice, as it won’t provide the same consistency. Another option is quinoa, which offers a unique flavor and is gluten-free. Just remember to adjust the cooking time and water ratio according to the type of rice or grain you choose!

Conclusion on Teriyaki Salmon Sushi Bake Recipe

In conclusion, the Teriyaki Salmon Sushi Bake Recipe is a delightful and innovative way to enjoy the classic flavors of sushi without the hassle of rolling. This dish combines tender salmon, seasoned sushi rice, and a savory teriyaki sauce, creating a warm and comforting meal that is perfect for any occasion. Whether you’re hosting a dinner party or simply enjoying a cozy night in, this recipe is sure to impress your family and friends.

Not only is this sushi bake easy to prepare, but it also offers versatility. You can customize it with different proteins or make it vegetarian, ensuring that everyone at your table can enjoy it. The fresh toppings, like avocado and green onions, add a burst of flavor and texture, making each bite a delightful experience.

As you embark on your culinary journey with this Teriyaki Salmon Sushi Bake, remember to follow the tips and variations provided. They will help you create a dish that is not only delicious but also visually appealing. With its balanced nutritional profile, this recipe is a great addition to your meal rotation.

So, gather your ingredients, roll up your sleeves, and get ready to create a dish that will have everyone asking for seconds. Enjoy the process, and most importantly, enjoy the delicious results of your hard work. Happy cooking!

Roasted Tandoori Chicken Recipe is a must-try dish!

Introduction to Roasted Tandoori Chicken Recipe

Roasted Tandoori Chicken is a delightful dish that brings the vibrant flavors of Indian cuisine right to your kitchen. This recipe is not just about cooking chicken; it’s about creating a culinary experience that tantalizes your taste buds. The combination of spices, yogurt, and marination creates a juicy, flavorful chicken that is both aromatic and satisfying. Whether you’re hosting a dinner party or enjoying a family meal, this dish is sure to impress.

What Makes Roasted Tandoori Chicken Unique?

What sets Roasted Tandoori Chicken apart is its unique blend of spices and the marination process. The use of yogurt not only tenderizes the chicken but also infuses it with rich flavors. Tandoori masala, a special spice mix, adds warmth and depth, making each bite a burst of flavor. The high roasting temperature ensures that the skin becomes crispy while keeping the meat juicy. This contrast in textures is what makes this dish so appealing.

Additionally, the vibrant color of the chicken, often a deep red or orange, comes from spices like paprika and turmeric. This visual appeal, combined with the aromatic spices, makes Roasted Tandoori Chicken a feast for the senses. It’s not just a meal; it’s an experience that brings people together around the table.

The History of Tandoori Cooking

The roots of tandoori cooking can be traced back to ancient India, where food was traditionally cooked in clay ovens called tandoors. These ovens are heated with charcoal or wood, giving the food a distinct smoky flavor. Tandoori cooking has evolved over centuries, influenced by various regions and cultures. It became popular in the Indian subcontinent and has since spread worldwide.

Historically, tandoori cooking was used for meats, breads, and even vegetables. The method of marinating food in spices and yogurt before cooking in a tandoor has been passed down through generations. Today, Roasted Tandoori Chicken is a beloved dish not only in India but also in many parts of the world. It represents the rich culinary heritage of Indian cuisine, showcasing the art of blending spices and cooking techniques.

In summary, Roasted Tandoori Chicken is a unique dish with a rich history. Its flavorful marinade and cooking method create a delicious meal that is perfect for any occasion. Get ready to dive into the next sections, where we will explore the ingredients and preparation steps to make this delightful dish!

Ingredients for Roasted Tandoori Chicken Recipe

To create the perfect Roasted Tandoori Chicken, you’ll need a selection of fresh ingredients that come together to form a flavorful marinade. Here’s what you’ll need:

  • 3 pounds bone-in, skin-on chicken pieces: Legs and thighs work best for this recipe, as they remain juicy and tender during cooking.
  • 1 cup plain yogurt: This acts as the base of the marinade, helping to tenderize the chicken and infuse it with flavor.
  • 2 tablespoons vegetable oil: This adds moisture and helps achieve a crispy skin.
  • 2 tablespoons lemon juice: Fresh lemon juice brightens the flavors and adds a tangy kick.
  • 4 cloves garlic, minced: Garlic adds a robust flavor that complements the spices.
  • 1 tablespoon fresh ginger, grated: Ginger brings warmth and a hint of spice to the marinade.
  • 2 tablespoons tandoori masala: This special spice blend is key to achieving the authentic tandoori flavor.
  • 1 teaspoon ground cumin: Cumin adds an earthy depth to the dish.
  • 1 teaspoon paprika: This contributes to the vibrant color and mild sweetness.
  • 1 teaspoon turmeric: Turmeric not only adds color but also has health benefits.
  • 1 teaspoon cayenne pepper: Adjust this according to your spice preference for a kick of heat.
  • 1 teaspoon salt: Essential for enhancing all the flavors in the dish.
  • 1 teaspoon black pepper: Adds a subtle warmth and depth.
  • Fresh cilantro, for garnish (optional): A sprinkle of cilantro adds a fresh touch when serving.
  • Lemon wedges, for serving (optional): These can be squeezed over the chicken for an extra burst of flavor.

Gathering these ingredients will set you on the right path to creating a delicious Roasted Tandoori Chicken. Each component plays a vital role in building the dish’s rich flavors and textures. Now that you have everything you need, let’s move on to the step-by-step preparation!

Step-by-Step Preparation of Roasted Tandoori Chicken Recipe

Step 1: Marinating the Chicken

The first step in creating your Roasted Tandoori Chicken is marinating the chicken pieces. This is crucial for infusing flavor and ensuring tenderness. Start by taking a large bowl and combining all the marinade ingredients. This includes yogurt, vegetable oil, lemon juice, minced garlic, grated ginger, tandoori masala, ground cumin, paprika, turmeric, cayenne pepper, salt, and black pepper. Mix everything well until you have a smooth marinade.

Next, add the chicken pieces to the bowl. Make sure each piece is thoroughly coated with the marinade. This is where the magic happens! Cover the bowl with plastic wrap and place it in the refrigerator. For the best results, let the chicken marinate for at least 4 hours, but overnight is even better. This allows the flavors to penetrate deeply into the meat, making it deliciously flavorful.

Step 2: Preparing the Tandoor or Oven

While the chicken is marinating, it’s time to prepare your cooking environment. Preheat your oven to 425°F (220°C). If you have a tandoor, you can use that for an authentic experience. However, an oven works perfectly for this recipe. Line a baking sheet with aluminum foil for easy cleanup. Then, place a wire rack on top of the baking sheet. This setup allows the heat to circulate around the chicken, ensuring even cooking and crispy skin.

Step 3: Roasting the Chicken

Once the chicken has marinated, it’s time to roast it. Remove the chicken pieces from the marinade, allowing any excess to drip off. Place the chicken skin side up on the wire rack. This positioning helps the skin get crispy while the meat stays juicy. Roast the chicken in the preheated oven for about 35-45 minutes. You’ll know it’s done when the internal temperature reaches 165°F (75°C) and the skin is golden brown and crispy.

Keep an eye on the chicken as it roasts. If you notice the skin browning too quickly, you can cover it loosely with aluminum foil to prevent burning. This way, you’ll achieve that perfect balance of crispy skin and juicy meat.

Step 4: Serving the Roasted Tandoori Chicken

After roasting, remove the chicken from the oven and let it rest for about 5-10 minutes. This resting period allows the juices to redistribute, making the chicken even more succulent. When ready to serve, garnish the chicken with fresh cilantro for a pop of color and flavor. You can also serve it with lemon wedges on the side. A squeeze of lemon adds a refreshing zing that complements the spices beautifully.

Now, your Roasted Tandoori Chicken is ready to be enjoyed! Serve it hot and watch as your family and friends savor every bite. This dish is perfect for gatherings, family dinners, or even a cozy night in. Enjoy the delightful flavors and the joy of sharing a delicious meal!

Variations of Roasted Tandoori Chicken Recipe

While the classic Roasted Tandoori Chicken is a favorite, there are many ways to enjoy this dish. Whether you’re looking for vegetarian alternatives or want to experiment with different marinades, there’s something for everyone. Let’s explore some exciting variations!

Vegetarian Alternatives

If you’re looking for a vegetarian option, you can easily adapt the Roasted Tandoori Chicken recipe. Instead of chicken, consider using:

  • Paneer: This Indian cheese absorbs flavors well and becomes deliciously crispy when roasted.
  • Tofu: Firm tofu is a great substitute. Press it to remove excess moisture, then marinate and roast.
  • Vegetables: Cauliflower, bell peppers, and mushrooms can be marinated and roasted for a colorful dish.

For these vegetarian options, follow the same marination process. Adjust the cooking time as needed, especially for vegetables, which may require less time to roast. The result will be a flavorful and satisfying meal that everyone can enjoy!

Different Marinade Options

Experimenting with marinades can take your Roasted Tandoori Chicken to new heights. Here are a few ideas to try:

  • Spicy Yogurt Marinade: Add more cayenne pepper or include chopped green chilies for an extra kick.
  • Coconut Milk Marinade: Substitute yogurt with coconut milk for a creamy, tropical twist.
  • Herb Marinade: Incorporate fresh herbs like mint or basil for a refreshing flavor profile.

Feel free to mix and match spices to create your unique blend. The beauty of this recipe lies in its versatility. No matter which variation you choose, you’re sure to enjoy a delicious meal that showcases the wonderful flavors of tandoori cooking!

Cooking Note for Roasted Tandoori Chicken Recipe

When preparing Roasted Tandoori Chicken, there are a few important cooking notes to keep in mind. These tips will help ensure that your chicken turns out perfectly every time, with juicy meat and crispy skin.

First, marination is key. The longer you marinate the chicken, the more flavorful it will be. While a minimum of 4 hours is recommended, overnight marination is ideal. This allows the spices to penetrate deeply into the meat, enhancing the overall taste.

Next, pay attention to the temperature of your oven. Preheating it to 425°F (220°C) is crucial for achieving that crispy skin. If your oven runs hot, consider checking the chicken a few minutes early to prevent overcooking. Using a meat thermometer is a great way to ensure the chicken reaches the safe internal temperature of 165°F (75°C).

Another important note is to let the chicken rest after roasting. This resting period allows the juices to redistribute throughout the meat, making it more tender and juicy. If you cut into the chicken too soon, you may lose those delicious juices, resulting in drier meat.

Lastly, don’t hesitate to customize your cooking method. If you have a grill, you can achieve a smoky flavor by grilling the marinated chicken instead of roasting it. Just be sure to monitor the cooking time closely, as grilling may cook the chicken faster than roasting.

By following these cooking notes, you’ll be well on your way to creating a mouthwatering Roasted Tandoori Chicken that will impress your family and friends. Enjoy the process and the delightful flavors that come with it!

Serving Suggestions for Roasted Tandoori Chicken Recipe

Once your Roasted Tandoori Chicken is ready, it’s time to think about what to serve alongside it. The right side dishes and accompaniments can elevate your meal, making it even more enjoyable. Here are some fantastic suggestions to complement your delicious chicken.

Side Dishes to Pair

When it comes to side dishes, you have plenty of options that pair beautifully with Roasted Tandoori Chicken. Here are a few favorites:

  • Basmati Rice: Fluffy basmati rice is a classic choice. It soaks up the flavors of the chicken and adds a nice texture to the meal.
  • Naan Bread: Soft, warm naan is perfect for scooping up the chicken and any sauces. You can also try garlic naan for an extra flavor boost.
  • Cucumber Salad: A refreshing cucumber salad with yogurt dressing balances the spices of the chicken. It adds a cool crunch that complements the dish.
  • Roasted Vegetables: Seasonal roasted vegetables, like carrots and bell peppers, add color and nutrition to your plate.

These side dishes not only enhance the meal but also provide a variety of flavors and textures that everyone will love. Feel free to mix and match based on your preferences!

Best Accompaniments

In addition to side dishes, consider these accompaniments to round out your Roasted Tandoori Chicken experience:

  • Mint Chutney: A tangy mint chutney adds a burst of freshness. It’s perfect for dipping or drizzling over the chicken.
  • Raita: This yogurt-based side dish, often made with cucumber and spices, cools down the heat from the chicken and adds creaminess.
  • Lemon Wedges: Fresh lemon wedges are a must! A squeeze of lemon over the chicken brightens the flavors and adds a zesty kick.
  • Pickles: Indian pickles, known as achar, can add a spicy and tangy element to your meal, enhancing the overall flavor profile.

These accompaniments not only complement the Roasted Tandoori Chicken but also create a well-rounded meal that is sure to impress your guests. Enjoy the delightful combination of flavors and textures as you savor this delicious dish!

Tips for Perfect Roasted Tandoori Chicken Recipe

Common Mistakes to Avoid

When making Roasted Tandoori Chicken, avoiding common mistakes can make a big difference in the final result. Here are some pitfalls to watch out for:

  • Skipping the Marination: One of the biggest mistakes is not marinating the chicken long enough. Marination is essential for flavor and tenderness. Aim for at least 4 hours, but overnight is best.
  • Using Cold Chicken: Cooking chicken straight from the fridge can lead to uneven cooking. Let the chicken sit at room temperature for about 30 minutes before roasting.
  • Not Preheating the Oven: Failing to preheat your oven can result in soggy skin. Always preheat to 425°F (220°C) for that perfect crispy texture.
  • Overcrowding the Baking Sheet: Placing too many chicken pieces on the baking sheet can trap steam, preventing crispiness. Ensure there’s space between each piece for even cooking.
  • Ignoring Internal Temperature: Relying solely on cooking time can lead to undercooked or overcooked chicken. Use a meat thermometer to check for an internal temperature of 165°F (75°C).

By avoiding these common mistakes, you’ll be on your way to creating a perfectly roasted tandoori chicken that is juicy and flavorful!

Enhancing Flavor Profiles

To take your Roasted Tandoori Chicken to the next level, consider these tips for enhancing flavor profiles:

  • Experiment with Spices: Don’t hesitate to adjust the spice levels in your marinade. Adding more cayenne or including spices like garam masala can elevate the flavor.
  • Incorporate Fresh Herbs: Adding fresh herbs like cilantro or mint to the marinade can provide a fresh burst of flavor. You can also sprinkle them on top before serving.
  • Use Citrus Zest: Adding lemon or lime zest to the marinade can enhance the citrus flavor, making the chicken even more vibrant.
  • Try Different Yogurts: Using flavored yogurt, like garlic or herb-infused, can add an extra layer of taste to your marinade.
  • Marinate with a Twist: For a unique twist, consider adding a splash of your favorite hot sauce or a bit of honey for sweetness to balance the spices.

These enhancements will not only deepen the flavors but also make your Roasted Tandoori Chicken a standout dish. Enjoy the process of experimenting and discovering new flavor combinations!

Breakdown of Time for Roasted Tandoori Chicken Recipe

Prep Time

The prep time for Roasted Tandoori Chicken is relatively straightforward. You’ll spend about 15-20 minutes gathering your ingredients and mixing the marinade. This includes chopping garlic and ginger, measuring spices, and combining everything in a bowl. Once the marinade is ready, you’ll need to coat the chicken pieces thoroughly. After this, cover the bowl and place it in the refrigerator. Remember, the longer you marinate, the better the flavor!

Cooking Time

When it comes to cooking, the roasting time is approximately 35-45 minutes. Preheating your oven to 425°F (220°C) is essential for achieving that crispy skin. During this time, keep an eye on the chicken to ensure it cooks evenly. Using a meat thermometer will help you check for the perfect internal temperature of 165°F (75°C). This way, you can be sure your chicken is both safe to eat and deliciously juicy.

Total Time

In total, you should plan for about 4 hours and 15 minutes to make Roasted Tandoori Chicken. This includes the marination time of at least 4 hours and the cooking time of 35-45 minutes. If you choose to marinate overnight, you can prepare the chicken the day before, making it a convenient option for busy schedules. With this breakdown, you can easily fit this flavorful dish into your meal planning!

Nutritional Information for Roasted Tandoori Chicken Recipe

Understanding the nutritional content of your meals is essential for maintaining a balanced diet. Roasted Tandoori Chicken is not only delicious but also packed with nutrients. Here’s a breakdown of the nutritional information per serving, which is based on a standard serving size of one piece of chicken.

Calories

Each serving of Roasted Tandoori Chicken contains approximately 360 calories. This makes it a satisfying option for a main dish without being overly heavy. The combination of protein and healthy fats helps keep you full and energized throughout the day.

Protein Content

One of the standout features of Roasted Tandoori Chicken is its high protein content. Each serving provides about 30 grams of protein. This is beneficial for muscle repair and growth, making it an excellent choice for those who are active or looking to maintain a healthy lifestyle.

Sodium Levels

In terms of sodium, each serving contains around 600 milligrams. While this is a moderate amount, it’s important to be mindful of your overall sodium intake, especially if you are watching your salt consumption. You can reduce sodium levels by using low-sodium yogurt and adjusting the salt in the marinade to suit your dietary needs.

Overall, Roasted Tandoori Chicken is a nutritious option that can fit well into a balanced diet. With its rich flavors and health benefits, it’s a dish that you can enjoy guilt-free!

FAQs about Roasted Tandoori Chicken Recipe

Can I use boneless chicken for this recipe?

Yes, you can use boneless chicken for your Roasted Tandoori Chicken. Boneless chicken cooks faster than bone-in pieces, so be sure to adjust the cooking time. Typically, boneless chicken will take about 25-30 minutes to roast at 425°F (220°C). Always check the internal temperature to ensure it reaches 165°F (75°C) for safe consumption.

How long should I marinate the chicken?

For the best flavor and tenderness, marinate the chicken for at least 4 hours. However, marinating overnight is highly recommended. This allows the spices and yogurt to penetrate deeply into the meat, resulting in a more flavorful and juicy chicken. If you’re short on time, even a 30-minute marinade can still enhance the taste, but longer is always better!

What can I substitute for yogurt in the marinade?

If you need a substitute for yogurt, there are several options you can try. Sour cream works well and provides a similar tangy flavor. Alternatively, you can use buttermilk, which will also tenderize the chicken. For a dairy-free option, consider using coconut milk or a plant-based yogurt. These alternatives will still give you a deliciously marinated chicken!

Is it possible to grill the chicken instead of roasting?

Absolutely! Grilling the chicken is a fantastic way to achieve a smoky flavor that complements the spices beautifully. If you choose to grill, preheat your grill to medium-high heat. Cook the marinated chicken for about 20-30 minutes, turning occasionally, until it reaches the safe internal temperature of 165°F (75°C). Grilling adds a delightful char and enhances the overall taste of the Roasted Tandoori Chicken.

Conclusion on Roasted Tandoori Chicken Recipe

In conclusion, the Roasted Tandoori Chicken recipe is a wonderful way to bring the rich flavors of Indian cuisine into your home. This dish is not only easy to prepare but also offers a delightful combination of spices that tantalize the taste buds. The marination process is key, allowing the chicken to absorb all the aromatic flavors, resulting in a juicy and tender meal.

Whether you’re cooking for a special occasion or simply enjoying a family dinner, Roasted Tandoori Chicken is sure to impress. Its vibrant color and enticing aroma will have everyone gathering around the table. Plus, with the variety of side dishes and accompaniments suggested, you can create a well-rounded meal that caters to everyone’s tastes.

Don’t hesitate to experiment with different marinades and variations, as this recipe is versatile and can be adapted to suit your preferences. From vegetarian alternatives to unique spice blends, the possibilities are endless. Remember to follow the tips for perfecting your chicken, and you’ll be well on your way to mastering this delicious dish.

So, gather your ingredients, fire up the oven, and get ready to enjoy a flavorful journey with Roasted Tandoori Chicken. It’s a dish that not only nourishes the body but also brings joy and connection to the dining experience. Happy cooking!

Black Pepper Chicken Recipe is a must-try dish!

Introduction to Black Pepper Chicken Recipe

Welcome to the delightful world of Black Pepper Chicken! This dish is not just a meal; it’s an experience that brings together vibrant flavors and a touch of spice. Whether you’re a seasoned chef or a beginner in the kitchen, this recipe is easy to follow and guarantees a delicious outcome. With its tender chicken pieces coated in a savory sauce, Black Pepper Chicken is sure to become a favorite in your household.

What Makes Black Pepper Chicken Unique?

What sets Black Pepper Chicken apart from other chicken dishes? The answer lies in its bold flavor profile. The star ingredient, black pepper, adds a warm, spicy kick that elevates the dish. Combined with soy sauce, garlic, and ginger, the flavors meld beautifully, creating a savory and aromatic experience. The crunch of fresh vegetables like bell peppers and onions adds texture, making each bite satisfying. This dish is not only tasty but also visually appealing, with its colorful ingredients that make it a feast for the eyes.

The Origins of Black Pepper Chicken

Black Pepper Chicken has roots in Asian cuisine, particularly in Chinese cooking. It showcases the use of black pepper, which is a staple spice in many Asian dishes. The dish has evolved over time, with various regions adding their unique twists. In some cultures, it’s common to find it served with rice or noodles, while others may enjoy it as part of a larger meal. Regardless of its variations, the essence of Black Pepper Chicken remains the same: a delicious, peppery delight that brings people together around the dinner table.

Ingredients for Black Pepper Chicken Recipe

To create a mouthwatering Black Pepper Chicken, you’ll need a selection of fresh ingredients. Each component plays a vital role in building the dish’s rich flavors. Here’s what you’ll need:

  • 1 pound boneless, skinless chicken breasts, cut into bite-sized pieces
  • 2 tablespoons soy sauce
  • 1 tablespoon cornstarch
  • 2 tablespoons vegetable oil
  • 1 medium onion, sliced
  • 1 bell pepper, sliced (any color)
  • 3 cloves garlic, minced
  • 1 tablespoon fresh ginger, minced
  • 1 tablespoon black pepper (adjust to taste)
  • 2 tablespoons oyster sauce
  • 1 tablespoon rice vinegar
  • 1 tablespoon sugar
  • 1/4 cup green onions, chopped for garnish

These ingredients come together to create a dish that is not only flavorful but also nutritious. The chicken provides a great source of protein, while the vegetables add essential vitamins and minerals. The combination of soy sauce and oyster sauce gives the dish a savory depth, while the black pepper adds that signature kick. Feel free to adjust the amount of black pepper based on your spice preference. Now that you have your ingredients ready, let’s move on to the preparation steps!

Step-by-Step Preparation of Black Pepper Chicken Recipe

Now that you have gathered all your ingredients, it’s time to dive into the cooking process! This step-by-step guide will help you create a delicious Black Pepper Chicken that is sure to impress. Let’s get started!

Step 1: Marinating the Chicken

First, take your bite-sized chicken pieces and place them in a medium bowl. Add the soy sauce and cornstarch to the chicken. The soy sauce will infuse flavor, while the cornstarch helps to tenderize the meat. Mix everything well until the chicken is evenly coated. Cover the bowl and let it marinate for at least 15 minutes. This step is crucial as it allows the flavors to penetrate the chicken, making it juicy and tasty.

Step 2: Preparing the Vegetables

While the chicken is marinating, it’s time to prepare your vegetables. Slice the onion and bell pepper into thin strips. You can choose any color of bell pepper you like, as they all add a unique flavor. Next, mince the garlic and ginger. These aromatic ingredients will enhance the dish’s overall taste. Having everything prepped in advance will make the cooking process smoother and quicker.

Step 3: Cooking the Chicken

Once the chicken has marinated, heat the vegetable oil in a large skillet or wok over medium-high heat. When the oil is hot, carefully add the marinated chicken to the skillet. Cook the chicken for about 5-7 minutes, stirring occasionally. You want the chicken to be browned and cooked through. Once done, remove the chicken from the skillet and set it aside. This step ensures that the chicken remains tender and flavorful.

Step 4: Combining Ingredients

In the same skillet, add the sliced onion and bell pepper. Stir-fry them for about 3-4 minutes until they start to soften. Then, add the minced garlic and ginger, cooking for an additional 1-2 minutes until fragrant. This combination of vegetables will add color and crunch to your dish. After the vegetables are cooked, return the chicken to the skillet. Now, add the black pepper, oyster sauce, rice vinegar, and sugar. Stir everything well to combine, allowing the flavors to meld together. Cook for another 2-3 minutes until everything is heated through.

Step 5: Final Touches

Once your Black Pepper Chicken is cooked, it’s time for the final touches! Remove the skillet from heat and garnish the dish with chopped green onions. This adds a fresh flavor and a pop of color. Your Black Pepper Chicken is now ready to be served! Enjoy it hot, and watch as your family and friends savor every bite.

Variations of Black Pepper Chicken Recipe

While the classic Black Pepper Chicken is a delight on its own, there are several variations you can try. These adaptations allow you to explore different flavors and cater to various dietary preferences. Let’s take a look at two popular variations: Spicy Black Pepper Chicken and Vegetarian Black Pepper Chicken.

Spicy Black Pepper Chicken Variation

If you love a bit of heat, the Spicy Black Pepper Chicken variation is perfect for you! To make this dish spicier, simply add sliced jalapeños or a dash of chili flakes during the cooking process. You can also increase the amount of black pepper to suit your taste. This variation not only enhances the flavor but also adds an exciting kick that spice lovers will enjoy. Serve it with a cooling side, like cucumber salad, to balance the heat!

Vegetarian Black Pepper Chicken Alternative

For those who prefer a meat-free option, the Vegetarian Black Pepper Chicken is a fantastic alternative. Instead of chicken, you can use tofu or tempeh as your protein source. Cut the tofu into bite-sized cubes and marinate it just like you would with chicken. The cooking process remains the same, allowing the tofu to absorb all the delicious flavors. You can also add more vegetables, such as broccoli or snap peas, to make the dish even more colorful and nutritious. This vegetarian version is not only satisfying but also packed with plant-based goodness!

Cooking Note for Black Pepper Chicken Recipe

When preparing your Black Pepper Chicken, there are a few important cooking notes to keep in mind. These tips will help you achieve the best flavor and texture, ensuring your dish turns out perfectly every time.

First, make sure to use a large skillet or wok. This allows for even cooking and prevents overcrowding. If the pan is too small, the chicken may steam instead of sear, resulting in a less desirable texture. A well-heated pan is essential for achieving that golden-brown color on the chicken.

Next, don’t skip the marinating step! Allowing the chicken to soak in the soy sauce and cornstarch mixture enhances its flavor and tenderness. If you have more time, consider marinating the chicken for up to an hour. This extra time will deepen the flavors even further.

Also, be mindful of the cooking time. Overcooking the chicken can lead to dryness. Aim for a juicy, tender result by checking the chicken for doneness after about 5-7 minutes. It should be cooked through but still moist.

Lastly, feel free to adjust the seasoning to your liking. The beauty of this recipe lies in its flexibility. If you prefer a milder flavor, reduce the amount of black pepper or omit the chili flakes in the spicy variation. Taste as you go, and make it your own!

By following these cooking notes, you’ll be well on your way to creating a delicious Black Pepper Chicken that will impress your family and friends. Happy cooking!

Serving Suggestions for Black Pepper Chicken Recipe

Once your Black Pepper Chicken is ready, it’s time to think about how to serve it. The right side dishes can elevate your meal and create a well-rounded dining experience. Here are some ideal side dishes and pairing options that complement the flavors of Black Pepper Chicken beautifully.

Ideal Side Dishes

When it comes to side dishes, you have plenty of delicious options to choose from. Here are a few that pair wonderfully with Black Pepper Chicken:

  • Steamed Vegetables: A mix of broccoli, carrots, and snap peas adds color and nutrition. The freshness of the vegetables balances the savory flavors of the chicken.
  • Stir-Fried Bok Choy: This leafy green is a classic in Asian cuisine. Stir-frying bok choy with garlic and a splash of soy sauce makes for a tasty side.
  • Asian Slaw: A crunchy slaw made with cabbage, carrots, and a sesame dressing provides a refreshing contrast to the warm chicken.
  • Spring Rolls: These crispy rolls filled with vegetables or shrimp make a delightful appetizer or side dish that complements the main course.

These side dishes not only enhance the meal but also add a variety of textures and flavors, making your dining experience more enjoyable.

Pairing with Rice or Noodles

Black Pepper Chicken pairs exceptionally well with rice or noodles, making them perfect accompaniments. Here are some options to consider:

  • Steamed Jasmine Rice: This fragrant rice is a classic choice. Its subtle flavor allows the bold taste of the chicken to shine.
  • Fried Rice: For a heartier option, try serving your Black Pepper Chicken over fried rice. The combination of flavors will be a hit!
  • Rice Noodles: If you prefer noodles, rice noodles are a great choice. They soak up the sauce beautifully and add a delightful chewiness.
  • Egg Noodles: These noodles are rich and satisfying. Toss them with a bit of soy sauce for extra flavor before serving with the chicken.

Whether you choose rice or noodles, they will soak up the delicious sauce from the Black Pepper Chicken, making every bite a flavorful experience. Enjoy your meal with family and friends, and watch as they savor the delightful combination of flavors!

Tips for Perfecting Your Black Pepper Chicken Recipe

To make your Black Pepper Chicken truly shine, consider these helpful tips. They will guide you in selecting the best ingredients and adjusting flavors to suit your taste. With these suggestions, you’ll be on your way to creating a dish that everyone will love!

Choosing the Right Chicken

When it comes to chicken, quality matters. Opt for fresh, boneless, skinless chicken breasts for the best results. They are tender and cook quickly, making them perfect for stir-frying. If you prefer a richer flavor, you can also use chicken thighs. They have more fat, which adds juiciness to the dish.

Before cooking, ensure the chicken is cut into uniform bite-sized pieces. This helps them cook evenly. If you have time, consider marinating the chicken for longer than 15 minutes. A longer marination allows the flavors to penetrate deeper, resulting in a more flavorful dish.

Adjusting Spice Levels

Black Pepper Chicken is known for its bold flavor, but you can easily adjust the spice levels to your liking. If you enjoy a milder taste, start with less black pepper. You can always add more later if you want extra heat. Remember, it’s easier to add spice than to take it away!

For those who love a kick, consider adding sliced jalapeños or a sprinkle of chili flakes during cooking. This will enhance the dish’s spiciness without overpowering the other flavors. Always taste as you go, and adjust the seasoning to find the perfect balance for your palate.

By following these tips, you’ll be well on your way to mastering the art of Black Pepper Chicken. Enjoy the process, and don’t hesitate to experiment with flavors to make this dish your own!

Breakdown of Time for Black Pepper Chicken Recipe

Understanding the time required for each step in the Black Pepper Chicken recipe can help you plan your cooking efficiently. Here’s a breakdown of the time you’ll need for preparation and cooking:

Prep Time

The prep time for this Black Pepper Chicken recipe is approximately 20 minutes. This includes:

  • Marinating the chicken: 15 minutes
  • Preparing the vegetables: 5 minutes

During the marinating time, you can prepare your vegetables, making the process smooth and efficient.

Cooking Time

The cooking time for Black Pepper Chicken is about 15 minutes. This consists of:

  • Cooking the chicken: 5-7 minutes
  • Stir-frying the vegetables: 3-4 minutes
  • Combining and heating everything together: 2-3 minutes

With a hot skillet, the chicken cooks quickly, ensuring a juicy and tender result.

Total Time

In total, you can expect the entire process to take around 35 minutes. This includes both prep and cooking time. It’s a quick and easy meal that’s perfect for busy weeknights or when you want to impress guests without spending hours in the kitchen.

With this time breakdown, you can easily fit Black Pepper Chicken into your schedule. Enjoy the cooking process and the delicious meal that awaits!

Nutritional Information for Black Pepper Chicken Recipe

Understanding the nutritional content of your meals is essential for maintaining a balanced diet. The Black Pepper Chicken recipe not only delights your taste buds but also provides valuable nutrients. Here’s a closer look at the nutritional information per serving:

Calories

290 calories. This makes it a satisfying yet light option for dinner. The calorie count is reasonable, allowing you to enjoy a flavorful meal without overindulging. Pair it with healthy sides to create a well-rounded meal.

Protein

28 grams of protein. This high protein content makes it an excellent choice for those looking to increase their protein intake, whether for muscle building or overall health.

Sodium

800 milligrams. While this is a moderate amount, it’s important to be mindful of your overall sodium intake, especially if you are watching your salt consumption. You can reduce the sodium level by using low-sodium soy sauce or oyster sauce, making it a healthier option without sacrificing flavor.

In summary, Black Pepper Chicken is not only delicious but also packed with protein and relatively low in calories. By being aware of the nutritional information, you can enjoy this dish as part of a balanced diet. Feel free to customize the recipe to suit your dietary needs while still enjoying its delightful flavors!

FAQs about Black Pepper Chicken Recipe

Can I use other types of pepper in the Black Pepper Chicken Recipe?

Absolutely! While black pepper is the star of this dish, you can experiment with other types of pepper to create unique flavors. For instance, white pepper offers a milder taste and is often used in Asian cuisine. If you enjoy a bit of heat, consider using crushed red pepper flakes or even fresh chili peppers. Just remember to adjust the quantity based on your spice preference. Each type of pepper will bring its own character to the dish, so feel free to get creative!

How can I make Black Pepper Chicken less spicy?

If you want to tone down the spice level in your Black Pepper Chicken, there are several easy ways to do so. First, reduce the amount of black pepper you use in the recipe. Start with half the amount and taste as you go. You can always add more if needed. Additionally, avoid adding any spicy ingredients like chili flakes or jalapeños. Another tip is to balance the heat with a touch of sweetness. Adding a little extra sugar or serving the dish with a side of sweet sauce can help mellow the spice. Enjoy your meal without the burn!

What are some common mistakes to avoid when making Black Pepper Chicken?

Making Black Pepper Chicken is straightforward, but there are a few common mistakes to watch out for. One mistake is overcrowding the skillet. If you add too much chicken at once, it may steam instead of sear, resulting in a less flavorful dish. Always cook in batches if necessary. Another mistake is skipping the marinating step. Marinating the chicken is crucial for flavor and tenderness, so don’t rush this part! Lastly, be careful not to overcook the chicken. Aim for juicy, tender pieces by checking for doneness after 5-7 minutes. By avoiding these pitfalls, you’ll create a delicious Black Pepper Chicken every time!

Conclusion on Black Pepper Chicken Recipe

In conclusion, the Black Pepper Chicken recipe is a delightful dish that combines bold flavors with simple ingredients. It’s perfect for any occasion, whether you’re cooking for family or entertaining guests. The tender chicken, vibrant vegetables, and the signature kick of black pepper create a meal that is both satisfying and memorable.

As you’ve seen, this recipe is not only easy to prepare but also allows for plenty of customization. You can adjust the spice levels, swap out proteins, or add extra vegetables to suit your taste. The versatility of Black Pepper Chicken makes it a fantastic addition to your weekly meal rotation.

Moreover, with its impressive nutritional profile, this dish provides a good balance of protein and essential nutrients. It’s a great way to enjoy a flavorful meal without compromising on health. Remember to pair it with your favorite sides, whether it’s rice, noodles, or a fresh salad, to create a well-rounded dining experience.

So, gather your ingredients, follow the steps, and enjoy the process of cooking this delicious Black Pepper Chicken. We hope you find joy in every bite and share this delightful dish with your loved ones. Happy cooking!

Chicken Avocado Ranch Burritos Recipe for Family Fun

Introduction to Chicken Avocado Ranch Burritos Recipe

Chicken Avocado Ranch Burritos Recipe is a perfect choice. These burritos are not only tasty but also packed with nutrients. They combine tender chicken, creamy avocado, and zesty ranch dressing, all wrapped in a warm tortilla. It’s a delightful mix of flavors and textures that will satisfy your cravings.

Whether you’re preparing a quick weeknight dinner or a fun weekend meal, this recipe is simple to follow. Plus, it takes just a short time to prepare and cook. You can even customize it to suit your taste. Want a little heat? Add some jalapeños! Prefer a vegetarian option? Swap the chicken for black beans or grilled veggies. The possibilities are endless!

Chicken Avocado Ranch Burritos Recipe. You’ll also find helpful tips and serving suggestions to make your meal even more enjoyable. So, roll up your sleeves and get ready to create a delicious dish that everyone will rave about!

Ingredients for Chicken Avocado Ranch Burritos Recipe

Chicken Avocado Ranch Burritos Recipe, you’ll need a few simple ingredients. These items are easy to find and can be adjusted based on your preferences. Here’s what you’ll need:

  • 2 cups cooked chicken, shredded
  • 1 ripe avocado, mashed
  • 1/2 cup ranch dressing
  • 1 cup shredded cheddar cheese
  • 1 cup lettuce, chopped
  • 1 medium tomato, diced
  • 4 large flour tortillas
  • 1/4 teaspoon garlic powder
  • 1/4 teaspoon onion powder
  • Salt and pepper to taste

These ingredients come together to create a delightful flavor profile. The shredded chicken provides protein, while the avocado adds creaminess. The ranch dressing brings a tangy taste that complements the other ingredients perfectly. Don’t forget the fresh veggies! They add crunch and freshness to each bite.

Chicken Avocado Ranch Burritos Recipe is versatile, making it a great option for any meal!

Preparation of Chicken Avocado Ranch Burritos Recipe

Chicken Avocado Ranch Burritos Recipe. This section will guide you through each step, ensuring that your burritos turn out delicious and satisfying. Let’s get started!

Step 1: Preparing the Chicken

First, you need to prepare the chicken. If you have leftover cooked chicken, that’s perfect! Simply shred it into bite-sized pieces. If you’re starting from raw chicken, you can boil or grill it until fully cooked. Once cooked, let it cool slightly before shredding. This step is crucial as it ensures the chicken is tender and easy to mix with the other ingredients.

Step 2: Making the Avocado Ranch Sauce

Next, it’s time to make the creamy avocado ranch sauce. In a large bowl, mash the ripe avocado until it’s smooth. Then, add the ranch dressing, garlic powder, onion powder, salt, and pepper. Mix everything together until well combined. This sauce will add a rich flavor to your burritos, making them even more enjoyable!

Step 3: Assembling the Burritos

Now comes the fun part—assembling your burritos! Lay out the large flour tortillas on a clean surface. Divide the chicken mixture evenly among the tortillas, placing it in the center of each one. Then, top the chicken with shredded cheddar cheese, chopped lettuce, and diced tomato. Make sure not to overfill the tortillas, as this will make them hard to roll.

Step 4: Cooking the Burritos

Finally, it’s time to cook the burritos. If you want them crispy, heat a skillet over medium heat. Place the burritos seam-side down in the skillet. Cook for about 2-3 minutes on each side until they are golden brown and crispy. This step adds a delightful crunch to your burritos, enhancing the overall texture. Once cooked, slice them in half and serve immediately!

Chicken Avocado Ranch Burritos ready to enjoy. They are perfect for lunch, dinner, or even a snack. Let’s move on to some variations you can try to make this recipe even more exciting!

Variation of Chicken Avocado Ranch Burritos Recipe

Chicken Avocado Ranch Burritos Recipe is its versatility. You can easily switch up the ingredients or cooking methods to create a dish that suits your taste. Let’s explore some alternative ingredients and different cooking methods that can elevate your burrito experience!

Alternative Ingredients for Chicken Avocado Ranch Burritos Recipe

While the original recipe is delicious, you might want to try some variations. Here are a few alternative ingredients you can use:

  • Protein Options: Instead of chicken, consider using shredded beef, turkey, or even tofu for a vegetarian option. Black beans or lentils can also be great substitutes.
  • Cheese Choices: Swap out cheddar cheese for Monterey Jack, pepper jack, or even a vegan cheese if you prefer a dairy-free option.
  • Veggie Additions: Add more veggies like bell peppers, corn, or spinach for extra flavor and nutrition. You can also include diced onions or olives for a different taste.
  • Spice It Up: For those who love a little heat, add diced jalapeños, a sprinkle of cayenne pepper, or your favorite hot sauce to the chicken mixture.

Chicken Avocado Ranch Burritos Recipe to fit your dietary needs or flavor preferences. Feel free to get creative and mix and match!

Different Cooking Methods for Chicken Avocado Ranch Burritos Recipe

In addition to the traditional skillet method, there are several other ways to cook your burritos. Here are some options to consider:

  • Baking: Preheat your oven to 375°F (190°C). Place the assembled burritos seam-side down on a baking sheet. Bake for about 15-20 minutes until they are golden brown. This method is great for making a larger batch at once.
  • Grilling: If you love that smoky flavor, try grilling your burritos. Preheat your grill to medium heat. Wrap the burritos in aluminum foil and place them on the grill for about 10-15 minutes, turning occasionally.
  • Air Frying: For a healthier option, use an air fryer. Preheat the air fryer to 375°F (190°C). Place the burritos in the basket and cook for about 8-10 minutes, flipping halfway through. This method gives you a crispy exterior without much oil.

Chicken Avocado Ranch Burritos Recipe. Choose the one that best fits your cooking style and enjoy a delicious meal!

Cooking Note for Chicken Avocado Ranch Burritos Recipe

Chicken Avocado Ranch Burritos Recipe, there are a few cooking notes to keep in mind. These tips will help ensure that your burritos turn out perfectly every time. Let’s dive into some important points to consider!

First, always use fresh ingredients. Fresh avocados, crisp lettuce, and ripe tomatoes will enhance the flavor of your burritos. If your avocado is overripe, it may not mash well and could affect the texture of your filling.

Next, be mindful of the tortillas you choose. Large flour tortillas work best for this recipe, as they can hold all the delicious fillings without tearing. If you prefer a healthier option, consider using whole wheat or spinach tortillas. They add a nice flavor and extra nutrients!

When cooking the burritos, keep an eye on the heat. Medium heat is ideal for achieving a golden brown exterior without burning the tortillas. If the heat is too high, the outside may cook too quickly while the inside remains cold.

Additionally, if you’re making a large batch, you can keep the cooked burritos warm in the oven. Set your oven to a low temperature (around 200°F or 93°C) and place the burritos on a baking sheet. This way, they stay warm until you’re ready to serve them.

Chicken Avocado Ranch Burritos Recipe is a great base for creativity. Try adding different spices or herbs to the chicken mixture for a unique twist. Enjoy the process and make it your own!

By following these cooking notes, you’ll be well on your way to creating delicious and satisfying burritos that everyone will love. Now, let’s explore some serving suggestions to make your meal even more delightful!

Serving Suggestions for Chicken Avocado Ranch Burritos Recipe

Chicken Avocado Ranch Burritos Recipe, it’s time to think about how to serve them. Presentation can elevate your meal, making it even more enjoyable. Here are some serving suggestions to consider:

  • Garnish with Fresh Herbs: Sprinkle some chopped cilantro or parsley on top of the burritos for a pop of color and freshness. This simple touch can enhance the overall flavor.
  • Pair with Dipping Sauces: Serve your burritos with a side of extra ranch dressing, salsa, or guacamole. These dips add an extra layer of flavor and make the meal more interactive.
  • Accompany with Sides: Consider serving your burritos with a side of tortilla chips and fresh salsa or a light salad. This adds variety to the meal and makes it feel more complete.
  • Offer a Beverage: Pair your burritos with refreshing drinks like iced tea, lemonade, or a light beer. These beverages can complement the flavors of the burritos beautifully.
  • Make it a Platter: For gatherings, arrange the burritos on a large platter. You can cut them in half to showcase the colorful filling. This makes for an appealing presentation that guests will love.

Chicken Avocado Ranch Burritos Recipe. Whether it’s a casual family dinner or a festive gathering, these ideas will surely impress your guests. Now, let’s move on to some tips for perfecting your burritos!

Tips for Perfect Chicken Avocado Ranch Burritos Recipe

Chicken Avocado Ranch Burritos Recipe is all about attention to detail. With a few simple tips, you can elevate your burrito game and impress your family and friends. Here are some helpful hints to ensure your burritos turn out delicious every time!

  • Choose Ripe Avocados: The key to a creamy filling is using ripe avocados. They should be slightly soft to the touch but not mushy. This will give your burritos a smooth texture that blends well with the other ingredients.
  • Season the Chicken: Don’t forget to season your chicken! Adding spices like cumin, paprika, or chili powder can enhance the flavor. This extra step makes a big difference in the overall taste of your burritos.
  • Warm the Tortillas: Before assembling, warm your tortillas in a skillet or microwave. This makes them more pliable and easier to roll without tearing. A warm tortilla also adds a nice touch to the final dish.
  • Don’t Overfill: It’s tempting to add lots of filling, but be careful! Overfilling can make it hard to roll the burrito. Stick to a moderate amount of filling to ensure a neat and tidy burrito.
  • Let the Filling Cool: If your chicken mixture is hot, let it cool slightly before adding it to the tortillas. This prevents the tortillas from becoming soggy and helps maintain their structure.
  • Experiment with Flavors: Feel free to get creative! Add different spices, herbs, or even a squeeze of lime juice to the filling. This can give your burritos a unique twist that keeps everyone coming back for more.
  • Serve Immediately: Burritos are best enjoyed fresh. Serve them right after cooking for the best taste and texture. If you need to make them ahead of time, consider wrapping them in foil to keep them warm.

Chicken Avocado Ranch Burritos Recipe. Each bite will be bursting with flavor, and your guests will be asking for seconds. Now, let’s break down the time needed to prepare this delicious meal!

Breakdown of Time for Chicken Avocado Ranch Burritos Recipe

Chicken Avocado Ranch Burritos Recipe can help you plan your meal better. Here’s a simple breakdown of the time required for preparation and cooking. This way, you can enjoy your delicious burritos without any rush!

Prep Time

The prep time for this recipe is quite short. You’ll need about 15-20 minutes to gather your ingredients and prepare the filling. This includes shredding the chicken, mashing the avocado, and mixing everything together. If you have leftover chicken, this time can be even less!

Cooking Time

Once your burritos are assembled, the cooking time is approximately 6-8 minutes. If you choose to bake or grill them, the time may vary slightly. For skillet cooking, aim for 2-3 minutes on each side until they are golden brown and crispy. This quick cooking time makes it easy to whip up a tasty meal in no time!

Total Time

Chicken Avocado Ranch Burritos ready to enjoy in no time!

Nutritional Information for Chicken Avocado Ranch Burritos Recipe

Chicken Avocado Ranch Burritos Recipe not only satisfies your taste buds but also provides valuable nutrients. Here’s a breakdown of the nutritional information per serving, so you can enjoy your meal while keeping track of your intake.

Calories

Chicken Avocado Ranch Burritos Recipe contains approximately 450 calories. This makes it a hearty meal option that can keep you full and energized. The combination of chicken, avocado, and cheese contributes to the calorie count, providing a good balance of protein and healthy fats.

Protein

Protein is an essential nutrient for building and repairing tissues. Each burrito packs about 30 grams of protein. This high protein content comes mainly from the shredded chicken and cheese, making it a great choice for those looking to increase their protein intake. It’s perfect for active individuals or anyone needing a filling meal.

Sodium

Chicken Avocado Ranch Burritos Recipe while keeping your sodium intake in check.

Chicken Avocado Ranch Burritos Recipe offers a delicious way to enjoy a balanced meal that is both satisfying and nutritious. Now, let’s move on to some frequently asked questions about this delightful recipe!

FAQs about Chicken Avocado Ranch Burritos Recipe

Can I make Chicken Avocado Ranch Burritos Recipe ahead of time?

Chicken Avocado Ranch Burritos Recipe ahead of time. To do this, assemble the burritos but do not cook them. Wrap each burrito tightly in plastic wrap or aluminum foil and store them in the refrigerator. They can be kept for up to 24 hours before cooking. When you’re ready to enjoy them, simply heat them in a skillet or oven until they are warm and crispy. This makes it easy to have a delicious meal ready to go on busy days!

What can I substitute for chicken in Chicken Avocado Ranch Burritos Recipe?

Chicken Avocado Ranch Burritos Recipe is versatile, so feel free to experiment with different proteins to find your favorite combination!

How do I store leftovers from Chicken Avocado Ranch Burritos Recipe?

Chicken Avocado Ranch Burritos Recipe is simple! Allow the burritos to cool completely before storing. Place them in an airtight container or wrap them tightly in plastic wrap. They can be kept in the refrigerator for up to 3 days. If you want to store them for a longer period, consider freezing them. Wrap each burrito in foil and place them in a freezer-safe bag. They can be frozen for up to 3 months. When you’re ready to eat, thaw them in the refrigerator overnight and reheat in the oven or microwave!

Conclusion on Chicken Avocado Ranch Burritos Recipe

Chicken Avocado Ranch Burritos Recipe is a fantastic meal option that combines flavor, nutrition, and convenience. With its simple ingredients and easy preparation steps, it’s perfect for busy weeknights or casual gatherings. The delightful mix of shredded chicken, creamy avocado, and zesty ranch dressing wrapped in a warm tortilla creates a satisfying dish that everyone will love.

Moreover, the versatility of this recipe allows you to customize it to your liking. Whether you prefer a spicy kick or a vegetarian alternative, the possibilities are endless. You can experiment with different proteins, cheeses, and vegetables to create a burrito that suits your taste buds perfectly.

Chicken Avocado Ranch Burritos, remember to follow the tips and suggestions provided. They will help you achieve the best results and ensure that your burritos are bursting with flavor. Don’t forget to serve them with your favorite dips and sides for a complete meal experience.

Chicken Avocado Ranch Burritos Recipe is sure to become a family favorite, bringing smiles to the table with every bite. Happy cooking!

Sheet Pan Sesame Chicken and Veggies is a must-try!

Introduction to Sheet Pan Sesame Chicken with Vegetables

Sheet Pan Sesame Chicken with Vegetables. This dish is not only easy to prepare, but it also packs a punch of flavor and nutrition. With tender chicken thighs marinated in a savory sesame sauce, combined with vibrant vegetables, this recipe is a perfect weeknight dinner option.

One of the best things about this recipe is its simplicity. Everything cooks together on one sheet pan, making cleanup a breeze. Plus, the combination of chicken and colorful veggies ensures that you get a balanced meal in every bite. The sesame oil and honey add a delightful sweetness, while the garlic and ginger bring a warm, aromatic touch.

Whether you’re a busy parent, a student, or just someone who enjoys good food, this recipe is designed for you. It’s versatile, allowing you to swap in your favorite vegetables or proteins. In just a short time, you can have a wholesome meal ready to serve. So, let’s dive into the ingredients and get started on this mouthwatering dish!

Ingredients for Sheet Pan Sesame Chicken with Vegetables

Sheet Pan Sesame Chicken with Vegetables, you’ll need a variety of fresh ingredients. Here’s what you’ll need:

  • 2 pounds boneless, skinless chicken thighs, cut into bite-sized pieces
  • 1/4 cup soy sauce
  • 2 tablespoons sesame oil
  • 2 tablespoons honey
  • 2 cloves garlic, minced
  • 1 teaspoon fresh ginger, grated
  • 1 tablespoon rice vinegar
  • 1 tablespoon cornstarch
  • 1 teaspoon sesame seeds
  • 1 red bell pepper, sliced
  • 1 yellow bell pepper, sliced
  • 1 cup broccoli florets
  • 1 cup snap peas
  • 2 tablespoons olive oil
  • Salt and pepper to taste
  • Green onions, sliced (for garnish)

These ingredients come together to create a flavorful and satisfying dish. The chicken thighs provide a juicy base, while the colorful vegetables add crunch and nutrition. The marinade, made with soy sauce, sesame oil, and honey, infuses the chicken with a rich taste that pairs perfectly with the veggies. Feel free to adjust the quantities based on your family’s preferences or dietary needs!

Preparation of Sheet Pan Sesame Chicken with Vegetables

Sheet Pan Sesame Chicken with Vegetables. This process is straightforward and quick, making it perfect for busy weeknights. Let’s break it down into easy steps!

Step 1: Prepping the Chicken and Vegetables

First, start by prepping your chicken and vegetables. Cut the boneless, skinless chicken thighs into bite-sized pieces. This helps them cook evenly and makes them easy to eat. Next, wash and slice the bell peppers into strips. You can also chop the broccoli into smaller florets if needed. Finally, rinse the snap peas and set everything aside. Having everything prepped will make the cooking process smoother.

Step 2: Marinating the Chicken

In a large bowl, combine the soy sauce, sesame oil, honey, minced garlic, grated ginger, rice vinegar, cornstarch, and a pinch of salt and pepper. Whisk these ingredients together until they are well mixed. Then, add the chicken pieces to the bowl. Toss the chicken in the marinade until every piece is coated. This step is crucial as it infuses the chicken with flavor. Let the chicken marinate for at least 15 minutes. If you have more time, marinating longer will enhance the taste even more!

Step 3: Arranging on the Sheet Pan

While the chicken is marinating, it’s time to prepare the vegetables. In a separate bowl, toss the sliced bell peppers, broccoli florets, and snap peas with olive oil, salt, and pepper. This will season the veggies and help them roast nicely. Once everything is ready, take a large baking sheet lined with parchment paper. Spread the marinated chicken on one side of the sheet pan. On the other side, arrange the seasoned vegetables. Make sure to leave some space between the chicken and veggies for even cooking.

Step 4: Baking the Dish

Preheat your oven to 425°F (220°C). Once it’s hot, place the sheet pan in the oven. Bake for 20-25 minutes, or until the chicken is cooked through and the vegetables are tender. Remember to stir everything halfway through cooking. This ensures that both the chicken and veggies roast evenly. When done, the chicken should be juicy, and the veggies should have a nice char. Remove the pan from the oven and sprinkle sesame seeds and sliced green onions on top for a beautiful finish!

Variation of Sheet Pan Sesame Chicken with Vegetables

Sheet Pan Sesame Chicken with Vegetables is its versatility. You can easily customize this dish to suit your taste or dietary needs. Let’s explore some alternative protein options and different vegetable combinations that can elevate your meal!

Alternative Protein Options

If you want to switch things up, consider using different proteins. While chicken thighs are delicious, you can also try:

  • Chicken Breasts: For a leaner option, use boneless, skinless chicken breasts. They cook quickly and remain juicy when marinated.
  • Tofu: For a vegetarian or vegan twist, substitute chicken with firm tofu. Press the tofu to remove excess moisture, then cut it into cubes and marinate as you would the chicken.
  • Pork Tenderloin: Thinly sliced pork tenderloin can be a tasty alternative. It cooks quickly and absorbs flavors well.
  • Shrimp: If you love seafood, shrimp is a fantastic choice. Just be sure to adjust the cooking time, as shrimp cooks much faster than chicken.

These alternatives not only change the flavor profile but also add variety to your meals. Feel free to experiment with your favorite proteins!

Different Vegetable Combinations

Vegetables are another area where you can get creative. While the original recipe calls for bell peppers, broccoli, and snap peas, you can mix and match based on what you have on hand or what’s in season. Here are some great options:

  • Carrots: Sliced or julienned carrots add a sweet crunch and vibrant color.
  • Zucchini: Chopped zucchini cooks quickly and adds a mild flavor that pairs well with the marinade.
  • Cauliflower: Cauliflower florets can be a great substitute for broccoli, providing a similar texture.
  • Asparagus: Tender asparagus spears roast beautifully and add a unique taste.
  • Mushrooms: Sliced mushrooms bring an earthy flavor and meaty texture to the dish.

Mixing different vegetables not only enhances the taste but also boosts the nutritional value of your meal. So, don’t hesitate to get creative and use what you love!

Cooking Note for Sheet Pan Sesame Chicken with Vegetables

Sheet Pan Sesame Chicken with Vegetables, there are a few important cooking notes to keep in mind. These tips will help ensure that your dish turns out perfectly every time, making your cooking experience enjoyable and stress-free.

First, always preheat your oven. This step is crucial for achieving that perfect roast. A hot oven helps the chicken cook evenly and gives the vegetables a nice caramelization. If you skip this step, you might end up with unevenly cooked food.

Next, consider the size of your chicken pieces and vegetables. Cutting them into similar sizes ensures they cook at the same rate. If you have larger pieces of chicken or veggies, they may need more time in the oven. Conversely, smaller pieces may cook faster, so keep an eye on them to avoid overcooking.

Another important note is to avoid overcrowding the sheet pan. If you pile everything too closely, the chicken and vegetables will steam instead of roast. This can lead to a soggy texture rather than the desired crispy finish. If you have a lot of ingredients, consider using two sheet pans to give everything enough space.

Lastly, don’t forget to check for doneness. Chicken should reach an internal temperature of 165°F (75°C) to be safe to eat. Using a meat thermometer can help you ensure that your chicken is cooked perfectly. For the vegetables, they should be tender yet still vibrant in color.

Sheet Pan Sesame Chicken with Vegetables. Happy cooking!

Serving Suggestions for Sheet Pan Sesame Chicken with Vegetables

Sheet Pan Sesame Chicken with Vegetables is ready, it’s time to think about how to serve it. This dish is not only visually appealing but also versatile, making it easy to pair with various sides. Here are some delightful serving suggestions to enhance your meal:

  • Steamed Rice: A classic choice, steamed white or brown rice complements the flavors of the chicken and veggies perfectly. The rice absorbs the savory sauce, making every bite delicious.
  • Quinoa: For a healthier option, serve your dish over fluffy quinoa. This protein-packed grain adds a nutty flavor and pairs well with the sesame marinade.
  • Noodles: Consider tossing the chicken and veggies with cooked noodles, such as rice noodles or soba. This creates a hearty meal that’s both filling and satisfying.
  • Salad: A fresh green salad can balance the richness of the dish. Try a simple mix of greens, cucumbers, and a light vinaigrette to add a refreshing crunch.
  • Wraps: For a fun twist, use the chicken and veggies as a filling for wraps. Use lettuce leaves or tortillas to create a delicious handheld meal.

Don’t forget to garnish your dish with sliced green onions and a sprinkle of sesame seeds for an extra touch of flavor and presentation. You can also serve it with a side of soy sauce or a spicy dipping sauce for those who enjoy a little heat.

Sheet Pan Sesame Chicken with Vegetables in a way that makes it truly your own!

Tips for Perfecting Sheet Pan Sesame Chicken with Vegetables

Sheet Pan Sesame Chicken with Vegetables truly shine, consider these helpful tips. They will ensure that your dish is not only delicious but also visually appealing and satisfying. Let’s dive into some expert advice!

First, always use fresh ingredients. Fresh vegetables and high-quality chicken will enhance the flavor of your dish. When possible, choose organic produce and free-range chicken for the best taste and nutrition.

Next, don’t skip the marinating step. Marinating the chicken for at least 15 minutes allows the flavors to penetrate deeply. If you have extra time, marinate for up to an hour in the refrigerator. This will make your chicken even more flavorful and tender.

Another tip is to experiment with the marinade. Feel free to add your favorite spices or herbs. A dash of chili powder or a squeeze of lime can add a unique twist. You can also try different types of vinegar, like apple cider or balsamic, for varied flavors.

When it comes to vegetables, consider their cooking times. Some veggies, like bell peppers and snap peas, cook quickly, while others, like carrots and broccoli, may need a bit longer. To ensure even cooking, cut denser vegetables into smaller pieces or add them to the pan a few minutes before the others.

For a crispy finish, broil the dish for the last few minutes of cooking. This will give your chicken and veggies a delightful char. Just keep a close eye on them to prevent burning!

Lastly, let your dish rest for a few minutes after removing it from the oven. This allows the juices to redistribute, making the chicken even juicier. Serve it warm, garnished with green onions and sesame seeds for that perfect finishing touch.

Sheet Pan Sesame Chicken with Vegetables to a whole new level. Enjoy the process and savor every bite!

Breakdown of Time for Sheet Pan Sesame Chicken with Vegetables

Sheet Pan Sesame Chicken with Vegetables can help you plan your cooking efficiently. Here’s a simple breakdown of the time involved in this delicious recipe.

Prep Time

The prep time for this dish is approximately 20 minutes. This includes:

  • Cutting the chicken thighs into bite-sized pieces.
  • Washing and slicing the bell peppers.
  • Chopping the broccoli and rinsing the snap peas.
  • Preparing the marinade by mixing all the ingredients.

Having everything prepped and ready will make the cooking process smoother and quicker!

Cooking Time

The cooking time is around 20-25 minutes. This involves:

  • Marinating the chicken for at least 15 minutes.
  • Baking the chicken and vegetables in the oven for 20-25 minutes.

Make sure to stir halfway through to ensure even cooking. The chicken should be cooked through, and the veggies should be tender yet crisp.

Total Time

In total, you can expect the entire process to take about 40-45 minutes. This includes both prep and cooking time. It’s a quick and easy meal that fits perfectly into a busy schedule!

Sheet Pan Sesame Chicken with Vegetables in no time!

Nutritional Information for Sheet Pan Sesame Chicken with Vegetables

Sheet Pan Sesame Chicken with Vegetables not only tastes great but also provides a good mix of nutrients. Here’s a closer look at the nutritional information for this delicious dish.

Calories

Sheet Pan Sesame Chicken with Vegetables contains approximately 350 calories. This makes it a satisfying option for dinner without being overly heavy. The combination of chicken and vegetables ensures that you’re getting a nutritious meal that can fit into various dietary plans.

Protein

Protein is an important part of any meal, and this dish delivers! Each serving provides about 28 grams of protein. The chicken thighs are a great source of lean protein, which helps in muscle repair and keeps you feeling full longer. Including protein in your meals is essential for overall health and wellness.

Sodium

When it comes to sodium, each serving contains around 800 milligrams. While this is a reasonable amount for a flavorful dish, it’s always good to be mindful of your sodium intake, especially if you’re watching your salt consumption. You can reduce the sodium content by using low-sodium soy sauce or adjusting the amount of soy sauce in the marinade.

Sheet Pan Sesame Chicken with Vegetables is a nutritious meal option that provides a good balance of calories, protein, and essential nutrients. Enjoying this dish can help you maintain a healthy lifestyle while satisfying your taste buds!

FAQs about Sheet Pan Sesame Chicken with Vegetables

Can I use frozen vegetables for Sheet Pan Sesame Chicken with Vegetables?

Sheet Pan Sesame Chicken with Vegetables. However, keep in mind that frozen veggies may release more moisture during cooking. This can lead to a slightly different texture. To avoid this, you might want to thaw and drain the vegetables before adding them to the pan. If you choose to use them frozen, just be sure to increase the cooking time by a few minutes to ensure they are heated through and tender.

How can I make Sheet Pan Sesame Chicken with Vegetables gluten-free?

Sheet Pan Sesame Chicken with Vegetables gluten-free is simple! The main ingredient to replace is soy sauce. You can use gluten-free soy sauce or tamari as a substitute. Both options provide a similar flavor without the gluten. Additionally, check the labels on your other ingredients, like rice vinegar and cornstarch, to ensure they are gluten-free. With these adjustments, you can enjoy this delicious dish without any gluten concerns!

What can I serve with Sheet Pan Sesame Chicken with Vegetables?

Sheet Pan Sesame Chicken with Vegetables. Here are a few ideas:

  • Steamed Rice: A classic pairing that complements the flavors beautifully.
  • Quinoa: A nutritious alternative that adds a nutty flavor.
  • Noodles: Toss the chicken and veggies with cooked noodles for a hearty meal.
  • Salad: A fresh green salad can balance the richness of the dish.
  • Wraps: Use the chicken and veggies as a filling for wraps for a fun twist.

These options not only enhance your meal but also allow you to customize it to your liking!

How long can I store leftovers of Sheet Pan Sesame Chicken with Vegetables?

Sheet Pan Sesame Chicken with Vegetables in an airtight container in the refrigerator for up to 3-4 days. To reheat, simply place the chicken and veggies in the microwave or oven until warmed through. If you want to keep the dish fresh for a longer period, consider freezing it. In the freezer, it can last for about 2-3 months. Just make sure to thaw it in the refrigerator before reheating for the best results!

Conclusion on Sheet Pan Sesame Chicken with Vegetables

Sheet Pan Sesame Chicken with Vegetables is a fantastic meal option that combines convenience, flavor, and nutrition. This dish is perfect for busy weeknights when you want something quick yet satisfying. With its simple preparation and minimal cleanup, it’s a win-win for anyone looking to enjoy a delicious home-cooked meal.

The versatility of this recipe allows you to customize it to your liking. Whether you choose different proteins or mix in your favorite vegetables, the possibilities are endless. Plus, the delightful marinade of soy sauce, sesame oil, and honey brings a burst of flavor that will leave your taste buds wanting more.

As you gather your ingredients and prepare to cook, remember the tips and variations shared throughout this article. They will help you create a dish that not only looks beautiful but also tastes amazing. Don’t hesitate to experiment and make this recipe your own!

Sheet Pan Sesame Chicken with Vegetables. Your family will love it, and you’ll enjoy the ease of preparation. Happy cooking!

Avocado Smoked Salmon Breakfast Bowl is a must-try!

Introduction to the Avocado Smoked Salmon Breakfast Bowl

Avocado Smoked Salmon Breakfast Bowl is the perfect choice! This delightful dish combines creamy avocado, savory smoked salmon, and protein-packed eggs, making it a wholesome breakfast option. Not only is it tasty, but it also offers a variety of health benefits.

Avocados are rich in healthy fats, which can help keep you full and satisfied. They also provide essential vitamins and minerals, such as potassium and vitamin E. On the other hand, smoked salmon is an excellent source of omega-3 fatty acids, which are known for their heart-healthy properties. Together, these ingredients create a balanced meal that fuels your body for the day ahead.

Avocado Smoked Salmon Breakfast Bowl is sure to impress. So, let’s dive into the ingredients and preparation methods to get you started on this delightful breakfast adventure!

Ingredients for the Avocado Smoked Salmon Breakfast Bowl

Avocado Smoked Salmon Breakfast Bowl, you will need a few fresh and simple ingredients. Here’s what you’ll need:

  • 1 ripe avocado, halved and pitted
  • 4 ounces smoked salmon
  • 2 large eggs
  • 1 tablespoon olive oil
  • 1 tablespoon lemon juice
  • Salt and pepper to taste
  • 1 tablespoon fresh dill, chopped (optional)
  • 1 cup baby spinach

These ingredients come together to create a flavorful and satisfying breakfast bowl. The creamy avocado pairs perfectly with the smoky flavor of the salmon, while the eggs add a protein boost. The fresh dill and lemon juice enhance the dish, giving it a bright and zesty finish.

Feel free to adjust the quantities based on your preferences or dietary needs. For instance, if you love more greens, you can add extra spinach or even include other leafy vegetables. The beauty of this recipe lies in its versatility, allowing you to customize it to your liking!

Preparation of the Avocado Smoked Salmon Breakfast Bowl

Avocado Smoked Salmon Breakfast Bowl. This process is simple and quick, making it perfect for busy mornings. Let’s break it down into easy steps!

Step 1: Preparing the Base

Start by boiling the eggs. In a small saucepan, bring water to a rolling boil. Carefully add the eggs to the boiling water. For soft-boiled eggs, cook them for 6-7 minutes. If you prefer hard-boiled eggs, let them cook for 9-10 minutes. Once they are done, transfer the eggs to an ice bath. This will stop the cooking process and make peeling easier.

Step 2: Adding the Avocado

While the eggs are cooling, it’s time to prepare the avocado. Take your ripe avocado and slice it in half. Remove the pit and carefully scoop out the flesh. You can slice the avocado or leave it in halves, depending on your preference. Place one half in each serving bowl. The creamy texture of the avocado will serve as a delicious base for the rest of your ingredients.

Step 3: Incorporating the Smoked Salmon

Next, it’s time to add the star of the dish: the smoked salmon. Lay the slices of smoked salmon over the avocado in each bowl. The smoky flavor of the salmon complements the creamy avocado beautifully. If you like, you can tear the salmon into smaller pieces for a more casual presentation.

Step 4: Final Touches and Garnishing

Avocado Smoked Salmon Breakfast Bowl. Peel the cooled eggs and slice them in half. Place the egg halves on top of the salmon in each bowl. Drizzle a tablespoon of fresh lemon juice over the entire bowl for a zesty kick. If you’re using fresh dill, sprinkle it on top for added flavor and a pop of color. Your breakfast bowl is now ready to serve!

Enjoy this delightful meal immediately for the best taste and freshness. It’s a perfect way to start your day with a burst of flavor and nutrition!

Variation of the Avocado Smoked Salmon Breakfast Bowl

Avocado Smoked Salmon Breakfast Bowl is a versatile dish that can be easily customized to suit your taste. Whether you want to switch up the ingredients or try a different serving style, there are plenty of options to explore. Let’s take a look at some alternative ingredients and serving styles that can elevate your breakfast experience!

Alternative Ingredients to Consider

If you’re looking to mix things up, consider these alternative ingredients:

  • Protein Options: Instead of smoked salmon, you can use cooked shrimp or crab for a seafood twist. Grilled chicken or turkey slices also work well for a heartier option.
  • Vegetable Additions: Add more greens like arugula, kale, or even roasted bell peppers. These will not only enhance the flavor but also boost the nutritional value.
  • Cheese Choices: Crumbled feta or goat cheese can add a creamy texture and tangy flavor. Just sprinkle a little on top for a delicious contrast.
  • Grain Base: For a more filling meal, consider adding a base of quinoa or brown rice. This will provide extra fiber and make the dish even more satisfying.
  • Herb Variations: If you don’t have dill, try using chives, parsley, or cilantro for a different flavor profile.

Avocado Smoked Salmon Breakfast Bowl that suits your preferences and dietary needs.

Different Serving Styles

How you serve your breakfast bowl can also change the experience. Here are some fun serving styles to consider:

  • Layered Bowl: Instead of placing everything on top, layer the ingredients in a clear bowl. Start with spinach, then add avocado, salmon, and finally the eggs. This creates a beautiful presentation.
  • Wrap It Up: For a portable option, consider wrapping the ingredients in a whole grain tortilla. This makes it easy to enjoy on the go!
  • Breakfast Platter: Serve the components separately on a platter. This allows everyone to customize their bowl according to their taste.
  • Mini Bowls: Create smaller versions of the breakfast bowl for a brunch gathering. This way, guests can sample different variations.

Avocado Smoked Salmon Breakfast Bowl even more enjoyable. So, don’t hesitate to get creative and find the combination that you love the most!

Cooking Note for the Avocado Smoked Salmon Breakfast Bowl

Avocado Smoked Salmon Breakfast Bowl, a few cooking notes can help ensure your dish turns out perfectly every time. Here are some essential tips to keep in mind:

First, choose a ripe avocado. A perfectly ripe avocado will be slightly soft to the touch but not mushy. If your avocado is too firm, it may not have the creamy texture you desire. On the other hand, if it’s overly soft, it might be overripe. To speed up the ripening process, place the avocado in a paper bag with a banana or apple for a day or two.

Next, pay attention to the eggs. For the best results, use fresh eggs. Fresh eggs will have a firmer white, which helps maintain the shape when boiled. If you prefer a creamier texture, opt for soft-boiled eggs. They add a delightful richness to the bowl. Remember to cool the eggs in an ice bath immediately after boiling. This not only stops the cooking process but also makes peeling easier.

When sautéing the spinach, be careful not to overcook it. You want it to be wilted but still vibrant green. Overcooking can lead to a mushy texture and loss of nutrients. A quick sauté of 2-3 minutes is usually sufficient.

Avocado Smoked Salmon Breakfast Bowl.

By following these cooking notes, you’ll create a delicious and visually appealing breakfast bowl that’s sure to impress. Enjoy the process and savor every bite!

Serving Suggestions for the Avocado Smoked Salmon Breakfast Bowl

Avocado Smoked Salmon Breakfast Bowl, presentation and pairing can elevate your meal experience. Here are some delightful serving suggestions to consider:

First, consider the dish’s visual appeal. Use colorful bowls to make the vibrant greens and pinks of the ingredients pop. A white or light-colored bowl can create a beautiful contrast, showcasing the fresh ingredients. You can also garnish with extra dill or a lemon wedge on the side for a touch of elegance.

Next, think about adding a side dish to complement your breakfast bowl. Here are a few ideas:

  • Whole Grain Toast: Serve with a slice of whole grain or sourdough toast. This adds a crunchy texture and is perfect for scooping up the delicious ingredients.
  • Fresh Fruit: A side of mixed berries or sliced citrus fruits can provide a refreshing contrast to the savory flavors of the bowl. Fruits like strawberries, blueberries, or orange slices are great choices.
  • Yogurt Parfait: Pair your breakfast bowl with a small yogurt parfait. Layer yogurt with granola and fresh fruit for a sweet and creamy addition.
  • Herbed Potatoes: For a heartier option, serve with roasted or sautéed herbed potatoes. The crispy texture and savory flavor will complement the bowl nicely.

Avocado Smoked Salmon Breakfast Bowls. This interactive approach adds fun and personalization to the meal.

Lastly, don’t forget about beverages! A refreshing drink can enhance your breakfast experience. Here are some suggestions:

  • Freshly Squeezed Juice: Serve a glass of freshly squeezed orange or grapefruit juice for a zesty start to the day.
  • Smoothies: A green smoothie made with spinach, banana, and almond milk can be a nutritious and delicious pairing.
  • Herbal Tea: A warm cup of herbal tea, like chamomile or mint, can provide a soothing complement to your meal.

Avocado Smoked Salmon Breakfast Bowl. Enjoy the flavors, colors, and textures that come together in this delicious dish!

Tips for Making the Perfect Avocado Smoked Salmon Breakfast Bowl

Avocado Smoked Salmon Breakfast Bowl is all about attention to detail and a few handy tips. With these suggestions, you can elevate your breakfast bowl to new heights of flavor and presentation. Let’s explore some essential tips to ensure your dish turns out delicious every time!

First, always choose the freshest ingredients. Fresh smoked salmon will have a vibrant color and a pleasant aroma. When selecting avocados, look for ones that yield slightly to gentle pressure. This indicates ripeness and ensures a creamy texture. If you can, buy organic produce for the best flavor and quality.

Next, consider the seasoning. While salt and pepper are essential, don’t be afraid to experiment with other spices. A pinch of smoked paprika or a dash of cayenne pepper can add a delightful kick. Additionally, a sprinkle of everything bagel seasoning can enhance the overall flavor profile, giving your bowl a unique twist.

When it comes to the eggs, timing is crucial. For perfectly soft-boiled eggs, set a timer and keep an eye on them. If you prefer hard-boiled eggs, let them sit in the boiling water a bit longer. Remember, the ice bath is key to achieving the right texture and making peeling easier.

Don’t forget about the presentation! A well-arranged bowl is more appetizing. Layer the ingredients thoughtfully, starting with the spinach, followed by the avocado, salmon, and eggs. This not only looks beautiful but also allows each bite to combine all the flavors harmoniously.

Avocado Smoked Salmon Breakfast Bowl immediately after preparation. This ensures that the ingredients remain fresh and vibrant. If you need to prepare it in advance, keep the components separate until you’re ready to eat. This way, the avocado won’t brown, and the spinach will stay crisp.

Avocado Smoked Salmon Breakfast Bowl that’s sure to impress. Enjoy the process and savor every bite of this nutritious breakfast!

Breakdown of Time for the Avocado Smoked Salmon Breakfast Bowl

Avocado Smoked Salmon Breakfast Bowl can help you plan your morning better. Here’s a simple breakdown of the time required for each step of the process.

Prep Time

The prep time for this delicious breakfast bowl is quite short. You’ll need about 10 minutes to gather and prepare your ingredients. This includes slicing the avocado, measuring out the smoked salmon, and washing the baby spinach. If you’re using fresh herbs, like dill, you’ll want to chop those as well. Overall, it’s a quick and easy setup!

Cooking Time

Cooking the eggs and sautéing the spinach will take approximately 10 minutes. Boiling the eggs requires about 6-10 minutes, depending on whether you want them soft or hard-boiled. Meanwhile, sautéing the spinach only takes about 2-3 minutes. So, in total, you can expect to spend around 10 minutes on cooking.

Total Time

Avocado Smoked Salmon Breakfast Bowl is about 20 minutes. This makes it a fantastic option for a quick yet nutritious breakfast. You can easily whip it up on a busy morning or enjoy it leisurely on a weekend!

Avocado Smoked Salmon Breakfast Bowl is not only quick to prepare but also packed with flavor and nutrition!

Nutritional Information for the Avocado Smoked Salmon Breakfast Bowl

Avocado Smoked Salmon Breakfast Bowl is not only delicious but also packed with nutrients that can support your health. Let’s break down the key nutritional components of this delightful breakfast bowl.

Calories

Avocado Smoked Salmon Breakfast Bowl contains approximately 450 calories. This makes it a satisfying meal that can keep you energized throughout the morning. The combination of healthy fats from the avocado and protein from the eggs and salmon contributes to the calorie count, providing you with a well-rounded breakfast option.

Protein

Avocado Smoked Salmon Breakfast Bowl delivers a hearty dose. Each serving contains about 25 grams of protein. This protein comes from the eggs and smoked salmon, making it an excellent choice for those looking to increase their protein intake. Starting your day with a protein-rich meal can help you feel fuller for longer, reducing the temptation to snack before lunch.

Sodium

Avocado Smoked Salmon Breakfast Bowl has approximately 800 milligrams per serving. While this is a moderate amount, it’s essential to be mindful of your overall sodium intake throughout the day. Smoked salmon can be higher in sodium due to the curing process, so if you’re watching your sodium levels, consider using low-sodium salmon or adjusting the amount of added salt in the dish.

Avocado Smoked Salmon Breakfast Bowl is a nutritious breakfast option that provides a good balance of calories, protein, and sodium. It’s a great way to start your day with wholesome ingredients that nourish your body and keep you satisfied!

FAQs about the Avocado Smoked Salmon Breakfast Bowl

What can I substitute for smoked salmon in the Avocado Smoked Salmon Breakfast Bowl?

Avocado Smoked Salmon Breakfast Bowl.

Can I make the Avocado Smoked Salmon Breakfast Bowl ahead of time?

Avocado Smoked Salmon Breakfast Bowl is best enjoyed fresh, you can prepare some components ahead of time. For instance, you can boil the eggs and store them in the refrigerator for up to a week. You can also wash and sauté the spinach in advance. However, it’s best to slice the avocado just before serving to prevent browning. Keeping the ingredients separate until you’re ready to eat will help maintain freshness and flavor.

Is the Avocado Smoked Salmon Breakfast Bowl suitable for meal prep?

Avocado Smoked Salmon Breakfast Bowl is suitable for meal prep! You can prepare individual servings in airtight containers. Just remember to keep the avocado separate until you’re ready to eat. This way, it stays fresh and creamy. You can also pre-cook the eggs and spinach, making it easy to grab a nutritious breakfast on busy mornings. Meal prepping this dish can save you time while ensuring you have a healthy meal ready to go!

What are some side dishes that pair well with the Avocado Smoked Salmon Breakfast Bowl?

To enhance your breakfast experience, consider adding some delightful side dishes. Here are a few ideas:

  • Whole Grain Toast: A slice of whole grain or sourdough toast is perfect for scooping up the delicious ingredients.
  • Fresh Fruit: A side of mixed berries or sliced citrus fruits adds a refreshing contrast to the savory flavors.
  • Yogurt Parfait: Pair your bowl with a small yogurt parfait layered with granola and fresh fruit for a sweet touch.
  • Herbed Potatoes: Roasted or sautéed herbed potatoes make for a heartier option that complements the bowl nicely.

Avocado Smoked Salmon Breakfast Bowl and create a satisfying meal that’s both delicious and nutritious!

Conclusion on the Avocado Smoked Salmon Breakfast Bowl

Avocado Smoked Salmon Breakfast Bowl is a delightful way to kickstart your day. This dish not only combines rich flavors and textures but also packs a nutritional punch. With creamy avocado, savory smoked salmon, and protein-rich eggs, it’s a meal that keeps you satisfied and energized.

Whether you’re preparing it for a busy weekday breakfast or a leisurely weekend brunch, this bowl is quick and easy to make. The versatility of the ingredients allows you to customize it to your liking, making it suitable for various dietary preferences. From swapping out the smoked salmon to adding extra veggies, the possibilities are endless!

Avocado Smoked Salmon Breakfast Bowl is not just about taste; it’s also about health. With its balance of healthy fats, protein, and essential vitamins, it supports your overall well-being. Plus, the vibrant colors and fresh ingredients make it visually appealing, turning your breakfast into a feast for the eyes.

So, why not give this delicious breakfast bowl a try? With its simple preparation and delightful flavors, it’s sure to become a favorite in your morning routine. Enjoy the process of making it, and savor every bite of this nutritious and satisfying meal!

Grilled Chicken Broccoli Bowls with Garlic Sauce are delicious!

Introduction to Grilled Chicken Broccoli Bowls with Garlic Sauce

Are you looking for a delicious and healthy meal that’s easy to prepare? Look no further! Grilled Chicken Broccoli Bowls with Garlic Sauce are the perfect solution. This dish combines tender grilled chicken, vibrant broccoli, and a creamy garlic sauce that will tantalize your taste buds.

Not only is this recipe packed with flavor, but it also offers a great balance of protein, healthy fats, and carbohydrates. With just a few simple ingredients, you can create a satisfying meal that the whole family will love. Plus, it’s versatile! You can easily customize it to suit your preferences.

Whether you’re trying to eat healthier or just want a quick weeknight dinner, these bowls are a fantastic choice. They are not only nutritious but also visually appealing, making them a great option for meal prep or entertaining guests. So, let’s dive into the ingredients and preparation steps to get you started on this delightful culinary adventure!

Ingredients for Grilled Chicken Broccoli Bowls with Garlic Sauce

To create your Grilled Chicken Broccoli Bowls with Garlic Sauce, you’ll need a handful of fresh and wholesome ingredients. Here’s what you’ll need:

  • 2 boneless, skinless chicken breasts (about 1 pound)
  • 1 tablespoon olive oil
  • 1 teaspoon garlic powder
  • 1 teaspoon onion powder
  • 1 teaspoon paprika
  • Salt and pepper to taste
  • 4 cups broccoli florets (fresh or frozen)
  • 1 cup cooked brown rice or quinoa
  • 1/2 cup plain Greek yogurt
  • 2 tablespoons mayonnaise
  • 2 cloves garlic, minced
  • 1 tablespoon lemon juice
  • 1 tablespoon chopped fresh parsley (optional)

These ingredients come together to create a balanced meal that is not only delicious but also nutritious. The chicken provides lean protein, while the broccoli adds essential vitamins and minerals. The creamy garlic sauce ties everything together, adding a rich flavor that enhances the dish.

Feel free to adjust the ingredients based on your dietary needs or preferences. For instance, you can swap out the brown rice for quinoa or use a different type of vegetable. The possibilities are endless!

Preparation of Grilled Chicken Broccoli Bowls with Garlic Sauce

Now that you have all your ingredients ready, it’s time to prepare your Grilled Chicken Broccoli Bowls with Garlic Sauce. This process is straightforward and will have your kitchen smelling amazing in no time. Let’s break it down step by step!

Step 1: Marinating the Chicken

Start by marinating the chicken. In a small bowl, mix together the olive oil, garlic powder, onion powder, paprika, salt, and pepper. This blend of spices will give your chicken a flavorful kick. Rub this mixture all over the chicken breasts, ensuring they are well coated. Let the chicken marinate for at least 15 minutes. This allows the flavors to soak in, making the chicken even tastier.

Step 2: Preparing the Broccoli

While the chicken is marinating, it’s time to prepare the broccoli. If you’re using fresh broccoli, wash it thoroughly and cut it into florets. If you’re using frozen broccoli, there’s no need to worry about cutting. Just have it ready to steam. This step is crucial as broccoli adds a nice crunch and vibrant color to your bowls.

Step 3: Grilling the Chicken

Once the chicken has marinated, preheat your grill to medium-high heat. Place the chicken breasts on the grill and cook for about 6-7 minutes on each side. You want the internal temperature to reach 165°F for safe consumption. After grilling, remove the chicken from the grill and let it rest for 5 minutes. This resting period helps keep the chicken juicy and tender.

Step 4: Cooking the Broccoli

While the chicken is grilling, steam the broccoli florets. If you’re using fresh broccoli, steam them for about 5-7 minutes until they are tender but still bright green. For frozen broccoli, follow the package instructions. Steaming helps retain the nutrients and keeps the broccoli crisp.

Step 5: Making the Garlic Sauce

Next, let’s whip up the creamy garlic sauce. In a separate bowl, combine the plain Greek yogurt, mayonnaise, minced garlic, lemon juice, and a pinch of salt. Mix everything together until it’s smooth and creamy. This sauce is the star of the dish, adding a rich flavor that complements the chicken and broccoli perfectly.

Step 6: Assembling the Bowls

Now comes the fun part—assembling your bowls! Start by placing 1/2 cup of cooked brown rice or quinoa at the bottom of each bowl. Next, add a generous portion of steamed broccoli and top it off with sliced grilled chicken. Finally, drizzle the creamy garlic sauce over the top. If you like, sprinkle some chopped parsley for a fresh touch. Your Grilled Chicken Broccoli Bowls with Garlic Sauce are now ready to enjoy!

Variation of Grilled Chicken Broccoli Bowls with Garlic Sauce

While the classic Grilled Chicken Broccoli Bowls with Garlic Sauce are delicious, there are many ways to switch things up! You can easily customize this recipe to suit your taste or dietary needs. Let’s explore some fun variations!

Alternative Proteins

If you’re looking to change the protein in your bowls, there are plenty of options. You can use:

  • Turkey Breast: Lean and flavorful, turkey is a great substitute for chicken.
  • Tofu: For a vegetarian option, marinated and grilled tofu works wonderfully.
  • Salmon: Grilled salmon adds a rich flavor and healthy omega-3 fatty acids.
  • Shrimp: Quick-cooking shrimp can be grilled or sautéed for a seafood twist.

Each of these proteins brings its own unique taste and texture, making your bowls exciting and new!

Different Vegetables

Don’t feel limited to just broccoli! You can mix in or replace vegetables to create your perfect bowl. Consider these options:

  • Bell Peppers: Add color and sweetness with grilled or roasted bell peppers.
  • Asparagus: Tender asparagus spears are a great addition for a fresh crunch.
  • Spinach: Sautéed spinach can add a nutritious boost to your meal.
  • Carrots: Shredded or steamed carrots add a nice sweetness and vibrant color.

Feel free to get creative! Mixing different vegetables can enhance the flavor and nutrition of your bowls.

Sauce Variations

The creamy garlic sauce is a highlight, but you can try different sauces to change the flavor profile. Here are some ideas:

  • Spicy Sriracha Sauce: Add a kick by mixing Sriracha with Greek yogurt for a spicy twist.
  • Honey Mustard: A blend of honey and mustard can create a sweet and tangy sauce.
  • Teriyaki Sauce: For an Asian flair, drizzle teriyaki sauce over your bowls.
  • Avocado Dressing: Blend ripe avocado with lime juice for a creamy, healthy alternative.

These sauce variations can completely transform your Grilled Chicken Broccoli Bowls with Garlic Sauce, making each meal feel new and exciting!

Cooking Note for Grilled Chicken Broccoli Bowls with Garlic Sauce

When preparing your Grilled Chicken Broccoli Bowls with Garlic Sauce, a few cooking notes can help ensure your meal turns out perfectly every time. These tips will enhance your cooking experience and the final dish.

First, always check the freshness of your ingredients. Fresh chicken and vegetables not only taste better but also provide more nutrients. If you’re using frozen broccoli, make sure it’s properly thawed before cooking. This helps it cook evenly and maintain its vibrant color.

Next, marinating the chicken is crucial. Allowing it to sit for at least 15 minutes helps the flavors penetrate the meat. If you have more time, consider marinating it for a few hours or even overnight in the refrigerator. This extra time can make a big difference in flavor.

When grilling the chicken, ensure your grill is preheated. A hot grill helps achieve those beautiful grill marks and locks in moisture. Use a meat thermometer to check the internal temperature. This ensures your chicken is cooked through without being dry.

For the broccoli, steaming is the best method to retain its nutrients. If you prefer a bit of char, you can also grill the broccoli for a smoky flavor. Just toss the florets in a little olive oil and season them lightly before placing them on the grill for a few minutes.

Lastly, when making the creamy garlic sauce, taste as you go. Adjust the garlic and lemon juice to suit your preference. If you like it tangier, add more lemon juice. For a richer flavor, consider adding a bit more mayonnaise or Greek yogurt.

By following these cooking notes, you’ll create delicious Grilled Chicken Broccoli Bowls with Garlic Sauce that are sure to impress your family and friends. Enjoy the process and happy cooking!

Serving Suggestions for Grilled Chicken Broccoli Bowls with Garlic Sauce

Once you’ve prepared your Grilled Chicken Broccoli Bowls with Garlic Sauce, it’s time to think about how to serve them. Presentation can elevate your meal, making it even more enjoyable. Here are some serving suggestions to enhance your dining experience:

  • Garnish with Fresh Herbs: A sprinkle of fresh parsley or cilantro can add a pop of color and freshness. It also enhances the flavor of the dish.
  • Serve with Lemon Wedges: Adding lemon wedges on the side allows everyone to squeeze fresh juice over their bowls. This adds a zesty kick that brightens the flavors.
  • Pair with a Side Salad: A light side salad with mixed greens, cherry tomatoes, and a simple vinaigrette complements the bowls perfectly. It adds crunch and freshness.
  • Offer Extra Sauce: Serve additional creamy garlic sauce on the side for those who love a little extra flavor. You can also provide different sauces for variety.
  • Use Colorful Bowls: Serving your bowls in colorful dishes can make the meal more visually appealing. Bright colors can make the food look even more appetizing.
  • Include Whole Grain Bread: A slice of whole grain bread or a roll can be a great addition. It’s perfect for soaking up any extra sauce.

These serving suggestions not only enhance the visual appeal of your Grilled Chicken Broccoli Bowls with Garlic Sauce but also add layers of flavor and texture. Whether it’s a family dinner or a gathering with friends, these tips will help create a delightful dining experience. Enjoy your meal!

Tips for Perfect Grilled Chicken Broccoli Bowls with Garlic Sauce

Creating the perfect Grilled Chicken Broccoli Bowls with Garlic Sauce is all about attention to detail. With a few simple tips, you can elevate your dish and impress everyone at the table. Here are some helpful suggestions to ensure your bowls turn out delicious every time:

  • Choose Quality Chicken: Start with fresh, high-quality chicken breasts. Look for organic or free-range options if possible. This can make a noticeable difference in flavor and texture.
  • Don’t Skip the Marinade: Allow the chicken to marinate for at least 15 minutes, but if you have time, let it sit for a few hours. This helps the spices penetrate the meat, making it more flavorful.
  • Preheat Your Grill: Always preheat your grill to medium-high heat. A hot grill ensures even cooking and helps achieve those beautiful grill marks.
  • Use a Meat Thermometer: To ensure your chicken is perfectly cooked, use a meat thermometer. The internal temperature should reach 165°F. This prevents overcooking and keeps the chicken juicy.
  • Steam Broccoli Just Right: When steaming broccoli, aim for a bright green color and tender-crisp texture. Overcooking can lead to mushy broccoli, so keep an eye on it!
  • Customize the Sauce: Feel free to adjust the creamy garlic sauce to your taste. If you love garlic, add an extra clove. For a tangier flavor, increase the lemon juice.
  • Layer Your Bowls: When assembling, layer the ingredients thoughtfully. Start with the rice or quinoa, then add broccoli, followed by chicken, and finish with the sauce. This creates a beautiful presentation.
  • Let It Rest: After grilling, let the chicken rest for about 5 minutes before slicing. This helps retain the juices, making each bite tender and flavorful.
  • Experiment with Toppings: Don’t hesitate to add toppings like sliced almonds, sesame seeds, or even a sprinkle of feta cheese. These can add extra flavor and texture to your bowls.
  • Enjoy Freshness: Serve your bowls immediately after assembling for the best taste. Fresh ingredients always shine when served right away!

By following these tips, you’ll create Grilled Chicken Broccoli Bowls with Garlic Sauce that are not only delicious but also visually appealing. Enjoy the process and savor every bite!

Breakdown of Time for Grilled Chicken Broccoli Bowls with Garlic Sauce

Understanding the time needed for each step in preparing your Grilled Chicken Broccoli Bowls with Garlic Sauce can help you plan your cooking efficiently. Here’s a simple breakdown of the time required for preparation and cooking.

Prep Time

The prep time for this recipe is approximately 20 minutes. This includes:

  • Gathering all your ingredients.
  • Marinating the chicken, which takes about 15 minutes.
  • Preparing the broccoli by washing and cutting it into florets.
  • Measuring out the ingredients for the creamy garlic sauce.

By organizing your ingredients and steps, you can streamline the process and make it even quicker!

Cooking Time

The cooking time for the Grilled Chicken Broccoli Bowls is around 15 minutes. This includes:

  • Grilling the chicken for about 12-14 minutes, flipping halfway through.
  • Steaming the broccoli for about 5-7 minutes until tender.

While the chicken is grilling, you can steam the broccoli simultaneously, making the most of your cooking time.

Total Time

In total, you can expect the entire process to take about 35 minutes. This includes both prep and cooking time. Here’s a quick summary:

  • Prep Time: 20 minutes
  • Cooking Time: 15 minutes
  • Total Time: 35 minutes

This quick and efficient timeline makes it easy to enjoy a healthy and delicious meal without spending hours in the kitchen. So, gather your ingredients and get ready to whip up these delightful Grilled Chicken Broccoli Bowls with Garlic Sauce!

Nutritional Information for Grilled Chicken Broccoli Bowls with Garlic Sauce

Understanding the nutritional content of your meals is essential for maintaining a balanced diet. The Grilled Chicken Broccoli Bowls with Garlic Sauce not only taste great but also provide a healthy mix of nutrients. Let’s break down the key nutritional components of this delicious dish.

Calories

Each serving of Grilled Chicken Broccoli Bowls with Garlic Sauce contains approximately 400 calories. This makes it a satisfying meal option without being overly heavy. The combination of grilled chicken, broccoli, and the creamy garlic sauce provides a well-rounded meal that can fit into various dietary plans.

Protein

Protein is crucial for building and repairing tissues, and this recipe delivers! Each serving contains about 35 grams of protein. The chicken is the primary source of protein, making it an excellent choice for those looking to increase their protein intake. This high protein content helps keep you feeling full and satisfied, making it a great option for lunch or dinner.

Sodium

When it comes to sodium, this dish is relatively moderate. Each serving has around 600 milligrams of sodium. While this is within a reasonable range for most diets, it’s always a good idea to monitor your sodium intake, especially if you have specific dietary restrictions. You can reduce the sodium by using low-sodium versions of the ingredients or by adjusting the amount of salt added during preparation.

Overall, the Grilled Chicken Broccoli Bowls with Garlic Sauce offer a nutritious meal that balances calories, protein, and sodium. This makes it a fantastic choice for anyone looking to enjoy a healthy and delicious dish without compromising on flavor!

FAQs about Grilled Chicken Broccoli Bowls with Garlic Sauce

Can I use frozen broccoli for Grilled Chicken Broccoli Bowls with Garlic Sauce?

Absolutely! Frozen broccoli is a convenient option and works perfectly in this recipe. Just follow the package instructions for steaming or cooking. It’s a great way to save time while still enjoying the nutritional benefits of broccoli. Plus, frozen broccoli is often flash-frozen at peak freshness, so it retains its nutrients well.

What can I substitute for garlic in the sauce?

If you’re looking to substitute garlic in the creamy sauce, there are a few options. You can use garlic powder or garlic salt for a milder flavor. Alternatively, consider using shallots or green onions for a different taste. If you want to avoid garlic altogether, try adding a bit of lemon zest or a dash of mustard for a tangy kick!

How can I make Grilled Chicken Broccoli Bowls with Garlic Sauce ahead of time?

Making these bowls ahead of time is easy! You can grill the chicken and steam the broccoli in advance. Store them separately in airtight containers in the refrigerator. When you’re ready to eat, simply reheat the chicken and broccoli, then assemble your bowls with the rice or quinoa and sauce. This makes for a quick and healthy meal on busy days!

Is this recipe suitable for meal prep?

Yes, this recipe is perfect for meal prep! The Grilled Chicken Broccoli Bowls with Garlic Sauce can be made in bulk and stored in individual containers. They keep well in the fridge for up to four days. Just remember to keep the sauce separate until you’re ready to eat to maintain the freshness and creaminess. This way, you’ll have delicious, healthy meals ready to go throughout the week!

Conclusion on Grilled Chicken Broccoli Bowls with Garlic Sauce

In conclusion, Grilled Chicken Broccoli Bowls with Garlic Sauce are a fantastic meal option that combines flavor, nutrition, and ease of preparation. This dish is not only satisfying but also versatile, allowing you to customize it to fit your taste preferences and dietary needs. Whether you’re enjoying it for a family dinner or meal prepping for the week, these bowls are sure to impress.

The combination of tender grilled chicken, vibrant broccoli, and a creamy garlic sauce creates a delightful harmony of flavors. Plus, with the added benefits of protein and essential nutrients, you can feel good about what you’re eating. The recipe is straightforward, making it accessible for cooks of all skill levels.

As you explore the variations and tips provided, don’t hesitate to get creative in the kitchen. Experimenting with different proteins, vegetables, and sauces can lead to exciting new flavors and textures. Remember, cooking is all about enjoying the process and making it your own!

So, gather your ingredients, fire up the grill, and get ready to enjoy a delicious and healthy meal. Your Grilled Chicken Broccoli Bowls with Garlic Sauce are waiting to be savored. Happy cooking!