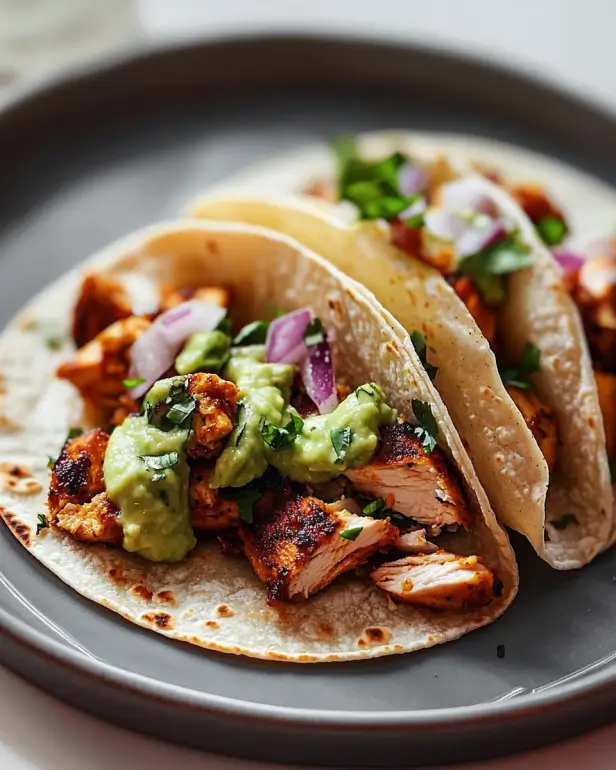
Introduction to Teriyaki Chicken Tacos with Pineapple-Pear Salsa
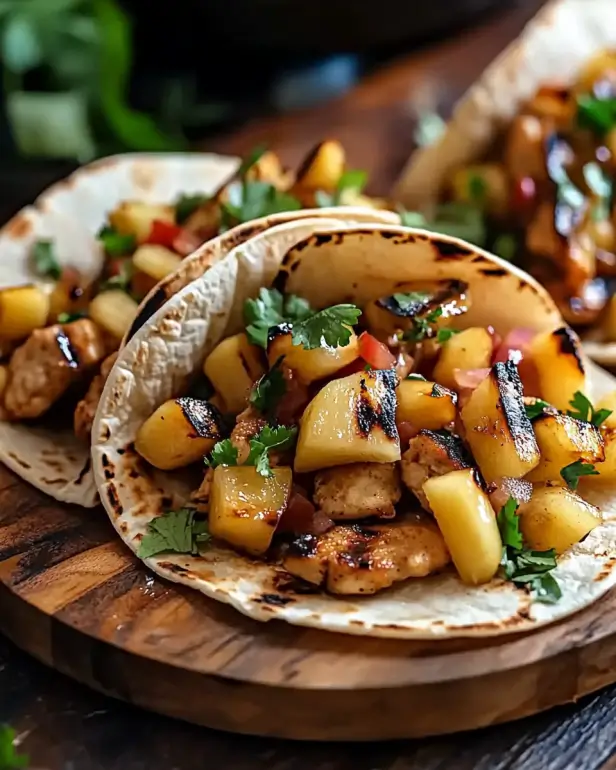
Are you ready to take your taco night to a whole new level? Teriyaki Chicken Tacos with Pineapple-Pear Salsa are a delightful twist on traditional tacos. They combine the savory flavors of teriyaki chicken with the refreshing sweetness of grilled pineapple and pear. This dish is not only delicious but also easy to prepare, making it perfect for any occasion. Whether you’re hosting a party or enjoying a family dinner, these tacos will surely impress your guests.
What Makes Teriyaki Chicken Tacos Unique?
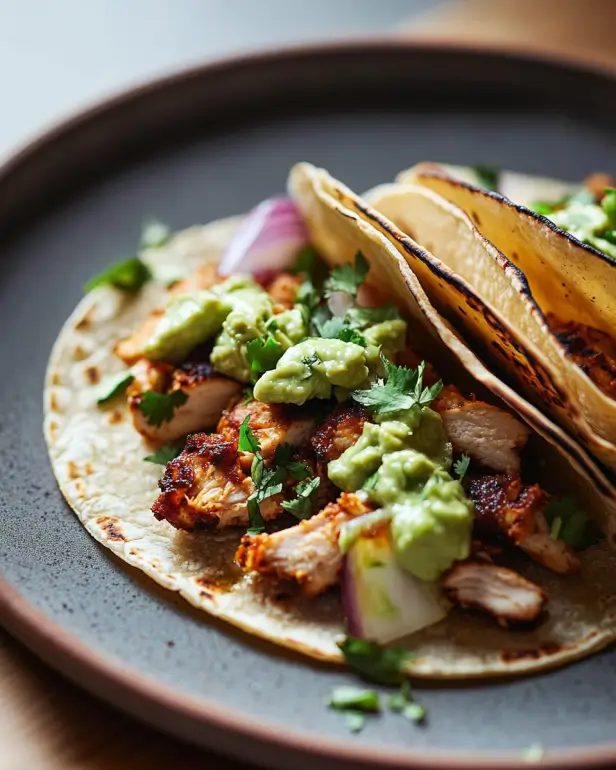
What sets Teriyaki Chicken Tacos apart from regular tacos? The answer lies in the unique blend of flavors. The teriyaki sauce adds a rich, sweet, and savory taste to the shredded chicken. This flavor profile is a delightful departure from the usual taco seasonings. Additionally, the use of corn tortillas gives these tacos a traditional touch, while the grilled chicken brings a smoky flavor that enhances the overall experience. Each bite is a burst of flavor that will leave you craving more!
The Perfect Pairing: Pineapple-Pear Salsa
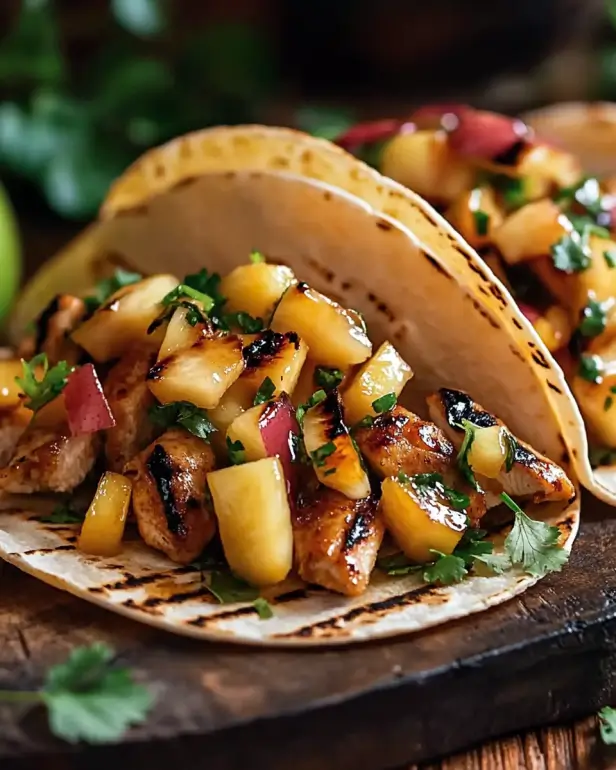
Now, let’s talk about the star of the show: the pineapple-pear salsa. This salsa is not just a topping; it’s a game-changer! The combination of fresh pineapple and ripe pear creates a sweet and tangy contrast to the savory chicken. The red onion adds a bit of crunch, while the cilantro brings a fresh herbaceous note. A splash of lime juice ties everything together, making this salsa a refreshing complement to the tacos. It’s a perfect balance of flavors that enhances the overall dish, making every bite a delightful experience.
Ingredients for Teriyaki Chicken Tacos with Pineapple-Pear Salsa
To create these mouthwatering Teriyaki Chicken Tacos with Pineapple-Pear Salsa, you’ll need a few simple ingredients. Each component plays a vital role in building the flavors and textures that make this dish so special. Here’s what you’ll need:
- 2 cups cooked chicken, shredded: Use rotisserie chicken for convenience or cook your own for a fresh taste.
- 1/2 cup teriyaki sauce: This sauce adds a sweet and savory flavor that’s essential for the chicken.
- 8 small corn tortillas: Corn tortillas provide a traditional base for the tacos, adding a nice texture.
- 1 cup fresh pineapple, diced: Grilled pineapple adds a sweet and smoky flavor that pairs perfectly with the chicken.
- 1 ripe pear, diced: The pear adds a juicy sweetness that complements the pineapple.
- 1/4 cup red onion, finely chopped: Red onion gives a crunchy texture and a bit of sharpness to the salsa.
- 1/4 cup fresh cilantro, chopped: Cilantro adds a fresh, herbaceous note that brightens the dish.
- 1 tablespoon lime juice: Lime juice adds acidity, balancing the sweetness of the salsa.
- 1 teaspoon olive oil: Olive oil helps to bring the salsa together and adds richness.
- Salt and pepper to taste: Seasoning is key to enhancing all the flavors in the dish.
- Lime wedges for serving: Fresh lime wedges are perfect for squeezing over the tacos for an extra zing.
Gathering these ingredients will set you on the path to creating a delicious meal that’s sure to impress. The combination of savory chicken and sweet salsa makes for a delightful taco experience. So, let’s get cooking!
Step-by-Step Preparation of Teriyaki Chicken Tacos with Pineapple-Pear Salsa
Now that you have all your ingredients ready, it’s time to dive into the preparation of these delicious Teriyaki Chicken Tacos with Pineapple-Pear Salsa. Follow these simple steps to create a meal that’s bursting with flavor!
Step 1: Marinating the Chicken
Start by marinating the chicken. In a medium bowl, combine the shredded chicken with the teriyaki sauce. Make sure every piece of chicken is coated well. This step is crucial as it allows the chicken to soak up the sweet and savory flavors of the teriyaki sauce. Let it marinate for at least 15 minutes. If you have more time, letting it sit longer will enhance the flavor even more!
Step 2: Cooking the Chicken
Once the chicken has marinated, it’s time to cook it. Preheat your grill or grill pan over medium-high heat. Place the marinated chicken on the grill and cook for about 5-7 minutes. Turn the chicken occasionally to ensure it heats evenly and gets a nice caramelized finish. The aroma will be irresistible!
Step 3: Preparing the Pineapple-Pear Salsa
While the chicken is grilling, you can prepare the pineapple-pear salsa. In a separate bowl, mix together the diced pineapple, diced pear, finely chopped red onion, chopped cilantro, lime juice, and olive oil. Season with salt and pepper to taste. Gently stir the ingredients to combine. This salsa is fresh, vibrant, and adds a wonderful contrast to the savory chicken.
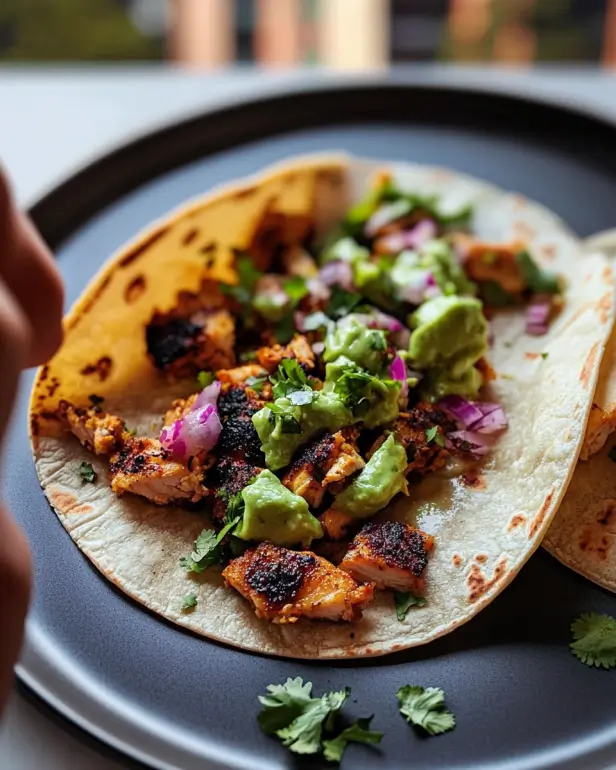
Step 4: Assembling the Tacos
Now comes the fun part—assembling the tacos! Start by warming the corn tortillas on the grill for about 30 seconds on each side. This makes them pliable and enhances their flavor. Once warmed, place a generous portion of the grilled teriyaki chicken on each tortilla. Top it off with a spoonful of the grilled pineapple-pear salsa. The combination of flavors will make your taste buds dance!
Serve the tacos immediately with lime wedges on the side. A squeeze of fresh lime juice over the tacos adds a zesty kick that elevates the dish even further. Enjoy your delicious Teriyaki Chicken Tacos with Pineapple-Pear Salsa!
Variations of Teriyaki Chicken Tacos with Pineapple-Pear Salsa
While the classic Teriyaki Chicken Tacos with Pineapple-Pear Salsa are a hit, there are many ways to switch things up! Exploring variations can keep your taco nights exciting and cater to different tastes. Here are some fun ideas to consider:
Alternative Proteins
If you want to change the protein in your tacos, there are plenty of delicious options. For a lighter choice, try using grilled shrimp. The sweet and slightly briny flavor of shrimp pairs wonderfully with the teriyaki sauce. Simply marinate the shrimp in the same teriyaki sauce and grill them until they turn pink and opaque.
Another great alternative is tofu. For a vegetarian option, use firm tofu. Press the tofu to remove excess moisture, then cut it into cubes. Marinate the cubes in teriyaki sauce and grill them until they are golden and crispy. This will give you a satisfying texture and flavor.
For those who enjoy beef, consider using thinly sliced flank steak. Marinate the steak in teriyaki sauce and grill it to your desired doneness. The rich flavor of beef adds a hearty touch to the tacos.
Different Salsas to Try
While the pineapple-pear salsa is a standout, you can experiment with other salsas to keep things fresh. A mango salsa is a fantastic alternative. Combine diced mango, red onion, jalapeño, cilantro, and lime juice for a tropical twist. The sweetness of mango complements the teriyaki chicken beautifully.
For a zesty kick, try a spicy avocado salsa. Mash ripe avocados and mix them with diced tomatoes, red onion, lime juice, and chopped cilantro. This creamy salsa adds richness and balances the flavors of the tacos.
If you’re feeling adventurous, consider a roasted corn salsa. Grill corn on the cob until charred, then cut the kernels off and mix them with diced bell peppers, red onion, lime juice, and cilantro. This salsa adds a smoky flavor that pairs well with the teriyaki chicken.
With these variations, you can customize your Teriyaki Chicken Tacos with Pineapple-Pear Salsa to suit your taste preferences. Enjoy experimenting and discovering new flavor combinations!

Cooking Note for Teriyaki Chicken Tacos with Pineapple-Pear Salsa
When preparing Teriyaki Chicken Tacos with Pineapple-Pear Salsa, a few cooking notes can help ensure your dish turns out perfectly every time. These tips will enhance your cooking experience and the final flavor of your tacos.
First, always use high-quality teriyaki sauce. The flavor of the sauce is crucial, as it infuses the chicken with sweetness and depth. If you have time, consider making your own teriyaki sauce. This way, you can control the sweetness and saltiness to your liking.
Next, when grilling the chicken, make sure your grill is preheated. A hot grill will give the chicken a nice sear, locking in moisture and flavor. If you’re using a grill pan, ensure it’s well-oiled to prevent sticking.
For the grilled pineapple, choose ripe fruit. A ripe pineapple will be sweeter and more flavorful. Cut the pineapple into thick slices to prevent them from falling apart on the grill. This will also help achieve those beautiful grill marks that add to the presentation.
When preparing the salsa, feel free to adjust the ingredients based on your taste. If you prefer a sweeter salsa, add more pear or pineapple. For a tangier flavor, increase the lime juice. Remember, cooking is all about personal preference, so don’t hesitate to make it your own!
Lastly, serve the tacos immediately after assembling. This ensures the tortillas remain warm and pliable, while the salsa stays fresh and vibrant. If you need to prepare in advance, keep the components separate until you’re ready to serve. This way, your tacos will taste as fresh as possible!
By following these cooking notes, you’ll create delicious Teriyaki Chicken Tacos with Pineapple-Pear Salsa that are sure to impress your family and friends. Happy cooking!
Serving Suggestions for Teriyaki Chicken Tacos with Pineapple-Pear Salsa
Once you’ve prepared your delicious Teriyaki Chicken Tacos with Pineapple-Pear Salsa, it’s time to think about what to serve alongside them. The right side dishes and beverages can elevate your meal and create a well-rounded dining experience. Here are some fantastic suggestions to complement your tacos!
Side Dishes to Complement the Tacos
When it comes to side dishes, you want something that balances the flavors of the tacos without overpowering them. Here are a few ideas:
- Mexican Street Corn (Elote): Grilled corn on the cob slathered in mayonnaise, cheese, lime juice, and chili powder is a perfect match. The creamy and spicy flavors enhance the sweetness of the tacos.
- Simple Green Salad: A fresh salad with mixed greens, cherry tomatoes, and a light vinaigrette can provide a refreshing contrast. The crispness of the greens will balance the richness of the chicken.
- Black Bean Salad: A hearty black bean salad with corn, bell peppers, and a lime dressing adds protein and fiber. This dish is colorful and complements the flavors of the tacos beautifully.
- Guacamole and Tortilla Chips: Creamy guacamole served with crunchy tortilla chips is always a crowd-pleaser. The richness of the guacamole pairs well with the sweet and savory tacos.
These side dishes not only enhance your meal but also add variety to your dining experience. Choose one or two to serve alongside your tacos for a complete feast!
Beverage Pairings
To wash down your Teriyaki Chicken Tacos with Pineapple-Pear Salsa, consider these refreshing beverage options:
- Margaritas: A classic margarita, whether frozen or on the rocks, is a fantastic pairing. The citrusy flavors complement the sweetness of the salsa.
- Light Beer: A crisp, light beer, such as a pilsner or lager, can enhance the flavors of the tacos without overwhelming them.
- Iced Tea: Unsweetened iced tea with a splash of lime is a refreshing non-alcoholic option. It’s light and won’t compete with the flavors of the meal.
- Fruit-Infused Water: For a healthy choice, serve water infused with slices of lime, lemon, or cucumber. This adds a refreshing twist and keeps everyone hydrated.
Choosing the right beverages can elevate your taco night. Whether you prefer something fruity, refreshing, or classic, these pairings will enhance your dining experience. Enjoy your meal!
Tips for Perfect Teriyaki Chicken Tacos with Pineapple-Pear Salsa
Creating the perfect Teriyaki Chicken Tacos with Pineapple-Pear Salsa is all about attention to detail. With a few helpful tips, you can elevate your taco-making skills and impress your family and friends. Here are some essential tips to ensure your tacos turn out delicious every time:
- Choose Quality Ingredients: Start with fresh, high-quality ingredients. Fresh chicken, ripe fruits, and good teriyaki sauce make a big difference in flavor. If possible, opt for organic produce to enhance the taste.
- Marinate Longer: While 15 minutes is the minimum for marinating the chicken, letting it sit for 30 minutes or even a few hours will deepen the flavor. If you have time, marinate overnight for the best results.
- Grill at the Right Temperature: Ensure your grill is preheated to medium-high heat. This helps achieve a nice sear on the chicken and pineapple, locking in moisture and flavor.
- Don’t Overcook: Keep an eye on the chicken while grilling. Overcooking can lead to dry chicken. Aim for an internal temperature of 165°F (75°C) for perfectly cooked chicken.
- Experiment with Toppings: Feel free to add extra toppings to your tacos. Sliced jalapeños, avocado, or a drizzle of sriracha can add a delightful kick. Get creative and make it your own!
- Warm Tortillas Properly: Warming the corn tortillas is key to making them pliable. You can also wrap them in a clean kitchen towel and place them in a microwave for about 20 seconds for a quick warm-up.
- Serve Fresh: Assemble the tacos just before serving. This keeps the tortillas warm and the salsa fresh. If you need to prepare in advance, keep the components separate until ready to serve.
- Garnish with Lime: Always serve lime wedges on the side. A squeeze of fresh lime juice over the tacos brightens the flavors and adds a zesty touch that enhances the overall dish.
By following these tips, you’ll create Teriyaki Chicken Tacos with Pineapple-Pear Salsa that are bursting with flavor and sure to impress. Enjoy the process and have fun experimenting with different ingredients!
Breakdown of Time for Teriyaki Chicken Tacos with Pineapple-Pear Salsa
Understanding the time needed to prepare Teriyaki Chicken Tacos with Pineapple-Pear Salsa can help you plan your meal better. Here’s a simple breakdown of the time required for each step, so you can enjoy a smooth cooking experience.
Prep Time
The prep time for these delicious tacos is quite manageable. You’ll need about 15-20 minutes to gather and prepare all your ingredients. This includes shredding the chicken, dicing the pineapple and pear, chopping the red onion and cilantro, and mixing the salsa. If you choose to marinate the chicken longer, you can use this time to relax or set the table!
Cooking Time
Once you’re ready to cook, the actual cooking time is approximately 10-15 minutes. This includes grilling the marinated chicken for about 5-7 minutes and grilling the pineapple for an additional 4-6 minutes. Warming the corn tortillas will take just a minute or two. Overall, the cooking process is quick and efficient, allowing you to enjoy your meal in no time!
Total Time
In total, you can expect to spend around 30-35 minutes from start to finish. This includes both prep and cooking time. If you decide to marinate the chicken for longer, the total time may extend slightly, but the extra flavor is well worth it! With this quick and easy timeline, you’ll have a delicious meal ready to serve in no time.
Nutritional Information for Teriyaki Chicken Tacos with Pineapple-Pear Salsa
Understanding the nutritional content of your meals is essential for maintaining a balanced diet. Teriyaki Chicken Tacos with Pineapple-Pear Salsa not only taste great but also provide a good mix of nutrients. Here’s a breakdown of the nutritional information per serving, so you can enjoy these tacos guilt-free!
Calories
Each serving of Teriyaki Chicken Tacos with Pineapple-Pear Salsa contains approximately 320 calories. This makes it a satisfying meal without being overly heavy. The combination of chicken, fresh fruits, and corn tortillas provides a balanced calorie count, perfect for lunch or dinner.
Protein
These tacos are a great source of protein, offering about 25 grams per serving. The shredded chicken is the primary protein source, which is essential for muscle repair and overall health. Including protein in your meals helps keep you feeling full and satisfied, making these tacos a smart choice for any meal.
Sodium
In terms of sodium, each serving contains around 600 milligrams. While this is a reasonable amount for a flavorful dish, it’s always good to be mindful of your sodium intake, especially if you’re watching your salt consumption. You can reduce the sodium by using low-sodium teriyaki sauce or adjusting the amount of added salt in the salsa.
Overall, Teriyaki Chicken Tacos with Pineapple-Pear Salsa offer a delicious and nutritious option for your meal planning. With a good balance of calories, protein, and sodium, they can fit well into a healthy diet. Enjoy these tasty tacos while feeling good about what you’re eating!
FAQs about Teriyaki Chicken Tacos with Pineapple-Pear Salsa
Can I use a different type of meat for the tacos?
Absolutely! While the recipe calls for shredded chicken, you can easily substitute it with other proteins. Grilled shrimp is a fantastic option, as its sweet flavor pairs well with the teriyaki sauce. If you prefer a vegetarian choice, tofu works wonderfully too. Just make sure to press and marinate the tofu before grilling. For beef lovers, thinly sliced flank steak can add a hearty touch. The key is to marinate your chosen protein in teriyaki sauce to infuse it with flavor!
How can I make the salsa spicier?
If you’re looking to add some heat to your pineapple-pear salsa, there are several easy ways to do so! One of the simplest methods is to include sliced jalapeños or serrano peppers. You can add them fresh for a crisp bite or grill them for a smoky flavor. Another option is to mix in a pinch of cayenne pepper or red pepper flakes. If you enjoy a creamy texture, consider adding diced avocado with a sprinkle of chili powder. These additions will give your salsa a delightful kick!
Can I prepare the tacos in advance?
While it’s best to assemble the tacos just before serving for optimal freshness, you can prepare some components in advance. The marinated chicken can be made a day ahead and stored in the refrigerator. The pineapple-pear salsa can also be prepared a few hours in advance; just keep it covered in the fridge. However, it’s best to warm the tortillas and assemble the tacos right before serving. This way, they stay warm and delicious!
What are some good toppings for Teriyaki Chicken Tacos?
There are plenty of tasty toppings you can add to your Teriyaki Chicken Tacos to enhance their flavor! Consider adding sliced avocado for creaminess or crumbled feta cheese for a salty kick. Fresh jalapeños can add heat, while a drizzle of sriracha or hot sauce can spice things up. For a refreshing crunch, shredded cabbage or sliced radishes work well. Finally, don’t forget a sprinkle of sesame seeds or a handful of extra cilantro for a beautiful finish. Get creative and make these tacos your own!
Conclusion on Teriyaki Chicken Tacos with Pineapple-Pear Salsa
In conclusion, Teriyaki Chicken Tacos with Pineapple-Pear Salsa are a delightful fusion of flavors that can elevate any meal. The combination of savory teriyaki chicken and the sweet, refreshing salsa creates a unique taste experience that is both satisfying and enjoyable. Whether you’re hosting a gathering or simply looking for a quick weeknight dinner, these tacos are sure to impress.
Not only are they easy to prepare, but they also offer versatility. You can customize the recipe with different proteins or salsas to suit your taste preferences. The vibrant colors and fresh ingredients make these tacos visually appealing, adding to the overall dining experience.
As you gather around the table to enjoy these delicious tacos, remember that cooking is about creativity and sharing moments with loved ones. So, don’t hesitate to experiment with flavors and make this dish your own. With the tips and variations provided, you can create a taco night that everyone will look forward to.
So, roll up your sleeves, gather your ingredients, and get ready to savor the delightful taste of Teriyaki Chicken Tacos with Pineapple-Pear Salsa. Happy cooking!