


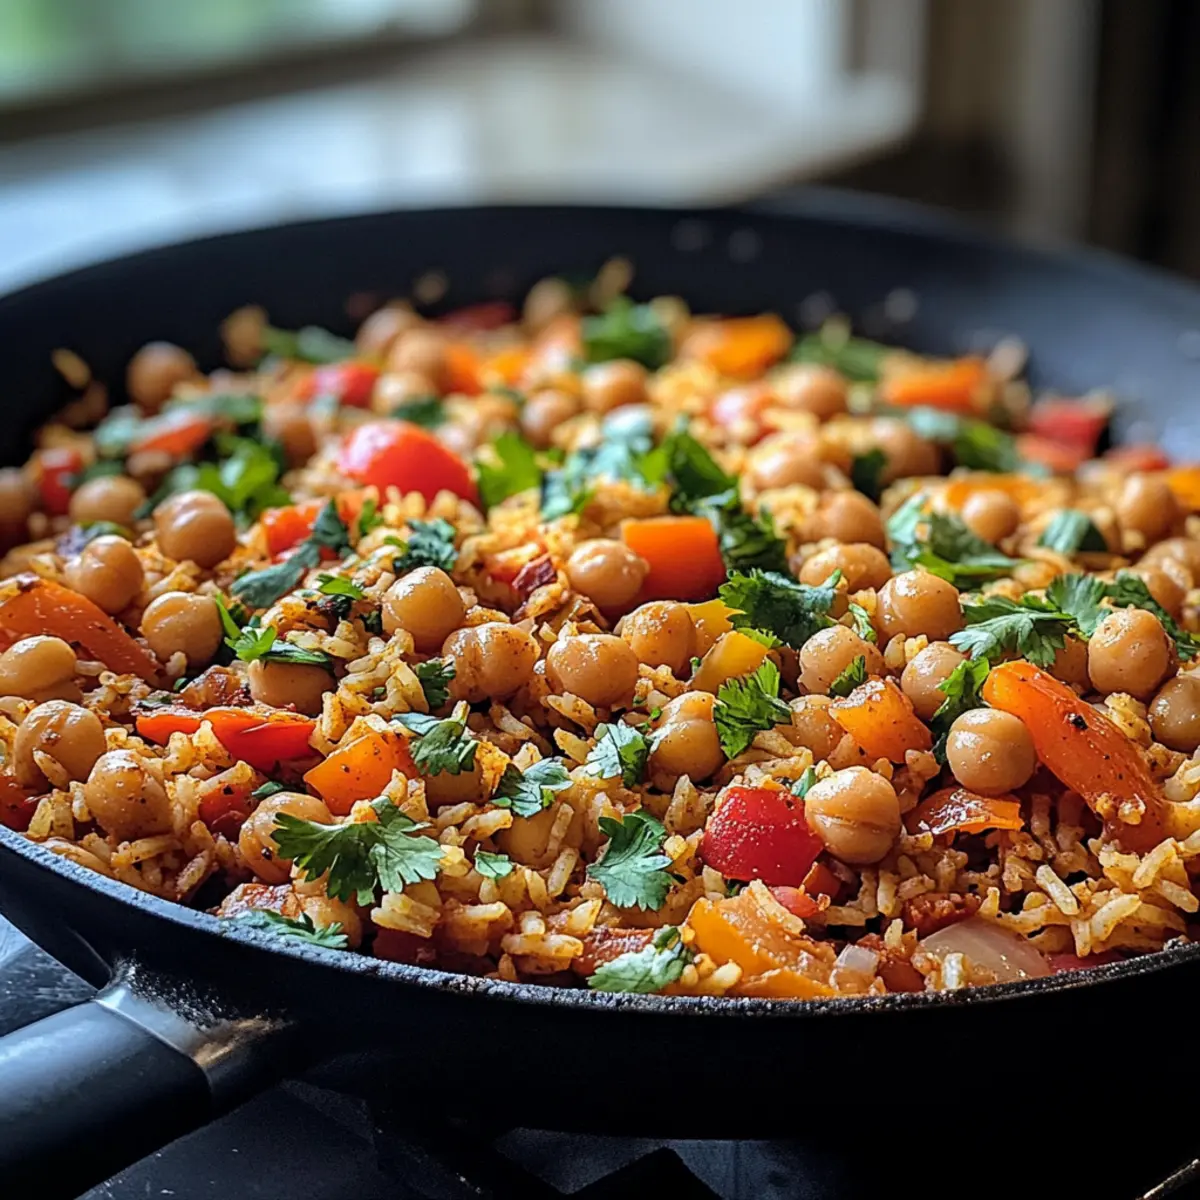
You know that feeling when you need a satisfying meal but life’s chaos gets in the way? That’s where my Taco-Spiced Chickpea and Rice Skillet comes to the rescue! Whipping this up is a breeze, making it perfect for those busy weeknights when you crave something flavorful yet uncomplicated. This dish celebrates the hearty and nutritious chickpeas, perfectly paired with rice, all wrapped in a warm hug of zingy Tex-Mex spices. It’s not just quick to prepare; it’s also customizable, allowing you to throw in your favorite veggies or toppings. Imagine gathering around the table, enjoying a delicious meal that everyone will love, and knowing you invested no more than 30 minutes to create it. Curious about how to bring this vibrant dish to life? Let’s dive in!
Why is this skillet recipe a must-try?
Bold, Flavorful Dish: The Taco-Spiced Chickpea and Rice Skillet brings bold Tex-Mex flavors to your table in no time.
Quick to Prepare: With just 30 minutes needed, this recipe is perfect for busy weeknights when you need a nutritious meal fast.
Customizable Options: Easily adapt this dish by using different proteins or veggies, just like in my Pepperoncini Chicken Skillet for more variety!
Crowd-Pleaser: Its zesty goodness makes it a terrific option for both family dinners and friendly gatherings.
Satisfying Textures: Enjoy a delightful mix of chewy chickpeas, tender rice, and crunchy vegetables that creates an irresistible harmony.
Taco-Spiced Chickpea and Rice Skillet Ingredients
For the Base
- Olive Oil – Adds richness and helps sauté vegetables; substitute with any neutral oil if needed.
- Onion – Provides sweetness and depth; use shallots for a milder flavor.
- Bell Pepper – Adds color and crunch; any variety (red, green, yellow) works beautifully.
- Garlic – Enhances flavor and aroma; fresh is best, but garlic powder can be used as a quick alternative.
- Canned Chickpeas – Offers protein and fiber; swap for black beans for a different taste and texture.
- Cooked Rice – Acts as the dish’s hearty base; any cooked rice can be utilized, though brown rice may require longer cooking time.
- Diced Tomatoes – Adds moisture and acidity; feel free to use fresh tomatoes if you prefer.
- Vegetable Broth – Enhances flavor and adds liquid; chicken broth works for a non-vegetarian option.
- Taco Seasoning – Infuses the dish with Tex-Mex spices; adjust the amount based on your spice preference.
- Salt and Pepper – Essential for seasoning; taste and adjust to your liking.
Optional Toppings
- Shredded Cheese – A classic addition for a cheesy finish; try a sharp cheddar for extra flavor!
- Sour Cream – Adds creamy richness; use a plant-based alternative for a dairy-free version.
- Avocado – Brings creaminess; diced avocado adds a refreshing touch.
- Cilantro – Adds bright, fresh flavor; sprinkle on top for a pop of color and taste.
This vibrant and customizable Taco-Spiced Chickpea and Rice Skillet is sure to become a comforting favorite!
Step‑by‑Step Instructions for Taco-Spiced Chickpea and Rice Skillet
Step 1: Heat the Oil
In a 10-inch skillet, heat 2 tablespoons of olive oil over medium heat until shimmering, about 1-2 minutes. This ensures a hot surface for sautéing. Once ready, add 1 chopped onion and 1 bell pepper, cooking for 5–7 minutes until they’re softened and fragrant, brightening your kitchen with delicious aromas.
Step 2: Add the Garlic
After the onion and bell pepper become tender, stir in 3 minced garlic cloves and cook for an additional minute. You’ll know it’s ready when the garlic becomes fragrant and slightly golden. This step adds depth to your Taco-Spiced Chickpea and Rice Skillet, setting the stage for all the vibrant flavors to come.
Step 3: Combine the Base Ingredients
Next, stir in 1 can of drained chickpeas, 1 cup cooked rice, 1 can of undrained diced tomatoes, 1 cup vegetable broth, and 2 tablespoons of taco seasoning. Mix well to combine all ingredients thoroughly. The vibrant colors will make your skillet come alive, promising an amazing meal ahead!
Step 4: Simmer and Cook
Bring the mixture to a gentle simmer, then reduce the heat to low. Cover the skillet and let it cook for 15–20 minutes, stirring occasionally as the flavors meld. You’re looking for the liquid to absorb and the rice to become tender, transforming ingredients into a warm, delicious Taco-Spiced Chickpea and Rice Skillet.
Step 5: Season to Taste
Once cooked, uncover the skillet and taste your dish. Season with salt and pepper according to your preference, allowing the flavors to shine through. You can adjust the taco seasoning here too if you crave more zest. Serve your vibrant meal hot, ready to please the whole family!
Taco-Spiced Chickpea and Rice Skillet Variations
Want to make this delightful dish even more your own? Let’s explore some exciting tweaks and substitutions!
- Protein Swap: Replace chickpeas with black beans or kidney beans for a different yet equally satisfying texture and flavor.
- Extra Veggies: Boost nutrition by adding corn, zucchini, or mushrooms—these will bring extra color and lovely textures to your skillet!
- Creamy Toppings: Garnish with guacamole, pico de gallo, or pickled onions—each adds a bright pop of flavor that perfectly complements the taco spices.
- Whole Grains: Swap regular rice for quinoa or brown rice for a nuttier flavor and added health benefits.
- Spice it Up: Incorporate a pinch of cayenne pepper or jalapeños to turn up the heat if your taste buds are feeling adventurous!
- Herb Infusion: Toss in fresh cilantro or parsley right before serving for an added burst of freshness and color.
- Cheesy Delight: Top with shredded cheese like Monterey Jack or Cotija for a rich, melty finish that just screams comfort food.
- Savory Broth: Use chicken broth instead of vegetable broth for added depth if you’re not keeping it strictly vegetarian.
Feel free to experiment and make this Taco-Spiced Chickpea and Rice Skillet your own! For more hearty options, check out my delicious Smothered Chicken Rice or vibrant Salmon Rice Bowls!
Expert Tips for Taco-Spiced Chickpea and Rice Skillet
- Choose the Right Oil: Opt for olive oil for richness, but feel free to substitute with canola or avocado oil if you prefer a neutral taste.
- Avoid Overcooking Vegetables: Sauté the onion and bell pepper just until tender for the best flavor and texture—about 5-7 minutes is ideal to prevent them from becoming mushy.
- Balance the Seasoning: Adjust the taco seasoning to suit your taste. Remember, it’s easier to add more later, so start small!
- Mix Ingredients Well: Ensure all ingredients are thoroughly combined before simmering—this helps in creating a robust flavor profile for the Taco-Spiced Chickpea and Rice Skillet.
- Keep an Eye on Liquid Levels: Stir occasionally while cooking to prevent sticking or burning, and feel free to add a splash of broth if it seems too dry.
- Customize Your Dish: Don’t hesitate to include your favorite vegetables or protein—this recipe is wonderfully versatile!
Make Ahead Options
These Taco-Spiced Chickpea and Rice Skillet ingredients are perfect for meal prep enthusiasts! You can chop and store the onions, bell peppers, and garlic in an airtight container up to 3 days in advance to save valuable cooking time. The canned chickpeas and cooked rice can also be stored separately for freshness. When ready to cook, just sauté the vegetables, stir in the chickpeas, rice, diced tomatoes, vegetable broth, and taco seasoning, and simmer as directed. To maintain the best quality, refrigerate any leftovers in an airtight container for up to 3 days, then reheat thoroughly before serving your delicious, nutritious meal!
How to Store and Freeze Taco-Spiced Chickpea and Rice Skillet
Fridge: Store leftovers in an airtight container for up to 3 days. Reheat thoroughly on the stovetop or in the microwave before enjoying again.
Freezer: Freeze portions in airtight containers or freezer bags for up to 3 months. Label with the date for easy tracking.
Thawing: Defrost overnight in the fridge before reheating, or use the microwave’s defrost setting for quicker results.
Reheating: Gently reheat on low heat on the stovetop, adding a splash of vegetable broth to revive moisture and flavor in the Taco-Spiced Chickpea and Rice Skillet.
What to Serve with Taco-Spiced Chickpea and Rice Skillet
Elevate your dining experience by pairing this vibrant skillet dish with delicious sides that enhance its bold flavors.
-
Creamy Avocado Salad: A refreshing salad with avocados, tomatoes, and lime, adding a creamy texture that balances the dish’s spice.
-
Warm Cornbread: Soft and slightly sweet cornbread is perfect for sopping up all those flavorful juices—comfort food at its best.
-
Zesty Cucumber Salsa: Crisp cucumbers and tangy lime create a vibrant salsa that adds a refreshing crunch to each bite.
-
Tortilla Chips with Guacamole: The crunchy chips paired with creamy guacamole provide delicious contrast and make for a great appetizer.
-
Mexican Street Corn: Grilled corn topped with lime and cotija cheese offers a sweet and smoky element to round out the meal.
-
Spiced Roasted Vegetables: Serve with a colorful mix of roasted seasonal vegetables that complements the Tex-Mex flavors beautifully.
-
Chilled Wine or Sparkling Water: Opt for a chilled white wine or infused sparkling water to cleanse the palate between bites and create a refreshing dining experience.
These delightful pairings not only enhance your Taco-Spiced Chickpea and Rice Skillet but elevate your entire meal into a festive culinary journey!
Taco-Spiced Chickpea and Rice Skillet Recipe FAQs
What type of chickpeas should I use for this skillet?
Absolutely! Canned chickpeas, which are higher in fiber and protein, are ideal for this dish as they cook quickly and save you prep time. If you prefer a different flavor or texture, you can also substitute them with black beans or kidney beans instead.
How should I store leftover Taco-Spiced Chickpea and Rice Skillet?
You can store leftovers in an airtight container in the refrigerator for up to 3 days. Make sure to let the skillet cool completely before sealing. When you’re ready to enjoy it again, reheat thoroughly on the stovetop or in the microwave for the best texture.
Can I freeze this dish for later?
Certainly! Freezing is a great way to enjoy your Taco-Spiced Chickpea and Rice Skillet later. To do this, let it cool, then portion it into airtight containers or freezer bags. It will last for up to 3 months. Be sure to label with the date for easier tracking.
How do I thaw and reheat the frozen skillet?
To thaw, place the frozen portions in the refrigerator overnight. If you need it sooner, use the microwave’s defrost setting. When you’re ready to reheat, do it gently over low heat on the stovetop. Adding a splash of vegetable broth can help restore moisture and keep your skillet flavorful.
What are some common issues I might encounter when making this recipe?
You might find that your rice is still hard, which could happen if you didn’t let it simmer long enough. Make sure to cover the skillet and allow it to cook for the full 15–20 minutes, stirring occasionally. If you notice the mixture looks dry, you can always add a bit more broth to ensure everything cooks evenly.
Are there any dietary considerations I should keep in mind?
Very! If you have allergies, this recipe is vegetarian and easily adaptable for vegans. Just use plant-based sour cream and cheese for the toppings. Additionally, ensure to check the labels on your vegetable broth and taco seasoning to avoid any hidden allergens.
Taco-Spiced Chickpea and Rice Skillet for Easy Weeknight Joy
Ingredients
Equipment
Method
- In a 10-inch skillet, heat 2 tablespoons of olive oil over medium heat until shimmering, about 1-2 minutes.
- Add 1 chopped onion and 1 bell pepper; cook for 5–7 minutes until softened and fragrant.
- Stir in 3 minced garlic cloves and cook for an additional minute.
- Stir in 1 can of drained chickpeas, 1 cup cooked rice, 1 can of diced tomatoes, 1 cup vegetable broth, and 2 tablespoons of taco seasoning. Mix well.
- Bring the mixture to a gentle simmer, then reduce the heat to low. Cover and cook for 15–20 minutes.
- Once cooked, uncover, season with salt and pepper, and adjust taco seasoning if needed.