


As I stood in the kitchen, the enticing aroma of garlic wafting through the air, my excitement grew. Today, I’m sharing a recipe that offers a delightful culinary experience: Roasted Garlic Bone Marrow with Air-Fried Roasted Garlic. This dish is a crowd-pleaser, perfect for an intimate dinner or a gathering of friends. It’s amazing how simple ingredients can transform into a gourmet treat in under an hour, allowing you to impress without the fuss. Plus, using the air fryer provides a quick prep method and perfectly crispy garlic that contrasts beautifully with the rich, buttery bone marrow. Are you ready to elevate your cooking and indulge in this savory delight?
Why is This Recipe a Must-Try?
Simplicity: The combination of two straightforward recipes allows anyone, even novice cooks, to shine in the kitchen with minimal fuss.
Flavor Explosion: Each bite delivers a rich, buttery bone marrow paired with the aromatic crunch of air-fried garlic, resulting in a sensational taste experience.
Use of Air Fryer: This recipe saves time without compromising on flavor, ensuring the garlic achieves that perfect crispy texture effortlessly.
Versatile Dish: Perfect as a luxurious appetizer, or a cozy dinner option, this dish adapts to any occasion, impressing guests while keeping prep stress-free.
Health Benefits: Bone marrow is not only delicious but also packed with nutrients like collagen and healthy fats. Enjoy this gourmet treat guilt-free!
Pair it with crusty bread or check out my recipes for Garlic Chicken Gnocchi and Garlic Butter Chicken to further elevate your meal.
Roasted Garlic Bone Marrow Ingredients
For the Roasted Garlic
• Bulb Garlic – Adds rich, sweet flavor when roasted; substitute with shallots for a milder option.
• Extra Virgin Olive Oil (EVOO) – Helps roast the garlic and adds richness; use avocado oil for a different flavor profile.
• Pink Himalayan Salt – Enhances flavor and adds a touch of minerals; regular sea salt can be used.
• Black Pepper – Provides a mild heat; adjust to taste.
For the Bone Marrow
• Beef Bones (1 pack) – The main ingredient providing a luxurious texture; ensure bones are cut lengthwise for easier access to marrow.
• Garlic Salt – Complements the garlic flavors; optional for those who prefer less garlic.
• Garlic Powder – Intensifies the garlic flavor; adjust to your preference.
• Sprinkle of Himalayan Salt (for topping) – Final touch for flavor; can use regular salt.
For Garnish
• Fresh Parsley (chopped, 1/8 cup) – Adds freshness and color; substitute with chives or green onions if desired.
Indulge in the rich taste of roasted garlic bone marrow that beautifully combines flavors. Enjoy your culinary adventure!
Step‑by‑Step Instructions for Roasted Garlic Bone Marrow
Step 1: Prepare the Air-Fried Roasted Garlic
Begin by cutting off the top of a whole bulb of garlic, exposing the individual cloves. Drizzle with extra virgin olive oil, then sprinkle with pink Himalayan salt and black pepper. Wrap it loosely in foil, creating a secure pouch. Set your air fryer to 380°F and air fry the garlic for about 20 minutes, or until it turns golden brown and crispy, releasing a sweet aroma.
Step 2: Preheat the Oven
While the garlic is air frying, preheat your oven to 425°F. This high temperature will ensure that the bone marrow cooks evenly and becomes beautifully caramelized. Line a baking sheet with parchment paper for easy cleanup and to catch any drippings from the beef bones.
Step 3: Arrange the Bone Marrow
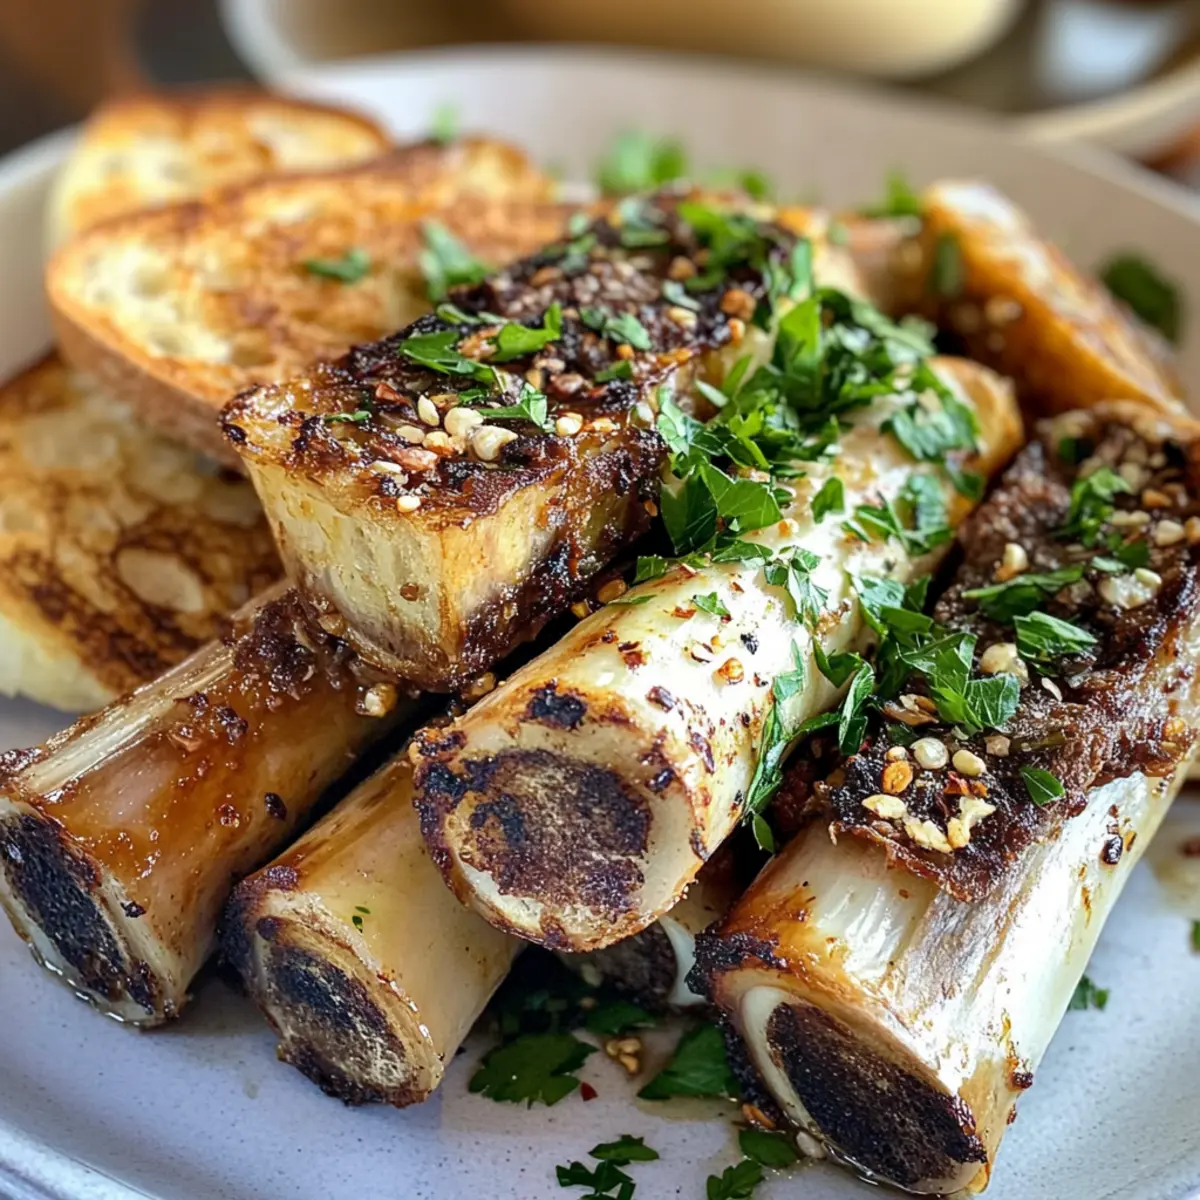
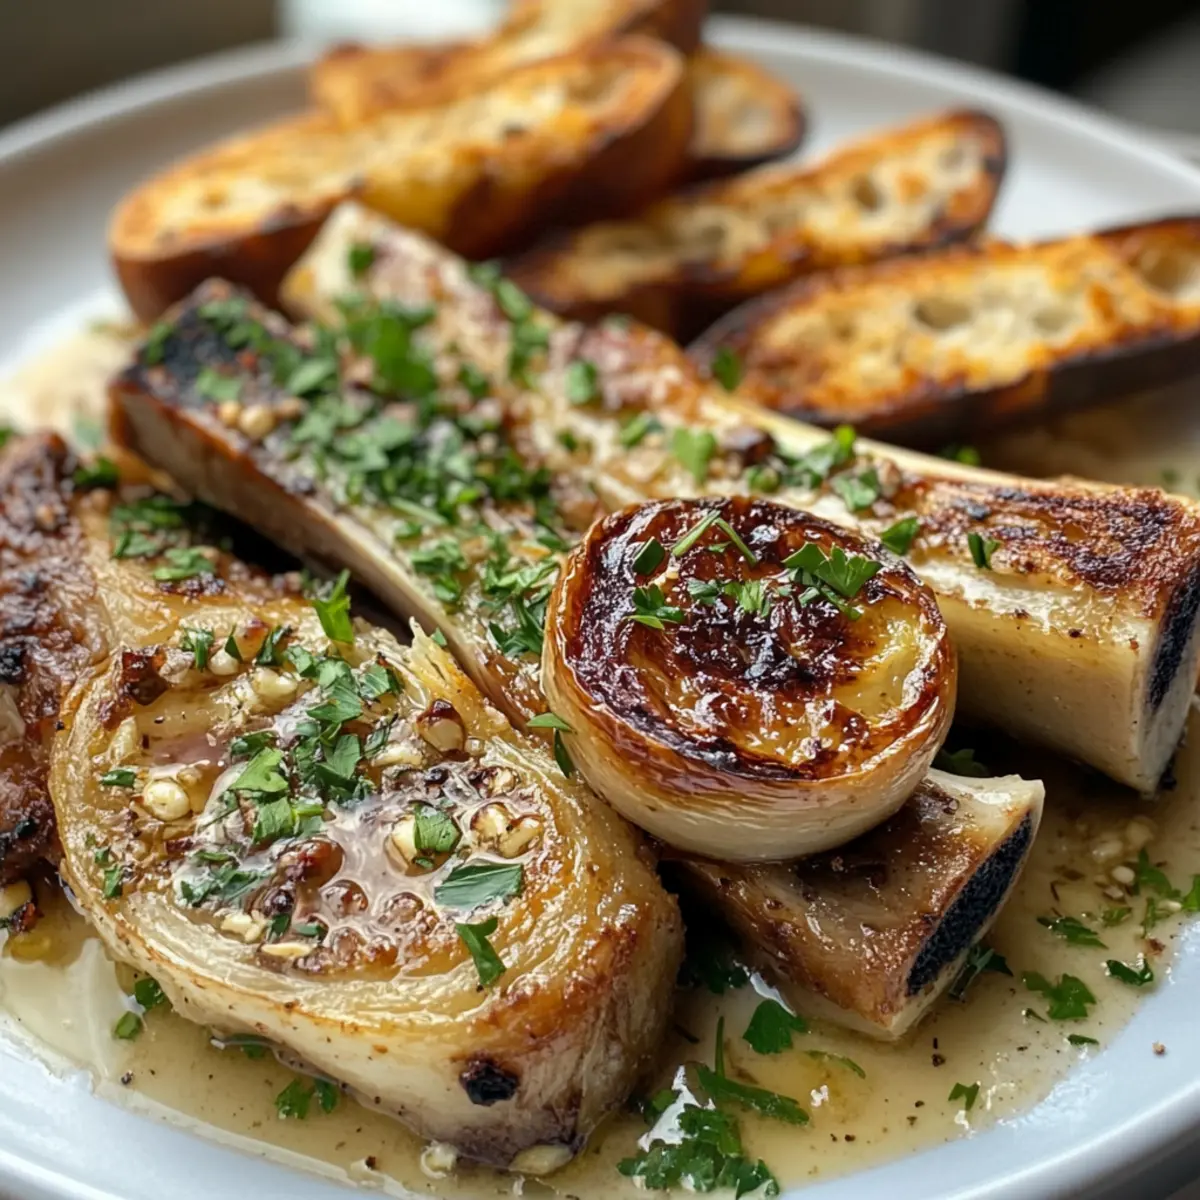
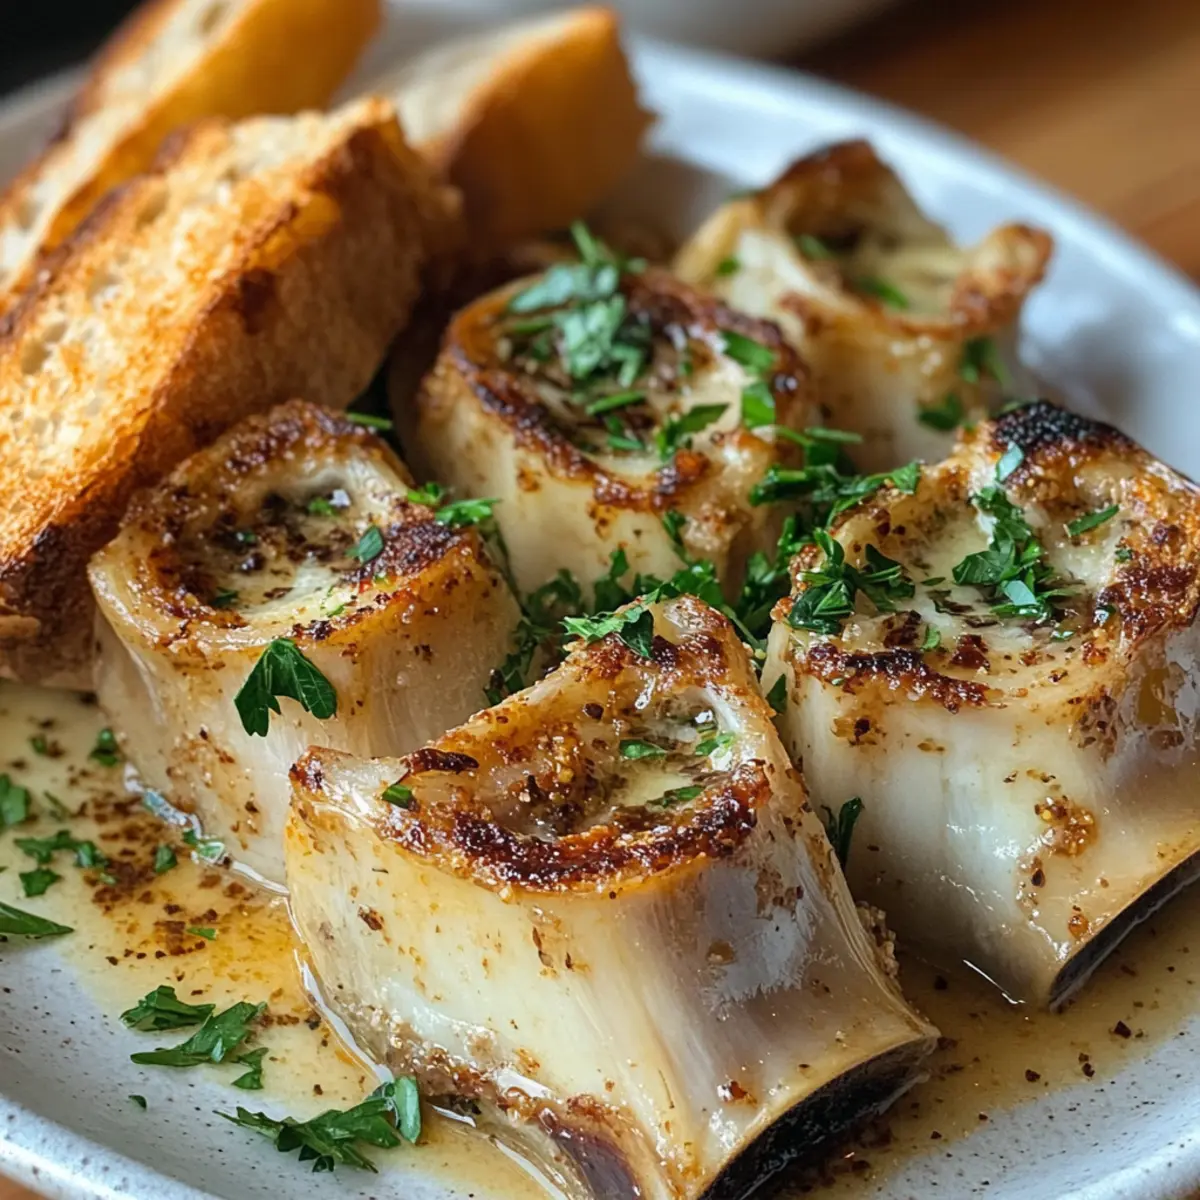
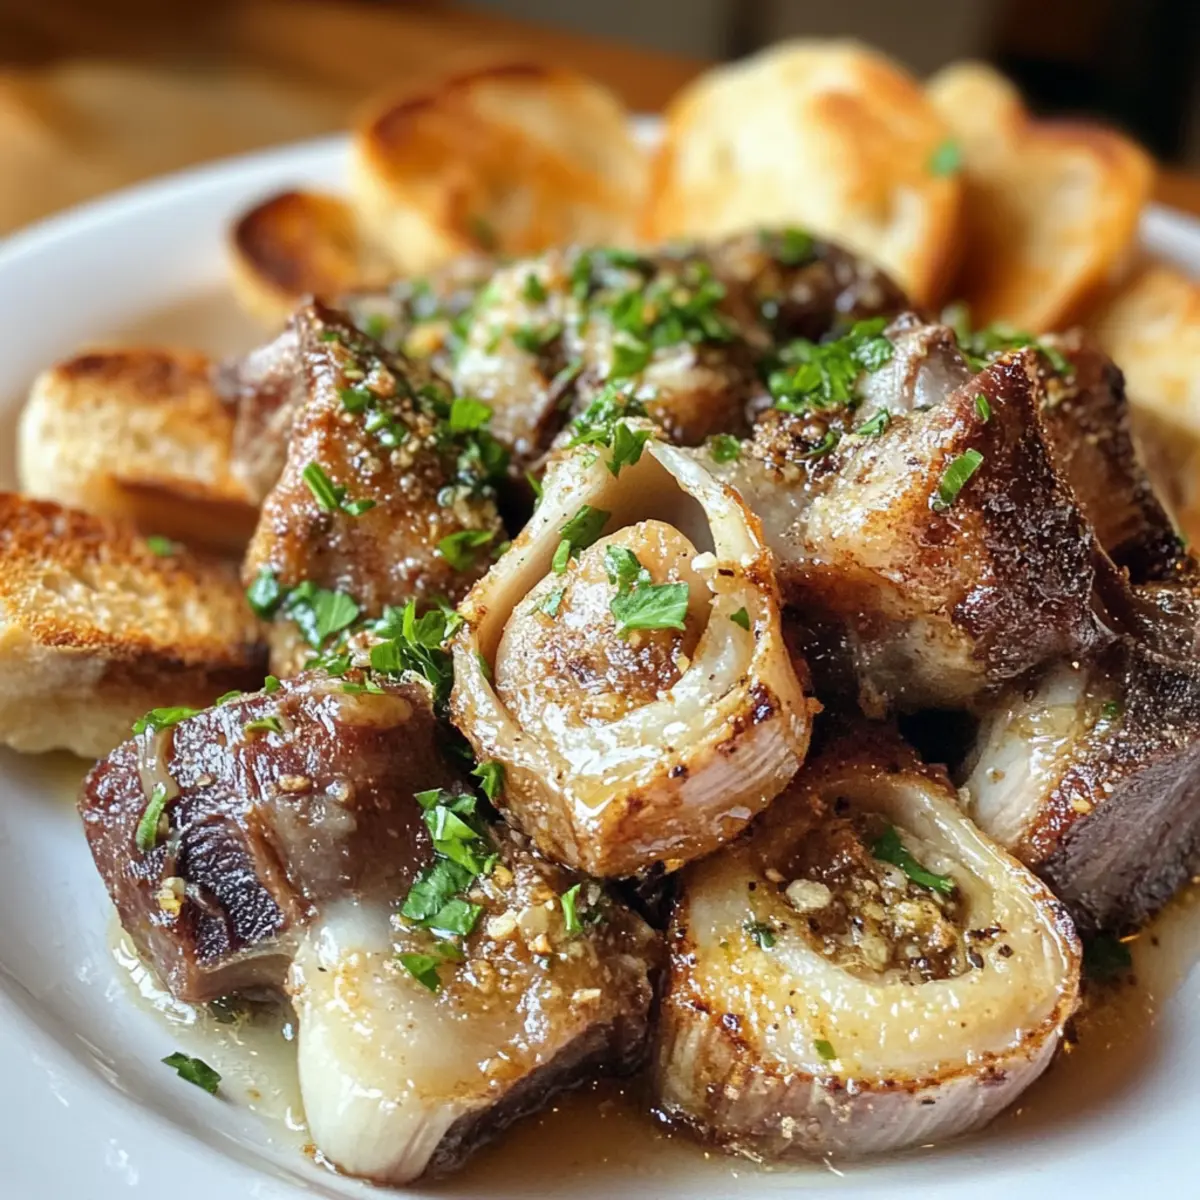
Once the oven is preheated, take the beef bones—cut lengthwise to expose the marrow—and arrange them on the lined baking sheet with the marrow side facing upward. Season generously with garlic salt, garlic powder, and black pepper, then finish with a sprinkle of Himalayan salt to enhance the flavors. These steps set the stage for roasting the delicious bone marrow.
Step 4: Roast the Bone Marrow
Place the prepared baking sheet with the seasoned bones in the preheated oven. Roast for about 20 minutes, or until the marrow becomes bubbly and golden brown on top. Keep an eye on them to avoid overcooking, as the marrow should be tender and slightly caramelized.
Step 5: Combine and Garnish
When the roasted garlic is done and the bone marrow is perfectly cooked, carefully remove them from the oven. Enjoy the delightful aroma! Crush or squeeze the roasted garlic cloves into a bowl, mixing their buttery goodness with freshly chopped parsley for added flavor and color, creating a vibrant garnish for your dish.
Step 6: Serve and Enjoy
To serve your Roasted Garlic Bone Marrow, begin by scooping the warm, rich marrow from the bones onto toasted bread or crostini. Top it with the aromatic roasted garlic mixture you prepared, ensuring each bite is bursting with flavor. Feel free to accompany this dish with pickled vegetables for a contrast that elevates the culinary experience.
Roasted Garlic Bone Marrow Variations
Feel free to explore these delightful twists that will make your roasted garlic bone marrow experience even more exciting!
-
Spicy Twist: Add cayenne pepper to your seasoning mix for the bone marrow to bring in a zesty heat that beautifully contrasts the buttery richness.
-
Herbaceous Flair: Swap out parsley for fresh thyme or rosemary to introduce an earthy aroma that complements the savory flavors perfectly.
-
Cheesy Indulgence: Top the marrow with grated Parmesan before roasting for an extra layer of umami and a delightful cheesy crust.
-
Tangy Addition: Serve with a side of pickled vegetables or a drizzle of balsamic glaze for a tangy contrast that brightens the dish.
-
Nutty Flavor: Incorporate toasted pine nuts or chopped nuts into the roasted garlic mixture for a crunchy texture that adds depth to each bite.
-
Creamy Delight: Mix cream cheese with your roasted garlic for a rich and creamy spread that pairs beautifully with the marrow on toasted bread.
-
Smoky Essence: Sprinkle smoked paprika or use a smoky sea salt on the bone marrow before roasting for a taste that transcends traditional flavors.
-
Gourmet Touch: Pair with homemade basil pesto; the vibrancy of the pesto offers a refreshing counterpoint to the rich marrow and savory garlic.
Looking to expand your culinary adventures? Try my easy recipe for Garlic Chilli Cacio or the comforting flavors in Garlic Butter Pork for your next dinner!
Make Ahead Options
These Roasted Garlic Bone Marrow recipes are perfect for meal prep enthusiasts looking to simplify their dinner routines! You can prepare the air-fried roasted garlic up to 24 hours in advance. Simply follow the initial steps of cutting and seasoning the garlic, then wrap it in foil and refrigerate it (this helps to maintain moisture and flavor). As for the bone marrow, you can season the bones up to 3 days in advance, keeping them covered in the fridge. When it’s time to serve, just bake the prepared bones for about 20 minutes at 425°F and air fry the garlic for 20 minutes at 380°F. This way, you’ll achieve that gourmet experience with minimal effort, allowing you to impress your guests while saving precious time!
How to Store and Freeze Roasted Garlic Bone Marrow
Fridge: Store leftover roasted garlic and bone marrow in separate airtight containers for up to 3 days. Ensure they are cooled completely before sealing to maintain freshness.
Freezer: For longer storage, freeze the bone marrow in an airtight container for up to 3 months. Thaw in the fridge overnight before reheating.
Reheating: Reheat marrow gently in the oven at 350°F for about 10 minutes until warmed through. Serve with freshly made air-fried garlic for an indulgent treat.
Roasted Garlic Storage: Roasted garlic can also be stored in a sealed container in the fridge for up to a week, making it a versatile addition to various dishes.
What to Serve with Crispy Air-Fried Roasted Garlic & Savory Bone Marrow Delight
Savoring the rich flavors of this gourmet dish deserves a complementary spread that harmonizes textures and tastes to create a memorable meal experience.
-
Toasted Crostini: The crispy texture of toasted bread provides a delightful contrast to the buttery richness of the bone marrow, making each bite irresistible.
-
Pickled Vegetables: A tangy side of pickled carrots and cucumbers adds a refreshing crunch that beautifully cuts through the richness of the marrow.
-
Simple Arugula Salad: A light arugula salad dressed with lemon vinaigrette introduces a peppery freshness, balancing the savory notes of roasted garlic.
-
Roasted Root Vegetables: Sweet roasted carrots and parsnips caramelize beautifully, complementing the deep, savory flavors of the bone marrow and garlic.
-
Creamy Mashed Potatoes: Silky mashed potatoes serve as a comforting side, providing a rich and creamy counterpoint that enhances the overall dining experience.
-
Red Wine: A full-bodied red wine pairs wonderfully with bone marrow, its tannins cutting through the richness and elevating the meal to wine-country levels.
Imagine gathering around the table, accompanied by these delightful pairings, each adding their unique flair to the luxurious roasted garlic bone marrow experience.
Expert Tips for Roasted Garlic Bone Marrow
-
Use Fresh Garlic: Fresh garlic is key for the sweetest flavor; dried or old garlic won’t achieve the caramelization that elevates this recipe.
-
Check Air Fryer Settings: Air fryer models vary greatly; start with 15 minutes and monitor for optimal browning of roasted garlic to avoid burning.
-
Quality Bone Selection: Choose high-quality beef bones with ample marrow; this ensures a rich and satisfying experience, enhancing your roasted garlic bone marrow delight.
-
Season Generously: Don’t skimp on seasoning—garlic salt and black pepper amplify flavors, so season bones thoroughly before roasting for best results.
-
Toasty Bread Pairing: Serve the marrow on toasted bread to create a crunchy contrast with the buttery texture of the marrow, enhancing the overall experience.
Roasted Garlic Bone Marrow Recipe FAQs
How do I choose the right garlic for roasting?
Absolutely! When selecting garlic, look for firm, plump bulbs without any dark spots or sprouting. Fresh garlic should feel heavy for its size and have a papery, dry outer skin. For a milder option, shallots can be substituted in place of garlic, giving a less pungent flavor while still providing sweetness.
What’s the best way to store leftover roasted garlic and bone marrow?
For leftovers, store roasted garlic and bone marrow in separate airtight containers in the fridge for up to 3 days. Make sure both are completely cooled before sealing to maintain their freshness and taste. If you’d like to enjoy them later, consider freezing the bone marrow for up to 3 months in an airtight container.
Can I freeze roasted garlic? If so, how?
Yes, you can absolutely freeze roasted garlic! Start by allowing it to cool completely. Then, place the cloves in an ice cube tray and cover them with olive oil. Once they are frozen, transfer the cubes into a resealable bag. These can be stored in the freezer for up to 3 months, allowing you to easily add garlic to any dish whenever the craving strikes.
What should I do if my garlic is burning in the air fryer?
If your garlic is burning, it may be due to cooking at a too high temperature or air frying for too long. Every air fryer is different, so I recommend checking your garlic after 15 minutes. You can reduce the temperature to 350°F and adjust the cooking time to around 15-18 minutes instead. Keep a close eye on it until golden and crispy; you’ll achieve that perfect buttery texture!
Is bone marrow safe for pets?
Very! Bone marrow can be a healthy treat for dogs, but it’s important to give it in moderation due to its rich nature. Make sure to ensure any bones are raw and avoid giving cooked bones, which can splinter and cause harm. Always consult your veterinarian if you’re unsure about introducing new foods to your pet’s diet.
Are there any dietary considerations I should be aware of?
Yes! Bone marrow is rich in fats and collagen, which can be beneficial but should be enjoyed in moderation, especially for those managing dietary restrictions or weight. Additionally, those with allergies to beef should avoid this recipe altogether. If you’re following a gluten-free diet, this dish is perfect since it contains no gluten, especially when served with gluten-free bread alternatives!
Tender Roasted Garlic Bone Marrow with Crispy Garlic Bliss
Ingredients
Equipment
Method
- Cut off the top of a whole bulb of garlic, drizzle with extra virgin olive oil, and sprinkle with salt and black pepper. Wrap in foil and air fry at 380°F for about 20 minutes.
- Preheat your oven to 425°F and line a baking sheet with parchment paper.
- Arrange the beef bones on the baking sheet with the marrow side facing upward. Season with garlic salt, garlic powder, and black pepper, finishing with a sprinkle of Himalayan salt.
- Roast the bones in the oven for about 20 minutes until bubbly and golden brown.
- Remove from the oven, crush the roasted garlic into a bowl, and mix with chopped parsley for garnish.
- Serve by scooping the marrow onto toasted bread and topping with the roasted garlic mixture.