


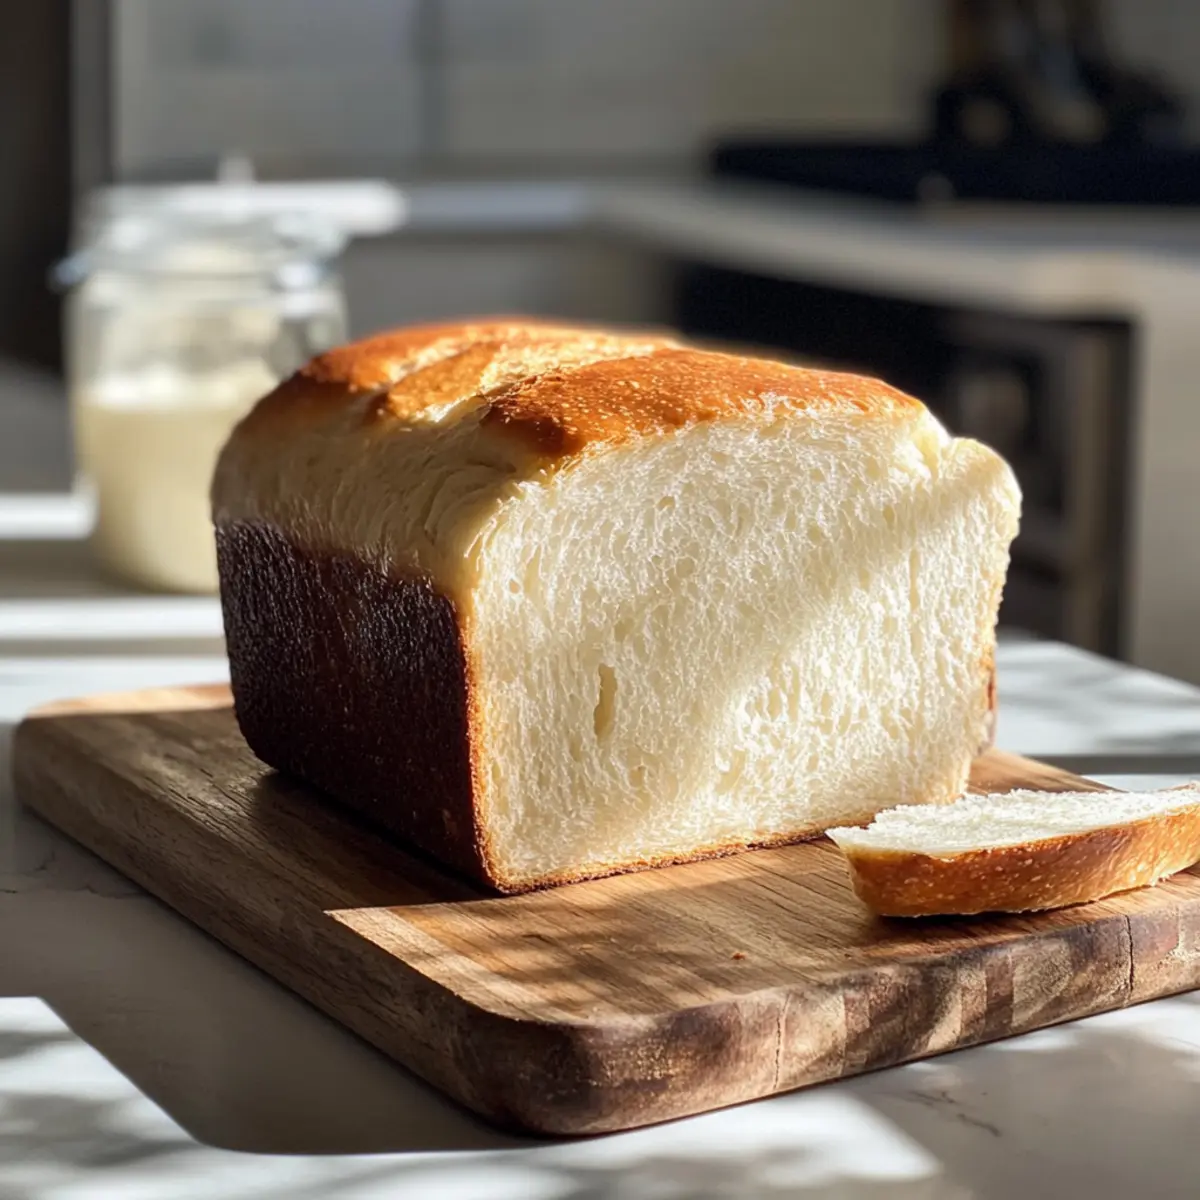
The first time I pulled a warm loaf of Homemade Bread from the oven, the smell enveloped my kitchen like a cozy hug, immediately whisking me back to my grandmother’s farmhouse. This recipe, with just six everyday ingredients, gives you that heartwarming experience without the hassle. Not only is this effortless white bread a fantastic base for your favorite sandwiches, but it also freezes beautifully, so you can always have fresh bread on hand. The joy of baking your own bread lies in its simplicity and the delightful satisfaction of sharing it with loved ones. Ready to fill your home with that irresistible aroma? Let’s get started on this delightful journey to making the best homemade bread!
Why is Homemade Bread So Irresistible?
Simplicity reigns supreme in this recipe! With just six ingredients, baking fresh, soft loaves has never been easier. Delicious aroma fills your kitchen, bringing back cherished memories with each bite. Versatile and adaptable, enjoy it as sandwiches or with a pat of butter. Effortless storage means you can freeze extra loaves for future cravings, making it practical for busy lives. If you’re looking for more delicious baking ideas, check out the Oven Turkish Bread or our Cottage Cheese Flatbread for delightful options!
Homemade Bread Ingredients
• Here’s everything you need to make your own homemade bread!
For the Dough
- Active Dry Yeast – Make sure it’s fresh for a wonderful rise; it’s the secret to fluffy homemade bread!
- Warm Water – Activates the yeast; aim for 100°F to 110°F (37°C to 43°C) for best results.
- Sugar or Honey – Feeds the yeast to help with fermentation; any sweetener will do if you’re out.
- Salt – Enhances flavor and strengthens the dough; don’t skip it for a well-rounded taste.
- Vegetable Oil – Adds moisture, ensuring a delightful texture; feel free to substitute with olive oil.
- All-Purpose Flour – Provides structure; you can replace up to half with whole wheat flour to boost nutrition.
Step‑by‑Step Instructions for Homemade Bread
Step 1: Proof Yeast
Begin by combining 2 teaspoons of active dry yeast, 1 tablespoon of sugar or honey, and 1 cup of warm water (100°F to 110°F or 37°C to 43°C) in a small bowl. Stir gently and let the mixture sit for 5-10 minutes until it becomes foamy on top. This bubbling action indicates that your yeast is active and ready to create the wonderful rise in your homemade bread.
Step 2: Mix Ingredients
In a large mixing bowl, whisk together the foamy yeast mixture, 1 teaspoon of salt, and 2 tablespoons of vegetable oil. Gradually add 3 cups of all-purpose flour, stirring with a wooden spoon until the dough starts to come together. Continue adding up to 1 more cup of flour, a little at a time, until the dough pulls away from the bowl’s sides, creating a cohesive ball.
Step 3: Knead Dough
Turn the dough onto a floured surface, and knead for about 4-5 minutes using your hands or a stand mixer with a dough hook. The dough should become smooth and elastic during this time. To check for doneness, gently stretch the dough; it should not tear easily. Proper kneading is crucial for developing the gluten structure in your homemade bread.
Step 4: First Rise
Lightly grease a large bowl, then place your kneaded dough inside and cover it with a clean kitchen towel. Set the bowl in a warm area of your kitchen for about 1.5 hours, or until the dough has doubled in size. This first rise is essential for achieving a light and airy texture in your final loaf of homemade bread.
Step 5: Shape Loaves
Once the dough has risen, punch it down gently to release the air. Divide the dough into two equal portions, shaping each one into a log or loaf form. Place the shaped loaves into greased loaf pans, ensuring there’s enough space for them to rise again. This shaping step helps create the classic loaf shape for your homemade bread.
Step 6: Second Rise
Cover the loaf pans with a kitchen towel and let them rise in a warm spot for another 45-60 minutes, or until the dough has risen to about an inch above the edges of the pans. Watching the dough double in size during this second rise is a delightful sign of the fluffy texture you’ll have in your baked homemade bread.
Step 7: Bake
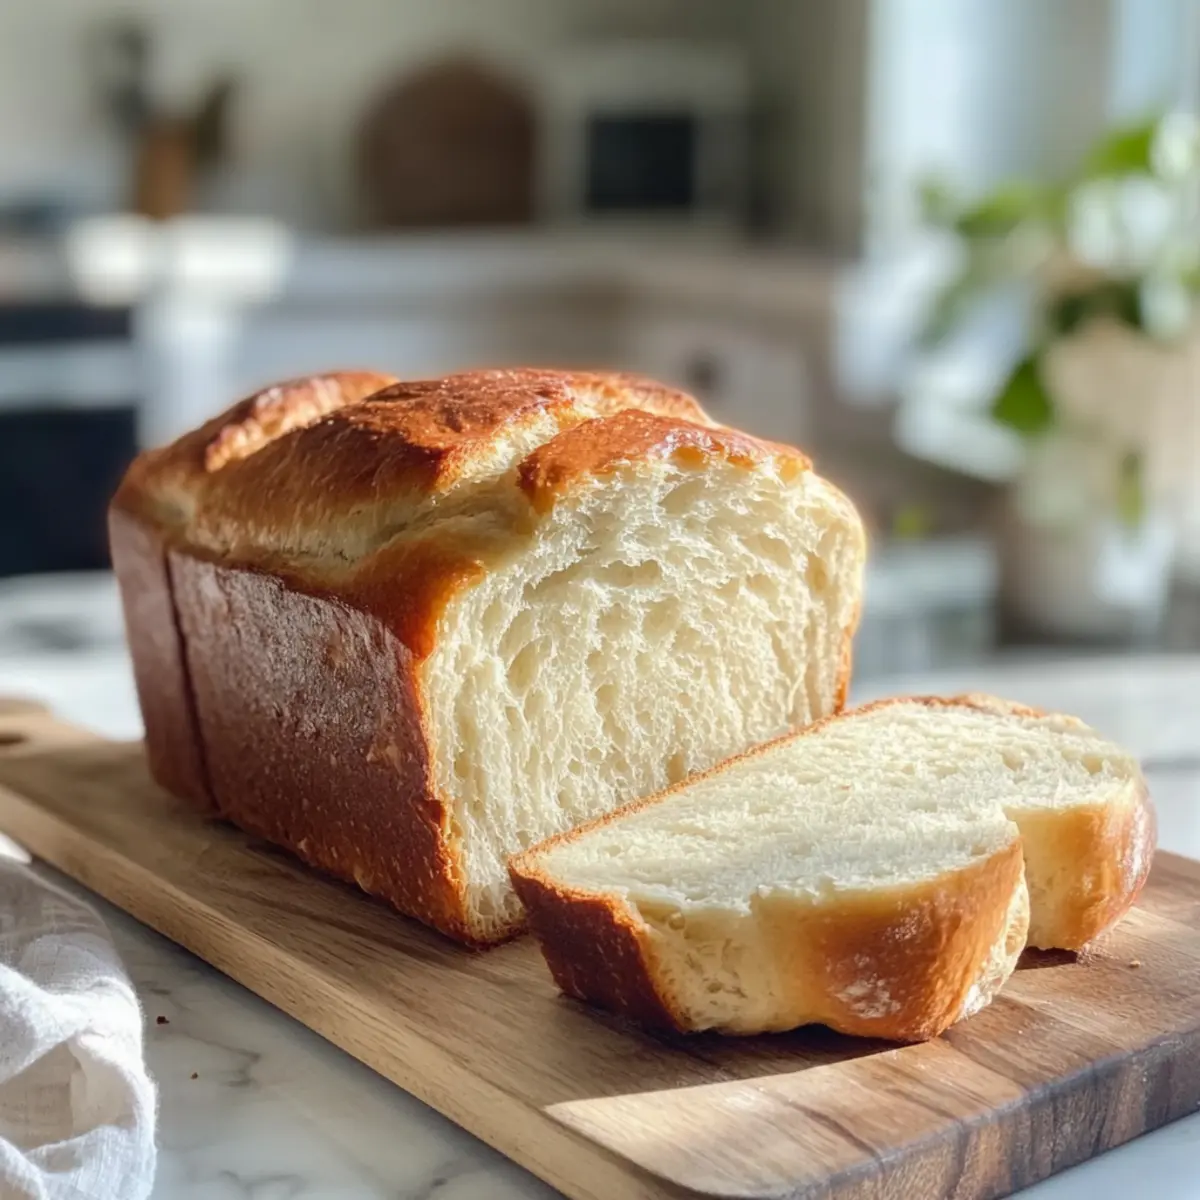
Preheat your oven to 350°F (175°C) while the loaves are doing their final rise. Once adequately risen, place the loaf pans in the oven and bake for 30-33 minutes. The loaves are done when they’re golden brown, and they sound hollow when tapped on the bottom. This is the moment you’ve been waiting for—your homemade bread is almost ready!
Step 8: Cool
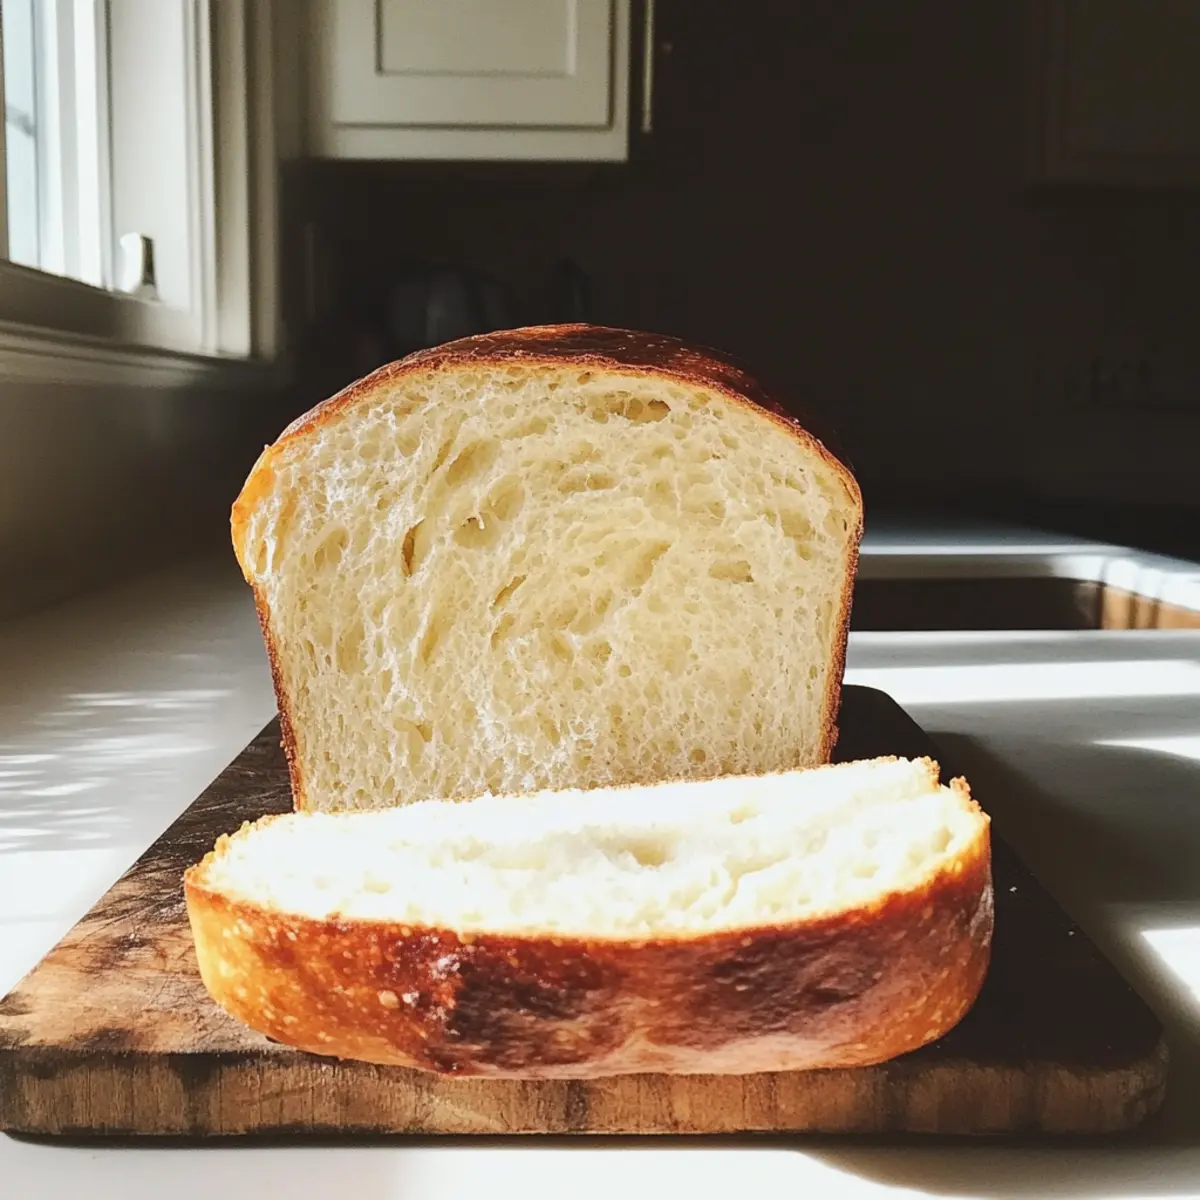
After baking, carefully remove the loaves from the oven and let them cool in the pans for about 5 minutes. Then transfer them to a wire rack to cool completely. If desired, you can brush the tops with melted butter for added flavor and shine. Once cooled, slice into your fluffy homemade bread and enjoy the joy of fresh baking!
Make Ahead Options
These Homemade Bread loaves are perfect for meal prep enthusiasts! You can prepare the dough up to 24 hours in advance by following the instructions through the first rise. After shaping your loaves, instead of letting them rise, cover the pans tightly and refrigerate. This slow rise in the refrigerator allows the dough to develop richer flavors. When you’re ready to bake, simply take the pans out and let them come to room temperature for about 30 minutes before proceeding with the second rise and baking. For an even quicker option, you can also freeze the baked loaves for up to three months; just wrap them tightly. Your fresh, delicious Homemade Bread will taste just as amazing with this time-saving strategy!
How to Store and Freeze Homemade Bread
Room Temperature: Keep your homemade bread wrapped in a clean kitchen towel or placed in a bread box for up to 3 days to maintain its softness.
Fridge: If you need to extend its life, refrigerate the bread in an airtight container for up to 5 days, but be aware that it may dry out more quickly.
Freezer: To freeze, wrap the loaf tightly in plastic wrap and then in aluminum foil. It will stay fresh for up to 3 months, allowing for easy defrosting whenever you desire homemade bread.
Reheating: To enjoy fresh-tasting bread after freezing, thaw it at room temperature, then warm it in the oven at 350°F (175°C) for about 10 minutes. This restores that delightful, warm texture.
Homemade Bread Variations & Substitutions
Feel free to explore creative twists on this homemade bread recipe that will make your baking experience even more delightful!
- Whole Wheat: Substitute up to half of the all-purpose flour with whole wheat flour for a nuttier flavor and extra fiber.
- Herbed Delight: Add dried herbs like rosemary, thyme, or oregano to the dough for a fragrant, savory touch that transforms your bread.
- Seed Boost: Sprinkle sesame, poppy, or flax seeds into the dough for added texture and a nutritional punch. They give a lovely crunch with every bite.
- Sweeten It Up: Incorporate a handful of raisins or dried cranberries into the dough for a subtly sweet flavor that’s perfect for breakfast or a snack.
- Cheesy Addition: Fold in shredded cheese, like cheddar or mozzarella, for a rich, cheesy homemade bread that pairs perfectly with soups.
- Garlic Infusion: Add minced garlic or garlic powder to the dough for a savory kick that elevates your bread experience to a whole new level.
- Spicy Kick: Mix in crushed red pepper flakes for a hint of heat, making your homemade bread an exciting addition to any meal.
If you want more baking inspiration, try your hand at the delightful Cottage Cheese Treat or the flavorful Hour Garlic Breadsticks. Happy baking!
What to Serve with Homemade Bread
There’s nothing quite like a warm slice of freshly baked bread to elevate any meal, making it feel special and inviting.
-
Creamy Tomato Soup: A classic pairing, this velvety soup’s acidity and warmth perfectly complement the soft, fluffy texture of homemade bread. Dip those slices in for a heavenly experience.
-
Garden Salad: Crisp greens with a tangy vinaigrette add a refreshing crunch to your meal, balancing the richness of the bread beautifully. Each bite brings a burst of flavors that elevate the entire dining experience.
-
Garlic Butter Shrimp: The savory and garlicky shrimp create a deliciously indulgent pairing, ideal for soaking up with your homemade bread. It’s a delectable way to enhance the meal while enjoying the comforting warmth of your loaf.
-
Cheese Platter: An assortment of cheeses, figs, and nuts makes for an elegant addition. The creamy, sharp, or tangy cheese pairs wonderfully with the milky softness of the bread, making each bite a blissful treat.
-
Avocado Toast: Spread some creamy avocado on thick slices of your homemade bread, topped with a sprinkle of salt and red pepper flakes for a trendy twist. It’s a nutritious and satisfying way to showcase the bread.
-
Honey Butter Spread: A simple yet indulgent treat, this sweet and creamy delight perfectly enhances the flavor of the bread, making it an irresistible choice for breakfast or an afternoon snack.
-
Iced Herbal Tea: A refreshing, lightly sweetened herbal tea works beautifully alongside, providing a cooling contrast to the warm, comforting bread. It’s a delightful choice that adds a touch of brightness to your meal.
-
Chocolate Chip Cookies: End your meal on a sweet note with a warm cookie, a nostalgic pairing that complements the homemade vibe of your bread. Perfect for all ages, it’s a lovely way to round off a family dinner.
Expert Tips for Homemade Bread
Fresh Yeast: Always check the expiration date of your active dry yeast. Fresh yeast leads to a better rise and overall texture in your homemade bread.
Accurate Measurements: Use a kitchen scale or make sure to aerate and spoon flour to avoid packing it. Incorrect flour measurement can lead to dense bread.
Kneading Duration: Don’t rush the kneading. Aim for 4-5 minutes with a mixer or 5-8 minutes by hand until the dough feels smooth and elastic.
Patience is Key: Allow the dough to rise fully during both rises. Rushing this step could yield a heavy loaf rather than the light, fluffy homemade bread you desire.
Hollow Sound Check: Tapping the bottom of the loaf should produce a hollow sound for perfect doneness. If it sounds dull, bake a little longer.

Homemade Bread Recipe FAQs
How can I tell if my yeast is fresh?
Absolutely! To check your yeast’s freshness, you can proof it. Combine 2 teaspoons of active dry yeast with 1 tablespoon of sugar and 1 cup of warm water (between 100°F and 110°F or 37°C to 43°C). Let it sit for 5-10 minutes. If it becomes foamy, your yeast is active and fresh!
How long can homemade bread be stored at room temperature?
Very! You can keep your homemade bread wrapped in a clean kitchen towel or stored in a bread box for up to 3 days. This keeps the bread soft and flavorful, making it perfect for sandwiches!
What are the best methods for freezing homemade bread?
To freeze your homemade bread, wrap the loaf tightly in plastic wrap first. Then, wrap it again in aluminum foil or place it in a freezer-safe bag. This double-wrapping prevents freezer burn and keeps it fresh for up to 3 months. When you’re ready to enjoy it, simply thaw at room temperature and warm it in the oven for about 10 minutes at 350°F (175°C).
What should I do if my bread doesn’t rise?
Don’t worry; it happens! If your bread doesn’t rise, it might be due to inactive yeast. Check that your yeast is fresh and that the water temperature was correct. You can also ensure the dough rises in a warm, draft-free place. If all else fails, give it another chance by letting it rest longer—sometimes, dough can surprise you with its persistence!
Is homemade bread safe for pets or people with allergies?
While homemade bread is generally safe for most, be cautious with ingredients. If you’re baking for someone with allergies, always check the ingredients. Common allergens include gluten (in flour), and be mindful of added herbs or toppings that may not be pet-friendly. Plain bread can be enjoyed by dogs in moderation, but avoid any that contain garlic or onion, as these are toxic to pets.
How can I enhance the flavor of my homemade bread?
You can absolutely elevate the flavor of your bread! Consider adding herbs like rosemary or basil to the dough for a fragrant twist. Additionally, experimenting with different types of flour—like whole wheat or rye—can add depth. Seed toppings (such as sesame or sunflower seeds) before the second rise also provide a delightful texture and flavor profile!
Homemade Bread: Soft, Fluffy Loaves You’ll Love Baking
Ingredients
Equipment
Method
- Combine yeast, sugar or honey, and warm water in a bowl. Stir gently and let sit for 5-10 minutes until foamy.
- Whisk together foamy yeast mixture, salt, and vegetable oil in a large bowl. Gradually add flour until a cohesive dough forms.
- Turn dough onto a floured surface and knead for 4-5 minutes until smooth and elastic.
- Place dough in a greased bowl, cover with a towel, and let rise in a warm area for 1.5 hours.
- Punch down the dough, divide it, and shape each piece into a loaf. Place in greased pans.
- Cover pans with a towel and let loaves rise for 45-60 minutes until doubled.
- Preheat oven to 350°F (175°C). Bake loaves for 30-33 minutes until golden brown.
- Remove from the oven, cool in pans for 5 minutes, then transfer to a wire rack.