There’s something magical about a slice of Decadent Chocolate Cheesecake that can instantly brighten your day. I remember the first time I made this rich delight; the aroma of melting chocolate filled my kitchen, and I felt like a culinary wizard. This cheesecake is not just a dessert; it’s a celebration of flavors that can impress your loved ones or simply satisfy your own sweet tooth. Whether you’re hosting a gathering or just need a quick indulgence after a long day, this recipe is your go-to solution. Trust me, every bite is worth it!
Why You’ll Love This Decadent Chocolate Cheesecake
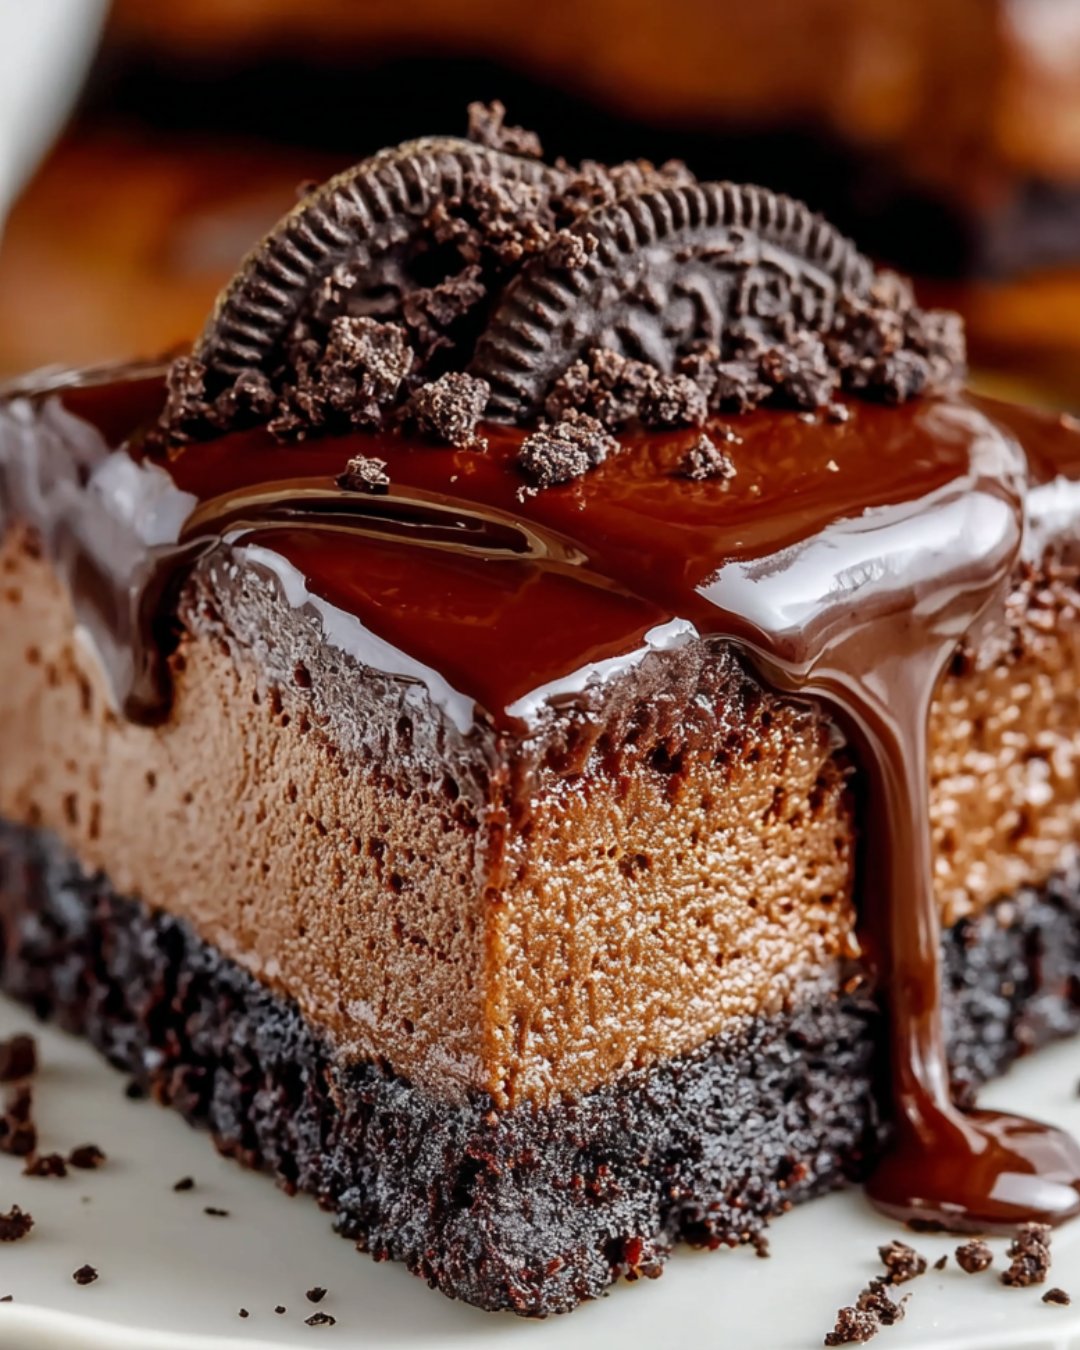
This Decadent Chocolate Cheesecake is a dream come true for chocolate lovers. It’s incredibly easy to whip up, making it perfect for busy weeknights or last-minute gatherings. The rich, creamy texture paired with the deep chocolate flavor creates a dessert that feels luxurious without the fuss. Plus, it’s a crowd-pleaser! You’ll find yourself basking in compliments, all while enjoying a slice of pure bliss.
Ingredients for Decadent Chocolate Cheesecake
Gathering the right ingredients is the first step to creating your masterpiece. Here’s what you’ll need for this Decadent Chocolate Cheesecake:
Cream Cheese: The star of the show! It provides that rich, creamy base that makes cheesecake so irresistible.
Granulated Sugar: This sweetens the cheesecake and balances the rich flavors. You can also use brown sugar for a deeper taste.
Vanilla Extract: A splash of vanilla enhances the overall flavor, adding warmth and depth.
Eggs: They help bind everything together, giving the cheesecake its structure. Remember to add them one at a time!
Semi-Sweet Chocolate: The heart of this dessert! Melted chocolate brings that luscious chocolate flavor. Dark chocolate can be used for a more intense taste.
Sour Cream: This adds creaminess and a slight tang, balancing the sweetness beautifully.
Cocoa Powder: For an extra chocolate kick, cocoa powder deepens the flavor and adds richness.
Salt: Just a pinch enhances all the flavors, making them pop.
Graham Cracker Crust: A pre-made crust saves time and adds a delightful crunch. You can also make your own if you’re feeling adventurous!
For exact measurements, check the bottom of the article where you can find everything listed for easy printing. Happy baking!
How to Make Decadent Chocolate Cheesecake
Now that you have your ingredients ready, let’s dive into the fun part: making this Decadent Chocolate Cheesecake! Follow these simple steps, and you’ll be on your way to dessert heaven.
Step 1: Preheat the Oven
Start by preheating your oven to 325°F. This step is crucial because it ensures even baking. A hot oven helps the cheesecake rise properly and sets the texture just right. Trust me, you don’t want to skip this!
Step 2: Prepare the Cream Cheese Mixture
In a large mixing bowl, beat the softened cream cheese with an electric mixer on medium speed. You want it to be smooth and creamy, which usually takes about 2 minutes. This step is vital; a well-beaten cream cheese base leads to a silky cheesecake.
Step 3: Combine Sugar and Vanilla
Next, gradually add the granulated sugar to the cream cheese mixture. Mix until well combined. Then, stir in the vanilla extract. Sugar not only sweetens the cheesecake but also enhances the flavors, while vanilla adds a warm, inviting aroma.
Step 4: Add Eggs
Now, it’s time to add the eggs. Do this one at a time, mixing on low speed after each addition. This method prevents overmixing, which can lead to cracks in your cheesecake. Each egg helps bind the ingredients, creating that perfect creamy texture.
Step 5: Incorporate Melted Chocolate
Slowly pour in the melted chocolate while mixing on low speed. This technique ensures the chocolate blends smoothly into the batter without clumping. The result? A rich, chocolatey flavor that makes this cheesecake truly decadent.
Step 6: Mix in Sour Cream and Cocoa
Next, add the sour cream, cocoa powder, and salt. Mix until everything is smooth. The sour cream adds creaminess and a slight tang, while cocoa powder deepens the chocolate flavor, making each bite even more indulgent.
Step 7: Pour into Crust
Carefully pour the cheesecake batter into the pre-made graham cracker crust. Use a spatula to smooth the top. To avoid spills, pour slowly and keep the bowl close to the crust. A neat pour means a beautiful presentation!
Step 8: Bake the Cheesecake
Place the cheesecake in the preheated oven and bake for 50-60 minutes. The center should be set but still slightly jiggly. This is the sweet spot for a creamy texture. Remember, it will continue to firm up as it cools!
Step 9: Cool the Cheesecake
Once baked, turn off the oven and crack the door open. Let the cheesecake cool in the oven for about an hour. This gradual cooling process helps prevent cracks and ensures a smooth texture. After that, let it cool to room temperature before refrigerating for at least 4 hours or overnight.
Tips for Success
Use room temperature cream cheese for a smoother batter.
Don’t skip the cooling step; it’s key to a perfect texture.
For a richer flavor, opt for dark chocolate instead of semi-sweet.
Top with whipped cream and chocolate shavings for an elegant touch.
Keep an eye on the baking time; every oven is different!
Equipment Needed
Mixing Bowl: A large bowl for combining ingredients. A stand mixer works great, but a hand mixer will do just fine.
Spatula: Essential for scraping down the sides and smoothing the batter.
Measuring Cups and Spoons: For accurate ingredient measurements.
9-inch Springform Pan: Ideal for easy removal of the cheesecake. A regular pie dish can work in a pinch.
Oven Thermometer: To ensure your oven is at the right temperature for baking.
Variations of Decadent Chocolate Cheesecake
Dark Chocolate Cheesecake: Swap semi-sweet chocolate for dark chocolate for a richer, more intense flavor.
Mint Chocolate Cheesecake: Add a teaspoon of peppermint extract to the batter for a refreshing twist.
Peanut Butter Swirl: Fold in some creamy peanut butter before baking for a delightful combination of chocolate and peanut butter.
Gluten-Free Option: Use a gluten-free graham cracker crust or make your own crust with gluten-free cookies.
Vegan Version: Substitute cream cheese with a vegan alternative and use aquafaba (chickpea water) instead of eggs for a plant-based treat.
Serving Suggestions for Decadent Chocolate Cheesecake
Pair with fresh berries for a pop of color and tartness.
Serve with a dollop of whipped cream for added creaminess.
Drizzle with chocolate sauce for an extra indulgent touch.
Enjoy with a cup of coffee or a glass of dessert wine.
Garnish with chocolate shavings for an elegant presentation.
FAQs about Decadent Chocolate Cheesecake
Can I make Decadent Chocolate Cheesecake ahead of time?
Absolutely! This cheesecake actually tastes better after chilling overnight. Just make sure to cover it well in the fridge to keep it fresh.
How do I know when my cheesecake is done baking?
The center should be set but still slightly jiggly. It will firm up as it cools, so don’t worry if it looks a bit soft when you take it out!
Can I freeze Decadent Chocolate Cheesecake?
Yes, you can freeze it! Just wrap it tightly in plastic wrap and then in aluminum foil. It can last up to three months in the freezer. Thaw it in the fridge before serving.
What can I use instead of cream cheese?
If you’re looking for a substitute, try using mascarpone cheese or a vegan cream cheese alternative. Just keep in mind that the flavor and texture may vary slightly.
How can I prevent cracks in my cheesecake?
To avoid cracks, make sure to mix the batter gently and avoid overmixing. Also, the cooling process is crucial—let it cool gradually in the oven before refrigerating.
Final Thoughts
Creating this Decadent Chocolate Cheesecake is more than just baking; it’s about crafting a moment of joy. Each slice offers a rich, creamy experience that can turn an ordinary day into something special. Whether you’re celebrating a milestone or simply treating yourself, this cheesecake is a delightful companion. The smiles and compliments from friends and family make the effort worthwhile. So, roll up your sleeves, embrace the process, and indulge in the sweet satisfaction that comes with every bite. Trust me, this dessert will become a cherished favorite in your home!