


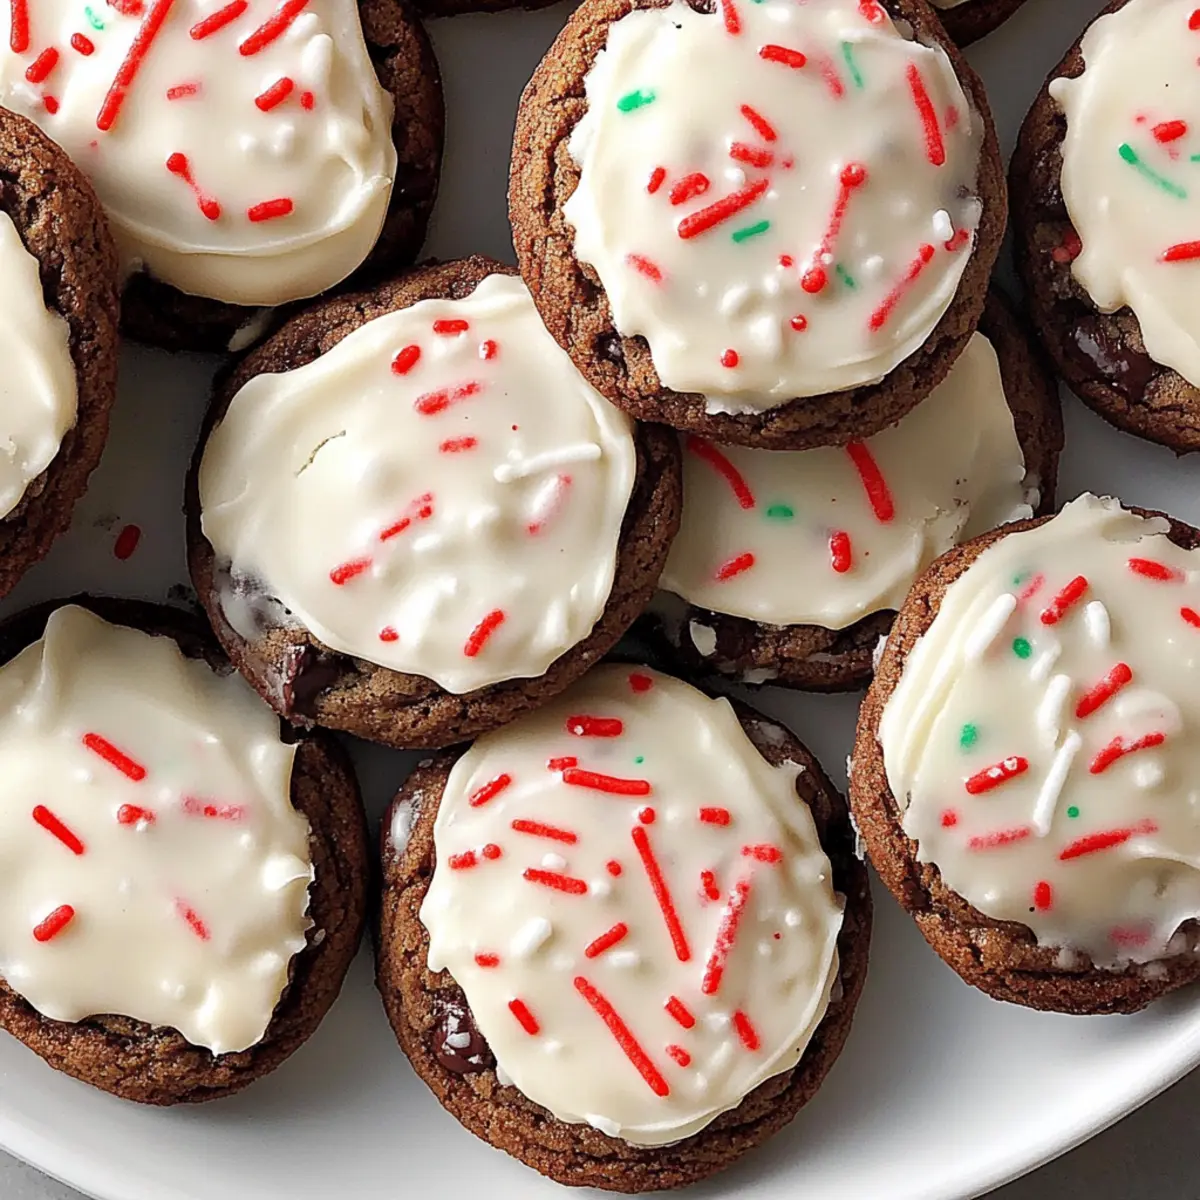
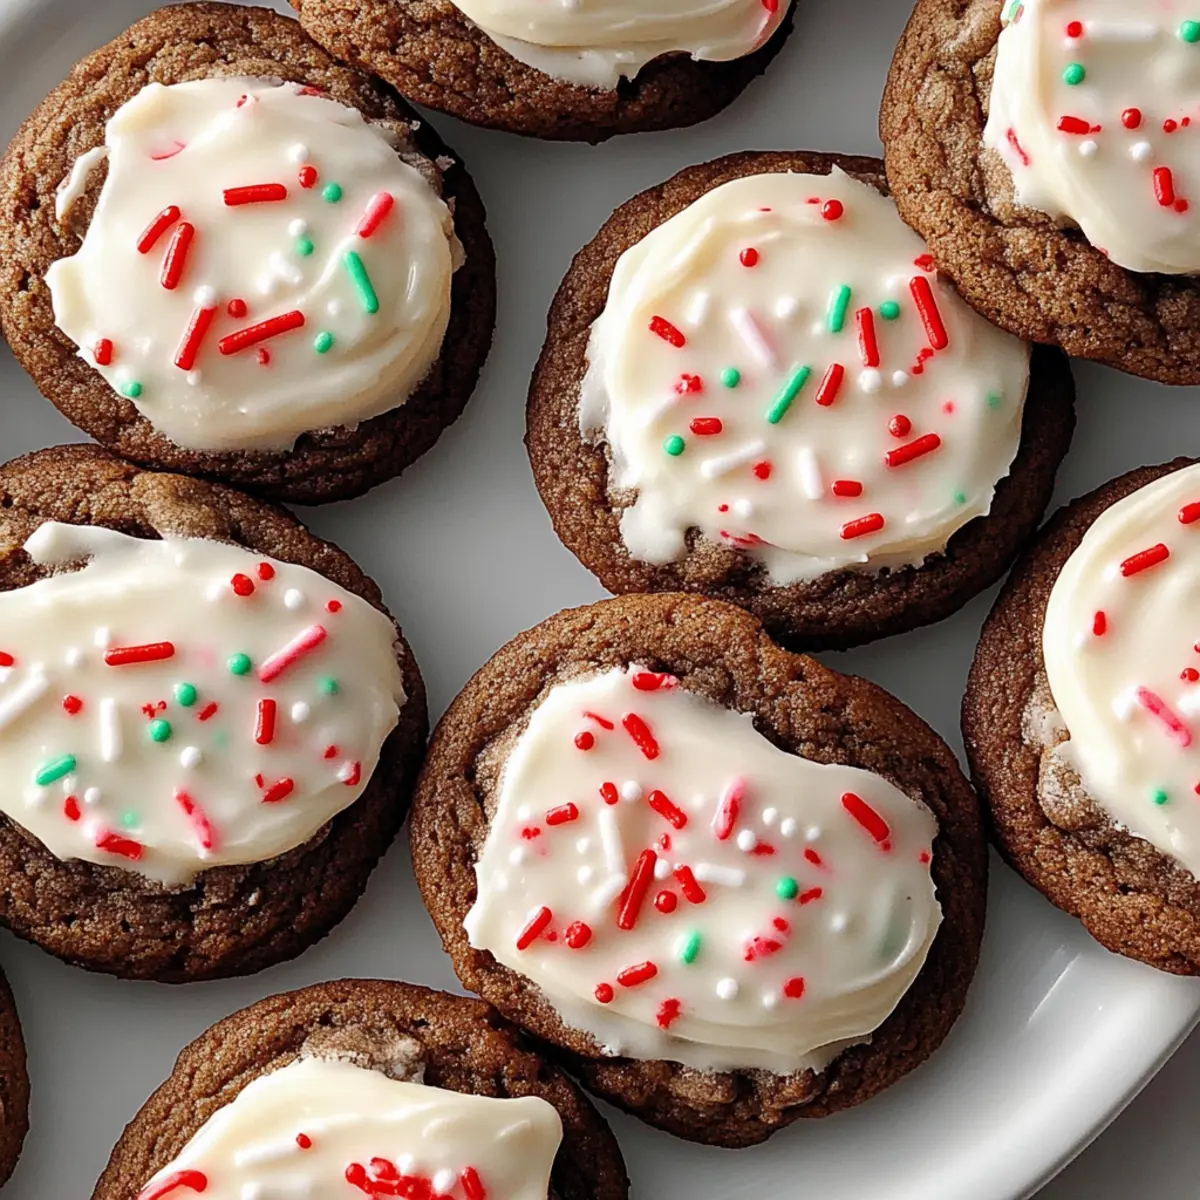
As the scent of warm chocolate wafts through the air, I can’t help but feel the magic of the holiday season. Nothing brings people together quite like the sight of freshly baked Chocolate Peppermint Cookies, their rich chocolaty goodness intertwined with a cool peppermint twist. This recipe is not only a crowd-pleaser but also a breeze to whip up, making it the perfect addition to your festive gatherings. With just a few simple steps, you can create delightful treats that will fill your home with joy and laughter. Imagine sharing these cookies with friends and family, each bite igniting the spirit of the holidays. Are you ready to dive into this sweet adventure? Let’s get baking!

Why Are These Cookies So Irresistible?
Irresistible Flavor: The combination of rich chocolate and refreshing peppermint creates a delightful holiday treat that captures the spirit of the season.
Effortless Preparation: This recipe is simple and quick, making it perfect for bakers of all skill levels. You can have a delectable batch ready in no time!
Perfect for Sharing: Bring joy to friends and family during gatherings, or package them as thoughtful gifts. Who wouldn’t love a box of festive cookies?
Endless Variations: Feel free to swap in your favorite mix-ins, like nuts or dried fruit, to personalize your Chocolate Peppermint Cookies. You might also enjoy the Easter Sprinkle Cookies for a fun twist!
Chocolate Peppermint Cookies Ingredients
• The key to these delicious cookies lies in the right combination of ingredients!
For the Cookie Base
- All-Purpose Flour – Gives the cookies structure; consider using gluten-free flour to cater to dietary needs.
- Granulated Sugar – Sweetens and helps the cookies brown beautifully; substitute with coconut sugar for a healthier option.
- Cocoa Powder – Adds a deep chocolate flavor, making these cookies extra rich and indulgent.
- Unsweetened Baking Chocolate – Intensifies the chocolate experience; use dark chocolate for a more intense taste.
- Butter – Brings richness and flavor; can be replaced with a vegetable shortening for a dairy-free alternative.
- Eggs – Binds everything together and helps with rising; flax eggs are a great vegan substitute.
- Baking Powder – Ensures the cookies have that delightful lift; don’t swap with baking soda without adjusting quantities first.
- Vanilla Extract – Enhances the overall flavor; almond extract can be a wonderful variation here.
For the Peppermint Flavor
- Peppermint Extract – Infuses the cookies with a refreshing minty essence; adjust according to your taste preference.
- Crushed Peppermint Candies – Add a festive crunch on top; these candies can also provide a fun texture change.
For Decorating
- Chocolate Drizzle – A luscious addition on top of the baked cookies; use semi-sweet or white chocolate melts for a different effect.
- Sprinkles – Brighten up your cookies with cheerful festive colors; substitute with crushed nuts or coconut flakes for a unique twist.
These Chocolate Peppermint Cookies will not only taste delightful but also add visual delight to your holiday spread!
Step‑by‑Step Instructions for Irresistibly Chewy Chocolate Peppermint Cookies
Step 1: Preparation
Begin by gathering all your ingredients for the Chocolate Peppermint Cookies. Preheat your oven to 350°F (175°C) and line your baking sheets with parchment paper. This early preparation will ensure a smooth baking process, so you can focus on crafting these delightful treats without any interruptions.
Step 2: Creaming the Butter and Sugar
In a large mixing bowl, cream together 1 cup of softened butter and 1 cup of granulated sugar until the mixture is light and fluffy, about 3-4 minutes. This step is crucial for creating a tender texture in your cookies. Add 2 eggs and 1 teaspoon of vanilla extract, mixing until well combined and smooth, allowing the flavors to meld beautifully.
Step 3: Mixing Dry Ingredients
In a separate bowl, whisk together 2 cups of all-purpose flour, ¾ cup of cocoa powder, and 1 teaspoon of baking powder. Gradually incorporate this dry mixture into your wet ingredients, stirring gently until just combined. Be careful not to overmix, as this helps to maintain the soft and chewy texture of your Chocolate Peppermint Cookies.
Step 4: Adding Peppermint Flavor
Pour in 1 teaspoon of peppermint extract and fold in your choice of crushed peppermint candies or chocolate chips. This step introduces the refreshing minty flavor that perfectly complements the rich chocolate. Ensure even distribution throughout the dough to create a deliciously festive cookie experience with every bite.
Step 5: Scooping the Dough
Using a cookie scoop or two tablespoons, portion the cookie dough onto your prepared baking sheets. Leave about 2 inches of space between each scoop to allow for spreading. The unbaked dough should appear rounded and generous—a sure sign that your Chocolate Peppermint Cookies will puff beautifully as they bake.
Step 6: Baking the Cookies
Place the baking sheets in your preheated oven and bake for 10-12 minutes, or until the edges are set and slightly firm to the touch. The centers may look a bit underdone, which creates that perfect chewy texture once cooled. Keep an eye on the cookies as they bake to achieve the ideal golden edges.
Step 7: Cooling the Cookies
Once baked, remove the cookies from the oven and allow them to cool on the sheets for about 5 minutes. This cooling period allows them to firm up just enough, making it easier to transfer them. Use a spatula to carefully place the cookies onto wire racks for further cooling, enhancing their chewy goodness.
Step 8: Decorating (Optional)
For an extra festive touch, melt some chocolate (either semi-sweet or white) and drizzle it over the cooled cookies. Sprinkle additional crushed peppermint on top while the chocolate is still wet, creating eye-catching and delicious decorations. Your Chocolate Peppermint Cookies are now ready to spread holiday cheer!

Expert Tips for Chocolate Peppermint Cookies
- Room Temperature Ingredients: Always start with butter and eggs at room temperature for the best creaming results; this helps your cookies achieve maximum fluffiness.
- Don’t Overmix: After adding the dry ingredients to the wet mixture, mix just until combined. Overmixing can result in tough cookies instead of soft, chewy Chocolate Peppermint Cookies.
- Adjust Peppermint: If you’re sensitive to mint, start with less peppermint extract and add more to taste. This way, you control the refreshing minty flavor without overpowering the chocolate.
- Chill the Dough: For thicker cookies, chill your dough for about 30 minutes before baking; this helps control spreading, resulting in beautifully shaped treats.
- Check for Doneness: Cookies should look slightly underdone in the center but firm around the edges; they will continue to cook as they cool. This ensures that lovely chewy texture!
Chocolate Peppermint Cookies Variations
Feel free to let your creativity shine and customize these cookies to match your taste preferences and celebrations!
- Gluten-Free: Use a gluten-free flour blend instead of all-purpose flour for a lighter option.
- Vegan: Substitute eggs with flax eggs and use vegan butter or coconut oil for a plant-based treat.
- Extra Minty: Enhance the peppermint flavor by adding mini candy canes to the dough for an extra crunch.
- Festive Swirls: Mix in some red and green sprinkles before baking for a cheerful holiday appearance.
- Spiced Up: Incorporate a pinch of cinnamon or nutmeg into the dough for a warm twist on the classic flavor.
- Chocolate Lovers: Increase cocoa powder for a richer chocolate taste, ensuring every bite is decadent.
- Peppermint Bark Variation: Add chopped pieces of white chocolate and crushed peppermint candies for a fun textural change.
- Chocolate Drizzle: For a beautiful finish, melt chocolate drizzles over the cooled cookies, creating a festive touch with every bite.
For other delightful treats, check out the Easter Sprinkle Cookies or the Elegant White Chocolate for a perfect balance to your holiday sweets!
How to Store and Freeze Chocolate Peppermint Cookies
Room Temperature: Store cookies in an airtight container at room temperature for up to 1 week to keep them fresh and chewy.
Fridge: If you prefer, you can keep them in the fridge for up to 2 weeks; however, they may lose a bit of their softness.
Freezer: Freeze the Chocolate Peppermint Cookies in a single layer on a baking sheet, then transfer to an airtight container for up to 3 months. Thaw at room temperature before enjoying!
Reheating: To refresh cookies, heat them in the microwave for about 10-15 seconds. This will bring back their delightful softness and warmth.
Make Ahead Options
These Chocolate Peppermint Cookies are perfect for busy home cooks looking to save time during the hectic holiday season! You can prepare the cookie dough up to 24 hours in advance; simply scoop it onto parchment-lined baking sheets, cover tightly with plastic wrap, and refrigerate. Alternatively, shape the cookies and freeze them for up to 3 months; just bake from frozen, adding an extra minute or two to the baking time. To maintain their soft, chewy texture, avoid overmixing the dough and make sure to cool them completely before storing. When ready to serve, drizzle with chocolate and crushed peppermint for a festive finish that will delight everyone!
What to Serve with Chocolate Peppermint Cookies
Indulge in the festive spirit by pairing these delightful cookies with satisfying accompaniments that elevate your holiday experience.
-
Rich Hot Chocolate: The creamy texture and chocolatey richness of a warm mug perfectly complement the cookies’ minty sweetness, enhancing each bite.
-
Vanilla Ice Cream: A scoop of velvety vanilla ice cream next to a warm cookie creates a delightful contrast that tantalizes the taste buds. The cooling effect balances the warmth, making every mouthful feel extra special.
-
Peppermint Milkshake: Blend up a refreshing milkshake with peppermint extract for a fun twist. This playful drink echoes the cookie flavor and adds a festive flair to your holiday gatherings.
-
Sweet Cream Cheese Frosting: Adding a dollop of sweet frosting on the side can elevate the delightful flavor combinations even further, creating a buttery richness that beautifully complements the cookies.
-
Spiced Apple Cider: Warm spiced cider brings cozy, comforting flavors to the table, presenting a wonderful contrast to the cookies’ rich chocolate and mint.
-
Gingerbread Cookies: A platter filled with varying festive cookies creates a joyful dessert spread, inviting everyone to mix and match their favorites during holiday celebrations.
These pairings celebrate the magic of the season, transforming your Chocolate Peppermint Cookies into a centerpiece of unforgettable gatherings!
Chocolate Peppermint Cookies Recipe FAQs
What type of chocolate should I use for the Chocolate Peppermint Cookies?
For the best flavor, I recommend using unsweetened baking chocolate along with cocoa powder. If you’re a dark chocolate lover, feel free to swap in dark chocolate for an even richer taste. This combination elevates the cookie experience, making them extra indulgent!
How should I store leftover Chocolate Peppermint Cookies?
Storing your cookies properly is essential for keeping them fresh. Place them in an airtight container at room temperature for up to 1 week. If you want them to last longer, you can refrigerate them for up to 2 weeks, but be aware they may lose a bit of their delightful softness.
Can I freeze Chocolate Peppermint Cookies?
Absolutely! To freeze these festive treats, first lay them out in a single layer on a baking sheet. Once frozen, transfer them to an airtight container or freezer bag, and store for up to 3 months. When you’re ready to enjoy, simply thaw them at room temperature, and they’re just like fresh from the oven!
What can I do if my Chocolate Peppermint Cookies turn out too flat?
If your cookies spread too much while baking, it could be due to melted butter or insufficient chilling time. Next time, try chilling your dough for at least 30 minutes before baking. Additionally, ensure your butter is softened but not melted, as this helps maintain the perfect balance for cookie structure!
Can I use a different extract instead of peppermint?
Certainly! If peppermint isn’t your thing or you’re looking for a twist, you can substitute it with almond or vanilla extract for a different flavor profile. Just remember, the amount might need adjusting based on your taste preference—start small and taste as you go along!
Are Chocolate Peppermint Cookies safe for pets?
Chocolate, in any form, can be toxic to dogs and other pets. If you’re sharing your baking creations with friends who have pets, it’s best to keep these delicious cookies away from them. Stick to pet-friendly treats for your furry friends to ensure everyone has a happy and safe holiday!
Irresistibly Chewy Chocolate Peppermint Cookies Recipe
Ingredients
Equipment
Method
- Preheat your oven to 350°F (175°C) and line your baking sheets with parchment paper.
- In a large mixing bowl, cream together 1 cup of softened butter and 1 cup of granulated sugar until light and fluffy, about 3-4 minutes.
- Add 2 eggs and 1 teaspoon of vanilla extract, mixing until well combined.
- In a separate bowl, whisk together 2 cups of all-purpose flour, ¾ cup of cocoa powder, and 1 teaspoon of baking powder.
- Gradually incorporate the dry mixture into the wet ingredients, stirring gently until just combined.
- Pour in 1 teaspoon of peppermint extract and fold in your choice of crushed peppermint candies.
- Using a cookie scoop or two tablespoons, portion the cookie dough onto prepared baking sheets, leaving about 2 inches of space between each scoop.
- Bake for 10-12 minutes, or until the edges are set and slightly firm.
- Allow the cookies to cool on the sheets for about 5 minutes before transferring to wire racks.
- For an optional festive touch, drizzle melted chocolate over cooled cookies and sprinkle with additional crushed peppermint.