Mediterranean Ground Chicken Skillet is a quick delight.

Introduction to Mediterranean Ground Chicken Skillet Recipe

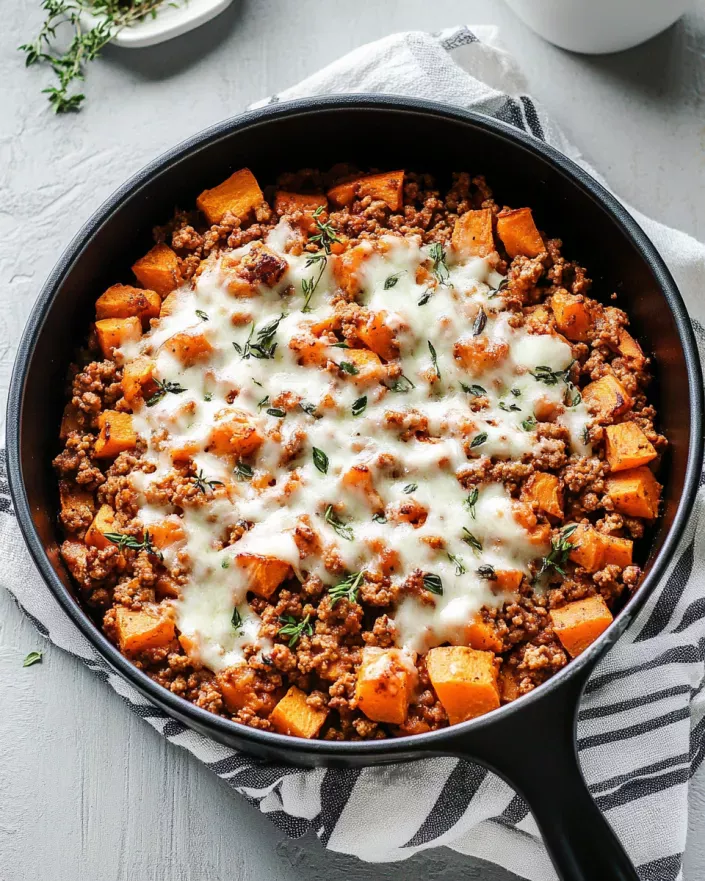
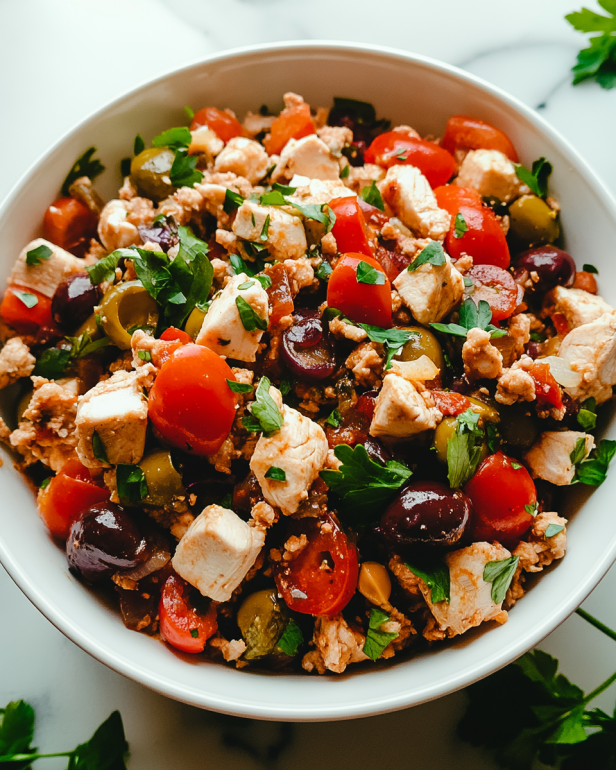
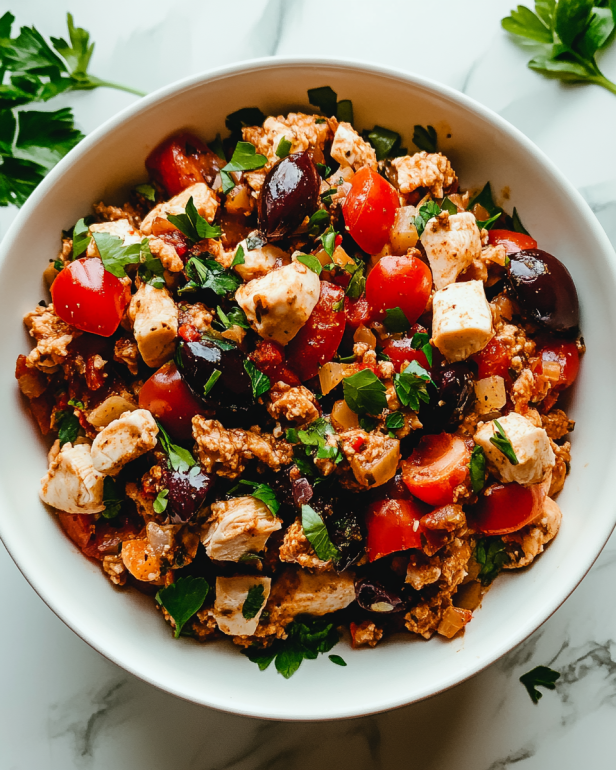
If you’re looking for a quick, healthy, and delicious meal, the Mediterranean Ground Chicken Skillet Recipe is just what you need. This dish combines the rich flavors of the Mediterranean with the lean protein of ground chicken, making it a perfect choice for busy weeknights or a cozy weekend dinner. With its vibrant colors and fresh ingredients, this skillet meal not only pleases the palate but also nourishes the body.

The beauty of this recipe lies in its simplicity. You can whip it up in under 30 minutes, making it ideal for those who want to enjoy a home-cooked meal without spending hours in the kitchen. The combination of juicy cherry tomatoes, briny Kalamata olives, and creamy feta cheese creates a delightful medley of flavors that will transport you straight to the sunny shores of the Mediterranean.

Moreover, this dish is versatile. You can easily customize it to suit your taste preferences or dietary needs. Whether you want to add more vegetables, switch up the protein, or even make it vegetarian, the Mediterranean Ground Chicken Skillet Recipe can adapt to your culinary desires. So, gather your ingredients and get ready to enjoy a meal that is not only satisfying but also bursting with flavor!

Ingredients for Mediterranean Ground Chicken Skillet Recipe

To create the delightful Mediterranean Ground Chicken Skillet, you’ll need a selection of fresh and flavorful ingredients. Each component plays a vital role in bringing out the dish’s vibrant taste. Here’s what you’ll need:

  • 1 pound ground chicken: This lean protein serves as the base of the dish, providing a hearty texture.
  • 1 tablespoon extra virgin olive oil: This healthy fat adds richness and helps sauté the vegetables.
  • 1 medium onion, finely chopped: Onions bring sweetness and depth to the flavor profile.
  • 2 cloves garlic, minced: Garlic adds a fragrant aroma and enhances the overall taste.
  • 1 cup halved cherry tomatoes: These juicy tomatoes contribute freshness and a burst of color.
  • 1/2 cup pitted and sliced Kalamata olives: Olives provide a briny contrast that complements the other ingredients.
  • 1 teaspoon dried oregano: This herb adds a classic Mediterranean flavor.
  • 1 teaspoon dried basil: Basil brings a sweet and aromatic touch to the dish.
  • 1/2 teaspoon sea salt: Salt enhances the flavors of all the ingredients.
  • 1/4 teaspoon freshly ground black pepper: Pepper adds a subtle kick to the dish.
  • 4 ounces crumbled feta cheese: Feta cheese adds creaminess and a tangy flavor that ties everything together.
  • 2 cups fresh baby spinach: Spinach adds a nutritious boost and a lovely green color.

These ingredients come together to create a delicious and satisfying meal. Feel free to adjust the quantities based on your preferences or dietary needs. For instance, if you love olives, you can add more, or if you prefer a milder flavor, reduce the garlic. The Mediterranean Ground Chicken Skillet Recipe is all about making it your own!

Preparation of Mediterranean Ground Chicken Skillet Recipe

Now that you have gathered all the ingredients, it’s time to dive into the preparation of your Mediterranean Ground Chicken Skillet Recipe. This section will guide you through each step, ensuring that you create a delicious and satisfying meal. Let’s get started!

Step 1: Preparing the Ingredients

Before you start cooking, it’s essential to prepare your ingredients. Begin by finely chopping the onion and mincing the garlic. Next, halve the cherry tomatoes and slice the Kalamata olives. Having everything ready will make the cooking process smooth and enjoyable. Remember, a well-prepared kitchen is a happy kitchen!

Step 2: Cooking the Ground Chicken

In a spacious skillet, warm the extra virgin olive oil over medium heat. Once the oil is hot, add the chopped onion. Sauté it for about 3-4 minutes until it becomes translucent and tender. Then, add the minced garlic and sauté for another minute. This step is crucial as it builds the flavor base for your dish.

Now, introduce the ground chicken into the skillet. Use a spatula to crumble the chicken as it cooks. Allow it to brown for about 5-7 minutes, stirring occasionally. Make sure the chicken is fully cooked and no longer pink. This step ensures that your meal is both safe and delicious!

Step 3: Adding Vegetables and Spices

Once the chicken is cooked, it’s time to add the vegetables and spices. Mix in the halved cherry tomatoes, sliced Kalamata olives, dried oregano, dried basil, sea salt, and freshly ground black pepper. Stir everything together, allowing the flavors to meld. This combination of ingredients will create a vibrant and aromatic dish that is sure to impress.

Step 4: Simmering the Mixture

Let the mixture simmer for an additional 3-4 minutes. This allows the tomatoes to soften and release their juices, creating a delicious sauce. Keep an eye on the skillet, stirring occasionally to prevent sticking. The aroma will fill your kitchen, making it hard to resist tasting!

Step 5: Final Touches and Serving

After simmering, it’s time to add the fresh baby spinach. Fold it into the mixture and stir until it wilts down, which should take about 2 minutes. This step not only adds nutrition but also a lovely green color to your dish. Once the spinach is wilted, take the skillet off the heat and generously sprinkle the crumbled feta cheese over the top.

Your Mediterranean Ground Chicken Skillet is now ready to serve! Enjoy it hot, and savor the vibrant flavors that come together in this delightful meal.

Variation of Mediterranean Ground Chicken Skillet Recipe

The Mediterranean Ground Chicken Skillet Recipe is not only delicious but also highly adaptable. You can easily switch up ingredients or cooking methods to create a dish that suits your taste or dietary needs. Let’s explore some alternative ingredients and different cooking methods to enhance your culinary experience.

Alternative Ingredients to Consider

When it comes to making this dish your own, the possibilities are endless! Here are some alternative ingredients you might consider:

  • Ground Turkey or Beef: If you prefer a different protein, ground turkey or beef can be used instead of chicken. Each option brings its unique flavor and texture.
  • Quinoa or Couscous: For a heartier meal, consider adding cooked quinoa or couscous. These grains will absorb the flavors and add a delightful chewiness.
  • Bell Peppers: Diced bell peppers can add sweetness and crunch. They also enhance the dish’s color, making it even more appealing.
  • Zucchini or Eggplant: These vegetables can be diced and added for extra nutrition. They soak up the flavors beautifully and add a lovely texture.
  • Fresh Herbs: Instead of dried oregano and basil, try using fresh herbs like parsley or cilantro. Fresh herbs can elevate the dish with their vibrant flavors.

Feel free to mix and match these ingredients based on what you have on hand or what you enjoy most. The Mediterranean Ground Chicken Skillet Recipe is all about flexibility and creativity!

Different Cooking Methods

While the skillet method is quick and easy, you can also explore other cooking techniques to prepare this dish. Here are a few options:

  • Oven-Baked: Transfer the mixture to a baking dish after cooking the chicken and vegetables. Top with feta cheese and bake at 375°F for about 20 minutes. This method creates a bubbly, cheesy topping.
  • Slow Cooker: For a hands-off approach, combine all ingredients in a slow cooker. Cook on low for 4-6 hours. This method allows the flavors to meld beautifully.
  • Grilled: If you enjoy grilling, consider making patties from the ground chicken mixture. Grill them for a smoky flavor and serve with the same toppings.

Experimenting with different cooking methods can add variety to your meals and keep things exciting in the kitchen. No matter how you choose to prepare it, the Mediterranean Ground Chicken Skillet Recipe is sure to be a hit!

Cooking Note for Mediterranean Ground Chicken Skillet Recipe

When preparing the Mediterranean Ground Chicken Skillet Recipe, a few cooking notes can help you achieve the best results. These tips will ensure that your dish is not only delicious but also visually appealing and nutritious.

First, always use fresh ingredients whenever possible. Fresh vegetables and herbs enhance the flavors significantly. For instance, ripe cherry tomatoes will burst with sweetness, while fresh spinach adds a vibrant green color. If you can, visit your local farmer’s market for the freshest produce.

Next, pay attention to the cooking temperature. Cooking over medium heat is ideal for sautéing onions and garlic. This temperature allows them to soften without burning, creating a flavorful base for your dish. If the heat is too high, the garlic can quickly turn bitter, ruining the taste.

Another important note is to avoid overcooking the chicken. Ground chicken cooks quickly, and overcooking can lead to a dry texture. Make sure to stir occasionally and check for doneness. The chicken should be browned and no longer pink, but still juicy.

Additionally, feel free to adjust the seasoning to your liking. Everyone’s palate is different, so taste as you go! If you prefer a spicier kick, consider adding red pepper flakes or a dash of hot sauce. On the other hand, if you enjoy a milder flavor, you can reduce the amount of garlic or omit the black pepper.

Lastly, don’t forget to let the dish rest for a few minutes after cooking. This allows the flavors to settle and meld together, making each bite even more enjoyable. Serve it warm, and watch as your family and friends savor every delicious mouthful!

By keeping these cooking notes in mind, you’ll be well on your way to mastering the Mediterranean Ground Chicken Skillet Recipe. Happy cooking!

Serving Suggestions for Mediterranean Ground Chicken Skillet Recipe

Once your Mediterranean Ground Chicken Skillet is ready, it’s time to think about how to serve it. This dish is not only delicious on its own but can also be paired with various sides to create a complete meal. Here are some serving suggestions to elevate your dining experience:

  • Serve with Whole Grain Bread: A slice of warm whole grain bread or pita can be perfect for scooping up the flavorful chicken mixture. It adds a nice texture and makes the meal more filling.
  • Pair with a Fresh Salad: A light salad made with mixed greens, cucumbers, and a lemon vinaigrette complements the rich flavors of the skillet. The freshness of the salad balances the dish beautifully.
  • Accompany with Rice or Quinoa: For a heartier option, serve the skillet over a bed of fluffy rice or quinoa. These grains soak up the juices and add a satisfying element to the meal.
  • Top with Extra Feta: If you love feta cheese, consider adding a bit more on top just before serving. The creamy texture and tangy flavor enhance the overall taste.
  • Garnish with Fresh Herbs: A sprinkle of fresh parsley or basil on top adds a pop of color and freshness. It also enhances the Mediterranean vibe of the dish.

These serving suggestions not only enhance the flavors but also make your meal visually appealing. Whether you’re hosting a dinner party or enjoying a quiet night in, these ideas will help you create a delightful dining experience. Enjoy your Mediterranean Ground Chicken Skillet with your favorite sides, and savor every bite!

Tips for Perfecting Your Mediterranean Ground Chicken Skillet Recipe

To truly master the Mediterranean Ground Chicken Skillet Recipe, a few tips can help you elevate your dish to new heights. These simple yet effective suggestions will ensure that every bite is bursting with flavor and satisfaction. Let’s dive into some expert tips that will make your cooking experience even more enjoyable!

  • Use Quality Ingredients: The foundation of any great dish starts with high-quality ingredients. Opt for fresh, organic vegetables and good-quality olive oil. This will enhance the overall flavor of your skillet meal.
  • Don’t Rush the Sautéing: Take your time when sautéing the onions and garlic. Allow them to cook slowly over medium heat until they are soft and fragrant. This step builds a rich flavor base that is essential for your dish.
  • Season Gradually: When adding spices and seasonings, do so gradually. Taste as you go to find the perfect balance. This way, you can adjust the flavors to suit your personal preference.
  • Experiment with Fresh Herbs: Fresh herbs can make a significant difference in flavor. Consider adding fresh parsley, dill, or mint at the end of cooking for a burst of freshness. These herbs complement the Mediterranean theme beautifully.
  • Let It Rest: After cooking, allow the skillet to rest for a few minutes before serving. This resting time helps the flavors meld together, making each bite even more delicious.
  • Customize Your Dish: Don’t hesitate to make this recipe your own! Add your favorite vegetables or adjust the spices to match your taste. The Mediterranean Ground Chicken Skillet Recipe is versatile, so feel free to get creative!
  • Pair with the Right Sides: Think about what you’ll serve alongside your skillet. A light salad or whole grain bread can complement the dish perfectly. The right sides can enhance the overall dining experience.

By following these tips, you’ll be well on your way to perfecting your Mediterranean Ground Chicken Skillet Recipe. Each time you make it, you’ll discover new ways to enhance the flavors and enjoy this delightful dish. Happy cooking!

Breakdown of Time for Mediterranean Ground Chicken Skillet Recipe

Understanding the time required for each step of the Mediterranean Ground Chicken Skillet Recipe can help you plan your cooking efficiently. Here’s a detailed breakdown of the time you’ll need for preparation and cooking:

Prep Time

The prep time for this delicious skillet meal is quite short. You’ll need about 10-15 minutes to gather and prepare your ingredients. This includes chopping the onion, mincing the garlic, halving the cherry tomatoes, and slicing the Kalamata olives. Having everything ready will make the cooking process smooth and enjoyable.

Cooking Time

Once your ingredients are prepped, the cooking time is approximately 15-20 minutes. This includes sautéing the onions and garlic, cooking the ground chicken, adding the vegetables and spices, and allowing the mixture to simmer. The quick cooking time makes this dish perfect for busy weeknights!

Total Time

In total, you can expect to spend about 25-35 minutes from start to finish. This includes both prep and cooking time. With such a quick turnaround, you can enjoy a flavorful and nutritious meal without spending hours in the kitchen. The Mediterranean Ground Chicken Skillet Recipe is not only delicious but also a time-saver!

Nutritional Information for Mediterranean Ground Chicken Skillet Recipe

Understanding the nutritional content of your meals is essential for maintaining a balanced diet. The Mediterranean Ground Chicken Skillet Recipe not only offers delightful flavors but also provides valuable nutrients. Here’s a breakdown of the key nutritional information for this dish:

Calories

320 calories. This makes it a great option for those looking to enjoy a satisfying meal without consuming excessive calories. The combination of lean protein and fresh vegetables ensures that you feel full and energized.

Protein

30 grams of protein per serving, this dish is an excellent source of protein. Ground chicken is a lean protein that supports muscle growth and repair. Including protein in your meals can help keep you feeling full longer, making it easier to manage your appetite throughout the day.

Sodium

600 milligrams of sodium per serving. While sodium is essential for bodily functions, it’s important to monitor your intake. You can reduce the sodium content by using low-sodium olives and feta cheese, making this dish even healthier.

Overall, the Mediterranean Ground Chicken Skillet Recipe is a nutritious choice that fits well into a balanced diet. With its rich flavors and wholesome ingredients, it’s a meal you can feel good about enjoying!

FAQs about Mediterranean Ground Chicken Skillet Recipe

What can I serve with Mediterranean Ground Chicken Skillet?

When it comes to serving your Mediterranean Ground Chicken Skillet, there are plenty of delicious options to consider. You can pair it with:

  • Whole Grain Bread: A slice of warm whole grain bread or pita is perfect for scooping up the flavorful chicken mixture.
  • Fresh Salad: A light salad with mixed greens, cucumbers, and a lemon vinaigrette complements the rich flavors of the skillet.
  • Rice or Quinoa: Serving the skillet over a bed of fluffy rice or quinoa adds a satisfying element to the meal.
  • Extra Feta: If you love feta cheese, sprinkle some more on top just before serving for an extra burst of flavor.
  • Garnish with Fresh Herbs: A sprinkle of fresh parsley or basil adds a pop of color and freshness to your dish.

These sides not only enhance the flavors but also make your meal visually appealing. Enjoy your Mediterranean Ground Chicken Skillet with your favorite accompaniments!

Can I use other types of meat in this recipe?

Absolutely! The Mediterranean Ground Chicken Skillet Recipe is versatile, and you can easily swap out the ground chicken for other types of meat. Here are some options:

  • Ground Turkey: A lean alternative that works well and has a similar texture to chicken.
  • Ground Beef: For a richer flavor, ground beef can be used. Just be mindful of the fat content.
  • Ground Lamb: This option adds a unique flavor that pairs beautifully with Mediterranean spices.

Feel free to experiment with different meats based on your preferences or what you have on hand. Each option will bring its own delicious twist to the dish!

How can I make this dish vegetarian?

If you want to make the Mediterranean Ground Chicken Skillet vegetarian, there are several great alternatives you can use. Here are some ideas:

  • Crumble Tofu: Firm tofu can be crumbled and sautéed in place of ground chicken. It absorbs flavors well and adds protein.
  • Tempeh: This fermented soy product has a nutty flavor and can be crumbled or diced for a hearty texture.
  • Chickpeas: Canned or cooked chickpeas can be added for a protein boost and a satisfying bite.
  • Vegetable Medley: You can also increase the amount of vegetables, such as zucchini, bell peppers, and mushrooms, to create a filling dish.

These substitutions will allow you to enjoy the vibrant flavors of the Mediterranean while keeping the dish vegetarian-friendly!

What are some common mistakes to avoid when making this recipe?

To ensure your Mediterranean Ground Chicken Skillet turns out perfectly, here are some common mistakes to avoid:

  • Overcooking the Chicken: Ground chicken cooks quickly. Make sure to stir occasionally and check for doneness to avoid a dry texture.
  • Not Prepping Ingredients: Failing to prepare your ingredients beforehand can lead to a chaotic cooking experience. Take the time to chop and measure everything before you start.
  • Using Low-Quality Ingredients: Fresh, high-quality ingredients make a big difference in flavor. Opt for fresh vegetables and good-quality olive oil.
  • Skipping the Seasoning: Don’t forget to taste and adjust the seasoning as you cook. This ensures a well-balanced flavor.
  • Rushing the Sautéing: Take your time when sautéing onions and garlic. Allow them to soften and develop flavor before adding other ingredients.

By avoiding these common pitfalls, you’ll be well on your way to creating a delicious Mediterranean Ground Chicken Skillet that everyone will love!

Conclusion on Mediterranean Ground Chicken Skillet Recipe

In conclusion, the Mediterranean Ground Chicken Skillet Recipe is a delightful and nutritious option for anyone looking to enjoy a quick yet flavorful meal. With its vibrant ingredients and simple preparation, this dish is perfect for busy weeknights or leisurely weekends. The combination of ground chicken, fresh vegetables, and aromatic herbs creates a satisfying meal that is both healthy and delicious.

Moreover, the versatility of this recipe allows you to customize it according to your taste preferences. Whether you choose to swap the ground chicken for turkey, beef, or even a vegetarian alternative, the Mediterranean Ground Chicken Skillet can adapt to your culinary desires. This flexibility makes it a fantastic choice for families with varying dietary needs.

As you explore this recipe, remember to embrace the joy of cooking. Take your time to savor each step, from preparing the ingredients to enjoying the final dish. With a little creativity and the right ingredients, you can create a meal that not only nourishes the body but also delights the senses.

So, gather your ingredients, follow the steps, and enjoy the vibrant flavors of the Mediterranean in your own kitchen. The Mediterranean Ground Chicken Skillet Recipe is sure to become a favorite in your household, bringing smiles and satisfaction to the dinner table. Happy cooking!

Chipotle Style Steak Tacos are a must-try recipe!

Introduction to Chipotle Style Steak Tacos

Are you ready to spice up your taco night? Look no further than Chipotle Style Steak Tacos! These delicious tacos are not only packed with flavor but also easy to make. Imagine tender, juicy steak marinated in a zesty blend of spices, grilled to perfection, and served in warm corn tortillas. It’s a meal that brings the vibrant taste of Mexican cuisine right to your kitchen.

Chipotle Style Steak Tacos are perfect for any occasion. Whether you’re hosting a casual get-together or enjoying a cozy family dinner, these tacos will impress everyone at the table. The combination of fresh ingredients and bold flavors creates a delightful experience for your taste buds. Plus, they are customizable, allowing you to add your favorite toppings and make them your own.

In this article, we will guide you through the process of making these mouthwatering tacos. From selecting the right ingredients to assembling the perfect taco, you’ll find everything you need to know. So, roll up your sleeves and get ready to enjoy a delicious meal that’s sure to become a family favorite!

Ingredients for Chipotle Style Steak Tacos

To create the perfect Chipotle Style Steak Tacos, you’ll need a selection of fresh and flavorful ingredients. Each component plays a vital role in bringing out the delicious taste of the steak and the overall taco experience. Here’s what you’ll need:

  • 1 pound flank steak: This cut is ideal for grilling, as it’s tender and flavorful.
  • 2 tablespoons extra virgin olive oil: This adds richness and helps the marinade stick to the steak.
  • 2 tablespoons fresh lime juice: The acidity brightens the flavors and tenderizes the meat.
  • 1 tablespoon smoked chili powder: This gives a smoky kick that enhances the overall taste.
  • 1 teaspoon ground cumin: Cumin adds a warm, earthy flavor that complements the spices.
  • 1 teaspoon garlic powder: Garlic powder provides a savory depth to the marinade.
  • 1 teaspoon onion powder: This adds a subtle sweetness and enhances the flavor profile.
  • 1 teaspoon sweet paprika: Paprika contributes a mild sweetness and vibrant color.
  • 1 teaspoon sea salt: Salt is essential for bringing out the flavors in the steak.
  • 1/2 teaspoon freshly ground black pepper: This adds a touch of heat and enhances the overall taste.
  • 8 small corn tortillas: Corn tortillas are traditional and provide a perfect base for the tacos.
  • 1 cup chopped fresh tomatoes: Fresh tomatoes add juiciness and a burst of flavor.
  • 1 cup crisp shredded lettuce: Lettuce adds crunch and freshness to each bite.
  • 1/2 cup crumbled feta cheese: Feta adds a creamy, tangy element that pairs well with the steak.
  • 1/4 cup freshly chopped cilantro: Cilantro brings a fresh, herbal note that brightens the dish.
  • Lime wedges for garnish: Lime wedges are perfect for squeezing over the tacos for extra zest.

Gather these ingredients, and you’ll be well on your way to making delicious Chipotle Style Steak Tacos that everyone will love!

Preparation of Chipotle Style Steak Tacos

Now that you have all your ingredients ready, it’s time to dive into the preparation of your Chipotle Style Steak Tacos. This process is simple and fun, allowing you to create a delicious meal that will impress your family and friends. Let’s break it down into easy steps!

Step 1: Marinating the Steak

First, you’ll want to marinate the flank steak. This step is crucial as it infuses the meat with flavor. In a medium bowl, combine the olive oil, lime juice, smoked chili powder, cumin, garlic powder, onion powder, sweet paprika, sea salt, and black pepper. Stir well until all the ingredients are mixed together.

Next, place the flank steak in a large resealable bag or a shallow dish. Pour the marinade over the steak, ensuring it is well coated. Seal the bag or cover the dish tightly. Now, let it marinate in the refrigerator for at least 1 hour. For even better flavor, consider marinating it overnight. This allows the spices to penetrate the meat, making it tender and tasty.

Step 2: Cooking the Steak

Once the steak has marinated, it’s time to cook it! Preheat your grill or grill pan to medium-high heat. Take the steak out of the marinade, allowing any excess to drip off. Place the steak on the grill and cook for about 5-7 minutes on each side. The cooking time may vary based on your preferred level of doneness. For medium-rare, aim for an internal temperature of 130°F.

After grilling, remove the steak from the heat and let it rest for about 5 minutes. This resting period is important as it allows the juices to redistribute throughout the meat, keeping it juicy and flavorful. Once rested, slice the steak thinly against the grain. This technique ensures each bite is tender and easy to chew.

Step 3: Preparing the Toppings

While the steak is resting, it’s a great time to prepare your toppings. Warm the corn tortillas on the grill for about 30 seconds on each side. This makes them soft and pliable, perfect for holding all the delicious fillings. Next, chop the fresh tomatoes, shred the lettuce, and crumble the feta cheese. Finally, chop the cilantro for a fresh garnish. Having everything ready will make assembling the tacos a breeze!

Step 4: Assembling the Tacos

Now comes the fun part—assembling your tacos! Take a warm corn tortilla and place a generous portion of sliced steak in the center. Top it with chopped tomatoes, shredded lettuce, crumbled feta cheese, and a sprinkle of fresh cilantro. For an extra burst of flavor, serve with lime wedges on the side. Squeeze some lime juice over the tacos just before eating for that zesty kick!

And there you have it! Your Chipotle Style Steak Tacos are ready to be enjoyed. Each bite is a delightful mix of flavors and textures that will leave everyone wanting more.

Variation of Chipotle Style Steak Tacos

While the classic Chipotle Style Steak Tacos are undeniably delicious, there are many ways to switch things up! Whether you want to try different proteins or explore vegetarian options, these variations will keep your taco nights exciting. Let’s dive into some tasty alternatives!

Alternative Proteins for Chipotle Style Steak Tacos

If you’re looking to change the protein in your tacos, there are several great options. Each alternative brings its own unique flavor and texture. Here are a few suggestions:

  • Chicken: Grilled chicken thighs or breasts marinated in the same zesty marinade work wonderfully. Chicken is lean and absorbs flavors well, making it a great substitute.
  • Pork: Try using pork tenderloin or shoulder. Marinate it just like the steak and grill until juicy. The sweetness of pork pairs nicely with the spices.
  • Fish: For a lighter option, consider using firm white fish like tilapia or mahi-mahi. Grill the fish for a few minutes on each side until flaky and tender.
  • Shrimp: Marinated shrimp can be grilled quickly and add a delightful seafood twist to your tacos. They cook in just a few minutes, making them a fast option!

These alternative proteins can be prepared using the same marinade and cooking methods as the flank steak. Each option will create a delicious taco experience that everyone will enjoy!

Vegetarian Options for Chipotle Style Steak Tacos

If you’re looking for a meatless option, there are plenty of delicious vegetarian ingredients to use. Here are some ideas to create flavorful vegetarian Chipotle Style Tacos:

  • Grilled Portobello Mushrooms: Marinate large portobello caps in the same marinade and grill them until tender. They have a meaty texture that makes them a fantastic substitute.
  • Tofu: Firm tofu can be marinated and grilled or sautéed. It absorbs flavors well and provides a great protein source for your tacos.
  • Black Beans: For a hearty filling, use seasoned black beans. They are rich in protein and fiber, making them a satisfying option.
  • Roasted Vegetables: A mix of bell peppers, zucchini, and onions can be roasted and used as a filling. Their natural sweetness and charred flavor add depth to the tacos.

These vegetarian options are not only healthy but also bursting with flavor. You can top them with the same fresh ingredients to create a delightful taco experience for everyone!

Cooking Note for Chipotle Style Steak Tacos

When it comes to making Chipotle Style Steak Tacos, a few cooking notes can help you achieve the best results. These tips will ensure that your tacos are not only delicious but also visually appealing and satisfying. Let’s explore some important cooking notes to keep in mind!

First, always preheat your grill or grill pan. This step is crucial as it helps to sear the steak quickly, locking in the juices and flavors. A hot grill also creates those beautiful grill marks that make your tacos look appetizing.

Next, consider the thickness of your flank steak. If your steak is particularly thick, you may need to adjust the cooking time. A thicker cut will require a longer cooking time to reach the desired doneness. Use a meat thermometer to check the internal temperature for accuracy. Remember, for medium-rare, you’re aiming for 130°F.

Another important note is to let the steak rest after grilling. This resting period allows the juices to redistribute throughout the meat, making it more tender and juicy. If you skip this step, you might end up with dry steak, which is not what you want for your tacos!

Lastly, don’t forget to warm your tortillas. Soft, pliable tortillas are essential for holding all the delicious fillings. You can warm them on the grill, in a skillet, or even in the microwave. Just be careful not to overheat them, as they can become too dry and break apart.

By following these cooking notes, you’ll be well on your way to creating mouthwatering Chipotle Style Steak Tacos that everyone will love. Enjoy the process and savor the delicious results!

Serving Suggestions for Chipotle Style Steak Tacos

Now that your Chipotle Style Steak Tacos are ready, it’s time to think about how to serve them! Presentation can elevate your meal, making it even more enjoyable. Here are some delightful serving suggestions to enhance your taco experience:

  • Family Style: Serve the tacos on a large platter, allowing everyone to build their own. Place the sliced steak, toppings, and warm tortillas in separate bowls. This way, guests can customize their tacos to their liking!
  • Side Dishes: Pair your tacos with delicious side dishes. Consider serving them with Mexican rice, refried beans, or a fresh corn salad. These sides complement the flavors of the tacos and create a complete meal.
  • Fresh Salsas: Offer a variety of salsas for an extra kick. A classic pico de gallo, mango salsa, or a spicy tomatillo salsa can add vibrant flavors to your tacos. Guests can choose their favorite to drizzle on top!
  • Guacamole: No taco night is complete without guacamole! Serve a creamy avocado dip alongside your tacos. The richness of guacamole pairs perfectly with the zesty flavors of the steak.
  • Drinks: Consider serving refreshing beverages to complement your meal. A chilled Mexican beer, margaritas, or even a fruity agua fresca can enhance the dining experience. These drinks will keep the festive spirit alive!

With these serving suggestions, your Chipotle Style Steak Tacos will not only taste amazing but also look inviting on the table. Enjoy the flavors, the company, and the joy of sharing a delicious meal!

Tips for Perfect Chipotle Style Steak Tacos

Creating the perfect Chipotle Style Steak Tacos is all about attention to detail. With a few helpful tips, you can elevate your taco game and impress your family and friends. Here are some essential tips to ensure your tacos turn out delicious every time!

  • Choose Quality Meat: Start with high-quality flank steak. Look for meat that is bright red with good marbling. This ensures tenderness and flavor. If flank steak isn’t available, consider using skirt steak or sirloin as alternatives.
  • Marinate Longer: For the best flavor, marinate the steak overnight. This allows the spices to penetrate deeply, making the meat more flavorful and tender. If you’re short on time, aim for at least 1 hour.
  • Use a Meat Thermometer: To achieve the perfect doneness, use a meat thermometer. This tool takes the guesswork out of cooking. For medium-rare, aim for 130°F; for medium, go for 140°F.
  • Slice Against the Grain: After grilling, always slice the steak against the grain. This technique shortens the muscle fibers, making each bite more tender and easier to chew.
  • Warm Tortillas Properly: Don’t skip warming your tortillas! This step makes them soft and pliable. You can warm them on the grill, in a skillet, or even in the microwave wrapped in a damp paper towel.
  • Balance Your Toppings: When assembling your tacos, aim for a balance of flavors and textures. Combine crunchy, creamy, and fresh toppings to create a delightful experience in every bite.
  • Experiment with Salsas: Don’t hesitate to try different salsas! A variety of salsas can add exciting flavors. Consider making a spicy salsa verde or a sweet corn salsa to complement the steak.
  • Garnish with Fresh Herbs: Fresh herbs like cilantro or green onions can brighten up your tacos. They add a pop of color and a burst of flavor that enhances the overall dish.
  • Enjoy with Friends: Finally, remember that food is best enjoyed with others. Share your delicious Chipotle Style Steak Tacos with family and friends for a fun and memorable meal!

By following these tips, you’ll be well on your way to making perfect Chipotle Style Steak Tacos that are bursting with flavor. Enjoy the cooking process and the delicious results!

Breakdown of Time for Chipotle Style Steak Tacos

Understanding the time needed to prepare your Chipotle Style Steak Tacos is essential for planning your meal. Here’s a simple breakdown of the time required for each step, so you can enjoy a smooth cooking experience!

Prep Time

The prep time for Chipotle Style Steak Tacos is approximately 15-20 minutes. This includes gathering your ingredients, mixing the marinade, and marinating the steak. If you choose to marinate the steak overnight, you can skip this step the next day, making your cooking process even quicker!

Cooking Time

Cooking the steak takes about 10-15 minutes. This includes grilling the steak for 5-7 minutes on each side, depending on your desired doneness. Additionally, warming the tortillas will take another 1-2 minutes. Overall, you can expect the cooking time to be around 15 minutes.

Total Time

In total, if you marinate the steak for just 1 hour, the entire process will take about 30-35 minutes. However, if you opt for overnight marination, you can prepare your tacos in just 15-20 minutes the next day. This flexibility makes Chipotle Style Steak Tacos a great option for a quick weeknight dinner or a fun weekend meal!

Nutritional Information for Chipotle Style Steak Tacos

When enjoying Chipotle Style Steak Tacos, it’s important to consider their nutritional value. Understanding the calories, protein, and sodium content can help you make informed choices. Here’s a breakdown of the nutritional information for one serving of these delicious tacos:

Calories

Each serving of Chipotle Style Steak Tacos contains approximately 350-400 calories. This number can vary based on the specific ingredients and portion sizes you use. The flank steak, tortillas, and toppings all contribute to the overall calorie count. If you’re looking to reduce calories, consider using less cheese or opting for lighter toppings.

Protein

Protein is an essential nutrient, and these tacos deliver! Each serving provides around 25-30 grams of protein, primarily from the flank steak. Protein is important for muscle repair and growth, making these tacos a satisfying meal option. If you choose alternative proteins or vegetarian options, the protein content may vary, but you can still achieve a good amount by selecting high-protein ingredients.

Sodium

The sodium content in Chipotle Style Steak Tacos is approximately 800-900 milligrams per serving. This includes the salt used in the marinade and any additional toppings. If you’re watching your sodium intake, consider using low-sodium options for the feta cheese and be mindful of how much salt you add during cooking. Fresh ingredients like tomatoes and lettuce can also help balance the flavors without adding too much sodium.

By keeping these nutritional facts in mind, you can enjoy your Chipotle Style Steak Tacos while being aware of their health benefits. They are a delicious and satisfying meal that can fit into a balanced diet!

FAQs about Chipotle Style Steak Tacos

What type of steak is best for Chipotle Style Steak Tacos?

The best type of steak for Chipotle Style Steak Tacos is flank steak. This cut is flavorful and tender, making it perfect for grilling. However, you can also use skirt steak or sirloin if flank steak is not available. Both options will provide a delicious taste and texture for your tacos. Just remember to slice the meat against the grain for maximum tenderness!

Can I make Chipotle Style Steak Tacos ahead of time?

Yes, you can make Chipotle Style Steak Tacos ahead of time! The steak can be marinated the night before and stored in the refrigerator. This allows the flavors to develop even more. You can also prepare the toppings in advance, such as chopping tomatoes, shredding lettuce, and crumbling feta cheese. Just warm the tortillas and grill the steak right before serving for the best results!

What toppings are recommended for Chipotle Style Steak Tacos?

There are many delicious toppings you can use for Chipotle Style Steak Tacos! Some popular options include:

  • Chopped fresh tomatoes
  • Crisp shredded lettuce
  • Crumble feta cheese or cotija cheese
  • Freshly chopped cilantro
  • Sliced jalapeños for heat
  • Guacamole for creaminess
  • Various salsas, like pico de gallo or mango salsa
  • Lime wedges for an extra zesty kick

Feel free to mix and match your favorite toppings to create a taco that suits your taste!

How can I make Chipotle Style Steak Tacos spicier?

If you want to add some heat to your Chipotle Style Steak Tacos, there are several ways to do so:

  • Add sliced jalapeños or serrano peppers as a topping.
  • Incorporate a spicy salsa, such as a chipotle salsa or a hot salsa verde.
  • Mix in some cayenne pepper or crushed red pepper flakes into the marinade.
  • Serve with a side of hot sauce for those who like it extra spicy!

These options will help you achieve the perfect level of spice for your tacos, making them even more enjoyable!

Conclusion on Chipotle Style Steak Tacos

In conclusion, Chipotle Style Steak Tacos are a fantastic way to bring bold flavors and vibrant ingredients to your dining table. With their tender, marinated steak and fresh toppings, these tacos offer a delightful culinary experience that is both satisfying and easy to prepare. Whether you’re hosting a gathering or enjoying a cozy family dinner, these tacos are sure to impress.

By following the steps outlined in this article, you can create a delicious meal that everyone will love. From marinating the steak to assembling the tacos, each step is simple and rewarding. Plus, the versatility of Chipotle Style Steak Tacos allows you to customize them to suit your taste. Feel free to experiment with different proteins, toppings, and salsas to make them your own!

Remember, the key to great tacos lies in the quality of your ingredients and the love you put into the cooking process. So gather your family and friends, and enjoy the fun of taco night together. With every bite, you’ll savor the zesty flavors and the joy of sharing a meal. Happy cooking, and enjoy your Chipotle Style Steak Tacos!

Garlic Chicken with Broccoli and Spinach Recipe delights!

Introduction to Garlic Chicken with Broccoli and Spinach Recipe

Are you looking for a quick and healthy meal that’s packed with flavor? Look no further! The Garlic Chicken with Broccoli and Spinach Recipe is just what you need. This dish combines tender chicken, vibrant greens, and a zesty lemon-garlic sauce that will make your taste buds dance.

Not only is this recipe delicious, but it’s also simple to prepare. In about 30 minutes, you can have a wholesome dinner on the table. Plus, it’s a great way to sneak in some extra vegetables into your diet. Broccoli and spinach are not just colorful; they are also loaded with vitamins and minerals that are essential for your health.

This recipe is perfect for busy weeknights or when you want to impress guests without spending hours in the kitchen. The combination of garlic and lemon adds a refreshing twist, making it a delightful choice for any occasion. Whether you’re a seasoned cook or a beginner, you’ll find this dish easy to follow and satisfying to eat.

So, roll up your sleeves and get ready to whip up this tasty Garlic Chicken with Broccoli and Spinach Recipe. Your family will love it, and you’ll feel great knowing you’ve served them a nutritious meal!

Ingredients for Garlic Chicken with Broccoli and Spinach Recipe

Gathering the right ingredients is the first step to creating a delicious Garlic Chicken with Broccoli and Spinach Recipe. Here’s what you’ll need:

  • 2 boneless, skinless chicken breasts (approximately 1 pound)
  • 2 tablespoons extra virgin olive oil
  • 4 cloves garlic, finely chopped
  • 1 cup broccoli florets
  • 2 cups fresh baby spinach
  • 1 teaspoon sea salt
  • 1/2 teaspoon freshly ground black pepper
  • 1/2 teaspoon crushed red pepper (optional, for a spicy kick)
  • 1 tablespoon fresh lemon juice
  • 1/4 cup grated Parmesan cheese

These ingredients come together to create a flavorful and nutritious dish. The chicken provides a great source of protein, while the broccoli and spinach add essential vitamins and minerals. The garlic and lemon juice not only enhance the taste but also offer health benefits.

Feel free to adjust the quantities based on your preferences or dietary needs. For instance, if you love garlic, you can add an extra clove or two. If you prefer a different green, you can swap out the spinach for kale or Swiss chard. The beauty of this recipe lies in its flexibility!

Now that you have your ingredients ready, let’s move on to the preparation steps to bring this delightful dish to life.

Preparation of Garlic Chicken with Broccoli and Spinach Recipe

Now that you have gathered all your ingredients, it’s time to dive into the preparation of your Garlic Chicken with Broccoli and Spinach Recipe. This section will guide you through each step, ensuring that your dish turns out perfectly every time. Let’s get started!

Step 1: Preparing the Chicken

First, take the boneless, skinless chicken breasts and cut them into thin strips. This helps them cook evenly and quickly. Once cut, season the chicken strips with sea salt, black pepper, and crushed red pepper if you enjoy a little heat. Make sure to coat the chicken well with the seasonings. This step is crucial as it enhances the flavor of the chicken, making it delicious!

Step 2: Cooking the Broccoli

Next, heat 2 tablespoons of extra virgin olive oil in a large frying pan over medium heat. Once the oil is warm, add 4 cloves of finely chopped garlic. Sauté the garlic for about a minute until it becomes aromatic. Be careful not to let it brown, as burnt garlic can taste bitter. After the garlic is fragrant, introduce the seasoned chicken strips to the pan. Cook them for around 5-7 minutes, stirring occasionally, until the chicken is fully cooked and no longer pink inside.

Step 3: Sautéing the Spinach

Once the chicken is cooked, it’s time to add the broccoli florets. Toss them into the pan and stir well. Allow the broccoli to cook for an additional 3-4 minutes. You want it to be vibrant and tender but still have a slight crunch. After the broccoli is ready, fold in 2 cups of fresh baby spinach. Drizzle the mixture with 1 tablespoon of fresh lemon juice. Continue cooking for another 2-3 minutes until the spinach has wilted down beautifully.

Step 4: Combining Ingredients

After the spinach has wilted, take the pan off the heat. This is where the magic happens! Generously sprinkle 1/4 cup of grated Parmesan cheese over the chicken and greens. Gently mix everything together, allowing the cheese to melt into the warm dish. The cheese adds a creamy texture and rich flavor that complements the garlic and lemon perfectly.

Step 5: Final Cooking Steps

Finally, give your dish a taste. Adjust the seasoning if needed, adding more salt or pepper to suit your preference. Serve the Garlic Chicken with Broccoli and Spinach hot, with extra Parmesan on the side if you wish. This dish is not only visually appealing but also packed with nutrients, making it a fantastic choice for any meal!

Now that you’ve prepared your Garlic Chicken with Broccoli and Spinach, let’s explore some variations to keep your meals exciting!

Variation of Garlic Chicken with Broccoli and Spinach Recipe

One of the best things about the Garlic Chicken with Broccoli and Spinach Recipe is its versatility. You can easily switch up ingredients or cooking methods to create new flavors and textures. Let’s explore some alternative ingredients and different cooking methods to keep your meals fresh and exciting!

Alternative Ingredients

Feel free to get creative with your ingredients! Here are some alternatives you can try:

  • Protein Options: Instead of chicken, you can use turkey, shrimp, or even tofu for a vegetarian option. Each protein brings its unique flavor and texture.
  • Greens Variety: If you’re not a fan of spinach, consider using kale, Swiss chard, or even arugula. Each green has its own taste and nutritional benefits.
  • Vegetable Swaps: Broccoli can be replaced with asparagus, green beans, or bell peppers. These veggies add different colors and crunch to your dish.
  • Cheese Choices: While Parmesan is delicious, you can also try feta, mozzarella, or even a dairy-free cheese for a different flavor profile.
  • Herbs and Spices: Experiment with fresh herbs like basil, thyme, or oregano. They can elevate the dish and add a fresh aroma.

These alternatives allow you to customize the recipe based on your taste preferences or what you have on hand. The key is to maintain the balance of flavors while keeping it healthy!

Different Cooking Methods

Besides the traditional stovetop method, there are several other ways to prepare this dish. Here are a few cooking methods you might consider:

  • Grilling: For a smoky flavor, grill the chicken strips instead of sautéing them. You can also grill the vegetables for added char and taste.
  • Baking: Place the seasoned chicken and vegetables in a baking dish. Drizzle with olive oil and lemon juice, then bake at 400°F (200°C) for about 20-25 minutes. This method allows the flavors to meld beautifully.
  • Stir-Frying: Use a wok for a quick stir-fry. This method cooks the ingredients rapidly, preserving their crunch and nutrients.
  • Slow Cooking: For a hands-off approach, use a slow cooker. Combine all ingredients and cook on low for 4-6 hours. The result is tender chicken and flavorful veggies.

By trying out these alternative ingredients and cooking methods, you can keep your Garlic Chicken with Broccoli and Spinach Recipe exciting and new every time you make it. Now, let’s move on to some important cooking notes to ensure your dish turns out perfectly!

Cooking Note for Garlic Chicken with Broccoli and Spinach Recipe

When preparing the Garlic Chicken with Broccoli and Spinach Recipe, there are a few important cooking notes to keep in mind. These tips will help you achieve the best flavor and texture, ensuring your dish is a hit every time!

First, always use fresh ingredients whenever possible. Fresh garlic, chicken, and vegetables not only enhance the taste but also provide better nutritional value. If you can, opt for organic produce to avoid pesticides and chemicals.

Next, pay attention to the cooking times. Chicken should be cooked until it reaches an internal temperature of 165°F (75°C). This ensures it is safe to eat while remaining juicy and tender. Use a meat thermometer for accuracy.

When sautéing garlic, keep a close eye on it. Garlic can burn quickly, turning bitter. If you notice it starting to brown, reduce the heat immediately. You want it to be fragrant and golden, not dark brown.

For the broccoli, remember that overcooking can lead to mushiness. Aim for a vibrant green color and a slight crunch. This not only makes the dish visually appealing but also preserves the nutrients in the broccoli.

Lastly, don’t forget to taste as you go! Adjust the seasoning to your liking. Everyone’s palate is different, so feel free to add more salt, pepper, or lemon juice to suit your taste. This step is crucial for creating a dish that you and your family will love.

By following these cooking notes, you’ll ensure that your Garlic Chicken with Broccoli and Spinach Recipe turns out delicious and satisfying every time. Now, let’s explore some serving suggestions to make your meal even more enjoyable!

Serving Suggestions for Garlic Chicken with Broccoli and Spinach Recipe

Once you’ve prepared your delicious Garlic Chicken with Broccoli and Spinach, it’s time to think about how to serve it. Presentation can elevate your meal, making it even more enjoyable. Here are some serving suggestions to enhance your dining experience:

  • Plate it Up: Serve the chicken and greens on a large platter for a family-style meal. This allows everyone to help themselves and creates a warm, inviting atmosphere.
  • Pair with Grains: For a heartier meal, consider serving the dish over a bed of cooked quinoa, brown rice, or whole wheat pasta. These grains add texture and make the dish more filling.
  • Add a Side Salad: A fresh side salad can complement the flavors of the Garlic Chicken. Try a simple mixed greens salad with a light vinaigrette to balance the richness of the dish.
  • Garnish with Fresh Herbs: Sprinkle some chopped fresh parsley or basil on top before serving. This adds a pop of color and freshness, making the dish even more appealing.
  • Serve with Lemon Wedges: Place lemon wedges on the side for an extra burst of citrus. Guests can squeeze fresh lemon juice over their servings for added flavor.
  • Accompany with Crusty Bread: A slice of crusty whole-grain bread or a warm baguette is perfect for soaking up the delicious juices from the chicken and vegetables.

These serving suggestions not only enhance the visual appeal of your Garlic Chicken with Broccoli and Spinach but also provide options to suit different tastes and preferences. Whether you’re hosting a dinner party or enjoying a cozy family meal, these ideas will help you create a delightful dining experience.

Now that you have some great serving ideas, let’s move on to tips for making the best Garlic Chicken with Broccoli and Spinach Recipe!

Tips for Making the Best Garlic Chicken with Broccoli and Spinach Recipe

Creating the perfect Garlic Chicken with Broccoli and Spinach Recipe is all about attention to detail and a few handy tips. These suggestions will help you elevate your dish, ensuring it’s not only delicious but also visually appealing. Let’s dive into some essential tips for making the best version of this recipe!

First, always start with high-quality ingredients. Fresh chicken, vibrant greens, and aromatic garlic make a significant difference in flavor. When possible, choose organic produce and free-range chicken for the best taste and health benefits.

Next, consider marinating the chicken before cooking. A simple marinade of lemon juice, garlic, and your favorite herbs can infuse the chicken with extra flavor. Just 30 minutes of marinating can enhance the taste and tenderness of the meat.

When cooking the chicken, ensure your pan is hot enough before adding the meat. This helps to sear the chicken, locking in moisture and creating a nice golden crust. Avoid overcrowding the pan, as this can lead to steaming instead of sautéing.

For the broccoli, try blanching it briefly in boiling water before adding it to the pan. This method helps to maintain its bright green color and crisp texture. After blanching, quickly transfer the broccoli to an ice bath to stop the cooking process.

Don’t forget to season your dish at every stage. Season the chicken, the vegetables, and even the final dish. This layering of flavors will create a more complex and satisfying taste.

Lastly, serve your Garlic Chicken with Broccoli and Spinach immediately after cooking. This ensures that the chicken remains juicy and the greens stay vibrant. If you need to hold the dish for a bit, keep it warm on low heat, but avoid overcooking.

By following these tips, you’ll be well on your way to making a Garlic Chicken with Broccoli and Spinach Recipe that impresses everyone at the table. Now, let’s break down the time needed for this delicious meal!

Breakdown of Time for Garlic Chicken with Broccoli and Spinach Recipe

Understanding the time required for each step of the Garlic Chicken with Broccoli and Spinach Recipe can help you plan your cooking efficiently. Here’s a breakdown of the time needed for preparation and cooking, so you can enjoy a delicious meal without any stress!

Prep Time

The prep time for this recipe is quite short, making it perfect for busy weeknights. You’ll need about 10-15 minutes to gather and prepare your ingredients. This includes:

  • Cutting the chicken breasts into strips
  • Chopping the garlic
  • Measuring out the broccoli florets and spinach
  • Gathering all other ingredients

With everything ready, you’ll be set to start cooking in no time!

Cooking Time

The cooking time for the Garlic Chicken with Broccoli and Spinach Recipe is approximately 15-20 minutes. Here’s how it breaks down:

  • Sautéing the garlic and chicken: 5-7 minutes
  • Cooking the broccoli: 3-4 minutes
  • Sautéing the spinach: 2-3 minutes
  • Combining and final cooking steps: 2-3 minutes

This quick cooking time ensures that your meal is not only delicious but also retains the nutrients in the vegetables.

Total Time

In total, you can expect to spend about 25-35 minutes from start to finish. This includes both prep and cooking time. It’s a fantastic option for a healthy dinner that doesn’t take all evening to prepare!

With this time breakdown, you can easily fit the Garlic Chicken with Broccoli and Spinach Recipe into your busy schedule. Now that you know how to manage your time, let’s take a look at the nutritional information for this delightful dish!

Nutritional Information for Garlic Chicken with Broccoli and Spinach Recipe

Understanding the nutritional content of your meals is essential for maintaining a balanced diet. The Garlic Chicken with Broccoli and Spinach Recipe is not only delicious but also packed with nutrients. Here’s a closer look at the nutritional information for this wholesome dish.

Calories

Each serving of Garlic Chicken with Broccoli and Spinach contains approximately 290 calories. This makes it a great option for those looking to enjoy a satisfying meal without consuming too many calories. The combination of chicken, vegetables, and cheese provides a well-rounded meal that keeps you full and energized.

Protein

Protein is vital for building and repairing tissues, and this recipe delivers! Each serving contains about 30 grams of protein. The chicken is the primary source of protein, making it an excellent choice for those looking to increase their protein intake. This high protein content helps support muscle health and keeps you feeling satisfied longer.

Sodium

When it comes to sodium, each serving has around 600 milligrams. While this is a reasonable amount for a meal, it’s always good to be mindful of your sodium intake, especially if you’re watching your salt consumption. You can reduce the sodium by using low-sodium chicken broth or by adjusting the amount of salt you add during cooking.

Overall, the Garlic Chicken with Broccoli and Spinach Recipe is a nutritious choice that provides a good balance of calories, protein, and essential nutrients. It’s a fantastic way to enjoy a healthy meal that supports your dietary goals. Now that you have a clear understanding of the nutritional benefits, let’s move on to some frequently asked questions about this recipe!

FAQs about Garlic Chicken with Broccoli and Spinach Recipe

Can I use frozen broccoli and spinach for this recipe?

Yes, you can absolutely use frozen broccoli and spinach in your Garlic Chicken with Broccoli and Spinach Recipe! Frozen vegetables are often picked at their peak freshness and can be just as nutritious as fresh ones. However, keep in mind that frozen vegetables may release more water during cooking. To avoid a watery dish, make sure to thaw and drain them before adding them to the pan. This way, you’ll still enjoy the vibrant flavors and textures of the dish!

What can I serve with Garlic Chicken with Broccoli and Spinach?

There are plenty of delicious options to serve alongside your Garlic Chicken with Broccoli and Spinach! Here are a few ideas:

  • Whole Grains: Serve it over brown rice, quinoa, or whole wheat pasta for a filling meal.
  • Side Salad: A fresh garden salad with a light vinaigrette can complement the flavors beautifully.
  • Crusty Bread: A slice of whole-grain bread or a warm baguette is perfect for soaking up the tasty juices.
  • Roasted Potatoes: Crispy roasted potatoes or sweet potatoes can add a hearty touch to your meal.

These sides not only enhance the meal but also provide additional nutrients, making your dining experience even more enjoyable!

How can I make this recipe healthier?

While the Garlic Chicken with Broccoli and Spinach Recipe is already a healthy choice, there are a few ways to make it even better:

  • Use Less Oil: You can reduce the amount of olive oil to cut down on calories and fat.
  • Choose Leaner Protein: Opt for skinless chicken thighs or turkey for a leaner protein source.
  • Increase Vegetables: Add more vegetables like bell peppers, zucchini, or carrots to boost fiber and nutrients.
  • Skip the Cheese: If you want to lower the fat content, you can omit the Parmesan cheese or use a lighter cheese option.

These simple adjustments can help you create a dish that aligns with your health goals while still being delicious!

Can I substitute chicken with another protein?

Absolutely! The Garlic Chicken with Broccoli and Spinach Recipe is versatile, and you can easily substitute chicken with other proteins. Here are some great alternatives:

  • Turkey: Ground turkey or turkey breast can be used for a leaner option.
  • Shrimp: Shrimp cooks quickly and adds a delightful seafood flavor to the dish.
  • Tofu: For a vegetarian or vegan option, firm tofu is a fantastic substitute. Just make sure to press it to remove excess moisture before cooking.
  • Tempeh: This fermented soy product is another great plant-based protein that adds a nutty flavor.

Feel free to experiment with these protein options to find your favorite combination. Each one brings its unique taste and texture to the dish!

Conclusion on Garlic Chicken with Broccoli and Spinach Recipe

In conclusion, the Garlic Chicken with Broccoli and Spinach Recipe is a delightful and nutritious meal that is perfect for any occasion. With its vibrant colors, rich flavors, and wholesome ingredients, this dish not only satisfies your taste buds but also supports a healthy lifestyle. The combination of tender chicken, fresh greens, and zesty lemon-garlic sauce creates a symphony of flavors that everyone will love.

This recipe is incredibly versatile, allowing you to customize it based on your preferences or what you have on hand. Whether you choose to swap out the chicken for shrimp or tofu, or experiment with different vegetables, the possibilities are endless. Plus, the quick preparation and cooking time make it an ideal choice for busy weeknights or when you want to impress guests without spending hours in the kitchen.

By following the tips and variations provided, you can elevate your Garlic Chicken with Broccoli and Spinach Recipe to new heights. Remember to use fresh ingredients, season well, and enjoy the cooking process. Your family and friends will appreciate the effort you put into creating a delicious and healthy meal.

So, gather your ingredients, roll up your sleeves, and get ready to enjoy a plate of Garlic Chicken with Broccoli and Spinach. It’s a dish that not only nourishes the body but also brings joy to the table. Happy cooking!

Mediterranean Herb-Crusted Salmon Recipe is delightful!

Introduction to Mediterranean Herb-Crusted Salmon Recipe

Welcome to a delightful culinary journey with our Mediterranean Herb-Crusted Salmon Recipe! This dish is not just a meal; it’s an experience that brings the vibrant flavors of the Mediterranean right to your kitchen. Salmon, known for its rich taste and health benefits, pairs beautifully with a blend of aromatic herbs and spices. The result? A dish that is both nutritious and bursting with flavor.

Imagine tender salmon fillets, perfectly infused with the essence of garlic, basil, and rosemary, all while being complemented by the sweetness of roasted cherry tomatoes. This recipe is simple yet elegant, making it perfect for a weeknight dinner or a special occasion. Plus, it’s quick to prepare, allowing you to enjoy a gourmet meal without spending hours in the kitchen.

Whether you’re a seasoned chef or a beginner, this Mediterranean Herb-Crusted Salmon Recipe is easy to follow. With just a few fresh ingredients and straightforward steps, you’ll create a dish that impresses family and friends alike. So, roll up your sleeves and get ready to savor the deliciousness of this herb-infused salmon!

Ingredients for Mediterranean Herb-Crusted Salmon Recipe

To create the perfect Mediterranean Herb-Crusted Salmon, you’ll need a selection of fresh and flavorful ingredients. Each component plays a vital role in enhancing the taste of the salmon. Here’s what you’ll need:

  • 2 (6-ounce) salmon fillets: Choose fresh, high-quality salmon for the best flavor and texture.
  • 2 tablespoons extra virgin olive oil: This adds richness and helps the herbs stick to the salmon.
  • 1 teaspoon garlic powder: For a subtle garlic flavor that complements the herbs.
  • 1 teaspoon dried basil: A classic Mediterranean herb that brings a sweet, aromatic taste.
  • 1 teaspoon dried rosemary: This herb adds a woodsy flavor that pairs well with salmon.
  • 1 teaspoon smoked paprika: It gives a hint of smokiness and a beautiful color to the dish.
  • 1 teaspoon zest from a fresh lemon: The zest brightens the dish with a refreshing citrus note.
  • Salt and freshly ground black pepper: To taste, enhancing all the flavors in the dish.
  • 1 cup halved cherry tomatoes: Their sweetness balances the savory salmon perfectly.
  • 1 lemon, cut into rounds: These add flavor and a lovely presentation.
  • Fresh parsley, chopped: For garnish, adding a pop of color and freshness.

Gather these ingredients, and you’re ready to embark on your cooking adventure! Each item contributes to the overall flavor profile, making this Mediterranean Herb-Crusted Salmon a dish you’ll want to make again and again.

Step-by-Step Preparation of Mediterranean Herb-Crusted Salmon Recipe

Now that you have gathered all your ingredients, it’s time to dive into the step-by-step preparation of your Mediterranean Herb-Crusted Salmon. This process is straightforward and will guide you to create a delicious meal that’s sure to impress. Let’s get started!

Step 1: Preparing the Salmon

First, take your salmon fillets and rinse them gently under cold water. This helps to remove any residual scales or impurities. After rinsing, pat the fillets dry with a paper towel. This step is crucial as it ensures that the herb mixture adheres well to the salmon. Next, check for any pin bones in the fillets. If you find any, use a pair of tweezers to remove them carefully. This will make for a more enjoyable eating experience.

Step 2: Making the Herb Crust

In a mixing bowl, combine the extra virgin olive oil, garlic powder, dried basil, dried rosemary, smoked paprika, lemon zest, salt, and freshly ground black pepper. Use a whisk or a fork to mix these ingredients until they form a smooth paste. The olive oil acts as a base, allowing the herbs and spices to blend beautifully. This herb crust is what gives the salmon its vibrant flavor, so make sure it’s well mixed!

Step 3: Coating the Salmon

Now it’s time to coat the salmon. Take the prepared fillets and place them on a parchment-lined baking sheet. Using a spoon or a brush, generously apply the herb mixture over the top of each fillet. Make sure to cover the salmon evenly, allowing the flavors to penetrate the fish. After coating the salmon, scatter the halved cherry tomatoes around the fillets. This not only adds flavor but also creates a colorful presentation. Finally, place the lemon rounds on top of the salmon and among the tomatoes for an extra burst of citrus flavor.

Step 4: Baking the Salmon

Preheat your oven to 400°F (200°C) if you haven’t done so already. Once the oven is ready, place the baking sheet with the salmon and tomatoes inside. Bake for about 12-15 minutes. The salmon is done when it flakes easily with a fork and has a lovely golden color on top. Keep an eye on it to avoid overcooking. Once finished, remove the baking sheet from the oven and let the salmon rest for a few minutes. This resting period allows the juices to redistribute, ensuring a moist and flavorful dish.

And there you have it! Your Mediterranean Herb-Crusted Salmon is now ready to be served. The combination of herbs, spices, and roasted tomatoes creates a delightful meal that’s both healthy and satisfying.

Variation of Mediterranean Herb-Crusted Salmon Recipe

While the Mediterranean Herb-Crusted Salmon Recipe is delicious as is, there are many ways to customize it to suit your taste. Whether you want to experiment with different flavors or try out new cooking methods, these variations will keep your meals exciting and fresh. Let’s explore some alternative herbs and spices, as well as different cooking methods you can use.

Alternative Herbs and Spices

One of the best things about cooking is the ability to adapt recipes to your liking. If you want to switch things up, consider using different herbs and spices. Here are some great alternatives:

  • Fresh Herbs: Instead of dried basil and rosemary, try using fresh herbs like dill, thyme, or cilantro. Fresh herbs can add a vibrant flavor and aroma to your dish.
  • Spices: For a different kick, consider adding cumin or coriander. These spices can give your salmon a unique twist.
  • Chili Flakes: If you enjoy a bit of heat, sprinkle some red pepper flakes into the herb mixture. This will add a spicy kick to your salmon.
  • Mustard: Mixing in a teaspoon of Dijon mustard can add a tangy flavor that pairs well with the richness of the salmon.

Feel free to mix and match these alternatives to create a flavor profile that excites your palate. The beauty of cooking lies in experimentation!

Different Cooking Methods

In addition to changing up the herbs and spices, you can also explore various cooking methods for your Mediterranean Herb-Crusted Salmon. Here are a few options:

  • Grilling: For a smoky flavor, grill the salmon fillets instead of baking them. Preheat your grill and cook the salmon for about 5-7 minutes on each side, depending on thickness.
  • Pan-Seering: Heat a skillet over medium-high heat with a bit of olive oil. Sear the salmon fillets for about 4-5 minutes on each side until golden brown and cooked through.
  • Broiling: If you want a crispy top, try broiling the salmon. Place it under the broiler for the last 2-3 minutes of cooking to achieve a nice crust.
  • Poaching: For a lighter option, poach the salmon in a mixture of water, lemon juice, and herbs. This method keeps the salmon moist and tender.

Each cooking method brings out different flavors and textures in the salmon. So, don’t hesitate to try them all and find your favorite way to enjoy this Mediterranean delight!

Cooking Note for Mediterranean Herb-Crusted Salmon Recipe

Cooking salmon can be a delightful experience, but there are a few important notes to keep in mind to ensure your Mediterranean Herb-Crusted Salmon turns out perfectly every time. Here are some tips and tricks to help you achieve the best results:

First, always choose fresh salmon. Fresh fish not only tastes better but also has a firmer texture. If you can, buy wild-caught salmon, as it tends to have a richer flavor compared to farmed varieties. When selecting salmon, look for fillets that are bright in color and have a clean, ocean-like smell.

Next, pay attention to the thickness of your salmon fillets. Thicker fillets may require a bit more cooking time, while thinner ones will cook faster. A general rule of thumb is to cook salmon for about 4-6 minutes per half-inch of thickness. This ensures that the fish cooks evenly and remains moist.

Additionally, consider using a meat thermometer to check for doneness. Salmon is perfectly cooked when it reaches an internal temperature of 145°F (63°C). This method takes the guesswork out of cooking and helps you avoid overcooking, which can lead to dry salmon.

Lastly, let the salmon rest after baking. This resting period allows the juices to redistribute throughout the fish, making it more flavorful and tender. A few minutes of resting can make a significant difference in the final taste and texture of your dish.

By following these cooking notes, you’ll be well on your way to mastering the art of preparing Mediterranean Herb-Crusted Salmon. Enjoy the process, and savor the delicious results!

Serving Suggestions for Mediterranean Herb-Crusted Salmon Recipe

Now that your Mediterranean Herb-Crusted Salmon is ready, it’s time to think about how to serve it. Pairing your dish with the right sides and beverages can elevate your meal to a whole new level. Here are some ideal side dishes and wine pairing recommendations that will complement the flavors of your salmon beautifully.

Ideal Side Dishes

When it comes to side dishes, you want to choose options that enhance the flavors of the salmon without overpowering it. Here are some delicious ideas:

  • Garlic Mashed Potatoes: Creamy mashed potatoes with a hint of garlic make a comforting side that pairs well with the herb-infused salmon.
  • Quinoa Salad: A light quinoa salad with cucumbers, tomatoes, and a lemon vinaigrette adds a refreshing touch to your meal.
  • Steamed Asparagus: Tender asparagus drizzled with olive oil and a sprinkle of salt provides a crunchy contrast to the soft salmon.
  • Roasted Vegetables: A medley of roasted bell peppers, zucchini, and carrots brings color and sweetness to your plate.
  • Greek Salad: A classic Greek salad with feta cheese, olives, and a tangy dressing complements the Mediterranean theme perfectly.

These side dishes not only taste great but also add a variety of textures and colors to your meal, making it visually appealing.

Wine Pairing Recommendations

Choosing the right wine can enhance your dining experience. Here are some excellent wine options to pair with your Mediterranean Herb-Crusted Salmon:

  • Sauvignon Blanc: This white wine is crisp and refreshing, with citrus notes that complement the lemon and herbs in the salmon.
  • Chardonnay: A lightly oaked Chardonnay offers a creamy texture that pairs well with the richness of the salmon.
  • Pinot Grigio: This wine is light and fruity, making it a great match for the herbaceous flavors of the dish.
  • Rosé: A dry rosé provides a lovely balance of fruitiness and acidity, enhancing the overall flavor profile of your meal.
  • Light Red Wine: If you prefer red wine, opt for a light-bodied option like Pinot Noir, which won’t overpower the salmon.

With these serving suggestions, your Mediterranean Herb-Crusted Salmon will be a hit at any dinner table. Enjoy the delightful combination of flavors and the joy of sharing a delicious meal with loved ones!

Tips for Perfecting Mediterranean Herb-Crusted Salmon Recipe

To truly master the Mediterranean Herb-Crusted Salmon Recipe, a few tips can help you elevate your dish to perfection. These simple yet effective suggestions will ensure that your salmon is flavorful, moist, and visually appealing. Let’s dive into some expert tips that will make your cooking experience even more enjoyable!

First, always marinate your salmon for at least 30 minutes before cooking. This allows the flavors from the herb mixture to penetrate the fish, resulting in a more robust taste. If you have time, marinating it for a few hours in the refrigerator can enhance the flavor even further.

Next, consider using a fish spatula when flipping or serving your salmon. This tool is designed to handle delicate fish fillets without breaking them apart. It makes serving much easier and keeps your salmon looking beautiful on the plate.

Another important tip is to keep an eye on the cooking time. Salmon can go from perfectly cooked to overdone very quickly. To avoid this, check for doneness a couple of minutes before the recommended cooking time. Remember, the salmon will continue to cook slightly after you take it out of the oven.

Additionally, don’t forget to experiment with presentation. A well-plated dish can make a big difference. Consider serving your salmon on a bed of sautéed spinach or alongside a colorful vegetable medley. Garnishing with fresh herbs or lemon wedges can also add a pop of color and freshness.

Lastly, always taste your herb mixture before applying it to the salmon. Adjust the seasoning as needed to suit your palate. If you prefer a stronger garlic flavor, add a bit more garlic powder. If you like it spicier, increase the smoked paprika or add some chili flakes. Personalizing the flavors will make the dish truly yours!

By following these tips, you’ll be well on your way to creating a Mediterranean Herb-Crusted Salmon that not only tastes amazing but also impresses everyone at the table. Happy cooking!

Breakdown of Time for Mediterranean Herb-Crusted Salmon Recipe

Understanding the time required for each step of the Mediterranean Herb-Crusted Salmon Recipe can help you plan your cooking efficiently. Here’s a detailed breakdown of the time you’ll need for preparation and cooking, ensuring a smooth and enjoyable cooking experience.

Prep Time

The prep time for this delicious salmon dish is approximately 15 minutes. During this time, you will gather all your ingredients, prepare the salmon fillets, and make the herb mixture. This step is crucial as it sets the foundation for the flavors in your dish. Make sure to take your time to ensure everything is ready before you start cooking!

Cooking Time

Once you have everything prepped, the cooking time is about 12-15 minutes. This includes baking the salmon and roasting the cherry tomatoes. Keep an eye on the salmon as it cooks, checking for that perfect flaky texture. Remember, the cooking time may vary slightly depending on the thickness of your salmon fillets.

Total Time

In total, you can expect to spend around 30 minutes from start to finish. This includes both the prep and cooking times. With such a quick turnaround, you can enjoy a gourmet meal without spending hours in the kitchen. It’s perfect for busy weeknights or when you want to impress guests with minimal effort!

Now that you have a clear understanding of the time involved, you can confidently prepare your Mediterranean Herb-Crusted Salmon. Enjoy the process and the delicious results!

Nutritional Information for Mediterranean Herb-Crusted Salmon Recipe

Understanding the nutritional value of your meals is essential for maintaining a balanced diet. The Mediterranean Herb-Crusted Salmon Recipe not only delights your taste buds but also offers a range of health benefits. Here’s a breakdown of the key nutritional components of this delicious dish.

Calories

Each serving of the Mediterranean Herb-Crusted Salmon contains approximately 350 calories. This makes it a satisfying yet healthy option for dinner. The combination of salmon and fresh ingredients ensures that you’re getting a nutritious meal without excessive calories. Plus, the healthy fats from the salmon contribute to your overall well-being.

Protein

Salmon is an excellent source of protein, providing about 34 grams per serving. Protein is vital for building and repairing tissues, making it an essential part of your diet. Including this dish in your meals can help you meet your daily protein needs while enjoying a flavorful experience.

Sodium

The sodium content in this Mediterranean Herb-Crusted Salmon Recipe is around 300 milligrams per serving. This level is moderate, making it suitable for most diets. However, if you are watching your sodium intake, you can adjust the amount of salt used in the herb mixture. Using fresh herbs instead of dried can also help reduce sodium levels while still providing great flavor.

In summary, the Mediterranean Herb-Crusted Salmon Recipe is not only delicious but also packed with essential nutrients. With its balanced calorie count, high protein content, and moderate sodium levels, it’s a fantastic choice for a healthy meal. Enjoy the flavors and the health benefits that come with this delightful dish!

FAQs about Mediterranean Herb-Crusted Salmon Recipe

Can I use frozen salmon for this recipe?

Yes, you can use frozen salmon for the Mediterranean Herb-Crusted Salmon Recipe! However, it’s important to thaw the salmon properly before cooking. The best way to do this is to place the frozen fillets in the refrigerator overnight. If you’re short on time, you can also submerge the sealed salmon in cold water for about an hour. Once thawed, follow the same preparation steps as you would with fresh salmon. Just keep in mind that cooking times may vary slightly, so check for doneness as you cook.

What can I substitute for fresh herbs?

If you don’t have fresh herbs on hand, don’t worry! You can easily substitute dried herbs in the Mediterranean Herb-Crusted Salmon Recipe. A general rule is to use one-third of the amount of dried herbs compared to fresh. For example, if the recipe calls for 1 tablespoon of fresh basil, use about 1 teaspoon of dried basil instead. Other great substitutes include Italian seasoning or herbes de Provence, which can add a lovely flavor to your dish. Just remember to adjust the quantities to suit your taste!

How do I know when the salmon is done cooking?

Knowing when your salmon is perfectly cooked is key to enjoying this dish. The best way to check for doneness is to use a meat thermometer. Salmon is done when it reaches an internal temperature of 145°F (63°C). If you don’t have a thermometer, you can also check by gently flaking the salmon with a fork. If it flakes easily and is opaque in color, it’s ready to serve. Keep an eye on the cooking time, as salmon can quickly go from perfectly cooked to overdone!

Can I make the herb crust ahead of time?

Absolutely! You can prepare the herb crust ahead of time, making your cooking process even easier. Simply mix the olive oil, garlic powder, dried herbs, smoked paprika, lemon zest, salt, and pepper in a bowl. Store the mixture in an airtight container in the refrigerator for up to 24 hours. When you’re ready to cook, just take it out, coat your salmon, and proceed with the baking instructions. This way, you can enjoy a delicious meal with minimal effort!

Conclusion on Mediterranean Herb-Crusted Salmon Recipe

In conclusion, the Mediterranean Herb-Crusted Salmon Recipe is a delightful dish that combines simplicity with vibrant flavors. This recipe not only showcases the rich taste of salmon but also highlights the aromatic herbs and spices that make Mediterranean cuisine so beloved. With its easy preparation and quick cooking time, it’s perfect for both busy weeknights and special occasions.

As you’ve seen, this dish is versatile. You can easily customize it with different herbs, spices, and cooking methods to suit your personal taste. Whether you choose to bake, grill, or pan-sear your salmon, the result will always be a flavorful and satisfying meal. Plus, the nutritional benefits of salmon make it a smart choice for a healthy diet.

We hope this recipe inspires you to bring the flavors of the Mediterranean into your kitchen. Don’t hesitate to experiment with side dishes and wine pairings to create a complete dining experience. Remember, cooking is all about enjoying the process and sharing delicious meals with loved ones.

So, gather your ingredients, follow the steps, and savor the delightful taste of your Mediterranean Herb-Crusted Salmon. Happy cooking, and bon appétit!

Stuffed Salmon with Cream Cheese and Spinach Recipe is easy!

Introduction to Stuffed Salmon with Cream Cheese and Spinach Recipe

Stuffed Salmon with Cream Cheese and Spinach Recipe is a delightful dish that combines the rich flavors of salmon with a creamy, savory filling. This recipe is not only easy to prepare but also packed with nutrients, making it a perfect choice for a family meal or a special occasion.

Salmon is known for its high protein content and omega-3 fatty acids, which are great for heart health. When you stuff it with cream cheese and spinach, you add a burst of flavor and texture that elevates the dish. The cream cheese provides a smooth, rich base, while the spinach adds a fresh, vibrant touch. Together, they create a filling that complements the salmon beautifully.

This recipe is versatile, allowing you to customize the filling to suit your taste. Whether you prefer a classic combination or want to experiment with different ingredients, the possibilities are endless. Plus, it’s a great way to sneak in some greens for those picky eaters!

In this article, we will guide you through the ingredients, preparation steps, and tips to make the perfect stuffed salmon. So, roll up your sleeves and get ready to impress your family and friends with this mouthwatering dish!

Ingredients for Stuffed Salmon with Cream Cheese and Spinach Recipe

Stuffed Salmon with Cream Cheese and Spinach Recipe, you’ll need a selection of fresh and flavorful ingredients. Here’s what you’ll need:

  • 4 salmon fillets (6 ounces each)
  • 8 ounces cream cheese, softened
  • 1 cup fresh spinach, finely chopped
  • 1/2 cup shredded mozzarella cheese
  • 1/4 cup grated Parmesan cheese
  • 2 cloves garlic, minced
  • 1 tablespoon fresh lemon juice
  • 1 teaspoon dried dill
  • 1 teaspoon salt
  • 1/2 teaspoon black pepper
  • 1 tablespoon olive oil
  • Lemon wedges, for garnish

These ingredients come together to create a deliciously creamy filling that pairs perfectly with the tender salmon. The combination of cheeses adds richness, while the spinach and herbs provide freshness and depth of flavor. The lemon juice brightens the dish, making it a delightful meal for any occasion.

Make sure to use fresh ingredients whenever possible. Fresh spinach and high-quality salmon will enhance the overall taste of your dish. Now that you have your ingredients ready, let’s move on to the preparation steps!

Preparation of Stuffed Salmon with Cream Cheese and Spinach Recipe

Stuffed Salmon with Cream Cheese and Spinach Recipe. This process is straightforward and will have your kitchen smelling amazing in no time. Let’s break it down into easy steps!

Step 1: Preparing the Spinach and Cream Cheese Filling

First, you’ll want to prepare the filling. Start by taking your softened cream cheese and placing it in a mixing bowl. Then, add the finely chopped spinach, shredded mozzarella, grated Parmesan, minced garlic, lemon juice, dried dill, salt, and black pepper. Using a fork or a spatula, mix everything together until it’s smooth and creamy. This filling is the heart of your dish, so make sure it’s well combined. The flavors will meld beautifully, creating a delicious stuffing for your salmon.

Step 2: Preparing the Salmon Fillets

Next, it’s time to prepare the salmon fillets. Lay each fillet skin-side down on a clean cutting board. With a sharp knife, carefully create a pocket in each fillet. Be cautious not to cut all the way through; you want to keep the bottom intact. This pocket will hold your creamy filling, so make it deep enough to hold a generous amount. Once all the fillets are ready, you can move on to the next step.

Step 3: Stuffing the Salmon

Now comes the fun part—stuffing the salmon! Take your prepared cream cheese mixture and use a spoon to fill each pocket in the salmon fillets. Pack the filling in gently but firmly, ensuring it’s well distributed. Don’t worry if a little spills out; that just means there’s extra flavor! Once all the fillets are stuffed, you’re almost ready to cook.

Step 4: Cooking the Stuffed Salmon

Finally, it’s time to cook your stuffed salmon. Preheat your oven to 375°F (190°C) if you haven’t done so already. Lightly coat a baking dish with olive oil to prevent sticking. Place the stuffed salmon fillets in the dish, skin-side down. Drizzle a little olive oil over the top for added moisture and flavor. Bake the salmon for 20-25 minutes, or until it’s fully cooked and flakes easily with a fork. The aroma will fill your kitchen, making it hard to wait!

Once cooked, remove the salmon from the oven and let it rest for a few minutes. This will help the flavors settle. Serve your delicious stuffed salmon hot, garnished with lemon wedges for a zesty touch. Enjoy!

Variation of Stuffed Salmon with Cream Cheese and Spinach Recipe

Stuffed Salmon with Cream Cheese and Spinach Recipe is a hit, there are many ways to switch things up! Variations can enhance flavors and cater to different tastes. Let’s explore some alternative fillings and cooking methods that can make your salmon dish even more exciting.

Alternative Fillings for Stuffed Salmon

One of the best things about stuffed salmon is its versatility. You can easily customize the filling to suit your preferences. Here are some tasty alternatives:

  • Sun-Dried Tomatoes: Add chopped sun-dried tomatoes to the cream cheese mixture for a tangy and sweet flavor.
  • Artichokes: Chopped artichokes can bring a unique taste and texture to your filling.
  • Feta Cheese: Swap out the Parmesan for feta cheese for a Mediterranean twist.
  • Herbs: Experiment with fresh herbs like basil or parsley to add a burst of freshness.
  • Mushrooms: Sautéed mushrooms can add an earthy flavor that pairs well with salmon.

Feel free to mix and match these ingredients to create a filling that excites your taste buds. The key is to balance flavors and textures, ensuring that each bite is delicious!

Cooking Methods for Stuffed Salmon

In addition to baking, there are several other cooking methods you can try for your stuffed salmon. Each method offers a different texture and flavor profile:

  • Grilling: For a smoky flavor, grill the stuffed salmon fillets. Just be sure to use a grill basket or foil to prevent sticking.
  • Pan-Seering: Sear the salmon in a hot skillet with olive oil for a crispy exterior. Finish cooking in the oven if needed.
  • Broiling: Broil the salmon for a few minutes at the end of cooking to achieve a golden, crispy top.
  • Poaching: For a lighter option, poach the salmon in a flavorful broth. This method keeps the fish moist and tender.

Stuffed Salmon with Cream Cheese and Spinach Recipe will never get boring!

Cooking Note for Stuffed Salmon with Cream Cheese and Spinach Recipe

Stuffed Salmon with Cream Cheese and Spinach Recipe, there are a few important cooking notes to keep in mind. These tips will help ensure that your salmon turns out perfectly every time, making your meal a delightful experience.

First, always choose fresh salmon fillets. Fresh fish not only tastes better but also has a firmer texture, which is essential for stuffing. If you can, buy wild-caught salmon for the best flavor and quality. If you opt for frozen salmon, make sure to thaw it completely in the refrigerator before cooking.

Next, pay attention to the cooking time. Salmon can easily overcook, leading to a dry texture. The general rule is to bake salmon for about 20-25 minutes at 375°F (190°C). However, cooking times may vary based on the thickness of the fillets. A good way to check for doneness is to use a fork. If the salmon flakes easily, it’s ready to eat!

Additionally, consider using a meat thermometer for accuracy. The internal temperature of cooked salmon should reach 145°F (63°C). This ensures that the fish is safe to eat while remaining moist and tender.

Lastly, let the salmon rest for a few minutes after removing it from the oven. This resting period allows the juices to redistribute, enhancing the flavor and texture. Serve your stuffed salmon with a side of vegetables or a fresh salad for a complete meal.

Stuffed Salmon with Cream Cheese and Spinach Recipe that will impress your family and friends!

Serving Suggestions for Stuffed Salmon with Cream Cheese and Spinach Recipe

Stuffed Salmon with Cream Cheese and Spinach Recipe is ready, it’s time to think about how to serve it. Presentation can elevate your dish, making it even more appealing. Here are some delightful serving suggestions to enhance your meal:

  • Fresh Salad: Pair the salmon with a light, crisp salad. A mix of greens, cherry tomatoes, and a lemon vinaigrette complements the rich flavors of the salmon.
  • Roasted Vegetables: Serve the salmon alongside roasted vegetables like asparagus, zucchini, or bell peppers. The caramelized flavors of the veggies add a nice contrast.
  • Quinoa or Rice: A side of fluffy quinoa or rice can soak up the delicious juices from the salmon. Consider adding herbs or lemon zest to the grains for extra flavor.
  • Garlic Bread: For a comforting touch, serve with warm garlic bread. The buttery, garlicky flavor pairs wonderfully with the creamy salmon.
  • Lemon Wedges: Don’t forget to include lemon wedges on the plate. A squeeze of fresh lemon juice right before eating brightens the dish and enhances the flavors.

For a complete dining experience, consider pairing your stuffed salmon with a glass of white wine, such as Sauvignon Blanc or Chardonnay. These wines complement the richness of the salmon and the cream cheese filling.

Stuffed Salmon with Cream Cheese and Spinach Recipe will not only taste amazing but also look stunning on the table. Enjoy your meal with family and friends, and watch them rave about this delicious dish!

Tips for Perfect Stuffed Salmon with Cream Cheese and Spinach Recipe

Stuffed Salmon with Cream Cheese and Spinach Recipe is all about attention to detail. With a few helpful tips, you can elevate your dish and impress everyone at the dinner table. Here are some essential tips to ensure your salmon turns out delicious every time:

  • Use Fresh Ingredients: Always opt for fresh salmon and vegetables. Fresh ingredients enhance the flavor and texture of your dish. If possible, buy wild-caught salmon for the best taste.
  • Don’t Overstuff: While it’s tempting to pack the filling tightly, avoid overstuffing the salmon. This can cause the filling to spill out during cooking. A generous but manageable amount will keep everything intact.
  • Season Well: Don’t forget to season the salmon itself. A sprinkle of salt and pepper on the outside can enhance the overall flavor. You can also add a dash of lemon zest for an extra zing.
  • Check for Doneness: Use a fork to test if the salmon is cooked. It should flake easily. Alternatively, a meat thermometer can help; the internal temperature should reach 145°F (63°C).
  • Let It Rest: After baking, let the salmon rest for a few minutes before serving. This allows the juices to redistribute, making each bite tender and flavorful.
  • Experiment with Herbs: Feel free to play with different herbs in your filling. Fresh dill, parsley, or even chives can add unique flavors that complement the salmon beautifully.
  • Pair with Sides: Think about what to serve alongside your stuffed salmon. Light salads, roasted vegetables, or grains like quinoa can create a balanced meal.
  • Garnish Creatively: A simple garnish can elevate your dish. Fresh herbs or a sprinkle of paprika can add color and visual appeal to your plate.

Stuffed Salmon with Cream Cheese and Spinach Recipe that is not only delicious but also visually stunning. Enjoy the process and have fun experimenting with flavors!

Breakdown of Time for Stuffed Salmon with Cream Cheese and Spinach Recipe

Stuffed Salmon with Cream Cheese and Spinach Recipe can help you plan your cooking efficiently. Here’s a simple breakdown of the time required for preparation and cooking.

Prep Time

The prep time for this delicious dish is approximately 15-20 minutes. This includes gathering your ingredients, preparing the spinach and cream cheese filling, and stuffing the salmon fillets. Make sure to take your time during this step to ensure everything is well-prepared. A little extra care here will lead to a more flavorful result!

Cooking Time

Once your salmon is stuffed and ready, the cooking time is about 20-25 minutes. Preheat your oven to 375°F (190°C) before placing the salmon in the oven. Keep an eye on the salmon as it cooks, checking for doneness. The salmon should flake easily when it’s ready, indicating that it’s perfectly cooked.

Total Time

In total, you can expect the entire process to take around 35-45 minutes. This includes both prep and cooking time. With this quick and easy recipe, you can have a delicious meal on the table in no time. It’s perfect for busy weeknights or when you want to impress guests without spending hours in the kitchen!

Nutritional Information for Stuffed Salmon with Cream Cheese and Spinach Recipe

Stuffed Salmon with Cream Cheese and Spinach Recipe not only delights your taste buds but also provides valuable nutrients. Here’s a closer look at the nutritional information per serving:

Calories

Each serving of this delicious stuffed salmon contains approximately 380 calories. This makes it a satisfying yet healthy option for dinner. The combination of salmon and the creamy filling ensures that you’re getting a meal that is both filling and nutritious.

Protein

One of the standout features of this recipe is its high protein content. Each serving provides about 36 grams of protein. Salmon is an excellent source of protein, which is vital for muscle repair and overall health. The addition of cream cheese and cheese also contributes to the protein content, making this dish a great choice for those looking to increase their protein intake.

Sodium

In terms of sodium, each serving contains around 600 milligrams. While this is a moderate amount, it’s important to be mindful of your overall sodium intake, especially if you are watching your salt consumption. You can reduce the sodium content by using low-sodium cheese and adjusting the salt in the filling to suit your dietary needs.

Stuffed Salmon with Cream Cheese and Spinach Recipe is a nutritious meal that offers a good balance of calories, protein, and flavor. It’s a fantastic option for anyone looking to enjoy a healthy and delicious dinner without compromising on taste!

FAQs about Stuffed Salmon with Cream Cheese and Spinach Recipe

Can I use frozen salmon for this recipe?

Stuffed Salmon with Cream Cheese and Spinach Recipe. However, it’s important to thaw the salmon completely before cooking. The best way to do this is to place the frozen salmon in the refrigerator overnight. If you’re short on time, you can also thaw it under cold running water for about an hour. Just make sure the salmon is fully thawed to ensure even cooking and to maintain its texture.

What can I substitute for cream cheese in the filling?

If you’re looking for a substitute for cream cheese, there are several options you can try. Greek yogurt is a great alternative that adds creaminess while being lower in fat. You can also use ricotta cheese for a lighter filling. For a dairy-free option, consider using cashew cream or a vegan cream cheese. Each of these substitutes will provide a different flavor and texture, so feel free to experiment to find what you like best!

How do I know when the salmon is cooked through?

To check if your salmon is cooked through, you can use a fork to gently flake the fish. If it flakes easily and appears opaque, it’s ready to eat. Another reliable method is to use a meat thermometer. The internal temperature of the salmon should reach 145°F (63°C) for it to be safe to consume. Remember, overcooking can lead to dry salmon, so keep an eye on it as it bakes!

Can I make the filling ahead of time?

Stuffed Salmon with Cream Cheese and Spinach Recipe ahead of time. Simply mix all the filling ingredients together and store it in an airtight container in the refrigerator. It can be made up to 24 hours in advance. When you’re ready to cook, just stuff the salmon fillets and bake as directed. This makes meal prep easier and allows you to enjoy a delicious dinner with minimal effort!

Conclusion on Stuffed Salmon with Cream Cheese and Spinach Recipe

Stuffed Salmon with Cream Cheese and Spinach Recipe is a delightful dish that combines flavor, nutrition, and ease of preparation. This recipe not only showcases the rich taste of salmon but also highlights the creamy, savory filling that makes each bite a true delight. Whether you’re cooking for a special occasion or a simple family dinner, this dish is sure to impress.

By following the steps outlined in this article, you can create a meal that is both satisfying and healthy. The combination of fresh ingredients, such as spinach and herbs, adds a burst of flavor while providing essential nutrients. Plus, the versatility of the recipe allows you to customize the filling to suit your taste preferences, making it a fun and creative cooking experience.

Remember to pay attention to cooking times and techniques to ensure your salmon is perfectly cooked. With a little practice, you’ll master the art of stuffing salmon and can explore various fillings and cooking methods. The tips and variations provided will help you elevate your dish and keep it exciting every time you make it.

Stuffed Salmon with Cream Cheese and Spinach Recipe is not just a meal; it’s an experience that brings joy to the table. Happy cooking!

Spinach Feta Quesadillas are a quick and tasty meal!

Introduction to Spinach Feta Quesadillas

Are you looking for a quick and tasty meal? Spinach Feta Quesadillas are the perfect solution! These delightful treats combine the rich flavors of feta cheese with the freshness of spinach, all wrapped in a crispy tortilla. Not only are they delicious, but they are also easy to make. Whether you’re cooking for yourself or entertaining guests, these quesadillas are sure to impress.

Spinach Feta Quesadillas are versatile too. You can enjoy them as a snack, a light lunch, or even a main dish. They are packed with nutrients, making them a healthier option compared to many other fast foods. Plus, they can be customized to suit your taste. Want to add some extra veggies or switch up the cheese? Go for it! The possibilities are endless.

In this article, we will guide you through the ingredients, preparation steps, and even some variations to try. By the end, you’ll be ready to whip up your own batch of Spinach Feta Quesadillas. So, let’s dive in and discover how to create this cheesy delight that everyone will love!

Ingredients for Spinach Feta Quesadillas

To create delicious Spinach Feta Quesadillas, you’ll need a few simple ingredients. Each one plays a vital role in bringing out the flavors and textures that make this dish so delightful. Here’s what you’ll need:

  • 2 cups fresh spinach, chopped: Fresh spinach adds a vibrant color and a healthy boost to your quesadillas.
  • 1 cup crumbled feta cheese: Feta cheese provides a tangy flavor that pairs perfectly with spinach.
  • 1 cup shredded mozzarella cheese: This cheese melts beautifully, giving your quesadillas that gooey texture we all love.
  • 4 large flour tortillas: Flour tortillas are soft and pliable, making them ideal for folding and cooking.
  • 1 tablespoon olive oil: Olive oil helps to sauté the spinach and adds a nice richness to the dish.
  • 1 teaspoon garlic powder: Garlic powder enhances the flavor, giving your quesadillas a savory kick.
  • 1 teaspoon onion powder: Onion powder adds depth and sweetness to the filling.
  • Salt and pepper to taste: These seasonings help to balance the flavors in your quesadillas.
  • Sour cream or salsa for dipping (optional): These make great accompaniments, adding creaminess or a spicy kick.

With these ingredients on hand, you’re all set to make your Spinach Feta Quesadillas. Each component contributes to a deliciously cheesy and satisfying meal. Now, let’s move on to the preparation steps!

Preparation of Spinach Feta Quesadillas

Now that you have all your ingredients ready, it’s time to prepare your Spinach Feta Quesadillas! This process is simple and fun. Follow these steps to create a delicious meal that everyone will enjoy.

Step 1: Preparing the Spinach

First, let’s get that spinach ready! Start by washing the fresh spinach thoroughly under cold water. This step is important to remove any dirt or grit. After washing, chop the spinach into small pieces. Next, heat the olive oil in a large skillet over medium heat. Once the oil is hot, add the chopped spinach. Sauté it for about 2-3 minutes. You want the spinach to become tender and bright green. This quick cooking helps to enhance its flavor and makes it easier to mix with the cheese.

Step 2: Mixing the Filling

Once your spinach is ready, it’s time to mix the filling! In a separate bowl, combine the sautéed spinach with crumbled feta cheese and shredded mozzarella cheese. Add the garlic powder and onion powder to the mixture. Don’t forget to season with salt and pepper to taste. Stir everything together until well blended. This mixture is what makes your quesadillas so cheesy and flavorful!

Step 3: Assembling the Quesadillas

Now comes the fun part—assembling your quesadillas! Take one large flour tortilla and lay it flat in the skillet. Spoon a generous portion of the spinach and cheese mixture onto one half of the tortilla. Be careful not to overfill it, as this can make folding tricky. Once you have the filling in place, fold the other half of the tortilla over to create a half-moon shape. Press down gently to help seal it.

Step 4: Cooking the Quesadillas

It’s time to cook your quesadillas! Keep the skillet on medium heat. Allow the folded quesadilla to cook for about 3-4 minutes. You want the bottom to become crispy and golden brown. After that, carefully flip the quesadilla over using a spatula. Cook the other side for an additional 3-4 minutes until the cheese is melted and the tortilla is perfectly crisp. Once cooked, remove the quesadilla from the skillet and repeat the process with the remaining tortillas and filling.

After all your quesadillas are cooked, cut each one into triangles. Serve them hot, and get ready to enjoy a cheesy delight!

Variation of Spinach Feta Quesadillas

While the classic Spinach Feta Quesadillas are already a hit, there’s always room for creativity in the kitchen! You can easily customize your quesadillas to suit your taste or to use up ingredients you have on hand. Here are some fun variations to try:

Adding Different Cheeses

Cheese lovers rejoice! You can switch up the cheese in your Spinach Feta Quesadillas for a unique twist. For instance, try adding some creamy goat cheese for a tangy flavor. Alternatively, you can use sharp cheddar cheese for a bolder taste. Mixing different cheeses can create a delightful blend of flavors and textures. Just remember to keep the mozzarella for that gooey meltiness. Experimenting with cheese can make your quesadillas even more delicious!

Incorporating Other Vegetables

Want to boost the nutrition and flavor of your quesadillas? Consider adding other vegetables! Bell peppers, mushrooms, or even zucchini can be great additions. Simply sauté them along with the spinach to enhance their flavors. You can also add some diced tomatoes for a fresh burst of flavor. Not only do these veggies add color, but they also provide extra vitamins and minerals. Feel free to get creative and mix in your favorite vegetables!

These variations will not only keep your Spinach Feta Quesadillas exciting but also allow you to cater to different tastes and dietary preferences. So, don’t hesitate to experiment and make this dish your own!

Cooking Note for Spinach Feta Quesadillas

Cooking Spinach Feta Quesadillas is a delightful experience, but there are a few tips to keep in mind to ensure they turn out perfectly every time. Here are some important cooking notes to help you achieve the best results:

First, make sure your skillet is preheated before adding the tortillas. A hot skillet helps to create that crispy texture we all love. If the skillet is not hot enough, the tortillas may become soggy instead of crispy. You can test the heat by sprinkling a few drops of water on the skillet; if they sizzle, it’s ready!

Next, don’t overcrowd the skillet. Cooking one or two quesadillas at a time allows for even cooking and prevents them from sticking together. If you try to cook too many at once, they may not cook evenly, and you might end up with a mess.

Additionally, keep an eye on the cooking time. Every stove is different, so you may need to adjust the time slightly. Look for a golden-brown color on the tortillas and melted cheese as indicators that they are ready to flip. If you notice the quesadillas browning too quickly, lower the heat to avoid burning.

Lastly, let the quesadillas rest for a minute after cooking. This short break allows the cheese to set slightly, making them easier to cut and serve. Plus, it helps to avoid burning your mouth on that delicious, gooey cheese!

By following these cooking notes, you’ll be well on your way to making perfect Spinach Feta Quesadillas that are crispy, cheesy, and utterly delicious. Happy cooking!

Serving Suggestions for Spinach Feta Quesadillas

Once your Spinach Feta Quesadillas are cooked to perfection, it’s time to think about how to serve them! The right accompaniments can elevate your meal and make it even more enjoyable. Here are some delicious serving suggestions to consider:

Dipping Sauces

Dipping sauces can add an extra layer of flavor to your quesadillas. Here are a few popular options:

  • Sour Cream: A classic choice, sour cream adds a creamy texture that balances the savory flavors of the quesadillas.
  • Salsa: Whether you prefer mild or spicy, salsa brings a fresh and zesty kick. It’s a great way to add some heat!
  • Guacamole: This creamy avocado dip pairs wonderfully with the cheesy quesadillas, adding richness and flavor.
  • Ranch Dressing: For a twist, try ranch dressing. Its herby flavor complements the spinach and feta beautifully.

Feel free to mix and match these sauces to find your favorite combination. Each dip can change the experience of your quesadillas, making every bite exciting!

Side Dishes

To round out your meal, consider serving your Spinach Feta Quesadillas with some tasty side dishes. Here are a few ideas:

  • Fresh Salad: A light salad with mixed greens, cherry tomatoes, and a simple vinaigrette can add freshness to your meal.
  • Rice or Quinoa: A side of seasoned rice or quinoa can provide a hearty complement to the quesadillas.
  • Roasted Vegetables: Roasted veggies like bell peppers, zucchini, or carrots can add color and nutrition to your plate.
  • Fruit Salad: A refreshing fruit salad can be a sweet contrast to the savory quesadillas, making for a balanced meal.

These side dishes not only enhance the meal but also provide a variety of flavors and textures. Enjoy experimenting with different combinations to find what you love best!

Tips for Perfect Spinach Feta Quesadillas

Making the perfect Spinach Feta Quesadillas is all about the details. With a few helpful tips, you can elevate your quesadilla game and impress your family and friends. Here are some essential tips to ensure your quesadillas turn out delicious every time:

First, use fresh ingredients. Fresh spinach and high-quality cheese make a big difference in flavor. When possible, choose organic spinach and a good brand of feta and mozzarella. Fresh ingredients not only taste better but also provide more nutrients.

Next, don’t skip the seasoning! While salt and pepper are essential, consider adding a pinch of red pepper flakes for a bit of heat. You can also experiment with herbs like oregano or basil to enhance the flavor profile. A little extra seasoning can take your quesadillas from good to great!

Another tip is to let the cheese mixture cool slightly before filling the tortillas. If the filling is too hot, it can make the tortillas soggy. Allowing it to cool for a few minutes helps maintain that crispy texture.

When cooking, keep the heat at medium. Too high of a heat can burn the tortillas before the cheese melts. If you notice the quesadillas browning too quickly, lower the heat. Patience is key to achieving that perfect golden-brown color.

Lastly, serve your quesadillas immediately after cooking. They taste best when hot and crispy. If you need to keep them warm, place them in a low oven (around 200°F) on a baking sheet. This way, they stay warm without getting soggy.

By following these tips, you’ll create Spinach Feta Quesadillas that are not only tasty but also visually appealing. Enjoy the process and have fun experimenting with flavors!

Breakdown of Time for Spinach Feta Quesadillas

Understanding the time needed to prepare and cook your Spinach Feta Quesadillas can help you plan your meal better. Here’s a simple breakdown of the time involved in each step:

Prep Time

The prep time for Spinach Feta Quesadillas is quite short. You’ll need about 10-15 minutes to gather your ingredients and prepare them. This includes washing and chopping the spinach, measuring out the cheeses, and mixing the filling. If you have everything ready, you can whip these up in no time!

Cooking Time

Cooking the quesadillas takes approximately 15-20 minutes. Each quesadilla will need about 6-8 minutes to cook, depending on your stove’s heat. If you’re making multiple quesadillas, you might need to adjust the cooking time slightly. Just keep an eye on them to ensure they turn golden brown and crispy.

Total Time

In total, you can expect to spend around 30-35 minutes from start to finish. This includes both prep and cooking time. With such a quick turnaround, Spinach Feta Quesadillas make for a fantastic meal option, whether it’s a busy weeknight or a casual weekend gathering. You’ll have a delicious, cheesy dish ready to enjoy in no time!

Nutritional Information for Spinach Feta Quesadillas

When it comes to enjoying delicious meals, knowing the nutritional information can help you make informed choices. Spinach Feta Quesadillas are not only tasty but also provide a good balance of nutrients. Here’s a breakdown of the key nutritional components you can expect from this delightful dish:

Calories

Each serving of Spinach Feta Quesadillas contains approximately 300-350 calories. This number can vary based on the specific ingredients and portion sizes you use. The combination of cheese, spinach, and tortillas provides a satisfying meal without being overly heavy. If you’re looking to reduce calories, consider using less cheese or opting for whole wheat tortillas.

Protein

Protein is an essential nutrient, and Spinach Feta Quesadillas deliver a decent amount. Each serving typically contains around 15-20 grams of protein. The protein comes mainly from the feta and mozzarella cheeses, as well as the spinach. This makes the quesadillas a great option for a post-workout meal or a filling lunch that keeps you energized throughout the day.

Sodium

Sodium content is another important factor to consider. Each serving of Spinach Feta Quesadillas has about 600-700 milligrams of sodium. This amount can vary depending on the type of cheese and any additional seasonings you use. If you’re watching your sodium intake, you can opt for low-sodium cheese or reduce the amount of added salt in the recipe. Balancing flavors with herbs and spices can also help enhance taste without relying on salt.

Overall, Spinach Feta Quesadillas can be a nutritious addition to your meal rotation. They offer a good mix of calories, protein, and essential nutrients, making them a satisfying choice for any time of day. Enjoy them as part of a balanced diet, and feel free to customize the ingredients to suit your dietary needs!

FAQs about Spinach Feta Quesadillas

Can I make Spinach Feta Quesadillas ahead of time?

Absolutely! You can prepare Spinach Feta Quesadillas ahead of time. To do this, assemble the quesadillas as instructed but do not cook them right away. Instead, place them in an airtight container or wrap them in plastic wrap. Store them in the refrigerator for up to 24 hours. When you’re ready to enjoy them, simply cook them in a skillet as directed. This makes them a great option for meal prep or quick lunches!

What can I substitute for feta cheese in Spinach Feta Quesadillas?

If you don’t have feta cheese or prefer a different flavor, there are several substitutes you can use. Goat cheese is a fantastic alternative, offering a similar tangy taste. Cream cheese can also work well, providing a creamy texture. For a milder flavor, try using ricotta cheese. Just remember that each cheese will change the overall taste of the quesadillas, so choose one that suits your palate!

Are Spinach Feta Quesadillas healthy?

Yes, Spinach Feta Quesadillas can be a healthy choice! They are packed with nutrients from the spinach, which is rich in vitamins A and C, iron, and fiber. The cheese adds protein and calcium, making them a balanced meal. However, keep an eye on portion sizes and the type of cheese you use, as these can affect the calorie and sodium content. By using whole wheat tortillas and adding extra veggies, you can make them even healthier!

Conclusion on Spinach Feta Quesadillas

In conclusion, Spinach Feta Quesadillas are a delightful and versatile dish that can easily become a favorite in your kitchen. With their crispy tortillas, creamy cheese, and nutritious spinach, they offer a perfect balance of flavors and textures. Whether you enjoy them as a quick snack, a light lunch, or a satisfying dinner, these quesadillas are sure to please everyone at the table.

Not only are they simple to prepare, but they also allow for endless customization. You can experiment with different cheeses, add various vegetables, or even try out new dipping sauces. This flexibility makes Spinach Feta Quesadillas a fantastic option for any occasion, from casual family meals to entertaining guests.

Moreover, with their nutritional benefits, these quesadillas can fit well into a balanced diet. They provide essential vitamins, minerals, and protein, making them a wholesome choice for both kids and adults. By incorporating fresh ingredients and mindful seasoning, you can create a dish that is not only delicious but also good for you.

So, why not give Spinach Feta Quesadillas a try? Gather your ingredients, follow the steps, and enjoy the process of cooking. You’ll be rewarded with a cheesy delight that is sure to become a staple in your meal rotation. Happy cooking!

Creamy Garlic Shrimp Recipe is a must-try dish!

Introduction to Creamy Garlic Shrimp Recipe

Creamy Garlic Shrimp Recipe. This dish is not just a meal; it’s an experience that brings together the rich flavors of garlic, butter, and succulent shrimp. Perfect for a cozy dinner or a special occasion, this recipe is sure to impress your family and friends.

What makes this creamy garlic shrimp recipe special? Well, it’s all about the balance of flavors and textures. The creamy sauce envelops the shrimp, creating a luscious coating that pairs beautifully with pasta. The garlic adds a fragrant aroma, while the hint of lemon juice brightens the dish, making it feel fresh and vibrant. Plus, it’s quick and easy to prepare, making it a go-to option for busy weeknights or last-minute gatherings.

In this article, we will guide you through the ingredients, preparation steps, and even some variations to make this dish your own. Whether you’re a seasoned chef or a beginner in the kitchen, you’ll find this creamy garlic shrimp recipe approachable and rewarding. So, let’s dive in and discover how to create this mouthwatering dish that will leave everyone asking for seconds!

What Makes This Creamy Garlic Shrimp Recipe Special?

This creamy garlic shrimp recipe stands out for several reasons. First, the combination of fresh ingredients creates a symphony of flavors. The shrimp are tender and juicy, while the garlic provides a savory depth. The creamy sauce, made with heavy cream and vegetable broth, adds richness that complements the shrimp perfectly.

Moreover, the recipe is versatile. You can easily customize it by adding your favorite vegetables or adjusting the spice level. Whether you prefer a mild dish or something with a kick, this recipe can adapt to your taste. Additionally, it’s a one-pan meal, which means less cleanup and more time to enjoy your delicious creation.

Finally, the presentation is stunning. The vibrant colors of the shrimp and fresh basil against the creamy sauce make for an eye-catching dish. It’s perfect for impressing guests or simply treating yourself to a gourmet meal at home. With all these wonderful qualities, it’s no wonder this creamy garlic shrimp recipe is a favorite among many!

Ingredients for Creamy Garlic Shrimp Recipe

Creamy Garlic Shrimp Recipe, you’ll need a selection of fresh and flavorful ingredients. Each component plays a vital role in building the dish’s rich taste and creamy texture. Here’s what you’ll need:

  • 1 pound large shrimp – Make sure they are peeled and deveined for easy cooking.
  • 2 tablespoons butter – This adds a rich flavor and helps sauté the garlic.
  • 4 cloves garlic – Finely chopped for that aromatic kick.
  • 1 teaspoon crushed red pepper (optional) – For those who enjoy a bit of heat.
  • 1 cup heavy cream – This is the star of the creamy sauce.
  • 1 cup vegetable broth – Adds depth and flavor to the sauce.
  • 1 tablespoon fresh lemon juice – Brightens the dish and balances the richness.
  • Salt and freshly ground black pepper – To taste, enhancing all the flavors.
  • 2 tablespoons fresh basil – Chopped, for a fresh finish.
  • 8 ounces fettuccine or spaghetti – Cooked al dente, serving as the perfect base for the shrimp and sauce.

Gathering these ingredients will set you on the right path to creating a delicious meal. Each item contributes to the overall flavor profile, ensuring that your creamy garlic shrimp dish is both satisfying and delightful. Now that you have everything ready, let’s move on to the step-by-step preparation!

Step-by-Step Preparation of Creamy Garlic Shrimp Recipe

Creamy Garlic Shrimp Recipe. Each step is simple and straightforward, ensuring that you can create this delicious dish with ease. Let’s get started!

Step 1: Preparing the Shrimp

First, you need to prepare the shrimp. If you haven’t done so already, peel and devein the shrimp. This step is crucial as it removes the shell and the digestive tract, making the shrimp more enjoyable to eat. Rinse the shrimp under cold water and pat them dry with a paper towel. This helps the shrimp cook evenly and prevents excess moisture from affecting the sauce.

Step 2: Sautéing the Garlic

Next, heat a large skillet over medium heat. Add the butter and let it melt completely. Once melted, toss in the finely chopped garlic and, if you like a bit of spice, the crushed red pepper. Sauté the garlic for about 1 minute. You want it to become fragrant but not browned. Browning can lead to a bitter taste, so keep an eye on it!

Step 3: Creating the Creamy Sauce

After the garlic is ready, it’s time to add the shrimp to the skillet. Cook the shrimp for about 2-3 minutes on each side until they turn pink and opaque. Once cooked, remove the shrimp from the skillet and set them aside on a plate. Now, pour the vegetable broth into the same skillet, allowing it to come to a gentle boil. Let it simmer for about 4-5 minutes to reduce slightly.

Once the broth has reduced, lower the heat and stir in the heavy cream along with the fresh lemon juice. Allow this mixture to simmer for an additional 3-4 minutes until it thickens to your desired consistency. This creamy sauce is what makes the dish so special!

Step 4: Combining Shrimp and Sauce

Now it’s time to bring everything together. Season the creamy sauce with salt and freshly ground black pepper to taste. Then, add the cooked shrimp back into the skillet. Gently toss the shrimp in the sauce, ensuring they are well coated. This step is essential for infusing the shrimp with all that delicious flavor!

Step 5: Final Touches and Serving

Finally, it’s time to serve your creamy garlic shrimp! Place the cooked fettuccine or spaghetti on plates and spoon the shrimp and creamy sauce over the top. For a beautiful finish, sprinkle the dish with fresh chopped basil. This not only adds a pop of color but also enhances the flavor. Enjoy your meal with a smile, knowing you’ve created something truly special!

Variations of Creamy Garlic Shrimp Recipe

Creamy Garlic Shrimp Recipe is delicious as is, there are many ways to customize it to suit your taste. Adding different ingredients can elevate the dish and make it even more exciting. Here are a couple of variations you might enjoy!

Adding Vegetables to the Creamy Garlic Shrimp Recipe

Incorporating vegetables into your creamy garlic shrimp can add color, texture, and nutrition. Here are some great options:

  • Spinach: Add a couple of handfuls of fresh spinach to the sauce just before serving. It wilts quickly and adds a lovely green color.
  • Cherry Tomatoes: Halve some cherry tomatoes and toss them in with the shrimp. They add a sweet burst of flavor.
  • Zucchini: Sauté sliced zucchini along with the garlic for a mild, fresh taste.
  • Bell Peppers: Diced bell peppers can add crunch and sweetness. Sauté them until they are tender before adding the shrimp.

These vegetables not only enhance the dish’s flavor but also make it more filling and nutritious. Feel free to mix and match based on what you have on hand!

Spicy Twist on the Creamy Garlic Shrimp Recipe

If you love a bit of heat, consider giving your creamy garlic shrimp a spicy twist. Here are some ideas to spice things up:

  • Extra Crushed Red Pepper: Increase the amount of crushed red pepper in the recipe for a bolder kick.
  • Jalapeños: Add finely chopped jalapeños when sautéing the garlic for a fresh, spicy flavor.
  • Hot Sauce: Drizzle your favorite hot sauce into the creamy sauce for an extra layer of heat.
  • Cayenne Pepper: A pinch of cayenne pepper can elevate the spice level without overpowering the dish.

These spicy variations will surely satisfy those who enjoy a little heat in their meals. Experiment with different levels of spice to find your perfect balance!

Cooking Note for Creamy Garlic Shrimp Recipe

Creamy Garlic Shrimp Recipe, there are a few important cooking notes to keep in mind. These tips will help ensure that your dish turns out perfectly every time, enhancing both flavor and texture.

First, always choose fresh shrimp when possible. Fresh shrimp not only taste better but also have a firmer texture. If you must use frozen shrimp, make sure to thaw them completely before cooking. This prevents excess water from being released into the sauce, which can dilute the flavors.

Next, be mindful of the cooking time for the shrimp. Overcooking can lead to rubbery shrimp, which is not pleasant. Cook them just until they turn pink and opaque, usually about 2-3 minutes per side. Remember, they will continue to cook slightly after being removed from the heat.

Another key point is to adjust the seasoning to your taste. The amount of salt and pepper can vary based on personal preference and the saltiness of your vegetable broth. Always taste the sauce before serving to ensure it meets your flavor expectations.

Lastly, if you want to make the dish even creamier, consider adding a splash of pasta water to the sauce. This starchy water helps to bind the sauce to the pasta, creating a more cohesive dish. Just remember to reserve some pasta water before draining your fettuccine or spaghetti!

Creamy Garlic Shrimp Recipe. Enjoy the process and the delicious results!

Serving Suggestions for Creamy Garlic Shrimp Recipe

Creamy Garlic Shrimp Recipe, it’s time to think about what to serve alongside it. The right side dishes can enhance the meal and create a well-rounded dining experience. Here are some fantastic options to consider:

Best Side Dishes to Pair with Creamy Garlic Shrimp Recipe

  • Garlic Bread: A classic choice! The buttery, garlicky flavor of garlic bread complements the creamy shrimp perfectly. Plus, it’s great for soaking up any leftover sauce.
  • Caesar Salad: A fresh Caesar salad adds a crisp contrast to the rich shrimp dish. The crunchy romaine and creamy dressing balance the meal beautifully.
  • Steamed Asparagus: Lightly steamed asparagus adds a pop of color and a healthy touch. Its mild flavor pairs well with the shrimp without overpowering it.
  • Roasted Vegetables: A medley of roasted vegetables, such as bell peppers, zucchini, and carrots, can add both flavor and nutrition. The caramelization from roasting enhances their natural sweetness.
  • Rice Pilaf: For a heartier option, serve the shrimp over a bed of fluffy rice pilaf. The rice absorbs the creamy sauce, making every bite delicious.

Creamy Garlic Shrimp Recipe but also add variety to your meal. Choose one or two to create a delightful dining experience that everyone will enjoy. Happy serving!

Tips for Perfecting Your Creamy Garlic Shrimp Recipe

Creamy Garlic Shrimp Recipe, a few tips can make all the difference. These simple yet effective suggestions will help you elevate your dish, ensuring it’s not only delicious but also visually appealing. Let’s explore some key tips to perfect your creamy garlic shrimp!

First, always use high-quality ingredients. Fresh shrimp, real butter, and good-quality heavy cream can significantly enhance the flavor of your dish. When you start with the best, the end result will be more satisfying.

Next, don’t rush the cooking process. Sauté the garlic slowly to release its full flavor without burning it. A gentle heat allows the garlic to become fragrant and sweet, adding depth to your sauce.

Another important tip is to taste as you go. Adjust the seasoning throughout the cooking process. This way, you can ensure the flavors are balanced and to your liking. Remember, a little salt can go a long way in enhancing the overall taste.

When it comes to the creamy sauce, consider adding a splash of white wine for an extra layer of flavor. Just let it simmer for a minute or two before adding the cream. This will give your sauce a sophisticated touch.

Lastly, don’t forget about presentation! A sprinkle of fresh basil or a squeeze of lemon juice right before serving can brighten the dish visually and flavor-wise. Serve it in a nice bowl or plate, and your creamy garlic shrimp will look as good as it tastes!

Creamy Garlic Shrimp Recipe that will impress everyone at the table. Enjoy the cooking process and the delicious results!

Breakdown of Time for Creamy Garlic Shrimp Recipe

Creamy Garlic Shrimp Recipe can help you plan your cooking efficiently. Here’s a simple breakdown of the time you’ll need for preparation and cooking.

Prep Time

The prep time for this delicious dish is quite short. You’ll need about 10-15 minutes to gather and prepare your ingredients. This includes peeling and deveining the shrimp, chopping the garlic, and measuring out the other ingredients. Having everything ready before you start cooking will make the process smoother and more enjoyable.

Cooking Time

Creamy Garlic Shrimp Recipe is perfect for busy weeknights or last-minute dinners.

Total Time

In total, you can expect to spend about 25-35 minutes from start to finish. This includes both prep and cooking time. With such a quick turnaround, you can enjoy a gourmet meal without spending hours in the kitchen. It’s a win-win for anyone looking to impress their family or guests with minimal effort!

Nutritional Information for Creamy Garlic Shrimp Recipe

Creamy Garlic Shrimp Recipe not only delights your taste buds but also provides valuable nutrients. Here’s a breakdown of the key nutritional information for one serving of this delicious dish.

Calories

Each serving of the creamy garlic shrimp contains approximately 550 calories. This calorie count includes the shrimp, pasta, and creamy sauce. While it’s a hearty meal, it’s important to enjoy it in moderation, especially if you’re watching your calorie intake. Pairing it with a light salad or steamed vegetables can help balance your meal.

Protein

This recipe is a great source of protein, providing about 30 grams per serving. Shrimp is known for being a lean protein option, making it an excellent choice for those looking to increase their protein intake without consuming too much fat. The addition of pasta also contributes to the overall protein content, making this dish both satisfying and nutritious.

Sodium

The sodium content in the creamy garlic shrimp recipe is around 800 milligrams per serving. This amount can vary based on the type of vegetable broth used and how much salt you add during cooking. If you’re concerned about sodium intake, consider using low-sodium broth and adjusting the salt to your taste. This way, you can enjoy the flavors without exceeding your daily sodium limit.

Creamy Garlic Shrimp Recipe while being aware of its health benefits. It’s a delicious way to treat yourself while still being mindful of your dietary needs!

FAQs about Creamy Garlic Shrimp Recipe

Can I use frozen shrimp for the Creamy Garlic Shrimp Recipe?

Creamy Garlic Shrimp Recipe. However, it’s important to thaw them completely before cooking. To do this, place the frozen shrimp in the refrigerator overnight or run them under cold water for about 10-15 minutes. Thawing ensures that the shrimp cook evenly and prevents excess water from being released into the sauce, which can dilute the flavors.

What can I substitute for heavy cream in the Creamy Garlic Shrimp Recipe?

If you’re looking for a substitute for heavy cream, there are several options available. You can use half-and-half for a lighter version, or opt for whole milk mixed with a tablespoon of flour to thicken it. For a dairy-free alternative, consider using coconut cream or cashew cream. Both options will provide a creamy texture while adding a unique flavor to your dish.

How can I make the Creamy Garlic Shrimp Recipe dairy-free?

Creamy Garlic Shrimp Recipe dairy-free, simply replace the heavy cream with a dairy-free alternative. Coconut cream is a popular choice, as it adds richness and a hint of sweetness. You can also use almond milk or oat milk combined with a thickener like cornstarch or flour to achieve a creamy consistency. Just be sure to adjust the seasoning, as these alternatives may alter the flavor slightly.

What is the best way to store leftovers of the Creamy Garlic Shrimp Recipe?

Creamy Garlic Shrimp Recipe, allow the dish to cool completely before transferring it to an airtight container. It can be stored in the refrigerator for up to 3 days. When reheating, do so gently on the stove over low heat to prevent the shrimp from becoming rubbery. You may need to add a splash of broth or cream to loosen the sauce as it reheats. Enjoy your delicious leftovers!

Conclusion on Creamy Garlic Shrimp Recipe

Creamy Garlic Shrimp Recipe is a delightful dish that combines rich flavors and simple preparation. Whether you’re cooking for a special occasion or just a cozy dinner at home, this recipe is sure to impress. The succulent shrimp, creamy sauce, and aromatic garlic create a meal that is both satisfying and elegant.

As you’ve seen, this recipe is versatile. You can easily customize it with your favorite vegetables or adjust the spice level to suit your taste. Plus, the quick cooking time makes it a perfect choice for busy weeknights. With just a few fresh ingredients and simple steps, you can create a gourmet experience right in your kitchen.

Remember to follow the tips provided to perfect your dish. From using high-quality ingredients to adjusting the seasoning, these small details can elevate your creamy garlic shrimp to new heights. And don’t forget to pair it with delicious side dishes for a complete meal that everyone will love.

So, gather your ingredients, roll up your sleeves, and get ready to enjoy a plate of creamy garlic shrimp that will leave your taste buds dancing. Happy cooking, and may your culinary adventures be filled with flavor and joy!

Mediterranean Steak Bowl Recipe for a Healthy Meal.

Introduction to the Mediterranean Steak Bowl Recipe

Are you looking for a delicious and healthy meal that’s easy to prepare? Look no further! The Mediterranean Steak Bowl Recipe is a vibrant dish that combines the rich flavors of grilled steak with fresh vegetables and wholesome grains. This recipe is not only packed with nutrients but also offers a delightful taste of the Mediterranean.

Imagine sinking your teeth into tender, marinated flank steak, perfectly grilled to your liking. Then, picture a colorful mix of cherry tomatoes, cucumbers, and bell peppers, all tossed together with fluffy quinoa. To top it off, a sprinkle of feta cheese and a drizzle of creamy tzatziki sauce bring everything together in a harmonious blend of flavors.

This Mediterranean Steak Bowl is perfect for lunch or dinner. It’s a great way to impress your family or friends with minimal effort. Plus, it’s customizable! You can easily swap out ingredients to suit your taste or dietary needs. Whether you’re a meat lover or prefer vegetarian options, this recipe has something for everyone.

In this article, we’ll guide you through the ingredients, preparation steps, and even some variations to try. So, roll up your sleeves and get ready to create a meal that’s not only satisfying but also bursting with Mediterranean flair!

Ingredients for the Mediterranean Steak Bowl Recipe

To create a mouthwatering Mediterranean Steak Bowl, you’ll need a variety of fresh and flavorful ingredients. Here’s what you’ll need:

  • 1 pound flank steak: This cut of meat is perfect for grilling and absorbs marinades well.
  • 2 tablespoons extra virgin olive oil: A healthy fat that adds richness and flavor.
  • 1 teaspoon garlic powder: For a hint of savory goodness.
  • 1 teaspoon onion powder: Adds depth to the marinade.
  • 1 teaspoon smoked paprika: Gives a smoky flavor that enhances the steak.
  • Salt and freshly ground black pepper: To taste, for seasoning the steak.
  • 1 cup cooked quinoa: A nutritious grain that serves as a hearty base.
  • 1 cup halved cherry tomatoes: Adds sweetness and color to the bowl.
  • 1 cucumber, diced: Provides a refreshing crunch.
  • 1 cup diced red bell pepper: For a pop of color and sweetness.
  • 1/2 red onion, sliced thin: Adds a sharp flavor that balances the dish.
  • 1/2 cup crumbled feta cheese: A tangy cheese that complements the other ingredients.
  • 1/4 cup chopped fresh parsley: For a burst of freshness and color.
  • Juice of 1 lemon: Brightens the flavors and adds acidity.
  • 1/4 cup tzatziki sauce: A creamy, yogurt-based sauce that ties everything together.

Gather these ingredients, and you’ll be well on your way to making a delicious Mediterranean Steak Bowl. Each component plays a vital role in creating a balanced and flavorful meal that’s sure to please everyone at the table!

Step-by-Step Preparation of the Mediterranean Steak Bowl Recipe

Now that you have all your ingredients ready, it’s time to dive into the preparation of your Mediterranean Steak Bowl. This step-by-step guide will help you create a delicious meal that’s sure to impress. Let’s get started!

Step 1: Marinating the Steak

extra virgin olive oil, garlic powder, onion powder, smoked paprika, salt, and black pepper. Stir the mixture until it’s well blended.

Next, take your flank steak and place it in the bowl. Use your hands or a brush to generously coat the steak with the marinade. Make sure every inch is covered. This will ensure that the flavors penetrate the meat. Once coated, let the steak marinate for at least 30 minutes. If you have more time, marinating for a few hours or overnight in the fridge will enhance the flavor even more!

Step 2: Cooking the Steak

After marinating, it’s time to cook the steak. Preheat your grill or grill pan to a medium-high temperature. This is important for achieving a nice sear on the meat. Once hot, place the marinated flank steak on the grill.

5-7 minutes on each side. The cooking time may vary depending on your grill and how well-done you like your steak. For medium-rare, aim for an internal temperature of 130°F. Once cooked to your liking, remove the steak from the grill and let it rest for about 5 minutes. This resting period allows the juices to redistribute, making the steak more tender.

Step 3: Preparing the Bowl Components

While the steak is resting, it’s time to prepare the other components of your Mediterranean Steak Bowl. If you haven’t cooked the quinoa yet, follow the package instructions to prepare it. Quinoa is a great source of protein and adds a nice texture to the bowl.

cooked quinoa, halved cherry tomatoes, diced cucumber, diced red bell pepper, sliced red onion, crumbled feta cheese, and chopped parsley. This colorful mix not only looks appealing but also provides a variety of flavors and nutrients.

fresh lemon juice over the mixture. This adds brightness and enhances the overall flavor. Gently stir everything together to combine.

Step 4: Assembling the Mediterranean Steak Bowl

Now comes the fun part—assembling your Mediterranean Steak Bowl! Start by placing a generous scoop of the quinoa salad in the bottom of each serving bowl. Then, slice the rested flank steak thinly against the grain. This helps to keep the meat tender.

tzatziki sauce over the steak. This creamy sauce adds a refreshing touch that ties all the flavors together.

Your Mediterranean Steak Bowl is now ready to be enjoyed! Serve it warm and watch as everyone digs in. This dish is not only delicious but also a feast for the eyes!

Variations of the Mediterranean Steak Bowl Recipe

The Mediterranean Steak Bowl is a versatile dish that can easily be adapted to suit different tastes and dietary preferences. Whether you’re looking for vegetarian alternatives or want to explore different protein options, there’s something for everyone. Let’s dive into some exciting variations!

Vegetarian Alternatives

If you’re looking to enjoy a meat-free version of the Mediterranean Steak Bowl, there are plenty of delicious vegetarian options. Here are a few ideas:

  • Grilled Portobello Mushrooms: These meaty mushrooms can be marinated and grilled just like steak. They absorb flavors beautifully and provide a satisfying texture.
  • Chickpeas: Roasted chickpeas add a crunchy element and are packed with protein. Toss them with olive oil and spices before roasting for extra flavor.
  • Tofu: Firm tofu can be marinated and grilled or sautéed. It’s a great source of protein and takes on the flavors of the marinade well.
  • Grilled Eggplant: Slices of eggplant can be grilled until tender. They add a smoky flavor and a unique texture to the bowl.

Feel free to mix and match these ingredients to create a vibrant vegetarian bowl that’s just as satisfying as the original!

Different Protein Options

If you want to switch up the protein in your Mediterranean Steak Bowl, there are several tasty alternatives to flank steak. Here are some options to consider:

  • Chicken: Grilled chicken breast is a lean option that pairs well with the Mediterranean flavors. Marinate it in the same mixture for a delicious twist.
  • Lamb: For a more traditional Mediterranean flavor, try using lamb. It’s rich and flavorful, making it a great choice for this bowl.
  • Fish: Grilled salmon or shrimp can add a light and fresh element to your bowl. Season them with lemon and herbs for a delightful taste.
  • Turkey: Ground turkey can be seasoned and cooked to create a hearty base for your bowl. It’s a leaner option that still delivers on flavor.

These protein options allow you to customize your Mediterranean Steak Bowl to fit your preferences. Each variation brings its own unique flavor and texture, ensuring that you never get bored with this delicious dish!

Cooking Note for the Mediterranean Steak Bowl Recipe

When preparing the Mediterranean Steak Bowl, there are a few important cooking notes to keep in mind. These tips will help you achieve the best results and ensure that your meal is both delicious and satisfying.

First, always choose high-quality flank steak. Look for meat that is bright red with a good amount of marbling. This marbling helps keep the steak juicy and flavorful during cooking. If flank steak isn’t available, you can substitute it with other cuts like sirloin or ribeye, but adjust the cooking time accordingly.

Next, marinating the steak is key. Allowing it to sit in the marinade for at least 30 minutes enhances the flavor. However, if you have time, marinating it overnight in the refrigerator will yield even better results. Just remember to bring the steak to room temperature before grilling for even cooking.

When grilling, preheat your grill or grill pan properly. A hot grill creates a nice sear, locking in the juices and flavor. Avoid flipping the steak too often; let it cook undisturbed for the recommended time on each side. This will help develop a beautiful crust.

Lastly, don’t skip the resting period after grilling. Allowing the steak to rest for about 5 minutes before slicing is crucial. This step helps the juices redistribute throughout the meat, making each bite tender and juicy.

By following these cooking notes, you’ll ensure that your Mediterranean Steak Bowl is not only flavorful but also a delightful experience for everyone at the table. Happy cooking!

Serving Suggestions for the Mediterranean Steak Bowl Recipe

Now that you’ve prepared your Mediterranean Steak Bowl, it’s time to think about how to serve it. Presentation can elevate your meal, making it even more enjoyable. Here are some serving suggestions to enhance your dining experience:

  • Layered Presentation: For a beautiful display, layer the ingredients in clear bowls. Start with a base of quinoa, then add the colorful vegetables, and top with sliced steak. This not only looks appealing but also allows guests to see the vibrant colors of the dish.
  • Garnish with Fresh Herbs: A sprinkle of fresh parsley or mint on top adds a pop of color and freshness. It also enhances the Mediterranean vibe of the dish.
  • Serve with Pita Bread: Warm pita bread on the side is a great addition. It can be used to scoop up the ingredients, making the meal interactive and fun.
  • Offer Extra Tzatziki: Place a small bowl of tzatziki sauce on the table for guests to add more as they like. This creamy sauce complements the flavors beautifully.
  • Pair with a Salad: A light side salad, such as a Greek salad with olives and feta, can complement the steak bowl. It adds more freshness and variety to the meal.
  • Wine Pairing: Consider serving a glass of red wine, like a Merlot or a light-bodied white wine, such as Sauvignon Blanc. These wines pair well with the flavors of the steak and vegetables.

These serving suggestions will not only enhance the visual appeal of your Mediterranean Steak Bowl but also create a delightful dining experience. Enjoy sharing this vibrant meal with family and friends!

Tips for Perfecting Your Mediterranean Steak Bowl Recipe

Creating the perfect Mediterranean Steak Bowl is all about attention to detail and a few helpful tips. With these suggestions, you can elevate your dish and impress your family and friends. Let’s explore some key tips to ensure your Mediterranean Steak Bowl is a hit!

  • Choose the Right Cut: Flank steak is ideal for this recipe, but you can also use skirt steak or sirloin. Each cut has its unique flavor and texture, so pick one that suits your taste.
  • Marinate Longer: For the best flavor, marinate the steak for at least 1 hour, or even overnight. This allows the spices to penetrate deeply, making the meat more flavorful.
  • Use a Meat Thermometer: To achieve your desired doneness, use a meat thermometer. Aim for 130°F for medium-rare and 145°F for medium. This ensures your steak is cooked perfectly every time.
  • Rest the Steak: After grilling, let the steak rest for 5-10 minutes. This step is crucial as it allows the juices to redistribute, resulting in a juicier steak.
  • Customize Your Veggies: Feel free to add or substitute vegetables based on your preferences. Roasted zucchini, artichokes, or olives can add even more Mediterranean flair.
  • Experiment with Grains: While quinoa is a great base, you can also use couscous, farro, or brown rice. Each grain brings a different texture and flavor to the bowl.
  • Make It Ahead: You can prepare the quinoa and chop the vegetables in advance. This makes assembly quick and easy, especially on busy days.
  • Adjust the Seasoning: Taste your marinade and quinoa salad before serving. Adjust the seasoning with more salt, pepper, or lemon juice to suit your taste.
  • Serve Fresh: For the best experience, serve the Mediterranean Steak Bowl fresh. The vibrant colors and flavors are most enjoyable when everything is freshly prepared.

By following these tips, you’ll be well on your way to creating a Mediterranean Steak Bowl that’s not only delicious but also visually stunning. Enjoy the process and have fun experimenting with different flavors!

Breakdown of Time for the Mediterranean Steak Bowl Recipe

Understanding the time needed for each step of the Mediterranean Steak Bowl Recipe can help you plan your cooking efficiently. Here’s a breakdown of the time required for preparation and cooking:

Prep Time

15-20 minutes. This includes gathering your ingredients, marinating the steak, and preparing the quinoa and vegetables. If you choose to marinate the steak for longer, you can adjust this time accordingly. Remember, the longer the steak marinates, the more flavorful it will be!

Cooking Time

15-20 minutes. The steak needs around 5-7 minutes on each side on the grill, depending on your desired doneness. Meanwhile, cooking the quinoa typically takes about 10-15 minutes, depending on the brand and type you use. Make sure to keep an eye on both to ensure they are cooked perfectly!

Total Time

30-40 minutes from start to finish. This includes both prep and cooking time. It’s a quick and satisfying meal that’s perfect for busy weeknights or a weekend gathering with friends and family. With this time breakdown, you can easily fit this delicious dish into your schedule!

Nutritional Information for the Mediterranean Steak Bowl Recipe

Understanding the nutritional content of your meals is essential for maintaining a balanced diet. The Mediterranean Steak Bowl is not only delicious but also packed with nutrients. Here’s a breakdown of the key nutritional information for this vibrant dish:

Calories

550-600 calories. This calorie count can vary based on the specific ingredients used and portion sizes. The combination of steak, quinoa, and fresh vegetables provides a satisfying meal that keeps you energized throughout the day.

Protein

35-40 grams per serving. The flank steak and quinoa contribute significantly to this protein content. Protein is essential for muscle repair and growth, making this bowl a perfect post-workout meal.

Sodium

600-700 milligrams per serving. This amount can vary depending on the amount of salt used in the marinade and the feta cheese. If you’re watching your sodium intake, consider using low-sodium feta or reducing the added salt in the recipe.

Overall, the Mediterranean Steak Bowl is a nutritious option that balances protein, healthy fats, and fresh vegetables. It’s a meal that not only tastes great but also supports your health and well-being. Enjoy this flavorful dish while knowing you’re making a smart choice for your body!

FAQs about the Mediterranean Steak Bowl Recipe

Can I use a different type of meat for the Mediterranean Steak Bowl Recipe?

Absolutely! While flank steak is a popular choice for this Mediterranean Steak Bowl Recipe, you can easily substitute it with other meats. Chicken breast, lamb, or even fish like salmon or shrimp can work wonderfully. Just remember to adjust the cooking times based on the type of meat you choose. For instance, chicken may take a bit longer to cook, while fish will cook much faster. Feel free to experiment and find the protein that suits your taste best!

What can I substitute for the grains in the Mediterranean Steak Bowl Recipe?

If you’re looking to swap out the grains in your Mediterranean Steak Bowl, there are plenty of delicious options! Quinoa is a great base, but you can also use couscous, farro, or brown rice. Each grain brings its own unique flavor and texture. For a low-carb option, consider using cauliflower rice or even a bed of leafy greens. These alternatives will still provide a satisfying meal while catering to your dietary preferences.

How can I make the Mediterranean Steak Bowl Recipe gluten-free?

Making the Mediterranean Steak Bowl gluten-free is quite simple! First, ensure that the grains you choose are gluten-free. Quinoa is naturally gluten-free, making it a perfect choice. If you opt for couscous, look for gluten-free varieties made from rice or corn. Additionally, check the labels on your tzatziki sauce and feta cheese to ensure they don’t contain gluten. With these adjustments, you can enjoy a delicious gluten-free Mediterranean Steak Bowl!

Can I prepare the Mediterranean Steak Bowl Recipe in advance?

Yes, you can prepare several components of the Mediterranean Steak Bowl in advance! Cooking the quinoa and chopping the vegetables can be done a day ahead. Store them in airtight containers in the refrigerator. You can also marinate the steak ahead of time, allowing the flavors to develop. Just remember to grill the steak fresh before serving for the best taste and texture. Assembling the bowl right before mealtime will keep everything vibrant and delicious!

Conclusion on the Mediterranean Steak Bowl Recipe

In conclusion, the Mediterranean Steak Bowl Recipe is a delightful and nutritious meal that brings the vibrant flavors of the Mediterranean right to your table. With its combination of tender grilled steak, fresh vegetables, and wholesome grains, this dish is not only satisfying but also visually appealing. It’s a perfect option for busy weeknights or special gatherings, allowing you to impress your family and friends with minimal effort.

As you’ve seen, this recipe is highly customizable. Whether you choose to stick with the classic flank steak or explore vegetarian alternatives, the possibilities are endless. You can mix and match ingredients to suit your taste preferences or dietary needs. The addition of tzatziki sauce and fresh herbs elevates the dish, making each bite a burst of flavor.

Moreover, the Mediterranean Steak Bowl is packed with nutrients, providing a balanced meal that supports your health. With its rich protein content and array of vitamins from the vegetables, it’s a smart choice for anyone looking to maintain a healthy lifestyle.

So, why not give this Mediterranean Steak Bowl Recipe a try? Gather your ingredients, follow the steps, and enjoy the process of creating a meal that’s as delicious as it is nourishing. We hope you find joy in preparing and sharing this dish with your loved ones. Bon appétit!

Sweet Chili Salmon Bowl Recipe for a Flavorful Meal

Introduction to the Sweet Chili Salmon Bowl Recipe

Sweet Chili Salmon Bowl Recipe. This dish is not just a meal; it’s a celebration of flavors and textures that come together beautifully. Imagine tender salmon, perfectly roasted vegetables, and fluffy basmati rice, all drizzled with a sweet and tangy sauce. It’s a dish that’s sure to impress your family and friends!

What Makes the Sweet Chili Salmon Bowl Special?

What sets the Sweet Chili Salmon Bowl apart is its unique combination of ingredients. The salmon is rich in omega-3 fatty acids, which are great for heart health. The sweet chili glaze adds a burst of flavor that balances the savory elements of the dish. Plus, the vibrant colors of the green beans and zucchini make it visually appealing.

Another fantastic aspect is its versatility. You can easily customize this bowl to suit your taste. Whether you prefer shrimp, tempeh, or even tofu, the base remains delicious. The addition of chia seeds not only enhances the texture but also boosts the nutritional value. This dish is perfect for a quick weeknight dinner or a special occasion.

In the following sections, we will guide you through the ingredients, preparation steps, and tips to make your Sweet Chili Salmon Bowl a hit. Get ready to dive into a world of flavor!

Ingredients for the Sweet Chili Salmon Bowl Recipe

Sweet Chili Salmon Bowl Recipe, you’ll need a variety of fresh ingredients. Each component plays a vital role in building the flavors and textures that make this dish so special. Here’s what you’ll need:

  • 2 cups cooked basmati rice: This fluffy rice serves as the perfect base for your bowl.
  • 1 pound salmon fillets: Fresh salmon is rich in flavor and packed with nutrients.
  • 1/4 cup sweet chili glaze: This glaze adds a sweet and spicy kick to the dish.
  • 2 tablespoons tamari sauce: A gluten-free alternative to soy sauce, it enhances the umami flavor.
  • 1 tablespoon avocado oil: This oil is great for roasting and adds healthy fats.
  • 1 teaspoon onion powder: A simple way to add depth to the flavor profile.
  • 1 teaspoon ground turmeric: This spice not only adds color but also offers health benefits.
  • 1 cup steamed green beans: These add a nice crunch and vibrant color to your bowl.
  • 1 cup diced zucchini: Zucchini is mild in flavor and complements the other ingredients well.
  • 1/4 cup sliced scallions: These provide a fresh, oniony taste that brightens the dish.
  • 1 tablespoon chia seeds: These tiny seeds are packed with nutrients and add a delightful crunch.

With these ingredients, you’re well on your way to creating a mouthwatering Sweet Chili Salmon Bowl. Each item contributes to the overall taste and health benefits, making this dish a wholesome choice for any meal.

Step-by-Step Preparation of the Sweet Chili Salmon Bowl Recipe

Sweet Chili Salmon Bowl Recipe. This step-by-step guide will help you create a delicious meal that’s both satisfying and nutritious. Let’s get started!

Step 1: Preparing the Salmon

First, preheat your oven to 425°F (220°C). This temperature is perfect for roasting the salmon and vegetables. While the oven heats up, take your salmon fillets and place them skin-side down on a lined baking tray. This helps with easy cleanup later. Make sure the fillets are fresh and free from any bones. If you find any, simply remove them with tweezers.

Step 2: Making the Sweet Chili Sauce

In a mixing bowl, combine the sweet chili glaze, tamari sauce, avocado oil, onion powder, and ground turmeric. Stir these ingredients together until they are well blended. This sauce is the star of the dish, adding a sweet and spicy flavor that pairs perfectly with the salmon. Feel free to taste it and adjust the sweetness or spice level to your liking!

Step 3: Cooking the Salmon

Once your sauce is ready, generously coat the salmon fillets with the mixture. Make sure each piece is well covered for maximum flavor. Next, scatter the steamed green beans and diced zucchini around the salmon on the tray. Drizzle them lightly with a bit of oil and season with salt and pepper. This will enhance their natural flavors while roasting.

Now, place the tray in the preheated oven and roast for about 10-12 minutes. Keep an eye on the salmon; it’s done when it turns opaque and flakes easily with a fork. The vegetables should be tender yet still vibrant in color.

Step 4: Assembling the Bowl

While the salmon and veggies are roasting, cook your basmati rice according to the package directions. Once everything is ready, it’s time to assemble your bowl. Start with a generous portion of fluffy rice at the bottom. Then, add the succulent salmon fillet on top, followed by the roasted green beans and zucchini.

To finish, sprinkle sliced scallions and chia seeds over the top. These not only add a pop of color but also enhance the texture and nutritional value of your dish. For an extra zing, consider squeezing a bit of lime juice over the bowl just before serving. Enjoy your delicious Sweet Chili Salmon Bowl!

Variations of the Sweet Chili Salmon Bowl Recipe

Sweet Chili Salmon Bowl Recipe is incredibly versatile. You can easily switch up the ingredients to suit your taste or dietary needs. Here are some exciting variations to consider!

Alternative Proteins to Use

If salmon isn’t your favorite, don’t worry! There are plenty of alternative proteins you can use. Here are a few options:

  • Shrimp: Shrimp cooks quickly and has a sweet flavor that pairs well with the sweet chili glaze. Just adjust the cooking time to about 5-7 minutes.
  • Tempeh: For a plant-based option, tempeh is a great choice. It absorbs flavors well and adds a nice texture. Marinate it in the same sauce before cooking.
  • Tofu: Firm tofu is another excellent alternative. Press it to remove excess moisture, then cube and coat it with the sauce. Bake or pan-fry until golden.
  • Chicken: Chicken breast can also be used. Simply slice it into strips and cook it until it’s no longer pink. The sweet chili sauce will add a delightful flavor.

These alternatives not only change the flavor profile but also cater to different dietary preferences. Feel free to experiment and find your favorite protein!

Different Vegetables for Your Bowl

Sweet Chili Salmon Bowl Recipe. Here are some delicious options to consider:

  • Bell Peppers: Sliced bell peppers add a sweet crunch. They roast beautifully and come in various colors.
  • Broccoli: This nutrient-packed vegetable can be steamed or roasted. It adds a nice bite and pairs well with the sauce.
  • Carrots: Diced or sliced carrots bring a natural sweetness. They can be roasted alongside the salmon for extra flavor.
  • Spinach: For a leafy green option, add fresh spinach. It wilts down nicely and adds a pop of color.

Mixing and matching different vegetables not only enhances the taste but also boosts the nutritional value of your bowl. Get creative and enjoy the process!

Cooking Note for the Sweet Chili Salmon Bowl Recipe

Sweet Chili Salmon Bowl Recipe, there are a few cooking notes to keep in mind to ensure your dish turns out perfectly every time. These tips will help you achieve the best flavor and texture, making your meal even more enjoyable.

First, always choose fresh salmon fillets. Fresh fish not only tastes better but also has a firmer texture, which is essential for this recipe. If you can, buy wild-caught salmon for the best flavor and health benefits.

Next, pay attention to the cooking time. Salmon can easily overcook, leading to a dry texture. Keep an eye on it while roasting. The fish should be opaque and flake easily with a fork when done. If you have a meat thermometer, aim for an internal temperature of 145°F (63°C) for perfectly cooked salmon.

Additionally, feel free to adjust the amount of sweet chili glaze based on your taste preferences. If you enjoy a spicier kick, consider adding a dash of sriracha or red pepper flakes to the sauce. This will elevate the flavor profile and give your bowl an extra zing!

Sweet Chili Salmon Bowl.

By following these cooking notes, you’ll create a delicious and visually appealing dish that everyone will love. Enjoy your cooking adventure!

Serving Suggestions for the Sweet Chili Salmon Bowl Recipe

Sweet Chili Salmon Bowl Recipe, presentation is key! A beautifully arranged bowl not only looks appetizing but also enhances the dining experience. Here are some delightful serving suggestions to elevate your meal:

  • Layering: Start with a base of fluffy basmati rice. Then, artfully arrange the salmon fillet on top, followed by the roasted vegetables. This layering technique creates a visually appealing dish that showcases each component.
  • Garnishing: Don’t forget to garnish your bowl! A sprinkle of sliced scallions adds a fresh touch, while chia seeds provide a delightful crunch. For an extra burst of flavor, consider adding a few cilantro leaves or a wedge of lime on the side.
  • Serving Size: This recipe serves four, making it perfect for family dinners or gatherings. For a more casual setting, consider serving the ingredients in separate bowls, allowing everyone to customize their own salmon bowl.
  • Accompaniments: Pair your Sweet Chili Salmon Bowl with a light side salad or a refreshing cucumber salad. This adds a crisp contrast to the warm bowl and balances the meal.
  • Drinks: To complement the flavors, serve your bowl with a chilled beverage. A sparkling water with a splash of lime or a light white wine can enhance the overall dining experience.

Sweet Chili Salmon Bowl with family and friends!

Tips for Perfecting Your Sweet Chili Salmon Bowl Recipe

Sweet Chili Salmon Bowl Recipe, a few tips can make all the difference. These simple yet effective suggestions will help you elevate your dish, ensuring it’s not only delicious but also visually appealing. Let’s dive into some expert tips!

First, always use high-quality ingredients. Fresh salmon and vibrant vegetables will enhance the overall flavor of your bowl. When shopping, look for salmon that has a bright color and a fresh smell. For vegetables, choose those that are firm and free from blemishes.

Next, consider marinating the salmon for extra flavor. If you have time, let the salmon sit in the sweet chili glaze mixture for about 30 minutes before cooking. This allows the flavors to penetrate the fish, making it even more delicious.

Another tip is to roast your vegetables until they are just tender. Overcooking can lead to mushy veggies, which aren’t as appealing. Keep an eye on them while roasting, and remove them from the oven as soon as they are bright and tender.

For added texture, try toasting the chia seeds before sprinkling them on your bowl. This simple step enhances their nutty flavor and adds a delightful crunch. You can do this in a dry skillet over medium heat for just a few minutes.

Lastly, don’t be afraid to experiment with flavors! Add a splash of soy sauce or a sprinkle of sesame seeds for an Asian twist. You can also try different herbs, like cilantro or basil, to give your bowl a fresh touch. The key is to make it your own!

Sweet Chili Salmon Bowl that’s not only tasty but also a feast for the eyes. Enjoy the process and have fun in the kitchen!

Breakdown of Time for the Sweet Chili Salmon Bowl Recipe

Sweet Chili Salmon Bowl Recipe can help you plan your cooking efficiently. Here’s a simple breakdown of the time required for preparation and cooking, ensuring you can enjoy this delicious meal without any rush.

Prep Time

The prep time for this recipe is approximately 15 minutes. During this time, you will gather all your ingredients, wash and chop the vegetables, and prepare the sweet chili sauce. Having everything ready before you start cooking makes the process smoother and more enjoyable.

Cooking Time

The cooking time is about 15-20 minutes. This includes roasting the salmon and vegetables in the oven for 10-12 minutes and cooking the basmati rice according to the package instructions, which usually takes around 10-15 minutes. Keep an eye on the salmon to ensure it cooks perfectly!

Total Time

Sweet Chili Salmon Bowl Recipe a quick and easy option for a weeknight dinner or a special occasion. With just a little time, you can create a flavorful and nutritious meal that everyone will love!

Nutritional Information for the Sweet Chili Salmon Bowl Recipe

Sweet Chili Salmon Bowl Recipe not only delights your taste buds but also provides a variety of nutrients. Here’s a closer look at the nutritional information for this delicious dish.

Calories

Sweet Chili Salmon Bowl contains approximately 460 calories. This makes it a satisfying meal that can fit well into a balanced diet. The combination of salmon, vegetables, and rice provides a hearty yet healthy option for lunch or dinner.

Protein Content

One of the standout features of this recipe is its protein content. Each serving offers about 32 grams of protein. Salmon is an excellent source of high-quality protein, which is essential for muscle repair and overall health. The addition of chia seeds also contributes to the protein content, making this bowl a great choice for those looking to increase their protein intake.

Sodium Levels

Sweet Chili Salmon Bowl contains approximately 800 milligrams per serving. This level is moderate, especially considering the use of tamari sauce, which can be higher in sodium. If you’re watching your sodium intake, consider using low-sodium tamari or adjusting the amount of sauce used in the recipe. Balancing flavors while keeping sodium levels in check is key to a healthy meal.

Sweet Chili Salmon Bowl Recipe is not only delicious but also packed with nutrients. It provides a good balance of calories, protein, and essential vitamins and minerals, making it a fantastic choice for any meal.

FAQs About the Sweet Chili Salmon Bowl Recipe

Can I use frozen salmon for the Sweet Chili Salmon Bowl Recipe?

Sweet Chili Salmon Bowl Recipe. However, it’s important to thaw the salmon properly before cooking. The best way to do this is to place the frozen salmon in the refrigerator overnight. If you’re short on time, you can also thaw it under cold running water for about 30 minutes. Once thawed, follow the same preparation and cooking steps as you would with fresh salmon. Just keep an eye on the cooking time, as frozen salmon may take a minute or two longer to cook through.

What can I substitute for sweet chili sauce in the Sweet Chili Salmon Bowl Recipe?

Sweet Chili Salmon Bowl a delicious flavor!

How can I make the Sweet Chili Salmon Bowl Recipe spicier?

Sweet Chili Salmon Bowl Recipe. First, you can add more sriracha or red pepper flakes to the sweet chili sauce. This will give your dish an extra kick. Another option is to sprinkle some cayenne pepper over the salmon and vegetables before roasting. For a fresh touch, consider adding sliced jalapeños or serrano peppers on top of your bowl just before serving. These additions will enhance the flavor and heat of your meal!

Is the Sweet Chili Salmon Bowl Recipe healthy?

Sweet Chili Salmon Bowl Recipe is a healthy choice for several reasons. Salmon is rich in omega-3 fatty acids, which are beneficial for heart health. The dish also includes a variety of colorful vegetables, providing essential vitamins and minerals. Basmati rice serves as a wholesome carbohydrate source, giving you energy. Additionally, the inclusion of chia seeds adds fiber and protein. Overall, this bowl is a balanced meal that supports a nutritious diet while being delicious!

Conclusion on the Sweet Chili Salmon Bowl Recipe

Sweet Chili Salmon Bowl Recipe is a delightful dish that brings together a medley of flavors, textures, and nutrients. It’s not just a meal; it’s an experience that can be enjoyed by everyone at the table. With its vibrant colors and delicious taste, this bowl is sure to impress your family and friends.

Whether you’re a seasoned cook or a beginner in the kitchen, this recipe is easy to follow and adaptable to your preferences. You can switch up the proteins and vegetables, making it a versatile option for any occasion. Plus, the health benefits of salmon, combined with the freshness of vegetables and the wholesome goodness of basmati rice, make this dish a nutritious choice.

As you prepare your Sweet Chili Salmon Bowl, remember to have fun and get creative. Experiment with different flavors and ingredients to make it your own. Don’t hesitate to share your culinary creations with loved ones, as food is best enjoyed together. So, gather your ingredients, follow the steps, and savor every bite of this delicious bowl!

Sweet Chili Salmon Bowl Recipe. Happy cooking!

Turkey Sweet Potato Bake: A Cozy, Delicious Treat!

Turkey Sweet Potato Bake

Introduction to Turkey Sweet Potato Bake

There’s something truly comforting about a dish that blends wholesome ingredients into one warm, satisfying meal. This Turkey Sweet Potato Bake brings together tender shredded turkey (or optionally, lean ground turkey), naturally sweet roasted potatoes, and savory herbs in a cozy, one-pan dinner. Perfect for chilly evenings, family meals, or meal prep, it’s both hearty and nutritious. Easy to assemble and full of flavor, this dish is sure to become a go-to favorite at your table.

Why You’ll Love This Turkey Sweet Potato Bake

This Turkey Sweet Potato Bake is perfect for busy weeknights or when you need a no-fuss, wholesome meal. It comes together easily in about an hour and is packed with comforting flavors that the whole family will enjoy. Whether you’re using leftover shredded turkey or prepping with lean ground turkey, it’s a nutritious, satisfying dish that even picky eaters will appreciate. It’s also a great make-ahead option and ideal for meal prepping or sharing at potlucks.

Ingredients for Turkey Sweet Potato Bake

Gathering the right ingredients is key to making this Turkey Sweet Potato Bake a success. Here’s what you’ll need:

  • Shredded cooked turkey – Ideal for using leftovers; adds lean protein and savory flavor.
  • Sweet potatoes – Peeled and diced for natural sweetness and a creamy texture.
  • Green beans – Fresh or frozen; adds crunch and color.
  • Corn kernels – Brings a touch of sweetness and balances the dish.
  • Low-sodium chicken broth – Keeps everything moist and adds depth.
  • Garlic powder & onion powder – For savory base flavor without chopping.
  • Dried thyme & paprika – Earthy and smoky seasonings that complement turkey.
  • Salt and black pepper – To taste.
  • Shredded cheddar cheese – Melts into a delicious, golden topping.
  • Breadcrumbs (optional) – For a crispy finish; mix with olive oil if using.
  • Olive oil – Helps with roasting and adds richness.

Note: See the recipe card below for exact measurements and substitutions.

How to Make Turkey Sweet Potato Bake

Now that you have all your ingredients ready, let’s dive into making this delightful Turkey Sweet Potato Bake! Follow these simple steps, and you’ll have a comforting meal that’s sure to please.

Step 1: Preheat the Oven

Set your oven to 375°F (190°C). This ensures even cooking and helps the cheese melt perfectly while the sweet potatoes become tender.

Step 2: Mix the Filling

In a large bowl, combine the shredded turkey, diced sweet potatoes, green beans, and corn. Pour in the chicken broth and gently stir until everything is evenly coated.

Step 3: Add Seasonings

Sprinkle in the garlic powder, onion powder, thyme, paprika, salt, and pepper. Stir well to distribute the flavors throughout the mixture.

Step 4: Assemble the Bake

Transfer the mixture into a greased 9×13-inch baking dish. Spread it out evenly for uniform cooking.

Step 5: Add Cheese and Topping

Sprinkle the shredded cheddar cheese on top. For extra crunch, mix breadcrumbs with a drizzle of olive oil and sprinkle over the cheese layer (optional).

Step 6: Bake Covered

Cover the dish with foil and bake for 30 minutes. This steams the sweet potatoes and keeps the turkey moist.

Step 7: Finish Uncovered

Remove the foil and bake for another 15–20 minutes until the top is golden and bubbly. Let cool slightly before serving.

Step 8: Cool and Serve

Once it’s out of the oven, let your Turkey Sweet Potato Bake cool for a few minutes. This helps the flavors settle and makes serving easier. Trust me, the wait will be worth it when you dig in!

Tips for Success

  • Use leftover turkey to save time and deepen the flavor.
  • Preheat the oven fully to ensure the dish cooks evenly throughout.
  • Add extra veggies like bell peppers, zucchini, or spinach for more color and nutrients.
  • For a creamier texture, stir in a splash of milk or cream before baking.
  • Let the bake rest for a few minutes after removing from the oven—this helps the flavors settle and makes serving easier.

Equipment Needed

  • 9×13-inch baking dish: Ideal for even cooking, though a smaller dish can be used if needed.
  • Mixing bowl: Any large bowl will work for combining the ingredients.
  • Spatula: Perfect for mixing and transferring the mixture; a wooden spoon is also a good alternative.
  • Aluminum foil: Used to cover the dish during baking; parchment paper can be substituted if necessary.

Variations

  • Spicy Kick: Add 1/2 teaspoon of cayenne pepper or red pepper flakes for a zesty, spicy twist.
  • Vegetarian Option: Swap the turkey for cooked lentils or chickpeas for a hearty, plant-based alternative.
  • Cheesy Delight: Try using different cheeses like Monterey Jack or pepper jack for a unique, bold flavor.
  • Herb Infusion: Add fresh herbs like rosemary or parsley for a burst of fresh, aromatic flavor.
  • Sweet Potato Swap: Replace sweet potatoes with butternut squash or pumpkin for a seasonal, slightly sweeter variation.

Serving Suggestions

  • Crisp green salad: Pair with a fresh salad for a light, refreshing contrast.
  • Warm, crusty bread: Serve alongside to soak up all the delicious flavors.
  • Chilled white wine: A glass of crisp white wine complements the dish perfectly.
  • Fresh herbs: Garnish with parsley or other fresh herbs for a vibrant pop of color.

FAQs about Turkey Sweet Potato Bake

Can I use fresh sweet potatoes instead of frozen?

Absolutely! Fresh sweet potatoes work wonderfully in this Turkey Sweet Potato Bake. Just peel and dice them before mixing. They’ll cook beautifully in the oven!

How can I make this dish dairy-free?

To make a dairy-free version, simply omit the cheddar cheese and use a dairy-free cheese alternative. You can also add a splash of coconut milk for creaminess without the dairy.

Can I prepare this Turkey Sweet Potato Bake ahead of time?

Yes! You can assemble the dish a day in advance and store it in the fridge. Just cover it tightly with foil. When you’re ready to bake, add a few extra minutes to the cooking time.

What can I serve with Turkey Sweet Potato Bake?

This dish pairs beautifully with a simple green salad or some roasted vegetables. A light vinaigrette can add a refreshing touch to your meal!

Is this Turkey Sweet Potato Bake gluten-free?

Yes, it is! Just make sure to use gluten-free breadcrumbs if you choose to add them. Otherwise, the dish is naturally gluten-free and perfect for everyone!

Final Thoughts

Cooking this Turkey Sweet Potato Bake is more than just preparing a meal; it’s about creating memories around the dinner table. The aroma wafting through your home will draw your family in, eager to share a moment together. Each bite is a delightful blend of flavors, warmth, and comfort, making it a dish that feels like home. Whether you’re using up leftovers or simply looking for a cozy meal, this recipe is sure to become a family favorite. So, roll up your sleeves, embrace the joy of cooking, and let this Turkey Sweet Potato Bake bring smiles to your loved ones!

“`

Print
clock clock iconcutlery cutlery iconflag flag iconfolder folder iconinstagram instagram iconpinterest pinterest iconfacebook facebook iconprint print iconsquares squares iconheart heart iconheart solid heart solid icon
Turkey Sweet Potato Bake

Turkey Sweet Potato Bake: A Cozy, Delicious Treat!


5 Stars 4 Stars 3 Stars 2 Stars 1 Star

No reviews

  • Author: Isabella
  • Total Time: 1 hour
  • Yield: 6 servings 1x

Description

A cozy and delicious Turkey Sweet Potato Bake that combines tender turkey, sweet potatoes, and vegetables, topped with melted cheddar cheese.


Ingredients

Scale
  • 2 cups cooked turkey, shredded
  • 2 cups sweet potatoes, peeled and diced
  • 1 cup green beans, trimmed and chopped
  • 1 cup corn, frozen or canned
  • 1 cup chicken broth
  • 1 teaspoon garlic powder
  • 1 teaspoon onion powder
  • 1 teaspoon dried thyme
  • 1 teaspoon paprika
  • Salt and pepper to taste
  • 1 cup shredded cheddar cheese
  • 1/2 cup breadcrumbs (optional)
  • 2 tablespoons olive oil

Instructions

  1. Preheat the oven to 375°F (190°C).
  2. In a large mixing bowl, combine the cooked turkey, sweet potatoes, green beans, corn, and chicken broth.
  3. Add garlic powder, onion powder, dried thyme, paprika, salt, and pepper to the mixture. Stir until well combined.
  4. Transfer the mixture to a greased 9×13-inch baking dish.
  5. Sprinkle the shredded cheddar cheese evenly over the top. If using breadcrumbs, mix them with olive oil and sprinkle over the cheese for added crunch.
  6. Cover the baking dish with aluminum foil and bake for 30 minutes.
  7. Remove the foil and bake for an additional 15-20 minutes, or until the sweet potatoes are tender and the cheese is bubbly and golden.
  8. Let it cool for a few minutes before serving.

Notes

  • For a spicier kick, add 1/2 teaspoon of cayenne pepper or red pepper flakes to the mixture.
  • Substitute the turkey with cooked chicken or ground turkey for a different flavor profile.
  • Prep Time: 15 minutes
  • Cook Time: 45 minutes
  • Category: Main Dish
  • Method: Baking
  • Cuisine: American

Nutrition

  • Serving Size: 1 serving
  • Calories: 320
  • Sugar: 5g
  • Sodium: 600mg
  • Fat: 12g
  • Saturated Fat: 5g
  • Unsaturated Fat: 7g
  • Trans Fat: 0g
  • Carbohydrates: 28g
  • Fiber: 4g
  • Protein: 25g
  • Cholesterol: 70mg