Spring Salmon Niçoise Salad Recipe is a must-try!

Introduction to Spring Salmon Niçoise Salad Recipe

Spring is a time for fresh flavors and vibrant colors, and what better way to celebrate than with a delightful Spring Salmon Niçoise Salad? This dish is not just a feast for the eyes; it’s also packed with nutrients and tastes amazing. Combining tender salmon, crisp vegetables, and a zesty dressing, this salad is perfect for a light lunch or a refreshing dinner. It’s a wonderful way to enjoy the season’s bounty while keeping your meals healthy and satisfying.

What Makes the Spring Salmon Niçoise Salad Unique?

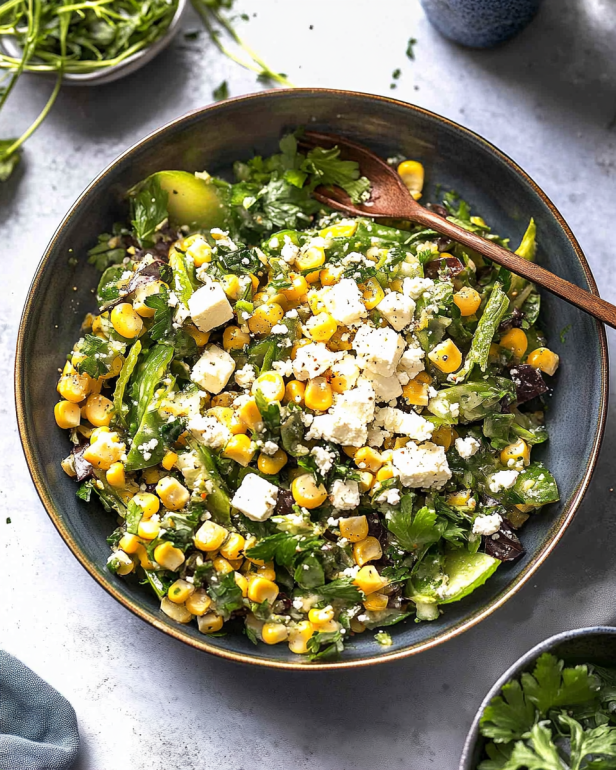
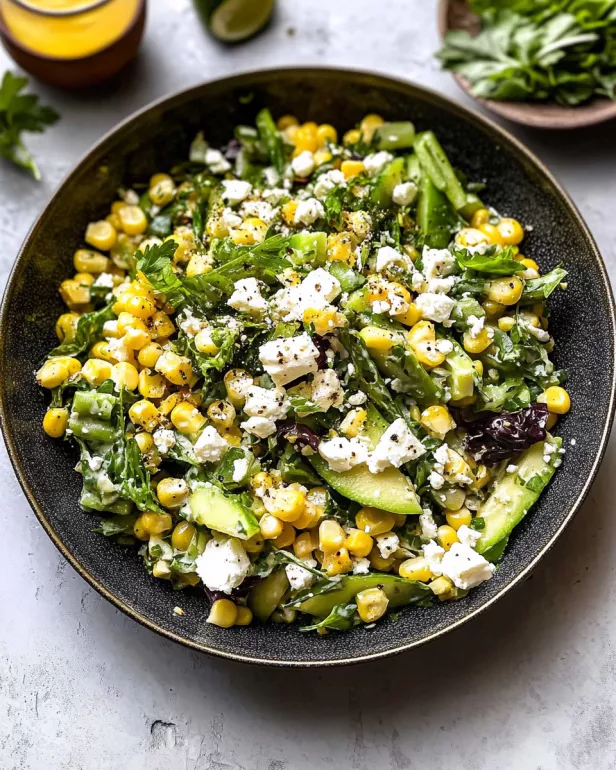
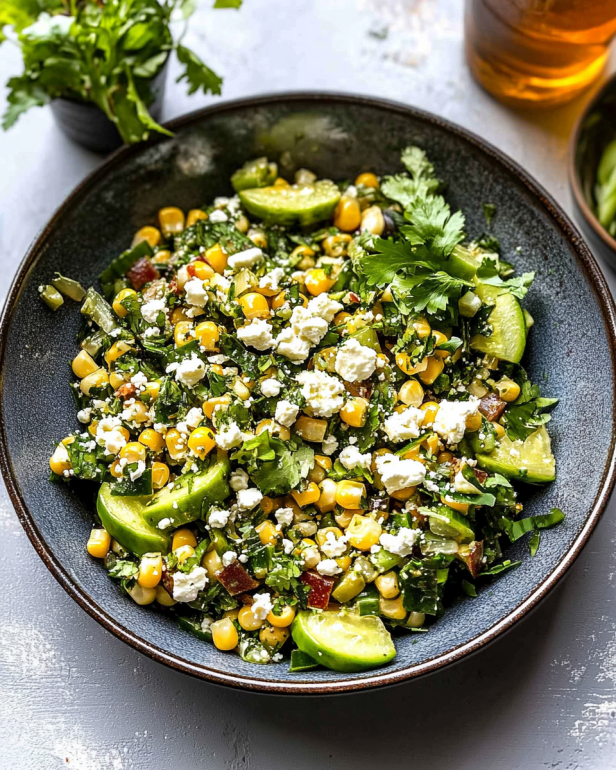
The Spring Salmon Niçoise Salad stands out for several reasons. First, it features a beautiful mix of textures and flavors. The flaky salmon pairs perfectly with crunchy snap peas and creamy hard-boiled eggs. Each bite offers a delightful contrast that keeps your taste buds excited. Additionally, the use of fresh ingredients like arugula and grape tomatoes adds a burst of color and nutrition.

Another unique aspect is the dressing. Made with high-quality olive oil and balsamic vinegar, it enhances the salad without overpowering it. This balance allows the natural flavors of the ingredients to shine through. Plus, the option to customize the salad with different proteins or seasonal vegetables makes it versatile for any occasion.

In essence, the Spring Salmon Niçoise Salad is not just a meal; it’s an experience. It brings together the essence of spring in every bite, making it a must-try recipe for anyone looking to enjoy a healthy and delicious dish.

Ingredients for Spring Salmon Niçoise Salad Recipe

To create a delicious Spring Salmon Niçoise Salad, you’ll need a variety of fresh ingredients that come together to form a colorful and nutritious dish. Here’s what you’ll need:
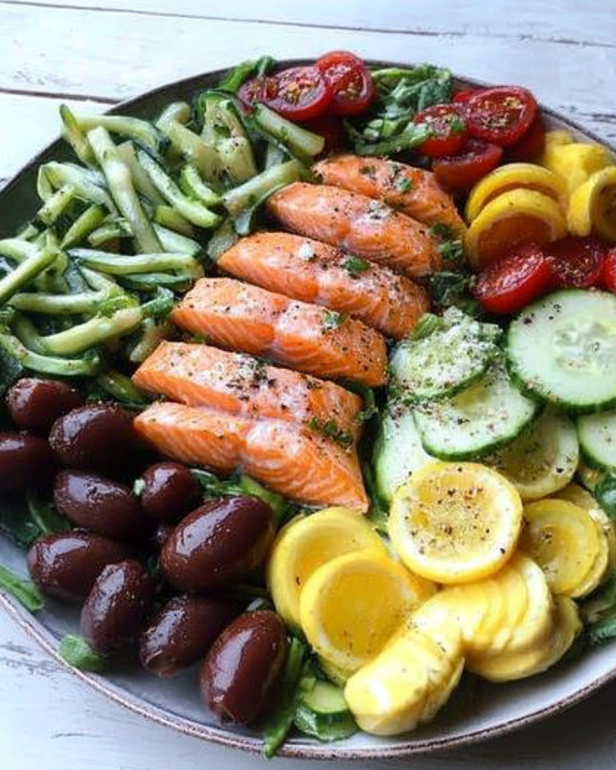
  • 2 cups arugula
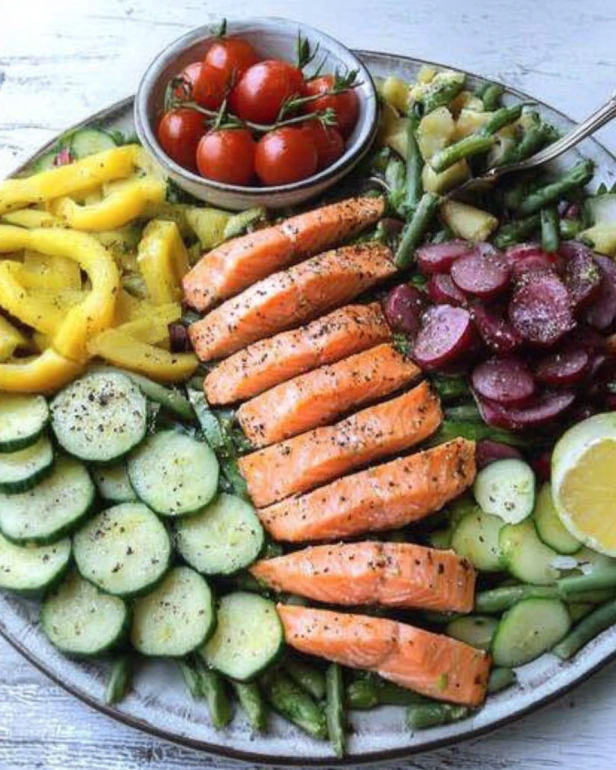
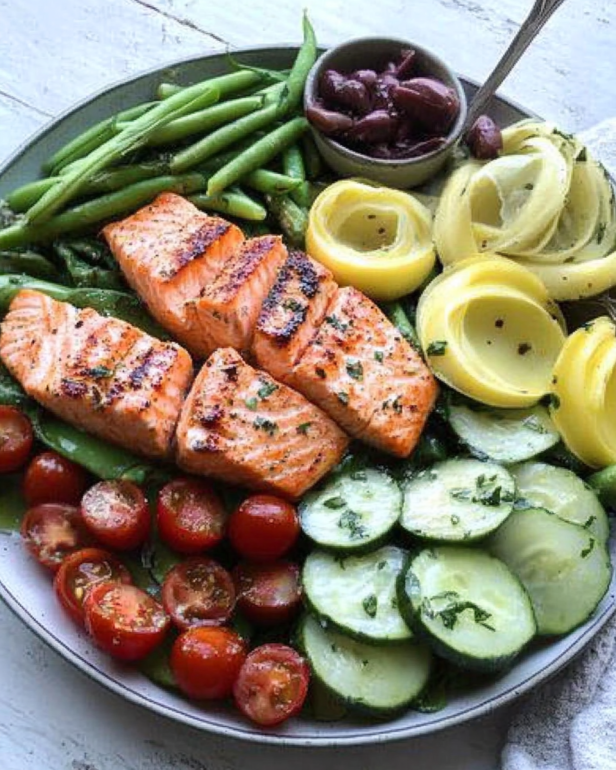
  • 1 cup grape tomatoes, halved
  • 1 cup snap peas, trimmed
  • 1 cup small Yukon gold potatoes, quartered
  • 1 can (6 ounces) tuna packed in olive oil, drained
  • 8 ounces poached salmon, flaked
  • 4 hard-boiled eggs, cut into wedges
  • 1/4 cup Kalamata olives, pitted and chopped
  • 1/4 cup shallots, finely sliced
  • 1/4 cup fresh basil, torn

For the dressing, gather the following ingredients:

  • 1/4 cup high-quality olive oil
  • 2 tablespoons balsamic vinegar
  • 1 teaspoon whole grain mustard
  • 1 clove shallot, minced
  • Salt and freshly ground black pepper to taste

These ingredients not only provide a burst of flavor but also ensure that your salad is packed with essential nutrients. The combination of protein from the salmon and tuna, healthy fats from the olive oil, and fiber from the vegetables makes this salad a well-rounded meal. Plus, it’s easy to prepare and perfect for any spring gathering!

Preparation of Spring Salmon Niçoise Salad Recipe

Now that you have all your ingredients ready, it’s time to prepare your Spring Salmon Niçoise Salad. This process is simple and quick, allowing you to enjoy a delicious meal in no time. Let’s break it down into easy steps.

Step 1: Preparing the Salmon

First, you need to prepare the salmon. If you’re using fresh salmon, poach it gently in simmering water for about 10-12 minutes. Make sure it’s cooked through but still moist. Once done, flake the salmon into bite-sized pieces. If you prefer, you can also use canned salmon for convenience. Just drain it well and set it aside.

Step 2: Cooking the Vegetables

Next, let’s cook the vegetables. In a large pot, bring water to a rolling boil and add a generous pinch of salt. Toss in the quartered Yukon gold potatoes and cook them for about 12-15 minutes, or until they are fork-tender. In the last two minutes of cooking, add the snap peas to the pot. This will keep them crisp and vibrant. Once cooked, drain the vegetables and let them cool.

Step 3: Assembling the Salad

Now comes the fun part—assembling your salad! In a spacious serving bowl, start by layering the arugula as your base. Then, add the halved grape tomatoes, drained tuna, and flaked salmon. Next, arrange the hard-boiled egg wedges, chopped Kalamata olives, and finely sliced shallots on top. Finally, add the cooled potatoes and snap peas. This colorful arrangement not only looks beautiful but also ensures that every bite is packed with flavor.

Step 4: Making the Dressing

To finish off your salad, let’s make the dressing. In a separate bowl, combine the high-quality olive oil, balsamic vinegar, whole grain mustard, and minced shallot. Season with a pinch of salt and freshly ground black pepper. Whisk the mixture until it’s well combined and emulsified. This dressing will add a delightful tang to your salad, enhancing all the fresh ingredients.

Once your dressing is ready, pour it over the assembled salad. Gently fold the ingredients together to ensure everything is evenly coated. This step is crucial for bringing all the flavors together!

Variation of Spring Salmon Niçoise Salad Recipe

While the Spring Salmon Niçoise Salad is delicious as is, there are plenty of ways to customize it. You can easily switch up the proteins or vegetables to suit your taste or dietary needs. Here are some great variations to consider.

Alternative Proteins to Use

If you’re looking for a different protein option, there are several tasty alternatives to salmon. For a vegetarian twist, consider using grilled tofu or chickpeas. Both options are packed with protein and will keep you feeling full. Grilled shrimp is another fantastic choice if you want a seafood alternative. It adds a nice flavor and pairs well with the salad’s fresh ingredients. You can also use canned salmon or even rotisserie chicken for a quick and easy option. Each of these proteins will bring a unique taste to your Spring Salmon Niçoise Salad, making it versatile for any meal.

Seasonal Vegetable Swaps

Seasonal vegetables can elevate your salad and keep it fresh. Instead of snap peas, try using asparagus or green beans for a crunchy texture. You can also swap out the Yukon gold potatoes for roasted sweet potatoes or even quinoa for a gluten-free option. If you want to add more color, consider including radishes or bell peppers. These vegetables not only enhance the visual appeal but also add extra nutrients. Feel free to mix and match based on what’s available at your local market. This flexibility allows you to enjoy a new version of the Spring Salmon Niçoise Salad every time you make it!

Cooking Note for Spring Salmon Niçoise Salad Recipe

When preparing your Spring Salmon Niçoise Salad, there are a few cooking notes to keep in mind to ensure the best results. First, the quality of your ingredients plays a significant role in the overall flavor of the dish. Always opt for fresh, high-quality salmon and vegetables. Fresh ingredients not only taste better but also provide more nutrients.

For the salmon, poaching is a gentle cooking method that helps retain moisture. If you choose to grill or bake the salmon, be careful not to overcook it. Overcooked salmon can become dry and lose its delicate flavor. Aim for a slightly pink center, as it will continue to cook slightly after being removed from heat.

When cooking the potatoes, make sure they are cut into uniform pieces. This ensures even cooking. If you prefer a different texture, you can roast the potatoes instead. Roasting adds a lovely crispiness that contrasts nicely with the other ingredients.

As for the snap peas, they should remain bright green and crisp. Adding them to the boiling water for just the last two minutes helps achieve this. If you want to enhance their color, consider shocking them in ice water after cooking. This technique stops the cooking process and keeps them vibrant.

Lastly, when mixing the salad, be gentle. You want to combine the ingredients without breaking the salmon or eggs. A light hand will help maintain the beautiful presentation of your Spring Salmon Niçoise Salad.

Serving Suggestions for Spring Salmon Niçoise Salad Recipe

Serving your Spring Salmon Niçoise Salad is just as important as preparing it. The way you present this vibrant dish can enhance the dining experience. Here are some delightful serving suggestions to consider:

  • Chilled Plates: Serve the salad on chilled plates. This keeps the salad fresh and adds a touch of elegance to your meal.
  • Accompany with Bread: Pair the salad with crusty whole-grain bread or a light baguette. This adds a satisfying crunch and makes the meal more filling.
  • Garnish with Extra Herbs: For a pop of color and flavor, sprinkle additional fresh herbs like parsley or dill on top just before serving. This not only looks appealing but also enhances the taste.
  • Serve Family-Style: Consider serving the salad in a large bowl at the center of the table. This encourages sharing and creates a warm, inviting atmosphere.
  • Wine Pairing: A crisp white wine, such as Sauvignon Blanc or a light rosé, pairs beautifully with the flavors of the salad. The acidity in the wine complements the dressing and fresh ingredients.
  • Make it a Meal: For a heartier option, serve the salad alongside a light soup, like a tomato basil or a vegetable minestrone. This combination makes for a well-rounded meal.

These serving suggestions will not only enhance the presentation of your Spring Salmon Niçoise Salad but also elevate the overall dining experience. Whether it’s a casual lunch or a special dinner, these tips will help you impress your guests and enjoy every bite!

Tips for Perfecting Your Spring Salmon Niçoise Salad Recipe

Creating the perfect Spring Salmon Niçoise Salad is all about attention to detail and a few helpful tips. With these suggestions, you can elevate your salad to new heights, ensuring it’s not only delicious but also visually stunning. Here are some tips to keep in mind:

  • Choose Fresh Ingredients: Always opt for the freshest ingredients available. Fresh arugula, ripe tomatoes, and high-quality salmon will make a noticeable difference in flavor.
  • Season Your Water: When boiling the potatoes and snap peas, don’t forget to season the water with salt. This enhances the flavor of the vegetables and ensures they taste their best.
  • Perfectly Cooked Salmon: If you’re poaching salmon, keep an eye on the cooking time. Overcooked salmon can become dry. Aim for a tender, flaky texture that melts in your mouth.
  • Cool Vegetables Quickly: After cooking the potatoes and snap peas, cool them quickly by rinsing under cold water. This helps maintain their vibrant color and crispness.
  • Customize Your Dressing: Feel free to experiment with the dressing. Adding a splash of lemon juice or a pinch of garlic can enhance the flavor profile. Adjust the seasoning to your taste.
  • Layering Matters: When assembling the salad, layer the ingredients thoughtfully. This not only looks appealing but also ensures that every bite has a mix of flavors and textures.
  • Let It Rest: Allow the salad to sit for a few minutes after dressing it. This gives the flavors time to meld together, making each bite even more delicious.
  • Garnish Wisely: Use fresh herbs as a garnish. They add a pop of color and a burst of flavor that can elevate the entire dish.
  • Serve Immediately: For the best experience, serve the salad right after assembling. This keeps the ingredients fresh and the textures intact.

By following these tips, you’ll be well on your way to mastering the Spring Salmon Niçoise Salad. Each step contributes to a delightful dish that’s sure to impress your family and friends. Enjoy the process and savor the delicious results!

Breakdown of Time for Spring Salmon Niçoise Salad Recipe

Understanding the time needed to prepare your Spring Salmon Niçoise Salad can help you plan your meal better. Here’s a simple breakdown of the time required for each step, ensuring you can enjoy this delicious dish without any rush.

Prep Time

The prep time for the Spring Salmon Niçoise Salad is approximately 15-20 minutes. This includes gathering all your ingredients, washing the vegetables, and preparing the salmon. If you’re using canned salmon, this step will be quicker. Make sure to have everything ready before you start cooking to streamline the process.

Cooking Time

Cooking the vegetables and salmon will take about 15-20 minutes. The potatoes need around 12-15 minutes to become fork-tender, while the snap peas only require a quick two minutes at the end. If you’re poaching fresh salmon, it will take about 10-12 minutes. Overall, the cooking time is efficient, allowing you to enjoy a healthy meal in no time.

Total Time

In total, you can expect to spend about 30-40 minutes from start to finish. This includes both prep and cooking time. It’s a quick and easy recipe that’s perfect for a busy weeknight or a leisurely weekend lunch. With just a little time, you can create a beautiful and nutritious Spring Salmon Niçoise Salad that everyone will love!

Nutritional Information for Spring Salmon Niçoise Salad Recipe

Understanding the nutritional content of your meals is essential for maintaining a balanced diet. The Spring Salmon Niçoise Salad is not only delicious but also packed with nutrients. Here’s a breakdown of the key nutritional information per serving:

Calories

Each serving of the Spring Salmon Niçoise Salad contains approximately 460 calories. This makes it a satisfying option for lunch or dinner without being overly heavy. The combination of protein, healthy fats, and fiber helps keep you full and energized throughout the day.

Protein

This salad is a great source of protein, providing about 32 grams per serving. The protein comes primarily from the salmon and tuna, which are both excellent sources of high-quality protein. Protein is essential for muscle repair and growth, making this salad a perfect post-workout meal.

Sodium

The sodium content in the Spring Salmon Niçoise Salad is approximately 600 milligrams per serving. While this is a moderate amount, it’s important to consider if you are watching your sodium intake. You can reduce sodium by using low-sodium tuna or adjusting the amount of salt in the dressing. This way, you can enjoy the salad while keeping your dietary needs in check.

Overall, the Spring Salmon Niçoise Salad is a nutritious choice that offers a balance of calories, protein, and essential nutrients. It’s a wonderful way to enjoy a healthy meal that supports your wellness goals while delighting your taste buds!

FAQs about Spring Salmon Niçoise Salad Recipe

Can I use canned salmon for the Spring Salmon Niçoise Salad Recipe?

Absolutely! Canned salmon is a convenient and tasty option for your Spring Salmon Niçoise Salad. It saves time and still provides great flavor and nutrition. Just make sure to choose high-quality canned salmon packed in water or olive oil for the best taste. Drain it well before adding it to your salad. This way, you can enjoy a delicious meal without the hassle of cooking fresh salmon!

What other dressings can I use for the Spring Salmon Niçoise Salad Recipe?

While the balsamic vinaigrette is a fantastic choice, there are many other dressings you can try! A lemon vinaigrette adds a bright, zesty flavor that pairs well with the salmon. You could also use a creamy dressing, like a yogurt-based ranch or a tahini dressing, for a different twist. If you prefer something tangy, a mustard vinaigrette or a honey mustard dressing can enhance the salad’s flavors. Feel free to experiment and find the dressing that you love the most!

How can I make the Spring Salmon Niçoise Salad Recipe ahead of time?

Making the Spring Salmon Niçoise Salad ahead of time is easy! You can prepare the ingredients in advance and store them separately in the refrigerator. Cook the potatoes and snap peas, then let them cool before storing them in airtight containers. You can also hard-boil the eggs and keep them in the fridge until you’re ready to assemble the salad. Just remember to add the dressing right before serving to keep the salad fresh and crisp. This way, you can enjoy a delicious meal with minimal effort on busy days!

Conclusion on Spring Salmon Niçoise Salad Recipe

In conclusion, the Spring Salmon Niçoise Salad is a delightful dish that captures the essence of spring with its vibrant colors and fresh flavors. This recipe is not only easy to prepare but also offers a nutritious meal that can be enjoyed any time of the day. With its combination of protein-rich salmon and tuna, crisp vegetables, and a zesty dressing, it’s a well-rounded option that satisfies both the palate and the body.

Whether you’re hosting a gathering or simply looking for a healthy lunch, this salad is sure to impress. The versatility of the ingredients allows you to customize it to your liking, making it a perfect fit for various dietary preferences. Plus, the tips and variations provided can help you make this dish your own, ensuring that every serving is unique and delicious.

So, gather your fresh ingredients, follow the simple steps, and enjoy the delightful experience of creating and savoring your Spring Salmon Niçoise Salad. It’s a meal that celebrates the season and brings joy to your table. Happy cooking!

Garlic Butter Orzo with Roasted Shrimp Recipe is delicious!

Introduction to Garlic Butter Orzo with Roasted Shrimp Recipe

Garlic Butter Orzo with Roasted Shrimp Recipe is not just a meal; it’s an experience that brings joy to your dining table.

This recipe is perfect for any occasion, whether it’s a cozy family dinner or a gathering with friends. The combination of tender orzo pasta, succulent shrimp, and vibrant vegetables creates a colorful and appetizing dish. Plus, it’s easy to prepare, making it a great choice for both novice cooks and seasoned chefs.

Imagine the aroma of garlic wafting through your kitchen as you prepare this dish. The roasted shrimp, infused with lemon and smoked paprika, adds a delightful twist that will leave your taste buds dancing. With just a few simple ingredients, you can create a meal that feels gourmet without spending hours in the kitchen.

Garlic Butter Orzo with Roasted Shrimp Recipe!

Ingredients for Garlic Butter Orzo with Roasted Shrimp Recipe

Garlic Butter Orzo with Roasted Shrimp Recipe, you’ll need a selection of fresh and flavorful ingredients. Each component plays a vital role in bringing this dish to life. Here’s what you’ll need:

  • 1 pound large shrimp, peeled and deveined
  • 1 cup orzo pasta
  • 4 tablespoons unsalted butter
  • 4 cloves garlic, finely chopped
  • 1 teaspoon lemon zest
  • 2 tablespoons fresh lemon juice
  • 1 teaspoon smoked paprika
  • Salt and freshly ground black pepper to taste
  • 2 tablespoons fresh parsley, chopped
  • 1 cup cherry tomatoes, halved
  • 1 cup baby spinach, roughly chopped

These ingredients come together to create a dish that is not only delicious but also visually appealing. The shrimp adds a protein boost, while the orzo serves as a comforting base. The garlic and lemon bring brightness, and the fresh vegetables add color and nutrition. With this list in hand, you’re ready to embark on your cooking journey!

Preparation of Garlic Butter Orzo with Roasted Shrimp Recipe

Garlic Butter Orzo with Roasted Shrimp Recipe. This section will guide you through each step, ensuring that your dish turns out perfectly delicious. Let’s get started!

Step 1: Preparing the Shrimp

First, let’s focus on the shrimp. Begin by rinsing the peeled and deveined shrimp under cold water. This helps to remove any residual grit. Next, pat them dry with a paper towel. This step is crucial because dry shrimp will roast better, giving you that lovely caramelization.

In a mixing bowl, combine the shrimp with 2 tablespoons of melted butter, finely chopped garlic, lemon zest, lemon juice, smoked paprika, salt, and pepper. Toss everything together until the shrimp are well coated. This mixture will infuse the shrimp with flavor as they roast. Once mixed, set the bowl aside while you prepare the orzo.

Step 2: Cooking the Orzo

While you’re prepping the shrimp, bring a large pot of salted water to a boil. The salt enhances the flavor of the orzo. Once boiling, add the orzo pasta and cook according to the package directions, usually around 8-10 minutes, until it reaches an al dente texture.

After cooking, drain the orzo in a colander and let it cool slightly. This will prevent it from becoming mushy when combined with the other ingredients later. Remember, the orzo will continue to cook a bit after draining, so it’s important not to overcook it.

Step 3: Making the Garlic Butter Sauce

Now, let’s create the garlic butter sauce that will bring everything together. In a large skillet, melt the remaining 2 tablespoons of butter over medium heat. Once melted, add the cooked orzo, halved cherry tomatoes, and roughly chopped baby spinach to the skillet.

Stir everything together gently, allowing the spinach to wilt and the tomatoes to soften. This should take about 2-3 minutes. The heat will help the flavors meld beautifully, creating a fragrant base for your dish.

Step 4: Combining Ingredients

Once the shrimp are roasted to perfection, it’s time to combine all the elements. Carefully fold the roasted shrimp into the orzo mixture in the skillet. Toss everything together until well combined and heated through. This step ensures that every bite is packed with flavor.

Garlic Butter Orzo with Roasted Shrimp Recipe not only tasty but also visually appealing. Now, you’re ready to serve and enjoy!

Variation of Garlic Butter Orzo with Roasted Shrimp Recipe

Garlic Butter Orzo with Roasted Shrimp Recipe is a delightful dish on its own, there are many ways to customize it to suit your taste or dietary needs. Whether you want to switch up the protein or explore vegetarian options, this section will guide you through some delicious variations.

Alternative Proteins

If shrimp isn’t your favorite or you’re looking for a change, there are several alternative proteins you can use. Here are a few tasty options:

  • Chicken: Diced chicken breast can be marinated in the same garlic butter mixture and roasted until golden brown. This will give you a hearty and satisfying meal.
  • Tofu: For a plant-based option, firm tofu works wonderfully. Press and cube the tofu, then toss it in the garlic butter mixture before roasting. This will add a lovely texture and flavor.
  • Scallops: If you’re feeling fancy, try using scallops. They cook quickly and pair beautifully with the garlic and lemon flavors.

Garlic Butter Orzo with Roasted Shrimp Recipe, allowing you to enjoy it in different ways!

Vegetarian Options

For those who prefer a vegetarian meal, you can easily adapt this recipe. Here are some ideas to make it meat-free:

  • Chickpeas: Canned chickpeas are a great source of protein. Rinse and drain them, then toss them in the garlic butter mixture before roasting. They will add a nice crunch and flavor.
  • Grilled Vegetables: Consider adding a mix of your favorite vegetables, such as bell peppers, zucchini, and asparagus. Toss them in the garlic butter and roast alongside the orzo for a colorful and nutritious dish.
  • Mushrooms: Sautéed mushrooms can add a rich, umami flavor. Use a mix of shiitake, cremini, or portobello for a delightful twist.

Garlic Butter Orzo with Roasted Shrimp Recipe more inclusive but also add a variety of flavors and textures to your meal. Enjoy experimenting with these variations!

Cooking Note for Garlic Butter Orzo with Roasted Shrimp Recipe

Garlic Butter Orzo with Roasted Shrimp Recipe is no exception. Here are some essential cooking notes to ensure your dish turns out perfectly every time.

First, always use fresh ingredients when possible. Fresh shrimp, vibrant vegetables, and aromatic garlic will elevate the flavors of your dish. If you can, buy shrimp that is still in the shell. This often means they are fresher and will taste better.

Next, pay attention to the cooking times. Overcooking shrimp can lead to a rubbery texture. Keep an eye on them while roasting. They should turn pink and opaque, which usually takes about 8-10 minutes. If you’re using larger shrimp, you may need to adjust the cooking time slightly.

When cooking the orzo, remember to stir occasionally. This prevents the pasta from sticking together. Also, make sure to taste the orzo before draining it. You want it to be al dente, which means it should have a slight bite to it.

For the garlic butter sauce, melting the butter over medium heat is key. If the heat is too high, the butter can burn, which will affect the flavor of your dish. Once the butter is melted, add the garlic and sauté it just until fragrant. This usually takes about 30 seconds. Be careful not to let it brown, as burnt garlic can taste bitter.

Lastly, don’t be afraid to adjust the seasoning. Everyone’s taste buds are different, so feel free to add more salt, pepper, or even a squeeze of lemon juice to brighten the flavors. A dash of red pepper flakes can also add a nice kick if you enjoy a bit of heat.

Garlic Butter Orzo with Roasted Shrimp Recipe. Happy cooking!

Serving Suggestions for Garlic Butter Orzo with Roasted Shrimp Recipe

Garlic Butter Orzo with Roasted Shrimp Recipe, it’s time to think about how to serve it. Presentation can elevate your dish from ordinary to extraordinary. Here are some serving suggestions to make your meal even more delightful:

  • Garnish with Fresh Herbs: A sprinkle of fresh parsley or basil on top adds a burst of color and freshness. It also enhances the overall flavor of the dish.
  • Pair with a Side Salad: A light side salad with mixed greens, cherry tomatoes, and a simple vinaigrette complements the richness of the orzo and shrimp. This adds a refreshing crunch to your meal.
  • Serve with Crusty Bread: A slice of warm, crusty bread is perfect for soaking up the garlic butter sauce. Consider serving a garlic bread or a baguette for a delightful touch.
  • Accompany with a Glass of White Wine: A chilled glass of white wine, such as Sauvignon Blanc or Pinot Grigio, pairs beautifully with the flavors of shrimp and lemon. It enhances the dining experience.
  • Use a Colorful Plate: Serving your dish on a vibrant plate can make it visually appealing. The contrast between the colorful ingredients and the plate will make your meal pop.

Garlic Butter Orzo with Roasted Shrimp Recipe but also create a memorable dining experience for you and your guests. Enjoy every bite!

Tips for Perfecting Garlic Butter Orzo with Roasted Shrimp Recipe

Garlic Butter Orzo with Roasted Shrimp Recipe, a few handy tips can make all the difference. These suggestions will help you elevate your dish, ensuring it’s not only delicious but also visually stunning. Let’s dive into some expert tips!

First, always taste as you go. This is key to achieving the perfect balance of flavors. After adding salt and pepper, take a moment to sample the orzo and shrimp. Adjust the seasoning if needed. A little extra lemon juice can brighten the dish, while a pinch of salt can enhance the overall taste.

Next, consider the timing of your ingredients. To keep everything fresh and vibrant, add the spinach and tomatoes just before combining with the shrimp. This way, the spinach wilts perfectly, and the tomatoes retain some of their juiciness. Timing is everything in cooking!

Another tip is to use high-quality shrimp. Fresh or frozen shrimp can make a big difference in flavor. If using frozen shrimp, make sure to thaw them properly. A quick soak in cold water for about 15-20 minutes works well. This ensures they cook evenly and taste great.

Don’t forget about presentation! A well-plated dish is more appetizing. Use a large serving bowl or individual plates to showcase the colorful ingredients. A sprinkle of fresh parsley or a lemon wedge on the side can add a nice touch.

Lastly, feel free to experiment with flavors. If you love spice, add a dash of cayenne pepper or red pepper flakes to the shrimp mixture. For a Mediterranean twist, consider adding olives or feta cheese to the orzo. The possibilities are endless!

Garlic Butter Orzo with Roasted Shrimp Recipe. Enjoy the process and happy cooking!

Breakdown of Time for Garlic Butter Orzo with Roasted Shrimp Recipe

Garlic Butter Orzo with Roasted Shrimp Recipe can help you plan your cooking efficiently. Here’s a simple breakdown of the time required for preparation and cooking, ensuring you can enjoy this delightful dish without any rush.

Prep Time

The prep time for this recipe is approximately 15 minutes. During this time, you will gather all your ingredients, rinse and dry the shrimp, chop the garlic, zest the lemon, and prepare the vegetables. Having everything ready before you start cooking will make the process smoother and more enjoyable.

Cooking Time

Garlic Butter Orzo with Roasted Shrimp Recipe is about 20 minutes. This includes:

  • Cooking the orzo pasta for about 8-10 minutes.
  • Roasting the shrimp in the oven for 8-10 minutes until they are perfectly pink and cooked through.
  • Sautéing the orzo with garlic, spinach, and tomatoes for an additional 2-3 minutes.

Total Time

In total, you can expect the entire process to take around 35 minutes. This includes both prep and cooking time. With this quick turnaround, you can have a delicious and satisfying meal ready in no time, perfect for busy weeknights or a special occasion!

Nutritional Information for Garlic Butter Orzo with Roasted Shrimp Recipe

Garlic Butter Orzo with Roasted Shrimp Recipe not only delights your taste buds but also provides a good mix of nutrients. Here’s a breakdown of the nutritional information per serving, so you can enjoy this dish while keeping your health in mind.

Calories

Garlic Butter Orzo with Roasted Shrimp Recipe contains approximately 420 calories. This makes it a satisfying meal that can fit into a variety of dietary plans. The calories come from a combination of protein, healthy fats, and carbohydrates, providing you with energy for your day.

Protein

Protein is an essential nutrient for building and repairing tissues. In this recipe, you’ll find about 30 grams of protein per serving. The shrimp is a fantastic source of lean protein, making this dish not only delicious but also beneficial for muscle health and overall wellness.

Sodium

When it comes to sodium, each serving contains around 600 milligrams. While sodium is necessary for bodily functions, it’s important to monitor your intake. You can adjust the amount of salt used in the recipe to suit your dietary needs. Using fresh ingredients can also help keep sodium levels in check.

Garlic Butter Orzo with Roasted Shrimp Recipe offers a balanced meal that is rich in flavor and nutrition. Enjoying this dish can be a delightful way to nourish your body while savoring every bite!

FAQs about Garlic Butter Orzo with Roasted Shrimp Recipe

Can I use frozen shrimp for this recipe?

Garlic Butter Orzo with Roasted Shrimp Recipe. Just make sure to thaw them properly before cooking. A quick soak in cold water for about 15-20 minutes works well. This ensures that the shrimp cook evenly and maintain their delicious flavor. Once thawed, follow the recipe as usual, and you’ll have a delightful meal in no time!

What can I substitute for orzo?

Garlic Butter Orzo with Roasted Shrimp Recipe will still be delicious!

How do I store leftovers of Garlic Butter Orzo with Roasted Shrimp?

Garlic Butter Orzo with Roasted Shrimp to cool completely before transferring it to an airtight container. You can keep it in the refrigerator for up to 3 days. When you’re ready to enjoy it again, simply reheat in the microwave or on the stovetop. If the dish seems dry, add a splash of water or broth to help revive the flavors.

Can I make Garlic Butter Orzo with Roasted Shrimp ahead of time?

Garlic Butter Orzo with Roasted Shrimp Recipe ahead of time! You can cook the orzo and roast the shrimp in advance. Just store them separately in the refrigerator. When you’re ready to serve, combine them with the sautéed vegetables and garlic butter sauce. This way, you can enjoy a fresh and flavorful meal without the last-minute rush!

Conclusion on Garlic Butter Orzo with Roasted Shrimp Recipe

Garlic Butter Orzo with Roasted Shrimp Recipe is a delightful dish that brings together the best of flavors and textures. With its combination of succulent shrimp, tender orzo, and vibrant vegetables, this recipe is sure to impress anyone at your dining table. Whether you’re cooking for a special occasion or just a cozy weeknight dinner, this dish is both satisfying and easy to prepare.

As you’ve seen, the recipe is versatile, allowing for various protein options and vegetarian adaptations. This means you can cater to different tastes and dietary preferences, making it a fantastic choice for gatherings. The cooking notes and tips provided will help you achieve the best results, ensuring that every bite is bursting with flavor.

Don’t forget the importance of presentation! A beautifully plated dish can elevate your meal, making it even more enjoyable. With a few simple garnishes and thoughtful serving suggestions, you can create a dining experience that feels special.

Garlic Butter Orzo with Roasted Shrimp Recipe is more than just a recipe; it’s an opportunity to share joy and deliciousness with those you love. Happy cooking!

“Summer Garden Pasta: A Fresh and Flavorful Delight”

Introduction to Summer Garden Pasta Recipe

Welcome to the delightful world of the Summer Garden Pasta Recipe! This dish is a celebration of fresh, vibrant vegetables that are abundant during the warm months. Imagine a plate filled with colorful zucchini, yellow squash, and juicy cherry tomatoes, all mingling with perfectly cooked pasta. It’s not just a meal; it’s a feast for the senses!

Whether you’re hosting a summer gathering or simply enjoying a quiet dinner at home, this pasta dish is sure to impress. It’s quick to prepare, making it perfect for busy weeknights or leisurely weekends. Plus, it’s a fantastic way to incorporate seasonal produce into your diet, promoting healthy eating habits.

In this recipe, we’ll guide you through each step, ensuring you create a dish that bursts with flavor and nutrition. With just a handful of ingredients, you can whip up a meal that’s not only delicious but also visually appealing. So, roll up your sleeves and get ready to dive into the fresh tastes of summer!

Ingredients for Summer Garden Pasta Recipe

To create your own Summer Garden Pasta, you’ll need a selection of fresh ingredients that bring out the best flavors of the season. Here’s what you’ll need:

  • 8 ounces of your preferred pasta
  • 2 tablespoons extra virgin olive oil
  • 1 medium onion, finely chopped
  • 2 cloves of garlic, minced
  • 1 medium zucchini, cut into small cubes
  • 1 medium yellow squash, cut into small cubes
  • 1 red bell pepper, chopped
  • 1 cup cherry tomatoes, halved
  • 1 teaspoon dried oregano
  • Salt and freshly ground pepper to taste
  • 1/4 cup fresh basil, roughly chopped
  • 1/4 cup grated Parmesan cheese

These ingredients come together to create a dish that is not only tasty but also packed with nutrients. The combination of colorful vegetables adds a variety of vitamins and minerals, making this pasta a healthy choice for any meal. Plus, the fresh basil and Parmesan cheese elevate the flavors, giving you a delightful dining experience.

Feel free to adjust the quantities based on your preferences or the number of servings you need. The beauty of this Summer Garden Pasta Recipe lies in its flexibility, allowing you to customize it to suit your taste!

Preparation of Summer Garden Pasta Recipe

Now that you have gathered all your fresh ingredients, it’s time to prepare your Summer Garden Pasta. This section will guide you through each step, ensuring that your dish turns out perfectly. Let’s get started!

Step 1: Preparing the Vegetables

First, wash all your vegetables thoroughly. This step is crucial to remove any dirt or pesticides. After washing, chop the onion, garlic, zucchini, yellow squash, and red bell pepper as described in the ingredients list. Make sure to cut them into small, even pieces. This helps them cook evenly and blend well with the pasta.

Next, halve the cherry tomatoes. This will allow them to burst and release their juices while cooking, adding a delicious flavor to your dish. Set all the prepared vegetables aside on a clean cutting board or plate. You’re now ready to move on to the next step!

Step 2: Cooking the Pasta

In a large pot, bring salted water to a boil. The salt enhances the pasta’s flavor, so don’t skip this step! Once the water is boiling, add your preferred pasta. Cook it according to the package directions until it reaches an al dente texture. This usually takes about 8-10 minutes, but check the package for specific times.

Once the pasta is cooked, drain it in a colander. Remember to reserve half a cup of the starchy cooking water. This water is a secret ingredient that helps create a creamy sauce later. Set the drained pasta aside while you prepare the vegetables.

Step 3: Combining Ingredients

Now, it’s time to bring everything together! In a large skillet, warm the extra virgin olive oil over medium heat. Add the finely chopped onion and sauté for about 3-4 minutes until it becomes translucent. Then, add the minced garlic and sauté for another minute. The aroma will be delightful!

Next, toss in the diced zucchini, yellow squash, and red bell pepper. Stir-fry these vegetables for about 5-7 minutes. You want them to soften and start to caramelize, which enhances their natural sweetness. After that, add the halved cherry tomatoes and sprinkle the dried oregano over the mixture. Cook everything together for another 2-3 minutes until the tomatoes begin to soften and burst.

Step 4: Final Touches

With the vegetables cooked to perfection, it’s time to combine them with the pasta. Carefully add the drained pasta to the skillet, mixing it well with the sautéed vegetables. If the dish seems too dry, gradually add some of the reserved pasta water until you achieve the desired creaminess.

Finally, season your pasta with salt and freshly ground pepper to taste. Remove the skillet from the heat and gently fold in the fresh basil and grated Parmesan cheese. This will add a burst of flavor and a lovely finish to your dish. Your Summer Garden Pasta is now ready to be served!

Variation of Summer Garden Pasta Recipe

One of the best things about the Summer Garden Pasta Recipe is its versatility. You can easily adapt it to suit your taste or the ingredients you have on hand. Let’s explore some seasonal ingredient swaps and dietary modifications that can elevate your dish even further!

Seasonal Ingredient Swaps

Feel free to get creative with your vegetable choices! The Summer Garden Pasta Recipe is perfect for showcasing seasonal produce. Here are some ideas:

  • Asparagus: Add chopped asparagus for a crunchy texture and a fresh flavor.
  • Spinach: Toss in a handful of fresh spinach at the end for added nutrients and a pop of color.
  • Broccoli: Steam or sauté small broccoli florets to add a delightful crunch and vibrant green color.
  • Bell Peppers: Mix in different colored bell peppers for a rainbow effect and varied taste.
  • Carrots: Shredded or diced carrots can add sweetness and a lovely orange hue to your dish.

These swaps not only enhance the flavor but also make your Summer Garden Pasta visually appealing. The more colors on your plate, the more nutrients you’re likely to consume!

Dietary Modifications

Whether you have dietary restrictions or simply want to try something new, there are plenty of modifications you can make to the Summer Garden Pasta Recipe:

  • Gluten-Free: Substitute regular pasta with gluten-free pasta made from rice, quinoa, or chickpeas.
  • Vegan: Omit the Parmesan cheese or replace it with a vegan cheese alternative. You can also add nutritional yeast for a cheesy flavor without dairy.
  • Low-Carb: Swap pasta for spiralized zucchini or spaghetti squash to create a low-carb version of this dish.
  • Protein Boost: Add grilled chicken, shrimp, or chickpeas for extra protein. This makes the dish more filling and satisfying.

These dietary modifications ensure that everyone can enjoy the Summer Garden Pasta Recipe, regardless of their dietary needs. With a little creativity, you can make this dish work for you!

Cooking Note for Summer Garden Pasta Recipe

Cooking is an art, and the Summer Garden Pasta Recipe is no exception! To ensure your dish turns out perfectly, here are some essential cooking notes to keep in mind:

  • Fresh Ingredients: Always opt for the freshest vegetables you can find. Fresh produce not only enhances the flavor but also adds vibrant colors to your dish. Visit local farmers’ markets or grocery stores that prioritize fresh, seasonal ingredients.
  • Al Dente Pasta: Cooking your pasta to an al dente texture is crucial. This means the pasta should be firm to the bite. Overcooked pasta can become mushy and lose its appeal. Remember, it will continue to cook slightly when mixed with the hot vegetables.
  • Stirring Technique: When sautéing your vegetables, stir them gently but frequently. This helps them cook evenly and prevents burning. Use a wooden spoon or spatula to avoid scratching your skillet.
  • Seasoning Gradually: Taste your dish as you go! Start with a little salt and pepper, then adjust according to your preference. This way, you can achieve the perfect balance of flavors.
  • Resting Time: After cooking, let your pasta rest for a few minutes before serving. This allows the flavors to meld together, making each bite even more delicious.

By following these cooking notes, you’ll elevate your Summer Garden Pasta Recipe to new heights. Enjoy the process, and don’t hesitate to experiment with flavors and textures. Happy cooking!

Serving Suggestions for Summer Garden Pasta Recipe

Now that you’ve prepared your delicious Summer Garden Pasta, it’s time to think about how to serve it. Presentation can elevate your dish from simple to spectacular! Here are some serving suggestions that will enhance your dining experience:

Pairing with Proteins

To make your Summer Garden Pasta even more satisfying, consider pairing it with a protein source. Here are some tasty options:

  • Grilled Chicken: Juicy grilled chicken adds a savory flavor and makes the dish heartier. Simply slice it and place it on top of the pasta.
  • Shrimp: Sautéed shrimp brings a touch of elegance. Toss them in with the vegetables for a delightful seafood twist.
  • Chickpeas: For a vegetarian option, add chickpeas. They provide protein and a nice texture, making the dish filling and nutritious.
  • Tofu: For a vegan choice, grilled or sautéed tofu can be a great addition. It absorbs flavors well and adds a protein boost.

These protein options not only enhance the flavor but also make your meal more balanced and satisfying.

Ideal Side Dishes

To complement your Summer Garden Pasta, consider serving it with some light side dishes. Here are a few ideas:

  • Garlic Bread: A warm slice of garlic bread is perfect for soaking up any leftover sauce. It’s a classic pairing that everyone loves!
  • Mixed Green Salad: A fresh salad with a light vinaigrette adds a refreshing crunch. Use seasonal greens and veggies for a colorful side.
  • Grilled Vegetables: Serve a platter of grilled vegetables alongside your pasta. This adds more flavor and showcases the summer produce.
  • Caprese Salad: Fresh mozzarella, tomatoes, and basil drizzled with balsamic glaze make a delightful side that complements the pasta beautifully.

These side dishes not only enhance the meal but also create a well-rounded dining experience. Enjoy your Summer Garden Pasta with these delicious accompaniments!

Tips for Perfecting Your Summer Garden Pasta Recipe

To truly elevate your Summer Garden Pasta, consider these helpful tips. They will ensure that your dish is not only delicious but also visually appealing and satisfying. Let’s dive into some expert advice!

Use Seasonal Ingredients

Whenever possible, choose seasonal vegetables. Fresh produce not only tastes better but also provides more nutrients. Visit local farmers’ markets to find the best options. Seasonal ingredients can make your Summer Garden Pasta shine!

Experiment with Herbs

While basil is a classic choice, don’t hesitate to experiment with other herbs. Fresh parsley, thyme, or even dill can add unique flavors. Try mixing different herbs to find your perfect combination!

Adjust the Texture

If you prefer a creamier sauce, consider adding a splash of cream or a dollop of ricotta cheese. This will give your pasta a rich texture. Alternatively, for a lighter option, a squeeze of lemon juice can brighten the flavors without adding heaviness.

Garnish Creatively

Presentation matters! Garnish your dish with extra basil leaves, a sprinkle of Parmesan, or even a drizzle of balsamic glaze. A beautiful presentation makes the meal more inviting and enjoyable.

Make it a One-Pan Meal

For an even easier cleanup, consider making your Summer Garden Pasta a one-pan meal. Cook the pasta in the same skillet as the vegetables. Just add the pasta to the skillet with the veggies and some reserved pasta water. This method infuses the pasta with all the delicious flavors!

By following these tips, you’ll create a Summer Garden Pasta that’s not only tasty but also a feast for the eyes. Enjoy the process and have fun experimenting with flavors!

Breakdown of Time for Summer Garden Pasta Recipe

Understanding the time needed for each step of the Summer Garden Pasta Recipe can help you plan your cooking efficiently. Here’s a simple breakdown of the time required for preparation and cooking:

Prep Time

Preparing your ingredients is the first step in making the Summer Garden Pasta. This includes washing, chopping, and measuring your vegetables and pasta. You can expect to spend about 15-20 minutes on this task. Having everything ready will make the cooking process smoother and more enjoyable!

Cooking Time

The actual cooking time for the Summer Garden Pasta is relatively quick. Boiling the pasta usually takes around 8-10 minutes, depending on the type you choose. Sautéing the vegetables will take about 10-12 minutes. In total, you should allocate around 20-25 minutes for cooking. This means you can have a delicious meal ready in no time!

Total Time

When you combine both prep and cooking times, the total time for the Summer Garden Pasta Recipe is approximately 35-45 minutes. This makes it a fantastic option for a weeknight dinner or a casual gathering with friends. With just a little time and effort, you can create a vibrant and flavorful dish that everyone will love!

Nutritional Information for Summer Garden Pasta Recipe

Understanding the nutritional content of your meals is essential for maintaining a balanced diet. The Summer Garden Pasta Recipe is not only delicious but also packed with nutrients. Here’s a breakdown of the nutritional information per serving:

Calories

Each serving of the Summer Garden Pasta contains approximately 350 calories. This makes it a satisfying yet light option for lunch or dinner. The combination of fresh vegetables and pasta provides energy without overwhelming your daily caloric intake.

Protein

In terms of protein, this dish offers about 12 grams per serving. The protein comes from the pasta and the addition of Parmesan cheese. If you choose to add grilled chicken, shrimp, or chickpeas, you can easily boost the protein content, making it even more filling and nutritious.

Sodium

The sodium content in the Summer Garden Pasta is relatively low, making it a heart-healthy choice. Depending on how much salt you add during cooking, the sodium level can vary. On average, you can expect around 300-400 mg of sodium per serving. To keep it lower, use less salt and opt for low-sodium broth if you decide to add any liquid.

Overall, the Summer Garden Pasta Recipe is a well-rounded meal that provides essential nutrients while being mindful of calories and sodium. Enjoy this vibrant dish knowing it supports your health and well-being!

FAQs about Summer Garden Pasta Recipe

What vegetables can I use in the Summer Garden Pasta Recipe?

You can use a variety of vegetables in your Summer Garden Pasta Recipe! While zucchini, yellow squash, and bell peppers are great choices, feel free to get creative. Seasonal vegetables like asparagus, spinach, broccoli, or even carrots can add unique flavors and textures. The key is to choose fresh, vibrant produce that you enjoy. Mixing different colors not only makes the dish visually appealing but also boosts its nutritional value!

Can I make the Summer Garden Pasta Recipe ahead of time?

Absolutely! The Summer Garden Pasta can be made ahead of time, making it a convenient option for busy days. After cooking, let the pasta cool completely before storing it in an airtight container in the refrigerator. It can last for up to three days. When you’re ready to eat, simply reheat it in a skillet with a splash of olive oil or a bit of reserved pasta water to bring back its creaminess. Just be mindful that some vegetables may lose their crispness upon reheating.

Is the Summer Garden Pasta Recipe suitable for meal prep?

Yes, the Summer Garden Pasta Recipe is perfect for meal prep! You can prepare a large batch and divide it into individual portions. Store them in meal prep containers for easy grab-and-go lunches or dinners throughout the week. This dish holds up well in the fridge, and you can easily customize each portion by adding different proteins or toppings. It’s a great way to ensure you have healthy meals ready to enjoy!

How can I make the Summer Garden Pasta Recipe vegan?

Making the Summer Garden Pasta Recipe vegan is simple! Just omit the Parmesan cheese or replace it with a vegan cheese alternative. You can also sprinkle nutritional yeast on top for a cheesy flavor without dairy. Additionally, ensure that your pasta is egg-free, as some pasta varieties contain eggs. With these adjustments, you can enjoy a delicious and satisfying vegan version of this vibrant dish!

Conclusion on Summer Garden Pasta Recipe

In conclusion, the Summer Garden Pasta Recipe is a delightful way to celebrate the flavors of the season. With its vibrant mix of fresh vegetables and perfectly cooked pasta, this dish is not only visually appealing but also packed with nutrients. It’s a fantastic option for any meal, whether you’re hosting a gathering or enjoying a quiet dinner at home.

This recipe is incredibly versatile, allowing you to customize it with seasonal ingredients and dietary modifications. Whether you prefer a protein-packed version or a lighter vegan option, the Summer Garden Pasta can easily adapt to your needs. Plus, with simple preparation and cooking steps, you can have a delicious meal ready in no time!

As you explore this recipe, remember to have fun with it. Experiment with different vegetables, herbs, and garnishes to create your unique twist. The joy of cooking lies in creativity, and the Summer Garden Pasta is the perfect canvas for your culinary imagination.

So, gather your fresh ingredients, roll up your sleeves, and dive into the delightful world of Summer Garden Pasta. Enjoy every bite, knowing you’re nourishing your body with wholesome, delicious food. Happy cooking!

Rainbow Orzo Salad Recipe: A Colorful Delight Awaits!

Introduction to Rainbow Orzo Salad Recipe

Welcome to the delightful world of the Rainbow Orzo Salad Recipe! This vibrant dish is not just a feast for the eyes but also a treat for your taste buds. Packed with colorful vegetables and a zesty dressing, it’s perfect for any occasion. Whether you’re hosting a summer barbecue or looking for a quick lunch, this salad is sure to impress. Let’s dive into what makes this salad so special and the benefits of including orzo in your meals.

What Makes the Rainbow Orzo Salad Unique?

The Rainbow Orzo Salad stands out due to its beautiful array of colors and textures. Each ingredient adds a unique flavor, creating a harmonious blend that is both refreshing and satisfying. The orzo pasta serves as a delightful base, while the cherry tomatoes, cucumbers, and bell peppers provide crunch and sweetness. The crumbled feta cheese adds a creamy touch, making every bite a burst of flavor. Plus, the vibrant colors make it visually appealing, making it a great addition to any table.

Benefits of Including Orzo in Your Diet

Orzo is a small, rice-shaped pasta that is not only delicious but also nutritious. It is a great source of carbohydrates, providing energy for your day. Additionally, orzo is versatile and can be used in various dishes, from salads to soups. It is also low in fat, making it a healthy choice for those watching their diet. By incorporating orzo into your meals, you can enjoy a satisfying dish that keeps you full and energized. Plus, it pairs wonderfully with a variety of ingredients, making it easy to customize your meals.

Ingredients for Rainbow Orzo Salad Recipe

To create the vibrant and tasty Rainbow Orzo Salad, you’ll need a selection of fresh ingredients. Each component plays a vital role in enhancing the flavor and texture of the dish. Here’s what you’ll need:

  • 2 cups orzo pasta
  • 1 cup halved cherry tomatoes
  • 1 cup diced cucumber
  • 1 cup diced bell peppers (any variety)
  • 1/2 cup finely chopped red onion
  • 1/2 cup crumbled feta cheese
  • 1/4 cup chopped fresh parsley
  • 1/4 cup extra virgin olive oil
  • 2 tablespoons red wine vinegar
  • 1 tablespoon freshly squeezed lemon juice
  • 1 teaspoon garlic powder
  • Salt and freshly cracked pepper to taste

These ingredients come together to create a colorful and nutritious salad. The orzo pasta serves as a hearty base, while the fresh vegetables add crunch and flavor. The feta cheese brings a creamy element, and the dressing ties everything together with a zesty kick. Feel free to adjust the quantities based on your preferences or dietary needs. Now that you have your ingredients ready, let’s move on to the preparation steps!

Step-by-Step Preparation of Rainbow Orzo Salad Recipe

Now that you have gathered all your ingredients, it’s time to bring this Rainbow Orzo Salad to life! Follow these simple steps to create a delicious and colorful dish that everyone will love.

Step 1: Cooking the Orzo

Start by boiling a large pot of salted water. Once the water is bubbling, add the orzo pasta. Cook it according to the package instructions, usually around 8-10 minutes, until it reaches an al dente texture. This means it should be firm to the bite but not hard. After cooking, drain the orzo in a colander and rinse it under cold water. This step is crucial as it stops the cooking process and cools the pasta down, making it perfect for your salad.

Step 2: Preparing the Vegetables

While the orzo is cooking, you can prepare the vegetables. Start by washing the cherry tomatoes and cutting them in half. Next, take the cucumber and dice it into small pieces. For the bell peppers, you can use any variety you like—red, yellow, or green. Just remove the seeds and chop them into bite-sized pieces. Finally, finely chop the red onion. This mix of fresh vegetables will add a delightful crunch and vibrant colors to your salad.

Step 3: Mixing the Ingredients

In a large mixing bowl, combine the cooled orzo with the prepared vegetables. Add the halved cherry tomatoes, diced cucumber, bell peppers, and red onion. Then, sprinkle in the crumbled feta cheese and chopped parsley. Gently fold all the ingredients together using a spatula or wooden spoon. Be careful not to mash the feta; you want to keep those lovely chunks intact!

Step 4: Adding the Dressing

Now it’s time to make the dressing! In a separate small bowl, whisk together the extra virgin olive oil, red wine vinegar, freshly squeezed lemon juice, garlic powder, salt, and pepper. Once the dressing is well combined, drizzle it over the orzo and vegetable mixture. Gently toss everything together until all the ingredients are evenly coated with the dressing. For the best flavor, let the salad sit in the refrigerator for at least 30 minutes. This allows the flavors to meld beautifully, making each bite even more delicious!

Variation of Rainbow Orzo Salad Recipe

One of the best things about the Rainbow Orzo Salad Recipe is its versatility. You can easily customize it to suit your taste or dietary needs. Let’s explore some alternative ingredients and seasonal variations that can elevate your salad experience.

Alternative Ingredients to Consider

If you want to switch things up, consider these alternative ingredients:

  • Protein Boost: Add grilled chicken, shrimp, or chickpeas for extra protein. This makes the salad more filling and nutritious.
  • Different Cheeses: Try using goat cheese or mozzarella instead of feta. Each cheese brings a unique flavor and texture.
  • Leafy Greens: Incorporate spinach or arugula for added greens. This not only enhances the nutrition but also adds a lovely color contrast.
  • Other Vegetables: Feel free to add ingredients like shredded carrots, radishes, or zucchini. These can add crunch and a pop of color.
  • Nuts and Seeds: Toss in some toasted pine nuts or sunflower seeds for a delightful crunch and healthy fats.

These alternatives can help you create a Rainbow Orzo Salad that fits your preferences while keeping it delicious and colorful!

Seasonal Variations for Rainbow Orzo Salad

Seasonal ingredients can make your Rainbow Orzo Salad even more exciting. Here are some ideas based on the time of year:

  • Spring: Add fresh peas, asparagus, or radishes for a crisp, refreshing taste.
  • Summer: Incorporate fresh corn, zucchini, or even diced avocado for a creamy texture.
  • Fall: Use roasted butternut squash, apples, or cranberries for a sweet and savory twist.
  • Winter: Add roasted Brussels sprouts, kale, or pomegranate seeds for a festive touch.

By using seasonal ingredients, you can keep your Rainbow Orzo Salad fresh and exciting all year round. Enjoy experimenting with different flavors and textures!

Cooking Note for Rainbow Orzo Salad Recipe

When preparing the Rainbow Orzo Salad, there are a few cooking notes to keep in mind to ensure your dish turns out perfectly every time. These tips will help you achieve the best flavor and texture, making your salad a standout dish.

First, always remember to salt your water when boiling the orzo. This simple step enhances the pasta’s flavor, making it more delicious. A good rule of thumb is to add about a tablespoon of salt for every quart of water.

Next, be cautious not to overcook the orzo. Cooking it al dente is key, as it will continue to soften slightly after being mixed with the other ingredients. If you cook it too long, the pasta can become mushy, which is not ideal for a salad.

Additionally, rinsing the orzo under cold water after draining is crucial. This not only stops the cooking process but also cools the pasta down quickly. It helps prevent the orzo from clumping together, ensuring a light and fluffy texture in your salad.

Lastly, don’t skip the resting time in the refrigerator. Allowing the salad to chill for at least 30 minutes lets the flavors meld together beautifully. This resting period enhances the overall taste, making each bite a delightful experience.

By following these cooking notes, you’ll create a Rainbow Orzo Salad that is not only visually appealing but also bursting with flavor. Enjoy your culinary adventure!

Serving Suggestions for Rainbow Orzo Salad Recipe

Once your Rainbow Orzo Salad is ready, it’s time to think about how to serve it. This colorful dish is not only delicious but also visually appealing, making it a great centerpiece for any meal. Here are some ideal pairings and presentation tips to elevate your serving experience.

Ideal Pairings with Rainbow Orzo Salad

The Rainbow Orzo Salad is versatile and pairs well with various dishes. Here are some great options to consider:

  • Grilled Proteins: Serve the salad alongside grilled chicken, shrimp, or fish. The lightness of the salad complements the smoky flavors of grilled meats.
  • Sandwiches and Wraps: This salad makes a perfect side for sandwiches or wraps. Try it with a turkey club or a veggie wrap for a balanced meal.
  • Soups: Pair the salad with a warm bowl of soup, like tomato basil or minestrone. The contrast of temperatures adds a delightful touch.
  • Picnic Favorites: Bring the Rainbow Orzo Salad to picnics or potlucks. It’s a crowd-pleaser that can be enjoyed cold or at room temperature.
  • Cheese and Charcuterie Boards: Add the salad to a cheese board for a colorful and nutritious option. It pairs well with various cheeses and cured meats.

These pairings not only enhance the meal but also make it more enjoyable for everyone at the table.

Presentation Tips for Serving

Presentation is key when serving your Rainbow Orzo Salad. Here are some tips to make it look as good as it tastes:

  • Use a Large Bowl: Serve the salad in a large, clear bowl to showcase the vibrant colors. A glass bowl allows guests to see the beautiful layers of ingredients.
  • Garnish with Fresh Herbs: Sprinkle some extra chopped parsley or basil on top just before serving. This adds a fresh touch and enhances the visual appeal.
  • Serve with Lemon Wedges: Place lemon wedges on the side. This allows guests to squeeze fresh lemon juice over their salad for an extra zing.
  • Individual Portions: For a more elegant presentation, serve the salad in individual cups or small bowls. This makes it easy for guests to enjoy their own portion.
  • Colorful Serving Utensils: Use bright and colorful serving utensils to match the salad’s theme. This adds a fun element to your table setting.

By following these serving suggestions and presentation tips, your Rainbow Orzo Salad will not only taste amazing but also look stunning on the table. Enjoy sharing this delightful dish with family and friends!

Tips for Perfecting Your Rainbow Orzo Salad Recipe

Creating the perfect Rainbow Orzo Salad is all about attention to detail. With a few simple tips, you can elevate your dish and ensure it turns out delicious every time. Here are some common mistakes to avoid and storage tips for any leftovers.

Common Mistakes to Avoid

Even the best cooks can make mistakes. Here are some common pitfalls to watch out for:

  • Overcooking the Orzo: Cooking orzo for too long can lead to a mushy texture. Always follow the package instructions and aim for al dente.
  • Skipping the Rinse: Failing to rinse the orzo after cooking can cause it to stick together. Rinsing under cold water helps keep the pasta light and fluffy.
  • Not Seasoning Enough: Don’t forget to season your salad! A pinch of salt and pepper can enhance the flavors of the vegetables and dressing.
  • Using Old Ingredients: Freshness matters! Always use fresh vegetables and herbs for the best taste and texture.
  • Skipping the Chill Time: Allowing the salad to sit in the fridge for at least 30 minutes is crucial. This resting time helps the flavors meld together beautifully.

By avoiding these common mistakes, you’ll create a Rainbow Orzo Salad that is not only tasty but also visually appealing!

Storage Tips for Leftover Salad

If you have any leftovers, proper storage is key to maintaining freshness. Here are some helpful tips:

  • Use an Airtight Container: Store your Rainbow Orzo Salad in an airtight container to keep it fresh. This prevents moisture and air from spoiling the ingredients.
  • Refrigerate Promptly: Make sure to refrigerate any leftovers within two hours of serving. This helps prevent bacterial growth.
  • Consume Within 3-5 Days: For the best taste and quality, try to eat the salad within 3-5 days. The flavors will still be vibrant, and the ingredients will remain fresh.
  • Keep Dressing Separate: If possible, store the dressing separately. This helps prevent the salad from becoming soggy. Add the dressing just before serving.
  • Revive with Fresh Ingredients: If the salad seems a bit dry after storage, add a splash of olive oil or a squeeze of lemon juice to revive the flavors.

By following these storage tips, you can enjoy your Rainbow Orzo Salad for days to come, ensuring it remains delicious and fresh!

Breakdown of Time for Rainbow Orzo Salad Recipe

Understanding the time needed to prepare your Rainbow Orzo Salad is essential for planning your meal. Here’s a simple breakdown of the time required for each step, ensuring you can enjoy this delicious dish without any rush.

Prep Time

The prep time for the Rainbow Orzo Salad is approximately 15-20 minutes. This includes gathering your ingredients, washing and chopping the vegetables, and measuring out the orzo and dressing components. Having everything ready before you start cooking will make the process smoother and more enjoyable.

Cooking Time

Cooking the orzo takes about 8-10 minutes. This is the time it takes to boil the water and cook the pasta until it reaches that perfect al dente texture. Remember to keep an eye on the clock to avoid overcooking! After draining, rinsing the orzo under cold water will take an additional 2 minutes.

Total Time

In total, you can expect the entire process of making the Rainbow Orzo Salad to take around 30-35 minutes. This includes prep and cooking time. If you factor in the chilling time of at least 30 minutes in the refrigerator, the total time from start to serving will be about 1 hour. This makes it a quick and easy dish to prepare, perfect for any occasion!

Nutritional Information for Rainbow Orzo Salad Recipe

Understanding the nutritional value of your meals is essential for maintaining a balanced diet. The Rainbow Orzo Salad is not only delicious but also packed with nutrients. Let’s break down the calories and macronutrients, as well as the health benefits of the ingredients used in this vibrant dish.

Calories and Macronutrients

Each serving of the Rainbow Orzo Salad contains approximately 220 calories. Here’s a quick overview of the macronutrients:

  • Net Carbohydrates: 30g
  • Protein: 6g
  • Fat: 9g

This balance of macronutrients makes the salad a great option for a light meal or side dish. The carbohydrates from the orzo provide energy, while the protein helps with muscle repair and growth. The healthy fats from olive oil and feta cheese contribute to overall heart health.

Health Benefits of Ingredients

Each ingredient in the Rainbow Orzo Salad brings its own set of health benefits:

  • Orzo Pasta: A good source of carbohydrates, orzo provides energy and is low in fat. It’s also enriched with vitamins and minerals.
  • Cherry Tomatoes: Rich in antioxidants, cherry tomatoes help fight inflammation and support heart health. They are also a great source of vitamins A and C.
  • Cucumber: Low in calories and high in water content, cucumbers are excellent for hydration. They also provide vitamins K and C.
  • Bell Peppers: These colorful veggies are packed with vitamins A and C, which boost the immune system and promote healthy skin.
  • Red Onion: Known for its anti-inflammatory properties, red onions can help lower blood sugar levels and improve heart health.
  • Feta Cheese: This cheese is lower in fat than many others and provides calcium and protein, which are essential for bone health.
  • Parsley: A nutrient-dense herb, parsley is rich in vitamins A, C, and K. It also has antioxidant properties that can help reduce oxidative stress.
  • Olive Oil: Extra virgin olive oil is known for its heart-healthy fats and anti-inflammatory properties. It can help lower cholesterol levels and improve overall heart health.
  • Red Wine Vinegar: This vinegar may aid in digestion and help regulate blood sugar levels, making it a healthy addition to your diet.
  • Lemon Juice: Fresh lemon juice is high in vitamin C and can boost your immune system while adding a refreshing flavor to the salad.

By enjoying the Rainbow Orzo Salad, you’re not just treating your taste buds; you’re also nourishing your body with a variety of essential nutrients. This makes it a fantastic choice for anyone looking to eat healthily while enjoying a delicious meal!

FAQs about Rainbow Orzo Salad Recipe

Can I make Rainbow Orzo Salad ahead of time?

Absolutely! The Rainbow Orzo Salad is perfect for making ahead of time. In fact, preparing it a few hours or even a day in advance allows the flavors to meld beautifully. Just remember to store it in an airtight container in the refrigerator. This way, you can enjoy a delicious and refreshing salad whenever you’re ready to serve it!

What can I substitute for orzo in the recipe?

If you’re looking for a substitute for orzo, there are several great options. Quinoa is a fantastic gluten-free alternative that adds a nutty flavor and extra protein. You can also use small pasta shapes like ditalini or couscous if you prefer. Each option will give your salad a unique twist while still keeping it delicious and satisfying!

Is Rainbow Orzo Salad suitable for meal prep?

Yes, the Rainbow Orzo Salad is an excellent choice for meal prep! It stores well in the refrigerator and can be portioned out for easy lunches or dinners throughout the week. Just be sure to keep the dressing separate until you’re ready to eat. This will help maintain the freshness of the salad and prevent it from becoming soggy.

How long does Rainbow Orzo Salad last in the fridge?

When stored properly in an airtight container, the Rainbow Orzo Salad can last in the fridge for about 3 to 5 days. However, for the best taste and texture, it’s recommended to enjoy it within the first few days. If you notice any changes in color or smell, it’s best to discard it. Enjoy your salad while it’s fresh for the best experience!

Conclusion on Rainbow Orzo Salad Recipe

In conclusion, the Rainbow Orzo Salad Recipe is a delightful and nutritious dish that brings together vibrant colors and fresh flavors. It’s not just a meal; it’s an experience that can brighten up any table. With its easy preparation and versatility, this salad is perfect for any occasion, whether it’s a family dinner, a picnic, or a potluck.

By incorporating a variety of fresh vegetables, healthy fats, and protein options, you can customize the salad to suit your taste and dietary needs. The health benefits of the ingredients make it a smart choice for anyone looking to eat well while enjoying delicious food. Plus, the beautiful presentation will surely impress your guests!

So, gather your ingredients, follow the steps, and create your own Rainbow Orzo Salad. Don’t forget to experiment with different variations and seasonal ingredients to keep things exciting. Enjoy the burst of flavors and the satisfaction of making a dish that is as good for your body as it is for your taste buds. Happy cooking!

French Potato and Green Bean Salad is a must-try dish!

Introduction to French Potato and Green Bean Salad

Welcome to the delightful world of French cuisine! One of the most beloved dishes is the French Potato and Green Bean Salad. This vibrant salad is not only a feast for the eyes but also a treat for the taste buds. It combines tender baby potatoes and crisp green beans, creating a medley that is both satisfying and refreshing.

This dish is perfect for any occasion, whether it’s a family gathering, a picnic in the park, or a simple weeknight dinner. The combination of fresh ingredients and a zesty dressing makes it a versatile side dish that pairs well with various main courses. Plus, it’s easy to prepare, making it a go-to recipe for both novice and experienced cooks alike.

What sets this salad apart is its balance of flavors. The earthiness of the potatoes complements the bright, grassy notes of the green beans. Adding shallots and fresh basil elevates the dish, giving it a fragrant aroma and a burst of freshness. The dressing, made with extra virgin olive oil, apple cider vinegar, and whole grain mustard, ties everything together beautifully.

In this article, we will guide you through the ingredients, preparation steps, and tips to make the perfect French Potato and Green Bean Salad. So, roll up your sleeves and get ready to impress your family and friends with this delightful dish!

Ingredients for French Potato and Green Bean Salad

To create a delicious French Potato and Green Bean Salad, you will need a selection of fresh ingredients. Each component plays a vital role in achieving the perfect balance of flavors and textures. Here’s what you’ll need:

  • 2 cups baby potatoes – Halved for even cooking and easy eating.
  • 1 cup green beans – Trimmed and cut into 2-inch pieces for a vibrant crunch.
  • 1/4 cup finely diced shallots – Adds a mild onion flavor that enhances the salad.
  • 1/4 cup fresh basil – Chopped to bring a fragrant, herbal note to the dish.
  • 1/4 cup extra virgin olive oil – Provides a rich, smooth base for the dressing.
  • 2 tablespoons apple cider vinegar – Adds a tangy kick that brightens the flavors.
  • 1 teaspoon whole grain mustard – Offers a subtle spiciness and depth to the dressing.
  • Salt and freshly ground black pepper – To taste, enhancing all the flavors in the salad.

These ingredients come together to create a colorful and nutritious dish. The baby potatoes provide a hearty base, while the green beans add a crisp texture. The shallots and basil contribute aromatic qualities, making each bite a delightful experience. The dressing, with its balance of oil, vinegar, and mustard, ties everything together beautifully.

Gather these ingredients, and you’ll be well on your way to preparing a delightful French Potato and Green Bean Salad that everyone will love!

Preparation of French Potato and Green Bean Salad

Now that you have gathered all the ingredients, it’s time to dive into the preparation of your French Potato and Green Bean Salad. This process is straightforward and enjoyable. Let’s break it down into easy steps!

Step 1: Preparing the Potatoes

Start by washing the baby potatoes thoroughly. This step is crucial to remove any dirt. Once clean, cut them in half. This helps them cook evenly. Next, place the halved potatoes in a large saucepan filled with salted water. Bring the water to a boil over medium-high heat. Once boiling, reduce the heat and let them simmer for about 15 minutes. You want them to be fork-tender but not mushy. After cooking, drain the potatoes and let them cool for a few minutes.

Step 2: Cooking the Green Beans

While the potatoes are cooling, it’s time to cook the green beans. In the same pot, fill it again with salted water and bring it to a rolling boil. Add the trimmed green beans and cook for 3-4 minutes. You want them to be vibrant green and slightly tender. After cooking, drain the beans and immediately plunge them into a bowl of ice water. This stops the cooking process and helps maintain their bright color. Once cooled, drain them again to remove excess water.

Step 3: Combining Ingredients

In a large mixing bowl, combine the cooled potatoes and green beans. Next, add the finely diced shallots and chopped basil. These ingredients will add flavor and texture to your salad. Gently mix them together, ensuring everything is evenly distributed. This step is essential for a well-balanced salad.

Step 4: Making the Dressing

Now, let’s prepare the dressing. In a separate small bowl, whisk together the extra virgin olive oil, apple cider vinegar, and whole grain mustard. Add a pinch of salt and freshly ground black pepper to taste. Whisk until the mixture is well blended and smooth. This dressing will bring all the flavors together, enhancing the overall taste of the salad.

Step 5: Tossing the Salad

Finally, drizzle the dressing over the potato and green bean mixture. Gently toss everything together, ensuring that all the ingredients are evenly coated with the dressing. This step is crucial for flavor distribution. Allow the salad to rest for at least 15 minutes before serving. This resting time lets the flavors harmonize beautifully. You can serve it at room temperature or chill it for a refreshing side dish.

With these steps, you’re well on your way to creating a delicious French Potato and Green Bean Salad that will impress your guests!

Variation of French Potato and Green Bean Salad

While the classic French Potato and Green Bean Salad is delightful on its own, there are many ways to customize it. Adding different ingredients can enhance the flavors and make it even more satisfying. Let’s explore some variations that you can try!

Adding Protein Options

To make your French Potato and Green Bean Salad more filling, consider adding protein. This addition not only boosts the nutritional value but also makes it a complete meal. Here are some great options:

  • Grilled Chicken: Sliced grilled chicken breast adds a savory touch and pairs well with the salad’s flavors.
  • Chickpeas: For a vegetarian option, toss in canned chickpeas. They add a nice texture and are packed with protein.
  • Tuna: Canned tuna can be a quick and easy addition. It brings a rich flavor that complements the salad.
  • Hard-Boiled Eggs: Chopped hard-boiled eggs add creaminess and extra protein, making the salad more satisfying.

Feel free to mix and match these protein options based on your preferences. Each choice will give your salad a unique twist!

Incorporating Different Vegetables

Another way to vary your French Potato and Green Bean Salad is by incorporating different vegetables. This not only adds color but also enhances the flavor profile. Here are some vegetables you might consider:

  • Cherry Tomatoes: Halved cherry tomatoes add a burst of sweetness and a pop of color.
  • Radishes: Sliced radishes provide a crunchy texture and a peppery flavor that contrasts nicely with the potatoes.
  • Bell Peppers: Diced bell peppers can add sweetness and a crunchy bite, making the salad even more vibrant.
  • Carrots: Shredded or thinly sliced carrots add a hint of sweetness and a lovely crunch.

By experimenting with different vegetables, you can create a unique version of the French Potato and Green Bean Salad that suits your taste. Enjoy the process of making this dish your own!

Cooking Note for French Potato and Green Bean Salad

When preparing the French Potato and Green Bean Salad, a few cooking notes can help ensure your dish turns out perfectly every time. These tips will enhance the flavors and textures, making your salad a standout side dish.

First, choose the right potatoes. Baby potatoes are ideal for this salad because they are tender and have a creamy texture. However, if you can’t find baby potatoes, you can use small red or yellow potatoes. Just make sure to cut them into similar sizes for even cooking.

Next, pay attention to the cooking times. Overcooking the potatoes can lead to a mushy texture, while undercooking them can make them hard. Aim for fork-tender potatoes that still hold their shape. Similarly, when cooking the green beans, keep an eye on the time. You want them to be bright green and slightly crisp, not limp. The ice water bath is crucial here, as it locks in that vibrant color and crunch.

Another important note is to season your water. Adding salt to the boiling water for both the potatoes and green beans enhances their natural flavors. This simple step can make a big difference in the overall taste of your salad.

Lastly, let the salad rest after tossing it with the dressing. This resting period allows the flavors to meld together beautifully. If you have time, consider making the salad a few hours in advance. This way, the ingredients can soak up the dressing, resulting in a more flavorful dish.

By following these cooking notes, you’ll create a French Potato and Green Bean Salad that is not only delicious but also visually appealing. Enjoy the process and the delightful results!

Serving Suggestions for French Potato and Green Bean Salad

Now that you’ve prepared your delicious French Potato and Green Bean Salad, it’s time to think about how to serve it. This salad is versatile and can complement a variety of dishes. Here are some serving suggestions to make your meal even more enjoyable!

First, consider serving the salad as a side dish alongside grilled meats. The freshness of the salad pairs wonderfully with the smoky flavors of grilled chicken, steak, or fish. The zesty dressing enhances the overall taste, making it a perfect accompaniment.

Another great option is to serve the salad at a picnic or potluck. Its vibrant colors and refreshing taste make it an eye-catching dish that everyone will love. Plus, it can be made ahead of time, allowing you to enjoy your time with friends and family without the stress of last-minute preparations.

If you’re looking for a light lunch, serve the French Potato and Green Bean Salad on a bed of mixed greens. This adds extra nutrients and makes for a satisfying meal. You can also top it with some sliced avocado for added creaminess and healthy fats.

For a more substantial meal, consider adding crusty bread or a baguette on the side. The bread can be used to scoop up the salad, making each bite even more delightful. A glass of chilled white wine or sparkling water can also enhance the dining experience.

Lastly, don’t forget about garnishing! A sprinkle of extra chopped basil or a few toasted pine nuts can add a lovely finishing touch. This not only elevates the presentation but also adds an extra layer of flavor and texture.

With these serving suggestions, your French Potato and Green Bean Salad will shine at any gathering or meal. Enjoy the delightful flavors and the smiles it brings to your table!

Tips for Making the Perfect French Potato and Green Bean Salad

Creating the perfect French Potato and Green Bean Salad is all about attention to detail and using fresh ingredients. Here are some helpful tips to ensure your salad turns out delicious every time!

First, always choose fresh ingredients. Fresh baby potatoes and green beans will enhance the flavor and texture of your salad. Look for firm potatoes without blemishes and bright green beans that snap easily. Fresh herbs, like basil, also make a big difference in taste.

Next, don’t skip the ice water bath for the green beans. This step is crucial for maintaining their vibrant color and crispness. After boiling, immediately plunge them into ice water. This halts the cooking process and keeps them looking fresh and appealing.

When it comes to seasoning, remember to salt your cooking water. This simple step enhances the natural flavors of the potatoes and green beans. A well-seasoned dish is always more enjoyable!

Another tip is to let your salad rest after tossing it with the dressing. Allowing it to sit for at least 15 minutes helps the flavors meld together beautifully. If you have time, consider making it a few hours in advance. This way, the ingredients can soak up the dressing, resulting in a more flavorful salad.

For added texture, consider incorporating nuts or seeds. Toasted pine nuts or sunflower seeds can add a delightful crunch. Just sprinkle them on top before serving for an extra layer of flavor.

Lastly, don’t be afraid to experiment! Feel free to add your favorite ingredients or adjust the dressing to suit your taste. Whether it’s a splash of lemon juice or a sprinkle of feta cheese, personal touches can make your salad unique.

By following these tips, you’ll create a French Potato and Green Bean Salad that is not only delicious but also visually stunning. Enjoy the process and the delightful results!

Breakdown of Time for French Potato and Green Bean Salad

Understanding the time needed to prepare your French Potato and Green Bean Salad can help you plan your cooking efficiently. Here’s a simple breakdown of the time required for each step, ensuring you can enjoy this delightful dish without any rush!

Prep Time

The prep time for this salad is quite manageable. You’ll need about 15 minutes to gather and prepare your ingredients. This includes washing the baby potatoes, trimming the green beans, and finely dicing the shallots. Additionally, chopping the fresh basil will take just a few moments. Overall, you can expect to spend around 15 minutes on prep work.

Cooking Time

Cooking the ingredients is the next step. The potatoes will take about 15 minutes to boil until they are fork-tender. While the potatoes are cooking, you can prepare the green beans. They only need about 3-4 minutes in boiling water. After that, don’t forget to cool them in an ice water bath, which takes an extra 2 minutes. In total, the cooking time will be approximately 20 minutes.

Total Time

When you combine the prep time and cooking time, the total time to make your French Potato and Green Bean Salad is around 35 minutes. This makes it a quick and easy dish to prepare, perfect for any occasion. Plus, with a little patience during the resting period, you’ll allow the flavors to meld beautifully before serving!

With this time breakdown, you can confidently plan your cooking and enjoy the delightful process of making this refreshing salad!

Nutritional Information for French Potato and Green Bean Salad

Understanding the nutritional content of your French Potato and Green Bean Salad is essential for making informed choices about your meals. This salad is not only delicious but also packed with nutrients that can contribute to a balanced diet. Let’s break down the key nutritional components of this delightful dish!

Calories

One serving of French Potato and Green Bean Salad contains approximately 180 calories. This makes it a light yet satisfying option for a side dish or a light lunch. The combination of baby potatoes and green beans provides a good source of energy without being overly heavy. Enjoying this salad can help you maintain a healthy calorie intake while still indulging in flavorful ingredients.

Protein

In terms of protein, each serving offers about 4 grams. While this may not seem high, the protein content can be increased by adding protein-rich ingredients like grilled chicken, chickpeas, or hard-boiled eggs. These additions not only enhance the nutritional value but also make the salad more filling, perfect for a complete meal.

Sodium

The sodium content in this salad is relatively low, with approximately 200 milligrams per serving. This is mainly due to the salt added during cooking. To keep the sodium levels in check, you can adjust the amount of salt used in the dressing and cooking water. This makes the salad a heart-healthy option, especially for those watching their sodium intake.

Overall, the French Potato and Green Bean Salad is a nutritious choice that can fit well into various dietary plans. With its balance of calories, protein, and low sodium, it’s a delightful addition to any meal. Enjoy this salad knowing that you’re nourishing your body with wholesome ingredients!

FAQs about French Potato and Green Bean Salad

Can I make French Potato and Green Bean Salad ahead of time?

Absolutely! Making French Potato and Green Bean Salad ahead of time is a great idea. In fact, preparing it a few hours in advance allows the flavors to meld beautifully. Just follow the recipe as usual, and once you toss the salad with the dressing, cover it and refrigerate. This way, the ingredients can soak up the dressing, enhancing the overall taste. Just remember to give it a gentle toss before serving to redistribute the dressing.

What can I substitute for green beans in the salad?

asparagus, which offers a similar crunch and flavor. Snap peas are another great option, providing a sweet taste and crisp texture. You could also try broccoli florets or zucchini, both of which can add a unique twist to your salad. Just make sure to adjust the cooking time accordingly to ensure they are tender yet crisp.

Is French Potato and Green Bean Salad gluten-free?

Yes, French Potato and Green Bean Salad is naturally gluten-free! The main ingredients—baby potatoes, green beans, and fresh herbs—do not contain gluten. The dressing, made with extra virgin olive oil, apple cider vinegar, and whole grain mustard, is also gluten-free. However, always check the labels of any store-bought ingredients to ensure they are gluten-free, especially the mustard.

How long does French Potato and Green Bean Salad last in the fridge?

When stored properly, French Potato and Green Bean Salad can last in the fridge for about 3 to 5 days. Make sure to keep it in an airtight container to maintain freshness. If you notice any changes in texture or smell, it’s best to discard it. Enjoying this salad within a few days ensures you get the best flavor and quality!

Conclusion on French Potato and Green Bean Salad

In conclusion, the French Potato and Green Bean Salad is a delightful dish that brings together fresh ingredients and vibrant flavors. This salad is not only easy to prepare but also versatile enough to suit various occasions. Whether you’re serving it at a family gathering, a picnic, or as a light lunch, it’s sure to impress your guests.

The combination of tender baby potatoes and crisp green beans creates a satisfying texture, while the addition of shallots and fresh basil adds aromatic notes that elevate the dish. The zesty dressing, made with extra virgin olive oil, apple cider vinegar, and whole grain mustard, ties everything together beautifully, making each bite a burst of flavor.

Moreover, the salad offers numerous opportunities for customization. You can easily add protein options like grilled chicken or chickpeas to make it a complete meal. Incorporating different vegetables can also enhance the taste and visual appeal, allowing you to make this dish your own.

With its nutritional benefits, including low calories and sodium, the French Potato and Green Bean Salad is a healthy choice that fits well into a balanced diet. Plus, it’s gluten-free, making it accessible for those with dietary restrictions.

So, why not give this delightful salad a try? With its simple preparation and delicious results, you’ll find it quickly becoming a favorite in your kitchen. Enjoy the process of making it, and savor the smiles it brings to your table!

Spicy Red Beans and Rice Recipe is a must-try dish!

Introduction to Spicy Red Beans and Rice Recipe

The Origins of Spicy Red Beans and Rice

The Spicy Red Beans and Rice recipe has deep roots in Southern cuisine, particularly in Louisiana. This dish is a staple in Creole and Cajun cooking, where flavors and spices come together to create a delightful meal. Traditionally, red beans were cooked with rice on Mondays, as it was a convenient way to use leftover meat from the weekend. Over time, this dish evolved, incorporating various spices and ingredients that reflect the rich cultural heritage of the region.

Red beans are not just tasty; they are also packed with nutrients. They are a great source of protein and fiber, making them a healthy choice for any meal. The combination of beans and rice creates a complete protein, which is essential for a balanced diet. This dish is not only delicious but also a wonderful way to experience the flavors of the South.

Why You Should Try This Spicy Red Beans and Rice Recipe

If you’re looking for a hearty, flavorful meal, this Spicy Red Beans and Rice recipe is a must-try. It’s easy to prepare and perfect for any occasion, whether it’s a family dinner or a gathering with friends. The zesty flavors will tantalize your taste buds, while the comforting texture will warm your soul.

Moreover, this recipe is versatile. You can easily customize it to suit your dietary preferences. Whether you’re a meat lover or a vegetarian, there’s a way to make this dish work for you. Plus, it’s budget-friendly, making it an excellent choice for anyone looking to eat well without breaking the bank.

In summary, the Spicy Red Beans and Rice recipe is not just a meal; it’s an experience. With its rich history and delightful flavors, it’s sure to become a favorite in your kitchen. So, roll up your sleeves and get ready to enjoy a dish that’s as fun to make as it is to eat!

Ingredients for Spicy Red Beans and Rice Recipe

To create the perfect Spicy Red Beans and Rice, you’ll need a selection of fresh and flavorful ingredients. Each component plays a vital role in building the dish’s rich taste. Here’s what you’ll need:

  • 1 cup dried red beans – Soaked overnight for better texture and quicker cooking.
  • 4 cups water – Essential for cooking the beans to a tender consistency.
  • 1 tablespoon olive oil – Adds richness and helps sauté the vegetables.
  • 1 medium onion, chopped – Provides a sweet and savory base flavor.
  • 2 cloves garlic, minced – Enhances the aroma and taste of the dish.
  • 1 green bell pepper, chopped – Adds a crunchy texture and fresh flavor.
  • 1 teaspoon smoked paprika – Infuses a smoky depth to the dish.
  • 1 teaspoon ground cumin – Offers a warm, earthy flavor that complements the beans.
  • 1/2 teaspoon cayenne pepper – Adjust to taste for that spicy kick!
  • 1 can (14.5 ounces) diced tomatoes, with juice – Brings moisture and acidity to balance the flavors.
  • 1 bay leaf – Adds a subtle herbal note during cooking.
  • Salt and black pepper to taste – Essential for seasoning and enhancing all the flavors.
  • 2 cups cooked white rice – Serves as the hearty base for the zesty bean mixture.
  • Chopped green onions for topping – Provides a fresh, vibrant finish to the dish.

These ingredients come together to create a delightful and satisfying meal. Each one contributes to the overall flavor profile, making this Spicy Red Beans and Rice recipe a true culinary delight. Gather your ingredients, and let’s move on to the next step of preparation!

Step-by-Step Preparation of Spicy Red Beans and Rice Recipe

Step 1: Preparing the Ingredients

Before you start cooking, it’s important to prepare all your ingredients. Begin by soaking the dried red beans overnight. This step is crucial as it softens the beans, making them easier to cook. Once soaked, drain and rinse the beans under cold water. Next, chop the onion, garlic, and green bell pepper. Having everything ready will make the cooking process smooth and enjoyable.

Step 2: Cooking the Aromatics

Now, let’s get cooking! In a large skillet, heat the olive oil over medium heat. Once the oil is hot, add the chopped onion, minced garlic, and green bell pepper. Sauté these ingredients for about 5 minutes. Stir occasionally until the vegetables become tender and fragrant. This step builds a flavorful base for your dish, so take your time to let the aromatics shine.

Step 3: Adding the Beans and Spices

After the vegetables are cooked, it’s time to add the spices. Sprinkle in the smoked paprika, ground cumin, and cayenne pepper. Stir well to combine, allowing the spices to cook for about a minute. This helps release their flavors. Next, add the drained red beans, diced tomatoes with their juice, and the bay leaf. Season the mixture with salt and black pepper to taste. Stir everything together, ensuring the beans are well coated with the spices.

Step 4: Simmering the Mixture

Once everything is combined, it’s time to let the flavors meld. Reduce the heat to low and cover the skillet. Allow the mixture to simmer for about 20 minutes. Stir occasionally to prevent sticking. This simmering process is essential as it allows the beans to absorb the spices and the tomatoes to create a rich sauce. The aroma will fill your kitchen, making it hard to wait!

Step 5: Cooking the Rice

While the bean mixture simmers, you can prepare the rice. If you haven’t cooked it yet, follow the package instructions for white rice. Typically, you’ll need to bring water to a boil, add the rice, and let it simmer until tender. Once cooked, fluff the rice with a fork. This fluffy rice will serve as the perfect base for your zesty red bean mixture.

Variations of Spicy Red Beans and Rice Recipe

Vegetarian and Vegan Options

If you’re looking for a vegetarian or vegan twist on the Spicy Red Beans and Rice recipe, you’re in luck! This dish is naturally adaptable. You can easily make it meat-free while still keeping all the delicious flavors. Instead of adding sausage or chicken, consider incorporating more vegetables. For instance, diced zucchini, carrots, or corn can add extra texture and nutrition.

Another great option is to include plant-based proteins like tofu or tempeh. Simply cube them and sauté them with the aromatics. They will soak up the spices beautifully. Additionally, you can use vegetable broth instead of water for cooking the beans. This will enhance the flavor even more. With these adjustments, you’ll have a hearty, satisfying meal that everyone can enjoy!

Adding Proteins: Sausage or Chicken

If you prefer a meatier version of the Spicy Red Beans and Rice recipe, adding proteins like sausage or chicken is a fantastic choice. For sausage lovers, consider using smoked sausage or andouille sausage. Slice the sausage and add it to the skillet after cooking the aromatics. Let it brown slightly before adding the spices and beans. This will infuse the dish with a rich, savory flavor.

For chicken, you can use diced chicken breast or thighs. Sauté the chicken pieces until they are cooked through before adding the spices. This will create a hearty and filling meal that’s perfect for any occasion. Both options will elevate the dish, making it even more satisfying and delicious!

Cooking Note for Spicy Red Beans and Rice Recipe

When preparing the Spicy Red Beans and Rice recipe, there are a few important cooking notes to keep in mind. These tips will help ensure that your dish turns out perfectly every time.

First, soaking the red beans overnight is essential. This step not only reduces cooking time but also helps the beans cook evenly. If you forget to soak them, you can use the quick soak method. Simply bring the beans to a boil in water for about 2 minutes, then remove from heat and let them sit for an hour before draining.

Next, be mindful of the heat level. The cayenne pepper adds a nice kick, but you can adjust the amount based on your spice preference. If you’re cooking for kids or those who prefer milder flavors, start with a smaller amount and add more as needed.

Additionally, stirring the mixture occasionally while it simmers is crucial. This prevents the beans from sticking to the bottom of the skillet and ensures even cooking. If you notice the mixture getting too thick, feel free to add a splash of water or vegetable broth to maintain the desired consistency.

Lastly, let the dish rest for a few minutes after cooking. This allows the flavors to meld together beautifully. Serve it warm over the fluffy rice, and enjoy the delightful combination of spices and textures!

Serving Suggestions for Spicy Red Beans and Rice Recipe

Pairing with Sides and Toppings

When it comes to serving your Spicy Red Beans and Rice, the right sides and toppings can elevate the meal even further. Here are some delightful suggestions to enhance your dining experience:

  • Fresh Salad: A crisp green salad with a light vinaigrette pairs wonderfully with the hearty beans and rice. The freshness of the salad balances the richness of the dish.
  • Cornbread: A slice of warm cornbread is a classic Southern side that complements the flavors of the Spicy Red Beans and Rice. Its slightly sweet taste contrasts beautifully with the zesty beans.
  • Avocado Slices: Creamy avocado slices add a rich texture and a cooling effect to the spicy dish. They are a great addition on top or served on the side.
  • Hot Sauce: For those who love extra heat, offering a variety of hot sauces can allow guests to customize their spice level. A few dashes can take the flavor to the next level!
  • Chopped Cilantro: Fresh cilantro sprinkled on top adds a burst of flavor and color. It brightens the dish and enhances the overall taste.
  • Lime Wedges: A squeeze of fresh lime juice over the dish can add a zesty kick. The acidity cuts through the richness and adds a refreshing element.

These sides and toppings not only enhance the flavor but also add visual appeal to your meal. Feel free to mix and match based on your preferences and what you have on hand. Enjoy your Spicy Red Beans and Rice with these delightful accompaniments for a truly satisfying dining experience!

Tips for Perfecting Your Spicy Red Beans and Rice Recipe

To make your Spicy Red Beans and Rice recipe truly shine, consider these helpful tips. They will guide you in achieving the best flavor and texture, ensuring a delightful meal every time.

First, always soak your red beans overnight. This step is crucial for softening the beans and reducing cooking time. If you’re short on time, you can use the quick soak method. Just boil the beans for two minutes, then let them sit for an hour before draining.

Next, don’t rush the sautéing process. Cooking the onions, garlic, and bell pepper until they are tender and fragrant builds a flavorful base. Take your time with this step; it’s worth it!

When adding spices, remember to toast them briefly in the oil. This enhances their flavors and makes your dish even more aromatic. Just a minute or two will do the trick!

Adjust the spice level to suit your taste. If you prefer a milder dish, start with less cayenne pepper. You can always add more later if you want extra heat. Taste as you go to find the perfect balance.

While simmering, keep an eye on the mixture. Stir occasionally to prevent sticking and ensure even cooking. If it gets too thick, add a splash of water or broth to maintain the desired consistency.

Lastly, let your dish rest for a few minutes after cooking. This allows the flavors to meld together beautifully. Serve it warm over fluffy rice, and enjoy the delightful combination of spices and textures!

By following these tips, you’ll create a Spicy Red Beans and Rice dish that’s bursting with flavor and sure to impress your family and friends. Happy cooking!

Breakdown of Time for Spicy Red Beans and Rice Recipe

Prep Time

Preparing your ingredients is an essential step in making the Spicy Red Beans and Rice recipe. The prep time typically takes about 15 to 20 minutes. This includes soaking the red beans overnight, chopping the onion, garlic, and green bell pepper, and gathering all your ingredients. Having everything ready will make the cooking process smoother and more enjoyable.

Cooking Time

The cooking time for this dish is approximately 1 hour and 20 minutes. This includes:

  • 60 minutes for simmering the soaked red beans until they are tender.
  • 20 minutes for cooking the aromatics, adding the spices, and letting the mixture simmer together.

During this time, the flavors meld beautifully, creating a rich and zesty dish that you’ll love.

Total Time

In total, you can expect to spend about 1 hour and 35 to 40 minutes from start to finish. This includes both the prep and cooking times. While it may seem like a bit of a commitment, the delicious results are well worth it! Plus, you can enjoy the delightful aroma filling your kitchen as you cook.

So, gather your ingredients, set aside some time, and get ready to create a fantastic Spicy Red Beans and Rice dish that will impress everyone at your table!

Nutritional Information for Spicy Red Beans and Rice Recipe

Calories

320 calories. This makes it a satisfying option for lunch or dinner without overwhelming your daily caloric intake. The balance of ingredients ensures that you get a fulfilling meal that keeps you energized throughout the day.

Protein

12 grams of protein per serving. The combination of red beans and rice creates a complete protein, making it a great choice for vegetarians and meat-eaters alike. This protein content supports muscle health and keeps you feeling full longer, making it a smart addition to your diet.

Sodium

600 milligrams of sodium. This amount can vary based on the specific ingredients you use, especially if you opt for canned tomatoes or broth that may contain added salt. To reduce sodium levels, consider using low-sodium canned products or adjusting the seasoning to suit your taste. This way, you can enjoy a flavorful dish while keeping your sodium intake in check.

FAQs about Spicy Red Beans and Rice Recipe

Can I make Spicy Red Beans and Rice Recipe ahead of time?

Absolutely! Making the Spicy Red Beans and Rice recipe ahead of time is a great idea. In fact, the flavors often improve after sitting for a day. To do this, prepare the dish as directed and let it cool completely. Then, store it in an airtight container in the refrigerator. It can last for up to 3 days. When you’re ready to enjoy it, simply reheat it on the stove or in the microwave. You may want to add a splash of water or broth to loosen it up while reheating. This makes it a perfect meal prep option for busy days!

What can I substitute for rice in this recipe?

If you’re looking for alternatives to rice in the Spicy Red Beans and Rice recipe, there are plenty of options! You can use brown rice for a nuttier flavor and added fiber. Quinoa is another excellent choice, as it’s high in protein and cooks quickly. For a low-carb option, consider cauliflower rice. Simply pulse cauliflower florets in a food processor until they resemble rice, then sauté them lightly before serving. Each of these substitutes will provide a unique twist to the dish while still complementing the zesty red beans beautifully!

How can I adjust the spice level in Spicy Red Beans and Rice Recipe?

Adjusting the spice level in your Spicy Red Beans and Rice recipe is easy! If you prefer a milder dish, start with less cayenne pepper. You can always add more later if you want extra heat. Another option is to include sweet bell peppers or even a dollop of sour cream or yogurt when serving. These can help balance the heat. If you love spice, consider adding diced jalapeños or a splash of hot sauce to the mix. Taste as you go to find the perfect balance that suits your palate!

Conclusion on Spicy Red Beans and Rice Recipe

In conclusion, the Spicy Red Beans and Rice recipe is a delightful dish that brings together rich flavors and comforting textures. With its roots in Southern cuisine, this meal not only satisfies your hunger but also offers a taste of tradition. Whether you’re cooking for family or friends, this recipe is sure to impress everyone at the table.

As you’ve seen, the versatility of this dish allows for various adaptations. You can easily make it vegetarian or add proteins like sausage or chicken to suit your preferences. The cooking process is straightforward, making it accessible for cooks of all skill levels. Plus, the nutritional benefits of red beans and rice make it a smart choice for a balanced diet.

Don’t forget the importance of seasoning and adjusting the spice level to your liking. This dish can be as mild or as spicy as you desire, ensuring that it caters to everyone’s taste buds. With the right sides and toppings, you can elevate your meal even further, creating a dining experience that is both satisfying and enjoyable.

So, gather your ingredients, follow the steps, and dive into the world of flavors that the Spicy Red Beans and Rice recipe offers. It’s more than just a meal; it’s a celebration of culture, comfort, and creativity in the kitchen. Enjoy every bite, and happy cooking!

Shishito Corn Salad with Feta is a must-try dish!

Introduction to Shishito Corn Salad with Feta Recipe

Welcome to the delightful world of Shishito Corn Salad with Feta! This vibrant dish combines the sweetness of fresh corn, the mild heat of shishito peppers, and the creamy tang of feta cheese. It’s not just a salad; it’s a celebration of flavors and textures that can brighten any meal. Whether you’re hosting a summer barbecue or looking for a light lunch, this salad is sure to impress.

What Makes Shishito Corn Salad Unique?

What sets this salad apart is its unique blend of ingredients. Shishito peppers are a standout feature. These small, green peppers are known for their mild flavor, with an occasional spicy kick. When grilled, they develop a smoky taste that enhances the overall dish. The combination of grilled corn and fresh vegetables creates a colorful medley that is as pleasing to the eye as it is to the palate. Plus, the addition of feta cheese adds a creamy texture that perfectly balances the crispness of the veggies.

The Benefits of Using Fresh Ingredients

Using fresh ingredients is key to making this salad truly shine. Fresh corn, for instance, is sweeter and more flavorful than frozen or canned options. It also provides a satisfying crunch. Shishito peppers, when grilled, become tender and flavorful, making them a perfect addition. Fresh tomatoes and red onions add brightness and a burst of flavor. Not only do fresh ingredients taste better, but they also offer more nutrients. Eating fresh produce can boost your health, providing vitamins and minerals that are essential for your well-being. So, when you prepare this Shishito Corn Salad with Feta, you’re not just treating your taste buds; you’re nourishing your body too!

Ingredients for Shishito Corn Salad with Feta Recipe

Fresh Produce and Key Components

To create a delicious Shishito Corn Salad with Feta, you’ll need a variety of fresh ingredients. Here’s a breakdown of the key components:

  • Fresh Corn Kernels: About 2 cups, which is roughly 3 ears of corn. Fresh corn adds sweetness and crunch.
  • Shishito Peppers: 1 cup, sliced and seeds removed. These peppers bring a mild heat and unique flavor.
  • Cherry Tomatoes: 1 cup, halved. Their juicy sweetness complements the other ingredients.
  • Red Onion: 1/2 cup, finely diced. This adds a sharp bite and vibrant color.
  • Feta Cheese: 1/2 cup, crumbled. Feta provides a creamy texture and tangy flavor.
  • Cilantro: 1/4 cup, chopped. Fresh cilantro adds a burst of herbal freshness.
  • Extra Virgin Olive Oil: 2 tablespoons. This is used for dressing and adds richness.
  • Lime Juice: 1 tablespoon, freshly squeezed. Lime juice brightens the flavors.
  • Agave Syrup: 1 teaspoon. This adds a hint of sweetness to balance the dish.
  • Salt and Pepper: To taste. These seasonings enhance all the flavors.

These ingredients come together to create a colorful and flavorful salad that is perfect for any occasion. The combination of textures and tastes makes each bite a delightful experience.

Optional Ingredients for Customization

While the core ingredients are fantastic on their own, you can customize your Shishito Corn Salad with Feta to suit your taste. Here are some optional ingredients to consider:

  • Avocado: Diced avocado adds creaminess and healthy fats.
  • Black Beans: Adding 1 cup of black beans can boost protein and fiber content.
  • Jalapeños: For those who enjoy more heat, diced jalapeños can spice things up.
  • Radishes: Thinly sliced radishes add a crunchy texture and peppery flavor.
  • Quinoa: For a heartier salad, consider mixing in cooked quinoa.

Feel free to mix and match these optional ingredients to create a salad that fits your preferences. The beauty of this Shishito Corn Salad with Feta is its versatility!

Step-by-Step Preparation of Shishito Corn Salad with Feta Recipe

Step 1: Preparing the Shishito Peppers

Start by washing the shishito peppers under cool water. This helps remove any dirt or residue. After rinsing, slice the peppers in half and remove the seeds. This step is important as it reduces the heat and makes them more enjoyable for everyone. Next, drizzle a little olive oil over the peppers and toss them gently to coat. This will help them blister nicely on the grill, enhancing their flavor.

Step 2: Cooking the Corn

While you prepare the peppers, it’s time to cook the corn. Preheat your grill to medium-high heat. Place the corn directly on the grill grates. Grill the corn for about 10-12 minutes, turning it occasionally. You want to achieve a nice char on the kernels, which adds a smoky flavor. Once the corn is tender and charred, remove it from the grill and let it cool. After cooling, carefully cut the kernels off the cob and set them aside.

Step 3: Combining Ingredients

In a large mixing bowl, combine the grilled corn kernels and the prepared shishito peppers. Next, add the halved cherry tomatoes and finely diced red onion. These ingredients bring a burst of color and flavor to your salad. Gently toss everything together to ensure an even distribution of the ingredients. This step is crucial as it sets the stage for the final flavors to meld together.

Step 4: Adding Feta and Dressing

Now it’s time to add the star ingredient: feta cheese! Sprinkle the crumbled feta over the salad mixture. Feta adds a creamy texture and tangy flavor that complements the other ingredients beautifully. In a separate small bowl, whisk together the remaining olive oil, freshly squeezed lime juice, agave syrup, salt, and pepper. This dressing will tie all the flavors together. Drizzle the dressing over the salad and gently fold everything together until well coated.

Step 5: Final Touches and Serving

Your Shishito Corn Salad with Feta is almost ready! For the final touch, garnish the salad with freshly chopped cilantro. This adds a pop of color and a fresh herbal note. You can serve the salad warm or at room temperature, depending on your preference. It’s perfect as a side dish or a light main course. Enjoy the delightful combination of flavors and textures in every bite!

Variations of Shishito Corn Salad with Feta Recipe

Adding Protein for a Heartier Meal

If you want to make your Shishito Corn Salad with Feta more filling, consider adding some protein. This can turn your salad into a complete meal. Here are a few tasty options:

  • Grilled Chicken: Sliced grilled chicken breast adds lean protein and pairs well with the salad’s flavors.
  • Shrimp: Grilled or sautéed shrimp can bring a delightful seafood twist to your dish.
  • Tofu: For a vegetarian option, try adding grilled or sautéed tofu. It absorbs flavors beautifully.
  • Chickpeas: Canned or cooked chickpeas can add a hearty texture and boost the protein content.

These additions not only enhance the nutritional value but also make the salad more satisfying. Feel free to experiment with different proteins to find your favorite combination!

Vegetarian and Vegan Alternatives

For those following a vegetarian or vegan diet, there are plenty of ways to enjoy this salad while keeping it plant-based. Here are some alternatives:

  • Vegan Feta: Substitute traditional feta with a plant-based feta cheese. This keeps the creamy texture without dairy.
  • Nut Cheese: Consider using cashew cheese or almond cheese for a rich, creamy flavor.
  • Quinoa: Adding cooked quinoa not only provides protein but also makes the salad more filling.
  • Seeds: Sprinkle some pumpkin or sunflower seeds for added crunch and nutrition.

These variations ensure that everyone can enjoy the Shishito Corn Salad with Feta, regardless of dietary preferences. The key is to keep experimenting until you find the perfect mix that suits your taste!

Cooking Note for Shishito Corn Salad with Feta Recipe

Tips for Perfectly Roasting Shishito Peppers

Roasting shishito peppers can elevate their flavor and texture, making them a delightful addition to your salad. Here are some tips to ensure they turn out perfectly:

  • Choose Fresh Peppers: Look for bright green, firm shishito peppers. Avoid any that are wrinkled or have blemishes.
  • Preheat the Grill: Make sure your grill is hot before adding the peppers. This helps them blister quickly, enhancing their smoky flavor.
  • Use a Grill Basket: If you have one, a grill basket can keep the peppers from falling through the grates. It also allows for even cooking.
  • Don’t Overcrowd: Give the peppers space on the grill. Overcrowding can lead to steaming instead of roasting, which affects the texture.
  • Watch Closely: Keep an eye on the peppers as they cook. They should blister and soften, but avoid burning them. A few charred spots are fine!

By following these tips, you’ll achieve perfectly roasted shishito peppers that add a wonderful depth of flavor to your Shishito Corn Salad with Feta.

Storing Leftovers Safely

If you have any leftovers from your Shishito Corn Salad with Feta, it’s important to store them properly to maintain freshness. Here’s how:

  • Cool Down: Allow the salad to cool to room temperature before storing. This helps prevent condensation in the container.
  • Use an Airtight Container: Transfer the salad to an airtight container. This keeps it fresh and prevents odors from other foods in the fridge.
  • Refrigerate Promptly: Store the salad in the refrigerator within two hours of preparation. It can last for up to 3 days.
  • Check Before Eating: Always check for any signs of spoilage before consuming leftovers. If it smells off or looks unusual, it’s best to discard it.

By following these storage tips, you can enjoy your Shishito Corn Salad with Feta for days to come, making it a convenient and delicious option for quick meals!

Serving Suggestions for Shishito Corn Salad with Feta Recipe

Ideal Pairings for a Complete Meal

When it comes to serving your Shishito Corn Salad with Feta, pairing it with the right dishes can elevate your meal. Here are some ideal pairings that complement the flavors of the salad:

  • Grilled Chicken: A simple grilled chicken breast seasoned with herbs makes a perfect protein addition. The lightness of the chicken pairs well with the salad’s vibrant flavors.
  • Fish Tacos: Serve the salad alongside fish tacos for a fresh and zesty meal. The crunchy salad balances the soft tortillas beautifully.
  • Quinoa Bowl: For a wholesome meal, serve the salad over a bed of quinoa. This adds extra fiber and makes it more filling.
  • Steak: A grilled steak with a hint of smokiness complements the charred flavors of the salad. The richness of the meat pairs nicely with the tangy feta.
  • Vegetable Skewers: For a vegetarian option, serve the salad with grilled vegetable skewers. The smoky veggies enhance the overall taste experience.

These pairings not only create a balanced meal but also enhance the enjoyment of your Shishito Corn Salad with Feta. Feel free to mix and match based on your preferences!

Creative Serving Ideas

Serving your Shishito Corn Salad with Feta can be as creative as the dish itself. Here are some fun ideas to present your salad:

  • In Lettuce Wraps: Use large lettuce leaves as wraps. Fill them with the salad for a fun, handheld option that’s perfect for parties.
  • Stuffed Avocados: Halve avocados and fill the centers with the salad. This not only looks beautiful but adds a creamy texture.
  • On a Platter: Serve the salad on a large platter, garnished with extra cilantro and lime wedges. This makes for an eye-catching centerpiece.
  • As a Dip: Blend the salad slightly to create a chunky dip. Serve it with tortilla chips or pita bread for a tasty appetizer.
  • In a Jar: Layer the salad ingredients in mason jars for a portable lunch option. This keeps everything fresh and makes for a great presentation.

These creative serving ideas can make your Shishito Corn Salad with Feta not just a dish, but an experience. Enjoy experimenting with different presentations to impress your guests!

Tips for Making the Best Shishito Corn Salad with Feta Recipe

Choosing the Right Corn

When it comes to making the best Shishito Corn Salad with Feta, selecting the right corn is crucial. Fresh corn on the cob is always the best choice. Here are some tips to help you pick the perfect corn:

  • Look for Bright Green Husks: The husks should be tightly wrapped around the cob and bright green. This indicates freshness.
  • Check for Plump Kernels: Gently squeeze the cob. You should feel plump, firm kernels underneath the husk. Avoid cobs with shriveled or dry kernels.
  • Smell the Corn: Fresh corn has a sweet, earthy aroma. If it smells off or sour, it’s best to choose another cob.
  • Buy Local: If possible, buy corn from local farmers’ markets. It’s often fresher and tastier than store-bought options.
  • Use It Quickly: Corn loses its sweetness quickly after being harvested. Try to use it within a day or two for the best flavor.

By choosing the right corn, you’ll ensure that your Shishito Corn Salad with Feta is bursting with sweetness and flavor!

Enhancing Flavor with Herbs and Spices

To elevate your Shishito Corn Salad with Feta, consider enhancing the flavors with various herbs and spices. Here are some ideas to make your salad even more delicious:

  • Fresh Herbs: In addition to cilantro, try adding fresh basil or parsley. These herbs can add a different layer of flavor and freshness.
  • Spices: A pinch of smoked paprika or cumin can add depth to the salad. These spices complement the grilled flavors beautifully.
  • Chili Flakes: If you enjoy a bit of heat, sprinkle some red pepper flakes over the salad. This adds a nice kick without overpowering the dish.
  • Lemon Zest: For a zesty twist, add some lemon zest along with the lime juice. This brightens the flavors and adds a refreshing touch.
  • Garlic: A small amount of minced garlic in the dressing can enhance the overall flavor profile. Just be careful not to overpower the other ingredients.

Experimenting with different herbs and spices can transform your Shishito Corn Salad with Feta into a unique culinary experience. Enjoy the process of discovering new flavor combinations!

Breakdown of Time for Shishito Corn Salad with Feta Recipe

Prep Time

Preparing your Shishito Corn Salad with Feta is quick and easy! The prep time typically takes about 15-20 minutes. This includes washing and slicing the shishito peppers, halving the cherry tomatoes, and finely dicing the red onion. Additionally, you’ll need to cut the corn off the cob after grilling. With everything prepped, you’ll be ready to move on to the cooking stage in no time!

Cooking Time

The cooking time for this salad is approximately 15-20 minutes. Grilling the corn takes about 10-12 minutes, while the shishito peppers will need around 5-7 minutes on the grill. This quick cooking process ensures that the vegetables retain their vibrant colors and fresh flavors. The grilling adds a delightful smoky taste that enhances the overall dish.

Total Time

In total, you can expect to spend about 30-40 minutes from start to finish when making your Shishito Corn Salad with Feta. This includes both prep and cooking times. It’s a relatively quick recipe, making it perfect for busy weeknights or last-minute gatherings. With such a short time commitment, you can enjoy a delicious and nutritious salad without spending hours in the kitchen!

Nutritional Information for Shishito Corn Salad with Feta Recipe

Calories and Macronutrient Breakdown

Understanding the nutritional content of your Shishito Corn Salad with Feta can help you make informed choices. Here’s a general breakdown of the calories and macronutrients per serving (approximately 1 cup):

  • Calories: About 200 calories
  • Protein: 6 grams
  • Carbohydrates: 20 grams
  • Fat: 10 grams
  • Fiber: 3 grams

This salad is not only delicious but also provides a good balance of macronutrients. The combination of fresh vegetables, feta cheese, and olive oil contributes to a satisfying meal that can fit into various dietary plans. The fiber content from the corn and vegetables helps keep you full, making it a great option for lunch or dinner.

Health Benefits of Key Ingredients

The Shishito Corn Salad with Feta is packed with health benefits thanks to its fresh ingredients. Here’s a closer look at some of the key components:

  • Fresh Corn: Rich in vitamins A, B, and C, corn is a great source of antioxidants. It supports eye health and boosts your immune system.
  • Shishito Peppers: These peppers are low in calories and high in vitamins C and K. They also contain capsaicin, which may help reduce inflammation.
  • Cherry Tomatoes: Packed with lycopene, tomatoes are known for their heart health benefits. They also provide hydration due to their high water content.
  • Red Onion: Onions are rich in antioxidants and have anti-inflammatory properties. They can help improve heart health and support digestion.
  • Feta Cheese: Feta is lower in fat than many other cheeses and provides calcium and protein. It can contribute to bone health and muscle maintenance.
  • Cilantro: This herb is known for its detoxifying properties and can help improve digestion. It also adds a fresh flavor to the salad.
  • Olive Oil: Extra virgin olive oil is a healthy fat that can support heart health and reduce inflammation. It’s rich in antioxidants and can help improve cholesterol levels.

By enjoying this Shishito Corn Salad with Feta, you’re not just treating your taste buds; you’re also nourishing your body with a variety of essential nutrients. It’s a delicious way to incorporate more fresh produce into your diet!

FAQs about Shishito Corn Salad with Feta Recipe

Can I use frozen corn instead of fresh?

Yes, you can use frozen corn if fresh corn is not available. However, fresh corn offers a sweeter and crunchier texture that enhances the salad’s overall flavor. If you choose frozen corn, make sure to thaw it completely and drain any excess water before adding it to the salad. This will help maintain the salad’s texture and prevent it from becoming soggy.

How spicy are shishito peppers?

Shishito peppers are generally mild, with a sweet flavor. However, about one in ten peppers can have a surprising kick! This makes them an exciting addition to dishes, as you never know when you might get a spicy one. If you’re sensitive to heat, you can always taste a small piece before adding them to your salad. Most people find them to be a delightful and manageable spice.

What can I substitute for feta cheese?

If you’re looking for a substitute for feta cheese, there are several options. For a similar tangy flavor, you can use goat cheese or ricotta salata. If you prefer a dairy-free option, try using vegan feta made from nuts or tofu. Nutritional yeast can also add a cheesy flavor without the dairy. Choose the substitute that best fits your dietary needs and taste preferences!

How long does the salad last in the fridge?

Your Shishito Corn Salad with Feta can last in the fridge for up to three days when stored properly in an airtight container. However, the salad is best enjoyed fresh, as the vegetables may lose their crispness over time. If you plan to keep leftovers, consider storing the dressing separately and adding it just before serving to maintain the salad’s freshness.

Conclusion on Shishito Corn Salad with Feta Recipe

Recap of Key Points

In summary, the Shishito Corn Salad with Feta is a delightful dish that brings together fresh ingredients for a burst of flavor. The combination of sweet corn, mild shishito peppers, juicy cherry tomatoes, and creamy feta creates a colorful medley that is both nutritious and satisfying. With its easy preparation and quick cooking time, this salad is perfect for any occasion, whether it’s a summer barbecue or a light lunch. Plus, the versatility of the recipe allows for customization, making it suitable for various dietary preferences.

Encouragement to Try the Recipe

We encourage you to try making this Shishito Corn Salad with Feta for yourself! Not only will you enjoy the delicious flavors, but you’ll also appreciate the health benefits of using fresh produce. Don’t hesitate to experiment with different ingredients and variations to make it your own. Whether you’re serving it as a side dish or a main course, this salad is sure to impress your family and friends. So fire up the grill, gather your ingredients, and enjoy the delightful experience of creating and savoring this vibrant salad!

Tomato Burrata Caprese Salad Recipe is a must-try!

Introduction to Tomato Burrata Caprese Salad Recipe

What is a Caprese Salad?

Caprese salad is a classic Italian dish that celebrates the simplicity of fresh ingredients. Traditionally, it features ripe tomatoes, fresh mozzarella cheese, basil, olive oil, and balsamic vinegar. The name “Caprese” comes from the island of Capri, where this salad originated. Each bite offers a delightful combination of flavors and textures, making it a favorite among many. The vibrant colors of red, white, and green also represent the Italian flag, adding to its charm.

The Appeal of Tomato Burrata Caprese Salad Recipe

The Tomato Burrata Caprese Salad Recipe takes this beloved dish to a whole new level. By substituting traditional mozzarella with creamy burrata cheese, you introduce a rich, velvety texture that elevates the entire experience. Burrata, with its outer shell of mozzarella and soft, creamy center, adds a luxurious touch. This salad is not only visually stunning but also bursting with flavor. The sweetness of the tomatoes, the freshness of the basil, and the richness of the burrata create a harmonious blend that is hard to resist.

Moreover, this salad is incredibly versatile. You can enjoy it as a light appetizer, a side dish, or even a main course. It’s perfect for summer gatherings, picnics, or a simple weeknight dinner. The Tomato Burrata Caprese Salad Recipe is a celebration of fresh ingredients, making it a delightful choice for anyone looking to enjoy a taste of Italy at home.

Ingredients for Tomato Burrata Caprese Salad Recipe

To create the perfect Tomato Burrata Caprese Salad, you’ll need a handful of fresh and high-quality ingredients. Each component plays a vital role in delivering the delightful flavors and textures that make this dish so special. Here’s what you’ll need:

  • 2 cups halved grape tomatoes: These sweet, juicy tomatoes are the star of the salad. Their small size makes them easy to eat and perfect for mixing.
  • 8 ounces creamy burrata cheese: This cheese is the heart of the dish. Its rich, creamy center adds a luxurious texture that pairs beautifully with the tomatoes.
  • 1/4 cup fresh basil leaves, torn: Fresh basil brings a fragrant aroma and a burst of flavor. Torn leaves release more oils, enhancing the salad’s taste.
  • 2 tablespoons high-quality olive oil: A drizzle of good olive oil adds richness and depth. It also helps to bring all the flavors together.
  • 1 tablespoon aged balsamic reduction: This sweet and tangy reduction adds a delightful contrast to the creamy burrata and sweet tomatoes.
  • Salt and freshly cracked black pepper to taste: These simple seasonings enhance the natural flavors of the ingredients.

With these ingredients, you’re well on your way to creating a vibrant and delicious Tomato Burrata Caprese Salad. Remember, the quality of your ingredients matters. Fresh, ripe tomatoes and creamy burrata will make all the difference in your dish!

Step-by-Step Preparation of Tomato Burrata Caprese Salad Recipe

Step 1: Gather Your Ingredients

Before you start, it’s essential to gather all your ingredients. This makes the cooking process smoother and more enjoyable. You’ll need halved grape tomatoes, creamy burrata cheese, fresh basil leaves, high-quality olive oil, aged balsamic reduction, salt, and freshly cracked black pepper. Having everything ready will help you create this delightful salad without any interruptions.

Step 2: Prepare the Tomatoes

Next, take your halved grape tomatoes and place them in a mixing bowl. These little gems are sweet and juicy, making them perfect for your salad. If you prefer, you can also use larger tomatoes, but halved grape tomatoes are easier to eat and mix. Make sure they are fresh and ripe for the best flavor. Their vibrant color will add a beautiful touch to your dish.

Step 3: Slice the Burrata

Now, it’s time to prepare the burrata cheese. Carefully remove it from its packaging and place it on a cutting board. Using a sharp knife, gently slice the burrata in half. This will reveal its creamy center, which is the star of the show. You can also tear it into smaller pieces if you prefer a more rustic look. Just be sure to handle it gently to keep that luscious cream intact.

Step 4: Assemble the Salad

With your tomatoes and burrata ready, it’s time to assemble the salad. In the mixing bowl with the tomatoes, add the torn basil leaves. Then, gently add the sliced or torn burrata on top. The combination of colors and textures will be stunning! Be careful not to over-mix; you want to keep the burrata intact while allowing the flavors to mingle.

Step 5: Drizzle with Dressing

Finally, it’s time to dress your salad. Drizzle the high-quality olive oil and aged balsamic reduction over the top. These ingredients will enhance the flavors and add a touch of richness. Sprinkle with salt and freshly cracked black pepper to taste. Give the salad a gentle toss to combine everything, but remember to keep it light. Serve immediately to enjoy the freshness and delightful creaminess of your Tomato Burrata Caprese Salad!

Variations of Tomato Burrata Caprese Salad Recipe

Adding Different Herbs

While basil is a classic choice for your Tomato Burrata Caprese Salad, you can easily switch things up by adding different herbs. For instance, fresh mint can bring a refreshing twist to the dish. Its cool flavor pairs wonderfully with the sweetness of the tomatoes. You might also consider using chives or parsley for a mild onion flavor. Experimenting with herbs not only enhances the taste but also adds a pop of color to your salad. Feel free to mix and match to find your favorite combination!

Incorporating Other Cheeses

If you want to explore beyond burrata, there are several other cheeses that can elevate your salad. Fresh mozzarella is a great alternative, offering a similar texture but with a firmer bite. Goat cheese can add a tangy flavor that contrasts beautifully with the sweet tomatoes. For a bolder taste, try crumbled feta or even a sprinkle of blue cheese. Each cheese brings its unique character, allowing you to customize your Tomato Burrata Caprese Salad to suit your palate.

Seasonal Vegetable Additions

To make your Tomato Burrata Caprese Salad even more vibrant, consider adding seasonal vegetables. Sliced cucumbers can add a refreshing crunch, while roasted bell peppers bring a sweet, smoky flavor. You could also include thinly sliced radishes for a peppery kick. If you’re feeling adventurous, try adding grilled zucchini or asparagus for a hearty touch. These additions not only enhance the flavor but also make your salad more colorful and nutritious!

Cooking Note for Tomato Burrata Caprese Salad Recipe

When preparing your Tomato Burrata Caprese Salad, there are a few cooking notes to keep in mind to ensure the best results. First, always choose the freshest ingredients. The quality of your tomatoes and burrata will significantly impact the flavor of your salad. Look for tomatoes that are firm yet slightly soft to the touch, indicating ripeness. For burrata, opt for cheese that is creamy and has a fresh aroma.

Another important tip is to serve the salad immediately after assembling it. This ensures that the tomatoes remain juicy and the burrata retains its creamy texture. If you let the salad sit for too long, the tomatoes may release excess moisture, making the salad watery. To avoid this, prepare your ingredients just before serving.

Additionally, consider the temperature of your ingredients. For the best flavor, let the burrata sit at room temperature for about 30 minutes before serving. This allows the cheese to soften, enhancing its creamy texture. Cold tomatoes can also dull the flavor, so if possible, allow them to come to room temperature as well.

Lastly, feel free to adjust the seasoning to your taste. Some may prefer a little more salt or a splash of lemon juice for added brightness. Don’t hesitate to experiment with the dressing until you find the perfect balance that suits your palate. With these cooking notes in mind, you’ll create a Tomato Burrata Caprese Salad that is not only delicious but also visually appealing!

Serving Suggestions for Tomato Burrata Caprese Salad Recipe

Pairing with Main Dishes

The Tomato Burrata Caprese Salad is a versatile dish that pairs beautifully with various main courses. Its fresh and creamy flavors complement many proteins, making it an excellent choice for a well-rounded meal. For a light and refreshing dinner, serve it alongside grilled chicken or fish. The salad’s acidity balances the richness of the meat, creating a harmonious plate.

If you’re in the mood for something heartier, consider pairing the salad with pasta dishes. A simple spaghetti aglio e olio or a creamy fettuccine Alfredo can be delightful companions. The freshness of the salad cuts through the richness of the pasta, providing a refreshing contrast. Additionally, it works well with pizza, especially those topped with fresh vegetables or a Margherita style.

For a vegetarian option, serve the Tomato Burrata Caprese Salad with a quinoa or farro bowl. These grains add a nutty flavor and a satisfying texture, making for a wholesome meal. You can also enjoy it with a charcuterie board, where the salad adds a burst of freshness among cured meats and cheeses.

Ideal Occasions for Serving

This delightful salad is perfect for various occasions, from casual gatherings to elegant dinners. Its vibrant colors and fresh ingredients make it an eye-catching appetizer for summer barbecues or picnics. Guests will appreciate the lightness of the salad, especially on warm days.

For more formal events, the Tomato Burrata Caprese Salad can serve as a stunning starter. Its luxurious ingredients, like burrata cheese, elevate the dish, making it suitable for dinner parties or holiday celebrations. You can also serve it as part of a buffet spread, allowing guests to enjoy a taste of Italy at their leisure.

Moreover, this salad is an excellent choice for brunch. Pair it with crusty bread and a selection of cheeses for a delightful spread. Whether you’re hosting a gathering or simply enjoying a meal at home, the Tomato Burrata Caprese Salad is sure to impress and satisfy.

Tips for Perfecting Your Tomato Burrata Caprese Salad Recipe

Choosing the Best Tomatoes

When it comes to making a delicious Tomato Burrata Caprese Salad, the tomatoes are the star of the show. To ensure you select the best tomatoes, look for ones that are firm yet slightly soft to the touch. This indicates ripeness and sweetness. Grape tomatoes are a great choice due to their natural sweetness and juicy texture. However, if you want to experiment, heirloom tomatoes can add a burst of color and flavor. Their unique shapes and varieties can make your salad visually stunning. Always choose tomatoes that are vibrant in color and free from blemishes for the best taste.

Selecting Quality Burrata

The quality of burrata cheese can make or break your salad. When selecting burrata, look for cheese that is fresh and has a creamy texture. It should feel soft and slightly squishy when you press it gently. Check the packaging date to ensure it’s as fresh as possible. If you can, buy burrata from a local cheese shop or farmers’ market, where you can often find the freshest options. Remember, the creaminess of the burrata is what elevates your Tomato Burrata Caprese Salad, so don’t skimp on quality!

Dressing Tips

The dressing is crucial for bringing all the flavors together in your Tomato Burrata Caprese Salad. For the best results, use high-quality olive oil and aged balsamic reduction. The olive oil should be fruity and aromatic, while the balsamic reduction should be thick and sweet. When drizzling, start with a small amount and adjust to your taste. You can also add a splash of lemon juice for a zesty kick. If you prefer a bit of heat, consider adding a pinch of red pepper flakes. Always taste your dressing before adding it to the salad to ensure it complements the ingredients perfectly.

Breakdown of Time for Tomato Burrata Caprese Salad Recipe

Prep Time

Preparing your Tomato Burrata Caprese Salad is quick and easy! The prep time for this delightful dish is approximately 15 minutes. This includes gathering your ingredients, washing the tomatoes, tearing the basil, and slicing the burrata. With everything ready, you’ll be amazed at how fast you can whip up this vibrant salad!

Cooking Time

Interestingly, there is no actual cooking time involved in this recipe. The beauty of the Tomato Burrata Caprese Salad lies in its simplicity and freshness. All you need to do is assemble the ingredients and drizzle on the dressing. This makes it a perfect choice for those busy days when you want something delicious without spending hours in the kitchen.

Total Time

In total, you can expect to spend about 15 minutes from start to finish. This quick preparation time makes the Tomato Burrata Caprese Salad an ideal option for a last-minute appetizer or a light meal. Whether you’re hosting friends or enjoying a quiet dinner at home, this salad is sure to impress without taking up too much of your time!

Nutritional Information for Tomato Burrata Caprese Salad Recipe

Calories

When it comes to enjoying a delicious Tomato Burrata Caprese Salad, you might be curious about its nutritional value. Each serving of this delightful salad contains approximately 220 calories. This makes it a light yet satisfying option for those looking to maintain a balanced diet. The combination of fresh ingredients ensures that you’re not only indulging in flavor but also nourishing your body.

Protein

Protein is an essential nutrient for our bodies, and the Tomato Burrata Caprese Salad provides a decent amount. Each serving contains about 8 grams of protein, primarily from the creamy burrata cheese. This protein content helps to keep you feeling full and satisfied, making it a great choice for a light lunch or dinner. Pairing this salad with a protein-rich main dish can create a well-rounded meal.

Sodium

In terms of sodium, this salad is relatively low, making it a heart-healthy option. The sodium content can vary based on the amount of salt you add and the type of burrata cheese used. On average, you can expect around 200 milligrams of sodium per serving. This allows you to enjoy the flavors without worrying too much about sodium intake. Always remember to adjust the seasoning to your taste while keeping health in mind!

FAQs about Tomato Burrata Caprese Salad Recipe

Can I use mozzarella instead of burrata?

Yes, you can definitely use mozzarella instead of burrata in your Tomato Burrata Caprese Salad. Fresh mozzarella will provide a similar texture and flavor, although it may not be as creamy as burrata. If you choose mozzarella, opt for the fresh variety for the best results. It will still create a delicious salad, but the unique creaminess of burrata is what truly elevates this dish.

How do I store leftover Caprese salad?

Storing leftover Tomato Burrata Caprese Salad can be a bit tricky due to the fresh ingredients. If you have leftovers, it’s best to store them in an airtight container in the refrigerator. However, keep in mind that the salad is best enjoyed fresh. The tomatoes may release moisture, making the salad watery over time. If possible, store the dressing separately and add it just before serving to maintain the salad’s freshness.

What type of tomatoes are best for this recipe?

For the best flavor in your Tomato Burrata Caprese Salad, opt for ripe, fresh tomatoes. Grape tomatoes are a fantastic choice due to their sweetness and juiciness. However, you can also use heirloom tomatoes for a more colorful and flavorful salad. Look for tomatoes that are firm yet slightly soft to the touch, indicating they are ripe and ready to eat. Always choose tomatoes that are vibrant in color and free from blemishes for the best taste.

Can I make this salad ahead of time?

While the Tomato Burrata Caprese Salad is best enjoyed fresh, you can prepare some components ahead of time. You can wash and halve the tomatoes, tear the basil, and slice the burrata a few hours before serving. However, it’s best to assemble the salad and add the dressing just before serving. This will help keep the ingredients fresh and prevent the salad from becoming soggy. If you want to save time, consider prepping everything and storing the components separately until you’re ready to enjoy your salad!

Conclusion on Tomato Burrata Caprese Salad Recipe

The Tomato Burrata Caprese Salad is a delightful dish that brings together the best of fresh ingredients in a simple yet elegant way. With its vibrant colors and rich flavors, this salad is not just a feast for the eyes but also a treat for the taste buds. Whether you’re enjoying it as a light appetizer, a side dish, or a main course, it’s sure to impress anyone at your table.

By using high-quality tomatoes and creamy burrata, you create a dish that celebrates the essence of Italian cuisine. The combination of sweet tomatoes, fragrant basil, and the luxurious texture of burrata makes each bite a memorable experience. Plus, the versatility of this salad allows you to customize it with various herbs, cheeses, and seasonal vegetables, ensuring that it can be enjoyed year-round.

As you prepare your Tomato Burrata Caprese Salad, remember to focus on the quality of your ingredients and the balance of flavors. With just a few simple steps, you can create a dish that not only nourishes the body but also brings joy to the heart. So, gather your ingredients, follow the steps, and savor the delightful taste of this Italian classic. Enjoy your culinary journey with the Tomato Burrata Caprese Salad, and share it with friends and family for a truly memorable meal!

Galinhada: Brazilian Chicken and Rice Recipe Made Easy

Introduction to Galinhada: Brazilian Chicken and Rice Recipe

What is Galinhada?

Galinhada is a traditional Brazilian dish that combines chicken and rice in a delightful, flavorful way. This hearty meal is often made with spices, vegetables, and sometimes even saffron, which adds a beautiful color and rich taste. The dish is typically cooked in one pot, making it not only delicious but also convenient for busy families. Galinhada is loved for its comforting flavors and is a staple in many Brazilian households.

The Cultural Significance of Galinhada in Brazil

In Brazil, food is more than just sustenance; it’s a way to bring people together. Galinhada holds a special place in Brazilian culture, often served during family gatherings, celebrations, and festive occasions. This dish reflects the warmth and hospitality of Brazilian families, as it is usually prepared in large quantities to share with loved ones. Each region in Brazil may have its own twist on Galinhada, showcasing local ingredients and culinary traditions. This diversity makes Galinhada not just a meal, but a celebration of Brazilian heritage and community.

Ingredients for Galinhada: Brazilian Chicken and Rice Recipe

To create a delicious Galinhada, you’ll need a variety of fresh ingredients that come together to form a flavorful dish. Here’s a list of what you’ll need:

  • 2 tablespoons extra virgin olive oil
  • 1 medium onion, finely diced
  • 3 cloves garlic, minced
  • 1 bell pepper, diced (any color)
  • 1 teaspoon smoked paprika
  • 1 teaspoon ground turmeric
  • 1 teaspoon ground cumin
  • 1 teaspoon sea salt
  • ½ teaspoon freshly ground black pepper
  • 4 cups chicken stock
  • 1 ½ cups basmati rice
  • 1 pound boneless, skinless chicken thighs, cut into small chunks
  • 1 cup chopped tomatoes (fresh or canned)
  • 1 cup green peas, frozen
  • ¼ cup fresh cilantro, chopped
  • Juice of 1 lime

These ingredients not only provide a burst of flavor but also contribute to the dish’s vibrant colors. The combination of spices like smoked paprika, turmeric, and cumin gives Galinhada its unique taste. The chicken stock enhances the overall richness, while the fresh vegetables add texture and nutrition. With these ingredients, you’re well on your way to preparing a delightful Brazilian chicken and rice dish that your family will love!

Preparation of Galinhada: Brazilian Chicken and Rice Recipe

Step 1: Marinating the Chicken

To start, marinate the chicken for extra flavor. In a bowl, combine the chicken chunks with a pinch of salt, black pepper, and a sprinkle of turmeric. This step enhances the chicken’s taste and ensures it absorbs the spices well. Let it sit for about 15 minutes. This simple marination process makes a big difference in the final dish.

Step 2: Preparing the Vegetables

While the chicken marinates, prepare the vegetables. Dice the onion, bell pepper, and mince the garlic. These ingredients will form the base of your Galinhada. The onion adds sweetness, while the bell pepper brings a nice crunch. Garlic, of course, adds that wonderful aroma. Having everything ready will make the cooking process smoother and more enjoyable.

Step 3: Cooking the Chicken

Next, heat the extra virgin olive oil in a large pot over medium heat. Once hot, add the marinated chicken. Cook it for about 5-7 minutes until it’s browned on all sides. This step locks in the flavors and gives the chicken a lovely color. Stir occasionally to ensure even cooking. Once done, remove the chicken from the pot and set it aside.

Step 4: Adding the Rice and Broth

In the same pot, add the diced onion, garlic, and bell pepper. Sauté them until the onion is soft and translucent, about 5 minutes. Then, sprinkle in the smoked paprika, cumin, and remaining turmeric. Stir for a minute to let the spices bloom. Now, pour in the chicken stock and bring it to a boil. Once boiling, add the basmati rice and stir well. This is where the magic begins!

Step 5: Simmering to Perfection

After adding the rice, return the browned chicken to the pot along with the chopped tomatoes. Lower the heat, cover the pot, and let it simmer for about 20 minutes. This gentle cooking allows the rice to absorb all the flavors. Keep an eye on it, and don’t lift the lid too often! When the rice is fluffy and the chicken is cooked through, you’ll know it’s ready.

Variations of Galinhada: Brazilian Chicken and Rice Recipe

Regional Variations in Brazil

Galinhada is a dish that varies greatly across Brazil, reflecting the diverse culinary traditions of each region. In the state of Goiás, for instance, the dish often includes a touch of saffron, giving it a unique flavor and vibrant color. This version is known for its rich, aromatic profile, making it a favorite during festive occasions.

In the northeastern part of Brazil, Galinhada may incorporate coconut milk, adding a creamy texture and a hint of sweetness. This variation is often paired with local spices, enhancing the dish’s tropical flair. Additionally, some regions might add vegetables like carrots or corn, making the dish even more colorful and nutritious.

Another interesting twist comes from the southern states, where Galinhada is sometimes prepared with a mix of different meats, such as sausage or pork. This hearty version is perfect for family gatherings, showcasing the region’s love for robust flavors. Each variation tells a story of local ingredients and traditions, making Galinhada a truly versatile dish.

Substitutions for Ingredients

While the traditional ingredients create a delicious Galinhada, you can easily customize the recipe to suit your taste or dietary needs. For instance, if you prefer a lighter option, you can substitute chicken thighs with chicken breast. This change will reduce the fat content while still providing a tasty meal.

If you’re looking for a vegetarian version, consider replacing the chicken with chickpeas or tofu. These alternatives will still provide protein and texture, making the dish satisfying. You can also use vegetable broth instead of chicken stock to keep it plant-based.

For those who may not have basmati rice on hand, jasmine rice or even quinoa can be great substitutes. Just keep in mind that cooking times may vary slightly. Lastly, feel free to experiment with different vegetables based on what you have available. Spinach, zucchini, or even bell peppers can add a delightful twist to your Galinhada.

Cooking Note for Galinhada: Brazilian Chicken and Rice Recipe

When preparing Galinhada, there are a few important cooking notes to keep in mind to ensure your dish turns out perfectly every time. First, the choice of rice is crucial. Basmati rice is preferred for its long grains and fluffy texture, but if you opt for another type, adjust the cooking time accordingly. Each rice variety absorbs liquid differently, so keep an eye on it as it cooks.

Another key point is the seasoning. The spices in Galinhada, such as smoked paprika and turmeric, are essential for flavor. However, feel free to adjust the amounts based on your personal taste. If you enjoy a bit of heat, consider adding a pinch of cayenne pepper or red pepper flakes. This will give your dish an extra kick!

Additionally, the simmering process is vital. Make sure to cover the pot while it simmers to trap steam and moisture. This helps the rice cook evenly and prevents it from becoming mushy. If you find that the rice is still too firm after the suggested cooking time, add a splash of chicken stock or water and let it simmer a bit longer.

Lastly, let your Galinhada rest for a few minutes after cooking. This resting period allows the flavors to meld together beautifully. When you’re ready to serve, fluff the rice gently with a fork to separate the grains. This will give your dish an appealing texture and make it even more enjoyable to eat.

Serving Suggestions for Galinhada: Brazilian Chicken and Rice Recipe

Traditional Accompaniments

When it comes to serving Galinhada, there are several traditional accompaniments that enhance the meal. One popular side is a fresh salad, often made with crisp lettuce, tomatoes, and cucumbers. This adds a refreshing crunch that balances the rich flavors of the chicken and rice.

Another classic pairing is farofa, a toasted cassava flour mixture. Farofa is often seasoned with onions, garlic, and sometimes bacon, providing a delightful texture and flavor contrast. It’s a staple in Brazilian cuisine and complements Galinhada beautifully.

Additionally, a side of black beans is a common choice. The creamy beans add protein and fiber, making the meal even more satisfying. You can serve them simply seasoned or with spices for an extra kick. Finally, a squeeze of lime over the dish just before serving brightens the flavors and adds a zesty touch.

Creative Serving Ideas

If you’re looking to get a bit creative with your Galinhada presentation, there are plenty of fun ideas to try! One option is to serve it in individual bowls, garnished with fresh cilantro and lime wedges. This not only looks appealing but also makes it easy for guests to enjoy their portions.

Another idea is to create a Galinhada platter. Arrange the chicken and rice in the center, surrounded by colorful sides like roasted vegetables or a vibrant corn salad. This communal style encourages sharing and adds a festive touch to your meal.

You can also consider using a cast-iron skillet for serving. The skillet retains heat well, keeping the dish warm throughout the meal. Plus, it adds a rustic charm to your table setting. For a fun twist, try serving Galinhada in hollowed-out bell peppers or squash. This not only looks stunning but also adds an extra layer of flavor.

Lastly, don’t forget about beverages! A chilled caipirinha, Brazil’s national cocktail, pairs wonderfully with Galinhada. If you prefer non-alcoholic options, fresh coconut water or a fruity lemonade can be refreshing choices. With these serving suggestions, your Galinhada will be a hit at any gathering!

Tips for Making the Perfect Galinhada: Brazilian Chicken and Rice Recipe

Creating the perfect Galinhada requires attention to detail and a few handy tips. These suggestions will help you elevate your dish and impress your family and friends.

First, always use fresh ingredients. Fresh vegetables and herbs enhance the flavor and nutrition of your Galinhada. When possible, choose organic produce for the best taste. Fresh cilantro, for example, adds a burst of flavor that dried herbs simply can’t match.

Next, don’t rush the marination process. Allowing the chicken to marinate for at least 15 minutes helps the spices penetrate the meat. This step is crucial for achieving a rich, flavorful dish. If you have more time, consider marinating the chicken for a few hours or even overnight in the refrigerator.

When cooking the chicken, ensure it’s browned properly. This step not only adds flavor but also gives the chicken a beautiful color. Use medium heat to avoid burning the spices. Stir occasionally to ensure even cooking and prevent sticking.

Pay attention to the rice. Rinsing basmati rice before cooking removes excess starch, which can make the rice sticky. Rinse it under cold water until the water runs clear. This simple step will help you achieve fluffy, separate grains in your Galinhada.

While simmering, resist the urge to lift the lid too often. Keeping the pot covered traps steam and moisture, which is essential for cooking the rice evenly. If you need to check on it, do so quickly to maintain the heat.

Lastly, let your Galinhada rest after cooking. This resting period allows the flavors to meld together beautifully. When ready to serve, fluff the rice gently with a fork to separate the grains. This will give your dish an appealing texture and make it even more enjoyable to eat.

By following these tips, you’ll be well on your way to making a delicious Galinhada that your loved ones will rave about!

Breakdown of Time for Galinhada: Brazilian Chicken and Rice Recipe

Prep Time

Preparing Galinhada is a straightforward process that doesn’t take too long. The prep time for this delicious dish is approximately 20 minutes. During this time, you will marinate the chicken, chop the vegetables, and gather all your ingredients. Having everything ready before you start cooking will make the process smoother and more enjoyable.

Cooking Time

The cooking time for Galinhada is about 30 minutes. This includes browning the chicken, sautéing the vegetables, and simmering the rice and chicken together. It’s important to keep an eye on the pot while it simmers to ensure everything cooks evenly. The gentle simmering allows the flavors to meld beautifully, resulting in a rich and satisfying dish.

Total Time

In total, you can expect to spend around 50 minutes from start to finish when making Galinhada. This includes both the prep and cooking times. With such a reasonable time commitment, you can easily whip up this flavorful Brazilian chicken and rice dish for a weeknight dinner or a special gathering. The best part? The delightful aroma that fills your kitchen will have everyone eagerly awaiting mealtime!

Nutritional Information for Galinhada: Brazilian Chicken and Rice Recipe

Calories

When it comes to enjoying Galinhada, it’s good to know the calorie content. A serving of this delicious Brazilian chicken and rice dish contains approximately 400 calories. This makes it a satisfying meal that provides energy without being overly heavy. The combination of chicken, rice, and vegetables ensures that you’re getting a balanced dish that can fit into a healthy diet.

Protein

Protein is an essential nutrient, and Galinhada delivers! Each serving offers about 30 grams of protein, primarily from the chicken. This high protein content helps support muscle growth and repair, making it a great option for active individuals. The addition of peas also contributes a bit of plant-based protein, enhancing the overall nutritional profile of the dish.

Sodium

Sodium levels are important to consider, especially for those watching their salt intake. A serving of Galinhada contains around 800 milligrams of sodium. This amount can vary based on the chicken stock used and any additional salt added during cooking. To reduce sodium, opt for low-sodium chicken stock or adjust the seasoning to your preference. This way, you can enjoy the flavors of Galinhada while keeping your sodium intake in check.

FAQs about Galinhada: Brazilian Chicken and Rice Recipe

What is the origin of Galinhada?

Galinhada has its roots in Brazil, where it is cherished as a traditional dish. The name “Galinhada” comes from the Portuguese word “galinha,” meaning chicken. This dish is believed to have originated in the central region of Brazil, particularly in Goiás. Over time, it has spread across the country, with each region adding its unique twist. The combination of chicken and rice reflects the agricultural abundance of Brazil, making it a staple in many households.

Can I make Galinhada with other proteins?

Absolutely! While chicken is the star of traditional Galinhada, you can easily substitute it with other proteins. For instance, turkey or duck can be used for a different flavor profile. If you prefer seafood, shrimp or fish can also work well. For a vegetarian option, consider using chickpeas or tofu. These alternatives will still provide a satisfying meal while allowing you to enjoy the delicious flavors of Galinhada.

How do I store leftovers of Galinhada?

Storing leftovers of Galinhada is simple! Allow the dish to cool completely before transferring it to an airtight container. You can keep it in the refrigerator for up to 3 days. If you want to store it for a longer period, consider freezing it. Place the cooled Galinhada in a freezer-safe container, and it can last for up to 3 months. When you’re ready to enjoy it again, simply thaw it in the refrigerator overnight and reheat on the stove or in the microwave until heated through.

Is Galinhada a healthy dish?

Yes, Galinhada can be a healthy dish when prepared with fresh ingredients. It offers a balanced combination of protein from the chicken, carbohydrates from the rice, and vitamins from the vegetables. The use of spices like turmeric and cumin not only adds flavor but also provides health benefits. However, it’s important to be mindful of the sodium content, especially if using regular chicken stock. Opting for low-sodium options and adding plenty of vegetables can enhance the nutritional value of your Galinhada, making it a wholesome meal for you and your family.

Conclusion on Galinhada: Brazilian Chicken and Rice Recipe

In conclusion, Galinhada is more than just a meal; it’s a celebration of Brazilian culture and culinary tradition. This delightful dish brings together the comforting flavors of chicken, rice, and spices, creating a satisfying experience for everyone at the table. Whether you’re enjoying it during a family gathering or a casual weeknight dinner, Galinhada is sure to impress.

With its versatility, you can easily adapt the recipe to suit your taste or dietary preferences. From regional variations to ingredient substitutions, the possibilities are endless. This adaptability makes Galinhada a dish that can be enjoyed by all, regardless of dietary restrictions.

As you prepare this delicious Brazilian chicken and rice recipe, remember the importance of fresh ingredients and proper cooking techniques. These elements will ensure that your Galinhada turns out flavorful and satisfying every time. Don’t forget to take your time during the marination and simmering processes, as these steps are key to achieving the best results.

Finally, serving Galinhada with traditional accompaniments or creative presentations can elevate your dining experience. Whether you choose to pair it with a fresh salad, farofa, or a refreshing beverage, your meal will be a hit with family and friends.

So, gather your ingredients, roll up your sleeves, and embark on this culinary journey to Brazil. With Galinhada, you’re not just cooking; you’re creating memories and sharing a piece of Brazilian culture with those you love. Enjoy every bite!

Jamaican Brown Stew Chicken Recipe is a must-try dish!

Introduction to Jamaican Brown Stew Chicken Recipe

Jamaican Brown Stew Chicken is a beloved dish that brings the vibrant flavors of the Caribbean right to your kitchen. This recipe is not just about cooking chicken; it’s about creating a warm, comforting meal that tells a story of culture and tradition. The combination of spices, fresh vegetables, and tender chicken creates a dish that is both hearty and satisfying. Whether you’re hosting a family dinner or simply craving something delicious, this stew is sure to impress.

What Makes Jamaican Brown Stew Chicken Unique?

What sets Jamaican Brown Stew Chicken apart from other chicken dishes? It’s all in the preparation and the ingredients. First, the chicken is marinated with a blend of spices that infuse it with rich flavors. The use of smoked paprika, garlic powder, and onion powder adds depth, while the Scotch bonnet pepper introduces a delightful heat that is characteristic of Jamaican cuisine.

Moreover, the cooking method is essential. The chicken is seared to perfection, creating a golden-brown crust that locks in moisture. Then, it’s simmered with fresh vegetables like bell peppers and carrots, which not only enhance the flavor but also add a pop of color to the dish. The result is a stew that is both visually appealing and bursting with taste.

Additionally, the balance of sweet and savory is a hallmark of this recipe. The dark brown sugar complements the savory elements, creating a harmonious blend that tantalizes the taste buds. This unique combination of flavors makes Jamaican Brown Stew Chicken a standout dish that is loved by many.

In the following sections, we will explore the ingredients, preparation steps, and tips to help you create this delightful stew in your own kitchen. Get ready to embark on a culinary journey that celebrates the essence of Jamaican cooking!

Ingredients for Jamaican Brown Stew Chicken Recipe

To create a delicious Jamaican Brown Stew Chicken, you’ll need a variety of fresh ingredients that come together to form a flavorful dish. Here’s a complete list of what you’ll need:

  • 3 pounds assorted chicken pieces (legs, thighs, or a combination)
  • 1 teaspoon sea salt
  • 1 teaspoon freshly ground black pepper
  • 1 teaspoon smoked paprika
  • 1 teaspoon garlic powder
  • 1 teaspoon onion powder
  • 1 tablespoon canola oil
  • 1 medium onion, thinly sliced
  • 2 cloves garlic, finely chopped
  • 1-inch piece of fresh ginger, minced
  • 1 bell pepper, cut into strips (any color)
  • 2 medium carrots, sliced into rounds
  • 2 green onions, finely chopped
  • 1 can (14 ounces) crushed tomatoes
  • 1 cup chicken stock
  • 2 tablespoons tamari or soy sauce
  • 1 tablespoon dark brown sugar
  • 1 teaspoon dried thyme
  • 1 whole Scotch bonnet pepper (for heat)
  • Fresh cilantro for garnish (optional)

These ingredients are not only essential for flavor but also contribute to the overall texture and appearance of the stew. The chicken pieces provide a hearty base, while the vegetables add color and nutrition. The spices and sauces work together to create that signature Jamaican taste that makes this dish so special.

As you gather your ingredients, consider the freshness of each item. Fresh vegetables and high-quality chicken will enhance the flavor of your stew. Now that you have everything ready, let’s move on to the next step in preparing this delightful Jamaican Brown Stew Chicken!

Step-by-Step Preparation of Jamaican Brown Stew Chicken Recipe

Step 1: Marinating the Chicken

Marinating the chicken is a crucial step in this recipe. It allows the flavors to penetrate the meat, making it tender and delicious. Start by placing the assorted chicken pieces in a large bowl. Sprinkle the sea salt, black pepper, smoked paprika, garlic powder, and onion powder over the chicken. Use your hands to rub the spices into the chicken, ensuring every piece is well-coated.

For the best results, let the chicken marinate for at least 30 minutes. However, if you have time, marinating overnight in the fridge will enhance the flavors even more. This step is essential for achieving that authentic Jamaican taste!

Step 2: Browning the Chicken

Once the chicken has marinated, it’s time to brown it. Heat the canola oil in a large pot or Dutch oven over medium-high heat. When the oil is hot, carefully add the marinated chicken pieces. Sear them for about 5-7 minutes, turning occasionally, until they develop a beautiful golden-brown crust on all sides.

This browning process not only adds flavor but also locks in the juices, keeping the chicken moist during cooking. Once browned, remove the chicken from the pot and set it aside on a plate. This step is vital for building the stew’s rich flavor.

Step 3: Sautéing the Vegetables

Now, it’s time to sauté the vegetables. In the same pot, add the sliced onion, chopped garlic, minced ginger, bell pepper, and carrot rounds. Stir the mixture and sauté for about 5 minutes. You want the vegetables to soften and release their wonderful aromas.

As the vegetables cook, they will absorb the flavors left in the pot from the chicken. This step is key to creating a flavorful base for your stew. Keep stirring occasionally to prevent sticking and ensure even cooking.

Step 4: Combining Ingredients

After the vegetables have softened, it’s time to bring everything together. Return the seared chicken to the pot. Pour in the crushed tomatoes, chicken stock, tamari or soy sauce, dark brown sugar, and dried thyme. Don’t forget to add the whole Scotch bonnet pepper for that signature heat!

Stir everything together gently, making sure the chicken is well-coated with the sauce and vegetables. This combination of ingredients is what makes Jamaican Brown Stew Chicken so special. The flavors will meld beautifully as they cook together.

Step 5: Simmering the Stew

Now that all the ingredients are combined, it’s time to let the stew simmer. Bring the mixture to a gentle simmer over medium heat. Once it starts bubbling, reduce the heat to low to maintain a soft bubbling. Cover the pot and let it cook for 30-40 minutes.

During this time, the chicken will become tender and flavorful. The longer it simmers, the better the flavors will develop. Just be sure to check occasionally, stirring gently to prevent sticking. After the cooking time, the chicken should be thoroughly cooked and ready to serve!

Variations of Jamaican Brown Stew Chicken Recipe

While the traditional Jamaican Brown Stew Chicken is a classic favorite, there are many ways to put a twist on this delicious dish. Whether you want to try different proteins or explore vegetarian options, these variations will keep your meals exciting and flavorful.

Alternative Proteins

If you’re looking to switch things up, consider using alternative proteins in your Jamaican Brown Stew. Here are a few options:

  • Turkey: Turkey pieces can be a leaner alternative to chicken. They absorb the spices well and provide a hearty meal.
  • Pork: Pork shoulder or ribs can add a rich flavor to the stew. Just be sure to adjust the cooking time, as pork may take longer to become tender.
  • Fish: For a lighter option, try using firm fish like snapper or mahi-mahi. Add the fish towards the end of cooking to prevent it from breaking apart.
  • Tofu: For a plant-based option, use firm tofu. Marinate and brown it just like chicken for a satisfying vegetarian dish.

These alternative proteins can bring new flavors and textures to your stew while still keeping the essence of Jamaican cuisine.

Vegetarian Options

If you prefer a vegetarian version of Jamaican Brown Stew, you can create a delicious stew without meat. Here’s how:

  • Vegetable Medley: Use a variety of vegetables such as zucchini, eggplant, and mushrooms. These will add depth and heartiness to the stew.
  • Beans: Incorporate canned beans like black beans or kidney beans for protein. They also add a creamy texture to the dish.
  • Jackfruit: Young green jackfruit is a fantastic meat substitute. It has a texture similar to pulled chicken and absorbs flavors beautifully.
  • Quinoa: For a nutritious twist, add cooked quinoa to the stew. It will soak up the flavors and provide a protein boost.

These vegetarian options allow everyone to enjoy the rich flavors of Jamaican Brown Stew, making it a versatile dish for all dietary preferences.

Cooking Note for Jamaican Brown Stew Chicken Recipe

When preparing Jamaican Brown Stew Chicken, there are a few important cooking notes to keep in mind. These tips will help you achieve the best results and ensure that your stew is bursting with flavor.

First, always choose high-quality chicken. Fresh, organic chicken will enhance the taste of your stew. If possible, opt for bone-in pieces, as they add more flavor and richness to the broth. The bones help to create a deeper, more satisfying taste.

Next, marinating the chicken is essential. As mentioned earlier, allowing the chicken to soak in the spices for at least 30 minutes—or even overnight—will make a significant difference. This step ensures that the flavors penetrate the meat, resulting in a more delicious dish.

When browning the chicken, make sure not to overcrowd the pot. If you add too many pieces at once, the chicken will steam instead of sear. This can prevent that lovely golden-brown crust from forming. If necessary, brown the chicken in batches to achieve the best results.

Additionally, be mindful of the Scotch bonnet pepper. This pepper is known for its heat, so if you prefer a milder stew, you can slice it open to release some heat or remove it earlier in the cooking process. Always taste the stew before serving to adjust the spice level to your liking.

Lastly, let the stew rest for a few minutes after cooking. This allows the flavors to meld together even more. Serve it warm, and enjoy the delightful aroma that fills your kitchen!

By following these cooking notes, you’ll be well on your way to creating a mouthwatering Jamaican Brown Stew Chicken that your family and friends will love. Happy cooking!

Serving Suggestions for Jamaican Brown Stew Chicken Recipe

Once your Jamaican Brown Stew Chicken is ready, it’s time to think about how to serve it. The right accompaniments can elevate your meal and enhance the flavors of the stew. Here are some traditional and modern serving suggestions to consider.

Traditional Accompaniments

Jamaican cuisine is known for its vibrant flavors and hearty sides. Here are some classic accompaniments that pair perfectly with Jamaican Brown Stew Chicken:

  • Rice and Peas: This is a staple side dish in Jamaican cooking. The combination of rice, kidney beans, and coconut milk adds a creamy texture that complements the stew beautifully.
  • Fried Plantains: Sweet fried plantains provide a delightful contrast to the savory stew. Their natural sweetness balances the heat from the Scotch bonnet pepper.
  • Coleslaw: A refreshing coleslaw made with cabbage, carrots, and a tangy dressing can add a crunchy texture to your meal. It’s a great way to cool down the palate.
  • Festival: These sweet fried dumplings are a popular Jamaican treat. Their slightly sweet flavor pairs well with the savory stew, making for a delicious combination.

These traditional sides not only enhance the meal but also bring a taste of Jamaica to your dining table. They create a well-rounded experience that celebrates the rich culinary heritage of the island.

Modern Twists

If you’re looking to add a contemporary flair to your meal, consider these modern twists on serving Jamaican Brown Stew Chicken:

  • Quinoa Salad: Instead of rice, serve your stew over a bed of fluffy quinoa. Toss in some fresh vegetables and a light vinaigrette for a nutritious twist.
  • Cauliflower Rice: For a low-carb option, try cauliflower rice. It’s a great way to enjoy the flavors of the stew while keeping the meal light and healthy.
  • Avocado Toast: Serve the stew alongside avocado toast for a trendy and delicious pairing. The creaminess of the avocado complements the spices in the stew.
  • Wraps: Use the stew as a filling for wraps. Add some fresh greens and a drizzle of sauce for a fun and portable meal option.

These modern twists allow you to enjoy Jamaican Brown Stew Chicken in new and exciting ways. They can cater to various dietary preferences while still celebrating the essence of the dish.

Whether you choose traditional sides or modern twists, serving your Jamaican Brown Stew Chicken with the right accompaniments will create a memorable dining experience. Enjoy the flavors and share the joy of this delightful dish with family and friends!

Tips for Perfecting Jamaican Brown Stew Chicken Recipe

To truly master the art of making Jamaican Brown Stew Chicken, a few tips can help you elevate your dish to new heights. These suggestions will ensure that your stew is flavorful, tender, and a hit at the dinner table.

First, always use fresh ingredients. Fresh vegetables and high-quality chicken make a significant difference in flavor. When possible, choose organic chicken for a richer taste. Fresh herbs, like cilantro, can also enhance the dish’s aroma and presentation.

Next, don’t rush the marinating process. Allowing the chicken to marinate for several hours or overnight will deepen the flavors. This step is crucial for achieving that authentic Jamaican taste. If you’re short on time, even a quick 30-minute marinade will still add some flavor.

When browning the chicken, ensure your pot is hot enough. A good sear creates a delicious crust and locks in moisture. If the pot is too cool, the chicken will steam instead of brown. Work in batches if necessary to avoid overcrowding.

As you sauté the vegetables, consider adding a splash of lime juice or vinegar. This can brighten the flavors and add a refreshing zing to the stew. Additionally, feel free to adjust the spice level. If you prefer a milder dish, remove the Scotch bonnet pepper earlier or slice it open to reduce the heat.

Lastly, let the stew rest for a few minutes after cooking. This allows the flavors to meld together beautifully. Serve it warm, garnished with fresh cilantro and green onions for a pop of color. Enjoy the delightful aroma that fills your kitchen as you share this comforting dish with loved ones!

Breakdown of Time for Jamaican Brown Stew Chicken Recipe

Prep Time

The prep time for Jamaican Brown Stew Chicken is essential for ensuring that all ingredients are ready to go. This includes marinating the chicken and chopping the vegetables. You can expect to spend about 15-20 minutes on this step. If you choose to marinate the chicken overnight, you can save time on the day of cooking. Just remember to plan ahead!

Cooking Time

Once you have everything prepped, the cooking time for the stew is approximately 40-50 minutes. This includes browning the chicken, sautéing the vegetables, and simmering the stew until the chicken is tender. The simmering process is crucial, as it allows the flavors to meld together beautifully. So, be patient and let it bubble away!

Total Time

In total, you can expect to spend about 1 hour to 1 hour and 10 minutes on this recipe, not including the marinating time. If you marinate the chicken overnight, the total time will be significantly less on the day you cook. This makes it a great option for a weeknight dinner or a special occasion. With just a little planning, you can enjoy a delicious Jamaican Brown Stew Chicken that’s full of flavor!

Nutritional Information for Jamaican Brown Stew Chicken Recipe

Understanding the nutritional content of your meals is essential for maintaining a balanced diet. Jamaican Brown Stew Chicken is not only delicious but also packed with nutrients. Here’s a breakdown of the nutritional information for this hearty dish.

Calories

One serving of Jamaican Brown Stew Chicken contains approximately 350-400 calories. This calorie count can vary based on the specific cuts of chicken used and the amount of oil added during cooking. The dish is filling and satisfying, making it a great option for a main meal without excessive calorie intake.

Protein Content

This stew is a fantastic source of protein, with each serving providing around 30-35 grams. The chicken pieces contribute significantly to this protein content, which is essential for muscle repair and overall health. Including protein in your meals helps keep you feeling full and energized throughout the day.

Sodium Levels

The sodium levels in Jamaican Brown Stew Chicken can range from 600 to 800 milligrams per serving. This amount largely depends on the use of tamari or soy sauce and the chicken stock. If you’re watching your sodium intake, consider using low-sodium chicken stock and adjusting the amount of soy sauce to suit your dietary needs. Balancing flavors while keeping sodium levels in check is key to a healthy meal.

Overall, Jamaican Brown Stew Chicken is a nutritious option that provides a good balance of calories, protein, and essential nutrients. Enjoying this dish as part of a varied diet can contribute to your overall health and well-being.

FAQs about Jamaican Brown Stew Chicken Recipe

What is the best way to marinate chicken for Jamaican Brown Stew?

The best way to marinate chicken for Jamaican Brown Stew is to use a blend of spices that enhance the flavor. Start by seasoning the chicken pieces with sea salt, black pepper, smoked paprika, garlic powder, and onion powder. Make sure to rub the spices into the chicken thoroughly. For optimal flavor, let the chicken marinate for at least 30 minutes. However, marinating overnight in the fridge is ideal. This allows the spices to penetrate the meat, resulting in a more flavorful dish.

Can I use skinless chicken for this recipe?

Yes, you can use skinless chicken for Jamaican Brown Stew. While traditional recipes often use skin-on pieces for added flavor and richness, skinless chicken can still be delicious. Just keep in mind that skinless chicken may cook faster and can be less juicy. To compensate, you might want to add a little extra oil or broth during cooking to keep the meat moist. Regardless of your choice, the spices and cooking method will still create a tasty stew.

How can I make Jamaican Brown Stew Chicken spicier?

If you want to make Jamaican Brown Stew Chicken spicier, there are several ways to do so. First, you can leave the Scotch bonnet pepper whole but pierce it with a knife to release more heat. Alternatively, you can slice the pepper open to let the heat infuse into the stew more intensely. If you enjoy extra spice, consider adding a pinch of cayenne pepper or a few dashes of hot sauce to the mix. Just remember to taste as you go, so you can adjust the heat to your liking!

What are some common side dishes to serve with Jamaican Brown Stew Chicken?

Jamaican Brown Stew Chicken pairs wonderfully with a variety of side dishes. Some common accompaniments include:

  • Rice and Peas: A classic side made with rice, kidney beans, and coconut milk.
  • Fried Plantains: Sweet and crispy plantains that balance the savory stew.
  • Coleslaw: A refreshing salad that adds crunch and coolness to the meal.
  • Festival: Sweet fried dumplings that complement the flavors of the stew.

These sides not only enhance the meal but also bring a taste of Jamaica to your dining experience. Enjoy experimenting with different combinations to find your perfect pairing!

Conclusion on Jamaican Brown Stew Chicken Recipe

In conclusion, Jamaican Brown Stew Chicken is more than just a meal; it’s a celebration of flavors, culture, and tradition. This dish brings together a delightful mix of spices, fresh vegetables, and tender chicken, creating a comforting stew that warms the heart and soul. Whether you’re cooking for family, friends, or simply treating yourself, this recipe is sure to impress.

As you’ve seen, the preparation involves simple yet essential steps that enhance the overall taste. From marinating the chicken to simmering it with vibrant vegetables, each stage contributes to the rich flavor profile that defines Jamaican cuisine. The versatility of this dish allows for various adaptations, whether you choose alternative proteins or explore vegetarian options. This makes it accessible for everyone, regardless of dietary preferences.

Moreover, serving Jamaican Brown Stew Chicken with traditional or modern accompaniments can elevate your dining experience. The right sides not only complement the stew but also add a touch of authenticity to your meal. Remember, the joy of cooking lies in experimenting and making the dish your own.

So, gather your ingredients, follow the steps, and embark on this culinary journey. Enjoy the process, savor the aromas, and share the delicious results with your loved ones. Jamaican Brown Stew Chicken is not just a recipe; it’s an invitation to experience the warmth and vibrancy of Caribbean cooking. Happy cooking!