Sticky Honey Garlic Chicken Tenders Recipe is a must-try!

Introduction to Sticky Honey Garlic Chicken Tenders Recipe

Sticky Honey Garlic Chicken Tenders Recipe is here to save the day. This dish combines tender chicken with a sweet and savory sauce that will have everyone asking for seconds. Not only is it simple to prepare, but it also packs a punch of flavor that will delight your taste buds.

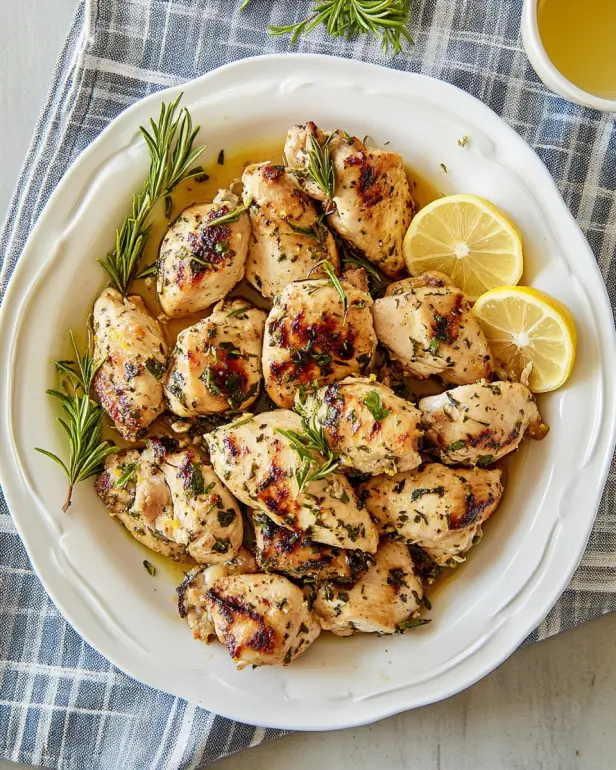
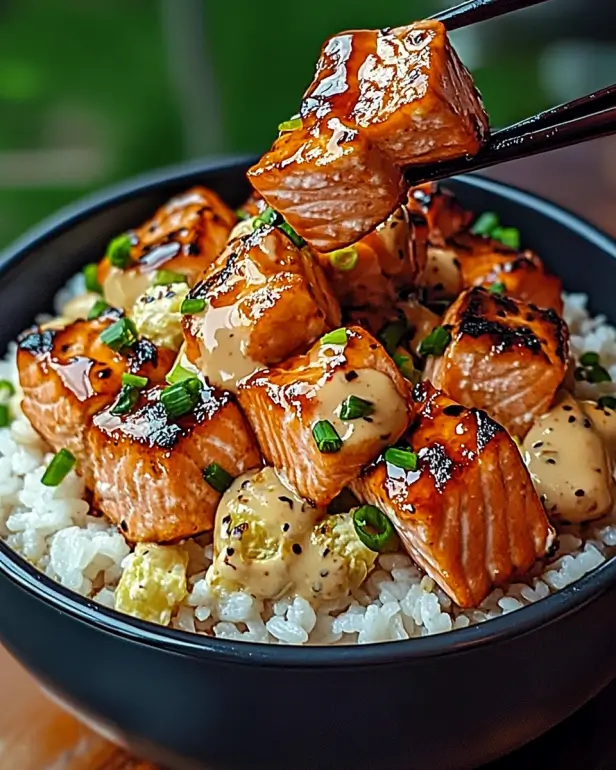
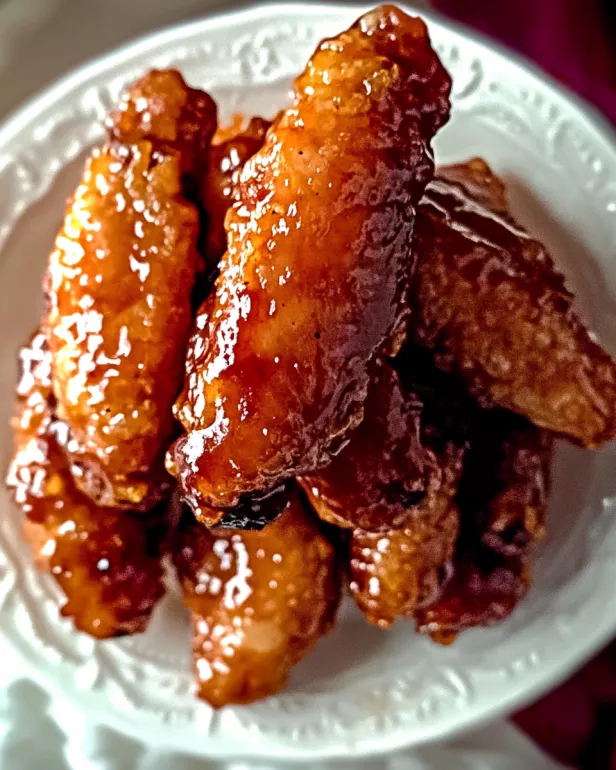
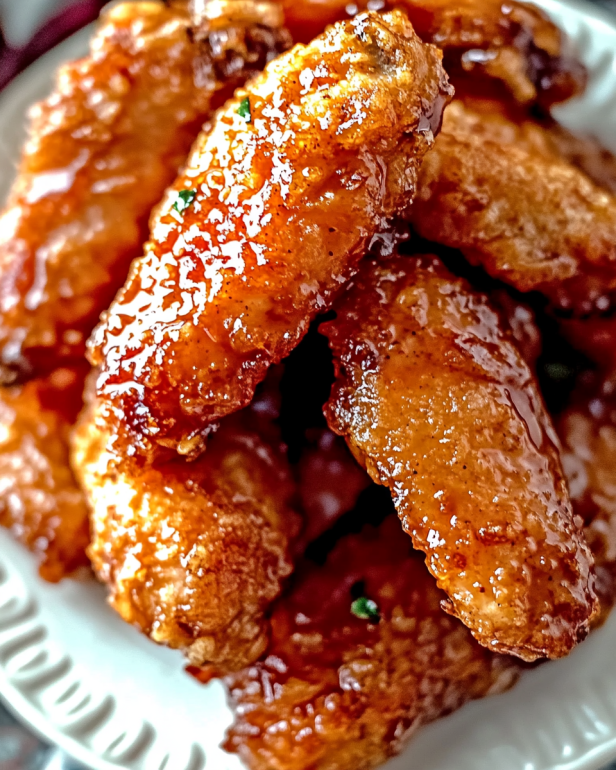
Imagine biting into juicy chicken tenders coated in a sticky honey garlic glaze. The sweetness of honey perfectly balances the savory notes of soy sauce and garlic. Plus, the addition of ginger adds a warm, aromatic touch that elevates the dish. Whether you’re hosting a family dinner or just want a quick weeknight meal, this recipe is sure to impress.

What makes this recipe even better is its versatility. You can easily customize it to suit your taste. Want a little heat? Add some red pepper flakes! Prefer a lighter option? Serve it with a fresh salad. The possibilities are endless, making it a go-to recipe for any occasion.

In this article, we will guide you through the ingredients, preparation steps, and even some variations to try. So, roll up your sleeves and get ready to whip up a batch of these mouthwatering sticky honey garlic chicken tenders!

Ingredients for Sticky Honey Garlic Chicken Tenders Recipe

Sticky Honey Garlic Chicken Tenders Recipe, you’ll need a few simple ingredients. These items are easy to find and will help you whip up a delicious meal in no time. Here’s what you’ll need:

  • 2 pounds chicken tenders
  • 1/2 cup honey
  • 1/4 cup soy sauce
  • 1 tablespoon apple cider vinegar
  • 1 tablespoon minced garlic
  • 1 teaspoon ground ginger
  • 1/2 teaspoon black pepper
  • 1 tablespoon cornstarch
  • 2 tablespoons water
  • 2 tablespoons sesame seeds (optional)
  • 2 green onions, chopped (optional)

These ingredients come together to create a delightful blend of flavors. The chicken tenders are the star of the show, providing a juicy and tender base. Honey adds sweetness, while soy sauce brings a savory depth. The apple cider vinegar gives a slight tang, and garlic and ginger add aromatic notes that make this dish truly special.

Feel free to adjust the ingredients to suit your taste. For instance, if you love garlic, you can add a bit more. Or, if you prefer a sweeter sauce, increase the honey. The beauty of this recipe lies in its flexibility, allowing you to make it your own!

Step-by-Step Preparation of Sticky Honey Garlic Chicken Tenders Recipe

Sticky Honey Garlic Chicken Tenders Recipe. Follow these simple steps to create a dish that’s bursting with flavor and sure to please everyone at the table.

Step 1: Marinating the Chicken

First, let’s get the chicken tenders marinated. This step is crucial for infusing the chicken with flavor. In a large bowl, place the chicken tenders. Then, pour the honey garlic mixture over the chicken. Make sure every piece is well-coated. You can use your hands or a spoon to toss the chicken gently. Cover the bowl with plastic wrap and let it marinate for at least 30 minutes. If you have more time, marinating for a few hours in the fridge will enhance the flavor even more!

Step 2: Preparing the Honey Garlic Sauce

While the chicken is marinating, let’s prepare the honey garlic sauce. In a medium bowl, combine the honey, soy sauce, apple cider vinegar, minced garlic, ground ginger, and black pepper. Whisk these ingredients together until they are well blended. This sauce is what makes the chicken sticky and delicious! You can taste it and adjust the flavors if needed. If you like it sweeter, add a bit more honey. For a tangy kick, a splash more vinegar will do the trick.

Step 3: Cooking the Chicken Tenders

Once the chicken has marinated, it’s time to cook! Preheat your oven to 400°F (200°C) and line a baking sheet with parchment paper. Arrange the marinated chicken tenders on the baking sheet in a single layer. Make sure they are not crowded, as this will help them cook evenly. Bake the chicken in the preheated oven for 20-25 minutes. Remember to flip them halfway through to ensure they get golden brown on both sides. The aroma will fill your kitchen, making it hard to wait!

Step 4: Glazing with Honey Garlic Sauce

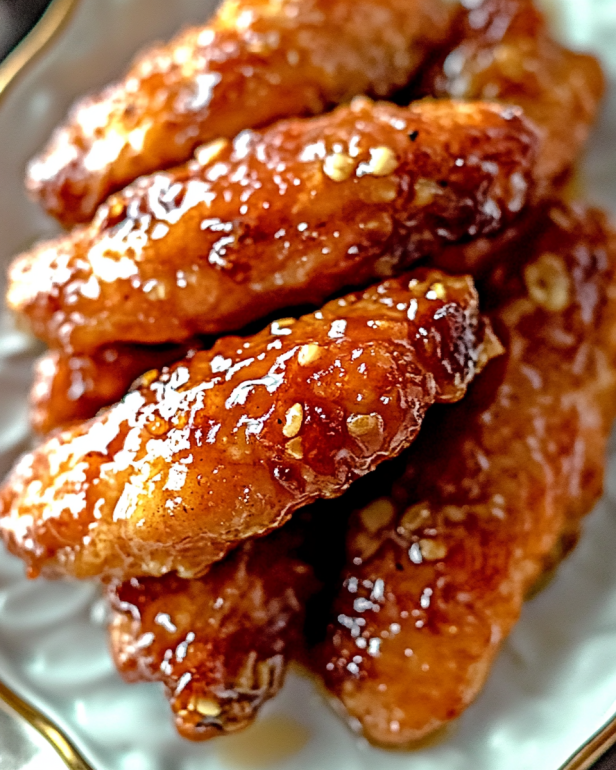
After the chicken is cooked through, it’s time to add that final touch! In a small bowl, mix the cornstarch and water to create a slurry. Drizzle this mixture over the chicken tenders and return them to the oven for an additional 5 minutes. This step thickens the sauce, making it even stickier and more delicious. Once done, remove the chicken from the oven and let it rest for a few minutes. You can sprinkle sesame seeds and chopped green onions on top for added flavor and presentation.

And there you have it! Your sticky honey garlic chicken tenders are ready to be served. Enjoy the delightful combination of sweet and savory flavors that will surely impress your family and friends!

Variations of Sticky Honey Garlic Chicken Tenders Recipe

Sticky Honey Garlic Chicken Tenders Recipe is already a hit, there are plenty of ways to switch things up! Here are a couple of tasty variations that you can try. Each one adds a unique twist to the original recipe, making it even more exciting to enjoy.

Spicy Version of Sticky Honey Garlic Chicken Tenders

If you love a little heat, this spicy version is perfect for you! To make your chicken tenders spicy, simply add a teaspoon of red pepper flakes to the honey garlic mixture. This will give your dish a delightful kick without overpowering the sweet and savory flavors. You can also use sriracha or your favorite hot sauce for an extra layer of flavor. Just mix it in with the other ingredients when preparing the sauce.

Another option is to marinate the chicken with sliced jalapeños or other hot peppers. This will infuse the chicken with a spicy flavor that pairs beautifully with the honey garlic glaze. Serve these spicy tenders with a cooling dip, like ranch or yogurt sauce, to balance the heat. Your family and friends will love this fiery twist!

Baked Sticky Honey Garlic Chicken Tenders

For a healthier option, you can make baked sticky honey garlic chicken tenders. This method is similar to the original recipe but focuses on using less oil and keeping the dish lighter. Instead of frying, you can bake the chicken tenders as described in the previous steps. Just ensure they are well-coated with the honey garlic sauce before baking.

To enhance the flavor, consider adding a sprinkle of your favorite herbs or spices, like paprika or thyme, to the chicken before baking. This will give the tenders an extra layer of taste. You can also serve them with a side of steamed vegetables or a fresh salad to create a balanced meal. This baked version is not only delicious but also a great way to enjoy a guilt-free treat!

Sticky Honey Garlic Chicken Tenders Recipe to suit your taste preferences. Whether you prefer it spicy or lighter, you can enjoy this dish in many delightful ways!

Cooking Note for Sticky Honey Garlic Chicken Tenders Recipe

Sticky Honey Garlic Chicken Tenders Recipe, there are a few important cooking notes to keep in mind. These tips will help ensure that your chicken turns out perfectly every time, making your meal a delightful experience.

First, always start with fresh chicken tenders. Fresh chicken not only tastes better but also cooks more evenly. If you must use frozen chicken, make sure to thaw it completely before marinating. This will help the flavors penetrate the meat more effectively.

Next, marinating the chicken is a key step. Allowing the chicken to soak in the honey garlic mixture for at least 30 minutes will enhance the flavor. If you have time, marinating it for a few hours or even overnight in the refrigerator will yield even better results. Just remember to cover the bowl tightly to prevent any contamination.

When baking the chicken, ensure that your oven is preheated to the correct temperature. This helps the chicken cook evenly and develop a nice golden color. Using parchment paper on your baking sheet not only prevents sticking but also makes cleanup a breeze.

As you cook, keep an eye on the chicken. Ovens can vary, so check for doneness a few minutes before the suggested cooking time. The chicken should reach an internal temperature of 165°F (75°C) to ensure it is safe to eat. Using a meat thermometer can help you avoid overcooking, which can lead to dry chicken.

Finally, don’t skip the glazing step! Drizzling the cornstarch slurry over the chicken before the final bake is what makes the sauce thick and sticky. This step is crucial for achieving that mouthwatering glaze that everyone loves. Once the chicken is done, let it rest for a few minutes before serving. This allows the juices to redistribute, keeping the chicken tender and juicy.

By following these cooking notes, you’ll be well on your way to creating delicious sticky honey garlic chicken tenders that will impress your family and friends. Enjoy the cooking process and the delightful meal that awaits!

Serving Suggestions for Sticky Honey Garlic Chicken Tenders Recipe

Sticky Honey Garlic Chicken Tenders Recipe, it’s time to think about how to serve them! The way you present your dish can elevate the dining experience and make it even more enjoyable. Here are some fantastic serving suggestions that will complement the flavors of your chicken tenders.

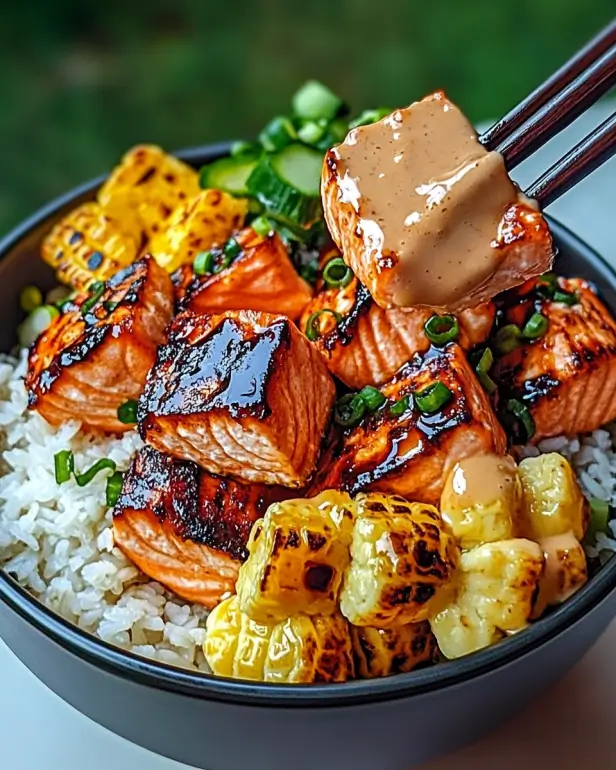
First, consider serving the chicken tenders over a bed of fluffy steamed rice. The rice will soak up the sticky honey garlic sauce, creating a delightful combination of flavors. You can use white rice, brown rice, or even jasmine rice for a fragrant touch. For a healthier option, try quinoa or cauliflower rice, which adds a nutritious twist.

Another great option is to pair the chicken tenders with a fresh salad. A crisp green salad with mixed greens, cherry tomatoes, and cucumbers will provide a refreshing contrast to the sweet and savory chicken. Drizzle a light vinaigrette or sesame dressing over the salad to enhance the flavors. This combination makes for a balanced meal that is both satisfying and nutritious.

If you’re looking for a fun twist, consider serving the chicken tenders in a wrap. Use whole wheat or lettuce wraps and fill them with the chicken, some crunchy veggies, and a drizzle of extra honey garlic sauce. This makes for a delicious handheld meal that’s perfect for lunch or a casual dinner.

For a more festive presentation, you can serve the chicken tenders on a platter garnished with sesame seeds and chopped green onions. This not only adds visual appeal but also enhances the flavor. You can also include small bowls of dipping sauces, such as sweet chili sauce or a spicy mayo, for guests to enjoy.

Lastly, don’t forget about the sides! Roasted vegetables, like broccoli or carrots, make a great accompaniment. They add color and nutrition to your plate. You can also serve some crispy potato wedges or sweet potato fries for a comforting touch.

Sticky Honey Garlic Chicken Tenders Recipe will shine at any meal. Whether it’s a family dinner or a gathering with friends, these ideas will help you create a memorable dining experience that everyone will love!

Tips for Perfect Sticky Honey Garlic Chicken Tenders Recipe

Sticky Honey Garlic Chicken Tenders Recipe turns out perfectly every time, here are some helpful tips to keep in mind. These suggestions will help you achieve tender, flavorful chicken with a deliciously sticky glaze that everyone will enjoy.

First, always use high-quality chicken tenders. Fresh chicken will yield the best flavor and texture. If you can, buy organic or free-range chicken for a more wholesome meal. If you’re using frozen chicken, make sure to thaw it completely before marinating. This allows the marinade to penetrate the meat better.

Next, don’t rush the marinating process. Allow the chicken to soak in the honey garlic mixture for at least 30 minutes. For even better flavor, marinate it for a few hours or overnight in the refrigerator. This extra time helps the chicken absorb all the delicious flavors.

When preparing the honey garlic sauce, taste it before adding it to the chicken. Adjust the sweetness or tanginess to your liking. If you prefer a sweeter sauce, add more honey. If you like it tangy, a bit more apple cider vinegar can do the trick. This way, you can customize the flavor to suit your taste buds.

While baking, make sure to arrange the chicken tenders in a single layer on the baking sheet. This ensures even cooking and helps them get that lovely golden color. Avoid overcrowding the pan, as this can lead to steaming instead of baking.

Keep an eye on the cooking time. Ovens can vary, so check the chicken a few minutes before the suggested time. The chicken is done when it reaches an internal temperature of 165°F (75°C). Using a meat thermometer can help you avoid overcooking, which can make the chicken dry.

Don’t skip the glazing step! Drizzling the cornstarch slurry over the chicken before the final bake is what makes the sauce thick and sticky. This step is crucial for achieving that mouthwatering glaze that everyone loves. After baking, let the chicken rest for a few minutes before serving. This allows the juices to redistribute, keeping the chicken tender and juicy.

Lastly, feel free to experiment with the recipe! Add your favorite spices or herbs to the marinade for a unique twist. You can also try different dipping sauces or sides to complement the chicken. The more you play around with the recipe, the more you’ll discover what you love!

By following these tips, you’ll be well on your way to creating the perfect sticky honey garlic chicken tenders that will impress your family and friends. Enjoy the cooking process and the delicious meal that awaits!

Breakdown of Time for Sticky Honey Garlic Chicken Tenders Recipe

Sticky Honey Garlic Chicken Tenders Recipe can help you plan your meal better. Here’s a simple breakdown of the time required for preparation and cooking. This way, you can enjoy a delicious meal without feeling rushed!

Prep Time

The prep time for this recipe is approximately 10-15 minutes. During this time, you will gather all your ingredients, marinate the chicken, and prepare the honey garlic sauce. If you choose to marinate the chicken for longer, you can set it aside and let the flavors develop while you go about your day. Just remember, the longer you marinate, the more flavorful your chicken will be!

Cooking Time

Once you’re ready to cook, the baking time for the chicken tenders is about 25-30 minutes. This includes 20-25 minutes of baking and an additional 5 minutes for glazing with the cornstarch slurry. Make sure to flip the chicken halfway through to ensure even cooking. The aroma of the chicken baking will surely make your mouth water!

Total Time

In total, you can expect the entire process to take around 40-45 minutes, not including any extra marinating time. This makes it a quick and easy meal option for busy weeknights or when you want to impress guests without spending hours in the kitchen. With just a little bit of planning, you can have a delicious dish ready to serve in no time!

Nutritional Information for Sticky Honey Garlic Chicken Tenders Recipe

Sticky Honey Garlic Chicken Tenders Recipe not only satisfies your taste buds but also provides valuable nutrients. Here’s a breakdown of the nutritional information per serving, so you can enjoy this dish while keeping your health in mind.

Calories

Each serving of the sticky honey garlic chicken tenders contains approximately 320 calories. This makes it a satisfying option for a main dish without being overly heavy. The combination of chicken and the honey garlic sauce provides a delightful mix of flavors while keeping the calorie count reasonable. If you’re watching your calorie intake, consider pairing the chicken with a light salad or steamed vegetables to create a well-rounded meal.

Protein

One of the standout features of this recipe is its protein content. Each serving offers about 28 grams of protein. Chicken tenders are an excellent source of lean protein, which is essential for muscle growth and repair. Including protein in your meals can help you feel fuller for longer, making it easier to manage your appetite throughout the day. This makes the sticky honey garlic chicken tenders a great choice for anyone looking to boost their protein intake.

Sodium

The sodium content in each serving is approximately 800 milligrams. While this is a moderate amount, it’s important to be mindful of your overall sodium intake, especially if you are watching your salt consumption. To reduce sodium levels, consider using low-sodium soy sauce in the recipe. This small adjustment can help you enjoy the same great flavor while keeping your sodium intake in check.

Sticky Honey Garlic Chicken Tenders Recipe as part of a balanced diet. This dish not only delivers on taste but also provides essential nutrients that contribute to your overall health. Enjoy your meal with confidence, knowing you’re making a delicious and nutritious choice!

FAQs about Sticky Honey Garlic Chicken Tenders Recipe

Can I use frozen chicken tenders for this recipe?

Sticky Honey Garlic Chicken Tenders Recipe. However, it’s important to thaw them completely before marinating. Thawing allows the marinade to penetrate the chicken better, ensuring that every bite is flavorful. You can thaw the chicken in the refrigerator overnight or use the defrost setting on your microwave for a quicker option. Once thawed, follow the recipe as usual for delicious results!

What can I serve with Sticky Honey Garlic Chicken Tenders?

Sticky Honey Garlic Chicken Tenders. A classic choice is fluffy steamed rice, which pairs perfectly with the sticky sauce. You can also opt for a fresh salad with mixed greens, cherry tomatoes, and cucumbers for a refreshing contrast. If you want something heartier, consider serving the chicken with roasted vegetables or crispy potato wedges. For a fun twist, try wrapping the chicken in whole wheat tortillas with crunchy veggies for a tasty handheld meal!

How do I store leftovers of Sticky Honey Garlic Chicken Tenders?

Sticky Honey Garlic Chicken Tenders Recipe is easy! Allow the chicken to cool completely before transferring it to an airtight container. You can store the chicken in the refrigerator for up to 3-4 days. If you want to keep it longer, consider freezing the chicken. Place it in a freezer-safe container or bag, and it can last for up to 3 months. When you’re ready to enjoy the leftovers, simply reheat them in the oven or microwave until heated through. This way, you can savor the delicious flavors again!

Conclusion on Sticky Honey Garlic Chicken Tenders Recipe

Sticky Honey Garlic Chicken Tenders Recipe is a delightful dish that brings together sweet and savory flavors in a way that is sure to please everyone at the table. With its simple preparation and minimal ingredients, this recipe is perfect for busy weeknights or special occasions alike. The tender chicken, coated in a sticky honey garlic glaze, creates a mouthwatering experience that is hard to resist.

Not only is this dish easy to make, but it also offers plenty of room for customization. Whether you prefer it spicy, baked, or with a side of fresh salad, the variations are endless. This flexibility allows you to adapt the recipe to suit your family’s tastes and dietary preferences. Plus, the nutritional benefits of chicken make it a smart choice for a healthy meal.

As you gather around the table to enjoy your sticky honey garlic chicken tenders, you’ll create lasting memories with family and friends. The aroma of the dish will fill your home, inviting everyone to join in the feast. So, don’t hesitate to try this recipe and make it your own. With just a few simple steps, you can serve up a delicious meal that will have everyone asking for seconds!

We hope you enjoy making and sharing this recipe as much as we do. Happy cooking!

Stuffed Salmon with Spinach and Cream Cheese Recipe delights!

Introduction to Stuffed Salmon with Spinach and Cream Cheese Recipe

Stuffed Salmon with Spinach and Cream Cheese Recipe is not just a meal; it’s an experience. Imagine tender salmon fillets filled with a creamy, flavorful mixture that brings together the richness of cream cheese and the freshness of spinach. This dish is perfect for a cozy dinner or a special occasion, making it a versatile addition to your culinary repertoire.

What Makes Stuffed Salmon with Spinach and Cream Cheese Special?

What sets this recipe apart is its unique combination of flavors and textures. The salmon is not only a great source of protein but also packed with omega-3 fatty acids, which are essential for heart health. The creamy spinach filling adds a burst of flavor and a touch of elegance to the dish. Plus, it’s easy to prepare, making it suitable for both novice cooks and seasoned chefs.

Another reason this recipe shines is its adaptability. You can customize the filling to suit your taste. Whether you prefer a hint of spice or a different green, the possibilities are endless. This flexibility allows you to create a dish that feels personal and special every time you make it.

In addition, serving stuffed salmon can impress your guests. The presentation of the stuffed fillets, paired with vibrant lemon wedges, makes for a stunning plate. It’s a dish that not only tastes good but looks good too!

Stuffed Salmon with Spinach and Cream Cheese Recipe. You’re just a few steps away from a delicious meal that will leave everyone asking for seconds!

Ingredients for Stuffed Salmon with Spinach and Cream Cheese Recipe

Stuffed Salmon with Spinach and Cream Cheese Recipe, you’ll need a selection of fresh and flavorful ingredients. Each component plays a vital role in bringing this dish to life. Here’s what you’ll need:

  • 2 (6-ounce) salmon fillets, skin removed
  • 4 ounces cream cheese, softened
  • 1 cup fresh spinach, finely chopped
  • 1 clove garlic, minced
  • 1 tablespoon lemon juice
  • 1 teaspoon dried dill
  • Salt and pepper, to taste
  • 1 tablespoon olive oil
  • Lemon wedges, for garnish

These ingredients are not only easy to find but also work together beautifully. The salmon fillets provide a rich, buttery flavor, while the cream cheese adds a creamy texture. Fresh spinach brings a pop of color and nutrients, making this dish both delicious and healthy.

Don’t forget the garlic and lemon juice! They enhance the overall taste, giving the dish a zesty kick. The dried dill adds a hint of earthiness, balancing the flavors perfectly. With just a few simple ingredients, you can create a meal that feels gourmet without the fuss.

Now that you have your ingredients ready, let’s move on to the next step: preparing the spinach and cream cheese filling!

Step-by-Step Preparation of Stuffed Salmon with Spinach and Cream Cheese Recipe

Stuffed Salmon with Spinach and Cream Cheese Recipe. This step-by-step guide will help you create a delicious meal that’s sure to impress. Let’s get started!

Step 1: Preparing the Spinach and Cream Cheese Filling

First, you’ll want to prepare the creamy filling. In a mixing bowl, combine the softened cream cheese with the finely chopped spinach. Make sure the cream cheese is at room temperature; this makes it easier to mix. Next, add the minced garlic, lemon juice, and dried dill. Season with a pinch of salt and pepper to taste.

Using a fork or a spatula, mix everything together until it’s creamy and well combined. The vibrant green spinach will add a lovely color to the filling, while the garlic and lemon juice will give it a fresh flavor. Once mixed, set the bowl aside. Your filling is now ready!

Step 2: Preparing the Salmon Fillets

Next, it’s time to prepare the salmon fillets. Start by rinsing the fillets under cold water and patting them dry with paper towels. This step is important as it helps remove any excess moisture, ensuring the salmon cooks evenly.

Now, carefully slice a pocket into the side of each fillet. Use a sharp knife and be gentle; you want to create a pocket without cutting all the way through. This pocket will hold your delicious spinach and cream cheese filling. Once you’ve made the pockets, season the outside of the fillets with a little salt and pepper. This will enhance the flavor of the salmon.

Step 3: Stuffing the Salmon

With the salmon fillets prepared, it’s time to stuff them! Take the creamy spinach filling and generously fill each pocket. Make sure to pack it in well, so it doesn’t spill out during cooking. You want each bite to be bursting with flavor!

After stuffing the fillets, lightly drizzle olive oil over the top. This will help keep the salmon moist while it bakes. If you like, you can sprinkle a bit more salt and pepper on top for added flavor. Your salmon is now ready for the oven!

Step 4: Cooking the Stuffed Salmon

Preheat your oven to 375°F (190°C) if you haven’t done so already. Line a baking dish with parchment paper for easy cleanup. Place the stuffed salmon fillets in the dish, ensuring they are spaced apart for even cooking.

Bake the salmon in the preheated oven for 20-25 minutes. You’ll know it’s done when the fish is tender and flakes easily with a fork. The filling should be warm and creamy, making each bite a delightful experience. Once cooked, remove the salmon from the oven and let it rest for a few minutes before serving.

Now that you’ve prepared your stuffed salmon, it’s time to enjoy this delicious meal! But before you serve, let’s explore some variations and tips to make this dish even more exciting.

Variations of Stuffed Salmon with Spinach and Cream Cheese Recipe

Stuffed Salmon with Spinach and Cream Cheese Recipe is a hit on its own, there are many ways to switch things up! Exploring variations can keep your meals exciting and cater to different tastes. Let’s dive into some alternative fillings and cooking methods that can elevate your salmon dish.

Alternative Fillings for Stuffed Salmon

One of the best parts about this recipe is its versatility. You can easily customize the filling to suit your preferences. Here are some tasty alternatives:

  • Sun-Dried Tomatoes and Feta: Swap out spinach for sun-dried tomatoes and add crumbled feta cheese. This combination gives a Mediterranean twist to your salmon.
  • Mushroom and Herb: Sauté finely chopped mushrooms with garlic and fresh herbs like parsley or thyme. This earthy filling pairs beautifully with salmon.
  • Crab and Cream Cheese: For a luxurious touch, mix in some lump crab meat with the cream cheese. This filling adds a rich flavor that seafood lovers will adore.
  • Broccoli and Cheddar: If you’re looking for a cheesy option, try mixing steamed broccoli with shredded cheddar cheese. This filling is both nutritious and delicious!

Feel free to experiment with different ingredients. The key is to balance flavors and textures, ensuring that your filling complements the salmon perfectly.

Different Cooking Methods for Stuffed Salmon

While baking is a popular method for cooking stuffed salmon, there are other ways to prepare this dish that can yield delightful results. Here are a few cooking methods to consider:

  • Grilling: For a smoky flavor, grill the stuffed salmon on medium heat. Wrap the fillets in foil to prevent the filling from spilling out. Grill for about 10-15 minutes, depending on the thickness of the salmon.
  • Pan-Seering: Heat a skillet over medium heat and add a little olive oil. Sear the stuffed salmon for about 4-5 minutes on each side until golden brown. This method gives a crispy exterior while keeping the inside moist.
  • Air Frying: If you have an air fryer, it’s a fantastic option! Preheat the air fryer to 375°F (190°C) and cook the stuffed salmon for about 12-15 minutes. This method results in a crispy texture without the need for much oil.

Each cooking method brings out different flavors and textures in the salmon. Choose the one that suits your taste and equipment best!

Stuffed Salmon with Spinach and Cream Cheese Recipe every time you make it. Now, let’s move on to some important cooking notes to ensure your salmon turns out perfectly every time.

Cooking Note for Stuffed Salmon with Spinach and Cream Cheese Recipe

Stuffed Salmon with Spinach and Cream Cheese Recipe.

First, always choose fresh salmon fillets. Fresh fish not only tastes better but also has a firmer texture, making it easier to handle while stuffing. If you can, buy wild-caught salmon for the best flavor and quality. If you opt for frozen salmon, make sure to thaw it completely in the refrigerator before cooking.

Next, pay attention to the thickness of your salmon fillets. Thicker fillets may require a longer cooking time, while thinner ones will cook faster. To ensure even cooking, try to select fillets that are similar in size. This way, they will all finish cooking at the same time.

When it comes to the filling, feel free to adjust the seasoning to your liking. Taste the filling before stuffing the salmon. If you prefer a stronger garlic flavor or more lemon zest, go ahead and add it! This is your chance to make the dish your own.

Another important note is to avoid overcooking the salmon. Overcooked salmon can become dry and lose its delicate flavor. Keep an eye on the cooking time, and use a fork to check for doneness. The salmon should flake easily but still be moist inside.

Stuffed Salmon with Spinach and Cream Cheese Recipe.

By following these cooking notes, you’ll be well on your way to creating a stunning and tasty dish that will impress your family and friends. Now, let’s explore some serving suggestions to complement your stuffed salmon!

Serving Suggestions for Stuffed Salmon with Spinach and Cream Cheese Recipe

Stuffed Salmon with Spinach and Cream Cheese Recipe is ready, it’s time to think about how to serve it. The right sides can elevate your meal, making it even more enjoyable. Here are some delicious serving suggestions that pair beautifully with your stuffed salmon:

  • Roasted Vegetables: A medley of roasted vegetables, such as asparagus, bell peppers, and zucchini, adds color and nutrition to your plate. The caramelized flavors of the veggies complement the richness of the salmon.
  • Quinoa or Rice: Serve your salmon over a bed of fluffy quinoa or rice. These grains absorb the flavors of the dish and provide a hearty base. Consider adding herbs or lemon zest to the grains for extra flavor.
  • Mixed Green Salad: A fresh salad with mixed greens, cherry tomatoes, and a light vinaigrette can balance the richness of the salmon. The crispness of the salad adds a refreshing contrast.
  • Garlic Mashed Potatoes: Creamy garlic mashed potatoes are a comforting side that pairs well with the salmon. The buttery texture complements the creamy filling, making each bite delightful.
  • Lemon Wedges: Don’t forget to serve lemon wedges on the side! A squeeze of fresh lemon juice over the salmon enhances its flavor and adds a zesty brightness.

For a complete meal, consider serving a glass of white wine, such as Sauvignon Blanc or Chardonnay. These wines have a crispness that pairs well with the flavors of the salmon.

Stuffed Salmon with Spinach and Cream Cheese Recipe will not only be a feast for the taste buds but also a feast for the eyes. Enjoy your meal with family and friends, and watch as they savor every bite!

Tips for Perfecting Stuffed Salmon with Spinach and Cream Cheese Recipe

Stuffed Salmon with Spinach and Cream Cheese Recipe is all about attention to detail. With a few helpful tips, you can elevate your dish to new heights. Here are some essential tips to ensure your salmon turns out delicious every time:

  • Use Fresh Ingredients: Fresh salmon and vegetables make a big difference in flavor. Always choose high-quality ingredients for the best results. Fresh spinach, in particular, adds a vibrant taste and texture to the filling.
  • Don’t Overstuff: While it’s tempting to pack the filling tightly, avoid overstuffing the salmon pockets. This can cause the filling to spill out during cooking. A generous but manageable amount will keep everything intact.
  • Season Generously: Don’t be shy with the seasoning! A little extra salt and pepper can enhance the flavors of the salmon and filling. Taste the filling before stuffing to ensure it’s seasoned to your liking.
  • Check for Doneness: Salmon is best when it’s cooked just right. Use a fork to check if it flakes easily. If it does, it’s ready! Overcooking can lead to dry salmon, so keep an eye on the time.
  • Let It Rest: After baking, let the salmon rest for a few minutes. This allows the juices to redistribute, making each bite tender and juicy. It’s worth the wait!
  • Experiment with Flavors: Don’t hesitate to try different herbs and spices in your filling. Fresh herbs like basil or parsley can add a unique twist. You can also experiment with different cheeses for added creaminess.
  • Pair with the Right Sides: Think about what you serve alongside your salmon. Complementary sides can enhance the overall meal experience. Consider light salads or hearty grains to balance the richness of the dish.

Stuffed Salmon with Spinach and Cream Cheese Recipe. Each time you make it, you’ll discover new ways to make it even better. Happy cooking!

Breakdown of Time for Stuffed Salmon with Spinach and Cream Cheese Recipe

Stuffed Salmon with Spinach and Cream Cheese Recipe can help you plan your cooking efficiently. Here’s a simple breakdown of the time you’ll need for preparation and cooking.

Prep Time

The prep time for this delicious dish is approximately 15-20 minutes. This includes gathering your ingredients, preparing the spinach and cream cheese filling, and slicing the pockets into the salmon fillets. Taking your time during this stage ensures that everything is ready for the next steps.

Cooking Time

Once your salmon is stuffed and ready, the cooking time is about 20-25 minutes. Baking the salmon at 375°F (190°C) allows it to cook evenly while keeping the filling warm and creamy. Keep an eye on the salmon as it cooks to ensure it reaches the perfect level of doneness.

Total Time

In total, you can expect to spend around 35-45 minutes from start to finish. This includes both prep and cooking time. With this quick and easy timeline, you can enjoy a delicious meal without spending hours in the kitchen. Plus, the result is a stunning dish that’s sure to impress!

Nutritional Information for Stuffed Salmon with Spinach and Cream Cheese Recipe

Stuffed Salmon with Spinach and Cream Cheese Recipe not only delights your taste buds but also provides valuable nutrients. Here’s a breakdown of the nutritional information per serving:

Calories

Each serving of this delicious stuffed salmon contains approximately 350 calories. This makes it a satisfying yet healthy option for dinner. The combination of salmon and cream cheese provides a rich flavor while keeping the calorie count reasonable. Enjoying this dish can fit well into a balanced meal plan.

Protein

One of the standout features of this recipe is its high protein content. Each serving offers about 34 grams of protein. Salmon is an excellent source of protein, which is essential for muscle repair and growth. The addition of cream cheese and spinach also contributes to the overall protein content, making this dish a great choice for those looking to increase their protein intake.

Sodium

When it comes to sodium, each serving contains around 500 milligrams. While this is a moderate amount, it’s important to be mindful of your overall sodium intake throughout the day. You can adjust the seasoning in the recipe to suit your dietary needs. Using low-sodium cream cheese or reducing added salt can help lower the sodium content if necessary.

Stuffed Salmon with Spinach and Cream Cheese Recipe is not only delicious but also packed with nutrients. With a good balance of calories, protein, and moderate sodium, it’s a meal that can support a healthy lifestyle. Now that you know the nutritional benefits, let’s move on to some frequently asked questions about this delightful dish!

FAQs about Stuffed Salmon with Spinach and Cream Cheese Recipe

Can I use frozen salmon for this recipe?

Stuffed Salmon with Spinach and Cream Cheese Recipe. However, it’s important to thaw the salmon completely before cooking. The best way to do this is to place the frozen fillets in the refrigerator overnight. If you’re short on time, you can also thaw them under cold running water for about 30 minutes. Just make sure the salmon is fully thawed to ensure even cooking and the best texture.

What can I serve with stuffed salmon?

Stuffed Salmon with Spinach and Cream Cheese Recipe. Consider pairing it with roasted vegetables, quinoa, or a fresh mixed green salad. Garlic mashed potatoes also make a comforting side. For a refreshing touch, serve lemon wedges to squeeze over the salmon. These sides not only complement the flavors of the salmon but also create a well-rounded meal.

How do I know when the salmon is cooked?

To check if your salmon is cooked perfectly, use a fork to gently flake the fish. It should flake easily and appear opaque in the center. The internal temperature should reach 145°F (63°C) for safe consumption. If you don’t have a thermometer, look for the salmon to be slightly firm to the touch and not translucent. Remember, overcooking can lead to dry salmon, so keep an eye on it as it bakes!

Can I make the filling ahead of time?

Absolutely! You can prepare the creamy spinach filling ahead of time. Simply mix the ingredients and store the filling in an airtight container in the refrigerator for up to 24 hours. When you’re ready to cook, just stuff the salmon pockets and bake as directed. This makes meal prep easier and allows you to enjoy a delicious dinner with minimal effort!

Conclusion on Stuffed Salmon with Spinach and Cream Cheese Recipe

Stuffed Salmon with Spinach and Cream Cheese Recipe is a delightful dish that combines flavor, nutrition, and elegance. With its creamy filling and tender salmon, this recipe is sure to impress anyone at your dinner table. Whether you’re cooking for a special occasion or just a cozy family meal, this dish is versatile enough to fit any setting.

Throughout this article, we’ve explored the ingredients, preparation steps, and various ways to customize this recipe. From alternative fillings to different cooking methods, the possibilities are endless. You can easily adapt the recipe to suit your taste preferences or dietary needs, making it a go-to option for any occasion.

Moreover, the nutritional benefits of this dish cannot be overlooked. With a good balance of protein, healthy fats, and essential vitamins, it supports a healthy lifestyle while satisfying your taste buds. Plus, the ease of preparation means you can enjoy a gourmet meal without spending hours in the kitchen.

Stuffed Salmon with Spinach and Cream Cheese Recipe, remember to have fun and experiment with flavors. Don’t hesitate to make it your own! With each attempt, you’ll discover new ways to enhance this dish, ensuring it remains a favorite in your home.

So, gather your ingredients, follow the steps, and enjoy the delicious results. Your stuffed salmon is just a few simple steps away from being the star of your next meal. Happy cooking!

Tuscan Lemon Chicken is a delightful Italian dish.

Introduction to Tuscan Lemon Chicken Recipe

Welcome to the delightful world of Tuscan cuisine! The Tuscan Lemon Chicken Recipe is a vibrant dish that brings together the zesty flavors of lemon and the aromatic essence of herbs. This recipe is not just a meal; it’s an experience that transports you to the sun-kissed hills of Tuscany. With its simple yet flavorful ingredients, this dish is perfect for family dinners or special occasions.

What Makes the Tuscan Lemon Chicken Recipe Special?

What sets the Tuscan Lemon Chicken Recipe apart is its unique blend of fresh ingredients and bold flavors. The combination of juicy chicken thighs, bright lemon juice, and fragrant herbs creates a symphony of taste that is both refreshing and satisfying. The use of cherry tomatoes adds a pop of color and sweetness, making the dish visually appealing as well.

Moreover, this recipe is incredibly versatile. You can easily adjust the spice level by adding crushed red pepper flakes or customize it with your favorite herbs. The cooking method allows the chicken to absorb all the delicious flavors, resulting in tender, juicy meat that pairs beautifully with the rich sauce.

Not only is this dish a feast for the senses, but it also offers a healthy option for those looking to enjoy a nutritious meal. With lean protein from the chicken and the goodness of fresh vegetables, the Tuscan Lemon Chicken Recipe is a wholesome choice for any dinner table.

So, whether you’re a seasoned cook or a beginner in the kitchen, this recipe is sure to impress. Let’s dive into the ingredients and get started on creating this Tuscan delight!

Ingredients for Tuscan Lemon Chicken Recipe

To create the mouthwatering Tuscan Lemon Chicken Recipe, you’ll need a selection of fresh and flavorful ingredients. Each component plays a vital role in bringing out the dish’s vibrant taste. Here’s what you’ll need:

  • 2 pounds boneless, skinless chicken thighs
  • 1 teaspoon sea salt
  • 1 teaspoon freshly ground black pepper
  • 2 tablespoons extra virgin olive oil
  • 4 cloves garlic, finely chopped
  • 1 cup low-sodium chicken broth
  • 1/4 cup freshly squeezed lemon juice (about 2 lemons)
  • 1 teaspoon dried oregano
  • 1 teaspoon dried thyme
  • 1/2 teaspoon crushed red pepper flakes (optional)
  • 1 cup halved cherry tomatoes
  • 1/4 cup freshly chopped basil
  • 1/4 cup grated Parmesan cheese

These ingredients come together to create a dish that is not only delicious but also visually stunning. The chicken thighs provide a juicy base, while the lemon juice adds a refreshing zing. The herbs and spices enhance the overall flavor, making each bite a delightful experience.

Feel free to adjust the quantities based on your preferences. For instance, if you love garlic, you can add an extra clove or two. If you prefer a milder flavor, you can reduce the amount of crushed red pepper flakes. The beauty of this recipe lies in its flexibility, allowing you to make it your own!

Now that you have gathered all the ingredients, let’s move on to the next step: preparing the Tuscan sauce that will elevate your chicken to new heights!

Step-by-Step Preparation of Tuscan Lemon Chicken Recipe

Now that you have all your ingredients ready, it’s time to dive into the step-by-step preparation of the Tuscan Lemon Chicken Recipe. Each step is designed to ensure that your chicken is flavorful and tender, making it a dish everyone will love. Let’s get started!

Step 1: Marinating the Chicken

Begin by marinating the chicken thighs. In a large bowl, combine the chicken with sea salt, black pepper, and a tablespoon of olive oil. Make sure to coat the chicken evenly. This step is crucial as it helps to infuse the chicken with flavor. Let it marinate for at least 15 minutes. If you have more time, marinating for an hour or even overnight in the fridge will enhance the taste even further.

Step 2: Preparing the Tuscan Sauce

While the chicken is marinating, you can prepare the Tuscan sauce. In a medium bowl, mix together the chicken broth, freshly squeezed lemon juice, dried oregano, dried thyme, and crushed red pepper flakes if you like a bit of heat. Stir well to combine all the ingredients. This sauce will be the heart of your dish, adding moisture and flavor to the chicken.

Step 3: Cooking the Chicken

Once the chicken has marinated, it’s time to cook it. Heat the remaining tablespoon of olive oil in a large skillet over medium-high heat. When the oil is hot, add the marinated chicken thighs. Sear them for about 5-7 minutes on each side until they turn golden brown. This step locks in the juices and gives the chicken a delicious crust.

Step 4: Combining Ingredients

After the chicken is nicely browned, remove it from the skillet and set it aside on a plate. In the same skillet, add the finely chopped garlic and sauté for about 30 seconds until fragrant. Then, pour in the prepared Tuscan sauce, scraping up any bits stuck to the bottom of the skillet. This adds extra flavor to your sauce. Return the chicken to the skillet and add the halved cherry tomatoes. Let everything simmer together for about 5 minutes.

Step 5: Final Touches

Once the sauce has thickened and the flavors have melded beautifully, it’s time for the final touches. Remove the skillet from the heat and fold in the freshly chopped basil and grated Parmesan cheese. Stir until everything is well combined. The cheese will melt slightly, adding a creamy texture to the sauce. Serve the chicken warm, spooning the luscious sauce over it. You can garnish with extra basil for a pop of color and flavor!

And there you have it! Your Tuscan Lemon Chicken is ready to be enjoyed. This dish is not only easy to prepare but also packed with flavor, making it a perfect choice for any occasion.

Variations of Tuscan Lemon Chicken Recipe

The beauty of the Tuscan Lemon Chicken Recipe lies in its versatility. You can easily switch up ingredients or cooking methods to create a dish that suits your taste. Let’s explore some alternative ingredients and different cooking methods that can elevate your culinary experience!

Alternative Ingredients for Tuscan Lemon Chicken Recipe

If you want to mix things up, consider these alternative ingredients:

  • Chicken Breasts: Instead of thighs, you can use boneless, skinless chicken breasts. They are leaner and cook faster, but be careful not to overcook them.
  • Herbs: Feel free to experiment with fresh herbs like rosemary or parsley. They can add a different flavor profile to your dish.
  • Vegetables: Add bell peppers, zucchini, or spinach for extra nutrition and color. These veggies can be sautéed along with the garlic.
  • Wine: For a richer sauce, consider adding a splash of white wine to the skillet after sautéing the garlic. Let it reduce before adding the chicken broth.
  • Cheese: Instead of Parmesan, try using feta or goat cheese for a tangy twist.

These alternatives can help you create a unique version of the Tuscan Lemon Chicken Recipe that suits your preferences and dietary needs.

Different Cooking Methods for Tuscan Lemon Chicken Recipe

In addition to the stovetop method, there are several other ways to prepare this delicious dish:

  • Oven-Baked: After searing the chicken, transfer it to a baking dish, pour the sauce over it, and bake at 375°F (190°C) for about 25-30 minutes. This method allows the chicken to absorb all the flavors while cooking evenly.
  • Slow Cooker: For a hands-off approach, place the marinated chicken and sauce ingredients in a slow cooker. Cook on low for 6-8 hours or high for 3-4 hours. The chicken will be incredibly tender and flavorful.
  • Grilled: Marinate the chicken as usual, then grill it over medium heat. Once cooked, drizzle the sauce over the chicken or serve it on the side for dipping.

These cooking methods can add variety to your meals and make the Tuscan Lemon Chicken Recipe even more enjoyable. Whether you prefer a quick stovetop meal or a slow-cooked delight, there’s a method for everyone!

Cooking Note for Tuscan Lemon Chicken Recipe

When preparing the Tuscan Lemon Chicken Recipe, there are a few important cooking notes to keep in mind. These tips will help ensure that your dish turns out perfectly every time, enhancing both flavor and texture.

First, always choose high-quality ingredients. Fresh chicken thighs, vibrant herbs, and ripe tomatoes will significantly elevate the taste of your dish. Fresh ingredients not only provide better flavor but also contribute to the overall healthiness of the meal.

Next, pay attention to the cooking temperature. Searing the chicken over medium-high heat is crucial for achieving that golden-brown crust. This step locks in the juices, making the chicken tender and flavorful. If the heat is too low, the chicken may steam instead of sear, resulting in a less appealing texture.

Additionally, don’t rush the simmering process. Allowing the chicken to simmer in the sauce for about 5 minutes helps the flavors meld together beautifully. This step is essential for creating a rich and delicious sauce that complements the chicken perfectly.

Lastly, remember to taste and adjust the seasoning. Before serving, give the sauce a quick taste. If it needs a little more brightness, add a splash of lemon juice. If it’s lacking depth, a pinch of salt or a sprinkle of herbs can make a big difference. This final touch ensures that your Tuscan Lemon Chicken is bursting with flavor.

By following these cooking notes, you’ll be well on your way to mastering the Tuscan Lemon Chicken Recipe. Enjoy the process and savor the delightful results!

Serving Suggestions for Tuscan Lemon Chicken Recipe

Once your Tuscan Lemon Chicken is ready, it’s time to think about what to serve alongside it. The right side dishes can enhance the meal and create a well-rounded dining experience. Here are some delicious options that pair beautifully with this flavorful chicken dish.

Best Side Dishes to Pair with Tuscan Lemon Chicken Recipe

  • Garlic Mashed Potatoes: Creamy mashed potatoes infused with garlic make a comforting side. They soak up the delicious sauce from the chicken, creating a delightful combination.
  • Steamed Asparagus: Lightly steamed asparagus adds a fresh, crisp element to your plate. The bright green color and subtle flavor complement the lemony chicken perfectly.
  • Quinoa Salad: A refreshing quinoa salad with cherry tomatoes, cucumber, and a lemon vinaigrette can add a healthy twist. It’s light and packed with nutrients, making it a great choice.
  • Roasted Vegetables: A medley of roasted vegetables, such as bell peppers, zucchini, and carrots, brings color and sweetness to the meal. The caramelization enhances their natural flavors.
  • Garlic Bread: Crispy garlic bread is always a hit! It’s perfect for soaking up the savory sauce from the chicken, making every bite even more enjoyable.
  • Caesar Salad: A classic Caesar salad with crunchy romaine, creamy dressing, and croutons adds a nice crunch. The flavors of the dressing pair well with the Tuscan chicken.

These side dishes not only complement the Tuscan Lemon Chicken Recipe but also create a colorful and appetizing presentation. Feel free to mix and match based on your preferences and what you have on hand. Enjoy your meal!

Tips for Perfecting Your Tuscan Lemon Chicken Recipe

To truly master the Tuscan Lemon Chicken Recipe, a few tips can make all the difference. These simple yet effective suggestions will help you elevate your dish, ensuring it’s bursting with flavor and cooked to perfection. Let’s explore some key tips that will guide you in creating a delightful meal every time!

First, always use fresh ingredients. Fresh herbs, ripe tomatoes, and high-quality chicken will enhance the overall taste of your dish. Freshness matters, especially with herbs like basil and oregano, which can lose their flavor when dried out. So, whenever possible, opt for fresh over dried.

Next, don’t skip the marinating step. Allowing the chicken to marinate for at least 15 minutes helps infuse it with flavor. If you have time, marinating it for a few hours or overnight will yield even better results. The longer the chicken sits in the seasoning, the more flavorful it becomes.

When cooking the chicken, ensure your skillet is hot before adding the meat. This step is crucial for achieving that beautiful golden-brown crust. If the skillet isn’t hot enough, the chicken may stick or steam instead of sear, which can affect the texture.

Another important tip is to avoid overcrowding the skillet. If you’re cooking a large batch, consider doing it in batches. Overcrowding can lower the temperature of the skillet, leading to uneven cooking. Give each piece of chicken enough space to brown nicely.

Lastly, always taste your sauce before serving. Adjust the seasoning as needed. A splash of lemon juice can brighten the flavors, while a pinch of salt can enhance the overall taste. This final touch ensures that your Tuscan Lemon Chicken is not only delicious but also perfectly balanced.

By following these tips, you’ll be well on your way to perfecting your Tuscan Lemon Chicken Recipe. Enjoy the cooking process and the delightful flavors that come with it!

Breakdown of Time for Tuscan Lemon Chicken Recipe

Understanding the time required for each step of the Tuscan Lemon Chicken Recipe can help you plan your cooking efficiently. Here’s a detailed breakdown of the time you’ll need for preparation and cooking.

Prep Time

The prep time for the Tuscan Lemon Chicken Recipe is approximately 20 minutes. This includes:

  • Gathering all your ingredients.
  • Marinating the chicken thighs with salt, pepper, and olive oil.
  • Chopping garlic, halving cherry tomatoes, and preparing the herbs.
  • Mixing the Tuscan sauce ingredients together.

Taking your time during the prep phase ensures that everything is ready when you start cooking, making the process smoother and more enjoyable.

Cooking Time

The cooking time for this recipe is about 20-25 minutes. This includes:

  • Searing the chicken thighs for 5-7 minutes on each side until golden brown.
  • Sautéing the garlic for 30 seconds.
  • Simmering the chicken in the sauce for about 5 minutes to meld the flavors.

Cooking the chicken properly is essential for achieving that juicy, tender texture that makes this dish so delightful.

Total Time

In total, you can expect the Tuscan Lemon Chicken Recipe to take around 40-45 minutes from start to finish. This includes both prep and cooking time. It’s a relatively quick meal that’s perfect for busy weeknights or when you want to impress guests without spending hours in the kitchen.

With this time breakdown, you can easily plan your cooking schedule and enjoy the process of creating this delicious Tuscan dish!

Nutritional Information for Tuscan Lemon Chicken Recipe

Understanding the nutritional content of your meals is essential for maintaining a balanced diet. The Tuscan Lemon Chicken Recipe not only delights your taste buds but also provides valuable nutrients. Here’s a breakdown of the nutritional information for this delicious dish.

Calories

One serving of the Tuscan Lemon Chicken Recipe contains approximately 350 calories. This makes it a satisfying yet light option for dinner. The calories primarily come from the chicken, olive oil, and Parmesan cheese, which provide essential fats and proteins. Enjoying this dish as part of a balanced meal can help you stay within your daily caloric needs.

Protein

This recipe is a great source of protein, offering about 30 grams per serving. Chicken thighs are rich in protein, which is vital for muscle repair and growth. Including protein in your meals can help you feel fuller for longer, making it easier to manage your appetite throughout the day.

Sodium

The sodium content in the Tuscan Lemon Chicken Recipe is approximately 600 milligrams per serving. This amount is relatively moderate, especially considering that low-sodium chicken broth is used. If you are watching your sodium intake, you can further reduce it by using less salt or opting for a homemade broth. Balancing sodium levels is important for maintaining healthy blood pressure and overall wellness.

In summary, the Tuscan Lemon Chicken Recipe is not only delicious but also nutritious. With a good balance of calories, protein, and sodium, it makes for a wholesome meal that you can enjoy guilt-free. So, go ahead and savor every bite of this delightful dish!

FAQs about Tuscan Lemon Chicken Recipe

Can I use other types of chicken for the Tuscan Lemon Chicken Recipe?

Absolutely! While the recipe calls for boneless, skinless chicken thighs, you can use other cuts of chicken. Boneless, skinless chicken breasts are a great alternative. They are leaner and cook faster, but be careful not to overcook them, as they can dry out. You can also use bone-in chicken pieces, but the cooking time will need to be adjusted. Just ensure that the chicken reaches an internal temperature of 165°F (75°C) for safety.

How can I make the Tuscan Lemon Chicken Recipe spicier?

If you love a bit of heat, there are several ways to spice up your Tuscan Lemon Chicken. One simple method is to add more crushed red pepper flakes to the sauce. You can also include fresh chopped chili peppers or a dash of hot sauce. For an extra kick, consider marinating the chicken with a bit of cayenne pepper or chili powder. Just remember to start with a small amount and adjust to your taste!

What can I substitute for lemon in the Tuscan Lemon Chicken Recipe?

If you don’t have lemons on hand or prefer a different flavor, there are a few substitutes you can use. Lime juice is a great alternative, providing a similar tangy flavor. You can also use vinegar, such as white wine vinegar or apple cider vinegar, but use it sparingly as it is more acidic. Another option is to use a splash of orange juice for a sweeter twist. Just keep in mind that these substitutes will alter the flavor profile slightly.

How long can I store leftovers of the Tuscan Lemon Chicken Recipe?

Leftovers of the Tuscan Lemon Chicken can be stored in an airtight container in the refrigerator for up to 3-4 days. To reheat, simply warm it in a skillet over low heat or in the microwave until heated through. If you want to keep it longer, you can freeze the chicken and sauce for up to 3 months. Just make sure to thaw it in the refrigerator before reheating for the best results.

Conclusion on Tuscan Lemon Chicken Recipe

In conclusion, the Tuscan Lemon Chicken Recipe is a delightful dish that brings the vibrant flavors of Italy right to your kitchen. With its combination of juicy chicken thighs, zesty lemon, and aromatic herbs, this recipe is sure to impress your family and friends. Not only is it easy to prepare, but it also offers a healthy and satisfying meal option that everyone can enjoy.

Throughout this article, we’ve explored the various aspects of the Tuscan Lemon Chicken Recipe, from the essential ingredients to the step-by-step preparation. We’ve also discussed variations, cooking methods, and serving suggestions that can enhance your dining experience. Whether you choose to stick to the classic recipe or experiment with alternative ingredients, the possibilities are endless.

Remember, the key to a successful Tuscan Lemon Chicken lies in using fresh ingredients and allowing the flavors to meld together beautifully. With a little patience and care, you can create a dish that not only tastes amazing but also looks stunning on the plate.

So, gather your ingredients, roll up your sleeves, and get ready to embark on a culinary adventure. The Tuscan Lemon Chicken Recipe is more than just a meal; it’s an opportunity to share love and joy through food. Enjoy every bite, and don’t forget to share your delicious creation with those you cherish!

Mediterranean Roasted Eggplant Recipe is a must-try!

Introduction to Mediterranean Roasted Eggplant Recipe

Welcome to the delightful world of Mediterranean cuisine! Today, we’re diving into a scrumptious dish that highlights the rich flavors of the Mediterranean: the Mediterranean Roasted Eggplant Recipe. This dish is not only easy to prepare but also packed with nutrients and vibrant tastes. Whether you’re a seasoned chef or a beginner in the kitchen, this recipe will surely impress your family and friends.

Eggplant, also known as aubergine, is a versatile vegetable that shines in Mediterranean cooking. Its unique texture and ability to absorb flavors make it a perfect canvas for various seasonings and toppings. In this recipe, we’ll explore how to transform simple eggplant into a mouthwatering delight that can be enjoyed in many ways.

What Makes Mediterranean Roasted Eggplant Unique?

What sets Mediterranean Roasted Eggplant apart from other eggplant dishes? First, it’s all about the seasoning. The combination of olive oil, herbs, and spices creates a flavor explosion that is both savory and aromatic. The use of fresh ingredients like basil and tomatoes adds a burst of freshness, making each bite a delightful experience.

Moreover, the grilling or roasting process enhances the natural sweetness of the eggplant while giving it a beautiful char. This method not only improves the taste but also adds a lovely texture that contrasts perfectly with the creamy goat cheese or feta cheese topping.

Additionally, this recipe is incredibly adaptable. You can easily customize it by adding your favorite herbs or vegetables. Whether you prefer a spicy kick or a more subtle flavor, the Mediterranean Roasted Eggplant Recipe can be tailored to suit your palate. So, let’s get started on this culinary adventure and discover how to make this unique dish!

Ingredients for Mediterranean Roasted Eggplant Recipe

To create the delicious Mediterranean Roasted Eggplant, you’ll need a selection of fresh and flavorful ingredients. Each component plays a vital role in enhancing the overall taste of the dish. Here’s what you’ll need:

  • 2 medium eggplants, cut into 1-inch thick slices
  • 1/4 cup extra virgin olive oil
  • 1 teaspoon sea salt
  • 1/2 teaspoon freshly ground black pepper
  • 1 teaspoon onion powder
  • 1 teaspoon dried thyme
  • 1 teaspoon cayenne pepper
  • 1/2 cup halved grape tomatoes
  • 1/4 cup crumbled goat cheese
  • 2 tablespoons fresh basil, chopped
  • 1 tablespoon red wine vinegar

These ingredients come together to create a dish that is not only tasty but also visually appealing. The eggplants serve as the star of the show, while the olive oil adds richness. The spices and herbs bring depth, and the goat cheese provides a creamy finish. You can also experiment with different ingredients to make this recipe your own!

For instance, if you prefer a tangy flavor, consider using feta cheese instead of goat cheese. Additionally, feel free to add more vegetables like bell peppers or zucchini for extra color and nutrition. The possibilities are endless, making this Mediterranean Roasted Eggplant Recipe a versatile choice for any meal.

Step-by-Step Preparation of Mediterranean Roasted Eggplant Recipe

Now that you have gathered all your ingredients, it’s time to dive into the preparation of your Mediterranean Roasted Eggplant. This step-by-step guide will help you create a delicious dish that is sure to impress. Let’s get started!

Step 1: Prepping the Eggplant

First, you need to prepare the eggplant. Start by washing the eggplants under cool running water. This helps remove any dirt or residue. Next, cut the eggplants into 1-inch thick slices. This thickness ensures even cooking and allows the eggplant to absorb the flavors beautifully.

After slicing, it’s a good idea to sprinkle some salt on the eggplant slices. This step helps draw out excess moisture and bitterness. Let the slices sit for about 15-20 minutes. You’ll notice some water pooling on the surface. Simply pat them dry with a paper towel before moving on to the next step.

Step 2: Seasoning the Eggplant

Once your eggplant slices are prepped, it’s time to season them. In a large mixing bowl, combine the extra virgin olive oil, sea salt, black pepper, onion powder, dried thyme, and cayenne pepper. Stir the mixture well to ensure all the spices are evenly distributed.

Now, add the eggplant slices to the bowl. Toss them gently to coat each slice thoroughly with the seasoning mixture. Make sure every piece is well-covered, as this will enhance the flavor during cooking. If you have time, consider letting the eggplant marinate for about an hour. This extra step can deepen the flavors even more!

Step 3: Roasting the Eggplant

With your eggplant seasoned, it’s time to roast them. Preheat your grill to medium-high heat. If you don’t have a grill, you can also use an oven set to 400°F (200°C). Place the eggplant slices directly on the grill grates or on a baking sheet if using the oven.

Cook the eggplant for about 5-7 minutes on each side. You want them to be tender and have beautiful grill marks. Keep an eye on them to prevent burning. During the last few minutes of cooking, add the halved grape tomatoes to the grill or baking sheet. This will allow them to soften and release their juices, adding even more flavor to your dish.

Step 4: Final Touches

Once the eggplant and tomatoes are perfectly roasted, it’s time to plate your dish. Carefully transfer the eggplant slices and tomatoes to a serving platter. Now, it’s time for the finishing touches! Sprinkle the crumbled goat cheese over the top, allowing it to melt slightly from the heat of the eggplant.

Finally, add a sprinkle of fresh basil for a burst of color and flavor. Drizzle with red wine vinegar to give it a zesty kick. Your Mediterranean Roasted Eggplant is now ready to be enjoyed! Serve it warm and watch as your family and friends savor every bite.

Variations of Mediterranean Roasted Eggplant Recipe

One of the best things about the Mediterranean Roasted Eggplant Recipe is its versatility. You can easily customize it to suit your taste preferences. Let’s explore some exciting variations that can elevate your dish even further!

Adding Different Herbs and Spices

Herbs and spices are the heart of Mediterranean cooking. You can experiment with various combinations to create unique flavors. For instance, try adding fresh oregano or dill for a fragrant twist. These herbs pair beautifully with eggplant and enhance its natural taste.

If you enjoy a bit of heat, consider adding crushed red pepper flakes or smoked paprika. These spices can give your dish a delightful kick. Alternatively, for a milder flavor, you might use parsley or cilantro. Each herb brings its own character, allowing you to tailor the dish to your liking.

Don’t hesitate to mix and match! A combination of rosemary and thyme can create a warm, earthy flavor, while mint can add a refreshing touch. The key is to find the balance that excites your palate. So, feel free to get creative with your herb and spice choices!

Incorporating Other Vegetables

Another fantastic way to vary your Mediterranean Roasted Eggplant Recipe is by incorporating other vegetables. Bell peppers, zucchini, and mushrooms are excellent additions. They not only add color but also enhance the nutritional value of your dish.

For a heartier option, consider adding chickpeas or lentils. These legumes can provide extra protein and fiber, making your meal more filling. Simply toss them in with the eggplant and seasonings before roasting.

Roasting a mix of vegetables can create a beautiful medley that is both visually appealing and delicious. You can also try layering the vegetables in a baking dish for a stunning presentation. The combination of flavors will surely impress your guests and make your Mediterranean Roasted Eggplant Recipe even more delightful!

Cooking Note for Mediterranean Roasted Eggplant Recipe

When preparing the Mediterranean Roasted Eggplant, there are a few important cooking notes to keep in mind. These tips will help ensure that your dish turns out perfectly every time. Let’s take a closer look!

First, the quality of your eggplant matters. Choose firm, shiny eggplants without blemishes. This will guarantee a fresh taste and a pleasant texture. If you notice any soft spots, it’s best to select another eggplant. Fresh ingredients lead to a more flavorful dish.

Next, consider the cooking method. While grilling adds a lovely smoky flavor, roasting in the oven is also a great option. If you choose to roast, use a baking sheet lined with parchment paper. This will prevent sticking and make cleanup easier.

Another key point is to avoid overcrowding the grill or baking sheet. If the eggplant slices are too close together, they may steam instead of roast. This can result in a soggy texture. Give each slice enough space to allow for even cooking and browning.

Lastly, keep an eye on the cooking time. Eggplants can vary in size and moisture content, which may affect how long they need to cook. Check for tenderness and a nice golden-brown color. If you’re unsure, you can always test a slice with a fork. It should be soft but not mushy.

By following these cooking notes, you’ll be well on your way to creating a delicious Mediterranean Roasted Eggplant that everyone will love. Enjoy the process and happy cooking!

Serving Suggestions for Mediterranean Roasted Eggplant Recipe

Now that you’ve prepared your Mediterranean Roasted Eggplant, it’s time to think about how to serve it. This dish is not only delicious on its own but also pairs wonderfully with various dips and spreads. Additionally, it can be enjoyed as a side dish or even as a main course. Let’s explore some fantastic serving suggestions!

Pairing with Dips and Spreads

One of the best ways to elevate your Mediterranean Roasted Eggplant is by pairing it with flavorful dips and spreads. Hummus is a classic choice that complements the eggplant beautifully. Its creamy texture and nutty flavor create a delightful contrast. You can serve the eggplant slices alongside a bowl of hummus for dipping.

Another great option is tzatziki, a refreshing yogurt-based dip. The coolness of tzatziki balances the warm, roasted flavors of the eggplant. Simply drizzle some over the eggplant or serve it on the side for a tasty combination.

If you’re feeling adventurous, try serving your roasted eggplant with baba ganoush. This smoky eggplant dip adds an extra layer of flavor that pairs perfectly with the roasted slices. You can spread it on pita bread or enjoy it as a dip with fresh veggies.

For a Mediterranean twist, consider a red pepper or olive tapenade. These spreads add a burst of flavor and can be drizzled over the eggplant for a gourmet touch. The combination of flavors will surely impress your guests!

Serving as a Side Dish or Main Course

The Mediterranean Roasted Eggplant can be served in various ways, making it a versatile addition to your meal. As a side dish, it pairs wonderfully with grilled meats, fish, or even a hearty grain salad. The rich flavors of the eggplant complement the savory notes of grilled chicken or lamb, creating a well-rounded meal.

If you prefer a vegetarian option, consider serving the roasted eggplant as a main course. You can layer it with cooked quinoa or couscous for a filling dish. Top it with additional herbs, nuts, or seeds for added texture and nutrition. This makes for a satisfying meal that is both healthy and delicious.

For a more casual approach, you can create a Mediterranean platter. Arrange the roasted eggplant alongside other roasted vegetables, olives, and cheeses. This colorful spread is perfect for gatherings and allows everyone to enjoy a variety of flavors.

Whether you choose to serve it as a side dish or a main course, the Mediterranean Roasted Eggplant is sure to be a hit. Its versatility and rich flavors make it a delightful addition to any meal!

Tips for Perfecting Your Mediterranean Roasted Eggplant Recipe

To truly master the Mediterranean Roasted Eggplant Recipe, a few tips can make all the difference. These simple yet effective suggestions will help you achieve the best flavor and texture. Let’s dive into some expert advice!

First, always choose the right eggplant. Look for firm, shiny eggplants without any blemishes. A fresh eggplant will have a smooth skin and feel heavy for its size. This ensures a delicious taste and a pleasant texture in your dish.

Next, consider salting your eggplant slices before cooking. This step helps draw out excess moisture and bitterness. After salting, let the slices sit for about 20 minutes. You’ll notice some water pooling on the surface. Pat them dry with a paper towel to remove any excess salt and moisture.

When it comes to seasoning, don’t be shy! Make sure to coat each slice evenly with the olive oil and spice mixture. This not only enhances the flavor but also helps achieve a beautiful golden-brown color during cooking. If you have time, marinating the eggplant for an hour can deepen the flavors even more.

Pay attention to your cooking method. If grilling, ensure your grill is preheated to medium-high heat. This helps create those lovely grill marks and prevents sticking. If roasting in the oven, use a baking sheet lined with parchment paper for easy cleanup.

Lastly, avoid overcrowding the grill or baking sheet. Give each eggplant slice enough space to roast evenly. If they are too close together, they may steam instead of roast, resulting in a soggy texture. Aim for a single layer for the best results.

By following these tips, you’ll be well on your way to creating a Mediterranean Roasted Eggplant that is bursting with flavor and perfectly cooked. Enjoy the process and savor the delicious results!

Breakdown of Time for Mediterranean Roasted Eggplant Recipe

Understanding the time required for each step of the Mediterranean Roasted Eggplant Recipe can help you plan your cooking efficiently. Here’s a detailed breakdown of the time you’ll need for preparation and cooking.

Prep Time

The prep time for this delightful dish is approximately 30 minutes. This includes washing and slicing the eggplants, salting them to draw out moisture, and mixing the seasoning ingredients. If you choose to marinate the eggplant for an hour, you can use that time to prepare other components of your meal or simply relax!

Cooking Time

Once you’re ready to cook, the actual cooking time is about 15 minutes. If you’re grilling, it will take around 5-7 minutes on each side for the eggplant to become tender and develop those beautiful grill marks. If you opt for roasting in the oven, the time remains similar, but keep an eye on the eggplant to ensure it doesn’t overcook.

Total Time

In total, you can expect the Mediterranean Roasted Eggplant Recipe to take about 45 minutes to 1 hour, depending on whether you choose to marinate the eggplant. This includes both prep and cooking time. With this efficient timeline, you can easily fit this delicious dish into your meal planning, making it a perfect choice for a weeknight dinner or a special gathering!

Nutritional Information for Mediterranean Roasted Eggplant Recipe

Understanding the nutritional content of your Mediterranean Roasted Eggplant Recipe is essential for maintaining a balanced diet. This dish is not only delicious but also packed with nutrients that can contribute to your overall health. Let’s break down the key nutritional components of this delightful recipe.

Calories

Each serving of the Mediterranean Roasted Eggplant contains approximately 190 calories. This makes it a great option for those looking to enjoy a flavorful dish without consuming too many calories. The combination of eggplant, olive oil, and toppings provides a satisfying meal that won’t weigh you down.

Protein

In terms of protein, this recipe offers about 6 grams per serving. While eggplant itself is not a high-protein vegetable, the addition of goat cheese contributes to the protein content. If you’re looking to increase the protein level, consider adding chickpeas or lentils to the dish. This will not only enhance the flavor but also make it more filling.

Sodium

The sodium content in this Mediterranean Roasted Eggplant Recipe is around 300 milligrams per serving. This amount is relatively moderate, especially considering the use of sea salt for seasoning. If you’re watching your sodium intake, you can adjust the salt to your preference or use a salt substitute. Remember, fresh herbs can also add flavor without the extra sodium!

Overall, the Mediterranean Roasted Eggplant Recipe is a nutritious choice that fits well into a healthy eating plan. With its low calorie count, moderate protein, and manageable sodium levels, it’s a dish you can enjoy guilt-free. So, go ahead and savor every bite of this delightful Mediterranean creation!

FAQs about Mediterranean Roasted Eggplant Recipe

Can I use other types of eggplant for this recipe?

Absolutely! While the classic choice is the medium-sized eggplant, you can experiment with other varieties. Japanese eggplants are thinner and sweeter, making them a great option. They cook quickly and have a tender texture. You can also try using globe eggplants, which are larger and have a slightly different flavor. Just remember to adjust the cooking time based on the size and thickness of the slices. No matter which type you choose, the Mediterranean flavors will shine through!

How do I know when the eggplant is done roasting?

Knowing when your eggplant is perfectly roasted is key to achieving the best flavor and texture. The eggplant is done when it becomes tender and has a nice golden-brown color. You can test it by inserting a fork or knife into a slice; it should slide in easily without resistance. Additionally, look for those beautiful grill marks if you’re grilling. If you’re roasting in the oven, keep an eye on it to prevent overcooking, which can lead to a mushy texture. Trust your senses, and you’ll know when it’s just right!

Can I make Mediterranean Roasted Eggplant ahead of time?

Yes, you can prepare Mediterranean Roasted Eggplant ahead of time! You can roast the eggplant and store it in an airtight container in the refrigerator for up to three days. When you’re ready to serve, simply reheat it in the oven or on the grill for a few minutes to warm it up. This makes it a convenient option for meal prep or entertaining guests. Just remember to add the fresh toppings, like goat cheese and basil, just before serving for the best flavor and presentation!

Conclusion on Mediterranean Roasted Eggplant Recipe

In conclusion, the Mediterranean Roasted Eggplant Recipe is a delightful dish that brings the vibrant flavors of the Mediterranean right to your table. With its simple preparation and fresh ingredients, this recipe is perfect for both casual meals and special occasions. The combination of roasted eggplant, juicy tomatoes, and creamy goat cheese creates a harmonious blend of tastes and textures that will surely please your palate.

Not only is this dish delicious, but it also offers numerous health benefits. Eggplant is low in calories and packed with essential nutrients, making it a great addition to any balanced diet. The use of olive oil and fresh herbs enhances the nutritional profile, providing healthy fats and antioxidants.

Moreover, the versatility of this recipe allows you to customize it to your liking. Whether you choose to add different vegetables, herbs, or spices, the Mediterranean Roasted Eggplant can easily adapt to suit your taste preferences. This adaptability makes it a fantastic option for meal planning, ensuring you can enjoy it in various ways throughout the week.

So, gather your ingredients, fire up the grill or oven, and embark on this culinary adventure. Your family and friends will be impressed by your cooking skills, and you’ll enjoy every delicious bite of this Mediterranean delight. Happy cooking!

Coconut Curry Shrimp Recipe is a must-try dish!

Introduction to Coconut Curry Shrimp Recipe

What Makes Coconut Curry Shrimp Special?

Coconut curry shrimp is a delightful dish that brings together the rich flavors of the tropics. The combination of succulent shrimp and creamy coconut milk creates a mouthwatering experience. The yellow curry powder adds warmth and depth, while fresh vegetables like bell peppers and green beans provide a colorful crunch. This dish is not only delicious but also quick to prepare, making it perfect for busy weeknights or special occasions. The balance of sweet and savory flavors, along with the aromatic spices, makes coconut curry shrimp a standout meal that everyone will love.

A Brief History of Coconut Curry in Cuisine

Coconut curry has roots in various cuisines, particularly in Southeast Asia and the Indian subcontinent. The use of coconut milk in cooking dates back centuries, as it was a staple ingredient in many tropical regions. In countries like Thailand and India, coconut curry dishes have evolved, showcasing local spices and ingredients. The versatility of coconut milk allows for a range of flavors, from spicy to sweet. Over time, coconut curry has gained popularity worldwide, inspiring countless variations. Today, coconut curry shrimp is celebrated for its vibrant taste and ease of preparation, making it a favorite among home cooks and food enthusiasts alike.

Ingredients for Coconut Curry Shrimp Recipe

Essential Ingredients

To create a delicious coconut curry shrimp, you’ll need a few key ingredients. These essentials work together to build the rich flavors that make this dish so special. Here’s what you’ll need:

  • 1 pound large shrimp: Peeled and deveined for easy cooking.
  • 1 tablespoon olive oil: This helps sauté the aromatics and adds a nice flavor.
  • 1 medium onion: Diced to provide a sweet base.
  • 3 cloves garlic: Minced for a fragrant kick.
  • 1 tablespoon fresh ginger: Minced to add warmth and spice.
  • 1 tablespoon yellow curry powder: The star spice that gives the dish its vibrant color.
  • 1 can (13.5 ounces) coconut cream: This creates the creamy base of the curry.
  • 1 tablespoon soy sauce: For a touch of umami flavor.
  • 1 tablespoon honey: To balance the spices with a hint of sweetness.
  • 1 yellow bell pepper: Sliced for color and crunch.
  • 1 cup green beans: Trimmed to add freshness and texture.
  • 1 tablespoon lemon juice: For a zesty finish.
  • Chopped basil: For garnish, adding a fresh aroma.
  • Steamed basmati rice: To serve as a base for the curry.

Optional Ingredients for Customization

While the essential ingredients create a fantastic dish, you can customize your coconut curry shrimp with a few optional ingredients. These additions can enhance the flavor or cater to your personal taste:

  • Coconut vinegar: A splash can add a tangy twist.
  • Chopped peanuts: For a crunchy texture and nutty flavor.
  • Chickpeas or seitan: Great vegetarian alternatives to shrimp.
  • Full-fat coconut cream: For an even creamier texture.
  • Fresh lime juice: To brighten the dish further.

Feel free to mix and match these ingredients to create your perfect coconut curry shrimp recipe!

Step-by-Step Preparation of Coconut Curry Shrimp Recipe

Step 1: Preparing the Shrimp

Before you start cooking, it’s important to prepare the shrimp properly. First, ensure that your shrimp are peeled and deveined. This step is crucial for both taste and texture. If you’re using frozen shrimp, thaw them in the refrigerator overnight or place them in a bowl of cold water for about 15-20 minutes. Once thawed, pat them dry with a paper towel. This helps the shrimp sear nicely when cooked. Set the shrimp aside while you prepare the other ingredients.

Step 2: Sautéing Aromatics

Next, heat the olive oil in a large saucepan over medium heat. Once the oil is hot, add the diced onion. Sauté the onion for about 5 minutes until it becomes translucent. This step builds a flavorful base for your curry. After the onion is ready, add the minced garlic and ginger. Cook for another minute, stirring frequently. You want to release their wonderful aromas without burning them. This combination of aromatics is what makes your coconut curry shrimp so inviting!

Step 3: Adding Coconut Milk and Spices

Now it’s time to add the spices! Sprinkle in the yellow curry powder and stir for 1-2 minutes. This toasting process enhances the flavor of the spices. After that, gradually pour in the coconut cream, soy sauce, and honey. Stir well to combine all the ingredients. Allow the mixture to simmer gently for a few minutes. This simmering helps the flavors meld together beautifully, creating a rich and creamy sauce.

Step 4: Cooking the Shrimp

Once your sauce is bubbling, it’s time to add the vegetables. Toss in the sliced yellow bell pepper and green beans. Cook for about 4-5 minutes until the vegetables are vibrant and slightly tender. Then, introduce the prepared shrimp to the pan. Simmer for 4-6 minutes, or until the shrimp turn a lovely pink color and are fully cooked. Be careful not to overcook the shrimp, as they can become tough. Stir occasionally to ensure even cooking.

Step 5: Final Touches and Garnishing

After the shrimp are cooked, remove the pan from heat. Squeeze in the lemon juice for a zesty finish. This brightens the flavors and adds a refreshing touch. To serve, ladle the tropical shrimp curry over a bed of steamed basmati rice. Finally, garnish with chopped basil for an aromatic touch. This not only adds color but also enhances the overall flavor of the dish. Enjoy your delicious coconut curry shrimp!

Variations of Coconut Curry Shrimp Recipe

Vegetarian Alternatives

If you’re looking for a vegetarian option, you can easily swap out the shrimp for plant-based ingredients. Chickpeas are a fantastic choice, as they add protein and a hearty texture. Simply replace the shrimp with one can of drained and rinsed chickpeas. Another great alternative is seitan, a meat substitute made from wheat gluten. It has a chewy texture that mimics shrimp well. You can also use tofu, which absorbs the flavors of the curry beautifully. Just make sure to press the tofu to remove excess moisture before cooking. These alternatives allow everyone to enjoy the deliciousness of coconut curry!

Different Protein Options

For those who prefer different proteins, there are plenty of options to explore. Chicken is a popular substitute; simply cut it into bite-sized pieces and cook it in the same way as the shrimp. You can also use fish, such as salmon or tilapia, which pairs wonderfully with coconut curry. Just be mindful of cooking times, as fish cooks faster than shrimp. For a unique twist, try adding scallops or even crab meat. Each protein brings its own flavor, making your coconut curry shrimp recipe versatile and exciting!

Spice Level Adjustments

Adjusting the spice level of your coconut curry shrimp is easy and can cater to your taste preferences. If you enjoy a milder flavor, you can reduce the amount of yellow curry powder. Alternatively, for those who love heat, consider adding red pepper flakes or diced fresh chili peppers. You can also include a dash of hot sauce for an extra kick. Remember, it’s always best to start with a small amount and gradually increase to avoid overwhelming the dish. This way, you can create a coconut curry shrimp recipe that suits everyone’s palate!

Cooking Note for Coconut Curry Shrimp Recipe

Tips for Perfectly Cooked Shrimp

Cooking shrimp can be tricky, but with a few simple tips, you can achieve perfectly cooked shrimp every time. First, always start with fresh or properly thawed shrimp. Frozen shrimp should be thawed in the refrigerator or under cold running water. This ensures even cooking. Next, avoid overcooking the shrimp. They only need about 4-6 minutes in the pan. When they turn pink and opaque, they are done. If you cook them too long, they can become rubbery and tough. Lastly, consider marinating the shrimp for 15-30 minutes before cooking. A simple marinade of lime juice, garlic, and a pinch of salt can enhance their flavor significantly.

Common Mistakes to Avoid

While making coconut curry shrimp, there are a few common mistakes to watch out for. One mistake is not preparing the ingredients ahead of time. Having everything ready to go makes the cooking process smoother and more enjoyable. Another mistake is using low-quality coconut cream. Opt for full-fat coconut cream for the best flavor and creaminess. Additionally, be cautious with the heat. Cooking on too high a flame can burn the spices and garlic, leading to a bitter taste. Lastly, don’t forget to taste your curry before serving. Adjust the seasoning as needed, whether it’s adding more salt, honey, or lemon juice. These small adjustments can make a big difference in the final dish!

Serving Suggestions for Coconut Curry Shrimp Recipe

Best Side Dishes to Pair

When it comes to serving coconut curry shrimp, choosing the right side dishes can elevate your meal. Here are some fantastic options to consider:

  • Steamed Basmati Rice: This is the classic choice. The fluffy rice absorbs the rich curry sauce beautifully, making each bite delightful.
  • Quinoa: For a healthier alternative, serve your curry over quinoa. It adds a nutty flavor and is packed with protein.
  • Roti or Naan: These Indian flatbreads are perfect for scooping up the curry. They add a wonderful texture and flavor to the meal.
  • Simple Green Salad: A fresh salad with mixed greens, cucumbers, and a light vinaigrette can balance the richness of the curry.
  • Grilled Vegetables: Lightly charred veggies like zucchini, bell peppers, and eggplant complement the curry’s flavors and add a smoky touch.

Creative Serving Ideas

To make your coconut curry shrimp experience even more enjoyable, consider these creative serving ideas:

  • Serve in Coconut Shells: For a fun presentation, serve the curry in halved coconut shells. This adds a tropical flair to your dish!
  • Garnish with Fresh Herbs: Besides basil, try using cilantro or mint for a refreshing twist. These herbs enhance the dish’s aroma and flavor.
  • Top with Toasted Coconut Flakes: A sprinkle of toasted coconut flakes adds a delightful crunch and enhances the coconut flavor.
  • Pair with a Tropical Drink: Serve your meal with a refreshing drink like coconut water or a fruity mocktail to complement the tropical theme.
  • Make it a Curry Bowl: Layer the rice, curry, and toppings in a bowl for a hearty and visually appealing meal.

These serving suggestions will not only enhance your coconut curry shrimp recipe but also create a memorable dining experience for you and your guests!

Tips for Making the Best Coconut Curry Shrimp Recipe

Ingredient Substitutions

Making a delicious coconut curry shrimp recipe is all about using the right ingredients. However, sometimes you may not have everything on hand. Here are some helpful substitutions to keep your dish flavorful:

  • Shrimp: If you don’t have shrimp, try using chicken, fish, or even tofu for a vegetarian option. Each will bring a unique taste to the curry.
  • Coconut Cream: If you can’t find coconut cream, you can use full-fat coconut milk instead. It will still provide a creamy texture, though it may be slightly thinner.
  • Honey: For a vegan alternative, use maple syrup or agave nectar. Both will add sweetness without compromising flavor.
  • Yellow Curry Powder: If you don’t have yellow curry powder, you can use red curry paste or a mix of turmeric and cumin for a similar taste.
  • Vegetables: Feel free to swap in any vegetables you have on hand. Broccoli, snap peas, or carrots can work beautifully in this dish.

These substitutions can help you create a tasty coconut curry shrimp recipe, even when you’re missing a few ingredients!

Storage and Reheating Tips

Storing and reheating your coconut curry shrimp properly can help maintain its delicious flavor. Here are some tips to keep in mind:

  • Storage: Allow the curry to cool completely before transferring it to an airtight container. It can be stored in the refrigerator for up to 3 days.
  • Freezing: If you want to keep it longer, you can freeze the curry. Just make sure to use a freezer-safe container. It can last for up to 2 months in the freezer.
  • Reheating: When you’re ready to enjoy your leftovers, reheat the curry on the stove over low heat. Stir occasionally to ensure even heating. You can add a splash of coconut milk or water if it seems too thick.
  • Microwave: If you prefer using a microwave, place the curry in a microwave-safe bowl. Cover it with a lid or microwave-safe wrap, and heat in short intervals, stirring in between.

By following these storage and reheating tips, you can enjoy your coconut curry shrimp recipe even days after making it!

Breakdown of Time for Coconut Curry Shrimp Recipe

Prep Time

Preparing your coconut curry shrimp is a breeze! The prep time typically takes about 15-20 minutes. During this time, you’ll gather all your ingredients, peel and devein the shrimp, and chop the vegetables. Having everything ready before you start cooking makes the process smoother and more enjoyable. So, take a moment to set up your workspace and get organized!

Cooking Time

The cooking time for this delicious dish is around 20-25 minutes. This includes sautéing the aromatics, simmering the sauce, and cooking the shrimp and vegetables. The quick cooking time is one of the reasons why coconut curry shrimp is perfect for busy weeknights. You can have a flavorful meal on the table in no time!

Total Time

In total, you can expect to spend about 35-45 minutes from start to finish. This includes both prep and cooking time. With such a short time commitment, you can enjoy a homemade, tropical-inspired meal that’s sure to impress your family and friends. So, roll up your sleeves and get ready to create a delightful coconut curry shrimp recipe!

Nutritional Information for Coconut Curry Shrimp Recipe

Calories and Macronutrients

Understanding the nutritional content of your meals is essential for maintaining a balanced diet. The coconut curry shrimp recipe serves four and provides a satisfying meal without compromising on flavor. Here’s a breakdown of the calories and macronutrients per serving:

  • Calories: 360
  • Net Carbs: 14g
  • Protein: 24g
  • Fat: 23g

This dish is rich in protein, thanks to the shrimp, making it a great option for those looking to build muscle or maintain a healthy weight. The healthy fats from coconut cream provide energy and help keep you feeling full. With a moderate amount of carbohydrates, this recipe fits well into various dietary plans.

Health Benefits of Key Ingredients

The ingredients in coconut curry shrimp not only create a delicious meal but also offer numerous health benefits:

  • Shrimp: A lean source of protein, shrimp is low in calories and high in essential nutrients like selenium and vitamin B12. These nutrients support immune function and energy production.
  • Coconut Cream: Rich in healthy fats, coconut cream contains medium-chain triglycerides (MCTs), which can boost metabolism and provide quick energy. It also has antimicrobial properties that may support gut health.
  • Yellow Curry Powder: This spice blend often contains turmeric, which has anti-inflammatory properties. It may help reduce inflammation and improve overall health.
  • Vegetables: The bell pepper and green beans add fiber, vitamins, and minerals to the dish. Fiber aids digestion, while vitamins A and C support skin health and boost the immune system.
  • Honey: A natural sweetener, honey has antioxidant properties and can help soothe sore throats and improve digestive health.

By enjoying this coconut curry shrimp recipe, you not only treat your taste buds but also nourish your body with wholesome ingredients. It’s a win-win for both flavor and health!

FAQs about Coconut Curry Shrimp Recipe

Can I use frozen shrimp for this recipe?

Yes, you can definitely use frozen shrimp for this coconut curry shrimp recipe! Just make sure to thaw them properly before cooking. You can do this by placing the shrimp in the refrigerator overnight or by submerging them in a bowl of cold water for about 15-20 minutes. Once thawed, pat them dry with a paper towel to ensure they cook evenly. Using frozen shrimp is a convenient option, and they will still turn out delicious in your curry!

What can I substitute for coconut milk?

If you don’t have coconut milk on hand, there are several substitutes you can use. Full-fat coconut milk is the best alternative, as it provides a similar creamy texture. If you need a non-coconut option, you can use heavy cream or half-and-half for a rich consistency. For a lighter choice, almond milk or soy milk can work, but they may not provide the same creaminess. Just keep in mind that the flavor will change slightly, so choose a substitute that fits your taste preferences!

How spicy is this coconut curry shrimp recipe?

This coconut curry shrimp recipe is mild to medium in spice level, thanks to the yellow curry powder. If you prefer a spicier dish, you can easily adjust the heat. Consider adding red pepper flakes, diced fresh chili peppers, or a dash of hot sauce to the curry. Start with a small amount and taste as you go to find the perfect balance for your palate. This way, you can enjoy a coconut curry shrimp recipe that suits your spice tolerance!

Can I make this recipe ahead of time?

Absolutely! You can make this coconut curry shrimp recipe ahead of time, which is perfect for meal prep or entertaining. After cooking, allow the curry to cool completely before transferring it to an airtight container. It can be stored in the refrigerator for up to 3 days. When you’re ready to enjoy it, simply reheat on the stove over low heat, stirring occasionally. You can also freeze the curry for up to 2 months. Just remember to thaw it in the refrigerator before reheating. Making it ahead of time can enhance the flavors, making your meal even more delicious!

Conclusion on Coconut Curry Shrimp Recipe

Recap of Key Points

In summary, the coconut curry shrimp recipe is a delightful dish that combines the rich flavors of shrimp, creamy coconut milk, and aromatic spices. With a quick preparation and cooking time, it’s perfect for busy weeknights or special occasions. The essential ingredients, such as yellow curry powder and fresh vegetables, create a vibrant and satisfying meal. Plus, the recipe offers plenty of opportunities for customization, whether you prefer vegetarian options or different protein choices. Remember to follow the tips for cooking shrimp perfectly and avoid common mistakes to ensure a delicious outcome every time.

Encouragement to Try the Recipe

Now that you have all the information you need, it’s time to roll up your sleeves and try making this coconut curry shrimp recipe! Whether you’re a seasoned cook or a beginner, this dish is approachable and rewarding. The combination of flavors will transport you to a tropical paradise with every bite. Don’t hesitate to experiment with the ingredients and make it your own. Gather your loved ones around the table and enjoy a meal that’s not only delicious but also nourishing. Happy cooking!

Turkey Sweet Potato Skillet is a must-try recipe!

Introduction to Turkey Sweet Potato Skillet

What is Turkey Sweet Potato Skillet?

The Turkey Sweet Potato Skillet is a delightful one-pan dish that combines ground turkey and sweet potatoes into a savory medley. This recipe is not only easy to prepare but also packed with nutrients. The sweet potatoes add a natural sweetness, while the turkey provides lean protein. Together, they create a satisfying meal that is perfect for busy weeknights. With vibrant vegetables like bell peppers and spinach, this dish is colorful and appealing to the eye, making it a great option for family dinners.

Why You Should Try Turkey Sweet Potato Skillet

There are many reasons to give the Turkey Sweet Potato Skillet a try. First, it’s a healthy choice. Ground turkey is lower in fat compared to other meats, making it a great option for those watching their diet. Sweet potatoes are rich in vitamins and minerals, providing a boost of energy and nutrition. Additionally, this dish is versatile. You can easily customize it by adding your favorite vegetables or spices. Plus, it’s quick to make, taking less than 30 minutes from start to finish. Whether you’re cooking for yourself or a crowd, this skillet meal is sure to impress!

Ingredients for Turkey Sweet Potato Skillet

To create a delicious Turkey Sweet Potato Skillet, you’ll need a variety of fresh ingredients. Each component plays a vital role in building flavor and nutrition. Here’s a detailed list of what you’ll need:

  • 1 pound ground turkey: This lean meat is the star of the dish, providing protein and a satisfying texture.
  • 2 medium sweet potatoes: Peeled and cut into cubes, these add natural sweetness and essential vitamins.
  • 1 medium onion: Chopped, it brings a savory base flavor to the skillet.
  • 2 cloves garlic: Finely chopped, garlic enhances the dish with its aromatic qualities.
  • 1 red bell pepper: Chopped, it adds color and a slight crunch.
  • 1 teaspoon smoked paprika: This spice gives a warm, smoky flavor that elevates the dish.
  • 1 teaspoon ground cumin: Cumin adds an earthy depth, making the flavors more complex.
  • Salt and black pepper: To taste, these seasonings enhance all the other flavors.
  • 2 tablespoons extra virgin olive oil: Used for sautéing, it adds healthy fats and richness.
  • 1 cup fresh or frozen spinach: This leafy green boosts the nutritional value and adds a pop of color.
  • 1/4 cup low-sodium chicken broth: This liquid helps cook the sweet potatoes and keeps everything moist.
  • 1 tablespoon fresh parsley: Chopped, for garnish, it adds freshness and a lovely finishing touch.

With these ingredients, you’re well on your way to making a hearty and nutritious Turkey Sweet Potato Skillet. Each item contributes to the overall flavor and health benefits of the dish, making it a perfect choice for any meal.

Preparation of Turkey Sweet Potato Skillet

Step 1: Preparing the Ingredients

Before you start cooking, it’s essential to prepare all your ingredients. Begin by peeling the sweet potatoes and cutting them into small cubes. This helps them cook evenly. Next, chop the onion and red bell pepper into bite-sized pieces. Finely chop the garlic cloves as well. Having everything ready will make the cooking process smoother and more enjoyable. Remember, a well-prepared kitchen is a happy kitchen!

Step 2: Cooking the Turkey

Now, it’s time to cook the turkey. Heat the extra virgin olive oil in a large skillet over medium heat. Once the oil is warm, add the chopped onion and red bell pepper. Sauté these vegetables for about 5 minutes until they soften. Then, add the minced garlic, smoked paprika, and ground cumin. Stir everything together and let it cook for about a minute. This step releases the wonderful aromas of the spices, making your kitchen smell amazing!

Step 3: Adding Sweet Potatoes

After the turkey is browned, it’s time to add the sweet potatoes. Carefully introduce the sweet potato cubes into the skillet. Pour in the low-sodium chicken broth, which will help cook the sweet potatoes and keep the dish moist. Season with salt and black pepper to taste. Cover the skillet with a lid and let it simmer for about 15 minutes. Stir occasionally to ensure the sweet potatoes cook evenly and don’t stick to the bottom.

Step 4: Incorporating Additional Ingredients

Once the sweet potatoes are tender, it’s time to add the spinach. Gently fold in the fresh or frozen spinach and stir until it wilts, which should take about 2 minutes. This not only adds a vibrant green color but also boosts the nutritional value of your Turkey Sweet Potato Skillet. The spinach will blend beautifully with the other ingredients, creating a delicious medley.

Step 5: Final Touches and Serving

After the spinach has wilted, remove the skillet from the heat. To finish, sprinkle the dish with fresh parsley for a pop of color and flavor. Your Turkey Sweet Potato Skillet is now ready to serve! This dish is perfect for a family dinner or meal prep for the week. Enjoy it warm, and savor the delightful combination of flavors!

Variation of Turkey Sweet Potato Skillet

Alternative Ingredients

One of the best things about the Turkey Sweet Potato Skillet is its versatility. You can easily swap out ingredients to suit your taste or dietary needs. For instance, if you prefer a different protein, ground chicken or beef can be used instead of turkey. This change will give the dish a new flavor profile while still keeping it hearty.

If you want to add more vegetables, consider including zucchini, carrots, or even corn. These additions not only enhance the nutrition but also add different textures. For a creamier version, you could stir in a bit of Greek yogurt or low-fat sour cream just before serving. This will give the dish a rich, creamy finish that pairs wonderfully with the spices.

For those who enjoy a bit of heat, adding diced jalapeños or a sprinkle of red pepper flakes can elevate the flavor. You can also experiment with different herbs, such as thyme or oregano, to create a unique twist on the classic recipe. The possibilities are endless, making this dish a great canvas for your culinary creativity!

Different Cooking Methods

While the skillet method is quick and convenient, there are other ways to prepare the Turkey Sweet Potato Skillet. If you prefer a hands-off approach, consider using a slow cooker. Simply add all the ingredients to the slow cooker, set it on low, and let it cook for 6-8 hours. This method allows the flavors to meld beautifully, resulting in a deliciously tender meal.

Another option is to use an Instant Pot. This method is perfect for those who are short on time. Add all the ingredients to the pot, seal the lid, and cook on high pressure for about 10 minutes. The Instant Pot will create a flavorful dish in a fraction of the time, making it ideal for busy weeknights.

Regardless of the method you choose, the Turkey Sweet Potato Skillet remains a delightful and nutritious meal. Each variation allows you to enjoy this dish in new and exciting ways!

Cooking Note for Turkey Sweet Potato Skillet

When preparing the Turkey Sweet Potato Skillet, there are a few cooking notes to keep in mind to ensure the best results. First, the choice of ground turkey is crucial. Opt for lean ground turkey to keep the dish healthy while still enjoying a rich flavor. If you prefer a juicier texture, you can choose ground turkey with a bit more fat content.

Next, the size of the sweet potato cubes matters. Cutting them into uniform pieces helps them cook evenly. If the cubes are too large, they may take longer to soften, while smaller pieces can become mushy. Aim for about 1-inch cubes for the perfect balance.

Additionally, be mindful of the cooking temperature. Medium heat is ideal for sautéing the vegetables and turkey. If the heat is too high, the ingredients may burn before they cook through. Stirring occasionally is also important to prevent sticking and ensure even cooking.

For the best flavor, allow the spices to cook with the vegetables before adding the turkey. This step helps release their essential oils, enhancing the overall taste of the dish. Don’t rush this part; it’s worth the wait!

Lastly, feel free to adjust the seasoning to your liking. Everyone’s palate is different, so taste as you go. If you prefer a bolder flavor, add more spices or herbs. Cooking is all about personal preference, and this dish is no exception!

By keeping these cooking notes in mind, you’ll create a Turkey Sweet Potato Skillet that is not only delicious but also a joy to prepare. Happy cooking!

Serving Suggestions for Turkey Sweet Potato Skillet

When it comes to serving your Turkey Sweet Potato Skillet, there are plenty of delightful options to enhance your meal experience. This dish is versatile and can be paired with various sides or garnishes to create a well-rounded dining experience. Here are some serving suggestions to consider:

  • Fresh Salad: A light, crisp salad can complement the hearty flavors of the skillet. Consider a simple mixed greens salad with a lemon vinaigrette. The acidity will balance the richness of the turkey and sweet potatoes.
  • Whole Grain Bread: Serve the skillet with slices of whole grain bread or a warm baguette. This addition is perfect for soaking up any delicious juices left on the plate.
  • Quinoa or Brown Rice: For a more filling meal, serve the Turkey Sweet Potato Skillet over a bed of quinoa or brown rice. These grains add extra fiber and nutrients, making your meal even healthier.
  • Avocado Slices: Adding fresh avocado slices on top of the skillet can provide a creamy texture and healthy fats. This addition not only enhances the flavor but also boosts the nutritional value.
  • Yogurt or Sour Cream: A dollop of Greek yogurt or low-fat sour cream can add a cool, creamy element to the dish. This is especially nice if you’ve added some heat with spices.
  • Pickled Vegetables: For a tangy contrast, consider serving pickled vegetables on the side. They can add a delightful crunch and acidity that brightens the overall flavor profile.

These serving suggestions can elevate your Turkey Sweet Potato Skillet, making it a complete and satisfying meal. Feel free to mix and match based on your preferences and dietary needs. Enjoy your delicious creation!

Tips for Perfecting Your Turkey Sweet Potato Skillet

Creating the perfect Turkey Sweet Potato Skillet is all about attention to detail and a few helpful tips. With these suggestions, you can elevate your dish and impress your family or guests. Here are some tips to ensure your skillet meal turns out delicious every time:

  • Use Fresh Ingredients: Fresh vegetables and herbs can significantly enhance the flavor of your dish. Whenever possible, opt for fresh spinach, bell peppers, and parsley. Fresh ingredients not only taste better but also provide more nutrients.
  • Don’t Rush the Cooking: Allow each ingredient to cook properly before adding the next. Sautéing the onions and peppers until they are soft will create a flavorful base. Patience is key to developing rich flavors!
  • Adjust Seasonings: Everyone has different taste preferences. Start with the recommended spices, but feel free to adjust them to suit your palate. A little extra cumin or paprika can make a big difference!
  • Check Sweet Potato Doneness: Sweet potatoes can vary in size and freshness. To ensure they are cooked through, test them with a fork. They should be tender but not mushy. If they need more time, simply cover the skillet and let them cook a bit longer.
  • Experiment with Herbs: While parsley is a great garnish, consider trying other herbs like cilantro or basil for a different flavor profile. Fresh herbs can brighten the dish and add a unique twist.
  • Make it a Meal Prep Star: This dish is perfect for meal prep! Make a larger batch and store it in the fridge for up to four days. Reheat portions for quick lunches or dinners throughout the week.
  • Pair with a Protein: If you want to boost the protein content, consider serving the skillet with a side of grilled chicken or fish. This can make your meal even more satisfying.

By following these tips, you’ll be well on your way to mastering the Turkey Sweet Potato Skillet. Each suggestion helps enhance the flavors and textures, making your dish a delightful experience. Happy cooking!

Breakdown of Time for Turkey Sweet Potato Skillet

Prep Time

Preparing the Turkey Sweet Potato Skillet is quick and straightforward. The prep time typically takes about 10 to 15 minutes. During this time, you’ll peel and cube the sweet potatoes, chop the onion and bell pepper, and mince the garlic. Having everything ready before you start cooking will make the process smoother and more enjoyable. Remember, a little organization goes a long way in the kitchen!

Cooking Time

The cooking time for the Turkey Sweet Potato Skillet is approximately 20 to 25 minutes. This includes sautéing the vegetables, browning the turkey, and simmering the sweet potatoes until they are tender. The key is to keep an eye on the skillet and stir occasionally to ensure even cooking. This relatively short cooking time makes it an ideal dish for busy weeknights when you want a nutritious meal without spending hours in the kitchen.

Total Time

In total, you can expect the entire process of making the Turkey Sweet Potato Skillet to take around 30 to 40 minutes. This includes both prep and cooking time. With such a quick turnaround, you can enjoy a delicious and healthy meal without the hassle. It’s perfect for families or anyone looking to whip up a satisfying dish in no time!

Nutritional Information for Turkey Sweet Potato Skillet

Calories

When it comes to enjoying a nutritious meal, understanding the calorie content is essential. Each serving of the Turkey Sweet Potato Skillet contains approximately 320 calories. This makes it a great option for those who are mindful of their caloric intake while still wanting a filling and satisfying dish. The combination of lean turkey and sweet potatoes provides a balanced meal that won’t leave you feeling deprived.

Protein

Protein is a vital nutrient for maintaining muscle mass and overall health. In the Turkey Sweet Potato Skillet, you’ll find about 28 grams of protein per serving. This high protein content comes primarily from the ground turkey, making it an excellent choice for anyone looking to increase their protein intake. Whether you’re an athlete or just someone who wants to stay healthy, this dish can help you meet your protein needs effectively.

Sodium

Monitoring sodium intake is important for maintaining heart health. The Turkey Sweet Potato Skillet contains approximately 400 milligrams of sodium per serving, especially if you use low-sodium chicken broth. This level is reasonable for a savory dish, allowing you to enjoy the flavors without excessive salt. If you’re watching your sodium intake, you can further reduce it by using fresh ingredients and limiting added salt during cooking.

FAQs about Turkey Sweet Potato Skillet

Can I make Turkey Sweet Potato Skillet ahead of time?

Absolutely! The Turkey Sweet Potato Skillet is perfect for meal prep. You can prepare it a day in advance and store it in the refrigerator. Just make sure to let it cool completely before transferring it to an airtight container. When you’re ready to eat, simply reheat it on the stove or in the microwave. This makes it a convenient option for busy weekdays, allowing you to enjoy a nutritious meal without the hassle of cooking from scratch each day.

What can I serve with Turkey Sweet Potato Skillet?

There are many delicious options to serve alongside your Turkey Sweet Potato Skillet. A fresh salad with mixed greens and a light vinaigrette can provide a refreshing contrast. You might also consider serving it with whole grain bread or quinoa for added fiber. For a creamy touch, a dollop of Greek yogurt or avocado slices can enhance the flavors. Feel free to get creative with your sides to make the meal even more satisfying!

Is Turkey Sweet Potato Skillet healthy?

Yes, the Turkey Sweet Potato Skillet is a healthy choice! It features lean ground turkey, which is lower in fat compared to other meats, and sweet potatoes, which are rich in vitamins and minerals. The addition of colorful vegetables like bell peppers and spinach boosts the nutritional value even further. With a balanced mix of protein, healthy fats, and carbohydrates, this dish is a wholesome option for anyone looking to maintain a healthy diet.

Can I use ground chicken instead of turkey in Turkey Sweet Potato Skillet?

Definitely! Ground chicken is a great alternative to turkey in this recipe. It will provide a similar texture and flavor while still keeping the dish healthy. You can also experiment with ground beef or even plant-based proteins if you prefer. The beauty of the Turkey Sweet Potato Skillet lies in its versatility, so feel free to make it your own!

Conclusion on Turkey Sweet Potato Skillet

In conclusion, the Turkey Sweet Potato Skillet is a fantastic dish that brings together flavor, nutrition, and convenience. This one-pan meal is not only easy to prepare but also offers a delightful combination of ingredients that cater to various tastes. With its lean protein from ground turkey and the natural sweetness of sweet potatoes, it’s a wholesome option for anyone looking to enjoy a healthy meal.

Moreover, the versatility of this recipe allows you to customize it according to your preferences. Whether you choose to add different vegetables, swap proteins, or experiment with spices, the Turkey Sweet Potato Skillet can easily adapt to your culinary creativity. It’s perfect for busy weeknights or meal prepping for the week ahead.

As you gather around the table to enjoy this delicious dish, you can feel good knowing that you’re serving a meal that is both satisfying and nutritious. So, why not give the Turkey Sweet Potato Skillet a try? Your taste buds and your body will thank you!

Happy cooking, and enjoy every bite of your Turkey Sweet Potato Skillet!

Mediterranean Steak Bowls are a healthy meal option.

Introduction to the Mediterranean Steak Bowl Recipe

Are you looking for a delicious and healthy meal that’s easy to prepare? The Mediterranean Steak Bowl Recipe is just what you need! This dish combines the rich flavors of grilled flank steak with fresh vegetables and wholesome grains. It’s not only tasty but also packed with nutrients. Let’s dive into what makes this bowl so special and the benefits of following a Mediterranean diet.

What Makes the Mediterranean Steak Bowl Unique?

The Mediterranean Steak Bowl stands out for its vibrant colors and diverse flavors. Each ingredient plays a role in creating a balanced meal. The flank steak is marinated with aromatic spices, giving it a savory kick. Fresh vegetables like cherry tomatoes and cucumbers add crunch and freshness. Plus, the creamy feta cheese and tangy olives bring a delightful contrast to the dish. This combination makes every bite exciting!

Moreover, the use of quinoa as a base not only enhances the texture but also boosts the nutritional value. Quinoa is a complete protein, meaning it contains all nine essential amino acids. This makes it a fantastic choice for those looking to maintain a healthy diet. Overall, the Mediterranean Steak Bowl is a feast for the senses, offering a unique blend of flavors and textures that will leave you satisfied.

Benefits of a Mediterranean Diet

Following a Mediterranean diet comes with numerous health benefits. This way of eating emphasizes whole foods, healthy fats, and plenty of fruits and vegetables. Research shows that it can help reduce the risk of heart disease, improve brain health, and even promote weight loss. The Mediterranean diet is also known for its anti-inflammatory properties, which can lead to better overall health.

Incorporating meals like the Mediterranean Steak Bowl into your routine can make it easier to enjoy these benefits. With its focus on fresh ingredients and balanced nutrition, this recipe is a perfect example of how delicious healthy eating can be. So, why not give it a try? You’ll be amazed at how good it tastes and how great you feel!

Ingredients for the Mediterranean Steak Bowl Recipe

Fresh Ingredients for a Flavorful Bowl

To create a delicious Mediterranean Steak Bowl, you need fresh and high-quality ingredients. Here’s a list of what you’ll need:

  • Flank Steak: This cut of meat is tender and flavorful, perfect for grilling.
  • Extra Virgin Olive Oil: A staple in Mediterranean cooking, it adds richness and depth.
  • Garlic Powder: This spice enhances the flavor of the steak with its aromatic qualities.
  • Onion Powder: It adds a subtle sweetness and depth to the marinade.
  • Dried Oregano: A classic herb in Mediterranean cuisine, it brings a fresh, earthy taste.
  • Smoked Paprika: This spice adds a smoky flavor that complements the grilled steak.
  • Salt and Pepper: Essential for seasoning, they enhance all the flavors in the dish.
  • Cooked Quinoa: A nutritious base that provides protein and fiber.
  • Cherry Tomatoes: Their sweetness and juiciness add a burst of flavor.
  • Cucumber: This crunchy vegetable adds freshness and hydration.
  • Baby Spinach: A nutrient-dense leafy green that adds color and health benefits.
  • Feta Cheese: Its creamy texture and tangy flavor elevate the dish.
  • Kalamata Olives: These olives add a briny taste that balances the flavors.
  • Lemon Juice: A squeeze of fresh lemon brightens the entire bowl.

Optional Ingredients to Customize Your Bowl

While the ingredients listed above create a fantastic Mediterranean Steak Bowl, you can customize it to suit your taste. Here are some optional ingredients to consider:

  • Avocado: Adds creaminess and healthy fats.
  • Roasted Red Peppers: For a sweet and smoky flavor.
  • Artichoke Hearts: They provide a unique taste and texture.
  • Chickpeas: A great source of protein and fiber, perfect for a heartier bowl.
  • Fresh Herbs: Basil, parsley, or mint can add a fresh touch.
  • Hot Sauce: For those who enjoy a spicy kick!

Feel free to mix and match these ingredients to create your perfect Mediterranean Steak Bowl. The beauty of this recipe lies in its versatility, allowing you to enjoy a meal that’s tailored just for you!

Step-by-Step Preparation of the Mediterranean Steak Bowl Recipe

Step 1: Marinating the Steak

Marinating the flank steak is crucial for infusing it with flavor. Start by mixing the olive oil, garlic powder, onion powder, oregano, smoked paprika, salt, and pepper in a bowl. This mixture will create a delicious marinade. Next, take your flank steak and coat it generously with the marinade. Make sure every inch of the steak is covered. Let it sit for at least 30 minutes. If you have more time, marinating it for a few hours or overnight will enhance the flavor even more!

Step 2: Cooking the Steak to Perfection

Once your steak has marinated, it’s time to cook it! Preheat your grill or grill pan to medium-high heat. Place the marinated steak on the grill and cook for about 5-7 minutes on each side. The cooking time may vary depending on how you like your steak. For medium-rare, aim for an internal temperature of 130°F. After grilling, remove the steak and let it rest for about 5 minutes. This resting period allows the juices to redistribute, making the steak more tender.

Step 3: Preparing the Base

While the steak is resting, prepare the base of your Mediterranean Steak Bowl. Cook your quinoa according to package instructions. Quinoa is not only nutritious but also easy to prepare. Once cooked, fluff it with a fork and set it aside. This will be the hearty foundation of your bowl, providing protein and fiber.

Step 4: Assembling the Mediterranean Steak Bowl

Now comes the fun part—assembling your bowl! Start with a generous scoop of cooked quinoa at the bottom. Next, add a handful of fresh baby spinach on top. This leafy green adds a pop of color and nutrients. Then, layer in the halved cherry tomatoes and diced cucumber. These fresh vegetables will bring crunch and brightness to your dish. Don’t forget to add the sliced kalamata olives and crumbled feta cheese for that authentic Mediterranean flavor!

Step 5: Adding Toppings and Dressings

Finally, it’s time to add the star of the show—the sliced flank steak! Arrange the steak beautifully over the vibrant vegetables in each bowl. To finish, squeeze fresh lemon juice over the top. This zesty touch will brighten all the flavors and make your Mediterranean Steak Bowl even more delicious. Serve immediately and enjoy your healthy, flavorful meal!

Variations of the Mediterranean Steak Bowl Recipe

Vegetarian Alternatives

If you’re looking for a vegetarian option, you can easily swap out the flank steak for plant-based proteins. One great alternative is grilled portobello mushrooms. Their meaty texture and rich flavor make them a perfect substitute. Simply marinate the mushrooms in the same mixture as the steak and grill them until tender.

Another option is to use chickpeas. Roasted chickpeas add a delightful crunch and are packed with protein. Toss them in olive oil and your favorite spices, then roast until crispy. You can also try adding grilled eggplant or zucchini for a hearty, flavorful bowl. These vegetables absorb the marinade beautifully and add a unique taste to your dish.

Different Protein Options

For those who prefer different proteins, there are plenty of choices! Chicken breast is a popular option. Marinate and grill it just like the flank steak for a delicious twist. You can also use shrimp, which cooks quickly and adds a lovely seafood flavor. Just be sure to adjust the cooking time accordingly.

If you’re feeling adventurous, try lamb or turkey. Both meats pair wonderfully with Mediterranean flavors. Simply follow the same marinating and cooking steps, and you’ll have a delightful variation of the Mediterranean Steak Bowl. Each protein brings its own unique taste, making your meal exciting and diverse!

Seasonal Vegetable Swaps

One of the best things about the Mediterranean Steak Bowl is its versatility with vegetables. Depending on the season, you can swap in different veggies to keep things fresh. In the summer, consider adding grilled bell peppers or zucchini. They add a sweet, smoky flavor that complements the other ingredients.

In the fall, roasted butternut squash or sweet potatoes can bring warmth and sweetness to your bowl. You can also use seasonal greens like kale or arugula for a different texture and taste. The key is to choose vegetables that are in season for the best flavor and nutrition. This way, your Mediterranean Steak Bowl will always be a delightful and vibrant meal!

Cooking Note for the Mediterranean Steak Bowl Recipe

Tips for Achieving the Perfect Steak

Cooking the perfect flank steak is all about technique and timing. Here are some tips to ensure your steak turns out tender and flavorful:

  • Choose Quality Meat: Always opt for high-quality flank steak. Look for meat that is bright red with a good amount of marbling. This will ensure a juicy and flavorful result.
  • Marinate Wisely: Allow the steak to marinate for at least 30 minutes, but for the best flavor, aim for a few hours or overnight. This helps the spices penetrate the meat.
  • Let It Rest: After grilling, let the steak rest for about 5 minutes. This allows the juices to redistribute, making each bite more succulent.
  • Slice Against the Grain: When it’s time to slice, always cut against the grain. This technique shortens the muscle fibers, making the steak easier to chew.
  • Use a Meat Thermometer: For precise cooking, use a meat thermometer. Aim for 130°F for medium-rare and 140°F for medium. This ensures your steak is cooked perfectly every time.

Recommended Cooking Methods

There are several methods to cook flank steak, each offering a unique flavor and texture. Here are some recommended cooking methods:

  • Grilling: This is the most popular method for flank steak. The high heat of the grill gives the meat a delicious char and smoky flavor. Preheat your grill to medium-high and cook for 5-7 minutes on each side.
  • Broiling: If you don’t have a grill, broiling is a great alternative. Place the steak on a broiler pan and cook it in the oven on high heat. Keep a close eye on it, as it cooks quickly!
  • Pan-Seering: For a quick and easy method, use a cast-iron skillet. Heat the skillet over medium-high heat, add a little oil, and sear the steak for about 5-7 minutes on each side.
  • Slow Cooking: For a tender and flavorful option, consider slow cooking. Marinate the steak and place it in a slow cooker with some broth and vegetables. Cook on low for 6-8 hours for a melt-in-your-mouth experience.

Each cooking method has its benefits, so choose the one that best fits your kitchen setup and time constraints. No matter how you cook it, following these tips will help you achieve a delicious Mediterranean Steak Bowl!

Serving Suggestions for the Mediterranean Steak Bowl Recipe

Pairing with Sides and Beverages

When it comes to serving your Mediterranean Steak Bowl, pairing it with the right sides and beverages can elevate your meal. Here are some delightful options to consider:

  • Fresh Pita Bread: Serve warm pita bread on the side. It’s perfect for scooping up the delicious ingredients from your bowl.
  • Hummus: A small bowl of hummus adds a creamy texture and complements the flavors of the steak and veggies. You can choose classic, roasted red pepper, or garlic hummus for variety.
  • Greek Salad: A side of Greek salad, with cucumbers, tomatoes, olives, and feta, pairs beautifully with the Mediterranean Steak Bowl. It adds extra freshness and crunch.
  • Roasted Vegetables: Consider serving a side of roasted seasonal vegetables. They add warmth and a touch of sweetness to your meal.
  • Wine: For beverages, a glass of chilled white wine, like Sauvignon Blanc or a light red like Pinot Noir, complements the flavors of the dish. If you prefer non-alcoholic options, try sparkling water with a slice of lemon or a refreshing iced tea.

These sides and beverages not only enhance the meal but also create a well-rounded dining experience. Enjoying your Mediterranean Steak Bowl with these additions will surely impress your family and friends!

Presentation Ideas for Your Bowl

Presentation plays a key role in making your Mediterranean Steak Bowl visually appealing. Here are some creative ideas to make your dish stand out:

  • Colorful Layering: When assembling your bowl, layer the ingredients in a way that showcases their vibrant colors. Start with quinoa at the bottom, then add greens, followed by colorful veggies, and finally, the steak on top.
  • Garnish with Fresh Herbs: Sprinkle fresh herbs like parsley or mint on top of your bowl for a pop of color and added flavor. This simple touch can make your dish look gourmet.
  • Use Unique Bowls: Serve your Mediterranean Steak Bowl in unique or colorful bowls. This adds a fun element to your meal and makes it more inviting.
  • Drizzle with Dressing: If you’re using a dressing, drizzle it artistically over the top of the bowl. This not only adds flavor but also enhances the visual appeal.
  • Serve with Lemon Wedges: Adding lemon wedges on the side not only looks great but also allows guests to add a fresh squeeze of lemon juice to their liking.

By focusing on presentation, you can turn a simple meal into a stunning culinary experience. Your Mediterranean Steak Bowl will not only taste amazing but also look beautiful on the table!

Tips for Making the Mediterranean Steak Bowl Recipe

Storage Tips for Leftovers

Leftovers from your Mediterranean Steak Bowl can be just as delicious the next day! To keep your meal fresh, follow these simple storage tips:

  • Cool Down: Allow the bowl to cool to room temperature before storing. This helps prevent condensation, which can make your ingredients soggy.
  • Use Airtight Containers: Store your leftovers in airtight containers. This keeps the flavors intact and prevents any odors from other foods in the fridge.
  • Separate Ingredients: If possible, store the steak, quinoa, and vegetables separately. This way, you can reheat only what you need without compromising the freshness of the veggies.
  • Refrigerate Promptly: Place your leftovers in the fridge within two hours of cooking. They can last for up to three days when stored properly.
  • Reheat Gently: When you’re ready to enjoy your leftovers, reheat them gently in the microwave or on the stovetop. Avoid overheating, as this can dry out the steak and vegetables.

Meal Prep Ideas

Meal prepping your Mediterranean Steak Bowl can save you time during busy weekdays. Here are some helpful meal prep ideas:

  • Batch Cook Quinoa: Prepare a large batch of quinoa at the beginning of the week. Store it in the fridge, and it will be ready to use for your bowls throughout the week.
  • Marinate Ahead: Marinate the flank steak in advance. You can do this the night before or even freeze it in the marinade. Just thaw it in the fridge the day before cooking.
  • Chop Vegetables in Advance: Wash and chop your vegetables ahead of time. Store them in separate containers in the fridge. This makes assembly quick and easy when you’re ready to eat.
  • Portion Out Bowls: Consider assembling individual bowls for easy grab-and-go meals. Layer the quinoa, veggies, and steak in meal prep containers for a quick lunch or dinner option.
  • Experiment with Dressings: Prepare different dressings to keep your meals exciting. Store them in small containers, so you can easily add a new flavor to your bowl each day.

By following these tips, you can enjoy your Mediterranean Steak Bowl throughout the week without the hassle of daily cooking. Meal prepping not only saves time but also helps you stick to healthy eating habits!

Breakdown of Time for the Mediterranean Steak Bowl Recipe

Prep Time

Preparing your Mediterranean Steak Bowl is quick and easy! The prep time mainly involves marinating the steak and chopping the vegetables. Here’s a breakdown:

  • Marinating the Steak: 30 minutes (or longer for enhanced flavor)
  • Chopping Vegetables: 10-15 minutes
  • Cooking Quinoa: 15 minutes (if not pre-cooked)

In total, you can expect about 55 minutes of prep time if you include marinating. However, if you marinate the steak overnight, you can cut down on the active prep time significantly!

Cooking Time

Cooking the steak and assembling the bowl is a breeze. Here’s how long each step takes:

  • Grilling the Steak: 10-14 minutes (5-7 minutes per side)
  • Resting the Steak: 5 minutes

So, the total cooking time is around 15-19 minutes. This means you can have a delicious meal ready in no time!

Total Time

When you combine both prep and cooking times, the total time for making your Mediterranean Steak Bowl is approximately:

  • With Marinating Time: 1 hour 10 minutes (if marinating for 30 minutes)
  • Without Marinating Time: 55 minutes (if you marinate overnight)

This makes the Mediterranean Steak Bowl a fantastic option for a weeknight dinner or meal prep. You can enjoy a healthy, flavorful meal without spending all evening in the kitchen!

Nutritional Information for the Mediterranean Steak Bowl Recipe

Calories and Macronutrients

The Mediterranean Steak Bowl is not only delicious but also nutritious! Here’s a breakdown of the estimated calories and macronutrients per serving:

  • Calories: Approximately 450-500 calories
  • Protein: 30-35 grams
  • Carbohydrates: 40-45 grams
  • Fat: 20-25 grams
  • Fiber: 6-8 grams

These values can vary based on the specific ingredients and portion sizes you use. The combination of flank steak, quinoa, and fresh vegetables provides a balanced meal that supports your energy needs while keeping you satisfied.

Health Benefits of Key Ingredients

Each ingredient in the Mediterranean Steak Bowl contributes to its overall health benefits. Here’s a closer look at some of the key components:

  • Flank Steak: A great source of high-quality protein, which is essential for muscle repair and growth. It also contains important nutrients like iron and zinc, which support immune function.
  • Quinoa: This superfood is gluten-free and packed with protein, fiber, and essential amino acids. It helps keep you full and supports digestive health.
  • Cherry Tomatoes: Rich in antioxidants, particularly lycopene, which may help reduce the risk of chronic diseases. They also provide vitamins A and C, which are important for skin and immune health.
  • Cucumber: Low in calories and high in water content, cucumbers help keep you hydrated. They also provide vitamins K and C, which are beneficial for bone health and skin.
  • Baby Spinach: Packed with vitamins A, C, and K, spinach is a nutrient-dense leafy green that supports overall health. It’s also rich in iron and calcium.
  • Feta Cheese: While it adds creaminess and flavor, feta also provides calcium and protein. Just be mindful of portion sizes, as it can be high in sodium.
  • Kalamata Olives: These olives are a good source of healthy fats, particularly monounsaturated fats, which are beneficial for heart health. They also contain antioxidants that may help reduce inflammation.
  • Lemon Juice: Fresh lemon juice adds a burst of flavor and vitamin C, which supports the immune system and enhances iron absorption from plant-based foods.

Incorporating these ingredients into your diet through the Mediterranean Steak Bowl not only makes for a tasty meal but also promotes overall health and well-being. Enjoy this nutritious bowl as part of a balanced diet!

FAQs about the Mediterranean Steak Bowl Recipe

Can I use a different type of meat?

Absolutely! The Mediterranean Steak Bowl is versatile, and you can easily swap out the flank steak for other types of meat. Chicken breast is a popular choice, as it grills well and absorbs flavors beautifully. You can also use pork tenderloin or lamb for a different taste. If you prefer seafood, shrimp or salmon can be delicious alternatives. Just remember to adjust the cooking times based on the type of meat you choose to ensure it’s cooked perfectly!

How can I make this recipe gluten-free?

Making the Mediterranean Steak Bowl gluten-free is simple! The main ingredient to watch out for is quinoa, which is naturally gluten-free. Just ensure that the quinoa you purchase is labeled as gluten-free, as some brands may process it in facilities that handle gluten-containing grains. Additionally, check any dressings or sauces you use to ensure they are gluten-free. By following these tips, you can enjoy a delicious gluten-free Mediterranean Steak Bowl!

What are some good substitutes for the dressing?

If you want to switch up the dressing for your Mediterranean Steak Bowl, there are plenty of tasty options! A simple olive oil and balsamic vinegar mix can add a tangy flavor. You could also try a yogurt-based dressing for creaminess, or a tahini sauce for a nutty twist. For a spicy kick, consider adding a dash of hot sauce or sriracha to your dressing. Feel free to experiment with different flavors to find the perfect match for your bowl!

How long can I store leftovers?

Leftovers from your Mediterranean Steak Bowl can be stored in the refrigerator for up to three days. To keep them fresh, make sure to store the ingredients in airtight containers. If you’ve kept the steak, quinoa, and vegetables separate, they will last longer and maintain their texture. When you’re ready to enjoy your leftovers, simply reheat them gently in the microwave or on the stovetop. This way, you can savor the delicious flavors of your Mediterranean Steak Bowl even after the first serving!

Conclusion on the Mediterranean Steak Bowl Recipe

Recap of Key Points

In summary, the Mediterranean Steak Bowl is a delightful and nutritious meal that brings together the best of Mediterranean flavors. With its tender flank steak, vibrant vegetables, and wholesome quinoa, this dish is not only visually appealing but also packed with essential nutrients. The marinade enhances the steak’s flavor, while the fresh ingredients provide a satisfying crunch and freshness. Plus, the versatility of this recipe allows you to customize it to your liking, whether you prefer different proteins or seasonal vegetables.

We’ve also explored various cooking methods, serving suggestions, and tips for meal prep, making it easy to enjoy this dish any day of the week. The Mediterranean diet is known for its health benefits, and incorporating meals like the Mediterranean Steak Bowl into your routine can help you lead a healthier lifestyle.

Encouragement to Try the Recipe

Now that you have all the information you need, it’s time to roll up your sleeves and try making the Mediterranean Steak Bowl! Whether you’re cooking for yourself, your family, or friends, this recipe is sure to impress. The combination of flavors and textures will make every bite a joy. Plus, it’s a fantastic way to introduce more fresh ingredients into your meals.

So, gather your ingredients, fire up the grill, and enjoy the process of creating this delicious dish. We hope you love the Mediterranean Steak Bowl as much as we do. Happy cooking!

Thai Peanut Sweet Potato Buddha Bowl is a must-try!

Introduction to the Thai Peanut Sweet Potato Bowl

The Thai Peanut Sweet Potato Bowl is a delightful dish that brings together vibrant flavors and wholesome ingredients. This nourishing bowl is not only visually appealing but also packed with nutrients. It’s perfect for anyone looking to enjoy a healthy meal without sacrificing taste. The combination of roasted sweet potatoes, crunchy vegetables, and a creamy peanut sauce creates a satisfying experience for your taste buds.

What Makes the Thai Peanut Sweet Potato Bowl Special?

What sets the Thai Peanut Sweet Potato Bowl apart is its unique blend of textures and flavors. The sweet potatoes provide a natural sweetness, while the crunchy cabbage and carrots add freshness. The edamame contributes a protein boost, making this bowl a well-rounded meal. The star of the show, however, is the peanut sauce. This rich and creamy sauce ties all the ingredients together, offering a delightful contrast to the other components.

Moreover, this dish is incredibly versatile. You can easily customize it to suit your preferences. Whether you want to add more protein, switch up the vegetables, or even make it spicier, the options are endless. This adaptability makes the Thai Peanut Sweet Potato Bowl a favorite among many, as it can cater to various dietary needs and tastes.

In addition to being delicious, this bowl is also a feast for the eyes. The vibrant colors of the ingredients make it a visually stunning dish that is sure to impress. Whether you’re serving it for a family dinner or a casual lunch with friends, it’s bound to be a hit. So, let’s dive into the ingredients and preparation steps to create this amazing meal!

Ingredients for the Thai Peanut Sweet Potato Bowl

To create the delicious Thai Peanut Sweet Potato Bowl, you’ll need a variety of fresh ingredients. Each component plays a vital role in building flavor and nutrition. Here’s what you’ll need:

  • 2 medium sweet potatoes, peeled and cut into 1-inch cubes
  • 1 tablespoon olive oil
  • 1 teaspoon sea salt
  • 1/2 teaspoon freshly ground black pepper
  • 1 cup cooked quinoa
  • 1 cup finely shredded red cabbage
  • 1 cup grated carrots
  • 1/2 cup shelled edamame
  • 1/4 cup sliced green onions
  • 1/4 cup fresh cilantro, chopped

For the peanut sauce, gather the following ingredients:

  • 1/4 cup creamy peanut butter
  • 2 tablespoons soy sauce
  • 1 tablespoon maple syrup
  • 1 tablespoon rice vinegar
  • 1 teaspoon sesame oil
  • 1-2 tablespoons water (to adjust consistency)
  • 1 clove garlic, minced
  • 1 teaspoon freshly grated ginger

These ingredients come together to create a nourishing and flavorful bowl. The sweet potatoes provide a hearty base, while the fresh vegetables add crunch and color. The peanut sauce ties everything together, making each bite a delightful experience. Now that you have your ingredients ready, let’s move on to the preparation steps!

Step-by-Step Preparation of the Thai Peanut Sweet Potato Bowl

Now that you have gathered all the ingredients, it’s time to dive into the preparation of your Thai Peanut Sweet Potato Bowl. This process is simple and straightforward, making it easy for anyone to follow along. Let’s break it down into manageable steps.

Step 1: Preparing the Sweet Potatoes

First, preheat your oven to 400°F. This temperature is perfect for roasting sweet potatoes, allowing them to become tender and caramelized. On a baking sheet, combine the sweet potato cubes with olive oil, sea salt, and black pepper. Toss them well to ensure they are evenly coated. Spread the cubes out in a single layer to promote even cooking. Roast the sweet potatoes for about 25-30 minutes, turning them halfway through. You’ll know they’re ready when they are golden brown and fork-tender.

Step 2: Making the Thai Peanut Sauce

While the sweet potatoes are roasting, you can prepare the delicious peanut sauce. In a medium bowl, mix together the creamy peanut butter, soy sauce, maple syrup, rice vinegar, and sesame oil. Add the minced garlic and freshly grated ginger for an extra kick of flavor. Stir everything together until well combined. If the sauce is too thick, gradually add water, one tablespoon at a time, until you reach your desired consistency. This sauce is what makes the bowl truly special!

Step 3: Cooking the Vegetables

Next, it’s time to prepare the fresh vegetables. While the sweet potatoes roast, you can finely shred the red cabbage and grate the carrots. If you have shelled edamame, make sure they are ready to go. You can steam them for a few minutes if you prefer them warm. Slice the green onions and chop the fresh cilantro. These vibrant vegetables will add color and crunch to your bowl.

Step 4: Assembling the Thai Peanut Sweet Potato Bowl

Once the sweet potatoes are done roasting, it’s time to assemble your nourish bowl. Start with a generous layer of cooked quinoa at the bottom of your bowl. This will serve as a hearty base. Next, layer on the roasted sweet potatoes, followed by the shredded cabbage, grated carrots, edamame, green onions, and cilantro. Finally, drizzle the creamy peanut sauce over the top. This will bring all the flavors together and make each bite a delight!

Enjoy your Thai Peanut Sweet Potato Bowl right away, or store it in the refrigerator for up to two days. It’s a quick and nutritious meal that’s perfect for lunch or dinner!

Variations of the Thai Peanut Sweet Potato Bowl

The Thai Peanut Sweet Potato Bowl is not only delicious but also highly adaptable. You can easily modify it to suit your taste preferences or dietary needs. Here are some fun variations to consider:

Adding Protein Options

If you want to boost the protein content of your bowl, consider adding grilled chicken, tofu, or chickpeas. Grilled chicken adds a savory flavor, while tofu provides a plant-based protein option. Chickpeas are also a great choice, as they are packed with nutrients and add a nice texture. Simply cook your chosen protein and layer it on top of the quinoa before adding the vegetables and sauce.

Alternative Vegetables to Use

Feel free to switch up the vegetables based on what you have on hand or your personal preferences. Bell peppers, cucumbers, or snap peas can add a refreshing crunch. You can also use spinach or kale for a leafy green option. The key is to keep the colors vibrant and the textures varied. This way, your bowl remains visually appealing and nutritious!

With these variations, you can create a new Thai Peanut Sweet Potato Bowl every time you make it. This flexibility ensures that you never get bored with this delightful dish!

Cooking Note for the Thai Peanut Sweet Potato Bowl

When preparing the Thai Peanut Sweet Potato Bowl, there are a few cooking notes to keep in mind. These tips will help you achieve the best results and enhance your overall cooking experience.

First, ensure that your sweet potatoes are cut into uniform cubes. This helps them cook evenly, resulting in a perfect texture. If you prefer a crispier texture, you can increase the roasting time by a few minutes, but keep an eye on them to prevent burning.

Next, when making the peanut sauce, feel free to adjust the ingredients to suit your taste. If you love a sweeter sauce, add a bit more maple syrup. For a tangier flavor, increase the rice vinegar. The beauty of this sauce is its versatility, allowing you to create a flavor profile that you enjoy.

Lastly, when assembling your bowl, don’t hesitate to get creative! Layer the ingredients in a way that appeals to you. You can also serve the peanut sauce on the side for dipping, allowing everyone to control how much they want to add. This can be especially fun for family meals or gatherings.

By keeping these cooking notes in mind, you’ll be well on your way to creating a delicious and satisfying Thai Peanut Sweet Potato Bowl that everyone will love!

Serving Suggestions for the Thai Peanut Sweet Potato Bowl

Serving your Thai Peanut Sweet Potato Bowl can be just as fun as making it! Here are some suggestions to elevate your dining experience:

  • Garnish with Fresh Herbs: A sprinkle of fresh cilantro or mint on top adds a burst of flavor and color.
  • Serve with Lime Wedges: A squeeze of fresh lime juice can brighten the dish and enhance the flavors.
  • Pair with a Side Salad: A light cucumber or mixed greens salad can complement the bowl nicely.
  • Offer Extra Toppings: Consider providing toppings like chopped peanuts, sesame seeds, or even sliced avocado for added texture and flavor.

These serving suggestions not only enhance the presentation but also allow your guests to customize their bowls. Enjoying the Thai Peanut Sweet Potato Bowl becomes a delightful experience for everyone at the table!

Tips for Perfecting Your Thai Peanut Sweet Potato Bowl

To ensure your Thai Peanut Sweet Potato Bowl turns out perfectly every time, here are some helpful tips:

  • Use Fresh Ingredients: Fresh vegetables and herbs will make a noticeable difference in flavor and texture.
  • Don’t Overcook the Sweet Potatoes: Keep an eye on them while roasting. They should be tender but not mushy.
  • Experiment with Flavors: Don’t be afraid to try different sauces or spices. A dash of chili flakes can add a nice kick!
  • Meal Prep: Consider preparing the components ahead of time. Store the roasted sweet potatoes, quinoa, and sauce separately for quick assembly during busy days.

By following these tips, you’ll be able to create a delicious and satisfying Thai Peanut Sweet Potato Bowl that will impress your family and friends!

Cooking Note for the Thai Peanut Sweet Potato Bowl

When preparing the Thai Peanut Sweet Potato Bowl, there are a few cooking notes to keep in mind. These tips will help you achieve the best results and enhance your overall cooking experience.

First, ensure that your sweet potatoes are cut into uniform cubes. This helps them cook evenly, resulting in a perfect texture. If you prefer a crispier texture, you can increase the roasting time by a few minutes, but keep an eye on them to prevent burning.

Next, when making the peanut sauce, feel free to adjust the ingredients to suit your taste. If you love a sweeter sauce, add a bit more maple syrup. For a tangier flavor, increase the rice vinegar. The beauty of this sauce is its versatility, allowing you to create a flavor profile that you enjoy.

Lastly, when assembling your bowl, don’t hesitate to get creative! Layer the ingredients in a way that appeals to you. You can also serve the peanut sauce on the side for dipping, allowing everyone to control how much they want to add. This can be especially fun for family meals or gatherings.

By keeping these cooking notes in mind, you’ll be well on your way to creating a delicious and satisfying Thai Peanut Sweet Potato Bowl that everyone will love!

Serving Suggestions for the Thai Peanut Sweet Potato Bowl

Serving your Thai Peanut Sweet Potato Bowl can be just as fun as making it! Here are some suggestions to elevate your dining experience:

  • Garnish with Fresh Herbs: A sprinkle of fresh cilantro or mint on top adds a burst of flavor and color. These herbs not only enhance the taste but also make the dish look more appealing.
  • Serve with Lime Wedges: A squeeze of fresh lime juice can brighten the dish and enhance the flavors. The acidity from the lime complements the sweetness of the sweet potatoes beautifully.
  • Pair with a Side Salad: A light cucumber or mixed greens salad can complement the bowl nicely. This adds a refreshing crunch and balances the richness of the peanut sauce.
  • Offer Extra Toppings: Consider providing toppings like chopped peanuts, sesame seeds, or even sliced avocado for added texture and flavor. These toppings can give your bowl a delightful crunch and extra nutrition.
  • Make it a Family Style Meal: Serve all the components separately and let everyone build their own bowl. This way, each person can customize their meal to their liking, making it a fun and interactive dining experience.

These serving suggestions not only enhance the presentation but also allow your guests to customize their bowls. Enjoying the Thai Peanut Sweet Potato Bowl becomes a delightful experience for everyone at the table!

Tips for Perfecting Your Thai Peanut Sweet Potato Bowl

To ensure your Thai Peanut Sweet Potato Bowl turns out perfectly every time, here are some helpful tips:

  • Use Fresh Ingredients: Fresh vegetables and herbs will make a noticeable difference in flavor and texture. Look for vibrant colors and firm textures when selecting your produce.
  • Don’t Overcook the Sweet Potatoes: Keep an eye on them while roasting. They should be tender but not mushy. A fork should easily pierce them, but they should still hold their shape.
  • Experiment with Flavors: Don’t be afraid to try different sauces or spices. A dash of chili flakes can add a nice kick! You can also explore other nut butters like almond or cashew for a unique twist.
  • Meal Prep: Consider preparing the components ahead of time. Store the roasted sweet potatoes, quinoa, and sauce separately for quick assembly during busy days. This makes it easy to enjoy a healthy meal on the go.
  • Adjust the Peanut Sauce: If you prefer a creamier sauce, add more peanut butter. For a thinner consistency, increase the water. Taste as you go to find your perfect balance!
  • Layer with Care: When assembling your bowl, layer the ingredients thoughtfully. Start with quinoa, then add sweet potatoes, followed by vegetables. This helps maintain the structure and makes for a beautiful presentation.
  • Serve Immediately: For the best experience, serve the bowl right after assembling. This keeps the vegetables crisp and the flavors fresh. If you need to store it, keep the sauce separate until ready to eat.

By following these tips, you’ll be able to create a delicious and satisfying Thai Peanut Sweet Potato Bowl that will impress your family and friends! Each bowl can be a new adventure, so don’t hesitate to make it your own.

Breakdown of Time for the Thai Peanut Sweet Potato Bowl

Understanding the time needed to prepare the Thai Peanut Sweet Potato Bowl can help you plan your cooking efficiently. Here’s a simple breakdown of the time required for each step:

Prep Time

The prep time for this delicious bowl is approximately 15-20 minutes. During this time, you will peel and cube the sweet potatoes, chop the vegetables, and prepare the peanut sauce. Having all your ingredients ready before you start cooking will make the process smoother and more enjoyable.

Cooking Time

The cooking time is about 25-30 minutes. This includes roasting the sweet potatoes in the oven until they are tender and golden brown. While the sweet potatoes are roasting, you can multitask by making the peanut sauce and preparing the fresh vegetables. This efficient use of time allows you to have everything ready at once!

Total Time

In total, you can expect to spend around 40-50 minutes from start to finish. This includes both prep and cooking time. It’s a quick and easy meal that’s perfect for busy weeknights or meal prep for the week ahead. With just under an hour, you can create a nutritious and flavorful Thai Peanut Sweet Potato Bowl that everyone will love!

Nutritional Information for the Thai Peanut Sweet Potato Bowl

Understanding the nutritional content of your meals is essential for maintaining a balanced diet. The Thai Peanut Sweet Potato Bowl is not only delicious but also packed with nutrients. Here’s a breakdown of the key nutritional information for one serving of this nourishing bowl:

Calories

Each serving of the Thai Peanut Sweet Potato Bowl contains approximately 450 calories. This makes it a satisfying meal that provides energy without being overly heavy. The combination of sweet potatoes, quinoa, and fresh vegetables contributes to a well-rounded calorie count, ensuring you feel full and satisfied.

Protein

This bowl offers about 15 grams of protein per serving. The protein comes from various sources, including quinoa and edamame. These ingredients not only help in muscle repair but also keep you feeling full longer. If you choose to add grilled chicken, tofu, or chickpeas, you can easily increase the protein content even further, making it a great option for those looking to boost their protein intake.

Sodium

The sodium content in the Thai Peanut Sweet Potato Bowl is around 600 milligrams. This amount is reasonable for a meal, especially considering the use of soy sauce in the peanut sauce. If you are watching your sodium intake, you can opt for low-sodium soy sauce or adjust the amount used in the recipe. This way, you can enjoy the flavors without compromising your dietary needs.

Overall, the Thai Peanut Sweet Potato Bowl is a nutritious choice that provides a good balance of calories, protein, and sodium. It’s a meal that not only tastes great but also supports your health and wellness goals!

FAQs about the Thai Peanut Sweet Potato Bowl

Can I make the Thai Peanut Sweet Potato Bowl ahead of time?

Absolutely! The Thai Peanut Sweet Potato Bowl is perfect for meal prep. You can roast the sweet potatoes and prepare the peanut sauce in advance. Store the components separately in airtight containers in the refrigerator. When you’re ready to eat, simply assemble your bowl with the quinoa and fresh vegetables. This way, you can enjoy a nutritious meal any day of the week without the hassle of cooking from scratch!

What can I substitute for peanut butter in the sauce?

If you’re looking for a substitute for peanut butter, there are several options available. Almond butter or cashew butter can work well, providing a similar creamy texture and flavor. For a nut-free option, try sunflower seed butter. It has a unique taste and is safe for those with nut allergies. Just keep in mind that the flavor profile will change slightly, but it will still be delicious!

Is the Thai Peanut Sweet Potato Bowl vegan-friendly?

Yes, the Thai Peanut Sweet Potato Bowl is entirely vegan-friendly! All the ingredients, including the sweet potatoes, quinoa, and peanut sauce, are plant-based. This makes it a great option for anyone following a vegan diet. Plus, it’s packed with nutrients, making it a wholesome choice for everyone, regardless of dietary preferences.

How can I make the Thai Peanut Sweet Potato Bowl spicier?

If you enjoy a bit of heat, there are several ways to spice up your Thai Peanut Sweet Potato Bowl. You can add a splash of sriracha or chili paste to the peanut sauce for an extra kick. Another option is to sprinkle some red pepper flakes over the assembled bowl. If you like fresh heat, consider adding sliced jalapeños or a dash of hot sauce on top. Adjust the spice level to your liking, and enjoy the added flavor!

Conclusion on the Thai Peanut Sweet Potato Bowl

The Thai Peanut Sweet Potato Bowl is more than just a meal; it’s a celebration of flavors, colors, and nutrition. This dish brings together the natural sweetness of roasted sweet potatoes, the crunch of fresh vegetables, and the creamy richness of peanut sauce. Each bite is a delightful experience that satisfies both your taste buds and your hunger.

What makes this bowl truly special is its versatility. You can easily customize it to fit your dietary needs or personal preferences. Whether you want to add protein, switch up the vegetables, or spice it up, the options are endless. This adaptability ensures that you can enjoy a new version of the bowl every time you make it, keeping your meals exciting and fresh.

Moreover, the Thai Peanut Sweet Potato Bowl is perfect for meal prep. You can prepare the components ahead of time, making it a convenient option for busy days. With just a little effort, you can have a nutritious and delicious meal ready to go whenever you need it.

In conclusion, the Thai Peanut Sweet Potato Bowl is a fantastic addition to your recipe repertoire. It’s not only easy to make but also packed with nutrients that support a healthy lifestyle. So, gather your ingredients, follow the steps, and enjoy this vibrant and satisfying dish. Your taste buds will thank you!

Garlic Herb Beef Tenderloin Recipe is a must-try!

Introduction to Garlic Herb Beef Tenderloin Recipe

Welcome to the world of culinary delights! Today, we’re diving into a dish that’s sure to impress your family and friends: the Garlic Herb Beef Tenderloin Recipe. This dish is not just a meal; it’s an experience. With its rich flavors and tender texture, it’s perfect for special occasions or a cozy dinner at home. The combination of garlic and fresh herbs creates a mouthwatering aroma that fills your kitchen, making it hard to resist.

What Makes Garlic Herb Beef Tenderloin Special?

So, what sets this Garlic Herb Beef Tenderloin apart from other recipes? First, the beef tenderloin itself is one of the most tender cuts of meat available. It’s known for its buttery texture and rich flavor. When you add a savory herb crust, it elevates the dish to a whole new level. The garlic, rosemary, and thyme blend beautifully, enhancing the natural taste of the beef.

Moreover, this recipe is incredibly versatile. You can easily customize it by swapping in your favorite herbs or adding a splash of your preferred marinade. Plus, it’s simple enough for beginners yet sophisticated enough to impress seasoned cooks. Whether you’re hosting a dinner party or enjoying a quiet night in, this dish is sure to be a hit!

In the following sections, we’ll guide you through the ingredients, preparation steps, and tips to make your Garlic Herb Beef Tenderloin a success. Let’s get started on this delicious journey!

Ingredients for Garlic Herb Beef Tenderloin Recipe

To create the perfect Garlic Herb Beef Tenderloin, you’ll need a selection of fresh ingredients that come together to enhance the flavor of the beef. Here’s what you’ll need:

  • 2 pounds beef tenderloin, trimmed for a clean cut
  • 4 tablespoons olive oil, divided for cooking and marinating
  • 4 cloves garlic, minced to release its aromatic flavor
  • 2 tablespoons fresh rosemary, finely chopped for a fragrant touch
  • 2 tablespoons fresh thyme, finely chopped to complement the rosemary
  • 1 teaspoon salt, to enhance the overall taste
  • 1 teaspoon freshly ground black pepper, for a bit of heat
  • 1 tablespoon Dijon mustard, adding a tangy kick
  • 1 tablespoon balsamic vinegar, for a hint of sweetness and acidity

These ingredients work together to create a savory crust that locks in the juices of the tenderloin, resulting in a flavorful and juicy dish. The combination of garlic, herbs, and spices not only enhances the beef but also fills your kitchen with an irresistible aroma.

Feel free to adjust the quantities based on your taste preferences. For instance, if you love garlic, you can add an extra clove or two. The beauty of this recipe lies in its flexibility, allowing you to make it your own!

Step-by-Step Preparation of Garlic Herb Beef Tenderloin Recipe

Now that you have all your ingredients ready, it’s time to dive into the preparation of your Garlic Herb Beef Tenderloin. This step-by-step guide will help you create a delicious dish that’s sure to impress. Let’s get started!

Step 1: Preparing the Marinade

First, you’ll want to prepare the marinade. In a mixing bowl, combine 2 tablespoons of olive oil, minced garlic, chopped rosemary, thyme, salt, and black pepper. Stir these ingredients together until they form a fragrant herb mixture. This marinade is the key to infusing the beef with flavor.

Step 2: Marinating the Beef Tenderloin

Next, take your trimmed beef tenderloin and place it on a clean cutting board. Generously apply the herb mixture all over the tenderloin. Make sure every inch is coated for maximum flavor. If you have time, consider letting the beef marinate for a few hours or even overnight in the refrigerator. This extra time allows the flavors to penetrate the meat, making it even more delicious.

Step 3: Prepping the Oven and Cooking Equipment

While the beef is marinating, preheat your oven to 400°F. This temperature is perfect for roasting the tenderloin to perfection. Additionally, grab a large, oven-safe skillet. This will be used for both searing and roasting the beef, making cleanup easier.

Step 4: Cooking the Beef Tenderloin

Once your oven is preheated, it’s time to cook! Heat the remaining 2 tablespoons of olive oil in the skillet over medium-high heat. When the oil is shimmering, carefully place the marinated tenderloin in the skillet. Sear it for about 3-4 minutes on each side until a golden-brown crust forms. This step locks in the juices and adds a beautiful color to the meat.

After searing, remove the skillet from the heat. Brush the tenderloin with Dijon mustard and drizzle balsamic vinegar over it. This adds a tangy kick that complements the herbs beautifully. Now, transfer the skillet to the preheated oven and roast the beef for 20-25 minutes. You’re looking for an internal temperature of 135°F for a perfect medium-rare finish.

Step 5: Resting and Slicing the Tenderloin

Once the beef is done cooking, carefully remove the skillet from the oven. Allow the tenderloin to rest for about 10 minutes. This resting period is crucial as it lets the juices redistribute throughout the meat, ensuring every slice is tender and juicy. After resting, slice the tenderloin into pieces and serve. Enjoy the fruits of your labor!

Variations of Garlic Herb Beef Tenderloin Recipe

While the classic Garlic Herb Beef Tenderloin is a delight on its own, there are many ways to switch things up! Let’s explore some variations that can add a unique twist to this already fantastic dish.

Different Herbs to Use

Herbs are the heart of this recipe, and you can easily customize them to suit your taste. Here are some alternatives:

  • Parsley: Fresh parsley adds a bright, fresh flavor that complements the beef beautifully.
  • Oregano: This herb brings a slightly sweet and earthy taste, perfect for a Mediterranean twist.
  • Sage: Known for its strong flavor, sage can add a warm, aromatic touch to your tenderloin.
  • Basil: For a hint of sweetness, fresh basil can be a delightful addition, especially in summer.
  • Chives: These add a mild onion flavor, giving your dish a unique and fresh taste.

Feel free to mix and match these herbs based on what you have on hand or what you enjoy most. The key is to maintain a balance so that the flavors enhance rather than overpower the beef.

Alternative Cooking Methods

If you’re looking to try something different, consider these alternative cooking methods for your Garlic Herb Beef Tenderloin:

  • Grilling: For a smoky flavor, grill the tenderloin over medium-high heat. This method adds a delicious char and is perfect for summer barbecues.
  • Slow Cooking: If you have more time, a slow cooker can make the beef incredibly tender. Cook on low for 6-8 hours with the herb mixture for a melt-in-your-mouth experience.
  • Sous Vide: This method involves vacuum-sealing the beef and cooking it in a water bath at a precise temperature. It ensures perfect doneness and retains all the juices.
  • Air Frying: For a quicker option, an air fryer can give you a crispy exterior while keeping the inside juicy. Cook at 400°F for about 20 minutes, checking for doneness.

Each cooking method brings its own unique flavor and texture to the dish. Experimenting with these variations can lead to exciting new meals that keep your dining experience fresh and enjoyable!

Cooking Note for Garlic Herb Beef Tenderloin Recipe

Cooking a Garlic Herb Beef Tenderloin is a delightful experience, but there are a few important notes to keep in mind to ensure your dish turns out perfectly every time. Here are some tips to help you along the way:

  • Choosing the Right Cut: Always opt for a high-quality beef tenderloin. Look for a cut that is bright red with a good amount of marbling. This marbling is essential as it adds flavor and keeps the meat juicy during cooking.
  • Room Temperature: Before cooking, let the beef tenderloin sit at room temperature for about 30 minutes. This helps it cook more evenly, resulting in a tender and juicy final product.
  • Use a Meat Thermometer: To achieve the perfect doneness, invest in a reliable meat thermometer. For medium-rare, aim for an internal temperature of 135°F. Remember, the temperature will rise a few degrees while resting.
  • Resting is Key: After cooking, always allow the tenderloin to rest for at least 10 minutes. This step is crucial as it allows the juices to redistribute, ensuring each slice is moist and flavorful.
  • Don’t Skip the Marinade: If time permits, marinating the beef for several hours or overnight can significantly enhance the flavor. The longer it marinates, the more intense the herb flavors will be.
  • Experiment with Seasoning: Feel free to adjust the seasoning to your liking. If you prefer a spicier kick, consider adding crushed red pepper flakes or a dash of cayenne pepper to the herb mixture.

By keeping these cooking notes in mind, you’ll be well on your way to creating a Garlic Herb Beef Tenderloin that’s not only delicious but also a true showstopper at your dinner table. Happy cooking!

Serving Suggestions for Garlic Herb Beef Tenderloin Recipe

Now that you’ve prepared your delicious Garlic Herb Beef Tenderloin, it’s time to think about how to serve it. The right side dishes and beverages can elevate your meal, making it even more enjoyable. Here are some fantastic serving suggestions to complement your tenderloin.

Ideal Side Dishes

When it comes to side dishes, you want to choose options that balance the rich flavors of the beef. Here are some great ideas:

  • Roasted Vegetables: A mix of seasonal vegetables like carrots, Brussels sprouts, and bell peppers, roasted until caramelized, pairs beautifully with the tenderloin.
  • Garlic Mashed Potatoes: Creamy mashed potatoes infused with garlic provide a comforting and delicious side that complements the beef perfectly.
  • Green Beans Almondine: Sautéed green beans with toasted almonds add a crunchy texture and a fresh taste to your plate.
  • Cauliflower Gratin: This cheesy, baked cauliflower dish offers a rich and creamy contrast to the savory beef.
  • Quinoa Salad: A light quinoa salad with cherry tomatoes, cucumber, and a lemon vinaigrette can add a refreshing touch to your meal.

These side dishes not only enhance the flavors of the Garlic Herb Beef Tenderloin but also create a colorful and appealing presentation on your dining table.

Wine Pairings

Choosing the right wine can elevate your dining experience. Here are some excellent wine pairings for your Garlic Herb Beef Tenderloin:

  • Cabernet Sauvignon: This full-bodied red wine has bold flavors that complement the richness of the beef, making it a classic choice.
  • Merlot: With its softer tannins and fruity notes, Merlot pairs well with the savory herbs and tender texture of the beef.
  • Malbec: Known for its dark fruit flavors and smoky finish, Malbec enhances the dish’s flavors beautifully.
  • Pinot Noir: If you prefer a lighter wine, Pinot Noir offers a nice balance with its acidity and berry flavors, making it a versatile option.
  • Châteauneuf-du-Pape: This French red blend is rich and complex, providing a luxurious pairing for your tenderloin.

Whether you choose a bold red or a lighter option, the right wine will enhance the overall dining experience, making your Garlic Herb Beef Tenderloin even more memorable.

Tips for Perfecting Garlic Herb Beef Tenderloin Recipe

Creating the perfect Garlic Herb Beef Tenderloin is an art that can be mastered with a few helpful tips. Whether you’re a novice cook or a seasoned chef, these suggestions will ensure your dish turns out delicious every time. Let’s explore some essential tips to elevate your cooking game!

  • Invest in Quality Ingredients: The foundation of any great dish starts with high-quality ingredients. Choose a fresh, well-marbled beef tenderloin for the best flavor and tenderness. Fresh herbs will also enhance the dish significantly.
  • Marinate for Maximum Flavor: If time allows, marinate the beef for several hours or overnight. This extra time allows the flavors to penetrate deeply, resulting in a more flavorful tenderloin.
  • Use a Meat Thermometer: To achieve the perfect doneness, a meat thermometer is your best friend. For medium-rare, aim for an internal temperature of 135°F. Remember, the temperature will rise slightly while resting.
  • Let It Rest: After cooking, always let the tenderloin rest for at least 10 minutes. This step is crucial as it allows the juices to redistribute, ensuring each slice is juicy and tender.
  • Experiment with Seasoning: Don’t hesitate to adjust the seasoning to your taste. If you enjoy a bit of heat, consider adding crushed red pepper flakes or a dash of cayenne pepper to the herb mixture.
  • Keep an Eye on Cooking Time: Cooking times can vary based on the size of your tenderloin and your oven. Always check the internal temperature rather than relying solely on time to ensure perfect doneness.
  • Pair with Complementary Flavors: Think about the flavors of your side dishes and wine. Choose options that balance the richness of the beef, enhancing the overall dining experience.
  • Practice Makes Perfect: Don’t be discouraged if your first attempt isn’t perfect. Cooking is a learning process, and each time you make this dish, you’ll get better at it!

By following these tips, you’ll be well on your way to mastering the Garlic Herb Beef Tenderloin Recipe. Each step you take will bring you closer to creating a dish that’s not only delicious but also a true showstopper at your dinner table. Happy cooking!

Breakdown of Time for Garlic Herb Beef Tenderloin Recipe

Understanding the time required for each step of the Garlic Herb Beef Tenderloin Recipe is essential for planning your meal. Here’s a detailed breakdown of the time you’ll need to prepare and cook this delicious dish.

Prep Time

The prep time for this recipe is approximately 20-30 minutes. This includes gathering your ingredients, trimming the beef tenderloin, and preparing the herb marinade. If you choose to marinate the beef for several hours or overnight, you’ll want to factor in that additional time. Marinating enhances the flavor, making it well worth the wait!

Cooking Time

Once you’re ready to cook, the actual cooking time is about 25-30 minutes. This includes:

  • Searing the beef: 6-8 minutes (3-4 minutes on each side)
  • Roasting in the oven: 20-25 minutes, depending on your desired doneness.

Using a meat thermometer will help you achieve the perfect internal temperature, ensuring your beef is cooked just right.

Total Time

In total, you can expect to spend about 45-60 minutes on the Garlic Herb Beef Tenderloin Recipe, not including marinating time. If you decide to marinate the beef overnight, the total time will increase, but the hands-on cooking time remains the same. This makes it a great option for both quick weeknight dinners and special occasions!

By keeping track of your prep and cooking times, you can ensure a smooth cooking experience, allowing you to enjoy the process and the delicious results!

Nutritional Information for Garlic Herb Beef Tenderloin Recipe

Understanding the nutritional content of your meals is essential for maintaining a balanced diet. The Garlic Herb Beef Tenderloin is not only delicious but also packed with nutrients. Here’s a breakdown of the nutritional information for this savory dish.

Calories

Each serving of Garlic Herb Beef Tenderloin contains approximately 350-400 calories. This calorie count can vary based on the specific cut of beef and the amount of oil used. The tenderloin is a lean cut, making it a great option for those looking to enjoy a hearty meal without excessive calories.

Protein Content

One of the standout features of beef tenderloin is its high protein content. Each serving provides around 50-55 grams of protein. This makes it an excellent choice for those looking to increase their protein intake, whether for muscle building or overall health. Protein is essential for repairing tissues and supporting various bodily functions.

Sodium Levels

The sodium content in Garlic Herb Beef Tenderloin is relatively moderate, with each serving containing about 600-700 milligrams of sodium. This level is primarily due to the added salt and Dijon mustard. If you’re watching your sodium intake, consider reducing the amount of salt in the marinade or opting for low-sodium mustard.

Overall, the Garlic Herb Beef Tenderloin is a nutritious option that provides a good balance of calories, protein, and sodium. It’s a satisfying meal that can fit well into a healthy diet, especially when paired with nutritious side dishes like vegetables or salads.

FAQs about Garlic Herb Beef Tenderloin Recipe

Can I use a different cut of beef for this recipe?

Absolutely! While beef tenderloin is the star of this recipe due to its tenderness, you can use other cuts if you prefer. Cuts like ribeye, sirloin, or filet mignon can work well too. Just keep in mind that cooking times may vary based on the cut you choose. For tougher cuts, consider marinating longer or using a slow cooking method to ensure tenderness.

How do I know when the beef tenderloin is done?

The best way to check if your beef tenderloin is done is by using a meat thermometer. For medium-rare, aim for an internal temperature of 135°F. If you prefer medium, go for 145°F. Remember, the temperature will rise a few degrees while resting, so take it out of the oven a bit earlier. This ensures your beef remains juicy and tender!

Can I make this recipe ahead of time?

Yes, you can! This Garlic Herb Beef Tenderloin is perfect for meal prep. You can marinate the beef a day in advance and store it in the refrigerator. When you’re ready to cook, simply follow the cooking instructions. If you have leftovers, they can be stored in the fridge for up to three days. Just reheat gently to maintain tenderness.

What are some good sides to serve with beef tenderloin?

Pairing sides with your Garlic Herb Beef Tenderloin can enhance the meal. Some great options include:

  • Roasted Vegetables: Seasonal veggies like carrots and Brussels sprouts add color and flavor.
  • Garlic Mashed Potatoes: Creamy and comforting, they complement the beef beautifully.
  • Caesar Salad: A crisp salad with a tangy dressing balances the richness of the beef.
  • Grilled Asparagus: This adds a fresh, crunchy element to your plate.
  • Wild Rice Pilaf: A nutty rice dish can provide a hearty base for the tenderloin.

These sides not only taste great but also create a well-rounded meal that everyone will enjoy!

Conclusion on Garlic Herb Beef Tenderloin Recipe

In conclusion, the Garlic Herb Beef Tenderloin Recipe is a delightful dish that brings together rich flavors and tender textures, making it a perfect choice for any occasion. Whether you’re celebrating a special event or simply enjoying a cozy dinner at home, this recipe is sure to impress your guests and family alike.

With its easy-to-follow steps and versatile ingredients, you can customize the dish to suit your taste preferences. The combination of garlic, fresh herbs, and quality beef creates a savory experience that tantalizes the taste buds. Plus, the cooking methods and variations discussed allow you to explore different flavors and techniques, ensuring that you never get bored with this classic dish.

Remember, the key to a successful Garlic Herb Beef Tenderloin lies in the quality of your ingredients and the care you take during preparation. By following the tips and suggestions provided, you’ll be well on your way to mastering this recipe. So, gather your ingredients, roll up your sleeves, and get ready to create a meal that’s not only delicious but also a true showstopper!

We hope you enjoy making and sharing this Garlic Herb Beef Tenderloin with your loved ones. Happy cooking, and bon appétit!

Sriracha Honey Salmon Bowl is a must-try recipe!

Introduction to Sriracha Honey Salmon Bowl

Sriracha Honey Salmon Bowl is a delightful dish that combines the rich flavors of salmon with a sweet and spicy glaze. This meal is not only delicious but also packed with nutrients, making it a perfect choice for a healthy dinner. With its vibrant colors and mouthwatering taste, this bowl is sure to impress your family and friends.

What Makes Sriracha Honey Salmon Bowl Special?

What sets the Sriracha Honey Salmon Bowl apart? First, it features a unique blend of flavors. The sweetness of honey perfectly balances the heat from sriracha, creating a delightful taste explosion. Additionally, the salmon is rich in omega-3 fatty acids, which are great for heart health. The combination of brown rice, steamed broccoli, and creamy avocado adds texture and nutrition to the dish.

Moreover, this bowl is incredibly versatile. You can easily customize it to suit your taste preferences. Whether you want to add more veggies or switch up the grains, the options are endless. Plus, it’s quick to prepare, making it an ideal choice for busy weeknights. In just a short time, you can enjoy a restaurant-quality meal right at home!

So, gather your ingredients and get ready to create a Sriracha Honey Salmon Bowl that will tantalize your taste buds and nourish your body. Let’s dive into the ingredients you’ll need to make this delicious dish!

Ingredients for Sriracha Honey Salmon Bowl

Sriracha Honey Salmon Bowl, you’ll need a few simple yet flavorful ingredients. Each component plays a vital role in bringing this dish to life. Here’s what you’ll need:

  • 2 salmon fillets (6 ounces each)
  • 2 tablespoons honey
  • 2 tablespoons sriracha
  • 1 tablespoon soy sauce
  • 1 tablespoon extra virgin olive oil
  • 1 teaspoon garlic powder
  • 1 teaspoon ground ginger
  • Salt and freshly ground black pepper to taste
  • 2 cups brown rice, cooked
  • 1 cup broccoli florets, steamed
  • 1 ripe avocado, sliced
  • 2 green onions, finely chopped
  • Sesame seeds for garnish

These ingredients come together to create a delightful balance of flavors. The salmon fillets provide a rich source of protein, while the honey and sriracha create a sweet and spicy glaze that elevates the dish. Brown rice serves as a hearty base, and the steamed broccoli adds a nutritious crunch. Finally, the creamy avocado and fresh green onions bring a refreshing touch to each bite.

Feel free to adjust the quantities based on your preferences or dietary needs. Now that you have your ingredients ready, let’s move on to the preparation steps for your Sriracha Honey Salmon Bowl!

Preparation of Sriracha Honey Salmon Bowl

Sriracha Honey Salmon Bowl. This process is simple and quick, allowing you to enjoy a delicious meal in no time. Let’s break it down into easy steps!

Step 1: Marinating the Salmon

First, we need to marinate the salmon. In a mixing bowl, combine the honey, sriracha, soy sauce, olive oil, garlic powder, ground ginger, and a pinch of salt and pepper. Stir the mixture well until it’s smooth and all ingredients are blended. This marinade is what gives the salmon its sweet and spicy flavor.

Next, place the salmon fillets in the bowl, ensuring they are fully coated with the marinade. Let them sit for about 15 minutes. This allows the flavors to soak into the fish, making it even tastier. If you have time, you can marinate it longer for a more intense flavor.

Step 2: Cooking the Salmon

While the salmon is marinating, preheat your oven to 400°F (200°C). Line a baking sheet with parchment paper for easy cleanup. Once the oven is ready, arrange the marinated salmon fillets on the baking sheet. Make sure to pour any leftover marinade over the top of the fillets for extra flavor.

Bake the salmon for about 12-15 minutes. You’ll know it’s done when it flakes easily with a fork. The salmon should be a beautiful golden color, and the glaze will caramelize slightly, adding a delicious finish.

Step 3: Preparing the Bowl Components

While the salmon is baking, it’s time to prepare the other components of your bowl. Start by cooking the brown rice if you haven’t done so already. You can use a rice cooker or follow the package instructions on the stovetop. Brown rice is a great source of fiber and will serve as a hearty base for your bowl.

Next, steam the broccoli florets until they are bright green and tender, which usually takes about 5-7 minutes. You can use a steamer basket or microwave them with a little water in a covered bowl. This step adds a nutritious crunch to your meal.

Finally, slice the ripe avocado and chop the green onions. These fresh ingredients will add creaminess and a burst of flavor to your bowl.

Step 4: Assembling the Sriracha Honey Salmon Bowl

Sriracha Honey Salmon Bowl! Start by placing a generous portion of cooked brown rice in each bowl. Then, carefully place a salmon fillet on top of the rice. Next, add the steamed broccoli and avocado slices around the salmon.

To finish, drizzle any remaining glaze over the assembled bowls. Sprinkle the chopped green onions and sesame seeds on top for a beautiful presentation. Your Sriracha Honey Salmon Bowl is now ready to be enjoyed!

Serve it warm and savor the delightful combination of flavors. This dish is not only visually appealing but also packed with nutrients, making it a perfect meal for any occasion.

Variation of Sriracha Honey Salmon Bowl

Sriracha Honey Salmon Bowl is already a delightful dish, there are many ways to add your personal touch. By swapping out a few ingredients or adding new ones, you can create a unique twist that suits your taste. Let’s explore some alternative ingredients that can elevate your bowl!

Alternative Ingredients for a Unique Twist

Here are some exciting alternatives to consider:

  • Protein Options: If you’re not a fan of salmon, try using grilled chicken, shrimp, or tofu. Each option brings its own flavor and texture, making your bowl just as delicious.
  • Grain Choices: Instead of brown rice, you can use quinoa, farro, or even cauliflower rice for a low-carb option. These grains add different nutrients and flavors to your meal.
  • Vegetable Varieties: Feel free to mix in other vegetables like bell peppers, snap peas, or carrots. Roasted or sautéed veggies can add a lovely depth of flavor.
  • Spice Level: If you love heat, consider adding sliced jalapeños or a sprinkle of red pepper flakes. For a milder version, you can reduce the amount of sriracha or use a sweet chili sauce instead.
  • Garnish Ideas: Instead of sesame seeds, try crushed peanuts or chopped cilantro for a fresh twist. These garnishes can enhance the overall flavor and presentation of your bowl.

Sriracha Honey Salmon Bowl that reflects your personal taste. The possibilities are endless, and each variation can bring a new experience to your dining table. So, don’t hesitate to get creative and make this dish your own!

Cooking Note for Sriracha Honey Salmon Bowl

Sriracha Honey Salmon Bowl, there are a few cooking notes to keep in mind. These tips will help ensure that your dish turns out perfectly every time. Let’s dive into some essential points to consider!

First, always choose fresh salmon fillets. Fresh fish not only tastes better but also has a firmer texture. If you can, buy wild-caught salmon for the best flavor and health benefits. If you opt for frozen salmon, make sure to thaw it completely before marinating.

Next, pay attention to the cooking time. Salmon can easily overcook, leading to a dry texture. Keep an eye on it while it bakes. The fish should be opaque and flake easily with a fork when it’s done. If you have a meat thermometer, aim for an internal temperature of 145°F (63°C) for perfectly cooked salmon.

Additionally, feel free to adjust the spice level of your marinade. If you prefer a milder flavor, reduce the amount of sriracha. On the other hand, if you love heat, add more sriracha or even a dash of cayenne pepper. This flexibility allows you to customize the dish to your liking.

Lastly, don’t forget about presentation! A well-plated dish is always more appetizing. Arrange the salmon, rice, and veggies in a visually appealing way. A sprinkle of sesame seeds and green onions not only adds flavor but also enhances the overall look of your bowl.

Sriracha Honey Salmon Bowl that everyone will love. Enjoy the cooking process and the delightful meal that follows!

Serving Suggestions for Sriracha Honey Salmon Bowl

Sriracha Honey Salmon Bowl, it’s time to think about how to serve it. While the bowl is already a complete meal, pairing it with complementary sides or drinks can enhance the overall dining experience. Here are some fantastic serving suggestions to consider!

Pairing Options to Enhance Your Meal

To elevate your meal, consider these pairing options:

  • Fresh Salad: A light salad with mixed greens, cherry tomatoes, and a citrus vinaigrette can add a refreshing contrast to the rich flavors of the salmon. The crispness of the salad balances the warmth of the bowl.
  • Pickled Vegetables: Adding pickled cucumbers or radishes can introduce a tangy flavor that complements the sweetness of the honey glaze. The acidity cuts through the richness of the salmon, making each bite more enjoyable.
  • Soup: A warm miso soup or a light vegetable broth can be a comforting addition. The warmth of the soup pairs well with the salmon bowl, creating a cozy meal.
  • Fruit Slices: Serve some fresh fruit slices, like mango or pineapple, on the side. Their natural sweetness can enhance the flavors of the dish and provide a refreshing palate cleanser.
  • Herbal Tea: For a drink, consider serving a cup of herbal tea, such as green tea or ginger tea. These options are light and can aid digestion while complementing the meal’s flavors.

Sriracha Honey Salmon Bowl but also create a well-rounded dining experience. Feel free to mix and match based on your preferences and what you have on hand. Enjoy your meal with family and friends, and savor every delicious bite!

Tips for Perfecting Your Sriracha Honey Salmon Bowl

Sriracha Honey Salmon Bowl is all about attention to detail. With a few simple tips, you can elevate your dish to new heights. Here are some helpful suggestions to ensure your bowl is a hit every time!

Choose Quality Ingredients

Start with the best ingredients you can find. Fresh salmon fillets are key to a delicious meal. Look for bright, firm fish with a clean smell. If possible, opt for wild-caught salmon for superior flavor and health benefits. Fresh vegetables and high-quality honey will also enhance the overall taste of your bowl.

Balance Flavors

Strive for a balance of flavors in your bowl. The sweetness of honey should complement the heat of sriracha. If you find the glaze too sweet or spicy, adjust it by adding more soy sauce or a splash of lime juice. This will help create a well-rounded flavor profile that pleases the palate.

Experiment with Cooking Techniques

While baking is a great method for cooking salmon, don’t hesitate to try grilling or pan-searing. Each technique brings out different flavors and textures. Grilling adds a smoky taste, while pan-searing gives a crispy skin. Experiment to find your favorite method!

Garnish Creatively

Garnishing your bowl can make a big difference in presentation. Use fresh herbs like cilantro or basil for a pop of color and flavor. A squeeze of lime or lemon juice can brighten the dish, while a sprinkle of chili flakes can add an extra kick. Get creative with your garnishes to make your bowl visually appealing!

Prep Ahead for Convenience

Sriracha Honey Salmon Bowl when you’re ready to eat.

Serve with Love

Finally, remember that presentation matters! Take the time to arrange your bowl thoughtfully. A well-presented dish not only looks appetizing but also enhances the dining experience. Serve your bowl with a smile, and enjoy the compliments that follow!

Sriracha Honey Salmon Bowl. Each bowl will be a delightful combination of flavors, textures, and colors that everyone will love. Happy cooking!

Breakdown of Time for Sriracha Honey Salmon Bowl

Sriracha Honey Salmon Bowl can help you plan your meal better. Here’s a simple breakdown of the time required for each step, so you can enjoy this delicious dish without any stress!

Prep Time

Sriracha Honey Salmon Bowl is approximately 20 minutes. This includes gathering your ingredients, marinating the salmon, and preparing the vegetables. Here’s a quick overview of what you’ll do:

  • Gather all ingredients and tools.
  • Mix the marinade and coat the salmon.
  • Prepare the brown rice and steam the broccoli.
  • Slice the avocado and chop the green onions.

With a little organization, you can have everything ready in no time!

Cooking Time

Sriracha Honey Salmon Bowl is about 15 minutes. This includes:

  • Baking the salmon in the oven for 12-15 minutes.
  • Cooking the brown rice (if not pre-cooked) for about 30-40 minutes, depending on the method.
  • Steaming the broccoli for 5-7 minutes.

While the salmon bakes, you can multitask by cooking the rice and steaming the broccoli, making the most of your time!

Total Time

Sriracha Honey Salmon Bowl. This includes both prep and cooking times. If you have pre-cooked rice, your total time will be closer to 35 minutes. If you need to cook the rice from scratch, it may take up to 55 minutes.

With this time breakdown, you can easily fit this flavorful meal into your busy schedule. Enjoy the process and the delicious results!

Nutritional Information for Sriracha Honey Salmon Bowl

Sriracha Honey Salmon Bowl is not only delicious but also packed with nutrients. Let’s take a closer look at the nutritional information for this delightful dish!

Calories

Sriracha Honey Salmon Bowl contains approximately 600 calories. This calorie count includes the salmon, brown rice, broccoli, avocado, and the flavorful glaze. The combination of ingredients provides a satisfying meal that keeps you full and energized.

Protein

Protein is a vital nutrient for building and repairing tissues. In this bowl, you’ll find about 35 grams of protein per serving, primarily from the salmon. Salmon is an excellent source of high-quality protein, making this dish a great choice for those looking to increase their protein intake.

Sodium

Sriracha Honey Salmon Bowl contains around 800 milligrams per serving. This amount comes from the soy sauce and the sriracha used in the marinade. If you’re watching your sodium intake, consider using low-sodium soy sauce to reduce the overall sodium content without sacrificing flavor.

Sriracha Honey Salmon Bowl is a nutritious meal that offers a good balance of calories, protein, and essential nutrients. It’s a fantastic option for anyone looking to enjoy a healthy and satisfying dish. Enjoy your meal knowing you’re nourishing your body with every bite!

FAQs about Sriracha Honey Salmon Bowl

Can I use frozen salmon for the Sriracha Honey Salmon Bowl?

Sriracha Honey Salmon Bowl. Just make sure to thaw it completely before marinating. Thawing can be done overnight in the refrigerator or by placing the sealed salmon in cold water for about an hour. Once thawed, follow the same marinating and cooking steps as you would with fresh salmon. This way, you can still enjoy a delicious meal even if you have frozen fish on hand!

What can I substitute for Sriracha in the Sriracha Honey Salmon Bowl?

If you don’t have sriracha or prefer a different flavor, there are several substitutes you can use. Sweet chili sauce is a great alternative, offering a similar sweetness with a milder heat. You can also mix hot sauce with a bit of honey to mimic the sweet and spicy profile. For a less spicy option, consider using barbecue sauce or even a mild chili paste. Just remember to adjust the amount based on your taste preferences!

How can I make the Sriracha Honey Salmon Bowl spicier?

Sriracha Honey Salmon Bowl. You can add more sriracha to the marinade for an extra kick. Additionally, consider incorporating sliced jalapeños or a sprinkle of red pepper flakes on top of the finished bowl. For those who enjoy a smoky flavor, a dash of chipotle powder can also enhance the heat while adding depth to the dish.

Is the Sriracha Honey Salmon Bowl healthy?

Sriracha Honey Salmon Bowl is a healthy meal option. Salmon is rich in omega-3 fatty acids, which are beneficial for heart health. The brown rice provides fiber and essential nutrients, while the broccoli and avocado add vitamins and minerals. Overall, this dish is balanced and nutritious, making it a great choice for anyone looking to enjoy a wholesome meal. Just be mindful of the sodium content if you’re watching your intake!

Conclusion on Sriracha Honey Salmon Bowl

Sriracha Honey Salmon Bowl is a fantastic dish that brings together a delightful mix of flavors and textures. With its sweet and spicy glaze, tender salmon, and nutritious ingredients, this bowl is not only satisfying but also nourishing. Whether you’re cooking for yourself or entertaining guests, this meal is sure to impress.

Moreover, the versatility of the Sriracha Honey Salmon Bowl allows you to customize it to your liking. You can easily swap out ingredients or adjust the spice level to suit your taste. This adaptability makes it a perfect choice for any occasion, from casual weeknight dinners to special gatherings.

As you prepare this dish, remember to enjoy the process. Cooking can be a joyful experience, and sharing a meal with loved ones is one of life’s greatest pleasures. So, gather your ingredients, follow the steps, and create a beautiful Sriracha Honey Salmon Bowl that everyone will love.

Finally, don’t forget to experiment with different variations and pairings. The possibilities are endless, and each time you make this bowl, you can create a new experience. So, dive into the world of flavors and enjoy every delicious bite of your Sriracha Honey Salmon Bowl!