


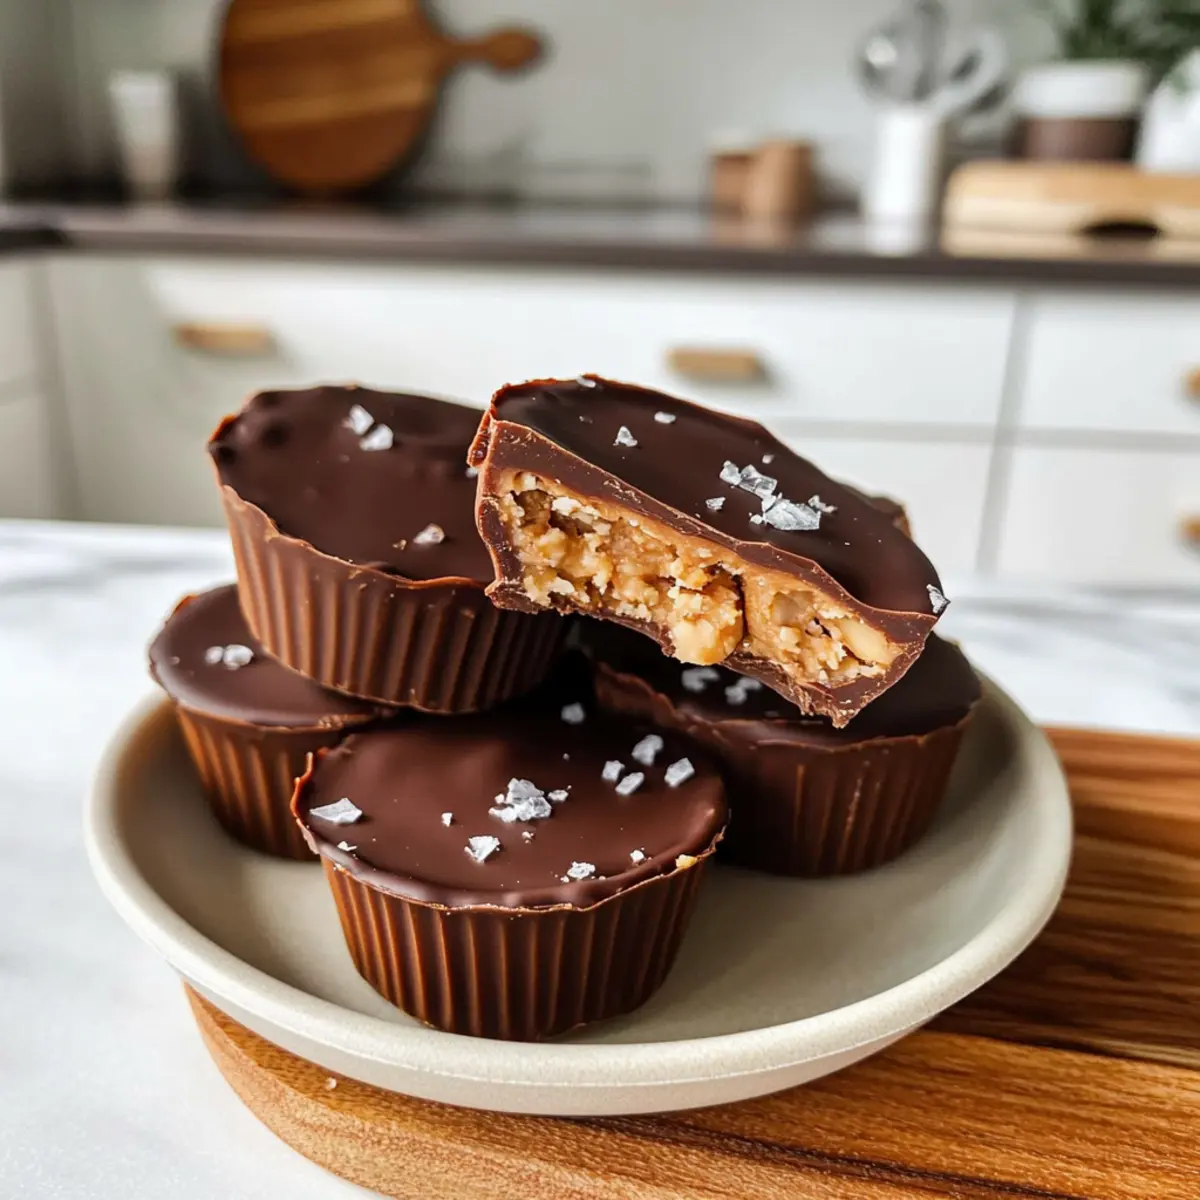
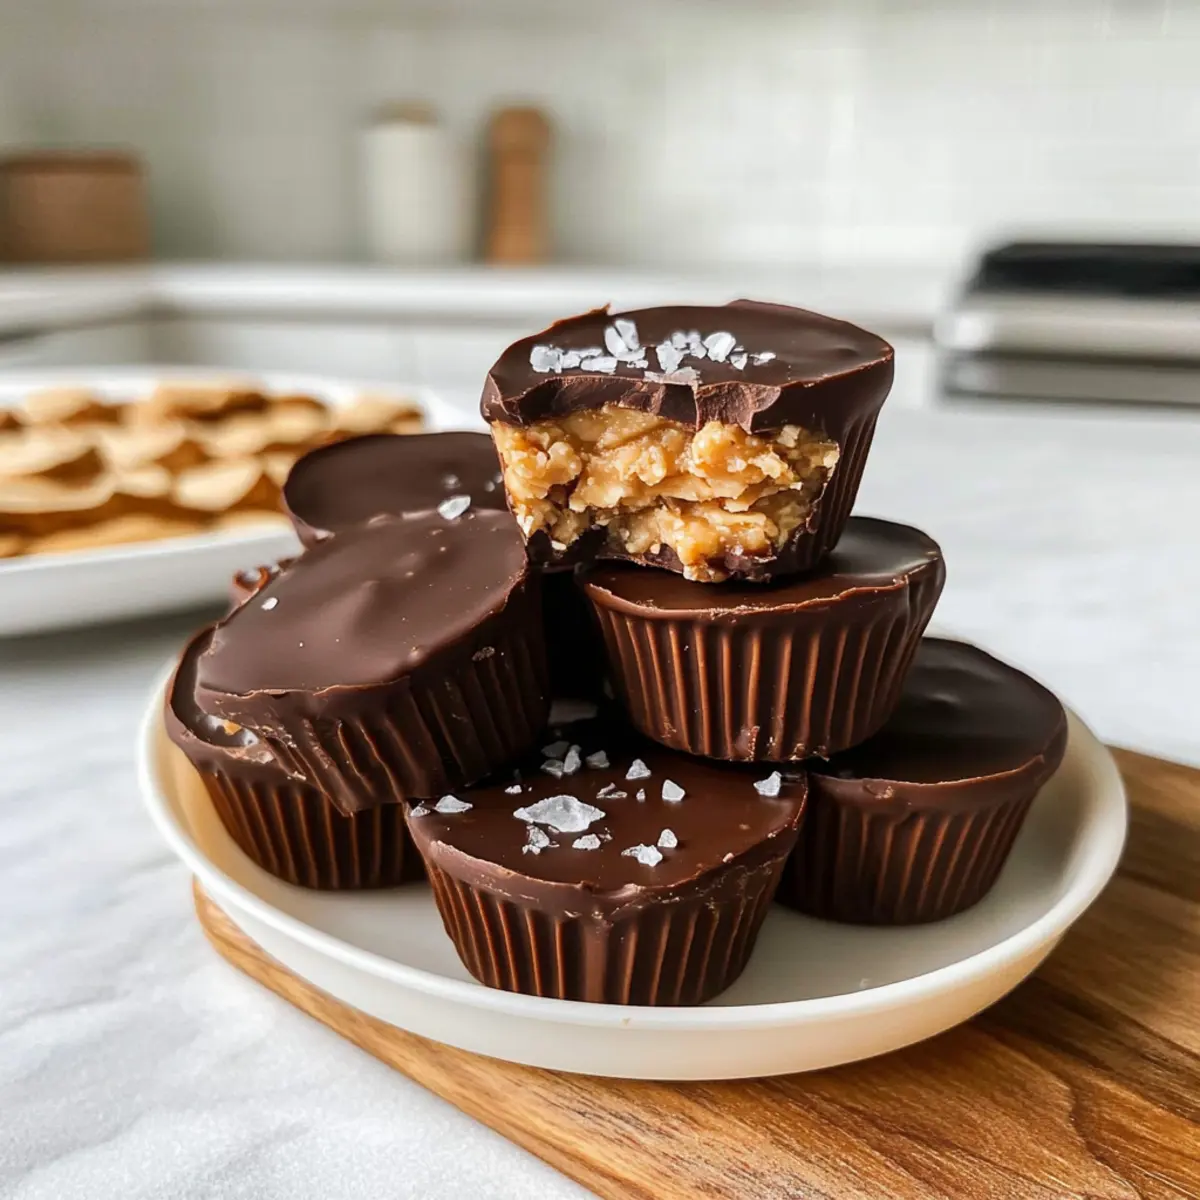
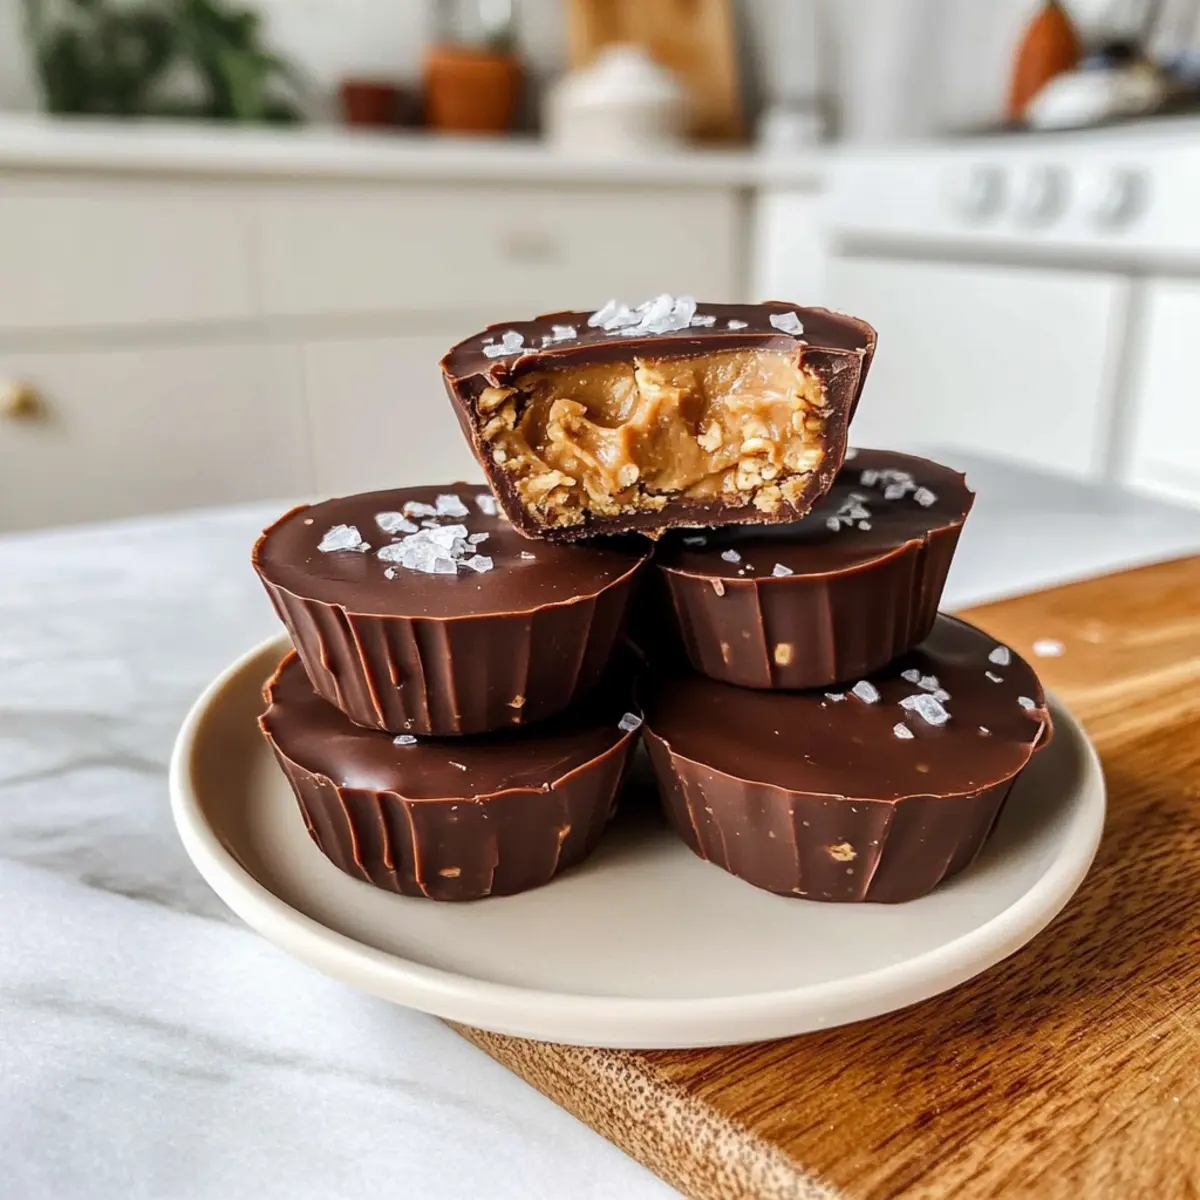
With just a few simple ingredients and a touch of creativity, I discovered a delightful treat that offers a healthy spin on indulgence—Vegan No-Bake Peanut Butter Oat Cups. These mini masterpieces come together in under 20 minutes, making them an ideal choice for anyone who’s tired of fast food but craves something sweet and satisfying. Not only are they gluten-free and dairy-free, but they also deliver the rich, comforting flavors of creamy peanut butter and dark chocolate without the guilt. Picture yourself biting into these soft yet chewy cups, knowing they’re packed with wholesome goodness. Whether you need a quick snack, a kid-friendly dessert, or a boost for your energy levels, these oat cups promise to elevate any moment. Curious to learn how to whip up this simple recipe? Let’s dive in!
Why Are Peanut Butter Oat Cups Amazing?
Simplicity at Its Best: These Peanut Butter Oat Cups require minimal effort and just a handful of ingredients, making them perfect for any home cook.
Guilt-Free Indulgence: Enjoy the rich flavors of peanut butter and chocolate, all while keeping it vegan and gluten-free—no one will believe they’re healthy!
No-Bake Convenience: With no oven required, you can whip these up in under 20 minutes, making them an ideal snack or dessert for busy weekdays.
Customizable Goodness: Whether you want to swap in sunflower seed butter for nut-free options or add in some chia seeds for extra nutrition, the possibilities are endless!
Crowd-Pleasing Treat: These oat cups are not only satisfying but also perfect for parties, lunchboxes, or as an after-school snack that kids will love.
Elevate your snacking game with these delightful little treats, and if you’re looking for more easy yet indulgent desserts, check out my Cookie Butter Icebox and Garlic Butter Chicken recipes!
Peanut Butter Oat Cups Ingredients
For the Cups
• Peanut Butter – Provides creaminess and flavor; substitute with any nut or seed butter for a different taste.
• Old Fashioned Rolled Oats – Acts as the base for texture and structure; use certified gluten-free oats to maintain gluten-free status.
• Maple Syrup – Adds sweetness; agave syrup or honey works well as alternatives.
• Chocolate Chips – Used for melting as a topping; vegan dark chocolate can be used for a plant-based option.
• Protein Powder (optional) – Enhances protein content; can be omitted or replaced based on dietary preference.
• Flaky Sea Salt – Optional for topping; adds a delightful flavor contrast to the sweetness.
These Peanut Butter Oat Cups are a delightful blend of wholesome ingredients, making them perfect for anyone seeking a guilt-free and delicious treat!
Step‑by‑Step Instructions for Peanut Butter Oat Cups
Step 1: Combine Ingredients
In a medium mixing bowl, add 1 cup of creamy peanut butter with 1/4 cup of maple syrup. Use a spatula or wooden spoon to mix them together until the mixture is completely smooth and well incorporated. This should take about 2-3 minutes. The creamy blend will serve as the delicious base for your Peanut Butter Oat Cups, so take your time to ensure it’s evenly mixed.
Step 2: Add Oats
Next, stir in 2 cups of old-fashioned rolled oats into the peanut butter mixture. Mix thoroughly until all oats are coated and the texture becomes thick and sticky, which should take another 2-3 minutes. This combination will form the sturdy foundation of your Peanut Butter Oat Cups, making it essential to ensure an even distribution of oats.
Step 3: Form the Cups
Prepare your silicone molds by placing them on a flat surface. Using a spoon or cookie scoop, portion out about 2 tablespoons of the oat mixture into each mold. Press down firmly to create a flat base, ensuring they’re compact and hold their shape. This step is crucial for the texture, and should take around 5-7 minutes, depending on how many cups you’re making.
Step 4: Add Toppings
If desired, take an additional dollop of peanut butter and place it on top of each oat cup. For an enhanced flavor, you can mix in some protein powder with the peanut butter before dolloping. This layer will create a rich filling, adding to the deliciousness of your Peanut Butter Oat Cups. Once done, pop the molds into the freezer for 20 minutes to allow the base to firm up.
Step 5: Melt the Chocolate
While the oat cups are chilling, it’s time to melt the chocolate. In a microwave-safe bowl, place 1/2 cup of chocolate chips with a teaspoon of coconut oil. Microwave for 30-second intervals, stirring in between, until the mixture is completely melted and smooth, which should take about 1-2 minutes. This decadent chocolate coating is what makes the Peanut Butter Oat Cups a true treat.
Step 6: Drizzle the Chocolate
Once the oat cups are firm, remove them from the freezer. Carefully drizzle the melted chocolate over the top of each cup using a spoon or piping bag for precise control. The warm chocolate will create a beautiful glossy finish, enhancing both looks and flavor. After drizzling, return the cups to the freezer for an additional 20 minutes to set the chocolate.
Step 7: Serve and Enjoy
Once the chocolate has set, gently remove the Peanut Butter Oat Cups from the silicone molds. Sprinkle with a pinch of flaky sea salt for an extra flavor burst, if desired. These delightful cups can be enjoyed immediately, or stored in an airtight container for later. They make a fantastic snack or dessert, perfect for any time of the day!
Make Ahead Options
These Peanut Butter Oat Cups are perfect for meal prep, allowing you to whip them up in advance for busy weeknights! You can prepare the oat mixture and portion it into molds up to 24 hours ahead. Just keep the molds in the refrigerator to maintain freshness. Additionally, once the cups are fully assembled, they can be stored in the freezer for up to 3 days before serving. When you’re ready to indulge, simply drizzle the melted chocolate on top and return them to the freezer for another 20 minutes to set. This way, you can enjoy a delightful, homemade snack at your convenience—guilt-free and just as delicious, waiting for you whenever your sweet tooth strikes!
Peanut Butter Oat Cups Variations
Feel free to explore these fun and delicious twists on the classic Peanut Butter Oat Cups!
-
Nut-Free: Substitute peanut butter with sunflower seed butter for a delightful, nut-free version everyone can enjoy. The sunflower seed flavor is unique and adds a fun twist while still delivering the creamy texture we love.
-
Sweetness Boost: Swap maple syrup for honey or agave syrup to add a hint of floral sweetness. This small change can elevate the flavor profile, giving a distinct taste while keeping it plant-based.
-
Extra Crunch: Toss in some chopped nuts, like almonds or walnuts, to add a satisfying crunch. The added texture complements the creamy elements beautifully, making each bite an adventure.
-
Fruit Fusion: Fold in diced fruit like bananas, apples, or dried strawberries for a fruity twist. This addition provides natural sweetness and contributes extra moisture to each cup—deliciously refreshing!
-
Choco-Mint Delight: Add a few drops of peppermint extract to the chocolate layer for a refreshing minty flavor. This version will remind you of your favorite mint chocolate treats, making them perfect for the holiday season.
-
Chia for Nutrition: Mix in chia seeds or ground flaxseed to the oat mixture for enhanced nutrition. This will not only boost the wellness aspect but also offer a unique texture that’s pleasing to the bite.
-
Protein Power: If you want to amp up the protein content, mix a scoop of your favorite protein powder into the peanut butter before combining it with the oats. It’s a great post-workout snack that doesn’t compromise on flavor.
For even more inspiration on simple homemade treats, don’t forget to check out my indulgent Garlic Butter Pork and irresistibly creamy Butter Mochi. Happy baking!
Expert Tips for Peanut Butter Oat Cups
-
Silicone Molds: Using silicone molds makes removal easier without damaging the cups; they hold their shape perfectly after freezing.
-
Consistency Matters: Adjust the freezing time based on the peanut butter’s thickness; thicker butters may need more time to set properly.
-
Creamy vs. Crunchy: If using creamy peanut butter, ensure it isn’t too runny for the right firmness; alternatively, opt for a denser nut butter.
-
Customize Sweetness: Feel free to adjust the amount of maple syrup according to your taste; just remember that sweetness varies between different brands.
-
Experiment with Mix-ins: Don’t hesitate to add a scoop of protein powder or sprinkle in seeds for extra nutrition; these variations can elevate your Peanut Butter Oat Cups!
How to Store and Freeze Peanut Butter Oat Cups
Fridge: Store your Peanut Butter Oat Cups in an airtight container in the refrigerator to keep them fresh for up to 3 days. This method maintains a softer texture that’s perfect for snacking.
Freezer: For longer storage, freeze the oat cups in a single layer on a baking sheet for about 1 hour, then transfer to an airtight container. They’ll stay good for up to 3 months; simply allow to thaw at room temperature before enjoying.
Reheating: If you prefer them slightly softer, allow the frozen Peanut Butter Oat Cups to sit at room temperature for a few minutes before indulging, or gently heat in the microwave for 10-15 seconds.
Wrapping: If stacking in a container, place parchment paper between layers to prevent them from sticking together, ensuring each cup remains intact and irresistible!
What to Serve with Vegan No-Bake Peanut Butter Oat Cups
Elevate your snack time with delightful pairings that complement the rich, nutty flavors of these wholesome treats.
-
Fresh Fruit Salad: Bright, juicy fruits like berries and melons add a refreshing contrast to the creamy oat cups, enhancing both taste and nutritional value. Consider a mix of strawberries, blueberries, and kiwis for color and zest.
-
Coconut Yogurt: Creamy, dairy-free yogurt brings a tangy flavor while keeping it vegan, creating a luscious pairing that is perfect for breakfast or as a light dessert.
-
Trail Mix: Crunchy nuts and seeds mixed with dried fruits will add texture and extra nourishment, making for an easy snack that marries well with the softness of the oat cups.
-
Chia Pudding: A chilled layer of vanilla-infused chia pudding will add a delightful creaminess along with added fiber, creating a satisfying contrast to the firm oat cups.
-
Chocolate Almond Milk: Rich and nutty, this creamy drink echoes the flavors of the oat cups while providing a dreamy chocolate twist. Perfect for an afternoon pick-me-up or dessert!
-
Dark Chocolate Dipped Strawberries: Indulge in a chocolatey treat that mirrors the theme of the oat cups, heightening the overall experience of your sweet moment.
-
Nut Butter Smoothie: A blended concoction of banana, spinach, and almond milk with a spoonful of nut butter ties the meal together harmoniously while offering a delightful nutritional boost.
-
Homemade Granola Clusters: Crunchy granola clusters drizzled with honey or agave syrup bring a satisfying crunch that perfectly contrasts the chewiness of the oat cups, making them a great breakfast or snack option.

Peanut Butter Oat Cups Recipe FAQs
How do I choose the right peanut butter for this recipe?
Absolutely! For the best results, select a creamy peanut butter that isn’t too runny. Look for a natural brand with minimal ingredients—just peanuts and salt. If you’d like to switch it up, feel free to try other nut butters like almond or seed butters for a unique flavor twist!
How long do Peanut Butter Oat Cups last in the fridge?
Very! Store your Peanut Butter Oat Cups in an airtight container in the refrigerator, and they’ll stay fresh for up to 3 days. This method keeps them soft and easy to enjoy as a quick snack or dessert.
Can I freeze these Peanut Butter Oat Cups?
Absolutely! To freeze your oat cups, arrange them in a single layer on a baking sheet and place them in the freezer for about 1 hour. Once they’re firm, transfer them to an airtight container, layering parchment paper between cups to prevent sticking. They can be stored for up to 3 months, perfect for when you’re craving a treat!
What should I do if my oat mixture is too dry?
If your mixture feels dry and crumbly, add a bit more peanut butter or a splash of maple syrup. This will help bind the ingredients together. Mix thoroughly until you achieve a sticky consistency—this is essential for forming those delicious cups!
Are Peanut Butter Oat Cups suitable for my allergies?
Definitely! These cups are vegan, gluten-free, and can be made nut-free by substituting peanut butter with sunflower seed butter. If allergies are a concern, always check labels on ingredients to ensure they meet your dietary needs.
What’s the best way to enjoy these oat cups?
The more the merrier! You can enjoy them straight from the fridge or freezer, perhaps with a cup of tea or coffee. For an extra treat, try pairing them with sliced banana or drizzling a bit of honey on top right before serving. Yum!
Peanut Butter Oat Cups: Guilt-Free, No-Bake Delight!
Ingredients
Equipment
Method
- In a medium mixing bowl, combine 1 cup of creamy peanut butter with 1/4 cup of maple syrup. Mix until smooth.
- Stir in 2 cups of old-fashioned rolled oats until all oats are coated. Mix thoroughly.
- Portion out about 2 tablespoons of the mixture into each silicone mold. Press down firmly to create a flat base.
- Optional: Add a dollop of peanut butter on top of each oat cup and freeze for 20 minutes.
- Melt 1/2 cup of chocolate chips with a teaspoon of coconut oil in a microwave-safe bowl until smooth.
- Drizzle melted chocolate over each cup after removing them from the freezer. Freeze again for 20 minutes.
- Remove from molds and sprinkle with flaky sea salt if desired. Store in an airtight container.