There’s something magical about the aroma of baked apples and cinnamon wafting through the kitchen. It takes me back to my childhood, where my grandmother would whip up her famous apple pie. But let’s be honest—sometimes, we need a quicker solution for dessert. That’s where these Apple Pie Biscuits come in! They combine the comforting flavors of traditional apple pie with the ease of biscuit-making. Perfect for a busy day or a cozy gathering, these biscuits are sure to impress your loved ones without keeping you tied to the oven for hours.
Why You’ll Love This Apple Pie Biscuits
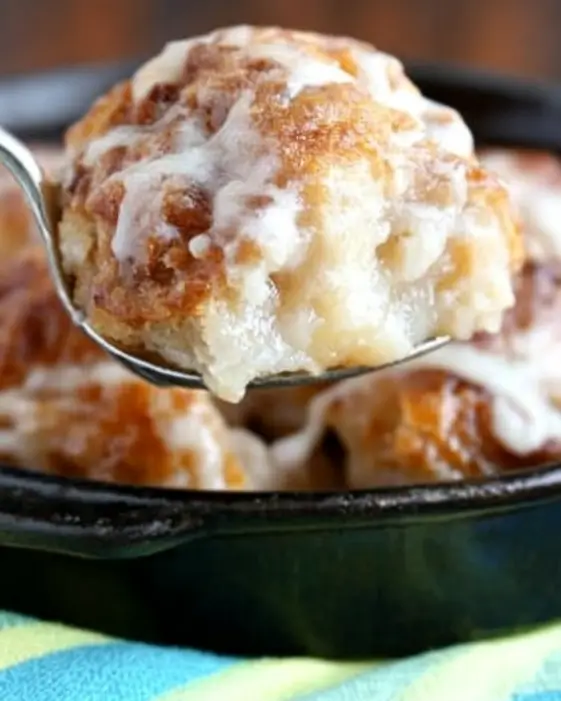
These Apple Pie Biscuits are a game-changer for anyone who loves dessert but craves simplicity. They come together in just about 35 minutes, making them perfect for those last-minute cravings. The flaky, buttery biscuits cradle a warm, spiced apple filling that’s downright irresistible. Plus, they’re versatile enough to serve at breakfast, dessert, or even as a snack. Trust me, once you try them, you’ll be hooked!
Ingredients for Apple Pie Biscuits
Gathering the right ingredients is the first step to creating these delightful Apple Pie Biscuits. Here’s what you’ll need:
All-purpose flour: The backbone of your biscuits, providing structure and fluffiness.
Baking powder: This leavening agent helps the biscuits rise, giving them that light, airy texture.
Salt: A pinch enhances the flavors, balancing the sweetness of the filling.
Granulated sugar: Adds sweetness to the dough, making each bite a treat.
Unsalted butter: Cold and cubed, it creates those flaky layers we all love in biscuits.
Milk: Brings moisture to the dough, helping it come together beautifully.
Vanilla extract: A splash of this adds a warm, inviting flavor that complements the apples.
Apple pie filling: You can use store-bought for convenience or make your own for a personal touch.
Cinnamon: This spice is a must for that classic apple pie flavor, warming up the entire dish.
Sugar (for topping): A sprinkle on top before baking gives a sweet, crunchy finish.
Egg: Used for an egg wash, it gives the biscuits a beautiful golden color.
For those looking to mix things up, consider adding a teaspoon of nutmeg or allspice to the apple filling for an extra flavor kick. You can find the exact measurements for these ingredients at the bottom of the article, ready for printing!
How to Make Apple Pie Biscuits
Creating these Apple Pie Biscuits is a delightful journey that’s as easy as pie—pun intended! Follow these simple steps, and you’ll have a batch of warm, flaky biscuits ready to impress.
Step 1: Preheat and Prepare
Start by preheating your oven to 425°F (220°C). This ensures your biscuits bake evenly and become perfectly golden. While the oven warms up, line a baking sheet with parchment paper. This will prevent sticking and make cleanup a breeze.
Step 2: Mix Dry Ingredients
In a large mixing bowl, combine the all-purpose flour, baking powder, salt, and granulated sugar. Whisk them together until they’re well blended. This step is crucial as it evenly distributes the leavening agent, ensuring your biscuits rise beautifully.
Step 3: Incorporate Butter
Next, add the cold, cubed butter to your flour mixture. Using a pastry cutter or your fingers, mix until the mixture resembles coarse crumbs. This is where the magic happens! The cold butter creates those flaky layers we all love in biscuits.
Step 4: Add Wet Ingredients
Pour in the milk and vanilla extract. Stir gently until just combined. Be careful not to overmix; a few lumps are perfectly fine. This will keep your biscuits tender and light.
Step 5: Form the Dough
Turn the dough out onto a lightly floured surface. Knead it gently a few times until it comes together. Then, roll it out to about 1/2 inch thick. This thickness is key for achieving that perfect biscuit texture.
Step 6: Cut and Fill Biscuits
Using a round biscuit cutter, cut out biscuits and place them on the prepared baking sheet. Now, it’s time to fill them! In a small bowl, mix the apple pie filling with cinnamon. Spoon about 1 tablespoon of this delicious filling onto the center of each biscuit.
Step 7: Seal and Brush
Fold the edges of the biscuit over the filling to create a pocket, pinching to seal. This step is essential to keep the filling from spilling out during baking. In a small bowl, beat the egg and brush it over the tops of the biscuits. Sprinkle with sugar for that sweet, crunchy finish.
Step 8: Bake to Perfection
Finally, bake your biscuits in the preheated oven for 15-18 minutes or until they’re golden brown and delicious. The aroma will fill your kitchen, making it hard to wait! Allow them to cool slightly before serving, and enjoy the delightful twist on a classic dessert.
Tips for Success
Use cold butter for flaky layers; it’s a game-changer!
Don’t overmix the dough; a few lumps are okay for tenderness.
Experiment with spices like nutmeg for a unique flavor twist.
Brush the biscuits with egg wash for a beautiful golden finish.
Serve warm for the best taste; they’re irresistible fresh out of the oven!
Equipment Needed
Mixing bowl: A large bowl for combining ingredients. A sturdy pot can work in a pinch.
Pastry cutter: Ideal for cutting in butter. You can also use your fingers or a fork.
Biscuit cutter: A round cutter for shaping biscuits. A glass or jar can serve as a substitute.
Baking sheet: Essential for baking. A cast-iron skillet can add a nice touch.
Parchment paper: For easy cleanup. Aluminum foil can be used if you’re in a bind.
Variations
Gluten-Free: Substitute all-purpose flour with a gluten-free blend for a delicious alternative.
Fruit Medley: Mix in other fruits like blueberries or peaches with the apple pie filling for a fruity twist.
Cheddar Biscuits: Add shredded sharp cheddar cheese to the biscuit dough for a savory-sweet combination.
Vegan Option: Use plant-based butter and a non-dairy milk to make these biscuits vegan-friendly.
Spiced Up: Incorporate ginger or cardamom into the filling for an extra layer of flavor.
Serving Suggestions
Pair with a scoop of vanilla ice cream for a classic dessert experience.
Drizzle warm caramel sauce over the biscuits for an indulgent touch.
Serve alongside a cup of spiced chai or coffee for a cozy afternoon treat.
Garnish with fresh mint leaves for a pop of color and freshness.
FAQs about Apple Pie Biscuits
Curious about these delightful Apple Pie Biscuits? Here are some common questions I often hear, along with answers to help you on your baking journey.
Can I use homemade apple pie filling?
Absolutely! Homemade apple pie filling adds a personal touch and can be tailored to your taste. Just make sure it’s cooled before using it in the biscuits.
How do I store leftover biscuits?
Store any leftover Apple Pie Biscuits in an airtight container at room temperature for up to two days. For longer storage, refrigerate them for up to a week.
Can I freeze these biscuits?
Yes! You can freeze unbaked biscuits. Just assemble them, place them on a baking sheet, and freeze until solid. Then transfer to a freezer bag. Bake from frozen, adding a few extra minutes to the baking time.
What can I serve with Apple Pie Biscuits?
These biscuits pair wonderfully with vanilla ice cream, whipped cream, or a drizzle of caramel sauce. They also make a great addition to a brunch spread!
Can I make these biscuits ahead of time?
Definitely! You can prepare the dough and fill the biscuits ahead of time. Just cover and refrigerate until you’re ready to bake. Freshly baked biscuits are always a hit!
Final Thoughts
There’s a certain joy that comes from baking, especially when it involves a recipe like Apple Pie Biscuits. The combination of flaky, buttery layers and warm, spiced apple filling creates a comforting experience that warms the heart. Whether you’re sharing them with family or enjoying them solo, these biscuits bring a slice of nostalgia to the table. They’re quick, easy, and oh-so-satisfying. So, roll up your sleeves, embrace the sweet aroma, and let these delightful biscuits become a new favorite in your kitchen. Trust me, they’ll leave you smiling with every bite!