


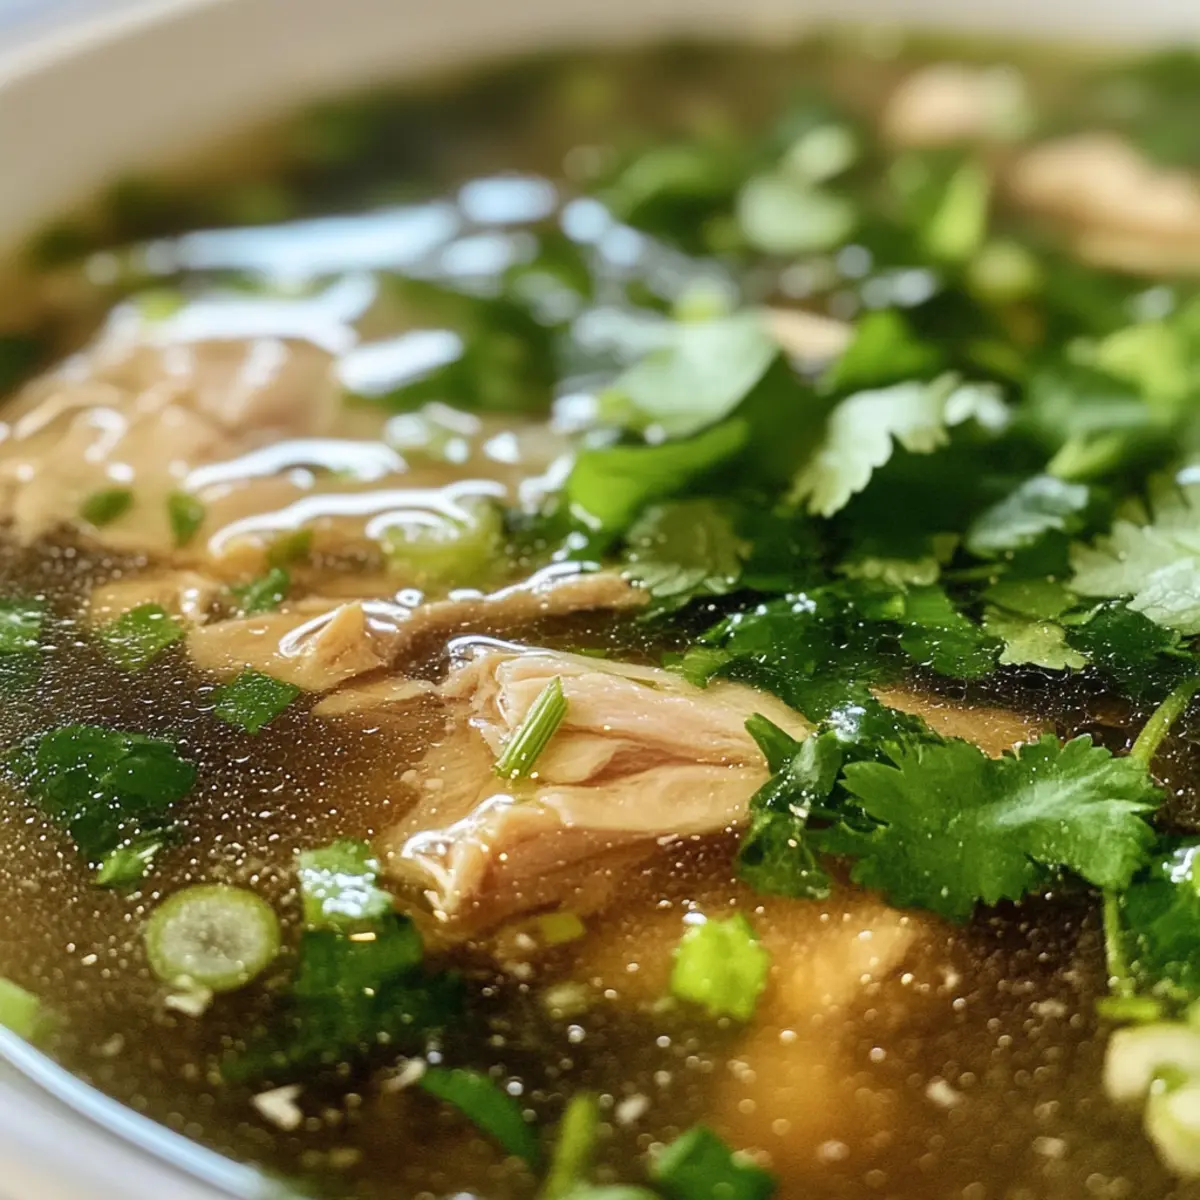
As I stood in my kitchen, the fragrant aroma of sizzling garlic filled the air, whisking me back to the vibrant streets of Thailand. This homemade Thai broth is my go-to for embodying the comforting essence of Thai cuisine, and it’s easier to make than you might think! With a delightful blend of simmered bones, fresh cilantro roots, and just a hint of white pepper, this clear broth recipe is incredibly versatile. Not only does it serve as a nourishing base for soups and noodle bowls, but it’s also a low-calorie gem you can enjoy on its own. Whether you’re aiming to impress dinner guests or craving a warm sip on a chilly evening, this Thai broth truly embodies the heart of home cooking. Are you ready to dive into the world of comforting flavors?

Why is Thai Broth So Special?
Aromatic Experience: The moment you start simmering, your kitchen transforms into a cozy haven filled with the uplifting scent of garlic and cilantro.
Nutrient-Packed: With collagen-rich bones, this broth not only soothes but also promotes joint and skin health.
Versatile Base: Perfect for everything from hearty soups to delicate noodle bowls, it’s your culinary blank canvas. You can even enjoy it as a solo sip or use it to enhance dishes like Thai Coconut Shrimp.
Easy Adaptability: Need a vegetarian version? Simply swap out the bones for mushrooms and veggies to create a lighter broth that still sings with flavor!
Time-Saving Comfort: Make a batch ahead of time and have healthy, homemade broth ready in your fridge or freezer for your everyday meals.
Thai Broth Ingredients
• Discover the key components for an authentic Thai experience.
For the Broth
- Chicken Bones or Pork Bones – Provides richness and natural collagen for a silky broth.
- Water – The essential base of the broth; maintain a consistent water-to-bone ratio for clarity.
- Fresh Garlic – Adds warmth and depth of flavor; crush it to release more aroma.
- Cilantro Roots or Stems – Infuses an earthy aroma typical of Thai cooking; parsley can be a substitute if needed.
- Ground White Pepper – Provides a subtle kick and aromatic quality; black pepper is fine but will change the broth’s look.
- Thin Soy Sauce – Adds mild savoriness and color; opt for tamari for a gluten-free option.
- Fish Sauce – Delivers unique salty depth characteristic of Thai cuisine; use soy sauce for a vegetarian alternative.
Optional Add-Ins
- Lemongrass – Adds a bright, citrusy note; slice and add it early in the simmering process for extra flavor.
- Kaffir Lime Leaves – Enhances the broth with a distinct, fragrant profile; tear the leaves to release oils.
- Chili Flakes – For a spicy kick, add according to heat preference; start with a small pinch.
- Mushrooms – For a vegetarian option, substitute bones with a mix of mushrooms for flavor and umami.
This Thai broth isn’t just a recipe; it’s a gateway to creating countless dishes that warm your heart and home!
Step‑by‑Step Instructions for Thai Broth
Step 1: Prepare Bones
Begin by washing the chicken or pork bones under cool running water for about 5 minutes to remove any impurities and minimize cloudiness in your Thai broth. This crucial step ensures a clearer and more flavorful end result. Transfer the cleaned bones to a large pot, ready for the next step.
Step 2: Combine Ingredients
In the same large pot, combine the cleaned bones with approximately 4 quarts of water. Add in 4-5 crushed garlic cloves, cilantro roots or stems, a teaspoon of ground white pepper, 2 tablespoons of thin soy sauce, and 1-2 tablespoons of fish sauce. Stir gently to blend all ingredients, and prepare for simmering.
Step 3: Simmer
Set the pot over medium-high heat and bring the mixture to a gentle simmer. Reduce the heat to low, maintaining the simmer for 2 hours. Make sure to skim any impurities that rise to the surface during the first 30 minutes to keep your Thai broth clear and flavorful.
Step 4: Season
After the 2-hour simmering period, taste your broth to evaluate the seasoning. Adjust the flavor by adding more fish sauce or soy sauce as needed. If desired, a pinch of sugar can enhance the broth’s depth, balancing any strong flavors and contributing to the overall warmth of the Thai broth.
Step 5: Strain
Once cooked, carefully strain the broth through a fine mesh sieve placed over a large bowl or pot. This step removes all solids, ensuring a smooth and clear liquid. Discard the solids left in the sieve to focus on preserving the fragrant, comforting essence of your homemade Thai broth.
Step 6: Cool and Store
Allow the strained broth to cool at room temperature for about 30 minutes. Once cooled, transfer the Thai broth into airtight containers for storage. You can keep the broth in the refrigerator for up to 4 days or freeze in smaller portions for longer use, enjoying homemade goodness whenever you need it.
What to Serve with Heartwarming Thai Broth
Transform your homemade broth into a satisfying meal with these delicious pairings!
- Fresh Rice Noodles: Their soft, tender texture beautifully absorbs the broth while adding a delightful chewiness to your dish.
- Sautéed Bok Choy: Crisp and refreshing, this green vegetable provides a lovely contrast to the warm broth, making each sip more vibrant.
- Grilled Shrimp Skewers: The smokiness of grilled shrimp enhances the broth’s flavors, creating a harmonious blend that transports you to Thailand.
- Herb-Infused Rice: Cooking rice in the broth adds layers of flavor, ensuring each grain carries a hint of that aromatic essence.
- Spicy Thai Spring Rolls: The crunchiness of these rolls creates an exciting texture, while their savory filling complements the broth’s lightness perfectly.
- Chili-Lime Chicken: Marinated chicken grilled to perfection adds zestiness and protein, balancing the broth’s warmth with a zesty bite.
- Cilantro-Lime Quinoa: This refreshing side brings a citrusy brightness that enhances the overall flavor of your bowl while being nutritious, too.
How to Store and Freeze Thai Broth
Fridge: Store homemade Thai broth in airtight containers for up to 4 days. Allow it to cool completely before sealing to maintain freshness.
Freezer: Freeze portions of Thai broth in freezer-safe containers or ice cube trays for up to 3 months. This makes it easy to thaw only what you need later!
Reheating: When ready to enjoy, reheat on the stovetop over medium heat until warmed through. Stir gently to ensure even heating and enhance the broth’s wonderful aroma.
Airtight Storage: Always ensure your containers are tightly sealed. This is crucial both for keeping flavors intact and preventing freezer burn if you’re freezing portions.
Thai Broth Variations & Substitutions
Get ready to make this delicious Thai broth your own with these exciting twists, perfect for every palate and dietary need!
-
Aromatic Upgrade: Add fresh lemongrass, galangal, or kaffir lime leaves to infuse delightful citrusy notes into your broth. These additions elevate the flavor to new heights, inviting a true taste of Thailand into your kitchen.
-
Vegetarian Delight: Swap out chicken or pork bones for a mix of mushrooms, seaweed, and assorted vegetables for a lighter, plant-based broth. It’s a fantastic way to enjoy the rich flavors without the meat!
-
Heat It Up: For those who crave a spicier kick, mix in crushed chili flakes or fresh chili peppers. Adjust to your desired spice level to tantalize your taste buds!
-
Enhanced Umami: Incorporate dried shiitake mushrooms or a splash of miso paste for a deep umami flavor. This will add richness to your broth, making it even more satisfying, especially in winter months.
-
Coconut Variation: Add a can of coconut milk toward the end of cooking for a creamy twist. This pairs beautifully if you’re using the broth in curry dishes, like Thai Coconut Shrimp.
-
Flavorful Broth Cubes: Reduce the finished broth until concentrated, then pour into ice cube trays for quick, ready-to-use broth cubes. Perfect for adding a boost of flavor to future recipes!
-
Zesty Accents: Squeeze in some fresh lime juice or serve with lime wedges to add brightness and acidity before serving, enhancing the overall flavor profile beautifully.
-
Herbal Infusion: Experiment with fresh herbs like basil or mint to enhance the broth’s aroma and freshness. This will not only brighten the flavors but add vibrant color as well.
Take your Thai broth to the next level with these ideas—you’re sure to create something truly personal and delightful!
Make Ahead Options
These Thai broth recipes are a fantastic choice for meal prep, allowing you to savor homemade goodness with minimal effort during busy weeknights! You can prepare the broth in advance and store it in the refrigerator for up to 4 days. To do this, follow all the cooking steps, then allow the broth to cool before transferring it to airtight containers. For even longer storage, freeze portions in smaller containers or ice cube trays for up to 3 months. When you’re ready to use the broth, simply heat it on the stove until warm and then adjust seasoning as needed, resulting in a comforting, flavorful base—just as delicious as when it was freshly made!
Expert Tips for Thai Broth
-
Skim for Clarity: Regularly skimming off impurities while simmering is essential; this keeps your Thai broth light and clear, enhancing its visual appeal.
-
Gentle Simmer: Avoid boiling the broth vigorously, as it can cause cloudiness. A gentle simmer ensures the flavors meld beautifully without murkiness.
-
Taste as You Go: Season your broth toward the end of cooking and adjust. Starting with a small amount of fish sauce or soy sauce prevents overpowering the delicate flavors.
-
Experiment with Herbs: Feel free to add aromatics like lemongrass or kaffir lime leaves for a more aromatic Thai broth. Don’t forget to adjust the seasoning accordingly!
-
Storage Matters: Store your broth in airtight containers. It stays fresh for up to 4 days in the fridge or freeze in portions for easy access to homemade goodness anytime.
Thai Broth Recipe FAQs
What kind of bones should I use for the Thai broth?
You can use chicken bones or pork bones for a rich, flavorful broth. I often recommend mixing bones, like adding some beef bones for more depth, or going with chicken backs and necks for a light, yet rich broth.
How long will my homemade Thai broth last in the fridge?
Your Thai broth can be stored in airtight containers in the refrigerator for up to 4 days. Make sure to let it cool completely before sealing, as this helps maintain its freshness and flavor.
Can I freeze Thai broth, and if so, how?
Absolutely! You can freeze your Thai broth in container portions or even in ice cube trays for up to 3 months. Once frozen, transfer the cubes to a freezer bag for organized storage. To use, simply thaw in the refrigerator overnight or heat straight from frozen on the stovetop.
What should I do if my broth is cloudy?
If your broth turns out cloudy, this usually happens from not skimming the impurities regularly or boiling too vigorously. Stick to a gentle simmer and skim off any foam or bits that rise to the top within the first 30 minutes. If it still looks cloudy, straining it through a cheesecloth can help clarify it!
Is there a vegetarian option for this Thai broth?
Absolutely! To make a vegetarian Thai broth, substitute the bones with a mix of hearty mushrooms (like shiitake or cremini), seaweed, and a variety of vegetables such as carrots and onions. Simmer these ingredients just like the original recipe for a flavorful plant-based broth.
Can I make this Thai broth ahead of time?
Yes! This broth is perfect for make-ahead cooking. I often prepare a batch to have ready for my weekly meals. Just cool it down and store it in the fridge or freeze it in individual servings for easy access any time you need a comforting base for soups or dishes.
Aromatic Thai Broth: Your Comforting Culinary Staple
Ingredients
Equipment
Method
- Begin by washing the chicken or pork bones under cool running water for about 5 minutes to remove impurities.
- In a large pot, combine the cleaned bones with approximately 4 quarts of water, garlic, cilantro roots or stems, white pepper, soy sauce, and fish sauce.
- Set over medium-high heat and bring to a gentle simmer. Reduce to low and simmer for 2 hours, skimming any impurities.
- After 2 hours, taste and adjust seasoning with fish sauce or soy sauce as needed. Add sugar for depth if desired.
- Strain the broth through a fine mesh sieve to remove solids.
- Allow to cool at room temperature for about 30 minutes before transferring to airtight containers for storage.