


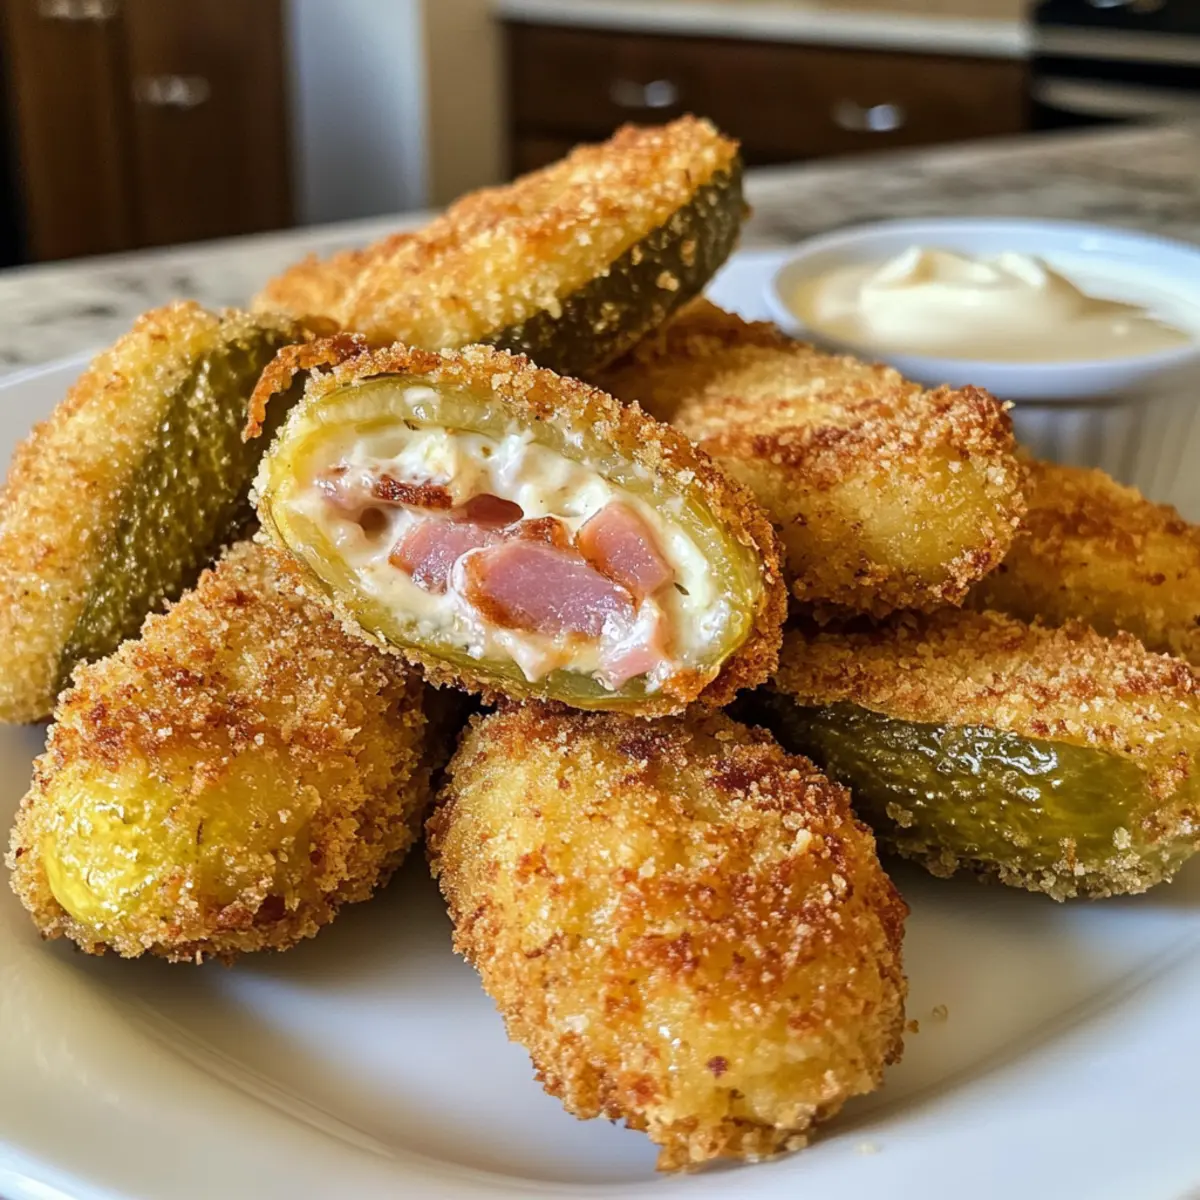
As I crunched into a crispy bite of those golden Stuffed Fried Pickles, the tangy flavor danced with the savory richness of melted cheese and ham—it felt like a warm hug from my childhood. These delicious morsels aren’t just perfect for game day gatherings; they’re a delightful way to elevate any appetizer spread. Not only are they incredibly easy to whip up, but they also bring that nostalgic comfort food vibe right to your kitchen. Whether you choose to fry them for an extra crunch or bake them for a lighter touch, these stuffed delights promise to be a crowd-pleaser every time. Are you ready to take your snack game to the next level?
Why Are Stuffed Fried Pickles a Must-Try?
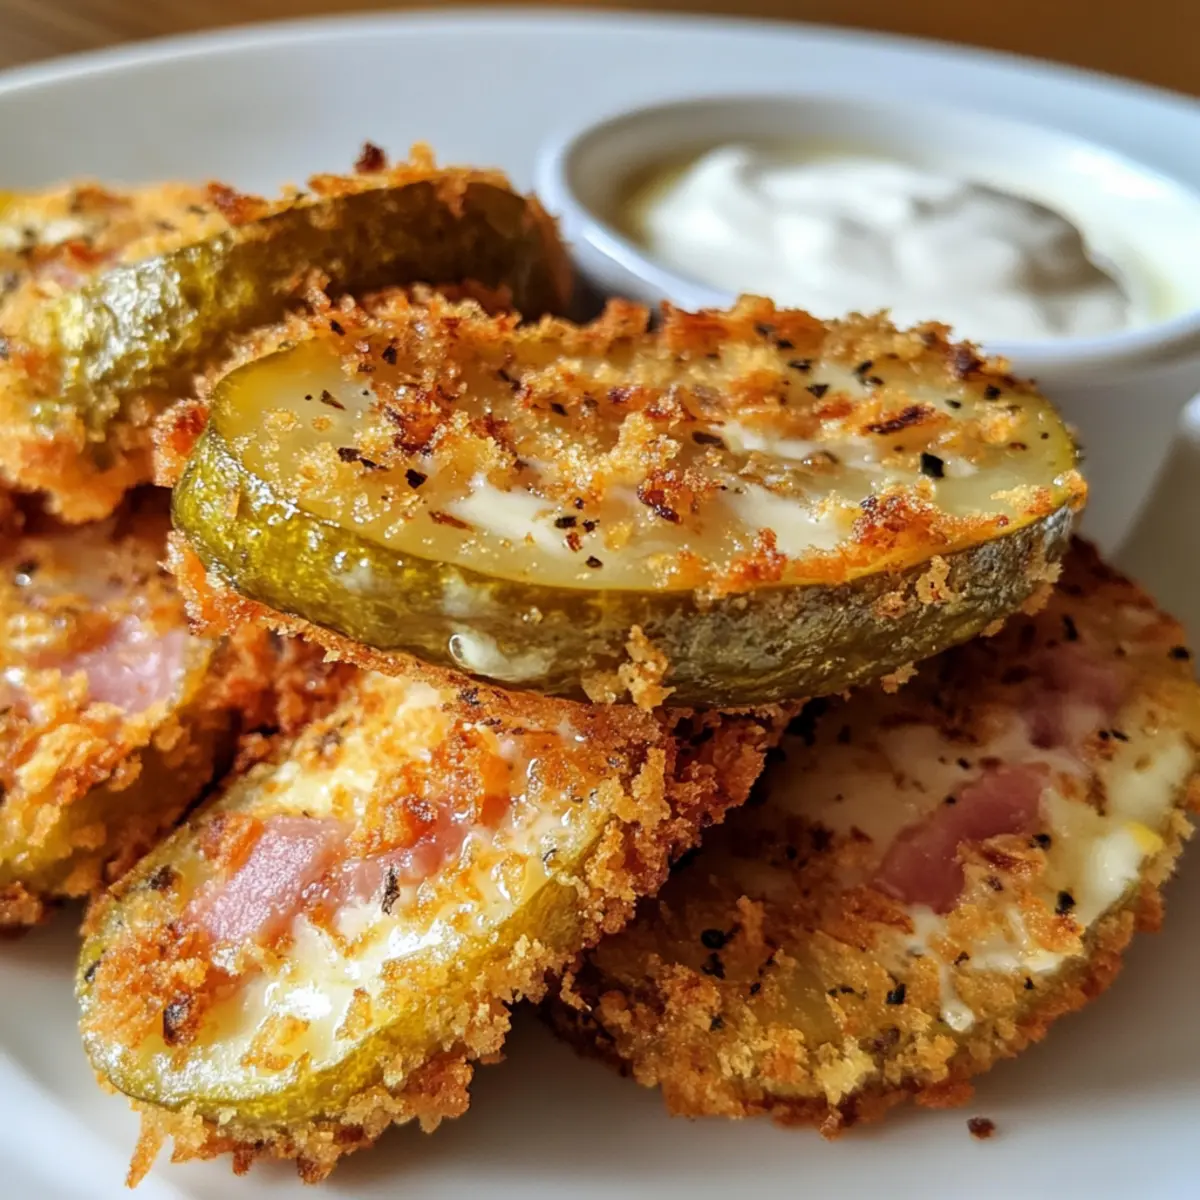
Crispy Delight: These Stuffed Fried Pickles deliver an irresistible crunch that will have your taste buds cheering for more.
Savory Goodness: Each bite is packed with gooey cheese and savory ham, making them a perfect comfort food.
Versatile Options: Whether you prefer them fried for extra texture or baked for a healthier twist, there’s a version for everyone!
Crowd-Pleasing Appetizer: Ideal for game day or casual gatherings, these bites guarantee smiles all around. You can even serve them alongside classics like Taco Stuffed Peppers for a complete spread!
Quick and Easy: With a straightforward process, you can impress guests in no time. Plus, the ingredients are simple enough to keep you stocked for spontaneous cravings!
Prepare to enjoy a nostalgic treat that’s as fun to make as it is to eat.
Stuffed Fried Pickles Ingredients
For the Pickles
• Dill Pickles – The crunchy base ingredient; hollow them out for perfect stuffing.
For the Filling
• Mozzarella Cheese – The star filling that melts delightfully; swap with cheddar for a sharper flavor.
• Ham – Adds a savory punch; turkey or no meat can fit a vegetarian option beautifully.
For the Coating
• All-Purpose Flour – Essential for crispiness; gluten-free flour works well if needed.
• Eggs – Binds the coating effectively; flaxseed meal offers a vegan alternative.
• Panko Breadcrumbs – Gives a satisfying crunch; replace with regular breadcrumbs if that’s what you have.
For Frying
• Oil (for frying) – The crucial ingredient for that golden crisp; sunflower or canola oil are great substitutes.
For Dipping
• Spicy Mayonnaise – Elevates the flavor; consider mixing sriracha for a zesty kick.
With these simple ingredients, you’re on your way to creating the ultimate Stuffed Fried Pickles that everyone will love!
Step‑by‑Step Instructions for Stuffed Fried Pickles
Step 1: Prepare the Pickles
Start by slicing the ends off your dill pickles, then use an apple corer to hollow them out carefully, setting aside the centers for later use. This creates the perfect vessel for your delicious stuffing. If you’re using bread and butter pickles, the process is the same, and you’ll find them delightfully sweet!
Step 2: Stuff the Pickles
Take a slice of ham and wrap it around a mozzarella stick, creating a lovely filling for each hollowed pickle. Make sure the cheese is snugly encased by the ham, as this will ensure a delightful melted center when cooked. Continue this process until all hollowed pickles are filled with the ham and cheese combination.
Step 3: Cut the Stuffed Pickles
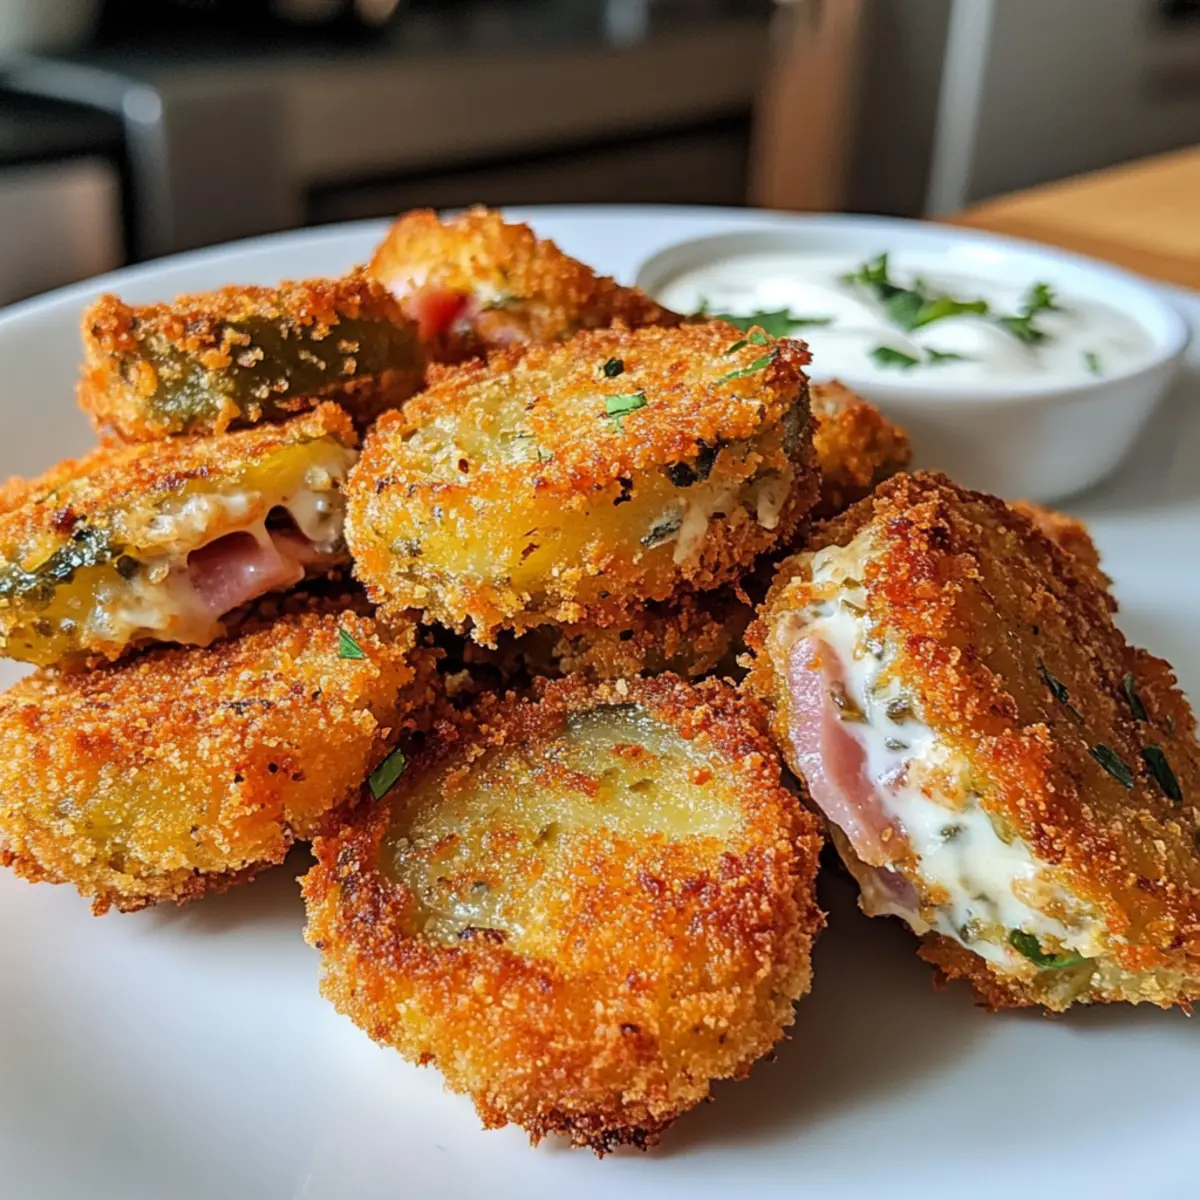
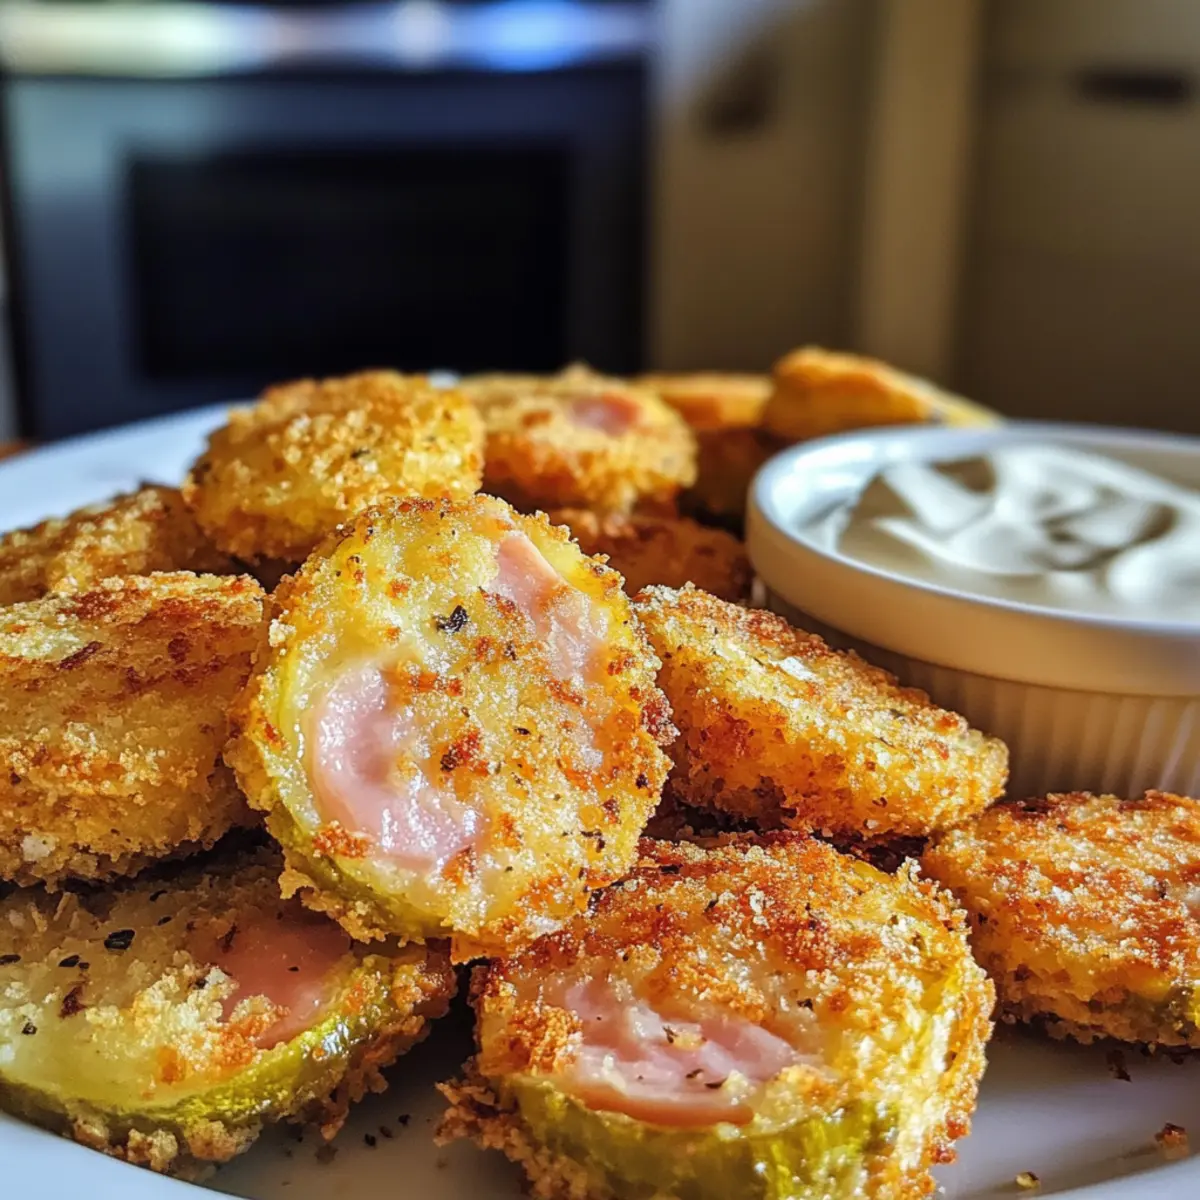
Once stuffed, slice each pickle into ¼-inch rounds. This makes for bite-sized treats, perfect for dipping and sharing. As you cut, watch for any oozy cheese that might escape—it just means extra gooeyness to enjoy! Set the rounds aside while you prepare for the coating process.
Step 4: Set Up the Coating Station
Create a lovely coating station by placing three bowls in a row. Fill one with all-purpose flour, the second with beaten eggs, and the third with panko breadcrumbs. Ensure your workspace is organized, as you’ll want to coat each pickle slice thoroughly in this order: flour, egg, and finally, panko for that irresistible crunch.
Step 5: Heat the Oil
In a frying pan, heat oil to 375°F (190°C) over medium-high heat. Use a deep, heavy pan to better maintain the temperature and avoid overcrowding, which can lead to greasy pickles. To test if it’s ready, drop a small piece of batter into the oil—if it sizzles and rises, you’re all set to start frying those Stuffed Fried Pickles!
Step 6: Fry the Pickles
Carefully place the coated pickle slices into the hot oil, frying them for 1–2 minutes until they achieve a beautiful golden brown color. Fry in batches if necessary, as this helps ensure they stay crisp. Watch closely to get that perfect crunch while the melty filling warms up beautifully inside.
Step 7: Drain and Serve
Once they are perfectly fried, use a slotted spoon to remove the stuffed fried pickles from the oil and place them on paper towels to drain excess oil. Serve them hot alongside a side of spicy mayonnaise for dipping, enhancing each crunchy bite. Grab your friends and get ready to enjoy the incredible flavors packed in these crispy delights!
Stuffed Fried Pickles Variations
Feel free to let your creativity shine as you adapt these stuffed fried pickles to fit your taste buds!
-
Cheese Swap: Replace mozzarella with cheddar or pepper jack for unique flavor dimensions. Creamy cheddar melts beautifully, while pepper jack introduces a delightful zest.
-
Tamper with the Spice: Add diced jalapeños or green chilies inside for an extra spicy kick! The heat complements the tanginess of the pickles, creating an unforgettable flavor explosion.
-
Herb-Infused: Mix fresh herbs like dill or chives into the cheese filling for a fresh burst of flavor. This adds a delightful twist that elevates this classic snack to gourmet territory.
-
Batter Up: For a deeper crunch, dip the pickle slices in beer batter before frying. This twist transforms your pickles into a pub-style favorite reminiscent of a classic tavern fare.
-
Vegetarian-Friendly: Omit the ham and load them up with a mixture of sautéed mushrooms and spinach for a rich, savory vegetarian option. You’ll still get that creamy cheese goodness without the meat!
-
Baked Crispy: Instead of frying, bake the coated pickles in a preheated oven at 425°F (220°C) for 15-20 minutes. This healthier option still offers a satisfying crunch without the grease.
-
Sauce Alterations: Try different dipping sauces like ranch dressing, tangy barbecue, or even garlic aioli to pair with the pickles. Each dip enhances the flavor and makes every bite a new experience!
-
Mini Stuffed Bites: For a fun twist, use small gherkin pickles instead of full-sized ones. They make adorable bite-sized snacks, perfect for parties when served alongside Southern Country Fried options!
With these variations, you’re sure to impress guests and keep your snack game exciting. Enjoy experimenting!
How to Store and Freeze Stuffed Fried Pickles
Fridge: Store cooked stuffed fried pickles in an airtight container for up to 3 days to maintain freshness and flavor.
Freezer: For longer storage, freeze the uncooked stuffed pickles individually on a baking sheet before transferring to a freezer-safe bag. They can last up to 2 months.
Reheating: When ready to enjoy, reheat in the oven at 375°F (190°C) for about 10-15 minutes to restore their crispy texture, ensuring they remain a delightful snack.
Make-Ahead Tips: You can prep the stuffed pickles ahead of time, coating them in panko and storing them in the fridge for up to 24 hours before frying, making game day prep a breeze!
What to Serve with Crispy Stuffed Fried Pickles
Experience a delicious array of flavors that elevate your appetizer game alongside these crunchy delights.
- Creamy Ranch Dip: A classic pairing that cools the heat of the fried pickles and enhances their flavors with a zesty touch.
- Zesty Coleslaw: This fresh, crunchy side adds a refreshing contrast to the warm, savory bite of stuffed pickles, balancing richness beautifully.
- Beer Battered Onion Rings: Keep the pub vibe alive! The crispy texture complements the pickles, making every bite a crunchy experience.
- Savory Buffalo Wings: Spicy and tangy, this duo is perfect for game day gatherings, creating a mouthwatering platter for guests.
- Garden Salad: A light, crisp salad with vinaigrette provides a fresh, cleansing element that counteracts the richness of deep-fried goodness.
- Chilled Craft Beer: An ideal beverage choice! The bitterness of the beer cuts through the richness of the fried pickles, creating a harmonious pairing.
- Sweet Potato Fries: With their natural sweetness and crisp texture, these fries offer a delightful contrast to the tangy stuffed pickles.
- Chocolate Lava Cake: To finish off on a sweet note, this indulgent dessert brings a rich, gooey texture that complements the savory starter perfectly.
Serve these delightful pairings alongside crispy stuffed fried pickles for an unforgettable gathering that tantalizes the taste buds!
Expert Tips for Stuffed Fried Pickles
-
Frying Temperature: Keep the oil at 375°F (190°C) to prevent greasy pickles. Too low will make them absorb oil; too high can burn them.
-
Coating Technique: Dredge pickles thoroughly to ensure a fantastic crispy finish. Don’t rush—taking time with the coating prevents soggy bites.
-
Batch Size Matters: Avoid overcrowding the frying pan. Frying in small batches helps maintain the oil’s temperature for that perfect crunch in your stuffed fried pickles.
-
Baking Alternative: For a healthier option, try baking at 425°F for 15-20 minutes instead of frying. This still delivers a satisfying result without the extra oil!
-
Serve Fresh: Enjoy your stuffed fried pickles immediately after frying for the best flavor and texture. If you make them ahead, reheat in an oven to restore crispiness.
Make Ahead Options
These Stuffed Fried Pickles are absolutely perfect for meal prep enthusiasts! You can hollow out the pickles and prepare the cheese and ham stuffing up to 24 hours in advance, simply covering the prepared components and refrigerating them to keep everything fresh. When ready to enjoy, assemble the pickles and coat them right before frying for crispy textures that are just as delicious as if made fresh. If desired, you can also fry them ahead of time and store the cooked pickles in an airtight container in the refrigerator for up to 3 days. Just reheat them in the oven at 375°F (190°C) for about 10 minutes to restore that delightful crunch!
Stuffed Fried Pickles Recipe FAQs
What kind of pickles should I use?
Absolutely! Dill pickles are the classic choice for this recipe because their tanginess complements the savory filling beautifully. However, if you prefer a sweeter option, you can use bread and butter pickles instead.
How should I store leftover stuffed fried pickles?
For optimal freshness, store cooked stuffed fried pickles in an airtight container in the refrigerator for up to 3 days. Placing parchment paper between layers can help maintain their crispiness. When reheating, use an oven to restore crunch.
Can I freeze stuffed fried pickles?
Yes! To freeze, place uncooked stuffed pickles in a single layer on a baking sheet and freeze until solid. Then, transfer them to a freezer-safe bag, where they can last up to 2 months. When ready to enjoy, fry them directly from frozen without thawing—just add a minute to the cooking time for perfectly crispy treats!
What if my coating is soggy?
If your stuffed fried pickles turn out soggy, it could be due to insufficient oil temperature or overcrowding the frying pan. To fix this, ensure your oil is properly heated to 375°F (190°C) before frying, and work in batches to maintain a constant heat. A crisp coating really makes all the difference!
Are there any dietary considerations for stuffed fried pickles?
Indeed! If you’re looking for vegetarian or gluten-free options, simply substitute the ham with veggies or turkey, and use gluten-free flour and breadcrumbs in the coating. For vegan options, consider using vegan cheese and flaxseed meal as an egg substitute. Enjoy personalized stuffed fried pickles that suit everyone’s preferences!
Can I make stuffed fried pickles ahead of time?
Certainly! You can prepare the stuffed pickles and coat them in panko up to 24 hours in advance. Store them in the fridge until you’re ready to fry. This makes game day prep a breeze, letting you enjoy more time with your friends and less time in the kitchen!
Crispy Stuffed Fried Pickles for the Ultimate Snack Attack
Ingredients
Equipment
Method
- Start by slicing the ends off your dill pickles, then use an apple corer to hollow them out carefully, setting aside the centers for later use.
- Take a slice of ham and wrap it around a mozzarella stick, creating a lovely filling for each hollowed pickle.
- Once stuffed, slice each pickle into ¼-inch rounds.
- Create a lovely coating station by placing three bowls in a row: flour, beaten eggs, and panko breadcrumbs.
- In a frying pan, heat oil to 375°F (190°C) over medium-high heat.
- Carefully place the coated pickle slices into the hot oil, frying them for 1–2 minutes until they achieve a golden brown color.
- Once they are perfectly fried, use a slotted spoon to remove the stuffed fried pickles from the oil and place them on paper towels to drain excess oil.