


As the sun sets and the kitchen starts to fill with that irresistible aroma, I find myself excited to whip up something special. Tonight, it’s all about Sticky Miso Chicken—a dish that captures the perfect balance of sweet and savory flavors in every bite. What I love most about this recipe is how it transforms a hectic weekday meal into a delightful dining experience, taking less than 20 minutes to prepare from start to finish. The best part? You can prep it ahead of time, ensuring that even the busiest of schedules can accommodate homemade goodness. Picture this: succulent, marinated chicken served over fluffy egg fried rice, ready to impress your family or simply treat yourself. Are you ready to dive into this quick culinary adventure? Let’s get started!
Why You’ll Crave Sticky Miso Chicken?
Quick and Easy: This dish can be prepared in under 20 minutes, making it a lifesaver for busy weeknights.
Flavor Packed: The combination of miso paste, honey, and fresh ginger creates a sweet and savory explosion that lingers on your palate.
Prep Ahead: Marinate the chicken in advance and enjoy a hassle-free dinner when the day gets hectic.
Versatile Ingredient: Feel free to swap chicken for tofu or tempeh for a plant-based delight — it’s just as tasty!
Perfect Pairing: Serve it over fluffy egg fried rice, and you’ll have a comforting meal that feels like a restaurant experience at home! If you love quick meals, give this Pepperoncini Chicken Skillet a try too!
Sticky Miso Chicken Ingredients
For the Marinade
- Miso Paste – The main flavoring agent that delivers delicious umami richness; substitute with tahini or fermented soy sauce if needed.
- Honey or Sugar – Adds sweetness to balance the salty notes of the miso; maple syrup works great for a vegan alternative.
- Ginger – Fresh ginger adds aromatic depth and warmth; ground ginger can be used in a pinch if you’re short on time.
- Garlic – Minced garlic enhances the dish’s flavorful punch; fresh is best, but garlic powder can suffice.
For the Chicken
- Chicken (thighs or breasts) – Tender and flavorful when marinated; thighs are juicier, while breasts are leaner and cook faster.
For Serving
- Rice – Forms the hearty base of the dish; using egg fried rice adds a delightful twist, or opt for cauliflower rice for a lighter dish.
Each ingredient plays a crucial role in creating the mouthwatering flavor profile of this Sticky Miso Chicken, ensuring a delightful meal that’s worth making again and again!
Step‑by‑Step Instructions for Sticky Miso Chicken
Step 1: Prepare Marinade
In a medium mixing bowl, combine 2 tablespoons of miso paste, 2 tablespoons of honey, 1 tablespoon of minced ginger, and 2 minced garlic cloves. Whisk together until smooth and well-blended, creating a glossy marinade. This sticky mixture will become the flavor foundation for your Sticky Miso Chicken.
Step 2: Marinate Chicken
Add your choice of 1 pound of chicken thighs or breasts into the marinade, turning the chicken to ensure it’s fully coated. Cover the bowl with plastic wrap and let it sit for at least 30 minutes at room temperature, or refrigerate for several hours for deeper flavor. This marinating step is essential for infusing your chicken with rich, savory goodness.
Step 3: Cook Rice
While the chicken is marinating, prepare the rice. Cook 2 cups of egg fried rice or your preferred rice option according to package instructions. If making ahead of time, keep the rice warm in a lidded pot. This fluffy rice will serve as the perfect backdrop for your sticky, caramelized chicken.
Step 4: Stir-fry Chicken
Heat a wok or large frying pan over high heat, adding a dash of oil once it’s hot. Add the marinated chicken to the pan in a single layer, allowing it to sear. Stir-fry for about 5 to 7 minutes, turning occasionally, until the chicken is golden brown and has a slightly caramelized glaze. The chicken should be cooked through, reaching an internal temperature of 165°F.
Step 5: Serve
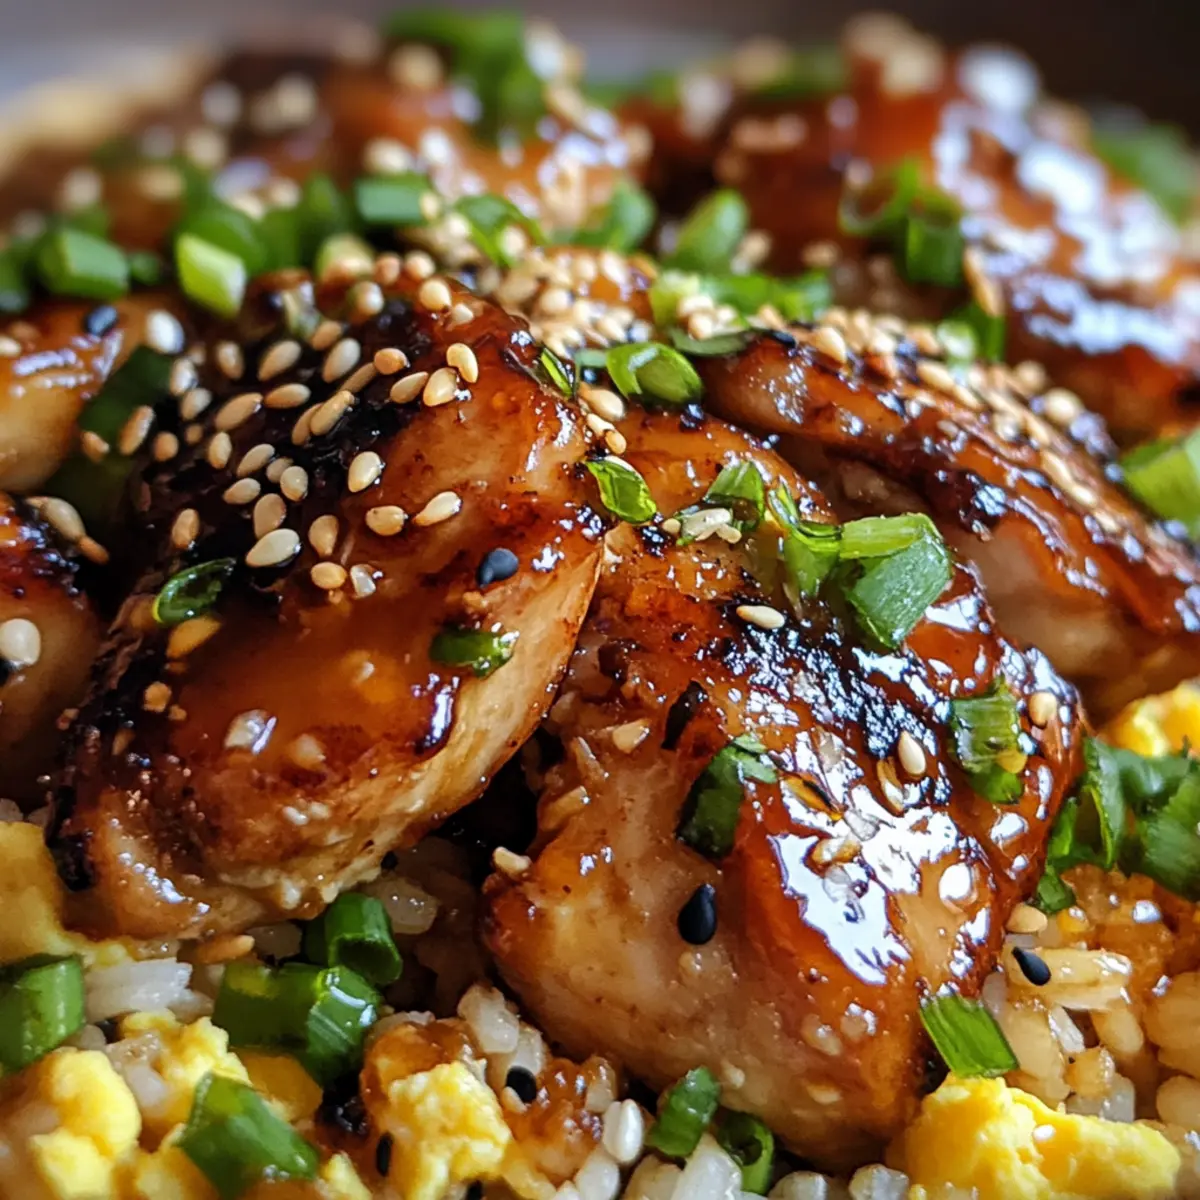
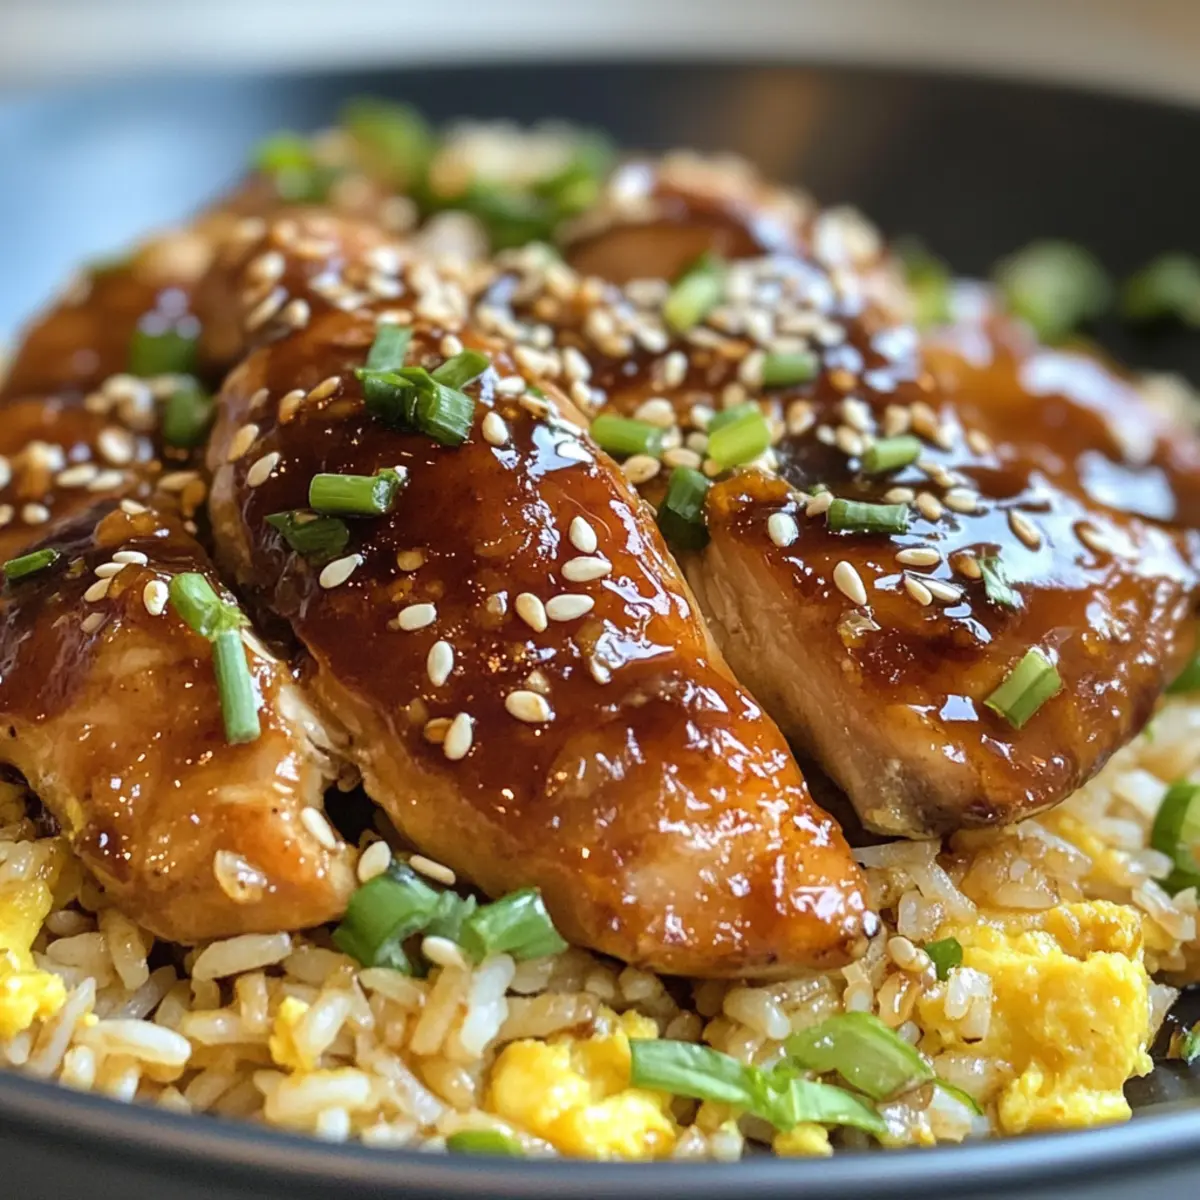
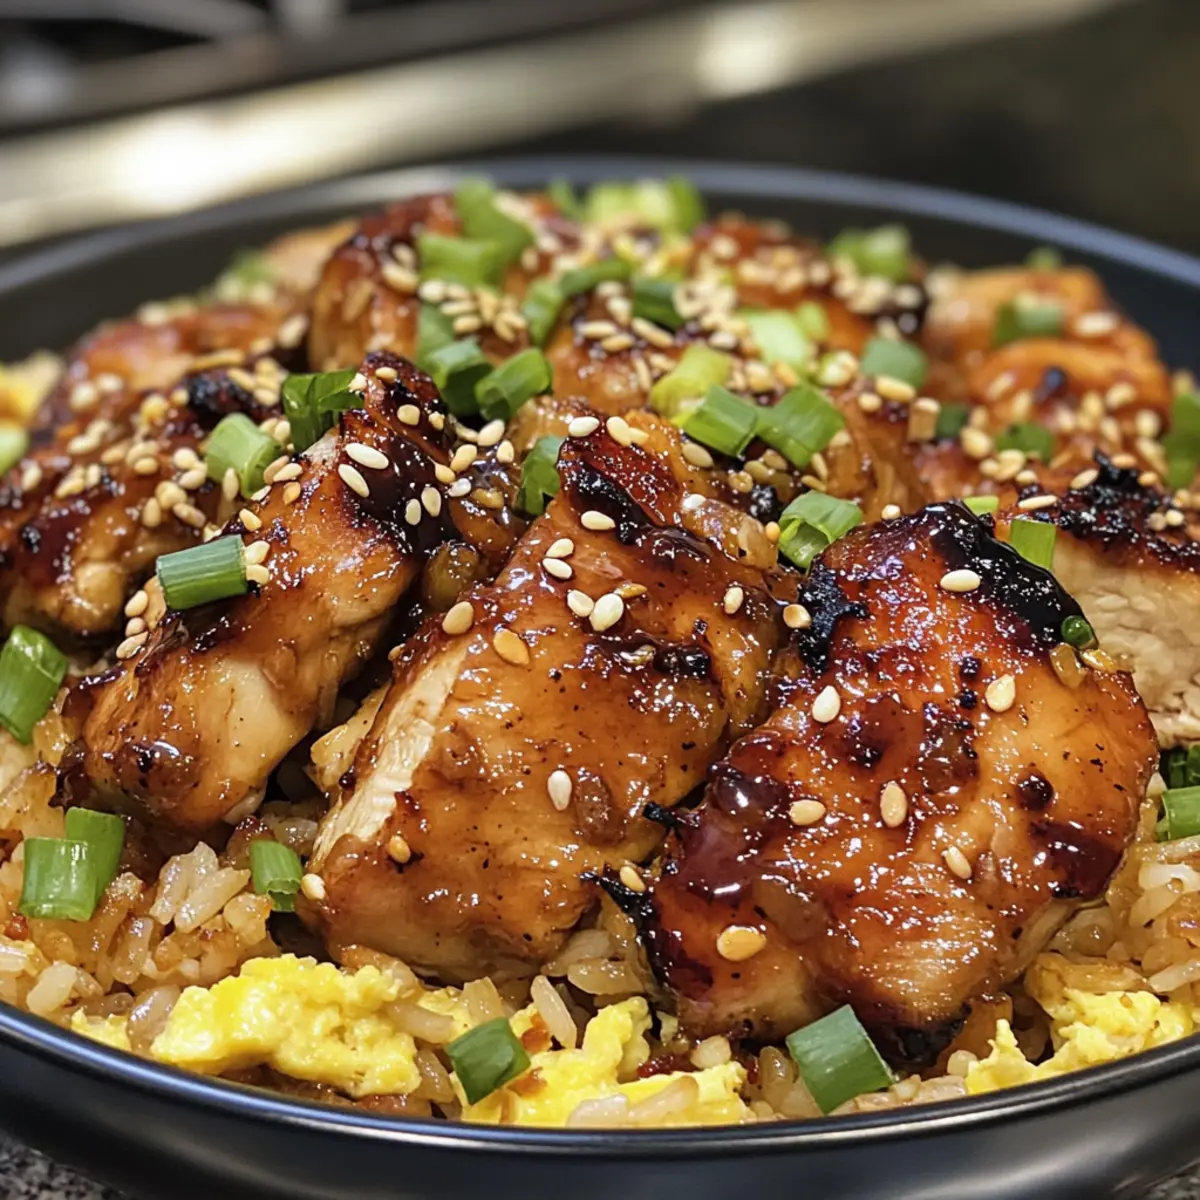
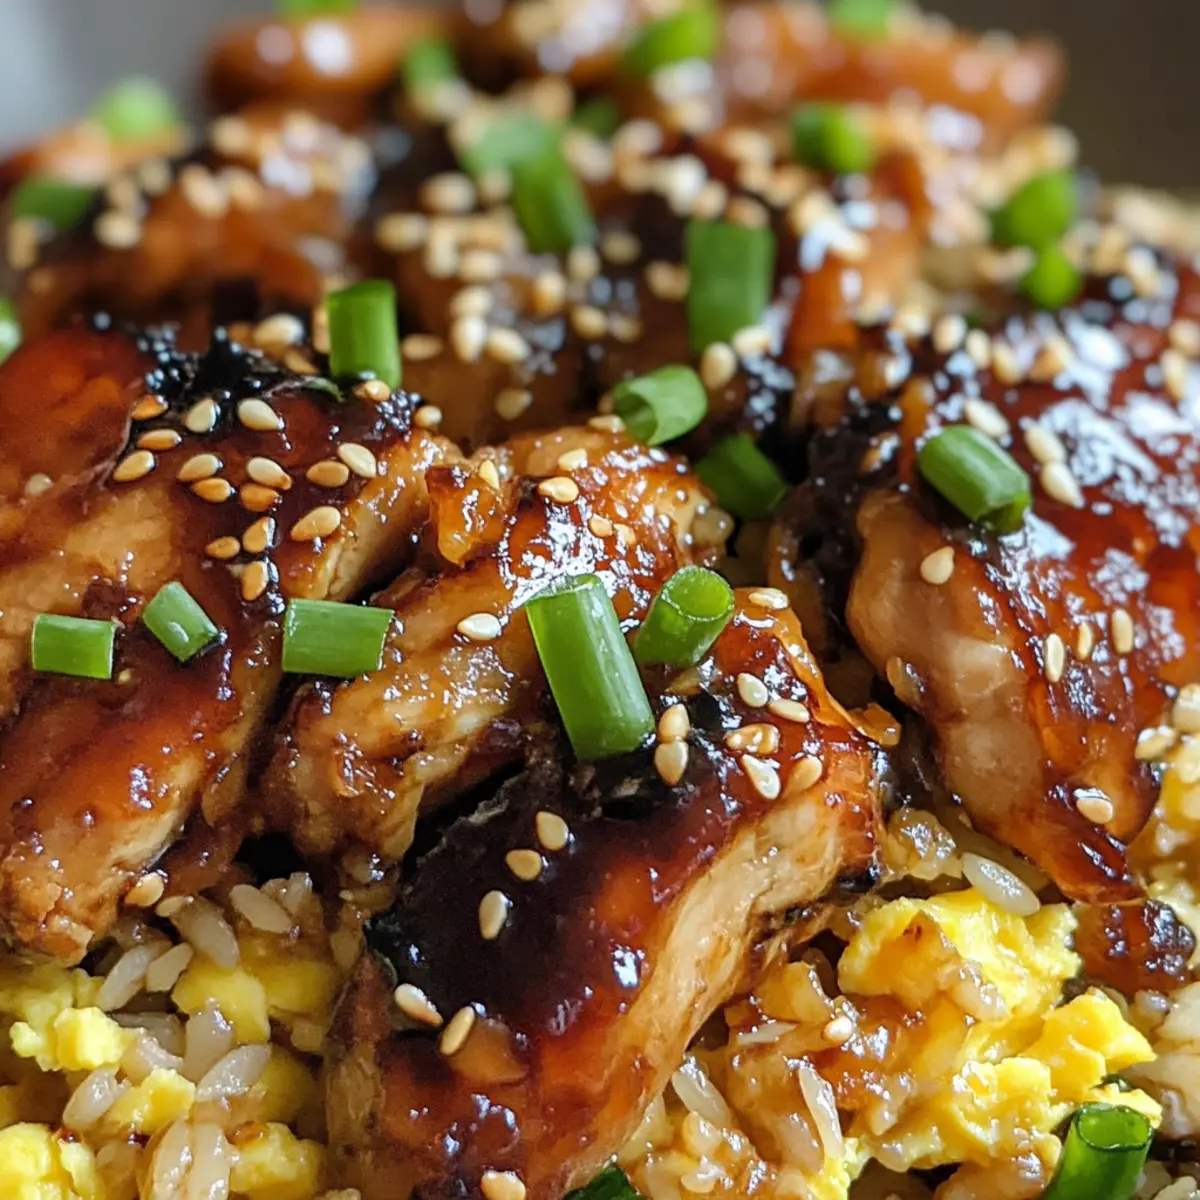
Once the chicken is perfectly cooked and glazed in the sticky miso sauce, remove it from heat. Plate the chicken over a generous serving of the warm egg fried rice, drizzling any remaining sauce from the pan on top. For an extra touch, garnish with sesame seeds or chopped spring onions, adding a fresh crunch to this delightful Sticky Miso Chicken experience.
Expert Tips for Sticky Miso Chicken
-
Marinate Overnight: For a deeper flavor, marinate the chicken overnight. This extra time will enhance the umami richness and tenderness of the meat.
-
Use High Heat: Ensure your wok or pan is preheated before adding chicken. High heat helps achieve that beautiful, slightly caramelized glaze that makes this dish special.
-
Don’t Overcrowd the Pan: Avoid cooking the chicken in large batches. This can cause steaming rather than browning, resulting in less flavor. Cook in two batches if necessary.
-
Choose the Right Chicken: Chicken thighs give a juicier bite, while breasts are a leaner option. Pick based on your preference for flavor and texture.
-
Garnish Wisely: A sprinkle of sesame seeds or spring onions not only adds visual appeal but also provides a crunchy contrast to the sticky miso chicken. Enjoy!
What to Serve with Sticky Miso Chicken
The perfect meal is just waiting to be complete; discover what pairs beautifully with this succulent dish!
-
Steamed Broccoli: This vibrant green veggie adds a fresh crunch to balance the sticky sweetness of the chicken.
-
Crispy Fried Tofu: For a delightful vegetarian twist, serve crispy tofu alongside the chicken for an extra textural contrast.
-
Cucumber Salad: A light, refreshing cucumber salad provides a cool, crunchy accompaniment to the rich flavors of the miso chicken.
-
Peanut Slaw: Crunchy, nutty slaw brings a robust flavor and texture, complementing the chicken’s sweetness while adding a satisfying crunch.
-
Egg Fried Rice: The classic pairing with sticky chicken, this fluffy rice absorbs the luscious glaze and rounds out the meal perfectly.
-
Sesame Noodles: These flavor-packed noodles add a sweet and nutty essence, making every bite a harmonious experience alongside the chicken.
-
Cool Green Tea: A refreshing glass of unsweetened green tea complements the savory elements of the dish, cleansing the palate with every sip.
-
Pineapple Sorbet: For dessert, a light and fruity sorbet refreshes after the savory meal, offering a sweet finale to your dining experience.
How to Store and Freeze Sticky Miso Chicken
Fridge: Keep leftover Sticky Miso Chicken in an airtight container for up to 3 days. Ensure it’s cooled before placing it in the fridge to maintain its texture.
Freezer: For longer storage, freeze the marinated chicken in a freezer-safe container or bag for up to 3 months. Thaw in the refrigerator overnight before cooking.
Reheating: To reheat, warm the chicken in a pan over medium heat for about 5-7 minutes or until heated through. Add a splash of water or broth to maintain moisture.
Prep Ahead: Marinate the chicken a day in advance and store it in the fridge, making it easy to pop into the pan for a quick weeknight dinner.
Make Ahead Options
These Sticky Miso Chicken will be a game-changer for your meal prep strategy! You can marinate the chicken up to 24 hours in advance—just combine the miso paste, honey, ginger, and garlic to create the marinade, ensuring the chicken is well coated before covering it and refrigerating. Additionally, you can prepare the egg fried rice in advance and keep it in an airtight container for up to 3 days. To maintain quality, store it separately from the chicken until you’re ready to serve. When it’s time for dinner, simply stir-fry the marinated chicken (it will be just as delicious after sitting) and serve it over your warmed rice for a quick and satisfying meal!
Sticky Miso Chicken Variations & Substitutions
Feel free to get creative with your Sticky Miso Chicken by trying out these delicious variations!
-
Vegetarian: Substitute chicken with tofu or tempeh to enjoy a equally tasty plant-based meal. This not only makes your dish more inclusive but allows for a unique chewy texture.
-
Seafood Twist: For a change of pace, use shrimp instead of chicken. The light flavor of shrimp pairs beautifully with miso, creating a delightful seafood sensation in every bite.
-
Extra Veggies: Stir in colorful vegetables like bell peppers, snap peas, or bok choy during cooking. This not only adds nutrition but also a pleasing crunch that brings the dish to life.
-
Spicy Kick: Looking for some heat? Add sliced red chilies or a sprinkle of red pepper flakes to the marinade for a fiery twist. You’ll be amazed at how the heat enhances the sweet and salty flavors!
-
Rice Alternatives: Swap out egg fried rice for quinoa or riced cauliflower for a lighter option that still offers a lovely base. This will let the sticky chicken shine while keeping your meal balanced.
-
Gluten-Free: Ensure you use gluten-free miso paste and soy sauce to keep this recipe safe for those with gluten sensitivities. You don’t have to sacrifice flavor for dietary needs!
-
Citrus Boost: Zest and juice a lime or lemon into the marinade for a zesty brightness. It adds a refreshing twist that elevates the dish to a whole new level of flavor.
As you customize this recipe, don’t forget to pair it with a side of warm steamed broccoli or perhaps a refreshing Tzatziki Chicken Salad for an even more delightful meal!
Sticky Miso Chicken Recipe FAQs
What type of miso paste should I use for Sticky Miso Chicken?
I recommend using red or white miso paste for the best flavor. Red miso offers a stronger umami taste, while white is milder. If you don’t have miso on hand, tahini or fermented soy sauce can serve as an excellent substitute, offering a similar depth of flavor.
How long can I store leftover Sticky Miso Chicken?
You can store your leftovers in an airtight container in the fridge for up to 3 days. Just make sure to let it cool completely before refrigerating to preserve its texture and taste. When you’re ready to enjoy it again, simply reheat it in a pan for the best results.
Can I freeze Sticky Miso Chicken?
Absolutely! For long-term storage, you can freeze marinated chicken in a freezer-safe container or a resealable bag for up to 3 months. Just thaw it in the refrigerator overnight before you plan on cooking it. This way, the flavors have even more time to meld!
How can I avoid the chicken from becoming dry?
To ensure your Sticky Miso Chicken stays moist, be mindful of cooking times. Stir-fry the chicken over high heat for about 5-7 minutes just until it reaches an internal temperature of 165°F. Also, don’t overcrowd the pan, as this can cause the chicken to steam instead of sear, resulting in a drier texture.
Is Sticky Miso Chicken suitable for people with allergies?
If you or someone you’re cooking for has soy allergies, you can avoid miso paste and opt for a homemade sauce using tahini or sunflower seed butter. Always check the labels of any condiments or pre-packaged ingredients for hidden allergens, especially gluten, as some miso products do contain wheat.
How can I make this recipe in advance for meal prep?
To prep ahead, marinate the chicken a day in advance and store it in the refrigerator. You can also cook the rice in advance and keep it warm until it’s time to serve. When you’re ready to enjoy, simply stir-fry the marinated chicken, and you’ll have a delectable meal ready in just minutes!
Sticky Miso Chicken: A Quick and Cozy Weeknight Delight
Ingredients
Equipment
Method
- In a medium mixing bowl, combine 2 tablespoons of miso paste, 2 tablespoons of honey, 1 tablespoon of minced ginger, and 2 minced garlic cloves. Whisk together until smooth and well-blended.
- Add your choice of 1 pound of chicken thighs or breasts into the marinade, turning the chicken to ensure it's fully coated. Cover with plastic wrap and let it sit for at least 30 minutes.
- While the chicken is marinating, prepare the rice. Cook 2 cups of egg fried rice according to package instructions.
- Heat a wok or large frying pan over high heat, adding a dash of oil. Add the marinated chicken to the pan and stir-fry for about 5 to 7 minutes until golden brown.
- Once the chicken is cooked through, plate it over the egg fried rice and drizzle any remaining sauce from the pan on top.