There’s something magical about the combination of red velvet and cookies.
Red Velvet Cupcake Cookies bring together the rich, velvety flavor of red velvet cake with the delightful chewiness of a cookie.
Whether you’re looking to impress friends at a gathering or simply want a sweet treat after a long day, these cookies are your answer.
They’re quick to whip up and even quicker to disappear!
Trust me, once you take a bite, you’ll understand why these cookies are a must-bake for any occasion.
Why You’ll Love This Red Velvet Cupcake Cookies
These Red Velvet Cupcake Cookies are a game-changer in the dessert world.
They’re incredibly easy to make, perfect for those busy weeknights when you crave something sweet.
With just a handful of ingredients, you can create a treat that’s both visually stunning and deliciously satisfying.
The rich flavor and soft texture will have everyone asking for seconds.
Trust me, these cookies are a delightful way to elevate your baking game!
Ingredients for Red Velvet Cupcake Cookies
To create these delightful Red Velvet Cupcake Cookies, you’ll need a few key ingredients that come together to form a treat that’s both rich and satisfying.
All-purpose flour: The backbone of your cookies, providing structure and a soft texture.
Cocoa powder: Just a touch adds depth to the flavor, enhancing that classic red velvet taste.
Baking soda: This leavening agent helps the cookies rise, giving them a light and airy feel.
Salt: A pinch balances the sweetness and enhances the overall flavor profile.
Unsalted butter: Softened butter creates a rich, creamy base, making your cookies tender and flavorful.
Granulated sugar: Sweetness is key! It helps achieve that perfect chewy texture.
Large egg: Acts as a binder, bringing all the ingredients together for a cohesive dough.
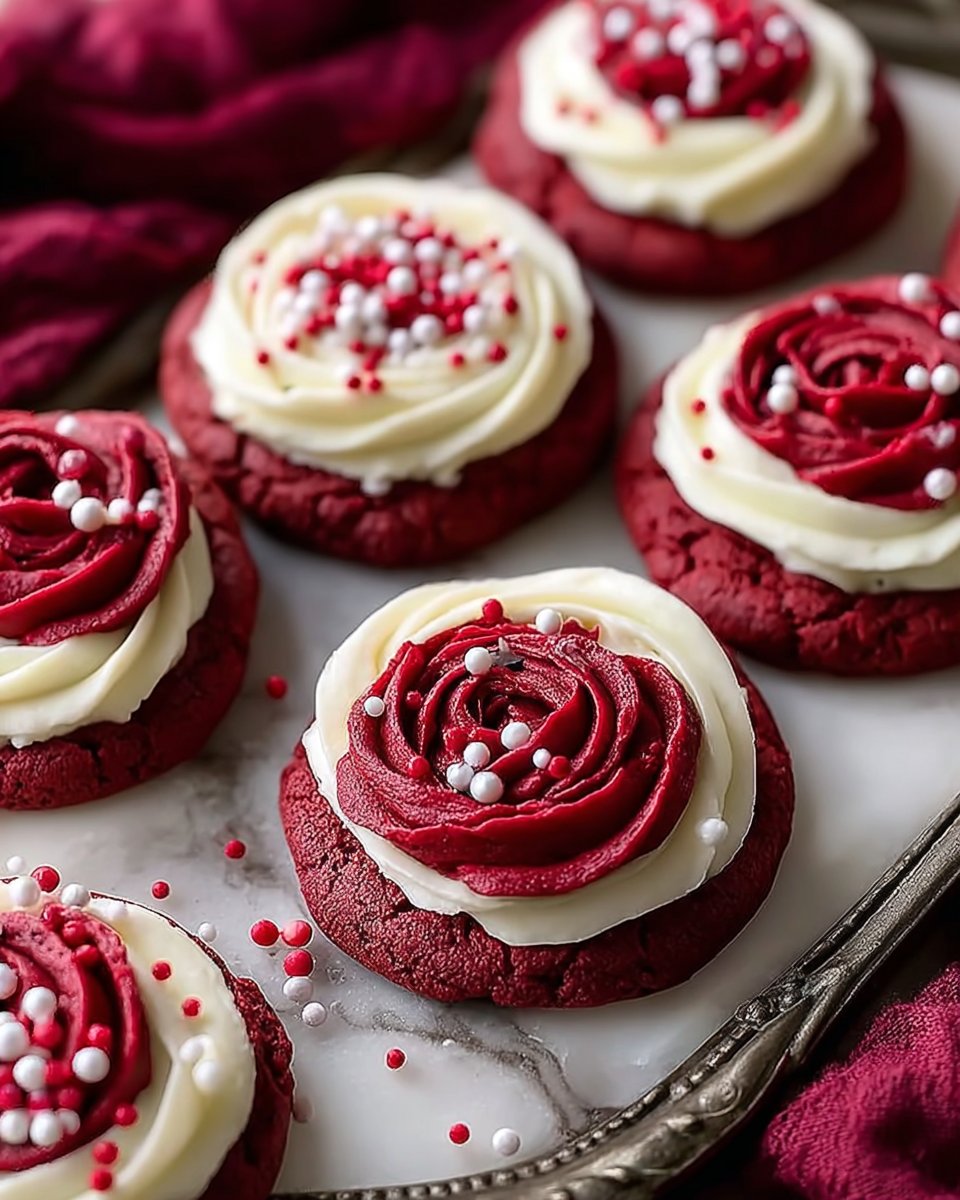
Red food coloring: This is what gives your cookies that iconic red hue, making them visually stunning.
Vanilla extract: A splash of vanilla adds warmth and enhances the overall flavor.
Almond extract: Just a hint of almond brings a unique twist to the classic red velvet taste.
White chocolate chips: These sweet morsels melt beautifully, adding a creamy texture and flavor contrast.
Cream cheese frosting: The finishing touch! A dollop on top makes these cookies feel like a true dessert.
For exact measurements, check the bottom of the article where you can find everything listed for easy printing. Happy baking!
How to Make Red Velvet Cupcake Cookies
Baking these Red Velvet Cupcake Cookies is a delightful journey.
With each step, you’ll see how simple it is to create something truly special.
Let’s dive into the process!
Step 1: Preheat and Prepare
Start by preheating your oven to 350°F (175°C).
While that’s heating up, line a baking sheet with parchment paper.
This will prevent your cookies from sticking and make cleanup a breeze.
Step 2: Mix Dry Ingredients
In a medium bowl, whisk together the all-purpose flour, cocoa powder, baking soda, and salt.
This step is crucial; it ensures that your dry ingredients are evenly distributed.
Set this mixture aside for now.
Step 3: Cream Butter and Sugar
In a large mixing bowl, cream the softened butter and granulated sugar together.
You want this to be light and fluffy, which should take about 2-3 minutes.
This step is where the magic begins, creating a rich base for your cookies.
Step 4: Combine Wet Ingredients
Now, add the large egg, red food coloring, vanilla extract, and almond extract to the butter mixture.
Mix until everything is well combined.
The vibrant red color will start to shine through, making you even more excited to bake!
Step 5: Combine Wet and Dry Ingredients
Gradually add the dry ingredients to the wet mixture.
Mix until just combined; you don’t want to overdo it.
This is where the cookie dough starts to take shape!
Step 6: Fold in Chocolate Chips
Gently fold in the white chocolate chips.
These sweet morsels will melt beautifully during baking, adding a creamy texture.
Make sure they’re evenly distributed throughout the dough.
Step 7: Scoop and Bake
Using a cookie scoop or a tablespoon, drop rounded balls of dough onto the prepared baking sheet.
Space them about 2 inches apart to allow for spreading.
Bake for 10-12 minutes, or until the edges are set.
The centers may look slightly underbaked, but they’ll firm up as they cool.
Step 8: Cool and Frost
Once baked, allow the cookies to cool on the baking sheet for about 5 minutes.
Then, transfer them to a wire rack to cool completely.
Once cooled, it’s time for the fun part!
Use a piping bag or a small spatula to add a dollop of cream cheese frosting on top of each cookie.
This final touch transforms your cookies into a delightful dessert!
Tips for Success
Make sure your butter is softened for easy creaming; it should be at room temperature.
Don’t skip the chilling step if you want a thicker cookie; it helps prevent spreading.
Use a cookie scoop for uniform sizes, ensuring even baking.
Experiment with different chocolate chips for a unique flavor twist.
Store cookies in an airtight container to keep them fresh longer.
Equipment Needed
Baking sheet: A standard baking sheet works well, but a silicone baking mat can be a great alternative for easy cleanup.
Parchment paper: Essential for preventing sticking; aluminum foil can be used in a pinch.
Mixing bowls: A set of various sizes is handy; you can also use any large bowl you have.
Cookie scoop: This helps with portioning; a tablespoon works just as well.
Whisk: A whisk is ideal for mixing dry ingredients; a fork can do the job too.
Variations
Chocolate Red Velvet: Swap out some of the all-purpose flour for cocoa powder to intensify the chocolate flavor.
Gluten-Free Option: Use a gluten-free all-purpose flour blend to make these cookies suitable for those with gluten sensitivities.
Nutty Twist: Add chopped walnuts or pecans for a delightful crunch and added flavor.
Vegan Version: Substitute the egg with a flax egg (1 tablespoon ground flaxseed mixed with 2.5 tablespoons water) and use vegan butter.
Frosting Variations: Experiment with different frostings like vanilla buttercream or chocolate ganache for a unique twist.
Serving Suggestions
Pair these Red Velvet Cupcake Cookies with a tall glass of cold milk for a classic treat.
Serve them alongside a scoop of vanilla ice cream for an indulgent dessert experience.
For a festive touch, arrange cookies on a decorative platter with fresh berries.
Drizzle with extra cream cheese frosting for an eye-catching presentation.
FAQs about Red Velvet Cupcake Cookies
Can I make these Red Velvet Cupcake Cookies ahead of time?
Absolutely! You can prepare the dough in advance and refrigerate it for up to 3 days. Just scoop and bake when you’re ready for fresh cookies!
What can I use instead of cream cheese frosting?
If cream cheese frosting isn’t your thing, try vanilla buttercream or even a simple glaze. Both will add a delicious touch to your cookies!
How should I store these cookies?
Keep your Red Velvet Cupcake Cookies in an airtight container at room temperature. They’ll stay fresh for about a week—if they last that long!
Can I freeze these cookies?
Yes! These cookies freeze well. Just place them in a single layer in a freezer-safe container. They can last up to 3 months in the freezer.
What’s the best way to serve these cookies?
Serve them warm with a dollop of frosting on top, or pair them with a scoop of ice cream for a delightful dessert experience. Enjoy!
Final Thoughts
Baking these Red Velvet Cupcake Cookies is more than just a culinary task; it’s an experience filled with joy and creativity.
The vibrant color and rich flavor bring a sense of celebration to any occasion, whether it’s a casual family gathering or a festive party.
Each bite offers a delightful combination of soft cookie and creamy frosting, making it hard to resist going back for more.
So, roll up your sleeves, gather your ingredients, and let the sweet aroma fill your kitchen.
These cookies are sure to create lasting memories and smiles all around!