


As I stood in my cozy kitchen, the warm scent of rising dough wrapped around me like a favorite blanket. There’s something truly magical about crafting homemade English muffins—especially when they boast those perfect crannies, just begging to be filled with luscious butter or jam. This easy homemade English muffins recipe takes minimal effort and transforms any ordinary morning into a delightful feast. Not only will you impress your family with a fresh, warm alternative to store-bought options, but you’ll also delight in knowing exactly what’s in each fluffy bite. Whether you prefer whole milk or are exploring dairy-free alternatives, this recipe caters to all. Ready to dive into a world of delicious breakfasts? Let’s get started!

Why Are Crannies So Important?
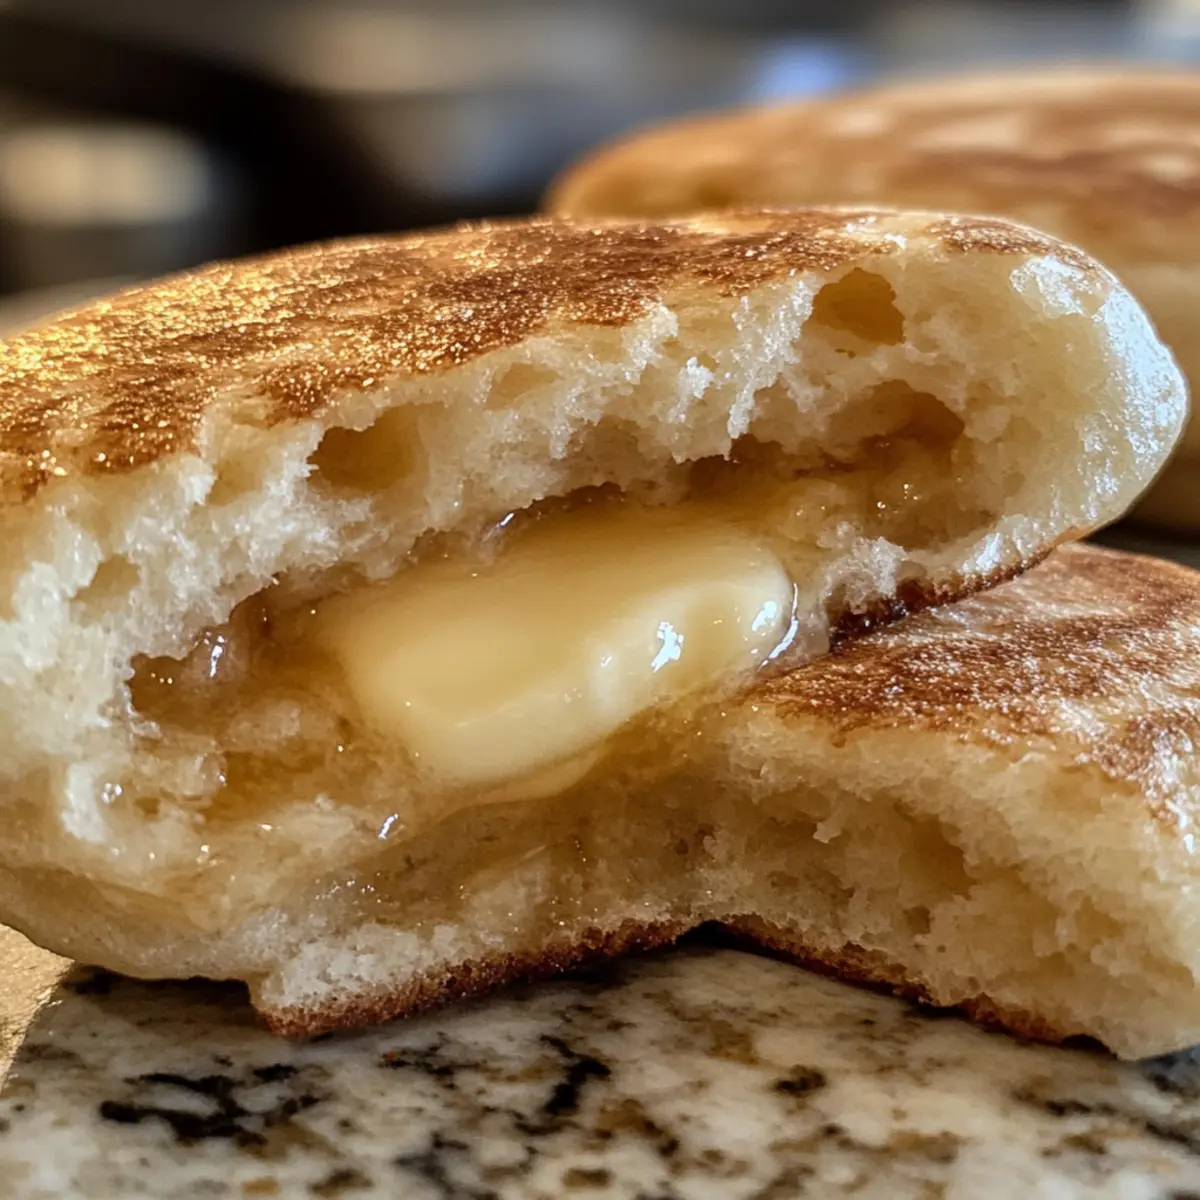
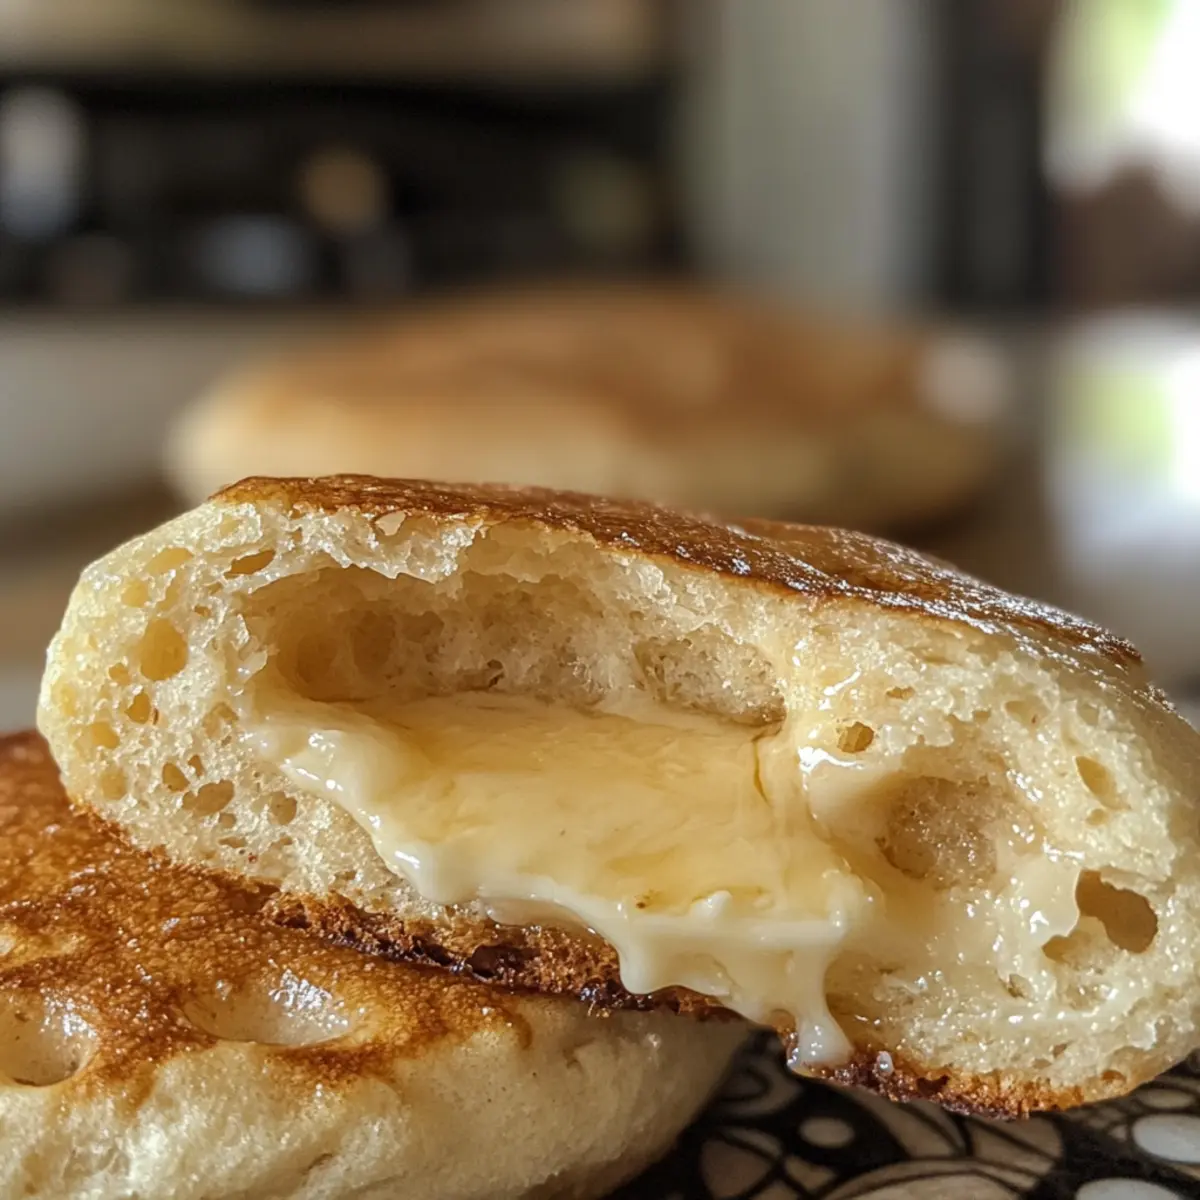
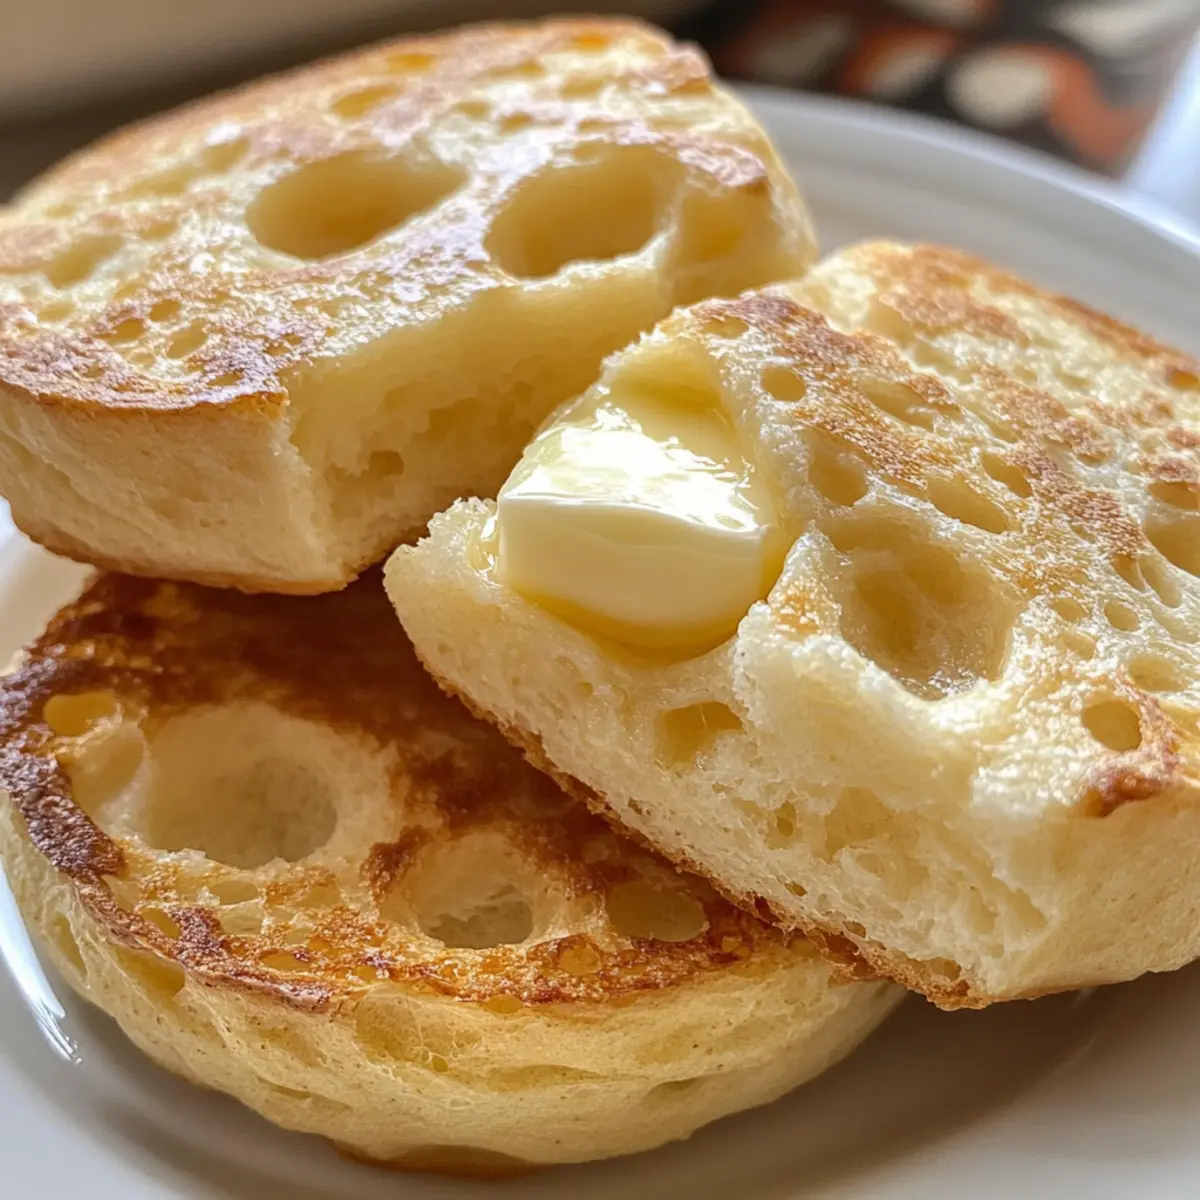
Perfect Crannies: These muffins aren’t just about good looks; their unique texture gives them the ability to hold toppings like butter and jam beautifully.
Homemade Goodness: Making your own muffins means you control every ingredient, ensuring freshness and quality that store-bought versions can’t match.
Flexibility & Customization: Whether you opt for whole milk or non-dairy alternatives, you can easily tailor this recipe to suit your dietary preferences.
Time-Saving Delight: With a simple process and few ingredients, you can whip up these English muffins in no time, perfect for a leisurely weekend breakfast or a quick weekday treat.
Endless Topping Options: From sweet jams to savory spreads, these muffins invite creativity—try pairing them with avocado or even use them as the base for breakfast sandwiches!
Impressive Crowd-Pleaser: Your family and friends will be wowed when you serve them warm, homemade English muffins that rival their favorite café treats, making any gathering special.
Muffins with Perfect Crannies Ingredients
For the Batter
- Whole Milk – Provides richness and activates yeast; substitute with warm almond or oat milk for a vegan option.
- Active Dry Yeast – Essential for rising; you can use instant yeast without proofing if you’re in a hurry.
- All-Purpose Flour – Offers versatility in texture; for added nutrition, mix half with whole wheat flour.
- Unsalted Butter – Adds a delicious richness; replace with the same amount of vegetable oil for a dairy-free version.
- Cornmeal or Semolina – Prevents sticking when cooking; alternatively, use flour or parchment paper.
Enjoy crafting these delightful muffins with perfect crannies, ready to hold all your favorite toppings!
Step‑by‑Step Instructions for Muffins with Perfect Crannies
Step 1: Prepare the Yeast Mixture
In a small bowl, combine 1 cup of warm whole milk (about 110°F), 2 tablespoons of sugar, and 2¼ teaspoons of active dry yeast. Stir gently to mix, then let it sit for 5-10 minutes until the mixture becomes frothy and bubbly—a sign that your yeast is active and ready to work its magic for your muffins with perfect crannies.
Step 2: Mix the Dry Ingredients
In a large mixing bowl, whisk together 2½ cups of all-purpose flour and 1 teaspoon of salt. Create a well in the center and pour in the melted 3 tablespoons of unsalted butter along with the foamy yeast mixture. Stir until a shaggy dough forms and you can see the first signs of those delightful crannies starting to emerge.
Step 3: Knead the Dough
Dust a clean surface with flour and transfer the shaggy dough onto it. Knead the dough for 6-8 minutes, adding a bit more flour if it feels sticky. Your goal is to achieve a smooth, elastic texture that springs back when you poke it; this step is essential for ensuring your muffins have those inviting crannies.
Step 4: First Rise
Place the kneaded dough into a lightly oiled bowl, turning it to coat in oil. Cover the bowl with a clean kitchen towel and let it rise in a warm spot until it doubles in size, about 1-1.5 hours. You’ll know it’s ready when the dough has ballooned and looks fluffy, promising those perfect crannies to come.
Step 5: Shape the Muffins
Once the dough has risen, punch it down gently to release air, then roll it out on a floured surface to about ½ inch thick. Use a round cutter to cut out circles and place them on a baking sheet dusted with cornmeal or semolina. Let them rise again for 30 minutes to allow the gluten to relax, setting the stage for the airy texture.
Step 6: Cook the Muffins
Preheat a skillet over low to medium-low heat. Carefully place 4-5 muffins at a time in the skillet, cooking for 7-8 minutes on each side. Look for a golden-brown color and a nice crust forming. Patience is key here; cooking too fast can lead to doughy centers, while slower cooking enhances those beloved crannies.
Step 7: Cool Down and Serve
Transfer the cooked muffins to a wire rack to cool completely. When cool enough, slice each muffin carefully with a fork to reveal the perfect crannies inside. Toast them lightly if desired, and then indulge with your favorite toppings—these delightful muffins with perfect crannies are a heavenly treat any time of day!
Expert Tips for Muffins with Perfect Crannies
-
Check Yeast Freshness: Ensure your yeast is active before use. If your mixture doesn’t foam, it may be expired, leading to flat muffins.
-
Kneading Matters: Knead the dough until it is smooth and elastic. This step is crucial for developing gluten, ensuring those perfect crannies form.
-
Watch the Temperature: Cooking on low to medium-low heat is essential. This prevents burning while allowing the muffins to cook evenly without doughy centers.
-
Rising Time: Be patient during the rising process. Don’t rush it; letting the dough rise until it doubles ensures fluffy muffins with the right texture.
-
Cool and Slice: Allow the muffins to cool before slicing with a fork. This preserves the crannies and makes for a perfect, airy texture ready for toppings.
Muffins with Perfect Crannies Variations
Feel free to personalize this recipe and explore exciting flavor combinations that will elevate your homemade English muffins!
-
Whole Wheat Twist: Replace half of the all-purpose flour with whole wheat for a nuttier flavor and added nutrition. You’ll enjoy a heartier muffin that complements savory toppings beautifully.
-
Dairy-Free Delight: Swap whole milk for warm almond or coconut milk to create a delicious vegan version. These non-dairy alternatives will still yield those coveted crannies while accommodating dietary needs.
-
Flavor-Infused Muffins: Add a teaspoon of cinnamon or nutmeg right into the dry ingredients for a warm, aromatic touch. This spice infusion will create an inviting aroma that fills your home with cozy charm.
-
Savory Spin: Mix in chopped herbs like rosemary or thyme and small cheese chunks into the dough for a gourmet touch. These muffins become an excellent base for savory sandwiches or alongside soups.
-
Extra Crunch: Sprinkle some sesame seeds or poppy seeds on top before cooking for added texture and flavor. This delightful addition brings a satisfying crunch that pairs wonderfully with spreads.
-
Fruit-Filled Fun: Toss in dried cranberries, blueberries, or chopped apples to introduce a delightful burst of sweetness. These fruity additions can make your muffins a fantastic snack or breakfast treat.
-
Spicy Kick: Add a pinch of cayenne pepper or black pepper to the dry ingredients for a surprising heat. This subtle spice will give your muffins an exciting twist sure to wake up your taste buds!
As you explore these variations, consider pairing your irresistible muffins with delicious options like classic butter, vibrant fruit jams, or even creamy avocado and poached eggs. For more delightful dishes to accompany your creations, don’t forget to check out Garlic Breadsticks Olive or try something exciting like Hot Honey Heat to make meal times even more special!
How to Store and Freeze Muffins with Perfect Crannies
Room Temperature: Store your muffins with perfect crannies in an airtight container at room temperature for up to 2 days. This keeps them soft and fresh.
Fridge: If you plan to extend their shelf life, these muffins can be stored in the fridge for up to 5 days. Just ensure they are tightly wrapped to prevent them from drying out.
Freezer: For longer storage, freeze the muffins for up to 3 months. Wrap each muffin individually in plastic wrap and place them in a freezer-safe bag.
Reheating: To enjoy them warm, toast frozen muffins directly from the freezer for a crispy exterior and soft interior or thaw overnight in the fridge before toasting.
What to Serve with Easy Homemade English Muffins
There’s nothing quite like enjoying your homemade muffins fresh from the skillet, warm and inviting, as you prepare a delicious spread to complement them.
- Scrambled Eggs: Fluffy scrambled eggs add a rich, buttery flavor that sits perfectly atop your English muffins, making for a hearty breakfast.
- Avocado Smash: Creamy avocado smeared on warm muffins introduces a delightful contrast of textures, plus it’s packed with healthy fats.
- Berry Compote: A sweet and tangy berry compote provides a vibrant burst of flavor that pairs irresistibly with the muffins’ nooks.
- Honey Butter: Whipped honey butter creates a decadent sweetness that effortlessly melds with the muffins’ warm, toasted surfaces.
- Smoked Salmon: Adding slices of smoked salmon gives a luxurious touch, turning your muffins into an elegant brunch delight.
- Maple Syrup: Drizzling maple syrup transforms your English muffins into a sweet treat, perfect for an indulgent breakfast or brunch.
- Herbed Cream Cheese: A spread of herbed cream cheese elevates the experience, providing a creamy, savory element that enhances every bite.
- Fruit Salad: A refreshing fruit salad on the side cleanses the palate and offers a light, nutritious contrast to the rich muffins.
- Chai Latte: Pair your homemade muffins with a warm chai latte. The spices echo the comfort of your kitchen and complement the flavors beautifully.
Make Ahead Options
These English muffins with perfect crannies are a fantastic choice for meal prep enthusiasts looking to save time during busy mornings! You can shape the dough after the first rise, cover it tightly, and refrigerate for up to 24 hours. This method slows the yeast reaction, ensuring fluffiness when you cook them. When you’re ready to enjoy your homemade muffins, simply let the dough sit at room temperature for about 30 minutes before cooking, which will help revive their rise. Just remember to keep them covered to prevent drying out! By preparing the dough in advance, you’ll enjoy fresh, warm English muffins with minimal effort on the day you want them.
Muffins with Perfect Crannies Recipe FAQs
How do I know if my ingredients are fresh enough for this recipe?
Absolutely! To ensure your English muffins with perfect crannies turn out great, check the yeast freshness first. If the yeast mixture doesn’t foam after 5-10 minutes, it may be expired. For flour and milk, look for no signs of spoilage; both should be stored in cool, dry places for best quality.
How should I store my homemade English muffins?
These muffins with perfect crannies can be stored at room temperature in an airtight container for up to 2 days. For longer freshness, place them in the refrigerator for 4-5 days, ensuring they are tightly wrapped to avoid drying out.
Can I freeze my English muffins, and if so, how?
Very! To freeze your muffins, wrap each one individually in plastic wrap, then place them in a freezer-safe bag. This prevents freezer burn and keeps them fresh for up to 3 months. When you’re ready to enjoy, toast them straight from the freezer for a lovely warm treat or let them thaw overnight in the fridge before toasting.
What if my dough isn’t rising properly?
If your dough isn’t rising, the yeast might not be active. Check the yeast’s expiration date, and make sure your warm milk wasn’t too hot or cold. Optimal temperature for the yeast to activate is around 110°F. If it fails to foam, it’s best to start again with new yeast, as this is crucial for your muffins to reach their perfect airy texture.
Are there any dietary considerations I should be aware of?
Absolutely! This recipe is flexible; you can easily swap whole milk for warm almond or oat milk for a dairy-free version. Moreover, if you or someone you’re serving has allergies, check all ingredients—especially in pre-packaged items like butter or any added toppings—to ensure they’re safe for everyone.
Muffins with Perfect Crannies: Your New Homemade Bliss
Ingredients
Equipment
Method
- Prepare the yeast mixture by combining warm milk, sugar, and active dry yeast in a bowl. Let it sit for 5-10 minutes until frothy.
- Mix together the flour and salt in a bowl. Make a well in the center and add melted butter and yeast mixture. Stir until shaggy dough forms.
- Knead the dough on a floured surface for 6-8 minutes until smooth and elastic.
- Place dough in a lightly oiled bowl, cover, and let rise until doubled in size, about 1-1.5 hours.
- Punch down the dough, roll out to ½ inch thick, cut circles, and let rise again for 30 minutes.
- Cook muffins on a preheated skillet over low to medium-low heat for 7-8 minutes on each side until golden brown.
- Cool muffins on a wire rack, slice carefully with a fork, and serve with your favorite toppings.