


“Did you hear that crunch?” I exclaimed as the first bite of my freshly baked Muffin Tin Meat Pie filled my mouth with warmth and flavor. These delightful little morsels evoke cherished memories of family dinners and gatherings, making them the perfect comfort food for any night of the week. What I love most about these easy Muffin Tin Meat Pies is that they come together quickly, turning a hectic evening into a cozy culinary experience with just a few simple steps. Plus, they’re incredibly customizable—whether you crave a zesty BBQ twist or a classic chicken pot pie vibe, the possibilities are endless! Trust me, these freezer-friendly bites will become a staple in your home, delighting your family with every flaky, cheesy bite. Ready to learn how to bring this heartwarming recipe into your kitchen? Let’s dive in!
Why are Muffin Tin Meat Pies a must-try?
Convenience at Its Best: With just a few ingredients and minimal prep time, you can whip up a delicious meal in no time.
Flavor-packed: Each bite is bursting with savory goodness from tender beef and melted cheese, sure to satisfy your cravings!
Versatile Creations: Whether you’re in the mood for BBQ Meat Pies or a comforting Chicken Pot Pie Style, the variations are endless!
Freezer-friendly: Prepare a batch, and store them for later—perfect for busy weeknights!
Family Favorite Appeal: These individual pies are perfect for kids and adults alike, making dinner a fun and interactive experience.
Elevate your comfort food game and enjoy these delightful snacks alongside a refreshing salad or some mashed potatoes! I promise, these Muffin Tin Meat Pies will become a cherished recipe in your collection.
Muffin Tin Meat Pies Ingredients
• Discover the key ingredients for your comforting Muffin Tin Meat Pies!
For the Filling
- Ground Beef – The heart of the recipe; you can swap it for ground turkey or chicken for a lighter touch.
- Onion – Adds natural sweetness and depth; yellow or white onions work beautifully.
- Frozen Mixed Vegetables – A quick way to add nutrition; feel free to use fresh veggies for a vibrant twist.
- Garlic – Infuses flavor into the filling; garlic powder is a convenient alternative if you’re short on fresh.
- Worcestershire Sauce – Introduces a savory umami depth to your meat mixture.
- Tomato Paste – Provides richness and helps thicken the filling.
- Cheddar Cheese – For that creamy, savory goodness; opt for sharp cheddar for a bolder flavor.
For the Crust
- Refrigerated Pie Crusts – Simplifies the process and saves time; homemade crust is lovely if you have time to spare.
- Salt and Pepper – Essential for enhancing all your flavors.
- Paprika – Adds a mild smokiness that complements the filling perfectly.
Get ready to bring the warmth and joy of these Muffin Tin Meat Pies to your kitchen!
Step‑by‑Step Instructions for Muffin Tin Meat Pies
Step 1: Preheat and Prepare the Muffin Tin
Preheat your oven to 375°F (190°C) and grease a 12-cup muffin tin with cooking spray or butter for easy removal later. Ensuring a well-greased pan will help your Muffin Tin Meat Pies come out perfectly golden and intact.
Step 2: Sauté the Onions
In a large skillet, heat a drizzle of olive oil over medium heat. Once hot, add diced onions and sauté until they become translucent and start to soften, about 3–5 minutes. The sweet aroma of the onions will fill the kitchen and set the flavor base for your savory filling.
Step 3: Add the Garlic
Stir in minced garlic with the sautéed onions, cooking for an additional 1–2 minutes until fragrant. Keep an eye on the garlic as it can burn quickly—your goal is to soften it and draw out its robust flavors to enhance the filling of your Muffin Tin Meat Pies.
Step 4: Brown the Ground Beef
Incorporate the ground beef into the skillet, breaking it apart with a spatula. Cook the beef for about 5–7 minutes until fully browned and no pink remains. Make sure to drain any excess grease, ensuring your filling remains deliciously hearty without being too greasy.
Step 5: Stir in Flavor Enhancers
Add tomato paste, Worcestershire sauce, and paprika to the cooked beef mixture. Stir well to combine and let the flavors meld for about 2–3 minutes on low heat. You’ll notice the mixture thickening, creating a rich and savory filling that will make your Muffin Tin Meat Pies irresistible.
Step 6: Mix in the Vegetables
Toss in the frozen mixed vegetables and stir them into the meat mixture. Cook for an additional 3–4 minutes until the vegetables are heated through. They add a pop of color and nutrition, making your Muffin Tin Meat Pies not only tasty but also vibrant and wholesome.
Step 7: Prepare the Pie Crusts
Roll out your refrigerated pie crusts on a clean surface and use a round cutter or a glass to cut circles that fit the muffin cups. Aim for about 4 inches in diameter for perfect muffin-sized crusts. The crust will cradle all the delicious filling, so aim for a neat and uniform cut as you prep for the Muffin Tin Meat Pies.
Step 8: Assemble the Meat Pies
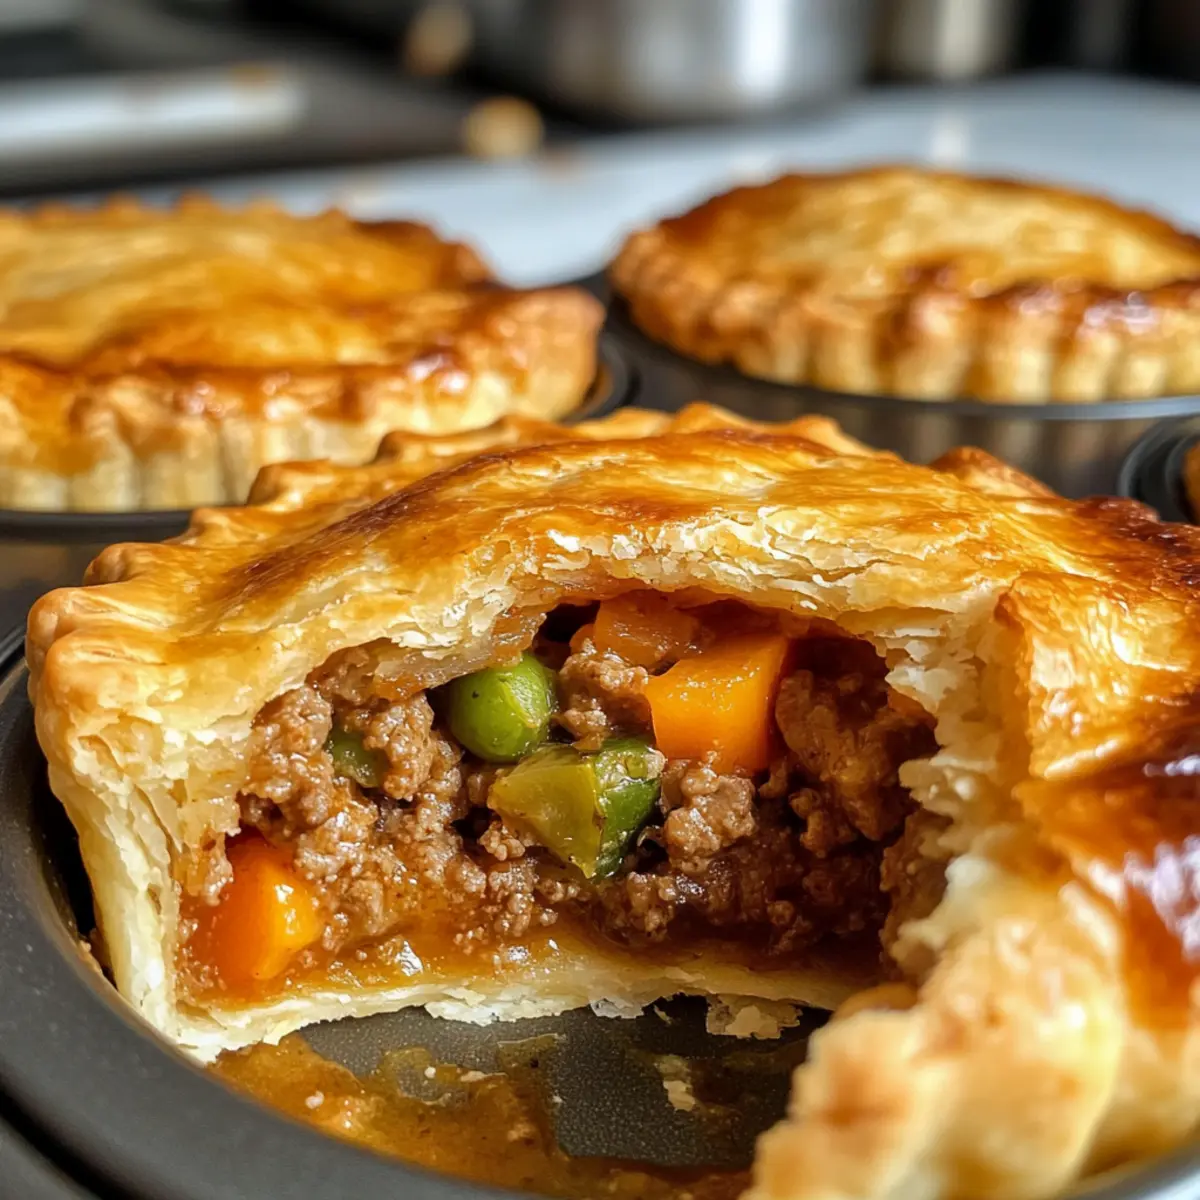
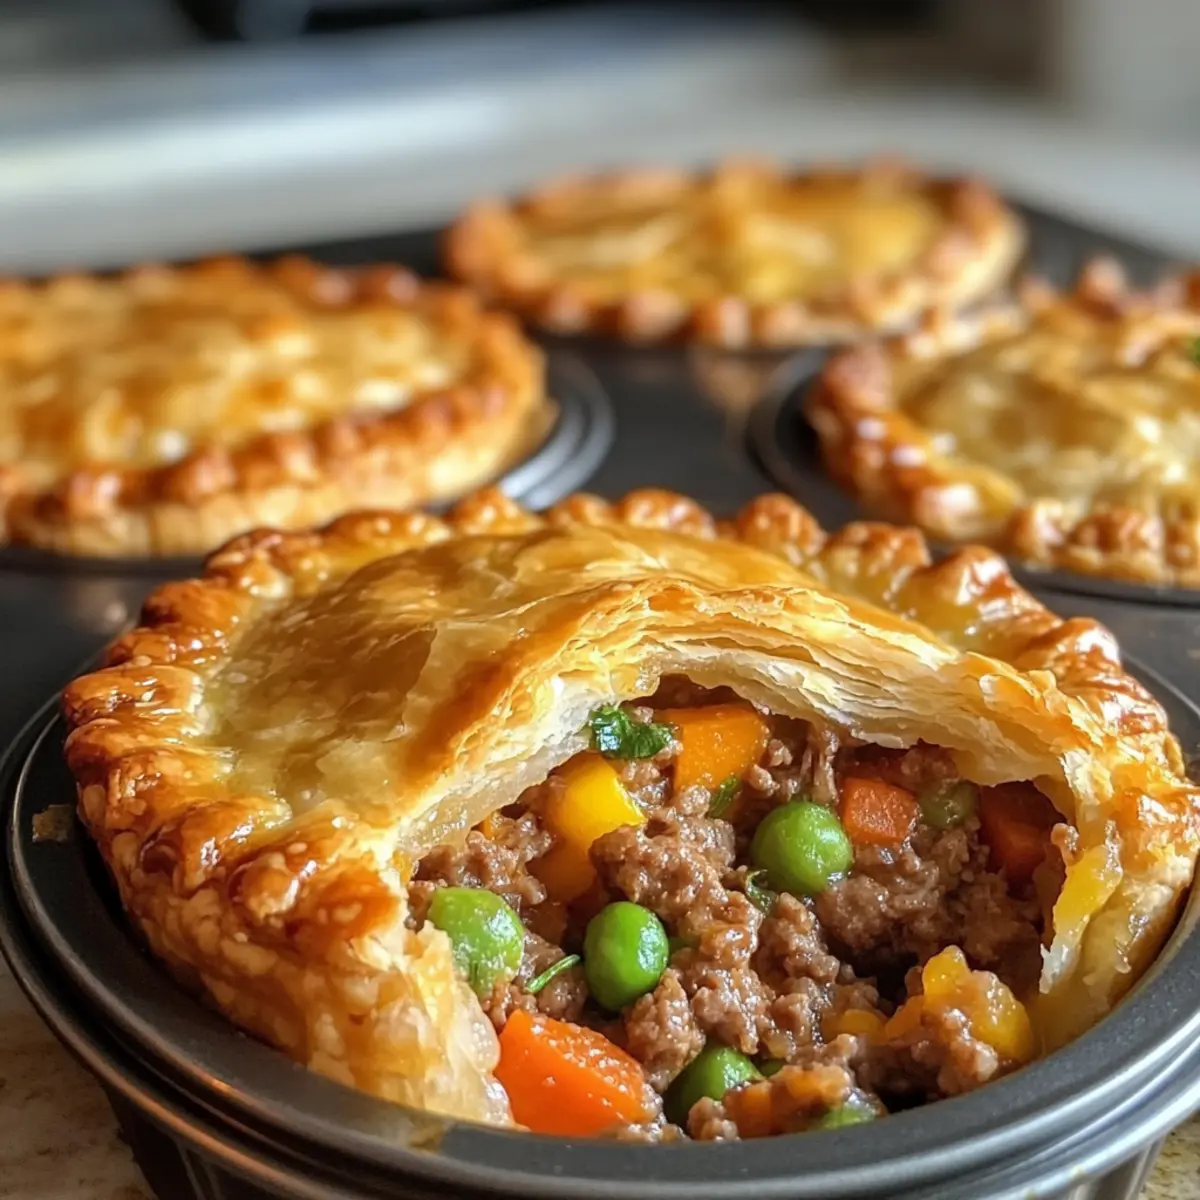
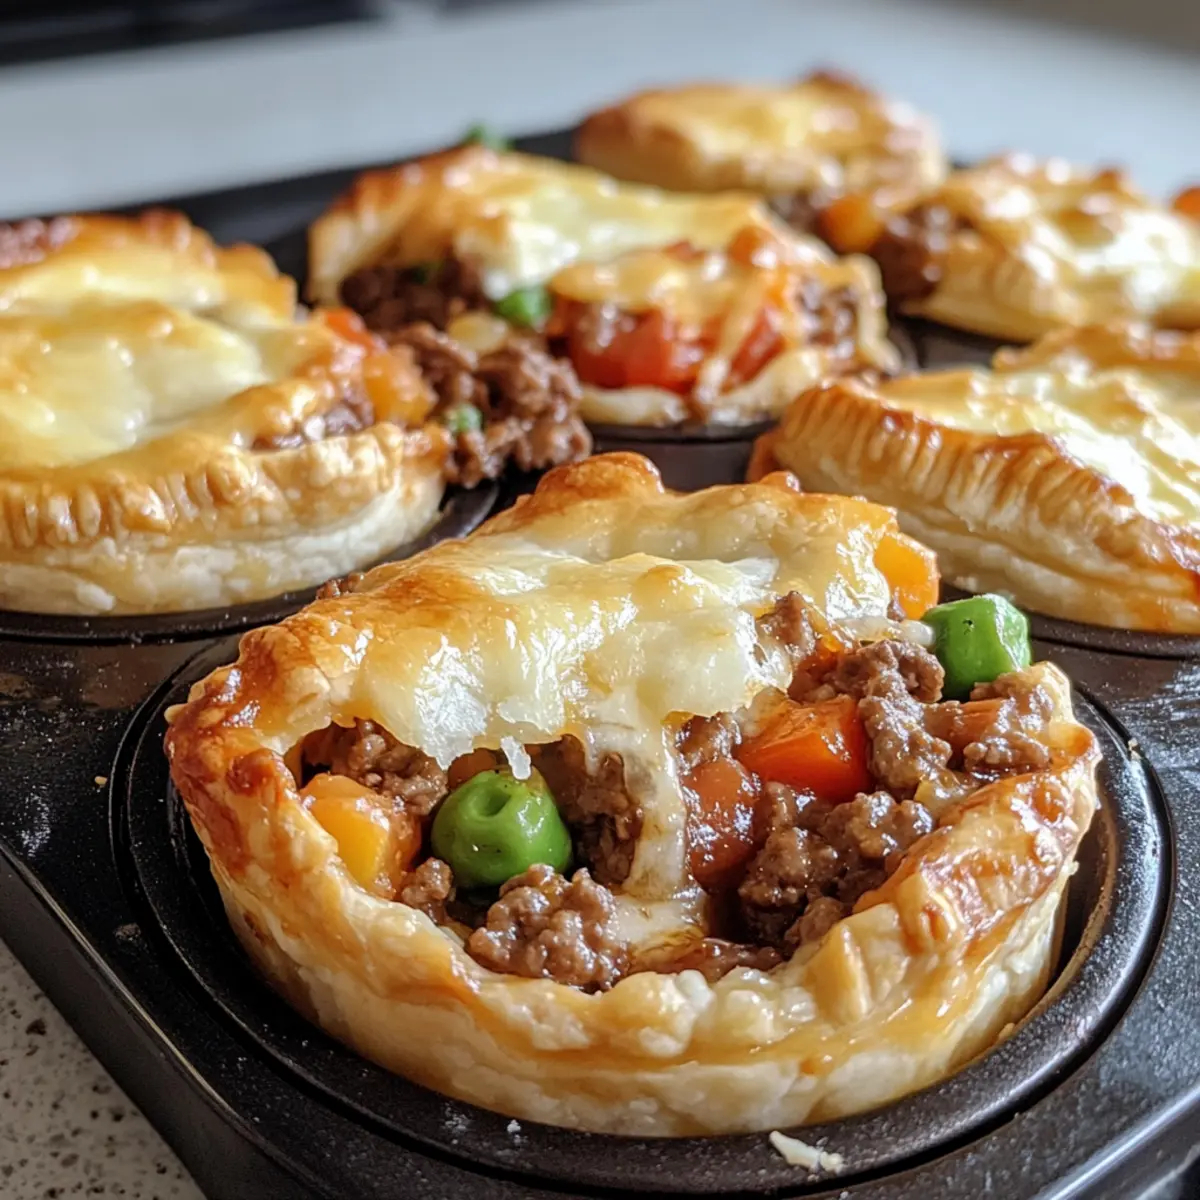
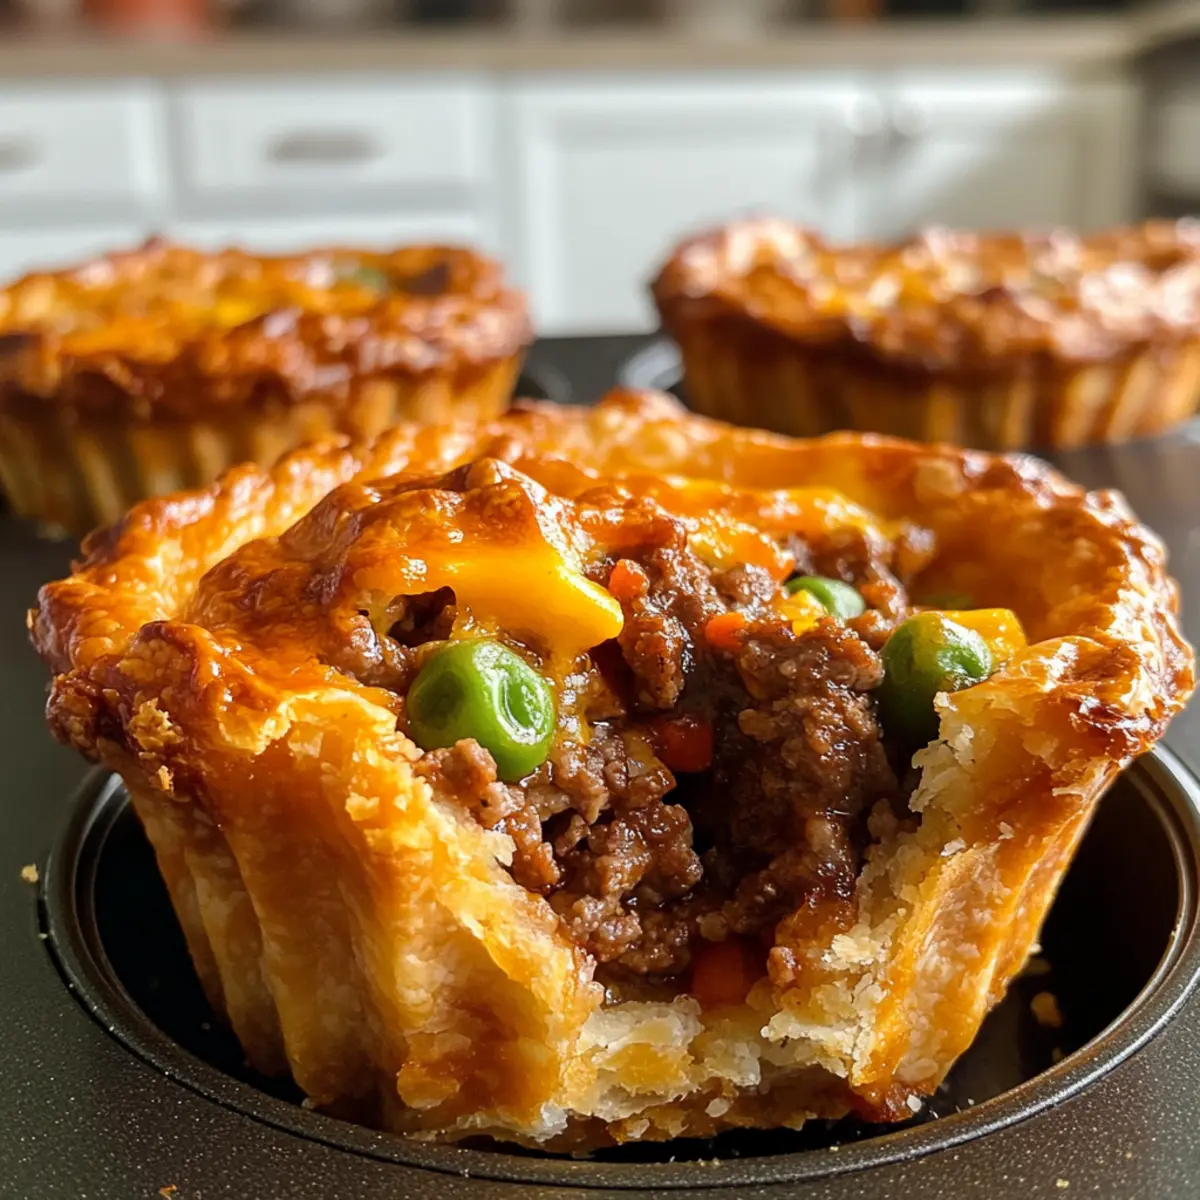
Gently place the dough circles into the greased muffin cups, pressing against the sides. Spoon the meat and vegetable filling generously into each pie crust, but be careful not to overfill. Top each filled crust with a sprinkle of shredded cheddar cheese, making them extra delicious and cheesy.
Step 9: Top with Crust and Seal
Using remaining pie crust, cut out smaller circles to cover your filled pies. Place these rounds on top and press the edges together to seal. Remember to cut small steam vents in the tops to allow steam to escape, preventing any overflow during baking of your Muffin Tin Meat Pies.
Step 10: Bake for Golden Perfection
Brush the tops of the pies with a beaten egg for a golden finish. Now, bake your Muffin Tin Meat Pies in the preheated oven for 20–25 minutes or until the tops are golden brown and the edges are flaky. Keep an eye on them as they bake, and enjoy the delightful aroma wafting through your kitchen.
Step 11: Cool and Serve
After baking, let the Muffin Tin Meat Pies cool for about 5 minutes in the tin. This allows the filling to set a little, making them easier to remove. Use a spoon to carefully lift each pie out of the tin, and serve them warm for a comforting and satisfying meal.
Expert Tips for Muffin Tin Meat Pies
-
Cool the Filling: Allow the meat mixture to cool slightly before filling the crusts. This helps prevent soggy bottoms and makes assembly easier.
-
Steam Vents Are Key: Don’t skip cutting steam vents on the tops of your Muffin Tin Meat Pies. This step is crucial to avoid overflow during baking!
-
Use Quality Cheese: Opt for sharp cheddar cheese for a more flavorful experience. A good cheese can elevate your meat pies to a whole new level!
-
Pre-assemble for Convenience: You can prepare unbaked Muffin Tin Meat Pies in advance and refrigerate for up to 24 hours. A great time-saver for busy weeknights!
-
Watch the Bake Time: Keep an eye on your pies as they bake since oven temperatures can vary. You want them golden brown but not overdone!
What to Serve with Muffin Tin Meat Pies
Transform your hearty Muffin Tin Meat Pies into a full meal with these delightful sides and toppings that will elevate your dining experience!
-
Creamy Mashed Potatoes: The rich, velvety texture pairs beautifully with the flaky pastry, creating a comforting combo that’s hard to resist. Drape them in gravy for a touch of elegance.
-
Mixed Green Salad: A refreshing contrast to the savory meat pies, this salad brings crisp textures and vibrant colors to your plate. Toss in some cherry tomatoes and a zesty vinaigrette for an extra zing!
-
Roasted Vegetables: Sweet, caramelized veggies add layers of flavor and nutrition, balancing the richness of the pies perfectly. Try a mix of seasonal favorites like carrots, bell peppers, and zucchini.
-
Gravy: A side of warm, savory gravy takes your meat pies to the next level, enhancing moisture and flavor. Dip and savor each bite for a full and satisfying experience.
-
Coleslaw: Light and crunchy, coleslaw brings a refreshing crunch that complements the warm, savory filling. The tangy dressing offers a delightful contrast to the richness of the pies.
-
Cheesy Garlic Bread: This comforting addition is perfect for soaking up any juices while providing a delicious cheesy element. It’s sure to satisfy garlic lovers and pie enthusiasts alike!
-
Apple Crisp: For a sweet finish, serve warm apple crisp with a scoop of vanilla ice cream. The sweet, crunchy topping offers a delightful contrast to your savory meal, rounding everything off perfectly.
These pairings will ensure that your Muffin Tin Meat Pies are not just a meal, but a delightful culinary experience for everyone at the table!
Make Ahead Options
These Muffin Tin Meat Pies are perfect for meal prep! You can prepare the filling (ground beef, vegetables, and seasonings) up to 3 days in advance and store it in an airtight container in the refrigerator, keeping all the savory flavors intact. For best results, let the filling cool before refrigerating to avoid condensation. You can also assemble the unbaked pies and refrigerate them for up to 24 hours before baking. When you’re ready to enjoy, simply preheat the oven and brush the tops with a beaten egg, then bake as directed. These make-ahead options save you time while ensuring fresh, delicious meals that your family will love!
How to Store and Freeze Muffin Tin Meat Pies
Fridge: Store cooled Muffin Tin Meat Pies in an airtight container for up to 4 days. This keeps them fresher, ready for quick reheating whenever cravings strike.
Freezer: For longer storage, individually wrap the pies in plastic wrap and freeze for up to 3 months. They make perfect grab-and-go meals!
Thawing: Thaw frozen Muffin Tin Meat Pies in the refrigerator overnight before reheating, ensuring they stay flavorful and moist.
Reheating: To enjoy, warm up in the oven at 350°F (175°C) for about 15-20 minutes, or until heated through, ensuring that every bite is deliciously comforting.
Muffin Tin Meat Pies: Customization Galore!
Feel free to explore and personalize the recipe to cater to your taste buds and dietary needs!
- BBQ Meat Pies: Add your favorite barbecue sauce to the meat mixture for a sweet and smoky flavor that brings a summer grill party straight to your table.
- Chicken Pot Pie Style: Swap ground beef for shredded chicken and stir in cream of chicken soup, along with extra veggies for a cozy twist that pays homage to a classic favorite.
- Low Carb Option: Ditch the crust and layer thin zucchini slices at the bottom, creating a keto-friendly version that doesn’t compromise on flavor. The added veggies give a delightful texture!
- Spicy Taco Meat Pies: Mix in taco seasoning and top with pepper jack cheese for a zesty, warm kick. The playful spices will dance on your palate, making dinnertime exciting!
- Vegetarian Delight: Substitute the meat with lentils or mushrooms, complemented by a medley of your favorite vegetables and seasonings for a savory, satisfying filling.
- Herb-Infused: Sprinkle in fresh herbs like thyme or rosemary to elevate the flavor profile for a delightful aromatic twist in each bite. Fresh herbs can truly transform your muffins into a gourmet experience!
- Cheesy Varieties: Experiment with different cheeses like goat cheese or mozzarella for creamy goodness that alters the taste profile entirely. Go cheesy—that’s never a bad choice!
- Sweet & Savory: Add a pinch of cinnamon to the meat mixture for a subtle warmth that contrasts beautifully against the savory elements—perfect for a unique flavor surprises your family will love!
For some delicious pairings, consider serving these tasty pies with a vibrant side salad or creamy mashed potatoes. And if you’re in the mood for a comforting soup, check out Potsticker Soup Comforting or White Cabbage Gratin. Happy cooking!
Muffin Tin Meat Pies Recipe FAQs
What type of meat works best for Muffin Tin Meat Pies?
Absolutely! While ground beef is the classic choice for these savory pies, you can easily switch it up with ground turkey or chicken for a lighter option. If you prefer a vegetarian version, try using lentils or mushrooms as a filling instead!
How should I store leftover Muffin Tin Meat Pies?
Very! Store your cooled Muffin Tin Meat Pies in an airtight container in the fridge for up to 4 days. If you want to keep them longer, individually wrap each pie in plastic wrap and freeze them for up to 3 months. This makes for easy meal prep and delicious, quick dinners!
Can I freeze Muffin Tin Meat Pies? If so, how?
Of course! To freeze your Muffin Tin Meat Pies, follow these steps:
- Allow the pies to cool completely after baking.
- Wrap each pie individually in plastic wrap or aluminum foil.
- Place the wrapped pies in a freezer-safe bag or container.
This way, they can last up to 3 months in the freezer. Just remember to thaw them overnight in the refrigerator before reheating!
How do I prevent my Muffin Tin Meat Pies from being soggy?
Great question! To keep your pies from becoming soggy, it’s crucial to allow the meat filling to cool slightly before filling the crusts. This helps to prevent moisture from seeping into the crust. Additionally, make sure to use refrigerated pie crusts, as homemade versions can sometimes absorb moisture more quickly.
What if I have allergies or dietary restrictions?
The more the merrier! If you’re accommodating allergies or dietary preferences, you can make Muffin Tin Meat Pies gluten-free by using gluten-free pie crusts. For dairy-free options, substitute the cheese with non-dairy alternatives or omit it entirely. Always double-check ingredient labels to ensure they meet your dietary needs.
How long does it take to bake Muffin Tin Meat Pies?
Typically, your Muffin Tin Meat Pies will need to bake for about 20-25 minutes at 375°F (190°C) until they’re golden brown and flaky. If you notice they’re browning too quickly, you can always cover them loosely with foil for the last few minutes to prevent over-baking. Enjoy!
Muffin Tin Meat Pies: Savory Comfort Food Made Easy
Ingredients
Equipment
Method
- Preheat your oven to 375°F (190°C) and grease a 12-cup muffin tin.
- In a large skillet, heat olive oil over medium heat, add diced onions and sauté until translucent, about 3–5 minutes.
- Add minced garlic with the onions and cook for an additional 1–2 minutes until fragrant.
- Incorporate the ground beef, breaking it apart, and cook until browned, about 5–7 minutes.
- Add tomato paste, Worcestershire sauce, and paprika, stirring well and cooking for another 2–3 minutes.
- Stir in the frozen mixed vegetables and cook for 3–4 minutes until heated through.
- Roll out the pie crusts and cut circles to fit the muffin cups.
- Place circles into the muffin cups, fill with the meat mixture, and top with shredded cheddar cheese.
- Cover filled pies with smaller circles of dough, sealing the edges and cutting steam vents on top.
- Brush the pies with a beaten egg and bake for 20–25 minutes until golden brown.
- Let cool for 5 minutes in the tin before serving.