There’s something magical about dessert that brings people together, and this Marshmallow Cheesecake is no exception. I remember the first time I made it; the kitchen filled with sweet aromas, and my family gathered around, eager to taste. This creamy delight is perfect for any occasion, whether you’re celebrating a birthday or just want to treat yourself after a long day. With its no-bake simplicity, it’s a quick solution for busy days, yet it impresses everyone at the table. Trust me, once you try this recipe, it will become a staple in your dessert repertoire!
Why You’ll Love This Marshmallow Cheesecake
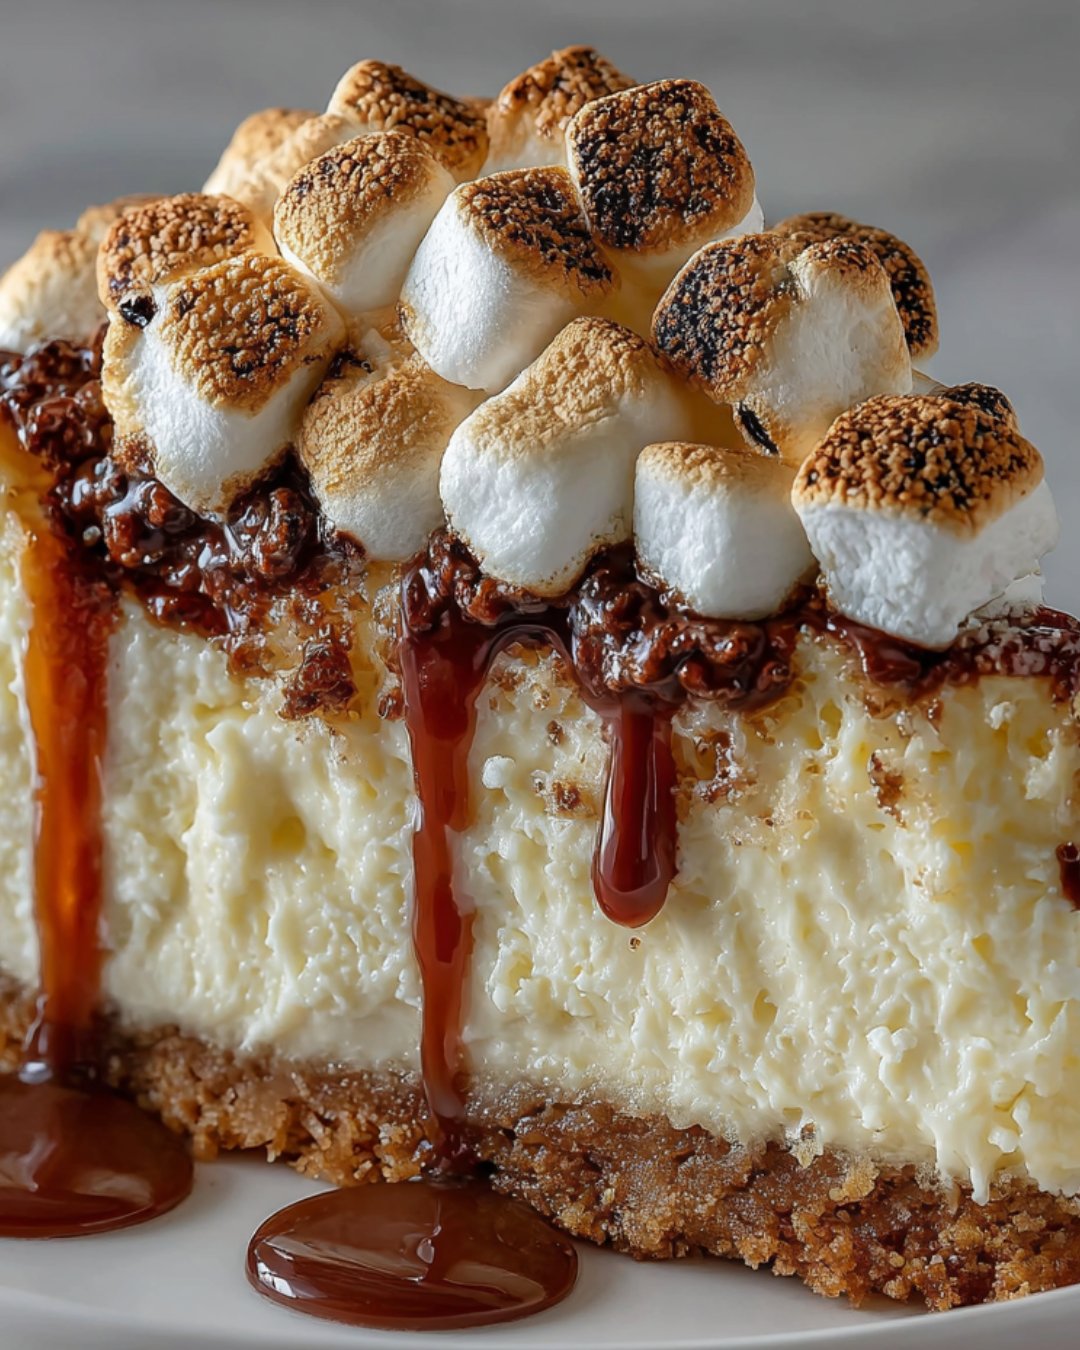
This Marshmallow Cheesecake is a game-changer in the dessert world. It’s incredibly easy to whip up, taking just 20 minutes of your time. The creamy texture and sweet marshmallow flavor will have your taste buds dancing. Plus, it’s a no-bake recipe, so you can skip the oven and avoid the heat. Perfect for impressing guests or satisfying your sweet tooth, this cheesecake is sure to become a favorite!
Ingredients for Marshmallow Cheesecake
Gathering the right ingredients is the first step to creating this delightful Marshmallow Cheesecake. Here’s what you’ll need:
Cream cheese: The base of our cheesecake, it adds a rich and creamy texture.
Marshmallow fluff: This sweet, gooey goodness gives the cheesecake its signature flavor and lightness.
Powdered sugar: A touch of sweetness that blends smoothly into the mixture.
Vanilla extract: A splash of this aromatic essence enhances the overall flavor profile.
Heavy whipping cream: Whipped to perfection, it adds volume and a cloud-like texture.
Graham cracker crust: The perfect base, providing a crunchy contrast to the creamy filling.
Mini chocolate chips (optional): For those who crave a little extra sweetness and texture.
Mini marshmallows (for topping): These add a fun, decorative touch and a burst of marshmallow flavor.
For those looking to mix things up, consider adding a bit of cocoa powder for a chocolate twist or swirling in some fruit puree for a colorful presentation. You can find all the exact measurements at the bottom of the article, ready for printing!
How to Make Marshmallow Cheesecake
Creating this Marshmallow Cheesecake is a delightful journey that’s as easy as pie—well, easier! Follow these simple steps, and you’ll have a creamy dessert that will wow your friends and family.
Step 1: Prepare the Cream Cheese Mixture
Start by grabbing a large mixing bowl. Beat the softened cream cheese with an electric mixer until it’s smooth and creamy. This step is crucial; you want to avoid any lumps. The cream cheese should be at room temperature for the best results. Trust me, it makes a world of difference!
Step 2: Combine Ingredients
Next, add the marshmallow fluff, powdered sugar, and vanilla extract to the bowl. Mix everything together until it’s well combined and smooth. The sweetness of the marshmallow fluff will blend beautifully with the cream cheese, creating a luscious base for your cheesecake.
Step 3: Whip the Cream
In a separate bowl, whip the heavy cream until stiff peaks form. This means when you lift the beaters, the cream should hold its shape. It’s like magic watching it transform! Just be careful not to over-whip, or you’ll end up with butter instead of whipped cream.
Step 4: Fold in the Whipped Cream
Now comes the fun part! Gently fold the whipped cream into the cream cheese mixture. Use a spatula and a light hand to combine them without deflating the whipped cream. This step is key to achieving that airy, cloud-like texture that makes this cheesecake so special.
Step 5: Add Optional Ingredients
If you’re feeling adventurous, now’s the time to fold in those mini chocolate chips. They add a delightful crunch and a burst of chocolatey goodness. But if you prefer a classic flavor, feel free to skip this step!
Step 6: Pour into Crust
Carefully pour the cheesecake filling into the pre-made graham cracker crust. Use a spatula to spread it evenly. This is where the magic happens! The filling should look smooth and inviting, ready to be chilled.
Step 7: Chill the Cheesecake
Finally, refrigerate the cheesecake for at least 4 hours, or overnight for the best results. This chilling time allows the flavors to meld and the cheesecake to set properly. Patience is key here, but I promise it will be worth the wait!
Tips for Success
Ensure your cream cheese is at room temperature for easy mixing.
Use a rubber spatula to fold in the whipped cream gently.
Chill the cheesecake overnight for the best flavor and texture.
Experiment with toppings like fresh fruit or chocolate drizzle for a personal touch.
Keep an eye on the whipped cream; over-whipping can lead to butter!
Equipment Needed
Mixing bowls: A large bowl for the cream cheese mixture and a separate one for whipping cream. Any size will do!
Electric mixer: A hand mixer works great, but a stand mixer can save you some elbow grease.
Spatula: Essential for folding and spreading the cheesecake filling.
Measuring cups: For accurate ingredient portions, though you can eyeball it if you’re feeling adventurous!
Variations
Chocolate Marshmallow Cheesecake: Add 1/4 cup of cocoa powder to the cream cheese mixture for a rich chocolate flavor.
Fruit Swirl: Incorporate a fruit puree, like raspberry or strawberry, before chilling for a colorful and tangy twist.
Nutty Delight: Fold in crushed nuts, such as pecans or walnuts, for added crunch and flavor.
Gluten-Free Option: Use a gluten-free graham cracker crust to make this dessert suitable for gluten-sensitive friends.
Vegan Version: Substitute cream cheese with a vegan alternative and use coconut cream instead of heavy whipping cream for a plant-based treat.
Serving Suggestions
Pair your Marshmallow Cheesecake with a dollop of whipped cream for extra indulgence.
Serve alongside fresh berries, like strawberries or blueberries, for a refreshing contrast.
Drizzle with chocolate or caramel sauce for a decadent touch.
For drinks, consider a chilled glass of milk or a sweet dessert wine.
FAQs about Marshmallow Cheesecake
As you embark on your Marshmallow Cheesecake journey, you might have a few questions. Here are some common queries that can help you along the way:
Can I make this cheesecake ahead of time?
Absolutely! This no-bake cheesecake is perfect for making ahead. Just prepare it a day in advance and let it chill overnight. It will taste even better after the flavors have had time to meld.
How long can I store leftover cheesecake?
You can store any leftover Marshmallow Cheesecake in the refrigerator for up to 3 days. Just cover it tightly to keep it fresh. If you want to keep it longer, consider freezing it!
Can I use a different crust?
Of course! While a graham cracker crust is traditional, you can experiment with other options like an Oreo crust or a nut-based crust for a gluten-free version. The choice is yours!
What can I use instead of cream cheese?
If you’re looking for a dairy-free option, try using a vegan cream cheese alternative. It will give you a similar creamy texture without the dairy. Just make sure it’s a brand you enjoy!
Is this cheesecake suitable for kids?
Definitely! Kids love the sweet marshmallow flavor and creamy texture. Just keep an eye on the sugar content if you’re serving it to little ones. They might just ask for seconds!
Final Thoughts
Creating this Marshmallow Cheesecake is more than just whipping up a dessert; it’s about crafting sweet memories. Each slice is a celebration of flavors that brings smiles to faces, whether at a family gathering or a quiet night in. The joy of sharing this creamy delight with loved ones is unmatched. Plus, the no-bake aspect means less time in the kitchen and more time enjoying life. So, roll up your sleeves, gather your ingredients, and dive into this delightful recipe. I promise, every bite will remind you why dessert is the best part of any meal!