


Stepping into my kitchen, I can almost feel the vibrant energy of the bustling streets of the Middle East, where the sweet aroma of freshly baked Knafeh wafts through the air. This beloved dessert combines crispy kataifi dough with a creamy, cheese-filled interior, making it a delightful treat that I absolutely love to share. Not only is Knafeh a feast for the senses, but it also brings joy to any gathering with its rich flavors and beautifully layered texture. Plus, it’s easier to whip up than you might think, allowing you to impress your friends and family with minimal fuss. If you’re ready to embark on this delicious journey and transform your dessert repertoire, stay with me to discover how to create your very own Knafeh masterpiece. What’s your favorite way to indulge in sweet pastries?
Why is Knafeh a Must-Try Dessert?
Simplicity: This recipe is straightforward and doesn’t require advanced baking skills, perfect for home cooks at any level.
Irresistible Flavor: The combination of sweet cheese and fragrant rose water syrup creates an unforgettable taste that will leave everyone craving more.
Crowd-Pleaser: Whether you’re hosting a dinner party or enjoying a cozy night in, Knafeh will surely impress your guests—it’s a conversation starter!
Versatility: You can easily customize it with different nuts or flavored syrups, allowing you to make it uniquely yours.
Cultural Experience: Enjoying Knafeh is like taking a mini-vacation to the Middle East; it’s steeped in tradition and embodies the warmth of hospitality.
For a delightful flavor boost, consider using variations like orange blossom water for a unique twist!
Knafeh Ingredients
For the Syrup
• Water – Base for syrup; no substitutions needed.
• Granulated Sugar – Sweetness for syrup; essential and cannot be substituted.
• Rose Water – Adds aromatic flavor; can substitute with orange blossom water for a different twist.
• Lemon Juice – Balances the sweetness; optional but recommended for depth.
For the Knafeh
• Kataifi Dough – Main structure for the dessert; ensure it’s thawed and moist—can substitute with filo, but expect a change in texture.
• Melted Butter – Adds richness and binds dough; salted gives more flavor, ghee is a suitable alternative.
• Sweet Cheese – Creamy filling; fresh mozzarella or a ricotta-mozzarella blend works well—ensure moisture is removed for best results.
For Toppings
• Crushed Pistachios – Adds texture and flavor; optional, can substitute with any preferred nuts.
• Kunafa Powdered Coloring (or food gel) – Optional for enhancing the color of your dough.
With these ingredients, you’re well on your way to creating a delicious Knafeh that embodies the sweet essence of Middle Eastern desserts!
Step‑by‑Step Instructions for Knafeh
Step 1: Prepare the Syrup
In a medium saucepan, combine equal parts water and granulated sugar over medium heat. Stir gently until the sugar dissolves, which should take about 5 minutes. Once dissolved, remove from heat and let it cool slightly before mixing in rose water and lemon juice for added fragrance. Set aside to allow the syrup to thicken.
Step 2: Prepare the Kataifi Dough
While the syrup cools, take the thawed kataifi dough and cut it into small pieces for easier handling. In a large mixing bowl, drizzle melted butter over the dough, then use your hands to mix thoroughly until every strand is evenly coated. This step is crucial for ensuring a rich flavor in your Knafeh, so take your time here.
Step 3: Form the Base Layer
Preheat your oven to 350°F (175°C) and grease a baking dish with a little melted butter. Firmly press half of the kataifi mixture into the bottom of the dish, creating an even layer. Make sure it’s compact and well-pressed to form a sturdy base that can hold the sweet cheese filling without breaking apart.
Step 4: Add the Cheese Filling
Now, take your sweet cheese and slice it evenly. Layer the cheese on top of the pressed kataifi base, ensuring that it spreads out uniformly across the surface. For a lighter Knafeh, use a moderate amount of cheese; the goal is to achieve the perfect balance between gooey and savory without overpowering the kataifi crust.
Step 5: Top with Remaining Dough
Complete your Knafeh by taking the remaining kataifi mixture and sprinkling it generously over the cheese layer. Gently press down on the top layer to ensure it adheres while maintaining a fluffy texture. This final layer is essential for achieving that crispy, golden crust that defines a delicious Knafeh.
Step 6: Bake to Perfection
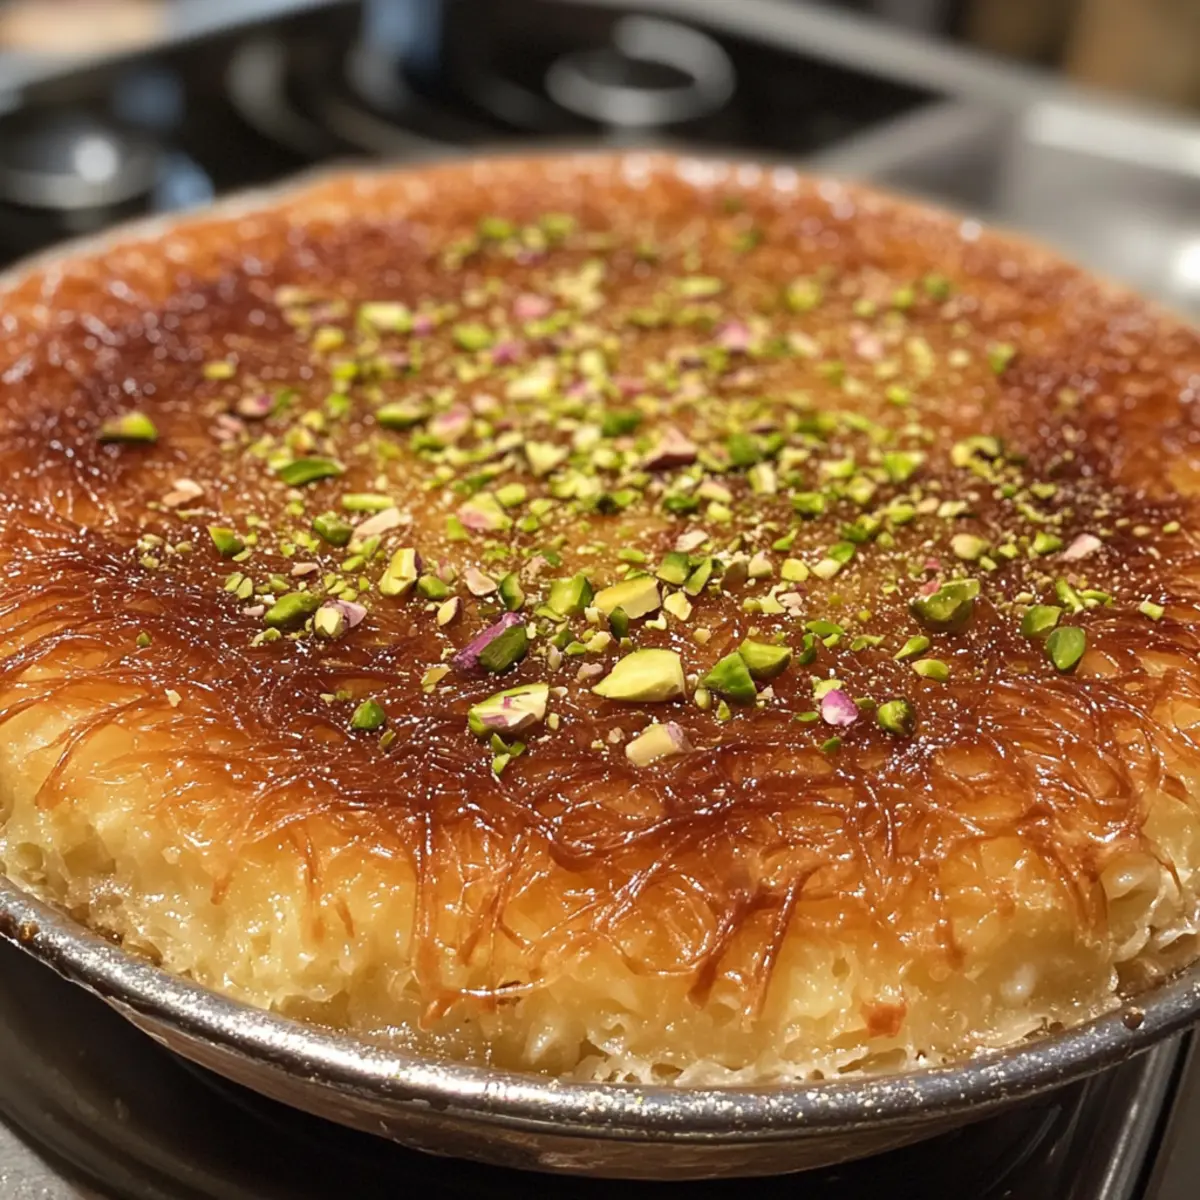
Place your assembled Knafeh in the preheated oven and bake for 40 to 50 minutes, or until it turns a beautiful golden-brown color. Keep an eye on it, as the visual cues will let you know when it’s perfectly crisp. The enticing aroma of baking Knafeh will fill your kitchen, tempting everyone nearby!
Step 7: Invert and Add Syrup
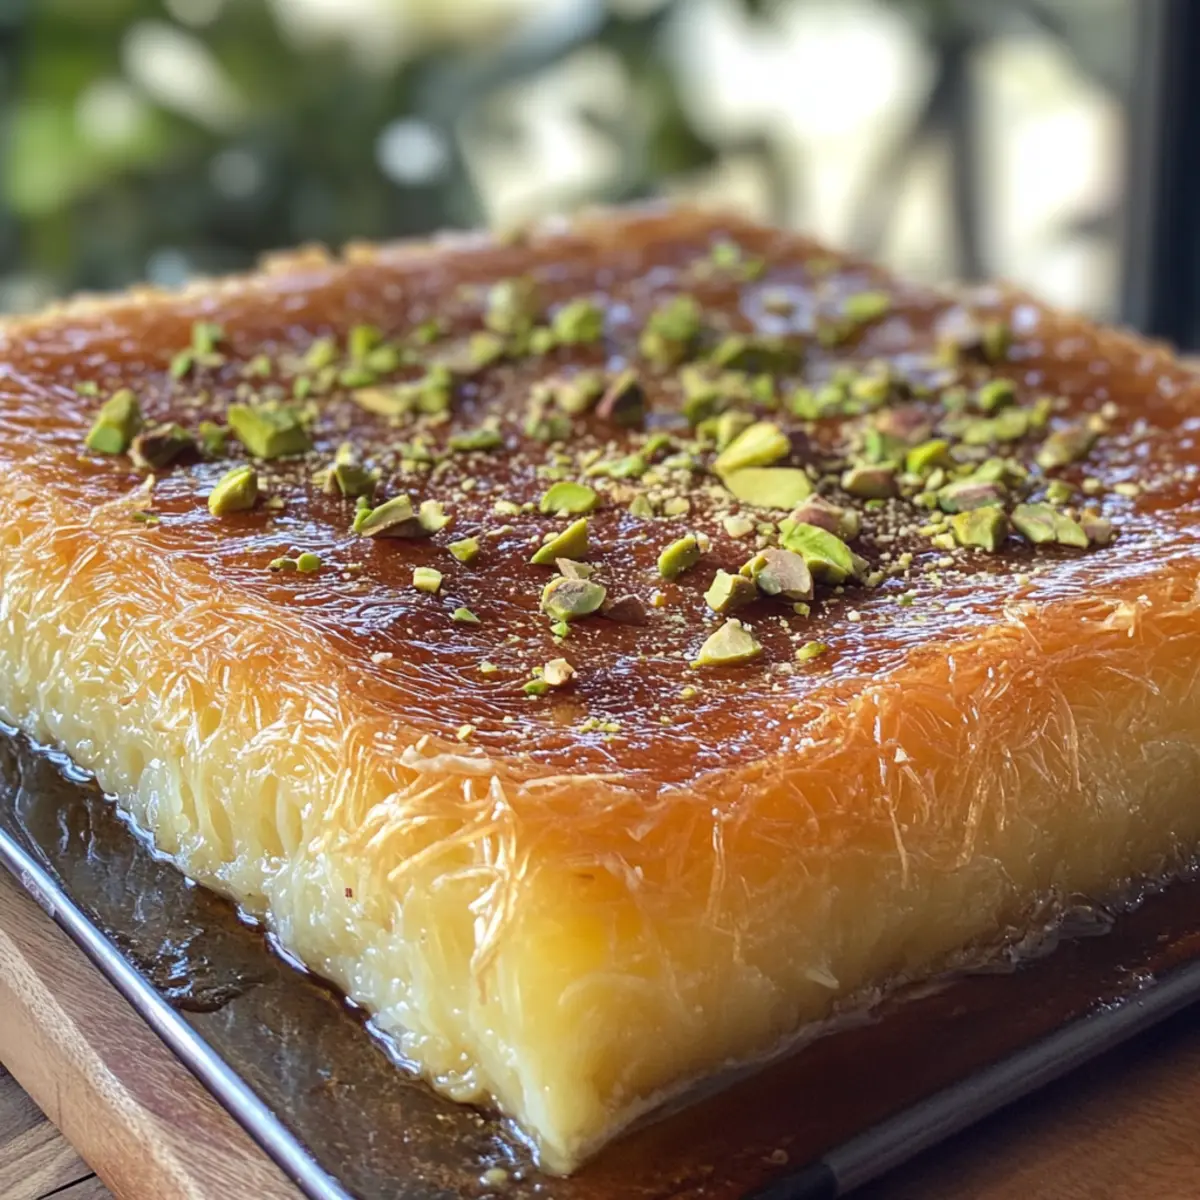
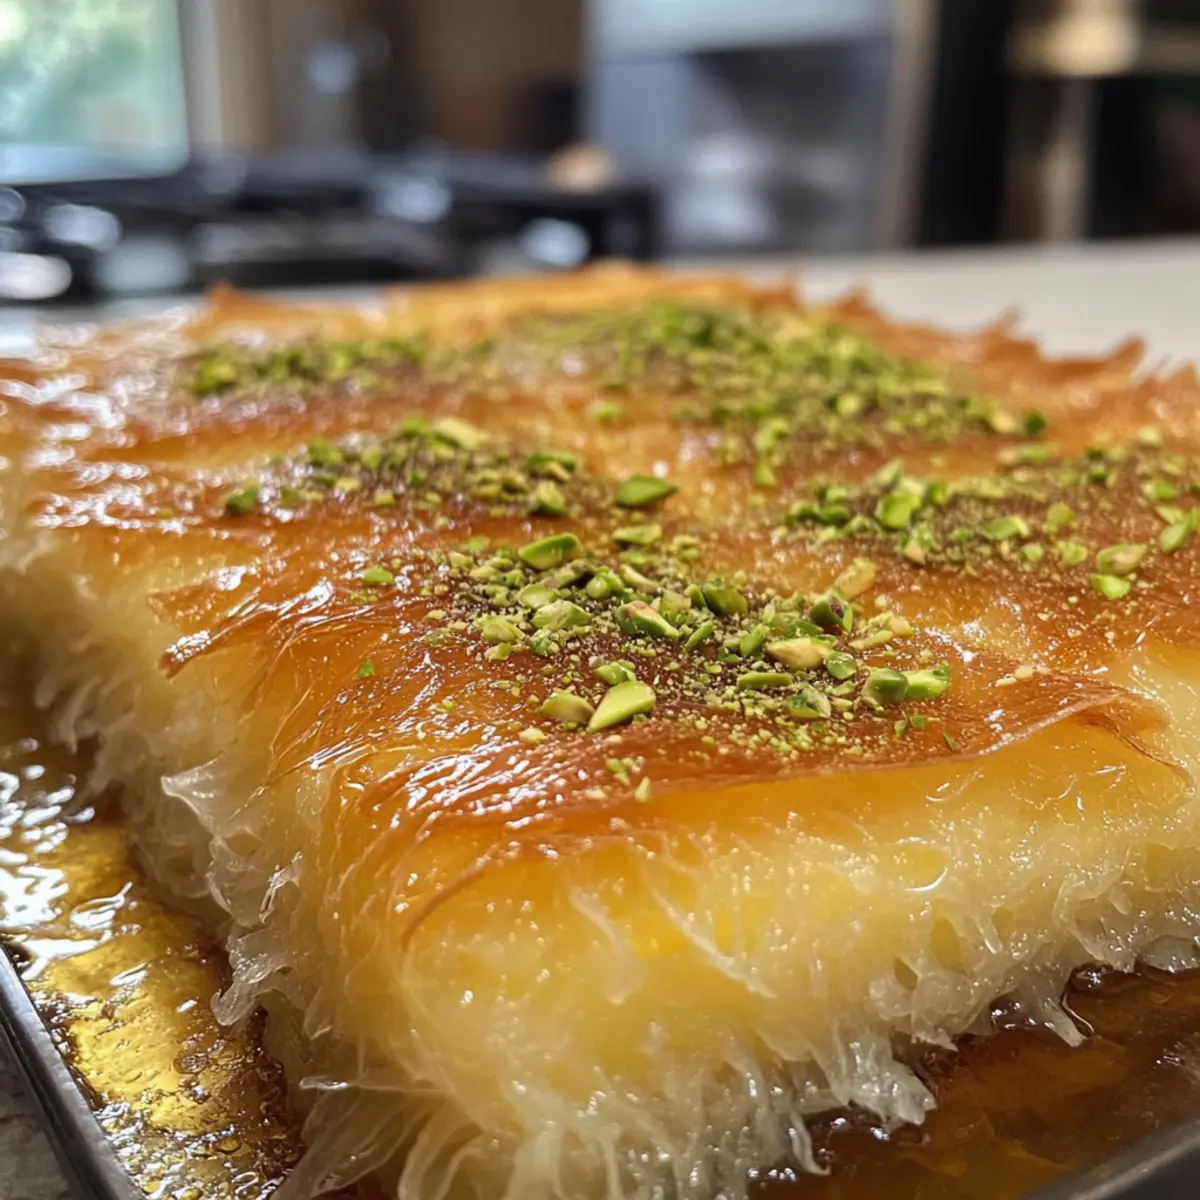
Once baked, remove the Knafeh from the oven and allow it to cool for about 10 minutes. Place a large serving plate on top of the baking dish and carefully invert the Knafeh onto the plate. Once inverted, pour the cooled syrup generously over your warm Knafeh, allowing it to soak in and create a luscious sweetness.
Step 8: Garnish and Serve
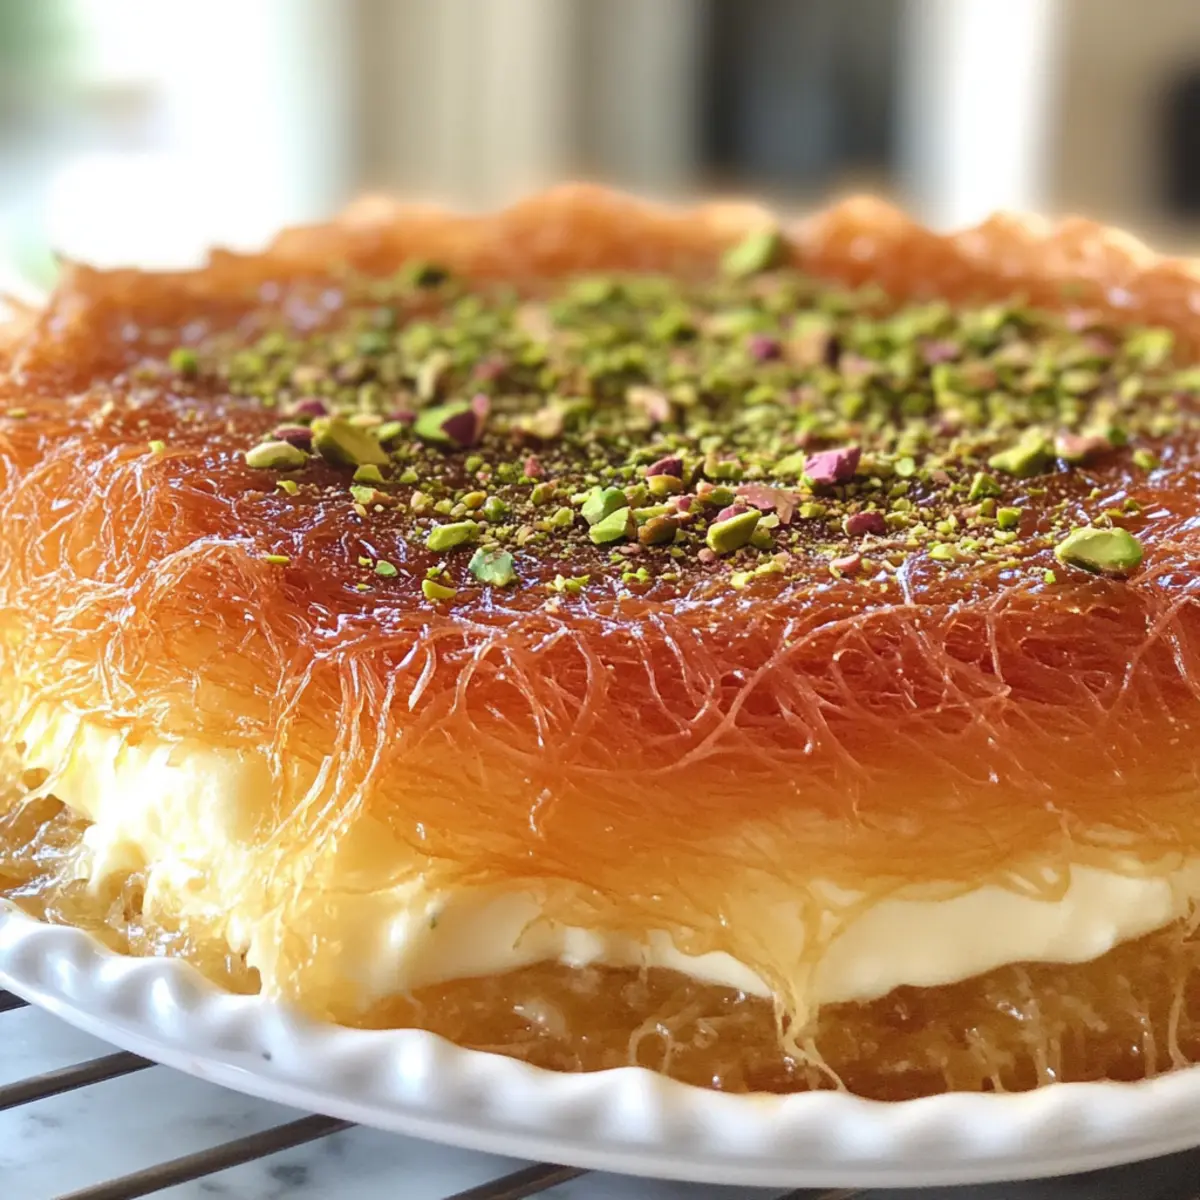
Finish your Knafeh by sprinkling crushed pistachios on top for added texture and a pop of color. Slice your Knafeh into squares or wedges and serve warm or at room temperature. This Middle Eastern delight is perfect for sharing, so gather your loved ones and enjoy this splendid treat!
What to Serve with Authentic Knafeh: A Middle Eastern Cheese Pastry Delight
Indulging in Knafeh is like savoring a trip to a vibrant Middle Eastern market, where every bite brings warmth and tradition to your table.
-
Fresh Fruits: Slices of oranges or pomegranates offer a refreshing contrast to the rich sweetness of Knafeh, balancing flavors beautifully.
-
Vanilla Ice Cream: The creamy, cold texture of vanilla ice cream melts slightly over warm Knafeh, creating a delightful temperature play that enhances the experience.
-
Mint Tea: A fragrant cup of mint tea complements the Knafeh’s sweetness and adds a refreshing herbal note, perfect for after a hearty meal.
-
Rose Water Milkshake: This creamy beverage echoes the floral notes in the Knafeh and makes for a unique pairing that transports you straight to the Mediterranean.
-
Baklava: Keeping with the Middle Eastern theme, serve a small piece of baklava alongside for an extra layer of rich, nutty sweetness and delightful crunch.
-
Pistachio Crumble: A sprinkle of finely crushed pistachios on the side elevates the dish with additional texture and flavor, making every bite even more special.
Make Ahead Options
These Knafeh are perfect for busy weeknights and meal prep enthusiasts! You can prepare the syrup and kataifi layers up to 24 hours in advance. Simply make the syrup (water, sugar, rose water, and lemon juice) and allow it to cool before refrigerating. For the kataifi, mix it with melted butter and press it into the baking dish, then store it uncovered in the fridge to maintain its texture. When you’re ready to bake, layer the sweet cheese on top, finish with the remaining kataifi, and bake directly from the fridge to oven. This way, you’ll have a delicious, homemade Knafeh with minimal effort, ready to impress your family and friends!
Storage Tips for Knafeh
-
Fridge: Store leftover Knafeh in an airtight container in the refrigerator for up to 3 days to maintain its delicious flavor and texture.
-
Freezer: For longer storage, wrap Knafeh tightly in plastic wrap and then in aluminum foil or place it in a freezer-safe container. It can be frozen for up to 2 months.
-
Reheating: When ready to enjoy, thaw Knafeh in the fridge overnight, and then reheat in the microwave for 30-60 seconds or in a preheated oven at 350°F until warm.
-
Serving Tip: Drizzle additional syrup over warm Knafeh before serving to enhance the sweetness and moisture, making it an irresistible dessert once again!
Expert Tips for Making Knafeh
-
Thawing Dough: Ensure your kataifi dough is completely thawed to avoid brittleness, making it easier to handle and layer.
-
Butter Dividing: Consider dividing your melted butter into two portions; this can enhance flavor and maintain the ideal texture in your Knafeh.
-
Cheese Selection: Use a combination of fresh mozzarella and ricotta for a creamy filling. Remember to thoroughly remove excess moisture for the best results.
-
Syrup Serving: Pour the syrup over the Knafeh right before serving, or offer it on the side for guests who prefer to control their sweetness level.
-
Flipping Technique: Use a larger plate to invert the Knafeh to avoid any breakage—this delicate dessert deserves a gentle touch!
Knafeh: Sweet Variations Await!
Ready to make Knafeh your own? Let your creativity shine with these delightful twists that will elevate this already fabulous dessert!
-
Dairy-Free: Swap the sweet cheese for a blend of soaked cashews and coconut yogurt for a creamy vegan alternative.
For those who are dairy-intolerant, this can bring a light and delightful surprise! -
Nutty Delight: Replace crushed pistachios with slivered almonds for a crunchier topping.
The almond flavor adds a nice flair while still maintaining the spirit of the traditional Knafeh. -
Chocolate Drizzle: Top with melted dark chocolate after pouring the syrup for a decadently sweet upgrade.
This variation combines sweet and savory in a truly indulgent way, perfect for the chocoholics among us! -
Fruity Topping: Add a layer of fresh berries like strawberries or raspberries before pouring the syrup for a fruity twist.
The burst of freshness complements the rich flavors perfectly, making every bite a refreshing treat! -
Spicy Kick: For a surprise heat, sprinkle some ground cardamom or cinnamon over the cheese layer before baking.
Adding warm spices can elevate the flavor, creating a mouthwatering experience that tantalizes the palate. -
Rose Essence: Enhance the floral notes by using a combination of rose and orange blossom water in your syrup.
This aromatic blend will not only intensify the authentic Middle Eastern essence but also create a beautiful aroma in your kitchen! -
Layered Pastry: Instead of forming traditional layers, try folding half the kataifi mixture into the cheese for a marbled effect.
This technique adds visual flair, making your Knafeh not just delicious but also stunning to serve to guests!
Feel free to mix and match these ideas as you create your inspired version of Knafeh, just like those cherished memories of exploring unique flavors on sweet adventures. If you’re interested in more twists, why not give my Dairy-Free Baklava a try too? It’s another delicious way to embrace the sweet side of cooking! Enjoy every bite!
Knafeh Recipe FAQs
What type of kataifi dough should I use?
Absolutely! For Knafeh, thawed kataifi dough is ideal due to its tender, flaky texture. If you can’t find kataifi, you can use filo dough as a substitute, but expect a drier texture in the final dessert.
How should I store leftover Knafeh?
Store leftover Knafeh in an airtight container in the refrigerator for up to 3 days. To maintain its delightful flavor and texture, consider reheating it in the microwave for 30-60 seconds before serving it again.
Can I freeze Knafeh, and if so, how?
Very much! To freeze Knafeh, wrap it tightly in plastic wrap, then in aluminum foil, or place it in a freezer-safe container. It can be stored for up to 2 months. When you’re ready to enjoy it, thaw it in the refrigerator overnight and reheat it in the oven.
What are some common troubleshooting tips for Knafeh?
If your Knafeh isn’t crispy, it could be due to excess moisture in the cheese. Always ensure that any fresh mozzarella or ricotta is pressed to remove moisture before layering. Additionally, check that the kataifi dough is evenly coated with butter to achieve that perfect crunch!
Is Knafeh a suitable dessert for people with nut allergies?
Great question! While Knafeh typically includes crushed pistachios for garnish, you can easily omit the nuts to accommodate those with allergies. The dessert’s rich flavor will still shine through without them!
How can I enhance the flavor of the syrup?
To elevate the syrup’s taste, consider adding a splash of lemon juice along with the rose water. This balances the sweetness beautifully and adds a refreshing note, making your Knafeh even more delightful.
Sweet Knafeh Delight: A Taste of Middle Eastern Tradition
Ingredients
Equipment
Method
- In a medium saucepan, combine equal parts water and granulated sugar over medium heat. Stir gently until the sugar dissolves.
- Once dissolved, remove from heat and let it cool slightly before mixing in rose water and lemon juice.
- Set aside to allow the syrup to thicken.
- While the syrup cools, take the thawed kataifi dough and cut it into small pieces.
- Drizzle melted butter over the dough in a large mixing bowl and mix thoroughly.
- Preheat your oven to 350°F (175°C) and grease a baking dish with a little melted butter.
- Firmly press half of the kataifi mixture into the bottom of the dish, creating an even layer.
- Layer the sweet cheese evenly on top of the pressed kataifi base.
- Sprinkle the remaining kataifi mixture over the cheese layer and gently press down.
- Place your assembled Knafeh in the preheated oven and bake for 40 to 50 minutes, or until golden-brown.
- Once baked, let it cool for 10 minutes and carefully invert the Knafeh onto a serving plate.
- Pour the cooled syrup generously over the warm Knafeh.
- Sprinkle crushed pistachios on top, slice, and serve warm or at room temperature.