


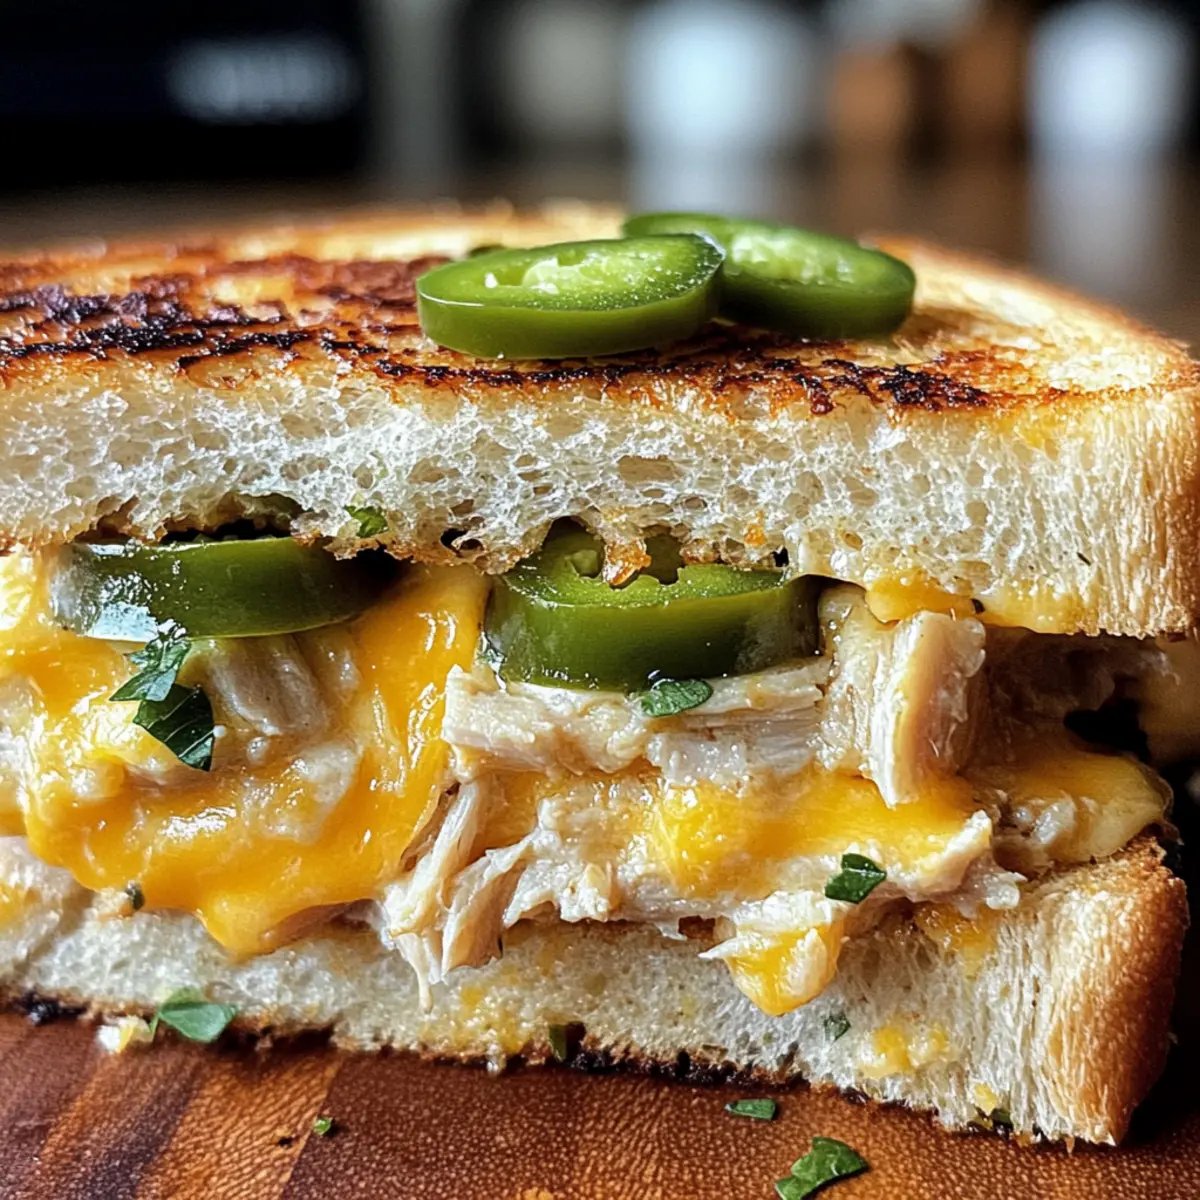
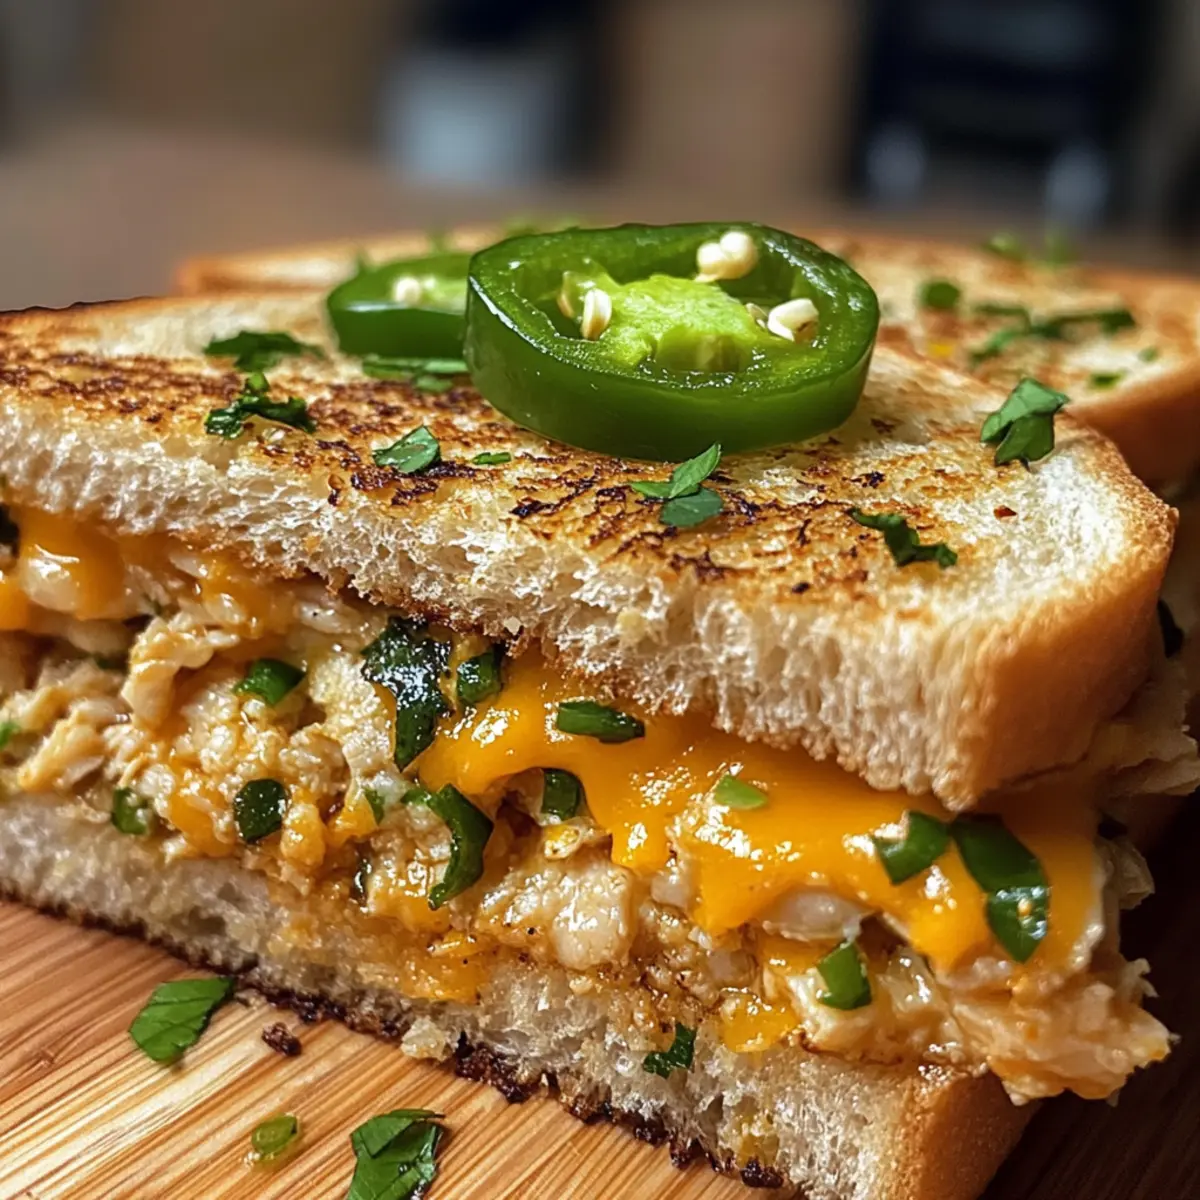
As I stood surrounded by a medley of colorful ingredients, the rich aroma of sharp cheddar mingled with the zest of fresh jalapeños whisked me back to lazy afternoons spent in a friend’s kitchen. One bite of these Jalapeño Cheddar Tuna Melts transports you to the heart of comfort food bliss—creamy, spicy, and oh-so-satisfying. Not only do they come together in under 10 minutes, but they’re also a protein-packed delight perfect for those bustling days when time is precious. Plus, with endless possibilities for customization, whether you prefer a milder twist or extra crunch, every creation can tell a unique story. Ready to dive into a melt that’s both quick and versatile? Let’s get started!
Why are Jalapeño Cheddar Tuna Melts amazing?
Quick to Prepare: In just 10 minutes, you can whip up a satisfying meal that fits perfectly into any busy schedule.
High in Protein: Packed with nutritious ingredients like canned tuna and cheese, these melts are great for replenishing energy post-workout.
Totally Customizable: Feel free to experiment! Add different cheeses, swap out jalapeños for milder peppers, or throw in veggies to suit your taste.
Comfort Food with a Twist: Enjoy the nostalgia of classic tuna melts with a modern, spicy kick that will have everyone coming back for more. Pair them with some crunchy carrot sticks for a delightful balance. If you’re looking for more quick meal ideas, check out our Potato Broccoli Cheddar for a cozy, hearty option!
Jalapeño Cheddar Tuna Melt Ingredients
• Explore the essentials for your delicious dish!
For the Filling
- Canned Tuna – Provides protein; choose light or white tuna based on your preference.
- Cream Cheese – Adds creaminess and binds the mix beautifully.
- Sharp Cheddar Cheese – Offers rich flavor; substitute with mild cheddar or vegan options if desired.
- Jalapeños – Infuses a spicy kick; switch to bell peppers for a milder flavor.
- Mayonnaise – Enhances moisture and overall taste; Greek yogurt serves as a lighter alternative.
- Celery (optional) – Adds a refreshing crunch; omit if not preferred or substitute with diced bell pepper.
For the Base
- Bread – The foundation for your melt; any bread that toasts well works, but popular picks include sourdough, whole wheat, or bagels.
Step‑by‑Step Instructions for Jalapeño Cheddar Tuna Melt
Step 1: Prepare the Filling
In a large mixing bowl, combine one can of drained tuna, 4 ounces of cream cheese, 1 cup of sharp cheddar cheese, and diced jalapeños to taste. Add 2 tablespoons of mayonnaise and optional chopped celery for crunch. Mix everything together until well combined, ensuring the ingredients are evenly distributed and the cream cheese is smooth. You’ll want a creamy consistency that’s easy to spread.
Step 2: Meal Prep Option
If you’re not ready to assemble your Jalapeño Cheddar Tuna Melts immediately, store the flavorful filling in an airtight container. This mixture stays fresh in the refrigerator for 2-3 days, making it a quick go-to for busy weeknight meals. Just give it a quick stir before using to ensure everything is evenly mixed again after sitting.
Step 3: Assemble the Melts
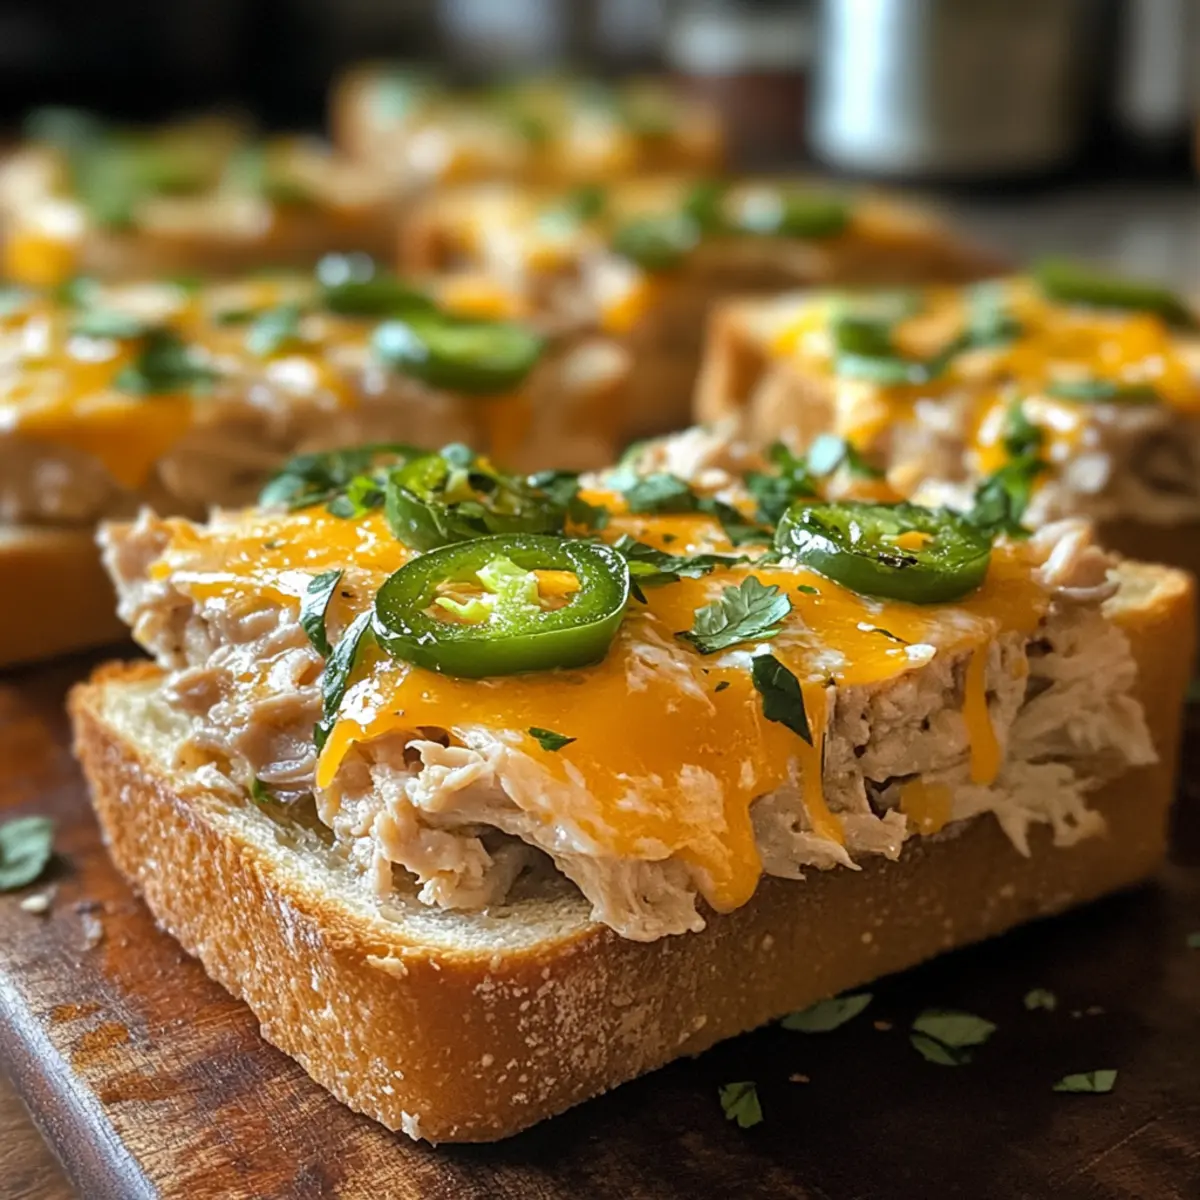
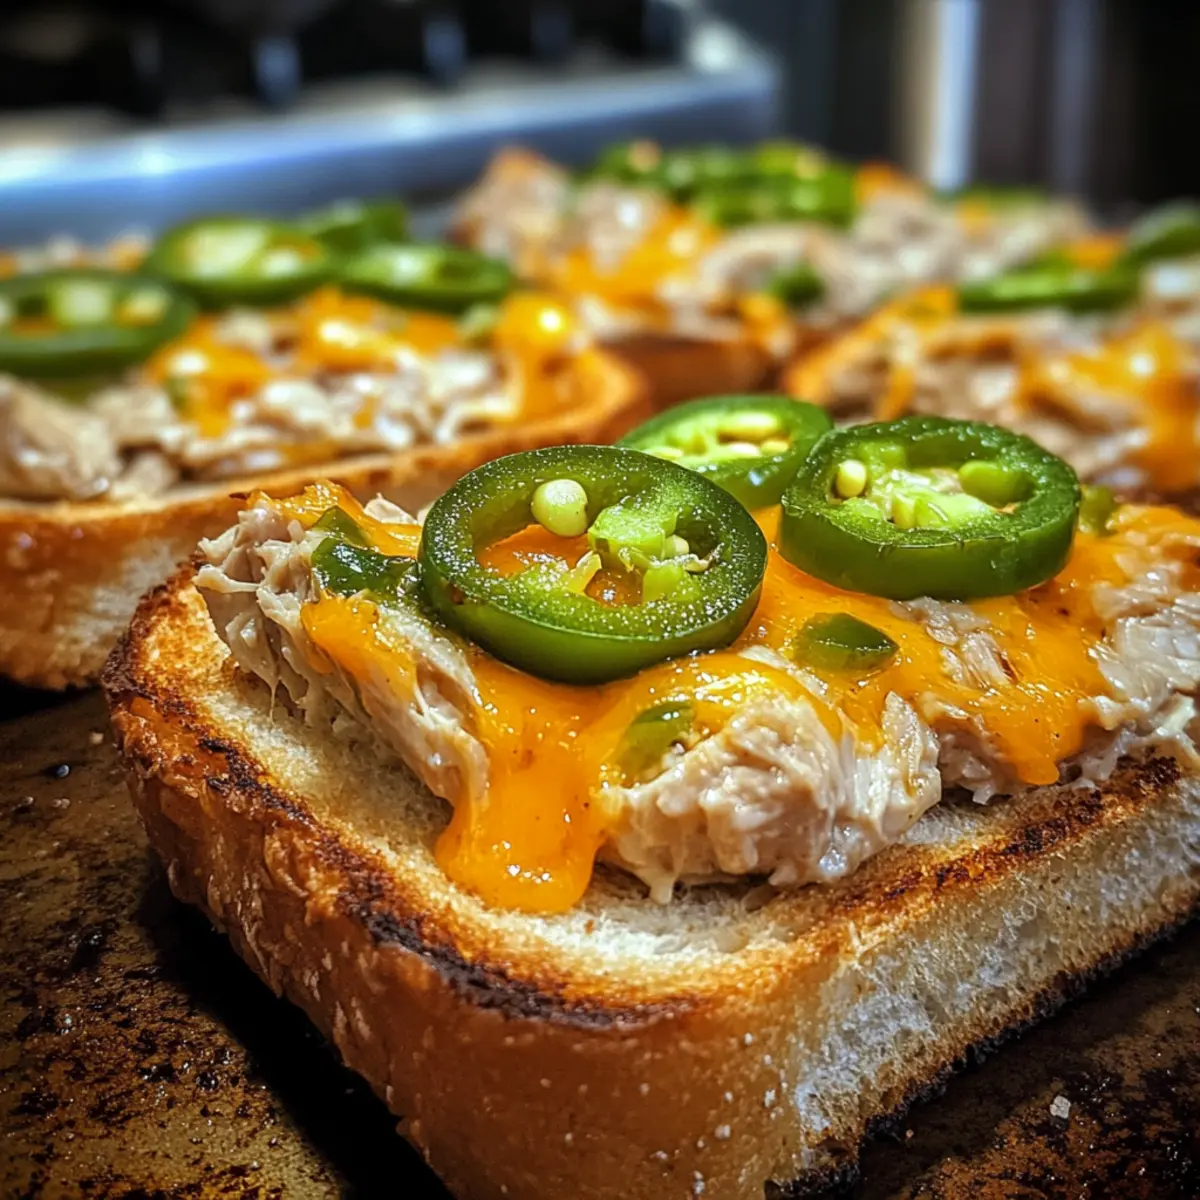
Preheat your oven or air fryer to 400°F, depending on your preferred cooking method. Take slices of your chosen bread—sourdough, whole wheat, or bagels work wonderfully—and spread a generous layer of the tuna filling on each slice. Make sure to cover the bread all the way to the edges to get a deliciously cheesy bite.
Step 4: Top with Cheese
After smearing the tuna mixture onto the bread, sprinkle additional sharp cheddar cheese over the top. For those who crave a little extra heat, add more jalapeños. This cheese layer will melt beautifully during cooking, creating that delectable gooey texture we love in a classic Jalapeño Cheddar Tuna Melt.
Step 5: Bake
Place the assembled melts in your preheated oven or air fryer. Bake for 7-9 minutes, keeping an eye on them for a perfectly toasted finish. You’ll know they’re ready when the cheese is bubbly and the bread is golden brown. If using an air fryer, this step will be just as effective with slightly less time.
Step 6: Finishing Touch
For an extra crispy layer, switch your oven to broil for an additional 2-3 minutes. This step adds a beautiful golden hue to your cheese and creates that perfect crunchy top. Watch closely to prevent burning; this is the time to achieve that delightful contrast in textures!
Step 7: Serve
Once your Jalapeño Cheddar Tuna Melts are finished baking, remove them from the oven and let them cool slightly. Serve warm alongside fresh veggies like carrot sticks or a simple salad for a balanced meal that complements the richness of the melts. Enjoy every cheesy, spicy bite!
Storage Tips for Jalapeño Cheddar Tuna Melts
- Fridge: Store any leftover Jalapeño Cheddar Tuna Melt in an airtight container in the fridge for up to 3 days. Reheat in the oven to restore the crispy texture.
- Freezer: If you want to save the tuna filling, freeze it in a sealed container for up to 2 months. Thaw overnight in the fridge before using.
- Reheating: For the best results, reheat the melts in a preheated oven at 350°F for about 10-15 minutes until warmed through. This helps regain that crunchy bite!
Expert Tips for the Best Jalapeño Cheddar Tuna Melts
-
Proper Drainage: Ensure that your canned tuna is thoroughly drained to prevent any excess moisture, which can make the filling soggy and less enjoyable.
-
Cheese Selection: Choose sharp cheddar for maximum flavor, but feel free to substitute with mild cheddar or a vegan alternative to suit your taste.
-
Adjusting Spice Levels: For a milder Jalapeño Cheddar Tuna Melt, remove the seeds from the jalapeños or reduce their quantity. This way, everyone can enjoy the flavor without overwhelming heat.
-
Perfect Toasting: Keep an eye on the cooking time; oven and air fryer temperatures can vary. You want the bread to be golden and crispy, complementing the melty filling.
-
Meal Prep Friendly: Prepare extra filling at once and store in an airtight container. This Tuna Melt mix stays fresh in the fridge for 2-3 days, making it easy for a quick meal any day of the week.
Jalapeño Cheddar Tuna Melt Variations
Feel free to let your creativity run wild with these scrumptious suggestions to customize your melts!
-
Dairy-Free: Swap sharp cheddar with a vegan cheese alternative to keep it creamy without the dairy.
Every bit will still taste indulgent while being suitable for dairy-free diets. -
Spicy Twist: Add diced serrano peppers for an extra kick if you’re craving more heat.
This addition can easily elevate your melts into a fiery flavor experience—perfect for heat seekers! -
Crunchy Veggies: Toss in some diced bell peppers or shredded carrots for added crunch.
They brighten up each bite while integrating color and nutrition into your meal. -
Different Proteins: Use canned salmon or chicken instead of tuna for a new flavor profile.
This swap keeps the high-protein aspect while introducing intriguing new elements to your dish. -
Herb Infusion: Mix in fresh herbs like dill or parsley to the filling for a refreshing twist.
These additions can lift the dish and introduce a delightful aromatic quality. -
Savory Spread: Replace mayonnaise with hummus for a creamy texture that adds extra flavor.
Not only does it change the taste, but it’s also a fantastic healthy alternative. -
Bread Variety: Experiment with a crusty baguette or fluffy brioche for different textures.
Choosing a unique bread can make your melts truly stand out and transform each dinner experience.
For even more delightful ideas, consider pairing your meal with a refreshing salad or trying other comforting recipes like our Potato Broccoli Cheddar soup!
What to Serve with Jalapeño Cheddar Tuna Melts?
Fresh flavors and delightful textures complement these cheesy delights beautifully!
-
Creamy Tomato Soup: The warmth and acidity of tomato soup balance the richness of the melts, creating a classic combination. There’s nothing quite like dipping a melty tuna sandwich into a bowl of comforting soup.
-
Crisp Garden Salad: A refreshing garden salad adds a burst of color and crunch, providing a vibrant contrast to the creamy tuna. Top it with a zesty vinaigrette for added flavor harmony.
-
Crunchy Veggie Sticks: Fresh carrot and cucumber sticks are perfect for dipping into hummus or a creamy dressing. They provide a light, crunchy side that enhances the overall meal experience.
-
Sweet Potato Fries: These fries offer a slightly sweet note that complements the spiciness of the melts. Their crispy exterior and soft interior create a delightful textural contrast.
-
Potato Chips: A classic side that adds crunch to every bite, potato chips are effortlessly satisfying. Choose a spiced variety to echo the flavors of jalapeño, adding an extra kick.
-
Sparkling Lemonade: A refreshing drink like sparkling lemonade brightens the meal, cutting through the richness with its citrusy fizz. It’s a perfect pairing that will leave everyone feeling refreshed.
-
Mini Cupcakes: For dessert, consider light mini cupcakes. Their sweetness contrasts the spicy melts wonderfully, leaving a delightful finish to your meal and balancing indulgence with playful flavors.
Make Ahead Options
These Jalapeño Cheddar Tuna Melts are perfect for meal prep enthusiasts looking to save time during hectic weeknights! You can prepare the creamy tuna filling up to 3 days in advance, storing it in an airtight container in the refrigerator. Just remember to give it a gentle stir before using to ensure it’s evenly combined. When you’re ready to enjoy your melts, simply spread the filling on your bread of choice, top with extra cheese and jalapeños, and bake for 7-9 minutes at 400°F for that deliciously crispy finish. By preparing ahead, you’ll have a hearty, protein-packed meal ready to go with minimal effort!
Jalapeño Cheddar Tuna Melts Recipe FAQs
What type of canned tuna should I use?
Absolutely! You can choose between light or white tuna depending on your preference. Light tuna often has a milder flavor, while white tuna provides a firmer texture. Just make sure to drain it thoroughly to avoid making your filling soggy.
How should I store leftovers of Jalapeño Cheddar Tuna Melts?
Store any leftover Jalapeño Cheddar Tuna Melts in an airtight container in the fridge. They will keep well for up to 3 days. When you’re ready to enjoy them again, reheat in the oven to restore their crispy texture.
Can I freeze the tuna filling?
Yes, you can! To freeze the filling, simply place it in a sealed, airtight container and store it in the freezer for up to 2 months. When you’re ready to use it, thaw overnight in the fridge. Then, just give it a quick stir before spreading it on your bread.
What if my tuna filling turns out too dry?
No worries! If your filling seems too dry, you can add a bit more mayonnaise or Greek yogurt for creaminess. Start with a tablespoon at a time until you achieve your desired texture. Mixing in some finely chopped veggies can also add moisture and flavor.
Are there any dietary considerations for the Jalapeño Cheddar Tuna Melts?
Very! If you’re preparing these melts for someone with dietary restrictions, opt for gluten-free bread to accommodate those with gluten sensitivities. Additionally, consider using vegan cheese and Greek yogurt instead of traditional cheese and mayonnaise for a vegan-friendly version. Always check the labels for any allergens, especially if serving to pets or individuals with allergies.
Irresistible Jalapeño Cheddar Tuna Melt in Just 10 Minutes
Ingredients
Equipment
Method
- In a large mixing bowl, combine one can of drained tuna, 4 ounces of cream cheese, 1 cup of sharp cheddar cheese, and diced jalapeños to taste. Add 2 tablespoons of mayonnaise and optional chopped celery for crunch. Mix everything together until well combined.
- Store the flavorful filling in an airtight container in the refrigerator for 2-3 days.
- Preheat your oven or air fryer to 400°F. Take slices of your chosen bread and spread a generous layer of the tuna filling on each slice.
- Sprinkle additional sharp cheddar cheese over the top. Add more jalapeños for extra heat.
- Place the assembled melts in your preheated oven or air fryer. Bake for 7-9 minutes until cheese is bubbly and bread is golden brown.
- Optional: switch your oven to broil for an additional 2-3 minutes for a crispy layer.
- Let the melts cool slightly and serve warm alongside fresh veggies like carrot sticks.