


A Bold and Beautiful Cake for Any Celebration
Red velvet cake has long been a favorite for its soft texture, mild cocoa flavor, and signature cream cheese frosting. But when St. Patrick’s Day rolls around, it’s time to trade in the red for a vibrant green hue. Green Velvet Cake delivers the same moist, rich flavor as its classic counterpart but with a playful, festive twist.
This cake isn’t just about color—it’s about texture, taste, and the joy of creating something unique. With its tender crumb, slight tang from buttermilk, and velvety-smooth cream cheese frosting, this cake is a crowd-pleaser for any occasion, whether you’re celebrating St. Patrick’s Day, a springtime event, or simply want to bake something fun and unexpected.
Why You’ll Love This Green Velvet Cake
1. It’s Perfect for St. Patrick’s Day (or Any Festive Occasion!)
If you’re looking for a show-stopping dessert for St. Patrick’s Day, this cake is the answer. The vibrant green color makes it an eye-catching centerpiece at any party. But it doesn’t have to be just for March 17th—this cake works great for birthdays, themed parties, or even Christmas celebrations.
2. A Velvet Texture Like No Other
What makes a velvet cake special is its soft, melt-in-your-mouth texture. Thanks to the combination of buttermilk, vinegar, and oil, this cake remains incredibly moist and tender, ensuring that every bite is just as good as the last.
3. A Hint of Cocoa for Depth of Flavor
Green velvet cake, like its red counterpart, isn’t a full-on chocolate cake, but it does have a subtle hint of cocoa to add depth and balance to its sweetness. This slight chocolate undertone enhances the overall flavor without overpowering the cake.
4. The Perfect Cream Cheese Frosting
Velvet cakes wouldn’t be complete without a rich, creamy frosting. The smooth tanginess of cream cheese, combined with the sweetness of powdered sugar and the richness of butter, creates a perfectly balanced topping for the soft cake layers.
5. Versatile and Customizable
This cake can be made into cupcakes, whoopie pies, cake pops, or layered cakes, making it a versatile recipe that suits any occasion or preference.
Ingredients: A Bold Twist on Classic Velvet Cake
For the Cake:
- All-purpose flour for structure
- Sugar for sweetness
- Cocoa powder for a subtle depth of flavor
- Baking soda and vinegar for leavening
- Eggs for moisture and stability
- Buttermilk for a tender crumb
- Oil for a soft texture
- Vanilla extract for added warmth
- Green food coloring for the signature festive hue
For the Cream Cheese Frosting:
- Cream cheese for a smooth, tangy base
- Butter for richness
- Vanilla extract for extra flavor
- Powdered sugar for sweetness and structure
- Milk as needed for the perfect consistency
Directions: Crafting the Perfect Green Velvet Cake
- Prepare the Batter: Mix dry ingredients separately, then blend wet ingredients together before combining them into a smooth, vibrant green mixture.
- Bake to Perfection: Pour batter into prepared cake pans or cupcake liners and bake at 350°F until set and springy to the touch.
- Whip Up the Frosting: Beat cream cheese and butter until creamy, then gradually mix in powdered sugar and vanilla for a fluffy consistency.
- Assemble and Decorate: Once the cake has cooled, generously frost and decorate with festive sprinkles or edible decorations.
Nutritional Highlights: A Sweet and Festive Treat
- Calories: ~320 per slice
- Carbohydrates: ~40g
- Fat: ~15g
- Sugar: ~30g
- Protein: ~3g
Expert Tips for the Best Green Velvet Cake
1. Use High-Quality Food Coloring for Vibrant Results
To achieve the bold green hue, you’ll need a good-quality gel food coloring. Gel-based food coloring provides a richer color without altering the texture of the batter. Liquid food coloring can work, but you may need more of it, which can slightly thin out the batter.
2. Don’t Skip the Buttermilk and Vinegar
These two ingredients are key to the signature velvet texture. Buttermilk adds moisture and tenderness, while vinegar reacts with the baking soda to create a light, airy crumb. If you don’t have buttermilk, you can make a quick substitute by mixing one cup of milk with a tablespoon of lemon juice or vinegar and letting it sit for five minutes.
3. Measure Ingredients Correctly for the Perfect Texture
- Spoon and level your flour rather than scooping directly from the bag to prevent packing it down, which can result in a dense cake.
- Use a kitchen scale if possible for precise measurements—this ensures your cake bakes up with the right texture every time.
4. Don’t Overmix the Batter
Overmixing can lead to a dense or tough cake. Once the wet and dry ingredients are combined, mix just until incorporated to keep the batter light and airy.
5. Let the Cake Cool Completely Before Frosting
A warm cake will melt the frosting, leading to a messy, uneven spread. Allow your cake to cool completely before adding the cream cheese frosting for the best results.
Creative Ways to Customize Your Green Velvet Cake
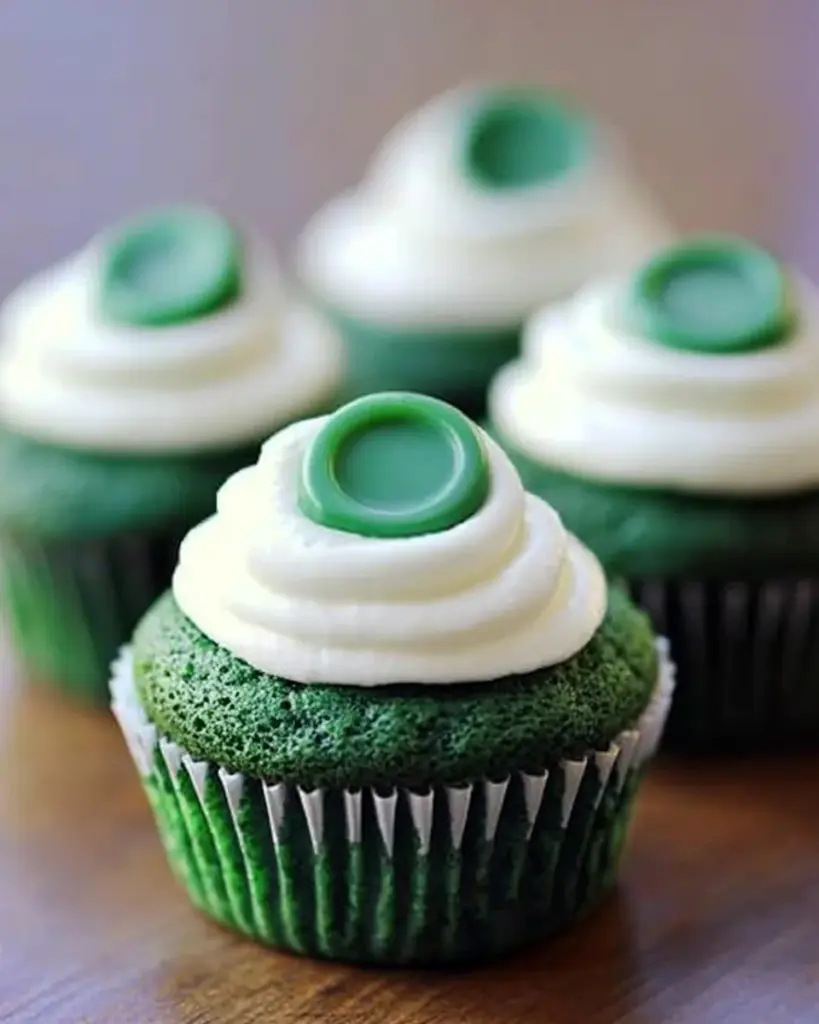
1. Turn It Into Cupcakes
Divide the batter into cupcake liners for easy-to-serve portions. Bake for around 16 minutes for regular cupcakes or 13 minutes for mini cupcakes. Top each one with a swirl of frosting and festive sprinkles.
2. Make a Two-Tone Velvet Cake
For a fun twist, divide the batter into two portions—one green and one white—and swirl them together for a marbled effect. This creates a visually stunning cake with a hint of contrast.
3. Add a St. Patrick’s Day Surprise
Hide a small gold chocolate coin inside a few cupcakes for a fun “lucky” surprise. Kids and guests will love discovering the hidden treat inside their dessert.
4. Make a Green Velvet Cake Roll
Instead of a traditional layer cake, bake the batter in a sheet pan, roll it with the frosting inside, and dust with powdered sugar for a fun take on a Swiss roll-style dessert.
5. Decorate with Gold Accents
Add edible gold leaf, gold sprinkles, or gold sugar dust for a festive touch that makes this cake feel even more special.
Frequently Asked Questions (FAQs)
1. Can I Make This Cake Ahead of Time?
Yes! You can bake the cake layers in advance and store them in the refrigerator for up to three days. You can also freeze unfrosted cake layers for up to three months—just wrap them tightly in plastic wrap and thaw before frosting.
2. Does This Cake Taste Like Chocolate?
Green velvet cake has a very mild cocoa flavor—not enough to be classified as a chocolate cake, but just enough to add depth. The primary flavor is sweet, slightly tangy, and rich.
3. Can I Use a Different Frosting?
While cream cheese frosting is the classic choice, you can also use:
- Buttercream frosting for a sweeter finish
- Whipped cream frosting for a lighter option
- Chocolate ganache for a more decadent twist
4. Can I Use Natural Food Coloring?
If you prefer to avoid artificial food coloring, try using matcha powder or spinach juice to create a natural green hue. However, the color will be more muted compared to gel food coloring.
5. How Do I Store Leftovers?
Store the cake in an airtight container in the refrigerator for up to five days. Bring it to room temperature before serving for the best texture.
6. Can I Make This Gluten-Free?
Yes! Swap the all-purpose flour for a 1:1 gluten-free flour blend. The cake may be slightly more delicate, but it will still have great flavor and texture.
Final Thoughts: A Cake Worth Celebrating
Green Velvet Cake is more than just a novelty dessert—it’s a rich, flavorful, and beautifully textured cake that brings joy to any celebration. Whether you’re making it for St. Patrick’s Day, a birthday, or just because, this cake delivers on both flavor and visual appeal.
With its soft, moist crumb, vibrant green color, and smooth cream cheese frosting, it’s a recipe that stands out while still staying true to the classic velvet cake experience. Plus, with so many ways to customize and experiment, it’s a dessert that you can make uniquely your own.
So why wait? Bake up this stunning cake, share it with friends and family, and enjoy a sweet treat that’s as fun to make as it is to eat!