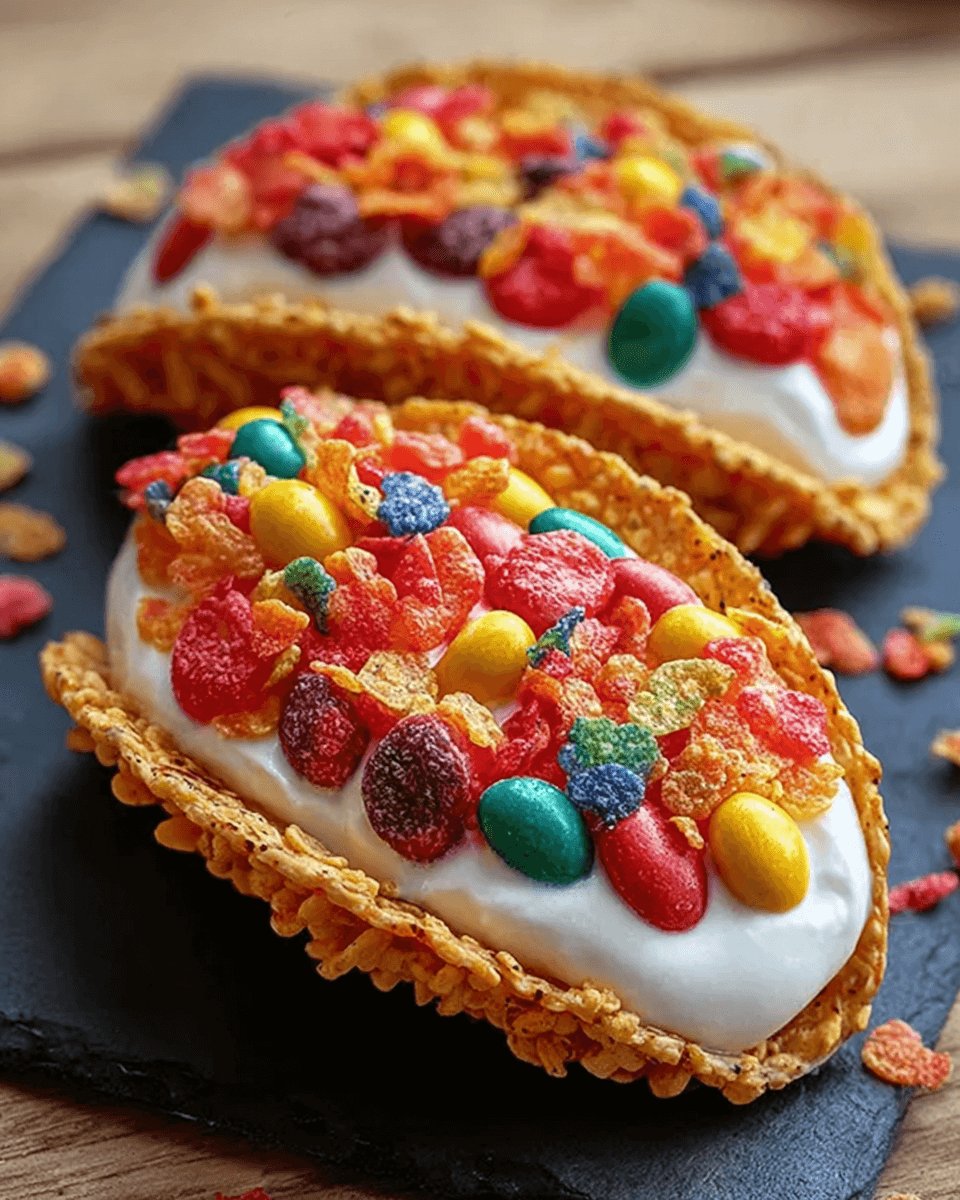
There’s something magical about dessert that brings out the kid in all of us. Fruity Pebbles Cheesecake Tacos are a delightful twist on traditional treats, combining the creamy goodness of cheesecake with the playful crunch of taco shells. Whether you’re looking to impress your friends at a gathering or simply want a fun dessert for a cozy night in, this recipe is your go-to. It’s quick, colorful, and bursting with flavor, making it perfect for any occasion. Trust me, once you take a bite, you’ll be transported back to carefree childhood days!
Why You’ll Love This Fruity Pebbles Cheesecake Tacos
These Fruity Pebbles Cheesecake Tacos are not just a feast for the eyes; they’re a breeze to make! With minimal prep time and simple ingredients, you can whip up a colorful dessert that’s sure to impress. The combination of creamy cheesecake and crunchy taco shells creates a delightful texture that’s hard to resist. Plus, they’re perfect for sharing, making them an ideal treat for gatherings or family nights!
Ingredients for Fruity Pebbles Cheesecake Tacos
Gathering the right ingredients is half the fun of cooking! For these Fruity Pebbles Cheesecake Tacos, you’ll need a mix of sweet and crunchy elements that come together beautifully. Here’s what you’ll need:
Crushed Fruity Pebbles cereal: This colorful cereal adds a burst of flavor and crunch, making it the star of the show.
Cream cheese: The creamy base for your cheesecake filling, it provides that rich, smooth texture we all love.
Powdered sugar: This sweetener helps to balance the tanginess of the cream cheese, creating a delightful filling.
Vanilla extract: A splash of this adds warmth and depth to the cheesecake flavor.
Whipped topping: Light and airy, it gives the filling a fluffy texture that melts in your mouth.
Flour tortillas: These serve as the taco shells, providing a soft yet sturdy base for your dessert.
Unsalted butter: Used to brush the tortillas, it adds richness and helps them crisp up in the oven.
Granulated sugar: This sweetens the butter mixture, enhancing the flavor of the taco shells.
Cinnamon: A sprinkle of this spice adds warmth and a hint of nostalgia to the taco shells.
Additional Fruity Pebbles: For garnish, these colorful bits not only look great but also add extra crunch.
For those looking to mix things up, consider substituting the Fruity Pebbles with another colorful cereal for a different flavor profile. You can find the exact measurements for each ingredient at the bottom of the article, ready for printing!
How to Make Fruity Pebbles Cheesecake Tacos
Creating these Fruity Pebbles Cheesecake Tacos is a fun and straightforward process. Follow these steps, and you’ll have a colorful dessert that’s sure to impress!
Step 1: Preheat the Oven
Start by preheating your oven to 350°F. This step is crucial because it ensures that your taco shells bake evenly. A properly preheated oven helps achieve that perfect crispiness, making your dessert even more enjoyable!
Step 2: Prepare the Butter Mixture
In a medium bowl, mix together melted butter, granulated sugar, and cinnamon. This mixture will coat your tortillas, adding flavor and a touch of sweetness. The cinnamon not only enhances the taste but also brings a warm aroma that fills your kitchen.
Step 3: Shape the Taco Shells
Now, it’s time to shape your tortillas into taco shells. Brush both sides of each tortilla with the butter mixture. Then, place them in a taco holder or drape them over the rungs of an oven-safe rack. This step is essential for creating that delightful texture that holds your cheesecake filling.
Step 4: Bake the Taco Shells
Place the shaped tortillas in the oven and bake for 10-12 minutes. Keep an eye on them! You want them to turn golden and crispy, but not burnt. Once they’re done, remove them from the oven and let them cool completely. This cooling time is vital for maintaining their crunch.
Step 5: Make the Cheesecake Filling
In a large bowl, beat the softened cream cheese until it’s smooth and creamy. Then, add the powdered sugar and vanilla extract, mixing until well combined. Finally, gently fold in the whipped topping. This technique keeps the filling light and fluffy, ensuring a delightful bite every time.
Step 6: Fill the Taco Shells
Once your taco shells are cool, it’s time to fill them! Spoon the cheesecake mixture into each shell, being generous but careful not to overfill. The balance of cheesecake and shell is key to enjoying every delicious bite.
Step 7: Garnish and Serve
To finish, sprinkle additional Fruity Pebbles on top for a colorful garnish. This not only adds a pop of color but also extra crunch. Serve these delightful tacos immediately for the best texture, or refrigerate them for up to an hour if you prefer them chilled. Enjoy the smiles they bring!
Tips for Success
Make sure your cream cheese is at room temperature for easy mixing.
Don’t skip the cooling step for taco shells; it keeps them crispy.
Experiment with different cereals for unique flavors and colors.
For added flair, drizzle chocolate or caramel sauce over the filled tacos.
Serve immediately for the best texture, but they can be refrigerated for up to an hour.
Equipment Needed
Oven: Essential for baking the taco shells; a toaster oven works too.
Taco holder: Helps shape the tortillas; you can use an oven-safe rack as an alternative.
Mixing bowls: For combining ingredients; any size will do.
Whisk or electric mixer: For beating the cream cheese; a fork can work in a pinch.
Variations
Chocolate Lovers: Add cocoa powder to the cheesecake filling for a chocolatey twist.
Fruit-Infused: Mix in fresh berries or diced bananas into the cheesecake filling for added flavor and freshness.
Gluten-Free Option: Use gluten-free tortillas to make this dessert suitable for those with gluten sensitivities.
Nutty Crunch: Incorporate crushed nuts like almonds or pecans into the filling for an extra crunch.
Vegan Version: Substitute cream cheese with a vegan alternative and use coconut whipped cream for a plant-based treat.
Serving Suggestions
Pair with a scoop of vanilla ice cream for a delightful contrast in temperature.
Serve alongside fresh fruit like strawberries or blueberries for a refreshing touch.
Consider a fun drink like a fruity soda or a milkshake to complement the dessert.
Present on a colorful platter to enhance the visual appeal.
FAQs about Fruity Pebbles Cheesecake Tacos
Can I make Fruity Pebbles Cheesecake Tacos ahead of time?
Absolutely! You can prepare the taco shells and cheesecake filling in advance. Just fill the shells right before serving for the best texture. If you need to refrigerate them, do so for no more than an hour to maintain their crunch.
What can I substitute for cream cheese?
If you’re looking for a lighter option, you can use Greek yogurt or a vegan cream cheese alternative. Both will give you a creamy texture while adding a unique flavor twist to your Fruity Pebbles Cheesecake Tacos.
How do I store leftovers?
Store any leftover filled tacos in an airtight container in the refrigerator. They’re best enjoyed within a day or two, but keep in mind that the shells may lose some crispiness over time.
Can I use a different cereal?
Definitely! While Fruity Pebbles are a fun choice, feel free to experiment with other colorful cereals like Trix or Cap’n Crunch. Each will bring its own flavor and texture to your dessert.
What’s the best way to serve these tacos?
For a fun presentation, serve your Fruity Pebbles Cheesecake Tacos on a vibrant platter. You can also drizzle them with chocolate or caramel sauce for an extra touch of sweetness. Enjoy with friends and family for a delightful treat!
Final Thoughts
Creating Fruity Pebbles Cheesecake Tacos is more than just making a dessert; it’s about bringing joy and nostalgia to the table. Each colorful bite transports you back to carefree days filled with laughter and fun. The combination of creamy cheesecake and crunchy taco shells is a delightful surprise that will leave everyone smiling. Whether you’re celebrating a special occasion or simply indulging in a sweet treat, these tacos are sure to impress. So gather your loved ones, whip up this playful dessert, and enjoy the happiness it brings. Trust me, it’s a memory worth savoring!
Fruity Pebbles Cheesecake Tacos are a fun and colorful dessert that combines the flavors of cheesecake with the crunch of taco shells, perfect for any occasion.
Ingredients
Scale
1 cup crushed Fruity Pebbles cereal
8 ounces cream cheese, softened
1/2 cup powdered sugar
1 teaspoon vanilla extract
1 cup whipped topping (like Cool Whip)
8 small flour tortillas
1/4 cup unsalted butter, melted
1/4 cup granulated sugar
1 teaspoon cinnamon
1/2 cup additional Fruity Pebbles for garnish
Instructions
Preheat your oven to 350°F.
In a medium bowl, mix the melted butter, granulated sugar, and cinnamon.
Brush both sides of each tortilla with the butter mixture.
Place the tortillas in a taco holder or shape them into taco shells by draping them over the rungs of an oven-safe rack.
Bake for 10-12 minutes or until they are golden and crispy. Remove from the oven and let cool.
In a large bowl, beat the softened cream cheese until smooth.
Add the powdered sugar and vanilla extract, mixing until well combined.
Gently fold in the whipped topping until the mixture is light and fluffy.
Once the taco shells are cool, fill each shell with the cheesecake mixture.
Top with additional Fruity Pebbles for garnish.
Serve immediately for the best texture, or refrigerate for up to 1 hour before serving.
Notes
For a fun twist, try adding a drizzle of chocolate or caramel sauce over the filled tacos.
You can also substitute the Fruity Pebbles with another colorful cereal for a different flavor and look.