There’s something magical about a dessert that brings people together, and the Flag Cake is just that. This delightful treat is perfect for celebrations, whether it’s a summer barbecue or a festive holiday gathering. I remember the first time I made it; the joy on my friends’ faces as they dug into the layers of fluffy cake and fresh berries was priceless. This recipe is not only easy to whip up, but it also adds a splash of color and fun to any occasion. Trust me, your loved ones will be impressed, and you’ll feel like a kitchen hero!
Why You’ll Love This Flag Cake
This Flag Cake is a game-changer for any celebration. It’s incredibly easy to make, so you won’t spend hours in the kitchen. The fluffy layers and fresh berries create a taste explosion that’s both refreshing and satisfying. Plus, it’s visually stunning, making it the star of the dessert table. Whether you’re a seasoned pro or a kitchen novice, this cake will have everyone asking for seconds!
Ingredients for Flag Cake
Gathering the right ingredients is the first step to creating your stunning Flag Cake. Here’s what you’ll need:
All-purpose flour: The backbone of your cake, providing structure and fluffiness.
Baking powder: This leavening agent helps the cake rise, giving it that light texture.
Baking soda: Works alongside baking powder for an extra lift, ensuring your cake is airy.
Salt: A pinch enhances the flavors, balancing the sweetness of the cake.
Unsalted butter: Adds richness and moisture; make sure it’s softened for easy mixing.
Granulated sugar: Sweetens the cake and contributes to its tender crumb.
Eggs: They bind the ingredients together and add moisture, creating a lovely texture.
Vanilla extract: A splash of this aromatic essence elevates the flavor profile.
Buttermilk: This tangy ingredient keeps the cake moist and adds a subtle flavor.
Heavy cream: Essential for whipping into a fluffy frosting that complements the cake.
Powdered sugar: Sweetens the whipped cream and helps it hold its shape.
Strawberries: Fresh and vibrant, they create the red stripes of the flag.
Blueberries: These little gems add a burst of flavor and complete the flag design.
For those looking to mix things up, consider substituting Greek yogurt for half of the heavy cream in the frosting for a lighter version. You can also add a hint of lemon zest to the batter for a refreshing twist. Exact measurements for these ingredients can be found at the bottom of the article, ready for printing!
How to Make Flag Cake
Creating a Flag Cake is a delightful journey that’s as enjoyable as the final product. Follow these simple steps, and you’ll have a stunning dessert that’s sure to impress!
Step 1: Preheat and Prepare
Start by preheating your oven to 350°F. This ensures your cake bakes evenly. While the oven warms up, grease and flour a 9×13-inch baking pan. This step is crucial; it prevents the cake from sticking, making it easier to remove later.
Step 2: Mix Dry Ingredients
In a medium bowl, whisk together the all-purpose flour, baking powder, baking soda, and salt. This blend is the foundation of your cake. Whisking aerates the mixture, ensuring a light and fluffy texture. Set this bowl aside for now; it’ll be combined with the wet ingredients shortly.
Step 3: Cream Butter and Sugar
In a large bowl, beat the softened unsalted butter and granulated sugar together using an electric mixer. Mix until the mixture is light and fluffy, about 3-4 minutes. This step is key for a tender cake, as it incorporates air into the batter.
Step 4: Add Eggs and Vanilla
Next, add the eggs one at a time, mixing well after each addition. This helps to incorporate them fully into the batter. Don’t forget to stir in the vanilla extract; it adds a wonderful aroma and flavor that elevates your cake.
Step 5: Combine Mixtures
Now, it’s time to bring everything together. Gradually add the dry ingredients to the butter mixture, alternating with the buttermilk. Start and end with the flour mixture. Mix until just combined; overmixing can lead to a dense cake.
Step 6: Bake the Cake
Pour the batter into your prepared baking pan, smoothing the top with a spatula. Bake in the preheated oven for 30-35 minutes. To check for doneness, insert a toothpick into the center; it should come out clean. The aroma will be heavenly!
Step 7: Cool the Cake
Once baked, allow the cake to cool in the pan for about 10 minutes. Then, transfer it to a wire rack to cool completely. This step is essential; frosting a warm cake can lead to a melty mess!
Step 8: Whip the Cream
In a medium bowl, whip the heavy cream with the powdered sugar and vanilla extract until stiff peaks form. This fluffy frosting is what makes your Flag Cake truly special. It should hold its shape well, ready to adorn your cake.
Step 9: Decorate with Berries
Once the cake is completely cool, spread the whipped cream evenly over the top. Now comes the fun part! Arrange the sliced strawberries and blueberries on top to create a beautiful flag design. This not only looks festive but also adds a burst of flavor.
Step 10: Serve and Enjoy
Finally, cut the cake into squares and serve. Watch as your friends and family marvel at your creation. Each slice is a delightful mix of fluffy cake, creamy frosting, and fresh berries. Enjoy every bite!
Tips for Success
Make sure your butter is at room temperature for easy mixing.
Use fresh berries for the best flavor and presentation.
Don’t skip the cooling step; it prevents the frosting from melting.
For a fun twist, try adding a splash of almond extract to the batter.
Keep an eye on the baking time; ovens can vary.
Equipment Needed
9×13-inch baking pan (or any similar-sized pan)
Electric mixer (a whisk works too, but it’ll take longer)
Mixing bowls (a large and a medium one)
Measuring cups and spoons (or a kitchen scale for precision)
Spatula (a rubber spatula is ideal for scraping the bowl)
Variations of Flag Cake
Chocolate Flag Cake: Substitute half of the all-purpose flour with cocoa powder for a rich chocolate flavor.
Gluten-Free Flag Cake: Use a gluten-free all-purpose flour blend to make this cake suitable for those with gluten sensitivities.
Fruit-Infused Flag Cake: Add lemon or orange zest to the batter for a refreshing citrus twist.
Vegan Flag Cake: Replace eggs with flaxseed meal and use plant-based butter and milk alternatives.
Nutty Flag Cake: Incorporate chopped nuts like almonds or walnuts into the batter for added texture and flavor.
Serving Suggestions for Flag Cake
Pair with a scoop of vanilla ice cream for a delightful contrast.
Serve alongside fresh lemonade or iced tea for a refreshing drink.
Garnish with mint leaves for a pop of color and flavor.
Present on a festive platter to enhance the celebration vibe
FAQs about Flag Cake
Can I make Flag Cake ahead of time?
Absolutely! You can bake the cake a day in advance. Just store it in an airtight container at room temperature. Frost it with whipped cream and berries on the day you plan to serve it for the best presentation.
What can I use instead of buttermilk?
If you don’t have buttermilk on hand, you can easily make a substitute. Just mix one cup of milk with one tablespoon of vinegar or lemon juice. Let it sit for about 5 minutes, and you’ll have a perfect buttermilk replacement!
How do I store leftover Flag Cake?
Store any leftover Flag Cake in the refrigerator. Cover it with plastic wrap or place it in an airtight container. It should stay fresh for about 3-4 days, but trust me, it’s so delicious, it might not last that long!
Can I use frozen berries for decoration?
While fresh berries are ideal for that vibrant look, you can use frozen berries in a pinch. Just make sure to thaw and drain them well to avoid excess moisture on your cake.
Is Flag Cake suitable for special diets?
This Flag Cake can be adapted for various dietary needs. You can make it gluten-free by using a gluten-free flour blend or vegan by substituting eggs and dairy with plant-based alternatives. Check the variations section for more ideas!
Final Thoughts
Creating a Flag Cake is more than just baking; it’s about bringing joy to your gatherings. The vibrant colors of the berries and the fluffy layers of cake create a visual feast that delights the senses. Each slice is a celebration of flavor, perfect for summer barbecues or festive holidays. I love how this cake sparks conversations and laughter around the table. It’s a simple yet impressive dessert that makes you feel like a culinary rock star. So, roll up your sleeves, gather your loved ones, and let the Flag Cake be the centerpiece of your next celebration!
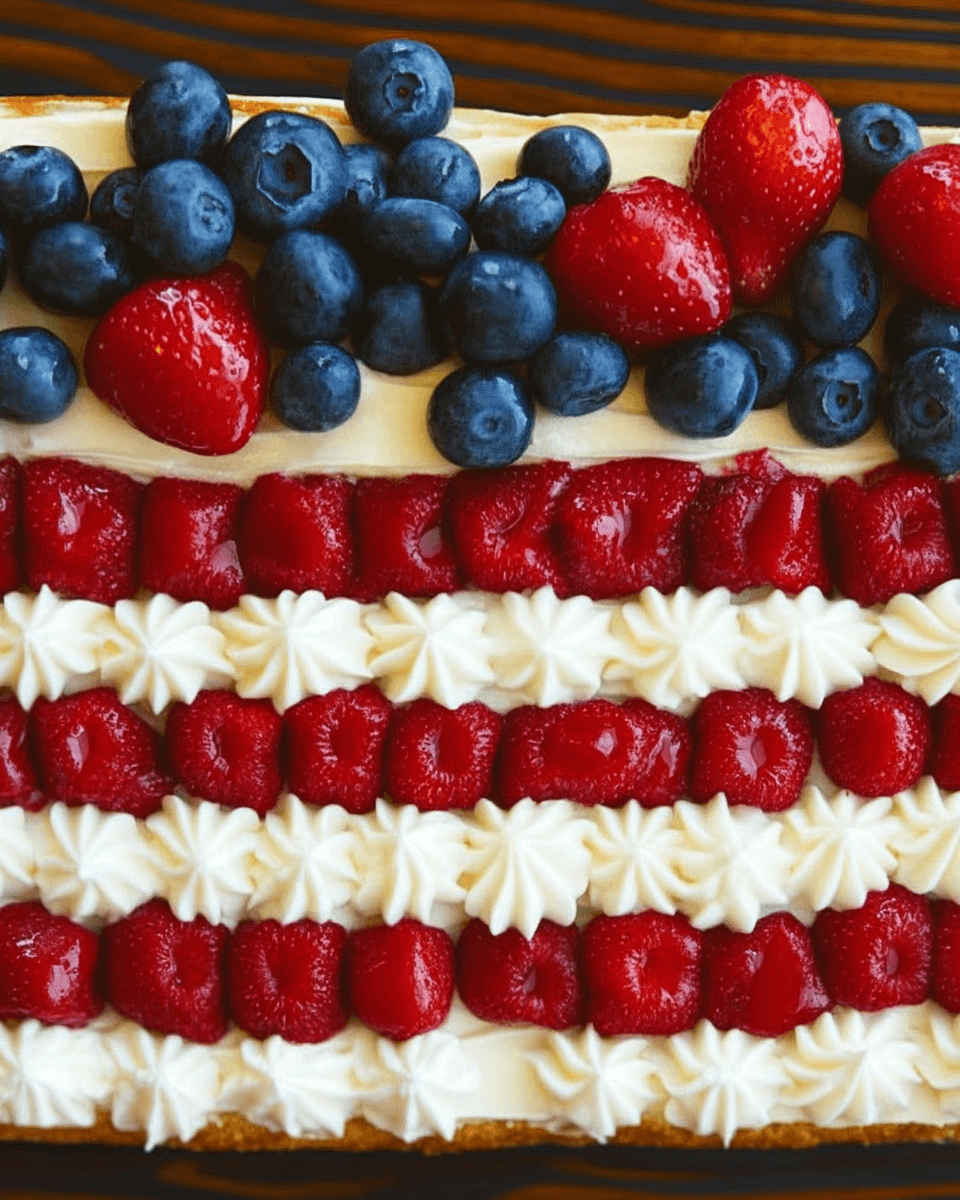
A delicious and festive Flag Cake perfect for celebrations, featuring layers of fluffy cake topped with whipped cream and fresh berries arranged in a flag design.
Ingredients
Scale
2 cups all-purpose flour
1 ½ teaspoons baking powder
½ teaspoon baking soda
½ teaspoon salt
1 cup unsalted butter, softened
2 cups granulated sugar
4 large eggs
1 tablespoon vanilla extract
1 cup buttermilk
2 cups heavy cream
¼ cup powdered sugar
1 teaspoon vanilla extract
1 pint strawberries, hulled and sliced
1 pint blueberries
Instructions
Preheat the oven to 350°F. Grease and flour a 9×13-inch baking pan.
In a medium bowl, whisk together the flour, baking powder, baking soda, and salt. Set aside.
In a large bowl, beat the softened butter and granulated sugar together with an electric mixer until light and fluffy, about 3-4 minutes.
Add the eggs one at a time, mixing well after each addition. Stir in the vanilla extract.
Gradually add the flour mixture to the butter mixture, alternating with the buttermilk. Start and end with the flour mixture, mixing until just combined.
Pour the batter into the prepared baking pan and smooth the top. Bake for 30-35 minutes, or until a toothpick inserted in the center comes out clean.
Allow the cake to cool in the pan for 10 minutes, then transfer to a wire rack to cool completely.
In a medium bowl, whip the heavy cream with the powdered sugar and vanilla extract until stiff peaks form.
Once the cake is completely cool, spread the whipped cream evenly over the top. Arrange the sliced strawberries and blueberries on top to create a flag design.
Cut into squares and serve.
Notes
For a lighter version, substitute Greek yogurt for half of the heavy cream in the frosting.
Consider incorporating lemon zest into the cake batter for a refreshing flavor.