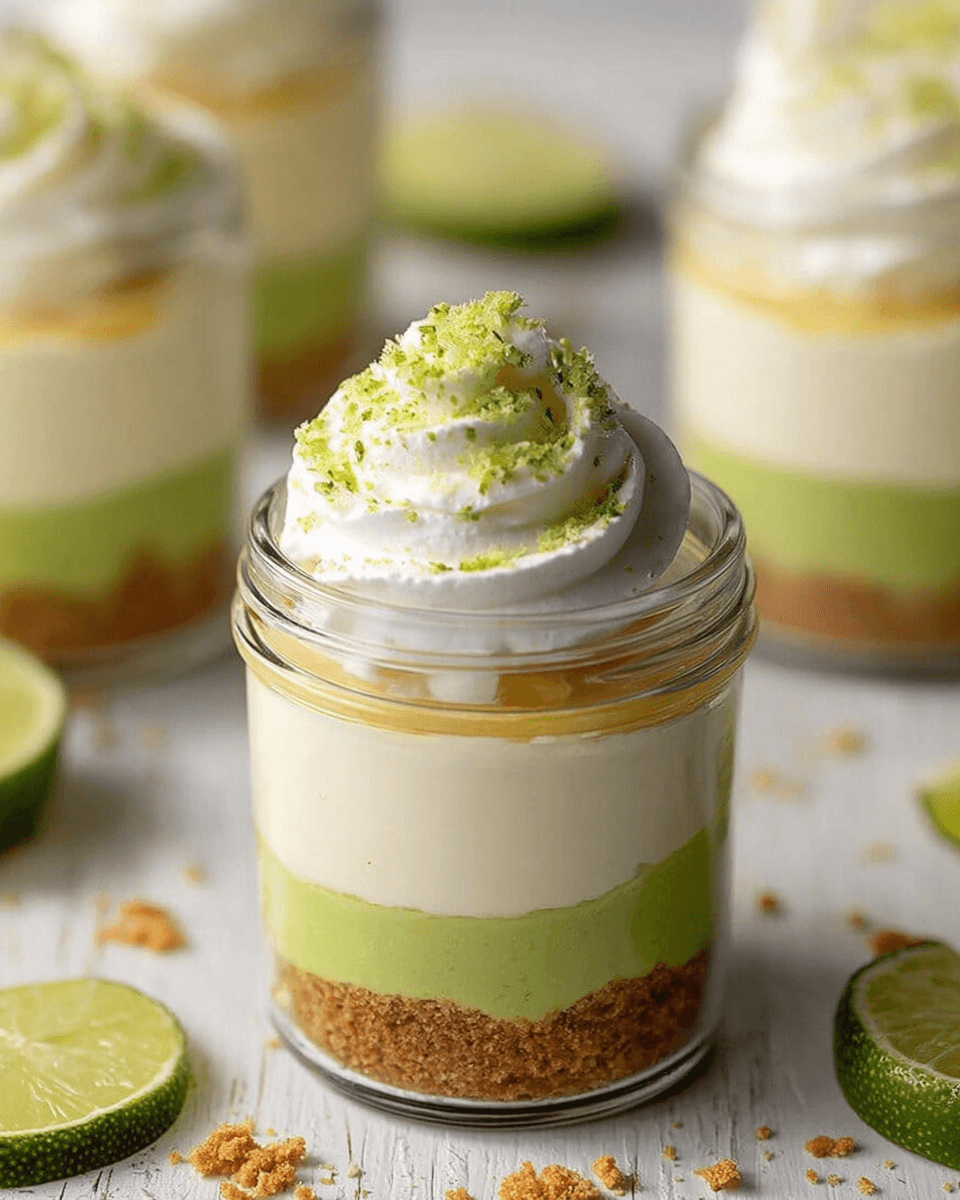
Introduction to Creamy No-Bake Key Lime Cheesecake Jars
There’s something magical about desserts that come together effortlessly, and my Creamy No-Bake Key Lime Cheesecake Jars are just that.
Picture a warm evening, the sun setting, and you want to impress your friends or family without spending hours in the kitchen.
These jars are a refreshing treat that requires minimal effort but delivers maximum flavor.
With zesty lime and a creamy filling, they’re perfect for any occasion.
Whether it’s a casual get-together or a special celebration, these delightful jars will surely be a hit!
Why You’ll Love This Creamy No-Bake Key Lime Cheesecake Jars
These Creamy No-Bake Key Lime Cheesecake Jars are a game-changer for dessert lovers.
They come together in just 20 minutes, making them a quick solution for busy days.
The zesty lime flavor dances on your palate, while the creamy texture is pure bliss.
Plus, no baking means less mess and more time to enjoy with friends.
Trust me, these jars will become your go-to dessert for any occasion!
Ingredients for Creamy No-Bake Key Lime Cheesecake Jars
Creating these delightful jars starts with gathering the right ingredients.
Here’s what you’ll need:
Crushed digestive biscuits: These form the base, providing a crunchy texture that contrasts beautifully with the creamy filling.
Brown sugar: Adds a hint of caramel sweetness to the biscuit base, enhancing the overall flavor.
Melted coconut oil: This replaces butter, giving a subtle tropical twist while binding the biscuit crumbs together.
Softened cream cheese: The star of the show! It creates that rich, creamy texture we all love in cheesecake.
Icing sugar: This sweetens the cream cheese mixture, making it light and fluffy without the graininess of regular sugar.
Plain yogurt: Adds a tangy flavor and helps lighten the filling, making it less dense.
Freshly squeezed lime juice: The zesty kick that brings everything to life! Fresh is best for that vibrant flavor.
Almond extract: A little goes a long way, adding a subtle nutty aroma that complements the lime.
Chilled heavy cream: Whipped to perfection, it gives the cheesecake its airy texture, making each bite a delight.
Lime wedges and zest: For decoration, these not only look stunning but also enhance the lime flavor when served.
For exact measurements, check the bottom of the article where you can find everything listed for easy printing.
Gather these ingredients, and you’re on your way to creating a dessert that’s as fun to make as it is to eat!
How to Make Creamy No-Bake Key Lime Cheesecake Jars
Creating these Creamy No-Bake Key Lime Cheesecake Jars is a breeze!
Follow these simple steps, and you’ll have a delightful dessert ready to impress.
Step 1: Prepare the Biscuit Base
Start by mixing the crushed digestive biscuits with brown sugar and melted coconut oil.
Use a fork or your hands to combine them until the mixture resembles wet sand.
This base is crucial; it gives the jars that satisfying crunch.
Don’t rush this step; the texture is key!
Step 2: Layer the Base
Now, take your biscuit mixture and layer it into the bottom of your jars.
Press down firmly to create a solid base.
This will help hold everything together when you dig in later.
Make sure it’s even; no one likes a lopsided dessert!
Step 3: Make the Cream Cheese Mixture
In a mixing bowl, blend the softened cream cheese using an electric mixer.
Beat it until it’s creamy and smooth, with no lumps in sight.
This is where the magic begins!
The cream cheese is the heart of your cheesecake filling.
Step 4: Incorporate Other Ingredients
Gradually add in the icing sugar, plain yogurt, lime juice, and almond extract.
Mix until everything is fluffy and well combined.
The lime juice will give it that zesty kick, while the yogurt keeps it light.
Taste as you go; adjust sweetness if needed!
Step 5: Whip the Cream
In a clean bowl, whip the chilled heavy cream until stiff peaks form.
This means when you lift the whisk, the cream holds its shape.
It’s a fun step, and the whipped cream adds that airy texture we love.
Just be careful not to over-whip; we want it fluffy, not butter!
Step 6: Fold the Cream
Gently fold the whipped cream into the cream cheese mixture.
Use a spatula and be careful not to deflate the whipped cream.
This step is crucial for keeping your filling light and airy.
It’s like a dance; be gentle and graceful!
Step 7: Fill the Jars
Now, distribute the creamy filling evenly over the biscuit base in each jar.
Use a spoon or a piping bag for a neat finish.
Fill them to the top, but leave a little space for decoration.
You want each jar to look as good as it tastes!
Step 8: Refrigerate
Seal the jars and pop them in the refrigerator for at least 4 hours, or overnight if you can wait.
This chilling time allows the flavors to meld beautifully.
Trust me, the wait is worth it!
Step 9: Decorate
Before serving, decorate your jars with lime wedges and a sprinkle of lime zest.
This not only looks stunning but also enhances the lime flavor.
A little garnish goes a long way in making your dessert feel special.
Now, dig in and enjoy the refreshing taste of your hard work!
Tips for Success
Use fresh limes for the best flavor; bottled juice just doesn’t compare.
Chill your mixing bowl and beaters before whipping the cream for better results.
Don’t rush the refrigeration; letting the jars sit overnight enhances the taste.
Adjust the sweetness to your liking by modifying the icing sugar amount.
Experiment with different toppings like crushed nuts or berries for added texture.
Equipment Needed
Mixing bowls: Use any size you have; just ensure they’re clean and dry.
Electric mixer: A hand mixer works great, but a stand mixer can save time.
Measuring cups and spoons: Essential for accuracy; you can also use a kitchen scale.
Spoons or piping bags: For filling the jars neatly.
Jars or cups: Any small containers will do; just make sure they’re sealable.
Variations
Fruit Swirls: Add a layer of fruit puree, like raspberry or mango, between the biscuit base and cream cheese filling for a fruity twist.
Chocolate Drizzle: Drizzle melted dark chocolate over the top before serving for a rich contrast to the lime flavor.
Gluten-Free Option: Substitute crushed gluten-free cookies for the digestive biscuits to make this dessert gluten-free.
Vegan Version: Use vegan cream cheese and coconut whipped cream to create a dairy-free version of these jars.
Nutty Crunch: Mix in some chopped nuts, like pecans or almonds, into the biscuit base for added texture and flavor.
Serving Suggestions
Pair with a refreshing iced tea or a zesty mojito for a delightful summer vibe.
Serve alongside fresh fruit, like berries or sliced kiwi, to enhance the dessert’s brightness.
For a stunning presentation, use clear jars to showcase the beautiful layers.
Consider adding a sprig of mint for a pop of color and freshness.
FAQs about Creamy No-Bake Key Lime Cheesecake Jars
Can I make these jars ahead of time?
Absolutely! These Creamy No-Bake Key Lime Cheesecake Jars are perfect for making ahead. Just prepare them the night before and let them chill overnight. This enhances the flavors and saves you time on the day you plan to serve them.
How long do these jars last in the fridge?
These jars can last up to 3 days in the refrigerator. Just make sure they are sealed properly to maintain freshness. However, I recommend enjoying them within the first couple of days for the best taste and texture.
Can I use a different type of cookie for the base?
Definitely! While crushed digestive biscuits are traditional, you can use graham crackers, Oreos, or even gluten-free cookies. Each will give a unique flavor and texture to your cheesecake jars.
What can I substitute for cream cheese?
If you’re looking for a lighter option, you can use Greek yogurt or a dairy-free cream cheese alternative. Just keep in mind that the texture and flavor may vary slightly, but it will still be delicious!
Is it possible to make these jars vegan?
Yes! To create a vegan version of these Creamy No-Bake Key Lime Cheesecake Jars, use vegan cream cheese and coconut whipped cream. This way, you can enjoy the same delightful flavors without any animal products.
Final Thoughts
Creating these Creamy No-Bake Key Lime Cheesecake Jars is more than just whipping up a dessert; it’s about crafting a moment of joy.
Each jar is a little celebration, bursting with zesty lime and creamy goodness.
Whether you’re sharing them with friends or savoring one solo after a long day, they bring a refreshing twist to any occasion.
The best part? They’re simple enough to make on a whim yet impressive enough to wow your guests.
So, roll up your sleeves, gather your ingredients, and let the delightful flavors transport you to a sunny paradise!