There’s something magical about a dessert that requires no baking, especially when it’s as delightful as Creamy Butterfinger Pie. I remember the first time I made this pie; it was a hot summer day, and the last thing I wanted was to turn on the oven. This no-bake treat quickly became my go-to for family gatherings and casual get-togethers. With its creamy peanut butter filling and crunchy Butterfinger bits, it’s a crowd-pleaser that’s as easy to whip up as it is to devour. Perfect for impressing your loved ones or simply treating yourself, this pie is a sweet escape from the everyday hustle.
Why You’ll Love This Creamy Butterfinger Pie
This Creamy Butterfinger Pie is a dessert that checks all the boxes. It’s incredibly easy to make, requiring no baking and minimal effort. In just about 20 minutes of prep time, you’ll have a luscious pie ready to chill. The combination of creamy peanut butter and crunchy Butterfinger pieces creates a flavor explosion that’s hard to resist. Plus, it’s a guaranteed hit at any gathering, making you the star of the show!
Ingredients for Creamy Butterfinger Pie
Gathering the right ingredients is the first step to creating this delightful Creamy Butterfinger Pie. Here’s what you’ll need:
Crushed graham cracker crumbs: These form the base of your pie crust, providing a sweet and crunchy texture.
Unsalted butter: Melted butter binds the crumbs together, ensuring a rich flavor without the extra salt.
Creamy peanut butter: The star of the show! It gives the pie its signature flavor and creamy texture.
Powdered sugar: This sweetens the filling and helps achieve that smooth consistency.
Cream cheese: Softened cream cheese adds richness and a slight tang, balancing the sweetness.
Whipped topping: Light and airy, it makes the filling fluffy and easy to spread.
Butterfinger candy bars: Crushed for that irresistible crunch and chocolate-peanut butter flavor combo.
Chocolate syrup: Optional, but a drizzle on top adds a decadent touch.
For those looking to mix things up, consider using a chocolate cookie crust instead of graham crackers for a chocolatey twist. You can also swap creamy peanut butter for crunchy if you prefer a bit more texture. Exact measurements for these ingredients can be found at the bottom of the article, ready for printing!
How to Make Creamy Butterfinger Pie
Creating this Creamy Butterfinger Pie is a breeze. Follow these simple steps, and you’ll have a delicious dessert that will impress everyone. Let’s dive in!
Step 1: Prepare the Crust
Start by preheating your oven to 350°F. In a medium bowl, mix the crushed graham cracker crumbs with the melted butter. You want it to resemble wet sand. Press this mixture firmly into the bottom and up the sides of a 9-inch pie pan. Bake for 8-10 minutes until it’s lightly golden. Once done, let it cool completely. This crust is the perfect crunchy base for your creamy filling.
Step 2: Make the Peanut Butter Filling
In a large mixing bowl, beat together the creamy peanut butter, powdered sugar, and softened cream cheese. Use an electric mixer for a smooth and creamy texture. This filling is where the magic happens! The combination of peanut butter and cream cheese creates a rich, velvety base that’s hard to resist.
Step 3: Combine with Whipped Topping
Next, gently fold in the whipped topping. This step adds lightness to your filling. Be careful not to overmix; you want to keep that airy texture. The whipped topping makes the filling fluffy and easy to spread, ensuring every bite is a delight.
Step 4: Add Butterfinger Candy
Now, it’s time to stir in the crushed Butterfinger candy bars. This is where the fun begins! The crunchy bits will add a delightful texture and flavor contrast to the creamy filling. Reserve a small amount for topping later. Trust me, you’ll want that extra crunch on top!
Step 5: Assemble the Pie
Pour the peanut butter mixture into your cooled graham cracker crust. Spread it evenly with a spatula, making sure it looks as good as it tastes. The filling should be smooth and inviting, ready to chill.
Step 6: Chill the Pie
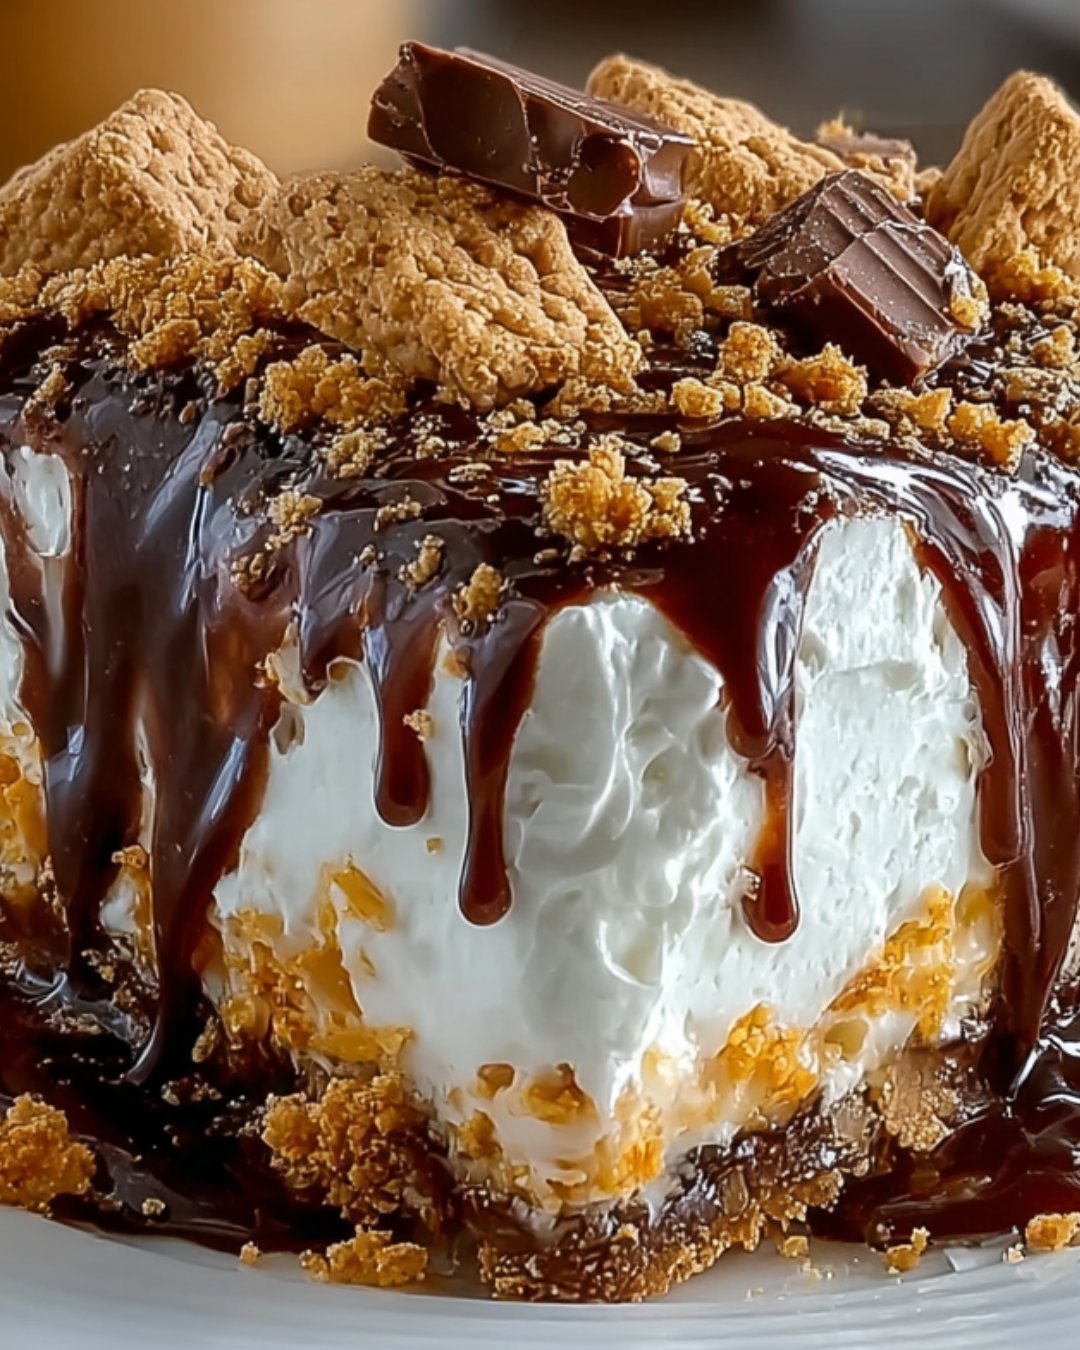
Cover the pie with plastic wrap and refrigerate for at least 4 hours, or overnight for the best results. This chilling time allows the flavors to meld beautifully. When you’re ready to serve, drizzle with chocolate syrup and sprinkle the reserved Butterfinger on top. Your Creamy Butterfinger Pie is now ready to shine!
Tips for Success
Make sure your cream cheese is softened for easy mixing.
For a smoother filling, sift the powdered sugar before adding it.
Chill the pie overnight for the best flavor and texture.
Use a spatula to spread the filling evenly in the crust.
Don’t skip the chocolate syrup drizzle; it adds a delicious touch!
Equipment Needed
9-inch pie pan: A standard pie dish works best, but a springform pan can also be used.
Mixing bowls: Use medium and large bowls for mixing ingredients.
Electric mixer: A hand mixer is perfect, but a whisk will do in a pinch.
Spatula: Essential for spreading the filling evenly.
Measuring cups: For accurate ingredient portions.
Variations
Chocolate Cookie Crust: Swap the graham cracker crust for a chocolate cookie crust for an extra chocolatey experience.
Crunchy Peanut Butter: Use crunchy peanut butter instead of creamy for added texture and a delightful crunch.
Nut-Free Option: Substitute peanut butter with sunbutter or almond butter for a nut-free version.
Vegan Twist: Use vegan cream cheese and whipped topping to make this pie plant-based.
Flavor Infusion: Add a teaspoon of vanilla extract or a pinch of sea salt to enhance the flavor profile.
Serving Suggestions
Pair with a scoop of vanilla ice cream for a delightful contrast in temperature and texture.
Serve alongside fresh berries for a pop of color and a refreshing bite.
Drizzle extra chocolate syrup on plates for an elegant presentation.
Offer coffee or milk as a perfect beverage complement.
FAQs about Creamy Butterfinger Pie
Can I make Creamy Butterfinger Pie ahead of time?
Absolutely! This pie is perfect for making ahead. Just prepare it the day before and let it chill overnight. The flavors will meld beautifully, making it even more delicious!
How long does Creamy Butterfinger Pie last in the fridge?
This pie can be stored in the refrigerator for up to 5 days. Just make sure to cover it well to keep it fresh and prevent it from absorbing any odors.
Can I use other candy bars instead of Butterfinger?
Definitely! While Butterfinger adds a unique flavor, you can experiment with other candy bars like Snickers or Reese’s for a different twist. Just chop them up and fold them into the filling.
Is this pie suitable for a gluten-free diet?
To make this pie gluten-free, simply use gluten-free graham cracker crumbs for the crust. The rest of the ingredients are naturally gluten-free, so you’re good to go!
What can I serve with Creamy Butterfinger Pie?
This pie pairs wonderfully with a scoop of vanilla ice cream or a dollop of whipped cream. Fresh berries also make a great side, adding a refreshing contrast to the rich pie.
Final Thoughts
Creating this Creamy Butterfinger Pie is more than just whipping up a dessert; it’s about sharing joy and indulgence with those you love. Each slice is a delightful blend of creamy peanut butter and crunchy candy, evoking sweet memories and smiles. Whether it’s a family gathering or a quiet evening at home, this no-bake treat brings a sense of celebration to any occasion. So, roll up your sleeves, gather your ingredients, and let the magic happen. Trust me, once you serve this pie, you’ll be the hero of dessert time, and everyone will be asking for seconds!
A delicious no-bake pie featuring a creamy peanut butter filling and crushed Butterfinger candy bars, all nestled in a graham cracker crust.
Ingredients
Scale
1 ½ cups crushed graham cracker crumbs
½ cup unsalted butter, melted
1 cup creamy peanut butter
1 cup powdered sugar
8 ounces cream cheese, softened
1 cup whipped topping (like Cool Whip)
1 cup Butterfinger candy bars, crushed (about 4–5 bars)
Chocolate syrup, for drizzling (optional)
Instructions
Preheat your oven to 350°F. In a medium bowl, combine the crushed graham cracker crumbs and melted butter until well mixed. Press the mixture firmly into the bottom and up the sides of a 9-inch pie pan. Bake for 8-10 minutes until lightly golden. Remove from the oven and let cool completely.
In a large mixing bowl, beat together the peanut butter, powdered sugar, and softened cream cheese until smooth and creamy.
Gently fold in the whipped topping until fully combined.
Stir in the crushed Butterfinger candy bars, reserving a small amount for topping.
Pour the peanut butter mixture into the cooled graham cracker crust, spreading it evenly.
Refrigerate the pie for at least 4 hours, or overnight for best results.
Before serving, drizzle with chocolate syrup and sprinkle the reserved crushed Butterfinger on top.
Notes
For a chocolate twist, use a chocolate cookie crust instead of graham cracker.
You can also substitute the creamy peanut butter with crunchy peanut butter for added texture.