There’s something magical about desserts that bring back memories, isn’t there? Cherry Coconut Magic Bars are one of those treats that can transport you straight to your childhood. Picture a warm kitchen filled with the sweet aroma of cherries and chocolate, a perfect way to impress your loved ones or simply indulge after a long day. These bars are not just easy to make; they’re a delightful solution for busy days when you crave something sweet without the fuss. Trust me, once you try these, they’ll become a staple in your dessert repertoire!
Why You’ll Love This Cherry Coconut Magic Bars
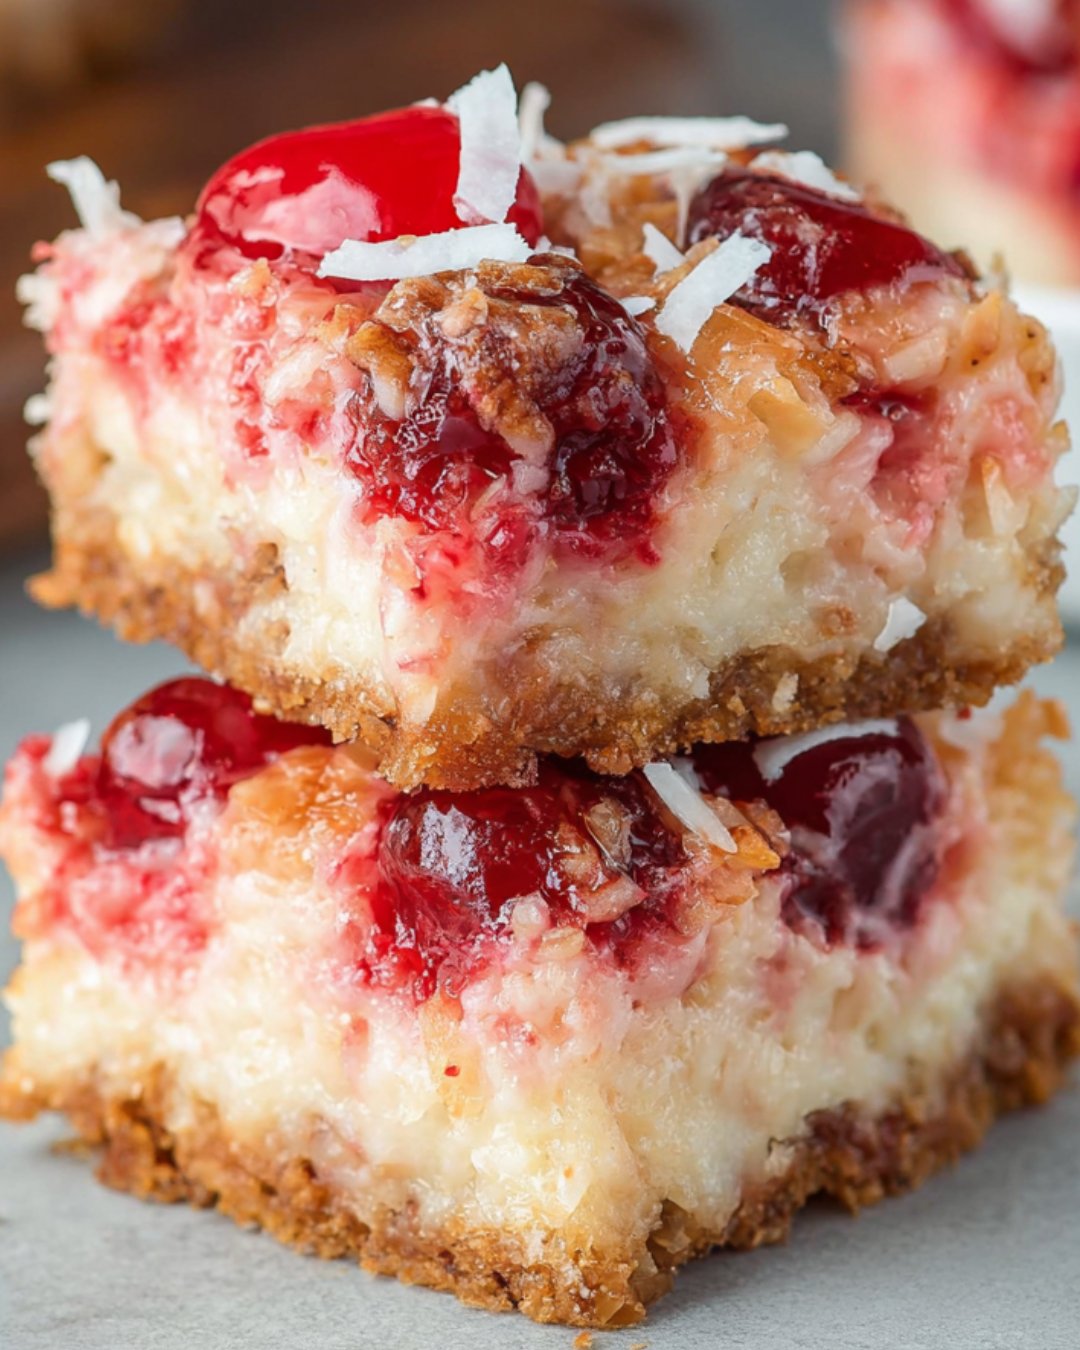
Cherry Coconut Magic Bars are the ultimate dessert for anyone who loves a quick and delicious treat. They come together in just 45 minutes, making them perfect for last-minute gatherings or a cozy night in. The combination of sweet cherries, rich chocolate, and crunchy coconut creates a flavor explosion that will have everyone asking for seconds. Plus, they’re so easy to make that even the busiest home cook can whip them up without breaking a sweat!
Ingredients for Cherry Coconut Magic Bars
Gathering the right ingredients is the first step to creating these delightful Cherry Coconut Magic Bars. Each component plays a crucial role in building layers of flavor and texture. Here’s what you’ll need:
Graham cracker crumbs: These form the base of your bars, providing a sweet and crunchy foundation.
Unsweetened shredded coconut: Adds a tropical flair and chewy texture that complements the cherries beautifully.
Unsalted butter: This binds the crust together and adds richness. Make sure it’s melted for easy mixing.
Sweetened condensed milk: This creamy layer sweetens the bars and helps hold everything together, creating a luscious texture.
Cherry pie filling: The star of the show! It brings a burst of fruity flavor and sweetness that pairs perfectly with the other ingredients.
Semi-sweet chocolate chips: These add a rich, chocolatey layer that balances the sweetness of the cherries.
Chopped pecans or walnuts (optional): For those who enjoy a bit of crunch, nuts add a delightful contrast to the soft layers.
Feel free to get creative! You can swap the cherry pie filling for other fruits like pineapple or mango for a tropical twist. If you’re feeling adventurous, a sprinkle of sea salt on top before baking can elevate the flavors with a sweet and salty contrast. For exact measurements, check the bottom of the article where you can find everything available for printing.
How to Make Cherry Coconut Magic Bars
Creating Cherry Coconut Magic Bars is a straightforward process that anyone can master. With just a few simple steps, you’ll have a delicious dessert that’s sure to impress. Let’s dive into the magic of baking!
Step 1: Preheat the Oven
Start by preheating your oven to 350°F (175°C). This ensures that your bars bake evenly. While the oven warms up, prepare your baking dish. Grease a 9×13-inch dish or line it with parchment paper for easy removal later. Trust me, you’ll thank yourself when it’s time to cut those bars!
Step 2: Prepare the Crust
In a medium bowl, combine the graham cracker crumbs, shredded coconut, and melted butter. Mix everything together until the crumbs are evenly coated. This mixture will form the delicious base of your Cherry Coconut Magic Bars, so make sure it’s well combined!
Step 3: Press the Crust
Now, it’s time to create the crust. Firmly press the crumb mixture into the bottom of your prepared baking dish. Use the back of a measuring cup or your hands to ensure it’s an even layer. This step is crucial for a sturdy base that holds all the delicious layers together.
Step 4: Add Sweetened Condensed Milk
Next, pour the sweetened condensed milk evenly over the crust. Use a spatula to spread it out gently. This creamy layer adds sweetness and helps bind everything together, making each bite a delightful experience.
Step 5: Layer the Cherry Filling
Now comes the fun part! Spoon the cherry pie filling over the condensed milk layer. Spread it gently to cover as much of the surface as possible. The cherries will add a burst of flavor that perfectly complements the other ingredients.
Step 6: Sprinkle Chocolate and Nuts
Evenly sprinkle the semi-sweet chocolate chips over the cherry layer. If you’re using nuts, now’s the time to add them too! The chocolate will melt beautifully during baking, creating a rich layer that balances the sweetness of the cherries.
Step 7: Bake
Place your baking dish in the preheated oven and bake for 25-30 minutes. Keep an eye on it! You want the edges to turn golden brown and the chocolate to melt. The aroma wafting through your kitchen will be irresistible!
Step 8: Cool and Serve
Once baked, remove the dish from the oven and let it cool completely on a wire rack. This step is important for the bars to set properly. After cooling, cut them into squares and serve. Enjoy the delightful layers of cherry, coconut, and chocolate!
Tips for Success
Use fresh ingredients for the best flavor. Stale graham crackers or old coconut can affect the taste.
Don’t skip the cooling step! Allowing the bars to cool completely helps them set and makes cutting easier.
For a cleaner cut, use a sharp knife and wipe it between cuts.
Store leftovers in an airtight container to keep them fresh for up to a week.
Equipment Needed
9×13-inch baking dish: A standard size for these bars. If you don’t have one, a similar-sized dish will work.
Mixing bowl: Any medium bowl will do for combining ingredients.
Spatula: Useful for spreading layers evenly. A spoon can also work in a pinch.
Wire rack: Ideal for cooling. If you don’t have one, a plate will suffice.
Variations
Tropical Twist: Swap the cherry pie filling for pineapple or mango filling for a refreshing change.
Nut-Free Option: Omit the nuts entirely or replace them with sunflower seeds for a nut-free alternative.
Gluten-Free Version: Use gluten-free graham cracker crumbs to make these bars suitable for gluten-sensitive friends.
Vegan Delight: Substitute the butter with coconut oil and use a dairy-free condensed milk for a vegan-friendly treat.
Chocolate Lovers: Add a layer of chocolate fudge or drizzle melted chocolate on top for an extra chocolatey experience.
Serving Suggestions
Pair with Ice Cream: Serve warm bars with a scoop of vanilla or coconut ice cream for a delightful contrast.
Garnish with Whipped Cream: A dollop of whipped cream on top adds a creamy touch.
Enjoy with Coffee: These bars pair perfectly with a cup of freshly brewed coffee or a rich espresso.
Presentation: Dust with powdered sugar before serving for an elegant finish.
FAQs about Cherry Coconut Magic Bars
As you embark on your journey to create these delightful Cherry Coconut Magic Bars, you might have a few questions. Here are some common queries that can help you along the way:
Can I use fresh cherries instead of cherry pie filling?
Absolutely! Fresh cherries can be used, but you’ll need to cook them down with some sugar and cornstarch to create a filling-like consistency. This will enhance the flavor and ensure they blend well with the other layers.
How do I store leftover Cherry Coconut Magic Bars?
Store any leftovers in an airtight container at room temperature for up to a week. If you want to keep them longer, refrigerate them for up to two weeks. Just make sure to let them come to room temperature before serving for the best taste!
Can I make these bars ahead of time?
Yes! These bars are perfect for making ahead. You can prepare them a day in advance and store them in the fridge. Just remember to let them cool completely before cutting and storing.
What can I substitute for sweetened condensed milk?
If you’re looking for a dairy-free option, try using coconut cream mixed with a bit of maple syrup. This will give you a similar sweetness and creaminess that complements the other flavors beautifully.
Are Cherry Coconut Magic Bars gluten-free?
They can be made gluten-free by using gluten-free graham cracker crumbs. This way, everyone can enjoy this sweet treat without worry!
Final Thoughts
Creating Cherry Coconut Magic Bars is more than just baking; it’s about crafting memories and sharing joy. Each bite is a delightful blend of flavors that transports you to sun-soaked days and sweet moments. Whether you’re enjoying them with family or surprising friends at a gathering, these bars are sure to bring smiles all around. The ease of preparation means you can whip them up anytime the craving strikes. So, roll up your sleeves, embrace the magic of these bars, and let the sweet aroma fill your kitchen. Trust me, you’ll be glad you did!