


A Warm Memory in Every Bite
There’s something magical about the aroma of freshly baked bread filling the house. It’s the kind of scent that instantly makes a place feel like home, wrapping you in warmth and comfort. Growing up, I remember watching my mother knead dough with effortless grace, her hands moving rhythmically as she transformed simple ingredients into something extraordinary.
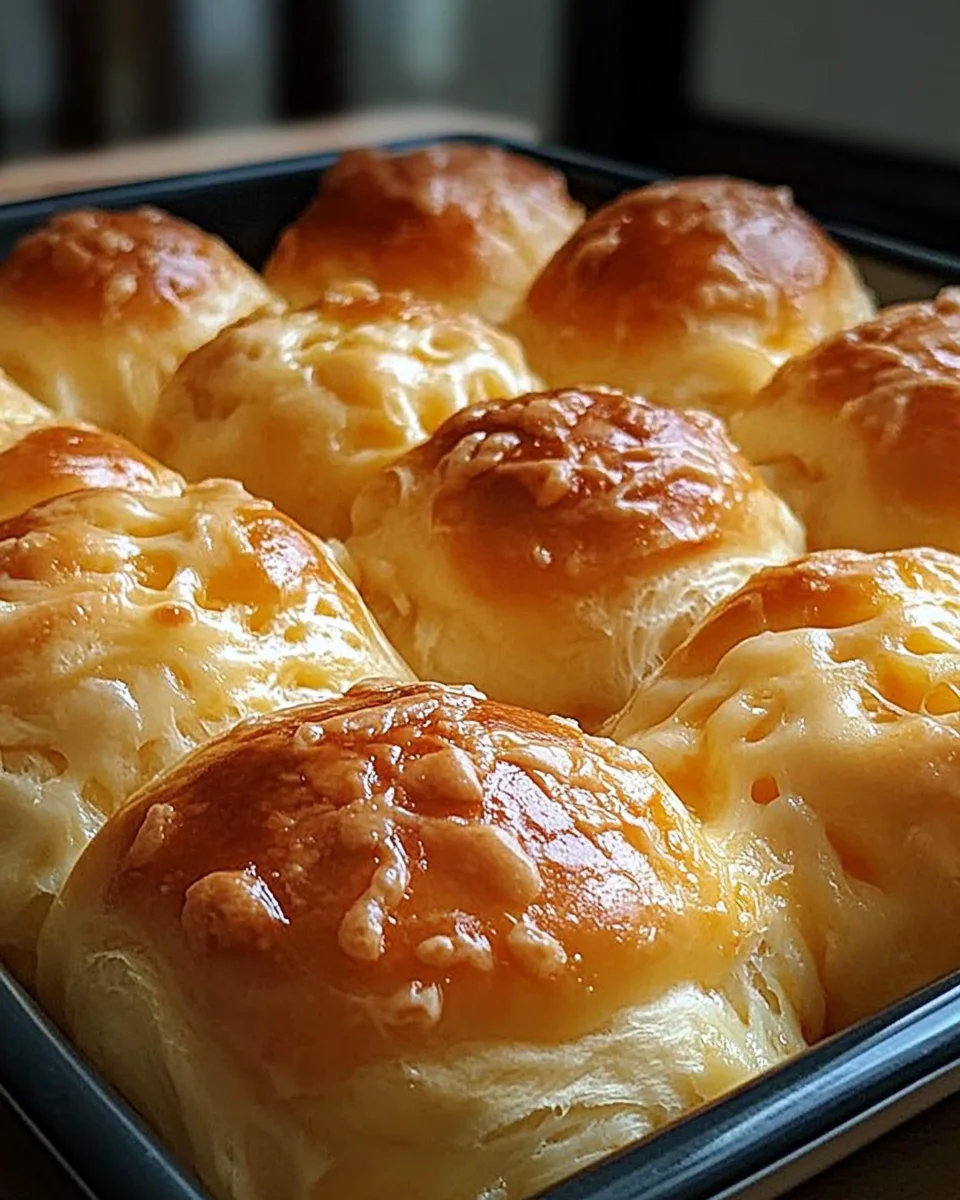
One of my fondest memories is of the weekends when she made cheese-stuffed buns. We’d eagerly gather around the kitchen, peeking into the oven as the dough rose and turned golden brown. The moment they came out, we couldn’t resist pulling them apart, watching the gooey cheese stretch and melt in our hands. They weren’t just delicious—they were a tradition, a reminder that food has the power to bring people together.
Now, every time I bake these melt-in-your-mouth cheese-stuffed buns, I’m transported back to those cozy mornings. Whether served as a snack, a side dish, or even a breakfast treat, these buns capture the essence of homemade comfort. They are the perfect blend of soft, fluffy bread and rich, gooey cheese—simple, yet utterly irresistible.
Why You’ll Love These Cheese-Stuffed Buns
1. Soft, Fluffy, and Incredibly Satisfying
These buns have the perfect texture—crispy on the outside, pillowy soft on the inside, with a melty cheese center that makes every bite indulgent.
2. Perfect for Any Occasion
Whether you’re serving them at breakfast, brunch, or as a dinner side, these buns complement any meal. They’re also a hit at parties, potlucks, and family gatherings.
3. Easy to Customize
One of the best things about this recipe is its versatility. You can experiment with different types of cheeses, fillings, and even dough variations to make them uniquely yours.
4. A Fun Baking Project
There’s something deeply satisfying about making bread from scratch. Kneading the dough, shaping the buns, and watching them bake to perfection makes this a rewarding experience for both beginners and seasoned bakers.
5. A Family Favorite
Kids and adults alike love these buns. They’re great for lunchboxes, after-school snacks, or as a comforting bite with a warm bowl of soup.
Ingredients: The Pillowy Goodness Begins Here
- 1 cup warm milk (110°F)
- 2 1/4 tsp active dry yeast
- 1 tbsp sugar
- 3 cups all-purpose flour
- 1 tsp salt
- 4 tbsp unsalted butter, melted
- 1 large egg
- 2 cups grated cheese (mozzarella, cheddar, or a mix)
Directions: From Dough to Golden Perfection
- Activate the Yeast:
- Mix warm milk, sugar, and yeast in a bowl. Let it sit for 5-10 minutes until it turns frothy.
- Form the Dough:
- In a separate bowl, combine flour and salt.
- Make a well in the center, then add the yeast mixture, melted butter, and egg.
- Mix until a dough forms.
- Knead & Rise:
- Knead the dough on a floured surface for 8-10 minutes until smooth and elastic.
- Place it in a greased bowl, cover, and let it rise for 1 hour until doubled in size.
- Stuff with Cheese:
- Punch down the dough and divide it into 12 equal pieces.
- Flatten each piece, place a tablespoon of cheese in the center, and fold into a bun.
- Second Rise:
- Arrange the buns on a parchment-lined baking sheet, cover, and let them rise for another 30 minutes.
- Bake to Perfection:
- Preheat the oven to 375°F (190°C).
- Brush the buns with milk or beaten egg for a golden crust.
- Bake for 15-20 minutes until golden brown and cheese starts oozing out.
- Cool & Serve:
- Let them cool slightly before enjoying their melty, cheesy center!
Nutritional Highlights (Per Serving, Approximate)
- Calories: ~220-250
- Protein: ~8g
- Carbohydrates: ~28g
- Fat: ~10g
- Fiber: ~1g

The Secret to the Perfect Cheese-Stuffed Buns
Choosing the Right Cheese
The cheese is the heart of this recipe, so it’s important to choose one that melts beautifully. Mozzarella is a classic choice for a stretchy, gooey filling, while cheddar adds a sharp, bold flavor. You can also experiment with gruyère, gouda, or fontina for a more complex taste.
Getting the Dough Just Right
A well-risen dough is key to soft, fluffy buns. Make sure your yeast is active (it should foam up when mixed with warm milk and sugar) and let the dough rest in a warm place until it doubles in size.
Sealing the Buns Properly
When shaping the buns, ensure the edges are sealed well so the cheese doesn’t leak out during baking. Pinch the dough tightly around the filling and place the seam side down on the baking sheet.
The Golden Touch
Brushing the buns with milk or an egg wash before baking gives them a beautiful golden crust. If you want an extra rich flavor, try brushing them with melted butter after baking.
Creative Variations to Try
1. Add a Flavor Twist
- Garlic and Herb: Mix minced garlic and dried herbs into the dough for an aromatic touch.
- Spicy Kick: Add chopped jalapeños or a pinch of red pepper flakes for a bit of heat.
- Savory Fillings: Try adding cooked bacon, caramelized onions, or sun-dried tomatoes to the cheese mixture.
2. Swap the Cheese
- Gorgonzola or Blue Cheese: For a sharp, tangy flavor.
- Smoked Gouda: Adds a deliciously smoky depth.
- Brie or Camembert: For a creamy, luxurious center.
3. Make Them Sweet
- Replace the cheese with Nutella, peanut butter, or jam for a dessert version.
- Dust with powdered sugar for an extra touch of sweetness.
4. Turn Them into Mini Pizzas
Flatten the dough, add tomato sauce, shredded cheese, and pepperoni, then fold into buns for a pizza-inspired treat.
FAQs: Everything You Need to Know
1. Can I Make the Dough Ahead of Time?
Yes! You can prepare the dough the night before and let it rise in the refrigerator overnight. This slow fermentation enhances the flavor. When ready to bake, let the dough come to room temperature before shaping the buns.
2. How Do I Store These Buns?
Store the buns in an airtight container at room temperature for up to 2 days or in the refrigerator for up to 5 days. If they start to dry out, warm them in the oven or microwave before serving.
3. Can I Freeze Cheese-Stuffed Buns?
Absolutely! To freeze:
- Let the buns cool completely.
- Wrap them individually in plastic wrap and store them in a freezer-safe bag.
- When ready to eat, reheat in a 350°F oven for 10-12 minutes or microwave for 30-40 seconds.
4. What’s the Best Way to Reheat Them?
For the best results, warm the buns in a toaster oven or conventional oven at 350°F for a few minutes until heated through. This keeps the outside crispy while melting the cheese inside.
5. Can I Use Whole Wheat Flour Instead of All-Purpose Flour?
Yes, but keep in mind that whole wheat flour makes the buns denser. For a softer texture, try using half whole wheat and half all-purpose flour.
6. What Can I Serve with These Buns?
These buns pair wonderfully with:
- Soup: Tomato soup, potato soup, or creamy mushroom soup.
- Salads: A fresh green salad with vinaigrette.
- Eggs: Serve with scrambled or poached eggs for a delicious breakfast.
- Grilled Meats: They make an excellent side for roasted chicken or steak.
A Bite of Happiness in Every Bun
Cheese-stuffed buns are more than just a recipe—they’re an experience. From the moment you mix the dough to the first warm, gooey bite, there’s a joy in making and sharing them. They bring people together, whether it’s for a weekend brunch, a family dinner, or a cozy snack on a rainy afternoon.
Baking has always been a way to create comfort, and these buns are a perfect example of that. They remind us that sometimes, the simplest ingredients—flour, milk, yeast, cheese—can create something truly special.
So the next time you’re in the mood for a warm, cheesy, pull-apart delight, gather your ingredients, knead some dough, and let your kitchen fill with the scent of freshly baked bread. Because no matter where you are or who you’re with, food made with love always tastes better.