


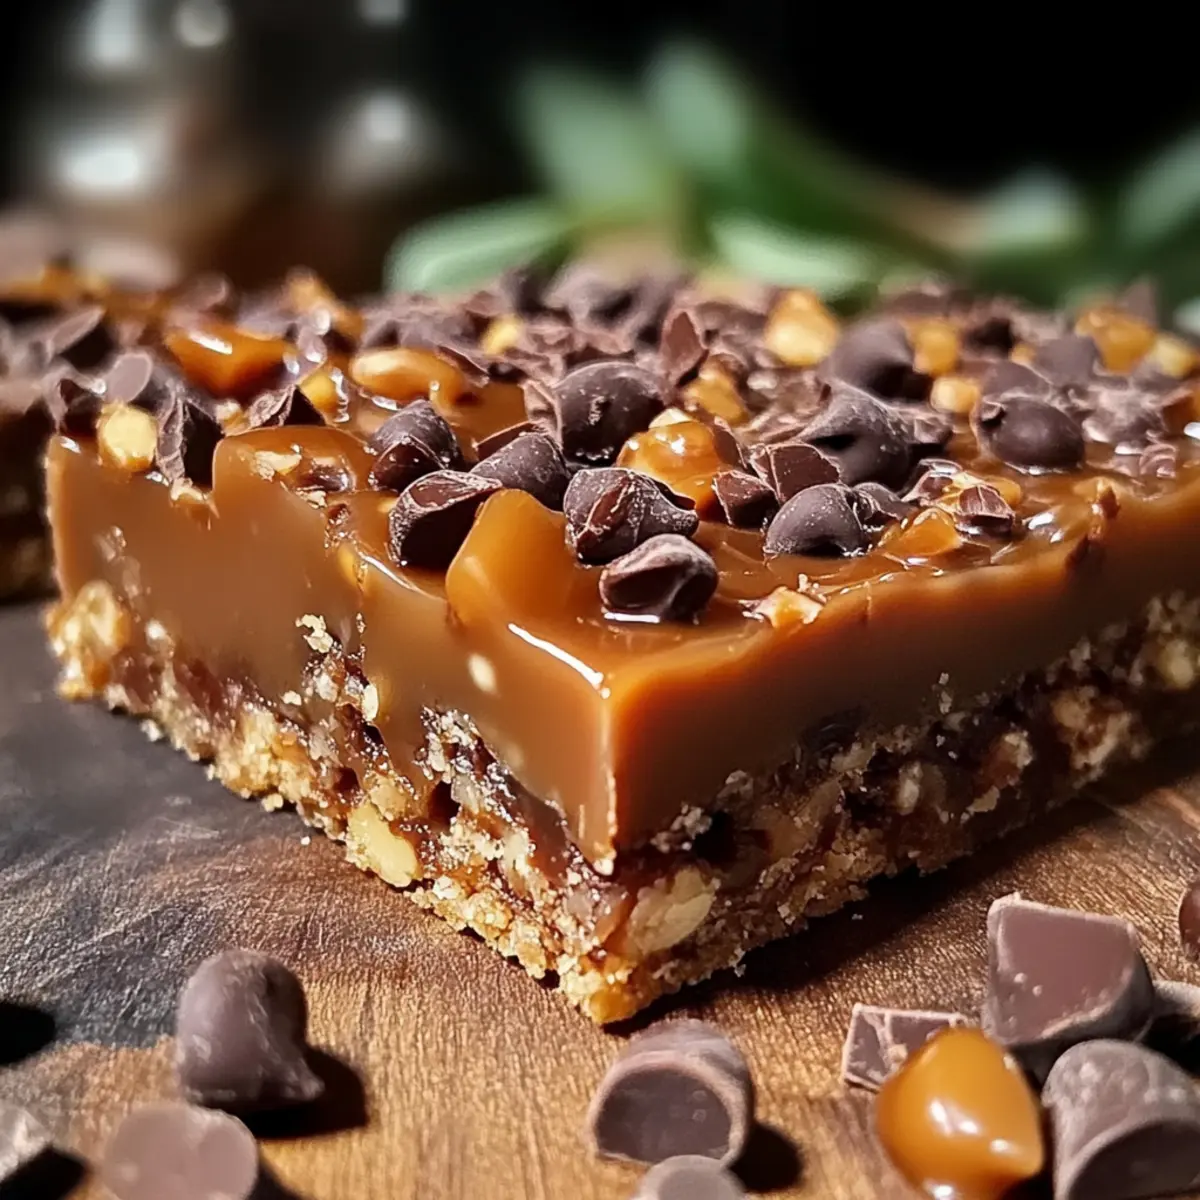
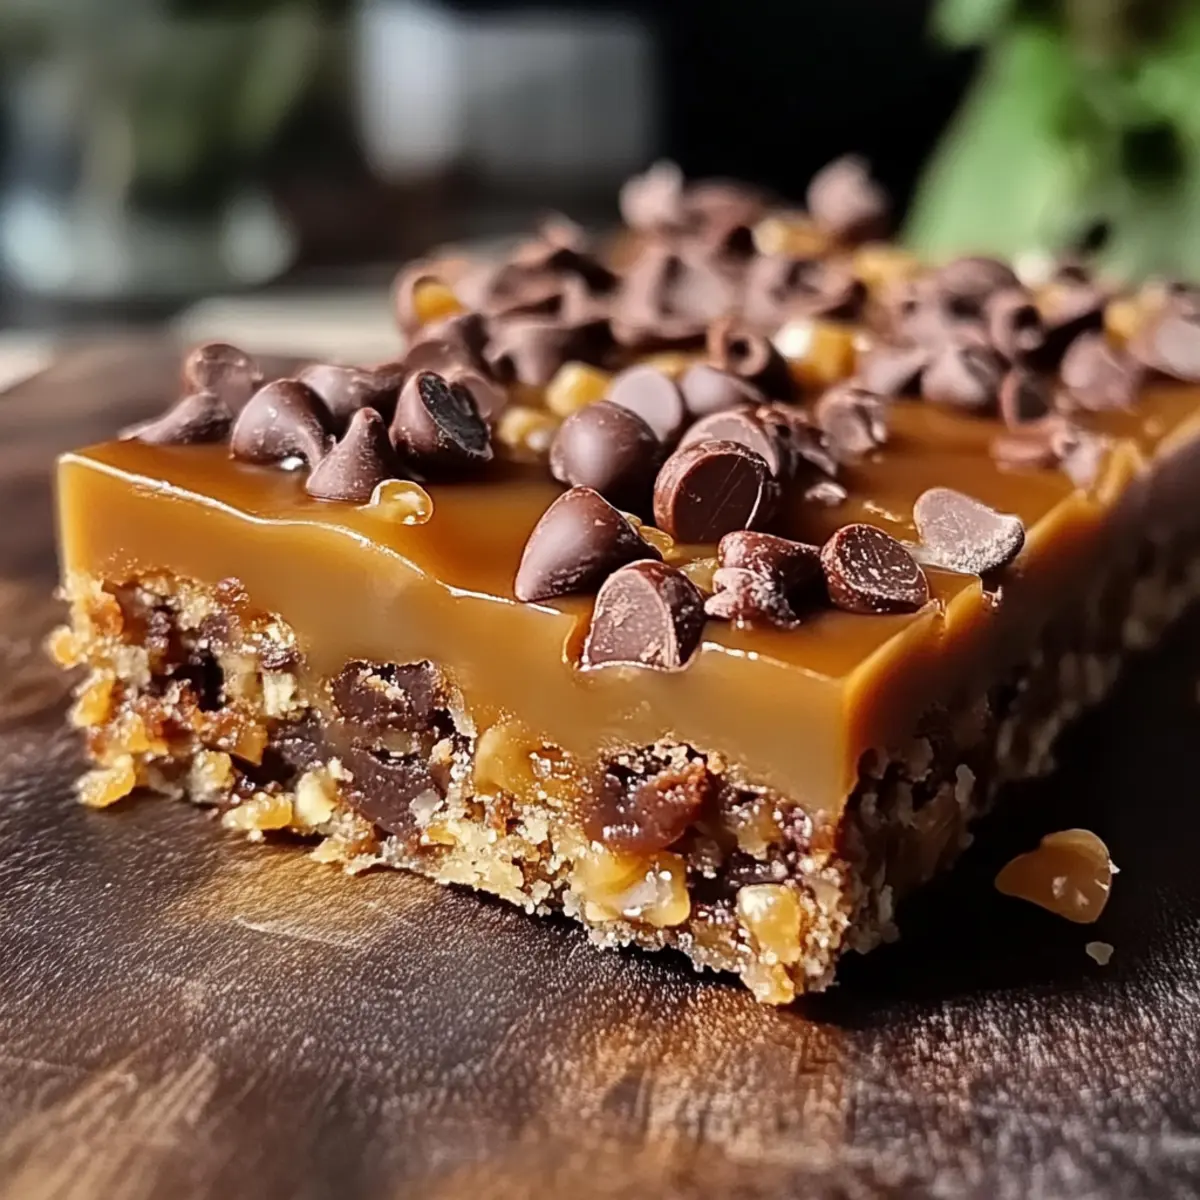
While enjoying a cozy evening at home, the thought struck me: what if I could whip up a treat that perfectly blends crunch and gooey goodness? That’s when I landed on the idea of these Caramel Chocolate Crunch Bars. With their layers of buttery, crispy delight topped by a silky chocolate sheen, they make for a ridiculously easy, no-bake dessert. Not only do they come together in a snap, but they’re also a guaranteed crowd-pleaser—from family movie nights to potluck gatherings. The best part? You can customize them endlessly, swapping ingredients to tailor them to your taste. Which variations will you experiment with first?

Why Are These Bars So Irresistible?
Simplicity at Its Best: These Caramel Chocolate Crunch Bars are incredibly easy to make, requiring just a few pantry staples and minimal cooking—perfect for any skill level!
Decadent Flavor: The combination of rich chocolate and sticky caramel offers a mouthwatering treat that hits all the sweet spots.
Customization Galore: Whether you’re swapping in different chocolates or adding unique toppings, the possibilities are endless to make these bars uniquely yours!
Crowd-Pleasing Appeal: Bring them to a gathering, and you’ll be the star of the show; these bars are always a hit with guests.
No-Bake Convenience: With minimal baking involved, you’ll have more time to enjoy making memories with loved ones—perfect for busy weeknights!
For more sweet inspiration, check out my recipe for Elegant White Chocolate and Shamrock Sugar Cookie bars that are sure to delight!
Caramel Chocolate Crunch Bars Ingredients
• Dive into delightful layers of flavor with these easy Caramel Chocolate Crunch Bars!
For the Base
- Graham Crackers or Saltines – These add the perfect crunch and structure; swap for gluten-free crackers to keep it inclusive!
- Butter – Acts as the binding agent for the crust; unsalted is best to fine-tune the saltiness.
For the Filling
- Caramel Sauce – The gooey heart of the bars; feel free to use store-bought for a quick fix or make your own for that homemade touch!
For the Topping
- Chocolate (milk, dark, or semi-sweet) – This rich layer creates a glossy finish; opt for vegan chocolate if you need a dairy-free option.
- Chopped Peanuts, Pretzels, or Toffee Bits – These toppings provide extra crunch and enhance the texture; mix and match for a personalized twist!
Step‑by‑Step Instructions for CARAMEL CHOCOLATE CRUNCH BARS
Step 1: Preheat the Oven
Begin by preheating your oven to 350°F (175°C). This ensures the crust will toast perfectly and develop a golden-brown color as you bake it. While the oven heats, gather your ingredients and get ready to create those delicious Caramel Chocolate Crunch Bars.
Step 2: Prepare the Crust
In a mixing bowl, melt about 1 cup of unsalted butter until completely liquid. Combine the melted butter with 2 cups of crushed graham crackers or saltines, stirring until the mixture resembles wet sand. Firmly press this mixture into the bottom of a lined 9×13-inch baking pan, spreading it evenly for a solid crust.
Step 3: Bake the Crust
Place the prepared crust in the preheated oven and bake for 10-12 minutes. Keep an eye on it—you want the edges to become a light golden brown to indicate doneness. Once done, remove the pan from the oven and let it cool for a few minutes before adding the caramel.
Step 4: Make the Caramel
In a saucepan over medium heat, melt 1 cup of caramel sauce, stirring constantly until it thickens and bubbles. This should take about 5-7 minutes. The caramel will become glossy and slightly darker in color, which is your cue that it’s ready to pour over the crust.
Step 5: Pour the Caramel
Once the caramel reaches that perfect consistency, carefully pour it over the cooled crust, spreading it evenly with a spatula. Allow the caramel to cool slightly for a couple of minutes, ensuring it doesn’t fully solidify before you add the chocolate.
Step 6: Melt the Chocolate
While the caramel cools, melt 1 ½ cups of your chosen chocolate (milk, dark, or semi-sweet) in a heatproof bowl. You can do this over a double boiler or in the microwave. If using the microwave, heat in 30-second increments until smooth and fully melted.
Step 7: Spread the Chocolate
With the chocolate melted, gently pour it over the warm caramel layer, smoothing it out with a spatula for a lovely even top. Before it sets, sprinkle your choice of crunchy toppings, like chopped peanuts or pretzels, onto the chocolate, pressing them in slightly.
Step 8: Chill and Set
Once everything is layered, place the baking pan in the refrigerator for at least 2 hours, or until the layers are firm and set. This cooling period is crucial for creating perfect cuts when you slice the Caramel Chocolate Crunch Bars.
Step 9: Cut and Serve
After chilling, remove the pan from the refrigerator. Using a sharp knife, cut the bars into squares or rectangles, wiping the knife with a warm cloth between cuts for clean edges. Serve these delightful bars chilled or at room temperature to enjoy their gooey texture and crunchy topping.
Step 10: Store Leftovers
If you have any bars left, store them in an airtight container in the fridge for up to a week. For longer storage, freeze them for up to 2 months, allowing you to enjoy the delicious layers of Caramel Chocolate Crunch Bars whenever you please!

Expert Tips for Making Caramel Chocolate Crunch Bars
- Perfect Caramel Consistency: Ensure your caramel thickens until it’s bubbling and glossy; this helps it set well after cooling and prevents soggy bars.
- Chill for Clean Cuts: Allow the bars to chill completely in the fridge for at least 2 hours; they cut much easier and retain their shape if fully firmed up.
- Careful Chocolate Spreading: Let the melted chocolate cool slightly to prevent excessive melting of the caramel layer underneath when spreading; this keeps the layers distinct.
- Pan Lining Must-Have: Always line your baking dish with parchment paper for a seamless removal of your delicious Caramel Chocolate Crunch Bars without any fuss.
- Topping Tips: Experiment with crunch toppings like pretzels or toffee bits; add them while the chocolate is still warm to ensure they stick nicely!
What to Serve with Caramel Chocolate Crunch Bars?
Indulging in these rich, sweet treats opens up a world of delightful pairings that elevate your dessert experience to new heights.
- Vanilla Ice Cream: A classic companion, the creamy texture contrasts beautifully with the bars’ crunch, creating a delightful taste balance.
- Fresh Berries: Strawberries or raspberries add a pop of freshness; their tartness cuts through the sweetness for a refreshing bite.
- Chocolate Drizzle: A touch of extra melted chocolate over the top can intensify the chocolate flavor, making each bite even more decadent.
- Coffee: A cup of rich, hot coffee complements the sweetness of the bars, offering a warming contrast that enhances the chocolate flavor.
- Milk Shake: A creamy milkshake—chocolate or vanilla—creates a nostalgic pairing that kids and adults alike will love.
- Toasted Nuts: Serve the bars with a side of lightly salted toasted nuts for an appealing crunch and an extra layer of flavor.
- Cheesecake Dip: A light, creamy cheesecake dip brings a delightful creaminess to the table, perfect for pairing with decadent sweets.
- Herbal Tea: A warm cup of herbal tea offers a soothing balance to the richness, transforming the dessert into an elegant after-dinner treat.
- Dark Chocolate Chunks: For serious chocolate lovers, serve with bites of dark chocolate to amplify the rich experience of the Caramel Chocolate Crunch Bars.
- Coconut Flakes: Toasted coconut flakes sprinkled on top can elevate the flavor profile, adding a sweet nuttiness that harmonizes beautifully with the bars.
Make Ahead Options
These Caramel Chocolate Crunch Bars are a fantastic option for meal prep, allowing you to enjoy a delightful treat without the last-minute rush! You can prepare the crust and caramel layers up to 24 hours in advance; simply store the assembled crust in an airtight container at room temperature and the cooled caramel in the fridge to prevent it from hardening. Additionally, the bars can be made two to three days ahead of serving—just cover the completed bars with plastic wrap and refrigerate. When it’s time to enjoy, melt the chosen chocolate, spread it over the caramel, and add your crunchy toppings just before serving for that fresh and delicious finish. With these tips, you’ll have irresistible Caramel Chocolate Crunch Bars ready to impress with minimal effort!
CARAMEL CHOCOLATE CRUNCH BARS Variations & Substitutions
Feel free to switch things up and make these Caramel Chocolate Crunch Bars entirely your own—let your creativity shine!
- Gluten-Free: Use gluten-free crackers instead of graham crackers or saltines to keep this treat bubbly and crunchy for everyone to enjoy.
- Vegan Delight: Replace butter with coconut oil and opt for dairy-free chocolate for a plant-based version that’s just as delectable.
- Nut-Free: Swap in seeds like pumpkin or sunflower for that satisfying crunch, perfect for schools or nut-free gatherings.
- Spiced Up: Add a sprinkle of cinnamon or a dash of cayenne to the caramel for a warm, spicy kick that dances on your palate.
- Richer Chocolate: Experiment with dark chocolate or even chocolate hazelnut spread for a richer, more intense flavor experience.
- Cookie Crust: Replace the crust with crushed chocolate sandwich cookies for a more indulgent and flavorful base—a guaranteed hit!
- Fruit Fusion: Drizzle with some melted peanut butter or swirl in raspberry preserves for a fruity surprise amidst all that chocolate and caramel goodness.
- Topping Twist: Mix up your toppings—try crunchy granola or crushed cereal for an unexpected texture and flavor twist.
No matter how you decide to adorn or adapt these bars, your loved ones will surely appreciate the personal touch. For more delightful dessert ideas, don’t miss my Elegant White Chocolate or the ever-fun Shamrock Sugar Cookie bars!
Storage Tips for Caramel Chocolate Crunch Bars
Fridge: Store leftover Caramel Chocolate Crunch Bars in an airtight container in the fridge for up to 1 week. This keeps them fresh and gooey.
Freezer: For longer storage, freeze the bars wrapped tightly in plastic wrap or in a freezer-safe container. They can last up to 2 months in the freezer.
Thawing: To enjoy frozen bars, simply transfer them to the fridge for a few hours or overnight before serving. This allows them to soften while retaining their texture.
Reheating: If desired, warm individual bars in the microwave for about 10 seconds to melt the chocolate slightly, enhancing the gooey experience.
Caramel Chocolate Crunch Bars Recipe FAQs
How do I choose ripe ingredients for the bars?
When selecting your ingredients, ensure that your butter is fresh, as older butter can develop off-flavors. If you opt for fresh caramel sauce, check for a glossy appearance without any sugar crystals or dark spots, indicating freshness.
What is the best way to store leftover Caramel Chocolate Crunch Bars?
Store your Caramel Chocolate Crunch Bars in an airtight container in the refrigerator for up to 1 week. This keeps them nice and fresh! If you’d like to keep them longer, freezing is your best bet; just wrap them individually in plastic wrap or place them in a freezer-safe container for up to 2 months.
Can I freeze Caramel Chocolate Crunch Bars?
Absolutely! To freeze your Caramel Chocolate Crunch Bars, follow these simple steps: First, allow the bars to cool completely. Then, cut them into individual pieces and wrap each one in plastic wrap to prevent freezer burn. Finally, place the wrapped bars in a freezer-safe bag or container. When ready to enjoy, thaw them overnight in the fridge or on the countertop for a few hours!
What should I do if my caramel sauce is too runny?
If your caramel sauce turns out too runny, don’t worry! Simply return it to the stovetop over low heat and continue to simmer it, stirring frequently. This process will help it thicken. Aim for a glossy, bubbling texture, which should take about another 5-10 minutes. Be sure to keep a close eye on it to prevent burning!
Are there any dietary considerations I should keep in mind?
Yes! If you’re making these Caramel Chocolate Crunch Bars for someone with allergies or dietary restrictions, there are easy swaps you can make. For a gluten-free version, substitute graham crackers with gluten-free options. If you’re catering to a vegan audience, choose vegan butter and chocolate. Always check ingredient labels for potential allergens!
Decadent Caramel Chocolate Crunch Bars You Can't Resist
Ingredients
Equipment
Method
- Preheat your oven to 350°F (175°C).
- Melt 1 cup of unsalted butter in a mixing bowl. Combine with 2 cups of crushed graham crackers or saltines until resembling wet sand. Press into the bottom of a lined 9x13-inch baking pan.
- Bake the crust for 10-12 minutes until edges are light golden brown. Cool for a few minutes before adding caramel.
- Melt 1 cup of caramel sauce in a saucepan over medium heat until thickened and bubbling, about 5-7 minutes. Pour over the cooled crust.
- Melt 1.5 cups of chosen chocolate in a heatproof bowl. Pour it over the caramel layer and smooth it out.
- Sprinkle your choice of toppings onto the melted chocolate before it sets.
- Chill the baking pan in the refrigerator for at least 2 hours until set.
- Cut into squares or rectangles after chilling, serve and enjoy.
- Store any leftovers in an airtight container in the fridge for up to a week or freeze for up to 2 months.